83PingPong's 1983 SR5 build-up Thread!
 12-04-2012, 01:01 PM
#1
Registered User
Thread Starter
Join Date: Jan 2012
Location: Kansas City, Missouri
Posts: 325
Likes: 0
Received 0 Likes
on
0 Posts
83PingPong's 1983 SR5 build-up Thread!
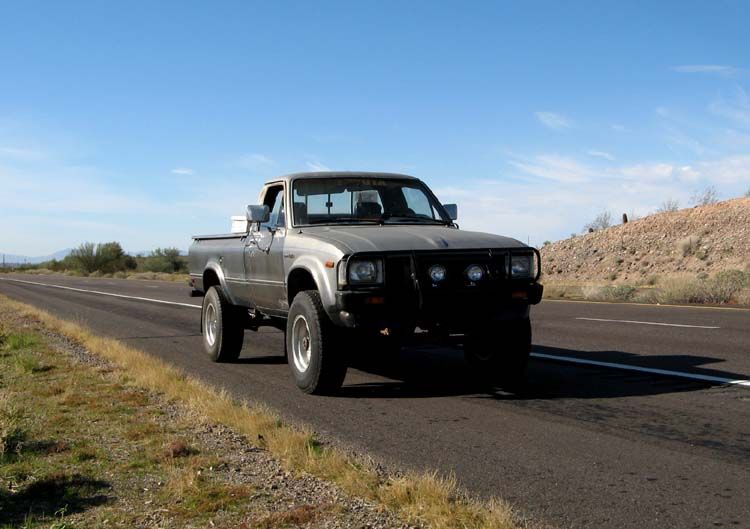
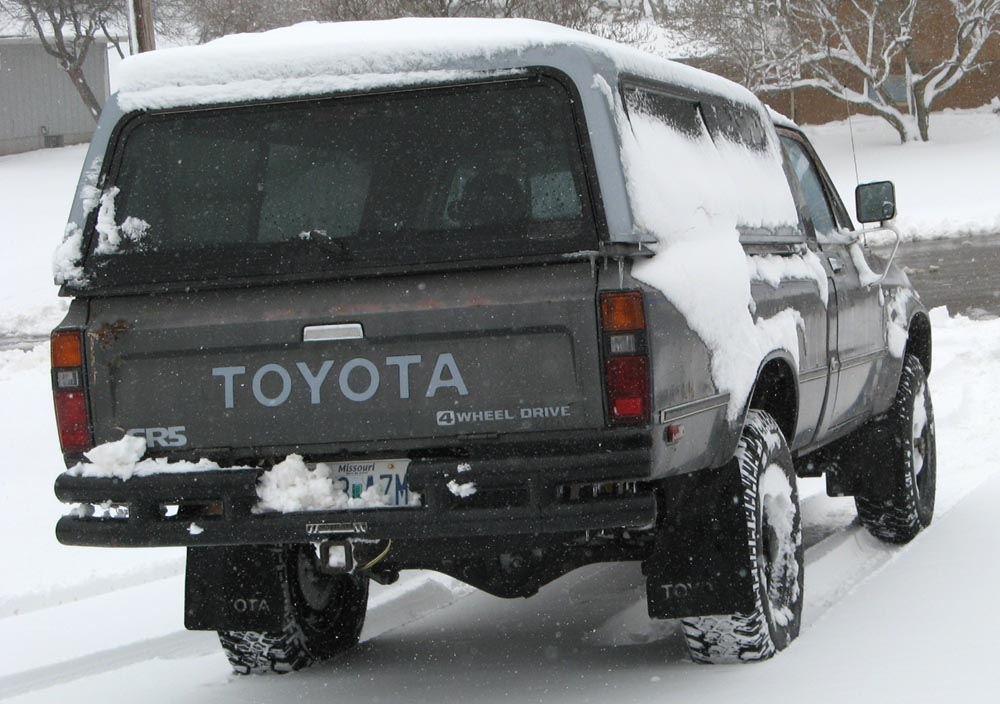
I've posted repairs and stuff already, but here is the history, starting at about 226,000 miles (Ha!). All I know is that this truck spent it's life in Colorado and Arizona (mostly). I picked it up in Pheonix, after flying out there with a one way ticket, on a gamble that it would actually drive and bring me back home to Kansas City.
It did, and what a great adventure!
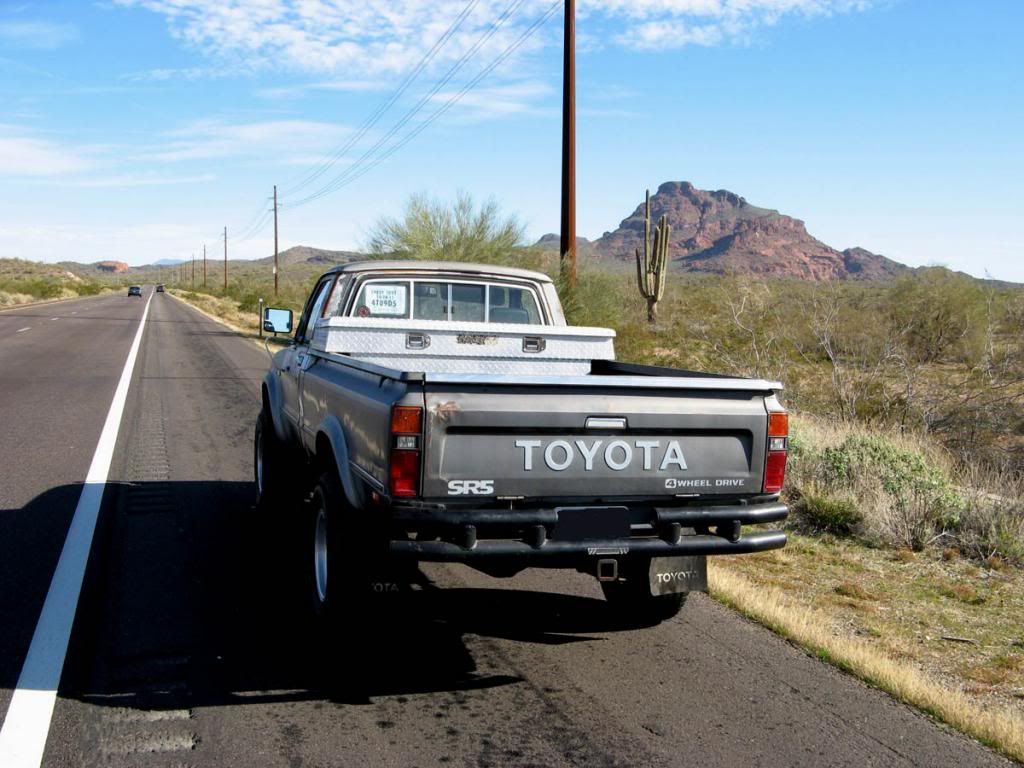
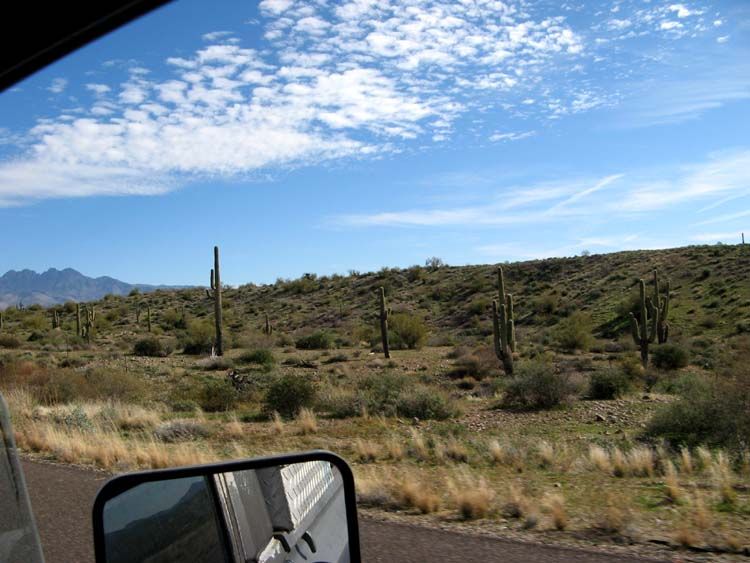
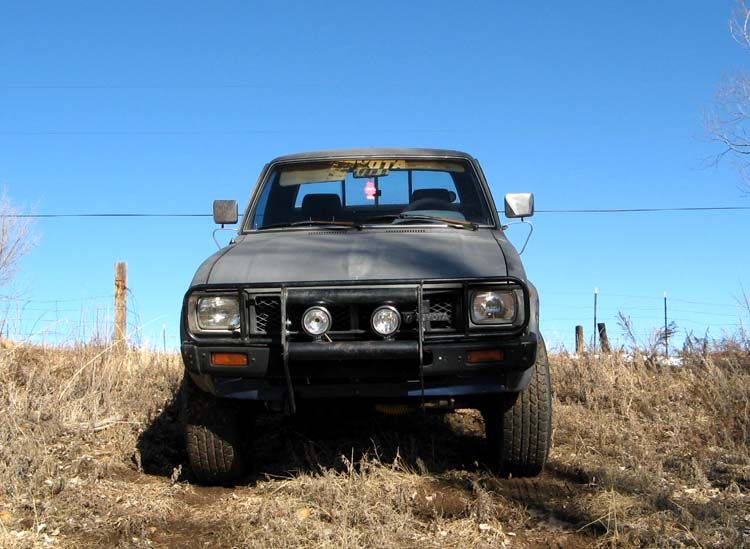
So here it is on the Arizona desert Northeast of Pheonix:
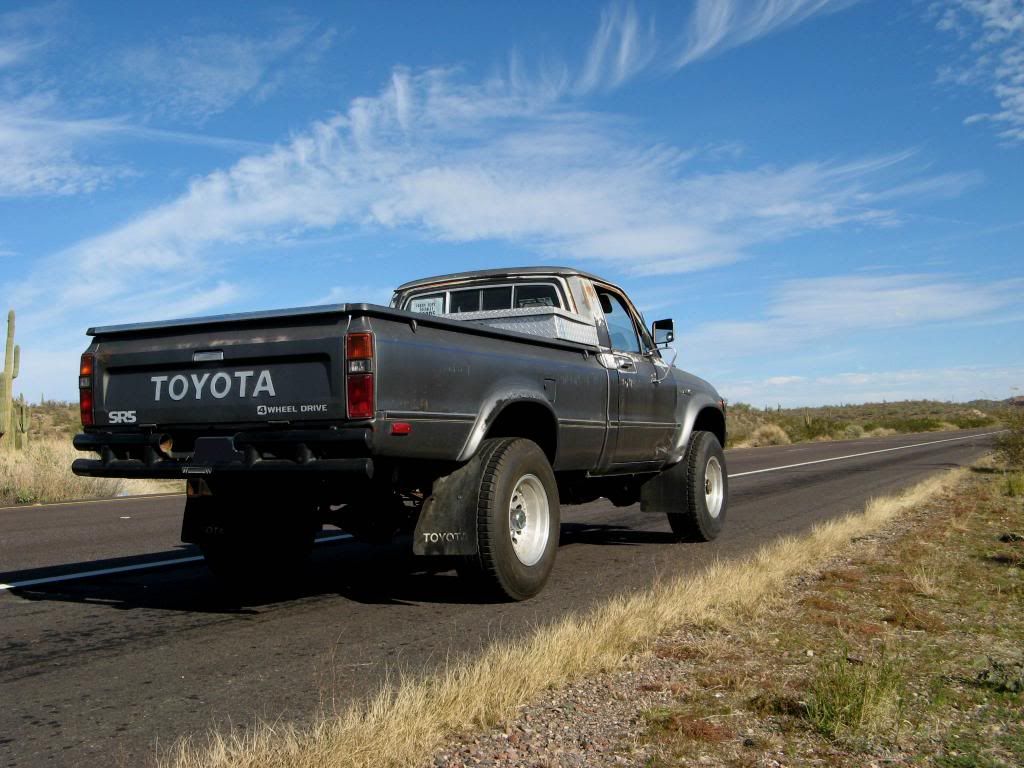
I took a few photos while cruising North across the desert, up into the mountains towards New Mexico. I drove through some snow flurries before I reached I40. That would be a great place to live.
Then...
I stopped in Northeastern New Mexico to visit the ranchita.
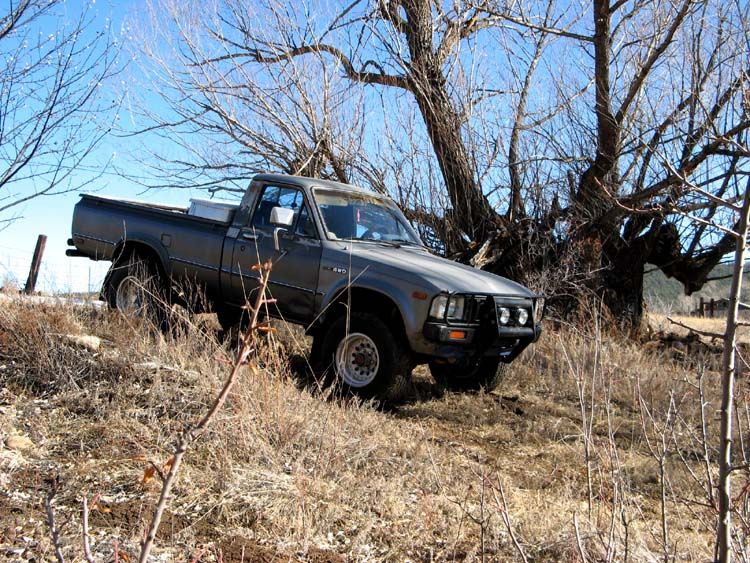
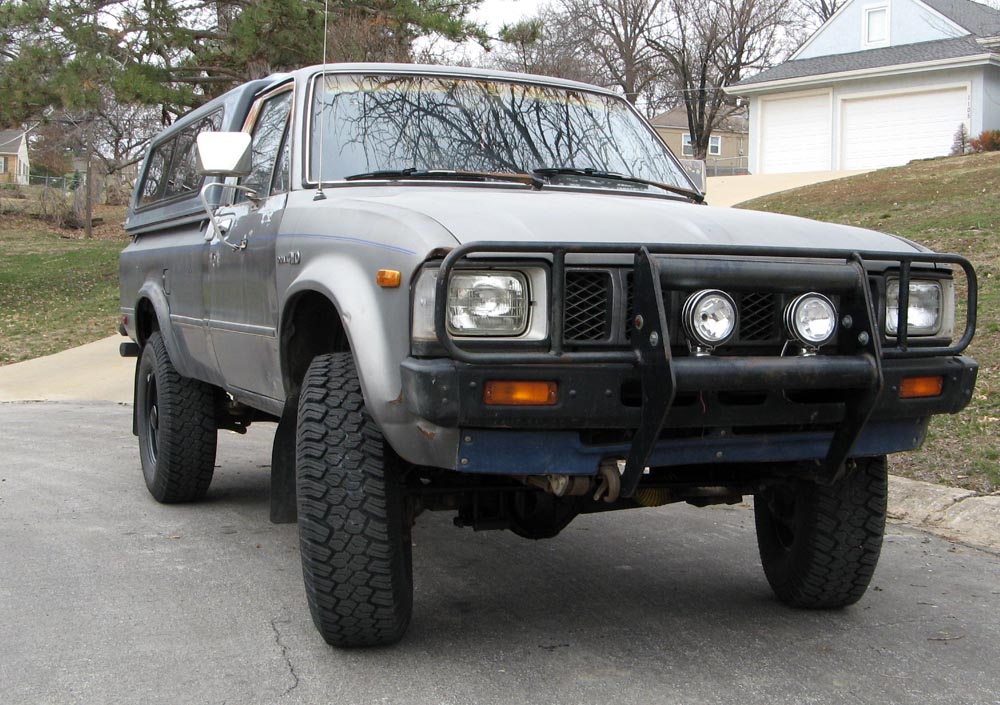
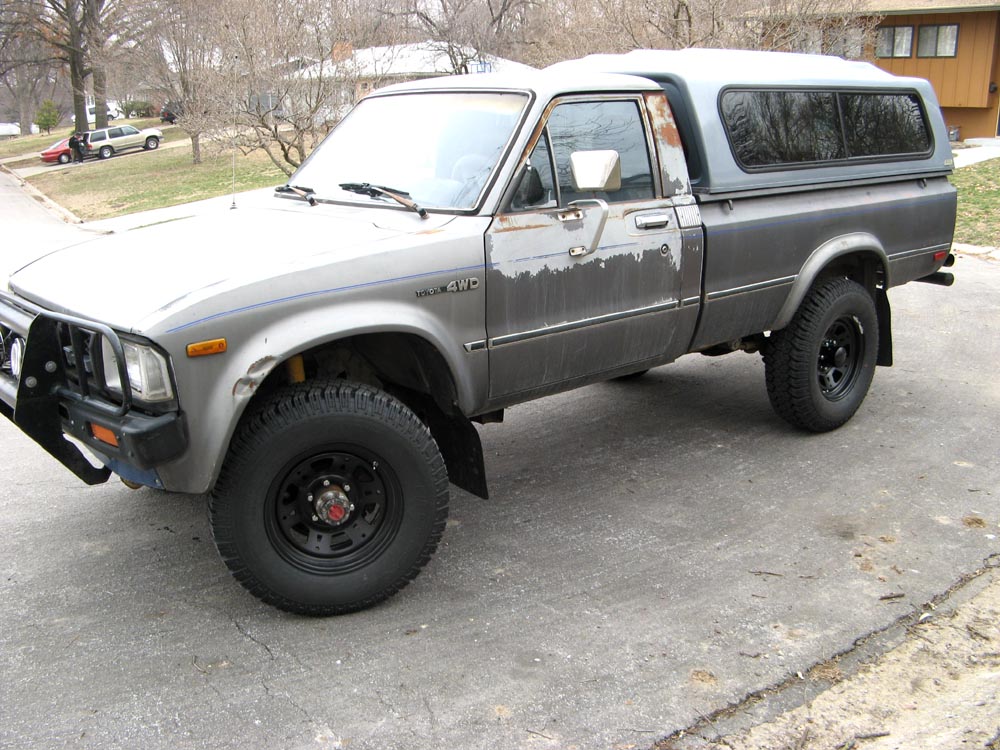
You can see the basics. 31" tires on nice alloy wheels, a front bumper guard with some lights, and the rear bumper is a decent Smittybilt tubular. The mounting hardware on the rear bumper and class III tow hitch is BEEFY and not rusted. I sold the tool box and put a Leer top on it. That's another thread. I'll find it and put a link here later.
That little "hill" is where I tried to test the 4WD. Would not engage! But it just turned out to be a dirty grimy lock (left front). That was the first thing I fixed when I got back to Kansas City. It just needed a good cleaning, and lube. No problems with the transfer case as far as I can tell.
The best part about the truck is that the frame and body have only surface rust. Frame needs to be scrubbed and sealed to prevent any more rusting! That's a priority.
Here we go!!
I'll begin posting more details with photos.
It did, and what a great adventure!
So here it is on the Arizona desert Northeast of Pheonix:
I took a few photos while cruising North across the desert, up into the mountains towards New Mexico. I drove through some snow flurries before I reached I40. That would be a great place to live.
Then...
I stopped in Northeastern New Mexico to visit the ranchita.
You can see the basics. 31" tires on nice alloy wheels, a front bumper guard with some lights, and the rear bumper is a decent Smittybilt tubular. The mounting hardware on the rear bumper and class III tow hitch is BEEFY and not rusted. I sold the tool box and put a Leer top on it. That's another thread. I'll find it and put a link here later.
That little "hill" is where I tried to test the 4WD. Would not engage! But it just turned out to be a dirty grimy lock (left front). That was the first thing I fixed when I got back to Kansas City. It just needed a good cleaning, and lube. No problems with the transfer case as far as I can tell.
The best part about the truck is that the frame and body have only surface rust. Frame needs to be scrubbed and sealed to prevent any more rusting! That's a priority.
Here we go!!
I'll begin posting more details with photos.
Last edited by 83pingpong; 01-10-2013 at 11:01 AM.

 12-27-2012, 08:34 AM
#5
Registered User
Thread Starter
Join Date: Jan 2012
Location: Kansas City, Missouri
Posts: 325
Likes: 0
Received 0 Likes
on
0 Posts
seat replaced
The original driver's seat was collapsed on the front left, and springs poking out of the seat actually bruised my outer left thigh! It had to go. I found a pair of Honda Civic seats, and installed the driver's seat.
I don't have resources to do the major work that needs to be done at the moment. Fortunately, the motor still runs OK, and the drive train is holding up.So this will have to do for now. Here is a picture of the completed job:

Complete thread on the install is here:
https://www.yotatech.com/forums/f114...hy-not-263073/
I don't have resources to do the major work that needs to be done at the moment. Fortunately, the motor still runs OK, and the drive train is holding up.So this will have to do for now. Here is a picture of the completed job:
Complete thread on the install is here:
https://www.yotatech.com/forums/f114...hy-not-263073/
Last edited by 83pingpong; 12-27-2012 at 08:36 AM.
12-28-2012, 03:53 PM
#6
Registered User
iTrader: (1)
Join Date: Apr 2008
Location: Alaska
Posts: 227
Likes: 0
Received 0 Likes
on
0 Posts
Cool! That was quite a drive for a truck! Heck, I though my 6 hour drive from Denver was quite a trip for a truck... Or my 150 mile drive from Interior AK to Anchorage. I am excited to see were this goes, the seat looks like a huge upgrade.


Trending Topics
01-01-2013, 03:13 PM
#9
Registered User
Thread Starter
Join Date: Jan 2012
Location: Kansas City, Missouri
Posts: 325
Likes: 0
Received 0 Likes
on
0 Posts
The Leer bed topper/canope
This topper came from a C10 (7 foot bed). It's an inch too wide, so has an overhang at the bed rails. This gives it more space inside actually. Works OK.

Here's the more complete thread:
https://www.yotatech.com/forums/f114...ng-gap-261509/
Here's the more complete thread:
https://www.yotatech.com/forums/f114...ng-gap-261509/
Last edited by 83pingpong; 01-03-2013 at 03:33 PM.
01-10-2013, 03:47 AM
#11
Registered User
Thread Starter
Join Date: Jan 2012
Location: Kansas City, Missouri
Posts: 325
Likes: 0
Received 0 Likes
on
0 Posts
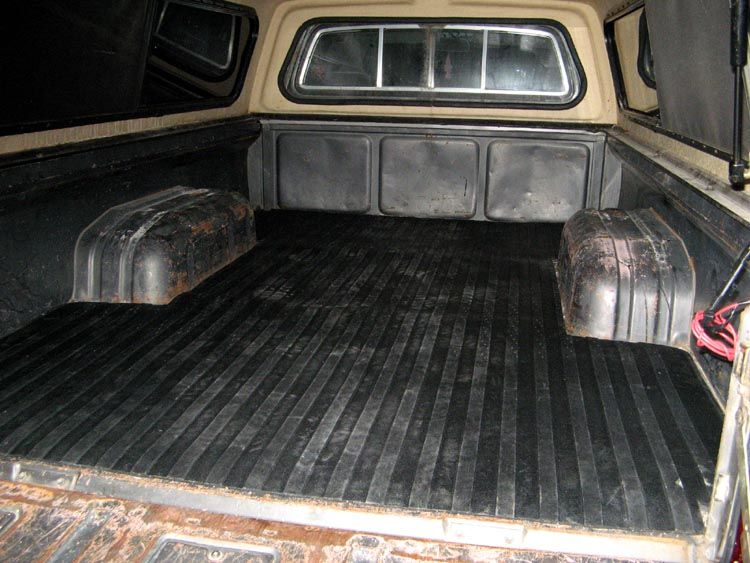
new bedliner
There are no sources for custom bed liners for 1st gen pickups, but I found a sale on Protecta brand rubber mats and got one for a Chevy Full size longbed (Truck Customizers, Protecta 6974D). The width is perfect. I had to cut the wheel wells, the front and back, and cut notches for the rear turn signal boxes. A metal straight edge and utility knife made the job pretty easy.. Here is the full thread:
https://www.yotatech.com/forums/f114.../#post52024359

https://www.yotatech.com/forums/f114.../#post52024359
03-23-2013, 12:20 PM
#12
Registered User
Thread Starter
Join Date: Jan 2012
Location: Kansas City, Missouri
Posts: 325
Likes: 0
Received 0 Likes
on
0 Posts
Tires/Wheels
I finally got around to buying wheels and tires. I like the looks of the tires and wheels that were on it when I bought it, but I wanted slightly narrower and taller tires with steel wheels. I got LT24575R16 BF Goodrich Commercial Traction tires. Load range E. These are heavy duty tires, kind of overkill, and mounted on Black Rock 16x7 wheels. The wheels were even heavier than I thought!
These might last as long as my toyota
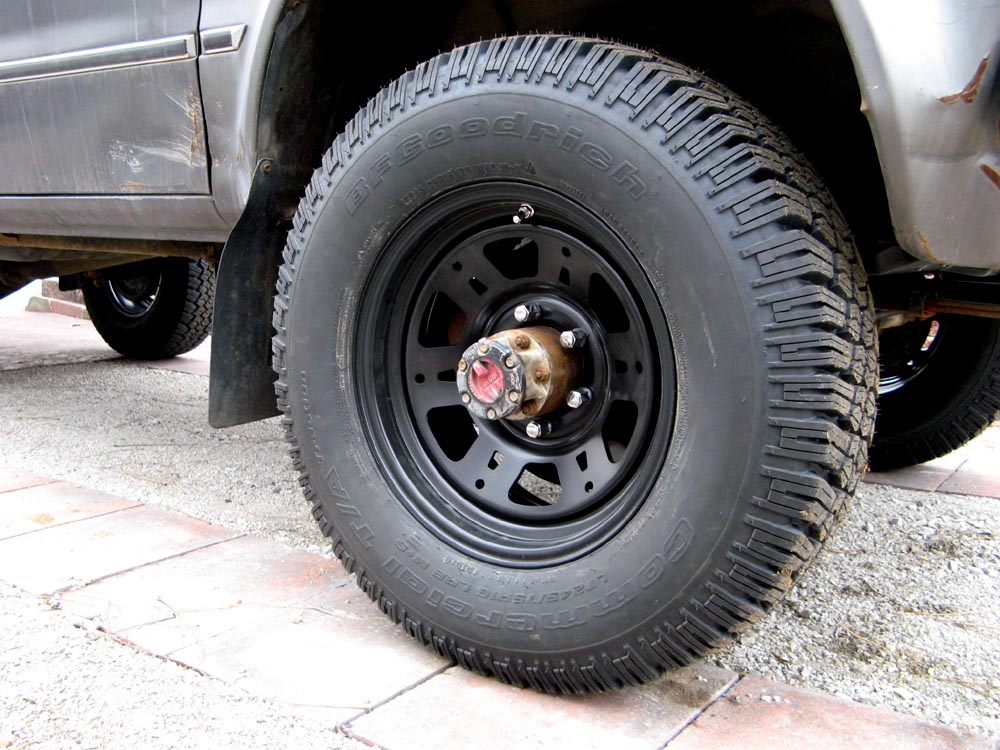
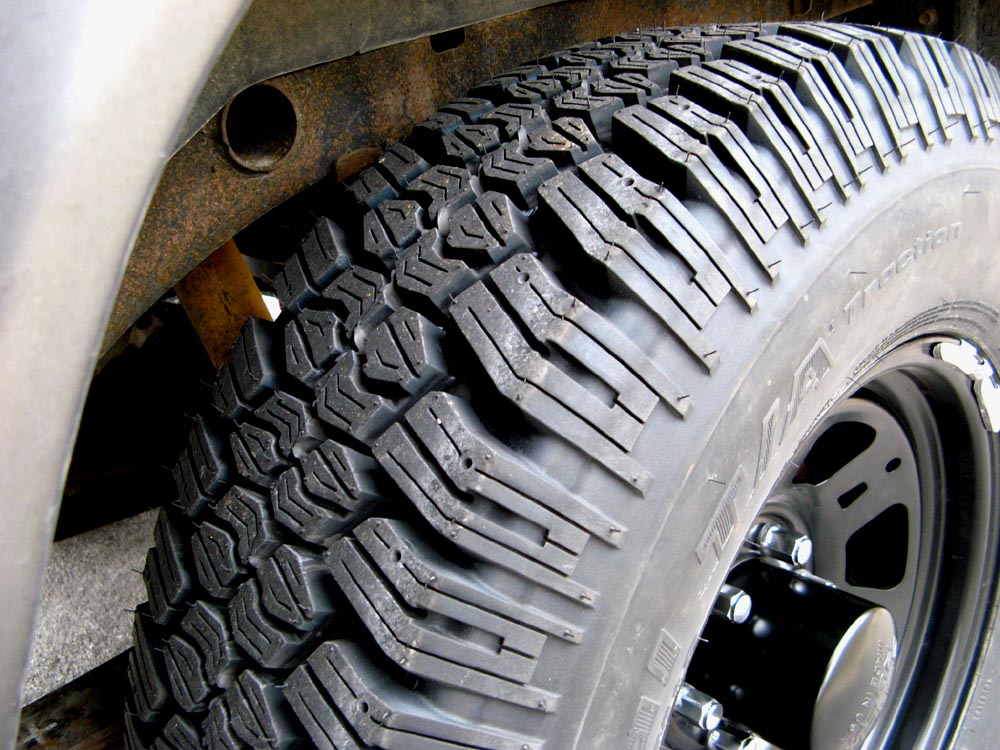
The tire shop aired them up to 80 psi (stated on the tire), but I'll drop it back to 40psi after they sit on there for a while. Stiffer feel, steers easier, and I think it will drive through a two foot snow drift now, or a pretty deep mud pit, and bite right through. I almost got the LT225 (about $150 less for the 4), but I am glad I got the LT245s. BEEFY tough!
AND-wider tires would float up and slip/slide on mud or snow-this is a little truck. I don't drive on sand, and I'd rather have them bite through the mud and snow.
I can't wait for more snow!
These might last as long as my toyota
The tire shop aired them up to 80 psi (stated on the tire), but I'll drop it back to 40psi after they sit on there for a while. Stiffer feel, steers easier, and I think it will drive through a two foot snow drift now, or a pretty deep mud pit, and bite right through. I almost got the LT225 (about $150 less for the 4), but I am glad I got the LT245s. BEEFY tough!
AND-wider tires would float up and slip/slide on mud or snow-this is a little truck. I don't drive on sand, and I'd rather have them bite through the mud and snow.
I can't wait for more snow!
Last edited by 83pingpong; 12-19-2014 at 01:07 PM.
03-24-2013, 10:10 AM
#13
Registered User
Thread Starter
Join Date: Jan 2012
Location: Kansas City, Missouri
Posts: 325
Likes: 0
Received 0 Likes
on
0 Posts
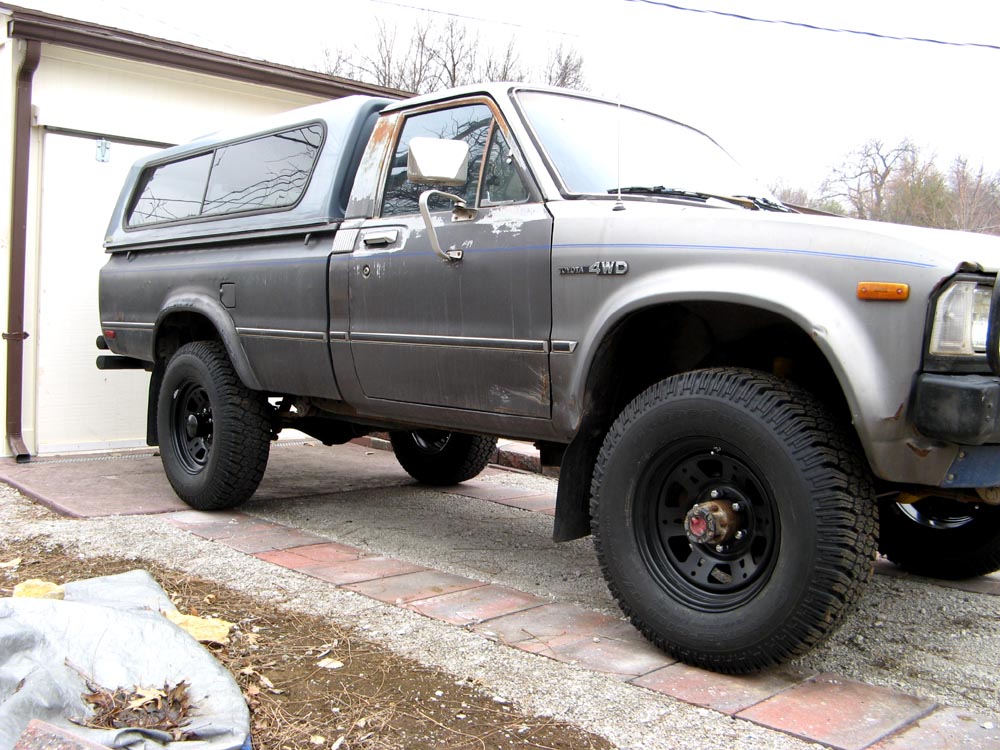
Snow!
Well, I didn't have to wait long for another snowstorm. Just 8-10 inches with drifting, but enough to get an idea of how well these tires dig into snow. The driveway was windswept and only less snow on it. The old 31 inch tires floated up and spun out on this stuff...but these tires bite in and go, even slowly up a steep hill. Awesome. I definitely recommend these tires for traction. It will be years before I can say anything about treadwear. It was deeper in the back yard, but still excellent traction. Great tires.
Last edited by 83pingpong; 10-24-2014 at 03:47 AM.
03-27-2013, 04:20 AM
#14
Registered User
Thread Starter
Join Date: Jan 2012
Location: Kansas City, Missouri
Posts: 325
Likes: 0
Received 0 Likes
on
0 Posts
header, before rebuild, or after
I am thinking of going ahead with a Pacesetter 70-1080. I should fix my oil leak and install the header. The engine runs fine otherwise. I can work on a separate 22R block in the shop in the meantime. Still hunting for a 22R block
03-28-2013, 03:56 AM
#16
Registered User
Thread Starter
Join Date: Jan 2012
Location: Kansas City, Missouri
Posts: 325
Likes: 0
Received 0 Likes
on
0 Posts
This is enough to make me delay the header. I don't want to dig into a carb right now (I think I have marginally low float bowl setting too). You've saved me some time and headaches!
BUT... I am getting a 22R this weekend, and starting the build, so I should concentrate on making that build work right with a header. Yes! I found a 22R!
Now I cam get serious

Last edited by 83pingpong; 03-28-2013 at 04:00 AM.
03-31-2013, 10:05 AM
#17
Registered User
Thread Starter
Join Date: Jan 2012
Location: Kansas City, Missouri
Posts: 325
Likes: 0
Received 0 Likes
on
0 Posts
Oil Leak FIXED!
WOW. Easter Bunny nice to me today. I've assumed my oil leak would be something like the front seal, or blown gasket somewhere. I was VERY wrong.
The PO did something weird with the bolt that holds the air conditioner tensioner pulley bracket in place. Maybe he reinstalled a longer bolt by mistake, but there was a gap between the bolt head and the bracket. I tried to tighten it. NO. I took it out, and put a few washers on it, then tightened it. This compressed the oil pump housing and FIXED the leak. I feel lucky today. I'll clean up the oily mess under there and change the oil now.
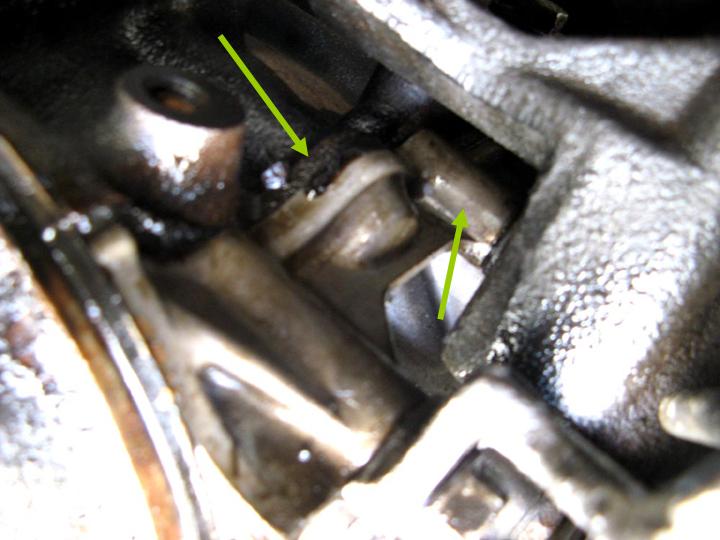
Here's oil pouring out SECONDS after drying it with engine running about 1500 rpm Left arrow shows the oil quickly dripping down, the right arrow is the bolt housing that the air conditioner tensioer assembly sits on top of:
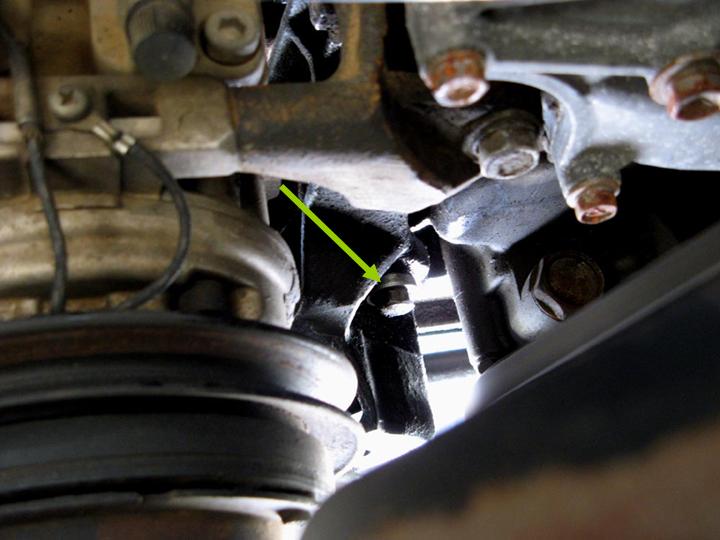
Here's the washers on the bolt:
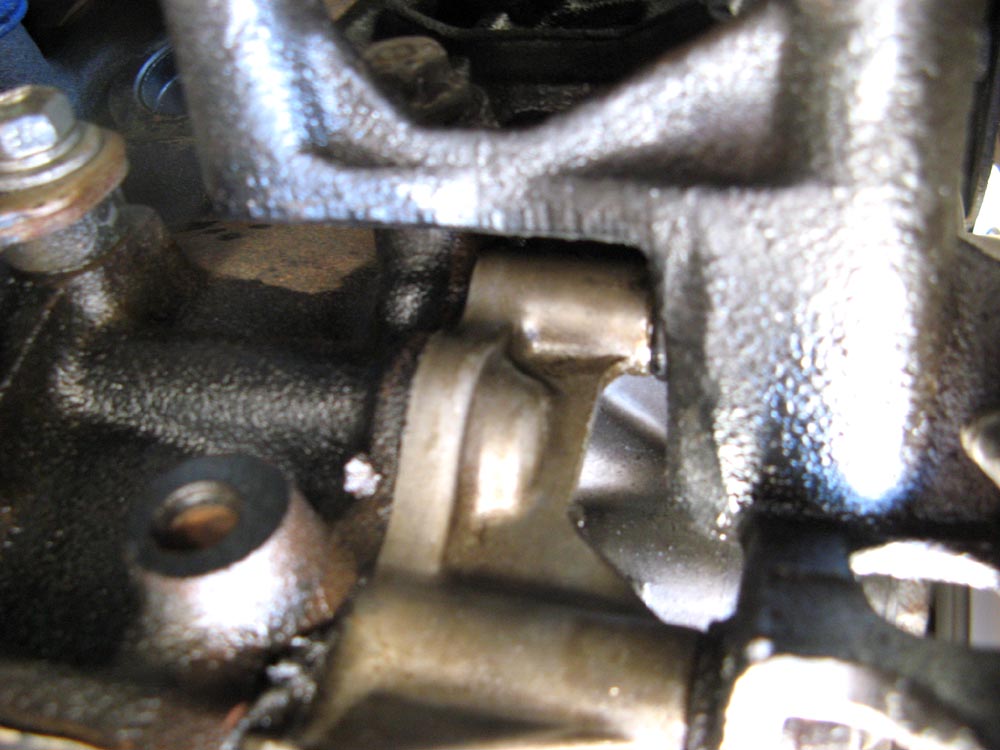
Here it is after fixing it. Ran for 5 minutes after cleaning it all up. WOW. No leak. Cool.
The PO did something weird with the bolt that holds the air conditioner tensioner pulley bracket in place. Maybe he reinstalled a longer bolt by mistake, but there was a gap between the bolt head and the bracket. I tried to tighten it. NO. I took it out, and put a few washers on it, then tightened it. This compressed the oil pump housing and FIXED the leak. I feel lucky today. I'll clean up the oily mess under there and change the oil now.
Here's oil pouring out SECONDS after drying it with engine running about 1500 rpm Left arrow shows the oil quickly dripping down, the right arrow is the bolt housing that the air conditioner tensioer assembly sits on top of:
Here's the washers on the bolt:
Here it is after fixing it. Ran for 5 minutes after cleaning it all up. WOW. No leak. Cool.
Last edited by 83pingpong; 03-31-2013 at 10:06 AM.
04-21-2013, 12:27 PM
#18
Registered User
Thread Starter
Join Date: Jan 2012
Location: Kansas City, Missouri
Posts: 325
Likes: 0
Received 0 Likes
on
0 Posts
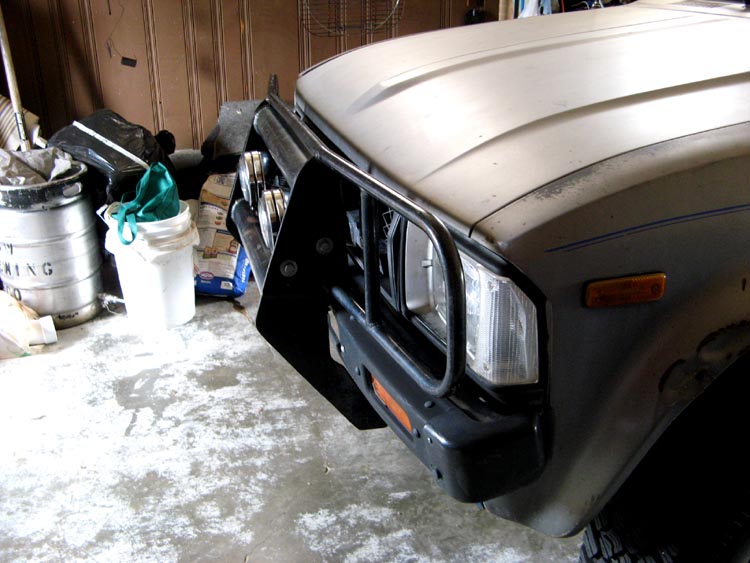
Bumper lights and Bumper guard mounting bolts
PO had bolted on the bumper guard without bolting on the two mounting tabs that mount on the top of the bumper. It wiggled and squeaked a lot while driving down the road (mounting tabs scraping the top of the bumper). The bumper guard also sagged forward-looked cheesy !! 
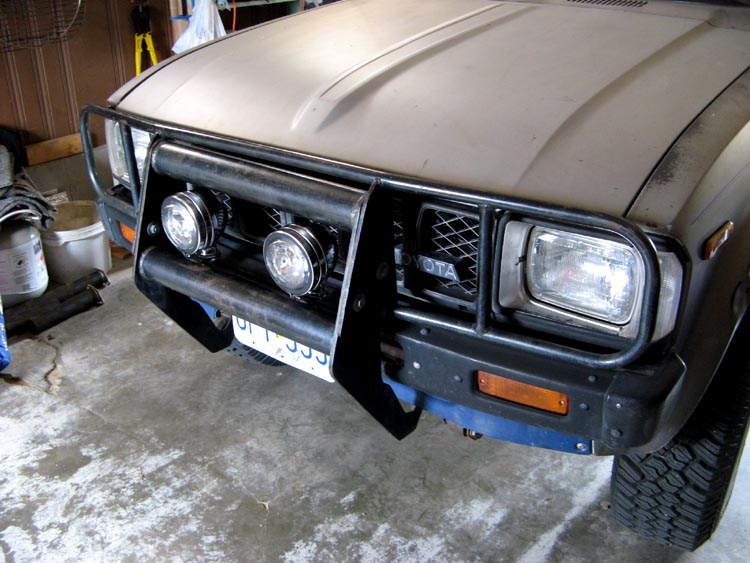
PO also had bolted on the lights without actually installing them. One of the lights didn't even have a bulb! Cosmetic "lights".
So I finally tackled these two. First, I lifted the bumper guard with a floor jack so the tabs were in place, and drilled holes using the holes in the tab to center the bit (that worked out nicely). Installed a couple of good 3/4" bolts and WOW... solid front bumper guard. I should have done this a long time ago. You can see the chrome flex (wiring housing) for the light-this photo after I finished that too.
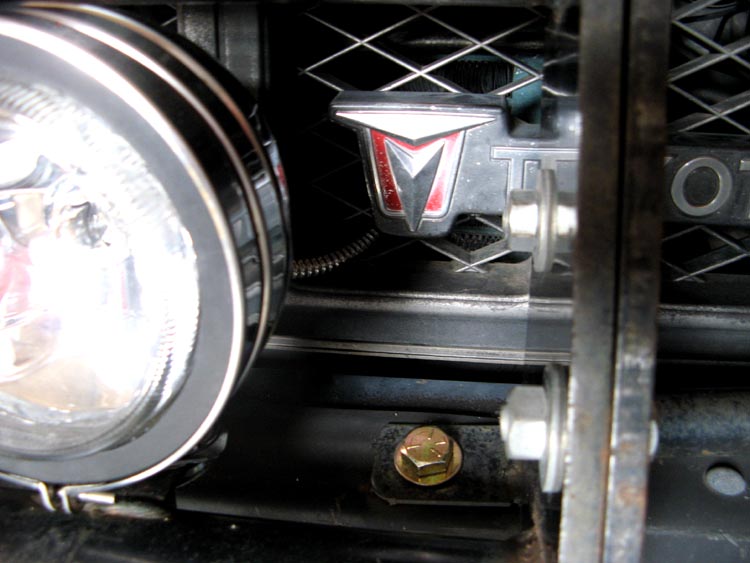
The guard is much closer at the top now:
Here is how the lights look more from the front:
The light wiring went pretty smoothly. I mounted the relay in front of the battery. You can see the purple grounding wire that activates the relay from the new light switch on the dash.
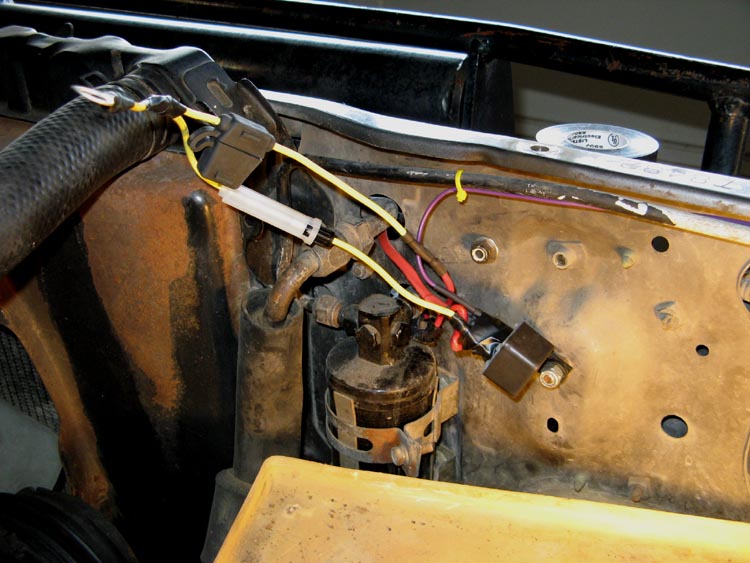
Getting through the firewall was easy with a piece of vacuum hose (wire fit through). I wrapped the ends of the vacuum tube with electrical tape to help keep it from moving. It is a snug fit, but with tape, NOT moving.
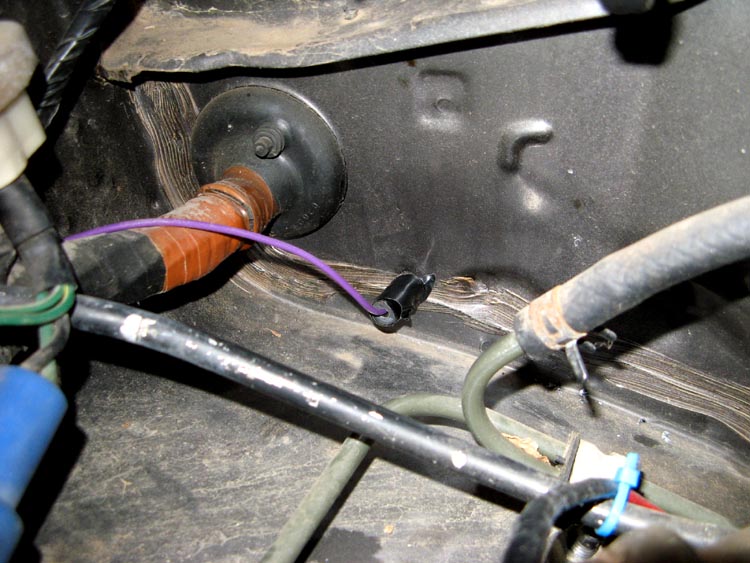
Here it is on the inside of the firewall.

I used the spot next to the lighter. Sweet! This is a push/pull switch, and it connects to ground via emergency brake lever mounting bolt. This was just as easy as I thought it would be!

I need to adjust the lights a little, but this was another good day working on the Yota
PO also had bolted on the lights without actually installing them. One of the lights didn't even have a bulb! Cosmetic "lights".
So I finally tackled these two. First, I lifted the bumper guard with a floor jack so the tabs were in place, and drilled holes using the holes in the tab to center the bit (that worked out nicely). Installed a couple of good 3/4" bolts and WOW... solid front bumper guard. I should have done this a long time ago. You can see the chrome flex (wiring housing) for the light-this photo after I finished that too.
The guard is much closer at the top now:
Here is how the lights look more from the front:
The light wiring went pretty smoothly. I mounted the relay in front of the battery. You can see the purple grounding wire that activates the relay from the new light switch on the dash.
Getting through the firewall was easy with a piece of vacuum hose (wire fit through). I wrapped the ends of the vacuum tube with electrical tape to help keep it from moving. It is a snug fit, but with tape, NOT moving.
Here it is on the inside of the firewall.
I used the spot next to the lighter. Sweet! This is a push/pull switch, and it connects to ground via emergency brake lever mounting bolt. This was just as easy as I thought it would be!
I need to adjust the lights a little, but this was another good day working on the Yota
12-01-2013, 08:10 AM
#20
Registered User
Thread Starter
Join Date: Jan 2012
Location: Kansas City, Missouri
Posts: 325
Likes: 0
Received 0 Likes
on
0 Posts
Spare 22R getting ready
I have about 230k on the original engine in this truck. Aside from replacement parts like the fuel pump and exhaust gasket it's all original. It does burn a little oil, but fires on all cylinders smoothly. No weird noises and no oil leaks. The carburetor is bad during warm up, but OK once it is warmed up. So I want to rebuild the original engine.
I got a cheap used remanufactured 22R to swap out while I work on the rebuild. But this may be a challenge... I am sure the carb is toast. But that's OK...because I am going to desmog it with a LCengineering blockoff plate kit, and install a new Weber I got a few months ago. This way I can take my time setting up the used engine with desmog and Weber before swapping out to rebuild my engine. I can work out the kinks on the Weber while the remanufactured engine is in there.
When I have my engine rebuilt and ready to put back in, I can swap the blockoff plates and Weber onto my rebuild. That's the plan anyway. Here is the used engine I found:
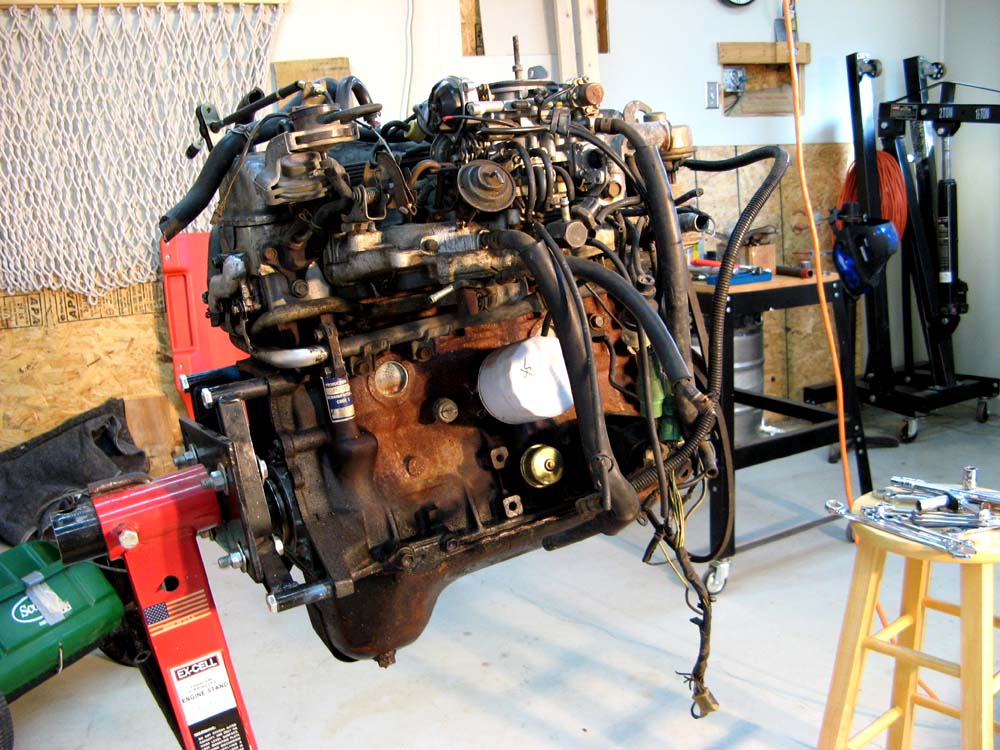
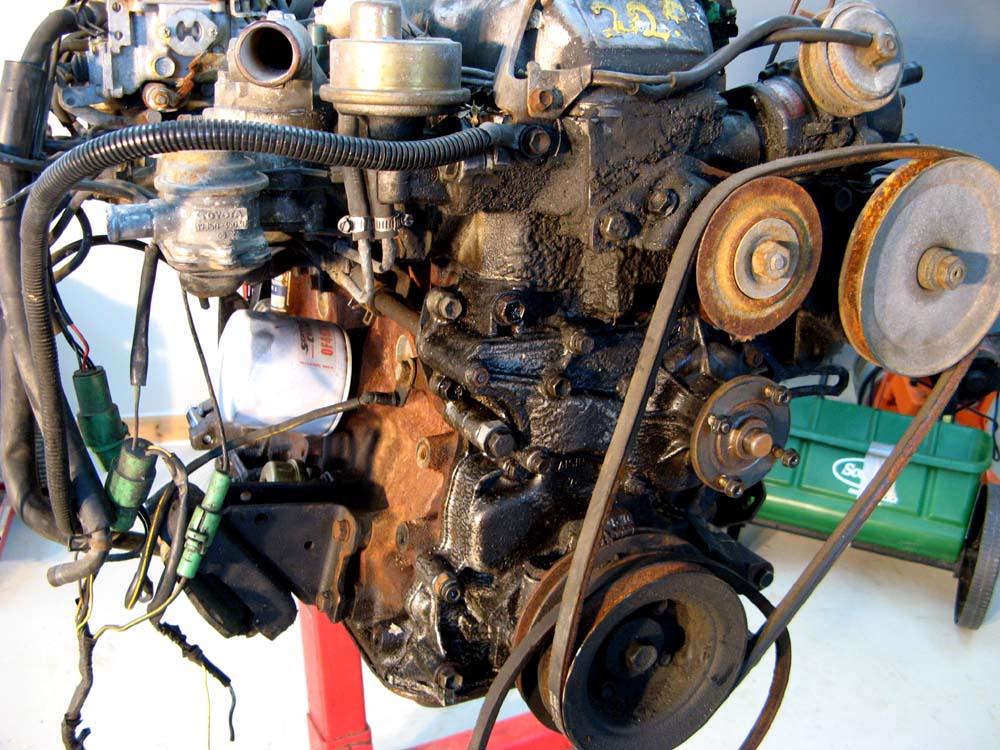
Outside it is pretty bad- rusty pulleys grimy dirt/oil coating the front. I just hope it runs well enough to keep the truck on the road while I rebuild my engine. I haven't looked into the distributor yet, but already removed the air conditioner compressor.
I got a cheap used remanufactured 22R to swap out while I work on the rebuild. But this may be a challenge... I am sure the carb is toast. But that's OK...because I am going to desmog it with a LCengineering blockoff plate kit, and install a new Weber I got a few months ago. This way I can take my time setting up the used engine with desmog and Weber before swapping out to rebuild my engine. I can work out the kinks on the Weber while the remanufactured engine is in there.
When I have my engine rebuilt and ready to put back in, I can swap the blockoff plates and Weber onto my rebuild. That's the plan anyway. Here is the used engine I found:
Outside it is pretty bad- rusty pulleys grimy dirt/oil coating the front. I just hope it runs well enough to keep the truck on the road while I rebuild my engine. I haven't looked into the distributor yet, but already removed the air conditioner compressor.
Last edited by 83pingpong; 12-02-2013 at 03:36 AM.


