1976 Ford Super Cab Restore
 11-18-2016, 07:01 PM
#21
Contributing Member
Love your builds and have a soft spot for the old fords. Another one to enjoy. 
 11-19-2016, 10:09 PM
#22
Super Moderator
Staff
Thread Starter
iTrader: (1)
Join Date: Aug 2008
Location: Anderson Missouri
Posts: 11,788
Likes: 0
Received 21 Likes
on
19 Posts
Hello Robb... The drive shaft is long, when I was pulling it out, I did not get it loosened from the rear axle and it was a handful to get it where I needed it to be get it removed. It is long.
Thanks Habanero...Wife thinks it is an ugly truck, hehe, I told her to wait until I am done with it and see what she thinks then. I like any old car regardless of what model it is. So nice seeing classics on the road.
Thanks Habanero...Wife thinks it is an ugly truck, hehe, I told her to wait until I am done with it and see what she thinks then. I like any old car regardless of what model it is. So nice seeing classics on the road.
11-19-2016, 10:22 PM
#23
Super Moderator
Staff
Thread Starter
iTrader: (1)
Join Date: Aug 2008
Location: Anderson Missouri
Posts: 11,788
Likes: 0
Received 21 Likes
on
19 Posts
Today I went and put a battery in. The wiper has a delay and it will occasionally operate the wiper. Starter is not turning over so I put the battery on charge and am hoping that is the problem. Will check and see if those two problems will go away with a fresh charged battery but am not holding my breath on that. I have found a couple of wires chewed so maybe that could be part of the problem. I want to know of any electrical problems before I tear it down just to start investigating on them. Blower motor is not working for the heater so will need to keep that in mind.
Head lights, blinkers and brake lights work. Other then the couple of chewed wires, the wiring looks like it is basically untouched and that is rare on a lot of older cars and trucks. I have not found any real hack jobs to speak of. Usually any old car or truck I get is butchered up from previous owners.
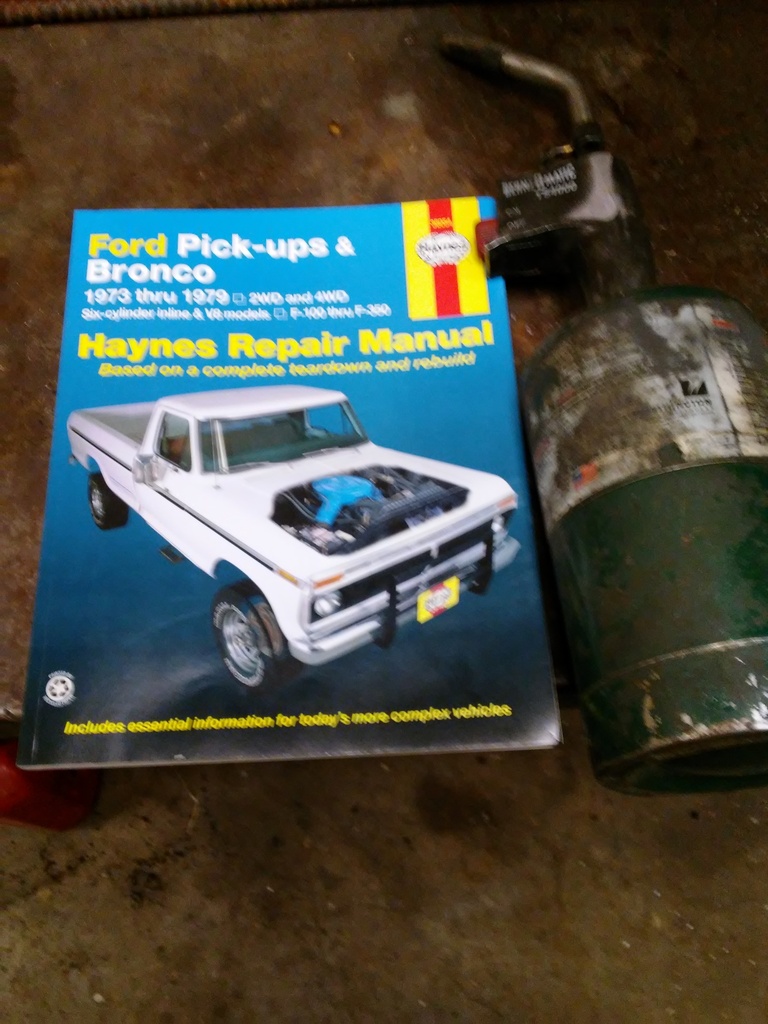
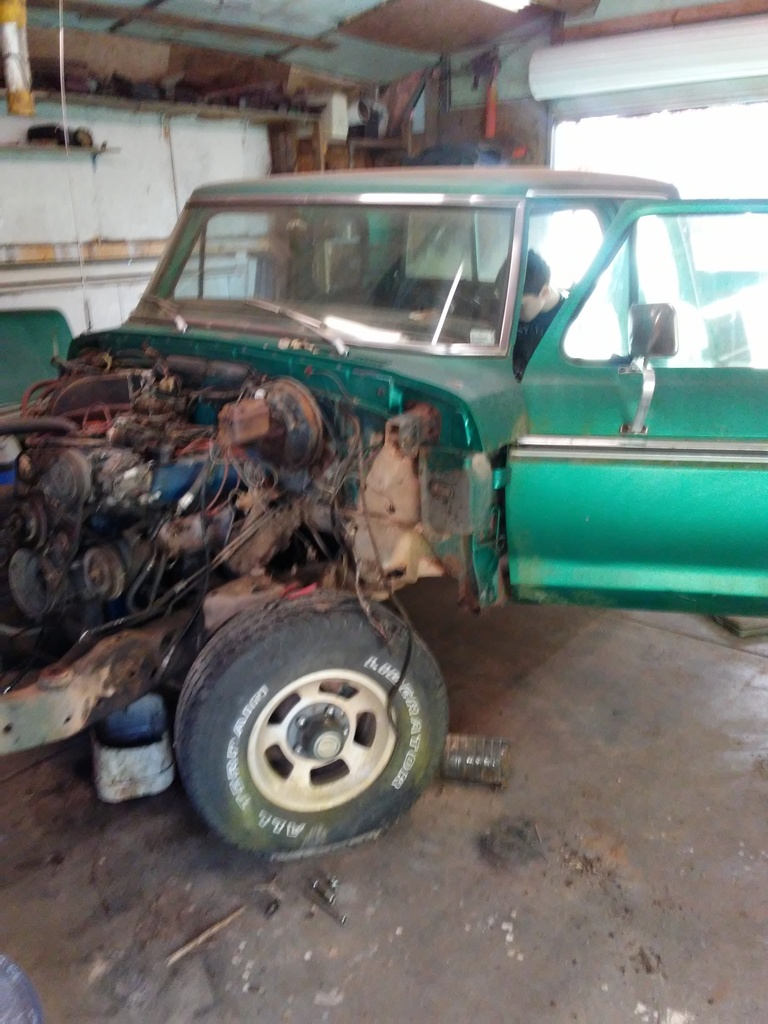
I got me a Haynes Manual. There are some factory manuals on line that I can get access to but I like a hard copy in front of me. Most of my learning mechanics has been with a Haynes and just getting into it. If I counted right, there are 9 different motors that came in these trucks. This one has the 460 in it. If it is good I will keep it for the time being. If it is bad, I will start looking for a different motor and go with a manual transmission. I pulled the drive shaft and no transmission oil came out of the tail shaft so that has me concerned. All part of a project truck.I was really after was the cab, frame, and everything else is just a bonus to build it the way I want it to be.
I am planning on either getting a MIG welder or cutting torch soon. I cant get both and not sure which one I want just yet. As bad as I want a welder, I think a cutting torch would be handier at the time. I can braze so that would help not needing a welder at this time. Some of these bolts are being stubborn. Heat would make the job a little easier. In the mean time I am hoping a propane torch will help free up a couple of bolts.
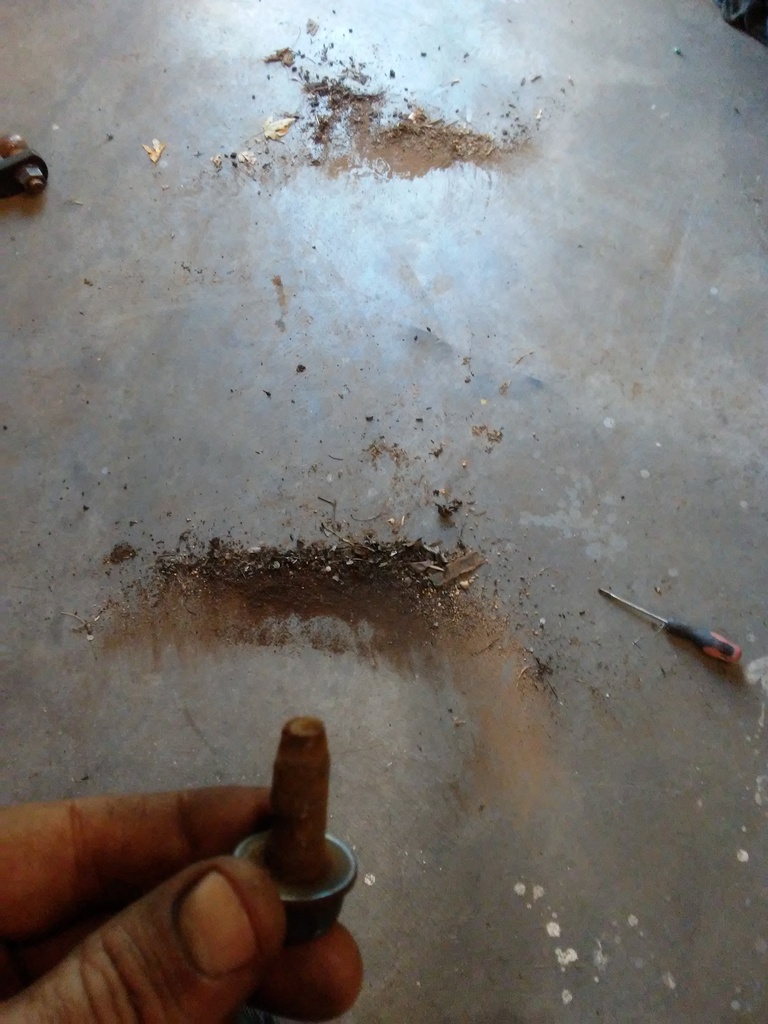
Well I finally broke a bolt. Luckily it will not be a major issue as it is a body mount bolt. It is half the diameter of what it should be and has rusted away. I tried heat and penetrating oil and several days worth of soaking it. Also these trucks have just a big a problem of debris getting into the cowl and working its way down to the inner fender.
Head lights, blinkers and brake lights work. Other then the couple of chewed wires, the wiring looks like it is basically untouched and that is rare on a lot of older cars and trucks. I have not found any real hack jobs to speak of. Usually any old car or truck I get is butchered up from previous owners.
I got me a Haynes Manual. There are some factory manuals on line that I can get access to but I like a hard copy in front of me. Most of my learning mechanics has been with a Haynes and just getting into it. If I counted right, there are 9 different motors that came in these trucks. This one has the 460 in it. If it is good I will keep it for the time being. If it is bad, I will start looking for a different motor and go with a manual transmission. I pulled the drive shaft and no transmission oil came out of the tail shaft so that has me concerned. All part of a project truck.I was really after was the cab, frame, and everything else is just a bonus to build it the way I want it to be.
I am planning on either getting a MIG welder or cutting torch soon. I cant get both and not sure which one I want just yet. As bad as I want a welder, I think a cutting torch would be handier at the time. I can braze so that would help not needing a welder at this time. Some of these bolts are being stubborn. Heat would make the job a little easier. In the mean time I am hoping a propane torch will help free up a couple of bolts.

Well I finally broke a bolt. Luckily it will not be a major issue as it is a body mount bolt. It is half the diameter of what it should be and has rusted away. I tried heat and penetrating oil and several days worth of soaking it. Also these trucks have just a big a problem of debris getting into the cowl and working its way down to the inner fender.

Last edited by Terrys87; 11-20-2016 at 02:15 PM.
11-21-2016, 01:26 PM
#24
Super Moderator
Staff
Thread Starter
iTrader: (1)
Join Date: Aug 2008
Location: Anderson Missouri
Posts: 11,788
Likes: 0
Received 21 Likes
on
19 Posts
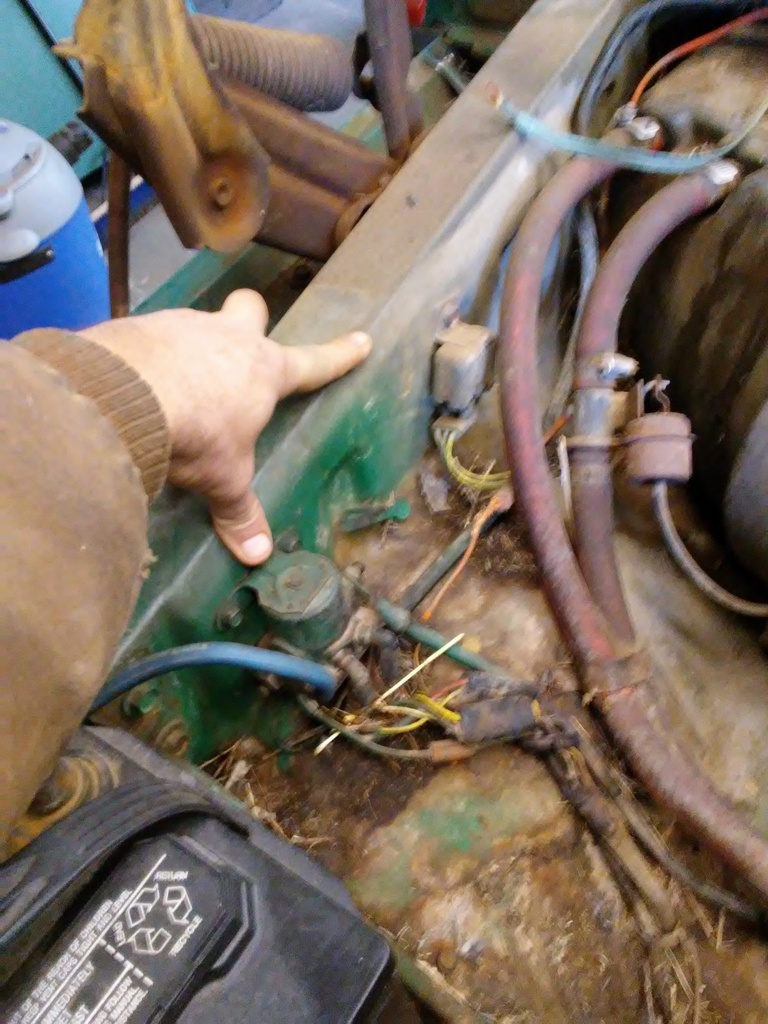
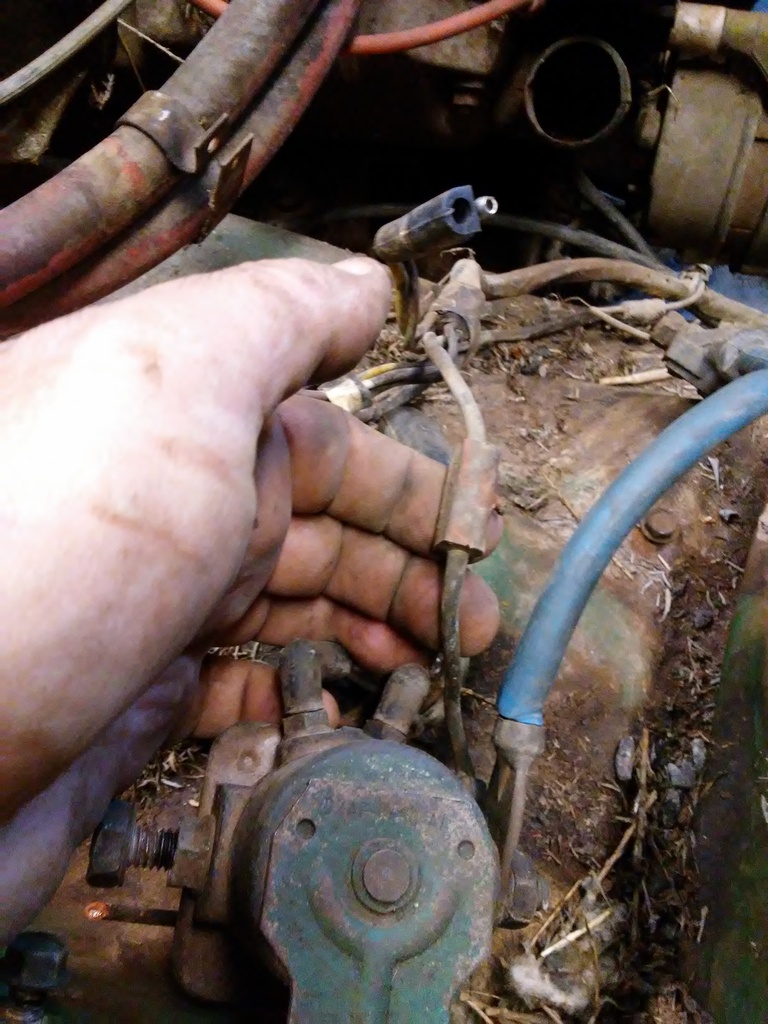
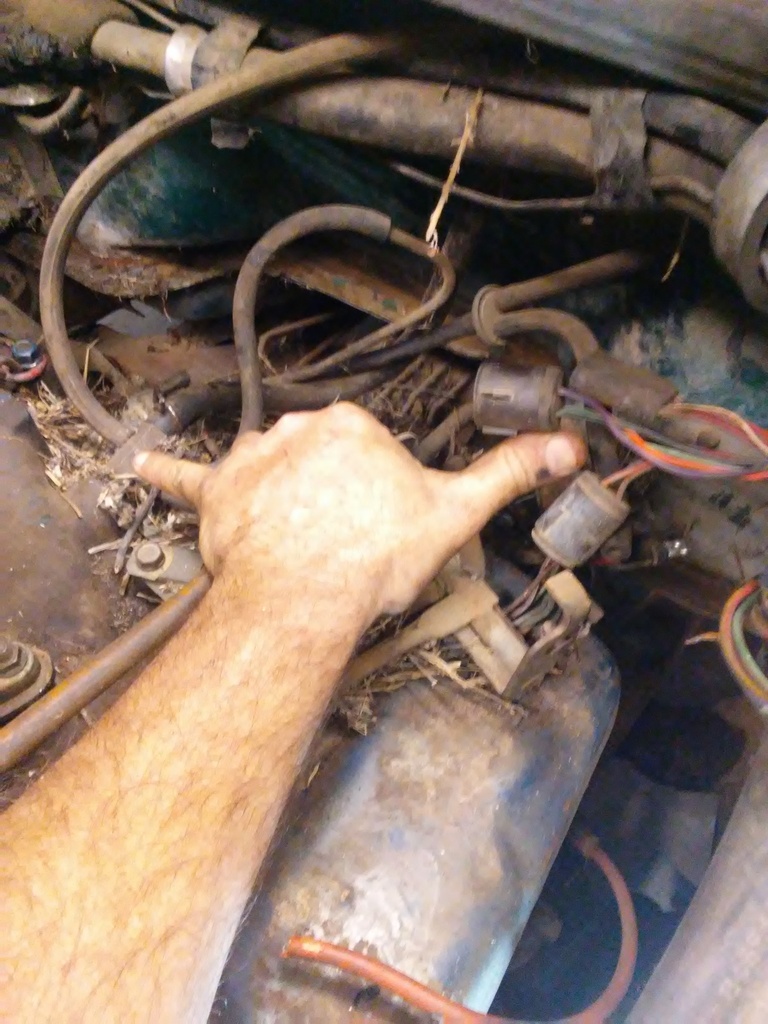
A reference picture for me. Starter wire goes to the rear of the solenoid. A square wire goes to the front. Where the Starter Solenoid and some other part goes on the inner fender.
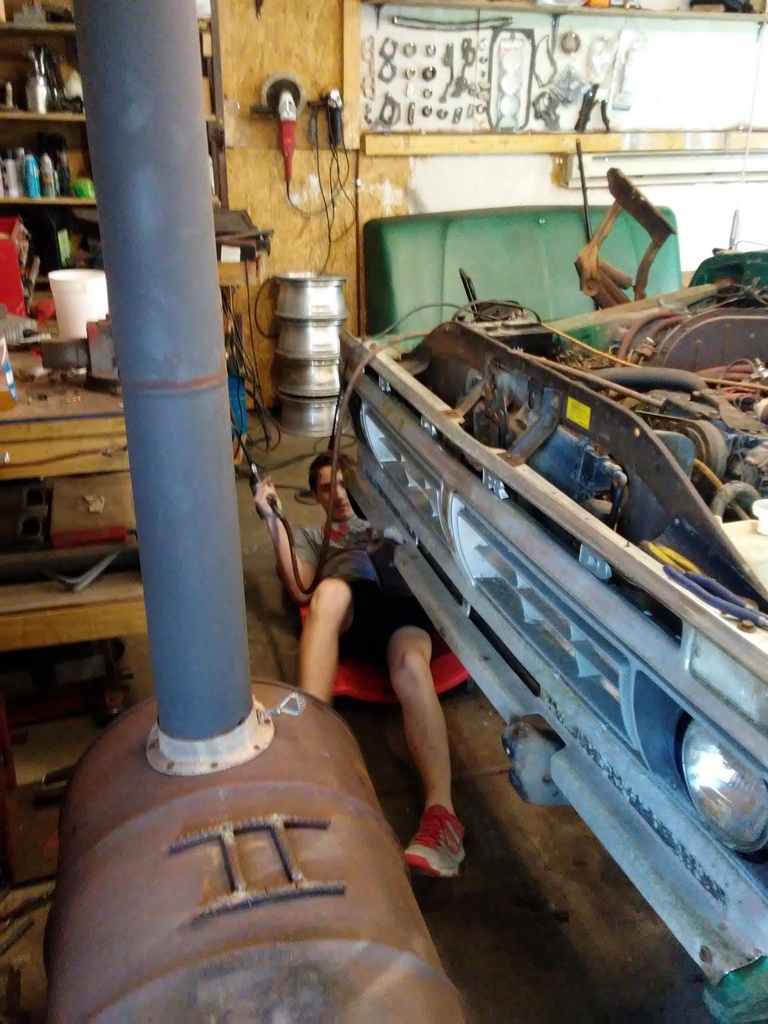
Sexy legs Justin heard me running the Impact Wrench and wanted to help get the front end off. We decided to take the fenders off. The passenger fender has been damaged by a previous accident. It does look fixable but I dont think I can get it to where it needs to be. I would rather have a straight fender or minor dings if possible. I can get a new fender easy around here.
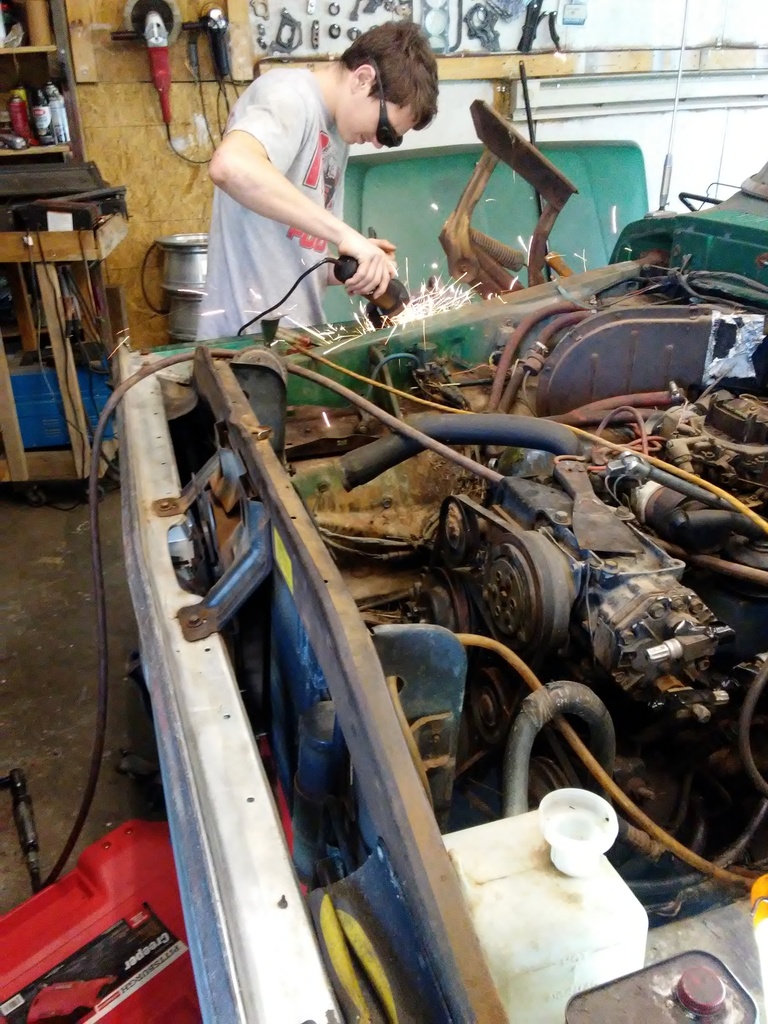
We did have to cut off 2 bolts and I need to add them to a earlier post so as I remember to get them when at the bone yard. I will grab a bunch of spares when there. I showed him how to cut the head of a bolt and to chesiel it off. He did a great job for the first time. He did not place the cut off wheel in a great place and it fell to the floor. It broke the wheel. Will show picture later on but he did learn to take care of tools and how to swap blades.
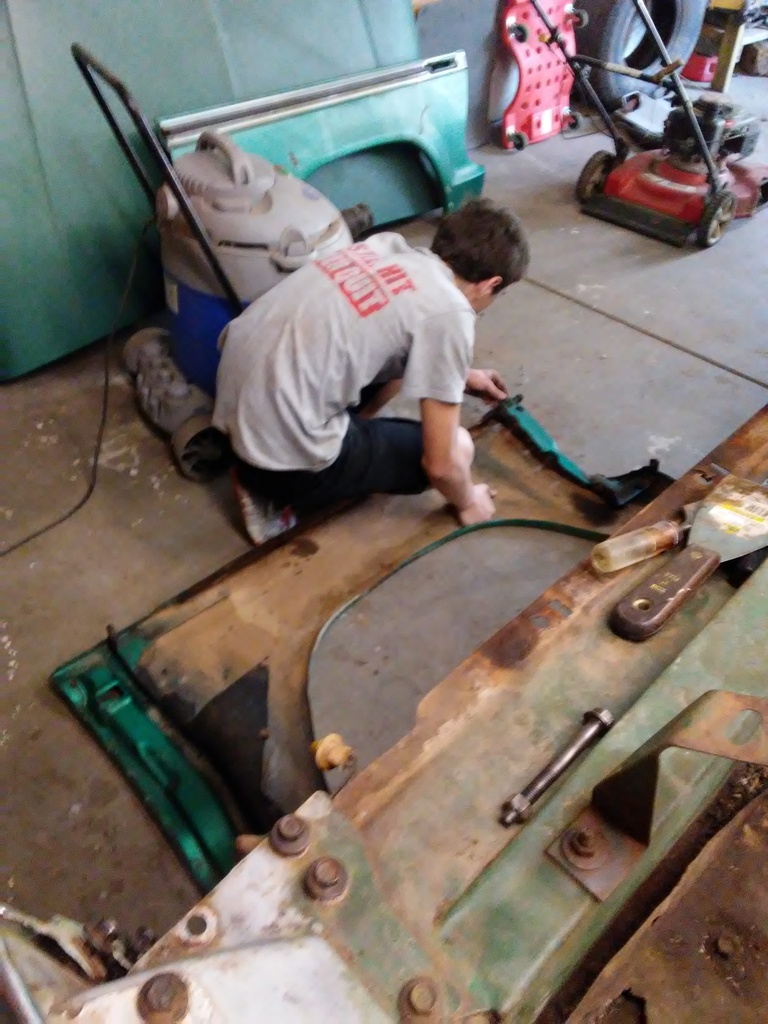
Here we got the fenders off and I made him put the bolts where they belong so as to keep track of them and which bolts will be used for the fenders.
Reference picture. Square wire to the front, Starter to the rear.
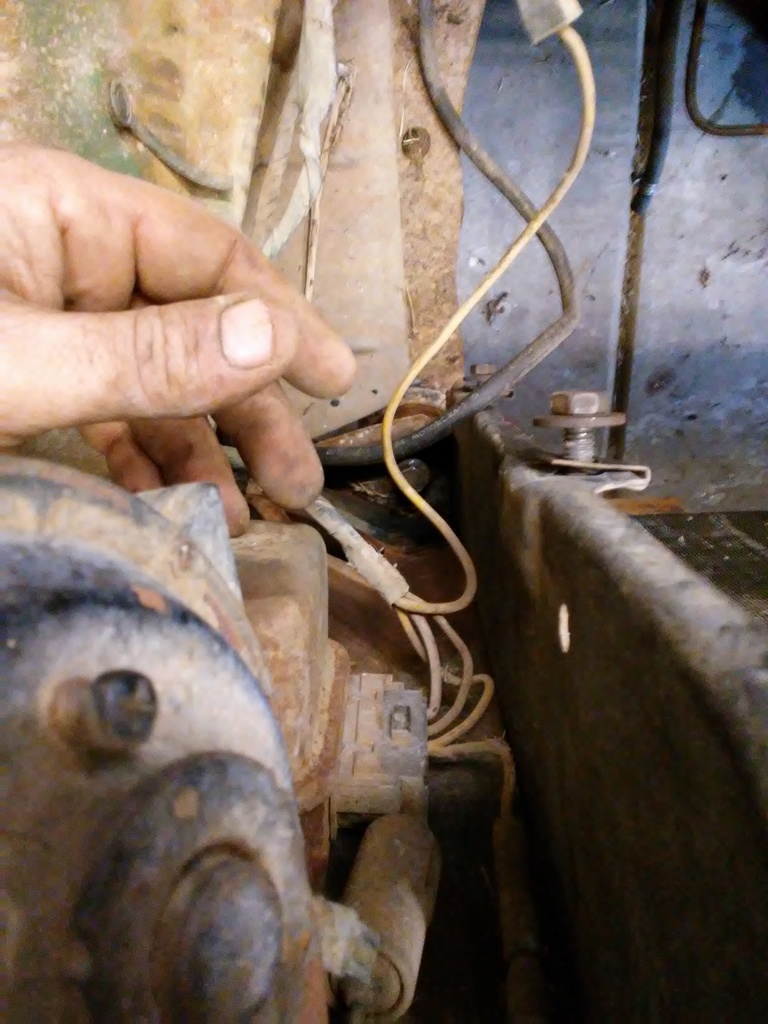
Reference picture. Looking down from the front of the core support, 2 sheet metal screws hold an electrical box.
Here we got the front clip off. Justin was ready to pull the motor but it was getting late and told him I need to post picture for future reference.
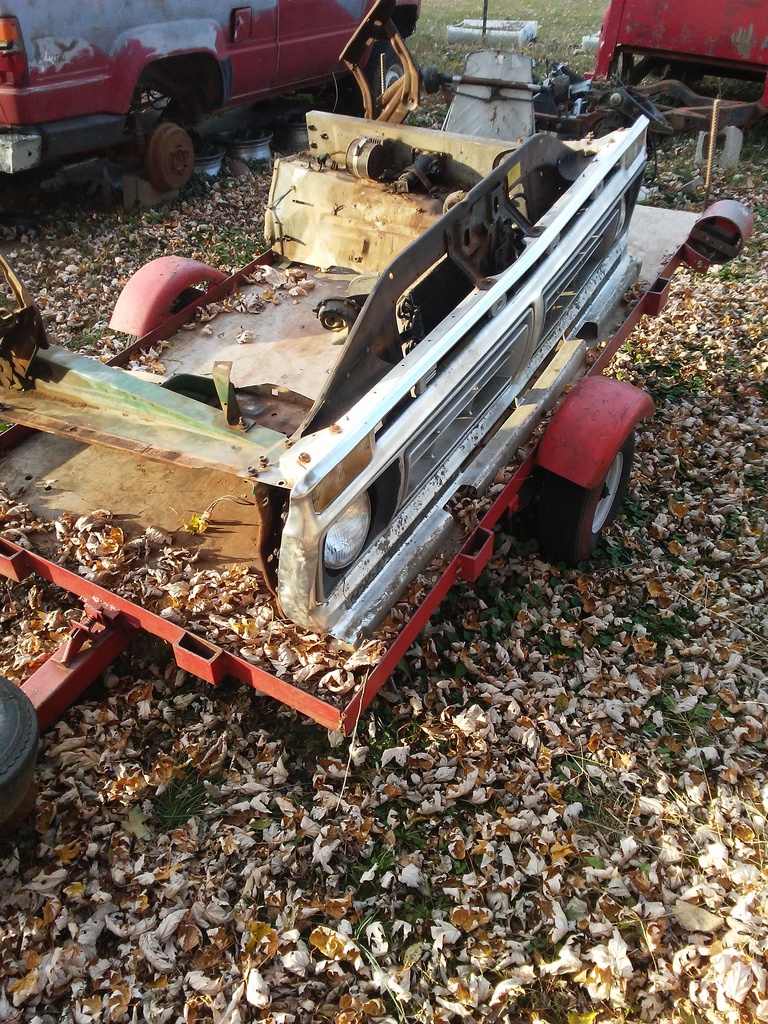
In the Toyota graveyard, I put the front clip back there and will clean, repair, and paint at a later time. Trying to get things in sections before the cold sits in as I can not use my stove at this time. Red Runner will be going in the shop in a couple of months for restore. Looks bad but will be an easy restore as I have most parts.
Here is the cut off wheel that fell to the floor and he did learn the importance of taking care of tools and even helped get the shop cleaned back up. And he thinks we just like to get on to him about keeping his room clean, haha

Sexy legs Justin heard me running the Impact Wrench and wanted to help get the front end off. We decided to take the fenders off. The passenger fender has been damaged by a previous accident. It does look fixable but I dont think I can get it to where it needs to be. I would rather have a straight fender or minor dings if possible. I can get a new fender easy around here.

We did have to cut off 2 bolts and I need to add them to a earlier post so as I remember to get them when at the bone yard. I will grab a bunch of spares when there. I showed him how to cut the head of a bolt and to chesiel it off. He did a great job for the first time. He did not place the cut off wheel in a great place and it fell to the floor. It broke the wheel. Will show picture later on but he did learn to take care of tools and how to swap blades.

Here we got the fenders off and I made him put the bolts where they belong so as to keep track of them and which bolts will be used for the fenders.

Reference picture. Square wire to the front, Starter to the rear.

Reference picture. Looking down from the front of the core support, 2 sheet metal screws hold an electrical box.

Here we got the front clip off. Justin was ready to pull the motor but it was getting late and told him I need to post picture for future reference.

In the Toyota graveyard, I put the front clip back there and will clean, repair, and paint at a later time. Trying to get things in sections before the cold sits in as I can not use my stove at this time. Red Runner will be going in the shop in a couple of months for restore. Looks bad but will be an easy restore as I have most parts.

Here is the cut off wheel that fell to the floor and he did learn the importance of taking care of tools and even helped get the shop cleaned back up. And he thinks we just like to get on to him about keeping his room clean, haha
 11-22-2016, 08:04 AM
#25
Super Moderator
Staff
Thread Starter
iTrader: (1)
Join Date: Aug 2008
Location: Anderson Missouri
Posts: 11,788
Likes: 0
Received 21 Likes
on
19 Posts
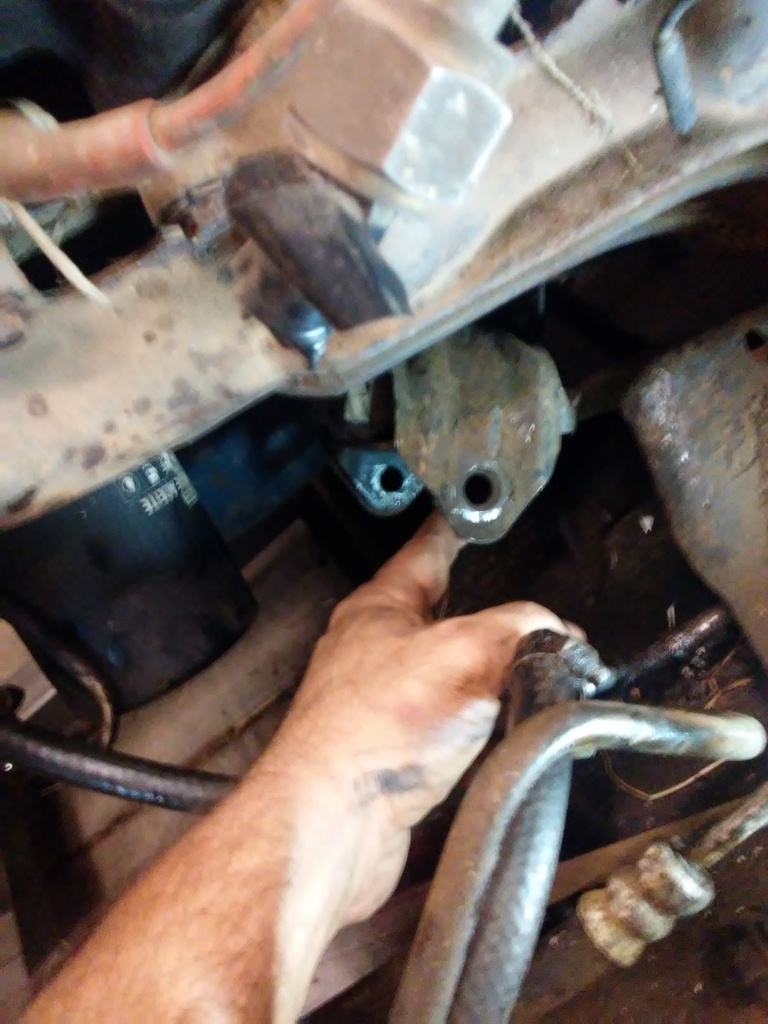
I am getting ready to pull the motor. I think I have everything undone, exhaust, electrical, shifting linkage,cruise control, transmission mount,power steering, and cooling systems. The one problem I am having is getting a motor mount bolt out. I will need to pull the starter to get the bolt on the passenger side out and then I think it will be ready to pull the motor. I do see I have a broken exhaust manifold bolt.
Some of the big work trucks that are used for delivery trucks or power company trucks use the Inline 6 cylinder/300 cubic inch motor. They are known as one of Fords bullet proof motors and for torque. I prefer the small block motors and at one time knew them real well. These big block motors just take to much room. Looks like with the front clip off changing the rear spark plugs would be a chore. I guy once mentioned that he would like to trade motors. I am thinking I will be looking into some other drive train. I would like to go small block but am looking into the 300 cubic inch motor. I have seen some of the newer starters are smaller and more powerful and fit right in. I am going to go with space saving upgrades. Not sure if this truck is points (most probably dont know or remember those) to electronic ignition for dependability.
After a couple of knuckle busters, I decided to stop for now. I might get back after it later today will have to wait and see. Got Thanksgiving coming and that will be some hold up. Really trying to get things out so as I can get in the shop without heat. Hoping the weather will hold out. For mid to late November we are getting some great weather. You can never have a big enough shop. Toyotas fit in easy and plenty of room.
Getting closer to getting it out.
 11-25-2016, 07:52 AM
#26
Super Moderator
Staff
Thread Starter
iTrader: (1)
Join Date: Aug 2008
Location: Anderson Missouri
Posts: 11,788
Likes: 0
Received 21 Likes
on
19 Posts
Reference picture. 2 vacuum lines, 1 ground wire, and 2 electrical plugs.
I had some free time for a couple of hours and got the starter out. I was surprised at how small the bolts are that hold it in. 7/16th x2. These have a two piece motor mount and trying to clear the base was difficult. I was concerned my chain to the motor could be a little weak. It worked but will get a better chain for later.
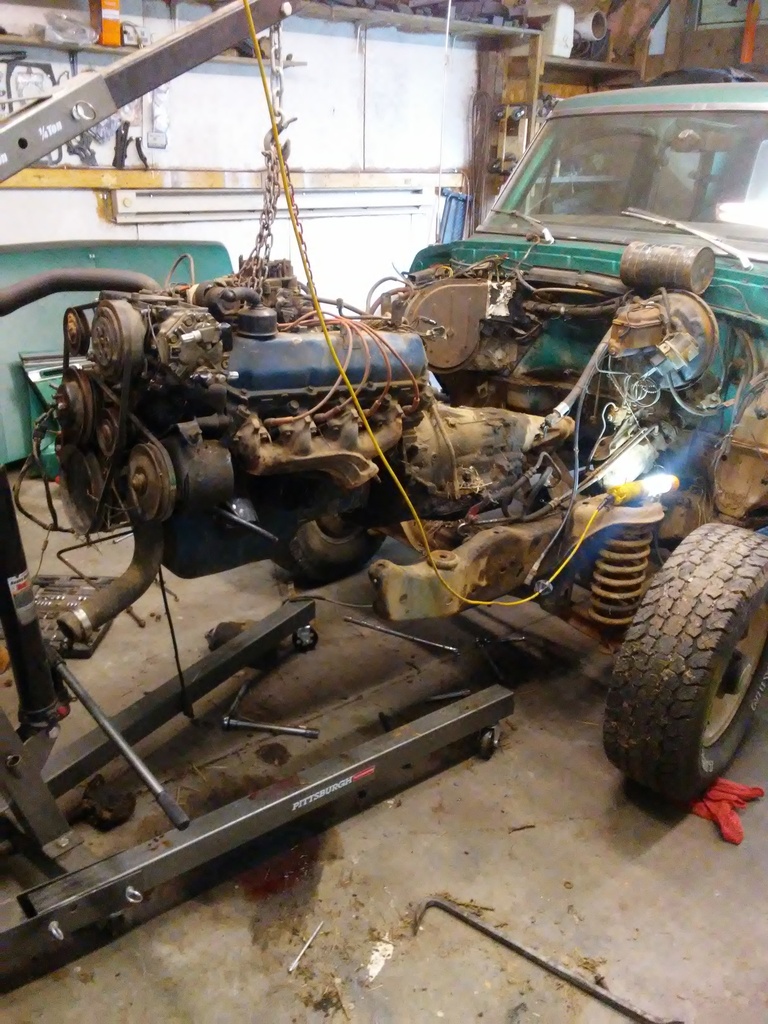
Motor is out. I am gong to look into the 300/6 cylinder. I like the small block motor over the big block. These big blocks are heavy and take some room. I can now turn the steering wheel with ease. With the motor in, it took a lot of strength. I also want to go manual transmission. One thing about building a truck from scratch is you can build it the way you want.
 11-25-2016, 07:59 AM
#27
Super Moderator
Staff
Thread Starter
iTrader: (1)
Join Date: Aug 2008
Location: Anderson Missouri
Posts: 11,788
Likes: 0
Received 21 Likes
on
19 Posts
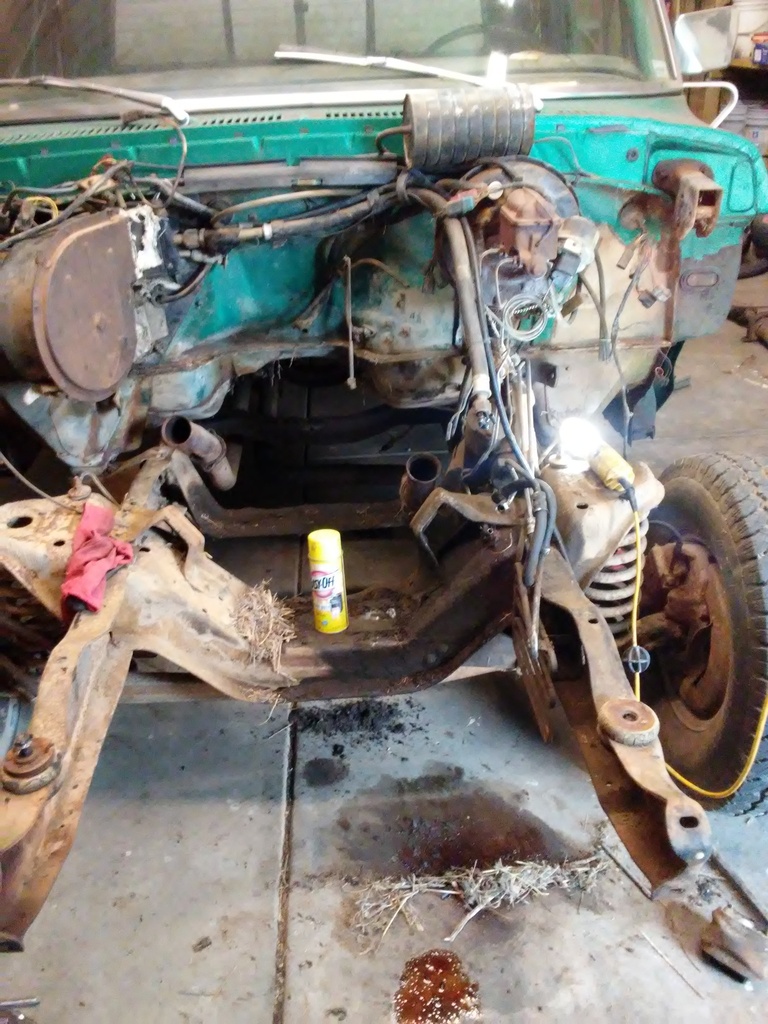
I dont care for winter but some reason I do like working in the shop when I can get the stove going. I built a small fire and it was nice. I will start cleaning the frame with Easy Off.
 11-26-2016, 12:30 PM
#28
Super Moderator
Staff
Thread Starter
iTrader: (1)
Join Date: Aug 2008
Location: Anderson Missouri
Posts: 11,788
Likes: 0
Received 21 Likes
on
19 Posts
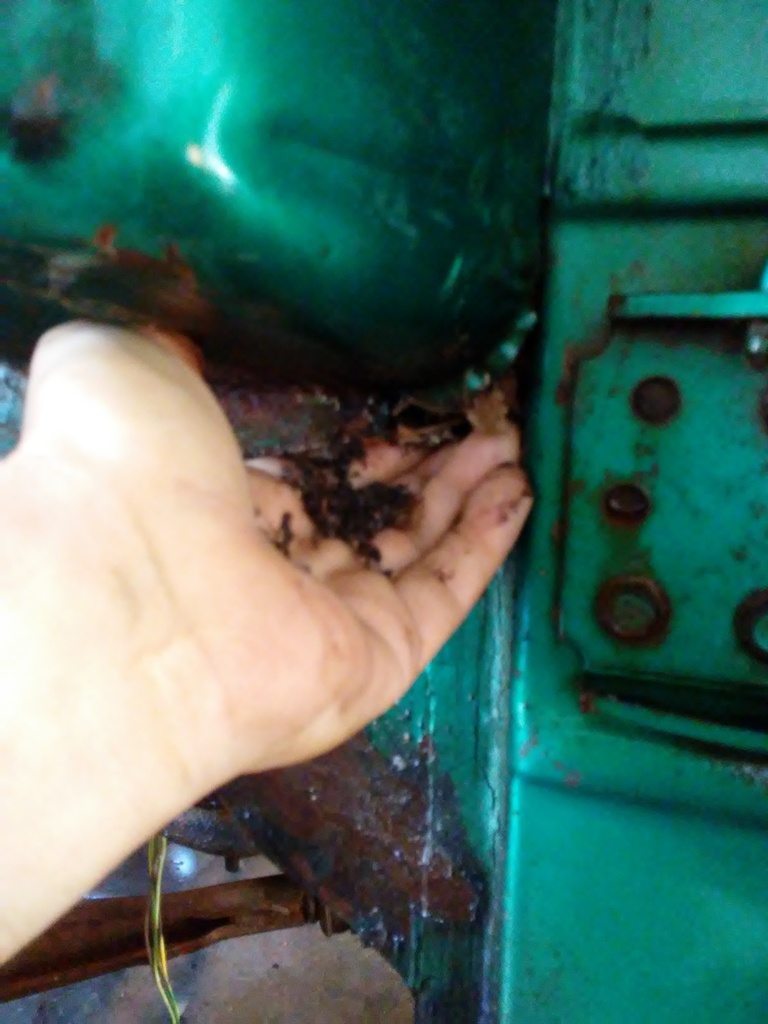
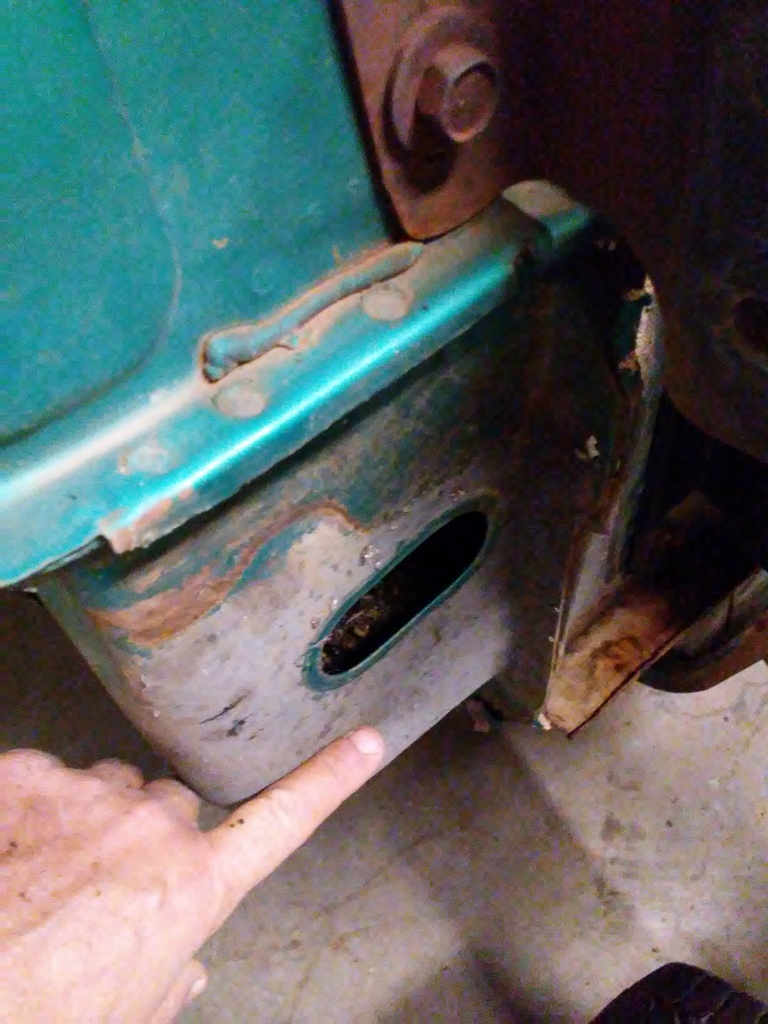
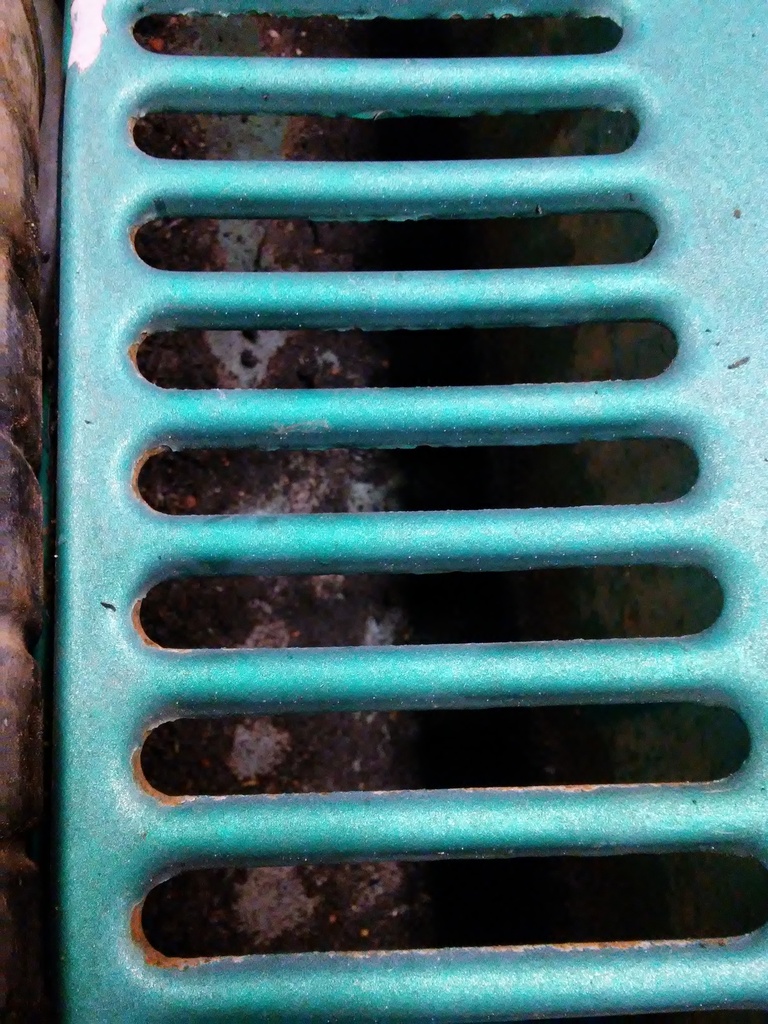
Just about any cowl I see that can allow trash in, seems to get trapped somewhere. I found it on this truck. There is a plug that you can remove to get access to it but not sure if you could get to it with the fender on.
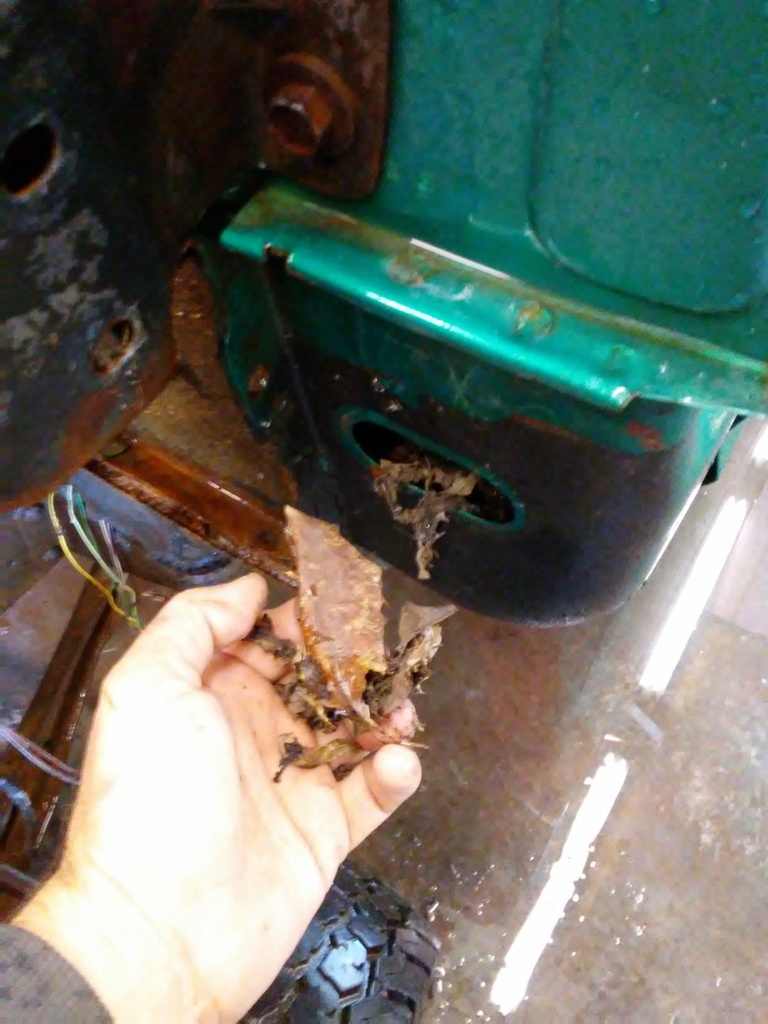
It does have a drain hole and I will need to clean it out at a later time. Currently it is clogged.
Easy Off did help get a lot of the grease broke down. Still have a ways to go. It would be nice to have a pressure washer to help get it cleaned but since an over abundance if cash is not a problem I have, I get to do it the old fashion way of scrubbing. Secretly I was hoping the Easy Off would help take off some of the surface rust. I will hit it with a sanding pad at a later time.
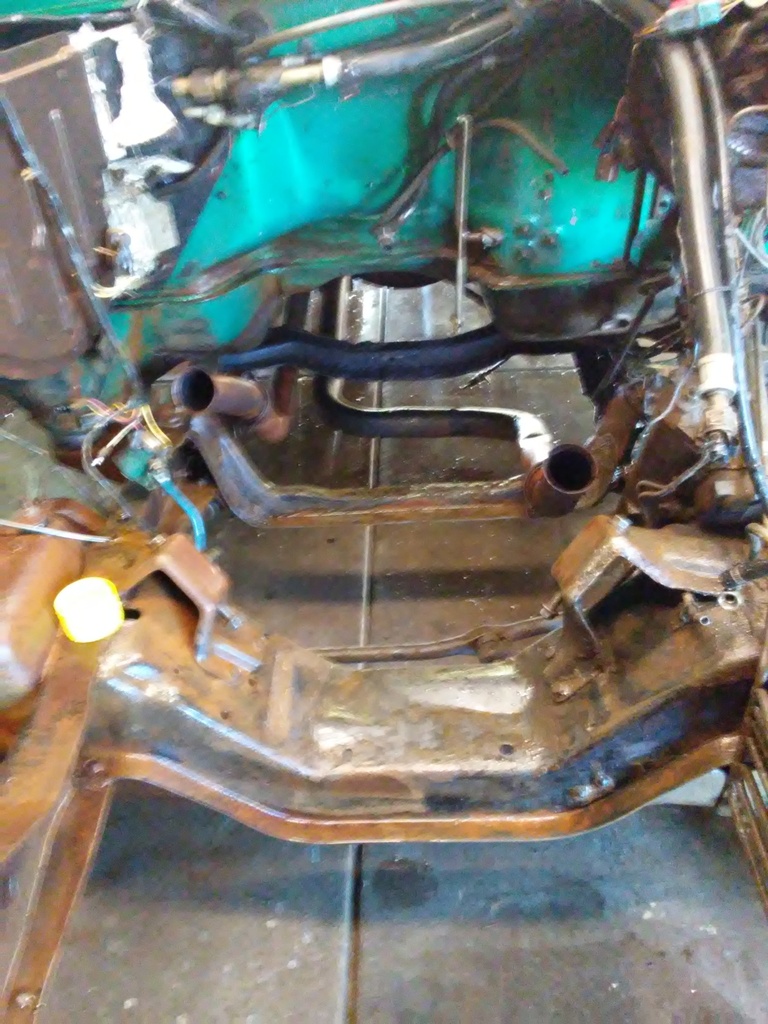
Fire wall cleaned up decently. I think it will clean up better. Painting the firewall is something I dont think I will have to do and was not wanting to do. I built the shop with intentions of having plenty of water on the floor when painting. I washed under the truck and gave the exterior a quick bath. Hope it helps cut down on the dust in my eyes.

It does have a drain hole and I will need to clean it out at a later time. Currently it is clogged.

Easy Off did help get a lot of the grease broke down. Still have a ways to go. It would be nice to have a pressure washer to help get it cleaned but since an over abundance if cash is not a problem I have, I get to do it the old fashion way of scrubbing. Secretly I was hoping the Easy Off would help take off some of the surface rust. I will hit it with a sanding pad at a later time.

Fire wall cleaned up decently. I think it will clean up better. Painting the firewall is something I dont think I will have to do and was not wanting to do. I built the shop with intentions of having plenty of water on the floor when painting. I washed under the truck and gave the exterior a quick bath. Hope it helps cut down on the dust in my eyes.

Last edited by Terrys87; 11-26-2016 at 12:32 PM.
11-27-2016, 12:06 AM
#29
Super Moderator
Staff
Thread Starter
iTrader: (1)
Join Date: Aug 2008
Location: Anderson Missouri
Posts: 11,788
Likes: 0
Received 21 Likes
on
19 Posts
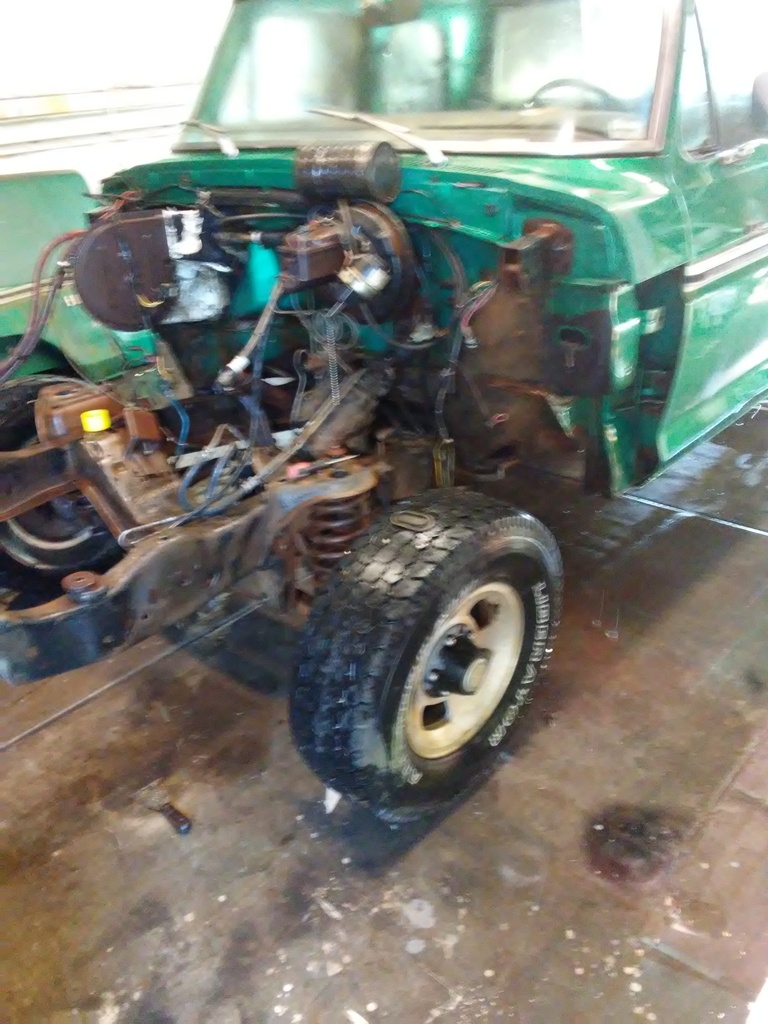
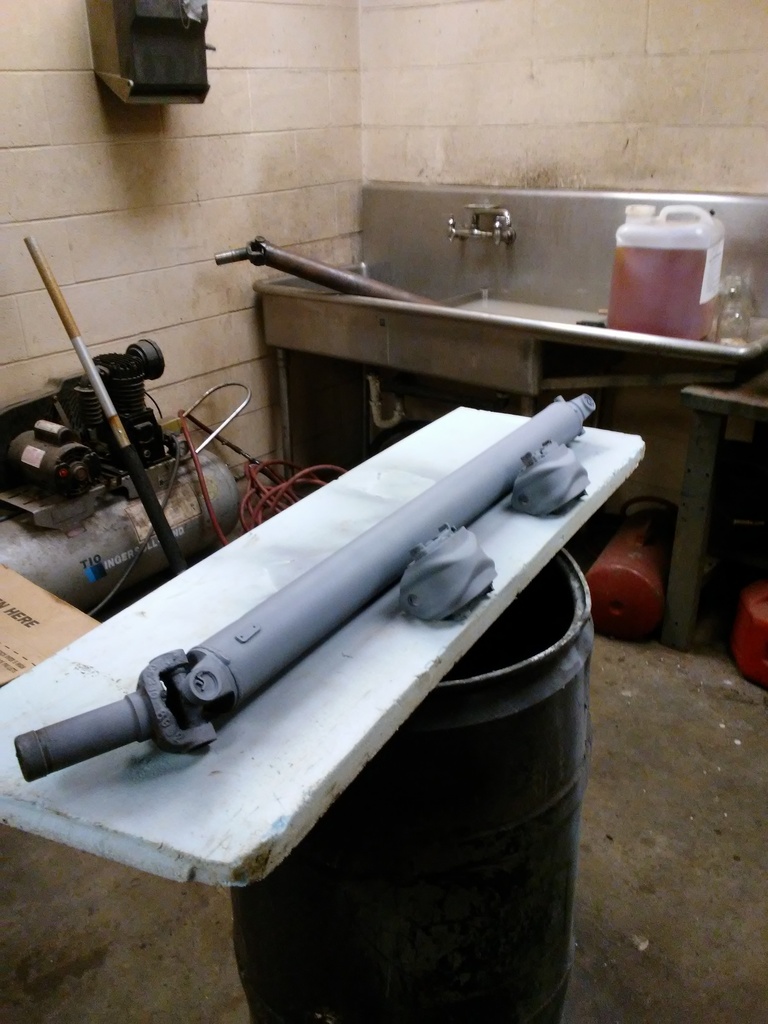
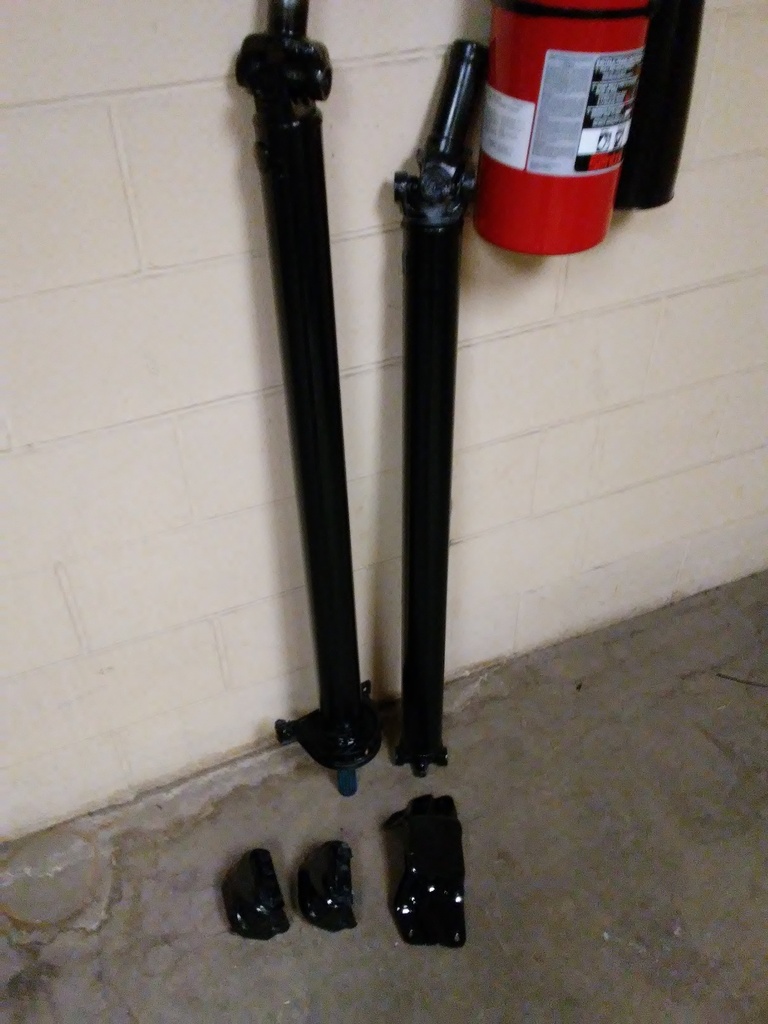
Earlier I showed the drive shaft and it had a lot of rust build up on it. I got one half of the shaft cleaned up. It has taken a wire brush, sand paper, and CLR to get the rust off. I need to get some paint and get part of the shaft and two pieces of the motor mounts painted. I figure a piece at a time each day and eventually it will start to look like a truck again. Pictures dont even show the amount of time I have involved in cleaning and disassembling.
I am concerned if my HF engine stand will support the weight of the 460. I am going to try and get the motor and transmission seperated in the next few days if all goes well. Still trying to get enough of the pieces off of the truck that I can work on it a piece at a time in the shop before it gets cold. Eventually the frame and cab will have to sit outside. To big to keep the complete truck in the shop.
A few more pieces getting done.Much better then what it was originally. In primer and the other half of the shaft is in the process of getting done.
 11-27-2016, 11:23 AM
#30
Super Moderator
Staff
Thread Starter
iTrader: (1)
Join Date: Aug 2008
Location: Anderson Missouri
Posts: 11,788
Likes: 0
Received 21 Likes
on
19 Posts
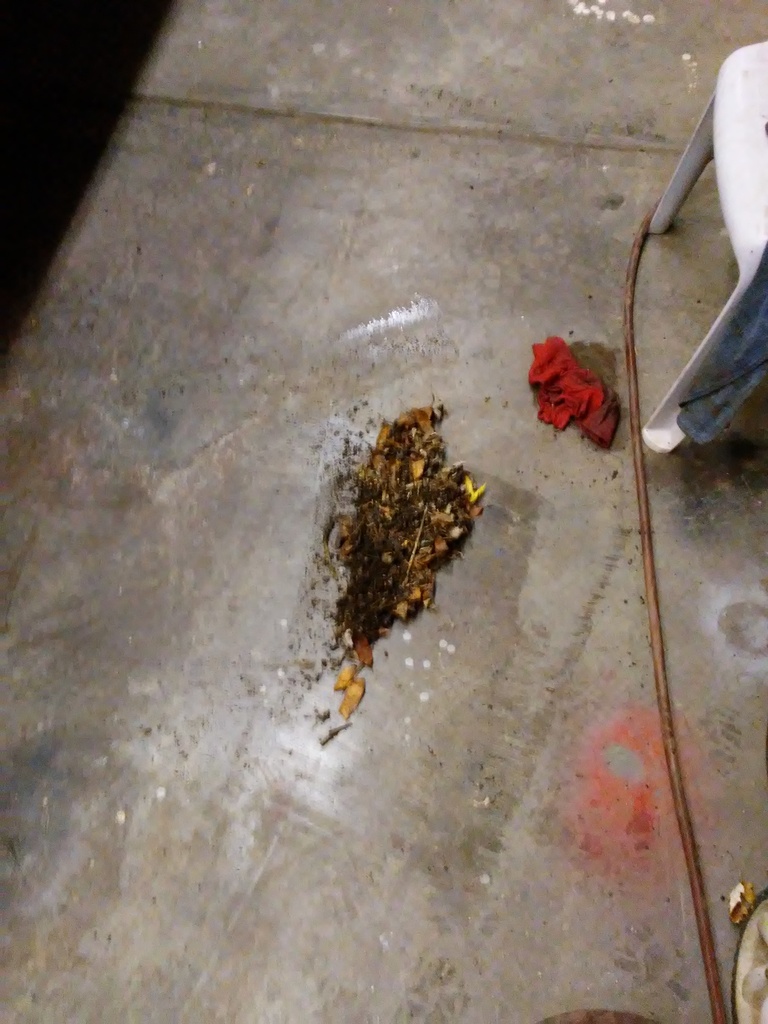
I tried to use the air gun to blow out the debris from the cowl. That got some but not all of it. It kept moving to the front instead of to the drain hole. On the passenger side it was half full of debris.
Some of what was in the cowl in front of the windshield.
What was in the passenger side. I finally got it all out when I took and flushed it out with a water hose.
I did some more cleaning and got about 5 pounds of build up off of the frame of mud, oil, and gunk. I had to cut a bolt off of the passenger side motor mount as some one had the wrong bolt in it and it was not going to come out. Cut off saw made quick work of it.
11/28/2016
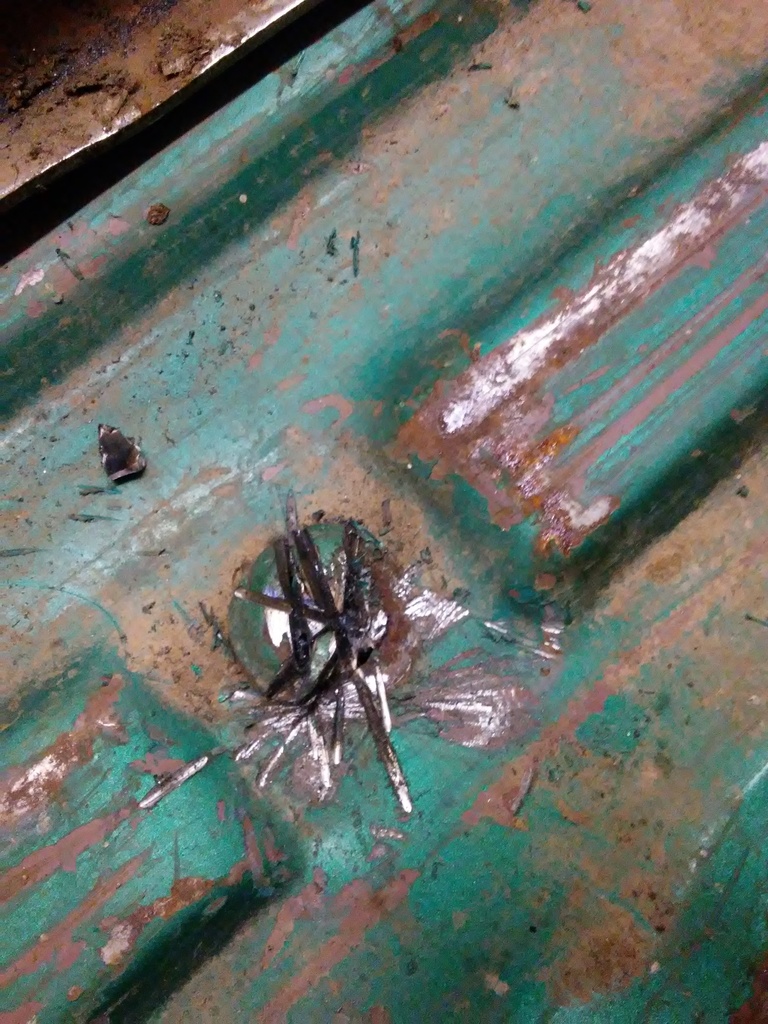
I had to cut a bolt off of the passenger side motor mount. A previous owner used an inferior bolt and it would just strip. I knicked the mount when cutting it and put a scratch in it with the cut off saw. It wont show when in the truck.
Some parts cleaned and painted. I did some more cleaning on the front end. A ton of time on it. Going to start working on getting the bed off tomorrow. We have one more descent day before the weather cools.

Some of what was in the cowl in front of the windshield.

What was in the passenger side. I finally got it all out when I took and flushed it out with a water hose.

I did some more cleaning and got about 5 pounds of build up off of the frame of mud, oil, and gunk. I had to cut a bolt off of the passenger side motor mount as some one had the wrong bolt in it and it was not going to come out. Cut off saw made quick work of it.
11/28/2016
I had to cut a bolt off of the passenger side motor mount. A previous owner used an inferior bolt and it would just strip. I knicked the mount when cutting it and put a scratch in it with the cut off saw. It wont show when in the truck.
Some parts cleaned and painted. I did some more cleaning on the front end. A ton of time on it. Going to start working on getting the bed off tomorrow. We have one more descent day before the weather cools.

Last edited by Terrys87; 11-28-2016 at 06:17 AM.
11-30-2016, 03:55 PM
#31
Super Moderator
Staff
Thread Starter
iTrader: (1)
Join Date: Aug 2008
Location: Anderson Missouri
Posts: 11,788
Likes: 0
Received 21 Likes
on
19 Posts
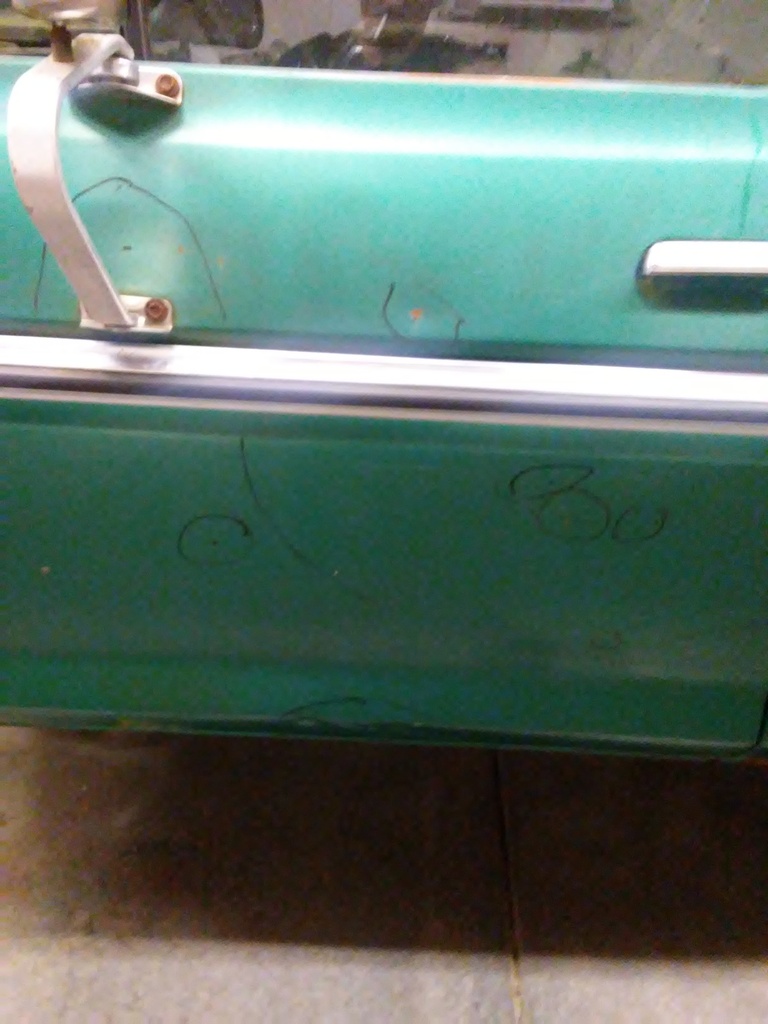
While out in the shop, I was looking at the truck from an angle. All in all the truck is in great shape for around here. Most trucks had a hard life in my area as they got worked. You cant see the dings it from the side, but looking at an angle, you can see several door dings. My guess is a previous owner was always parking to close to gas pumps or front row parking. I always park way out in parking lots just to avoid dings.
Dings I found in the door.
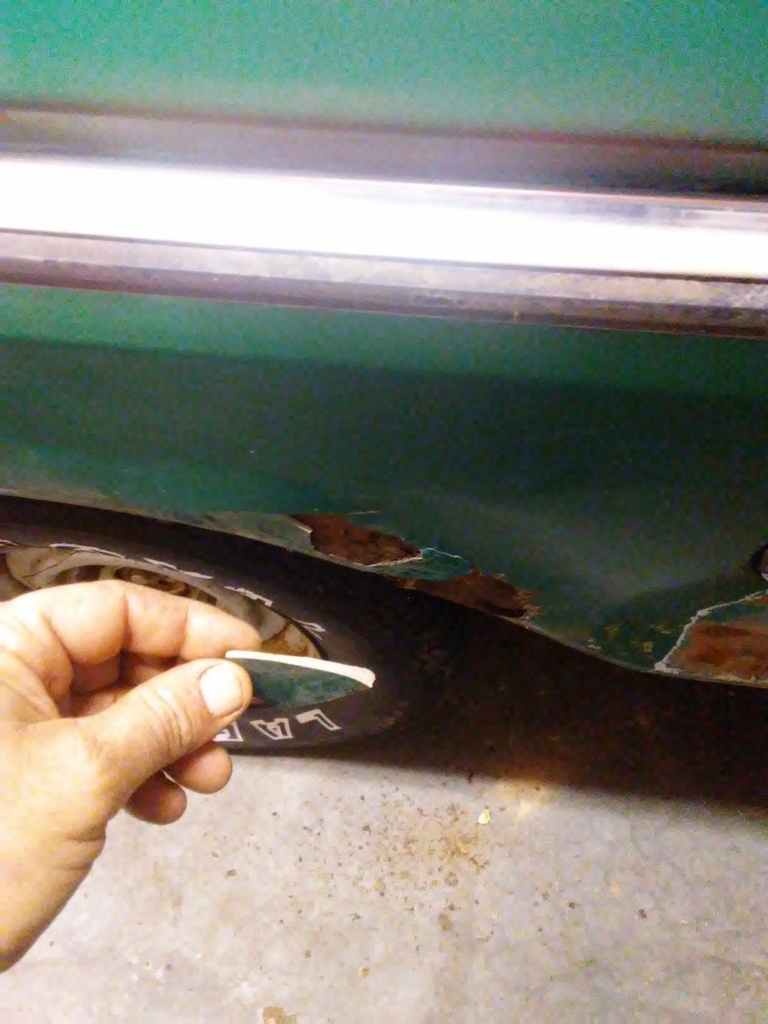
Probably at one time there was not much rust on the rear wheel well but when this truck was repainted, they put body filler over it and probably made the rust much worse. I will replace it with some patch panels when I get to the body work stage.
I have soaked the bed bolts with PB Blaster several times and I can not get the bolts freed with a breaker bar or Impact wrench. I am ready to get the bed off so am just going to cut the bolts off. I tried cutting the bolts with a horizontal and vertical cut and just cant get them to break free. I am having to do several cuts to get them cut. I got one down and several more to go. Should have the bed off tomorrow if all goes well and plan on getting on the fuel tanks and clean the frame some.
Dings I found in the door.

Probably at one time there was not much rust on the rear wheel well but when this truck was repainted, they put body filler over it and probably made the rust much worse. I will replace it with some patch panels when I get to the body work stage.

I have soaked the bed bolts with PB Blaster several times and I can not get the bolts freed with a breaker bar or Impact wrench. I am ready to get the bed off so am just going to cut the bolts off. I tried cutting the bolts with a horizontal and vertical cut and just cant get them to break free. I am having to do several cuts to get them cut. I got one down and several more to go. Should have the bed off tomorrow if all goes well and plan on getting on the fuel tanks and clean the frame some.
 12-02-2016, 11:41 PM
#32
Super Moderator
Staff
Thread Starter
iTrader: (1)
Join Date: Aug 2008
Location: Anderson Missouri
Posts: 11,788
Likes: 0
Received 21 Likes
on
19 Posts
I did not get any work done on my truck on my days off which are Wednesday-Friday but I did get to a bone yard that had 3 dents in the yard. To bad other customers had them all stripped down and not much left on them. I go to the bone yard and practice on their trucks and do not destroy them but dis assemble them as if it was my own. Gives me practice on theirs and saves damage on mine.
The dashes were all torn a part but I did learn a little something so it was not a complete loss. I know how dirty it can get behind the dash and what I call a field truck, like mine which has been sitting for long periods of time can get filthy from mice and just debris getting into the trucks.
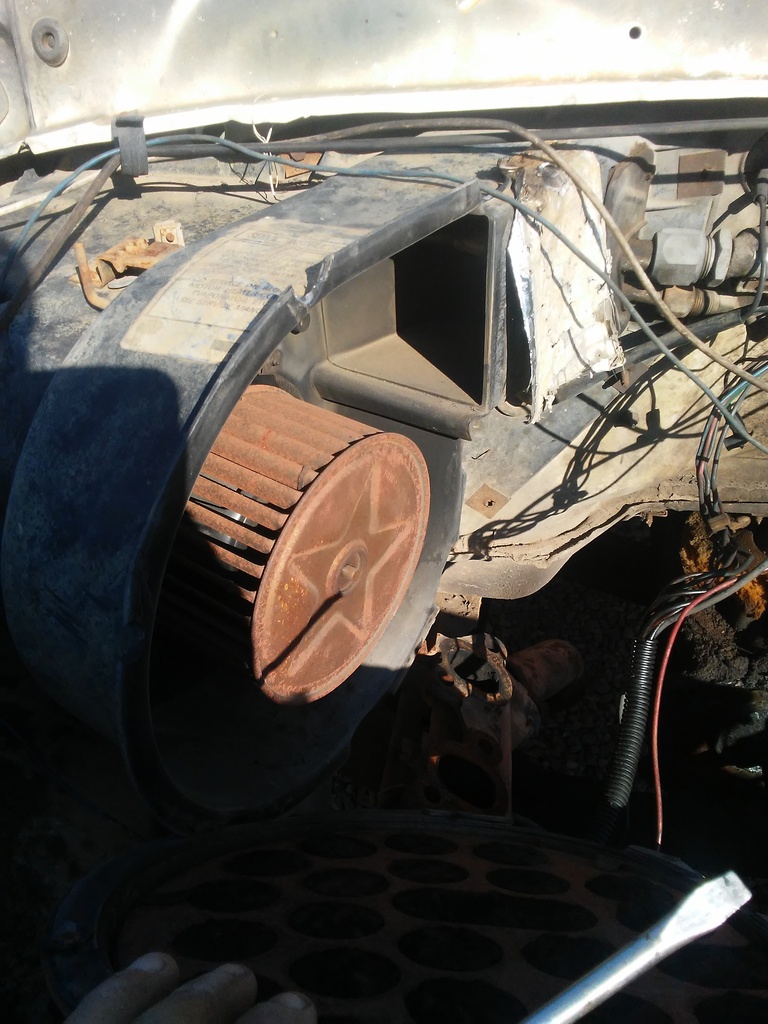
I want to learn how to get the Evaporator and Heater Core out. From what I have read on the internet and my Haynes Manual, I really dont think it is going to be as bad of a job with my front clip off and I am hoping I can get good access to the unit with out pulling the entire dash out just yet.
There was 4 or 5 nuts that held the cover to the core and evaporator. I removed them and got access to the unit. I think I could just disconnect the lines outside on the fire wall and remove a few more bolts and unit will come out.
Also when you remove the cover in my hand in lower picture, this is where I found that the outside air comes from on the passenger side and the tubing that connects to the cover is connected to the passenger cowl and it had some debris in there as well. I am sure mine is going to loaded with debris from what I seen in the salvage yard.
I could not get a clear picture due to the lighting but hope this gives an idea. I will post several pictures as I go and later on when I learn these trucks, I am able to refer to my thread for the information to help others at a later time. I have a tough time finding the time of day on the internet.

Another thing I learned is there is no use in pulling the cover off under the hood. I was thinking of drilling out the rivets and replacing the rivets with nuts and bolts. The blower has to come out from the oppisite side of the assembly. So no use in drilling the rivets out. Since this truck had a mouse living in it and I am sure there is going to be a ton of dust under the dash, I will eventually clean under the dash and sanitize it with bleach water. Getting the ventilation system and piping clean will give it a fresh smell in there.
There was a sticker on the housing saying the blower has to come out from inside the housing and there would be no way of accessing the blower screws with the cover off. While at the yard, I did get a few clips and bolts I needed. Anytime I am at the yards, I grab every nut and bolt laying around. I will eventually get a nice stash of nuts, bolts, and clips.
The dashes were all torn a part but I did learn a little something so it was not a complete loss. I know how dirty it can get behind the dash and what I call a field truck, like mine which has been sitting for long periods of time can get filthy from mice and just debris getting into the trucks.
I want to learn how to get the Evaporator and Heater Core out. From what I have read on the internet and my Haynes Manual, I really dont think it is going to be as bad of a job with my front clip off and I am hoping I can get good access to the unit with out pulling the entire dash out just yet.
There was 4 or 5 nuts that held the cover to the core and evaporator. I removed them and got access to the unit. I think I could just disconnect the lines outside on the fire wall and remove a few more bolts and unit will come out.
Also when you remove the cover in my hand in lower picture, this is where I found that the outside air comes from on the passenger side and the tubing that connects to the cover is connected to the passenger cowl and it had some debris in there as well. I am sure mine is going to loaded with debris from what I seen in the salvage yard.
I could not get a clear picture due to the lighting but hope this gives an idea. I will post several pictures as I go and later on when I learn these trucks, I am able to refer to my thread for the information to help others at a later time. I have a tough time finding the time of day on the internet.

Another thing I learned is there is no use in pulling the cover off under the hood. I was thinking of drilling out the rivets and replacing the rivets with nuts and bolts. The blower has to come out from the oppisite side of the assembly. So no use in drilling the rivets out. Since this truck had a mouse living in it and I am sure there is going to be a ton of dust under the dash, I will eventually clean under the dash and sanitize it with bleach water. Getting the ventilation system and piping clean will give it a fresh smell in there.
There was a sticker on the housing saying the blower has to come out from inside the housing and there would be no way of accessing the blower screws with the cover off. While at the yard, I did get a few clips and bolts I needed. Anytime I am at the yards, I grab every nut and bolt laying around. I will eventually get a nice stash of nuts, bolts, and clips.
 12-04-2016, 09:18 PM
#33
Super Moderator
Staff
Thread Starter
iTrader: (1)
Join Date: Aug 2008
Location: Anderson Missouri
Posts: 11,788
Likes: 0
Received 21 Likes
on
19 Posts
My oldest son come out to help me get the bed bolts cut off. I showed him how to cut and chisel the bolt heads as the bolts are just to rusted. First I tried making cuts the head with a "+" style cut but could not chisel the heads off so then I went with the hash mark "#" style and had better luck.
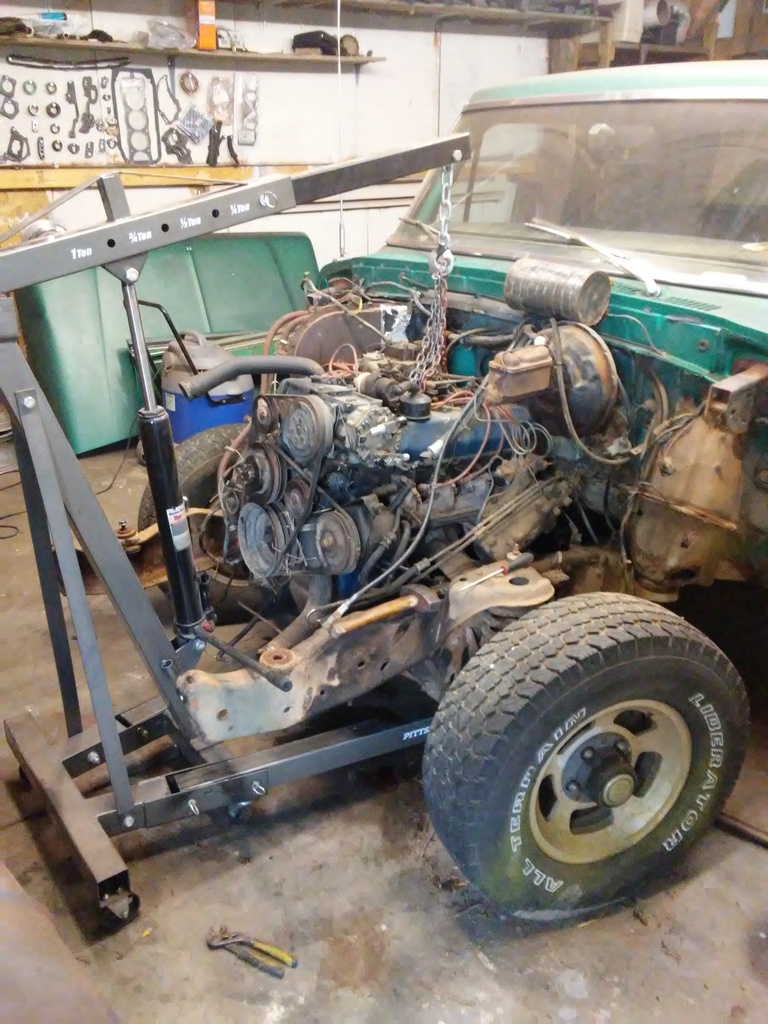
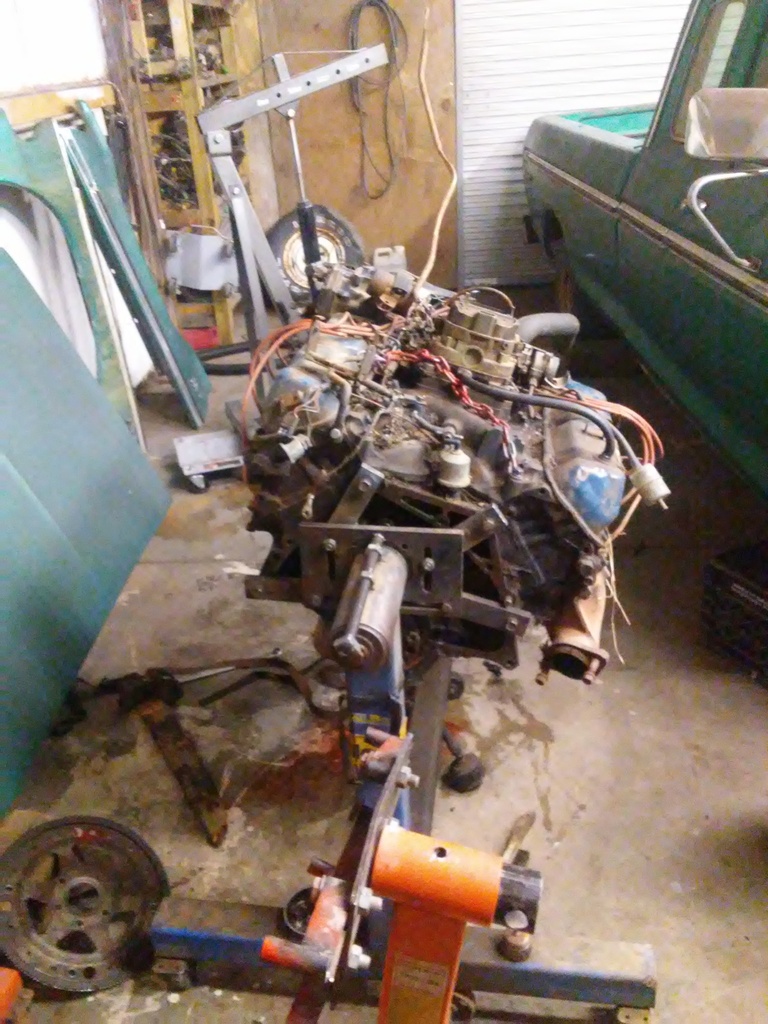
I still need to get the engine on my motor stand. I have a HF engine stand and am concerned if it will hold the weight of the motor. My oldest son was ready to pull the bed off but we are going to use the cherry picker to lift the bed. I showed him about the torque converter bolts but I removed those bolts as the motor was hanging from the cherry picker and was concerned that if it did fall it would get him. I removed the torque converter bolts and let him do the bell housing bolts. He got a little better understanding of how the motor turns the transmission.
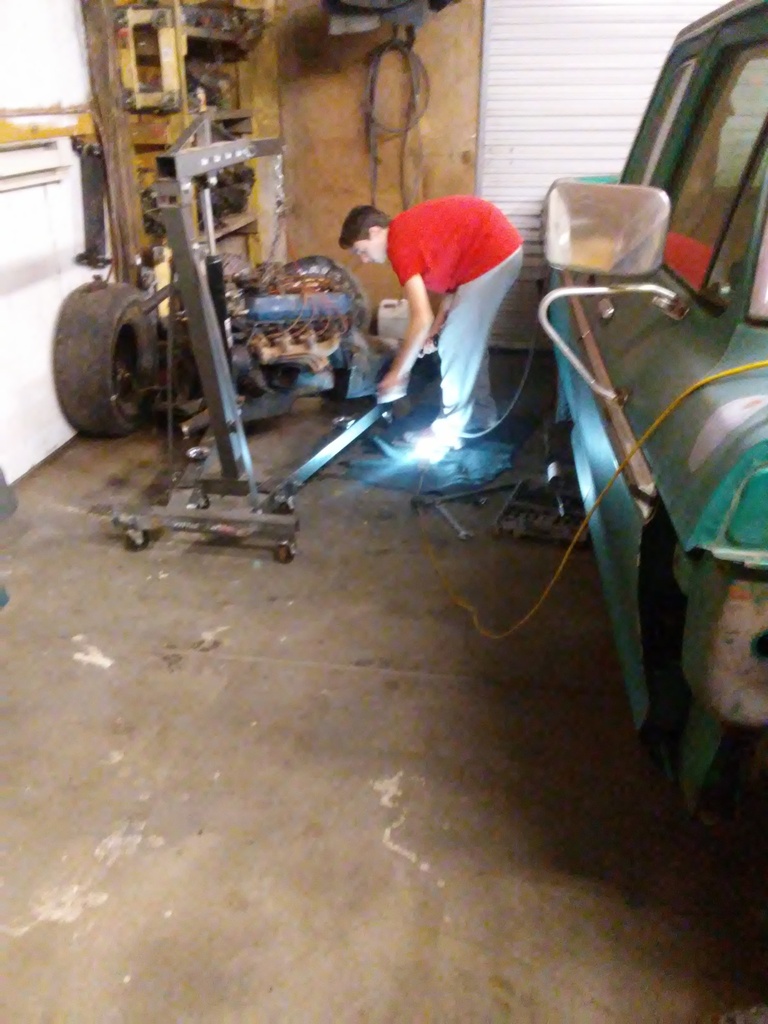
Here he got the transmission seperated from the motor. I will remove the fuel lines from the bed and need to get some bolts to hold the motor on the engine stand and will try to do the smaller things so when he gets home from school, that the big things like lifting the bed off will seem like he got quite a bit done. Trying to keep it exciting for him. Usually I just go about my own pace and just go from one thing to the other. It does slow me down showing him what all is going on and what each part does but I am trying to teach him what took me years to learn.
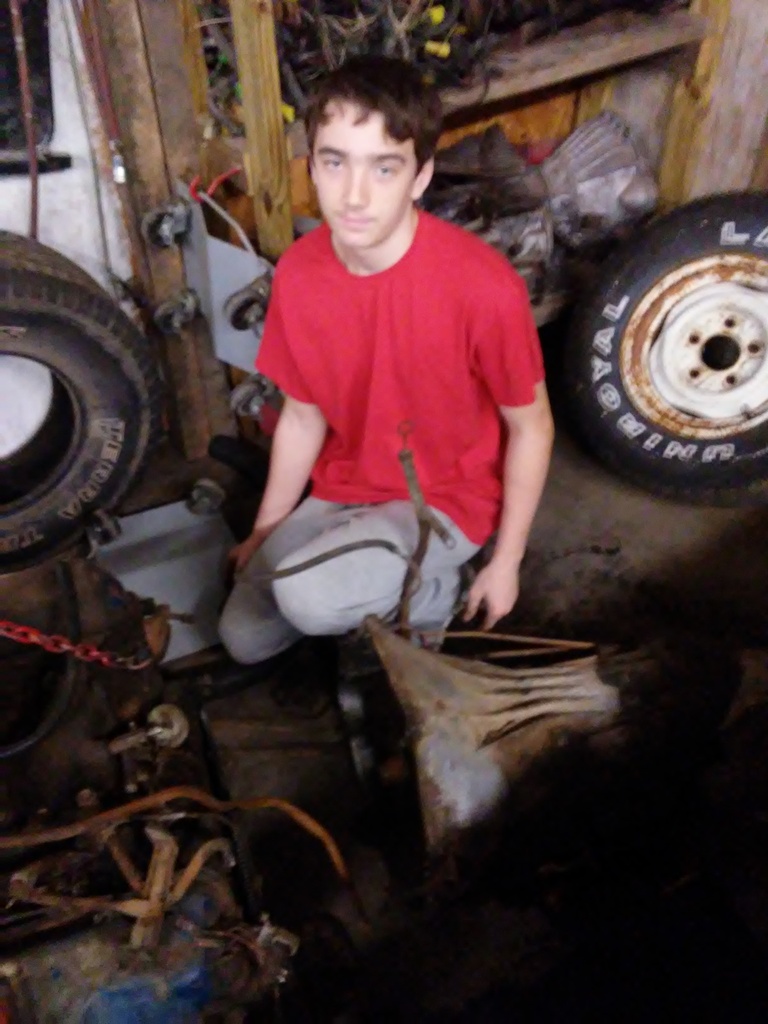
Justin pretty happy with getting the motor and transmission a part.

I still need to get the engine on my motor stand. I have a HF engine stand and am concerned if it will hold the weight of the motor. My oldest son was ready to pull the bed off but we are going to use the cherry picker to lift the bed. I showed him about the torque converter bolts but I removed those bolts as the motor was hanging from the cherry picker and was concerned that if it did fall it would get him. I removed the torque converter bolts and let him do the bell housing bolts. He got a little better understanding of how the motor turns the transmission.

Here he got the transmission seperated from the motor. I will remove the fuel lines from the bed and need to get some bolts to hold the motor on the engine stand and will try to do the smaller things so when he gets home from school, that the big things like lifting the bed off will seem like he got quite a bit done. Trying to keep it exciting for him. Usually I just go about my own pace and just go from one thing to the other. It does slow me down showing him what all is going on and what each part does but I am trying to teach him what took me years to learn.
Justin pretty happy with getting the motor and transmission a part.
 12-05-2016, 09:48 AM
#34
Super Moderator
Staff
Thread Starter
iTrader: (1)
Join Date: Aug 2008
Location: Anderson Missouri
Posts: 11,788
Likes: 0
Received 21 Likes
on
19 Posts
I did not get as much done as I was hoping. As I suspected the HF engine stand is not strong enough to hold a big block. I had tried a Chevy big block on one 15 years ago and seems like it bent it as well. The plate on the back is just to thin to hold the weight. A friend of mine says he has one strong enough to hold it and I will borrow it from him in the next few days.
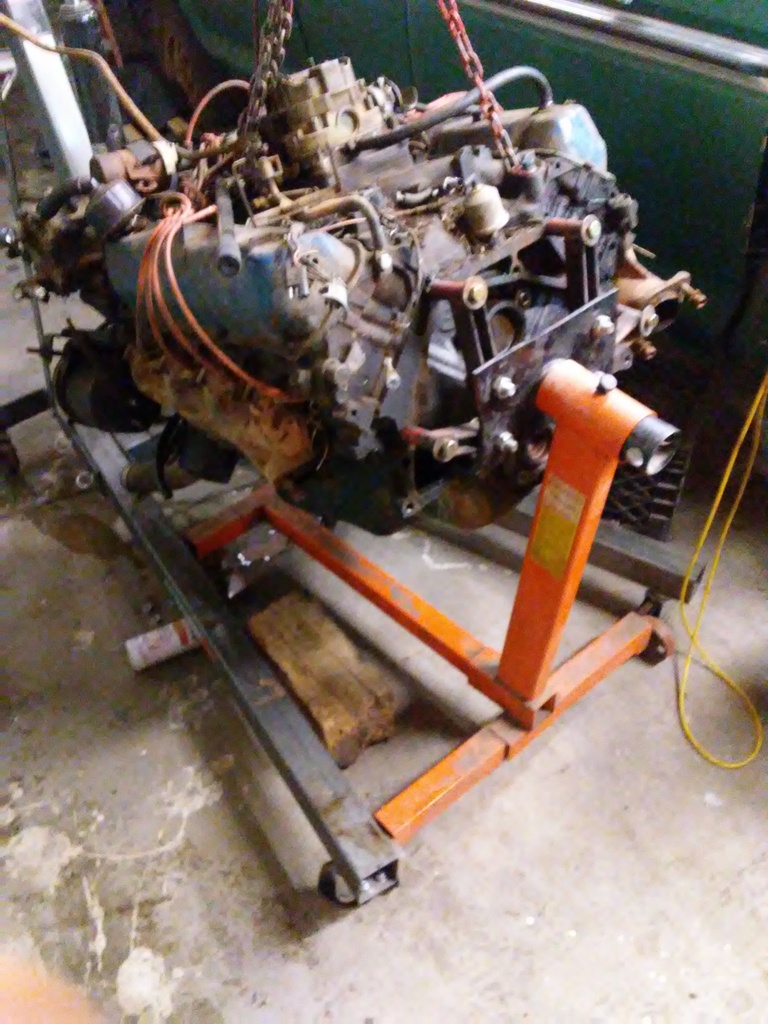
I have it sitting on a platform with some weight on the hoist and some on the platform until I get another engine stand.
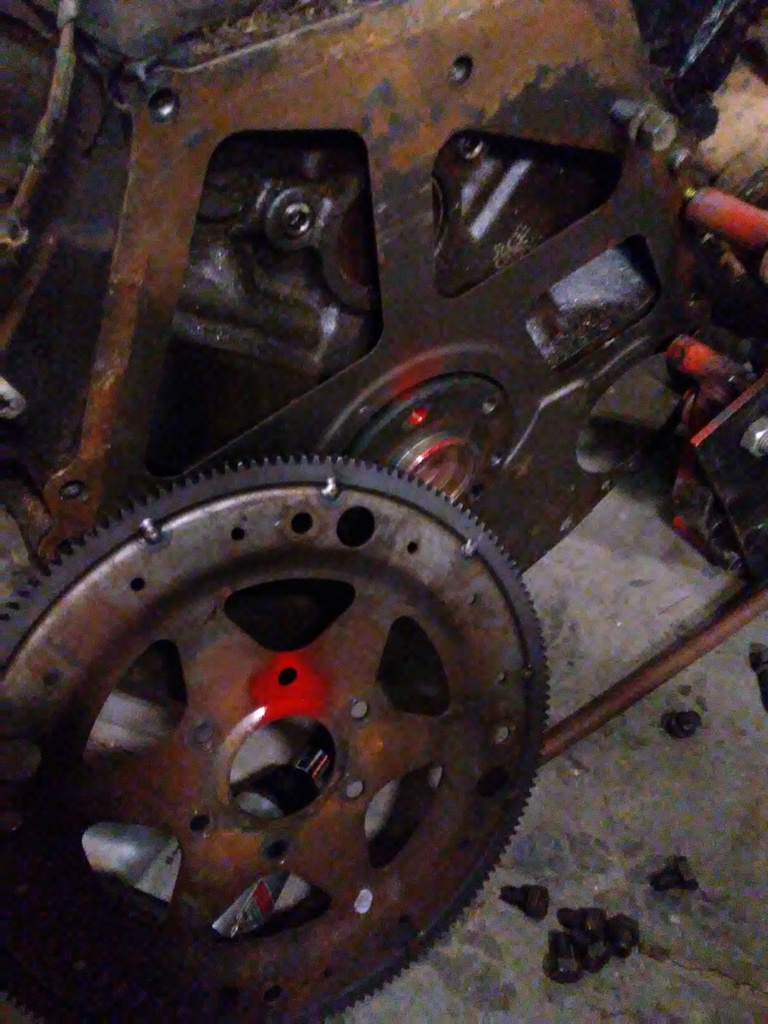
I always mark where things that could be a balance issue with a quick splash of spray paint. Later on I will take my engraver and make a dot or some sort of reference for me to remember where they were originally located.
Here I marked the flywheel to the crankshaft for a temporary marking.

I have it sitting on a platform with some weight on the hoist and some on the platform until I get another engine stand.
I always mark where things that could be a balance issue with a quick splash of spray paint. Later on I will take my engraver and make a dot or some sort of reference for me to remember where they were originally located.
Here I marked the flywheel to the crankshaft for a temporary marking.
 12-05-2016, 12:01 PM
#35
Contributing Member
Nice updates, also, sexy legs... 
12-08-2016, 04:56 AM
#36
Super Moderator
Staff
Thread Starter
iTrader: (1)
Join Date: Aug 2008
Location: Anderson Missouri
Posts: 11,788
Likes: 0
Received 21 Likes
on
19 Posts
Hello hab... He is a great helper and has been getting more involved in with the project. Today I was out there and he stuck his head in the shop before heading to school. He would of rather stayed home and in the shop then go to school which wasnt going to happen. lol
12-08-2016, 04:56 AM
#37
Super Moderator
Staff
Thread Starter
iTrader: (1)
Join Date: Aug 2008
Location: Anderson Missouri
Posts: 11,788
Likes: 0
Received 21 Likes
on
19 Posts
It is 30 degrees in the shop. I got a fire going and it will be warm by the time I get coffee in me. I used to despise winters but having a warm shop really makes winter time a far different experience. Had a dusting of snow but it will be here soon enough.
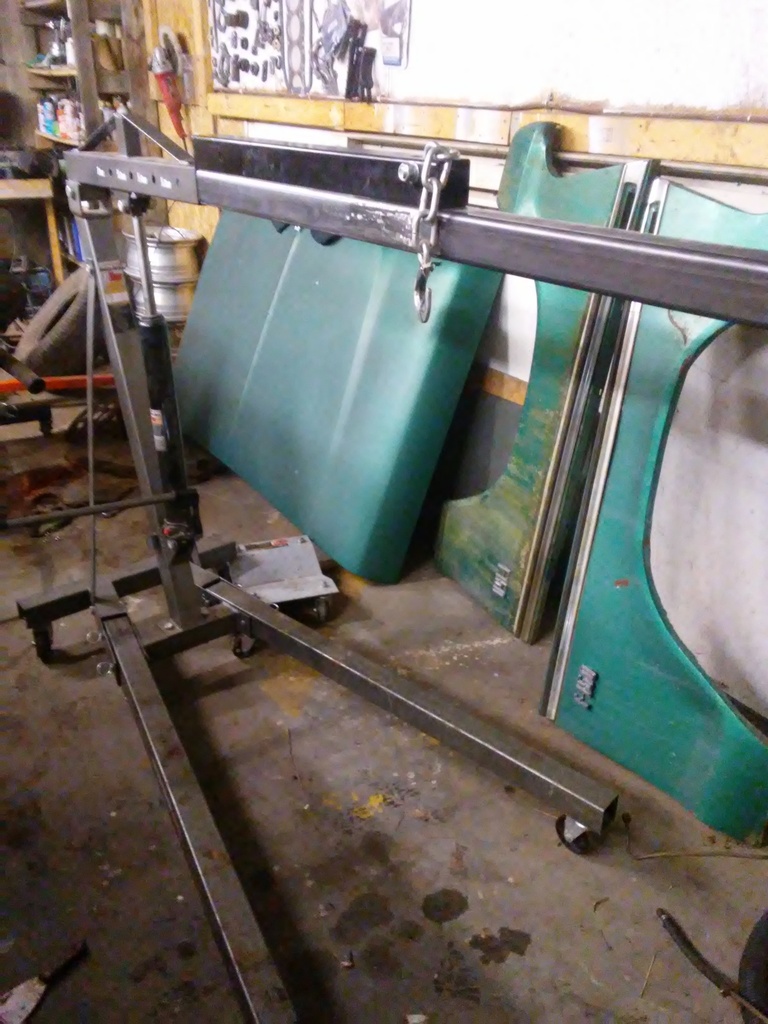
I got a HF cherry picker and it does great for what I need but when I went to lift the bed off with it, the arm is too short. Went and got a 2 1/2 inch square tubing and have to thin the sides down a little to make it fit. I got a 5 foot section so that the tube on the cherry picker will support the whole section and not just a small area. I will mark the new tubing with the old piece so as not to exceed weight limits. Kind of a poor design but a little work and it will do what I need for light loads.
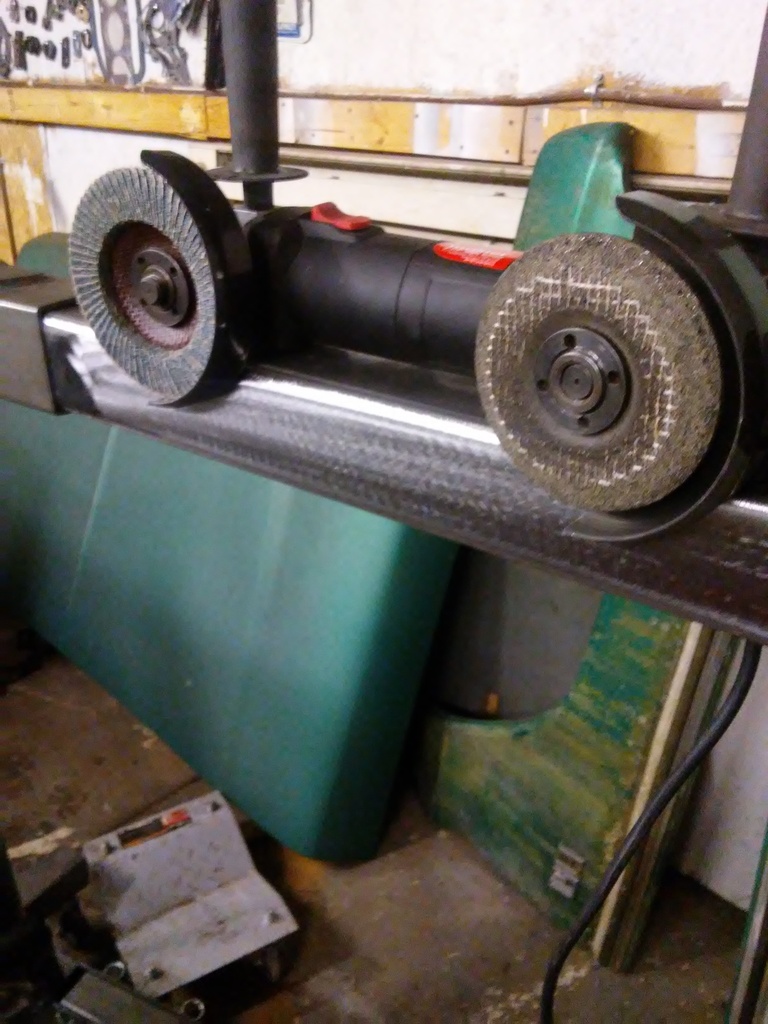
Here you can see the top has some room but the sides need thinning a little. I used a grind stone and then went over it with a flap disk.
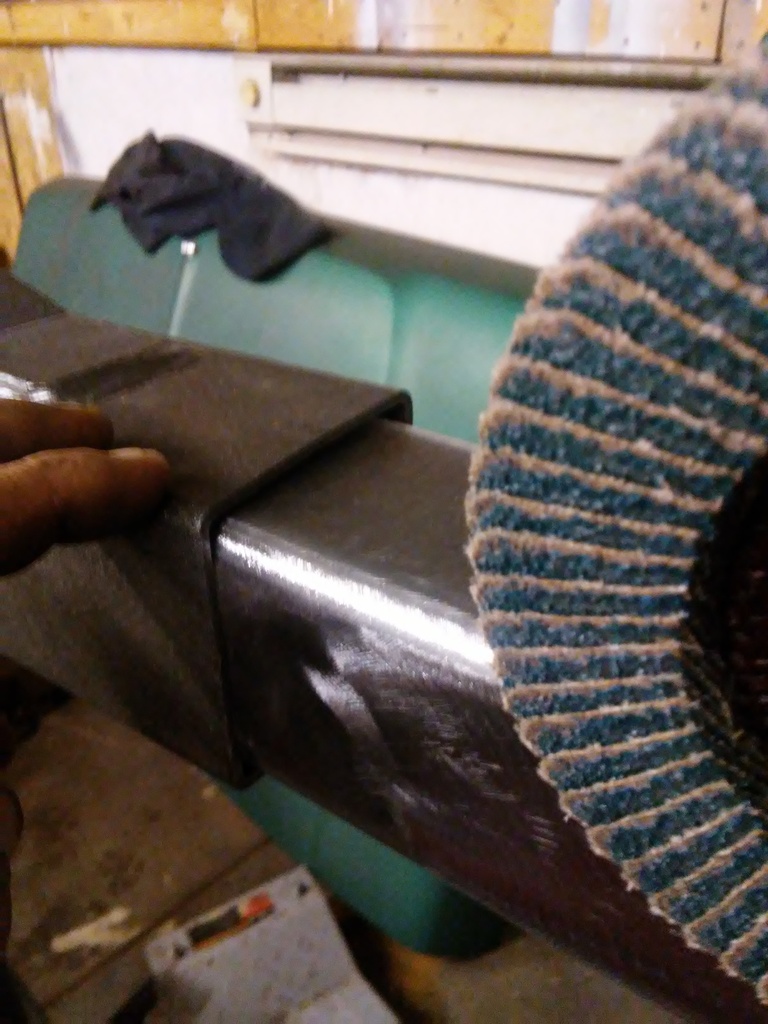
Having two different grinders is nice instead of having to swap disk all of the time. Each new project seems to increase the number of tools I need. I have 10 times the amount of tools then what I my dad ever had and it is still not enough. Each tool makes life easier and sometimes you have to improve what you have.
I got a friends engine stand for the time being. I am going to improve my engine stand in the near future. I dont care to borrow tools so will be working with what I have. It is still shop time and going toward the truck. Beats sitting in the house while it is snowing outside. Shop is getting crowded and am trying to get the things I want to work on seperate so that I can move around.
I got a HF cherry picker and it does great for what I need but when I went to lift the bed off with it, the arm is too short. Went and got a 2 1/2 inch square tubing and have to thin the sides down a little to make it fit. I got a 5 foot section so that the tube on the cherry picker will support the whole section and not just a small area. I will mark the new tubing with the old piece so as not to exceed weight limits. Kind of a poor design but a little work and it will do what I need for light loads.

Here you can see the top has some room but the sides need thinning a little. I used a grind stone and then went over it with a flap disk.

Having two different grinders is nice instead of having to swap disk all of the time. Each new project seems to increase the number of tools I need. I have 10 times the amount of tools then what I my dad ever had and it is still not enough. Each tool makes life easier and sometimes you have to improve what you have.

I got a friends engine stand for the time being. I am going to improve my engine stand in the near future. I dont care to borrow tools so will be working with what I have. It is still shop time and going toward the truck. Beats sitting in the house while it is snowing outside. Shop is getting crowded and am trying to get the things I want to work on seperate so that I can move around.
 12-08-2016, 02:37 PM
#38
Super Moderator
Staff
Thread Starter
iTrader: (1)
Join Date: Aug 2008
Location: Anderson Missouri
Posts: 11,788
Likes: 0
Received 21 Likes
on
19 Posts
My son come out and helped me get the rear tank out. I was going to just lower it with my hands when he suggested using the transmission jack, Doh!!! Why didnt I think of that? Justin wanted to know why the spring was in the fill hose. I told him it was to keep gas from getting stolen.
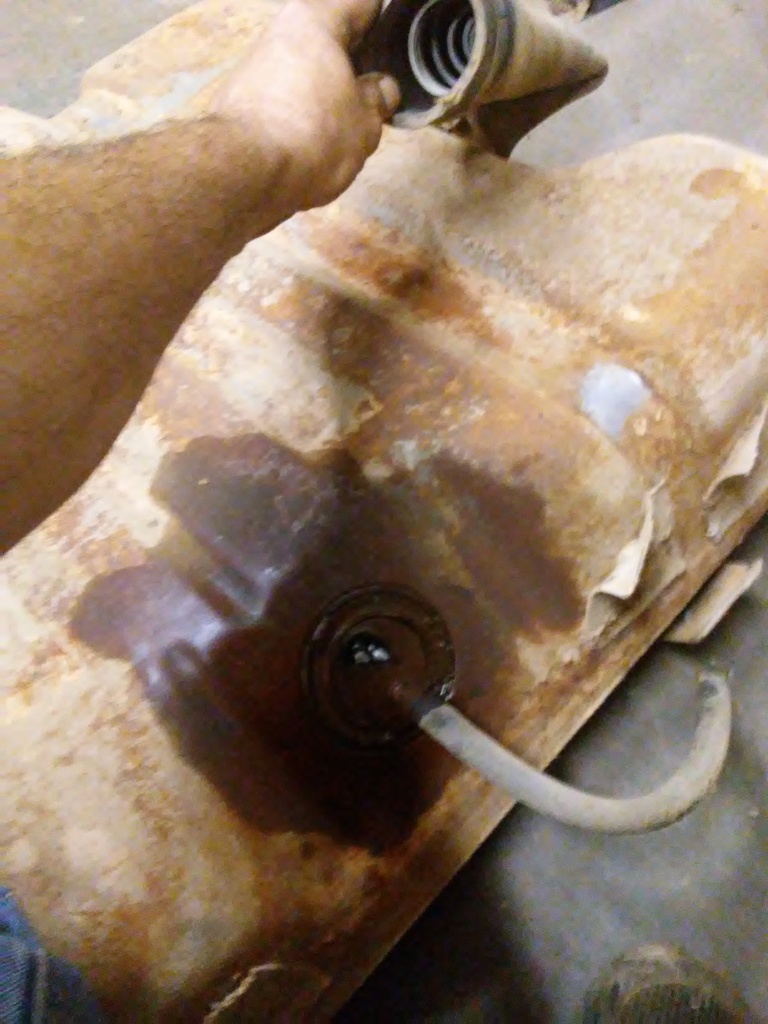
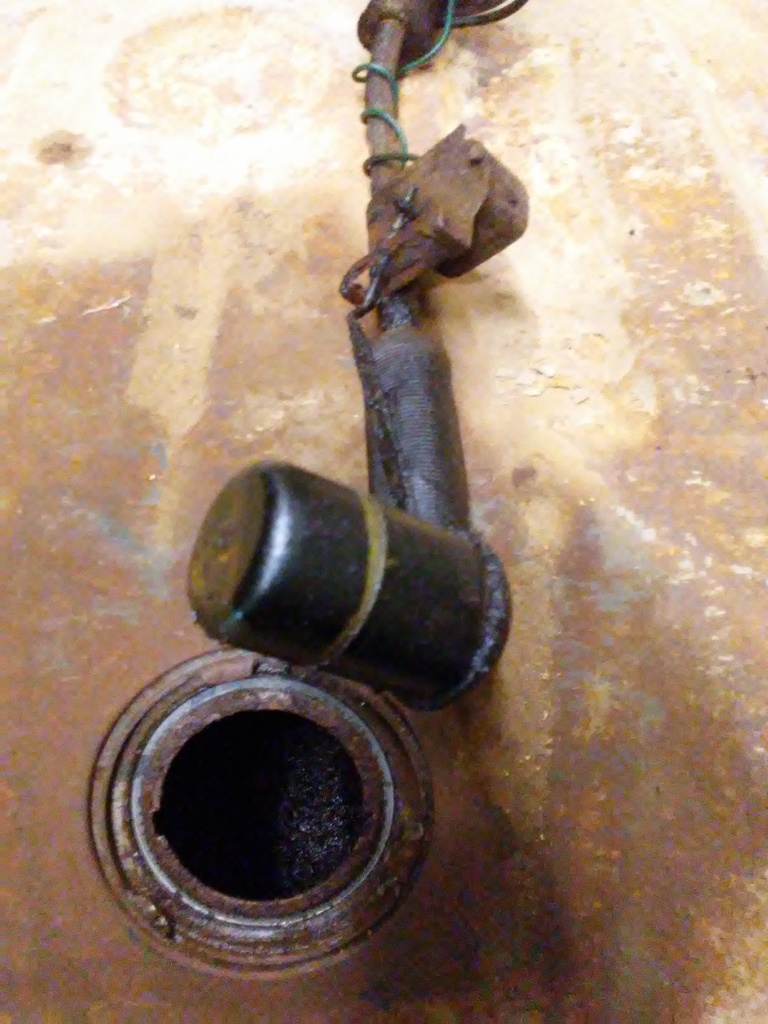
Soaking the lock ring with PB Blaster and a picture of the spring. Curious to see if this tank is real dirty or is usable. Having a tough time getting the straps loose on the Auxillary tank.
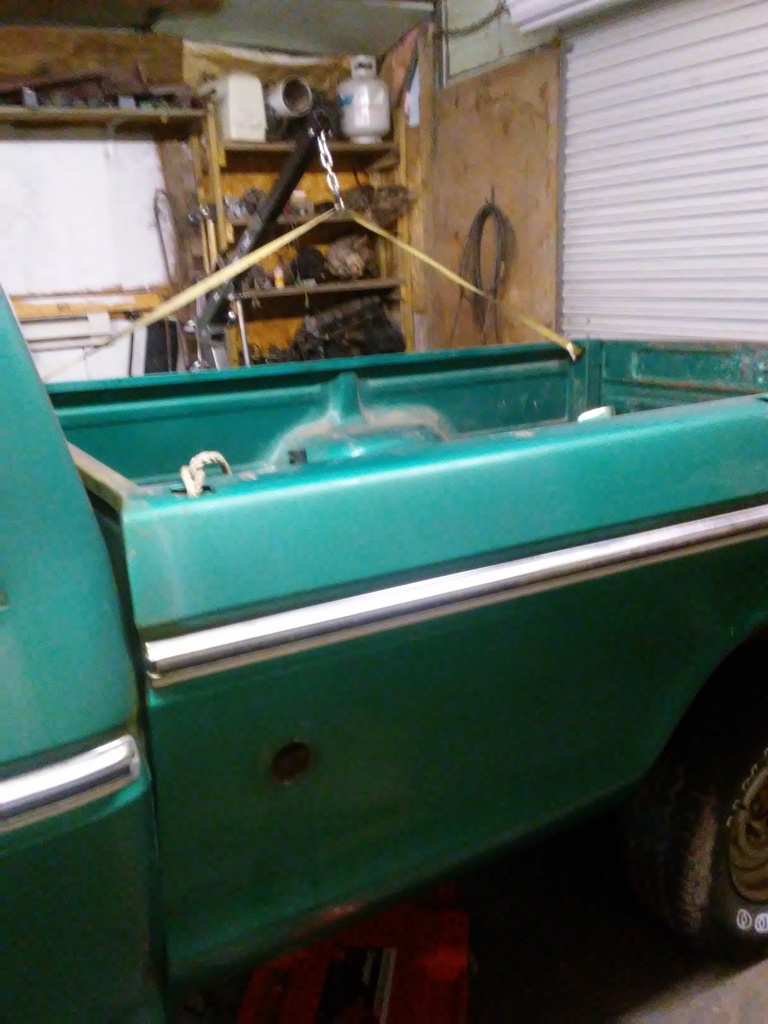
Really wishing I would of completed my overhead lift project. I am using my cherry picker to help get the bed up to access a few things under the bed. Hope to have the bed off tomorrow.
 12-09-2016, 07:15 AM
#39
Super Moderator
Staff
Thread Starter
iTrader: (1)
Join Date: Aug 2008
Location: Anderson Missouri
Posts: 11,788
Likes: 0
Received 21 Likes
on
19 Posts
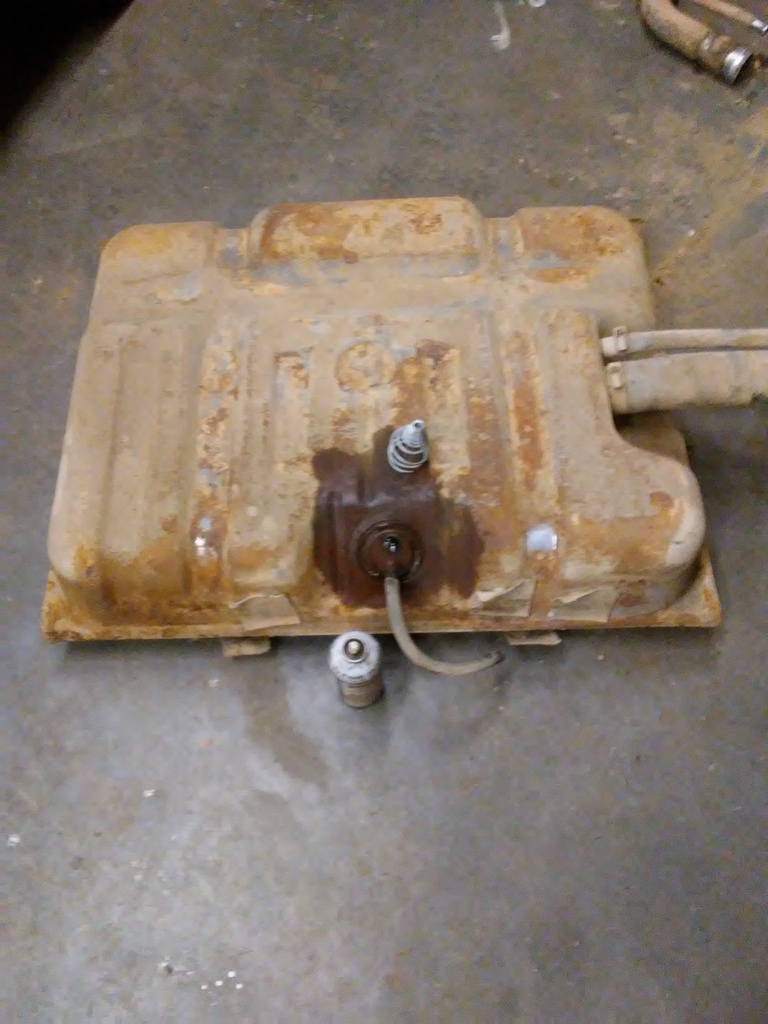
I have cleaned many tanks. What looks like rust on the inside is chemical build up from the fuel in todays gas. I will clean this one up and see how it turns out. I have seen rusty looking tanks come out with nice shiney metal and no pitting. One tank out and one to go.
Typical of what I have seen numerous times. You can see some in the bottom of the tank.
Typical of what I have seen numerous times. You can see some in the bottom of the tank.
 12-09-2016, 12:22 PM
#40
Contributing Member
Uck, here's to a good shiny outcome.


