superchiem's Toyota RV 5vz Swap
 12-06-2011, 06:46 PM
#41
Registered User
Thread Starter
iTrader: (1)
Join Date: Jan 2004
Location: Anaheim, California
Posts: 212
Likes: 0
Received 0 Likes
on
0 Posts
I got some stuff done this week.
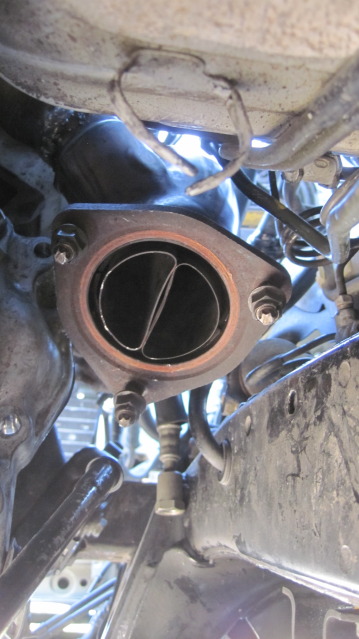
First I cut behind the passenger-side exhaust manifold flange. Then cut the cross over. We tried rotating it toward the transmission and welding it in place, but we were having to much trouble with the metal.
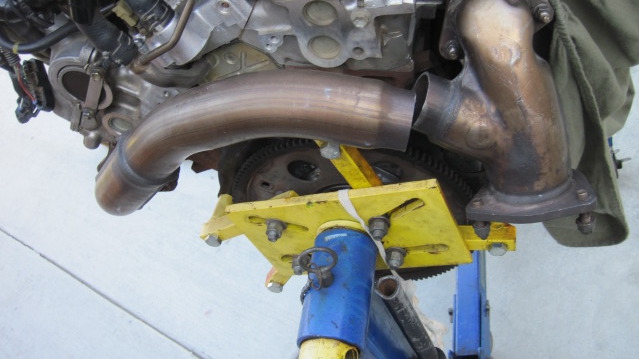
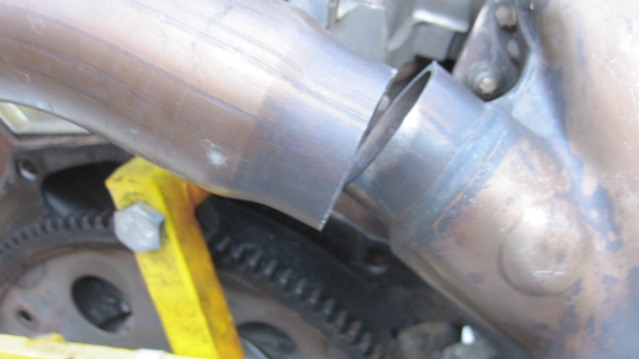
We ended up shoving a pipe in the cross over coming from the driver side and bending it up to match the height of the passenger side.
So I marked it with white out and tacked welded it from the inside. We still had trouble welding it so I took it to an exhaust shop and guess what! They said the cross over is stainless steel. Thats why we were having so much trouble.
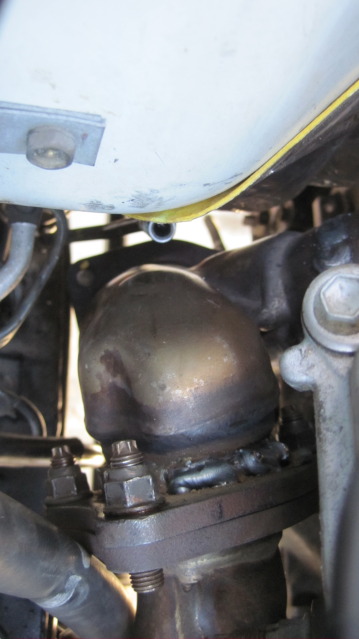
The transmission is bolted in. Driveshaft is installed and fits perfectly. Still I have a lot of work, but I think finishing the cross-over was the biggest hurdle thus far.
First I cut behind the passenger-side exhaust manifold flange. Then cut the cross over. We tried rotating it toward the transmission and welding it in place, but we were having to much trouble with the metal.
We ended up shoving a pipe in the cross over coming from the driver side and bending it up to match the height of the passenger side.
So I marked it with white out and tacked welded it from the inside. We still had trouble welding it so I took it to an exhaust shop and guess what! They said the cross over is stainless steel. Thats why we were having so much trouble.
The transmission is bolted in. Driveshaft is installed and fits perfectly. Still I have a lot of work, but I think finishing the cross-over was the biggest hurdle thus far.

 12-08-2011, 01:55 PM
#46
Registered User
Thread Starter
iTrader: (1)
Join Date: Jan 2004
Location: Anaheim, California
Posts: 212
Likes: 0
Received 0 Likes
on
0 Posts
The smog ref doesn't care if its modified with in reason. It has to be passenger side drop w/ 2 cats behind it. I wish I could have just went with a drive side drop, but just because of the CA smog ref I have to do it this way. How'd you get past the smog ref? Seeing that you are from Vista, CA and all.
01-03-2012, 06:42 PM
#47
Registered User
Thread Starter
iTrader: (1)
Join Date: Jan 2004
Location: Anaheim, California
Posts: 212
Likes: 0
Received 0 Likes
on
0 Posts
Got back to working on the RV again.
I needed a shorter Alternator bracket. So I cut it and re-welded it. I also used a shorter belt:
Napa micro-v belt # 25-040405
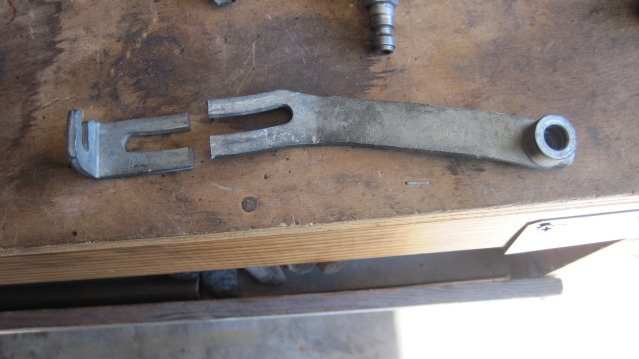
From the adjustment bracket notch to the first bend of the bracket should measure around 2".
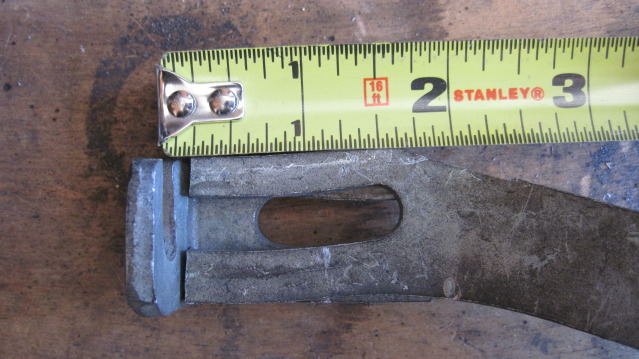
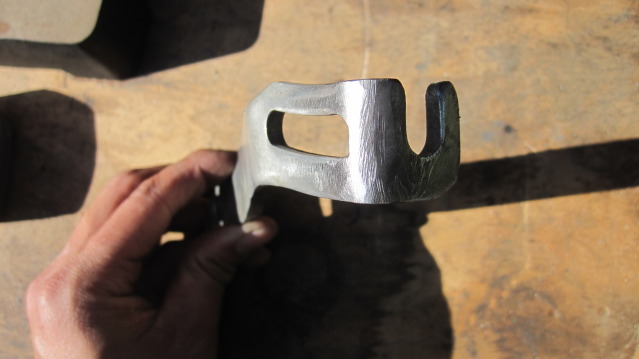
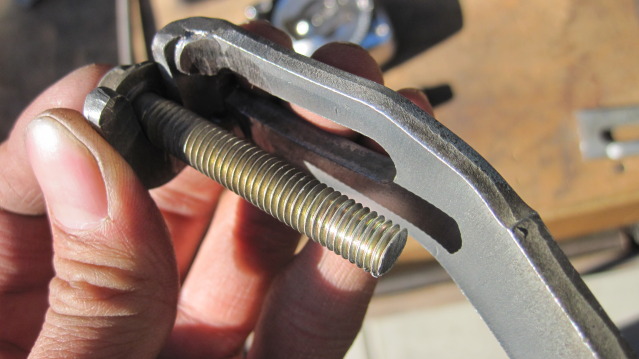
The adjustment bolt was too long so I cut it where the bracket starts bending.
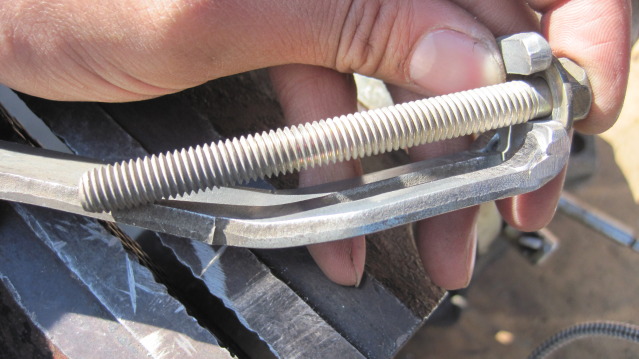
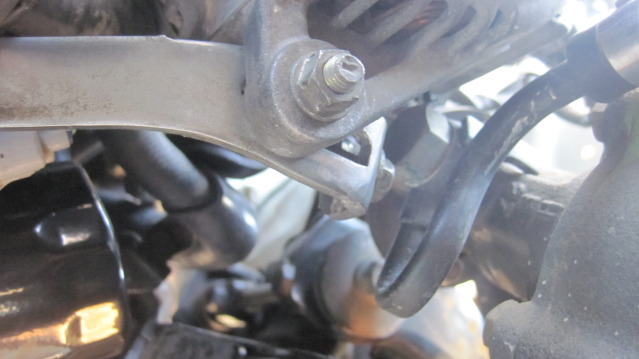
Although I shorten the bracket I can only fit an open end wrench between the bracket and steering box. Probably could have shorten about 1/4" and still have plenty of adjustment, but I don't want to do it again.
I needed a shorter Alternator bracket. So I cut it and re-welded it. I also used a shorter belt:
Napa micro-v belt # 25-040405
From the adjustment bracket notch to the first bend of the bracket should measure around 2".
The adjustment bolt was too long so I cut it where the bracket starts bending.
Although I shorten the bracket I can only fit an open end wrench between the bracket and steering box. Probably could have shorten about 1/4" and still have plenty of adjustment, but I don't want to do it again.
01-04-2012, 04:42 PM
#49
Registered User
Thread Starter
iTrader: (1)
Join Date: Jan 2004
Location: Anaheim, California
Posts: 212
Likes: 0
Received 0 Likes
on
0 Posts

Also to fit the adjustment bolt in the bracket you have to pull on the belt to get all the slack out. If you cut it too short you might have trouble getting the bolt in.
Good luck!
Navy
01-18-2012, 08:22 AM
#50
Registered User
Thread Starter
iTrader: (1)
Join Date: Jan 2004
Location: Anaheim, California
Posts: 212
Likes: 0
Received 0 Likes
on
0 Posts
Took a giant step back a week ago. I needed to drill and tap the threads for the column shifter bracket because I didn't swap bell housings. I snapped a bolt in there then snapped the extractor in there. So I ended up pulling the drive shaft, tranny mount, and tranny fluid lines. Then swapped bell housings.
5vz bell housing on the left. 3vz on the right.
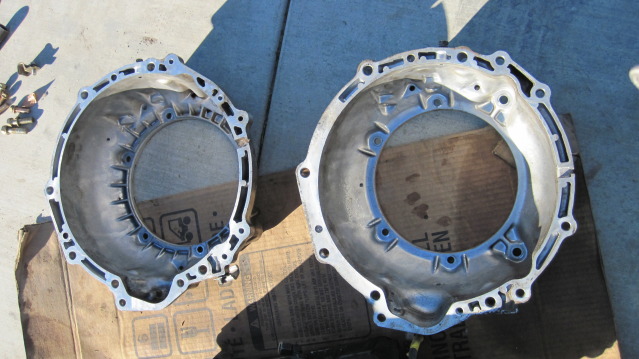
I drilled out the hole for the starter on the 3vz bell housing because it is threaded. I wanted to use the 5vz starter just because its newer.
5vz bell housing on the left. 3vz on the right.
I drilled out the hole for the starter on the 3vz bell housing because it is threaded. I wanted to use the 5vz starter just because its newer.
01-23-2012, 09:45 AM
#51
Registered User
Thread Starter
iTrader: (1)
Join Date: Jan 2004
Location: Anaheim, California
Posts: 212
Likes: 0
Received 0 Likes
on
0 Posts
Small update
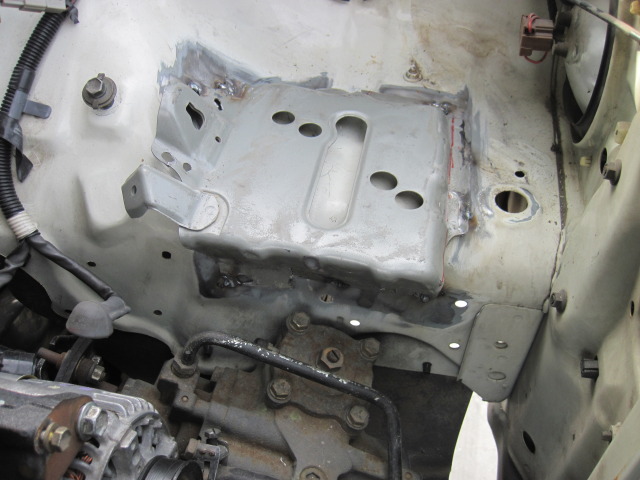
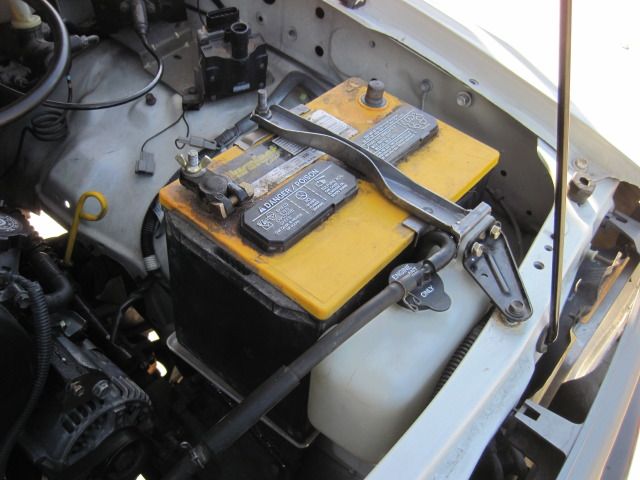
Just installed the battery tray. I had help from my dad, but he has a rush rush personality, therefore it didn't come out as clean as I want it. :rolleyes: Oh well the battery and paint will cover the ugliness.
If you use the battery tray from the 4runner. You have to make it sit lower other wise the battery is pretty close to the hood when you close it.
01-28-2012, 07:07 PM
#52
Registered User
Thread Starter
iTrader: (1)
Join Date: Jan 2004
Location: Anaheim, California
Posts: 212
Likes: 0
Received 0 Likes
on
0 Posts
Here is the battery tray painted:
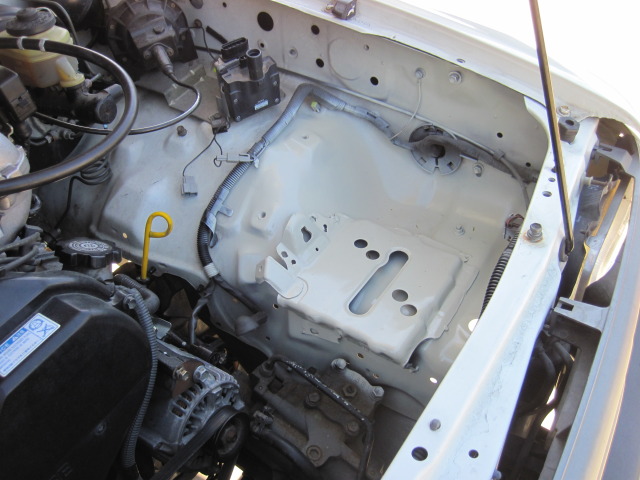
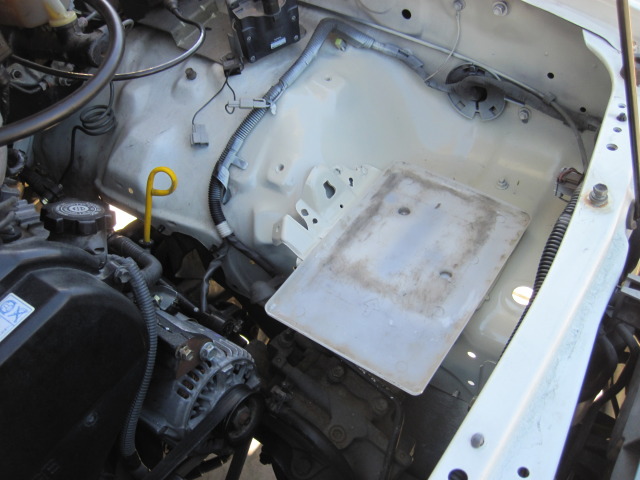
Basically the overflow tank had threads on the mounting bracket. I wanted to put bolts through the over flow tank bracket and battery holder to sandwich them together. So I drilled the overflow bracket threads. I then cut the battery holder and welded a piece of metal perpendicular to the battery holder, but parallel to the overflow mount. Drilled two holes and welded some nuts on the other end. That was harder to explain then the actual work.
Basically the overflow tank had threads on the mounting bracket. I wanted to put bolts through the over flow tank bracket and battery holder to sandwich them together. So I drilled the overflow bracket threads. I then cut the battery holder and welded a piece of metal perpendicular to the battery holder, but parallel to the overflow mount. Drilled two holes and welded some nuts on the other end. That was harder to explain then the actual work.
02-26-2012, 08:20 PM
#53
Registered User
Thread Starter
iTrader: (1)
Join Date: Jan 2004
Location: Anaheim, California
Posts: 212
Likes: 0
Received 0 Likes
on
0 Posts
Its been a while, but started collecting pictures and things. Started wiring finally. Its getting interesting thats for sure :lmao:
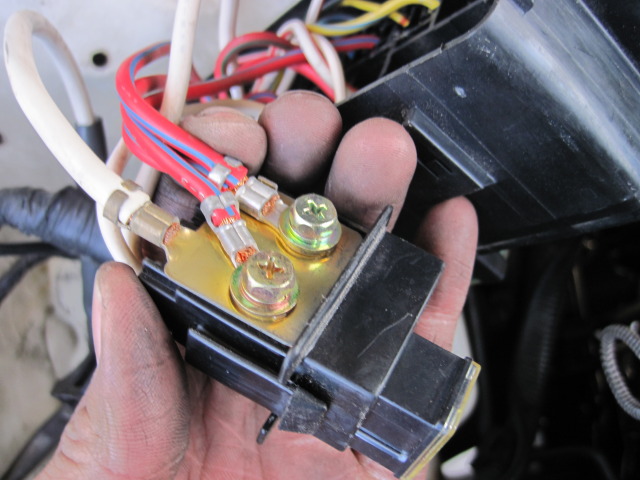
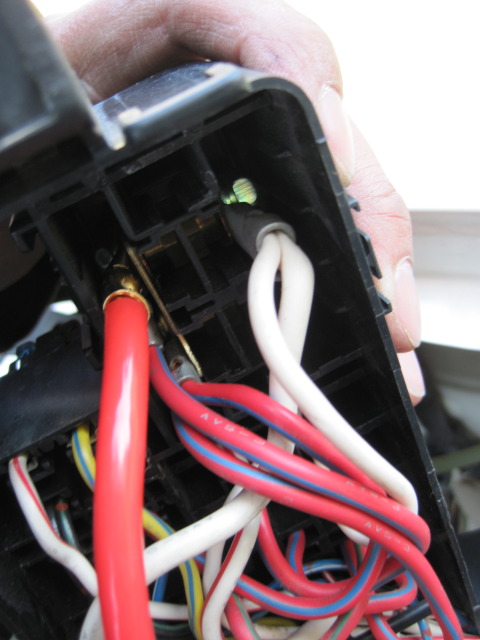
Here is the fuse box:
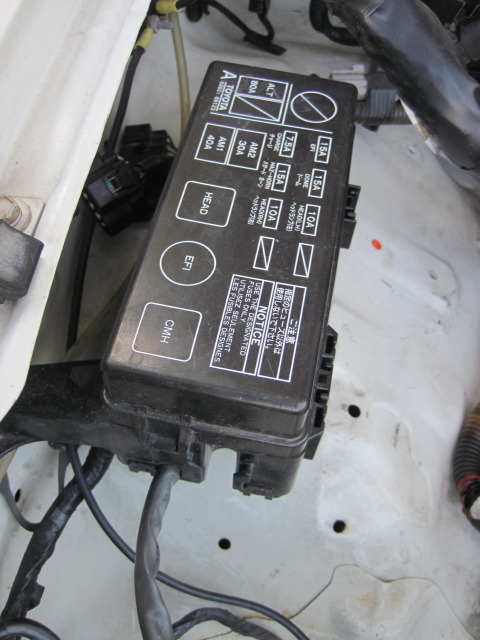
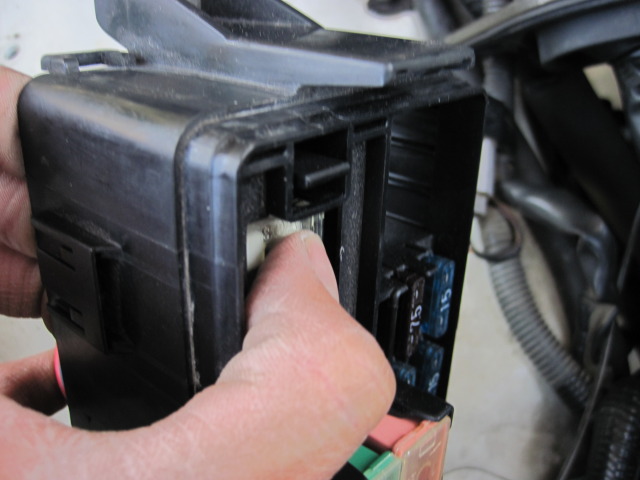
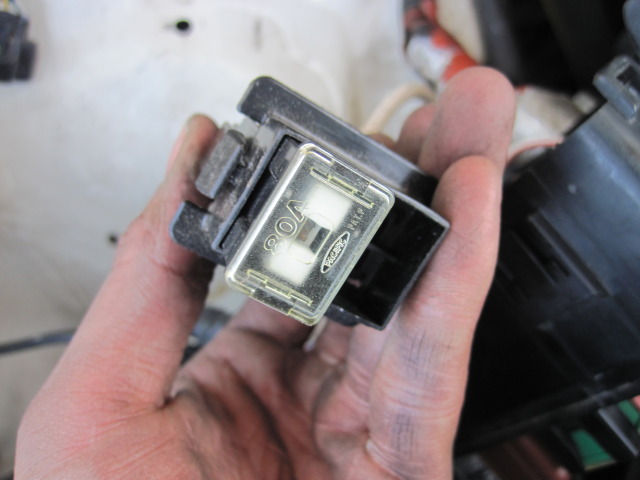
You first need to pull the 80 amp alternator fuse. There are 2 clips that you need to release on each side of the fuse. Then you just push down on the fuse itself. I forgot to mention you have to disassemble the bottom of the fuse box, which isn't difficult.
This is how the stock setup is. You have to replace that white cable with a larger cable and wire it toward the new battery location. I used a 8 gauge wire from an $30 amp kit from fry's electronics.
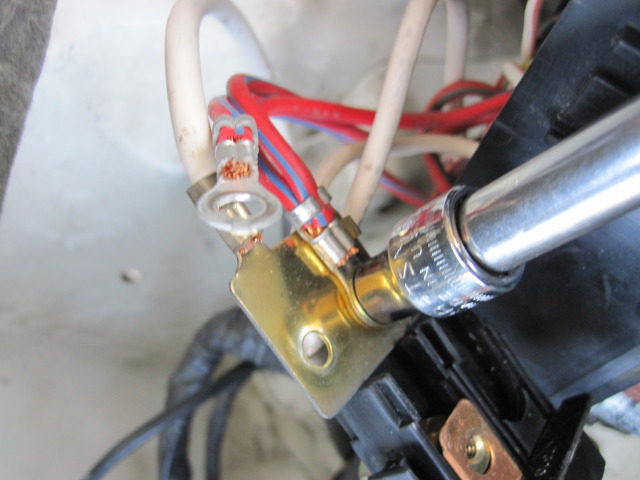
Unbolt the terminals.
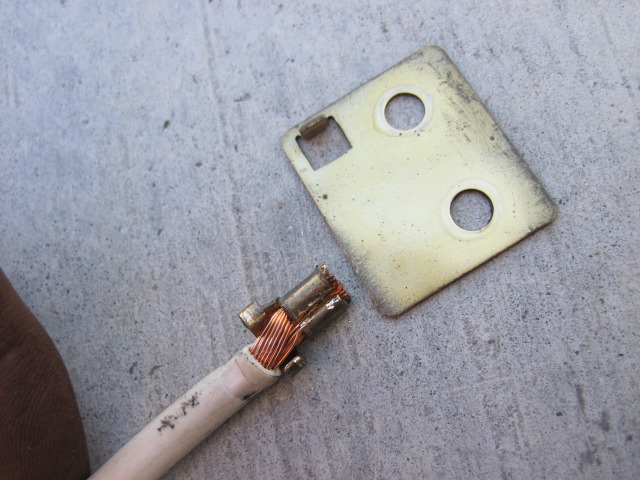
I hacked off the crimping area for the white cable.
Bolted the new 8 gauge wire on.
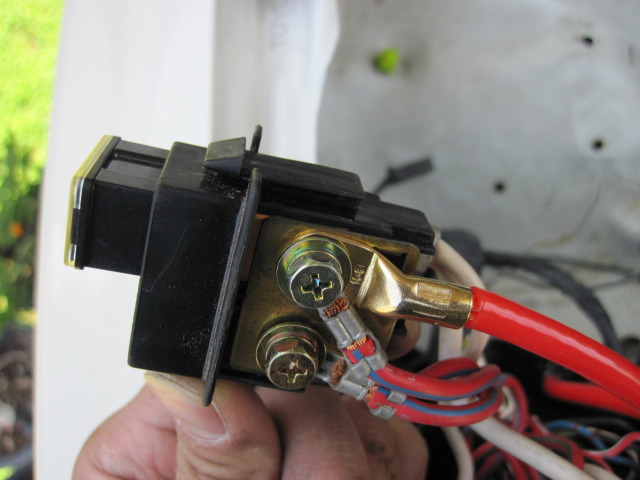
Plugged the fuse back in.
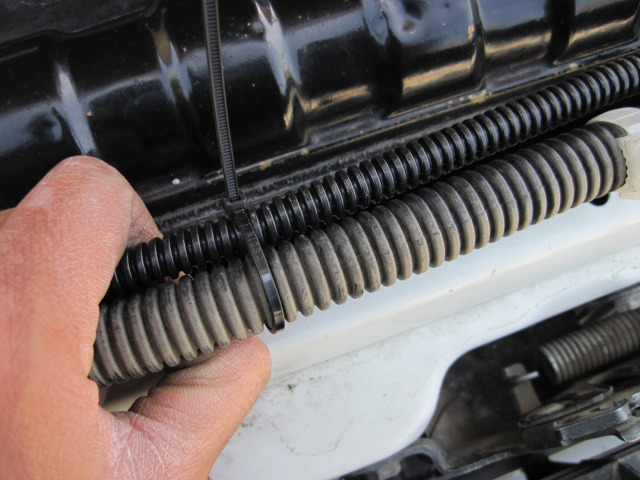
I went around the front of the engine bay and to the battery. I zipped tied the new cable to the harness that was already in front of the radiator. Hopefully the excess heat doesn't cause to much resistance here. I'll possibly move it if it causes me problems.
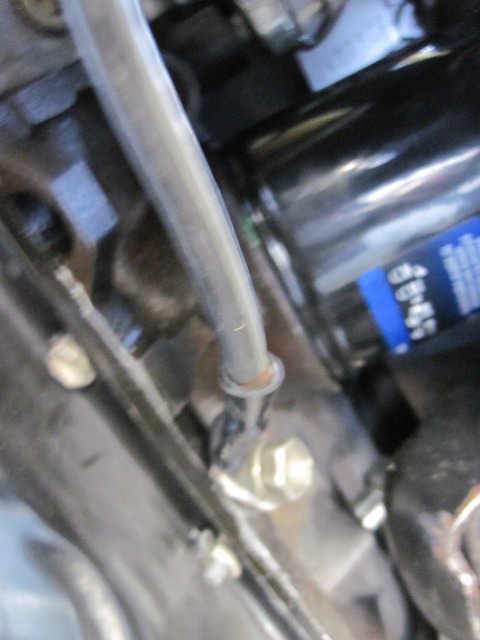
Believe it or not have I had no idea where the original main ground was located. I found it on the 5vz block.
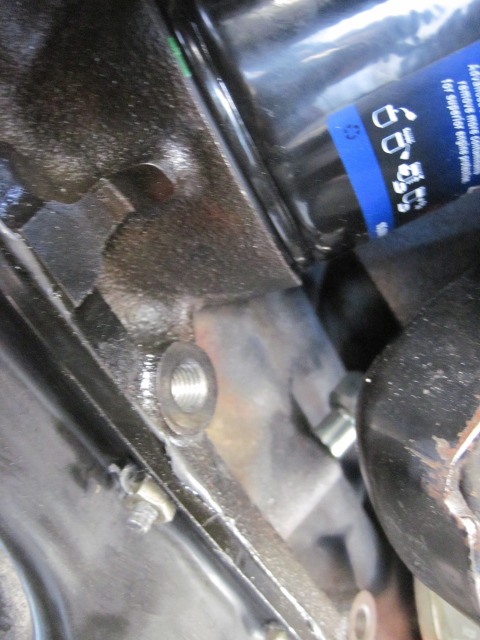
I'll take a better shot later.
Wiring is hard to photograph when you are in the zone. I'll try to keep it up, but I won't keep any promises. I'll get my brother to film on how to release terminals from connectors on safetydang tv.
Thanks for looking!
Navy
Here is the fuse box:
You first need to pull the 80 amp alternator fuse. There are 2 clips that you need to release on each side of the fuse. Then you just push down on the fuse itself. I forgot to mention you have to disassemble the bottom of the fuse box, which isn't difficult.
This is how the stock setup is. You have to replace that white cable with a larger cable and wire it toward the new battery location. I used a 8 gauge wire from an $30 amp kit from fry's electronics.
Unbolt the terminals.
I hacked off the crimping area for the white cable.
Bolted the new 8 gauge wire on.
Plugged the fuse back in.
I went around the front of the engine bay and to the battery. I zipped tied the new cable to the harness that was already in front of the radiator. Hopefully the excess heat doesn't cause to much resistance here. I'll possibly move it if it causes me problems.
Believe it or not have I had no idea where the original main ground was located. I found it on the 5vz block.
I'll take a better shot later.
Wiring is hard to photograph when you are in the zone. I'll try to keep it up, but I won't keep any promises. I'll get my brother to film on how to release terminals from connectors on safetydang tv.
Thanks for looking!
Navy
02-28-2012, 06:30 PM
#56

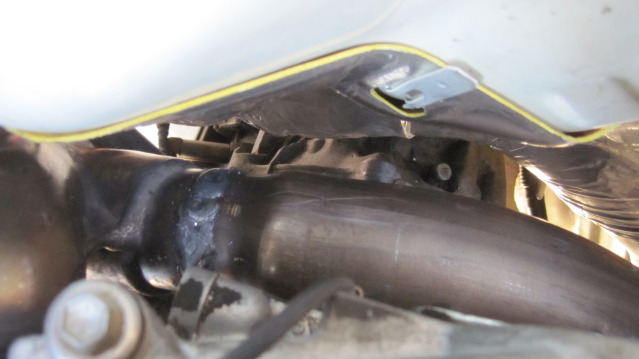
as far as the rear of the engine i used the existing 3.0 heater valve, with all hoses and the other heater hose off the block i used one from the 3.4 and cut it a little bit... i used the stock lower radiator hose with inlet hose from the 3.0 bolted to the 3.4 and the upper i just matched up @ autozone today ill post the part # later but after i cut about 2" off one end it fit perfect
03-30-2012, 10:21 PM
#57
Registered User
Thread Starter
iTrader: (1)
Join Date: Jan 2004
Location: Anaheim, California
Posts: 212
Likes: 0
Received 0 Likes
on
0 Posts
as far as the rear of the engine i used the existing 3.0 heater valve, with all hoses and the other heater hose off the block i used one from the 3.4 and cut it a little bit... i used the stock lower radiator hose with inlet hose from the 3.0 bolted to the 3.4 and the upper i just matched up @ autozone today ill post the part # later but after i cut about 2" off one end it fit perfect
Thanks for all the comments. Sea Jay, I hope your motor roars to life soon.
Small update for things that had to be done.
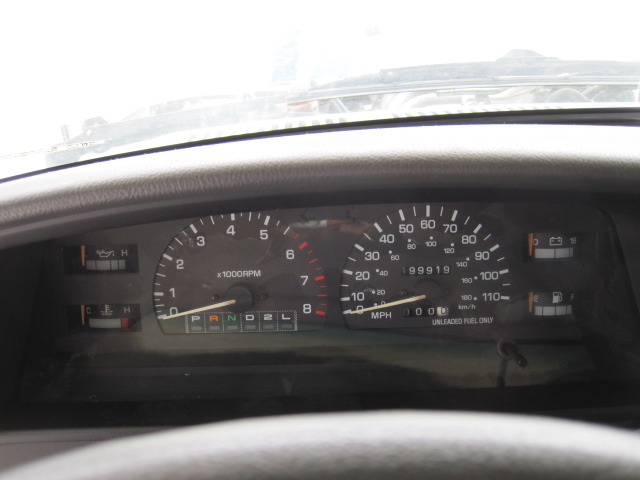
My house is going to be swarming with relatives, so I am having some sleep in the RV. That means no dash or instrument panels sitting everywhere in the camper. So I put the dash back together and installed my T100 SR5 gauge cluster. I believe the 5vz oil pressure sensor may work with the this, but I'll do a voltage test and see if its the same.
I needed to get the RV off the jack stands, so that meant putting on torsion bars and the rest of the suspension components. I first needed to route the tranny wires and o2 sensor wires. One of the 02 connectors broke when I pulled the motor for the 3rd time.
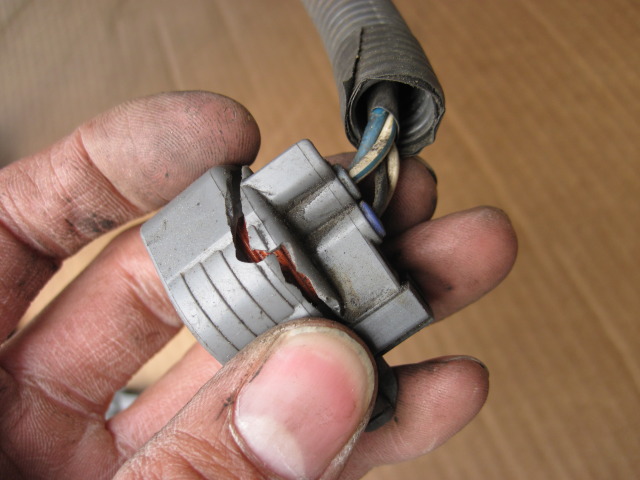
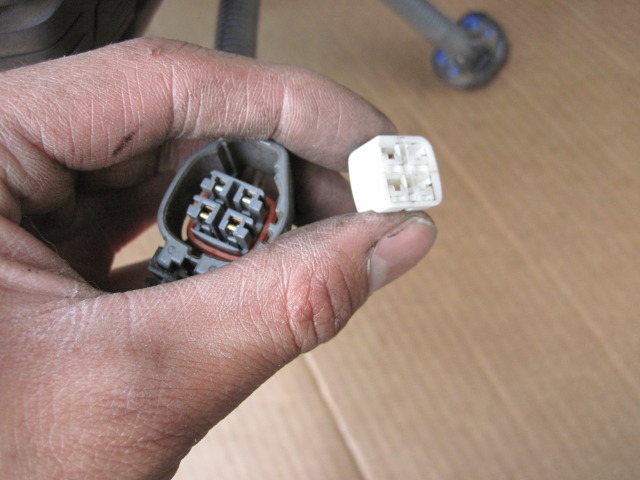
I found the exact connector from the window washer pump.
Pulled out the lock.

Pulled out the terminals.
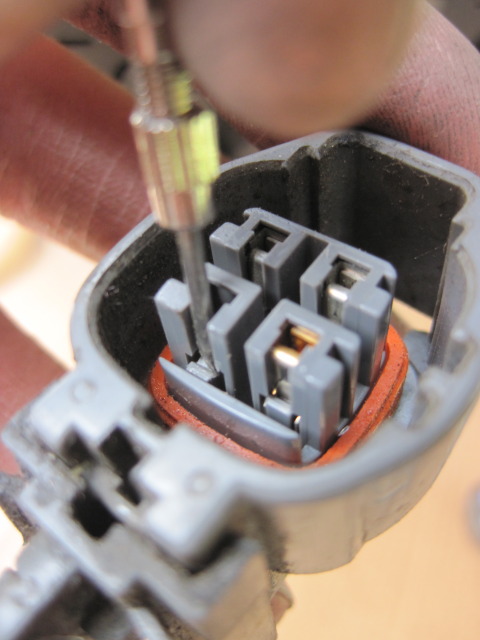
Do them one at a time.
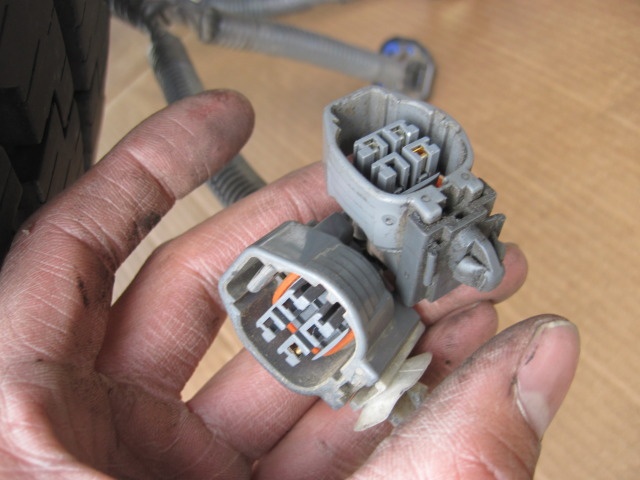
Done!

So torsion time!
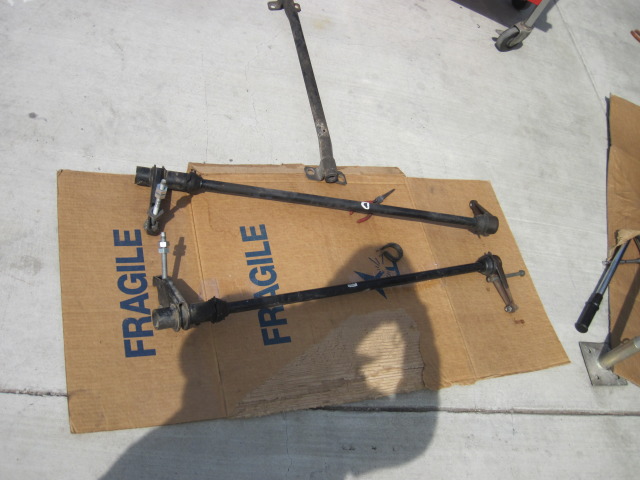
And shes back on the ground!
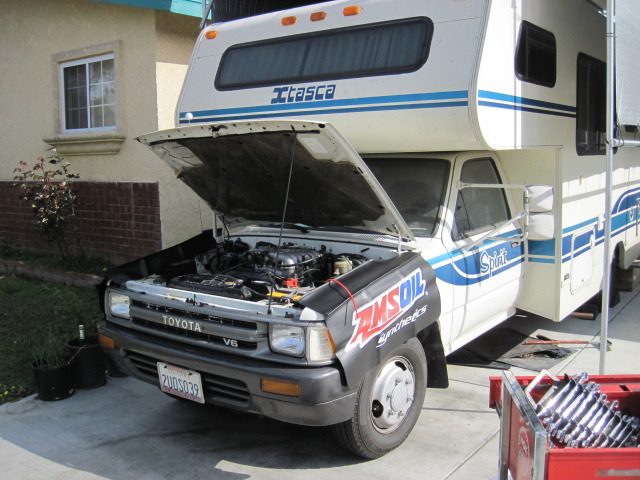
Don't worry guys April 21st is the wedding. Then we'll be back on the projects.
03-31-2012, 07:23 PM
#58
How Ironic you are being married on my birthday april 21st! Ill be 35 ... Your progress looks good! Where exactly are you checking the voltage for the sending unit? I have a similar dash I just got so i can add a tach and I want to be sure I use the right oil pressure sending unit. I wonder If I ohm it out if that will tell me?
04-03-2012, 04:06 PM
#59
Registered User
Thread Starter
iTrader: (1)
Join Date: Jan 2004
Location: Anaheim, California
Posts: 212
Likes: 0
Received 0 Likes
on
0 Posts
How Ironic you are being married on my birthday april 21st! Ill be 35 ... Your progress looks good! Where exactly are you checking the voltage for the sending unit? I have a similar dash I just got so i can add a tach and I want to be sure I use the right oil pressure sending unit. I wonder If I ohm it out if that will tell me?
Thanks for looking!
Navy
04-09-2012, 08:19 AM
#60
Registered User
Thread Starter
iTrader: (1)
Join Date: Jan 2004
Location: Anaheim, California
Posts: 212
Likes: 0
Received 0 Likes
on
0 Posts
Looks like a change of plans for the fuse box. I am going to use the 4runners fuse box. I have to add a few relay and fuses if I want to use the older style.
Anybody know what the 8 wires to make the engine run are, in order for me to turn the rv around?
Thank you,
Navy
Anybody know what the 8 wires to make the engine run are, in order for me to turn the rv around?
Thank you,
Navy


