superchiem's Toyota RV 5vz Swap
 10-26-2011, 04:57 PM
#21
Registered User
Thread Starter
iTrader: (1)
Join Date: Jan 2004
Location: Anaheim, California
Posts: 212
Likes: 0
Received 0 Likes
on
0 Posts
Does anybody know the torque specifications on the exhaust manifold nuts? In the haynes manual it says 30 lbs/ft. It took an average of 45 lbs/ft to take the nuts off and 1 of them took about 60 lbs/ft.
Thank you,
Navy
Thank you,
Navy
 10-27-2011, 09:30 AM
#23
By the time I get home these days, it's dark already. I do it all outside. Even the weekends are taken with other stuff. I have a few hours here and there now. I'm trying to marry the wiring from 95 truck to 96 engine and 98 manual ECU....
 10-27-2011, 05:41 PM
#24
Registered User
are the oil pan baffles different? just swapped t100 oil pan/sump to my donor engine,a 2000 4runner. drilled my block myself without guide.thought baffles were the same.
10-29-2011, 07:48 AM
#25
Registered User
Thread Starter
iTrader: (1)
Join Date: Jan 2004
Location: Anaheim, California
Posts: 212
Likes: 0
Received 0 Likes
on
0 Posts
Thanks for the torque specs!
Navy
Good luck with your swap!
Navy
 10-31-2011, 05:35 PM
#28
Registered User
Thread Starter
iTrader: (1)
Join Date: Jan 2004
Location: Anaheim, California
Posts: 212
Likes: 0
Received 0 Likes
on
0 Posts
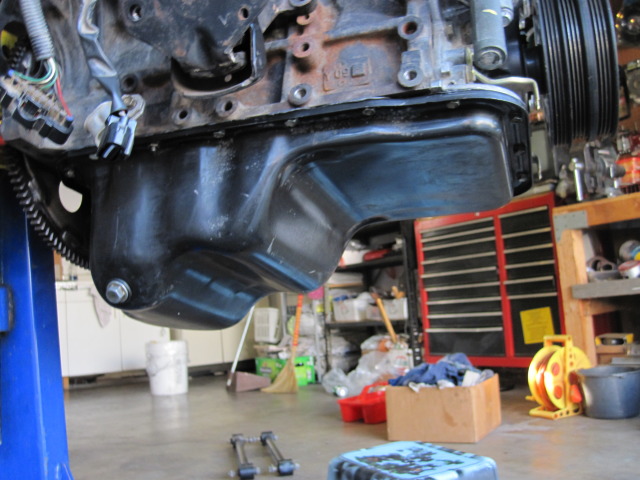
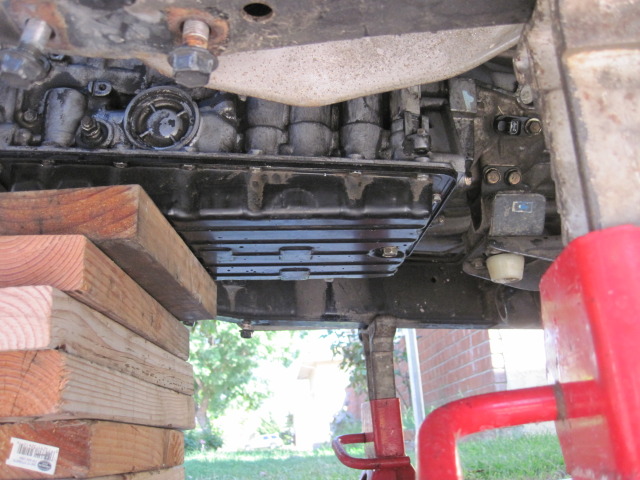
Very small update today. I was able to scrape all the old gasket material off the 3vze oil pan and I got to say this is my least favorite thing to do so for during the entire swap.
Here it is mounted w/ new silicone:
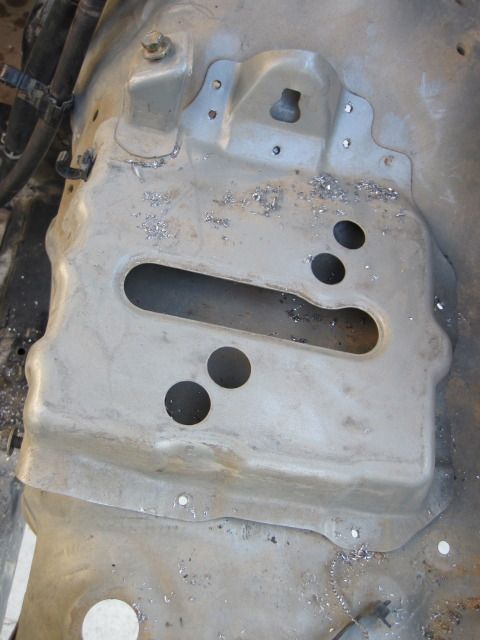
After that I tried to drill out the tac welds holding the 4runner battery tray and was unsuccessful. I'll have to try again next time.
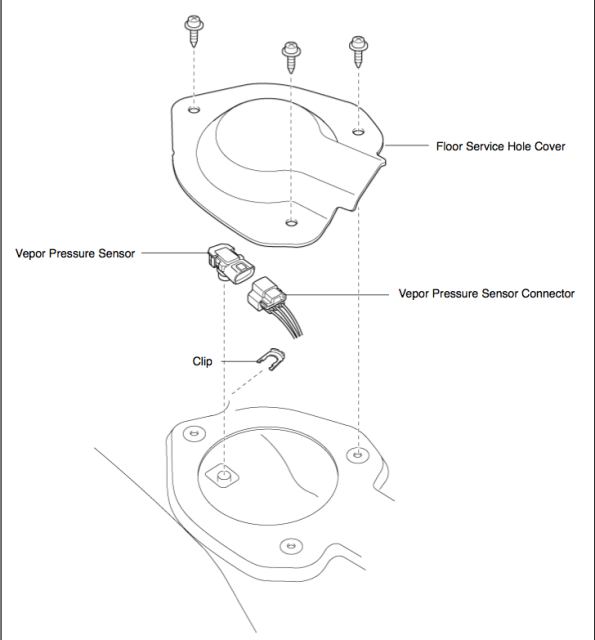
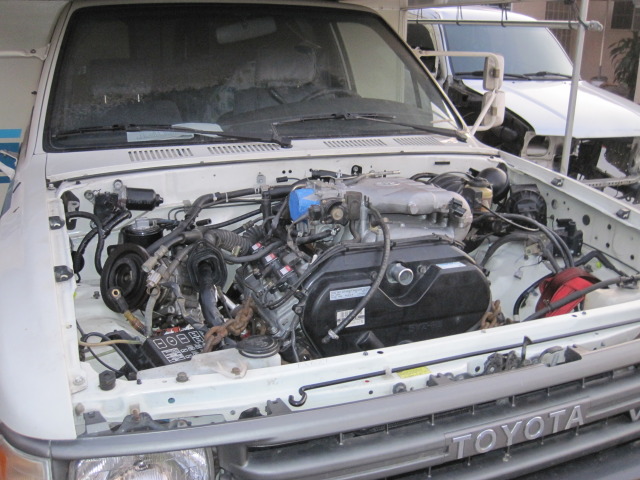
The motor is pretty much ready to go. I still need to clear out the engine bay a little. I also need to remove the speedo cable that comes from the tranny through the firewall to the gauges. Also need to order a new firewall protector. Anybody know the part number?
Thank you,
Navy
10-31-2011, 07:30 PM
#29
I found a dremel to be very useful for cutting the welds on the battery tray.
Although I wasnt trying to keep it in tact either... started with a cut off wheel to get as much clearance as I could to cut the welds.
Although I wasnt trying to keep it in tact either... started with a cut off wheel to get as much clearance as I could to cut the welds.
Last edited by calipatient; 10-31-2011 at 07:31 PM.
 11-04-2011, 12:21 PM
#31
Registered User
Join Date: Oct 2011
Posts: 16
Likes: 0
Received 0 Likes
on
0 Posts
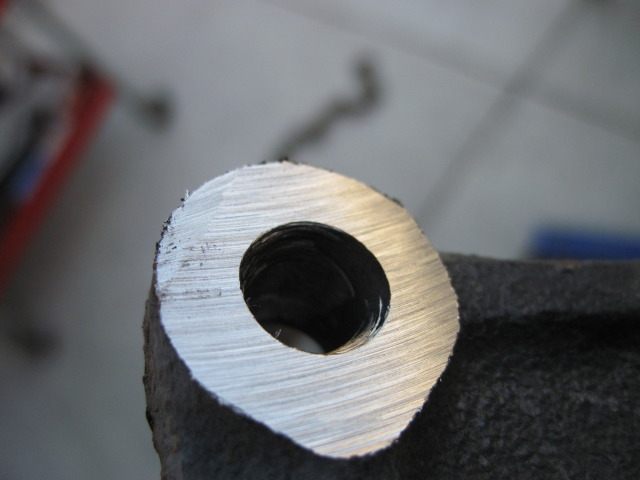
Sorry if i missed it but was size was that U bit you used to drill the dip stick hole? I have an 02 4runner donor also and mines didnt come with that plug....i would have to drill a pilot hole and work my way up.
11-05-2011, 09:06 PM
#32
Registered User
Thread Starter
iTrader: (1)
Join Date: Jan 2004
Location: Anaheim, California
Posts: 212
Likes: 0
Received 0 Likes
on
0 Posts
The drill size is "U", which comes out to .368". 3/8s comes out to be .375". You can go to your local hardware store and ask for a U size bit.
11-07-2011, 01:59 PM
#33
Registered User
Thread Starter
iTrader: (1)
Join Date: Jan 2004
Location: Anaheim, California
Posts: 212
Likes: 0
Received 0 Likes
on
0 Posts
Good size update today.
The other day I wired wheel some rust that I saw in the engine bay. I then primed and painted it.
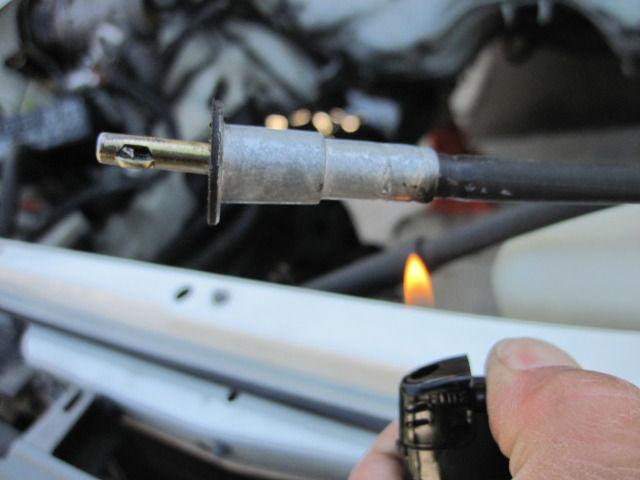
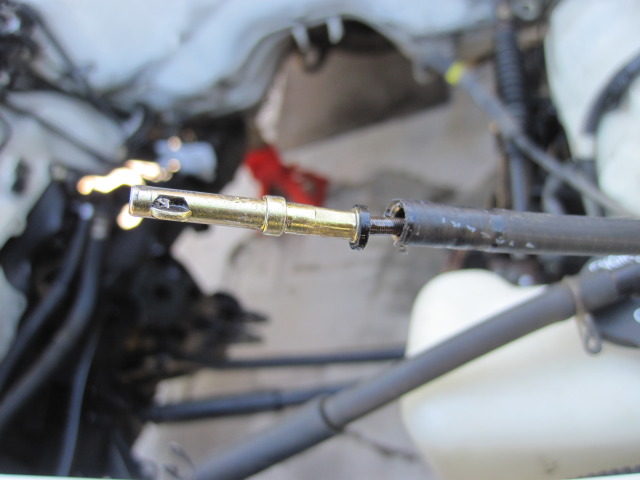
I went ahead a pulled a part some of the dash to get to the combometer. I unplugged the speedo cable from the back of the combometer. I found that you either had to cut the speedo cable or some how take it a part. I just used a lighter to heat up the end and the stopper came out. Now the speedo cable can fit through the hole of the firewall.
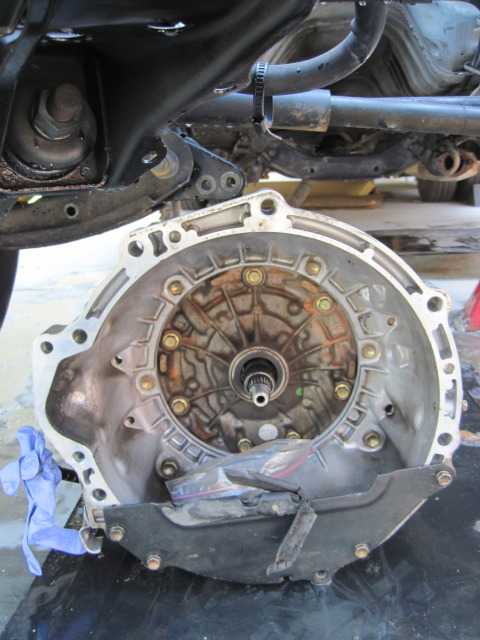
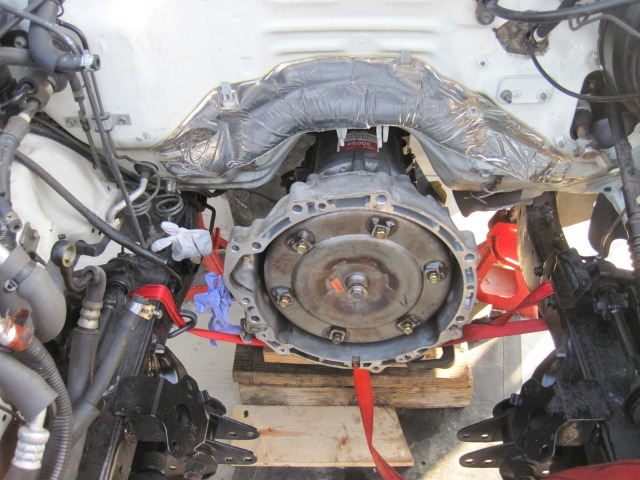
I then decided to install the tranny today.
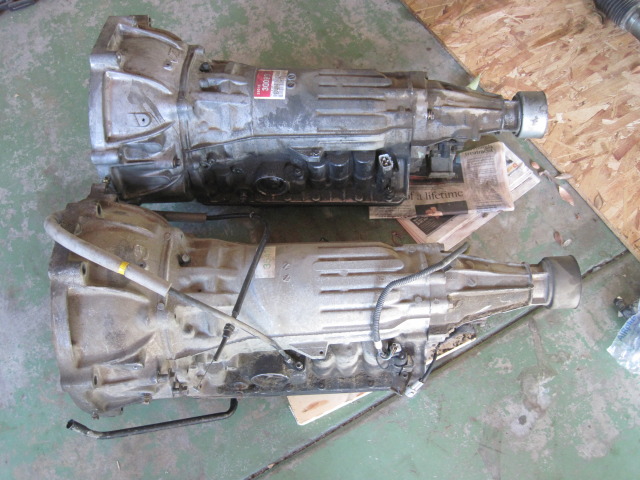
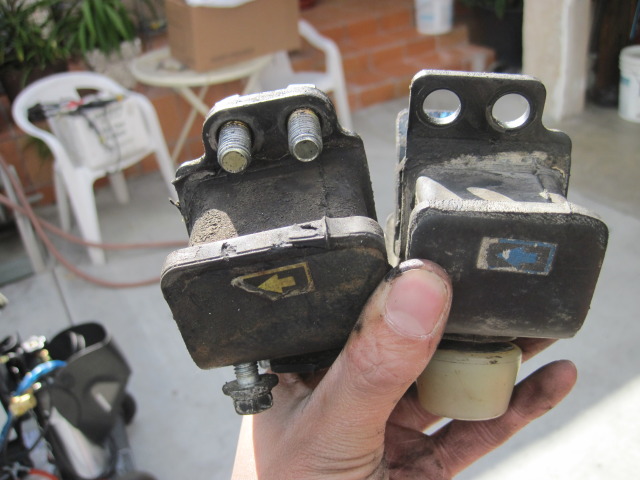
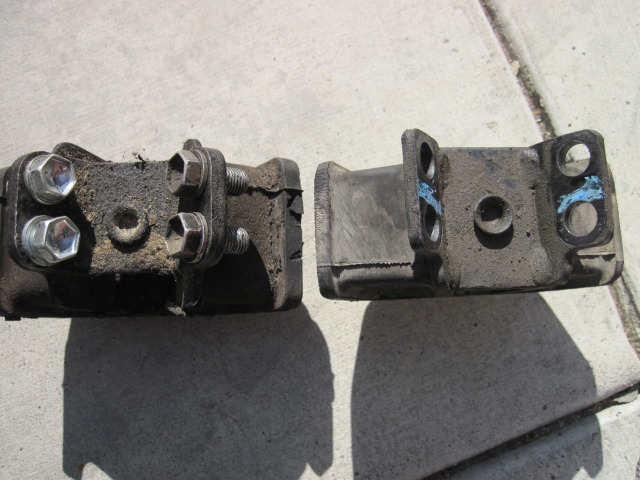
Here they are side by side (5vz 2wd auto on top and 3vz 2wd auto on bottom):
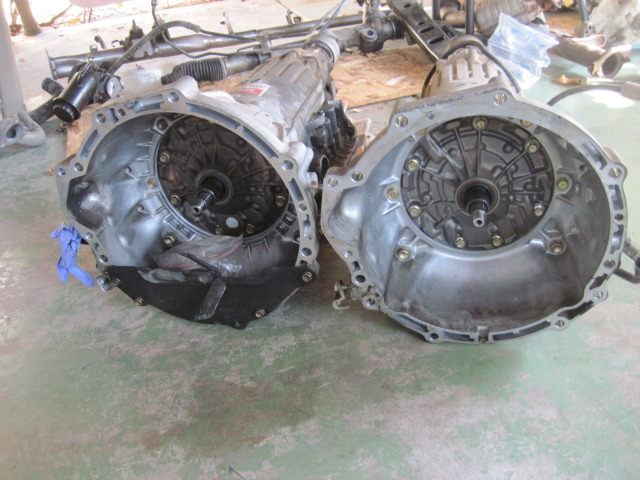
I dragged the tranny under the truck and used ratchet straps to lift it up until I was able to get a jack under it.
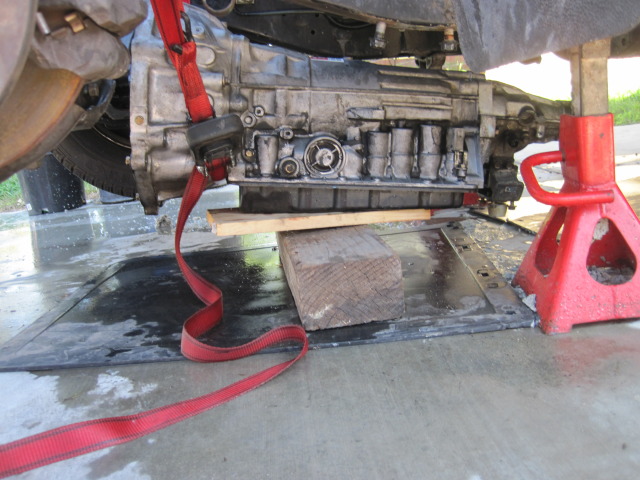
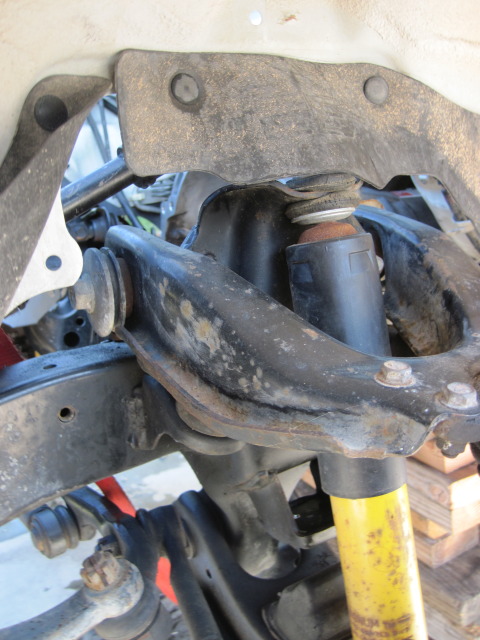
The newer and older tranny mount are interchangeable. The older brace and crossmember have to be used.
Still have the urge to long travel this thing, but not sure if the 1 ton suspension is different.
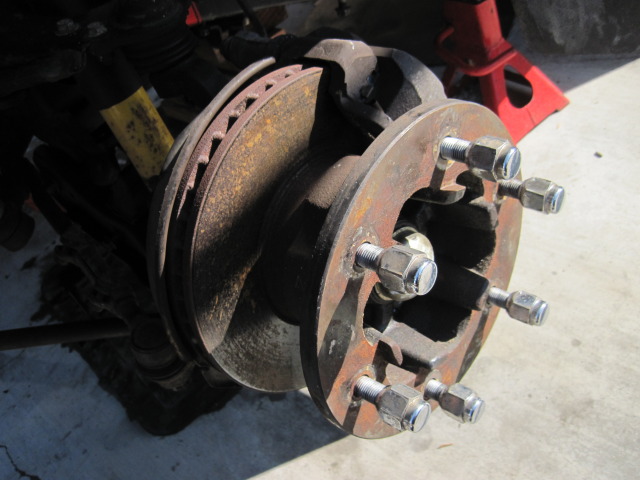

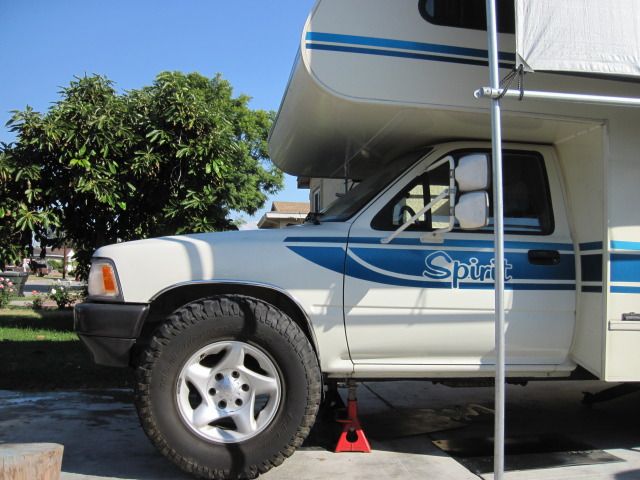
Since the tire was off I thought I would see what it would look like.
The rim is not bolted it is just sitting beside it because the lug pattern is different from my 6 lug taco.
The other day I wired wheel some rust that I saw in the engine bay. I then primed and painted it.
I went ahead a pulled a part some of the dash to get to the combometer. I unplugged the speedo cable from the back of the combometer. I found that you either had to cut the speedo cable or some how take it a part. I just used a lighter to heat up the end and the stopper came out. Now the speedo cable can fit through the hole of the firewall.
I then decided to install the tranny today.
Here they are side by side (5vz 2wd auto on top and 3vz 2wd auto on bottom):
I dragged the tranny under the truck and used ratchet straps to lift it up until I was able to get a jack under it.
The newer and older tranny mount are interchangeable. The older brace and crossmember have to be used.
Still have the urge to long travel this thing, but not sure if the 1 ton suspension is different.
Since the tire was off I thought I would see what it would look like.
The rim is not bolted it is just sitting beside it because the lug pattern is different from my 6 lug taco.
11-15-2011, 07:31 PM
#34
Registered User
Thread Starter
iTrader: (1)
Join Date: Jan 2004
Location: Anaheim, California
Posts: 212
Likes: 0
Received 0 Likes
on
0 Posts
I had somewhat of a productive day today.
Was gearing up to install the torque converter. First I poured some ATF into the converter.
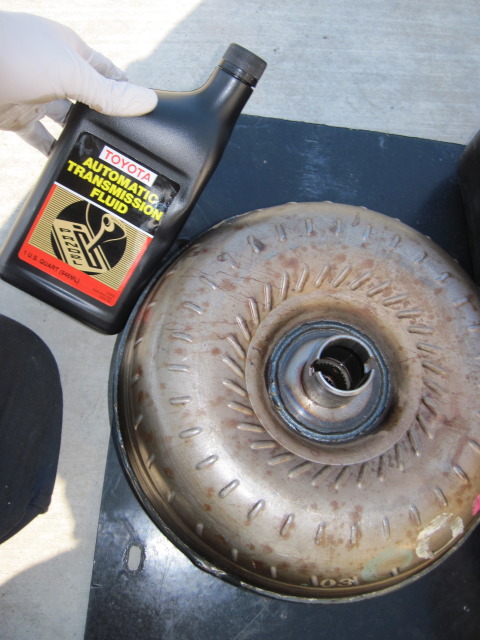
Then I installed it into the transmission. I had to wiggle it back and forth until it fell into place. You should not use a hammer to install these.
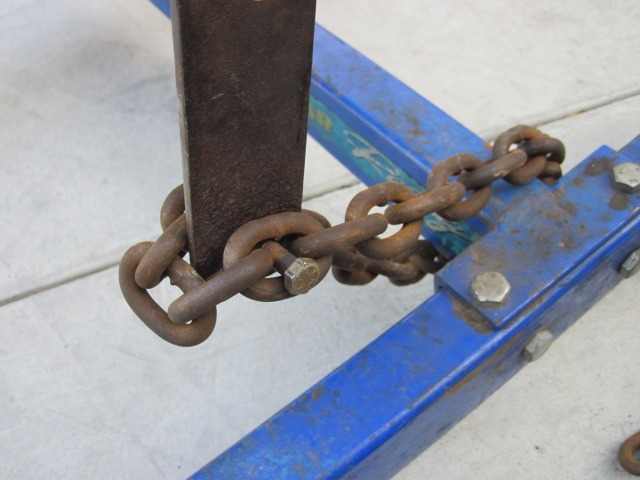
Also was able to torque down my crankshaft pulley to 217 ft/lbs. I used a grade 8 bolt to hold the chain in place on the stand.
I ground down the A/C bracket where it used to sandwich the motor mount.
Now it sits flush as it should.
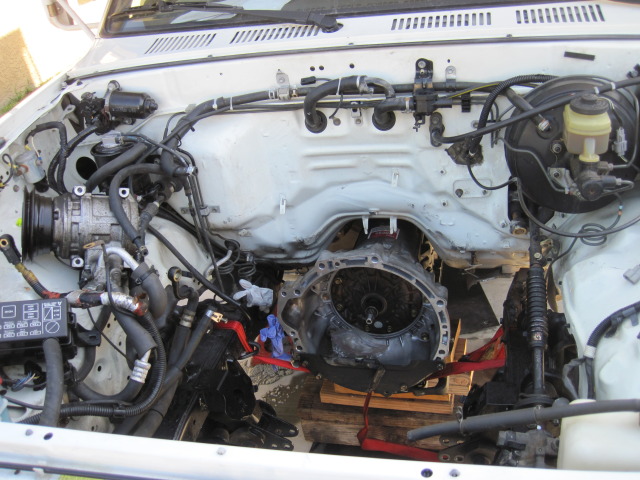
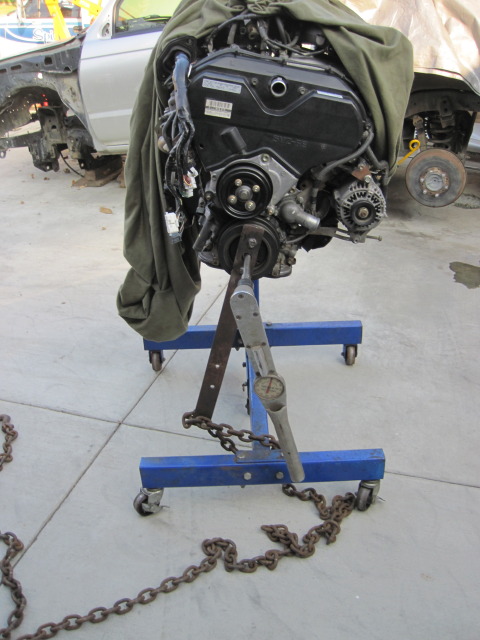
After that the motor was ready to be dropped in.
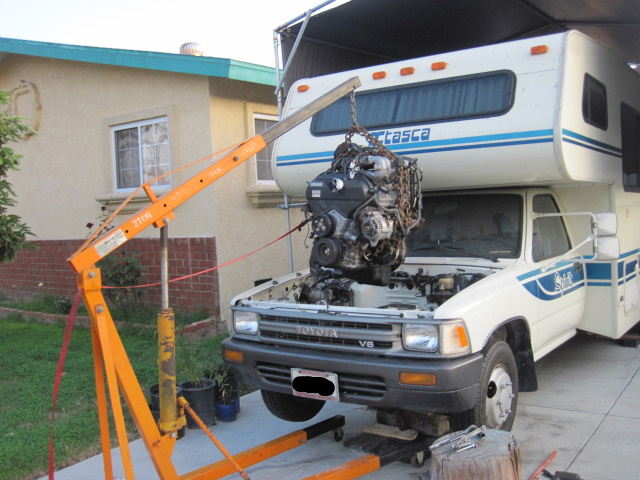
I was working alone so I needed a way to control it as I was lowering it. So I hooked a tie down strap to one side of the engine.
Heres the motor finally sitting on the motor mounts. Only problem is the holes don't match on the driver side. Its about 1/4" off from lining up. I'm going to lift it again and see if I can get closer sometime next week I hope.
Was gearing up to install the torque converter. First I poured some ATF into the converter.
Then I installed it into the transmission. I had to wiggle it back and forth until it fell into place. You should not use a hammer to install these.
Also was able to torque down my crankshaft pulley to 217 ft/lbs. I used a grade 8 bolt to hold the chain in place on the stand.
I ground down the A/C bracket where it used to sandwich the motor mount.
Now it sits flush as it should.
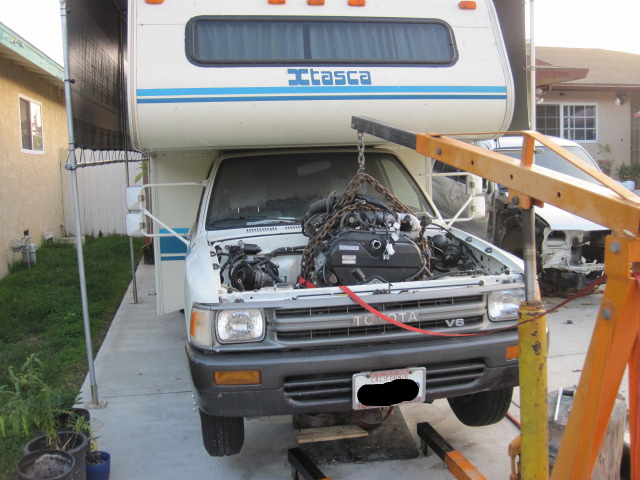
After that the motor was ready to be dropped in.
I was working alone so I needed a way to control it as I was lowering it. So I hooked a tie down strap to one side of the engine.
Heres the motor finally sitting on the motor mounts. Only problem is the holes don't match on the driver side. Its about 1/4" off from lining up. I'm going to lift it again and see if I can get closer sometime next week I hope.
11-21-2011, 11:46 AM
#35
Registered User
Thread Starter
iTrader: (1)
Join Date: Jan 2004
Location: Anaheim, California
Posts: 212
Likes: 0
Received 0 Likes
on
0 Posts
Thanks!
Things are moving along. Finally got the engine to sit into the motor mounts. I had to use the hoist and lift the engine and shake it a few times and lower it multiple times.
I posted that the 4runner tranny mount works on the tranny crossmember bracket, which it does, but doesn't work when then engine is in. You have to use the old one. Not sure if its because the rv is a 1 ton, but its much beefier anyways.
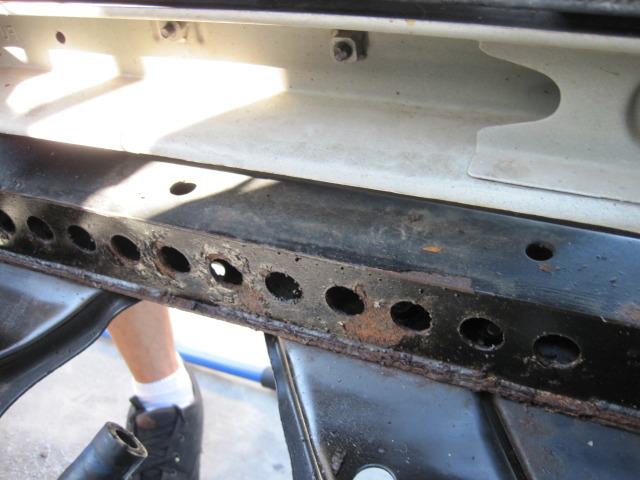
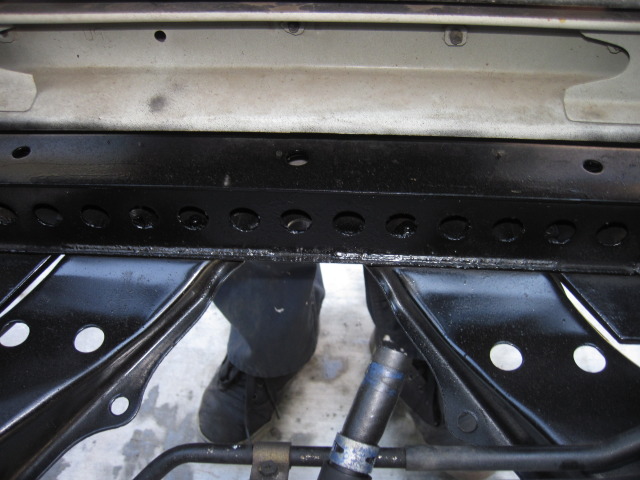
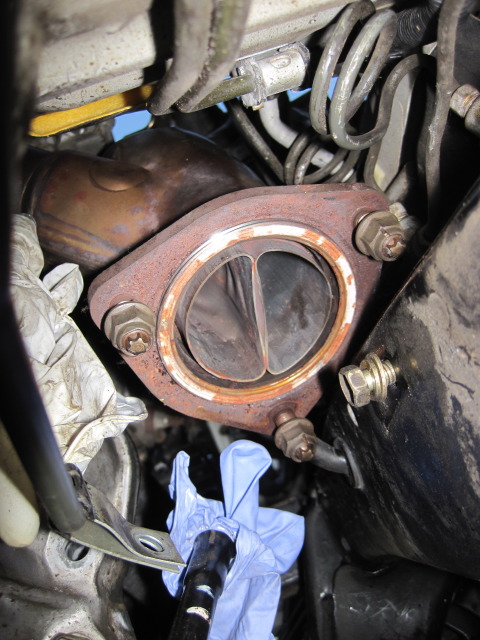
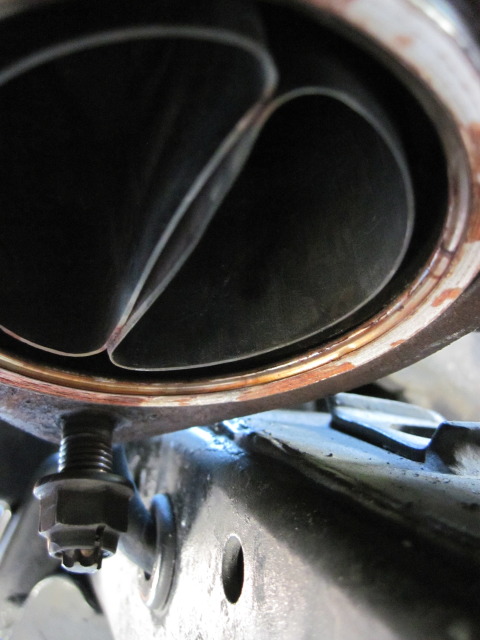
Had to bend some brake lines out of the way to get the down pipe in, but the frame is still in the way. Going to have to weld a jig up so I know how far to bend the down pipe. It looks like it needs to be bent 2 inches to the driver side. Hopefully lots of heat and a pry bar will do the trick.
I was thinking of buying a tube bender and learn how to do the exhaust myself or pay somebody to do it.
What do you guys think?
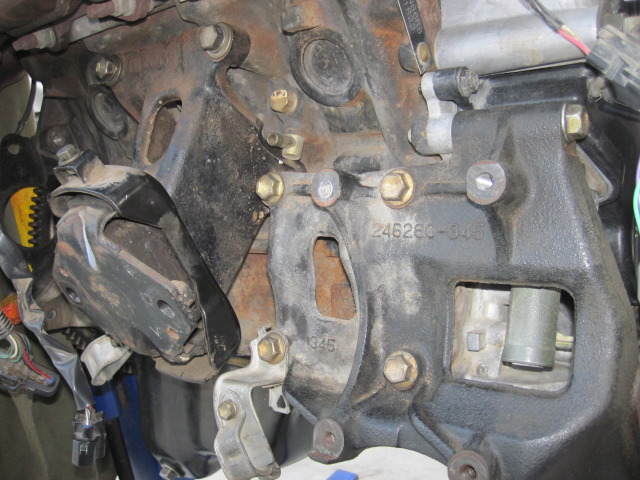
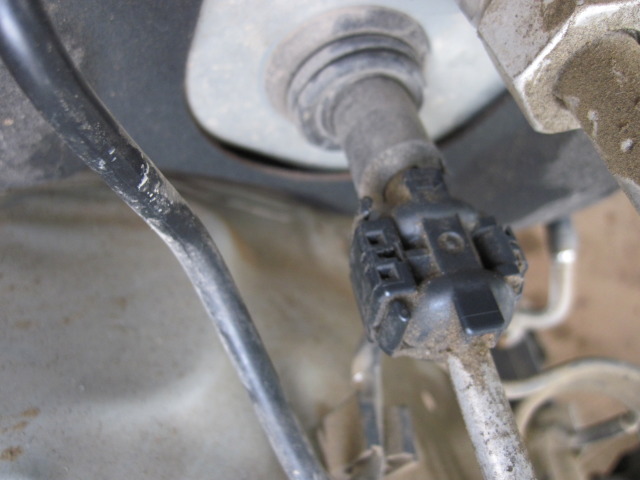
Also still pulling parts off the donor. Does anybody know how to unclip this? It hold the engine bay ac hose line to the ac condenser I think.
Thank you,
Navy
Things are moving along. Finally got the engine to sit into the motor mounts. I had to use the hoist and lift the engine and shake it a few times and lower it multiple times.
I posted that the 4runner tranny mount works on the tranny crossmember bracket, which it does, but doesn't work when then engine is in. You have to use the old one. Not sure if its because the rv is a 1 ton, but its much beefier anyways.
Had to bend some brake lines out of the way to get the down pipe in, but the frame is still in the way. Going to have to weld a jig up so I know how far to bend the down pipe. It looks like it needs to be bent 2 inches to the driver side. Hopefully lots of heat and a pry bar will do the trick.
I was thinking of buying a tube bender and learn how to do the exhaust myself or pay somebody to do it.
What do you guys think?
Also still pulling parts off the donor. Does anybody know how to unclip this? It hold the engine bay ac hose line to the ac condenser I think.
Thank you,
Navy
 11-22-2011, 07:07 AM
#39
Registered User
Thread Starter
iTrader: (1)
Join Date: Jan 2004
Location: Anaheim, California
Posts: 212
Likes: 0
Received 0 Likes
on
0 Posts
I'm using the donor's battery tray. That way I can swap the battery to the driver side. The tray is tacked in so I have to drill out the welds. I'm going to tack them in the same spots once I get it out. I wanted to use the battery tray like in your swap, but keeping this as low budget as possible.
Thanks for checking out my swap! I remember reading your swap thread and getting stoked to do mine.
Thanks for checking out my swap! I remember reading your swap thread and getting stoked to do mine.
Last edited by superchiem; 11-22-2011 at 07:09 AM.


