My SAS Build And MUCH More
 02-27-2012, 05:18 PM
#1
Registered User
Thread Starter
iTrader: (1)
Join Date: Jan 2012
Location: SLC, UT
Posts: 68
Likes: 0
Received 0 Likes
on
0 Posts
My SAS Build And MUCH More
So this has been a dream of mine to do for years. Ever since I bought my first 95 toyota pickup when I was 15. Since then I have built to the max that 95, a 01, and a 07 but because of limited knowledge of doing a sas and the time/ good opportunity to do one I never pulled the trigger on the sas swap. My 95 had a 7" lift with
35's. My 01 had a 13" lift with 37's and my 07 had a 6" lift with 33's. All were IFS and needless to say I have gone through many cv axles over the years. So when I bought my 92 pickup last summer the plan was to do a SAS on it to make it my best hunting rig to date. When I bought it it already had a 4" bracket lift on it and that was about it. I put 2.5" ball joint spacers on it with 2.5" OME springs that sat on top of 4" blocks with 33's. The first wheeling trip I broke both cv axles so as soon as I got home I started doing my research on the SAS swap. After months of research and countless hours on this site reading some great build up threads I finally chose to order trail gears 5" HD IFS elemenator kit along with the creeper gusset kit, arp studs, and 5" rear springs.
35's. My 01 had a 13" lift with 37's and my 07 had a 6" lift with 33's. All were IFS and needless to say I have gone through many cv axles over the years. So when I bought my 92 pickup last summer the plan was to do a SAS on it to make it my best hunting rig to date. When I bought it it already had a 4" bracket lift on it and that was about it. I put 2.5" ball joint spacers on it with 2.5" OME springs that sat on top of 4" blocks with 33's. The first wheeling trip I broke both cv axles so as soon as I got home I started doing my research on the SAS swap. After months of research and countless hours on this site reading some great build up threads I finally chose to order trail gears 5" HD IFS elemenator kit along with the creeper gusset kit, arp studs, and 5" rear springs.
 02-27-2012, 05:40 PM
#2
Registered User
Thread Starter
iTrader: (1)
Join Date: Jan 2012
Location: SLC, UT
Posts: 68
Likes: 0
Received 0 Likes
on
0 Posts
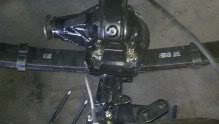
I found a 85 4 runner axle to use as the donor. I completely rebuilt it and added a front diff guard that I built and painted it. I had the truck tore down for about 2 months while I completed everything.
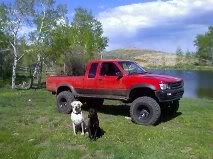
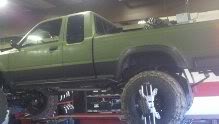
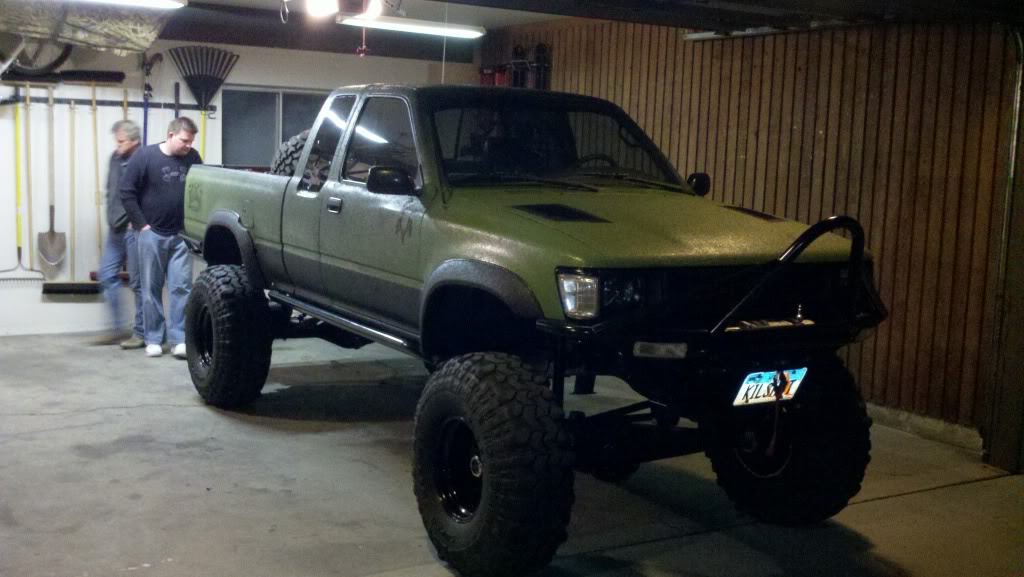
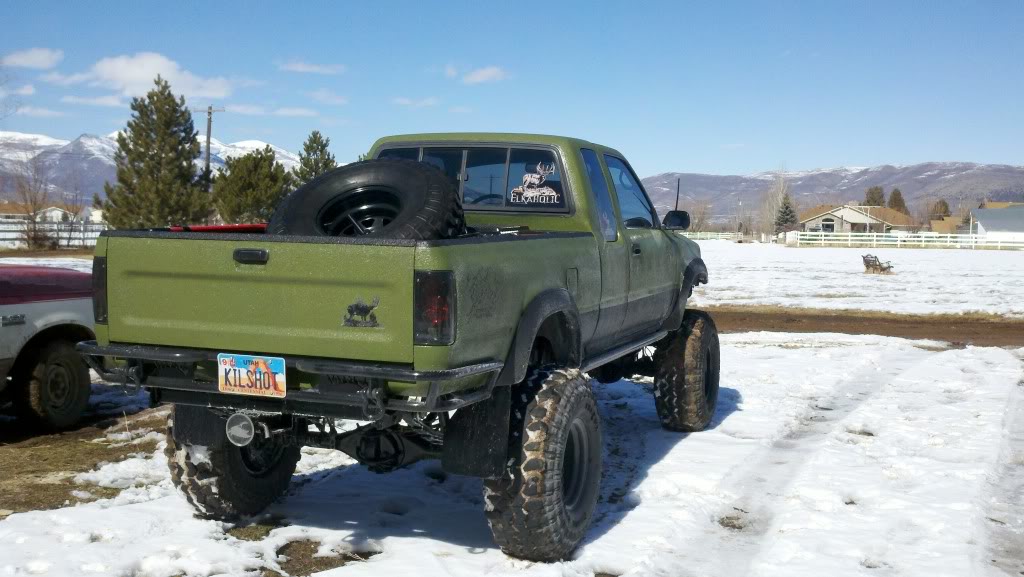
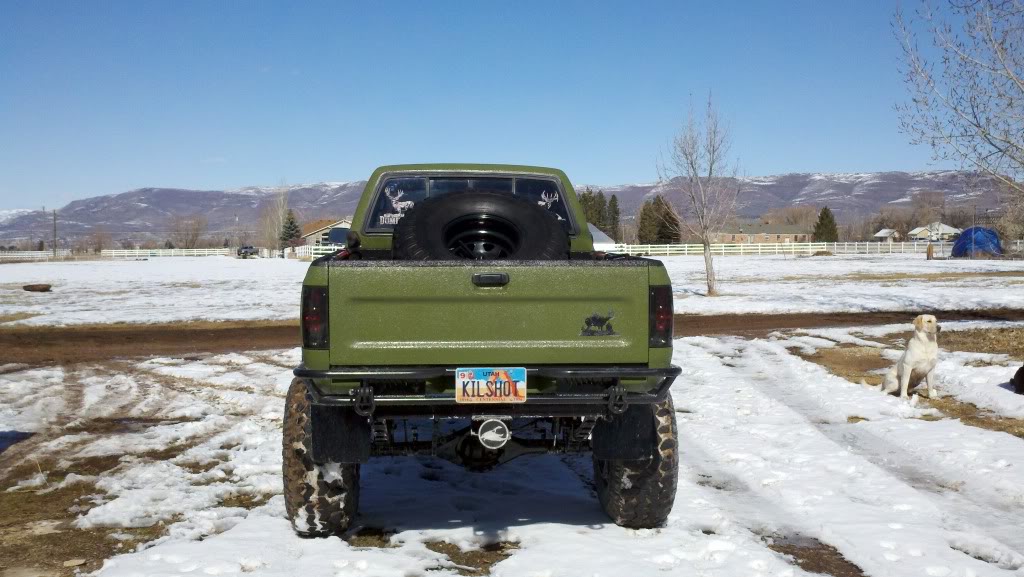
As it sits now:
5" HD springs in front and 5" springs in the rear. 85 toyota 4 runner solid axle, creeper gusset kit, arp studs, custom front diff guard, 4:88's front and rear, lock right in the rear, 36" bias swamper tsl's, 15" steel wheels, custom tire carrier, custom rear bumper, tool box, trail gear front bumper, 8000 lb caisson winch, smittybuilt rope cable, warn hubs, durabak on the truck and bed, tint, new stereo system, 6 under carriage lights, 2 bed lights, 5125 bilstein shocks all around, custom rock sliders, bushwhacker fender flares, magnaflow straight pipe exhaust, high lift and shovel mounted in the bed, I cut out my stock turn signal light brackets off of my stock bumper and welded them on trail gears front bumper to re use my stock turn signals, after market tail lights, head lights, and corner lights, and of course gotta have the camo hunting decals on the windows. Im sure there's more that I haven't listed but you can see it all in the
pics.
02-27-2012, 05:53 PM
#4
Registered User
Thread Starter
iTrader: (1)
Join Date: Jan 2012
Location: SLC, UT
Posts: 68
Likes: 0
Received 0 Likes
on
0 Posts
I have a ton of pics of the sas and the rest of the build along with a couple pics of my previous trucks listed above but its not letting me post pics on here. Keeps telling me to enter the url address and I don't have a photo bucket account to add them to. Never used to ask me that before. I used to just upload them right on here. Anybody feel like posting some pics for me if I email them over or walk me though a way of doing it myself without the url?
02-27-2012, 06:33 PM
#5
Registered User

Get a photobucket account, they are quite handy.
And if you sign up in the next 26 minuets, its free!
Last edited by rattlewagon; 02-27-2012 at 06:37 PM.

Trending Topics
02-29-2012, 05:56 AM
#9
Registered User
Thread Starter
iTrader: (1)
Join Date: Jan 2012
Location: SLC, UT
Posts: 68
Likes: 0
Received 0 Likes
on
0 Posts
Let the pictures begin!
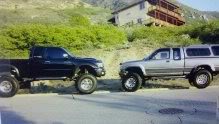
This is my 95 and my 01
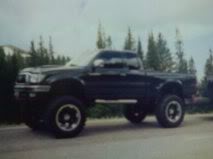
This is my 01 with some more upgrades. It had a TRD supercharger with the 7th injector kit and smaller pulley and ran a 15 flat in Utah in the quarter with 37's on it. With the 4:88 gears I went through a few rear ends with that truck. Had 333 horse power!!
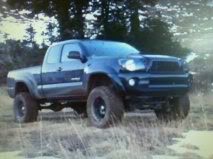
This is my 07 Blacked out with a 6" fabtec lift on 33"s
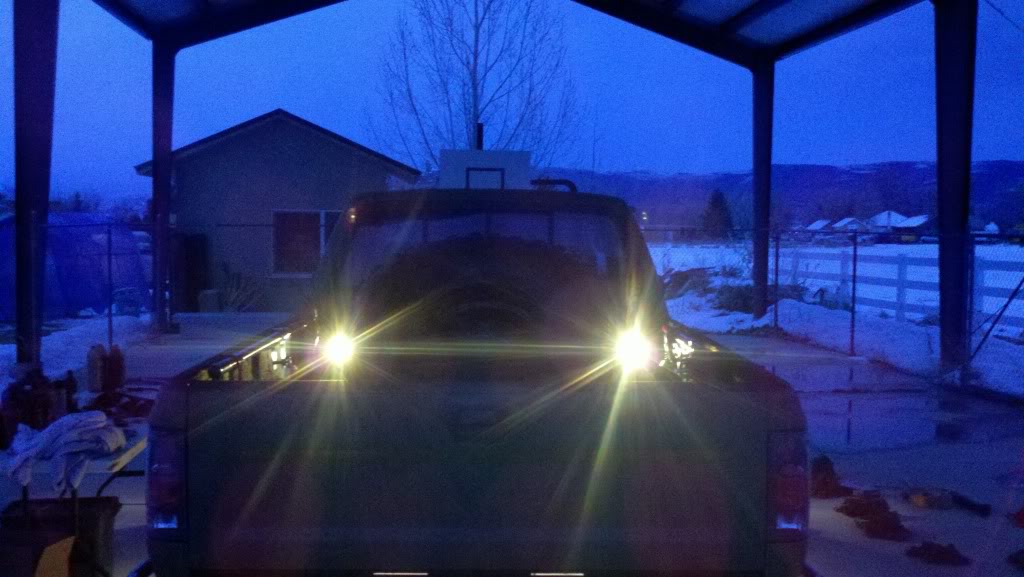
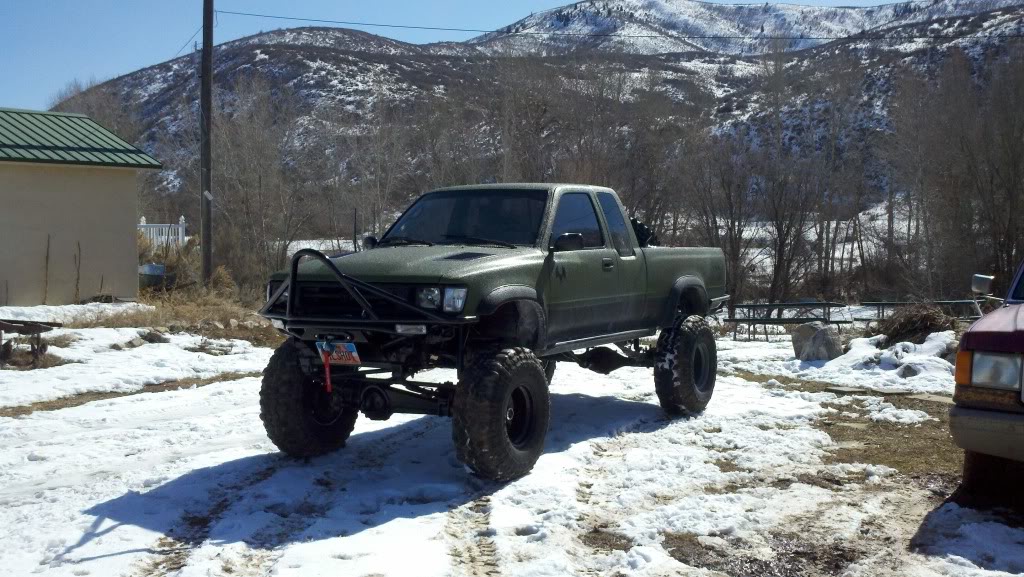
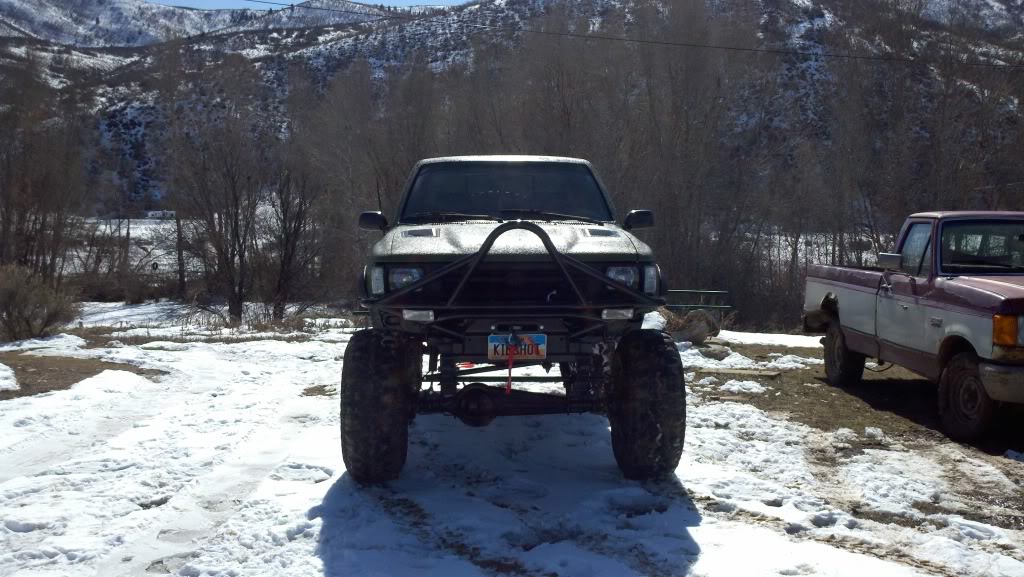
This is the 92 the day I bought it
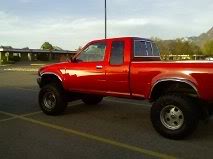
After a few mods to make it my own
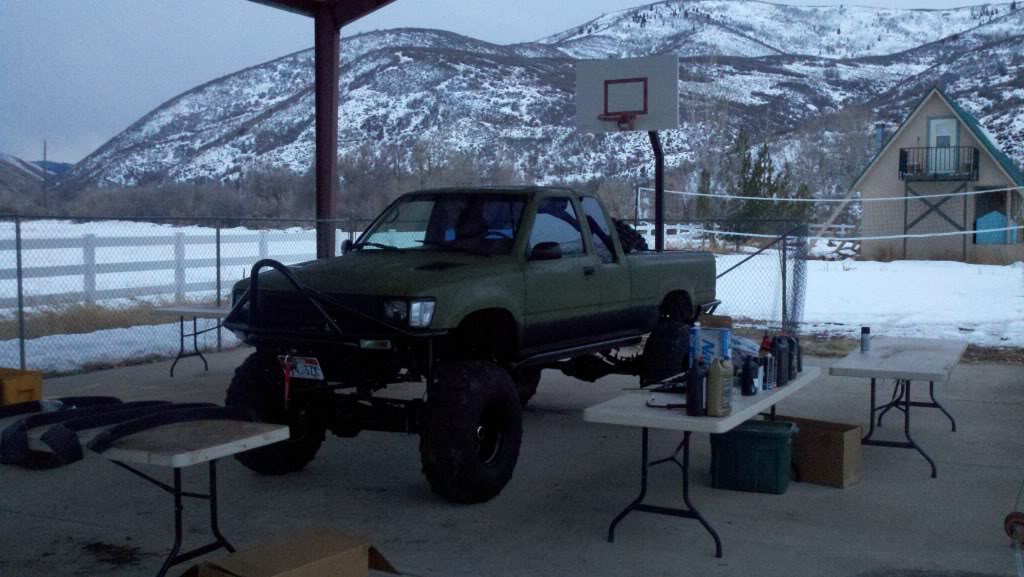
After I put the ball joint spacers and OME springs in the rear
The day I broke my cv axles and the SAS vision became a reality
This is my 95 and my 01
This is my 01 with some more upgrades. It had a TRD supercharger with the 7th injector kit and smaller pulley and ran a 15 flat in Utah in the quarter with 37's on it. With the 4:88 gears I went through a few rear ends with that truck. Had 333 horse power!!
This is my 07 Blacked out with a 6" fabtec lift on 33"s
This is the 92 the day I bought it
After a few mods to make it my own
After I put the ball joint spacers and OME springs in the rear
The day I broke my cv axles and the SAS vision became a reality
 02-29-2012, 06:15 AM
#11
Registered User
Thread Starter
iTrader: (1)
Join Date: Jan 2012
Location: SLC, UT
Posts: 68
Likes: 0
Received 0 Likes
on
0 Posts
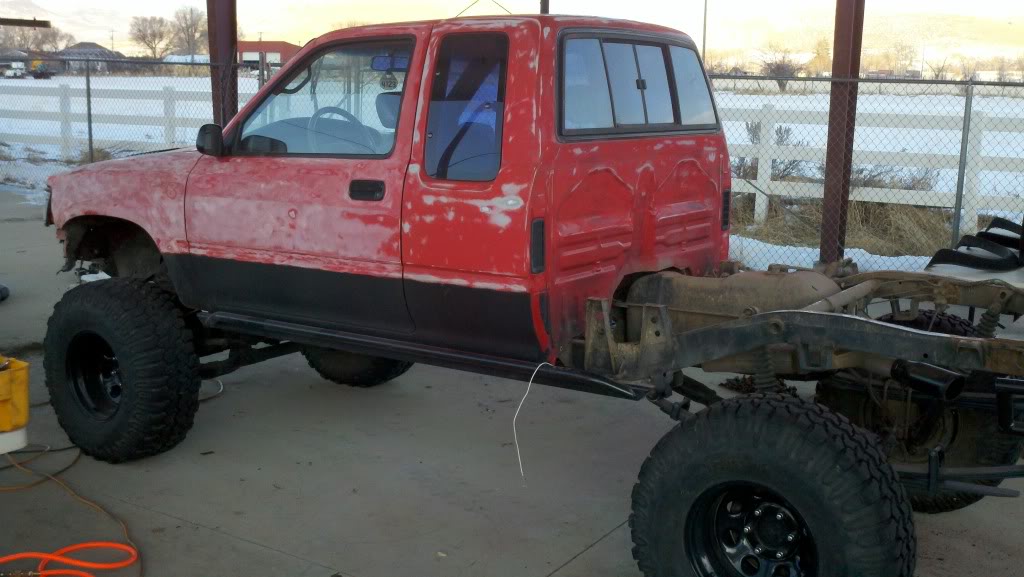
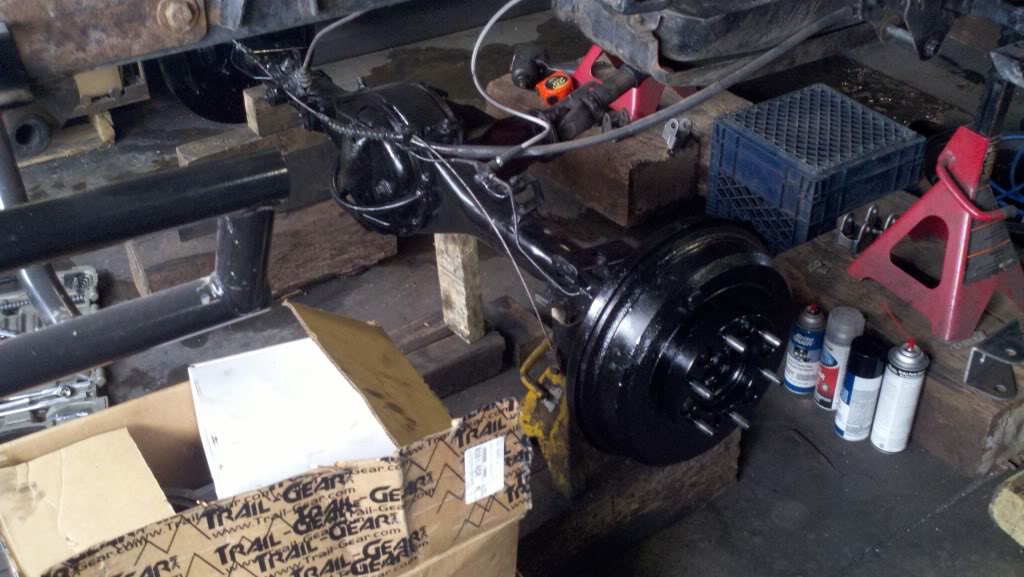
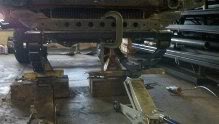
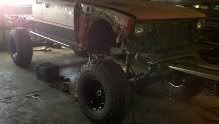
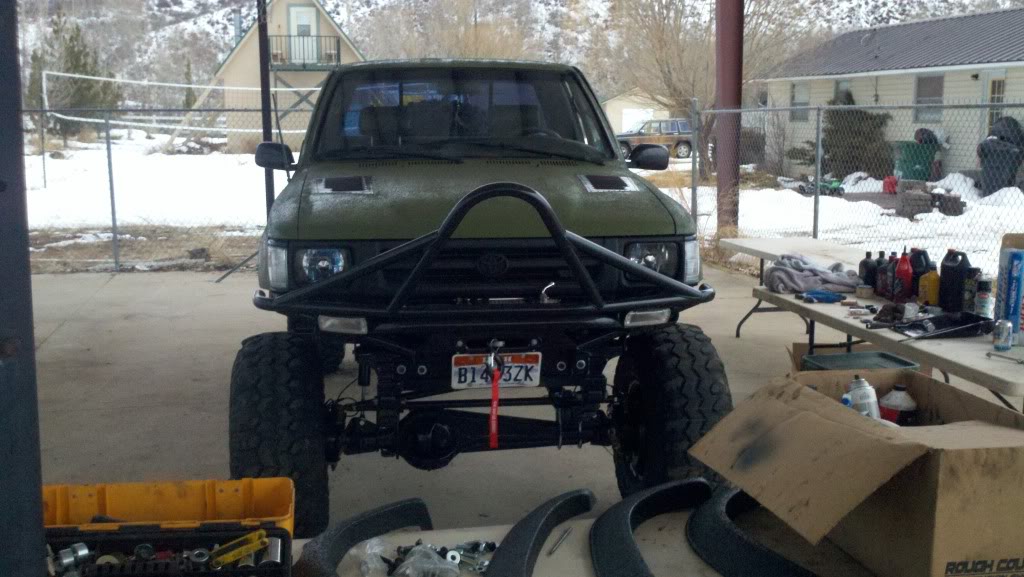
Moved it over to the shop to tear apart the IFS and the rear. What a pain in the ASS all that IFS removal is!! I powder coated a lot of the trail gear parts and painted the rest.
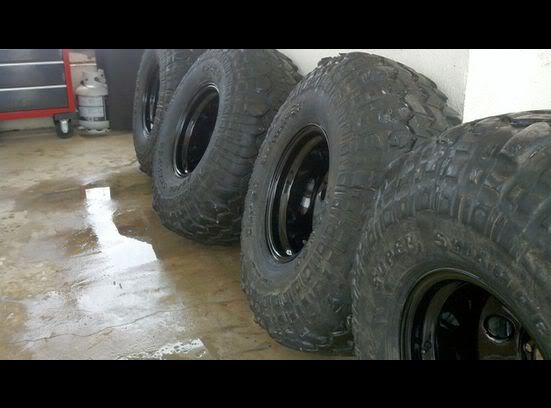
Found a good deal on some 36" swampers with steel wheels and a brand new full size spare to throw on my tire carrier I built.
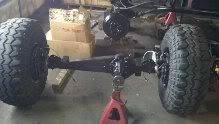
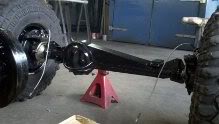
Got the front axle all put together with no major issues.

Found a good deal on some 36" swampers with steel wheels and a brand new full size spare to throw on my tire carrier I built.
Got the front axle all put together with no major issues.
02-29-2012, 06:19 AM
#12
Registered User
Thread Starter
iTrader: (1)
Join Date: Jan 2012
Location: SLC, UT
Posts: 68
Likes: 0
Received 0 Likes
on
0 Posts
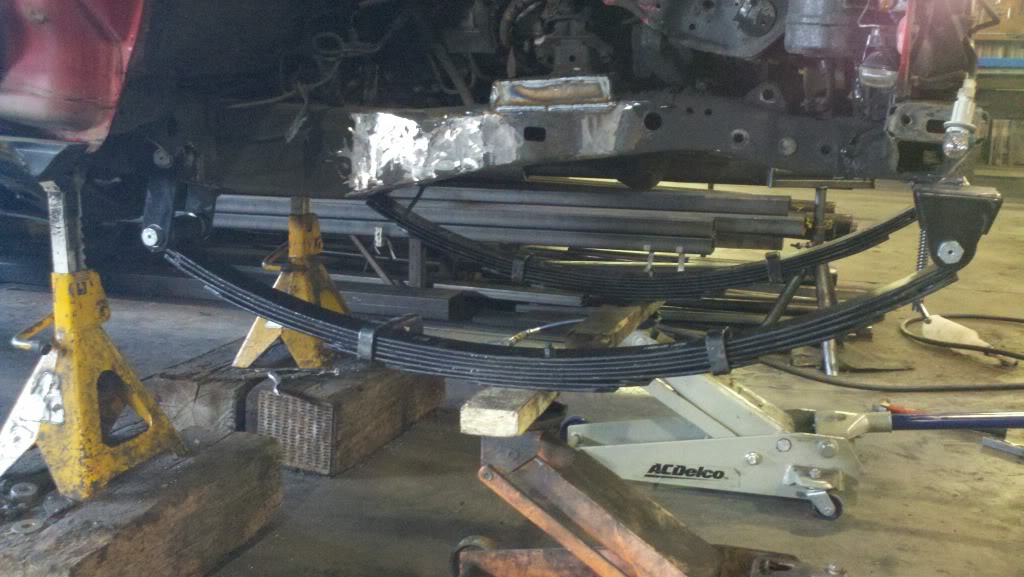
Started working on the rear lift first.
The rear lift about finished
I left part of the stock hanger on the passenger side cause it had my brakelines mounted to it.
The rear lift about finished
I left part of the stock hanger on the passenger side cause it had my brakelines mounted to it.
02-29-2012, 06:29 AM
#14
Registered User
Thread Starter
iTrader: (1)
Join Date: Jan 2012
Location: SLC, UT
Posts: 68
Likes: 0
Received 0 Likes
on
0 Posts
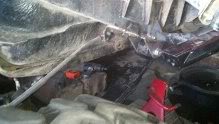
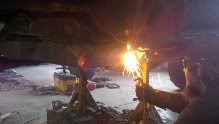
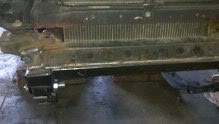
Torched all the IFS brackets off
Then grinded them smooth.

Torched the frame holes and welded the motor mount plate.
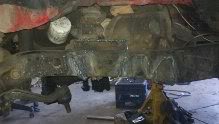
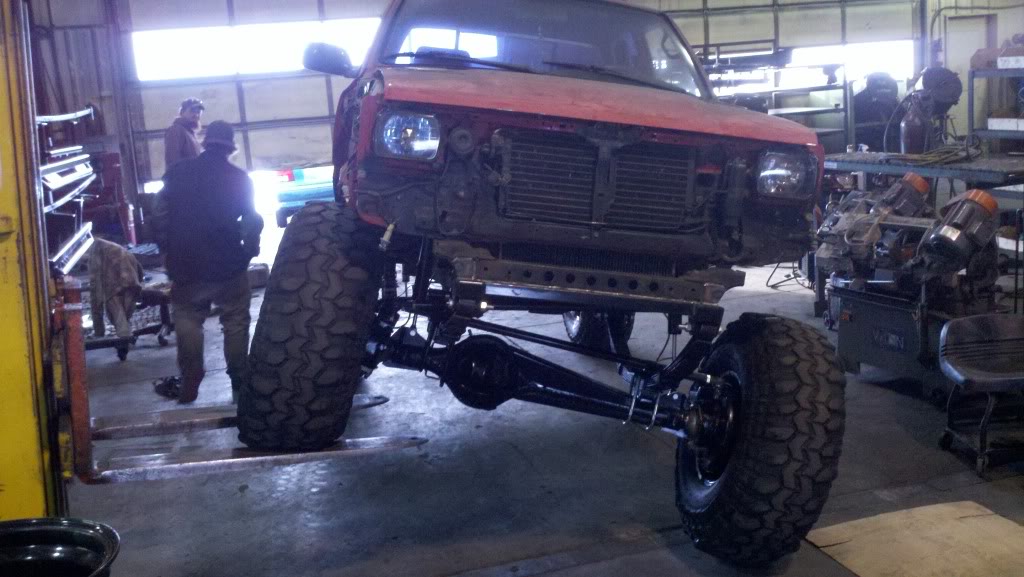
Tacked and clamped the hanger to instal the front springs and then used the floor jacks to test the shackle angle under load.
Welded the front hanger and gussets in.
Moved the front axle in place for intal. Man thats a heavy sucker to move around!!
Then grinded them smooth.
Torched the frame holes and welded the motor mount plate.
Tacked and clamped the hanger to instal the front springs and then used the floor jacks to test the shackle angle under load.
Welded the front hanger and gussets in.
Moved the front axle in place for intal. Man thats a heavy sucker to move around!!
02-29-2012, 06:38 AM
#15
Registered User
Thread Starter
iTrader: (1)
Join Date: Jan 2012
Location: SLC, UT
Posts: 68
Likes: 0
Received 0 Likes
on
0 Posts
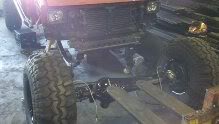
Bolting it up.
Man that passenger side inner u bolt was a pain in the ASS to get on with my front diff guard!!
Put the shock hoops and braces on and then the shocks.
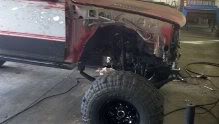
A little flex test to intal the bumpstops and steering stabilizer.
As it sat after that day.

Man that passenger side inner u bolt was a pain in the ASS to get on with my front diff guard!!
Put the shock hoops and braces on and then the shocks.
A little flex test to intal the bumpstops and steering stabilizer.
As it sat after that day.
02-29-2012, 06:52 AM
#16
Registered User
Thread Starter
iTrader: (1)
Join Date: Jan 2012
Location: SLC, UT
Posts: 68
Likes: 0
Received 0 Likes
on
0 Posts
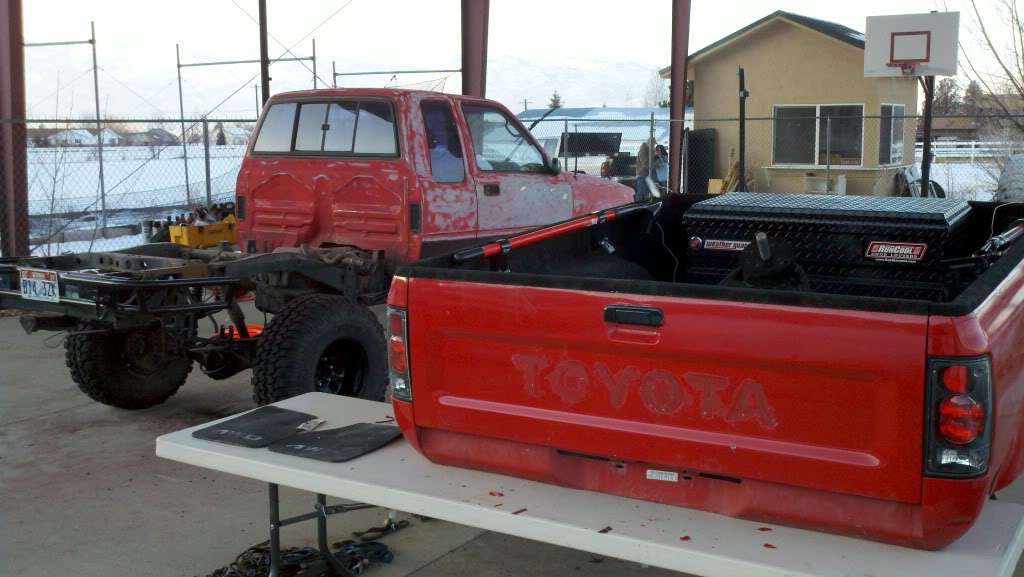
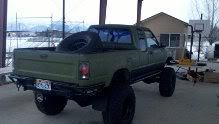
Next was to start painting and durabaking the whole truck. I went with DURABAK because it is super adhesive and has a UV protectant built in that wont fade my color.
http://i1250.photobucket.com/albums/...GTOY88/T36.jpg
Put the bed back on then took it home to start putting on all the goodies.
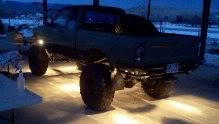
Then I hooked up my under carriage lights and bed lights.
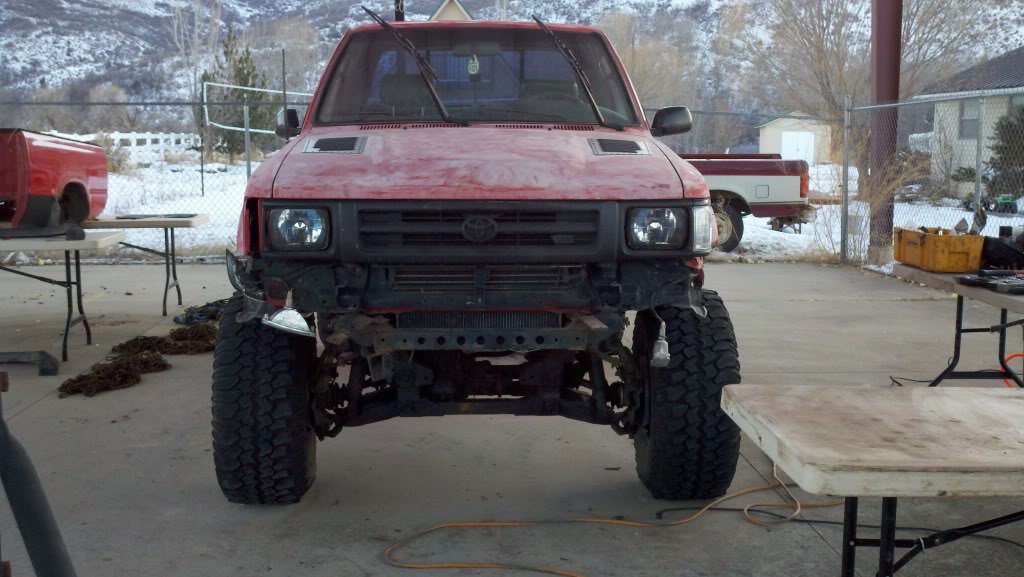
Next was to go get the alignment done and I was actually impressed with how well it alligned up.
Then I put all my decals and logos on and had the winows, windshiled, and tail lights tinted.

http://i1250.photobucket.com/albums/...GTOY88/T36.jpg
Put the bed back on then took it home to start putting on all the goodies.
Then I hooked up my under carriage lights and bed lights.
Next was to go get the alignment done and I was actually impressed with how well it alligned up.
Then I put all my decals and logos on and had the winows, windshiled, and tail lights tinted.
02-29-2012, 07:11 AM
#17
Registered User
Thread Starter
iTrader: (1)
Join Date: Jan 2012
Location: SLC, UT
Posts: 68
Likes: 0
Received 0 Likes
on
0 Posts
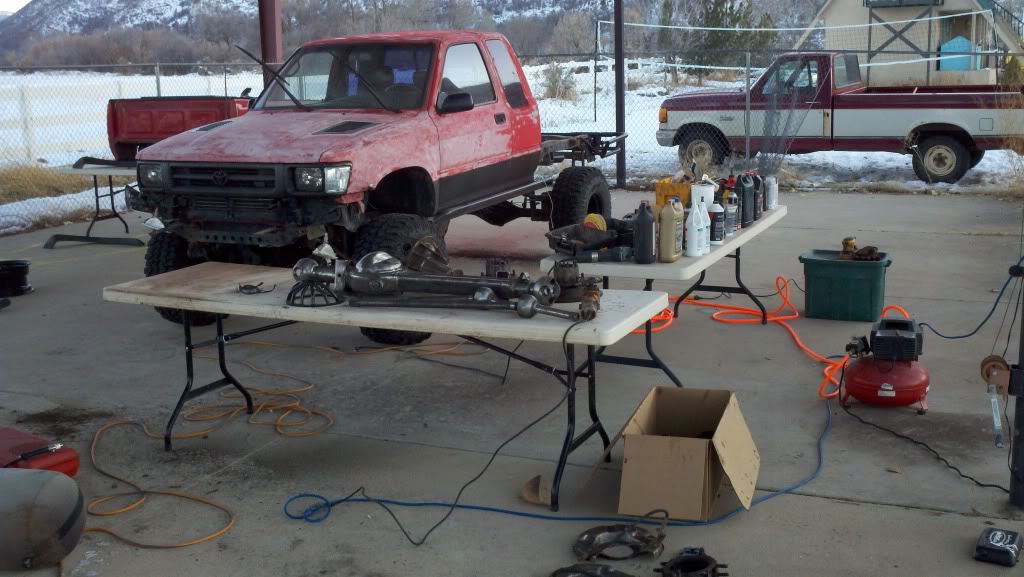
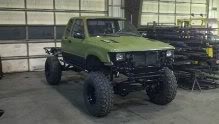
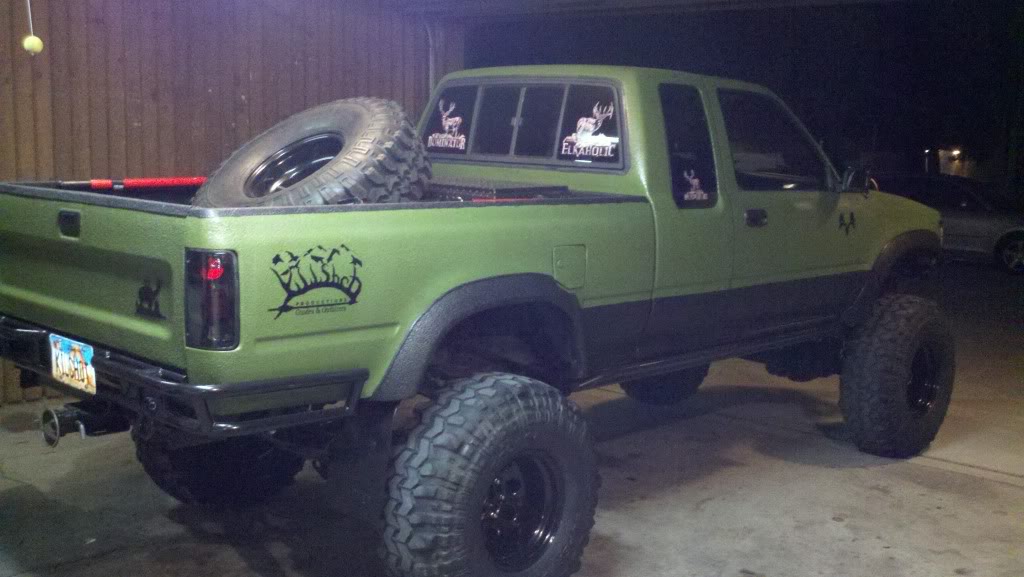
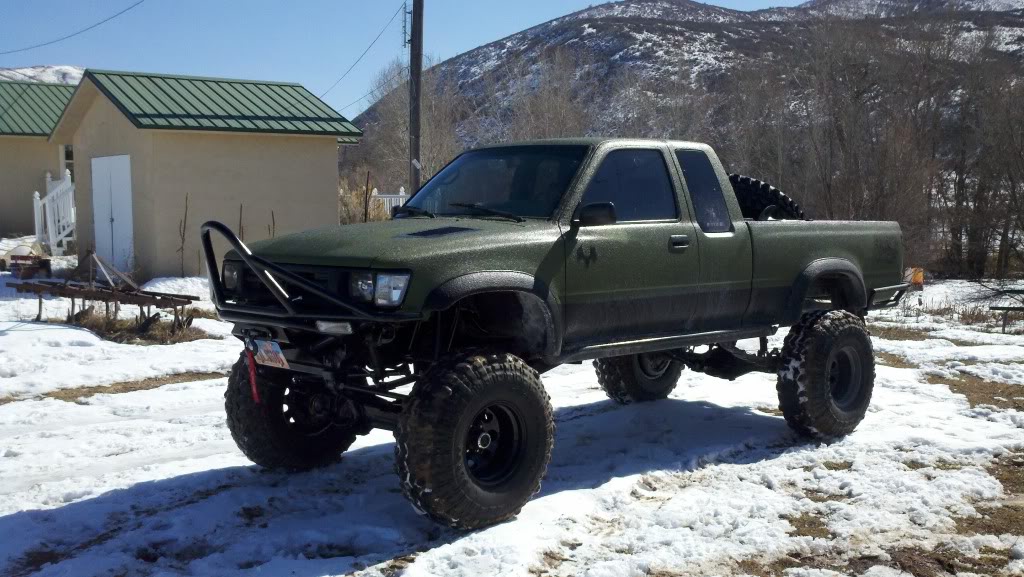
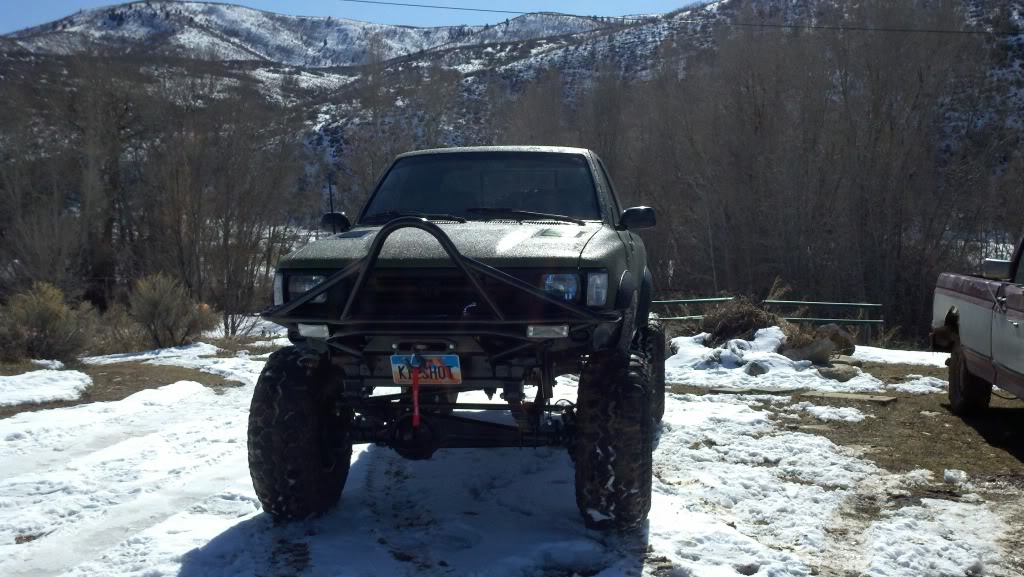
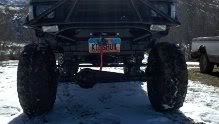
Next I took it down to a buddys shop and had him fine tune the engine for me and replace all the plugs and wires so it runs like a champ now! Heres some pics as it sits today. I still need to figure out a better way to mount my rear shocks to give me more travel on them because there is only about 4-5 inches of rod sticking out of the shaft and it will limit my rear flex.
I hope my build up will help some people out with their own and give them some different ideas. It is good to give back to this site as it has helped me learn a lot about these trucks and how to troubleshoot different issues you come across while doind projects like these.
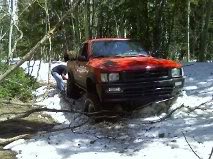
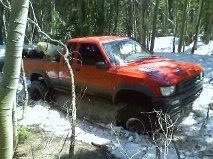
I am picking up my front driveshaft today and will be taking it out on its first wheeling trip this wknd so hopefully I will have some good wheeling pics to post up for you guys soon.
I hope my build up will help some people out with their own and give them some different ideas. It is good to give back to this site as it has helped me learn a lot about these trucks and how to troubleshoot different issues you come across while doind projects like these.
I am picking up my front driveshaft today and will be taking it out on its first wheeling trip this wknd so hopefully I will have some good wheeling pics to post up for you guys soon.


