
W56 Top Shift Rebuild With Marlins Kit - Pics Along the Way
 08-27-2012, 11:56 AM
#21
Registered User
iTrader: (2)
Join Date: Dec 2009
Location: Pleasanton, CA - SF Bay Area
Posts: 2,159
Likes: 0
Received 7 Likes
on
5 Posts
Great work with the photos and step by step - this will help a lot of folks out there!
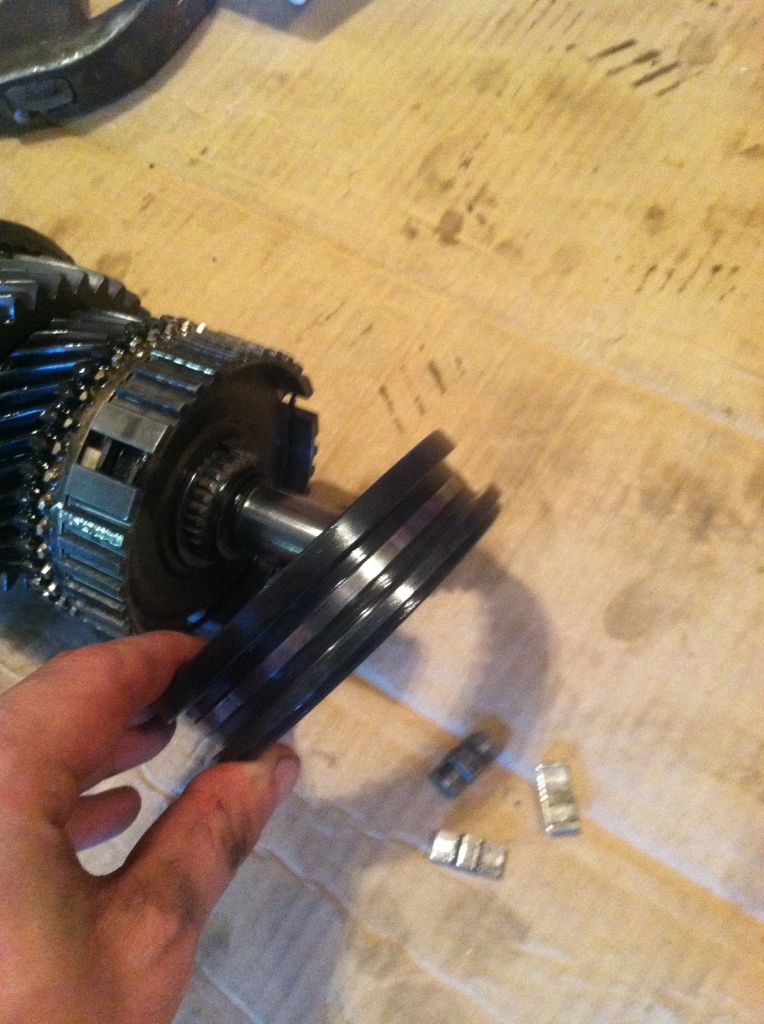
Curious...what are the "tabs" below? I think I found one of these loose when I took mine apart, but maybe it was smaller - mine appeared broken off. I thought it was a tooth of a gear but looked too flat to be. Could not find any gears that appeared to be missing a tooth.
My (broken) tranny is gone now, but I always wondered
Good luck - you're doing great!
 08-27-2012, 12:20 PM
#22

I believe those are referred to as shift keys, but don't quote me on it. They are mentioned in the FSM. They go into the gear hub that you can see just behind the piece that I'm holding. In that hub you can see an "empty" spot. They go right in there. You want to make sure that the raised side of the keys (raised part in the middle) is facing outward (away from the shaft/middle). There is a small lip on the under/opposing side (two "lips" actually) of th keys. This is how they are retained with the two retaining clips that go on each side of the hub gear (piece behind what I'm holding).
Put each retainer clip in the gear - make sure the open spaces on the retainer clips don't overlap.
Place the keys with the raised section in the middle toward the outside - tricky to hold them in place
Then place the piece that I'm holding over it. It is kind of tough to get on, but it "snaps" into place and the whole unit is held there and you don't have to worry about it anymore.
If I get another one, I will take more detailed pics of the process of assembling one. I believe I have one of them left. I should have more progress tonight. I will be putting the shafts back into the center plate this evening and pressing on more bearing/gears/hubs onto the opposing side of the plate.
Last edited by live4soccer7; 08-27-2012 at 12:22 PM.
 08-27-2012, 03:13 PM
#24
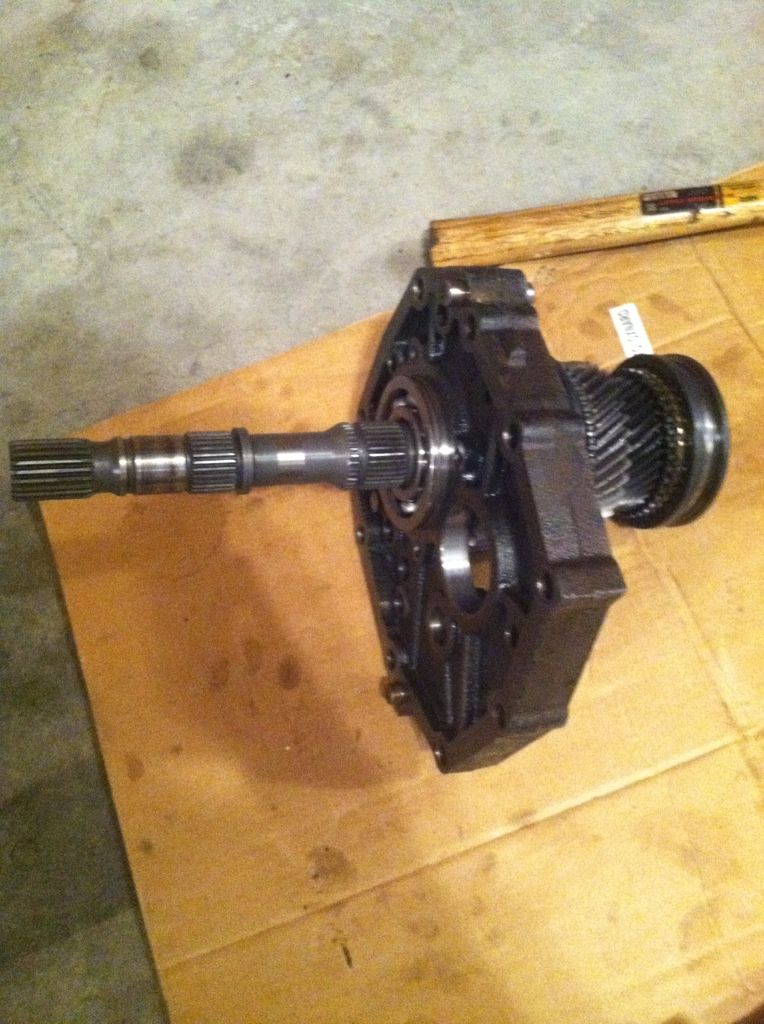
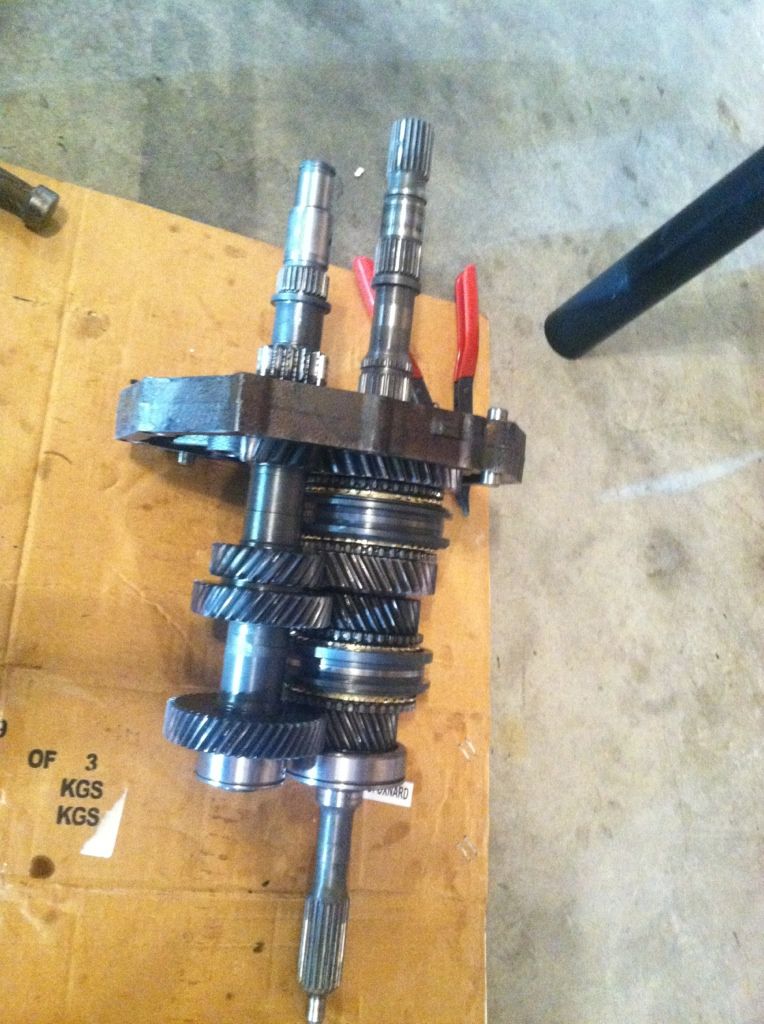
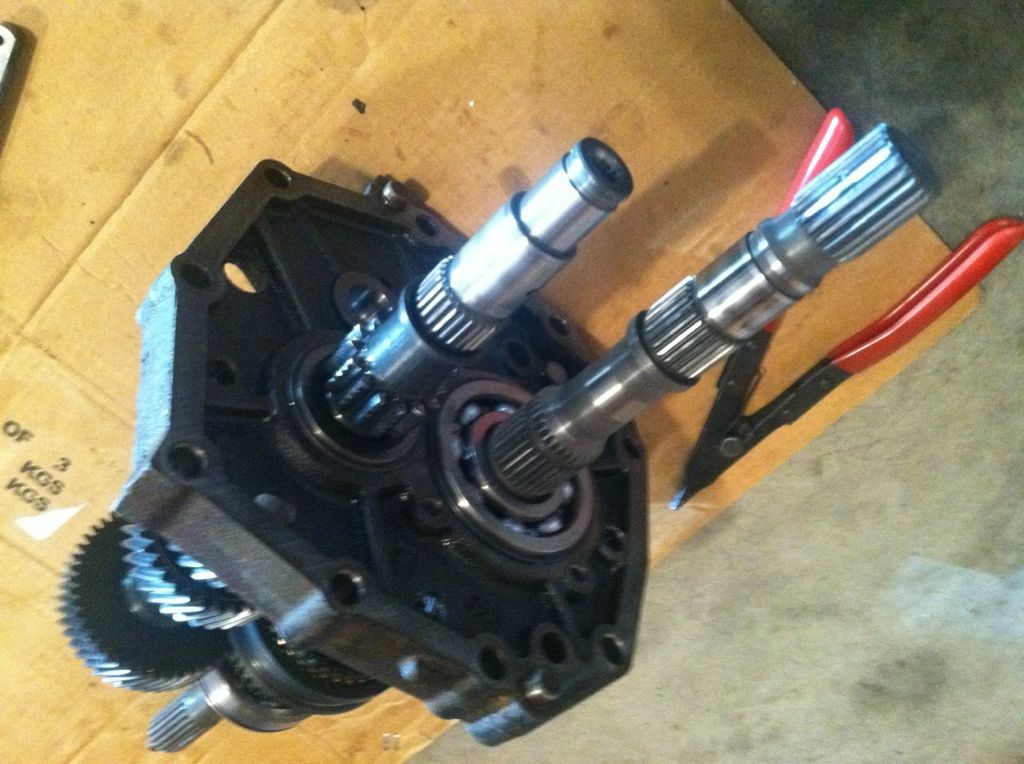
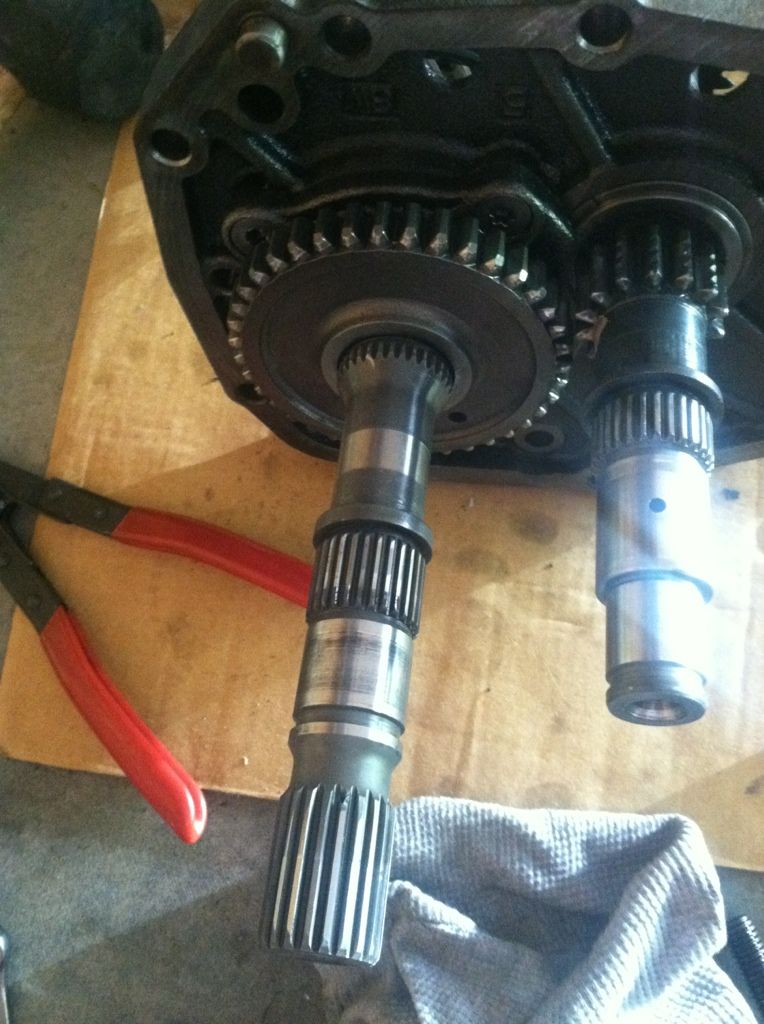
Then the input part of the shaft and the counter shaft are now installed. You must install these simultaneously to get them to fit. The bearing race/cap that goes in the middle plate must not be installed when getting these into place. You will install it after you get the shafts into place and in the plate. This is because it either won't fit or would be way to difficult.
 08-27-2012, 03:24 PM
#27
Registered User

Join Date: Aug 2012
Location: Ohio
Posts: 2
Likes: 0
Received 0 Likes
on
0 Posts
Hey fellow yota owners, i'm brand spankin new to this, but i'm parting out my truck thats very rare and i thought this would be the best place for these parts to find the right owner in need. it's the 86 22ret 4x4. was hit in the rear at 30 mph and cracked my rusty ohio frame. it's the truck i have for my profile pic. everything on it is for sale. for a fair price i'll sell the whole thing together. thanks, and i hope i'm helping someone thats been looking hi and low for these parts. motor is smoking a bit but still runs and boosts fine.
08-27-2012, 04:49 PM
#28


What a dork...
Anywho...those are some nice looking gears. Plenty of meat left on 'em still. Should last a while yet, if you don't go too hard on 'em. They can be expensive to replace. I've got an R150F with 230k HARD miles on it, that needs all of the gears replaced. So it's basically beyond rebuilding is what I'm gettin' at. Which is sad, because I want too. Oh well, I've got a 4T60-E(GM automatic)I'm going start rebuilding here pretty soon. Pretty much because the rebuild kits for it are so cheap, and it sounds like fun to me. I think all it's needs is new clutches, but I'm going to fully rebuild it anyhow. It's only got 124k on it. Should be good for at least another 100k after that. Then I can hammer on the one I swapped in(to my 98 Monte Caro...she's me caro...get it?) with 87k 'till it starts slippin', swap in the rebuild, and rebuild the swap out, so on an' so forth. And see how afar that gets me.

Last edited by MudHippy; 08-27-2012 at 04:56 PM.
08-27-2012, 05:03 PM
#30
Soooo.... I do have a question that I'd like some input on. As far as sealing this thing back up, should I use the toyota red gasket sealer and gaskets, just gaskets, or just sealer?
08-27-2012, 05:05 PM
#31
Not fully. I replaced some bearings in my R150F before it finally let go for good/wasn't worth messing with anymore. Then I bought a used one with 105k on it. Tore it open, inspected it thoroughly, everything looked good. So I just replaced the input/output seals on it, and slapped 'er back together. And that's the extent of my transmission rebuilding experience. It's been good fun so far. Looking forward to more of it. Gears are cool...
Oops, I didn't anser that second question. I've been using just Ultra Copper(no gaskets) on my Toyota manual trans with no leaks so far. But I've never seen the Toyota red leak on anything I've seen it used on. So it has to be pretty good. My 4T60-E has o-rings and rubber coated metal case cover and oil pan gaskets, which I've reused 3 times now without any leakage(they're recommended to be re-used as long as possible). I've got a cork and rubber composite oil pan gasket that came with the filter kit I bought for it. In case I ever need it. I'm kinda scared to use RTV on a auto tranny pan gasket. I've seen that leak every time I've seen it used as such(though I've never seen the Toyota red used there yet).
Oops, I didn't anser that second question. I've been using just Ultra Copper(no gaskets) on my Toyota manual trans with no leaks so far. But I've never seen the Toyota red leak on anything I've seen it used on. So it has to be pretty good. My 4T60-E has o-rings and rubber coated metal case cover and oil pan gaskets, which I've reused 3 times now without any leakage(they're recommended to be re-used as long as possible). I've got a cork and rubber composite oil pan gasket that came with the filter kit I bought for it. In case I ever need it. I'm kinda scared to use RTV on a auto tranny pan gasket. I've seen that leak every time I've seen it used as such(though I've never seen the Toyota red used there yet).
Last edited by MudHippy; 09-01-2012 at 09:43 AM.
08-27-2012, 09:01 PM
#32
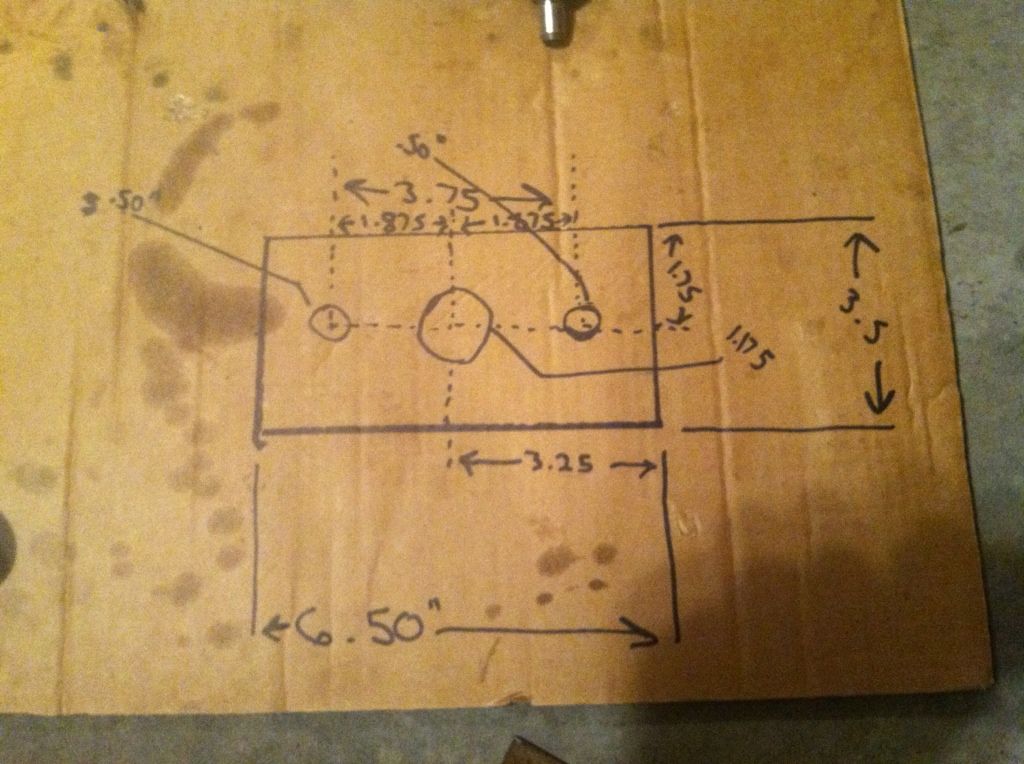
Proposed plate schematics for a custom tool to help press the gears on the other side of the main shaft (output side). I'll post more pics when I have the plate and it'll make more sense then. It'll probably be about 1/4" thick.
Last edited by live4soccer7; 08-27-2012 at 09:04 PM.
08-28-2012, 12:31 PM
#33
Registered User
Join Date: Aug 2012
Location: Ohio
Posts: 2
Likes: 0
Received 0 Likes
on
0 Posts
hey mudhippy... u callin me a dork bro? wtf?? grow up and realize i might not be tryin to f with ur thread and im new to this. i'm not tryin to spam up the place alright? i was lookin all over for parts for my truck untill it got totalled recently. after wanting to f the guy up that hit me, hating my insurance company and ill be honest... crying a lil.. im forced to chalk up my truck that ive dreamed of having since i was 5 years old. now im just tryin to help someone in the position i was just in "not being able to find parts" for their yota. this site is all we old yota owners have to find these parts. so gimme a ˟˟˟in break man and any other new member that might not know exactly where and how to post sht.
08-28-2012, 12:41 PM
#34
Let's keep the thread clean here. This is an information how to/experimental thread for those that want to join along on the process of my tranny rebuild attempt.
There are lots of places to find yota parts. Craigslist, ebay, local junkyards, and the list goes on. There are lots of parts out there. I can almost find anything I want for my truck (stock stuff) within an hour drive from my location. On another note, we are all sorry to hear about your toyota story. Get another one with the money you make, they can be had for really cheap if you find a great deal out here. There is also a for sale/trade forum on YT as well, try posting up in that section.
Thanks and please leave further comments out of this thread unless they are actually related to the thread topic.
08-28-2012, 12:49 PM
#35
FYI: get some 1" thick plates cut out of CS and throw those cast ones that came with the HF 20 ton press away. The cast ones will EXPLODE.
Looking good so far.
I've used Toyota RED FIPG and/with gaskets.
:wabbit2:
Looking good so far.
I've used Toyota RED FIPG and/with gaskets.
:wabbit2:
Last edited by waskillywabbit; 08-28-2012 at 12:51 PM.
08-28-2012, 12:52 PM
#36
Registered User
iTrader: (2)
Join Date: Dec 2009
Location: Pleasanton, CA - SF Bay Area
Posts: 2,159
Likes: 0
Received 7 Likes
on
5 Posts
So, anyway, back to gears....
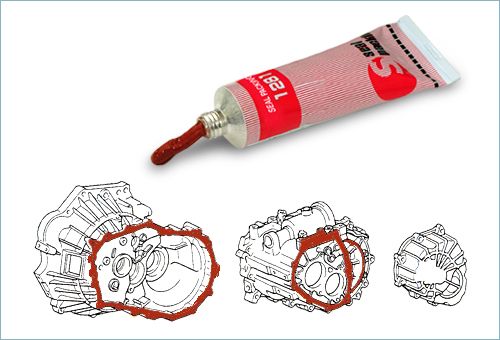
I used red FIPG on mine, but used the factory gasket for the T case (not FIPG red).
I had to take mine apart (front and rear casings/T case) due to a leak, so I just re sealed everything while I was at it. No leaks after 3,000 miles so far.....
Don't use FIPG black - it's for motor oil and not gear oil - use RED.
Keep up the great work!
I had to take mine apart (front and rear casings/T case) due to a leak, so I just re sealed everything while I was at it. No leaks after 3,000 miles so far.....
Don't use FIPG black - it's for motor oil and not gear oil - use RED.
Keep up the great work!
08-28-2012, 12:53 PM
#37
Thanks for the tip, luckily there hasn't been any extensive pressure situation. I think pulling some of the gears off on the output side at the beginning was by far the worst. We had to hook up the gear pullers to an IR titanium 1/2" impact gun to get them off. I thought for sure something was going to break or fly off, likely the puller. Worked like a charm. Before trying that, we had break bars attached to the wrench and the gear puller and it still wouldn't budge.
Philbert: Thanks for the input. I currently have a gasket on the tranny to tcase mating area. Yes, I will be using the RED FIPG. I can't remember if I said red or black earlier in the thread, but I meant to say red if I didn't. I will take your word on that one and seal this thing up with red when the time comes. Hopefully soon.
Philbert: Thanks for the input. I currently have a gasket on the tranny to tcase mating area. Yes, I will be using the RED FIPG. I can't remember if I said red or black earlier in the thread, but I meant to say red if I didn't. I will take your word on that one and seal this thing up with red when the time comes. Hopefully soon.
Last edited by live4soccer7; 08-28-2012 at 12:55 PM.
08-28-2012, 03:47 PM
#38
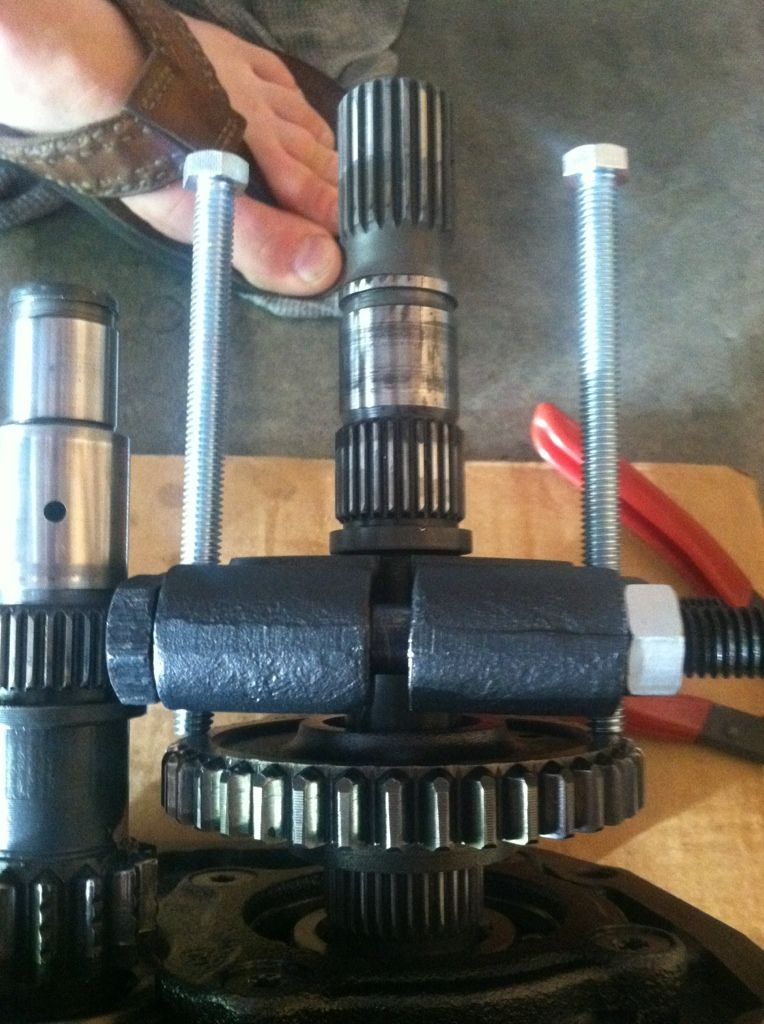
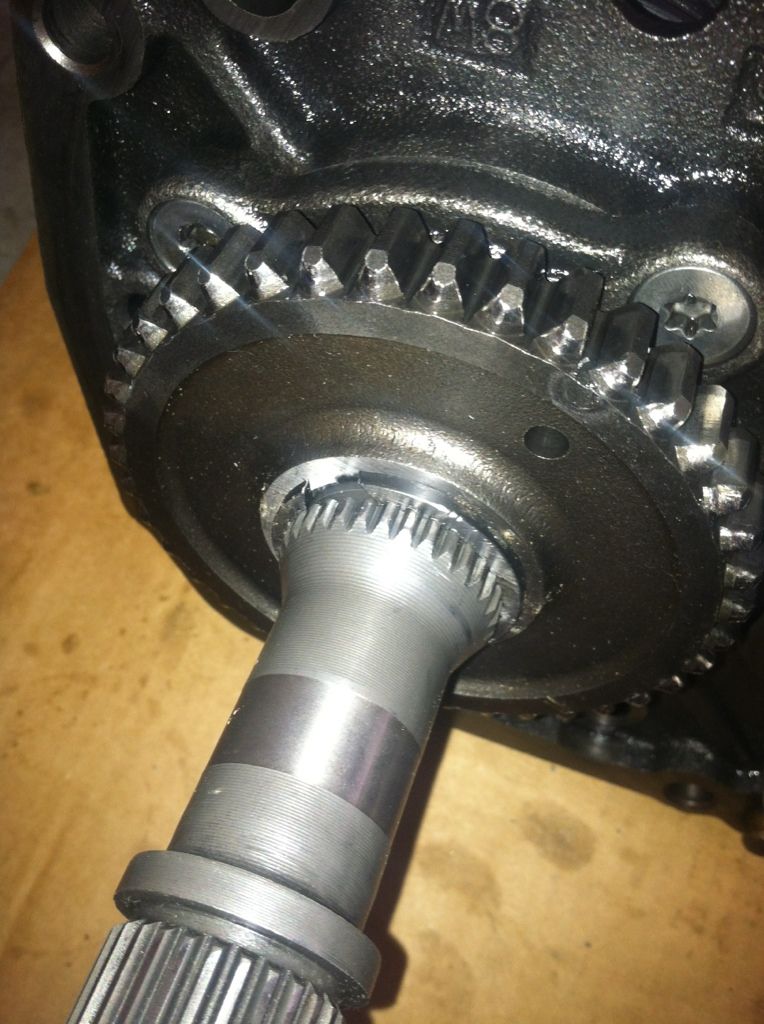
Here is a picture pressing on this gear (1st perhaps). I can't remember off the top of my head. It could be reverse. Anyways I had to get 5" bolts for this and the next part of the pressing (hopefully done tonight). I forgot to add, I also used two small steel plates and ended up putting them between the gear and the both bolts (one small plate for each bolt). This is so that the bolt didn't slide off the gear and get the teeth while pressing it on. It went on very easily (compared to removal). You want to note the direction that the gear goes on.
Last edited by live4soccer7; 08-28-2012 at 03:58 PM.
08-28-2012, 03:55 PM
#39
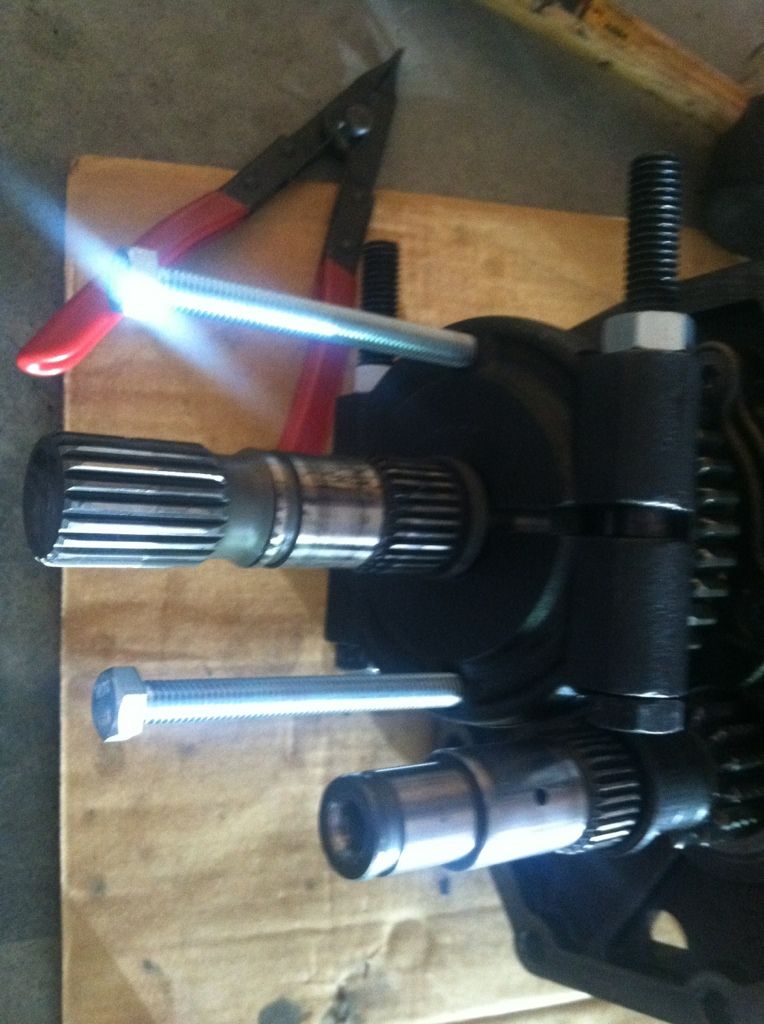
Installed the snap ring on this guy. I had to pound the snap ring on because it was a little tighter than previously. It is likely my thrust clearance measurements that were made prior to the last guy that tore it apart. Literally a thousandth or two would have made it go on without having to "hammer" it on. I used a large bolt and a hammer to hammer the c-clip on once it was in place. I didn't hit extremely hard as it is a force that is perpendicular to the main bearing and didn't want to change any kind damage at all. I'm sure there was nothing to worry about, but i'd rather caution on the safe side of things.
I made a mistake and never replaced the center bearing on the counter shaft. I went to check my bearing box to be sure that I had replaced everything in the kit up until this point. There was a bearing that had the c-clip on that look extremely similar to the bearing that goes on next. I had mistaken it for the wrong one and it was actually the counter shafter center bearing that goes in the plate. I tore it apart and pulled the shafts out of the center plate and then put the new bearing on. This set me back about an hour today.
I'm waiting on the plate that will help press on the next gear and bearing. Hopefully that arrives before too long. I have someone that has a hydraulic punch that can make it in a matter of minutes. Hopefully it fits and will be a relatively easy press. That is the step that I got the 5" bolts for.
08-28-2012, 04:49 PM
#40
There's 2 types of black actually(one for oil apps., one for coolant apps.). Neither are for gear oil apps., but neither is the red technically. None the less, Toyota uses their red FIPG(1281) on transmissions(manual and automatic) and transfer cases. And it works excellent for that IMO. However, there are no claims made as for it being better than any other types of RTV/FIPG when used in gear oil applications. Though there are claims for it being better in ATF applications.
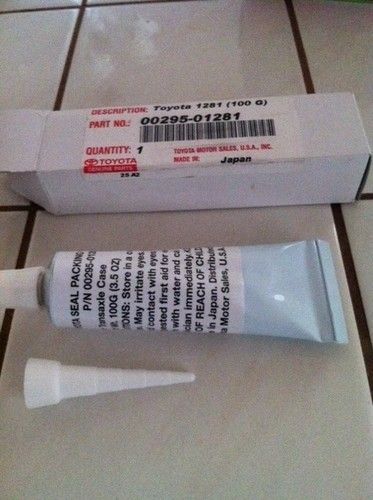
Toyota seal packing red (1281) is equivalent to ThreeBond 1281, who claims the following:
And notice how the tube states Transaxle Case.
FWIW, Marlin recommends Ultra Grey for transmissions and transfer cases. I've used it for axle housings/differentials(as well as coolant apps.) without issues.
But the only RTVs that I've heard of that are claimed to offer better gear oil resistance than other types are ThreeBond 1215, TB1216A(or TB1216F), and Permatex Gear Oil RTV. None of which have an OEM/Toyota equivalent.
Toyota seal packing red (1281) is equivalent to ThreeBond 1281, who claims the following:
1281 Non solvent type silicone-based
- Excellent ATF resistance.
- Corrodes copper and copper-based alloys. Can not be used for copper and copper-based alloys in tightly-sealed state
FWIW, Marlin recommends Ultra Grey for transmissions and transfer cases. I've used it for axle housings/differentials(as well as coolant apps.) without issues.
But the only RTVs that I've heard of that are claimed to offer better gear oil resistance than other types are ThreeBond 1215, TB1216A(or TB1216F), and Permatex Gear Oil RTV. None of which have an OEM/Toyota equivalent.
ThreeBond 1215 Non solvent type silicone based
ThreeBond 1216 Silicone Liquid Gasket
• Excellent oil resistance (engine oil, gear oil, transmission oil)
• Excellent chemical resistance
• Excellent heat and cold resistance. Rubber elasticity will be retained over a wide range of temperature from -60�C to 200�C.
- General-purpose liquid gaskets.
- Excellent engine-oil resistance.
- Excellent gear-oil resistance.
- Corrodes copper and copper-based alloys. Can not be used for copper and copper-based alloys in tightly-sealed state.
ThreeBond 1216 Silicone Liquid Gasket
• Excellent oil resistance (engine oil, gear oil, transmission oil)
• Excellent chemical resistance
• Excellent heat and cold resistance. Rubber elasticity will be retained over a wide range of temperature from -60�C to 200�C.
Permatex� Gear Oil RTV Gasket Maker
OEM specified. Specially formulated to withstand the harsh gear oil environment found in differentials and transfer cases. Because gear oil has friction modifiers that break down normal RTV and cause leaking, this specialty silicone has been tested to OEM specifications to ensure complete sealing. As a gasket maker it seeks and seals leak paths that cut gaskets cannot.
OEM specified. Specially formulated to withstand the harsh gear oil environment found in differentials and transfer cases. Because gear oil has friction modifiers that break down normal RTV and cause leaking, this specialty silicone has been tested to OEM specifications to ensure complete sealing. As a gasket maker it seeks and seals leak paths that cut gaskets cannot.
Last edited by MudHippy; 09-05-2012 at 07:24 AM.


