
 02-09-2016, 10:13 AM
Last edit by: IB Advertising
See related guides and technical advice from our community experts:
Browse all: Interior Guides
- Toyota 4Runner 1984-1995 How to Swap Gauge Cluster
Step by step instructions for do-it-yourself repairs
Browse all: Interior Guides

SR5 Gauge Cluster Swap - How-to, with pics!
12-06-2011, 09:06 AM
#221
So I finally got around to doing my electronic speedo conversion over the weekend... I took lots of pics and I'll be doing a write up sometime over the next week or two.
ANYWAY... my new cluster was from a V6 and yet again needs to be calibrated for the 4cyl, unlike the last time I swapped the cluster I don't have a stand alone tach that I can use to calibrate by.
Thinking about it I devised a simple and effective way to calibrate the cluster
1. First, look up my last post explaining the potentiometer location. Also, if you have one, use a multimeter to get the original pot value (this is just in case you screw something up; you can always bring it back to where you started and try again)
2. With the cluster out and the engine running (while in park or neutral) hold the throttle such that the RPMs read 2000 exactly.
3. While holding the throttle as steady as you can: adjust the pot until the RPMs read 3000 exactly.
4. DONE!
--------------
Think about it:
The tach gets a certain number of pulses per rotation based on the coil
That means for every 4 pulses the tach sees it's expecting 6 so the tach reads 4/6ths (or reduced: 2/3rds) what it should be...
When the tach is reading 2K rpm it means the engine is really running at 3K rpm. So by holding the throttle steady at a known RPM we've given ourselves a calibration point.
For making a 4 cyl cluster work with a v6 you'd do the opposite: hold the throttle steady where the tach reads 3K then adjust it such that it reads 2K.
Last edited by twistedsymphony; 12-06-2011 at 09:10 AM.
 12-24-2011, 06:18 PM
#222
Registered User

Join Date: Nov 2011
Location: Beaumont, CA
Posts: 14
Likes: 0
Received 0 Likes
on
0 Posts
THANKS 'bleeder and everyone else for this thread- just awesome.
I just finished this mod and would like to make the following notes:
My truck (for my daughters to learn to drive in) is a '90 2wd with 22re and manual trans.
1) The cluster I got on epay was from a "90-92 4Runner 4 cyl"; it had several bad scratches (one about half way across the entire clear window) and the top left mounting tab was broken off. The Seller denied the damage but I got it for $50 including shipping so "oh well". I was able to polish all the scratches out with a 3M Headlight Restoration Kit #39014 ($22.00 at AutoZone) with about 1/2 hour of elbow work. DO NOT use any of the polishing pads NOR a drill!!!! This plastic is way softer than headlight lenses- I tried all the polishing pads in a corner and they all scratched heavily. All you need to use is the foam pad for the compound and the compound itself.
2) I tried to swap the clear windows and was able to pry the original off but the replacement from SR5 still had very good glue and things started to get cracked; that's why I polished the window instead.
3) I wasn't able to disassemble the odometer so I used a drill and a 1" rubber disk I punched out of some sheet I had and mounted it to a 10-24 x 2" screw to run the mileage back. I was getting about 10,000 miles back every 7 minutes (had to go 120,000).
4) I replaced the oil pressure switch with a Toyota sensor #83520-35031 @ $56 each because NAPA wanted $65 for an Echlin brand unit

5) Before I installed the speedo I plugged the cluster in to the truck and ran the engine at idle and at 3,000 rpm with a digital timing light featuring a tachometer and adjusted the analog tach; much easier than trying to get to it later.
THANKS to all of you here including the Mod's!!!
-Ken in SoCal
I just finished this mod and would like to make the following notes:
My truck (for my daughters to learn to drive in) is a '90 2wd with 22re and manual trans.
1) The cluster I got on epay was from a "90-92 4Runner 4 cyl"; it had several bad scratches (one about half way across the entire clear window) and the top left mounting tab was broken off. The Seller denied the damage but I got it for $50 including shipping so "oh well". I was able to polish all the scratches out with a 3M Headlight Restoration Kit #39014 ($22.00 at AutoZone) with about 1/2 hour of elbow work. DO NOT use any of the polishing pads NOR a drill!!!! This plastic is way softer than headlight lenses- I tried all the polishing pads in a corner and they all scratched heavily. All you need to use is the foam pad for the compound and the compound itself.
2) I tried to swap the clear windows and was able to pry the original off but the replacement from SR5 still had very good glue and things started to get cracked; that's why I polished the window instead.
3) I wasn't able to disassemble the odometer so I used a drill and a 1" rubber disk I punched out of some sheet I had and mounted it to a 10-24 x 2" screw to run the mileage back. I was getting about 10,000 miles back every 7 minutes (had to go 120,000).
4) I replaced the oil pressure switch with a Toyota sensor #83520-35031 @ $56 each because NAPA wanted $65 for an Echlin brand unit
5) Before I installed the speedo I plugged the cluster in to the truck and ran the engine at idle and at 3,000 rpm with a digital timing light featuring a tachometer and adjusted the analog tach; much easier than trying to get to it later.
THANKS to all of you here including the Mod's!!!
-Ken in SoCal
Last edited by blisters13; 12-24-2011 at 07:46 PM.
12-27-2011, 03:45 PM
#223
Registered User
Join Date: Nov 2011
Location: Beaumont, CA
Posts: 14
Likes: 0
Received 0 Likes
on
0 Posts
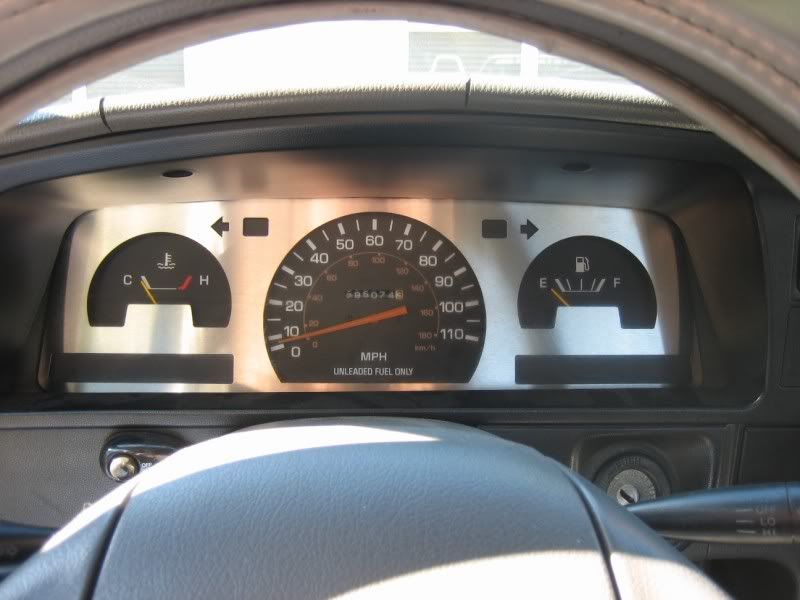
Difference in temp gauges SR5 upgrade
Hi All:
I just completed the mod you wrote up (THANKS!!!) and found that the temp gauge on the SR5 cluster reads in the middle while the old DLX gauge used to read in the first 1/4 of the range. Is it normal to have a mid-gauge reading for the SR5's or do I need to replace the temp sender unit?
Note: I just did the timing chain service and filled the cooling system with Toyota pre-mix pink coolant; the thermostat and radiator are new.
 01-02-2012, 11:44 AM
#227
Registered User
Join Date: Feb 2010
Location: Seattle
Posts: 156
Likes: 0
Received 0 Likes
on
0 Posts
I just picked up an 89 pickup and it doesn't have a tach I had a couple of questions about this cluster swap
1. did anyone ever determine what the proper tach resistance was for a 22RE? the guide linked to earlier claims 31.1Kohm for a 8cyl and that the original cluster was 42.5Khom but never stated if the original was a 6cyl or a 4cyl... most of the clusters I've found are from V6s so it'd be nice to know.
1. did anyone ever determine what the proper tach resistance was for a 22RE? the guide linked to earlier claims 31.1Kohm for a 8cyl and that the original cluster was 42.5Khom but never stated if the original was a 6cyl or a 4cyl... most of the clusters I've found are from V6s so it'd be nice to know.
To those people suggesting "2-3 degrees" you are slightly incorrect. The potentiometer is suuuper sensitive and easy to go too high. I wouldn't adjust it without a before and after meter reading. It is a very small amount of clockwise turn. Someone else suggested a 20k increase which seems to be exactly right.
01-04-2012, 09:10 AM
#228
Registered User
Join Date: Sep 2011
Location: West Alabama
Posts: 29
Likes: 0
Received 0 Likes
on
0 Posts
Hey guys, I just swapped my cluster out. If anyone with a stock 22re and W55 (stock rear end) could give some speeds and RPM ranges at those speeds that would be awesome. Say, 5th gear at 60mph =?rpm? This would help people make sure their set up is working properly.
Also, I changed out the oil pressure sending unit, and the gauge is not reading. I think I have a bad gauge in the cluster. Because the sending unit cost me $50, I took it back and got my money. I am just going to install a autometer electronic gauge, which should be better anyway, and only about $60-70. Right now I have a check engine light, likely because I do not have the idiot light sensor plugged in. I'm just going to leave it plugged in so the light goes off... anyone see a problem with that if the cluster is already screwed up?
Jon
EDIT: my truck is a 95 base pickup. My tach was not working so I had to run the wire from the P marked screw on the cluster to the yellow wire on the ignition near the coil. I just opened up the connector, put a skinny wire in, and plugged it back up. No splice needed.
Last edited by HeroEnVec; 01-04-2012 at 09:14 AM.
01-04-2012, 02:15 PM
#230
you can check the CEL code easily though by jumping a few pins in the fusebox and counting pulses....
http://www.ncttora.com/fsm/1993/engine/26diagnosi.pdf
02-02-2012, 08:08 PM
#231
Registered User
Question to super I see you have separated the front plastic to customize on the first page I would like to remove to clean the foggyness from the inside. It feels brittle and not sure how to go about it, hot exacto mayby?? looks to have a light coat of some sort of glue to it.
Any tips and tricks for this?? thanks
Disco.
Any tips and tricks for this?? thanks
Disco.
02-02-2012, 08:15 PM
#232
Registered User
Join Date: Feb 2010
Location: Seattle
Posts: 156
Likes: 0
Received 0 Likes
on
0 Posts
Question to super I see you have separated the front plastic to customize on the first page I would like to remove to clean the foggyness from the inside. It feels brittle and not sure how to go about it, hot exacto mayby?? looks to have a light coat of some sort of glue to it.
Any tips and tricks for this?? thanks
Disco.
Any tips and tricks for this?? thanks
Disco.
I found the vast majority of the swirling and clouding was on the exterior. I'd focus on that side, the interior was just a little dusty and came clean with a damp cloth.
Last edited by ra33it; 02-02-2012 at 08:17 PM.
02-02-2012, 08:17 PM
#233
Registered User
Join Date: Apr 2011
Location: Tucson, AZ
Posts: 44
Likes: 0
Received 0 Likes
on
0 Posts
7 months later and everything still works great. My daughter loves the gauges compared to what came stock with the truck.
The only problem that we found is that the low gas light doesn't come on any longer. Not sure how to go about fixing that. Anyone have any ideas?
The only problem that we found is that the low gas light doesn't come on any longer. Not sure how to go about fixing that. Anyone have any ideas?
Completed the swap on my daughter's truck today. Thanks for the great write up and tips! The swap in my case was plug and play. I found a gauge set from the same year truck so even the speedo drive didn't need changed. All I did was adjust the mileage on the odometer to be the same as the stock one that I took out.


02-02-2012, 08:22 PM
#234
Registered User
Join Date: Feb 2010
Location: Seattle
Posts: 156
Likes: 0
Received 0 Likes
on
0 Posts
It cost me about 15 bucks for the Long Life bulbs to replace every bulb in the unit.
02-02-2012, 08:50 PM
#235
Registered User
My bad it is a 90 sr5 from a runner going in my 91 p/u and I tried to remove the bezel from my basic cluster to clean and it is glued in certain spots and It ended up starting to crack from where I was trying to pry it off. I was doing the prying in a paint can lid motion and it came off the tabs but more around the bottom it wasn't budging??
May'by some years the glue was not applied as well?? hmmm well I just need to do it carefully I don't want to crack the new one.
As far as your fuel light I do believe it was covered in this thread from what I read it is a different sending unit with an extra wire to trip the low fuel.
Edit I have separated the two pieces using the tabs but I am trying to separate the actual plastic from the gauge covers if that makes sense.
Last edited by Discombobulated; 02-02-2012 at 08:54 PM.
02-02-2012, 09:13 PM
#236
Registered User
Join Date: Apr 2011
Location: Tucson, AZ
Posts: 44
Likes: 0
Received 0 Likes
on
0 Posts
Thanks, I'll have to go back and see what I can find. If that's the case, then my daughter can live without the fuel light for a while as I don't really want to drop the tank for just that.
02-02-2012, 10:31 PM
#237
Registered User
I did end up getting my bezel apart I just had to take it easy no prying just worked it out with a plastic trim tool. Well still waiting on oil sensor and LEDs but I might just post some pretty pics to add to the thread
02-16-2012, 09:58 PM
#238
Registered User
Thought I would add some stuff from my swap new to my toyota I have been pondering this swap for a while and I finally dug into it, and just thought I would add to the thread of a couple things you might look at before buying from the yard or on e-bay

Notice anything missing?? Yea no 4wd light got this cluster off of e-bay listed as a cluster from a 4-runner 3.0 4wd. Hmmmmm might ask the seller to make sure of this!!!!
So after breaking the bezel polishing this gauge I went and got one from the yota yard by my house I wasn't too happy about needing another one but the guy at the yard is great and hooked me up!! So I get this one home and it has the 4wd indicator and everything looks peachy oh but wait look at this pic!!

Some bastard scratched the check engine light contact apart! I'm assuming to sell the vehicle but anyway to sum this up check what you are buying if it is in your hands and if it is on e-bay make sure to ask the seller if the description is correct!! But all in all I mixed and matched parts from both and got a great result and I couldn't be happier!! Thanks for the great thread super
Notice anything missing?? Yea no 4wd light got this cluster off of e-bay listed as a cluster from a 4-runner 3.0 4wd. Hmmmmm might ask the seller to make sure of this!!!!
So after breaking the bezel polishing this gauge I went and got one from the yota yard by my house I wasn't too happy about needing another one but the guy at the yard is great and hooked me up!! So I get this one home and it has the 4wd indicator and everything looks peachy oh but wait look at this pic!!
Some bastard scratched the check engine light contact apart! I'm assuming to sell the vehicle but anyway to sum this up check what you are buying if it is in your hands and if it is on e-bay make sure to ask the seller if the description is correct!! But all in all I mixed and matched parts from both and got a great result and I couldn't be happier!! Thanks for the great thread super
Last edited by Discombobulated; 02-16-2012 at 10:01 PM.
02-17-2012, 12:00 AM
#239
Registered User

Join Date: Feb 2012
Posts: 11
Likes: 0
Received 0 Likes
on
0 Posts
 07-08-2012, 07:11 PM
#240
Registered User
Join Date: Jun 2012
Location: Mesa, AZ
Posts: 67
Likes: 0
Received 0 Likes
on
0 Posts
old post I know, but if you're talking about the large clear piece over the entire face of the cluster, it comes right off, you just have to release the clips along the edges... I removed mine to clean and polish it... I'm pretty sure you have to remove it if you want to get the speedo out too.
----------------
On another note, I'm getting ready to convert my truck to a electronic speedometer from a cable based speedo... On some really cold days last winter the thing would make a squealing sound until the grease warmed up, and then of course the needle bobs up and down, especially at low speeds, the cluster is a total pain to remove since I've got a body lift (effectively shortening the length of the cable and how much slack I have to work with) and then a couple weeks ago the cable snapped... so now it doesn't even work
Another benefit is that you should be able to calibrate an electronic speedo a lot cheaper and easier too.
Anyway, I've got all the parts I need ordered, if people are interested I'll do a write up on how to do the conversion. On a whole it should only cost another $50 or so over the cost of an SR5 swap with another 20 minutes or so worth of work if you do it at the same time.
Last edited by Krazy Ken; 07-08-2012 at 07:20 PM.


