And so the 22re rebuild begins
 07-21-2009, 05:04 PM
#41
Contributing Member
Thread Starter
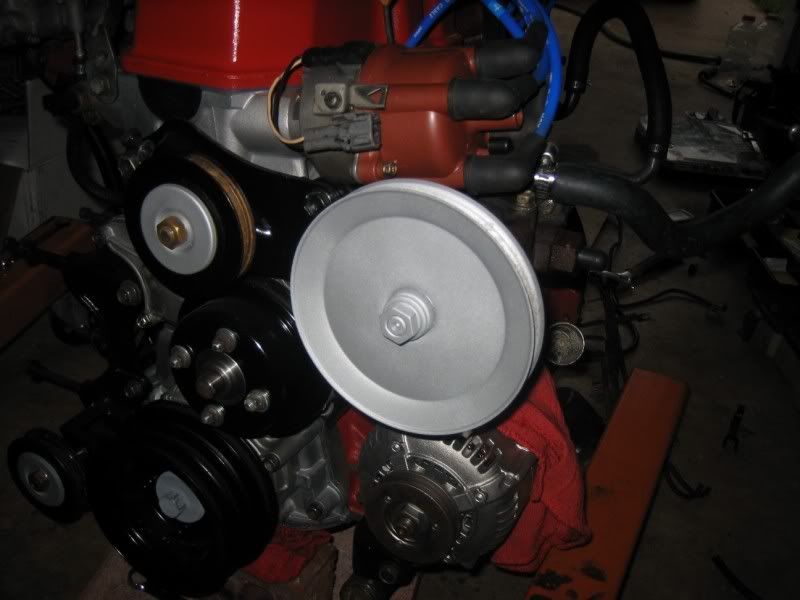
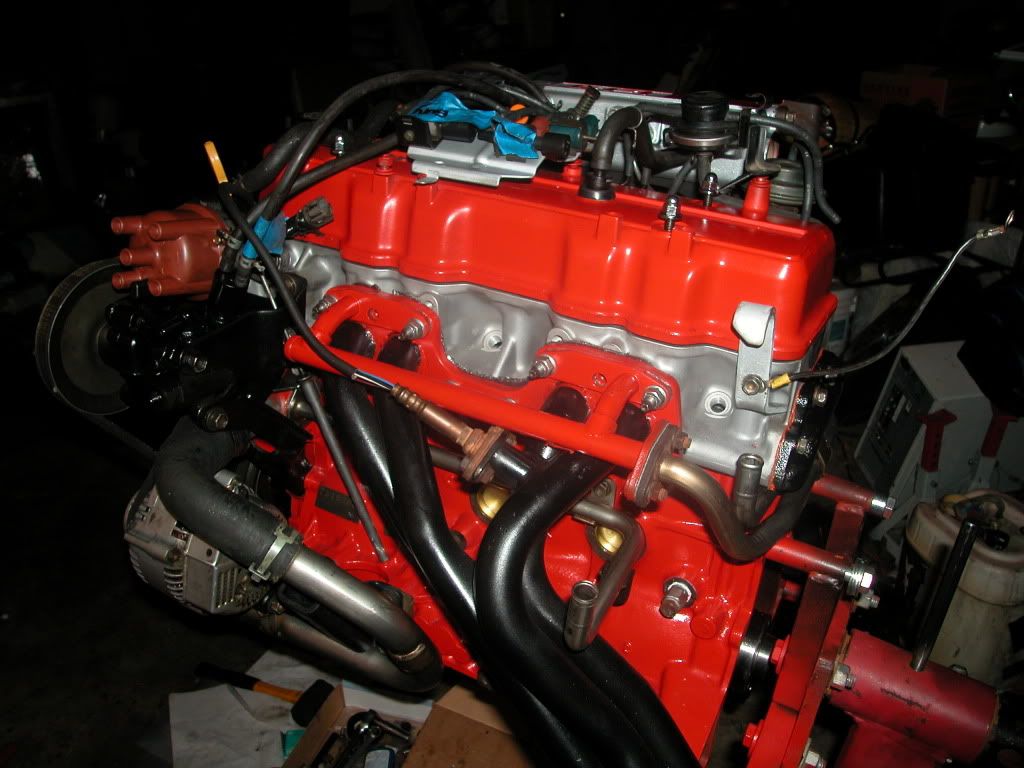
Progress is a bit slow but I have to tear down one motor to get the parts and bolts/nut off it to build this one but it's getting closerif I can get the crank pully's off then it should start going together because I will be able to put the timing chain together and from there it will start to fly that right now is my biggest hold up with putting it all together for now.
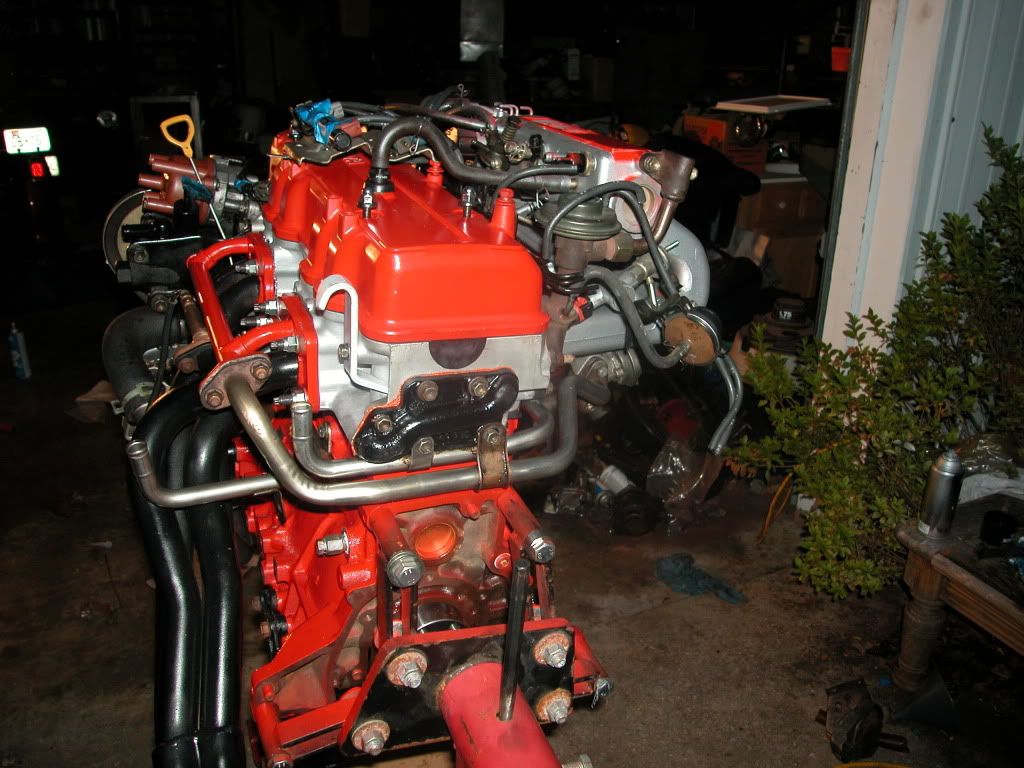
But here is a sneek peak at what it should look like together


But here is a sneek peak at what it should look like together
 07-21-2009, 06:10 PM
#42
Contributing Member
that silver color on the power steering pump pulley looks familiar 
lol
Look'n really good man! I can't wait to see her all thrown together!
why'd you pull the harmonic balancer and outter pulley apart?
lol
Look'n really good man! I can't wait to see her all thrown together!
why'd you pull the harmonic balancer and outter pulley apart?
07-21-2009, 07:14 PM
#43
Contributing Member
Thread Starter
It's a learning curve this is my first time doing a car motor like this and I was trying to pull the balancer and thought maybe the 4 bolts were holding it together some how i am used to two cylinders and carrying the whole motor so this is all new for me I am learning as I tear apart the motor in the truck and reassembling it on this one O.J.T. lol.
Once again I tell ya GREAT MINDS THINK ALIKE
Once again I tell ya GREAT MINDS THINK ALIKE
07-22-2009, 09:10 PM
#44
Contributing Member
Thread Starter
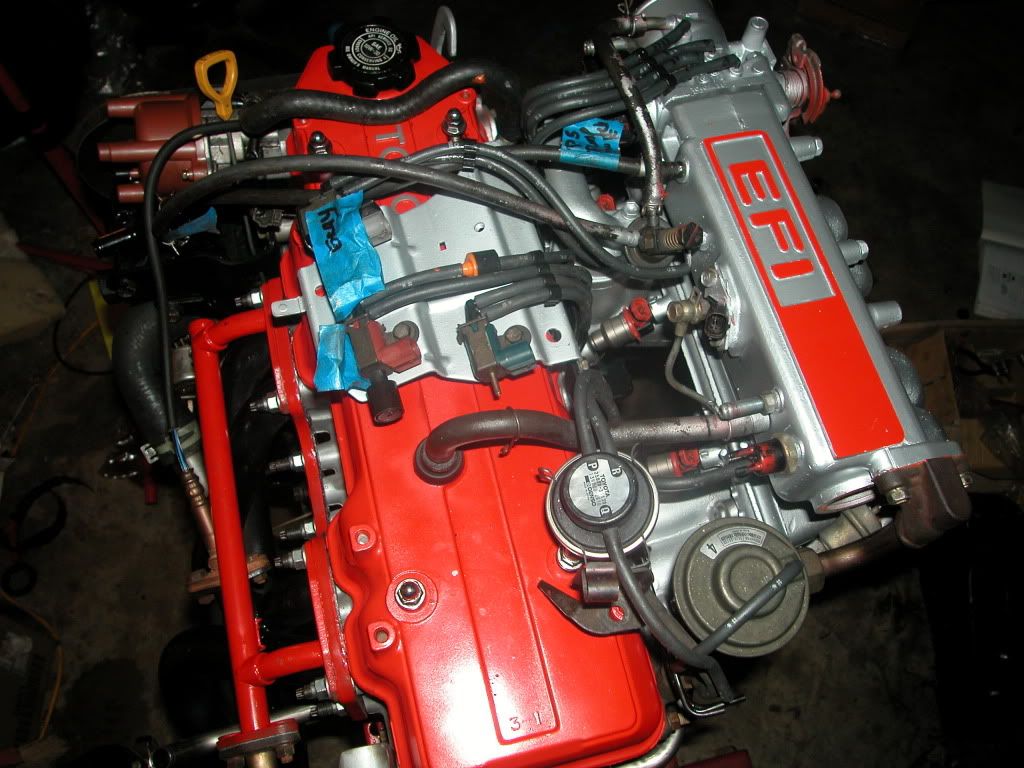
OK so I had a couple hours today to get done what I could so here's what I did get to today
1. I got a puller and pulled the crank pulley off the old motor and the rest of the timing cover bolts so I could transfer them to the new motor.
2. Got the radiator pulled and ready to set up the electric fan set up
3. Installed the new ENGNBLDR timing chain kit and had to go buy new keyways because the others would not come off the crankshaft oh well a whole .93 cents to replace with new ones
Put the new timing cover on and the extra bolt in the head , mounted it with ultra copper rtv on the gaskets and some on the top of the timing cover that fits under the head.
4. Mounted the water pump and as many of the pulley's and there brackets as I could
5. Got all confused on the instalation of the oil pump with the arrows not lining up with each other , scratched my head for a while trying to figue this out searched for about an hour and could not find anything that told me one way or the other.
So this is where it stands as of about 7 pm just got back from a meeting I had tonight at 11:30 pm

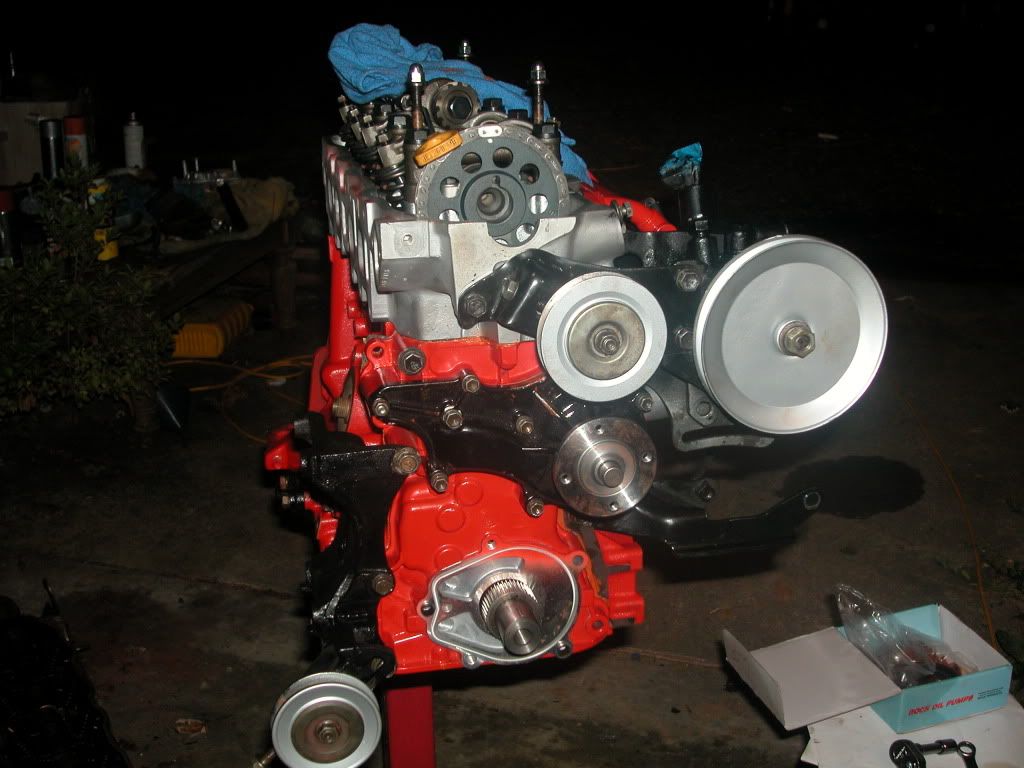
Hope to get this thing ready to run in the next week but still need to pull the old motor out and get a new clutch set up first.
1. I got a puller and pulled the crank pulley off the old motor and the rest of the timing cover bolts so I could transfer them to the new motor.
2. Got the radiator pulled and ready to set up the electric fan set up
3. Installed the new ENGNBLDR timing chain kit and had to go buy new keyways because the others would not come off the crankshaft oh well a whole .93 cents to replace with new ones
Put the new timing cover on and the extra bolt in the head , mounted it with ultra copper rtv on the gaskets and some on the top of the timing cover that fits under the head.
4. Mounted the water pump and as many of the pulley's and there brackets as I could
5. Got all confused on the instalation of the oil pump with the arrows not lining up with each other , scratched my head for a while trying to figue this out searched for about an hour and could not find anything that told me one way or the other.
So this is where it stands as of about 7 pm just got back from a meeting I had tonight at 11:30 pm
Hope to get this thing ready to run in the next week
but still need to pull the old motor out and get a new clutch set up first.
07-23-2009, 12:23 AM
#45
Contributing Member
Thread Starter
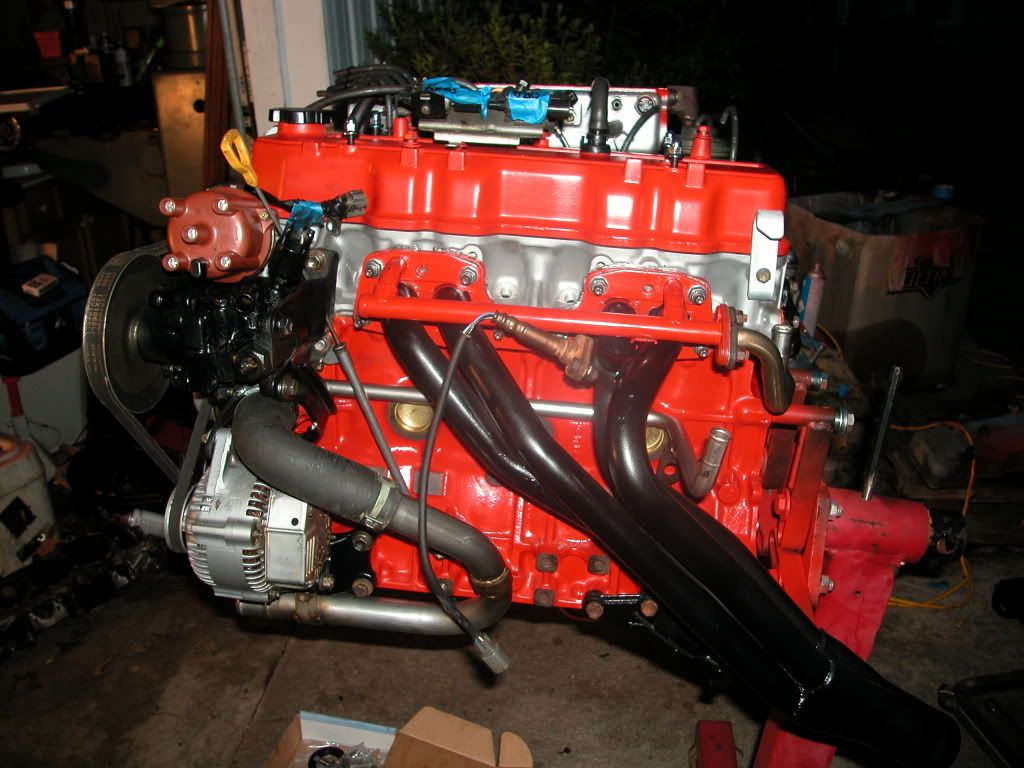
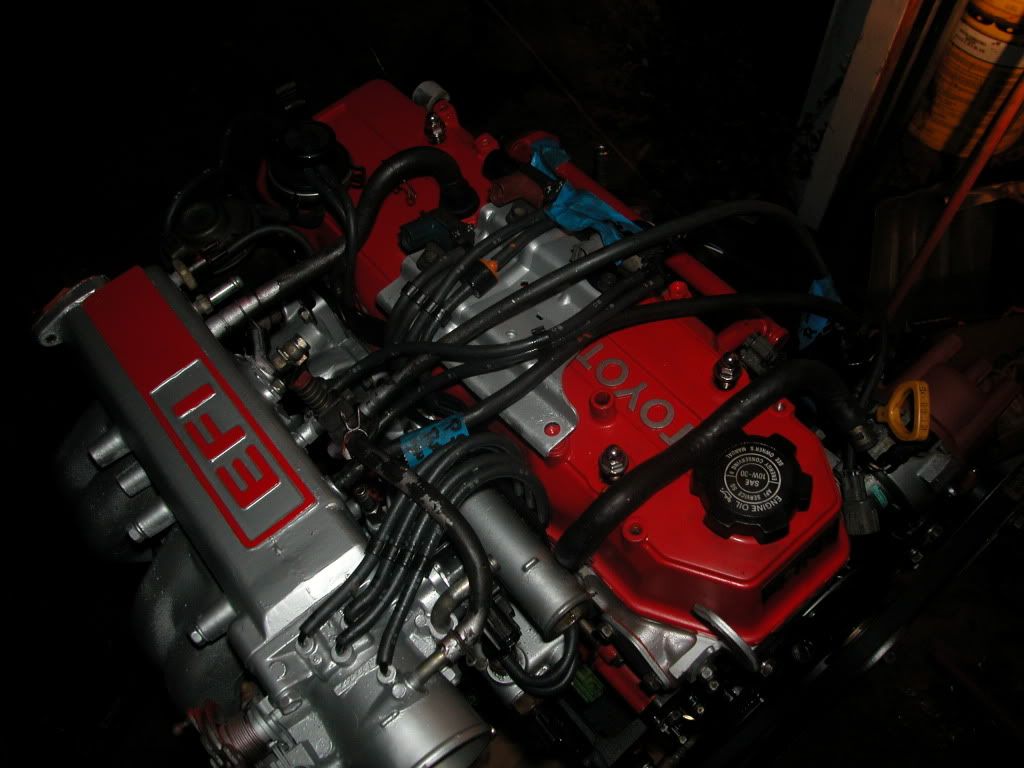
Well I got home tonight and could not resist had to go out to the garage and play with my motor some more and try to finish up a few things that I could not get out of my brain so here you go a few more pic's.


Notice the timing mark , this is after I hand cranked the motor over one full revolution and it ended up right at 0 I believe that's just whats supposed to happen right?


The new electric fan installed on the radiator 2500 cfm pulling power OH YA BABY
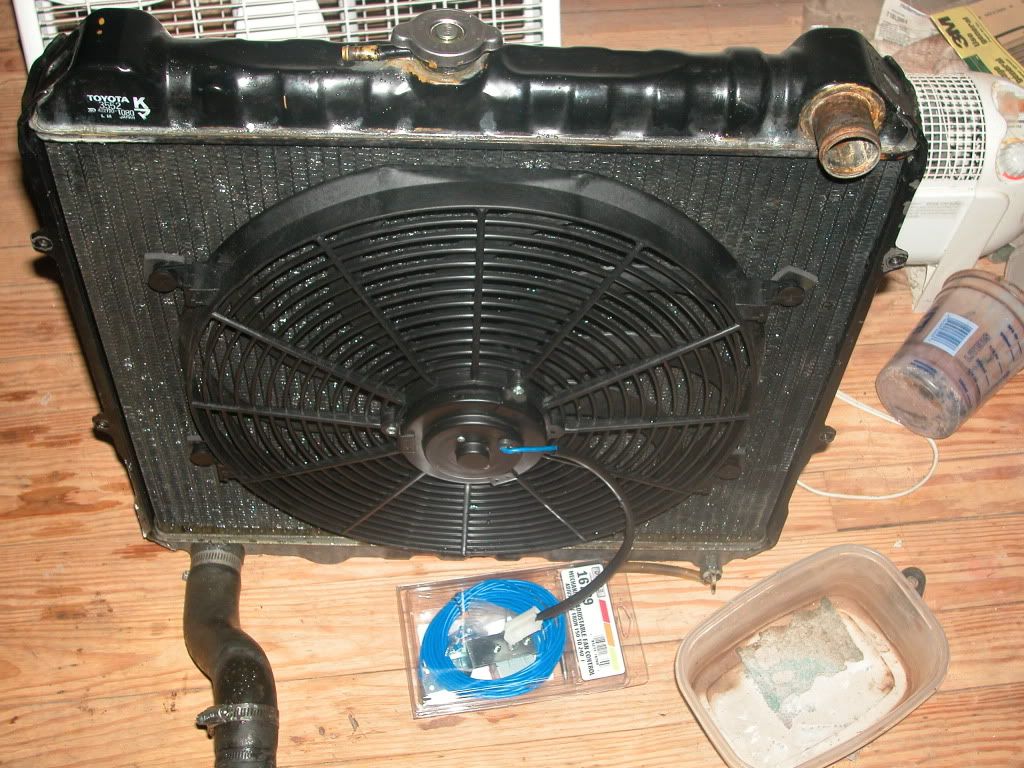
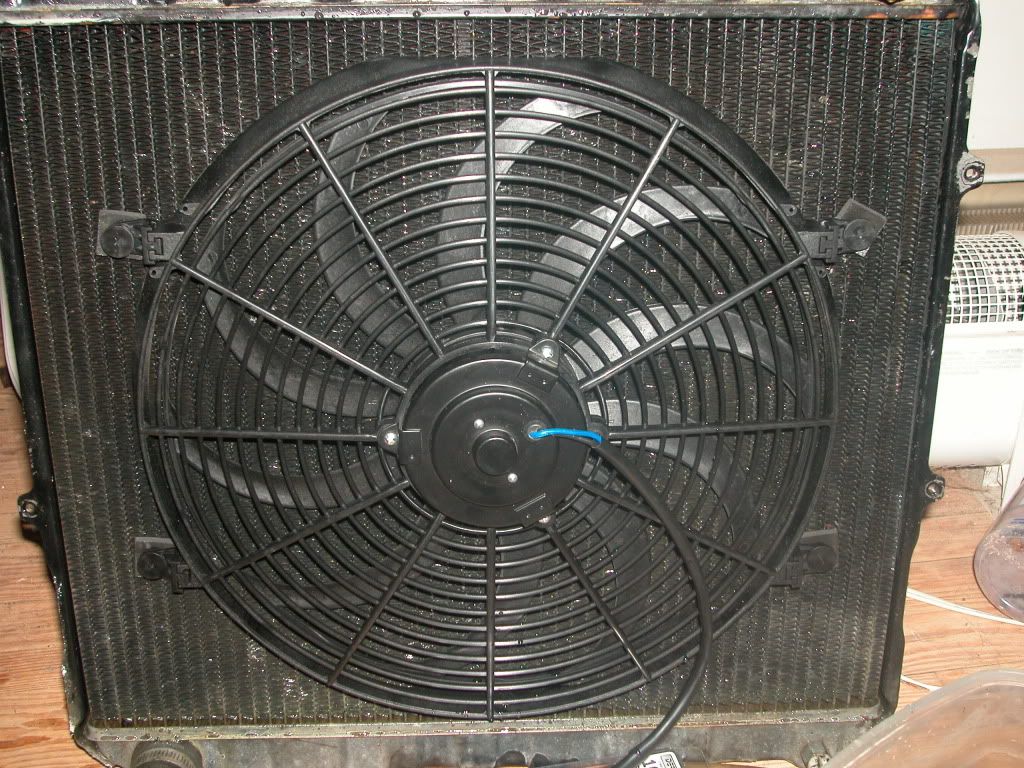
not sure if you can see them but these are the tabs that hold the fan on the radiator with the push through type zip ties

Notice the timing mark , this is after I hand cranked the motor over one full revolution and it ended up right at 0 I believe that's just whats supposed to happen right?
The new electric fan installed on the radiator 2500 cfm pulling power OH YA BABY
not sure if you can see them but these are the tabs that hold the fan on the radiator with the push through type zip ties
Last edited by olharleyman; 07-23-2009 at 06:44 AM.
07-23-2009, 03:36 PM
#46
Contributing Member
Thread Starter
Well it rained most of today so I did not get much done on the motor but I did get a chance to figure out a couple brackets that did not look quite right to me and got them straightened out and then I got to figuring out how the belts go on and did them added the water tube for the radiator and little stuff .
Hoping tomorrow will be a little better both weather and progress wise so I can start on pulling the intake system and transfer it to this motor. Oh well here's a couple pics of today's progress.


Hoping tomorrow will be a little better both weather and progress wise so I can start on pulling the intake system and transfer it to this motor. Oh well here's a couple pics of today's progress.
07-23-2009, 09:05 PM
#48
Contributing Member
Thread Starter
hoping this week sometime but I need to get a motor hoist and another engine stand may have a friend with both will see other wise I will find a way to make it happen
Last edited by olharleyman; 07-23-2009 at 09:06 PM.
07-24-2009, 06:05 PM
#49
Contributing Member
Thread Starter
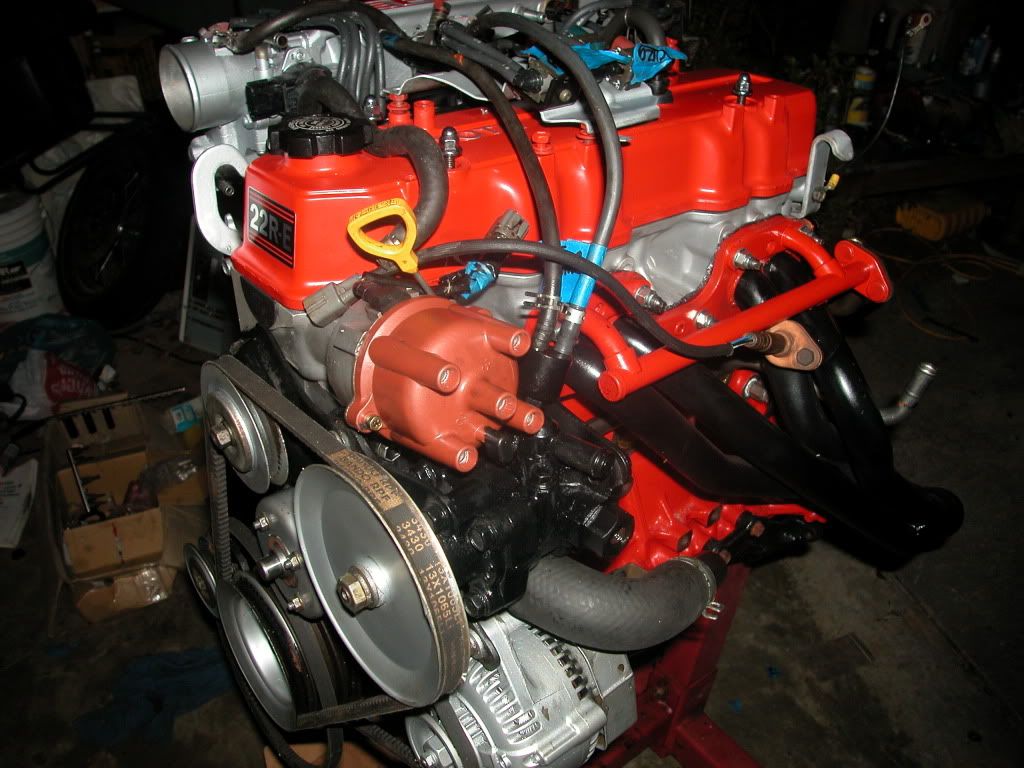
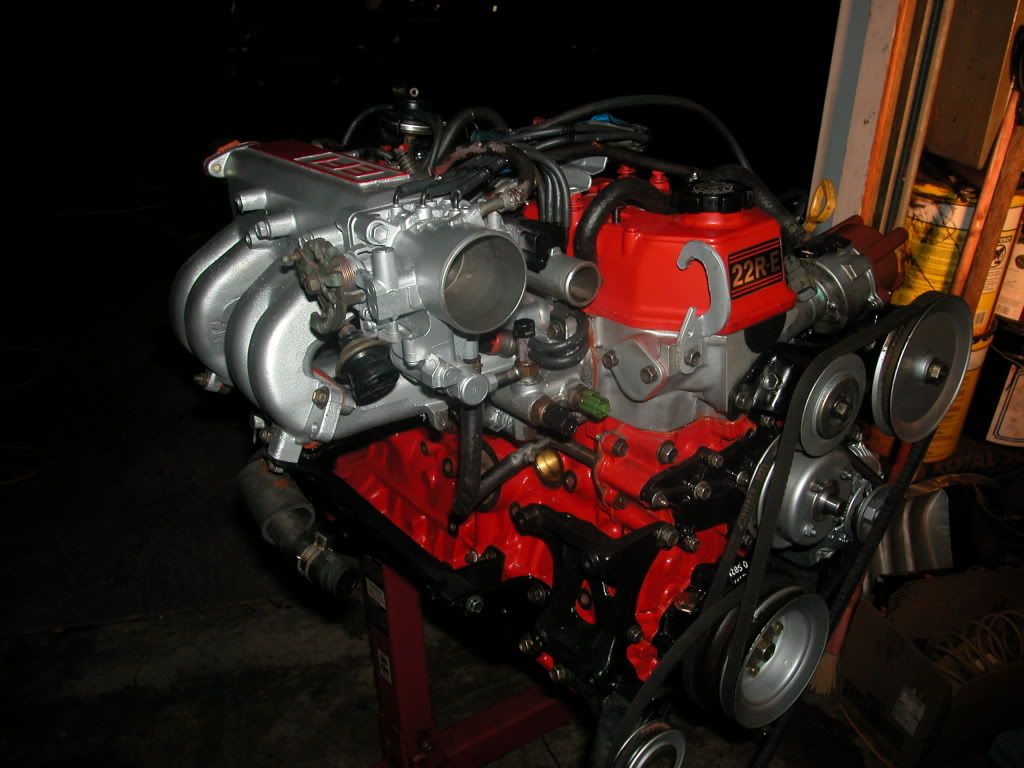
OK well today was a anther good day got some real progress today or at least it really looks like it anyway. My biggest issue was when I went to pull the top manifold the wiring harness was run through the middle of it not sure if that's the way TOYOTA did it or the way someone did it when they re did the head gasket the first time on that motor, either way I had to pull the entire wiring harness back to the rear of the transmission loose and ended up with two wires from the very rear of the tranny pulling out of the plastic holder they belong in , I hope I can find which one goes to which side one wire is green and one is white in the front part of the clip as for where they plug into on the back side is where I am not sure as to which is which so if anybody knows please fill me in so I can get this right and not have any issues at install time.
Other then that taking about 1 1/2 hours here's some progress pic's for you all to nit pick me on but remember , I have NEVER DONE THIS BEFORE and with only pic's and info I find here and a couple other places I am learning as I do this so be easy on me.


I had a issue with the paint sticking to the upper manifold for some reason it's the same HI HEAT paint as the rest of the motor but just did not want to stick I think it's the humidity but I did get a quick look at what it would look like and it turned out looking real good where it stuck , so just to kill time and get an idea I did a reverse job on how I planned to do it and I don't think I like this look so I will get some more paint and redo it again and see if it will stick this time and do it the way I had decided to with the letters red and the bottom of the letters area silver and the flat spot on top red as well.

I want the manifold to be just the opposite of the valve cover here

It got dark fast so this is where I ended up tonight learning lots of this along the way though
Other then that taking about 1 1/2 hours here's some progress pic's for you all to nit pick me on but remember , I have NEVER DONE THIS BEFORE and with only pic's and info I find here and a couple other places I am learning as I do this so be easy on me.
I had a issue with the paint sticking to the upper manifold for some reason it's the same HI HEAT paint as the rest of the motor but just did not want to stick I think it's the humidity but I did get a quick look at what it would look like and it turned out looking real good where it stuck , so just to kill time and get an idea I did a reverse job on how I planned to do it and I don't think I like this look so I will get some more paint and redo it again and see if it will stick this time and do it the way I had decided to with the letters red and the bottom of the letters area silver and the flat spot on top red as well.
I want the manifold to be just the opposite of the valve cover here
It got dark fast so this is where I ended up tonight learning lots of this along the way though
07-24-2009, 09:49 PM
#50
Contributing Member
did you primer the manifold before painting it? you need to primer any bare metal before painting it, or yeah you will have a rough time getting paint to stick to it 
looking really good man!
I thought about sticking a new 22re decal on the front of my valve cover, but I think instead I'm going to try and scavenge the junk yard for a car that has a little 2.4l chrome emblem somewhere and stick that on there I like to be different
looking really good man!
I thought about sticking a new 22re decal on the front of my valve cover, but I think instead I'm going to try and scavenge the junk yard for a car that has a little 2.4l chrome emblem somewhere and stick that on there
I like to be different
07-24-2009, 10:48 PM
#51
Contributing Member
Thread Starter
did you primer the manifold before painting it? you need to primer any bare metal before painting it, or yeah you will have a rough time getting paint to stick to it
looking really good man!
I thought about sticking a new 22re decal on the front of my valve cover, but I think instead I'm going to try and scavenge the junk yard for a car that has a little 2.4l chrome emblem somewhere and stick that on there I like to be different
looking really good man!
I thought about sticking a new 22re decal on the front of my valve cover, but I think instead I'm going to try and scavenge the junk yard for a car that has a little 2.4l chrome emblem somewhere and stick that on there
I like to be different2. Coming from someone in the same shoes I say Thank You and a tip of the hat to ya
3. That would be cool I did not know they existed or I too would have gone for something like that just to be different.
 07-25-2009, 06:23 PM
#52
Contributing Member
Thread Starter
My e-bay score of the day/week
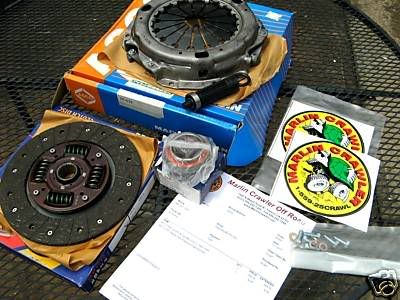
all for $127 shipped to my door MC HD 1200 lb kit fly wheel bolts washers with two MC Stickers
all for $127 shipped to my door MC HD 1200 lb kit fly wheel bolts washers with two MC Stickers
Last edited by olharleyman; 07-25-2009 at 06:27 PM.
07-25-2009, 08:18 PM
#53
Contributing Member
wth, that's my MC order exactly!
I think my order got shipped to someone else on accedent and they're selling in on eBay lol
lol
Oh no wait, I don't see a master and slave cylinder
I think my order got shipped to someone else on accedent and they're selling in on eBay
lolOh no wait, I don't see a master and slave cylinder
07-28-2009, 03:01 PM
#55
Contributing Member
Thread Starter
Well I finaly got the problem figuered out as to why the paint would not stick to the intake after pressure washing it 3 times with de greaser it worked and here is how it turned out.


Now I can get back to finishing up the rest of this motor build YA!
Now I can get back to finishing up the rest of this motor build YA!
 07-28-2009, 05:30 PM
#57
Contributing Member
Thread Starter
OK well here's where I am at as of 9:24 pm 7-28 just got done doing as much as I could stand I think I may have a world record for mosquito bite's in a night I bet I have 100 bites had to run in to the house before I got carried off fo dinner.
So here ya go what say you?


So here ya go what say you?
Last edited by olharleyman; 10-06-2009 at 09:28 PM.
07-28-2009, 06:18 PM
#58
Contributing Member
Thread Starter
Just got an update from UPS (I hate getting anything shipped by these guy's they just take so long and are more expensive then the post office) so my MC Clutch kit will be here tomorrow from Kentucky 3 day's crazy and my new motor mounts Thursday from South Carolina again 3 day's and I can drive there in 8-10 hours depending on the traffic. Anyway sorry about the rant , but then I can get back to doing and have this thing ready to drop in the truck and maybe just maybe start driving it this week OH YA BABY!
07-28-2009, 06:49 PM
#59
Registered User

Join Date: Jul 2009
Location: oxford. miss
Posts: 16
Likes: 0
Received 0 Likes
on
0 Posts
I've been using rock prod. for years and haven't had any problems. I had concerns when I started using there stuff, im not one to use the cheep stuff but its much cheeper than topline. So far the only thang i've seen is there bearings are not very consistent(rod,mains). gaskets seem to hold up fine, dont use the oil pan gasket. and get the HD timing set i've seen the plastic guides break in less than 10k.
07-28-2009, 07:18 PM
#60
Contributing Member
Thread Starter
I've been using rock prod. for years and haven't had any problems. I had concerns when I started using there stuff, im not one to use the cheep stuff but its much cheeper than topline. So far the only thang i've seen is there bearings are not very consistent(rod,mains). gaskets seem to hold up fine, dont use the oil pan gasket. and get the HD timing set i've seen the plastic guides break in less than 10k.
All my gaskets I have been using ULTRA COPPER GASKET SEALER with them all just a habit so I think I will be fine there as well
Timing chain is the ENGNBLDR steel drivers side heavy duty kit and I have heard nothing but good about them and for all that it matters I have the MASTER REBUILD KIT from ENGNBLDR as well and I see no issues with his stuff and I will be the first to say the one little set back I had he covered it and never thought twice or questioned me one bit , to me that is SERVICE and I will recommend him to anybody because of the way he does business and the way he stands behind what he sell's.
Last edited by olharleyman; 10-06-2009 at 09:27 PM.


