Rebuilding entire front end
 06-27-2014, 11:21 AM
#1
Registered User
Thread Starter

Join Date: May 2014
Posts: 19
Likes: 0
Received 0 Likes
on
0 Posts
Rebuilding entire front end
Almost all of it.
Patient name: Stella
Relation: Girlfriends 95 4 runner.
Doctor: Me with no experience.
So long story short my girls front cv axle shaft on the driver side broke. So I go in to buy a new one and decide to do brakes. Now we got both axles and new front Brake Calipers. Might as well get rotors ball joints tie rods pitman arm and idler arm and all new Ranchos to go around. And a new radiator because we have been having issues there. YUP.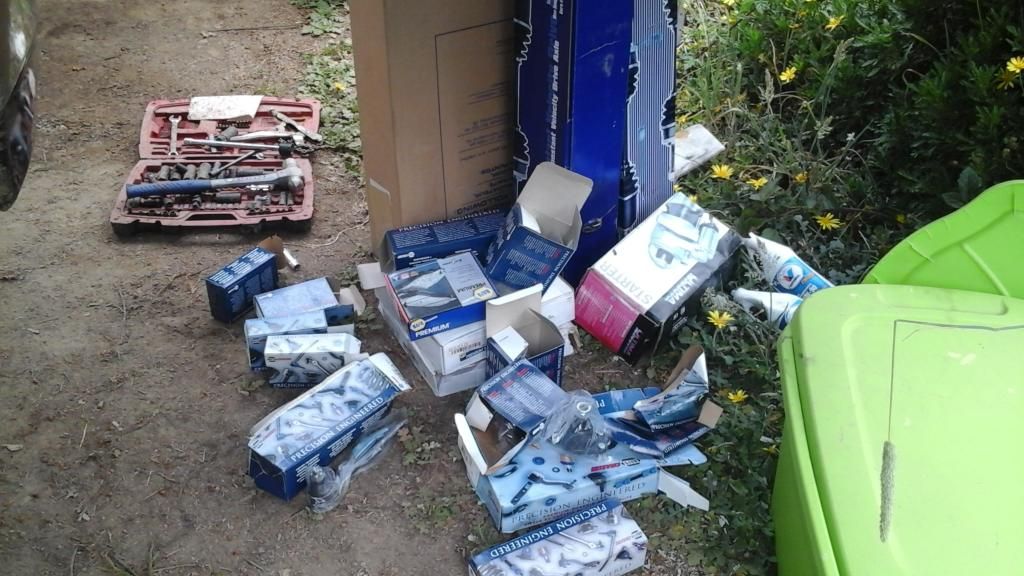
I know I could have done better on parts shopped around and got higher quality but this isn't going to be a real off-road rig.
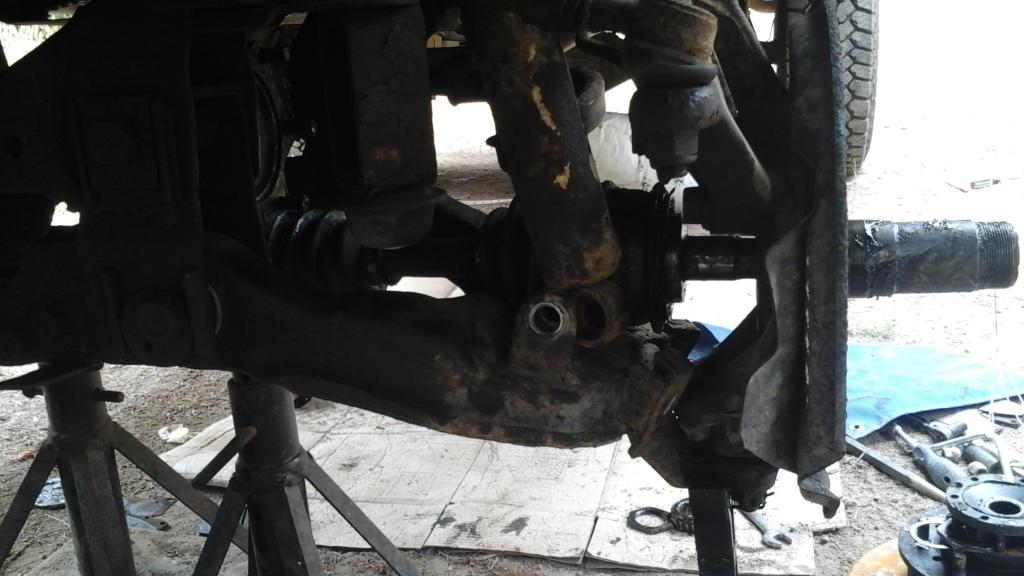
So now I got her jacked. Hub and rotor off. Axles already loosened while wheels on using Brake. I have a few write ups opened on other tabs. Question is can I just remove this mount the ball joints tie rod and brake are attached too. I want to repaint it anyways.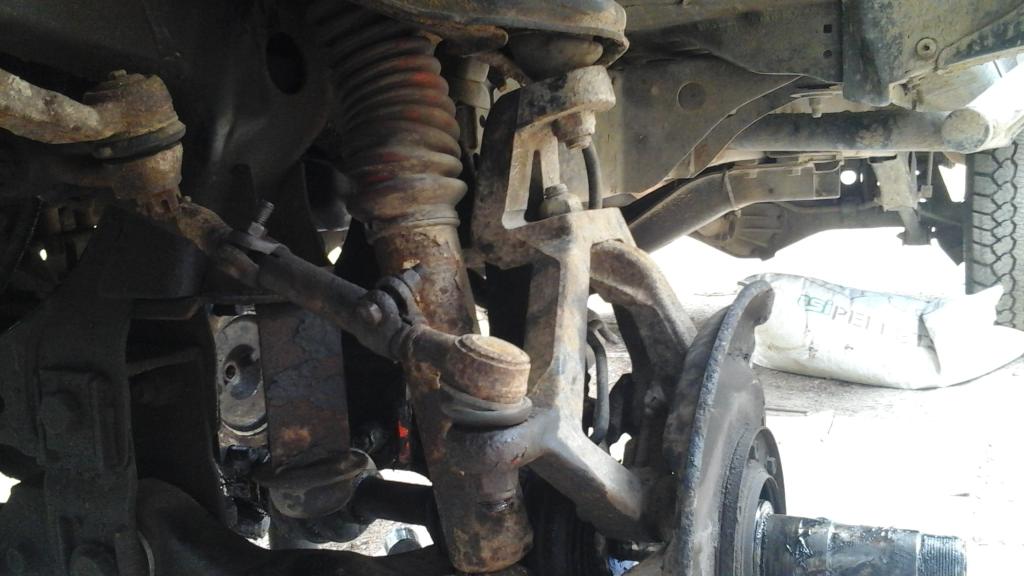
It looks possible. I just don't want any weight to be resting where it shouldn't. I have it supported on a cross member in the front area. May be able to see from pics. If I took this bracket off I could paint it and pull axle out towards me instead of in past the flange. Sorry for the scattered post. Will try to read and make a more concise update. Thanks all
Patient name: Stella
Relation: Girlfriends 95 4 runner.
Doctor: Me with no experience.
So long story short my girls front cv axle shaft on the driver side broke. So I go in to buy a new one and decide to do brakes. Now we got both axles and new front Brake Calipers. Might as well get rotors ball joints tie rods pitman arm and idler arm and all new Ranchos to go around. And a new radiator because we have been having issues there. YUP.

I know I could have done better on parts shopped around and got higher quality but this isn't going to be a real off-road rig.

So now I got her jacked. Hub and rotor off. Axles already loosened while wheels on using Brake. I have a few write ups opened on other tabs. Question is can I just remove this mount the ball joints tie rod and brake are attached too. I want to repaint it anyways.

It looks possible. I just don't want any weight to be resting where it shouldn't. I have it supported on a cross member in the front area. May be able to see from pics. If I took this bracket off I could paint it and pull axle out towards me instead of in past the flange. Sorry for the scattered post. Will try to read and make a more concise update. Thanks all
Last edited by StayFoolish22; 06-27-2014 at 11:28 AM.
 06-27-2014, 11:46 AM
#2

Well not too long ago I did similar work. Was much more than I expected. But it's nothign difficult to 'understand'.. you'll figure it out.
Get some pullers for the tapered mating surfaces. I didn't have any rust though.
Get some pullers for the tapered mating surfaces. I didn't have any rust though.
06-27-2014, 12:07 PM
#3
Registered User
Thread Starter
Join Date: May 2014
Posts: 19
Likes: 0
Received 0 Likes
on
0 Posts
From this point is it safe to disconnect the tie rod. Then the upper ballpoint then the lower ball joint. Remove the bracket they all attach to. I would then be able to paint it and Be able to remove the axle shaft easier.
06-27-2014, 12:15 PM
#4
As long as the car is properly supported, there is no safety issues in the order of items you remove. I suggest (since you're going to anyway if i understood correctly) remove the lower control arm, and everything else will be easier. You can remove the tie-rod ends anytime.
06-27-2014, 12:39 PM
#5
Registered User
Thread Starter
Join Date: May 2014
Posts: 19
Likes: 0
Received 0 Likes
on
0 Posts
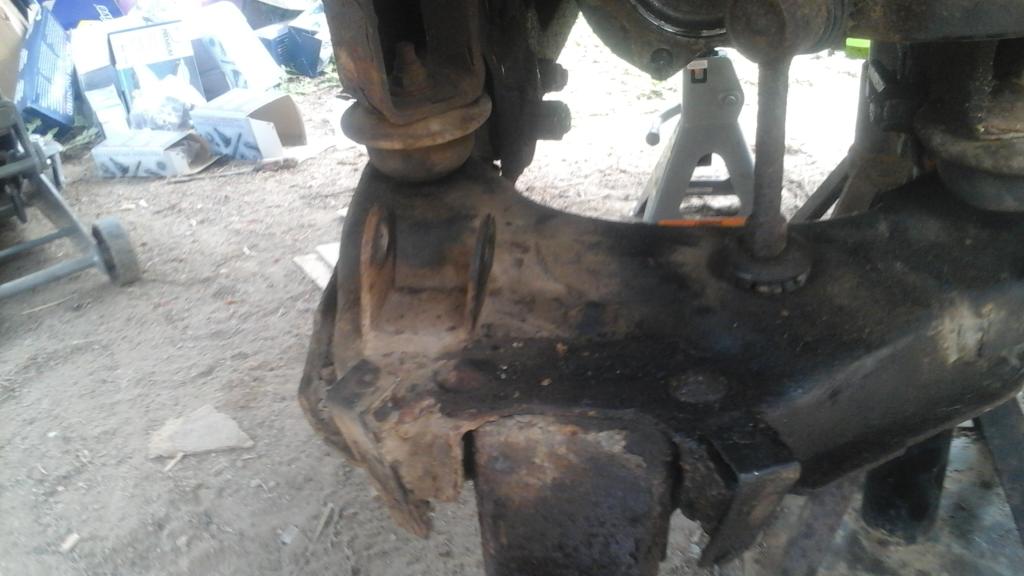
To take off the lower control arm is there a lot of weight involved. I just don't want any parts dropping hard. I was talking about the bracket attached from the lower control arm to the ball joints and tie rod. Its in the 3rd picture I believe.
I might as well take off the lower control arm and replace bushings and paint it also. Is this going to add a whole new level of chaos or is it all the same ˟˟˟˟. I feel like I should now though although I wasn't considering it. When else will it be this ripped apart ya know.
Thanks so much for the replies. I really appreciate your help. You already gave me the confidence to jump back at it.
Last edited by StayFoolish22; 06-27-2014 at 12:40 PM.
06-27-2014, 12:41 PM
#6
After some quick research on these forums, I found that the bushings for the contorl arms are a whole other animal and decided not to touch those. I'm glad I didn't.. the rest of the work was a lot.
I still have to get around to it though.
Nothing should be dropping, but the control arm isn't going to be light. I would hang it with some wire during removal.
I still have to get around to it though.
Nothing should be dropping, but the control arm isn't going to be light. I would hang it with some wire during removal.
06-27-2014, 02:12 PM
#7
Control arm bushings are another beast but if you're already taking everything else apart you might as well think about doing them and you'll have a brand new front end. I'd remove the arms and take it to machine shop to press out the bushings unless you want to torch them out.
The LCA and steering knuckle doesn't have much weight. I would suggest sticking a block of wood on the droop bump stop or ratchet strap the UCA in place because the tbars will be pushing it down. Make sure you measure your tie rods before taking them apart or it'll be fun getting it aligned later
Don't forget a fresh steering stabilizer shock too and maybe poly bushings for the front swaybar. Rig should drive like brand new after all those parts!
Trending Topics
07-17-2014, 11:00 AM
#8
Registered User
Thread Starter
Join Date: May 2014
Posts: 19
Likes: 0
Received 0 Likes
on
0 Posts
Been way too busy in every other aspect of life to work on the truck. I got the driver side completely apart. All parts I want to replace are off and done with. Now should I take apart the passenger side so it is all stripped down. Or should I rebuild the drivers side back up first.
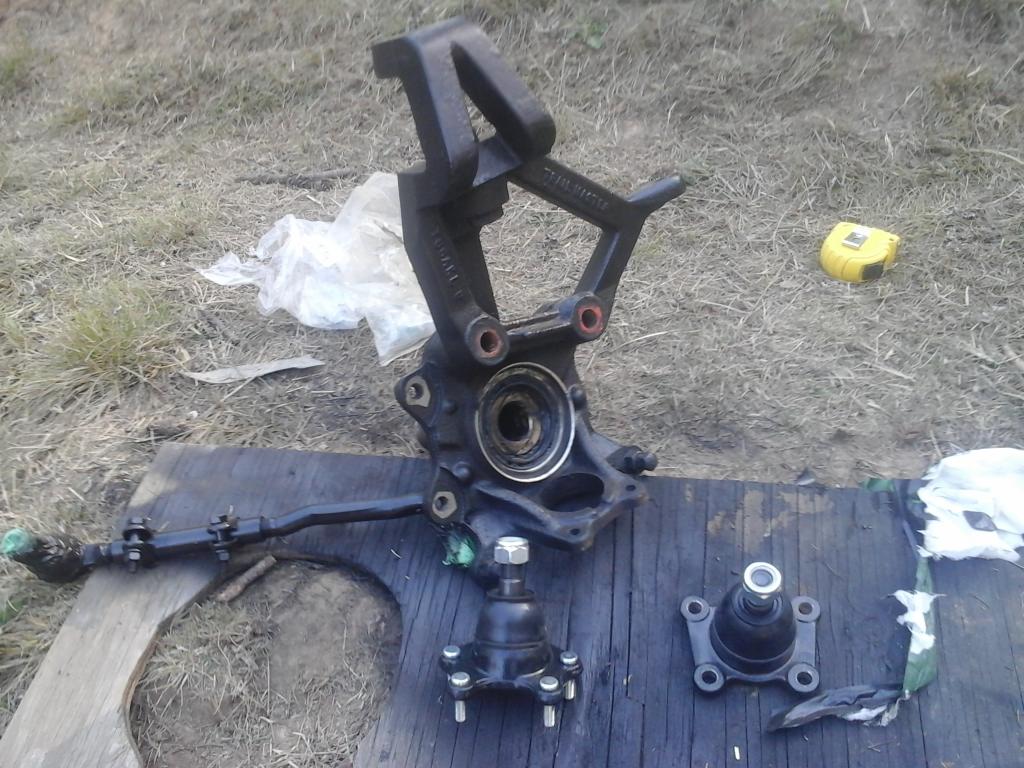
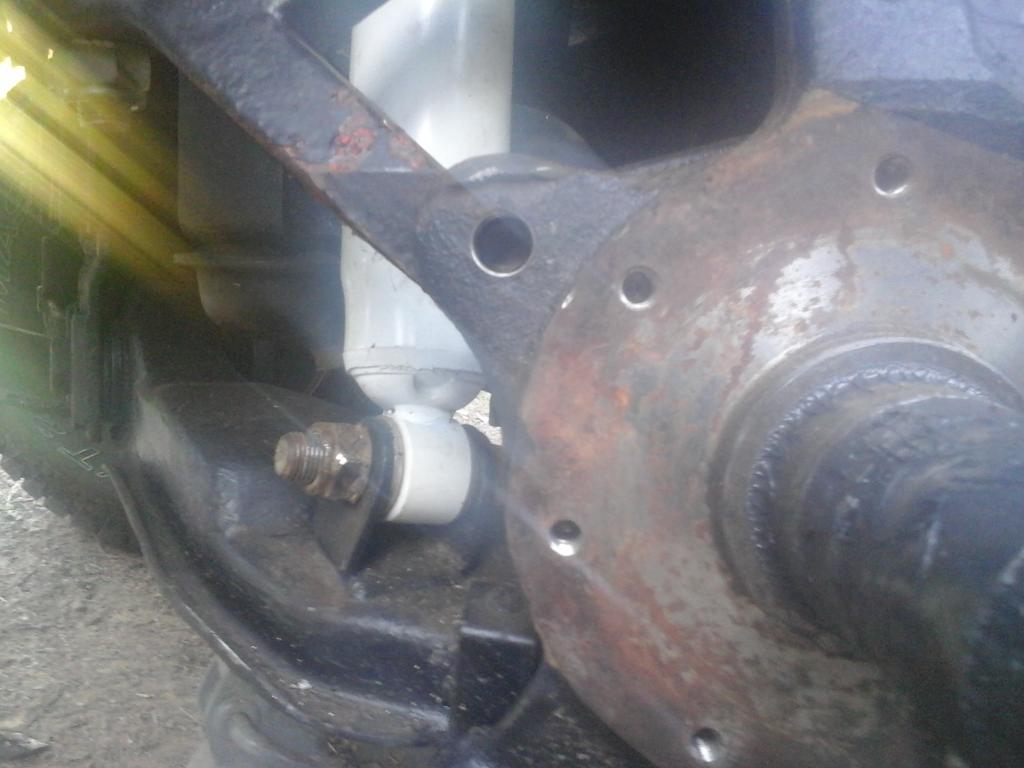
Is this part easy to take apart and clean and regrease?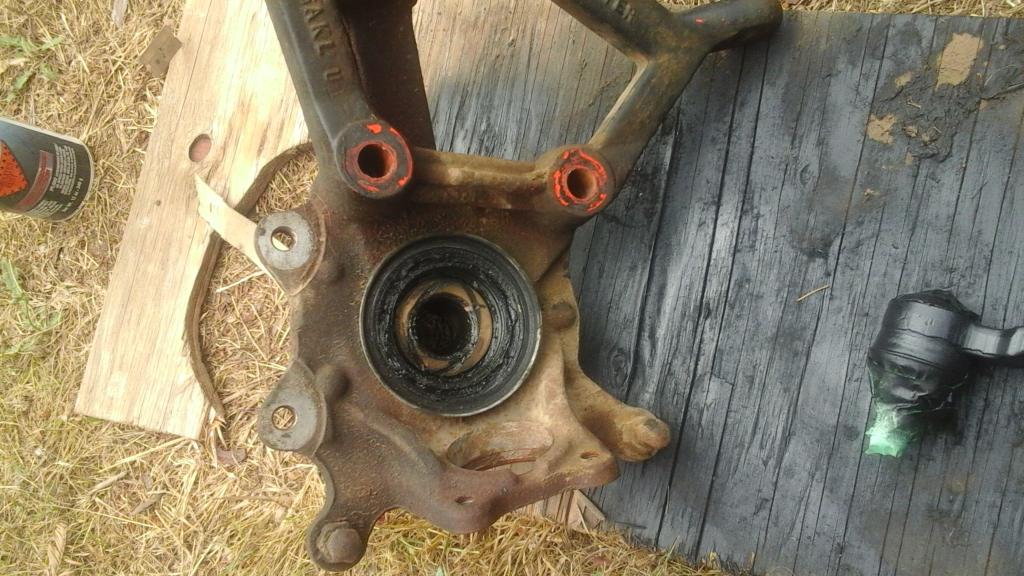
I just want to clean it out and paint it up after taping the important parts.
Should I replace this?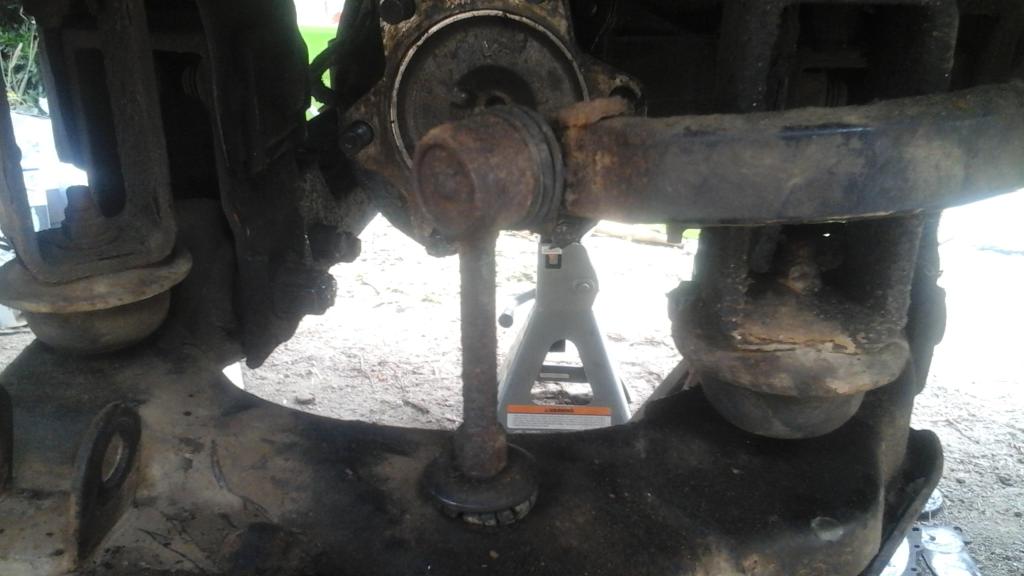
I think I might have but this bracket for the lower part of the shock absorber. Hit it back straight with a hammer or is it supposed to be bent.
Thanks for all and any help. This has been a fun project so far. Little daunting at times but I am figuring it out.
Is this part easy to take apart and clean and regrease?

I just want to clean it out and paint it up after taping the important parts.
Should I replace this?

I think I might have but this bracket for the lower part of the shock absorber. Hit it back straight with a hammer or is it supposed to be bent.

Thanks for all and any help. This has been a fun project so far. Little daunting at times but I am figuring it out.
 Where do you live with all that rust??
07-19-2014, 11:51 AM
Where do you live with all that rust??
07-19-2014, 11:51 AM
#10
Registered User

Join Date: Jan 2009
Posts: 245
Likes: 0
Received 0 Likes
on
0 Posts
Ha ha. I was going to make a comment about how skimming YT's rust buckets often makes me feel a lot better about my rig--then I thought "that's not very nice."
Big undertaking, stayfoolish. Keep it up!
ps-think about sanding down some of that stuff and painting it.
Big undertaking, stayfoolish. Keep it up!
ps-think about sanding down some of that stuff and painting it.
09-15-2014, 03:08 PM
#11
Registered User
Thread Starter
Join Date: May 2014
Posts: 19
Likes: 0
Received 0 Likes
on
0 Posts
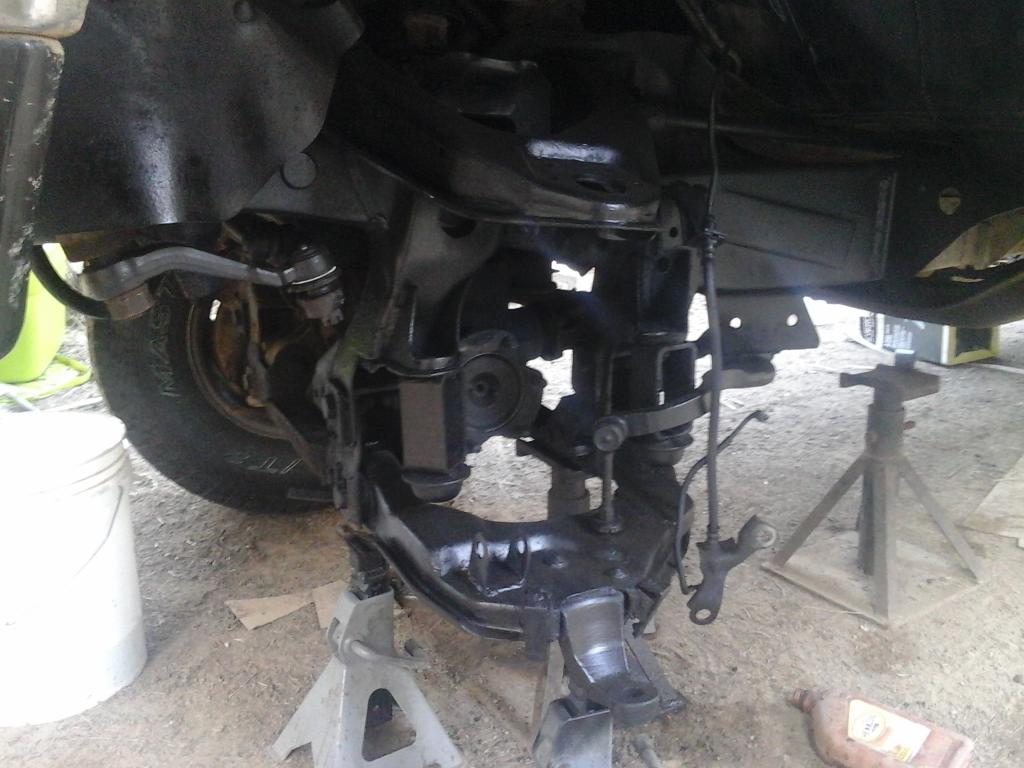
So I started cracking into this again. Few questions. Do I need to load the tie rod ends and ball joints with Grease? If so how. Only 1 side on a tie rod has a fitting to do it. I assume that's what it's for. So from here I sanded and painted down everything I could. No professional job but it looks better. From here should I do things in this order. Install cv axle. Attach lower ball joint to control arm. Attach upper ball joint to upper control arm. Add the lower control arm to the the whole setup, slide the cv axle in, bolt everything on then add the tie rod back to it? Probably going to look into disabling the ADD and adding in manual hubs. Easy job? Thanks all for any help.

 09-16-2014, 08:21 AM
#12
yes, you pretty much have it figured out - basically reverse of what you did. you can also reference the FSM if you want specifics. might be a good idea to read it over at least once and write down the torque specs for all the different bolts/nuts.
as to the grease - no. they should all come pre-lubed from the factory. if they are toyota BJs they are sealed. aftermarket versions have a threaded hole to accept zerk fitting for future lube.
btw, looking at your pic...you still have the CV studs in place -- i'd recommend you press/hammer them out and grind down the splines slightly so they are easy to remove, like bolts. it's a common modification. this will make future CV repairs significantly easier when on the trail.
10-05-2014, 03:43 PM
#13
Registered User
Thread Starter
Join Date: May 2014
Posts: 19
Likes: 0
Received 0 Likes
on
0 Posts
So I am losing my mind. Got everything back on and was attaching the 2 bolts for the brake sensor bracket and the left side hole won't line up. So basically there's 2 bolts with a 10 on the head size 19 and you thread them from the back to the steering spindle. Somehow the threaded part won't line up. I will try to post pictures. It is the top most left bolt hole. How do I make this line up. Smashed at it with a hammer a bit didn't work. I need one side to move down a mm not even.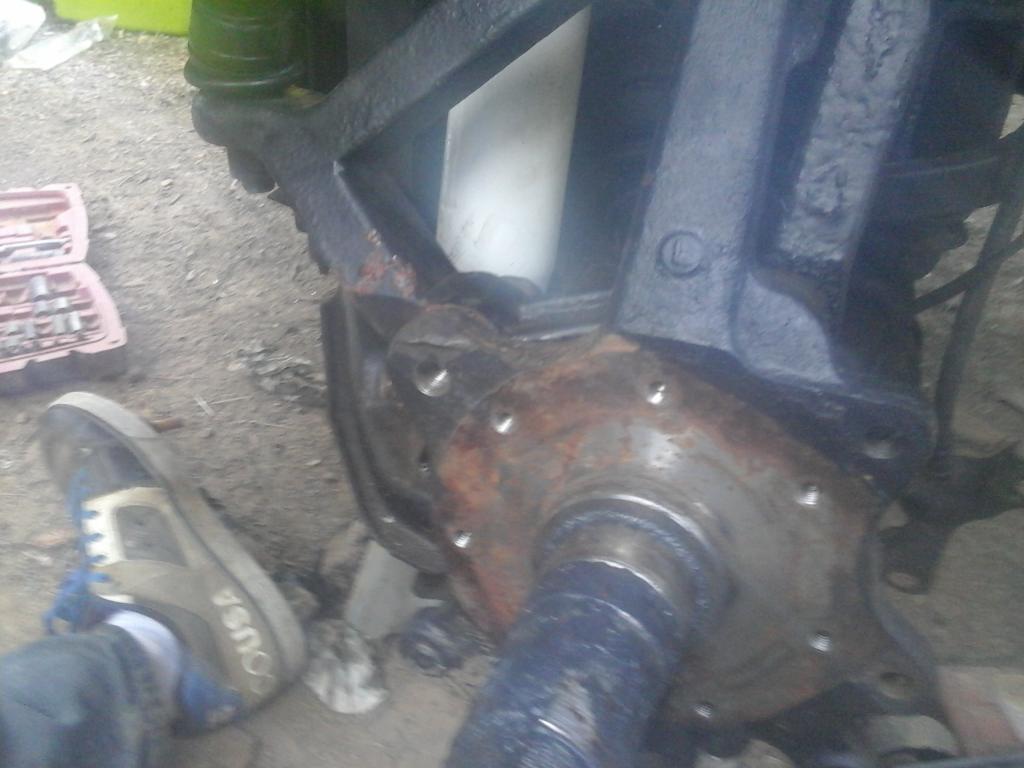
Do I need to remove the entire Steering knuckle again and shift it somehow. I am lost at this point.


Do I need to remove the entire Steering knuckle again and shift it somehow. I am lost at this point.

Thread
Thread Starter
Forum
Replies
Last Post
jasonty
Pre 84 Trucks (Build-Up Section)
41
12-23-2018 01:00 PM
FS[PacSouthWest]: 2- 8"3rd members:4.88 ratchet lockers,new setup kit, rear axle rebuild kit,diff armor
jerusry
Axles - Suspensions - Tires - Wheels
1
10-19-2015 05:28 PM
GreatLakesGuy
The Classifieds GraveYard
8
09-04-2015 09:27 AM
Vargntucson
95.5-2004 Tacomas & 96-2002 4Runners
0
07-04-2015 12:15 PM


