
Lessons learned timing chain, cover, guides, etc.
 11-01-2009, 03:22 PM
#1
Registered User
Thread Starter

Join Date: Jul 2009
Location: Albuquerque, NM
Posts: 28
Likes: 0
Received 0 Likes
on
0 Posts
Lessons learned timing chain, cover, guides, etc.
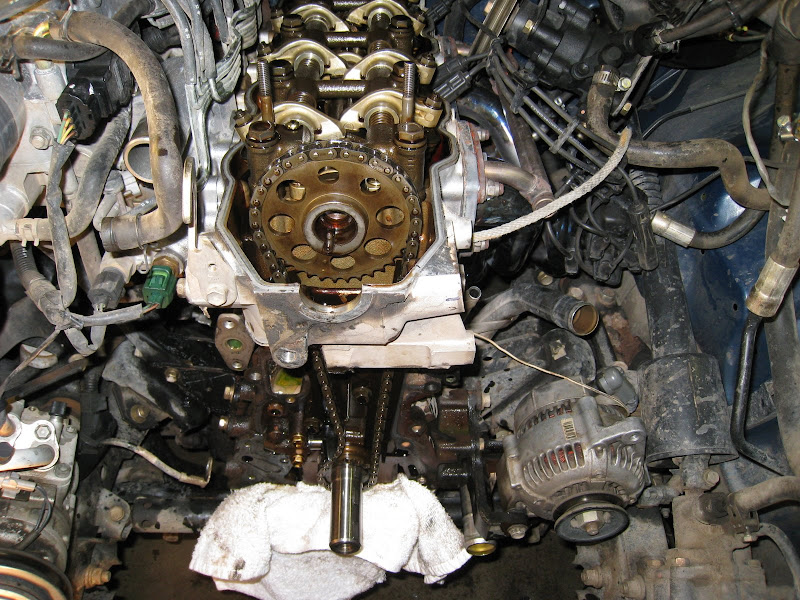
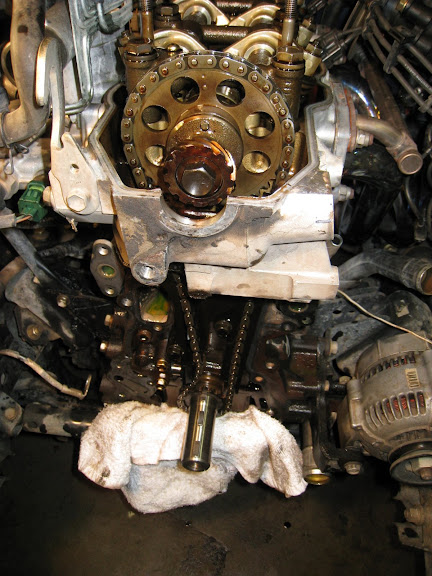
I tackled changing out the timing chain guides in my truck and I wanted to post my experiences to make the job easier for someone else.
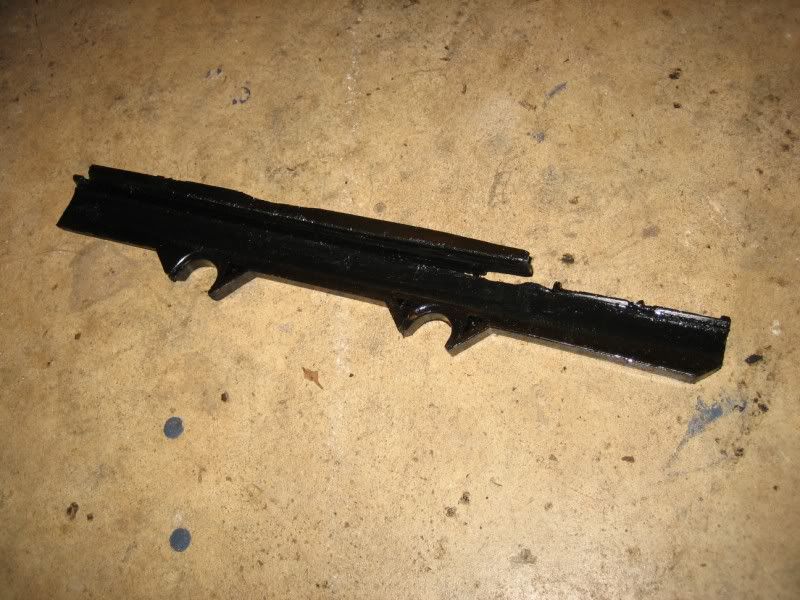
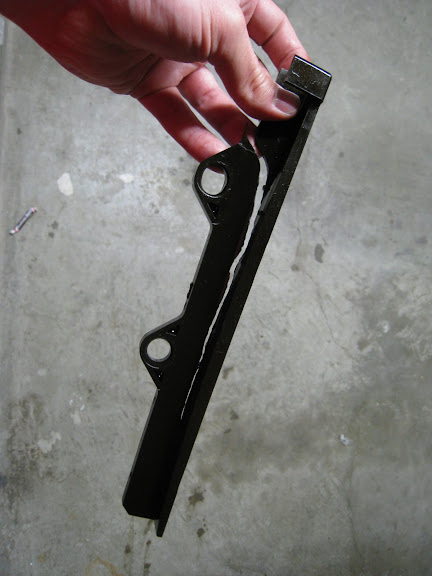
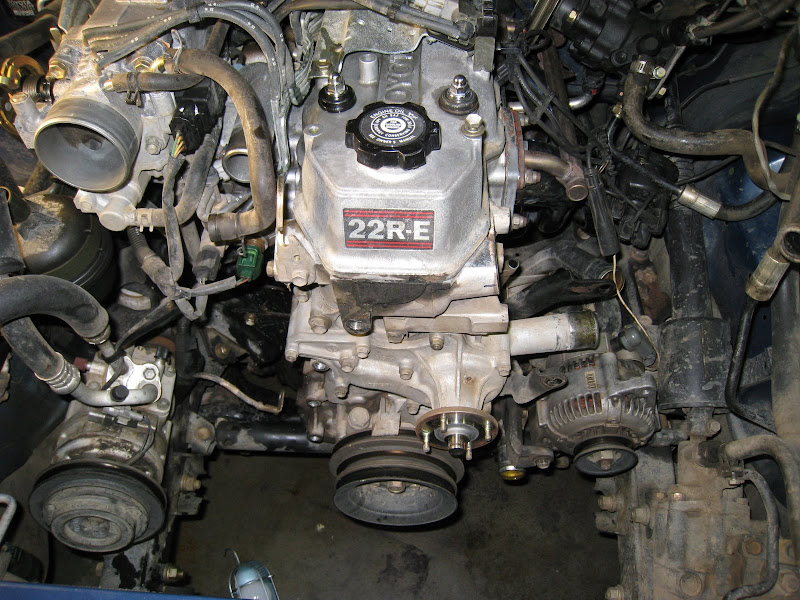
Short background: I have a 1994 extended cab 4x4 truck with the 22RE with 80K original miles. Last time I set the valve clearance, I noticed that the driver's side guide was cracked. (see pic) Luckily it was all still intact so I didn't have to pull the pan to fish out plastic parts. After hours of searching on this forum and others I finally felt confident I could get the job done so I ordered the kit from Engnbldr.com (Guides, sprockets, chain, tensioner, oil pump, water pump, chain cover, all seals and gaskets) Parts and service from Engnbldr was excellent. I didn't pull the head either.
Here is what I learned:
1.) The magic rope trick will stop your engine from turning so you can break loose the crank bolt. You take the #1 plug out, rotate the engine around so that the #1 piston is at TDC and then you back the piston down about 2" from TDC and stuff the soft piece of rope into the cylinder through the spark plug hole. Rotate the engine so that the piston squashes the rope. Unless you are strong enough to pop the cylinder head off, the engine will not turn. Break loose the bolt with a high quality 1/2 drive 6pt 19mm impact socket ($8.50 craftsman), a high quality 1/2 drive breaker bar (mines about 24" long). I had a piece of pipe to extend my breaker bar another 18" or so. Break the bolt loose and then you can pull the rope out. My dad uses this trick when he works on his Ford 8n tractor. This method was so much better than building your own SST (this technique wouldn't have worked for me because my pulley was way too deep. Maybe they aren't as deep on earlier models.) or using a chain or even the lodge the breaker bar against the frame and bump the starter method because I could use the same technique to break loose the bolt on the cam gear (and to re-torque them too). My dad says he has heard to the rope trick used to break the seal on a really stubborn head on those 8N tractors.
2.) Follow the instructions from 4Crawler. The write up was great. I didn't drain my oil but otherwise I followed the instructions to the letter.
3.) Take lots of pictures and especially of the power steering bracket and the alternator bracket. I spent 20 minutes solving the jigsaw of how those went back together because even though I had taken lots of pictures I didn't get a good one of those.
4.) Label everything. Every single bolt had a note about where it went. Even the ones that looked identical just in case. Make a note of how all pulleys, gears, etc came off.
5.) I think getting the distributor back on the right tooth is a bit of luck. I was ultra careful and I was positive I had gotten it back on exactly as it was before but the truck wouldn't start. I moved it one tooth and it started. So just be ready for that.
6.) No matter how careful you are, you will miss at least 1 bolt on the timing chain cover. If it doesn't come off with the tap of a rubber hammer, chances are you still have a bolt in there somewhere. I missed the one on the backside on the drivers side. If at first it doesn't move, check, check and re-check.
7.) Make sure you know the torque specs for everything. The engnbldr kit comes with instructions saying not to over torque the 2 bolts on tensioner body. 12ft-lbs is all they need. Too much and the tensioner body warps and the tensioner will have a very short life and your engine too.
8.) I measured both the new and old timing chain and I could not detect a difference of 1 mm between the chains on 17 links. So I am thinking 80k isn't enough miles on those chains to even show. Granted I did it using a ruler and not a caliper. I hope this means I can make it to 200K without having to do the job again.
Links to pics: (I couldn't figure out how to embed them in the post) Gallery 1 and Gallery 2
 11-01-2009, 04:03 PM
#2
Contributing Member
Join Date: Nov 2006
Location: Colorado
Posts: 280
Likes: 0
Received 0 Likes
on
0 Posts
All good tips.....the rope trick is interesting, I've never heard of that before.
I chuckled pretty good at number 3, because I did the same exact thing when I replaced mine TC a couple of years ago.
I chuckled pretty good at number 3, because I did the same exact thing when I replaced mine TC a couple of years ago.
11-01-2009, 04:18 PM
#3
Contributing Member
Good tips! 
hell, your driver's side guide looks GREAT compared to what mine looked like

as far as embeding the pics directly into the post, I, as well as many others on the forum like to use PhotoBucket, cause it's free for an account, and it's a breeze to use
you can use that Picasa server, it's just a little more difficult
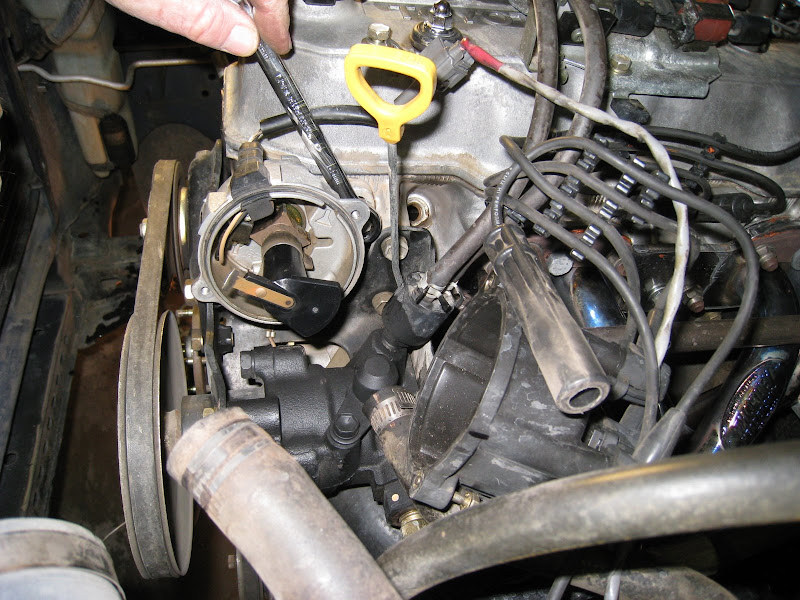
Also, a trick to get that dizzy dead-on; make sure the #1 cyl is at 0 degree TDC, and slide the dizzy in with the rotor pointing exactly strait up, and as you push it in let it rotate to the left worked flawless for me the first time during my rebuild

hell, your driver's side guide looks GREAT compared to what mine looked like
as far as embeding the pics directly into the post, I, as well as many others on the forum like to use PhotoBucket, cause it's free for an account, and it's a breeze to use
you can use that Picasa server, it's just a little more difficult
Also, a trick to get that dizzy dead-on; make sure the #1 cyl is at 0 degree TDC, and slide the dizzy in with the rotor pointing exactly strait up, and as you push it in let it rotate to the left
worked flawless for me the first time during my rebuild
Last edited by iamsuperbleeder; 11-01-2009 at 04:21 PM.
 11-01-2009, 04:31 PM
#5
Contributing Member


Trending Topics
11-01-2009, 05:30 PM
#8
Registered User
Thread Starter
Join Date: Jul 2009
Location: Albuquerque, NM
Posts: 28
Likes: 0
Received 0 Likes
on
0 Posts
YotaTech was a huge help. I was totally ready for the crank pulley bolt because of it. I was telling my dad about making the SST and that is when he told me about the rope trick. I was still planning on using the homemade SST but when I got down to the pulley I realized it wouldn't work on my truck so I went with the rope. Also without YotaTech I wouldn't have found the hidden timing chain cover bolt.
How did people mechanic before the internet? I'm 41 so I remember the days before the internet. My grandfather owned a garage. It makes me respect him even more.
Last edited by NMMarauder; 11-01-2009 at 05:31 PM.
11-01-2009, 05:37 PM
#9
Registered User
Thread Starter
Join Date: Jul 2009
Location: Albuquerque, NM
Posts: 28
Likes: 0
Received 0 Likes
on
0 Posts
It's funny now but at the time I was starting to doubt my sanity.
 01-02-2010, 06:05 PM
#11
Registered User

Join Date: Oct 2009
Location: Edmonton, Alberta
Posts: 7
Likes: 0
Received 0 Likes
on
0 Posts
I just did my first timing chain on a 22re. Well I guess I am better for it. I didn't label everything, and I need help. I think most of what went wrong, happened when I was pounding the new seal into the oil pump. Things bounced around.
-What size of bolt goes in the back side of the alt/ps bracket? I tried a couple different ones and they don't seem to be correct.
-Where can a find a new hidden timing cover bolt. The one under the cam gear. I have no idea where it went. I was organized, and its gone missing. What size is it?
-Stripped the threads on the top oil pump bolt, mixed up the torque ratings. , should a tap to a bigger bolt? or hel-coil?
Please help me?
At least the timing chain went in well, and I got the cover back on. The PO had put the slack to the drive side of the chain. Needless to say, I had no power. It did look fairly recent though.
Thanks, David
-What size of bolt goes in the back side of the alt/ps bracket? I tried a couple different ones and they don't seem to be correct.
-Where can a find a new hidden timing cover bolt. The one under the cam gear. I have no idea where it went. I was organized, and its gone missing. What size is it?
-Stripped the threads on the top oil pump bolt, mixed up the torque ratings.
, should a tap to a bigger bolt? or hel-coil?Please help me?
At least the timing chain went in well, and I got the cover back on. The PO had put the slack to the drive side of the chain. Needless to say, I had no power. It did look fairly recent though.
Thanks, David
01-02-2010, 08:33 PM
#12
Registered User

Join Date: Mar 2009
Location: just north of seattle, wa
Posts: 183
Received 0 Likes
on
0 Posts
how to post pics from picasa
While viewing your pic in picasa, you'll notice the 'get link to this Photo' on the side. That's the easy part. The hard part is choosing which link. IT's NOT the first one.
Instead, notice the 2 check boxes under the 'embed image option.' the 2nd check box (image only, no link) should be checked and then you can use the 'embed image option' link to use in yotatech. If you want to make the picture 'clickable' then you would deselect this box.
When posting a message with images, use the add image icon as you would expect.
A Picture is worth a thousand words:
Last edited by briholt; 01-02-2010 at 08:36 PM.
01-03-2010, 06:34 AM
#13
Registered User
I just through this thread.
I got one problem with the OP's original post. The magic rope trick.... I would NOT do this. Putting something - anything - between the top a piston and the head chamber, and then torquing the crankshaft with big a$$ breaker bar to crack the harmonic balancer nut loose seems to me that you run a huge risk of bending the rod, busting a piston, or warping that alloy head!!
But, I'm not a mechanic.
gNARLs.
 01-03-2010, 12:09 PM
#14
My motor is in pieces as I'm doing the chain and HG. I'm hoping to come close to finishing this coming weekend or so.
I struggled with the intake manifold. Some of those bolts were a major pain to get out. Especially the ones on the bottom (three towards the front) that are behind the metal fuel lines.
I'm referring to the 22R.
I struggled with the intake manifold. Some of those bolts were a major pain to get out. Especially the ones on the bottom (three towards the front) that are behind the metal fuel lines.
I'm referring to the 22R.
01-04-2010, 06:00 AM
#17
Registered User
Join Date: Feb 2006
Location: Barrie, Ontario CANADA
Posts: 1,730
Likes: 0
Received 0 Likes
on
0 Posts
I would say more often then not the timing chains break due to guide failure rather then actual chain failure.
I am also not a fan of the rope trick. I don't like sticking things where they don't belong...
I like the starter trick myself.
Good info to share though. Nice post.
I am also not a fan of the rope trick. I don't like sticking things where they don't belong...
I like the starter trick myself.
Good info to share though. Nice post.
Last edited by Flash319; 01-04-2010 at 06:02 AM.

Thread
Thread Starter
Forum
Replies
Last Post
skoti89
Off Road Trip Planning, Expeditions, Trips, & Events
0
07-06-2015 07:45 PM


