
The Herculining entire 4runner interior project thread..
 Feb 21, 2009 | 09:44 AM
#1

Thread Starter
Registered User
Joined: Aug 2008
Posts: 369
Likes: 1
From: Mesa AZ -> Federal Way, Wa
The Herculining entire 4runner interior project thread..
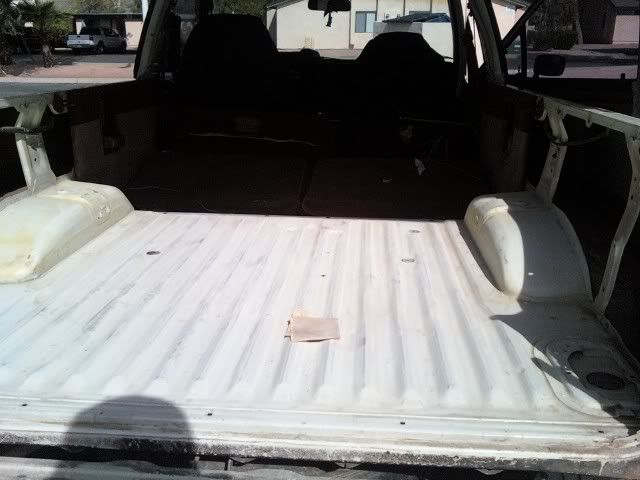
Started working on getting the inside of the 4runner prepped for the herculiner this morning. I decided that most likely I will just end up doing the "bed" of the 4runner today and hopefully the rest of the interior tomorrow (sunday). I'll update this as I go, I'm taking my first break so here's where I'm at so far.
btw, sorry for the crappy pictures I'm using my cellphone until my camera battery is charged.
Before:
Everything removed from the "bed".

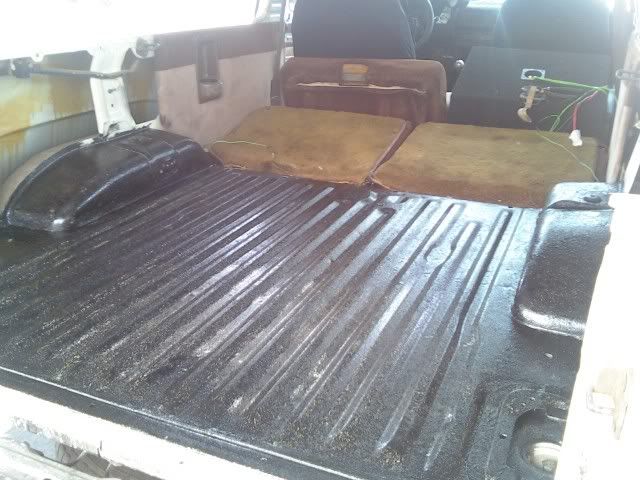
Using 80grit Sandpaper to scuff up the surfaces, following that by going back over it with the "scuff pad" that came in the Herculiner kit.
Mostly done sanding:
Now I'm going back out and starting on the cleaning process. Going to start with a degreaser to get some of the built up sludge out of the crevices/corners thats been there for 20 years..After that I'm going to run over it all with 80 grit again and then I'll start the cleaning with acetone process.
btw, sorry for the crappy pictures I'm using my cellphone until my camera battery is charged.
Before:
Everything removed from the "bed".
Using 80grit Sandpaper to scuff up the surfaces, following that by going back over it with the "scuff pad" that came in the Herculiner kit.
Mostly done sanding:
Now I'm going back out and starting on the cleaning process. Going to start with a degreaser to get some of the built up sludge out of the crevices/corners thats been there for 20 years..After that I'm going to run over it all with 80 grit again and then I'll start the cleaning with acetone process.
Feb 21, 2009 | 11:49 AM
#5
Thread Starter
Registered User
Joined: Aug 2008
Posts: 369
Likes: 1
From: Mesa AZ -> Federal Way, Wa
Just applied the first light coat of herculiner. Overall I'm pretty happy with the texture and the covering so far, the next coat should really come out nice.
Rinky, I am on greenfield between main and university.
Rinky, I am on greenfield between main and university.

Trending Topics
Feb 21, 2009 | 07:17 PM
#8
Thread Starter
Registered User
Joined: Aug 2008
Posts: 369
Likes: 1
From: Mesa AZ -> Federal Way, Wa
Probably the final update for the day, I've been at it for nearly 12 hours and I've had about enough to say the least lol.
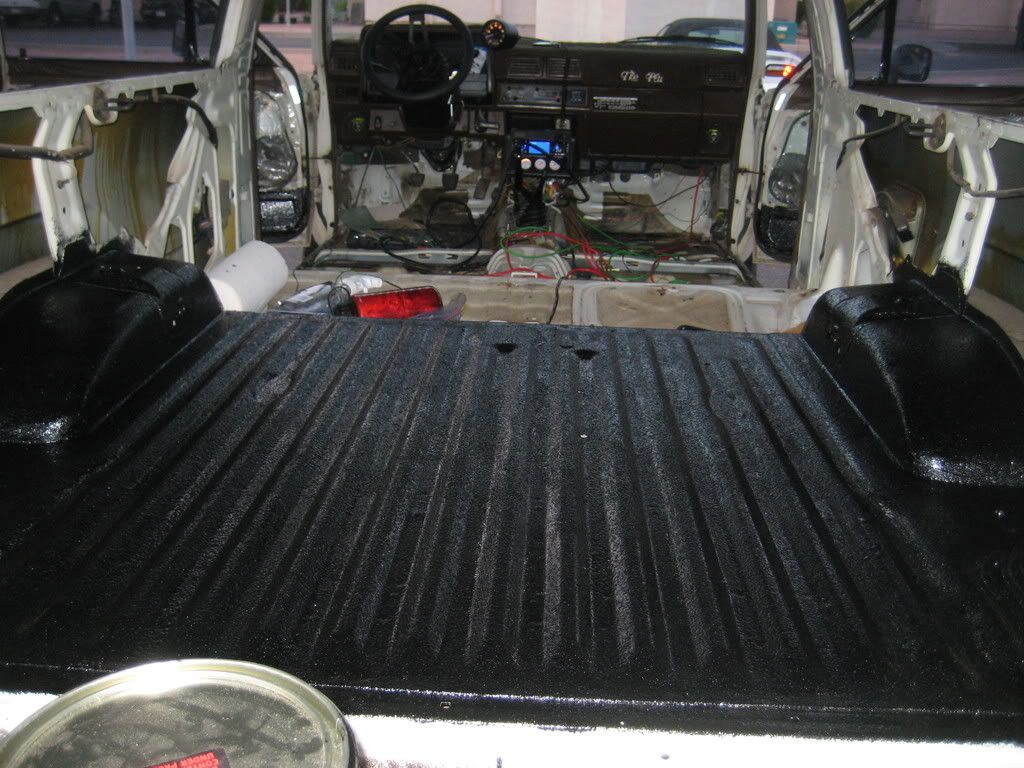
Got the 2nd coat on the "bed", turned out very nice..Debating if I should do a 3rd in the morning, I just might.
Here's a picture of the "bed" after the 2nd coat:
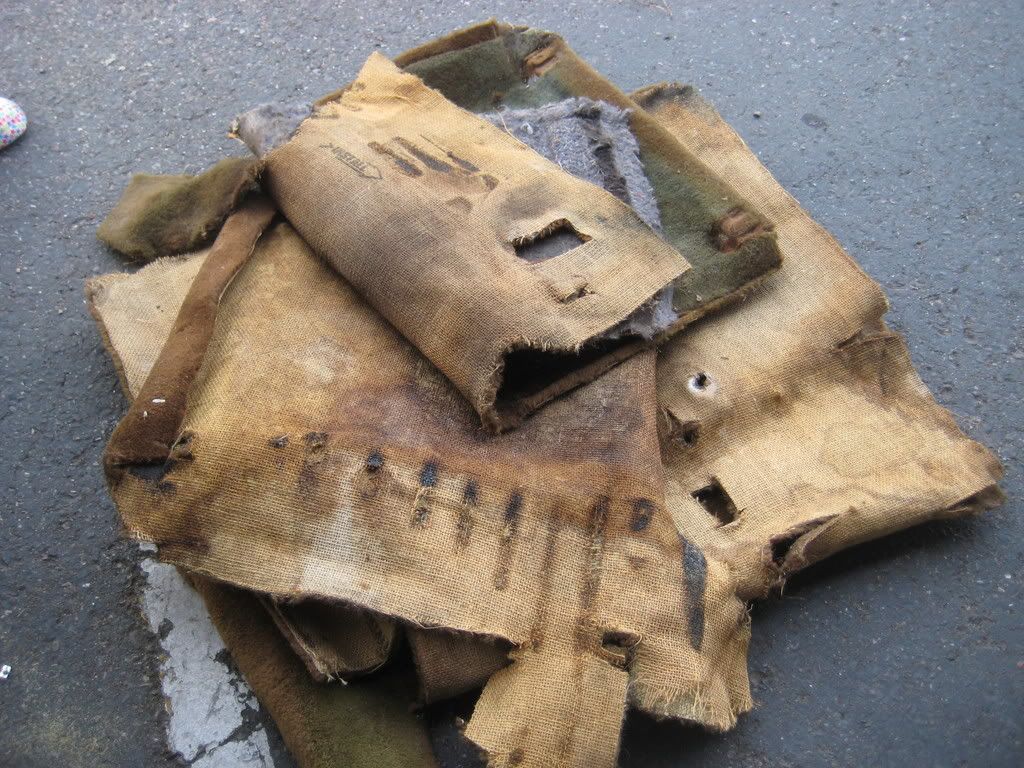
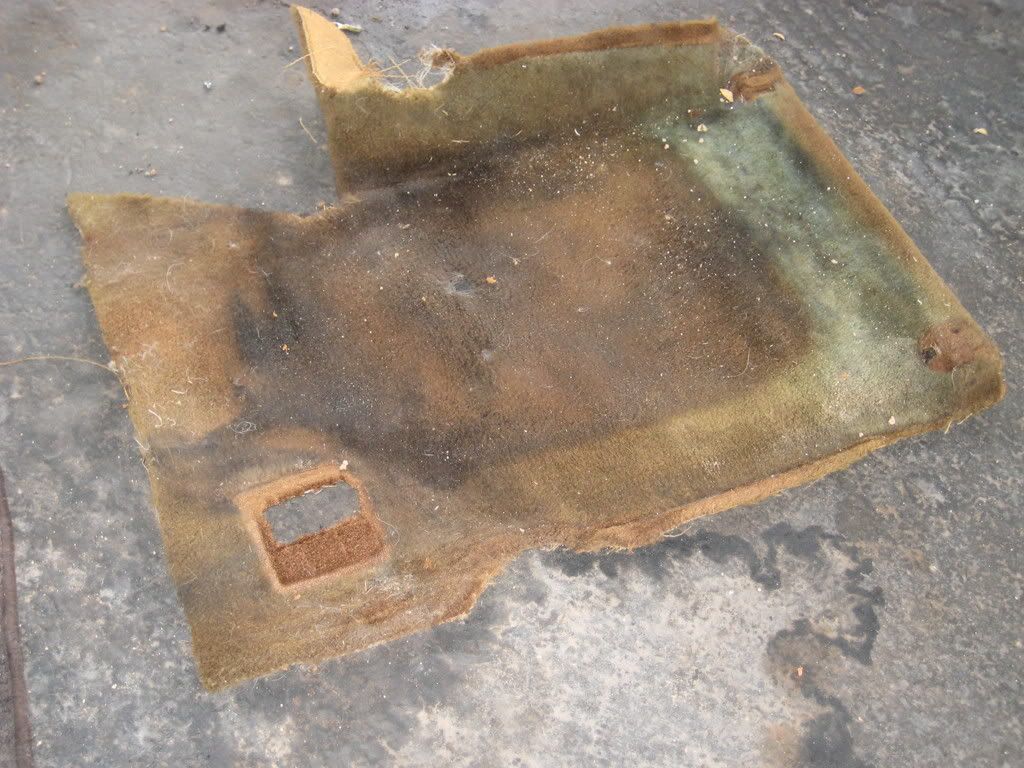
Pulled all the carpet out of the front! You can see my motivation for no longer wanting it, stuff was nasty!
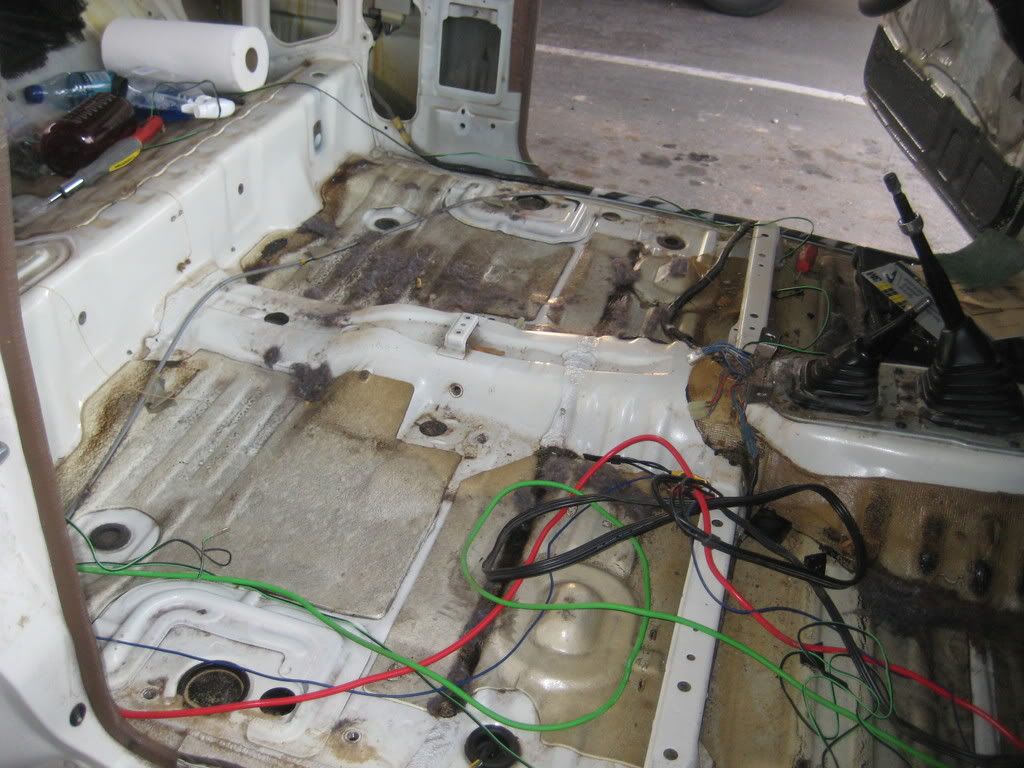
This is tomorrow's adventure, getting up all the old ass insulation, re-routing all the wires, prepping and lining the front! Going to be a long day!
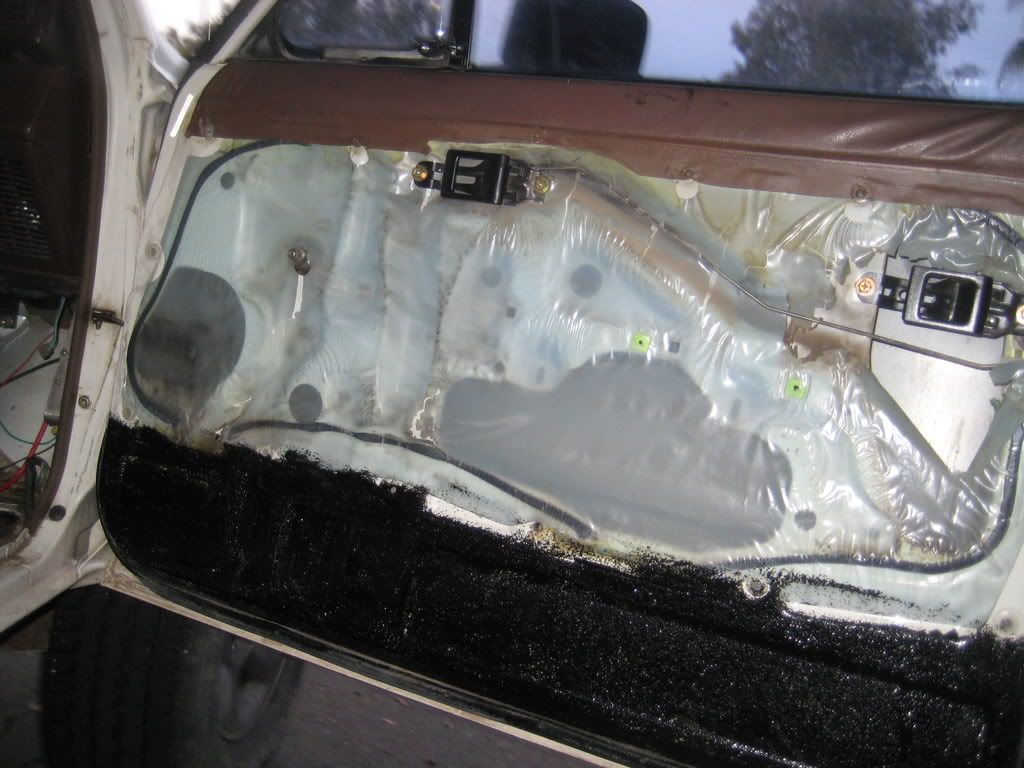
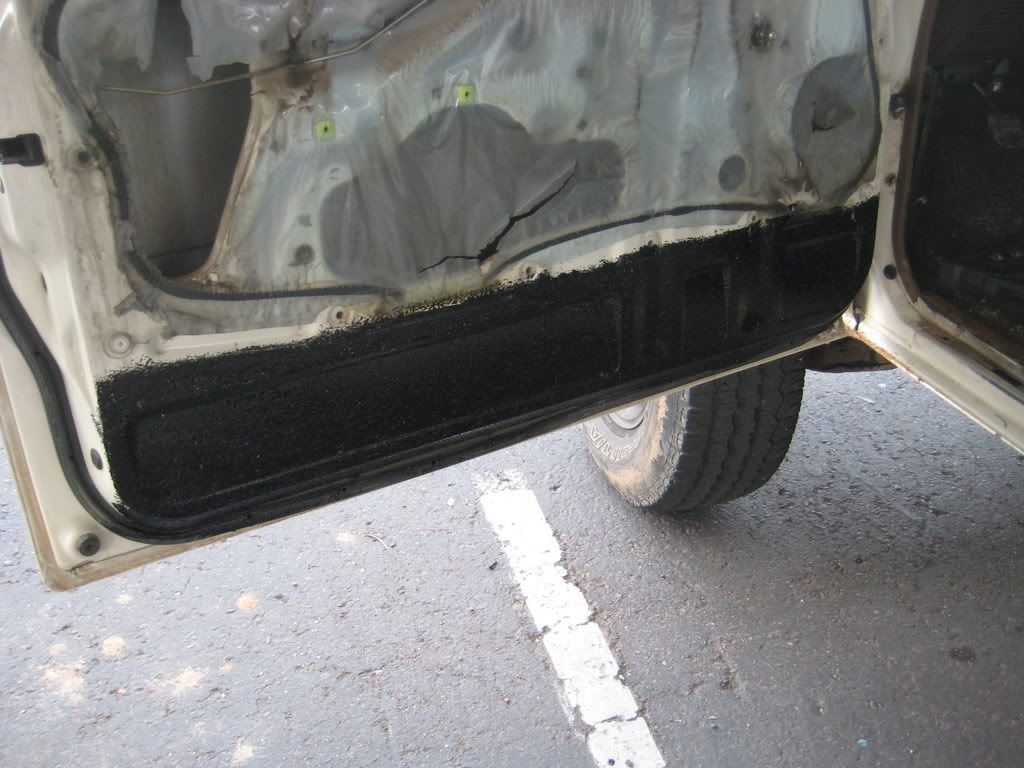
Also got the bottom of the doors done, this is the only visible part underneath the door panel.
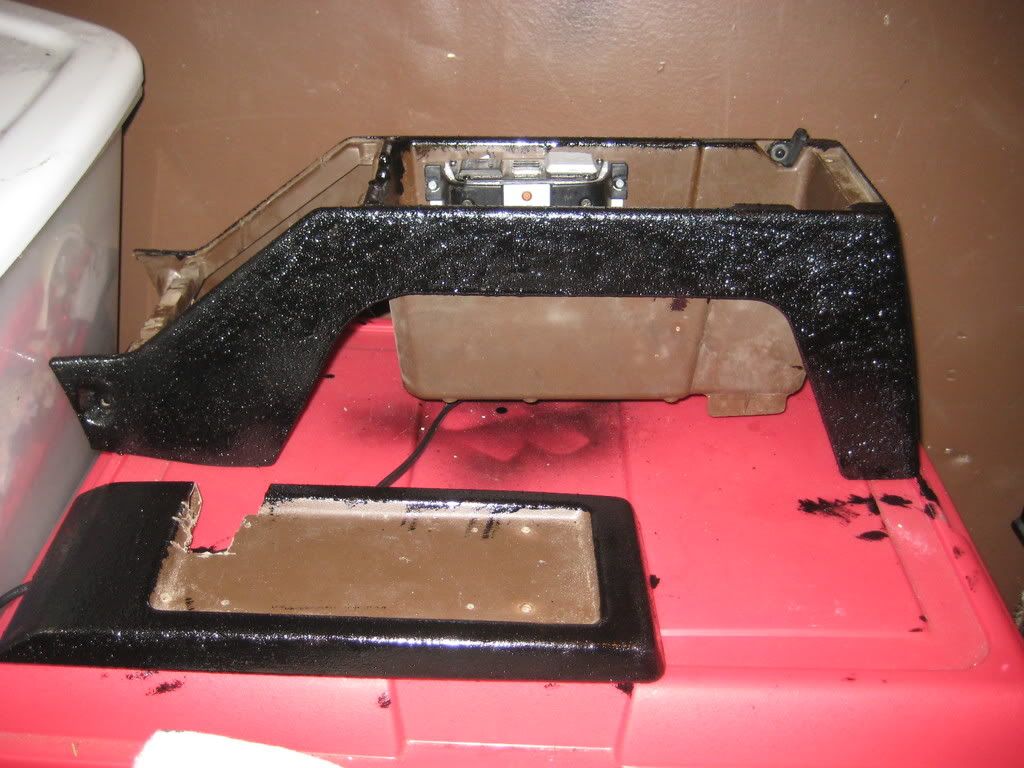
And finally, the first interior piece I decided to try was the center console. The parts left uncoated won't be visible once re-installed.
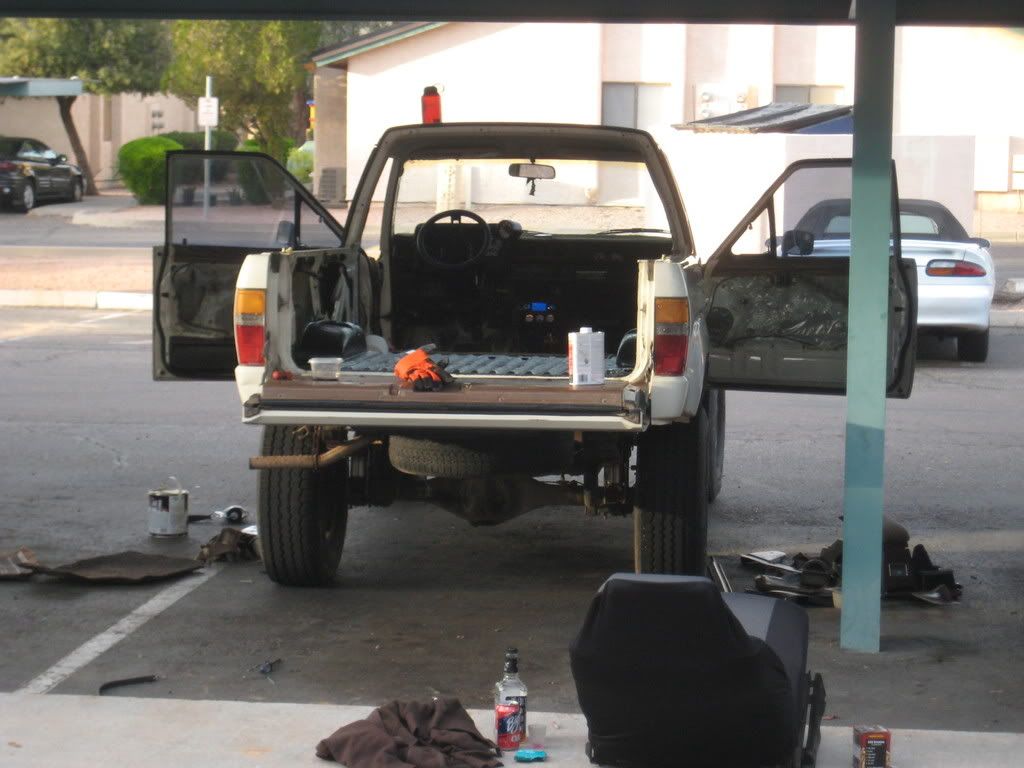
Just a random picture:
Got the 2nd coat on the "bed", turned out very nice..Debating if I should do a 3rd in the morning, I just might.
Here's a picture of the "bed" after the 2nd coat:
Pulled all the carpet out of the front! You can see my motivation for no longer wanting it, stuff was nasty!
This is tomorrow's adventure, getting up all the old ass insulation, re-routing all the wires, prepping and lining the front! Going to be a long day!
Also got the bottom of the doors done, this is the only visible part underneath the door panel.
And finally, the first interior piece I decided to try was the center console. The parts left uncoated won't be visible once re-installed.
Just a random picture:
Feb 21, 2009 | 07:30 PM
#11
Adding bedliner yourself is a major undertaking. Looks like it is turning out well. Hope it stays put as I've seen a lot of homebrew jobs peel up after a little abuse.
If I get mine done it will be Line-X with a lifetime guarantee.

If I get mine done it will be Line-X with a lifetime guarantee.
Feb 21, 2009 | 07:33 PM
#12
Thread Starter
Registered User
Joined: Aug 2008
Posts: 369
Likes: 1
From: Mesa AZ -> Federal Way, Wa
I am prepping the ever living hell out of this thing and taking my time. I'm fairly confident that I shouldn't have any major future problems with this.
Feb 21, 2009 | 07:40 PM
#14
Registered User
Joined: Mar 2008
Posts: 4,371
Likes: 6
From: Texas
I so want to do this to mine when I get time. I just really hate the idea of dropping 400$ on someone else doing it for me when I can take my time and do it for a lot less at the house.
Keep up the good work and keep posting pictures.
Keep up the good work and keep posting pictures.
Feb 22, 2009 | 12:16 PM
#15
Thread Starter
Registered User
Joined: Aug 2008
Posts: 369
Likes: 1
From: Mesa AZ -> Federal Way, Wa
Well..taking a break, thought I'd update real quick. I was definitely right about the fact that it's going to be a major pita to do the front part of the 4Runner. I've been out there for about 4 hours now and I'd say I'm maybe 1/2 done with cleaning/prepping the front floor for lining. Nothing to see so no pictures.
Feb 22, 2009 | 12:46 PM
#16
How much time did you spend on your surface prep? I did one of my old trucks, thought I did an awesome job using some sandpaper by hand. Turned out I wasted a weekend and the price of the liner. A grinder turned out to be the ticket...
hope it works...
chipping that factory sound deadener off is a PITA isn't it?
and be sure to put a screw into any threaded hole you are gonna need to use again...
hope it works...
chipping that factory sound deadener off is a PITA isn't it?
and be sure to put a screw into any threaded hole you are gonna need to use again...
Last edited by dropzone; Feb 22, 2009 at 12:49 PM. Reason: random thought
Feb 22, 2009 | 01:04 PM
#18
Registered User
Joined: Oct 2008
Posts: 426
Likes: 0
From: B-TOWN, ORYGUN
haha ya actually i did but had to get off the computer before i could comment it lol.. i bet between the jack and cola and then the fumes from the herculiner you might get quite the buzz lol
after seen the way this is turnin out, i cant want to do mine.. ya that factory sounddeader is a PITA.. when i was building a tranny tunnel for my 91
i was lucky enough that it was in the low 30s outside and i could just pund lightly with a small hammer and it would just shatter. im sure its a bit warmer where you are tho..


