
EB Street RV *check* 261 Cam *check* 22re blown HG *check*
 07-21-2011, 09:35 AM
#61
Registered User
Thread Starter
As you can see the in photo, the gasket split apart at the metal ring and it was right next to a coolant passage. For the most part, water only went into the cylinder and I caught it before it got really bad. I assume the gasket just did a pretty good job of sealing the head bolts up from oil, I dunno. I can't remember which one came out sludgey. We'll see if the timing cover gets here today, last time I ordered friday morning and it shipped sometime friday and got here saturday. Hoping that maybe it gets here today, if not it will be here tomorrow. It's only a few hour drive to Chico from here hehe.
 07-21-2011, 09:36 AM
#62
Registered User
Thread Starter
Today will be cleaning the block up, cleaning out the internals behind the timing cover, replacing the guide, hopefully dropping the oil pan and cleaning that out too.
Question:
Since I am pulling the head and oil pan, should I put the timing cover back on before putting the head and oil pan on to avoid gasket issues?
What's the order it all goes back together since I will have it all apart.
Question:
Since I am pulling the head and oil pan, should I put the timing cover back on before putting the head and oil pan on to avoid gasket issues?
What's the order it all goes back together since I will have it all apart.
07-21-2011, 09:46 AM
#64
Registered User
Thread Starter
So, how do you be sure that the timing chain stays on the correct gear tooth with the correct link after it's behind the cover while I still need to get the cam gear on the head with the tensioner pushing on the chain?
I saw the tape trick to keep the tensioner from pressing while getting it lined up, but that would only work with the head already on. Just trying to get an idea of what problems I'll face and how to deal with them effectively.
I saw the tape trick to keep the tensioner from pressing while getting it lined up, but that would only work with the head already on. Just trying to get an idea of what problems I'll face and how to deal with them effectively.
07-21-2011, 09:58 AM
#65
twist/zip-tie the chain in place to the cam gear and bungee that to your open hood. it'll keep everything in place and timed while you get the cover on. the tricky part is getting the head on. you'll have to kind of wrap the chain around the cam gear and rest it in the guides.
here you can see both the twist-tie and bunjee
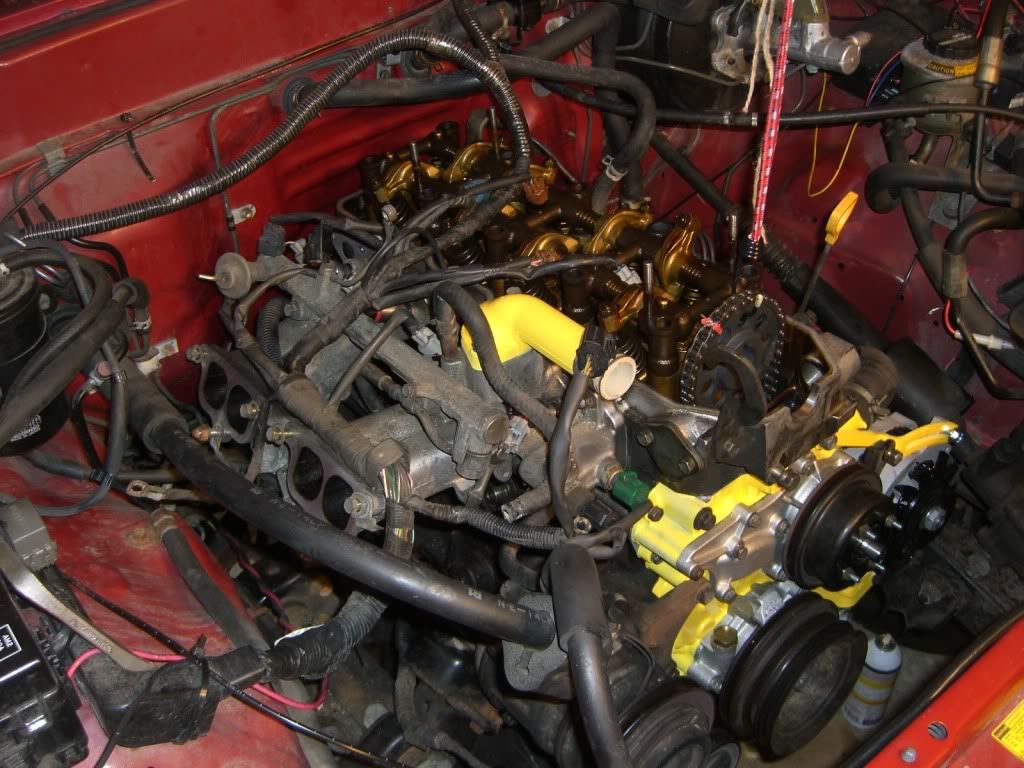
here you can see both the twist-tie and bunjee
07-21-2011, 10:26 AM
#66
Yeah, ^^, and don't forget they're on there(zip ties) when you go to turn the crank over, k? lol.
Also, ..... are you putting the cover on and THEN the head? If you do, you will really appreciate a helper to push back the tensioner while you pull the cam gear onto the cam end. Even then, two times, I HAD to turn the crank just a tiny bit to give me some play in order to get the cam gear over the cam. (I have a 2.5' screwdriver/flathead that works perfectly on pushing back the tensioner).
Also, as you're installing the timing cover, check as/after installing each bolt(along the sides and top) to be sure you're/you've not bound/kinked up the gaskets in any way. IT HAPPENS, ....most likely wont due to the dowel pins, ...but it can. (Especially on the top right due to the void there for the water pipe. It also can happen cuz the cover doesn't always just 'slide right on, no prob.' over the oil pump and then even on to the dowel pins..... Those pins can be a bit snug into the cover)> Also, as you're sliding the cover on, aside from having all the obvious tools/products to get it done quickly, ....have a small pick ready, to help you turn the oil pump drive spline that tiny bit that might be necessary in order to get the cover over and through into place
 07-21-2011, 11:43 AM
#68
Registered User
Ok, I did a quick skim of your build...Lookin good man!! Let me tell you, the Street RV head is nice I'm running one with a 268, should of got the 261 for more on the low end. So you combo I think will be great!!!
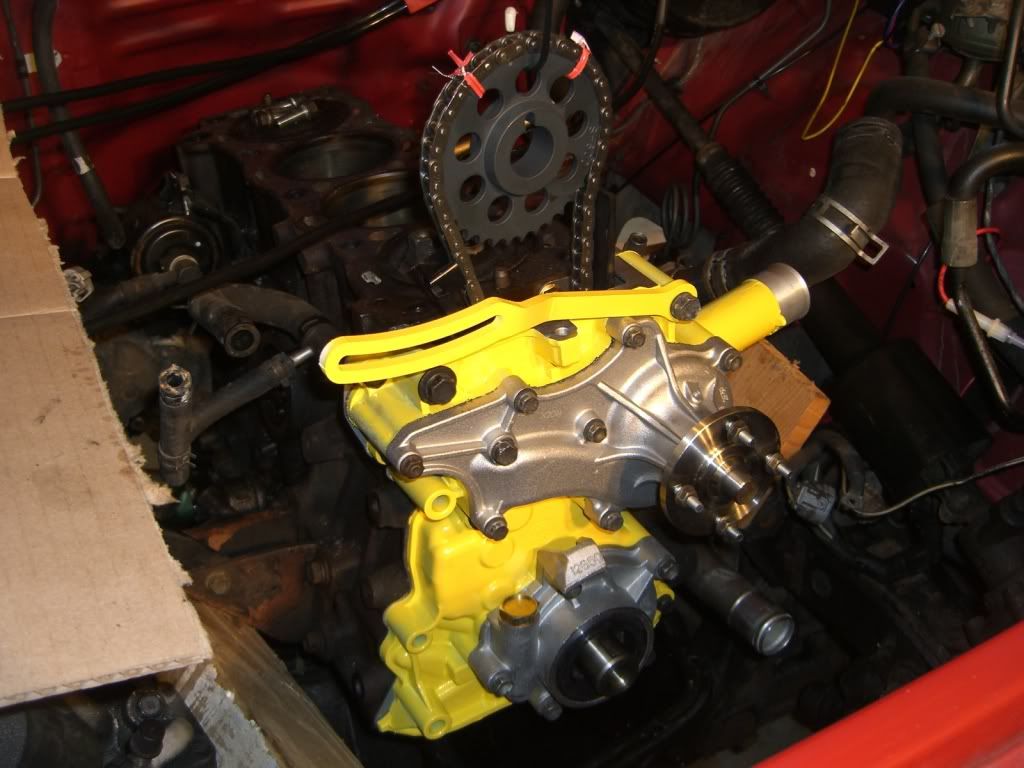
As far as the timing...Looks like you're 1 tooth off If I were you I'd double and triple check all the timing marks and get is set proper. The shiny should be at the dimple and just off center when installed on the cam.
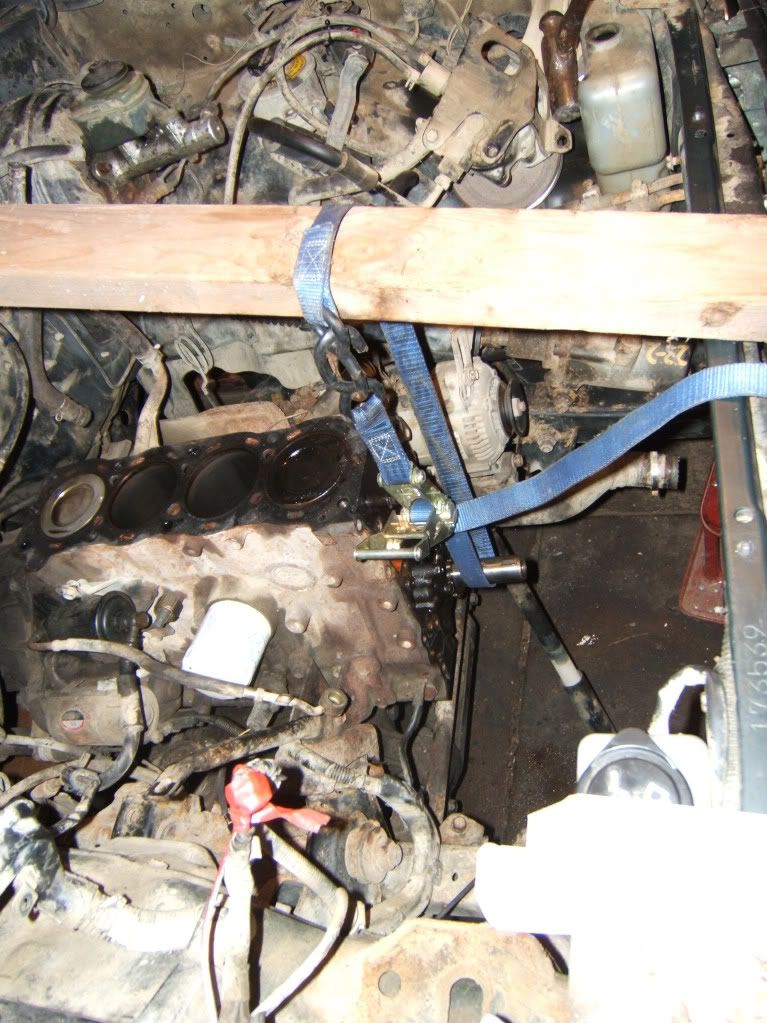
When I pulled my oil pan I took the nuts off the motor mounts and raised the engine a little bit. I also had to pull the steering damper out. I used a 2x4 and large ratchet strap to raise the engine a few inches to clear. I didn't want to drop the front diff.
I also did the intake bat swap seemed like the time to do it.
Watch the vac lines when getting it back together...I had some issues with that I had 3 that were not right.
I'm getting about 23mpg right now on 31's I think the 2.25 exhaust helps out a bit as well.
Need anything give a shout!!!
That's all for now...
https://www.yotatech.com/forums/f116...-again-215101/
As far as the timing...Looks like you're 1 tooth off If I were you I'd double and triple check all the timing marks and get is set proper. The shiny should be at the dimple and just off center when installed on the cam.
When I pulled my oil pan I took the nuts off the motor mounts and raised the engine a little bit. I also had to pull the steering damper out. I used a 2x4 and large ratchet strap to raise the engine a few inches to clear. I didn't want to drop the front diff.
I also did the intake bat swap seemed like the time to do it.
Watch the vac lines when getting it back together...I had some issues with that I had 3 that were not right.
I'm getting about 23mpg right now on 31's I think the 2.25 exhaust helps out a bit as well.
Need anything give a shout!!!
That's all for now...
https://www.yotatech.com/forums/f116...-again-215101/

 07-21-2011, 11:59 AM
#70
sc- yours is the second diagram (as is mine). i got a bit messed up on the lines just behind the intake chamber/manifold
california emmisions suck. too many hoses and what-not. i got lucky and hooked everything up right the first time. i'm sure you'll be fine
california emmisions suck. too many hoses and what-not. i got lucky and hooked everything up right the first time. i'm sure you'll be fine
07-21-2011, 01:16 PM
#71
Registered User
Thread Starter
Yes, very helpful diagrams, although I actually still haven't taken the vacuum lines off the manifold for the most part. I took it apart all attached as much as possible.
As far as the timing being off, that's how it was when I took it apart. I had the timing chain changed about 20k miles ago by someone else and it really has come back to bite me in the butt. Lots of bolts missing on the exhaust, broken timing cover, broken stud in the block from the AC bracket, timing off a tooth. That's just what I've found so far! Although, the top and the bottom could be off a tooth as far as I know (essentially right, just looks wrong), it lost tension when I pulled the head before the timing cover.
I'll check back in after I get the oil pan off, been doing some tree work on our property today while the tractor is here clearing the land.
07-22-2011, 10:47 AM
#72
Don't forget to ream out the oil pan bolt holes,..... who knows, maybe THAT was done right at one time, and the book says, "Put sealant in the holes and around the inside of the seam", lol. I had to do that twice, and I'm glad I did this time, as 2 bolts leaked after putting the pan back on the last 'thing' that machinist gave back to me. Even though I did a 'good' job, last time....the REALLY good job this time of cleaning them out really well has got me 2K now with NO LEAKS in the pan arena, not one drop.... even with a SLIGHTLY bowed pan surface(they often get that way over time or from removal).
And be GENEROUS with the sealant, ..... but DO NOT torque it down snug right off the bat! Just button it up hand tight(wear gloves, you'll thank me later, lol) and I DON'T mean 'as tight as you can, by hand', ... just get them up and in, watch for the 'OOZING' a lil, then stop, come back in 15 minutes and go a lil further, and remember, it doesn't take much UNTIL you button it up, cuz "button it up to 9#" is the final 'torque', .... yeah, not much, eh? lol. It's really the 'STUFF' that does the sealing, the bolts just hold it in place. The sealant on the bolts that go up and in is also part of the 'sealing' process for when, God forbid, the oil works it's way to the bolt hole(it's also why I laid a good size bead all the way around the bolt holes on the pan before slapping it up and in...."In case it get's PAST the bolt sealant as well). Not being negative or pessamistic, ..... I mean, LOTS of people button them up and what's the most common leak afterwards? THE PAN! lol
BEST WISHES, MAN, rootin for ya!
Last edited by ChefYota4x4; 07-22-2011 at 10:53 AM.
07-25-2011, 10:24 AM
#73
Registered User
Thread Starter
As promised, as I have been removing gaskets from the timing cover assembly here is what I've found. Sorry no pics yet.
There is a very very thin layer of a black gasket material sealer on the block side all the way down the driver's side of the gasket. There is no gasket sealer on the timing cover side except around the water lines. On both side there is a red sealant around the water line gaskets. Haven't removed the gasket from the passenger side yet.
There is a very very thin layer of a black gasket material sealer on the block side all the way down the driver's side of the gasket. There is no gasket sealer on the timing cover side except around the water lines. On both side there is a red sealant around the water line gaskets. Haven't removed the gasket from the passenger side yet.
07-25-2011, 10:26 AM
#74
Registered User
Thread Starter
I think this system did work well except that he pinched my HG putting the cover back on and that leak really covered the whole timing cover with a lot of oil. I never saw any leaks coming from anywhere except where the head meets the timing cover. I spent a lot of time inspecting it and shaking my fist at that leak.
07-26-2011, 03:30 PM
#75
Registered User
Thread Starter
Any tips for removing the oil pan? I've got the motor raised up a little and the diff dropped a little. Plenty of room to get it out, but I am worried about damaging the pan. It's glued on their pretty darn good? Any ideas?
07-26-2011, 04:31 PM
#76
unless you use a sledge hammer, i doubt you're going to damage it. make sure you got all the bolts (even the ones in the back). give a good tug, rock back and forth, and maybe use a razor to separate it. after its off, use a wire wheel to get all the gasket off the pan, not the block (use a razor).
07-26-2011, 04:52 PM
#77
Registered User
Thread Starter
Thanks, ended up getting it to come loose with a putty knife, just needed to break the seal and it popped right off. Now I'm having issues getting the pan to clear the steering arm that runs across. Either need to beat the cross member out all the way or remove the pitman arm and drop the steering. Haven't decided which yet. Couldnt get the cross member to drop all the way out and I persuaded it pretty hard
07-26-2011, 05:27 PM
#78
first, i removed the pickup tube. then i tilted the pan and slid it out the back, towards the driver's side. i installed it in reverse order. but before bolting the pan back up, i rested it on the diff and sat in front of the motor to put the sealant on. then i moved the pan straight up into place. no mess.
07-26-2011, 06:39 PM
#79
Registered User
Thread Starter
The crossmember is seized in there pretty good, I got it about another 1/2 inch lower than shown here, but still not low enough to get the pan out the back and the steering is in the way in the front 

07-26-2011, 06:48 PM
#80
Drop the diff, buddy! 3 mounting bolts and the shaft.... voila! Just support it and lower it down enough to get out the back, as mentioned. Let the pick up tube sit in there, no need to try and finagle that thing out of there... it's awkward! lol. Could just try to lift it up like Lumpy laid out for ya, ... using the crank shaft/straps and 2x4.
PS> The problem is often getting it back in, especially with the sealant on there all nice and perfect(that's much easier to do out on a bench, but without removing the motor, it's a bit more difficult, because, like he said, you need the pick up tube on, first, and once it's time to get the pick up tube in, you will most likely rub your arm all over the sealant if you do the sealant first(ask Jerry and Myself about that one! lol). I had my diff dropped, so I was able to get the pan up and in there a bit more easily.... You'll see, going out the back, how much the bell housing is really in the way.
PS> The problem is often getting it back in, especially with the sealant on there all nice and perfect(that's much easier to do out on a bench, but without removing the motor, it's a bit more difficult, because, like he said, you need the pick up tube on, first, and once it's time to get the pick up tube in, you will most likely rub your arm all over the sealant if you do the sealant first(ask Jerry and Myself about that one! lol). I had my diff dropped, so I was able to get the pan up and in there a bit more easily.... You'll see, going out the back, how much the bell housing is really in the way.
Last edited by ChefYota4x4; 07-26-2011 at 06:52 PM.


