
95 4Runner- 3VZE Cylinder Head Removal
 12-28-2013, 01:58 PM
#1
Registered User
Thread Starter

Join Date: Nov 2008
Posts: 30
Likes: 0
Received 0 Likes
on
0 Posts
95 4Runner- 3VZE Cylinder Head Removal
Hey guys,
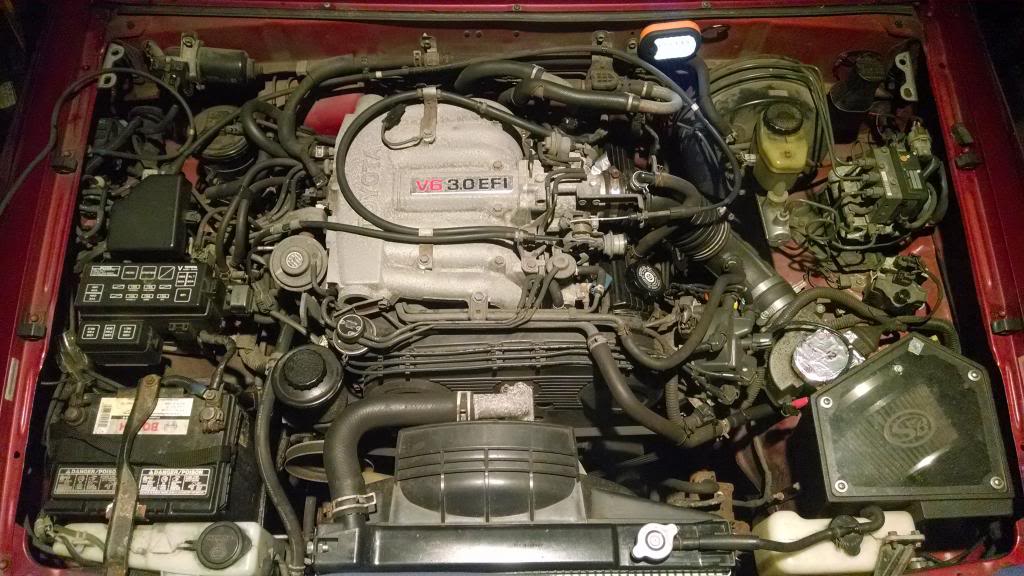
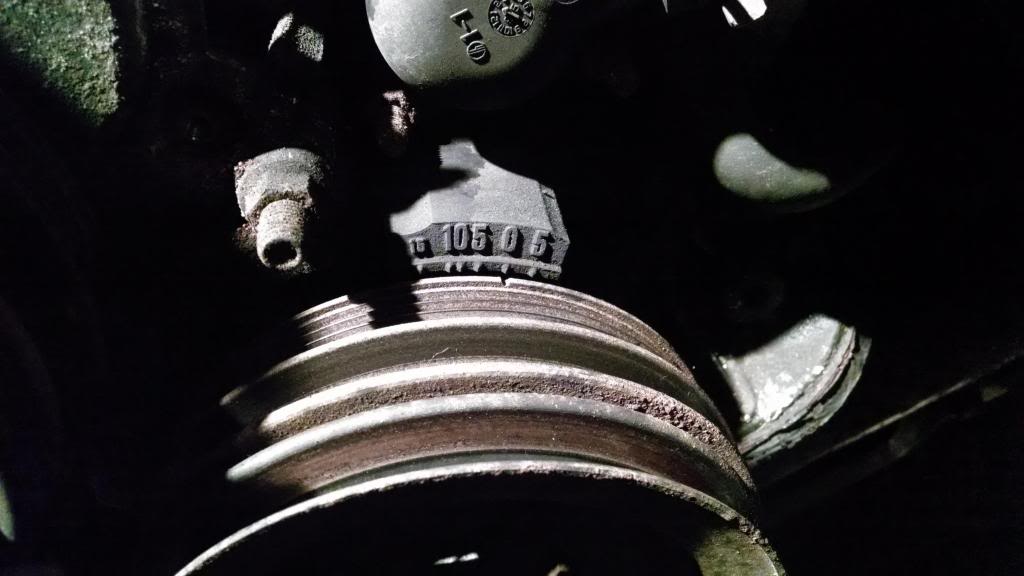
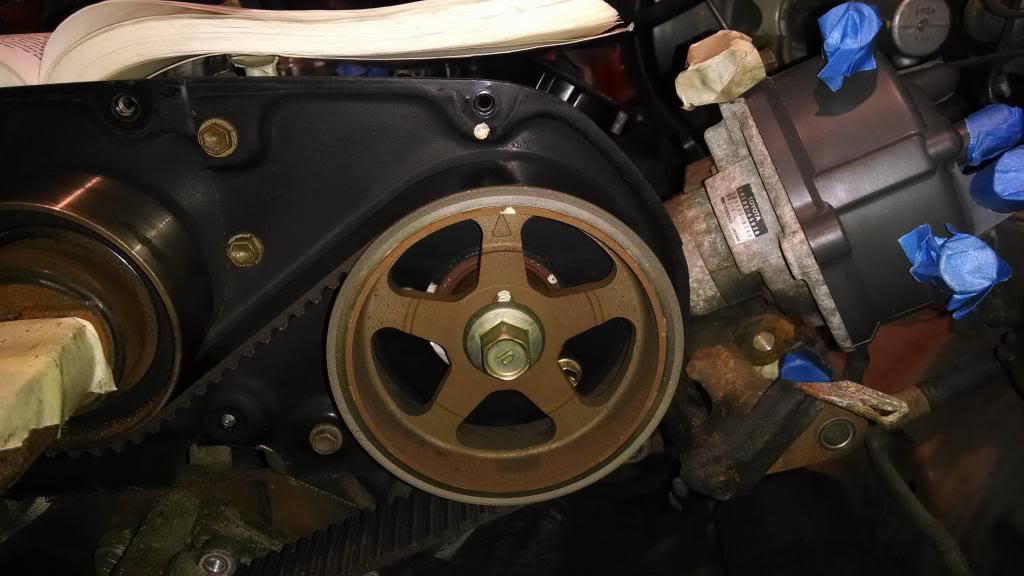
I started the tear down on my truck so I can get the heads rebuilt (0 psi compression in cylinder #6). Here's a look at how far I've gotten, but I'm kind of not sure what to make of the fact that the markings on the pulleys don't seem to line up where they should when the crank is at 0. Any help would be greatly appreciated- this is my first time tearing apart an engine so I'm trying to make sure I'm thorough!
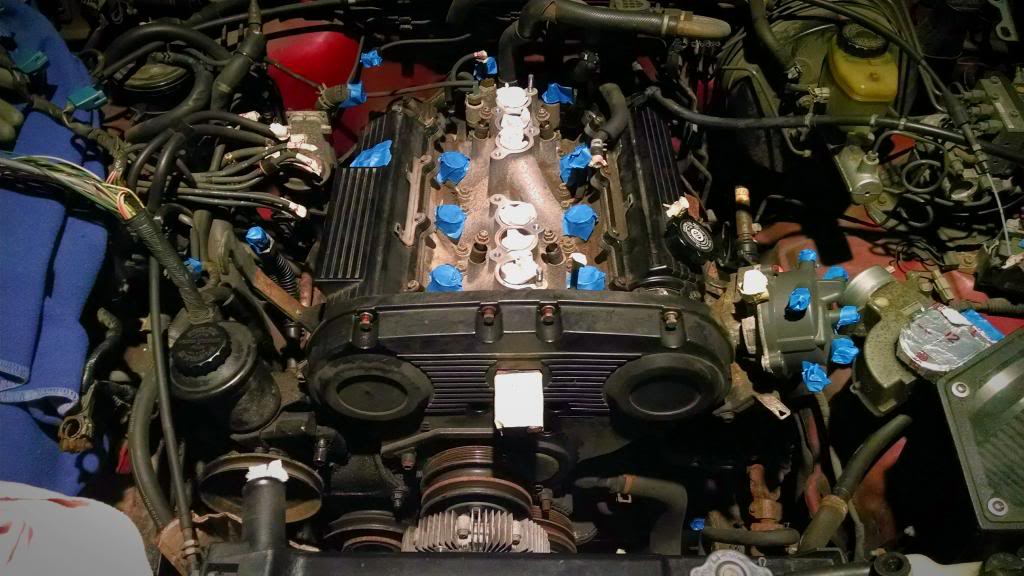
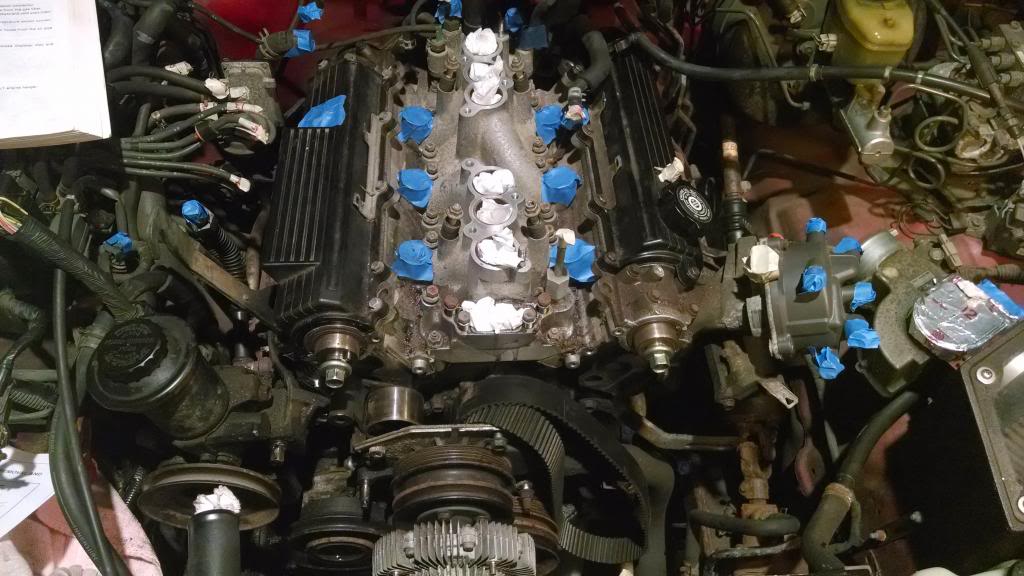
UPDATE 1/28/14- Here are some pics of how things stand as of a month ago. I plan on getting back to work to try and finish removing the heads this weekend.
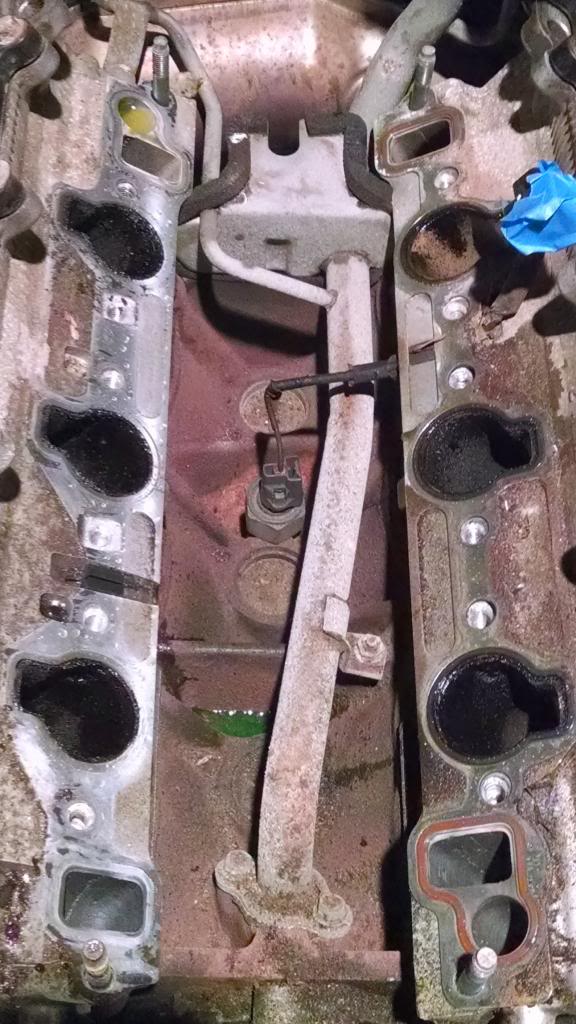
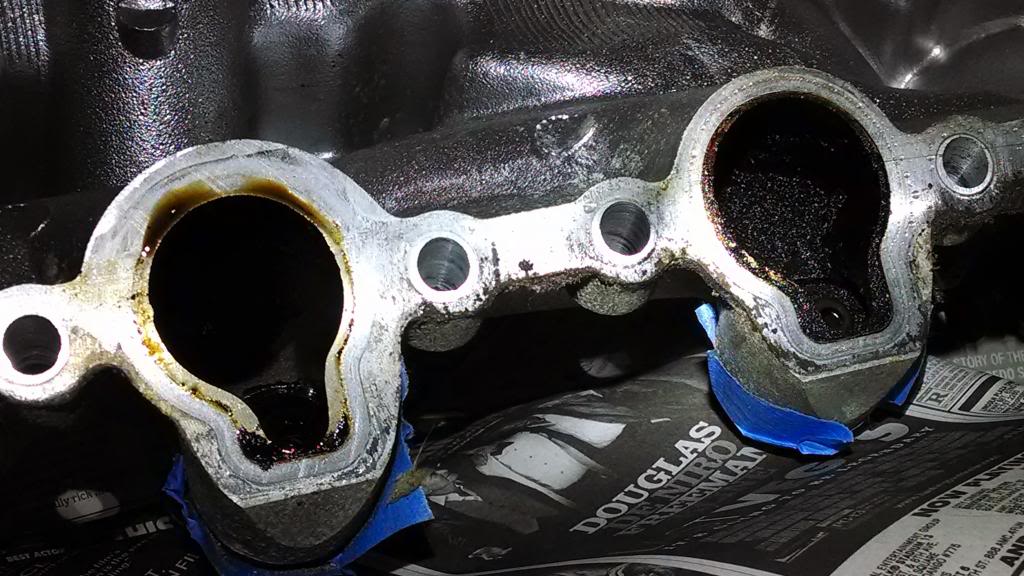
I'm thinking the oil and carbon deposits in the intake plenum are a result of the truck running on 5 cylinders for about 6 months. I'm pretty sure the exhaust valve in cylinder 6 is completely shot so I had been driving it with the fuel injector for cylinder 6 disconnected. I also messed around with the timing and air fuel ratio for a while to improve the idle and performance while running on 5 cylinders.
Last edited by jason724; 01-28-2014 at 11:58 AM.

 12-28-2013, 05:06 PM
#5
Registered User
All looks good.. keep going... looks like you're marking everything so that's a plus. Have fun with with the pulley and crank bolts.  I've got a thread on here with the teardown of my engine. It might help you out a little with what to watch out for plus I have links in it to other info. Good luck!
I've got a thread on here with the teardown of my engine. It might help you out a little with what to watch out for plus I have links in it to other info. Good luck!
12-29-2013, 12:10 PM
#6
Registered User
Thread Starter
Join Date: Nov 2008
Posts: 30
Likes: 0
Received 0 Likes
on
0 Posts
Thanks for all the tips!
AW1090- I checked out your teardown and found some useful tips.
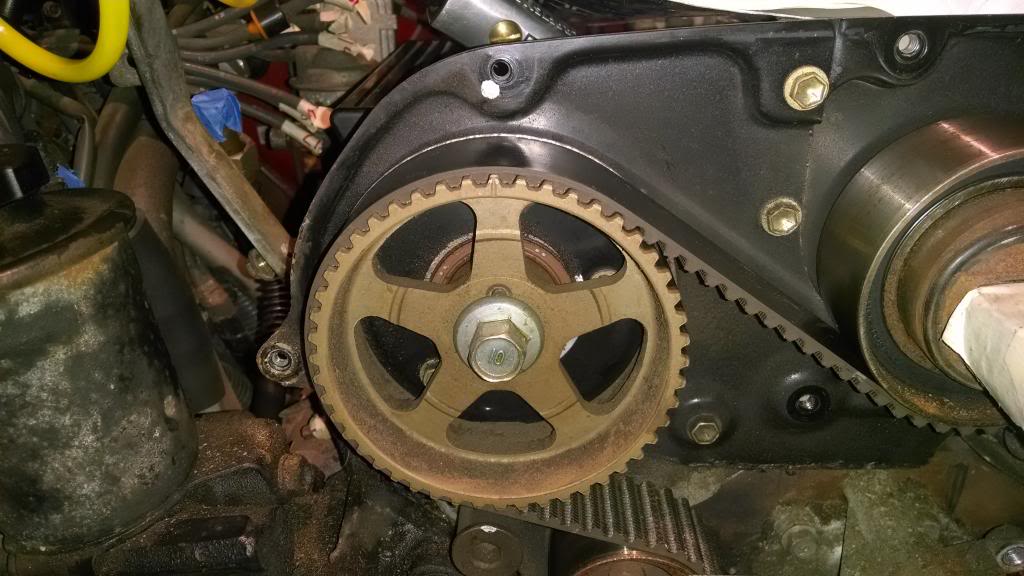
I tried to create a stand to hold the cam pulley still using some old angle irons I had laying around, but it wasn't quite rigid enough. I picked up this tool from harbor freight for $8.99 and I'm hoping I'll be able to use it to hold the pulley still enough while using an impact wrench.
AW1090- I checked out your teardown and found some useful tips.
I tried to create a stand to hold the cam pulley still using some old angle irons I had laying around, but it wasn't quite rigid enough. I picked up this tool from harbor freight for $8.99 and I'm hoping I'll be able to use it to hold the pulley still enough while using an impact wrench.
12-29-2013, 05:51 PM
#7
Registered User
Thread Starter
Join Date: Nov 2008
Posts: 30
Likes: 0
Received 0 Likes
on
0 Posts
Quick update- No luck with the tool from Harbor Freight. It just bent and wouldn't hold. Searching around now to see if I can find a better tool for a decent price or rent it from somewhere.
Let me know if anyone has any suggestions (I live in central NJ). I'm trying to avoid sacrificing my timing belt and I don't have access to a welder at the moment.
Let me know if anyone has any suggestions (I live in central NJ). I'm trying to avoid sacrificing my timing belt and I don't have access to a welder at the moment.
Trending Topics
12-29-2013, 10:50 PM
#9
Registered User
Thread Starter
Join Date: Nov 2008
Posts: 30
Likes: 0
Received 0 Likes
on
0 Posts
I saw a youtube video of someone doing that, but I'm just worried about any type of possible damage that may result from doing that.
12-29-2013, 10:55 PM
#10
Registered User

Join Date: Nov 2013
Posts: 5
Likes: 0
Received 0 Likes
on
0 Posts
Its actully better to do it that wat if you hold the gear you risk snapping the pin that holds the gear in place. As long as you use the right size wrench and put a rag between the wrench and the head surface you should be alright.

 01-21-2014, 11:12 AM
#14
Registered User

Join Date: Sep 2007
Location: San Francisco East Bay
Posts: 8,254
Likes: 0
Received 822 Likes
on
649 Posts
And I agree with earlycuyler88; this method is MUCH better than trying to hold onto the cam sprocket. The sprocket is prevented from turning only by the "knock pin," so if you try to keep the cam from turning via the sprocket you're putting all the load on the knock pin and the slot in the sprocket; not good!
01-28-2014, 11:40 AM
#15
Registered User
Thread Starter
Join Date: Nov 2008
Posts: 30
Likes: 0
Received 0 Likes
on
0 Posts
Ended up grabbing one of these and it worked like a dream. Definitely worth the purchase especially considering I'll need it when I torque everything back down.
I'm currently having trouble removing all of the wonderful exhaust components. Specifically the exhaust crossover and the front exhaust pipe. Anyone have any tips? The northeast winters have certainly taken their toll and I've already soaked everything with PB blaster.
I'm currently having trouble removing all of the wonderful exhaust components. Specifically the exhaust crossover and the front exhaust pipe. Anyone have any tips? The northeast winters have certainly taken their toll and I've already soaked everything with PB blaster.
01-28-2014, 12:03 PM
#16
Registered User
Join Date: Sep 2007
Location: San Francisco East Bay
Posts: 8,254
Likes: 0
Received 822 Likes
on
649 Posts
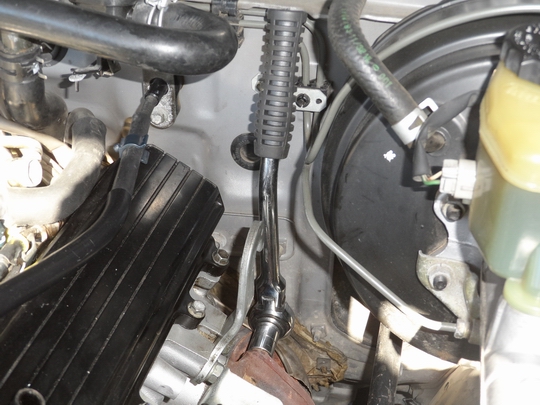
To remove the front exhaust pipe, you will work from underneath the cat (approximately) with a string of extensions. Save yourself a lot of grief; get good-sized 1/2" drive extensions. http://www.harborfreight.com/4-piece...set-67977.html (these are pretty cool; they lock to each other) If you have a nice "wobble" set http://www.harborfreight.com/9-piece...ons-67971.html DON'T use it; you're going to really wail on the wrench, and with the reduced neck (to produce the wobble) you'll break the extension.
01-28-2014, 01:19 PM
#17
Registered User
Thread Starter
Join Date: Nov 2008
Posts: 30
Likes: 0
Received 0 Likes
on
0 Posts
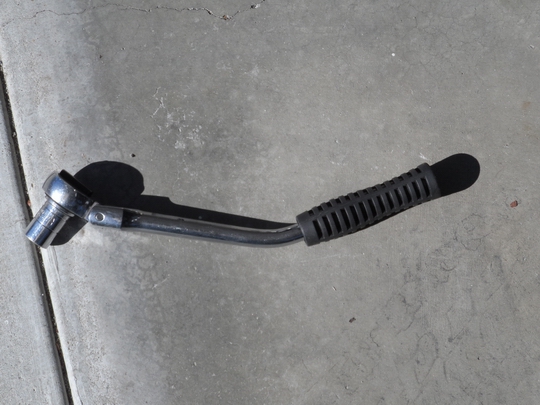
@scope103 - Wow, that's a clean looking engine bay you have there. Thanks for the advice to get an offset flex-head ratchet, but I think I had more of a problem getting to the third crossover bolt that is positioned below the bolt that you are wrenching on in your photo. (It's been a month since I've worked on it because I live about 5 hours away from the truck right now, but I'll be back there this weekend to get back at it)
It's funny that you mention to NOT use wobble extensions because I picked up a set from harbor freight explicitly for that purpose. I'm not sure if I still have the receipt so I might just give them a try and hope for the best. I have this impact wrench:
It claims 700 ft. lbs. of torque so I'm hoping it'll get the job done if I can get the right combination of extensions, but if I remember correctly there wasn't really a straight shot to the front exhaust pipe which is why I had opted to get the wobble extensions.
01-29-2014, 09:37 AM
#19
Registered User
Join Date: Sep 2007
Location: San Francisco East Bay
Posts: 8,254
Likes: 0
Received 822 Likes
on
649 Posts
Don't forget that "regular" extensions (and sockets) are not intended for use with an impact gun. So don't forget your safety glasses; there's always the chance you could break something when using an impact gun.
01-29-2014, 04:56 PM
#20
Registered User
Thread Starter
Join Date: Nov 2008
Posts: 30
Likes: 0
Received 0 Likes
on
0 Posts
Thankfully harborfreight is only ~15 min drive from my house. I picked up a set of impact extensions when I got the wobble extensions and I'm hoping some sort of configuration will get the exhaust pipe off.
As for the exhaust crossover- if I don't have any luck with my flex ratchets I'm going to seriously consider taking a sawzall to it. Tinkering around in a 20 degree garage takes a toll on my hands after a while.
As for the exhaust crossover- if I don't have any luck with my flex ratchets I'm going to seriously consider taking a sawzall to it. Tinkering around in a 20 degree garage takes a toll on my hands after a while.


