New Weber 32/36 DGEV and de-smog, oh so niceeee!
 08-18-2009, 08:22 PM
#21

there was a piece i didn't see. All is good. I'm sure I may have a question or two about some hoses etc.... I'm removing all the unnecessary stuff right now, have the adapter plates etc... on. I would take some pics but I have to have this thing running tomorrow and it's gettin late.
 08-18-2009, 08:52 PM
#22
Registered User
Thread Starter
It's not too hard. The only hose you really should have is from the distributor to the carburetor. As for the linkage, you need to remove part of the linkage that comes on the carburetor and replace it with the arm designed for the 22r. I used a combination of the supplied bolts, and some stock mounting bolts for the linkage due to my truck being a 4wd and needing to be spaced up. The instructions and a little problem solving will help out a lot. I had mine running in an evening, and I was working in the dark with a head lamp, so you can do it!
08-18-2009, 09:30 PM
#23
yeah, that's what i did. combined everything i had to make the throttle work right. I'm making some block off plates for the egr stuff right now. Just finishing that up. then it's time to put the carb on and see what I can find to hookup and what doesn't need to be there and what needs to be plugged etc. what did you do with the unit that is on the intake manifold directly below the electric choke on the new carb?
I see on yours it's not there anymore, but I still have that thing there with wires going to it etc...
I see on yours it's not there anymore, but I still have that thing there with wires going to it etc...
08-19-2009, 08:12 AM
#24
Well, here are my unknowns. This is what I have left in the install and it will be ready to start.
What do I do with this item? There is an open hose on the other end of the hose that the arrow is pointing to.
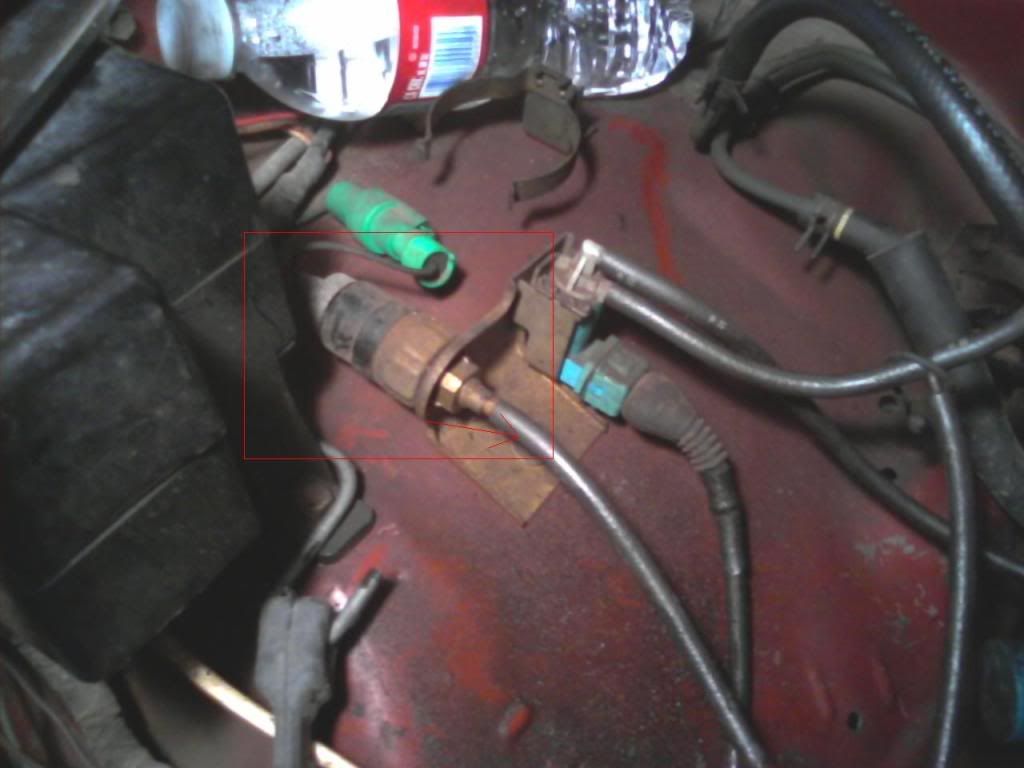
This is just a pic I took and put an arrow/box to explain what I did. I'm pretty sure this is alright. I took the brass fittings where the fuel inlet is and the one on the other side and switched them to opposite sides. This is the finished result (fuel was on the other side). If this is not ok speak up, but it seems they both feed right into the same spot.
I know oldgold3vze touched on this, but does anyone know which vacuum line should be hooked up to the carb? Also the one that isn't hooked up to the carb, should it be plugged?
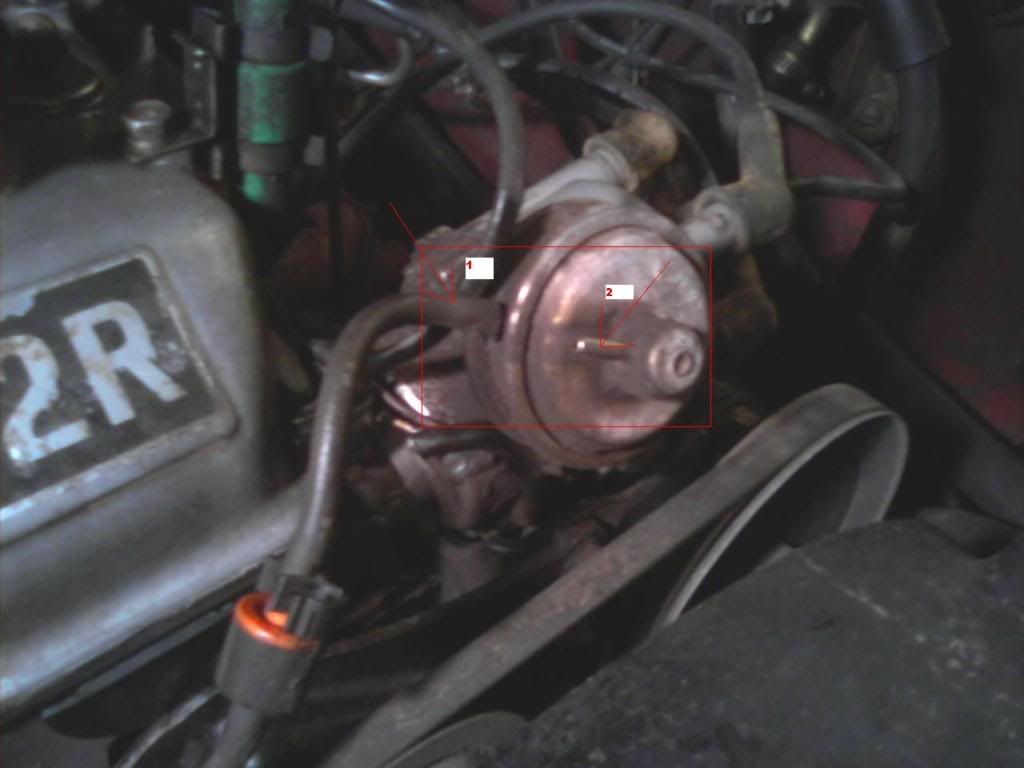
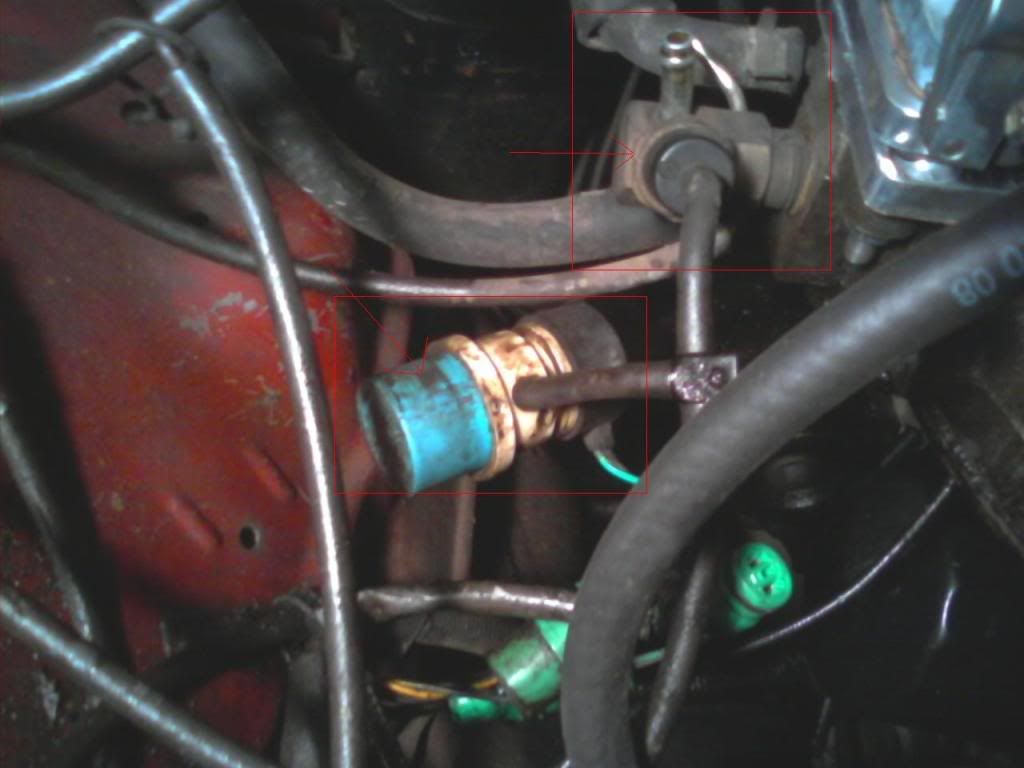
What in the world do I do with this thing? I see oldgold3vze doesn't seem to have it on his anymore (or maybe it was never there)?
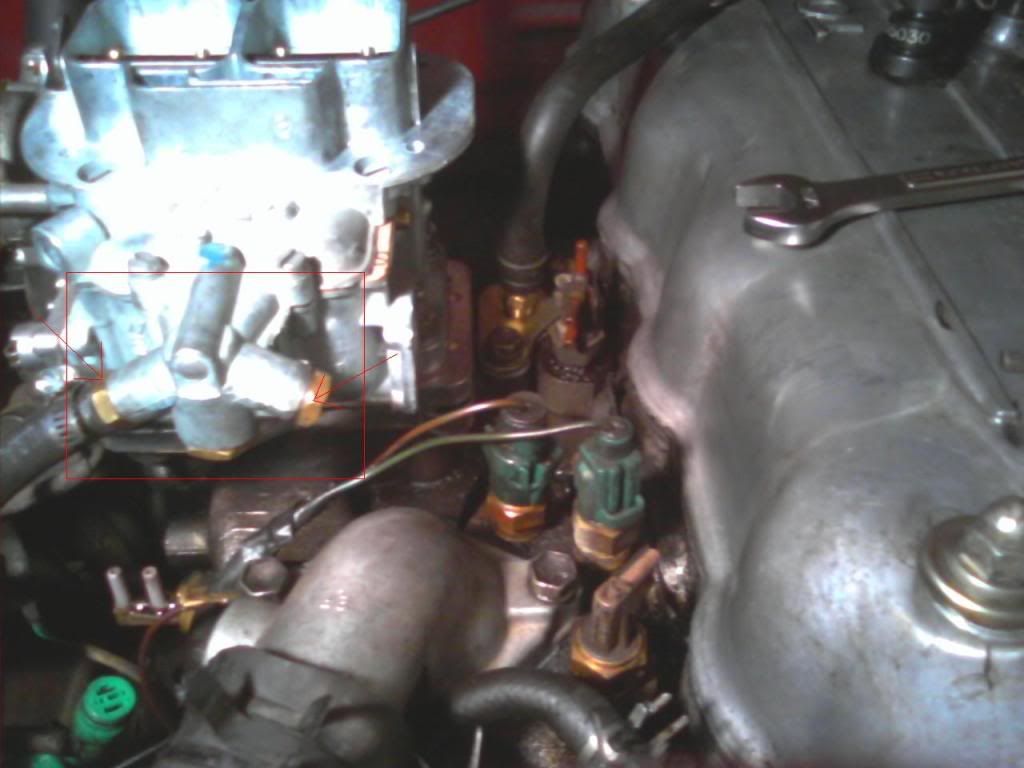
Lastly, what in the heck do I do with these two items? The bluish thing and the part coming out of the intake?
There is also one more component that I'm unsure of. It's a canister on the passenger side toward the very front of the vehicle, it's below the level of the battery. I don't have a pic at this time, but I can get one this evening.
Thanks for any help. I can post up final pics and everything that I did and add it to this thread for references when I'm finished.
What do I do with this item? There is an open hose on the other end of the hose that the arrow is pointing to.
This is just a pic I took and put an arrow/box to explain what I did. I'm pretty sure this is alright. I took the brass fittings where the fuel inlet is and the one on the other side and switched them to opposite sides. This is the finished result (fuel was on the other side). If this is not ok speak up, but it seems they both feed right into the same spot.
I know oldgold3vze touched on this, but does anyone know which vacuum line should be hooked up to the carb? Also the one that isn't hooked up to the carb, should it be plugged?
What in the world do I do with this thing? I see oldgold3vze doesn't seem to have it on his anymore (or maybe it was never there)?
Lastly, what in the heck do I do with these two items? The bluish thing and the part coming out of the intake?
There is also one more component that I'm unsure of. It's a canister on the passenger side toward the very front of the vehicle, it's below the level of the battery. I don't have a pic at this time, but I can get one this evening.
Thanks for any help. I can post up final pics and everything that I did and add it to this thread for references when I'm finished.
Last edited by live4soccer7; 08-19-2009 at 08:14 AM.
08-20-2009, 08:01 PM
#26
Registered User
the vacuum ports on the dist. plug the one nearest the dist. body use the outside vacuum port run it to either the carb body or the intake for vacuum, i researched this a while back and vacuum off the intake works for me, I found a plug and removed all the crap of the intake and plug it up.
08-20-2009, 08:09 PM
#27
Registered User
Join Date: Jun 2006
Location: Corvallis Oregon OSU
Posts: 462
Likes: 0
Received 0 Likes
on
0 Posts
When I cleaned up my intake i took off everything except the vacum for the brake booster and the distributor. To really make the intake clean i retapped the holes with a pipe thread tap and used allen head brass plugs. Plug the top port on the distributor its was originally for a high altitude system you dont really need it.


 08-21-2009, 06:59 AM
#31
Registered User
Thread Starter
08-21-2009, 09:25 PM
#34
Registered User
Through classifieds?
I plan on getting a new carb sometime this winter (birthday/christmas), or buying a rebuild kit.
08-22-2009, 12:37 PM
#35
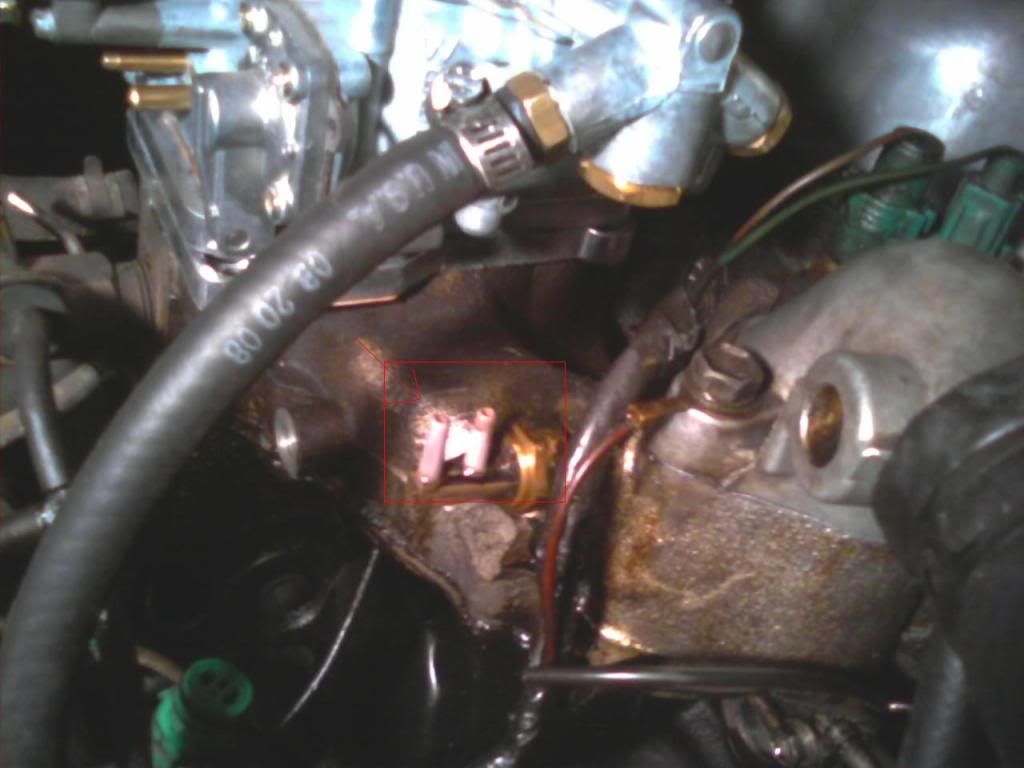
This is the last thing!!! Then I get to start it up. This is the charcoal canister for the carb (located right below the battery).
I'm not sure what to do with this hose (the bigger one) coming out of the top of it. Right now it's just open. Is there somewhere I connect it to or do I just plug it?
I'm not sure what to do with this hose (the bigger one) coming out of the top of it. Right now it's just open. Is there somewhere I connect it to or do I just plug it?
08-22-2009, 03:36 PM
#36
Registered User
woops didint see there was a second page, anyway hope i can get one soon, ill be eliminating all of my egr stuff as soon as my head gets done at the machine shop...
Last edited by yoterr; 08-22-2009 at 03:39 PM.
08-22-2009, 07:47 PM
#38
well, if anyone knows differently about the hose up a few posts then let me know. For the time being I just capped it off at the charcoal canister.
I'm hooking up the electric choke. JT said to hook it to a hot source when the IGN was on. It seems the electric choke from my old carb was about 3.1v or so when the ign was on. Is the voltage for the electric choke suppose to be 12v when the ignition is on?
I'm hooking up the electric choke. JT said to hook it to a hot source when the IGN was on. It seems the electric choke from my old carb was about 3.1v or so when the ign was on. Is the voltage for the electric choke suppose to be 12v when the ignition is on?
08-23-2009, 06:06 AM
#39
Registered User
Thread Starter
Just throw both those charcoal cans away. They are simply there to catch any un used fuel, I'm pretty sure. I tossed em both and it hasn't caused any issues. For the large threaded plug with 4 vacuum hoses coming off of it on the intake manifold, you could plug all those individually, or, for a cleaner look you could remove it and replace it with a rubber expansion plug. That's what I did. I got the 7/8" size and had to grind the rubber down to fit, but once it is in the hole there is a nut to tighten to expand the rubber, so the grinding doesn't have to be perfect. I got mine at Advance Auto in the "problem solvers" section.
08-23-2009, 06:32 AM
#40
Thanks for the info. I know that one of the install manuals for the carb mentioned the keep the charcoal canisters. I'll prob just toss em though and see what happens. Thanks for the reply, that really confirmed things up.


