My 22R Rebuild - KawaZX636

 12-20-2012, 11:11 AM
#23
the "E" in e-fan causes problems. I am very simplistic and I like things to simply work. Going electronic brings a whole other set of possible problems to the table that I don't like to worry about. I even got rid of my electric choke when I switched to a weber. With a mechanical fan, I know it's on and I know it's working - I don't need to flip a switch or worry about a failing relay. Plus there are no considerable benefits for me to justify an e-fan. My truck was and will be a daily driver. If I were doing something like rock crawling at low speeds and high RPMs then it would probably suit me better, but that isn't the case for me. Plus I'm minimizing everything under the hood. I'll only have wires for the alternator, starter, ignition/coil, temperature sensor, oil pressure sensor, distributor and battery. And the only vacuum hose I will have will be my advance to my alternator and my brake booster. The rest will be completely eliminated.
12-20-2012, 08:33 PM
#26
Nah, not a mechanic, but I've always had a knack for turning a wrench and building stuff. My pops and I always did our own mechanic work growing up so I learned a lot along the way - if we couldn't fix something then it wasn't worth fixing. I rode motorcycles for a while and had to rebuild a couple of those. Helped a friend of mine rebuild his 302 and I did one 22R before this one. Stuff like this comes easy to me. The biggest part of rebuilding motors is bagging and labeling everything as you take it off. Then it's just assembling in reverse order...kinda. My A.D.D. often gets the best of me so that's why everything is so clean and complete. I personally turned and cleaned every nut and bolt on this particular motor. Anything that wasn't salvageable was replaced. LCE's products helped out big time on the stuff that I otherwise would have had to fabricate.
I got a couple more steps done tonight, but I'll have to post it later
I got a couple more steps done tonight, but I'll have to post it later
12-21-2012, 09:19 PM
#27
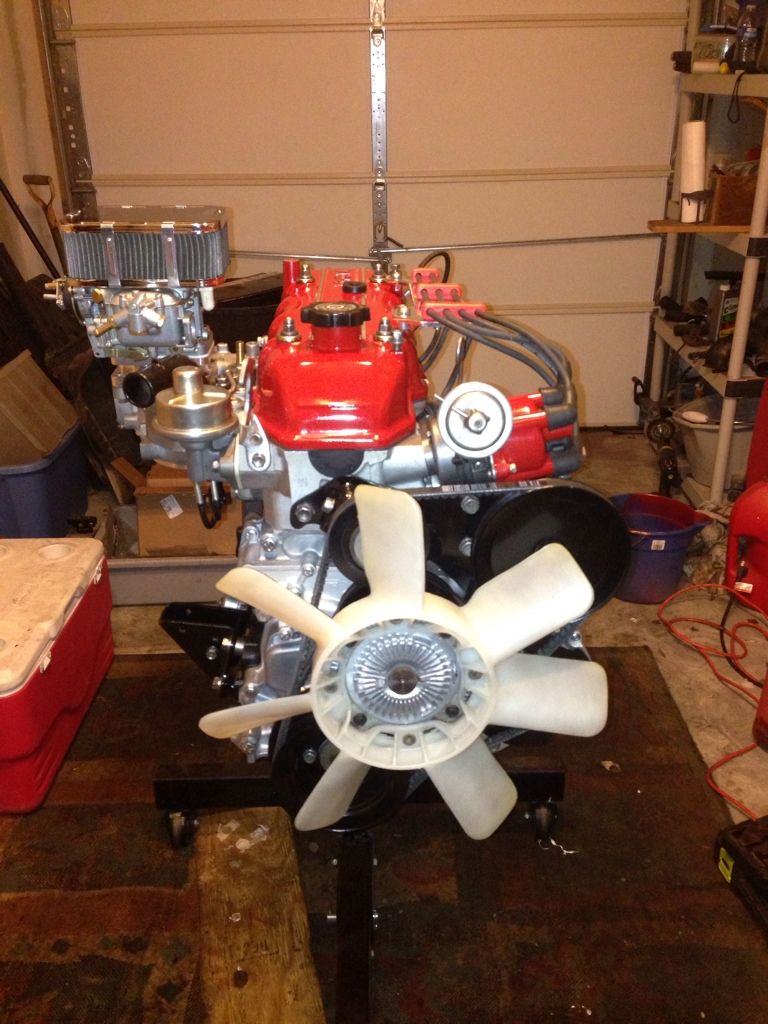
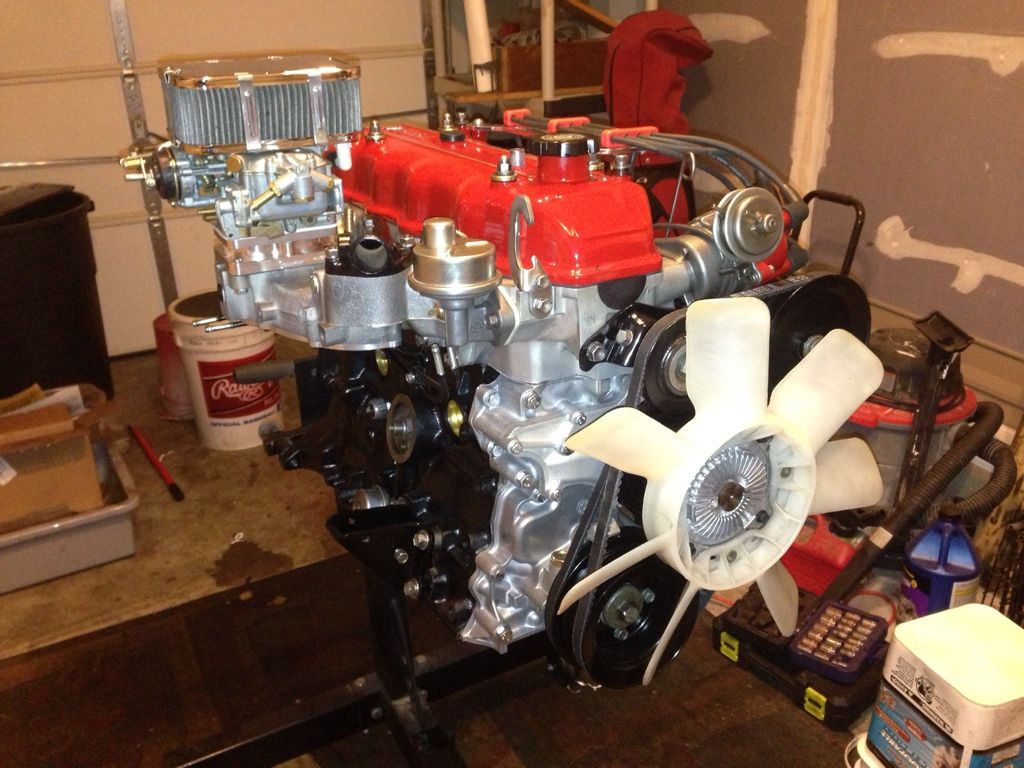
More progress pictures!
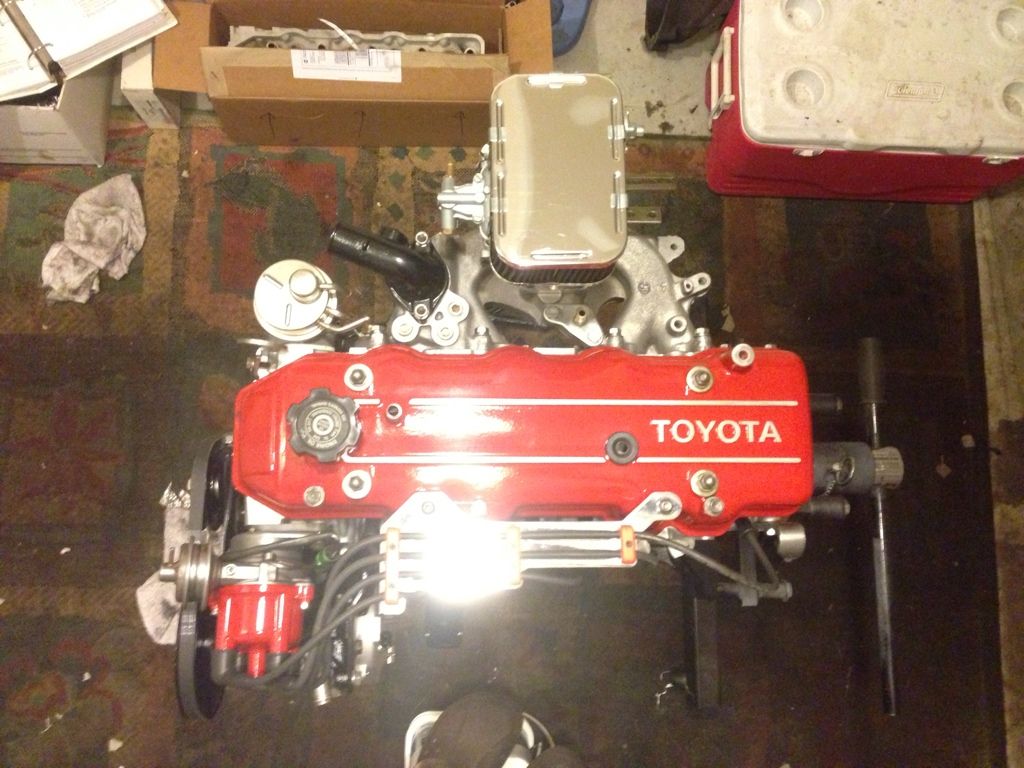
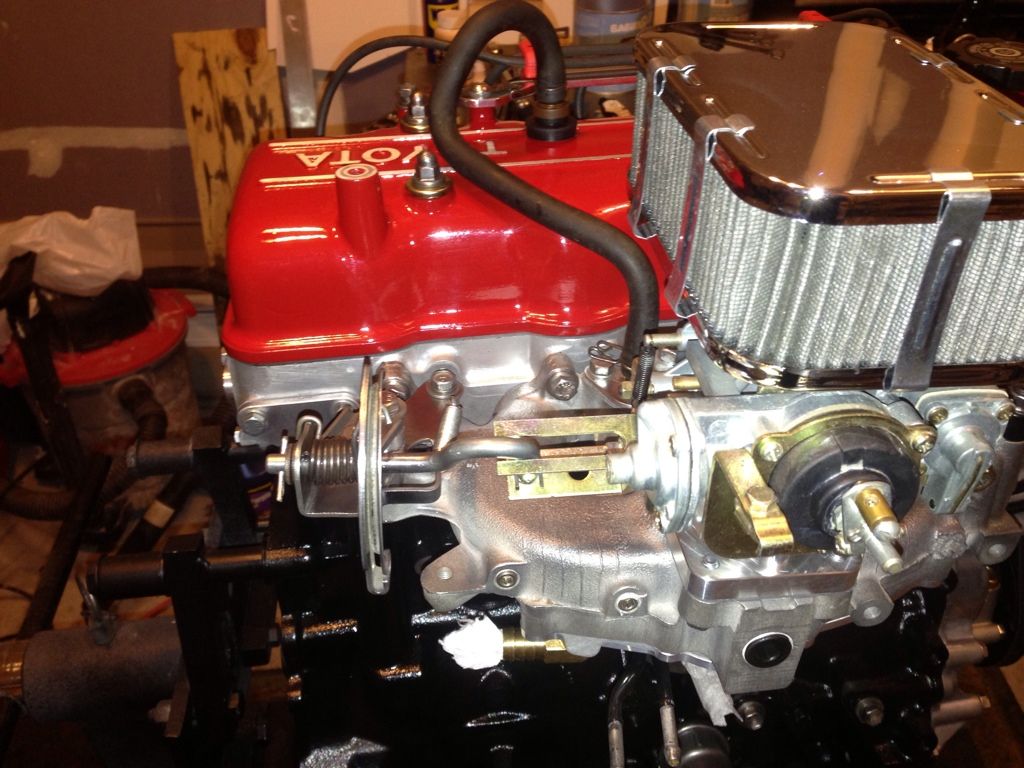
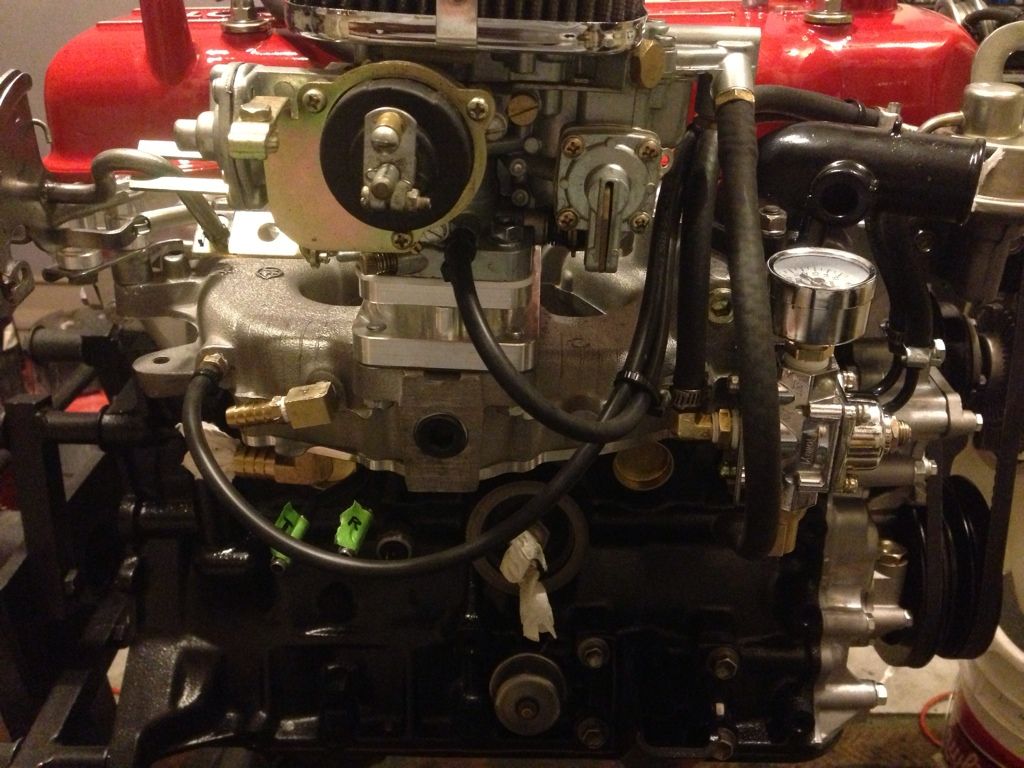
Intake manifold, thermostat housing and fuel pump installed. Also bolted down the emissions block plates on the intake side.
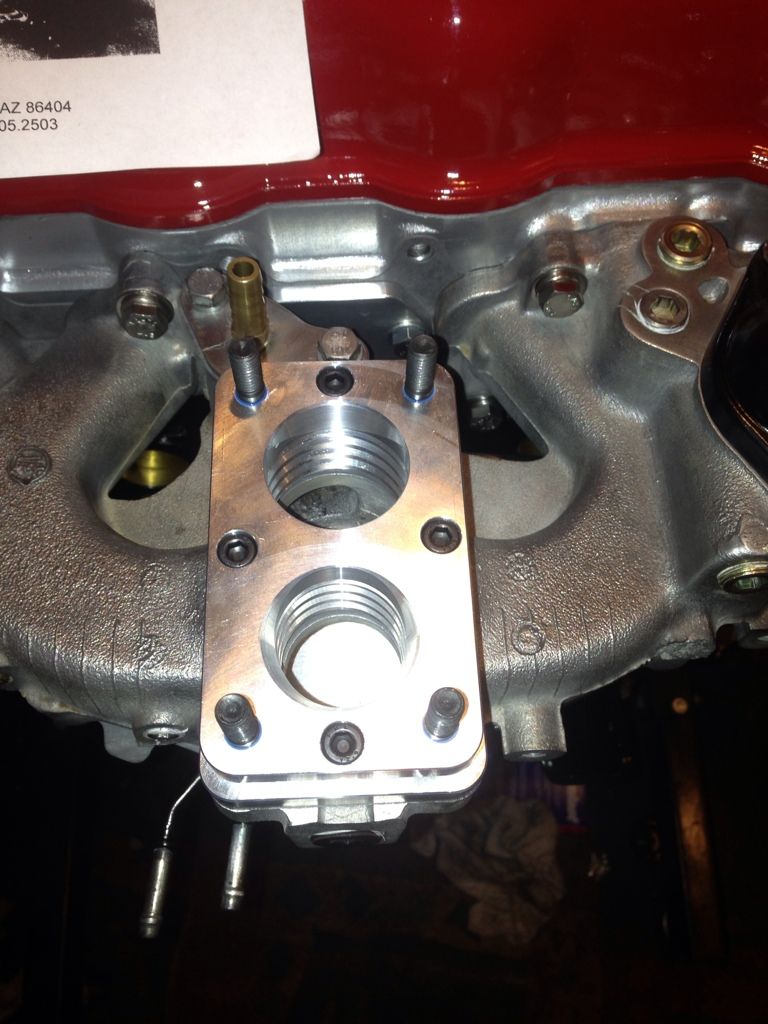
Here's a shot of the LCE spiral adaptor for those who have been asking.
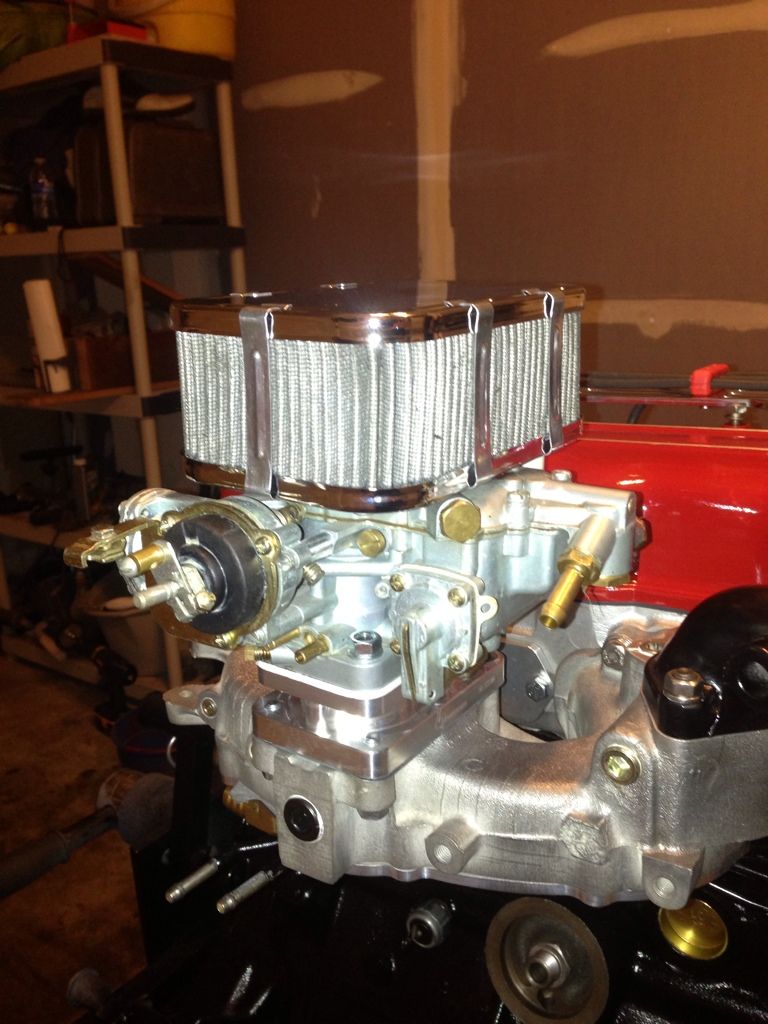
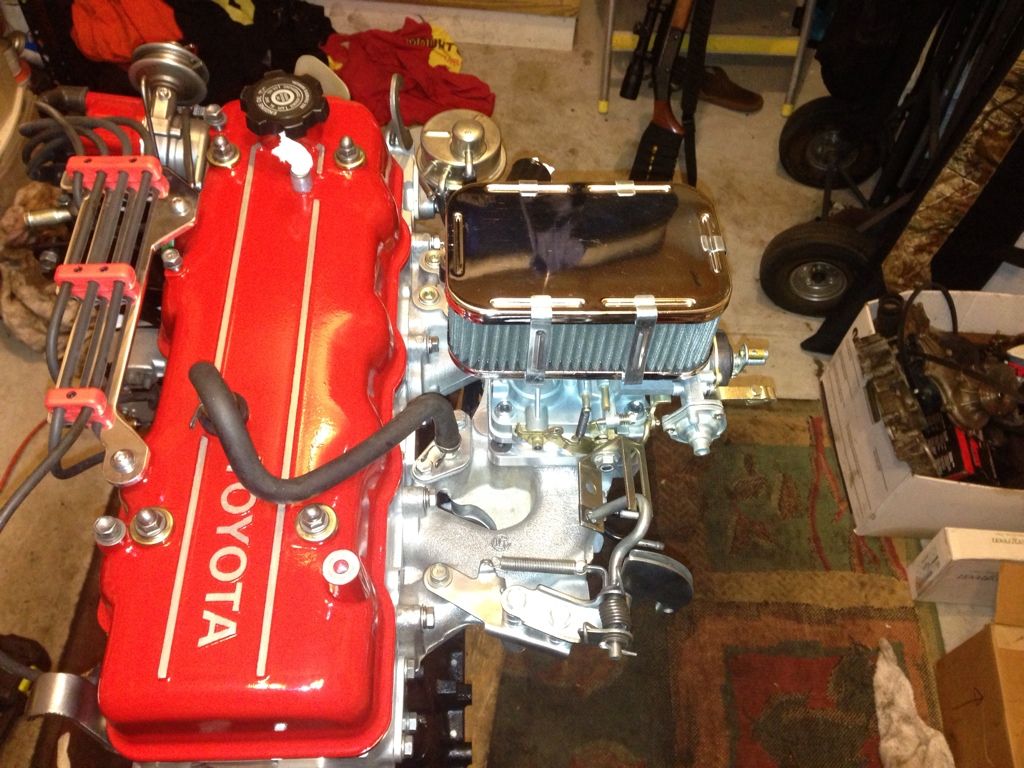
Weber 32/36 installed. I'm probably going to get the K&N air cleaner kit from LCE, but this will do for now.
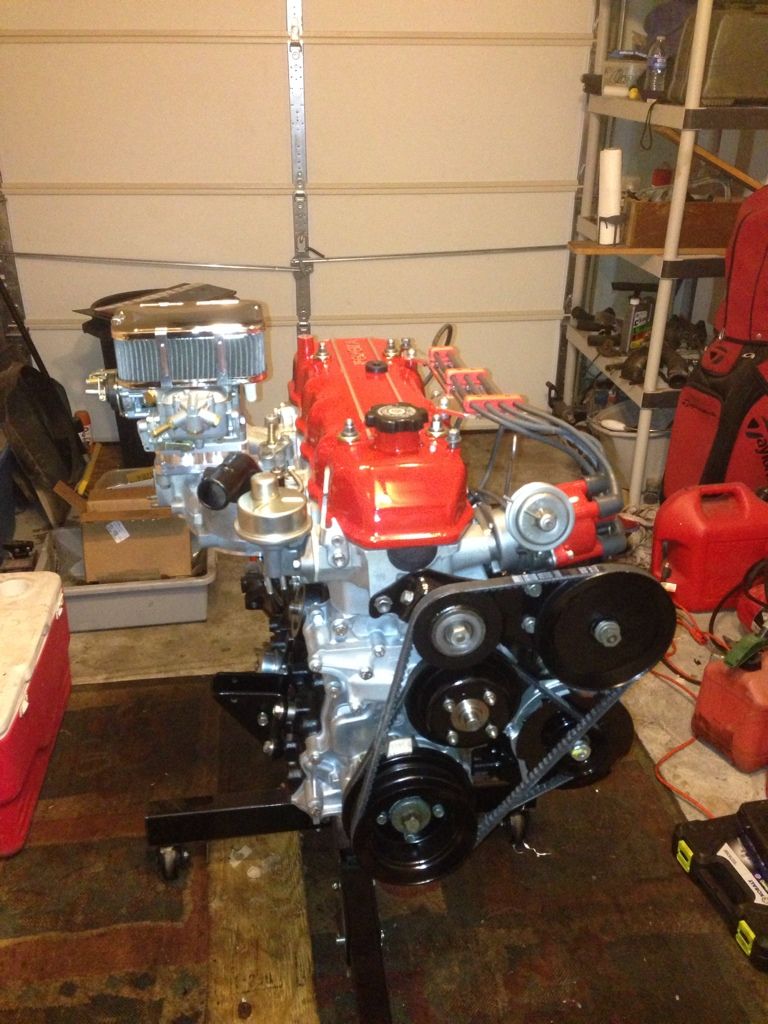
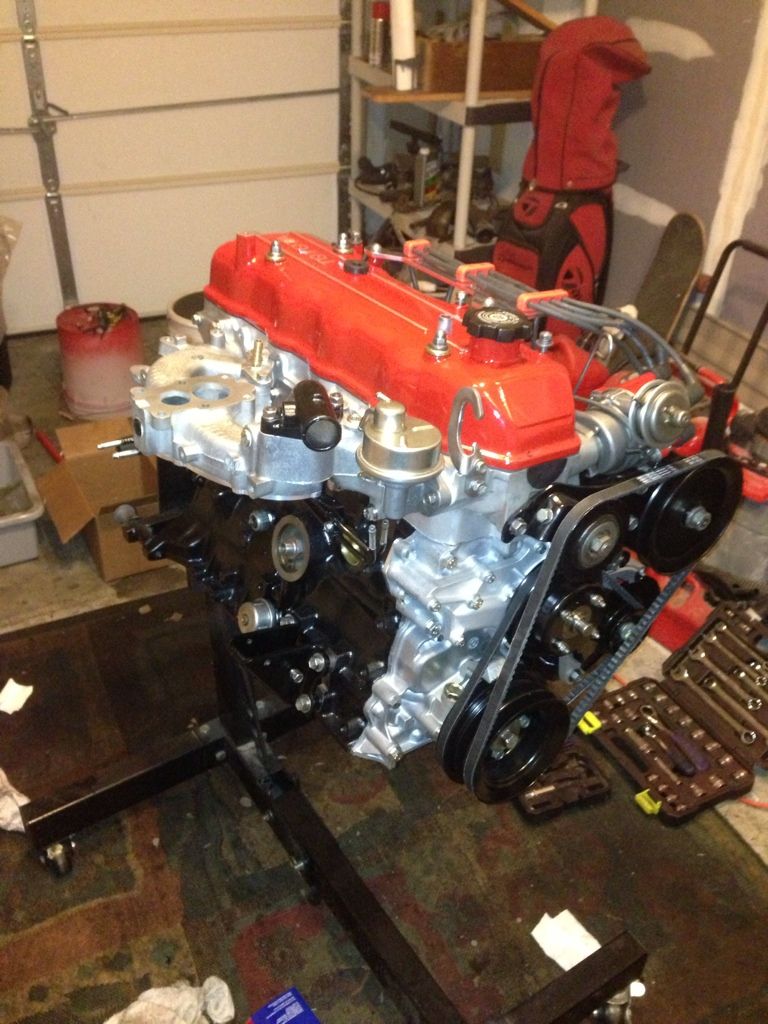
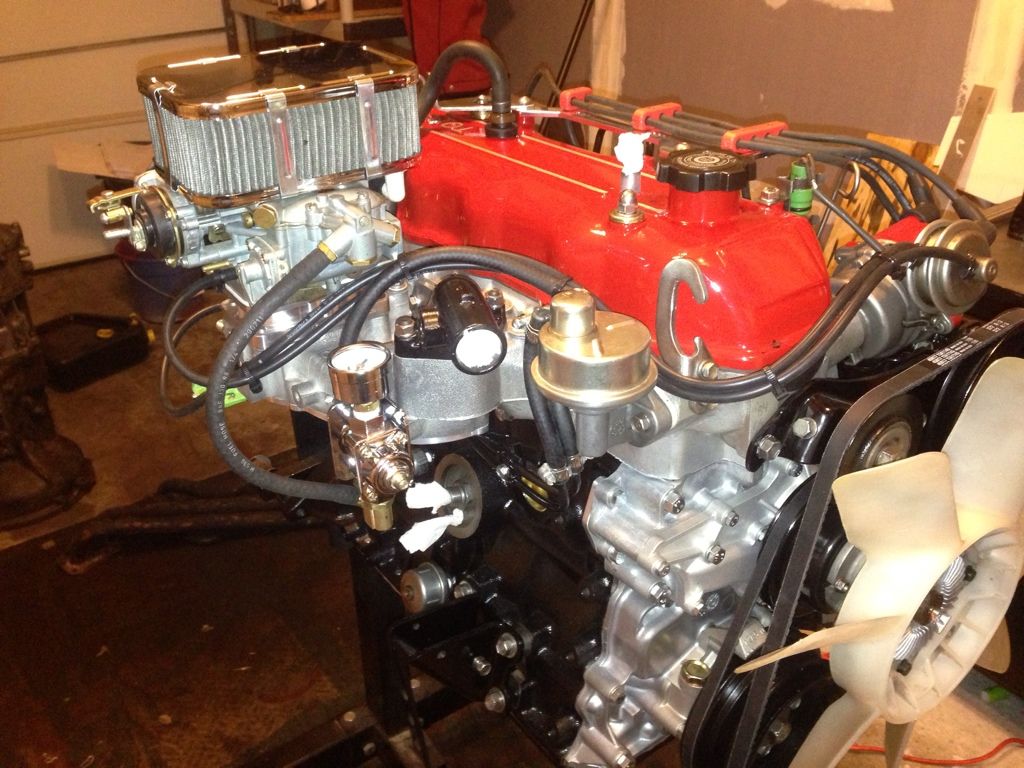
Aerial shot
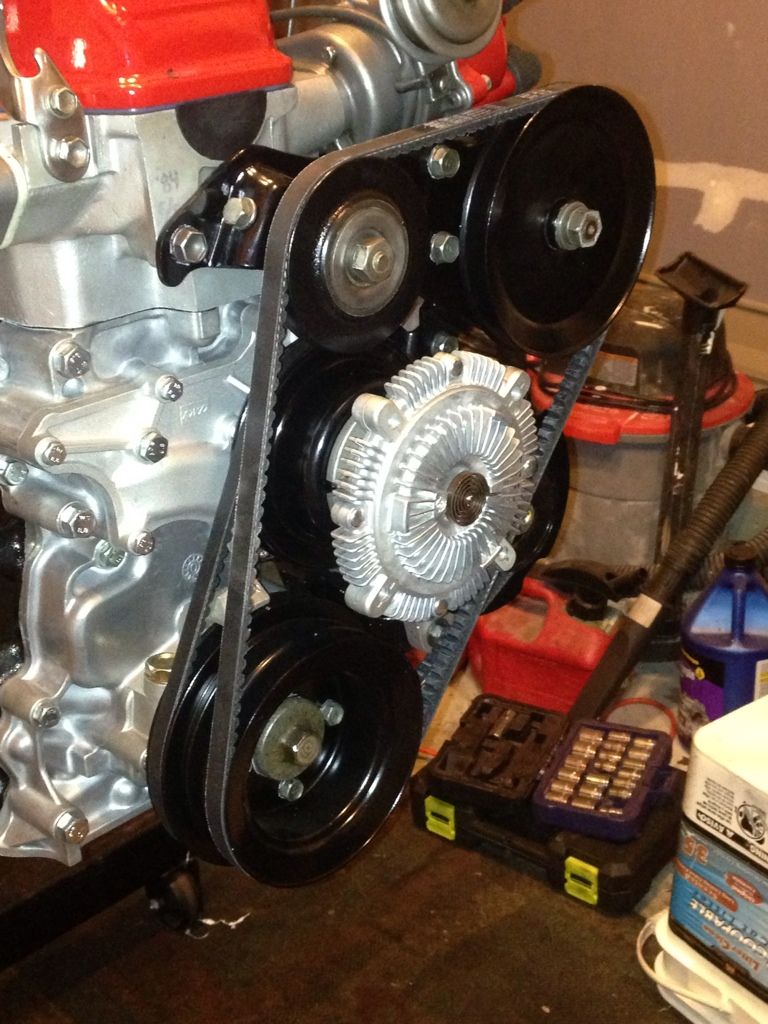
I decided to go with a new fan clutch using the factory fan. I was able to clean it up a bit, but it's work for now until I switch over to the flex fan. Plus I want to verify my fan clearance in the truck so I can get the appropriate spacer. The fan looks a lot cleaner in these pictures, but its just dirty enough to annoy me.
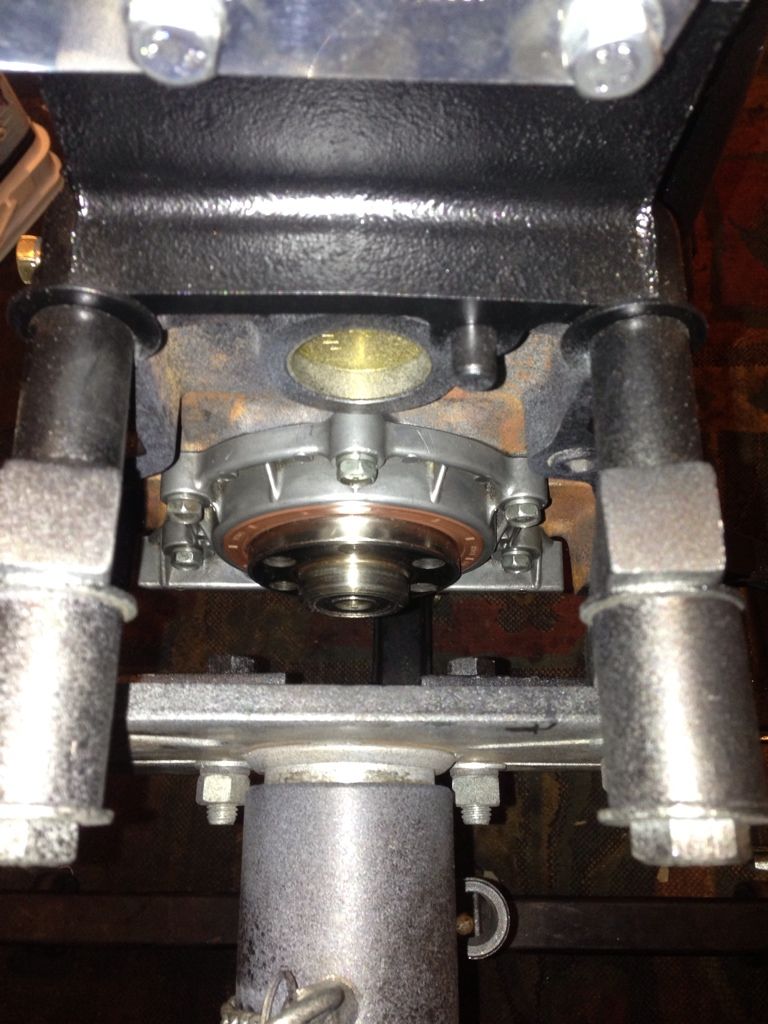
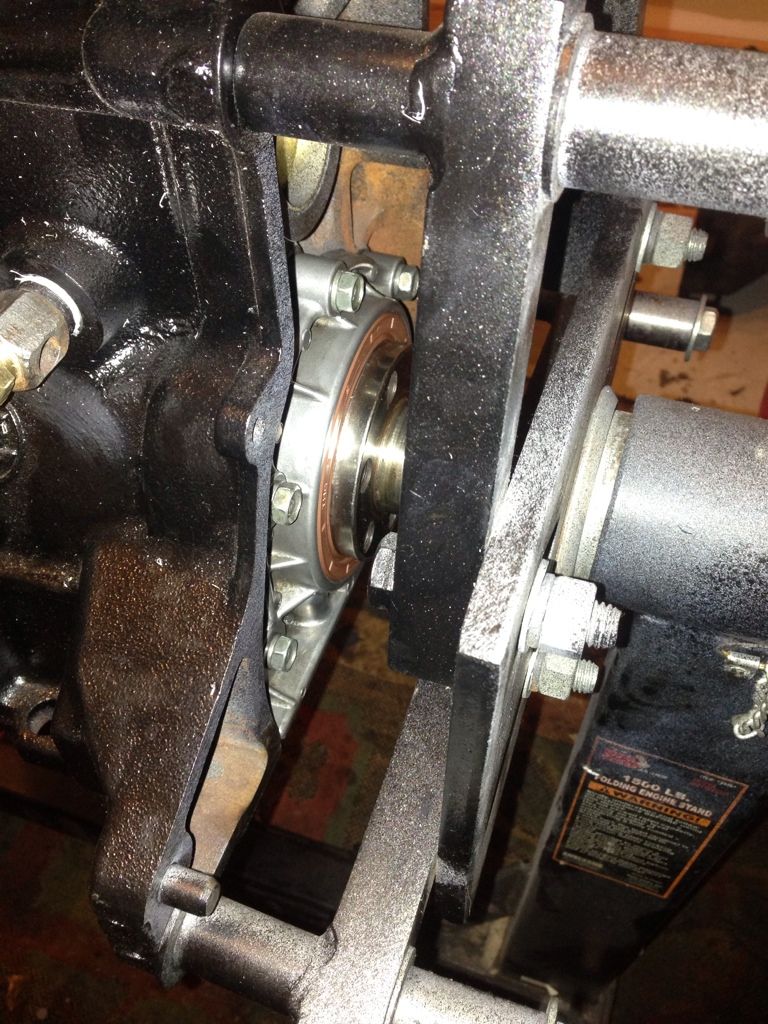
I was rumaging through the plethra of parts in my garage and noticed I forgot to install my rear main seal. Popped in a new viton seal and bolted up the seal retainer.
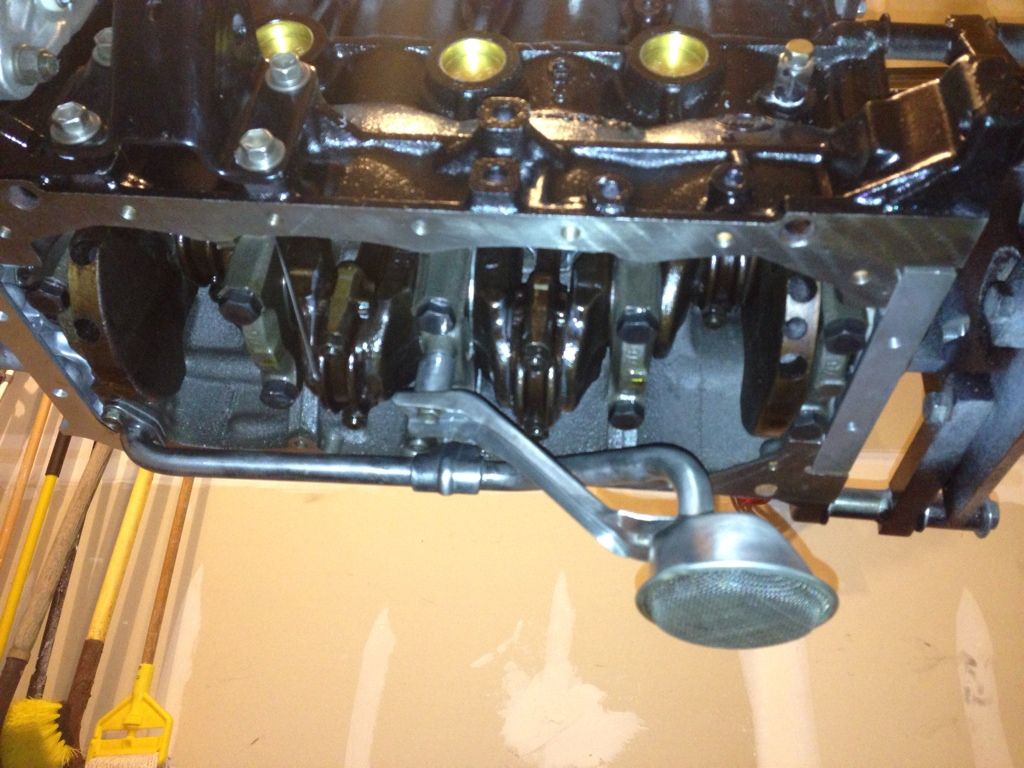
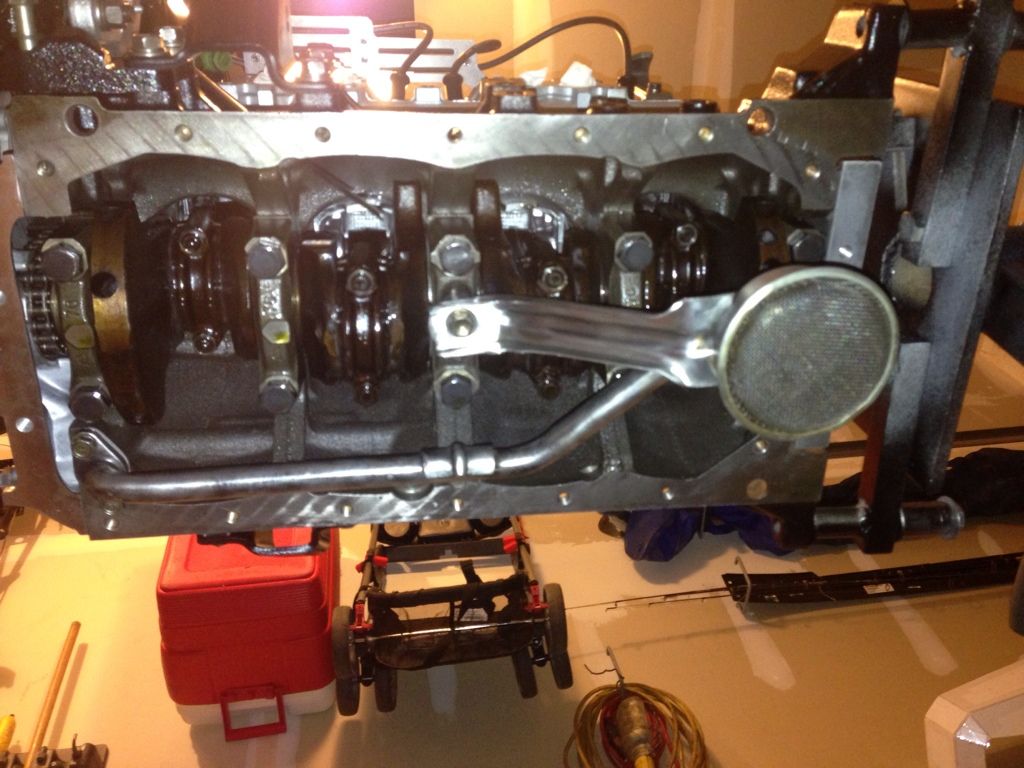
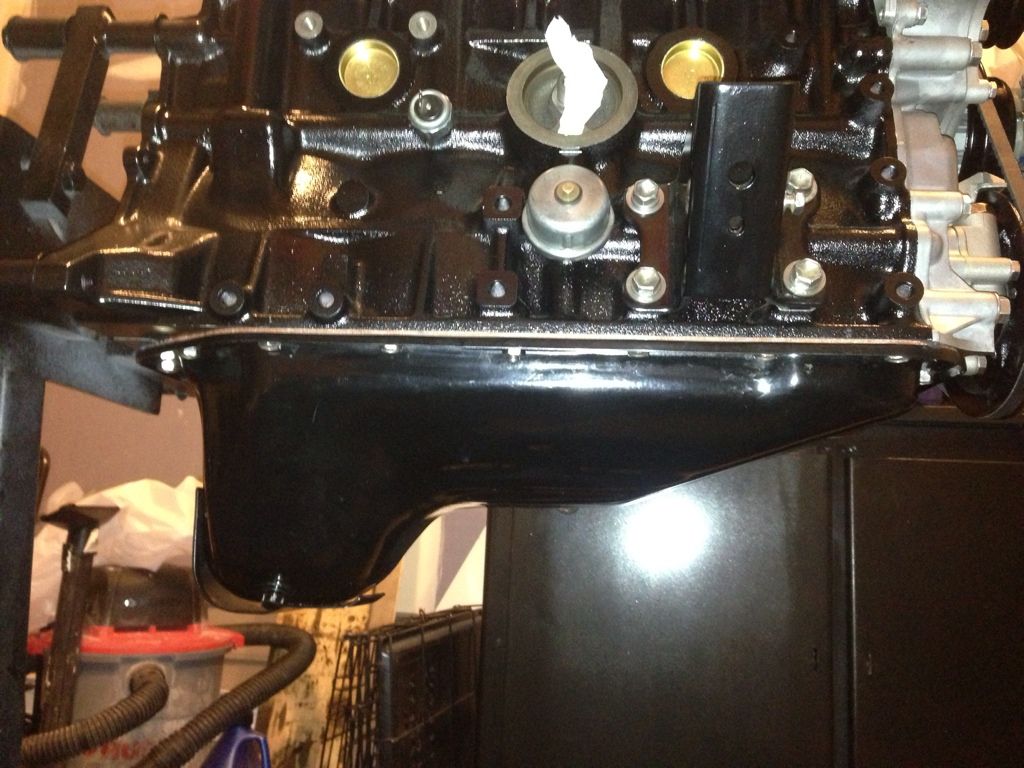
Clean up the oil pickup and installed.
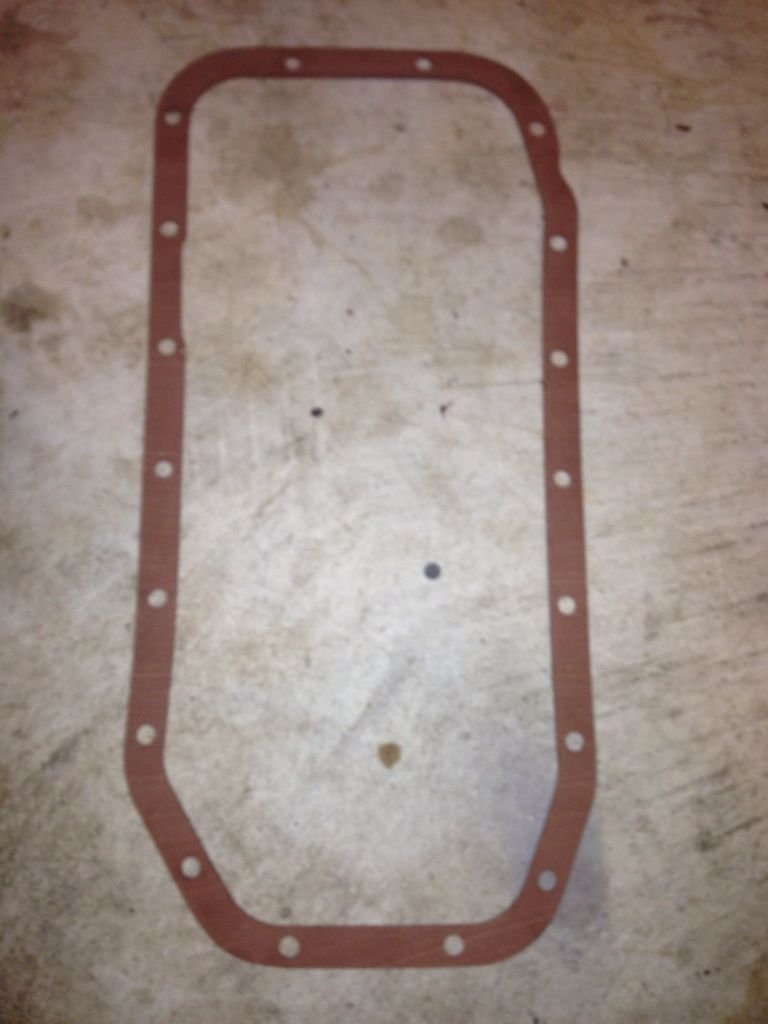
Another quick question for you all. My rebuild kit came from Engnbldr and from what I have heard, Ted provides excellent parts, but I was curious about the oil pan gasket that came with the gasket kit. In the past, I have used cork gaskets only to have it leak almost immediately. The Engnbldr kit came with what apears to be a rather nice and thick rubber oil pan gasket. Anybody have any experiences with these? It looks like it would seal up well, but typically I just use some sealant on the oil (which is what the FSM says to do). Below is a pic of the oil pan gasket. Thoughts??
Intake manifold, thermostat housing and fuel pump installed. Also bolted down the emissions block plates on the intake side.
Here's a shot of the LCE spiral adaptor for those who have been asking.
Weber 32/36 installed. I'm probably going to get the K&N air cleaner kit from LCE, but this will do for now.
Aerial shot
I decided to go with a new fan clutch using the factory fan. I was able to clean it up a bit, but it's work for now until I switch over to the flex fan. Plus I want to verify my fan clearance in the truck so I can get the appropriate spacer. The fan looks a lot cleaner in these pictures, but its just dirty enough to annoy me.
I was rumaging through the plethra of parts in my garage and noticed I forgot to install my rear main seal. Popped in a new viton seal and bolted up the seal retainer.
Clean up the oil pickup and installed.
Another quick question for you all. My rebuild kit came from Engnbldr and from what I have heard, Ted provides excellent parts, but I was curious about the oil pan gasket that came with the gasket kit. In the past, I have used cork gaskets only to have it leak almost immediately. The Engnbldr kit came with what apears to be a rather nice and thick rubber oil pan gasket. Anybody have any experiences with these? It looks like it would seal up well, but typically I just use some sealant on the oil (which is what the FSM says to do). Below is a pic of the oil pan gasket. Thoughts??
 12-22-2012, 08:47 AM
#30
The holes for the cap screws on mine were "raised" from being tightened on a cork gasket and it making the lip un-even. All I did was hold the lip of the pan on the edge of my work table, and put the round end of a ball pin hammer over the bolt holes, and then wack the hammer with another one( basically use it as a punch) to drive the "raised lump" back to flush or even below flush so when I put it back on with a cork casket, it wouldnt go on w.o a good surface.
12-27-2012, 08:50 PM
#31
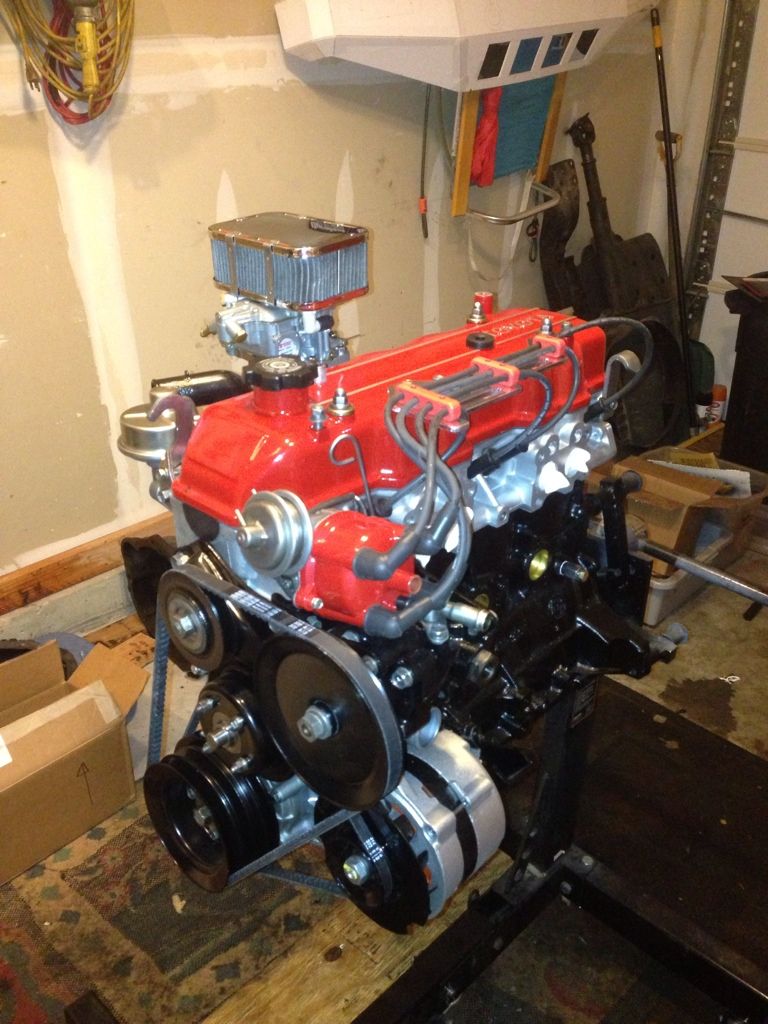
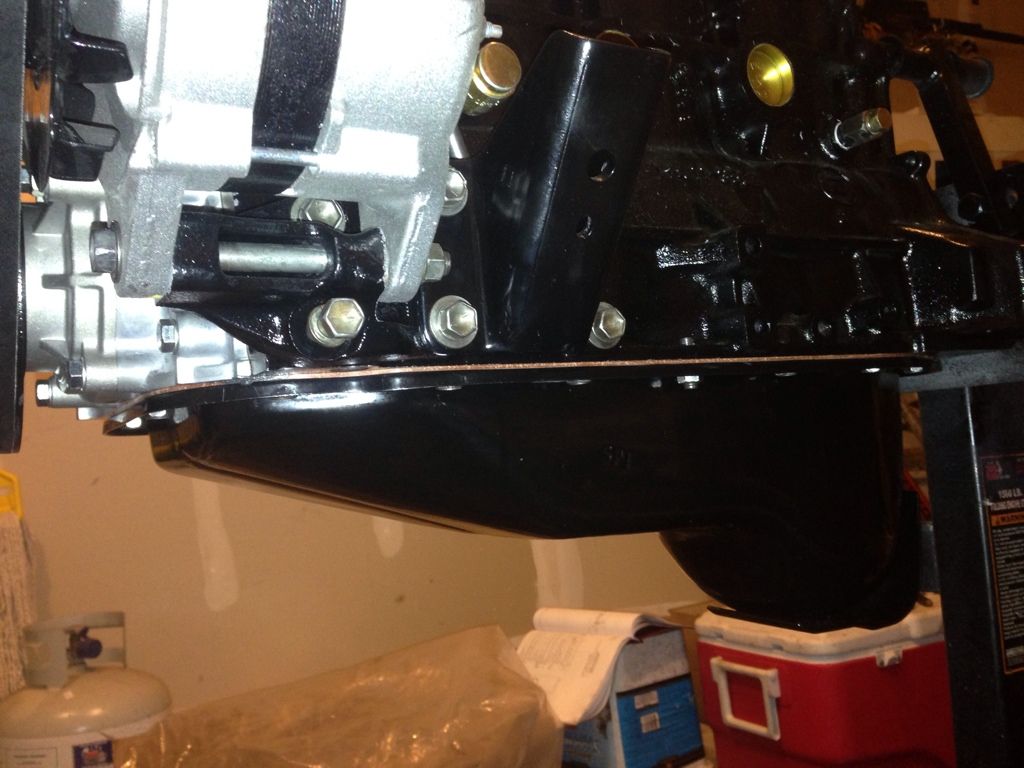
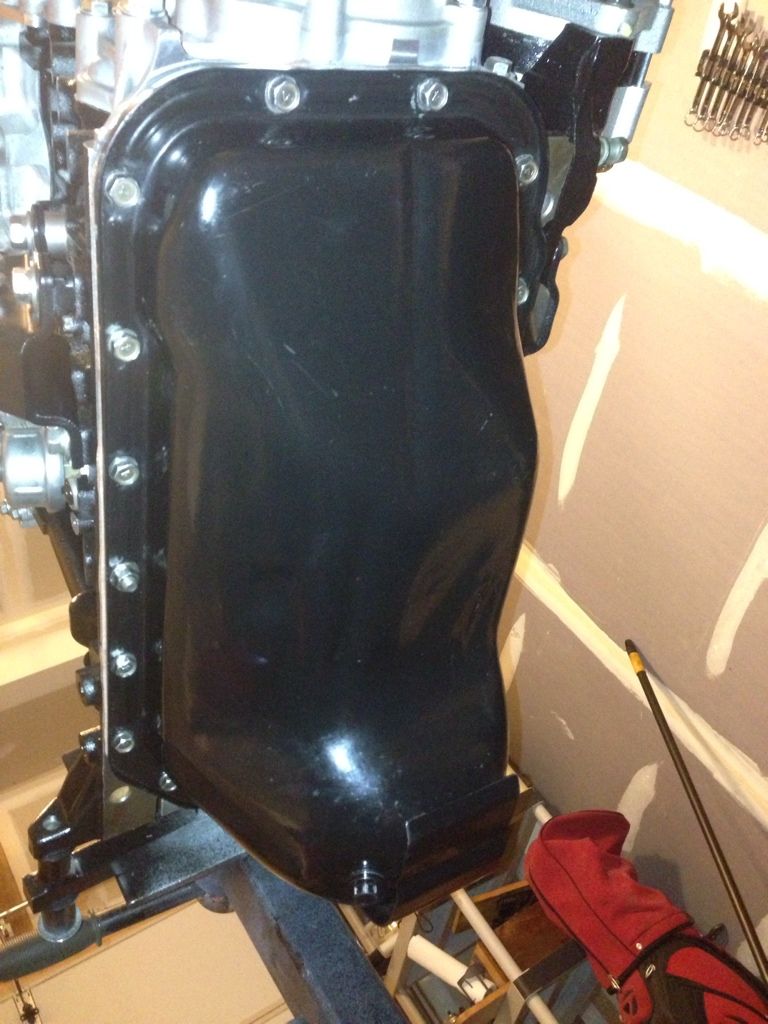
Finally got some "me" time after the busy holidays. Installed the oil pan tonight. Ended up using that rubber (not cork gasket) from Engnbldr. It seemed like a pretty legit gasket and much thicker and sturdier than the usual cork joints. I seem to have a little bit of a lip where the rear of the oil pan meets up with the rear main seal housing. Not sure how much of a problem this will give me when I install the tranny and the shield between the tranny and block. This is an aftermarket OEM pan that I had installed prior to the rebuild and I had some slight leaks near/around the rear seal so perhaps this was my culprit. I'll probably end up tapping the lip back a bit.
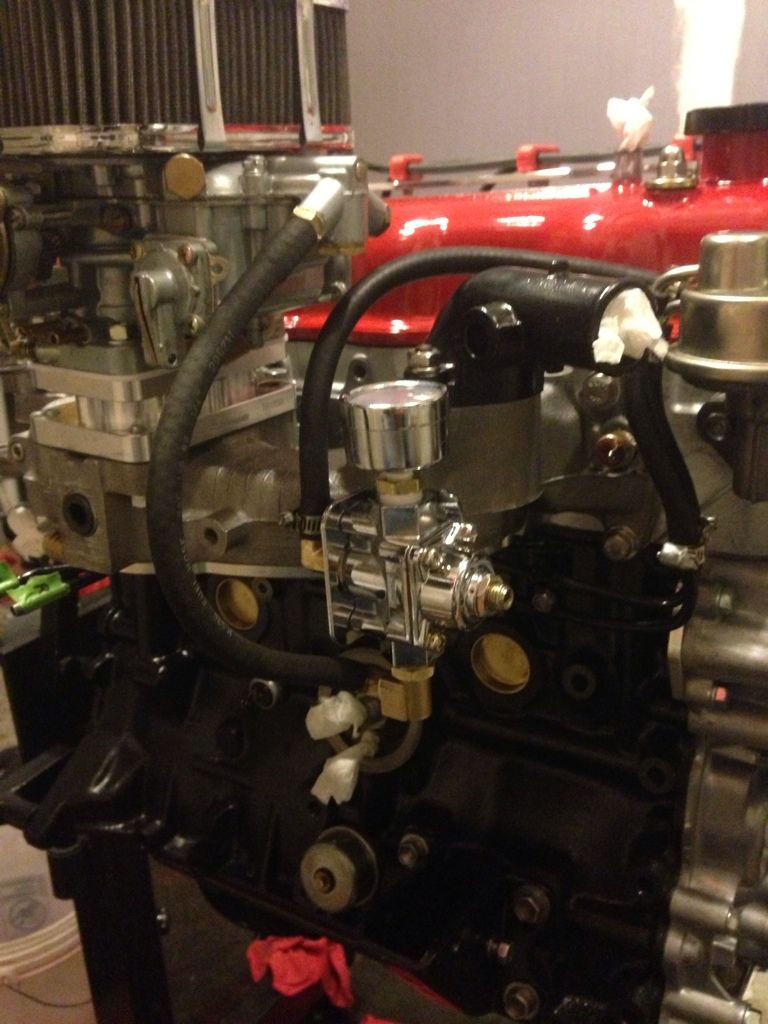
Installed the throttle linkage using the spacers that came with the LCE spiral adapter which are probably about a half inch taller than the Weber spacers. Also installed the PCV valve ran the hose back to the intake manifold.
I had some fresh vacuum hose lying around so I ran the vacuum advance to the distributor. My distributor has 2 vacuum advance ports; normal advance and idle advance. Since I plugged my intake manifold, I only have one vacuum advance source which is on the weber. Typically, the idle advance would run to the intake manifold, but I'm going to try just T-ing off of the normal advance on the carb. Hopefully it will work just fine. If not, I'll remove a plug on the intake and install a vacuum port. Looks a lot better with 2 vacuum hose instead of the birds nest of vacuum hoses on a stock 22R
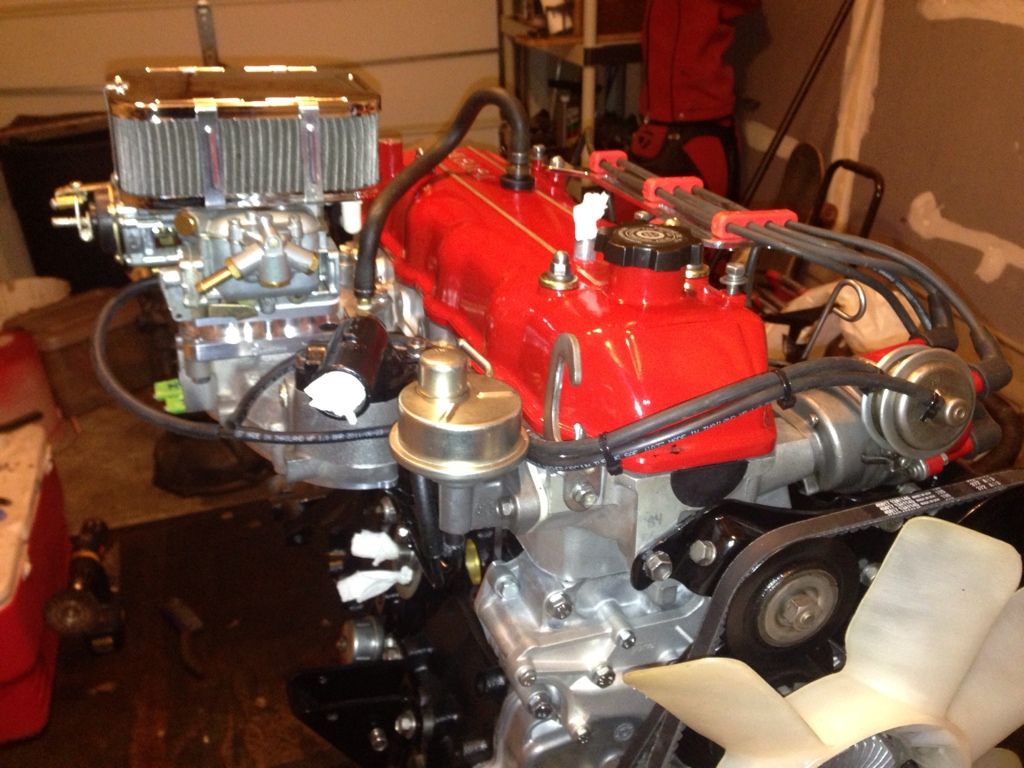
I plan on going with braid stainless steel radiator hoses, heater hoses and fuel lines. I'm not sure yet if I'll go that route with the vacuum hoses.
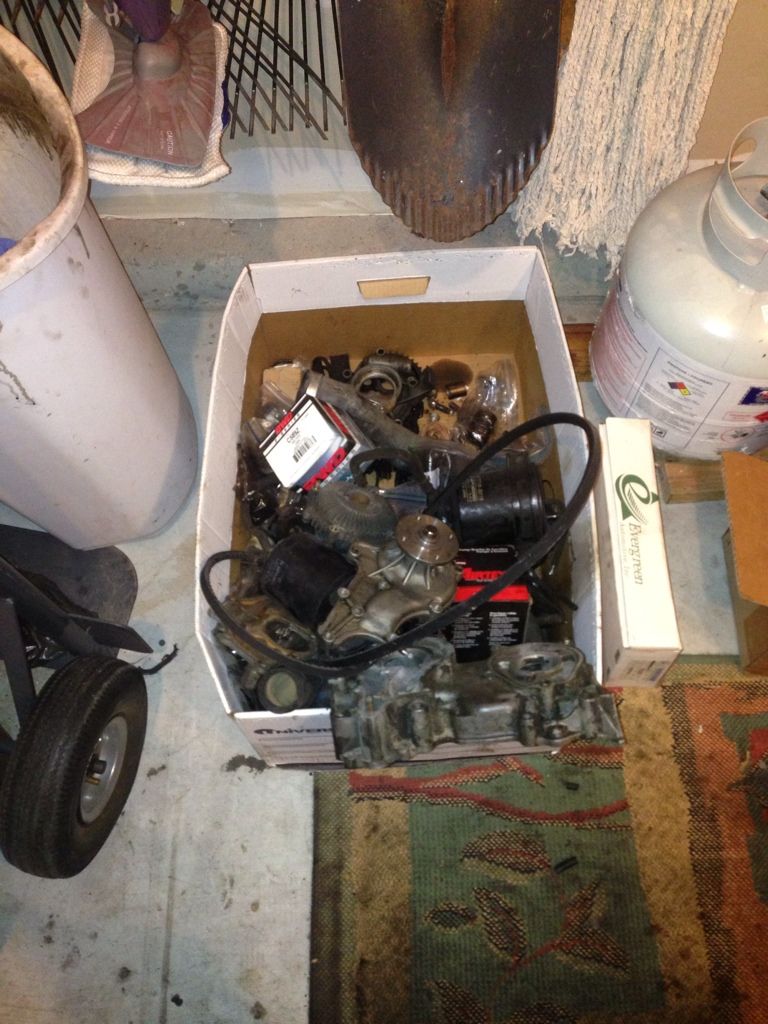
Took a pic of my box-o-crap parts. Just a bunch of random smog equipment, replaced parts and stuff that doesn't belong under a hood. I sold most of the smog equipment to a guy on here that was going the other way with his motor (sucks for him) so this isn't even everything. If anybody needs some stray parts just let me know, I may have what you're looking for.
With the motor pretty much done and the arrival of my new motor mounts about a week out, Up next is cleaning up this pig:
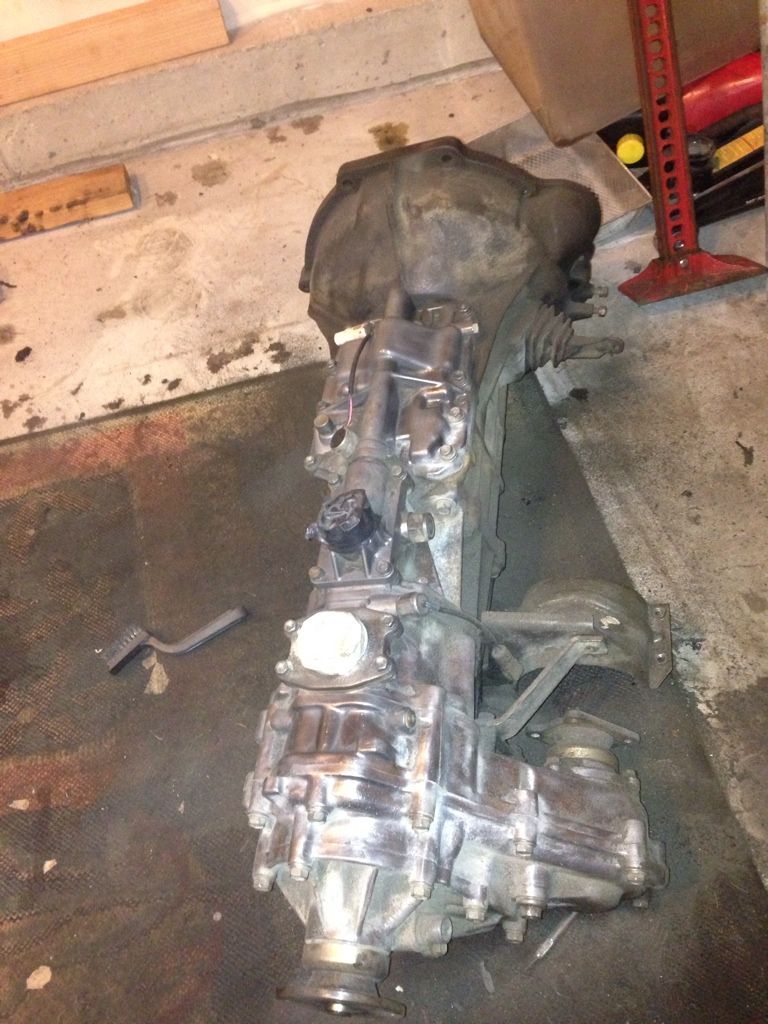
I started wire wheeling it a little already, but there's a lot left to do. Fortunately, it doesn't need rebuilding so a simple clean up and it's ready.
Installed the throttle linkage using the spacers that came with the LCE spiral adapter which are probably about a half inch taller than the Weber spacers. Also installed the PCV valve ran the hose back to the intake manifold.
I had some fresh vacuum hose lying around so I ran the vacuum advance to the distributor. My distributor has 2 vacuum advance ports; normal advance and idle advance. Since I plugged my intake manifold, I only have one vacuum advance source which is on the weber. Typically, the idle advance would run to the intake manifold, but I'm going to try just T-ing off of the normal advance on the carb. Hopefully it will work just fine. If not, I'll remove a plug on the intake and install a vacuum port. Looks a lot better with 2 vacuum hose instead of the birds nest of vacuum hoses on a stock 22R
I plan on going with braid stainless steel radiator hoses, heater hoses and fuel lines. I'm not sure yet if I'll go that route with the vacuum hoses.
Took a pic of my box-o-crap parts. Just a bunch of random smog equipment, replaced parts and stuff that doesn't belong under a hood. I sold most of the smog equipment to a guy on here that was going the other way with his motor (sucks for him) so this isn't even everything. If anybody needs some stray parts just let me know, I may have what you're looking for.
With the motor pretty much done and the arrival of my new motor mounts about a week out, Up next is cleaning up this pig:
I started wire wheeling it a little already, but there's a lot left to do. Fortunately, it doesn't need rebuilding so a simple clean up and it's ready.
01-01-2013, 09:11 PM
#32
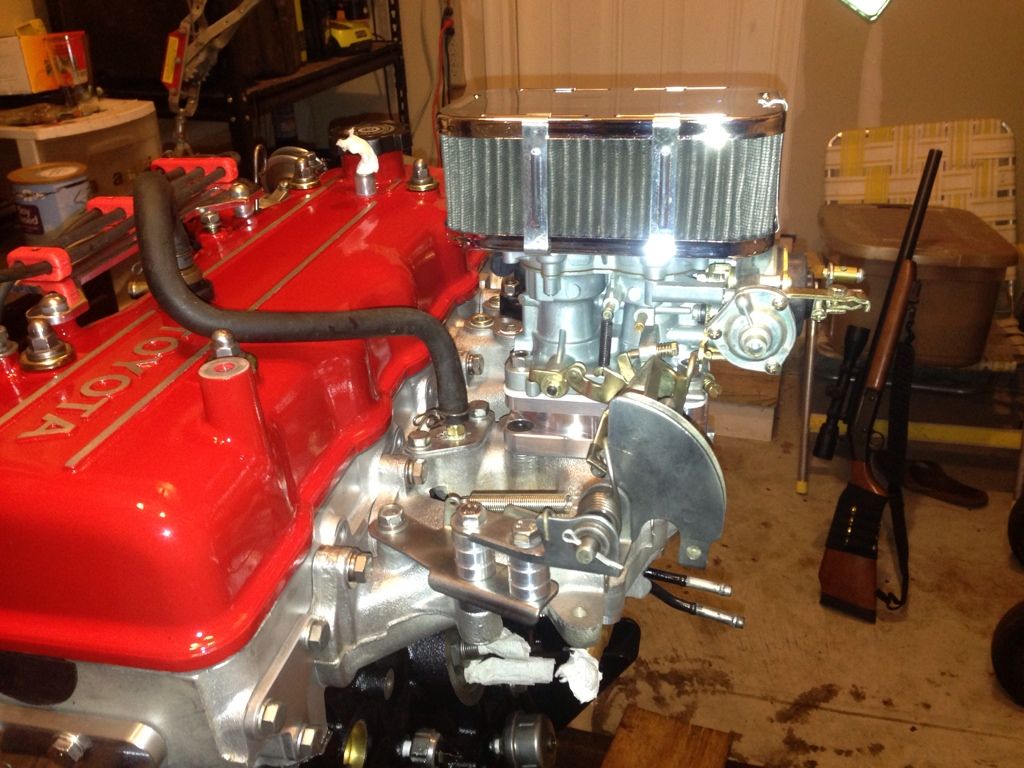
I figured out a neat way to mount my fuel pressure regulator to my intake manifold. I use a Holley regulator with Mr Gasket gauge. Essentially, all I did was use the bracket that comes with the Holley regulator and bolted it to an existing hole in the intake manifold. I then used a couple of elbow fitting to adjust the inlet and outlet on the regulator so that it better aligned with my hose routing. The gauge conveniently faces upward with the pressure adjustment facing towards the front so adjustments should be rather easy. In using the factory hardlines that run underneath the manifold I will only have two fuel hoses coming from the fender wall to the motor - the fuel feed and the return hoses. It will look a lot cleaner with the regulator on the manifold instead of the fender wall.

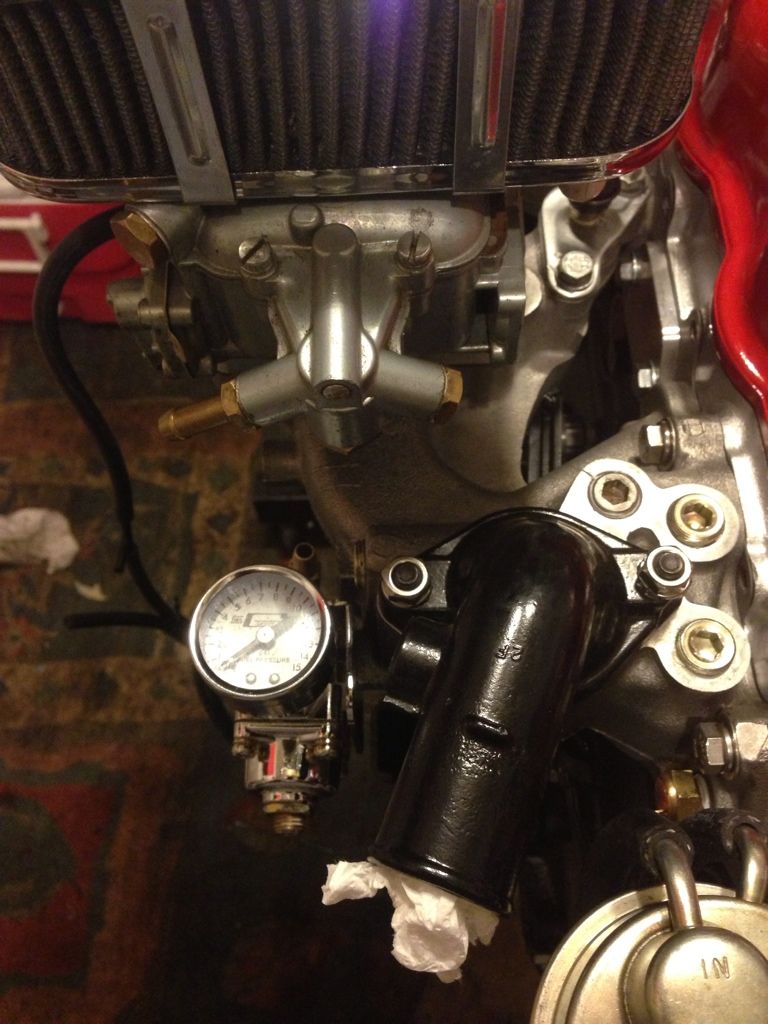
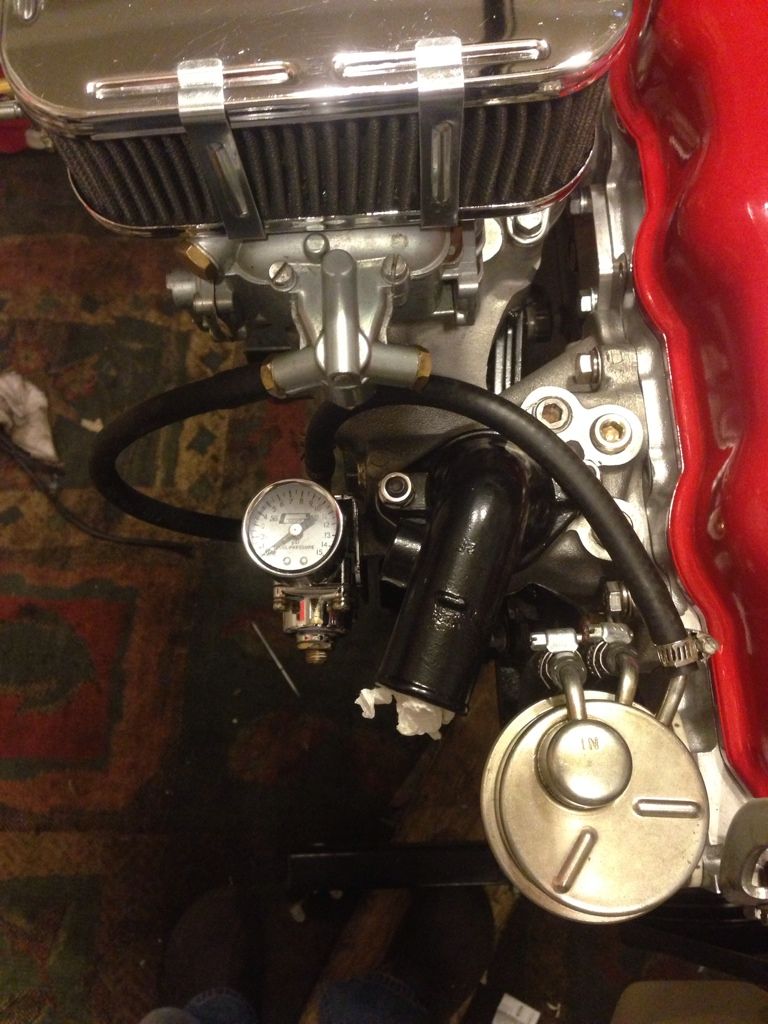
I also decided that I didn't like the "T" fitting in my vacuum advance lines. I ended up putting a barb fitting in the intake manifold for my manifold advance and ran the typical carb advance. I also forgot that I needed to leave the fitting for the brake booster (I had originally plugged it). To run the brake booster hose cleaner, I used an elbow fitting so that it will run strait back to the firewall instead of making a longer loop.
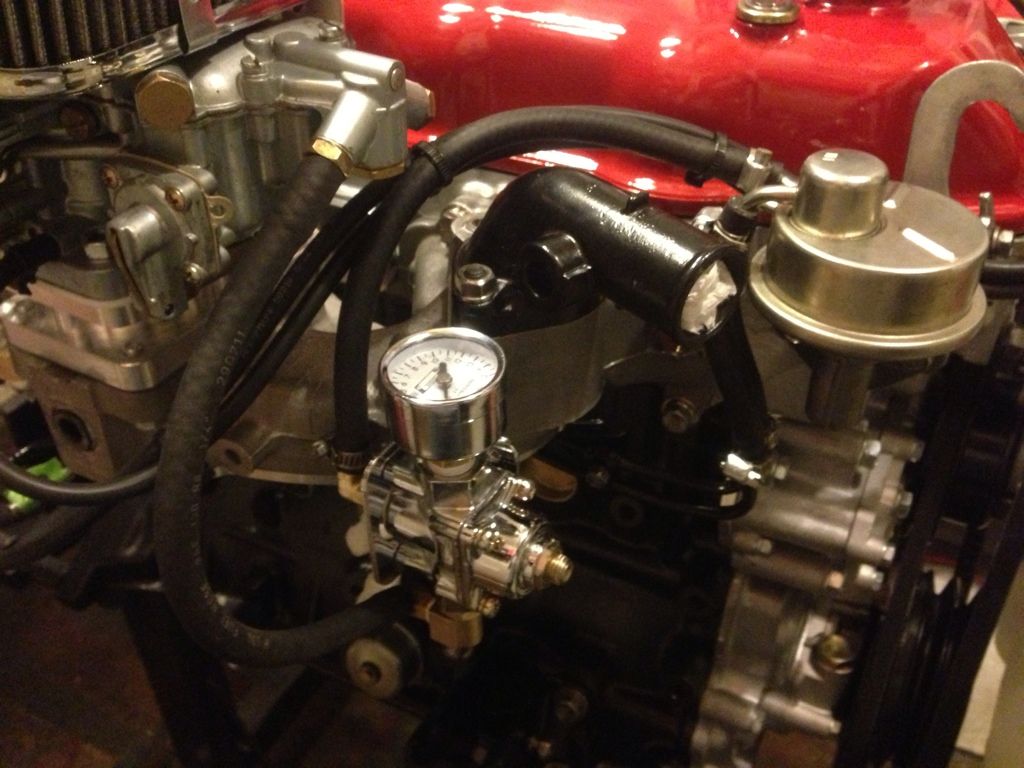
Good looking and clean huh??
I also decided that I didn't like the "T" fitting in my vacuum advance lines. I ended up putting a barb fitting in the intake manifold for my manifold advance and ran the typical carb advance. I also forgot that I needed to leave the fitting for the brake booster (I had originally plugged it). To run the brake booster hose cleaner, I used an elbow fitting so that it will run strait back to the firewall instead of making a longer loop.
Good looking and clean huh??
01-01-2013, 11:44 PM
#33
Registered User
iTrader: (1)
Join Date: Jul 2012
Location: Calistoga, CA
Posts: 639
Likes: 0
Received 0 Likes
on
0 Posts
Really fantastic work!
Thank you for sharing, too! I'm planning on doing the big rebuild this summer, and reading your thread's given me a lot of insight into the inner workings of these motors.
Thank you for sharing, too! I'm planning on doing the big rebuild this summer, and reading your thread's given me a lot of insight into the inner workings of these motors.
01-15-2013, 10:05 AM
#35
Not yet. I was going to drop it in to break it it for a couple thousand miles, but decide that I would go ahead and yank the cab to clean up the frame as well. Just ordered a gallon of POR-15 and a bunch of wire wheels to do the frame. I also wanted to clean up with engine bay and remove all the emissions wiring from the wiring harness prior to dropping it back in. Hopefully it won't take too long because it's killing me having the engine done and just sitting on the stand in the garage.
01-19-2013, 08:45 PM
#36
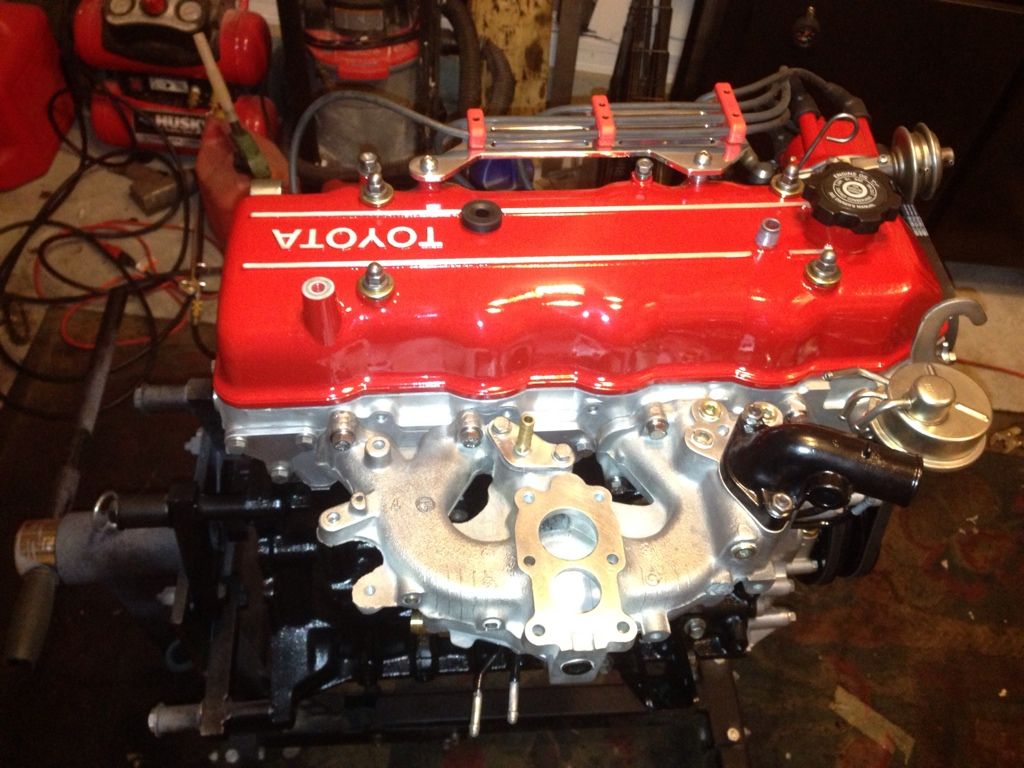
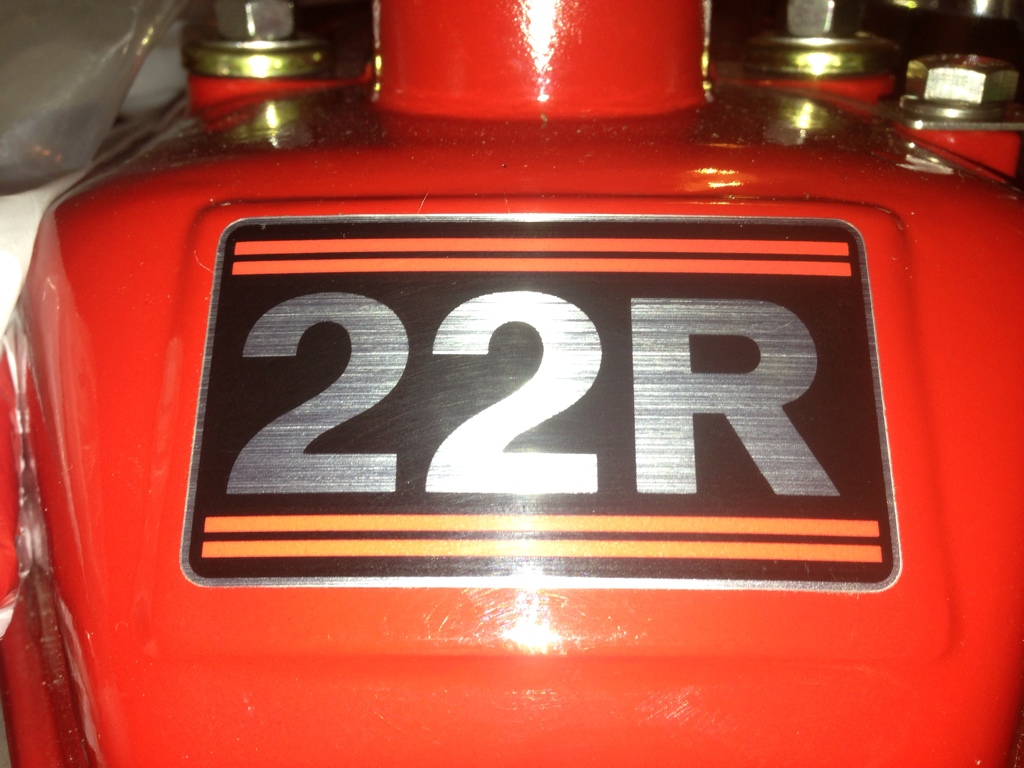
I put the finishing touch on today. Good ole 22R sticker on the valve cover:
With the motor done, I'm moving on to the frame and bodywork. Check it out here:
https://www.yotatech.com/forums/f197...-build-264229/
With the motor done, I'm moving on to the frame and bodywork. Check it out here:
https://www.yotatech.com/forums/f197...-build-264229/


