Redeth's 89 4Runner custom front plate bumper fab.
 09-17-2013, 09:00 PM
#1
Registered User
Thread Starter
Redeth's 89 4Runner custom front plate bumper fab.
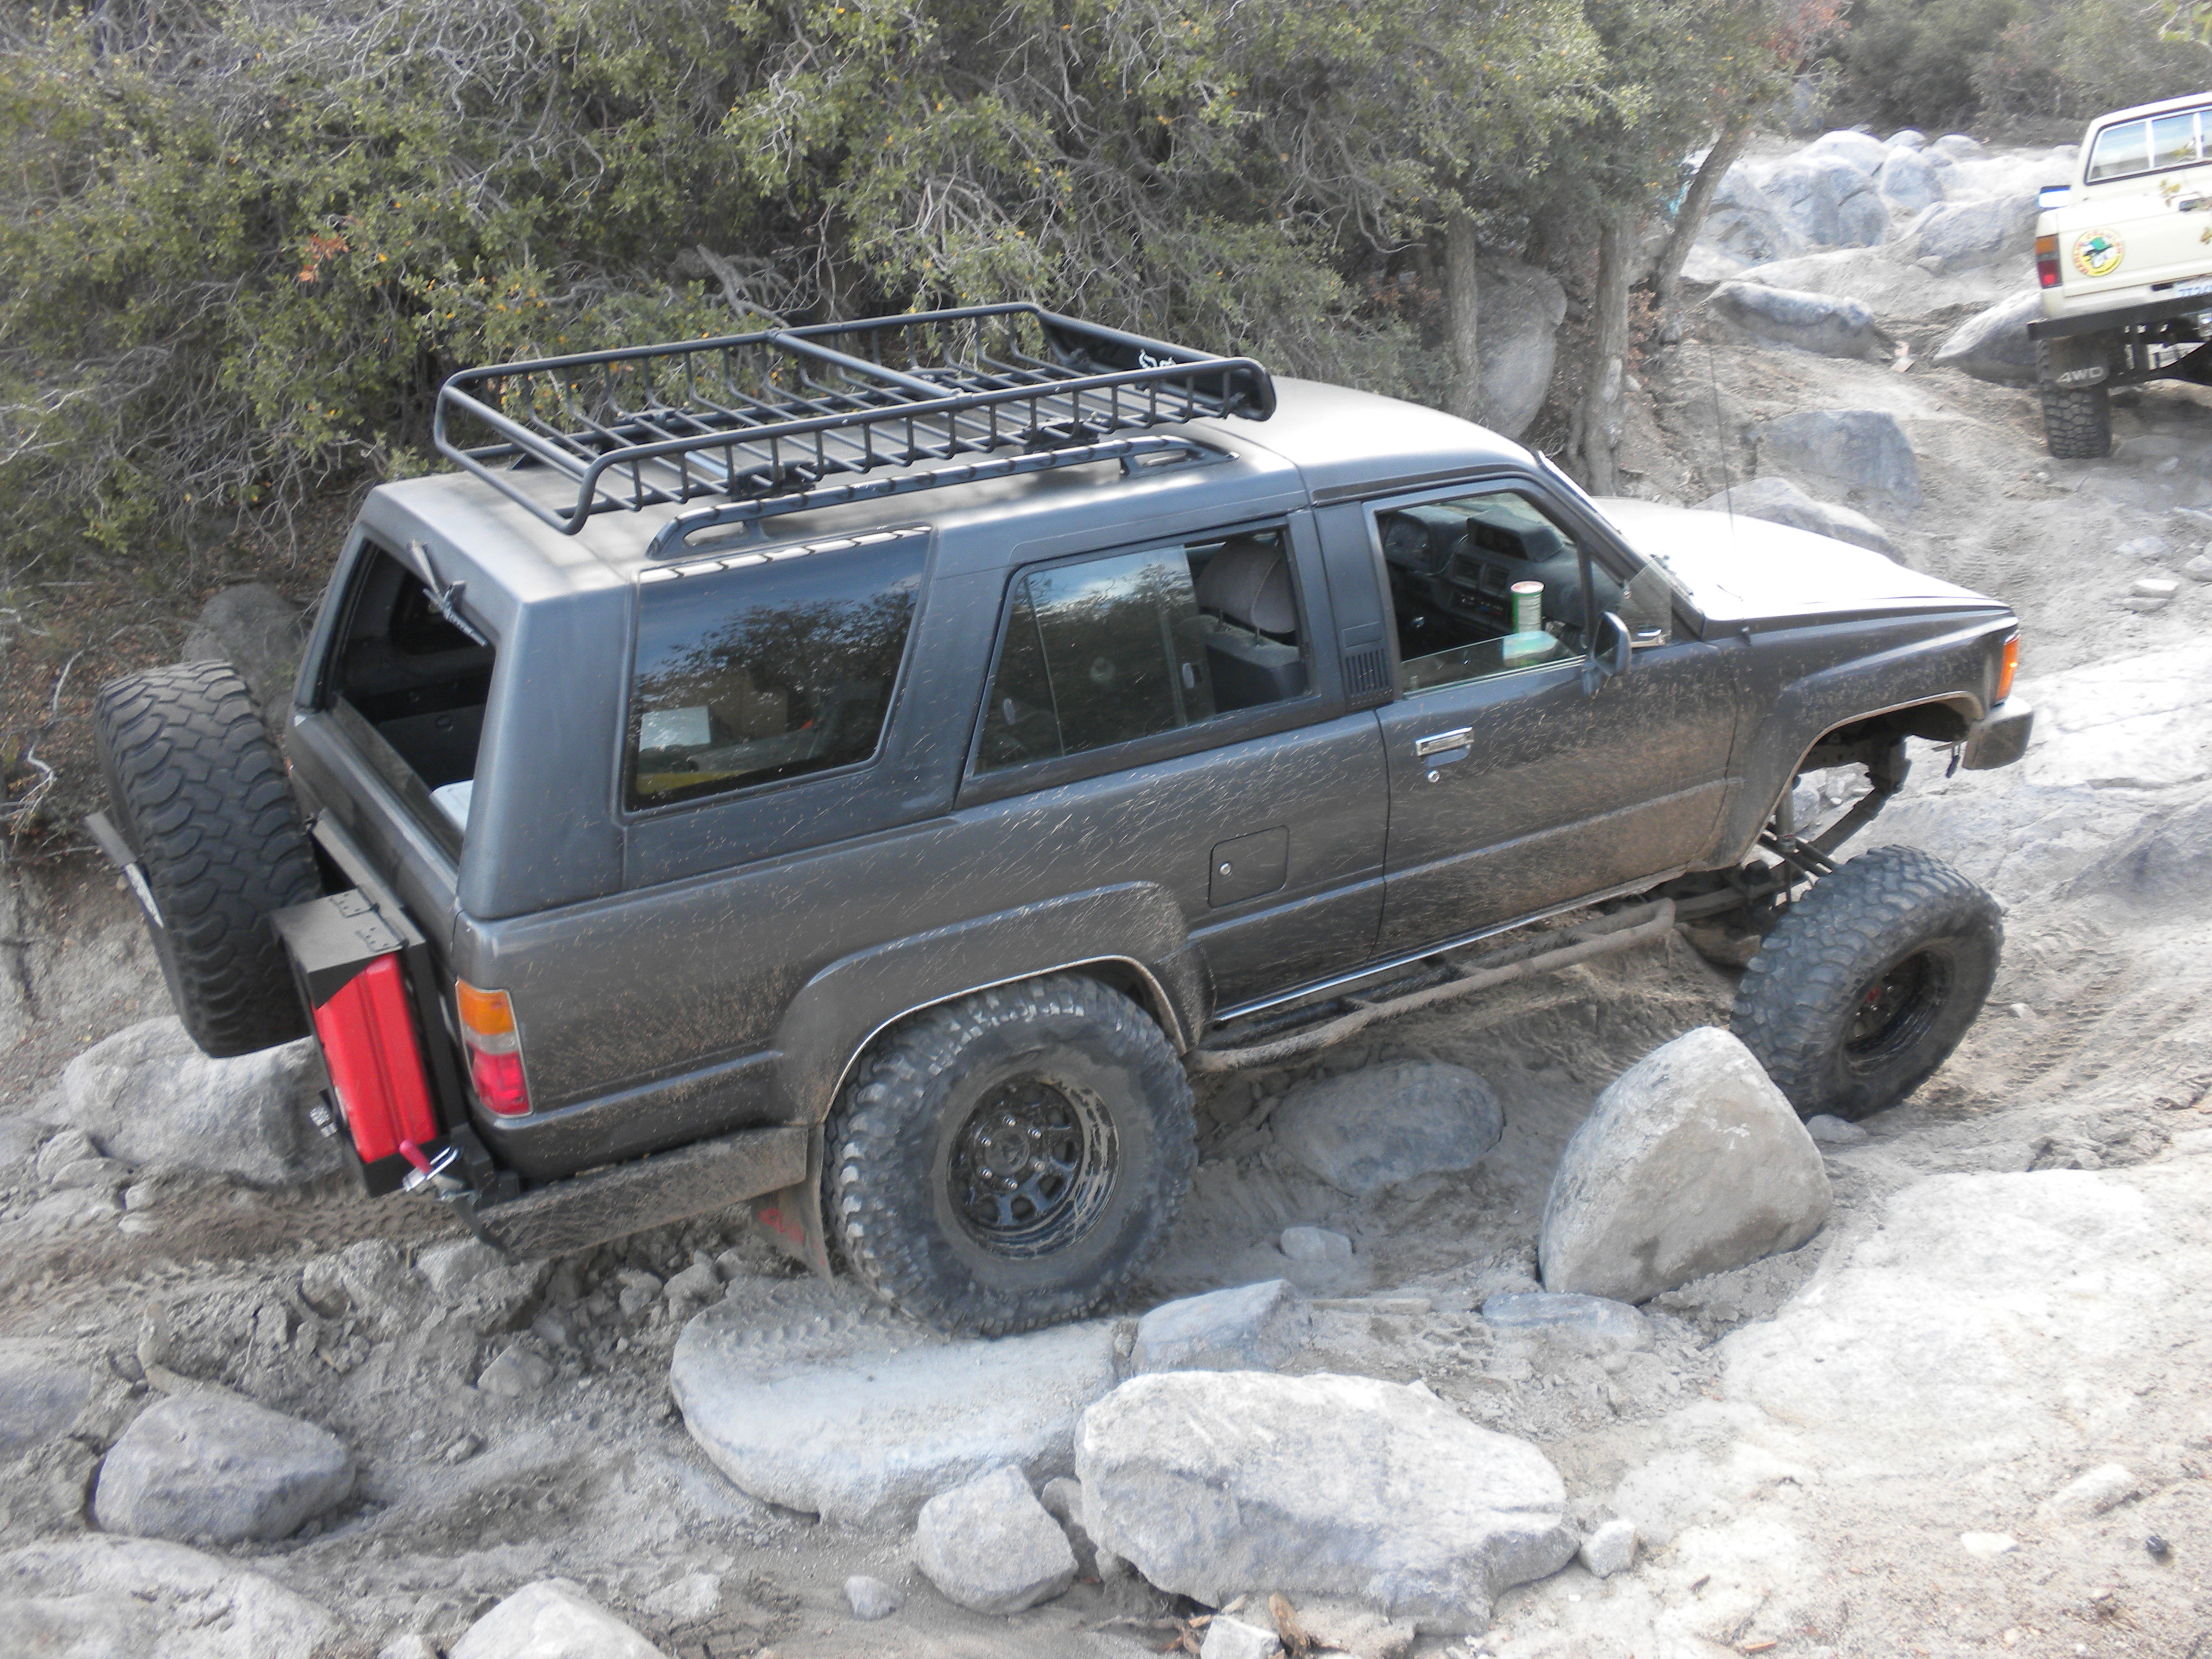
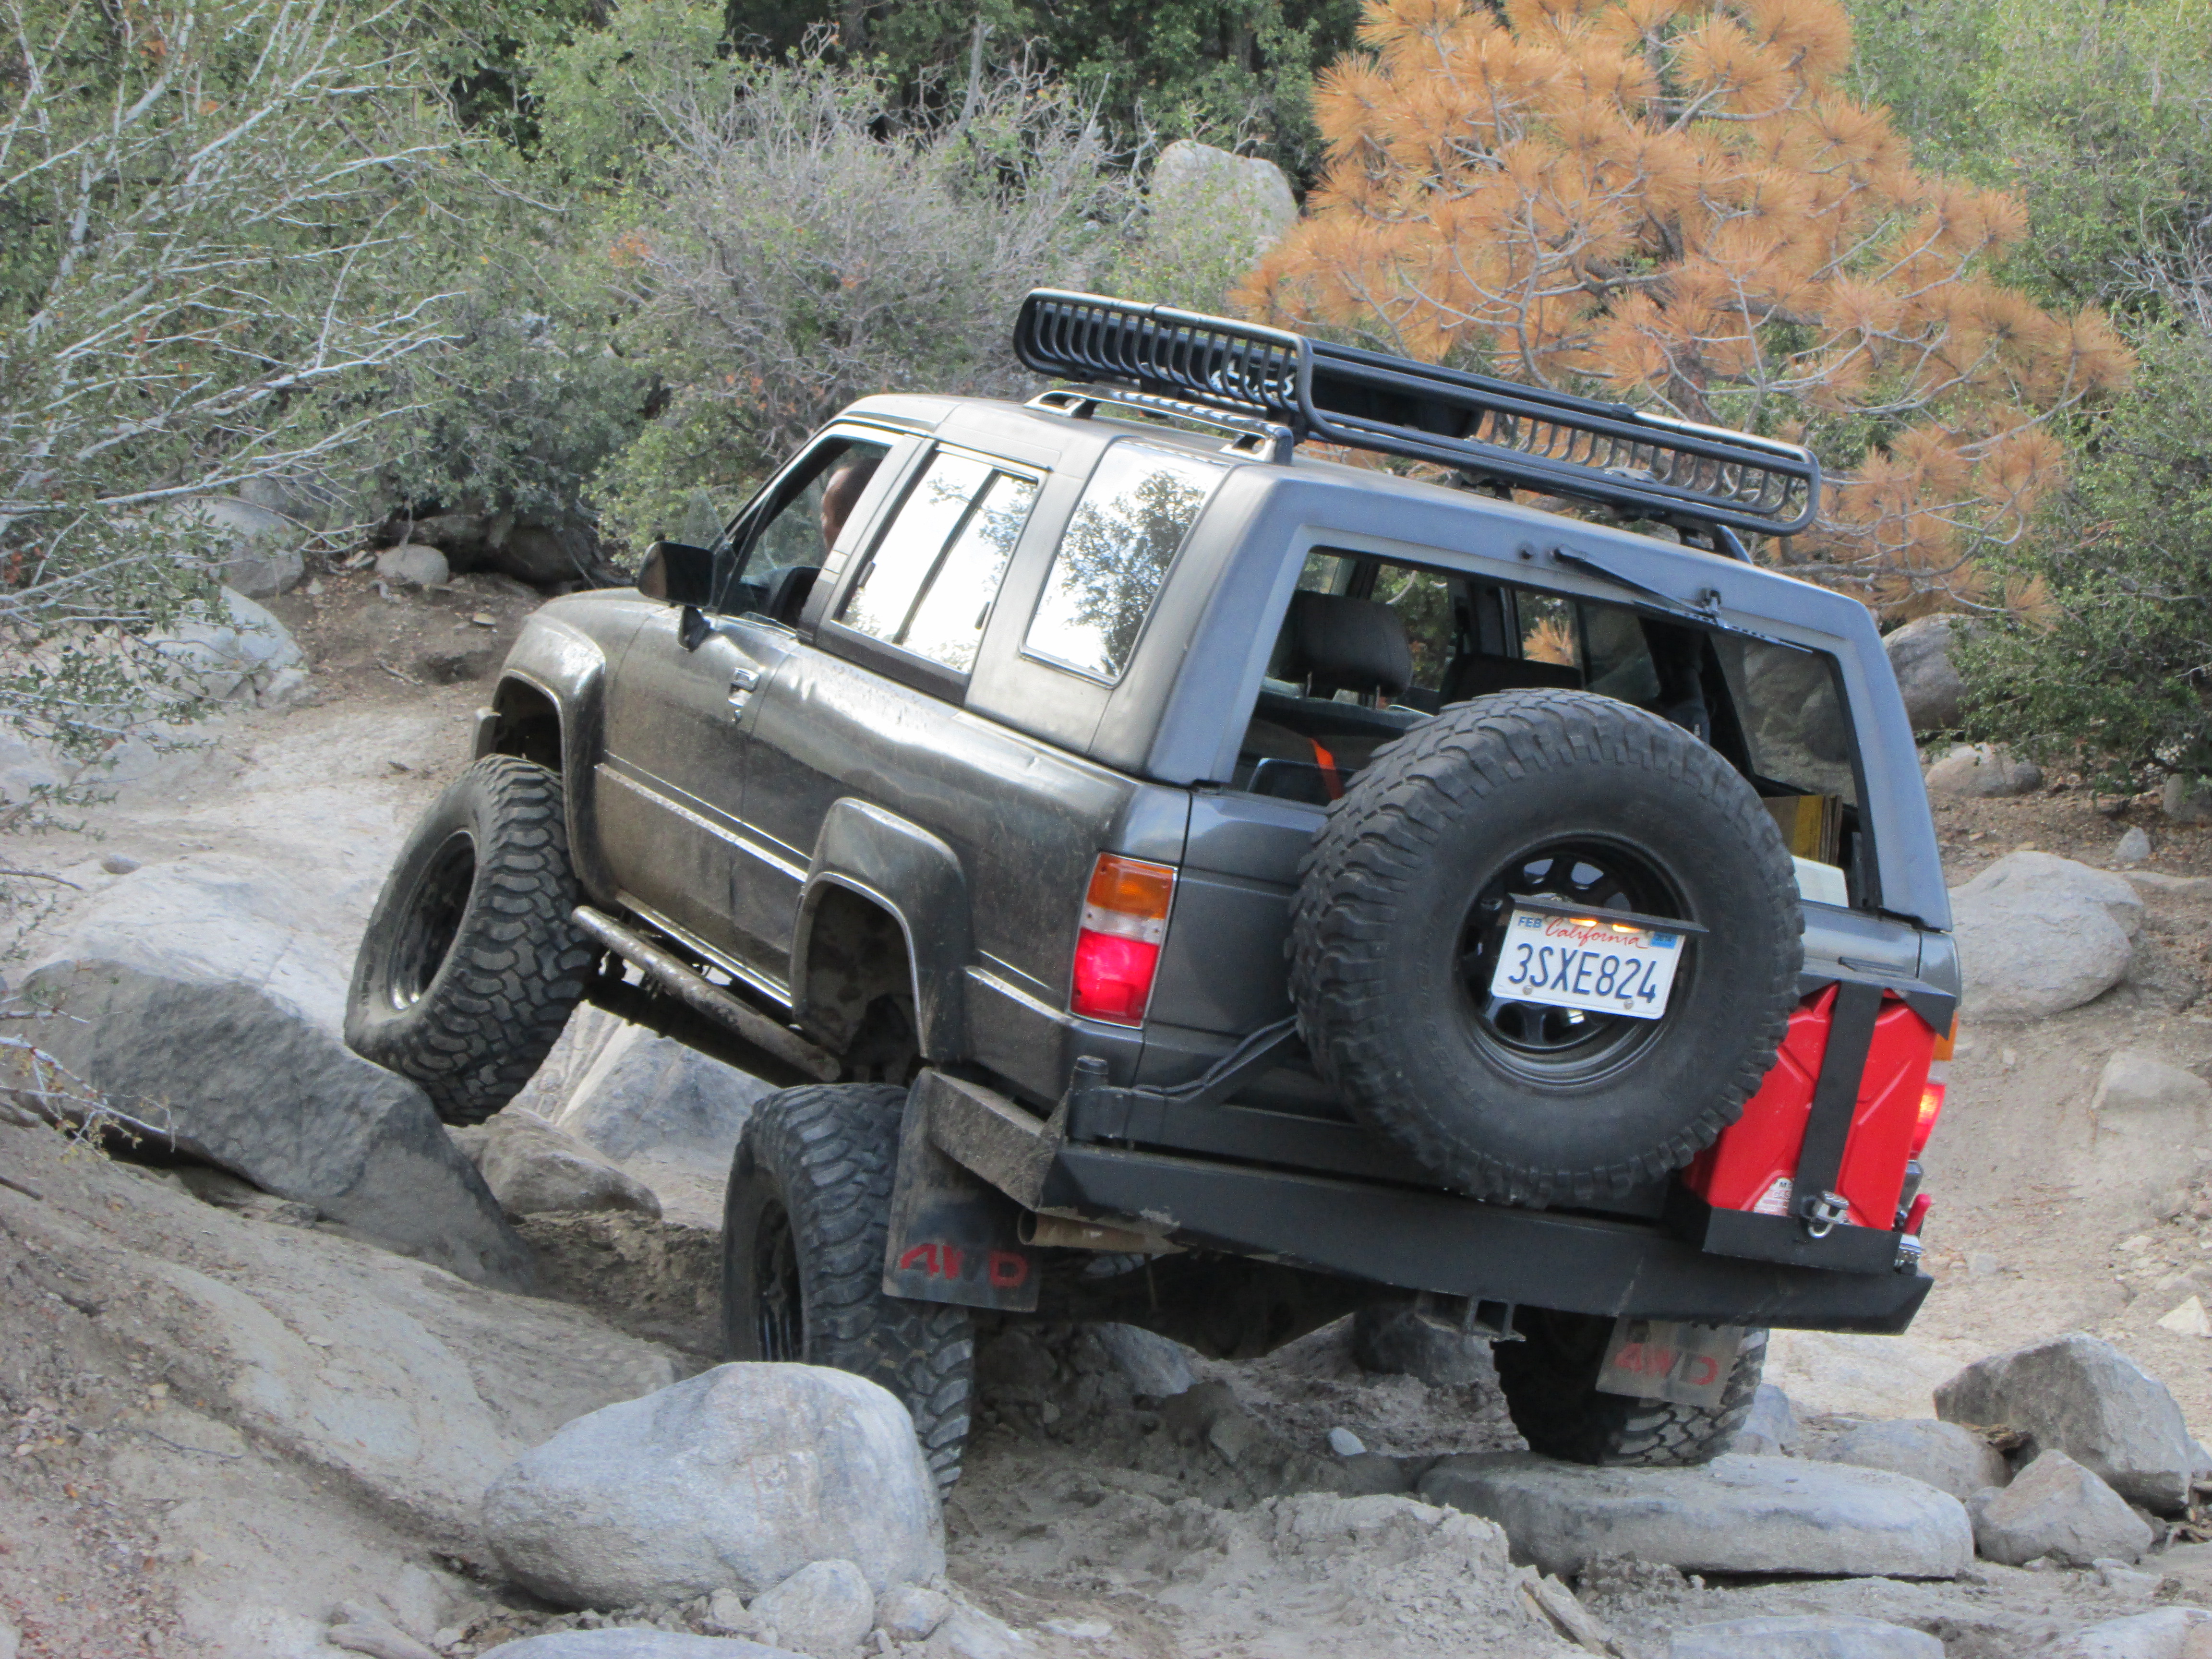
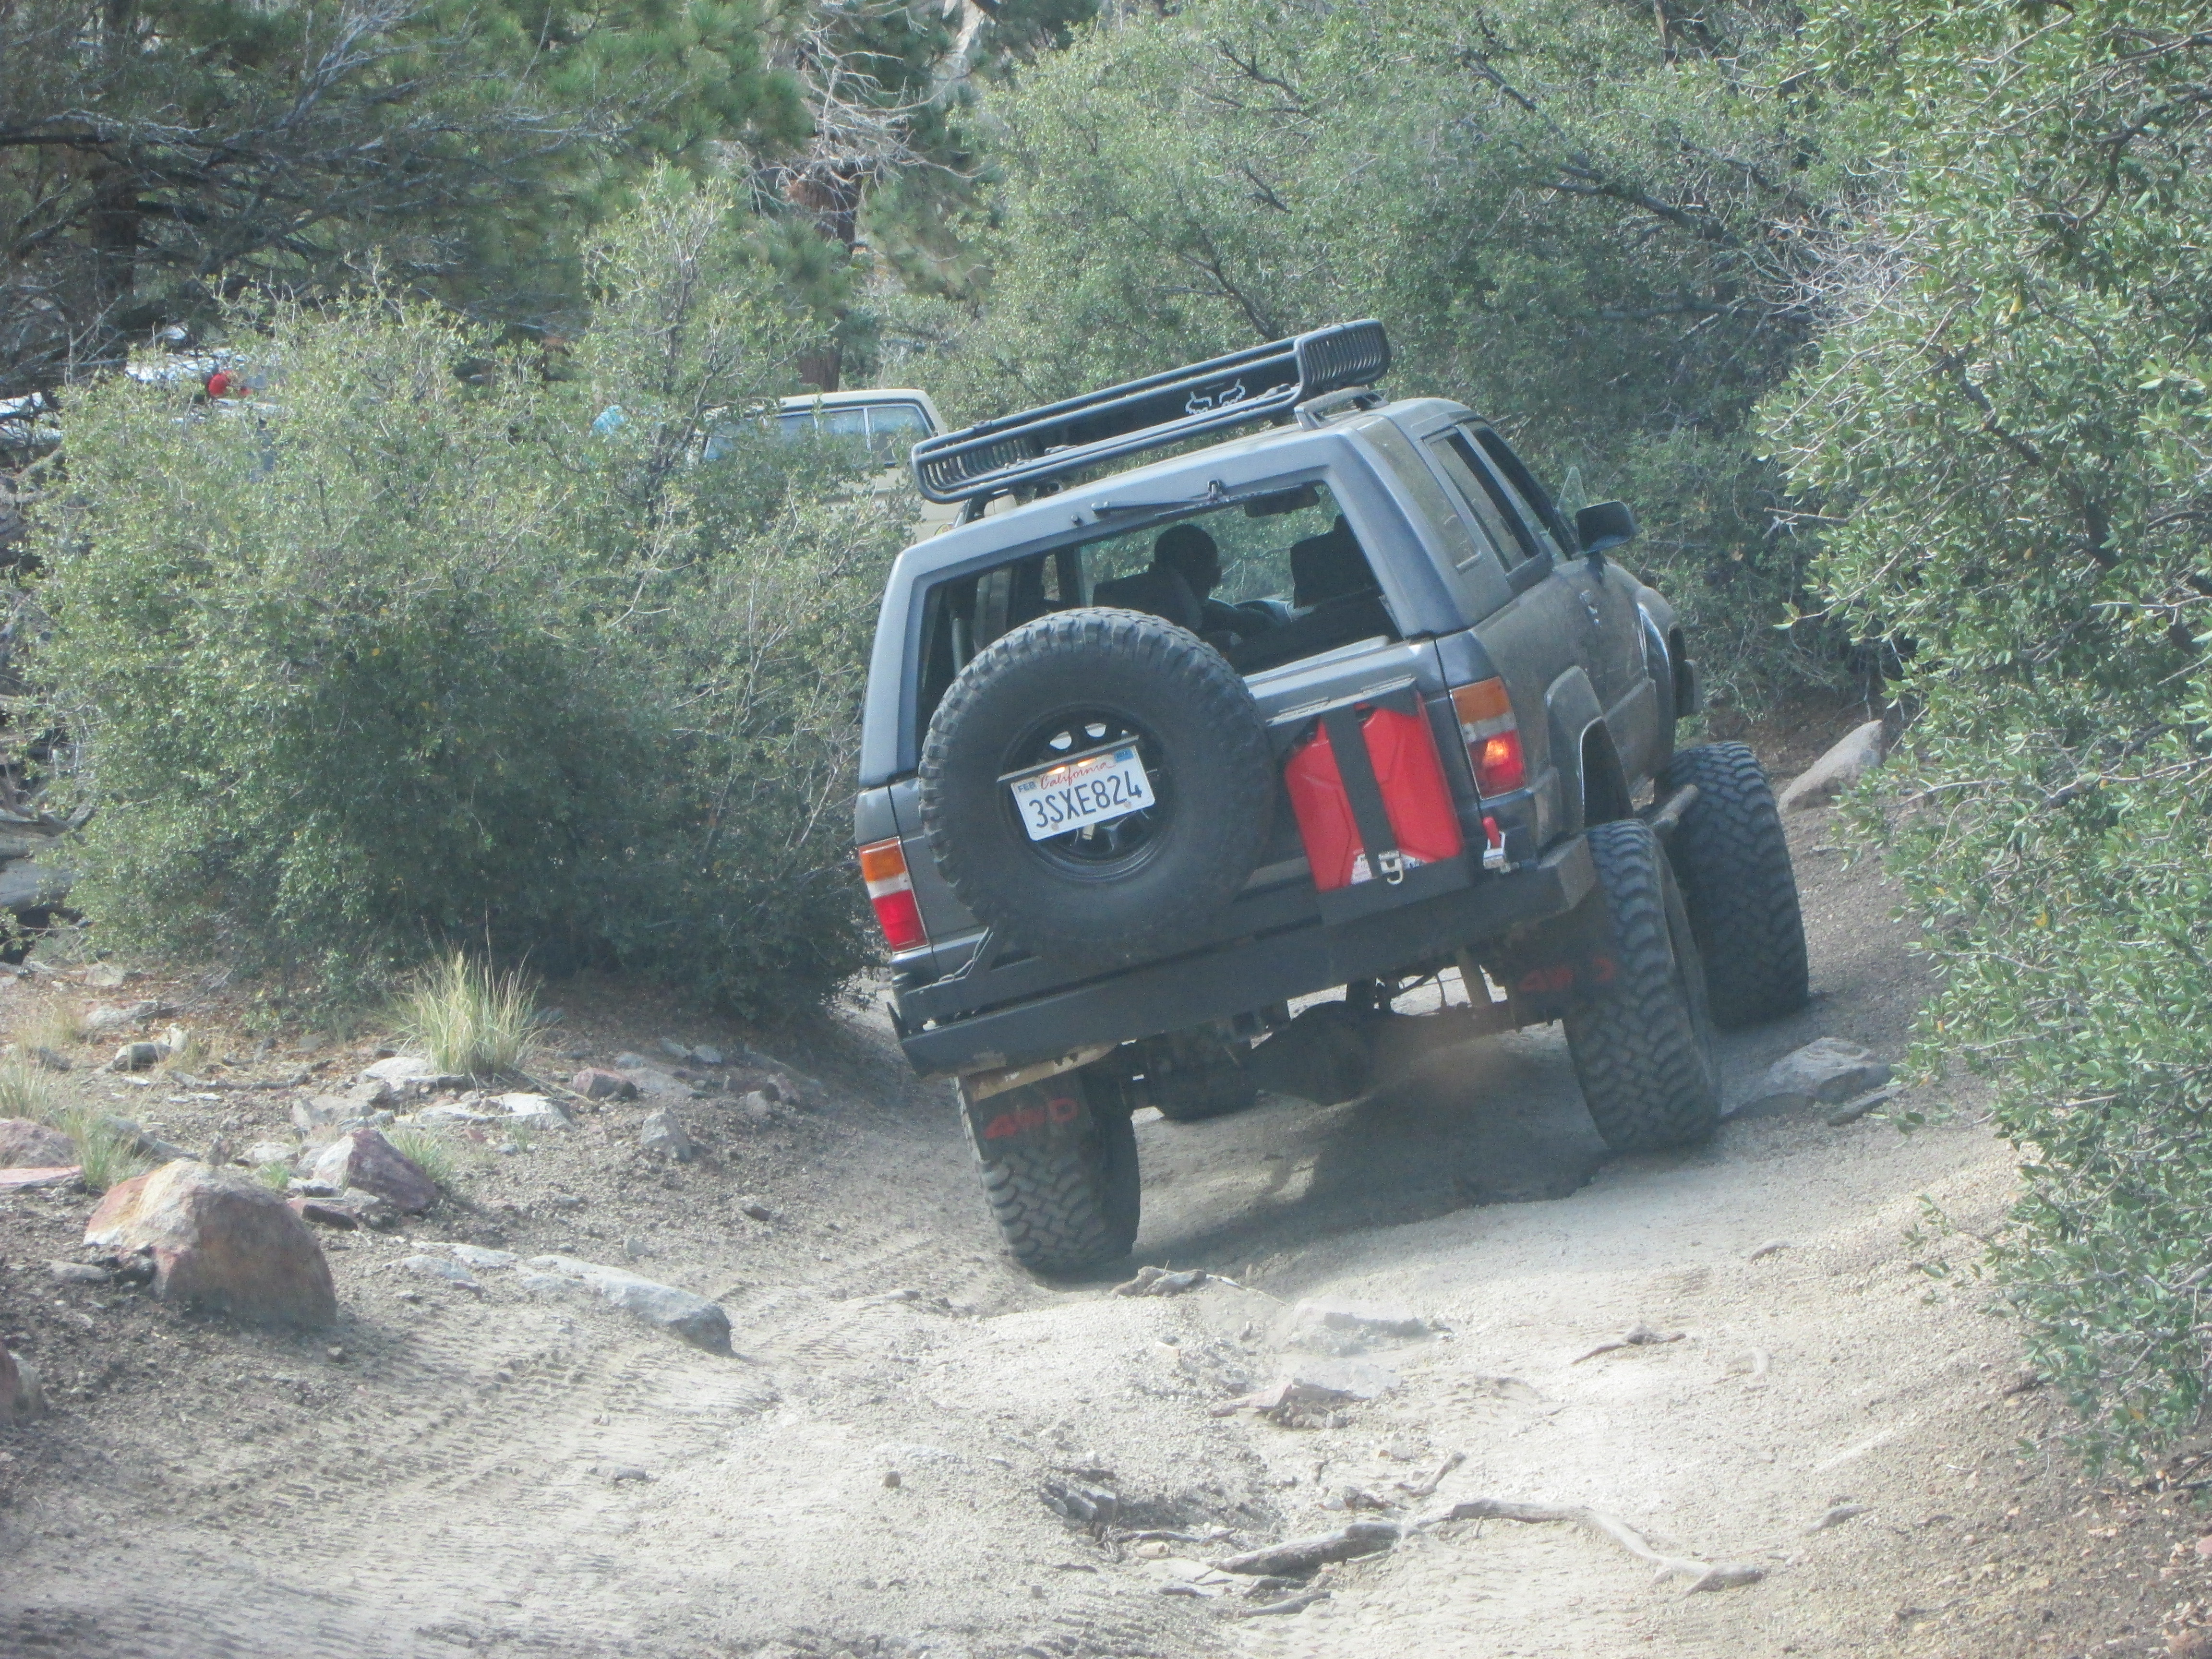
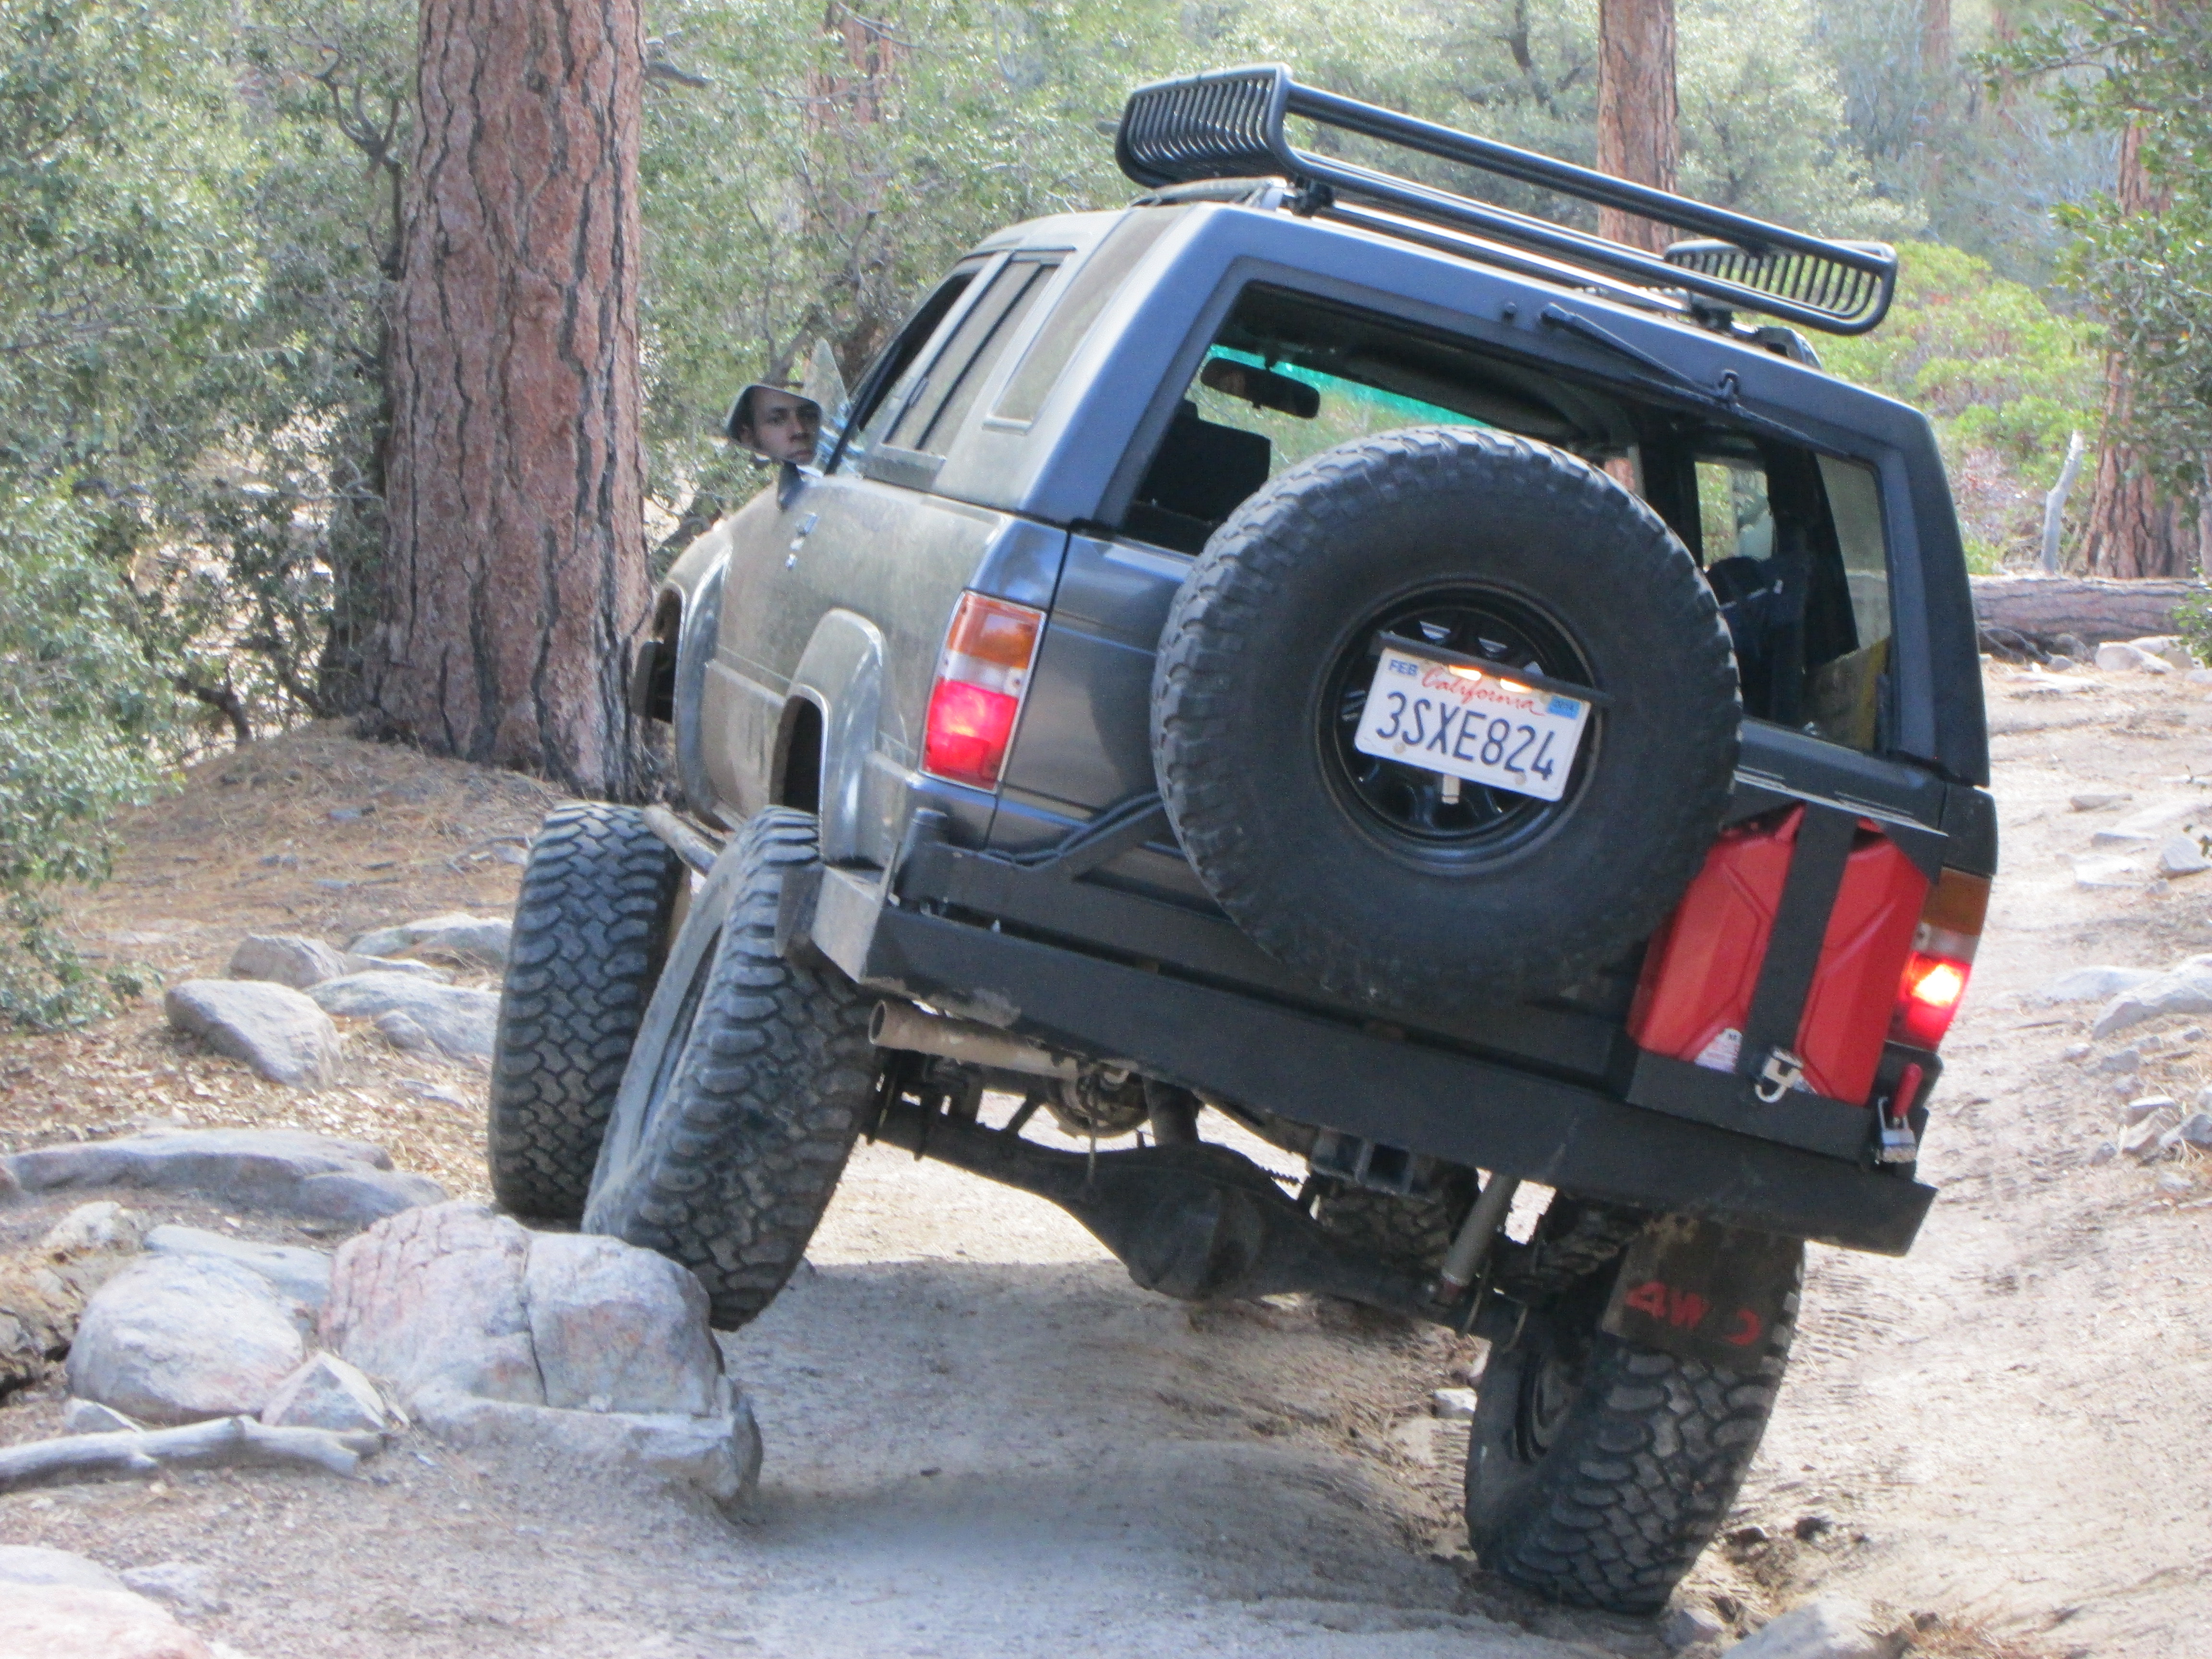
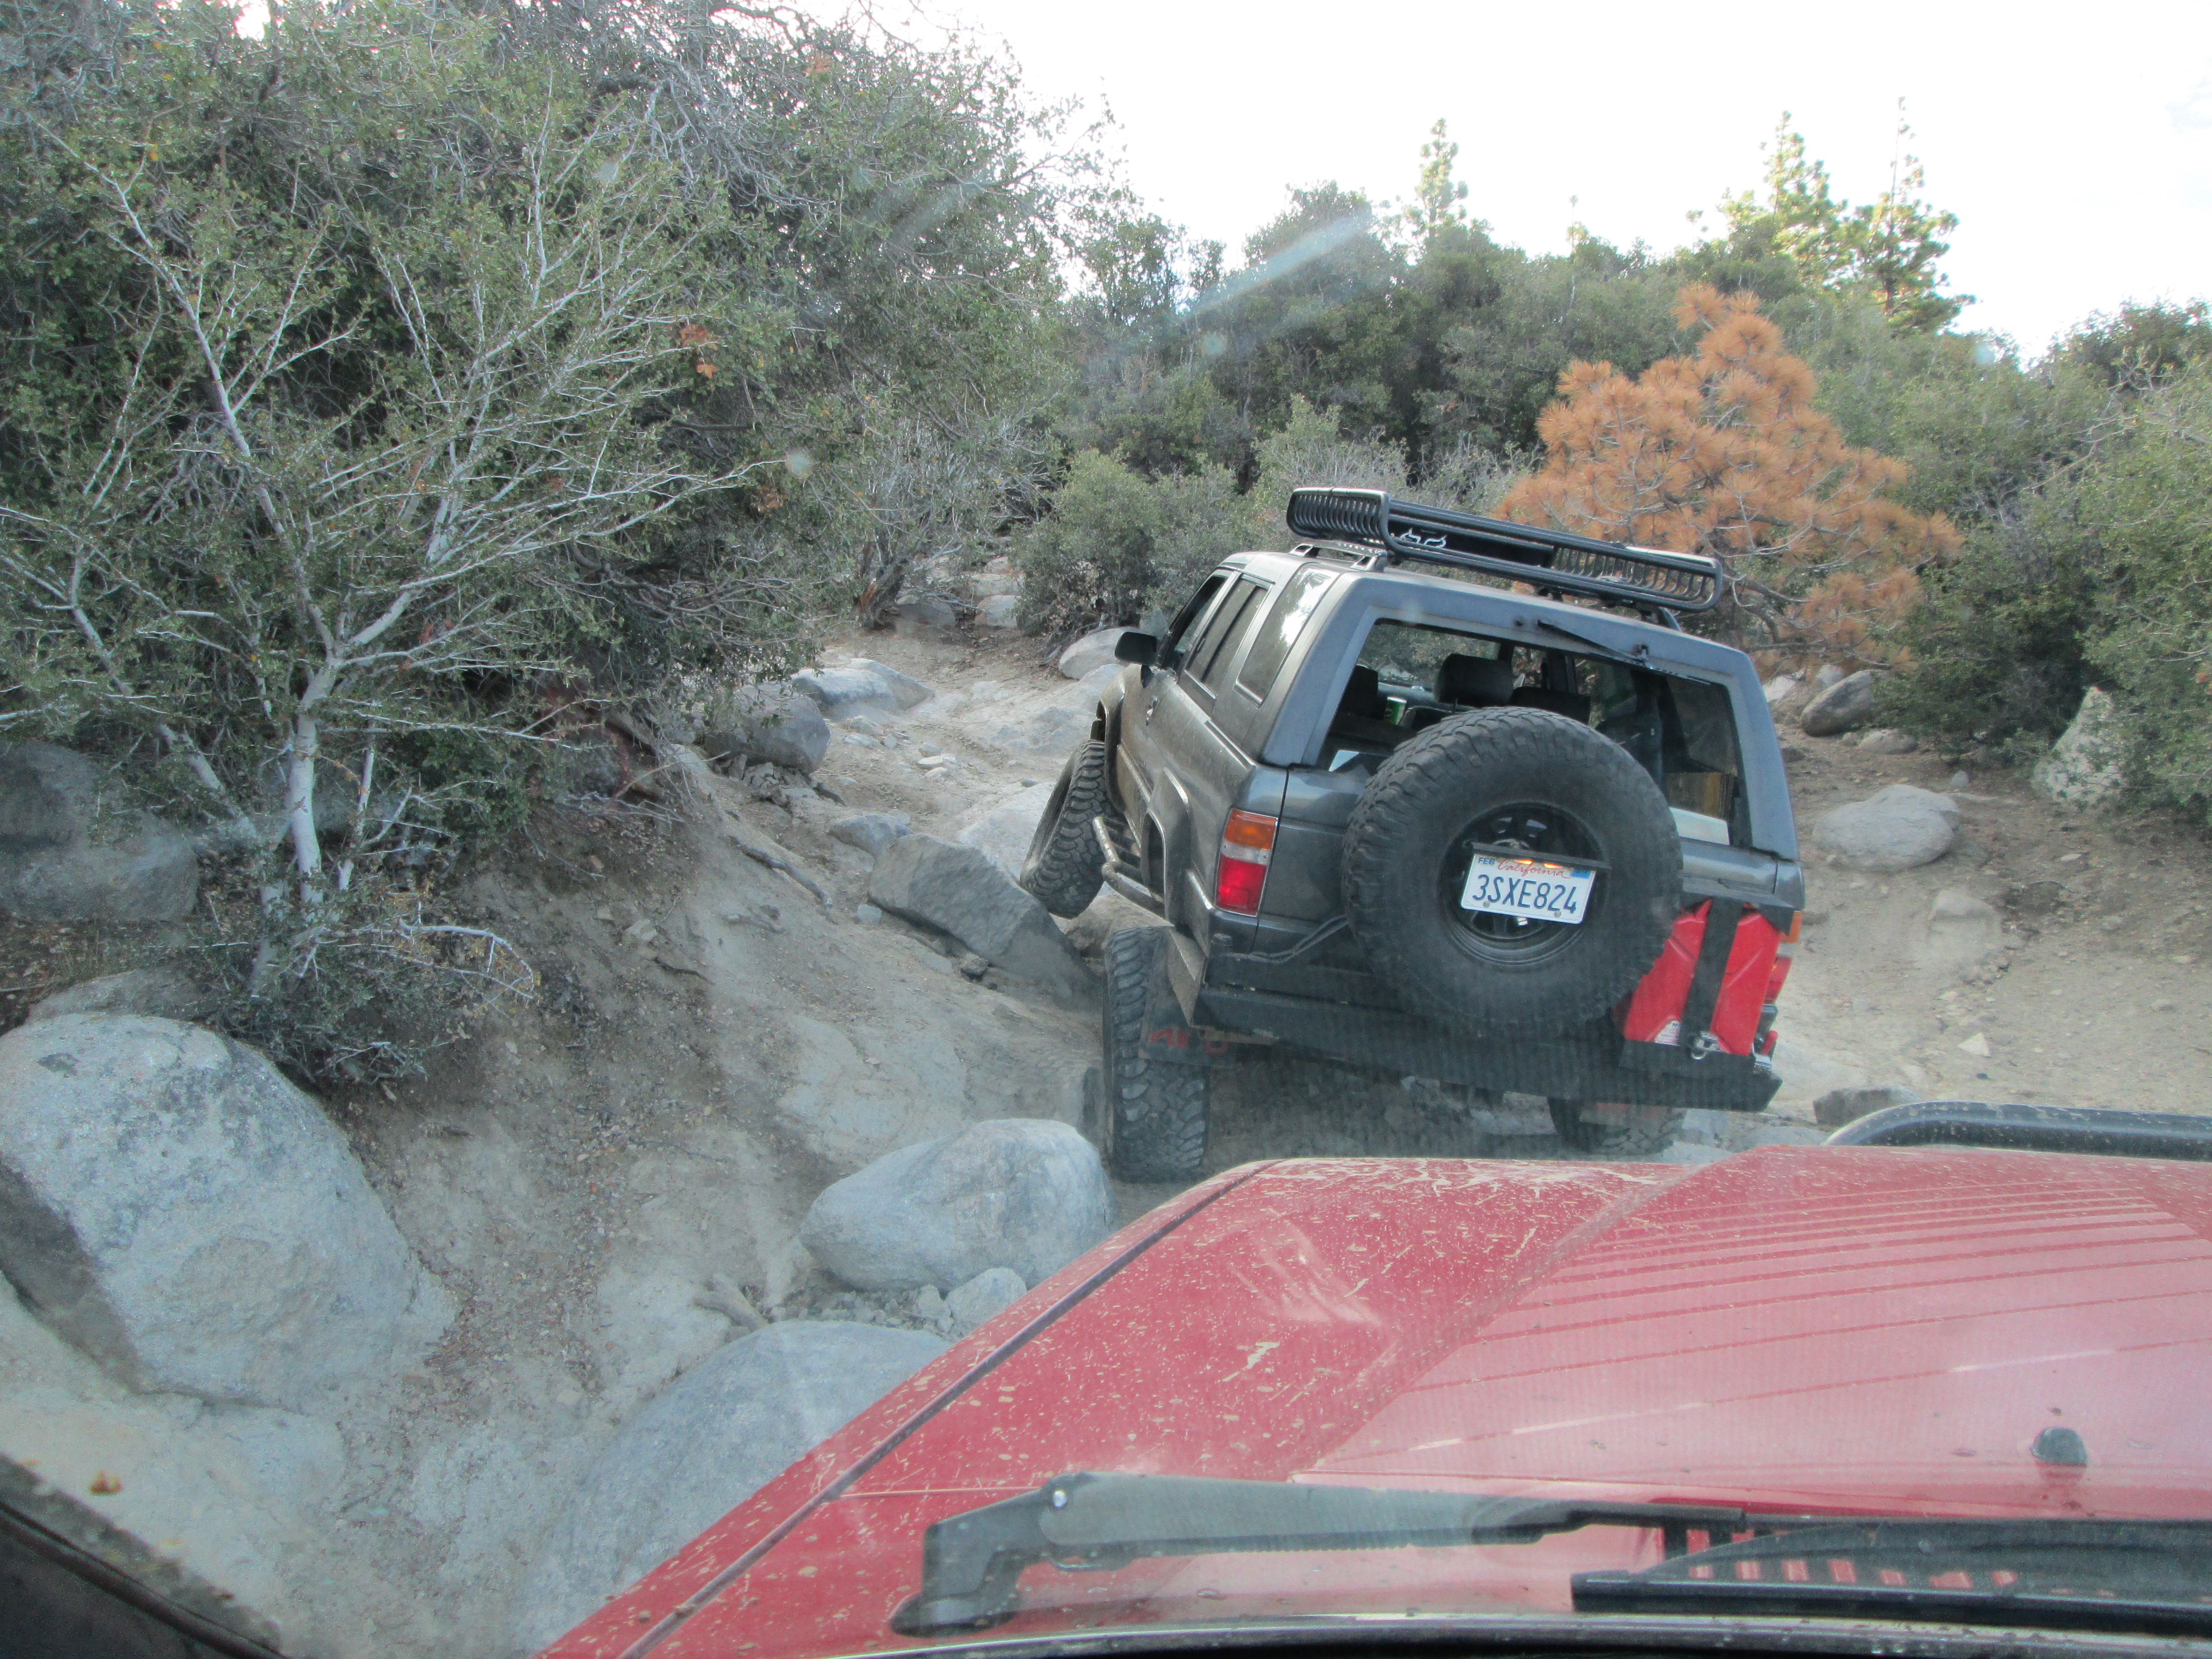
Hello everybody. After building my rear plate bumper/tirecarrier with jerry can i figured i ought to make a matching front bumper as well. Doing this rear bumper was a pretty big hit on my build thread. Had quite a few people checking out my progress and PM'ing me lots of questions/suggestions. And after testing this heavy duty bumper out on the the hardest Big bear trails, including the "John Bull" trail, i seen that we did an excellent job in creating it. I must had hit this bumper over 25x for sure and the only damage was paint scratches. I'm very satisfied with the work we did on the rear bumper that i want to make a front bumper just as durable. So i wanted to do it right this time and make a build thread to share my progress with you all here on yotatech rather then just the couple of folks on my build thread. I really hope you will all enjoy.
If you're curious to read up on my rear bumper build up you can find the project begin on page 84 of my build thread all the way to page 97.
Here: https://www.yotatech.com/forums/f199...6/index84.html
---------------------------------------------------------
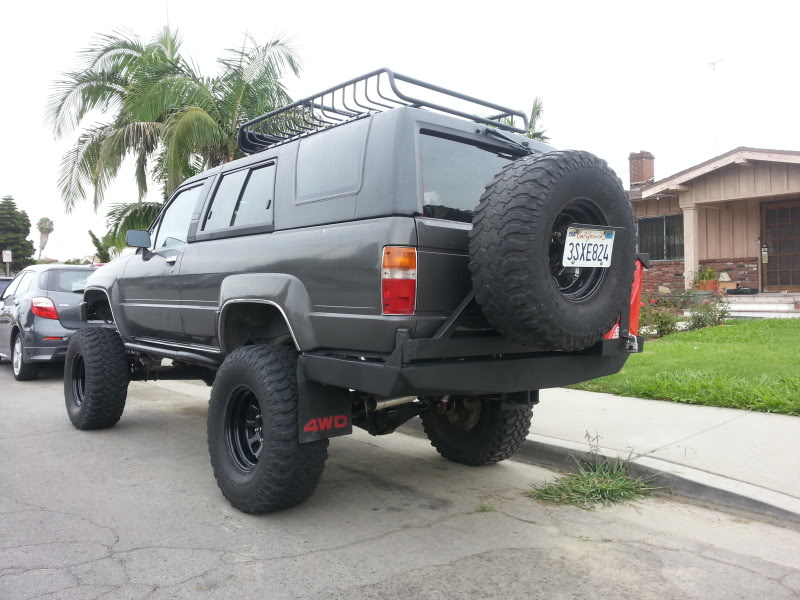
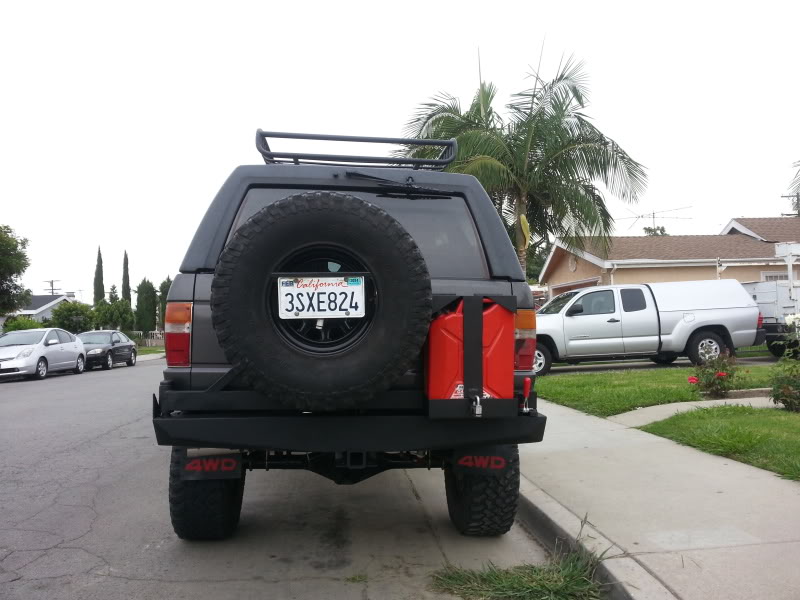
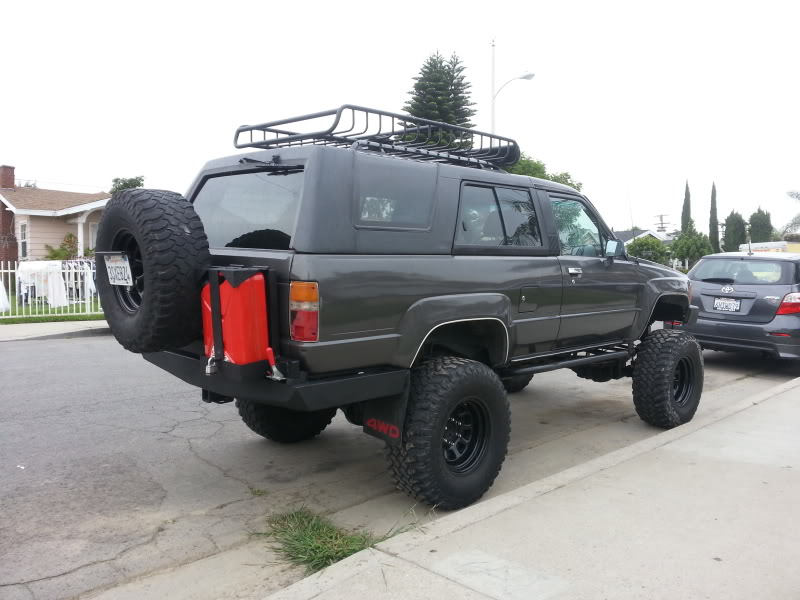
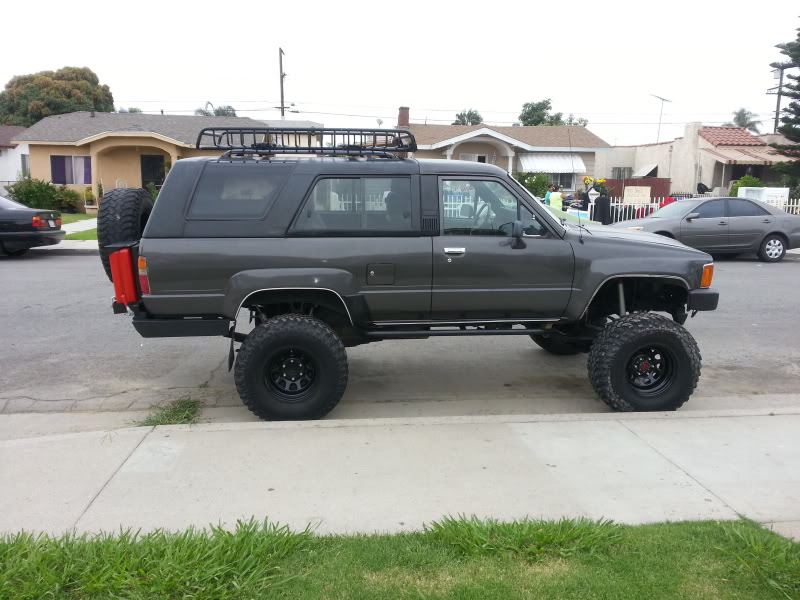
Here are some quick pictures of the finished work of my rear.
...and if you dont want to read up on the progress but are still curious to see how everything works on the bumper check out this video:
---------------------------------------------------------
Now that you've seen what we did with the rear bumper I can get back on subject and begin this thread with the front bumper stuff. Please enjoy
If you're curious to read up on my rear bumper build up you can find the project begin on page 84 of my build thread all the way to page 97.
Here: https://www.yotatech.com/forums/f199...6/index84.html
---------------------------------------------------------
Here are some quick pictures of the finished work of my rear.


...and if you dont want to read up on the progress but are still curious to see how everything works on the bumper check out this video:
Now that you've seen what we did with the rear bumper
I can get back on subject and begin this thread with the front bumper stuff. Please enjoy
 09-17-2013, 09:47 PM
#2
Registered User
Thread Starter
Today i bought a couple of the things i'll be wanting to incorporate into my bumper. I spent a lot but in the end getting great parts is what is going to matter on the trail.
----------------------------------------------------------------------
I Ordered my Smittybilt Xrc8 winch with synthetic line off 4WheelParts.com. And i wont be doing a store pick up since i got free shipping so i'll just wait it out. Came out to $490.49 total
http://www.4wheelparts.com/Winches-W..._PQ=Smittybilt
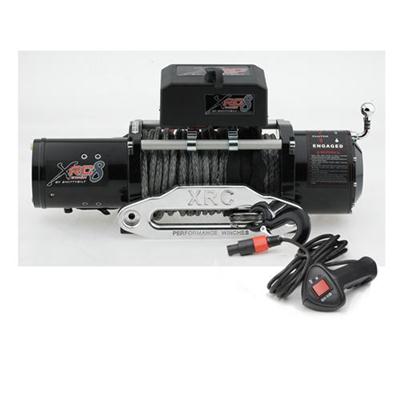
The reason i chose this is because Smittybilt has great products. They are durable, proven to last, and they are a bit cheaper then WARN. I am choosing Synthetic rope over steel because i don't want the line to start rusting over time. Not to mention it is so much lighter then steel cable; 1/7th the weight of steel cable. It cost about $140 more but just that weight difference is enough for me because I already have a ton of weight on my truck. With my 3vze, my whole rear bumper/tire carrier combo and a loaded roof rack. And then another plate front bumper. I am gonna be so heavy. It would definitely be nice to cut back on unnecessary weight
And yessss I have heard of the Badlands winches from Harbor Freight. But for what it costs(with steel line) i would rather pay the extra amount for a better winch that i know is better with a brand i trust. I definitely wouldn't want a recovery device to fail on me when i need it most. So this is why i am going with Smittybilt.
----------------------------------------------------------------------
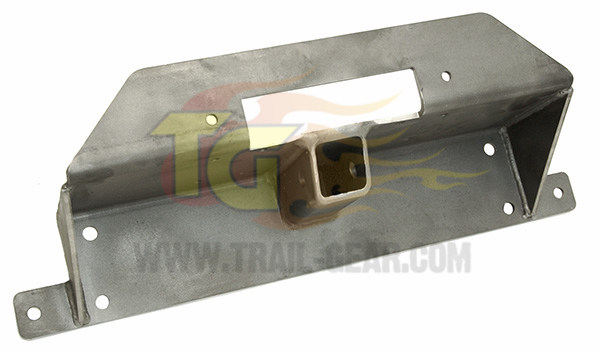
***Frame Support is a must have for me. I don't want my bumper flying off as i try to winch myself out of something. "The factory frame is only .090 wall material. This plate requires welding, but strengthens the mounting surface by 150%."
I Went with Addicted Off-Road's Frame support
http://www.addictedoffroad.com/index...products_id=73
----------------------------------------------------------------------
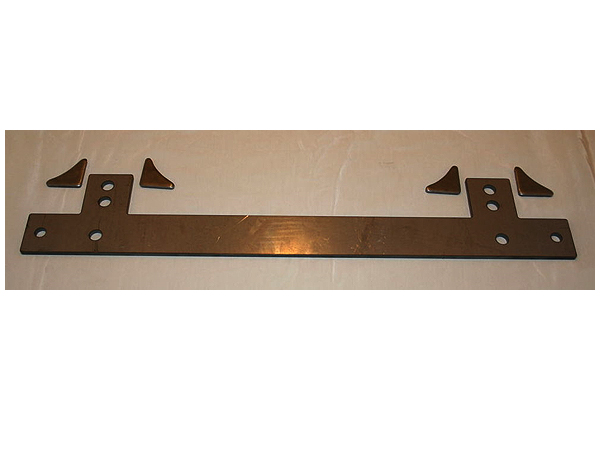
As for the winch plate. I had a choice between Trail-Gear's and the Addicted Off-Road one.
I really disliked the front look of this winch plate. I dont plan to run a hitch in the front. I dont plan to tow my truck anywhere so it is pointless for me to have. Plus it was just plain ugly IMO.
Here it is for $145.95 http://www.trail-gear.com/front-bumper-winch-mount
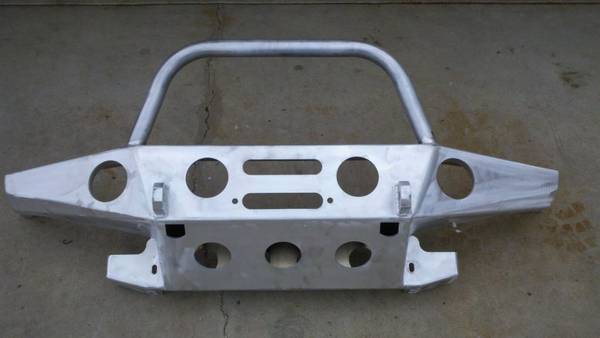
Now the Addicted Off-road winch plate has much better craftsmanship. I love the way it looks. It looks clean and has style. Has holes for D-rings AND it cost $139 http://www.addictedoffroad.com/index...roducts_id=456

(The Picture link on the website is broken So here are more pix on Ttora.com in case you're interested)
http://www.ttora.com/forum/showthread.php?t=146998
In the end I chose the Addicted offroad. I think it just had much nicer style to it for my taste.
----------------------------------------------------------------------
I am also going to be needing some turn signals. At least some that aren't as big and squared as the stock lights.
I found these Trail-Gear turn signals for $30
http://www.trail-gear.com/led-turn-signal-kit
I found that Scotty(AddictedOff-road) Sells the same ones for $29 . Just a buck less but hey i don't mind saving one dollar.
http://www.addictedoffroad.com/index...roducts_id=435
Here is the picture of the ones im talking about:
----------------------------------------------------------------------
I actually ended up buying the 3 things off Addicted off road. I figure it would probably be cheaper to buy the winch plate, turn signals, and frame support all from the same vendor vs buying from 3 different vendors.
My total for these 3 pieces came out to $254.66
----------------------------------------------------------------------
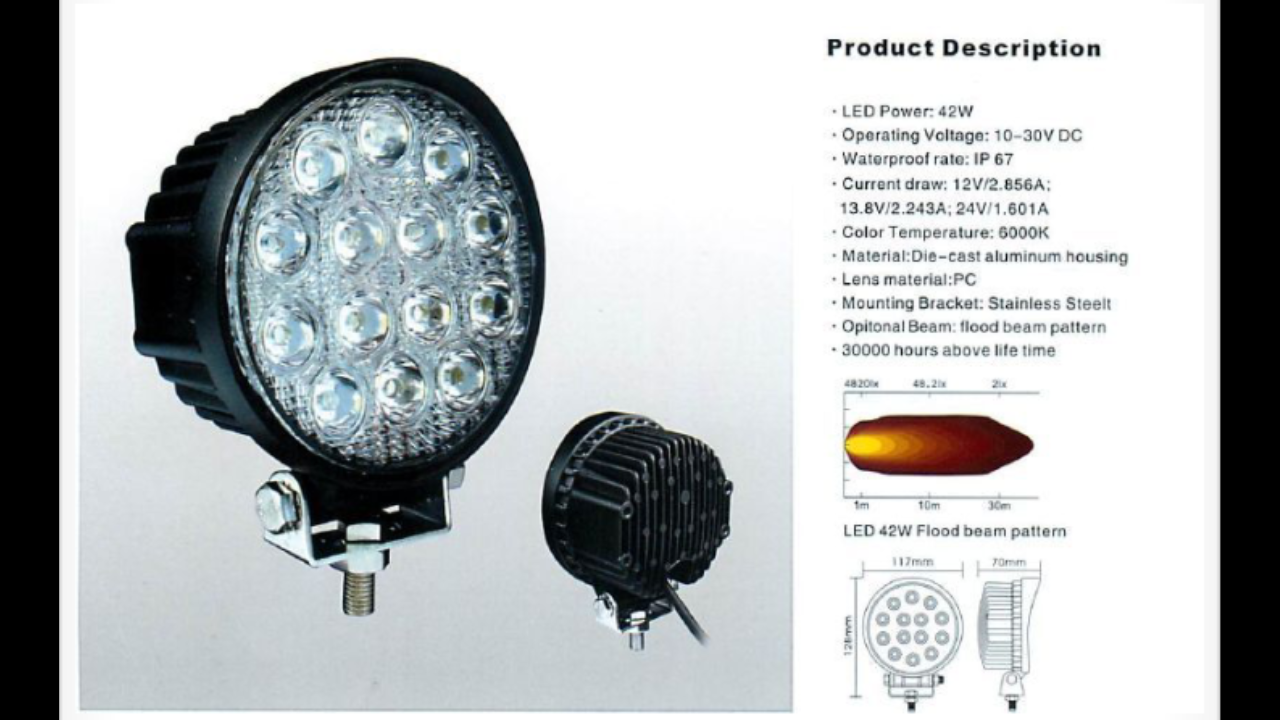
I also want to incorporate two round 4.5" LED lights into the actual bumper and then two more in the center part under the grill guard. I ordered a pair of these LED Flood Lights
Specs:
42w, 2090 lumens, waterproof, and 14 LED's and they are 4.5" They run for $59.95 each. This pair came out to $129.49 They are also located in Anaheim Ca which is super close to me so it would definitely arrive within the week.
http://www.ebay.com/itm/290961829325...84.m1423.l2649
I also plan to have those center lights in the center of the grillguard. What i had in mind was to buy Mark's(Chefyota4x4) old 8" Dick Ceptic Spot lights and place those in the center. Then place the ebay flood lights in the actual bumper.
I haven't bought Mark's spot lights yet but i will.
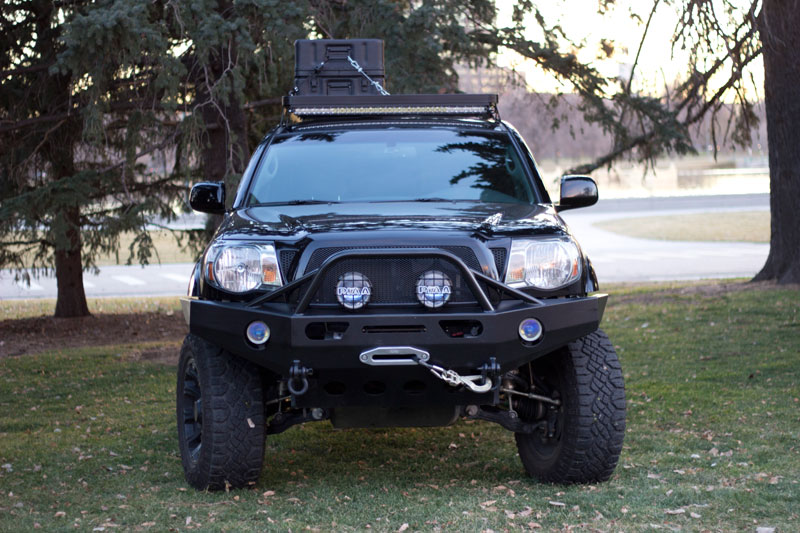
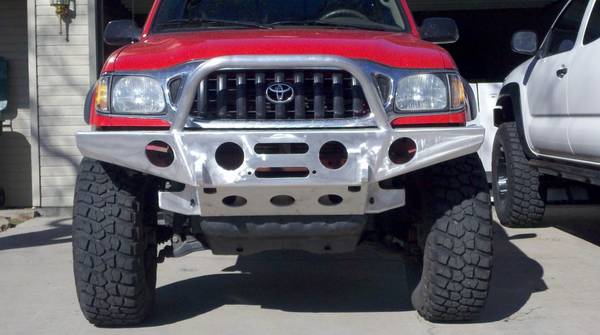
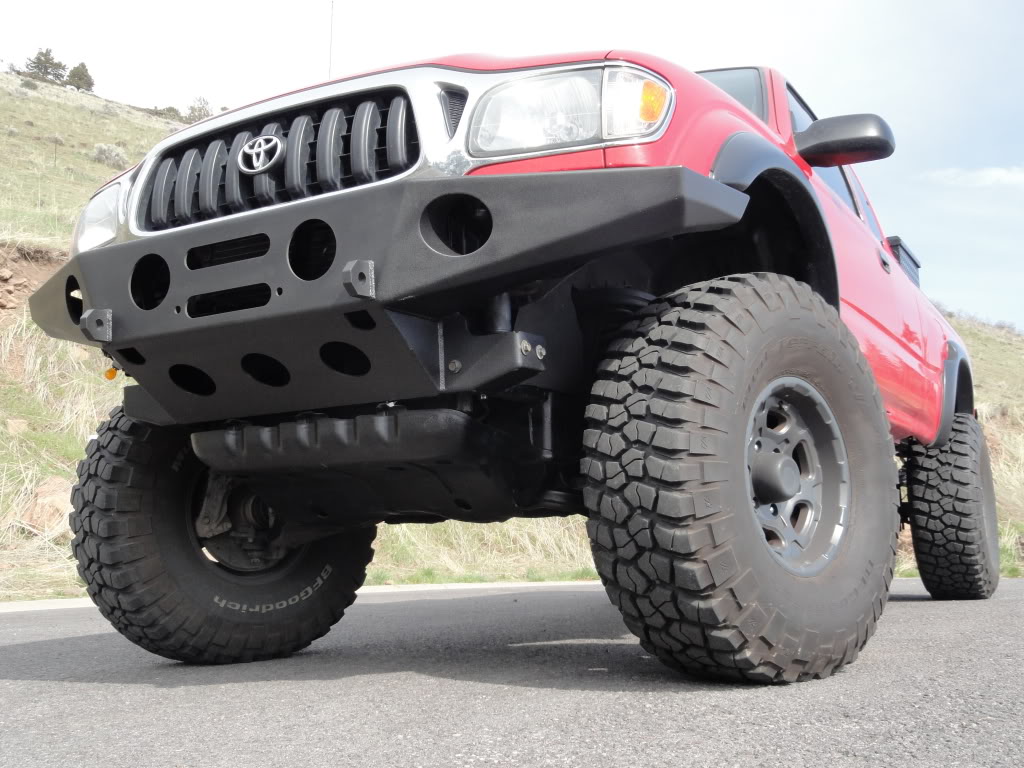
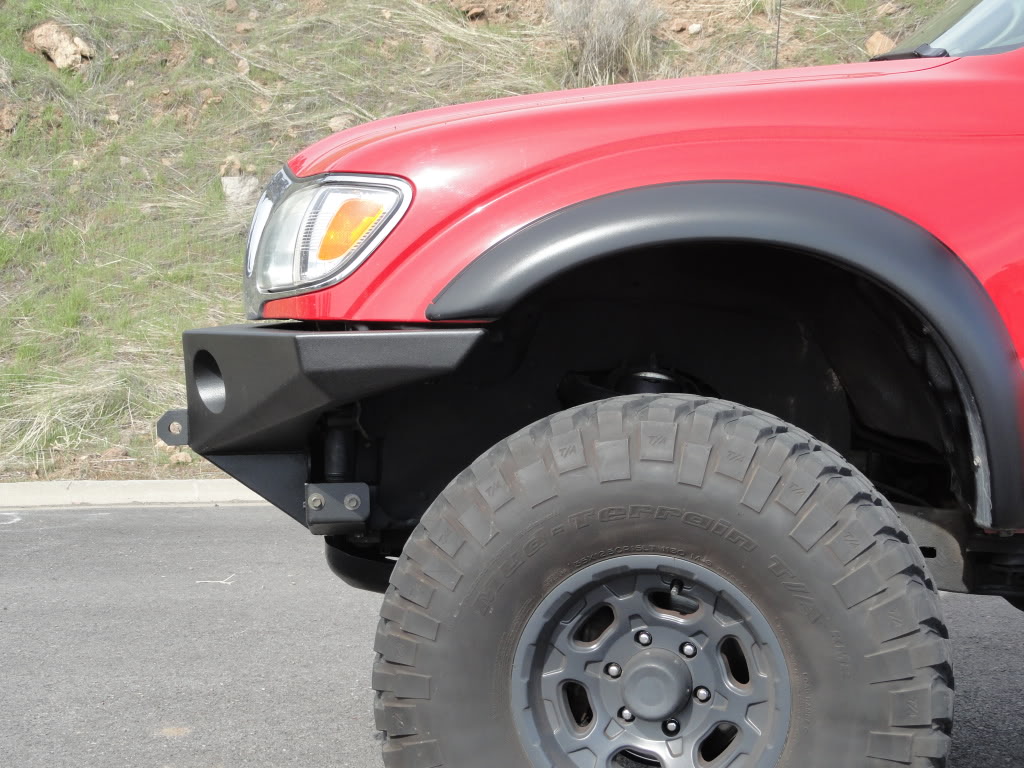
BTW this is what i mean by i want to incorporate the lights into the bumper. I want to go for something like this 4xInnovations bumper:
http://4xinnovations.com/p-FB1140.html
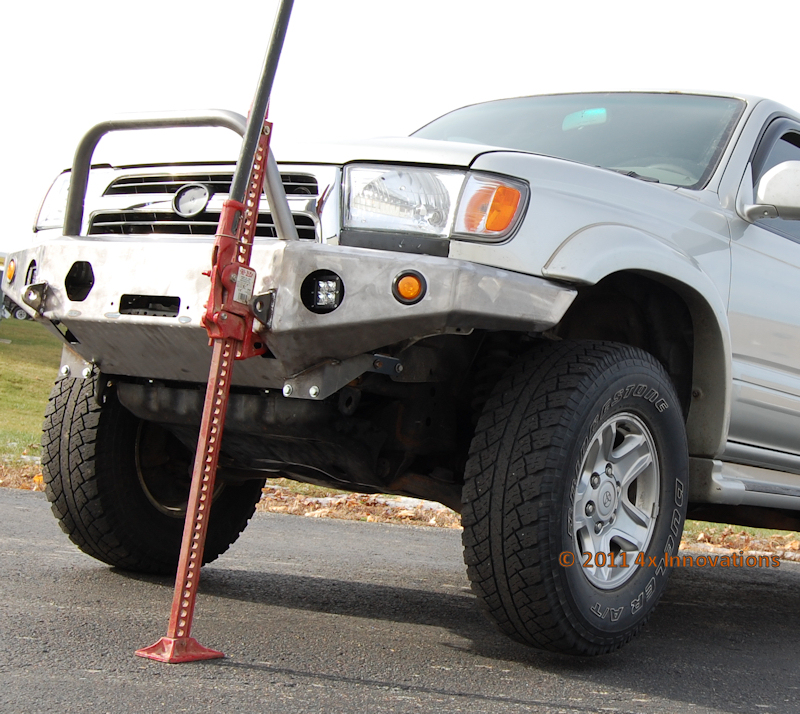
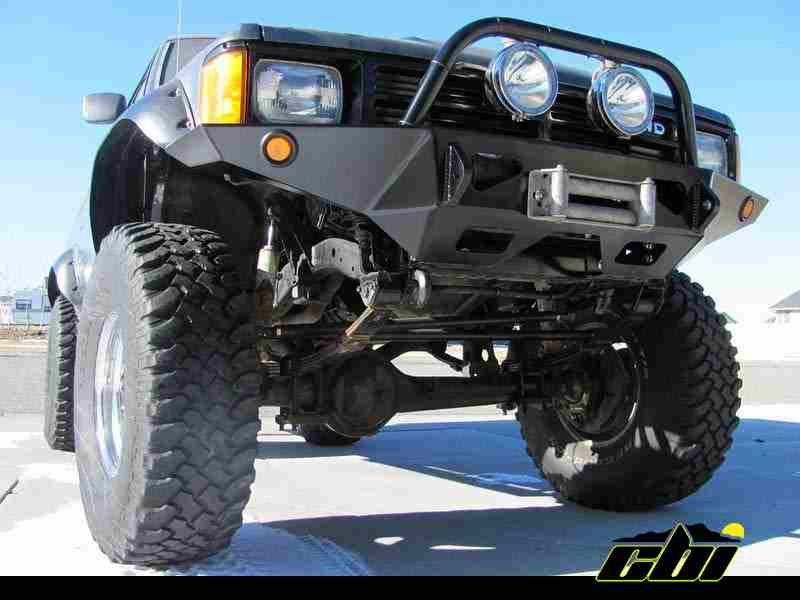
but with a bumper style more like the CBI offroad bumper(kind of like the stealth jet like look):
http://www.cbioffroadfab.com/product...y-front-bumper
And I still haven't ordered the grill guard because it might have to be made at a custom length so i didn't even bother getting it yet. I'd rather make the bumper first then measure how long across i am going to be needing it. I'm sure a local fabricator off craigslist can easily bend that darn tube for me for cheap. Maybe even have it done at the local metal store(BOBCO METAL) where i'll be buying my plate steel from. Im sure they do that kind of stuff too. I doubt the grill guard will cost more then $35.
----------------------------------------------------------------------
In the end this all brought me up to a whopping total of $874.64 Ouch When im done with this i'm probably going to come out spening about $1300-1400 in all these parts i just bought and all the steel/welding supplies, grinder/sander wheels and metal cutter discs. Either way although it is a lot of money, the complete bumper wont cost nearly as much for a custom plate bumper/ with everything i wanted to incorporate into it. I'm sure if i would have had a custom bumper made i would easily be paying $2500-2800. easy. If i have the skills to do it myself and save $1k why not lol.
I'm really looking forward to this project. Already have the Masonite board to get me started on a prototype.
I'm going to start drawing up a few designs on some graph paper soon; like i did for the rear bumper. But once i get the winch plate and lights i am definitely gonna have a better idea of how to make this work. I hope getting these parts in doesnt take too long though. im really anxious
----------------------------------------------------------------------
I Ordered my Smittybilt Xrc8 winch with synthetic line off 4WheelParts.com. And i wont be doing a store pick up since i got free shipping so i'll just wait it out. Came out to $490.49 total
http://www.4wheelparts.com/Winches-W..._PQ=Smittybilt

The reason i chose this is because Smittybilt has great products. They are durable, proven to last, and they are a bit cheaper then WARN. I am choosing Synthetic rope over steel because i don't want the line to start rusting over time. Not to mention it is so much lighter then steel cable; 1/7th the weight of steel cable. It cost about $140 more but just that weight difference is enough for me because I already have a ton of weight on my truck. With my 3vze, my whole rear bumper/tire carrier combo and a loaded roof rack. And then another plate front bumper. I am gonna be so heavy. It would definitely be nice to cut back on unnecessary weight
And yessss I have heard of the Badlands winches from Harbor Freight. But for what it costs(with steel line) i would rather pay the extra amount for a better winch that i know is better with a brand i trust. I definitely wouldn't want a recovery device to fail on me when i need it most. So this is why i am going with Smittybilt.
----------------------------------------------------------------------
***Frame Support is a must have for me. I don't want my bumper flying off as i try to winch myself out of something. "The factory frame is only .090 wall material. This plate requires welding, but strengthens the mounting surface by 150%."
I Went with Addicted Off-Road's Frame support
http://www.addictedoffroad.com/index...products_id=73
----------------------------------------------------------------------
As for the winch plate. I had a choice between Trail-Gear's and the Addicted Off-Road one.
I really disliked the front look of this winch plate. I dont plan to run a hitch in the front. I dont plan to tow my truck anywhere so it is pointless for me to have. Plus it was just plain ugly IMO.
Here it is for $145.95 http://www.trail-gear.com/front-bumper-winch-mount

Now the Addicted Off-road winch plate has much better craftsmanship. I love the way it looks. It looks clean and has style. Has holes for D-rings AND it cost $139 http://www.addictedoffroad.com/index...roducts_id=456


(The Picture link on the website is broken So here are more pix on Ttora.com in case you're interested)
http://www.ttora.com/forum/showthread.php?t=146998
In the end I chose the Addicted offroad. I think it just had much nicer style to it for my taste.
----------------------------------------------------------------------
I am also going to be needing some turn signals. At least some that aren't as big and squared as the stock lights.
I found these Trail-Gear turn signals for $30
http://www.trail-gear.com/led-turn-signal-kit
I found that Scotty(AddictedOff-road) Sells the same ones for $29 . Just a buck less but hey i don't mind saving one dollar.
http://www.addictedoffroad.com/index...roducts_id=435
Here is the picture of the ones im talking about:

----------------------------------------------------------------------
I actually ended up buying the 3 things off Addicted off road. I figure it would probably be cheaper to buy the winch plate, turn signals, and frame support all from the same vendor vs buying from 3 different vendors.
My total for these 3 pieces came out to $254.66
----------------------------------------------------------------------
I also want to incorporate two round 4.5" LED lights into the actual bumper and then two more in the center part under the grill guard. I ordered a pair of these LED Flood Lights
Specs:
42w, 2090 lumens, waterproof, and 14 LED's and they are 4.5" They run for $59.95 each. This pair came out to $129.49 They are also located in Anaheim Ca which is super close to me so it would definitely arrive within the week.
http://www.ebay.com/itm/290961829325...84.m1423.l2649
I also plan to have those center lights in the center of the grillguard. What i had in mind was to buy Mark's(Chefyota4x4) old 8" Dick Ceptic Spot lights and place those in the center. Then place the ebay flood lights in the actual bumper.
I haven't bought Mark's spot lights yet but i will.
BTW this is what i mean by i want to incorporate the lights into the bumper. I want to go for something like this 4xInnovations bumper:
http://4xinnovations.com/p-FB1140.html

but with a bumper style more like the CBI offroad bumper(kind of like the stealth jet like look):
http://www.cbioffroadfab.com/product...y-front-bumper

And I still haven't ordered the grill guard because it might have to be made at a custom length so i didn't even bother getting it yet. I'd rather make the bumper first then measure how long across i am going to be needing it. I'm sure a local fabricator off craigslist can easily bend that darn tube for me for cheap. Maybe even have it done at the local metal store(BOBCO METAL) where i'll be buying my plate steel from. Im sure they do that kind of stuff too. I doubt the grill guard will cost more then $35.
----------------------------------------------------------------------
In the end this all brought me up to a whopping total of $874.64 Ouch
When im done with this i'm probably going to come out spening about $1300-1400 in all these parts i just bought and all the steel/welding supplies, grinder/sander wheels and metal cutter discs. Either way although it is a lot of money, the complete bumper wont cost nearly as much for a custom plate bumper/ with everything i wanted to incorporate into it. I'm sure if i would have had a custom bumper made i would easily be paying $2500-2800. easy. If i have the skills to do it myself and save $1k why not lol. I'm really looking forward to this project. Already have the Masonite board to get me started on a prototype.
I'm going to start drawing up a few designs on some graph paper soon; like i did for the rear bumper. But once i get the winch plate and lights i am definitely gonna have a better idea of how to make this work. I hope getting these parts in doesnt take too long though. im really anxious
Last edited by Redeth005; 09-17-2013 at 09:59 PM.
09-18-2013, 12:03 PM
#3
Hey Richard, I'm glad your doing a build thread on your new front bumper build, Your rear bumper turned out sweet, so I really look forward to seeing what you design for the front! I like the looks of the Addicted Offroad winch mounting plate, I had never seen that one on there web site before, I agree it looks a lot nicer than the TG one! Can't wait to see what you come up with!
 09-18-2013, 01:35 PM
#4
Registered User
Thread Starter
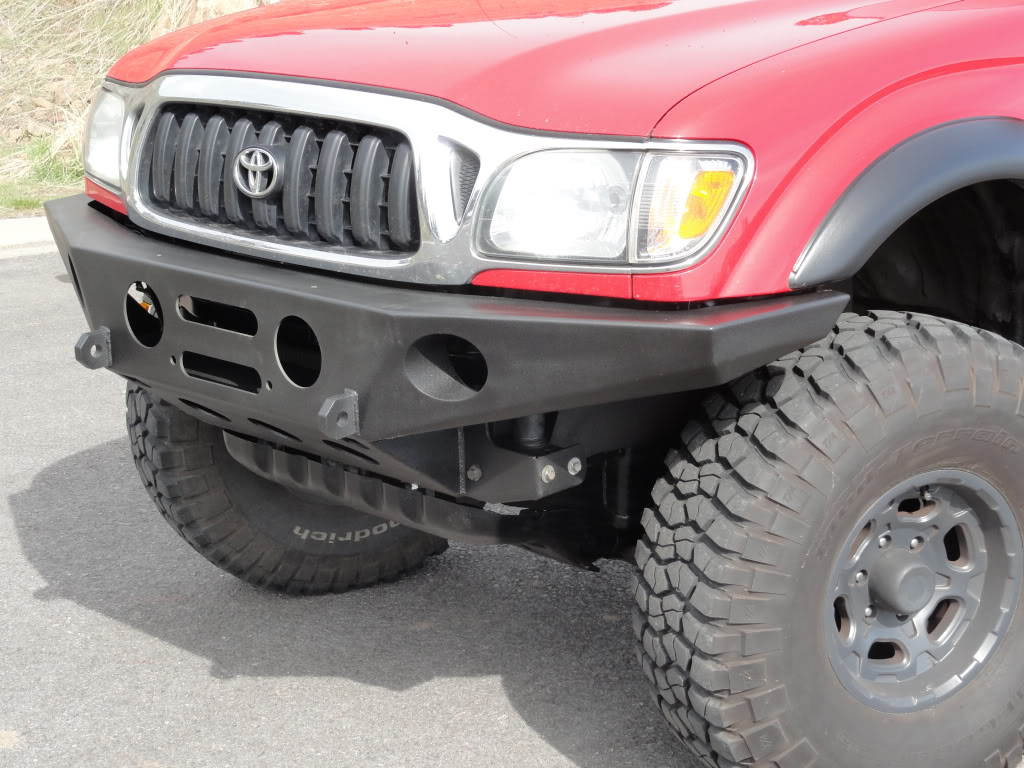
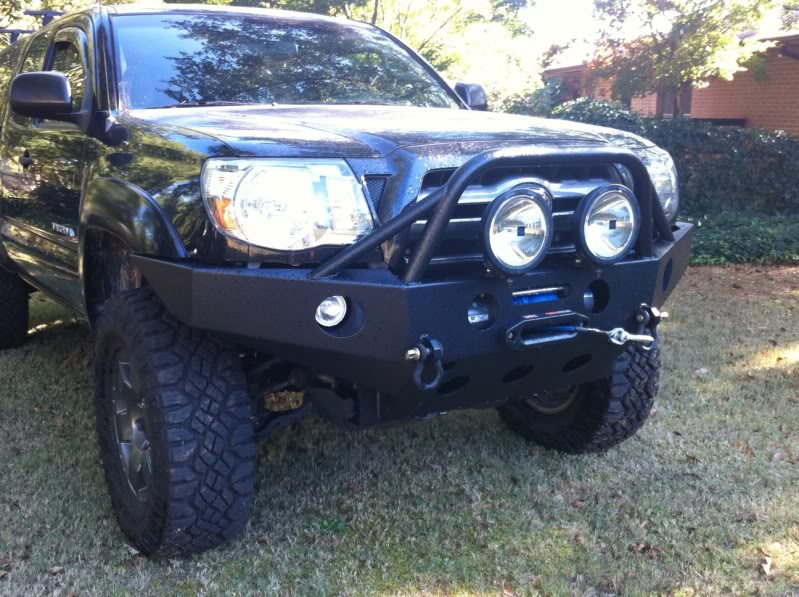
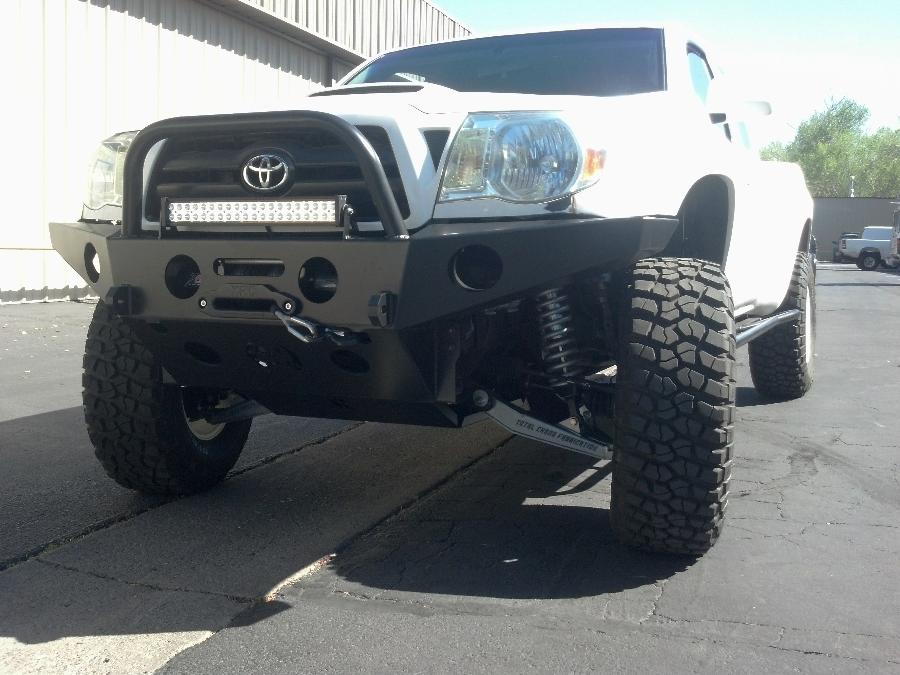
Thanks Ed. I am going to look up some more bumpers to get some better ideas of how I will want to build mine up. I definitely like the CBI bumper. But I was also checking out the Relentless Offroad tacoma bumpers and I'm realy liking those a lot too. Plus it looks like less angles to have to make on those but they still look great. Ill upload some pix later to show you the ones I had in mind to possibly copy for the 4Runner bumper.
09-18-2013, 10:49 PM
#5
Registered User
Thread Starter
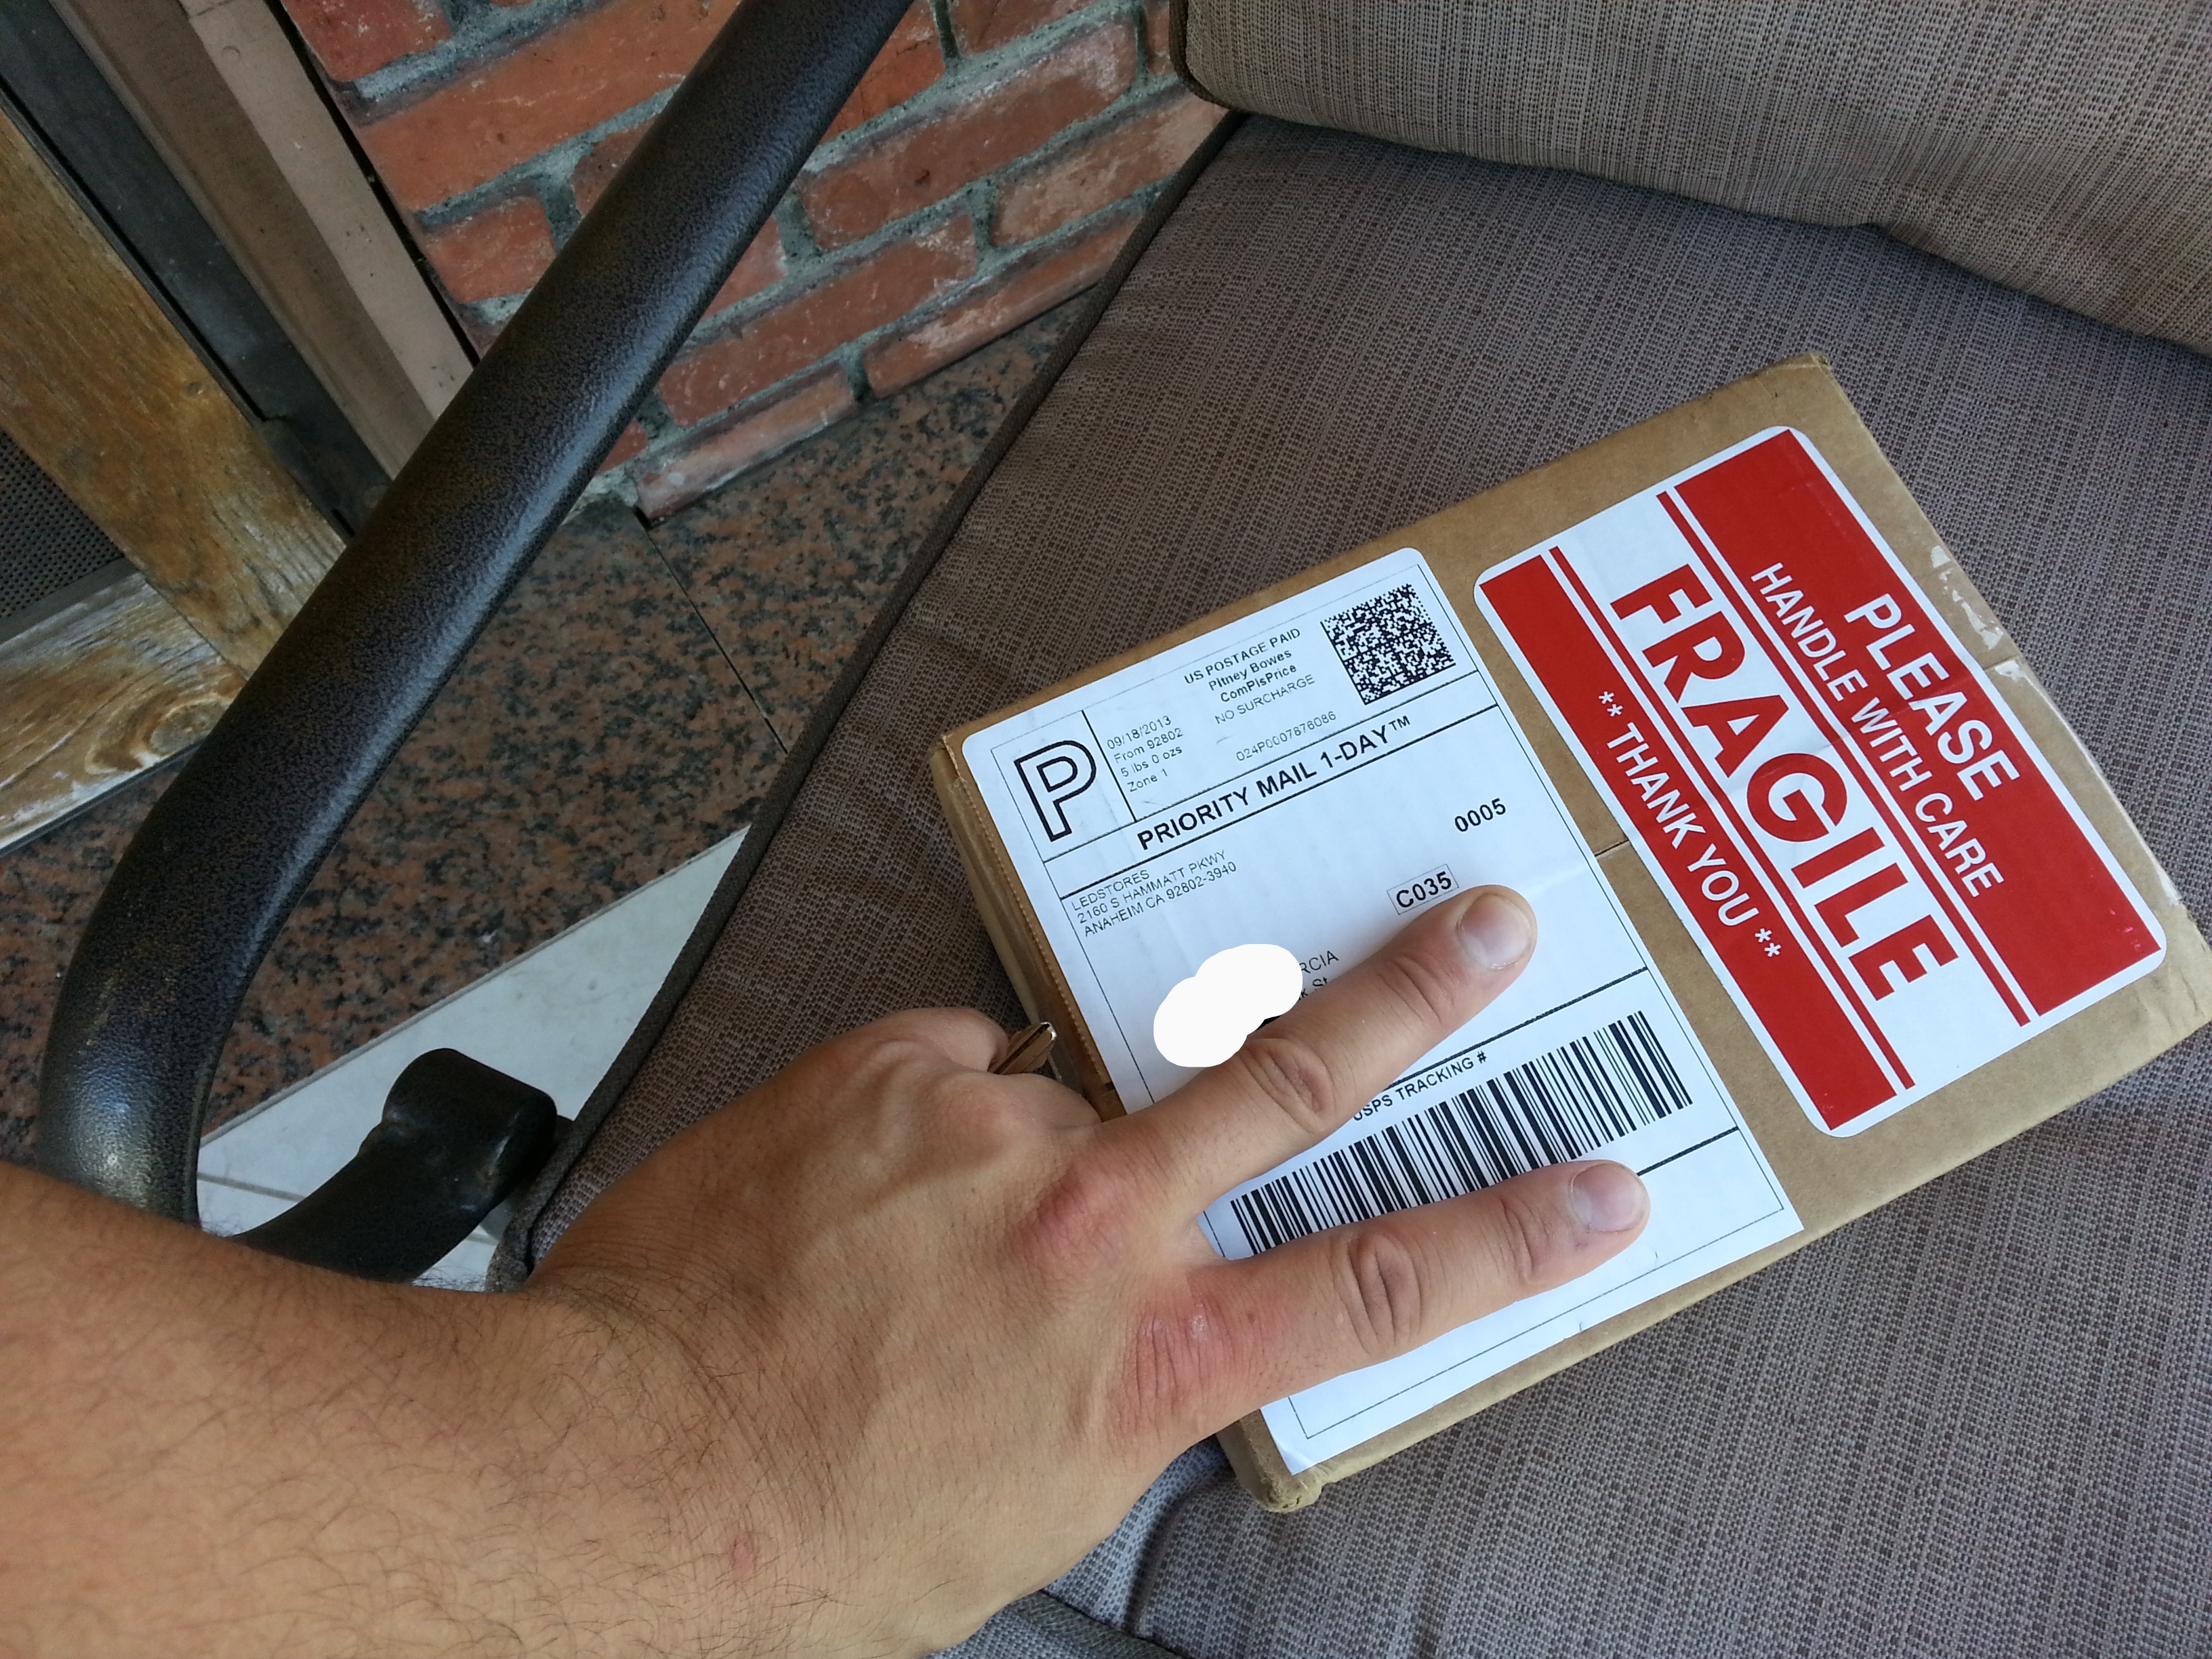
Looky what came in today. Just 1.5 days after I ordered it. Wow talk about quick.
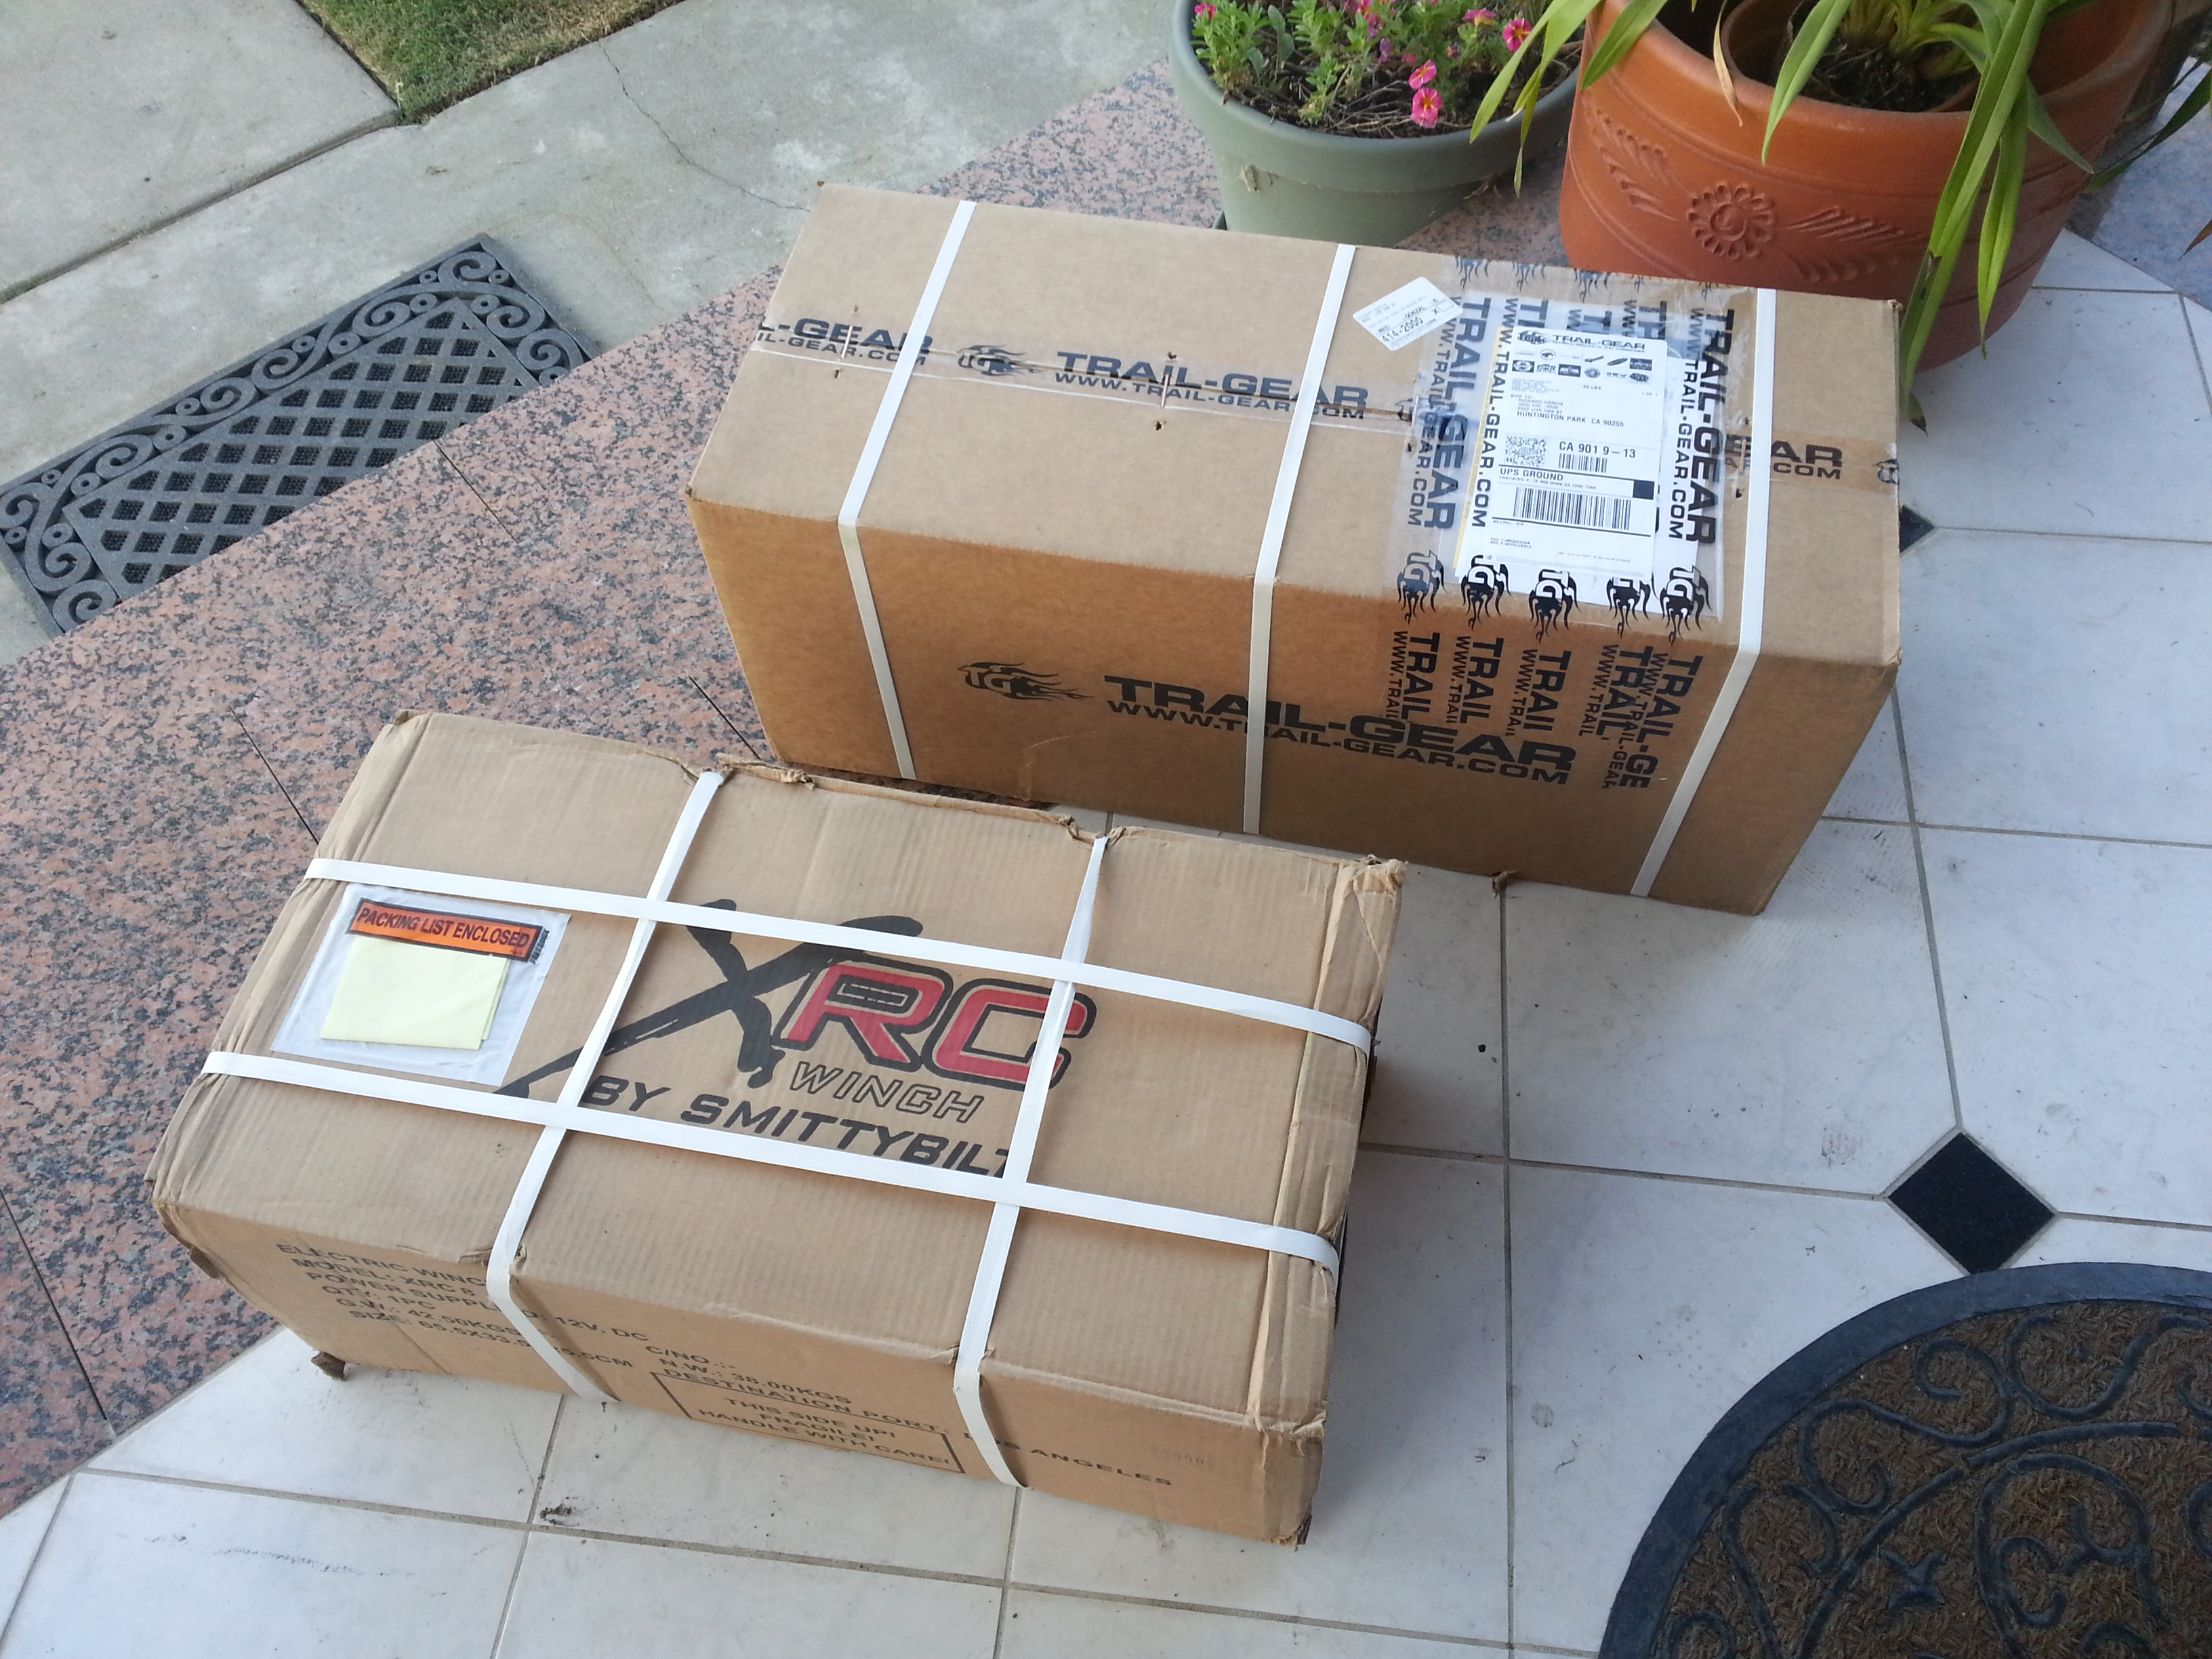
SmittyBilt xrc8 winch. Woot
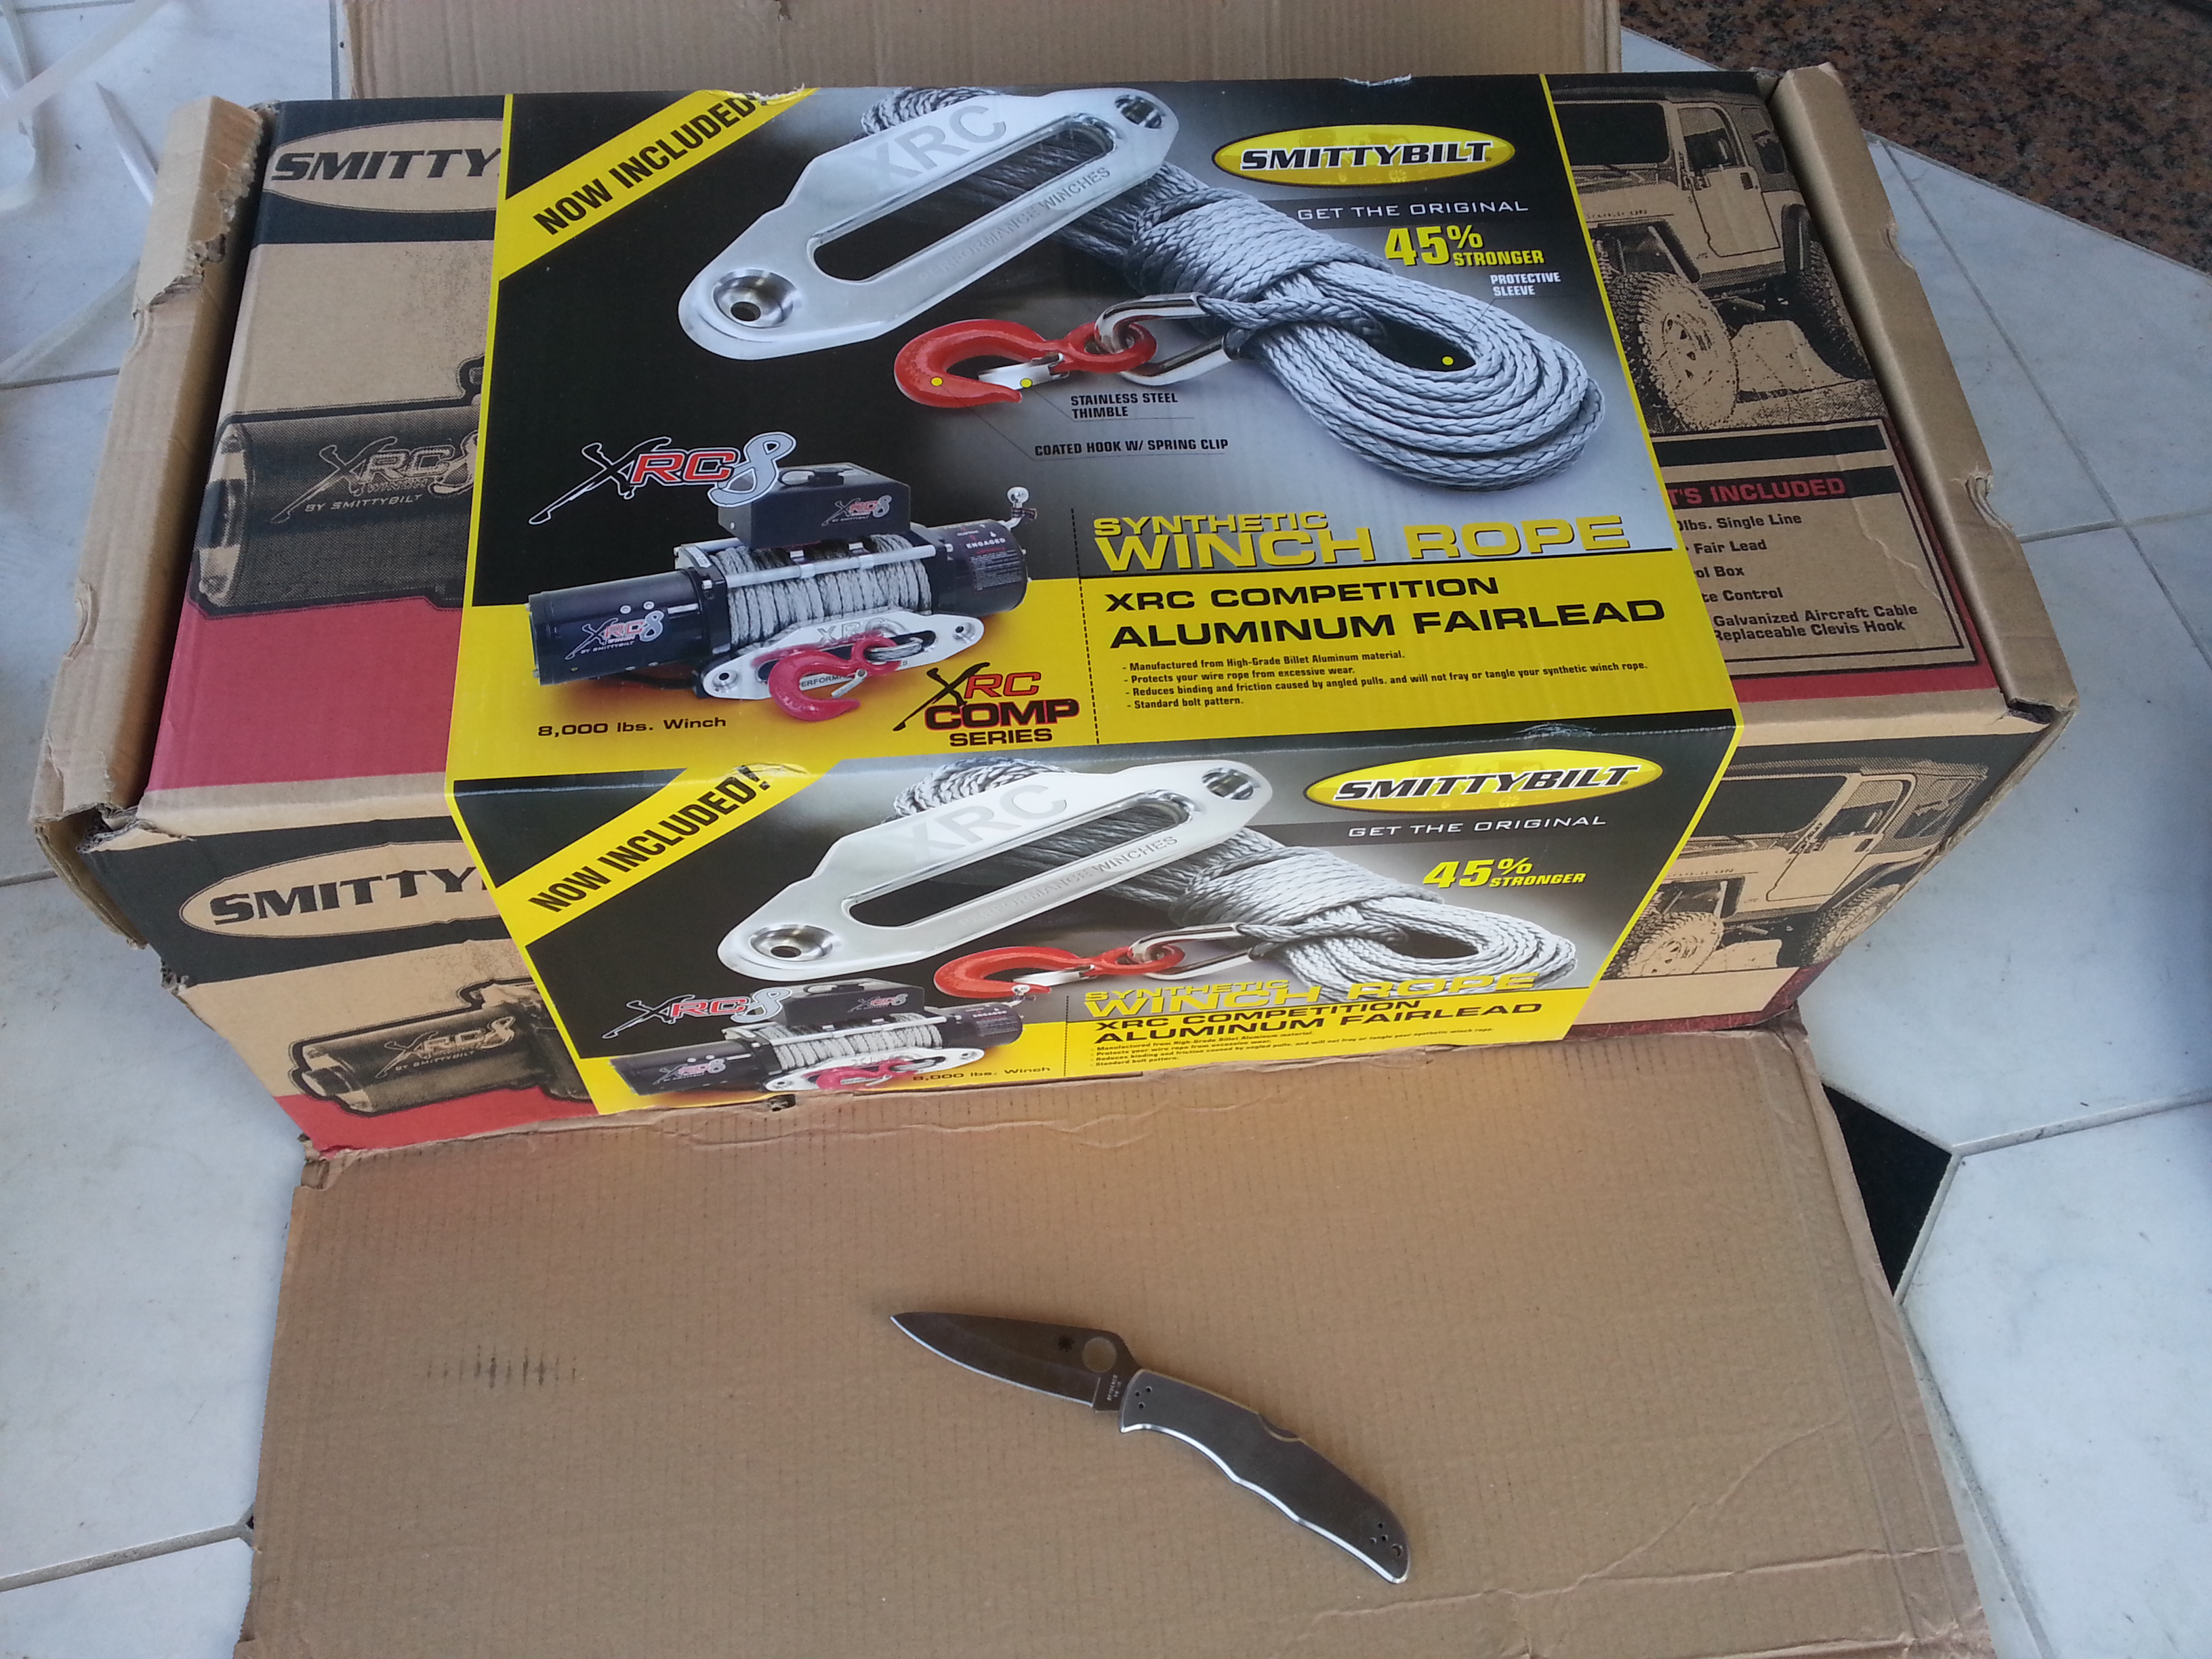
So apparently im a Addicted off-road does not sell their winch plate anymore Or its been discontinued i have no clue. But they sent me a trail gear winch plate. Dang it...
Also the turn signal lights I ordered.
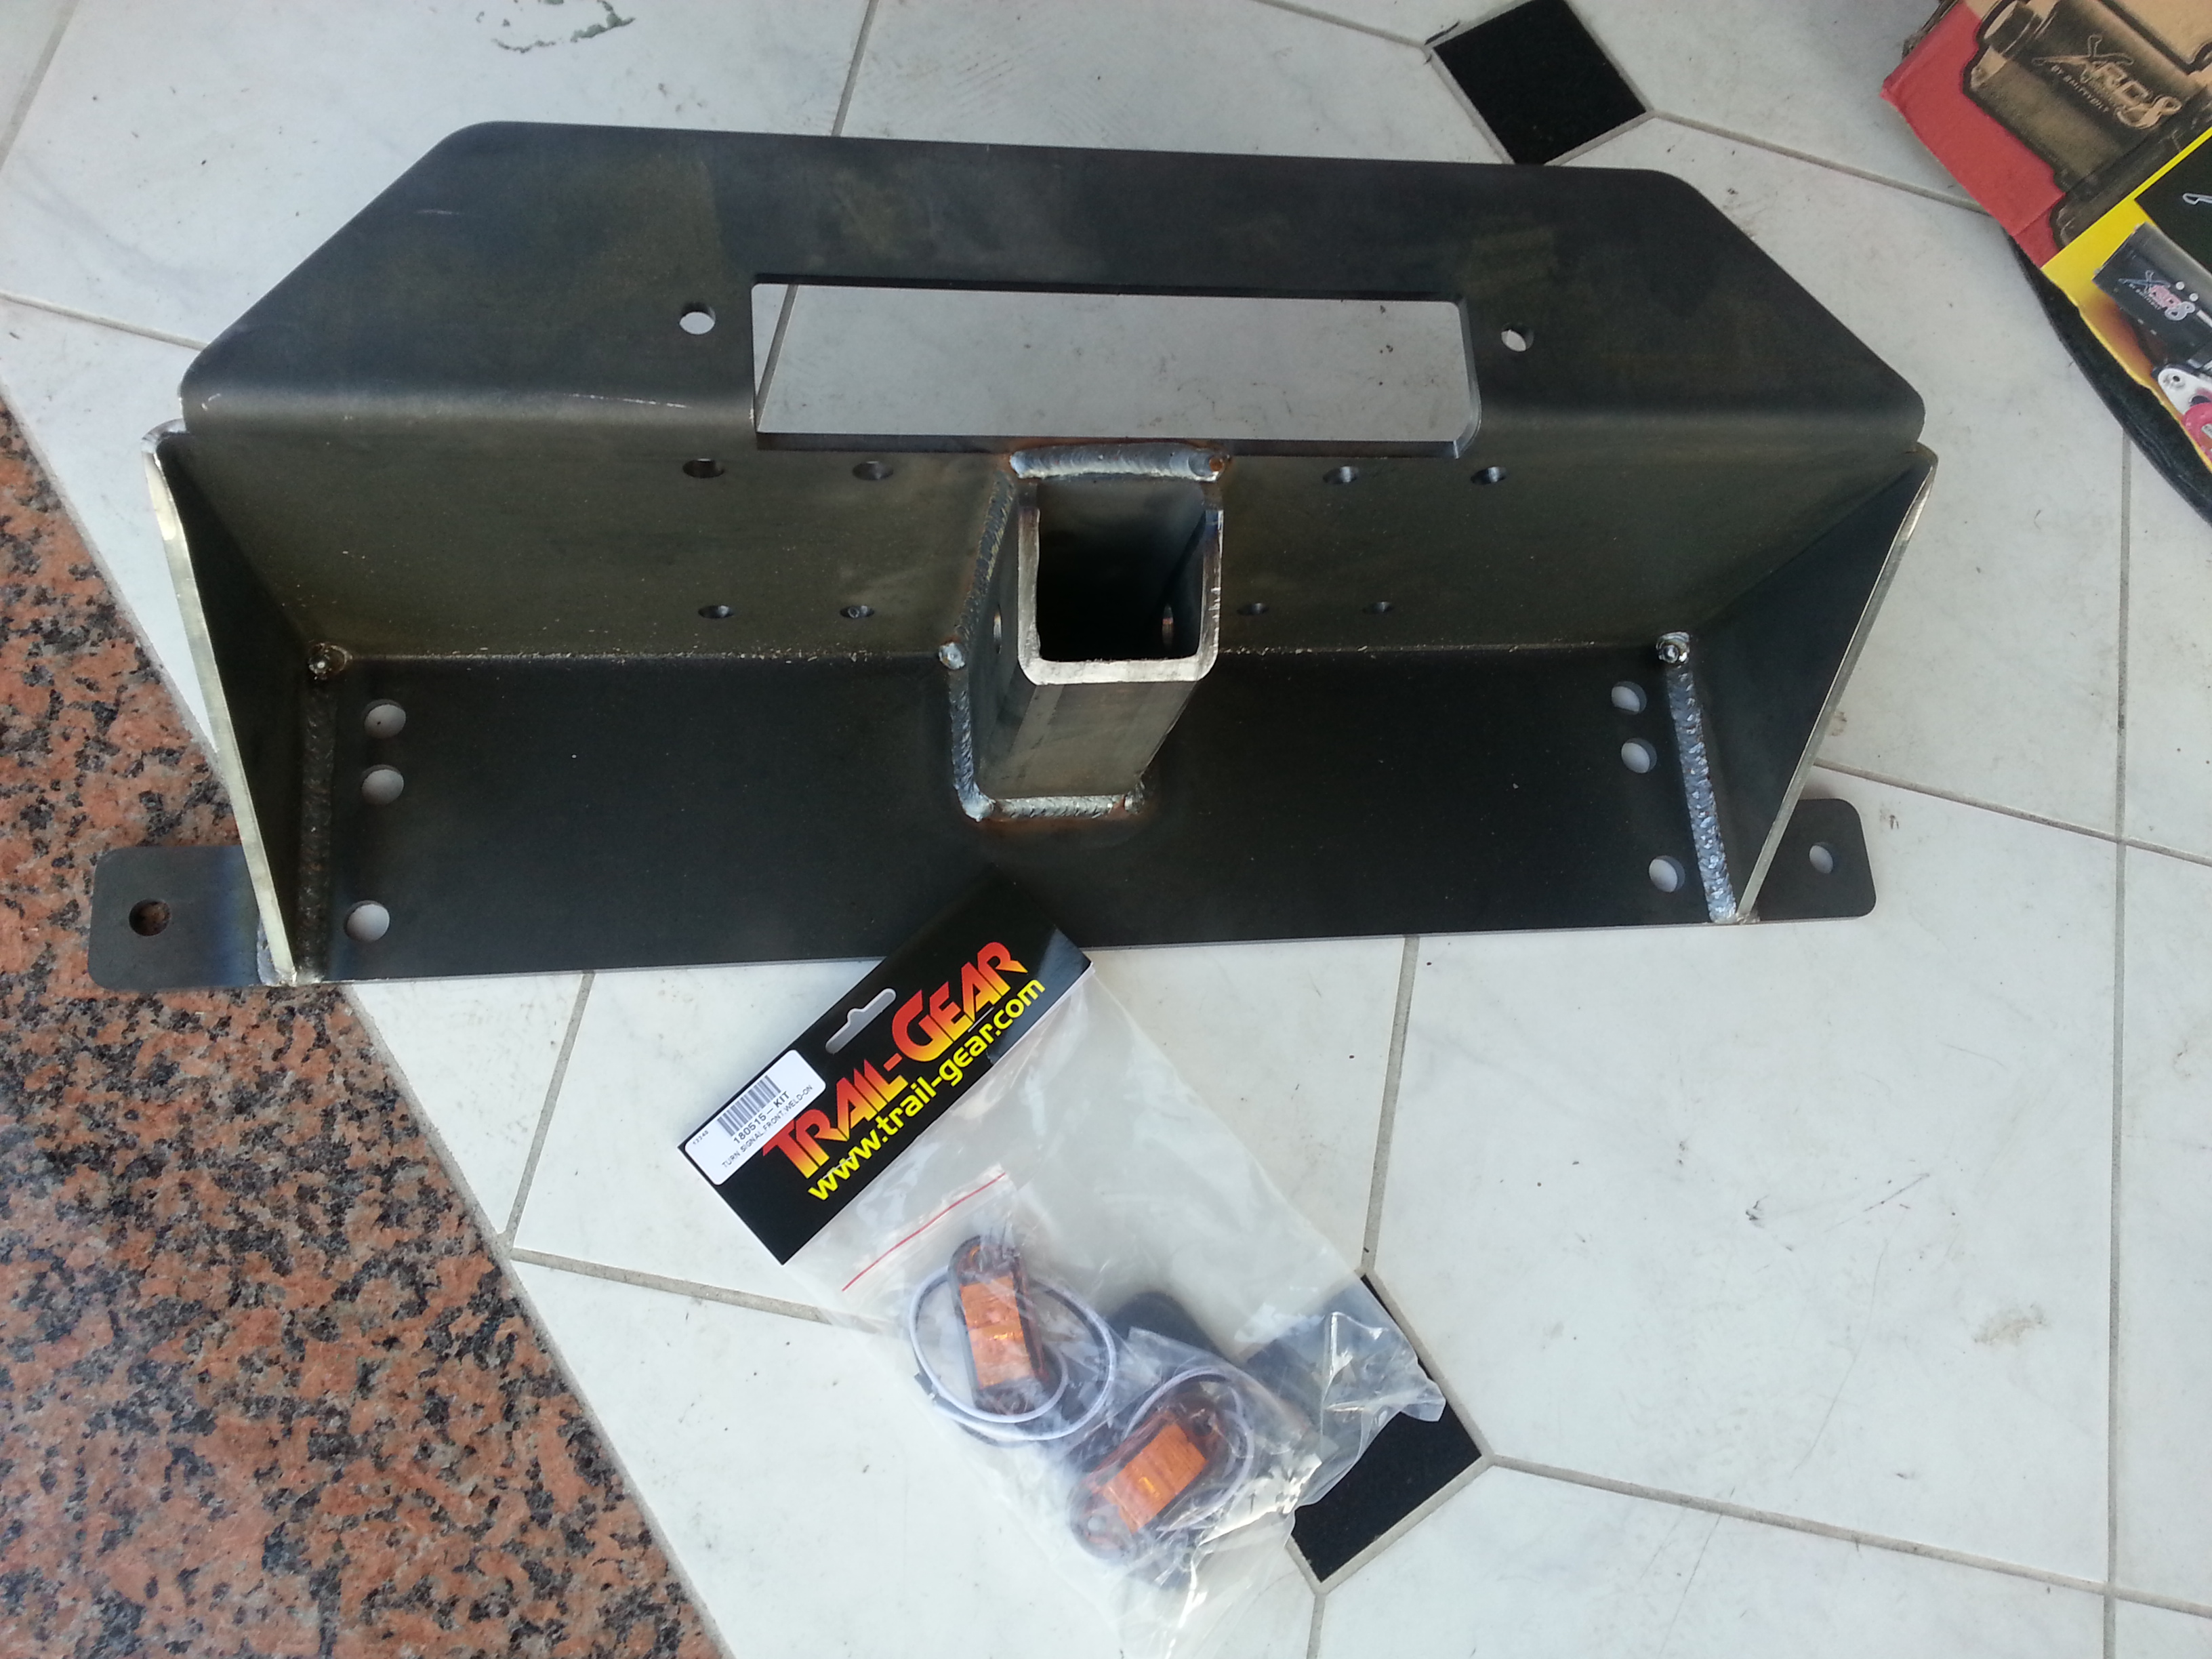
Guys honestly I have to say I was really disappointed in them for sending me the wrong one. But then I thought about it afterwards and remembered the time when I have to tow my neighbor Ruben back home. and I figure that this winch plate would definitely come in handy if anything ever happened to me on the trail, such as a burnt clutch, and had to be towed back home 200 miles or whatever. I could probabky buy a tow package from harbor freight or pep boys and integrate it into a hitch that can be mounted on and off.
Still gonna need to figure out how to build this thing. But I would definitely like somewhat of a skid plate like the addicted offroad one had with the holes. If I could make something similar while having the tow hole then thatd be pretty nice.
ONLY THINGS LEFT BEFORE I CAN BEGIN ARE MY LED LIGHTS AMD MY FRAME SUPPORT!
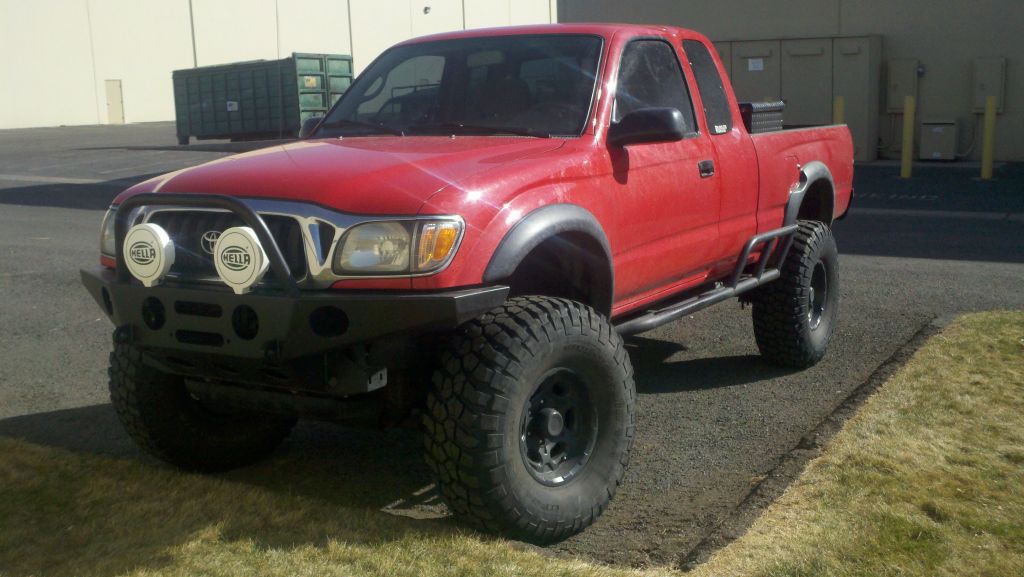
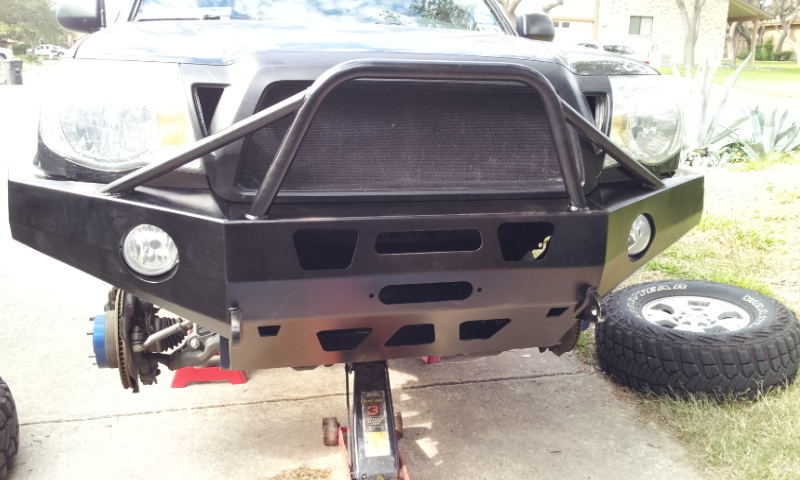
I went out to buy some graph paper so the designs will begin soon! I'm really loving the Relentless Off Road Fab bumpers made for Tacomas. I'm thinking of possibly making mine similar to these here. I love the way it looks!
Better close up shots for detail (for future reference)
This is exactly how mine will look with the led flood lights in the bumper.
SmittyBilt xrc8 winch. Woot
So apparently im a Addicted off-road does not sell their winch plate anymore Or its been discontinued i have no clue. But they sent me a trail gear winch plate. Dang it...
Also the turn signal lights I ordered.
Guys honestly I have to say I was really disappointed in them for sending me the wrong one. But then I thought about it afterwards and remembered the time when I have to tow my neighbor Ruben back home. and I figure that this winch plate would definitely come in handy if anything ever happened to me on the trail, such as a burnt clutch, and had to be towed back home 200 miles or whatever. I could probabky buy a tow package from harbor freight or pep boys and integrate it into a hitch that can be mounted on and off.
Still gonna need to figure out how to build this thing. But I would definitely like somewhat of a skid plate like the addicted offroad one had with the holes. If I could make something similar while having the tow hole then thatd be pretty nice.
ONLY THINGS LEFT BEFORE I CAN BEGIN ARE MY LED LIGHTS AMD MY FRAME SUPPORT!
I went out to buy some graph paper so the designs will begin soon! I'm really loving the Relentless Off Road Fab bumpers made for Tacomas. I'm thinking of possibly making mine similar to these here. I love the way it looks!
Better close up shots for detail (for future reference)
This is exactly how mine will look with the led flood lights in the bumper.
Last edited by Redeth005; 09-18-2013 at 11:01 PM.
09-18-2013, 11:21 PM
#6
Dannnnng! Busy bee you will be! Haha. I agree with that, I look forward to seeing the same time together. These are really looking nicer and nicer as new designs come out. It's a good thing you can put your own together!
you could find a way to do Scotty's if you call him and see he's going to have them available... Maybe he's just on backorder.if you could integrate a hitch tube in to that one maybe you would be happier with that? I don't know, but I was going to say you might want to think about that hitch tube having access ports at the rear, because you will need to put the pin in at some point if you ever had to tow it.
Exciting, man, going to be sick!
Trending Topics
09-19-2013, 03:50 PM
#8
Registered User
Thread Starter
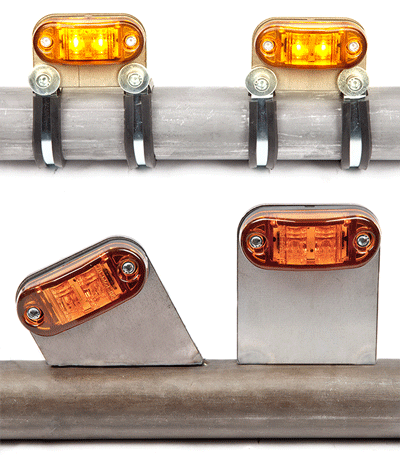
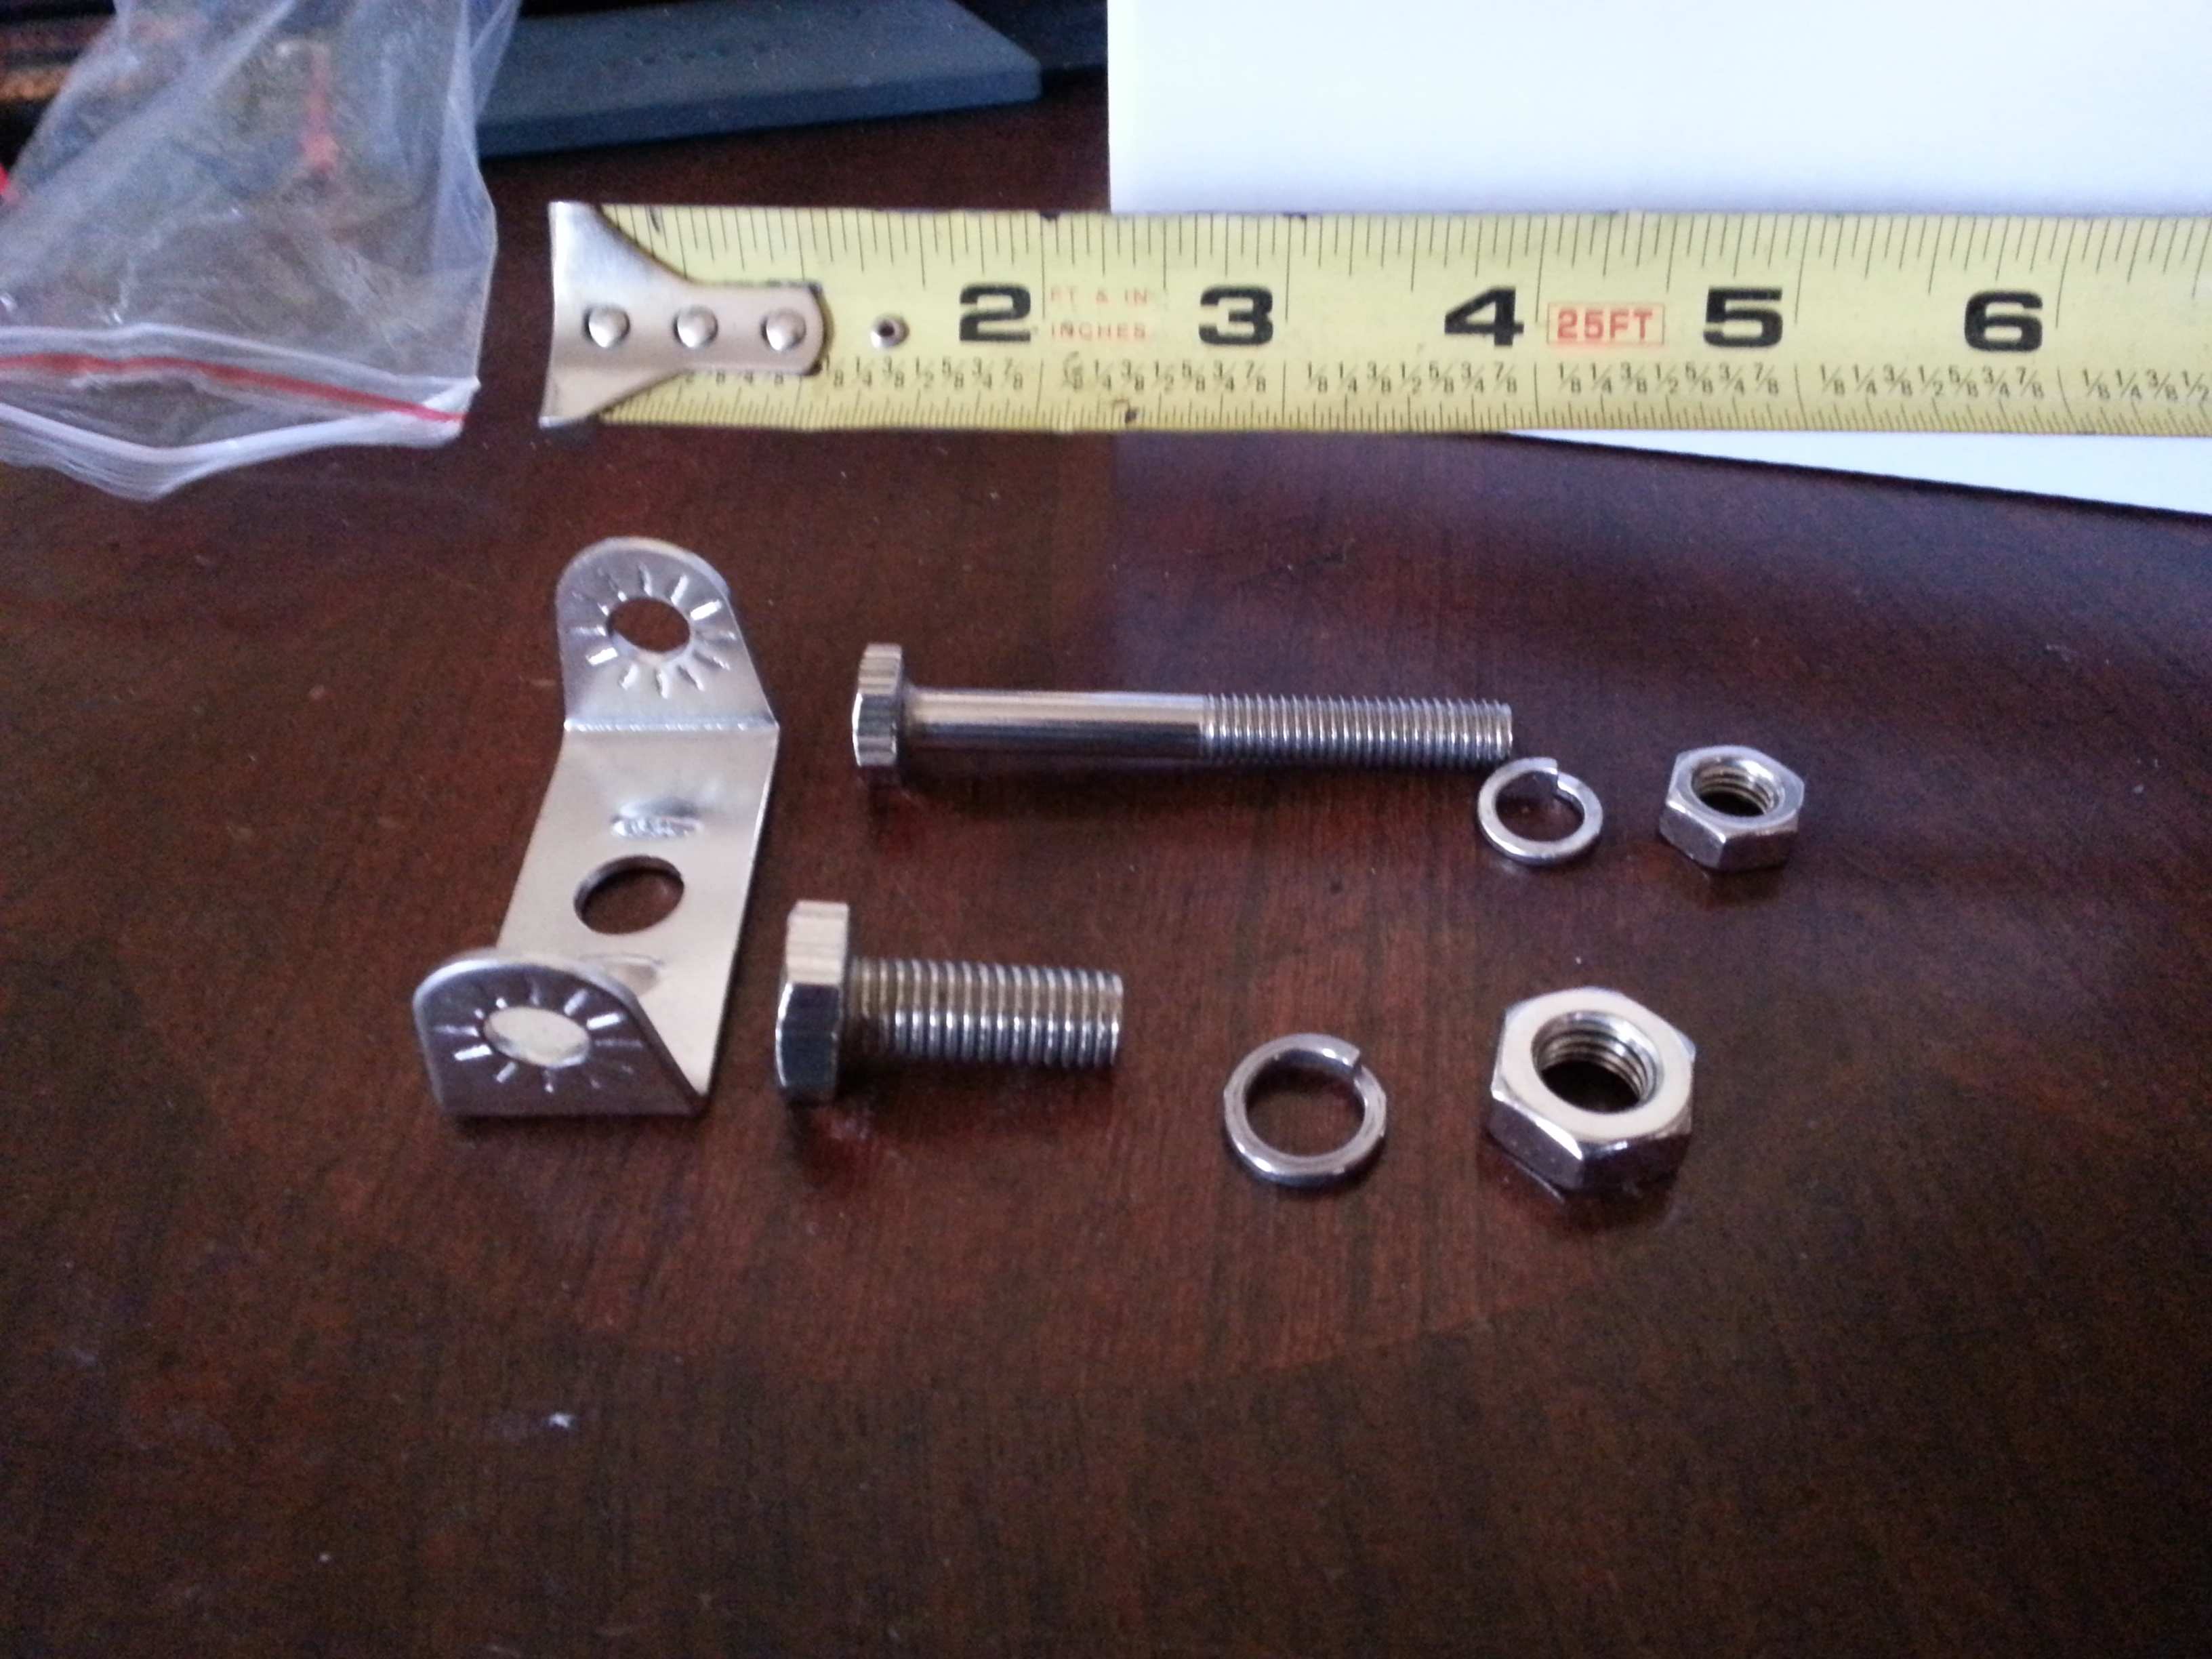
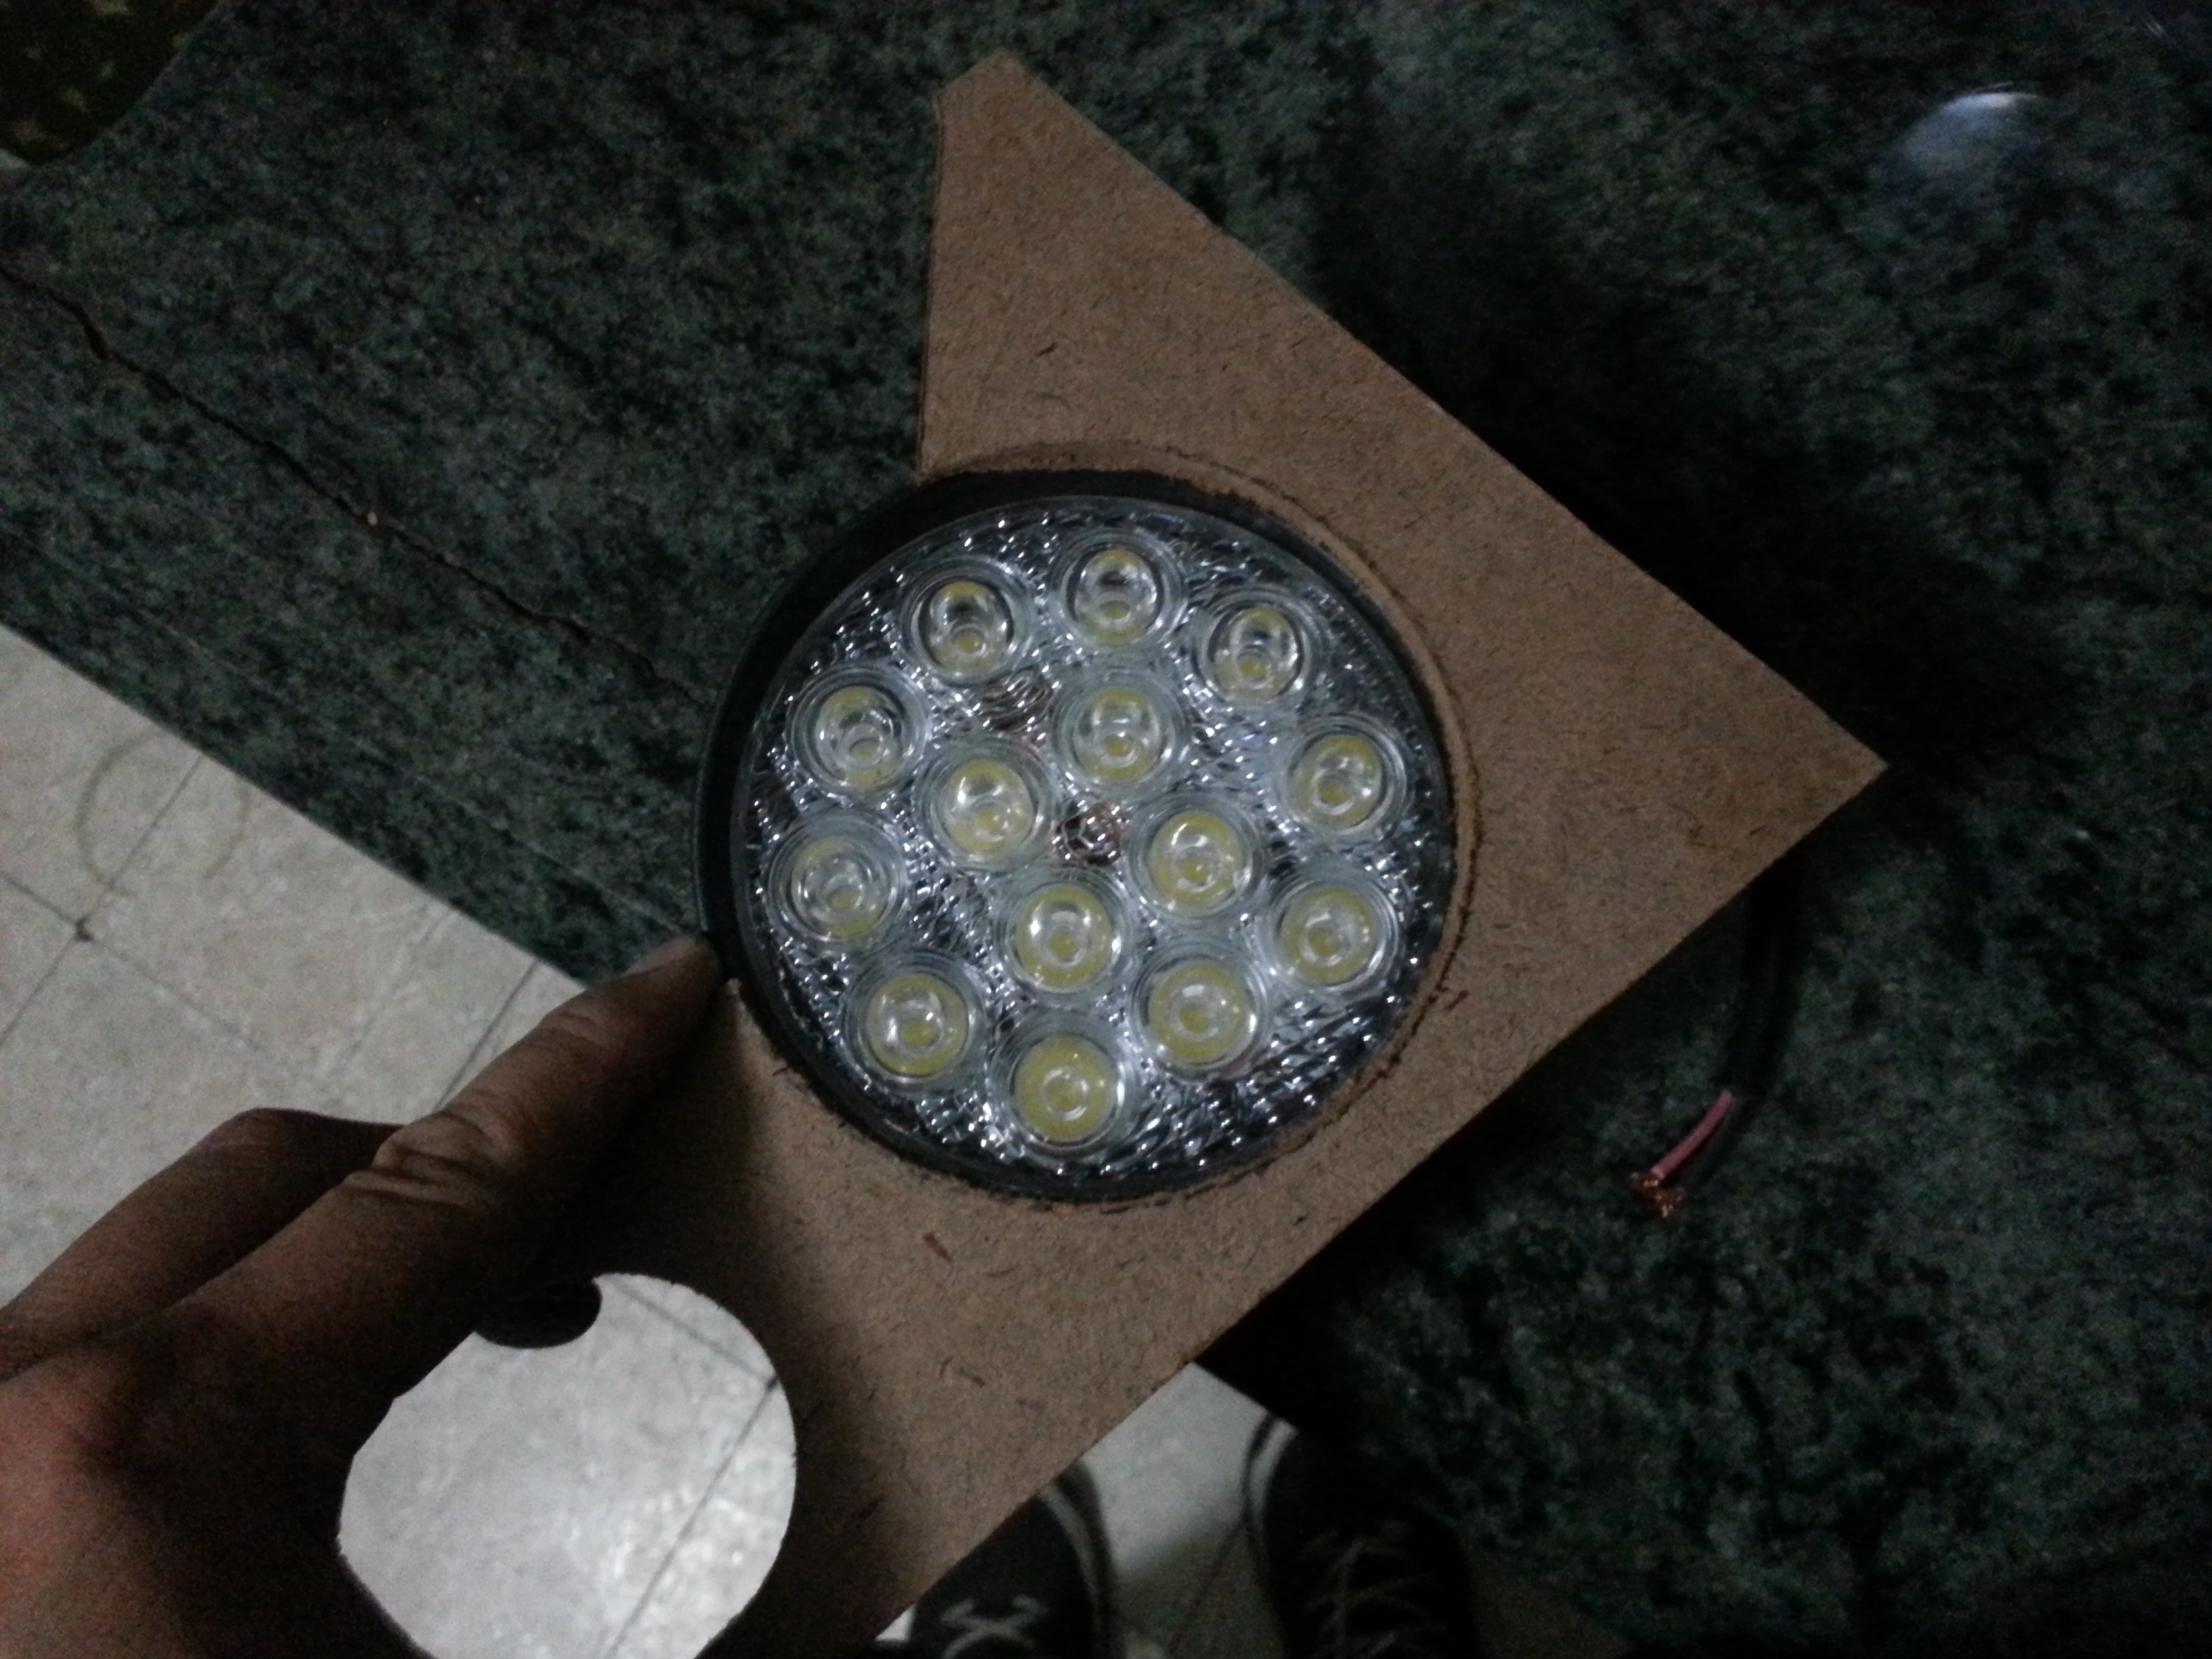
Sweet look what was waiting for me when i got home! Woot!
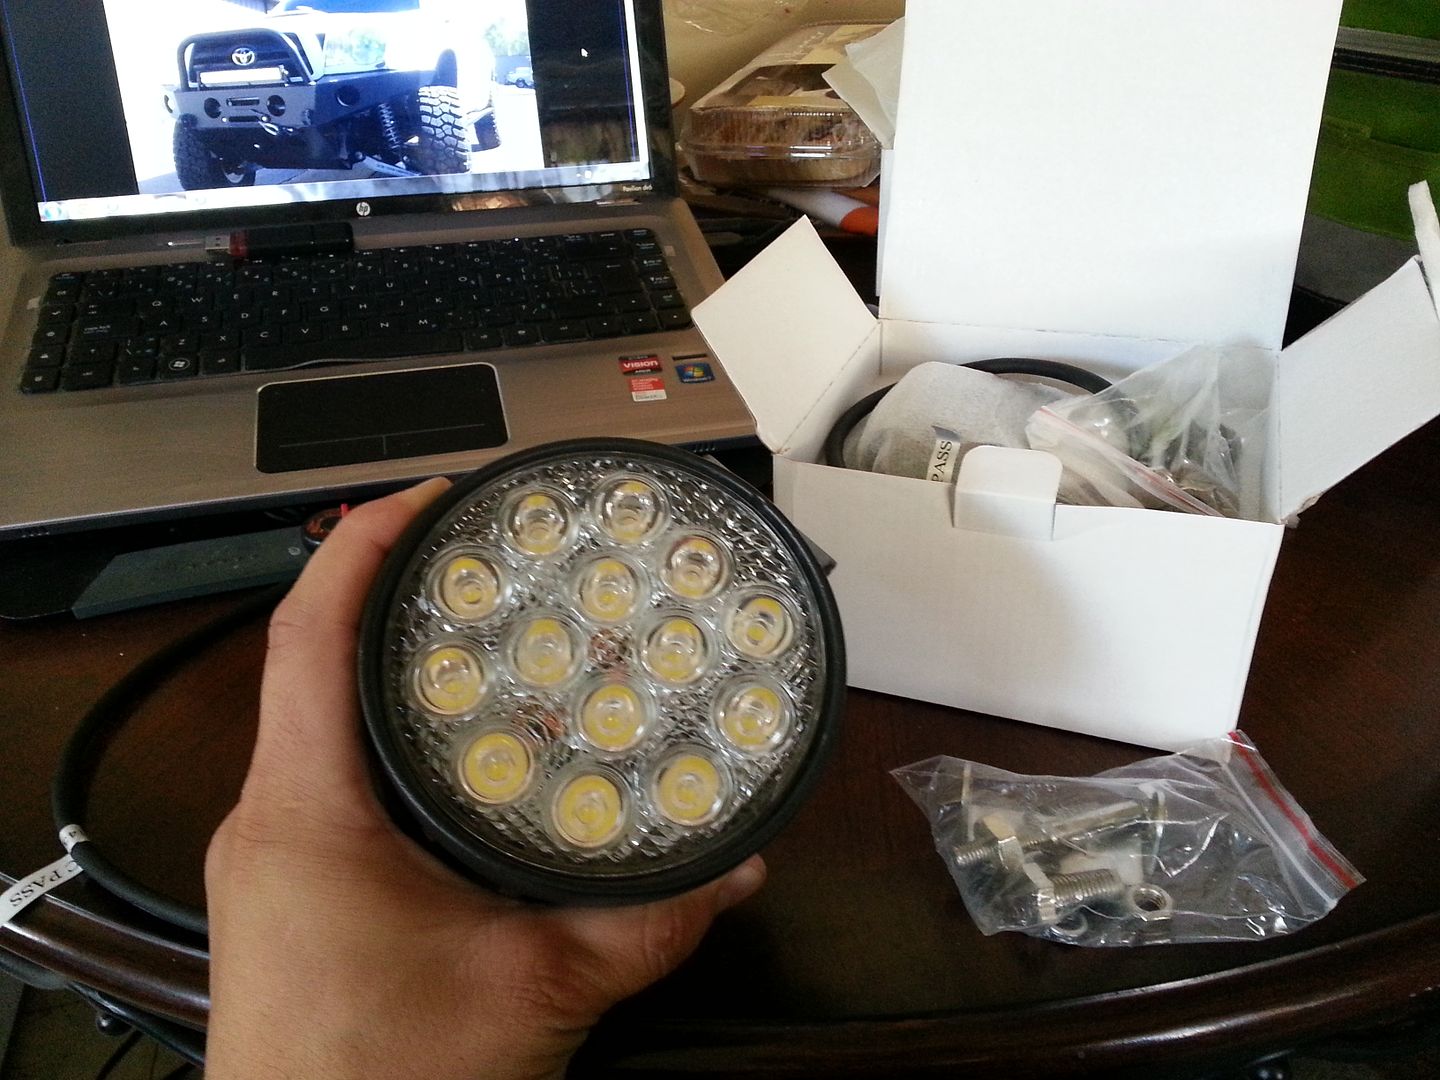
4&1/2" from one side of the outer rim to the other.
Wires are of nice quality. and insulated
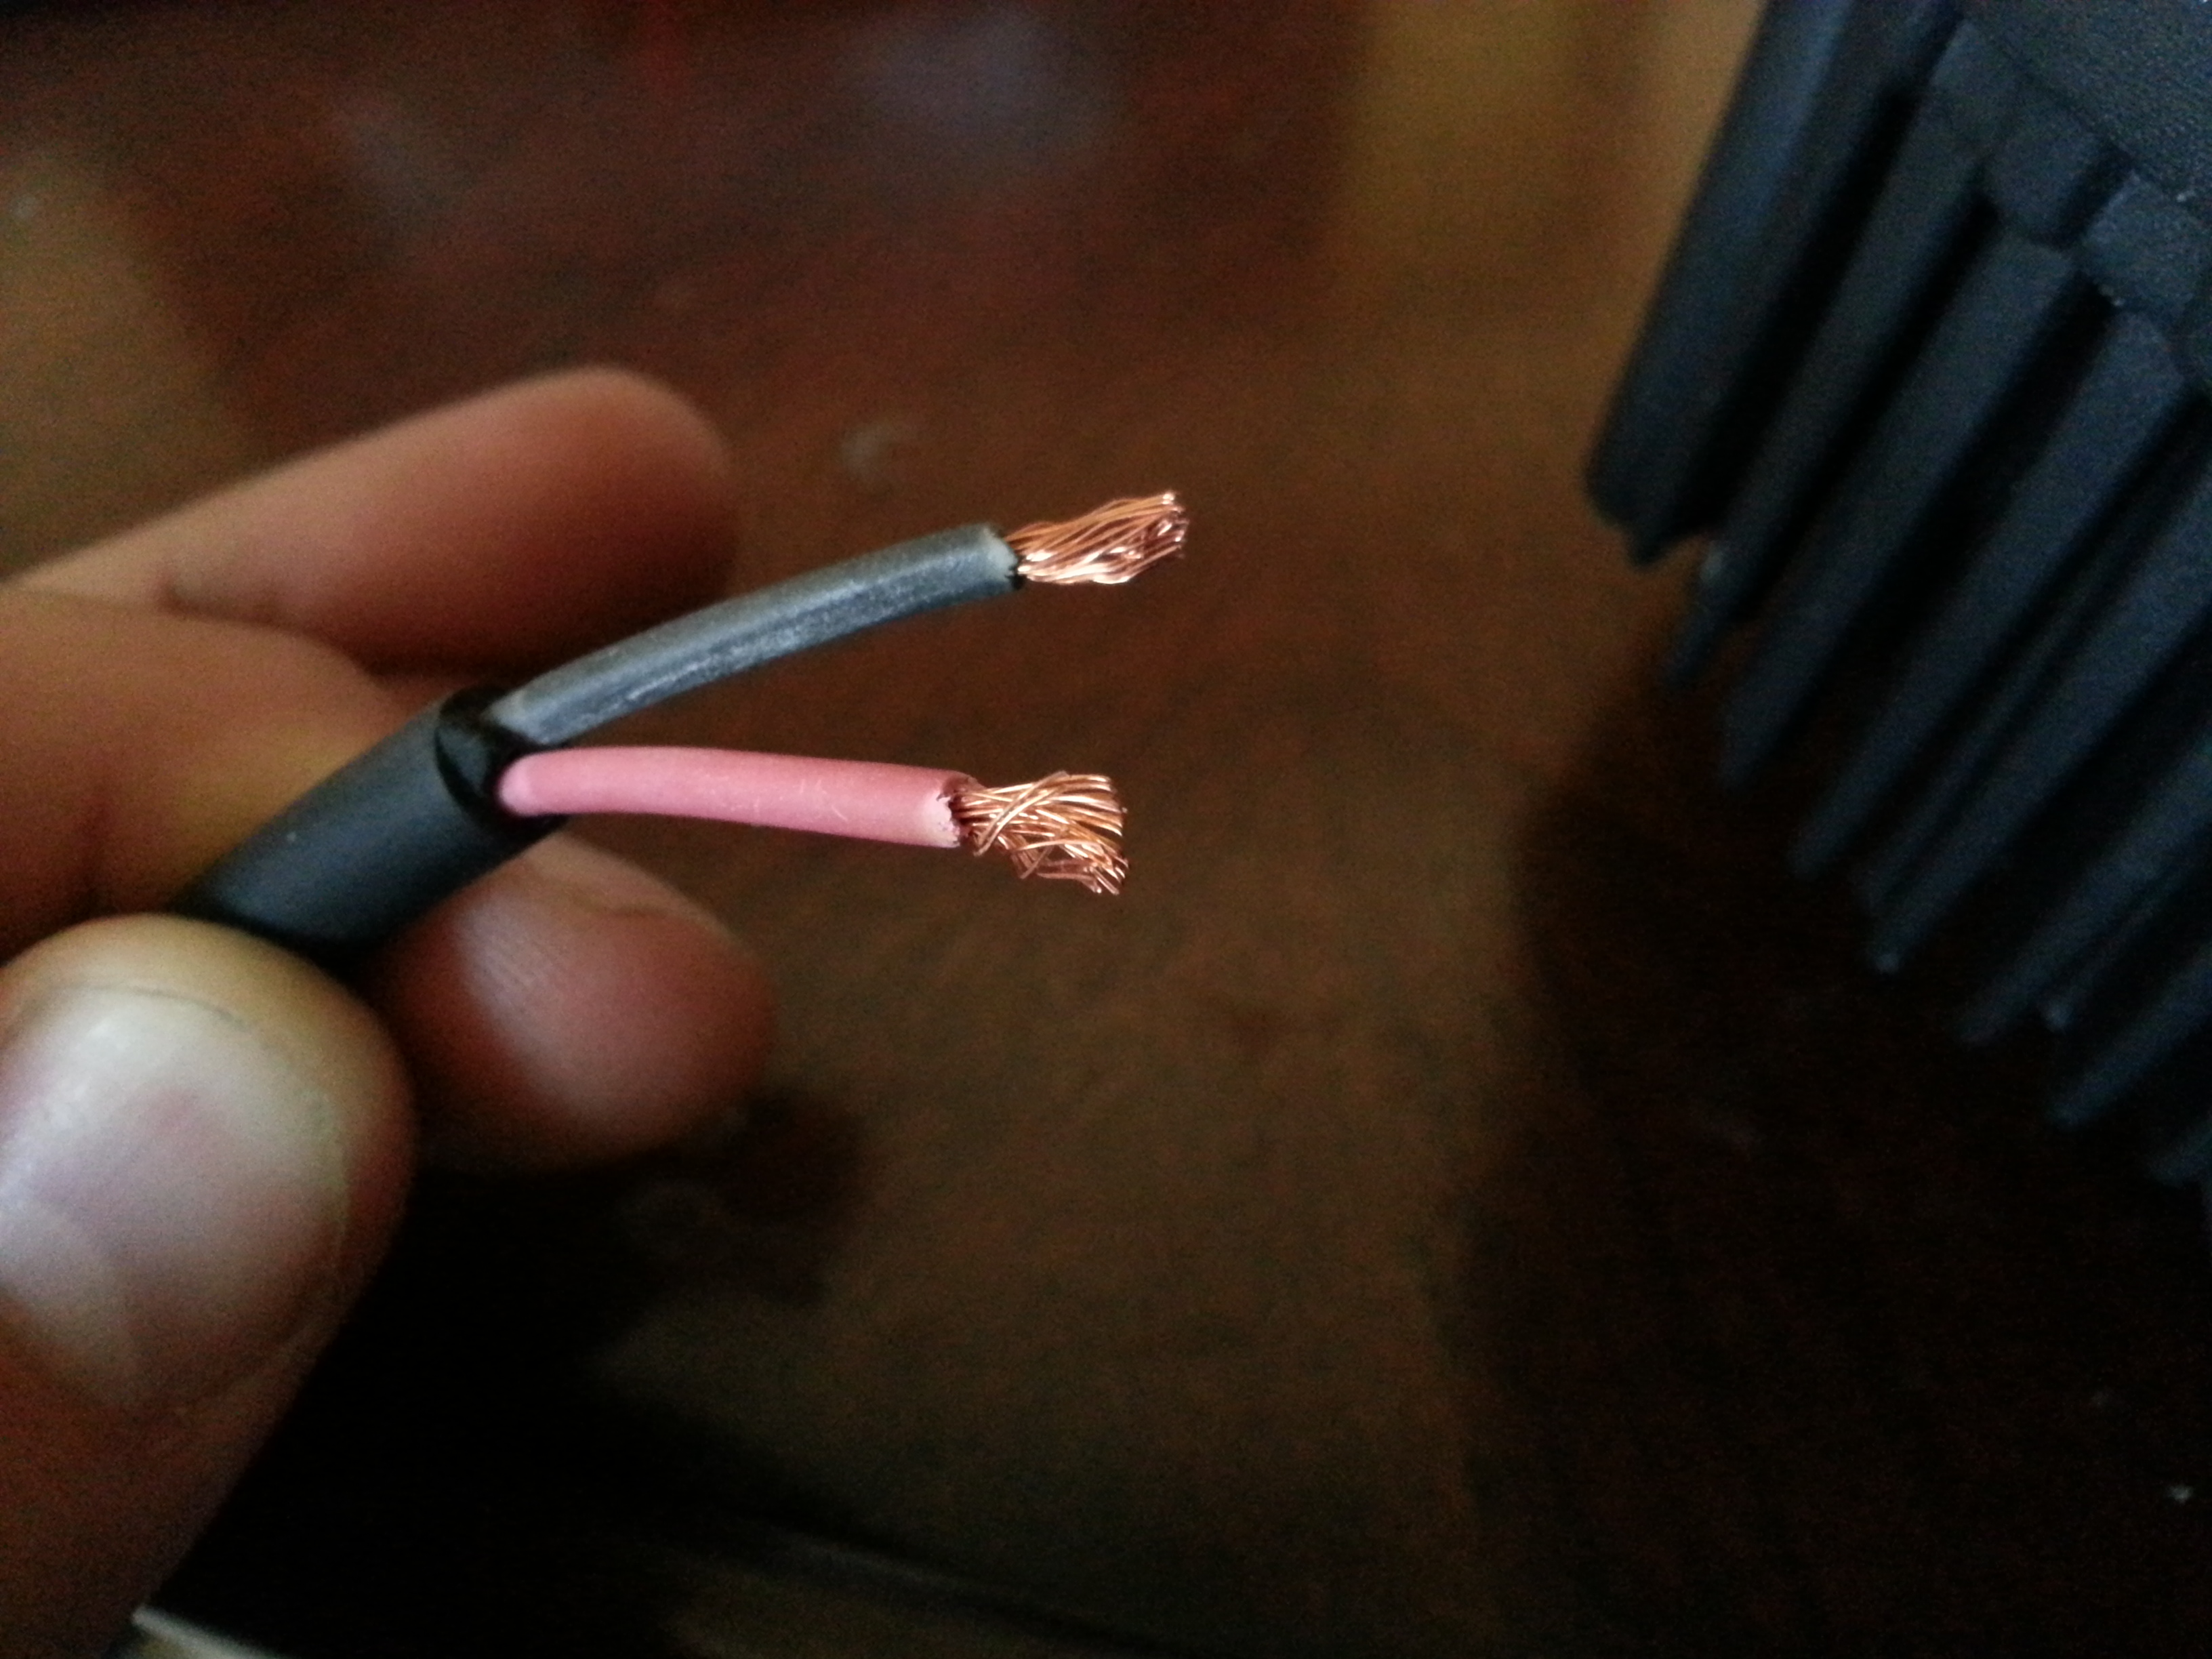
Here is the mounting hardware


4&1/2" from one side of the outer rim to the other.

Wires are of nice quality. and insulated

Here is the mounting hardware

Last edited by Redeth005; 09-19-2013 at 03:51 PM.
09-19-2013, 04:02 PM
#9
Registered User
iTrader: (1)
Join Date: Oct 2011
Location: Tahoe, California
Posts: 987
Likes: 0
Received 0 Likes
on
0 Posts
I'm looking forward to this! I'm sure you have plans to incorporate air flow to the radiator? You may have typed that, I was busy looking at the pictures  How much do you plan on the bumper weighing?
How much do you plan on the bumper weighing?
09-20-2013, 05:58 AM
#10
Registered User
Thread Starter
I had thought of possibly leaving some air holes or something kind of like the bumpers I posted up. But I don't have a laser cutter like all these fabricators do so I might not be able to do that. I guess we'll see how it goes. I do know I'm going to hace to replace my radiator sometime in the future though because it doesn't cool as much as I woukd like it to. It keeps everything cool when driving out here in the city. Street and freeway. But when i drive out to big bear on those up hills I do notice the needle goes up. I just don't like seeing that. We'll see what I come out with. I totally forgot to brong ny vraph paper to work today. I wanted to sketch something up.... darn.
09-20-2013, 10:55 AM
#11
Registered User
Join Date: Sep 2012
Location: iowa
Posts: 618
Likes: 0
Received 0 Likes
on
0 Posts
You don't need a laser cutter, u can just get a hole saw and use a drill. It takes a lil while to do it but that's what we use on my dad's race car and it works good.
09-20-2013, 11:44 AM
#12
Registered User
Thread Starter
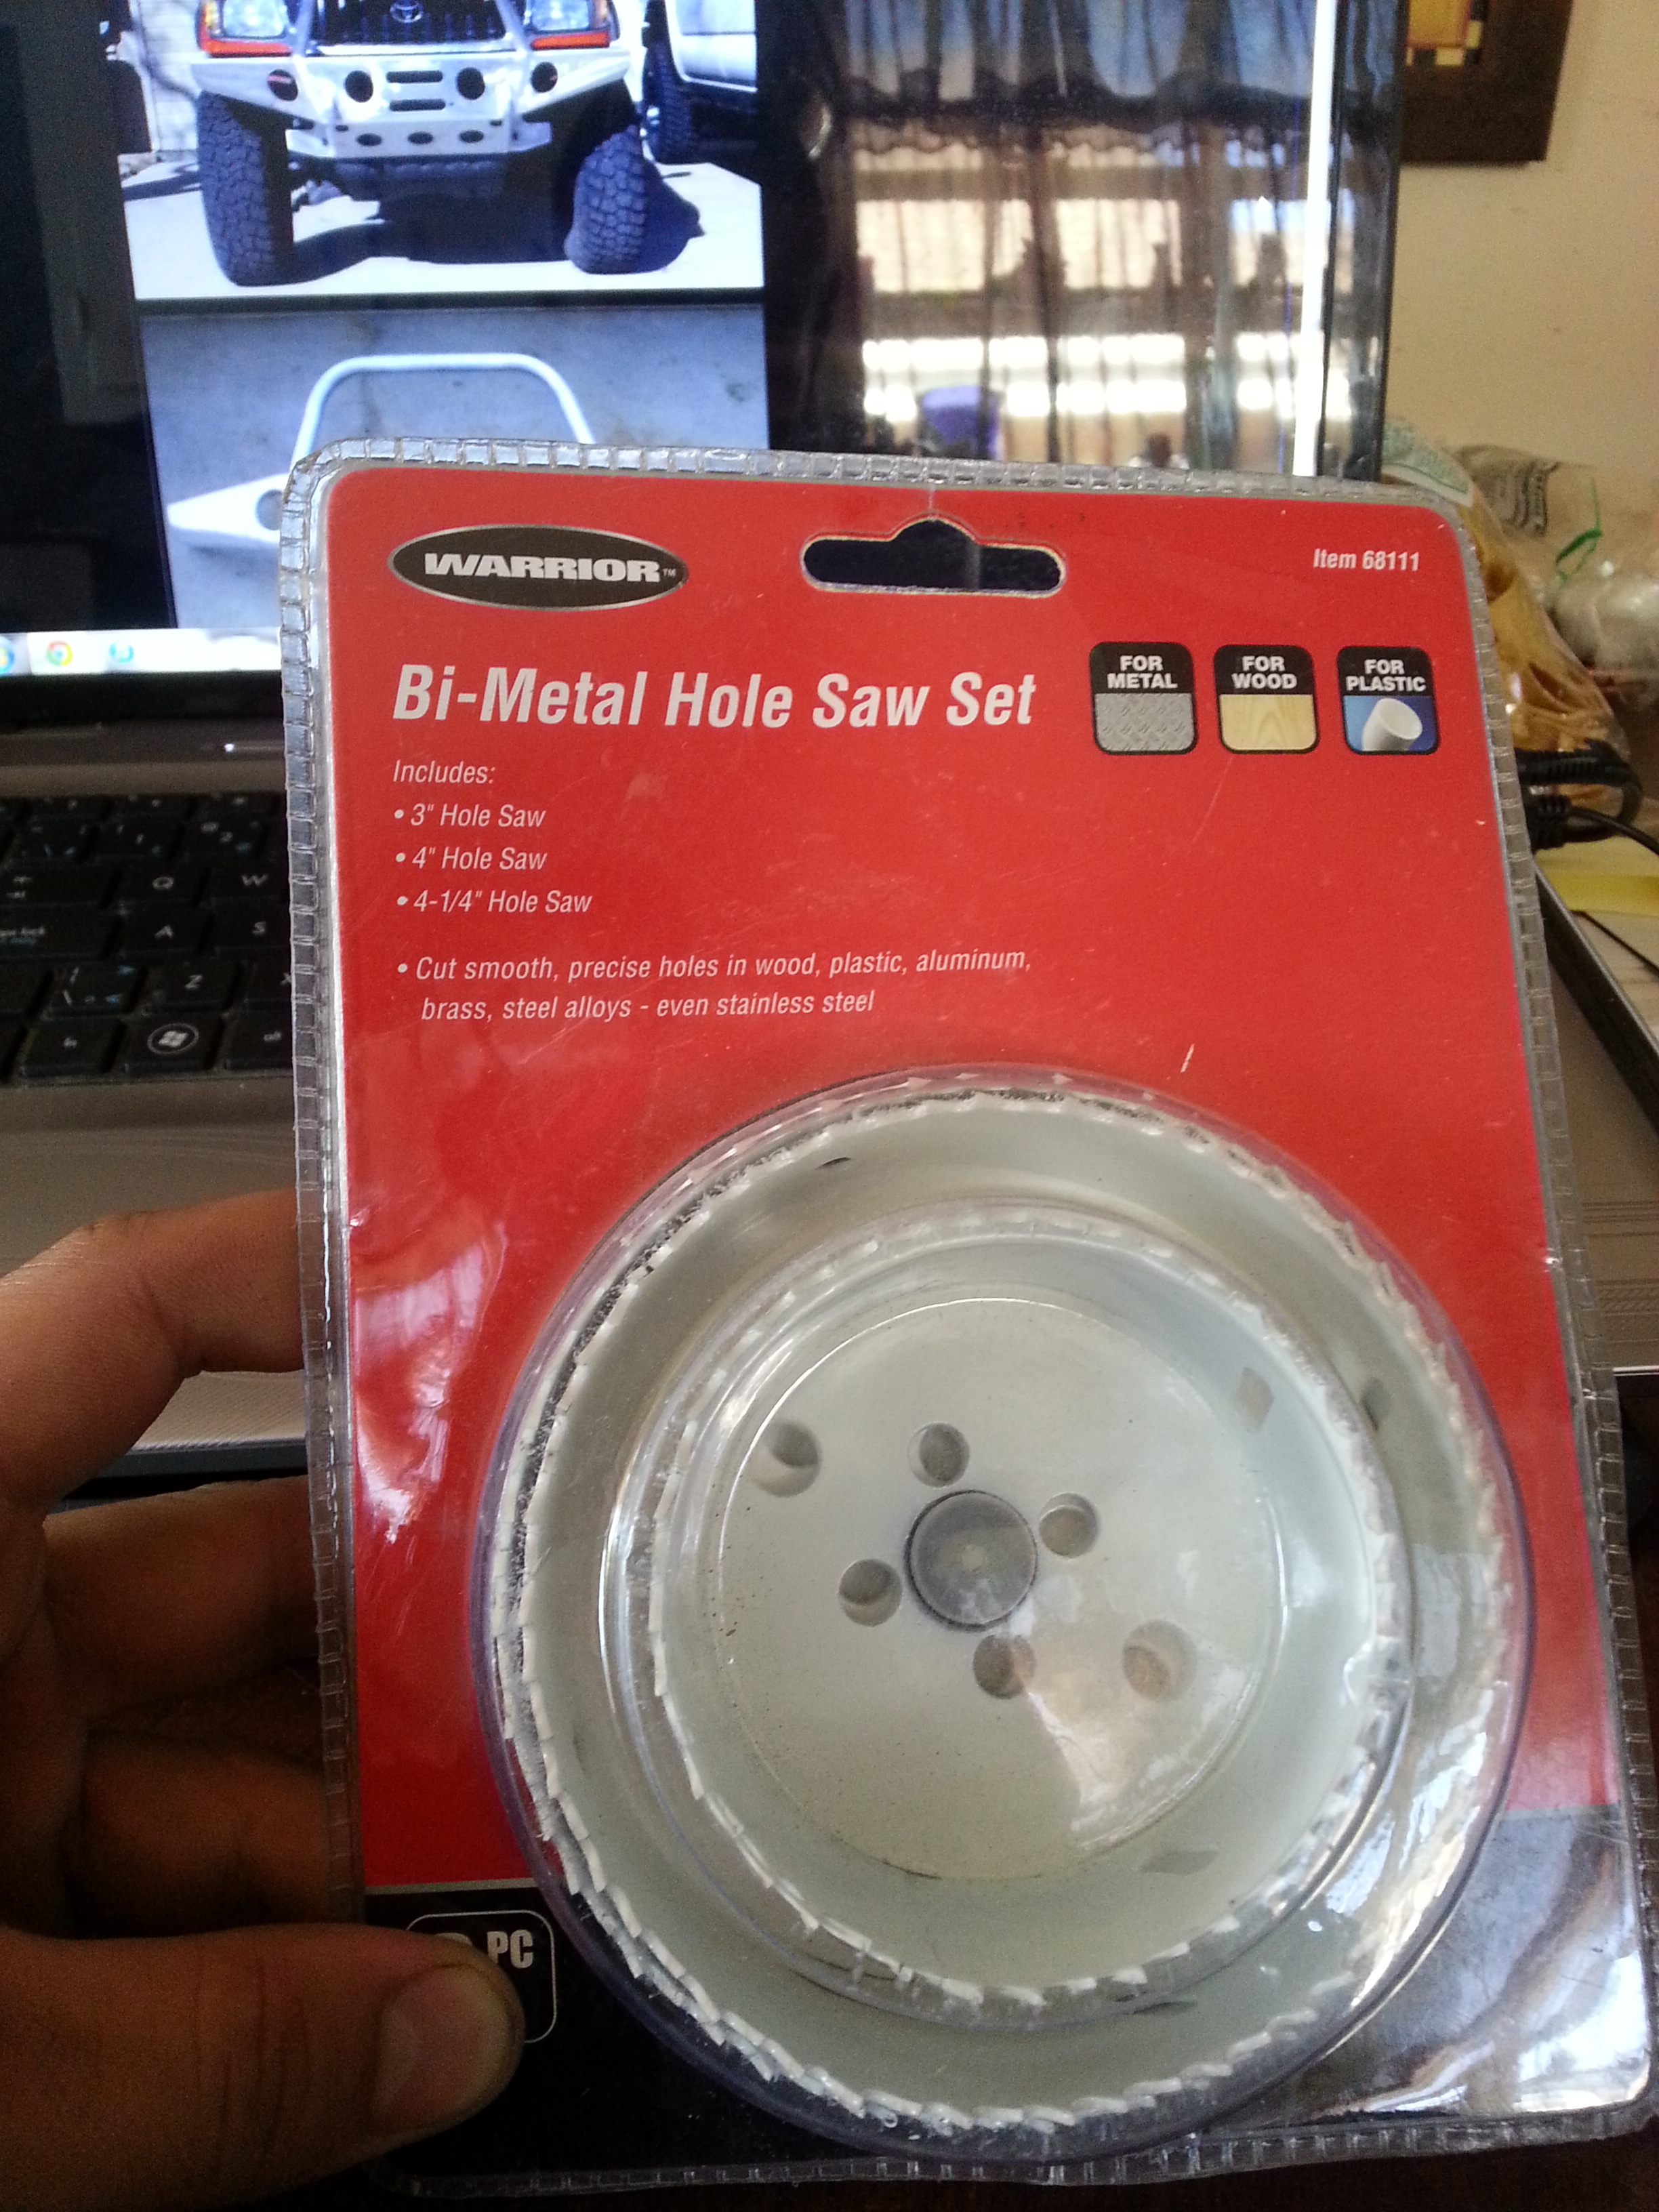
That's also what I had in mind. I will have to get a bigger hole saw because the ones I have only range from 0.5-2.5"
Might just buy the size I need for the LED lights(4.5") and just make 2 holes of that size in front of the radiator area too for that ventilation.
Might just buy the size I need for the LED lights(4.5") and just make 2 holes of that size in front of the radiator area too for that ventilation.
09-20-2013, 11:52 AM
#13
Registered User
Thread Starter
Alright guys, Scotty with Addicted off-road got back to my email today and told me that Frame reinforcements are being cut out today and shipped.
As for the winch plate that I originally wanted he said that they don't offer that winch plate for sale. Oh well. Ill make the Trail-Gear one work for me. No problem.
As for the winch plate that I originally wanted he said that they don't offer that winch plate for sale. Oh well. Ill make the Trail-Gear one work for me. No problem.
09-21-2013, 04:41 PM
#16
Registered User
Thread Starter
Nice I'm looking forward to this too.
RBx do you have a thread for your bumper? im just curious to know what style you went with that's all.
09-21-2013, 04:52 PM
#17
Registered User
Thread Starter
Finally some progress!
Hey guys i had this weekend free. So i spent a couple of hours taking measurements from different angles and spend about 4 hours just drawing up some bumper designs. I had to redo a bunch of them because they just looked too bulky but i finally liked one enough to keep and try to achieve building.
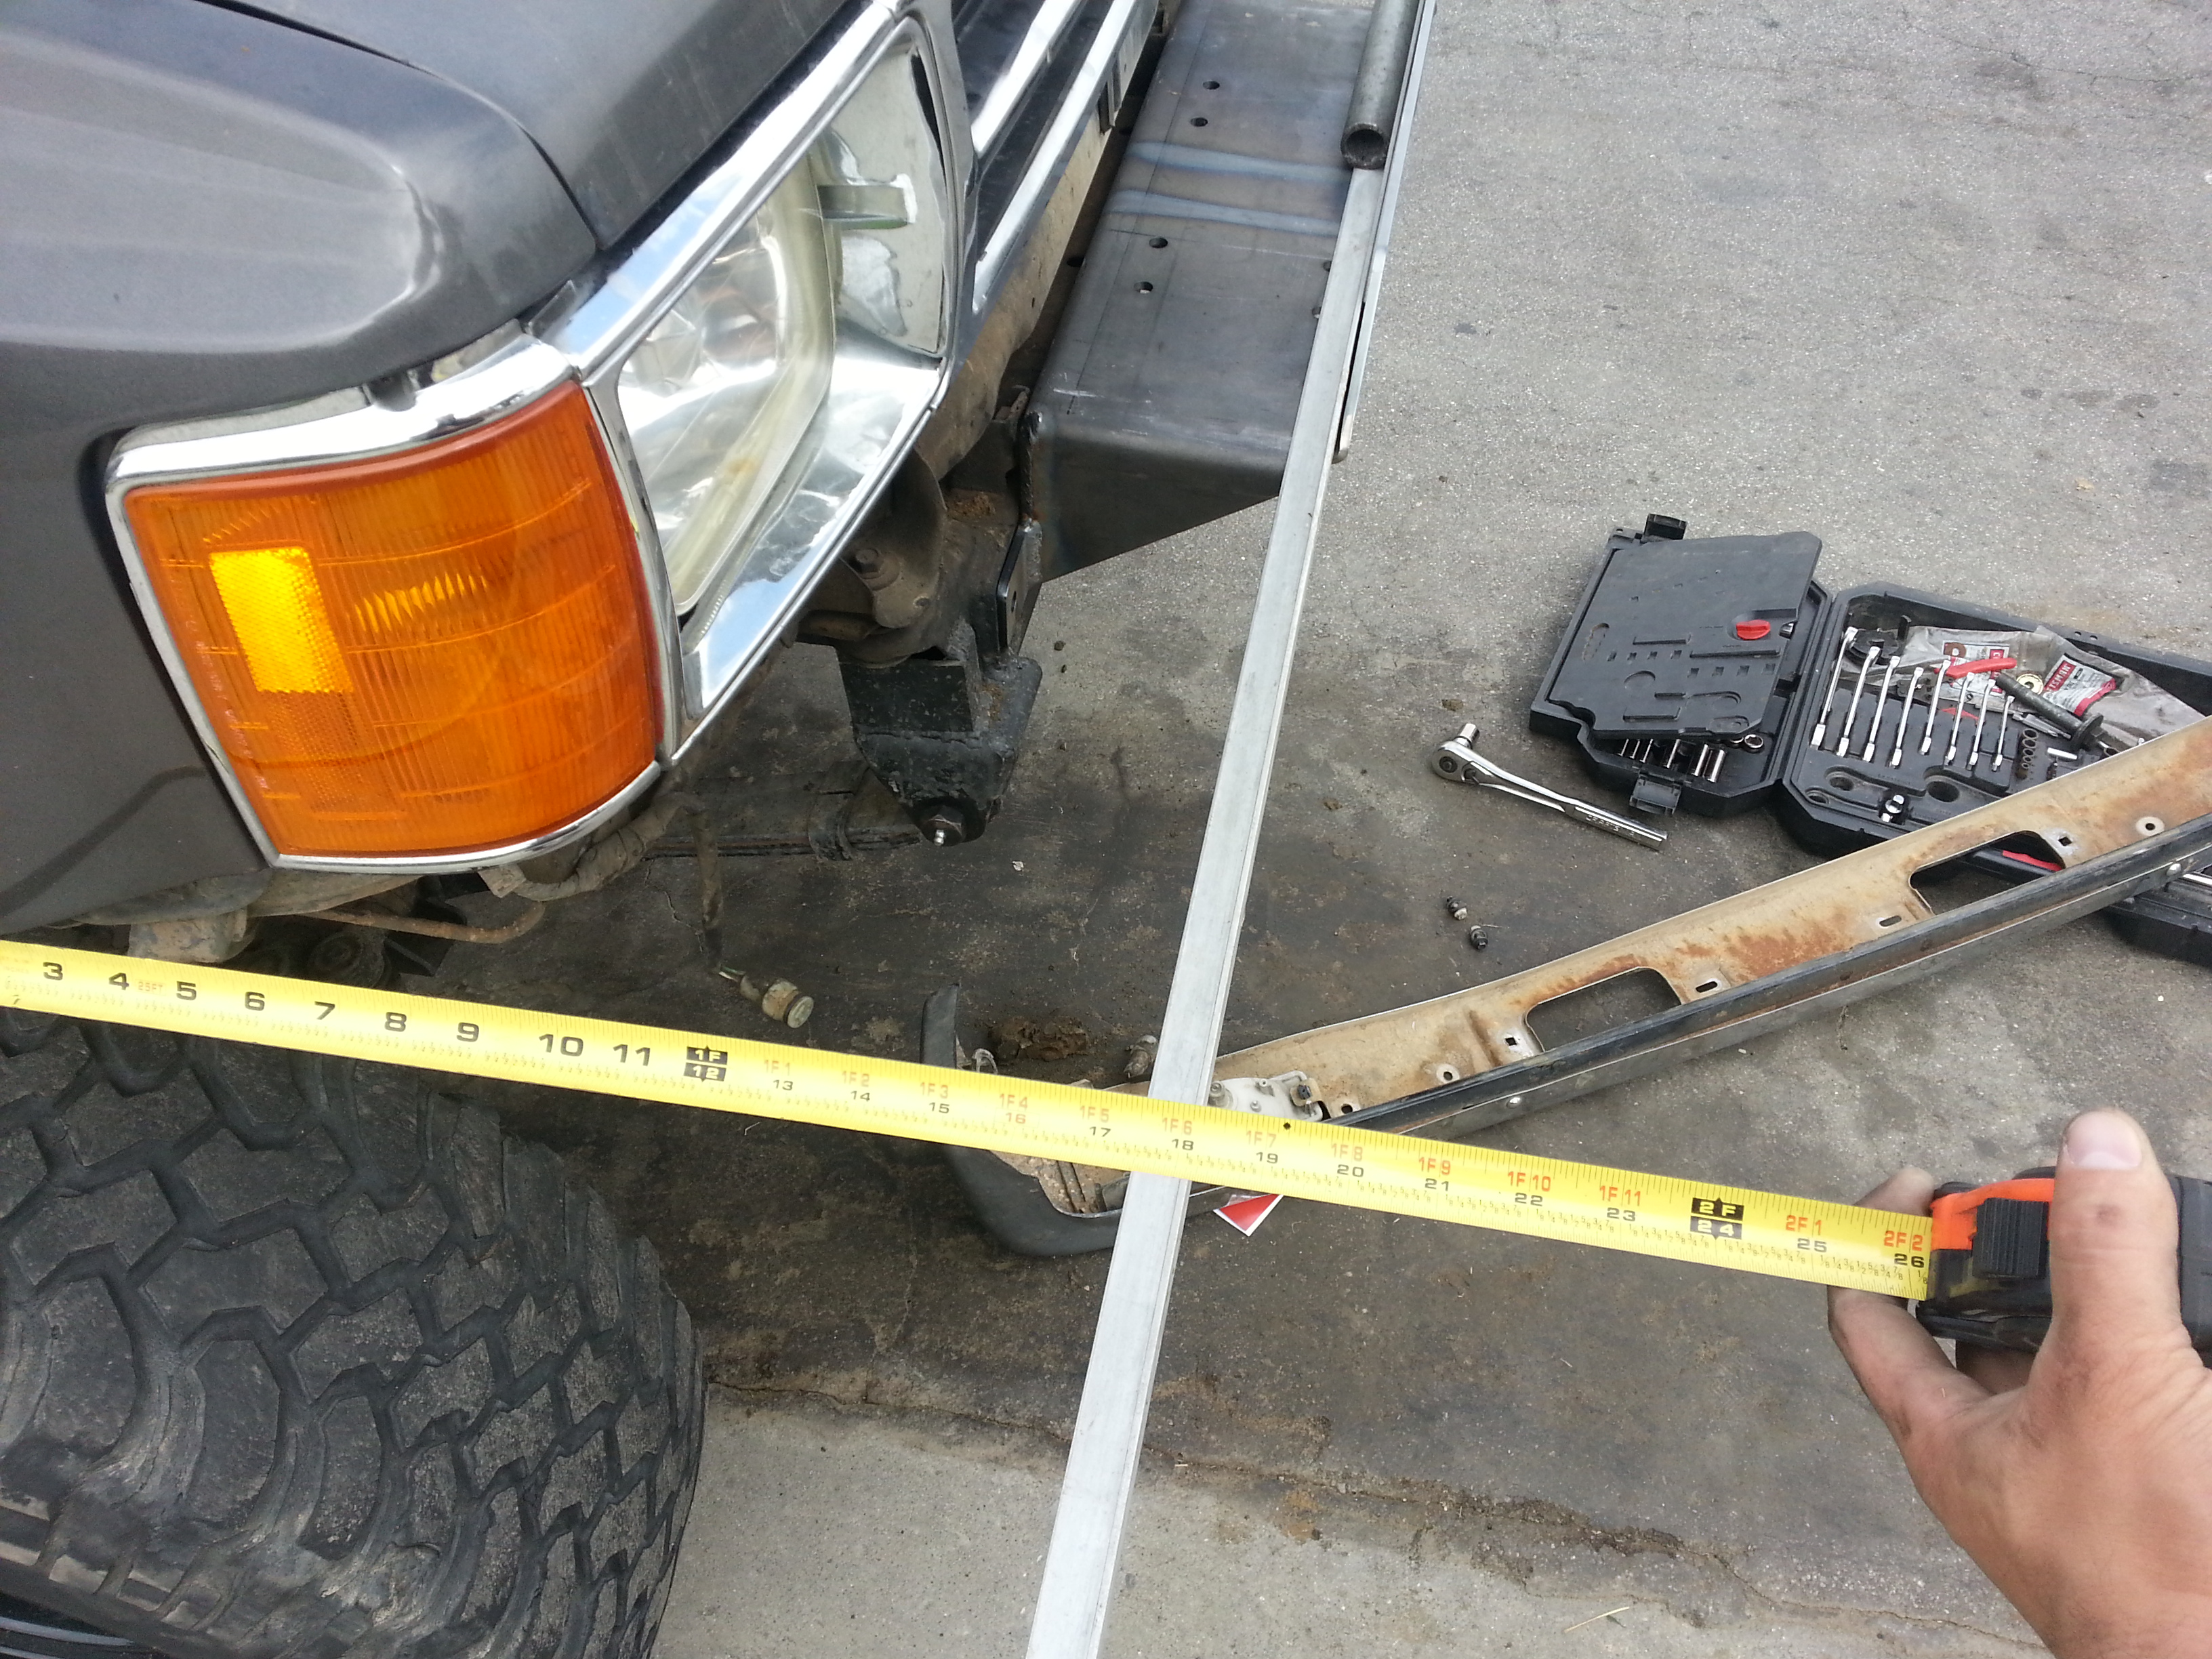
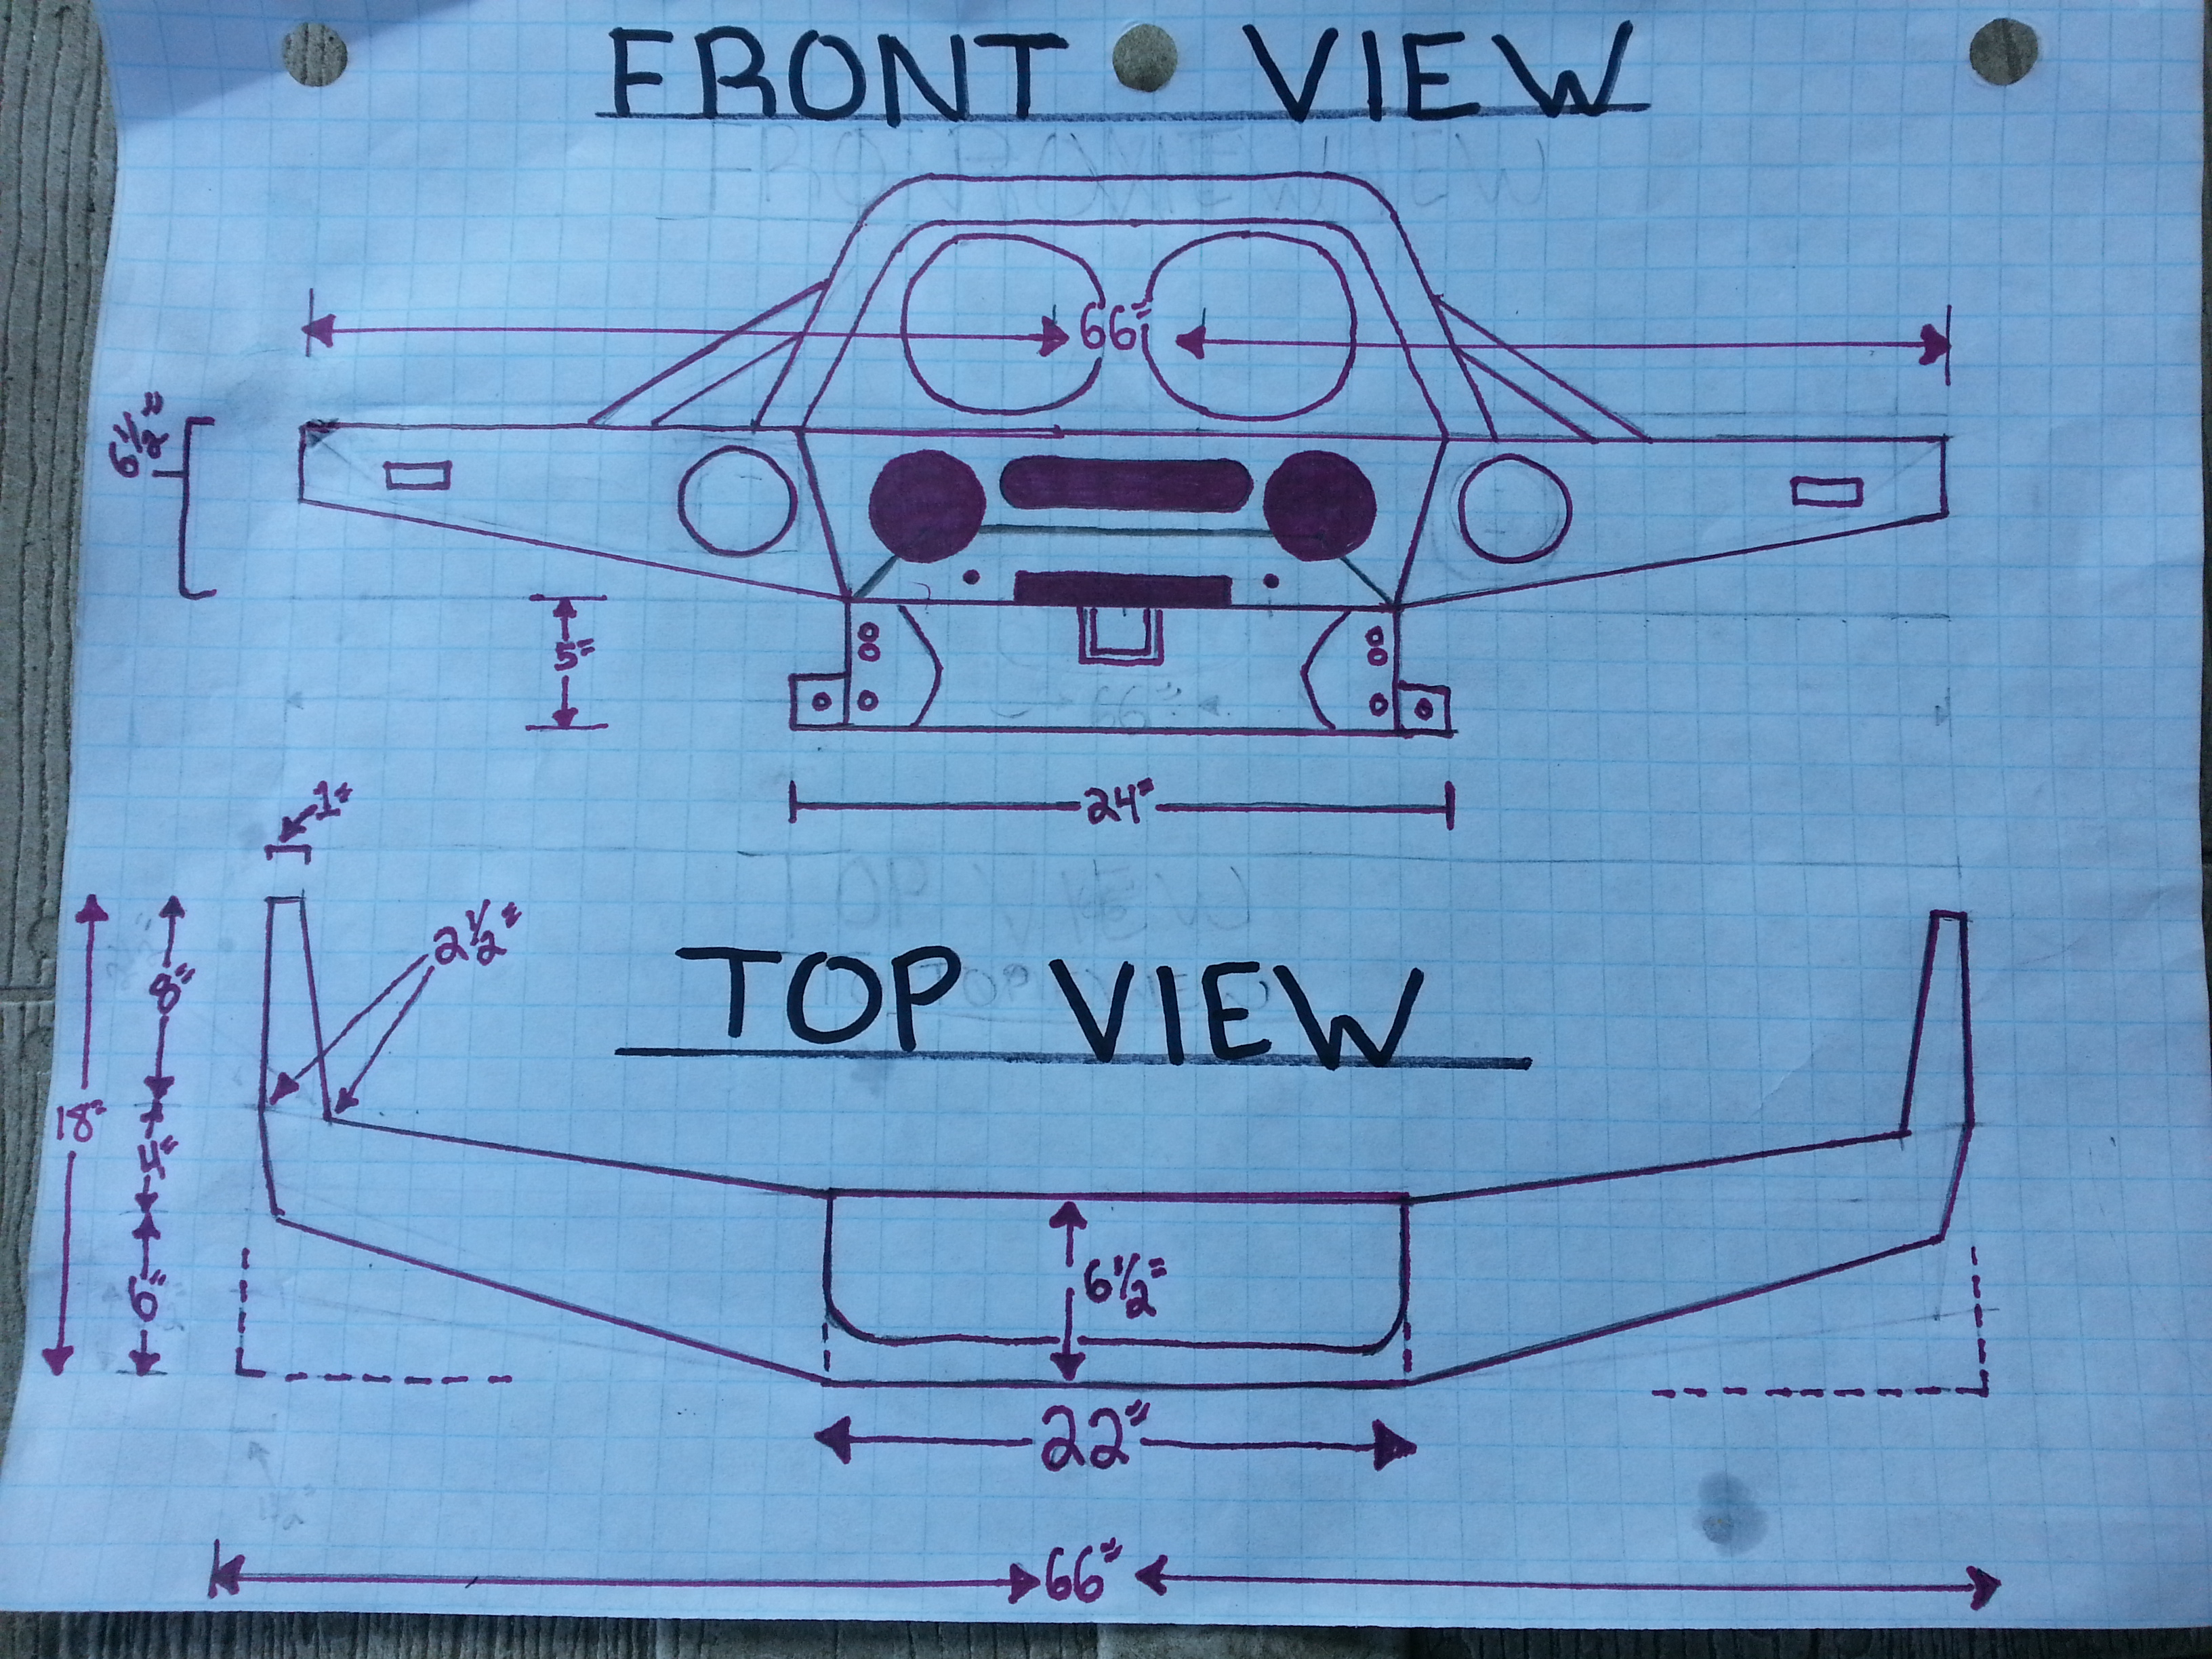
Took off my front stock bumper and put the T.G. winch plate on. Then used a straight edge metal level to get accurate measurements.
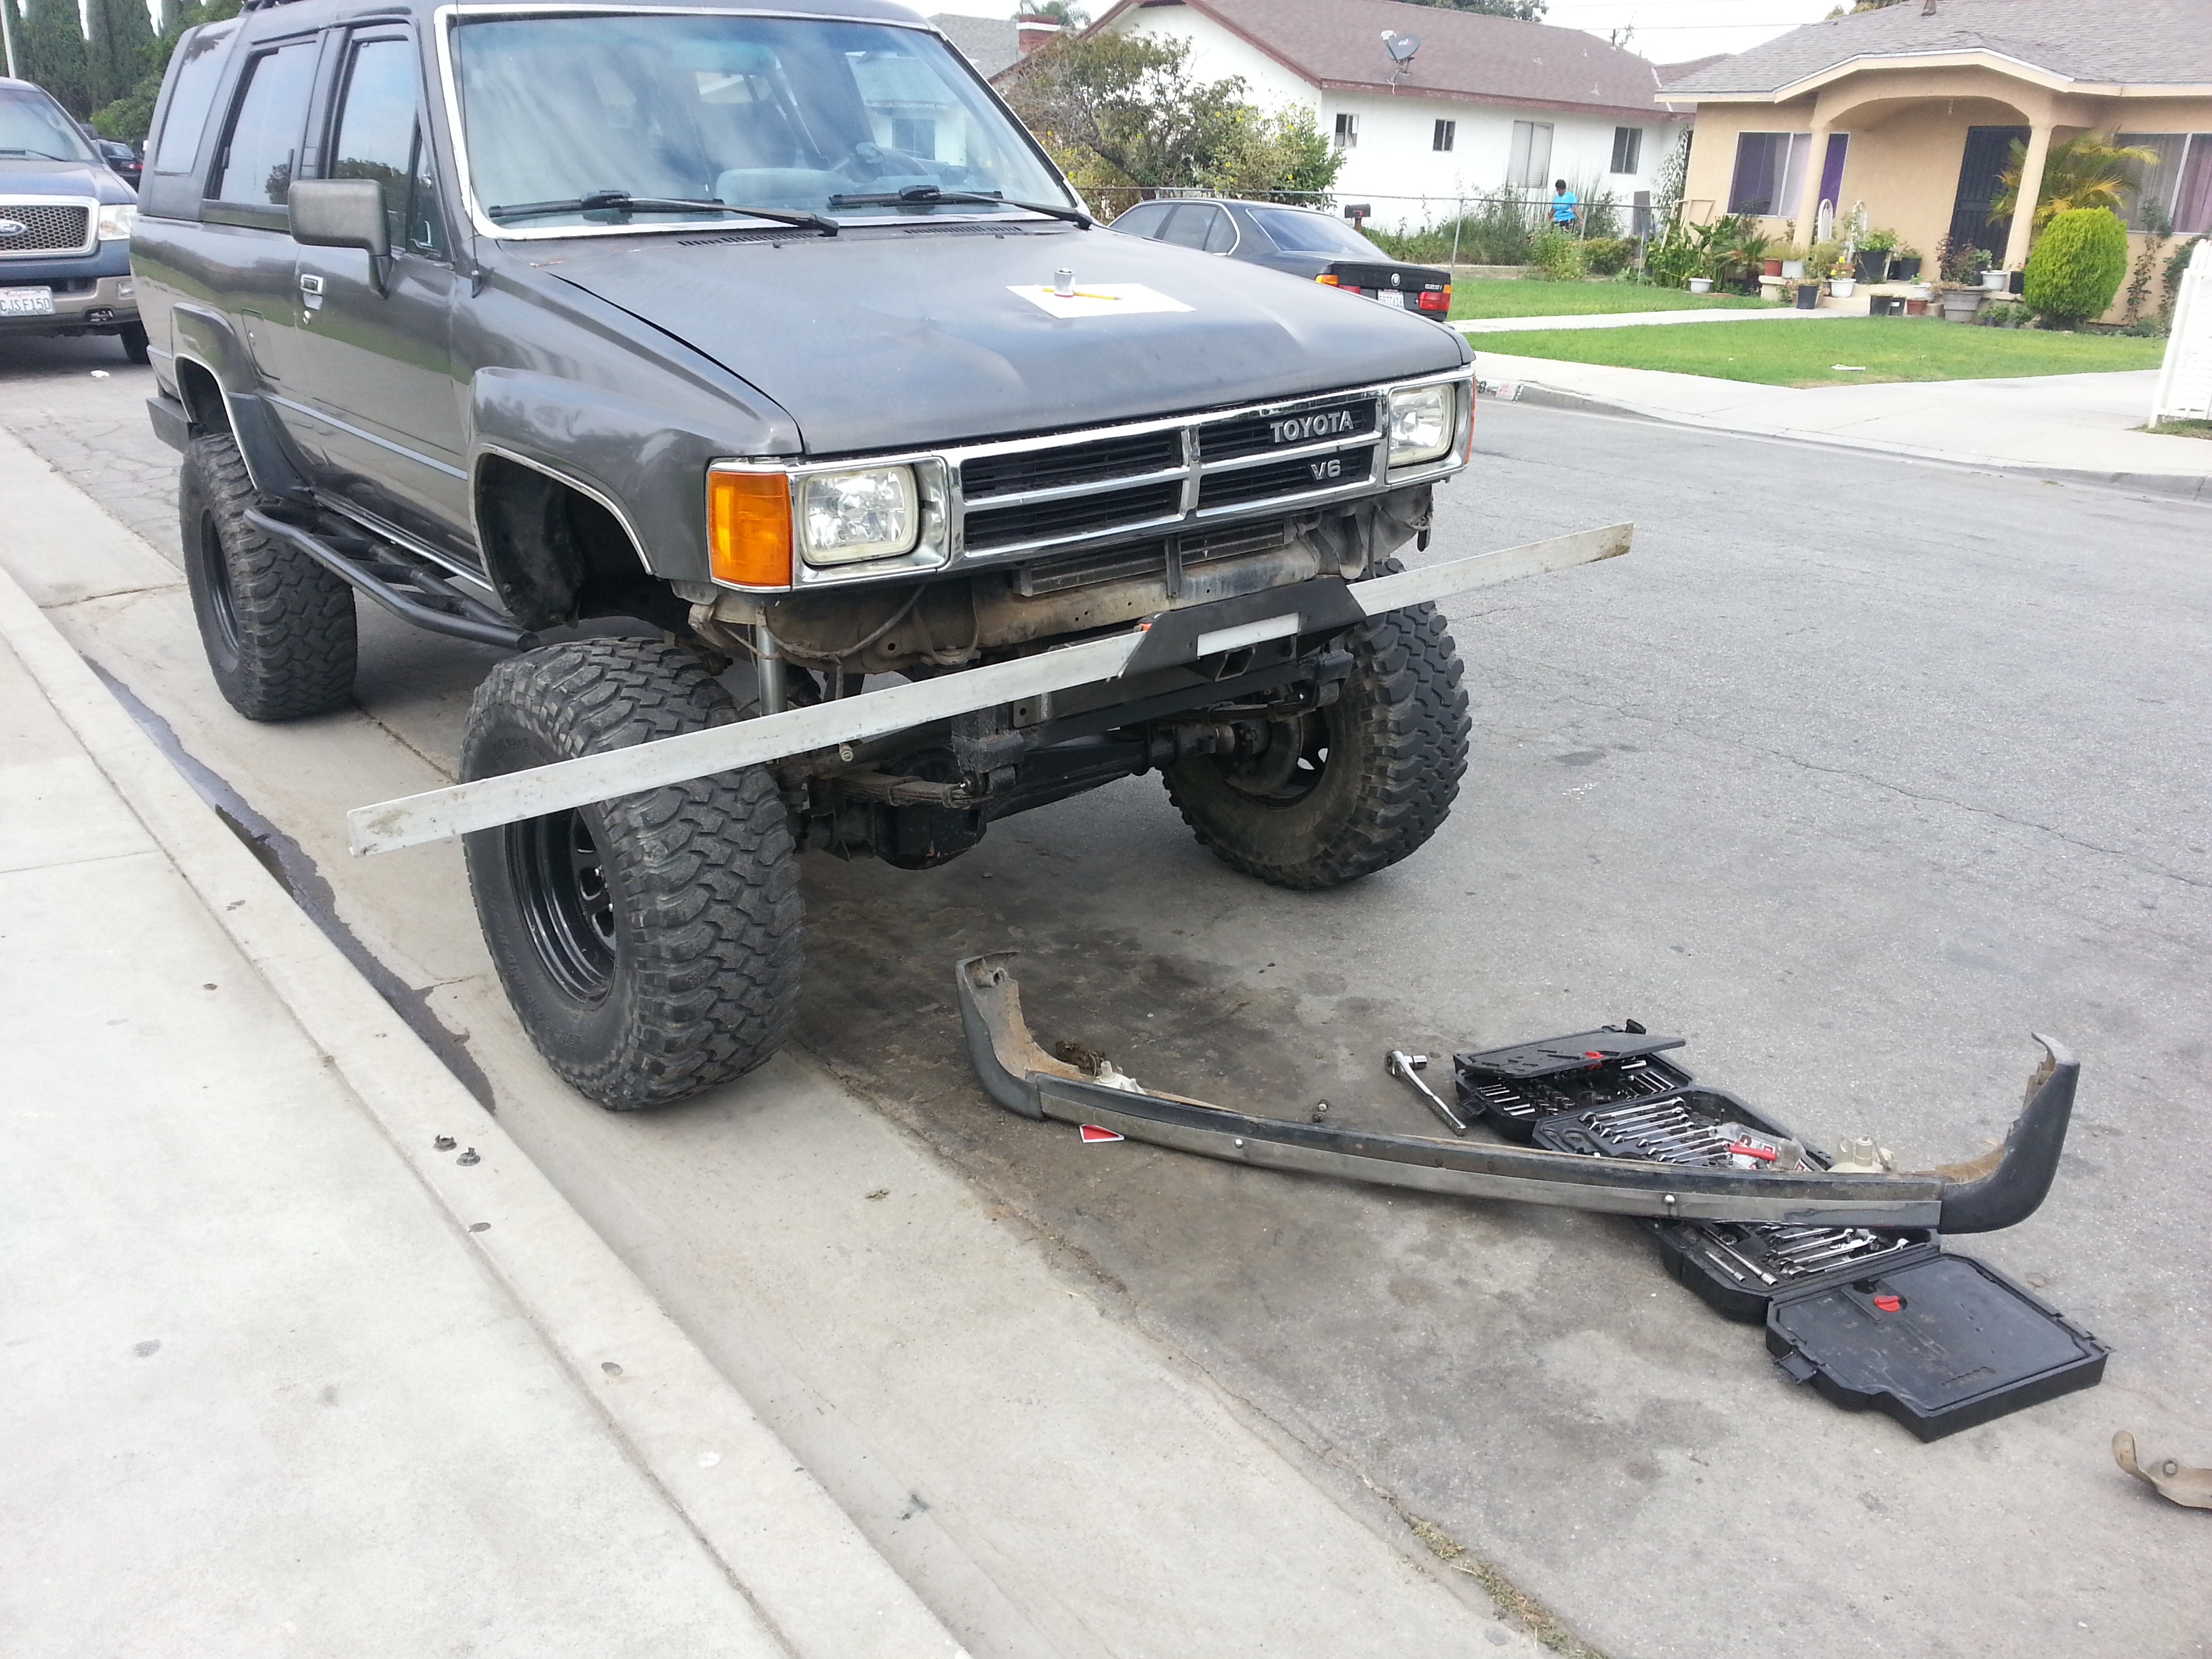
Measured from the front side of the wheel well to the front of that level. It's 18" exact.
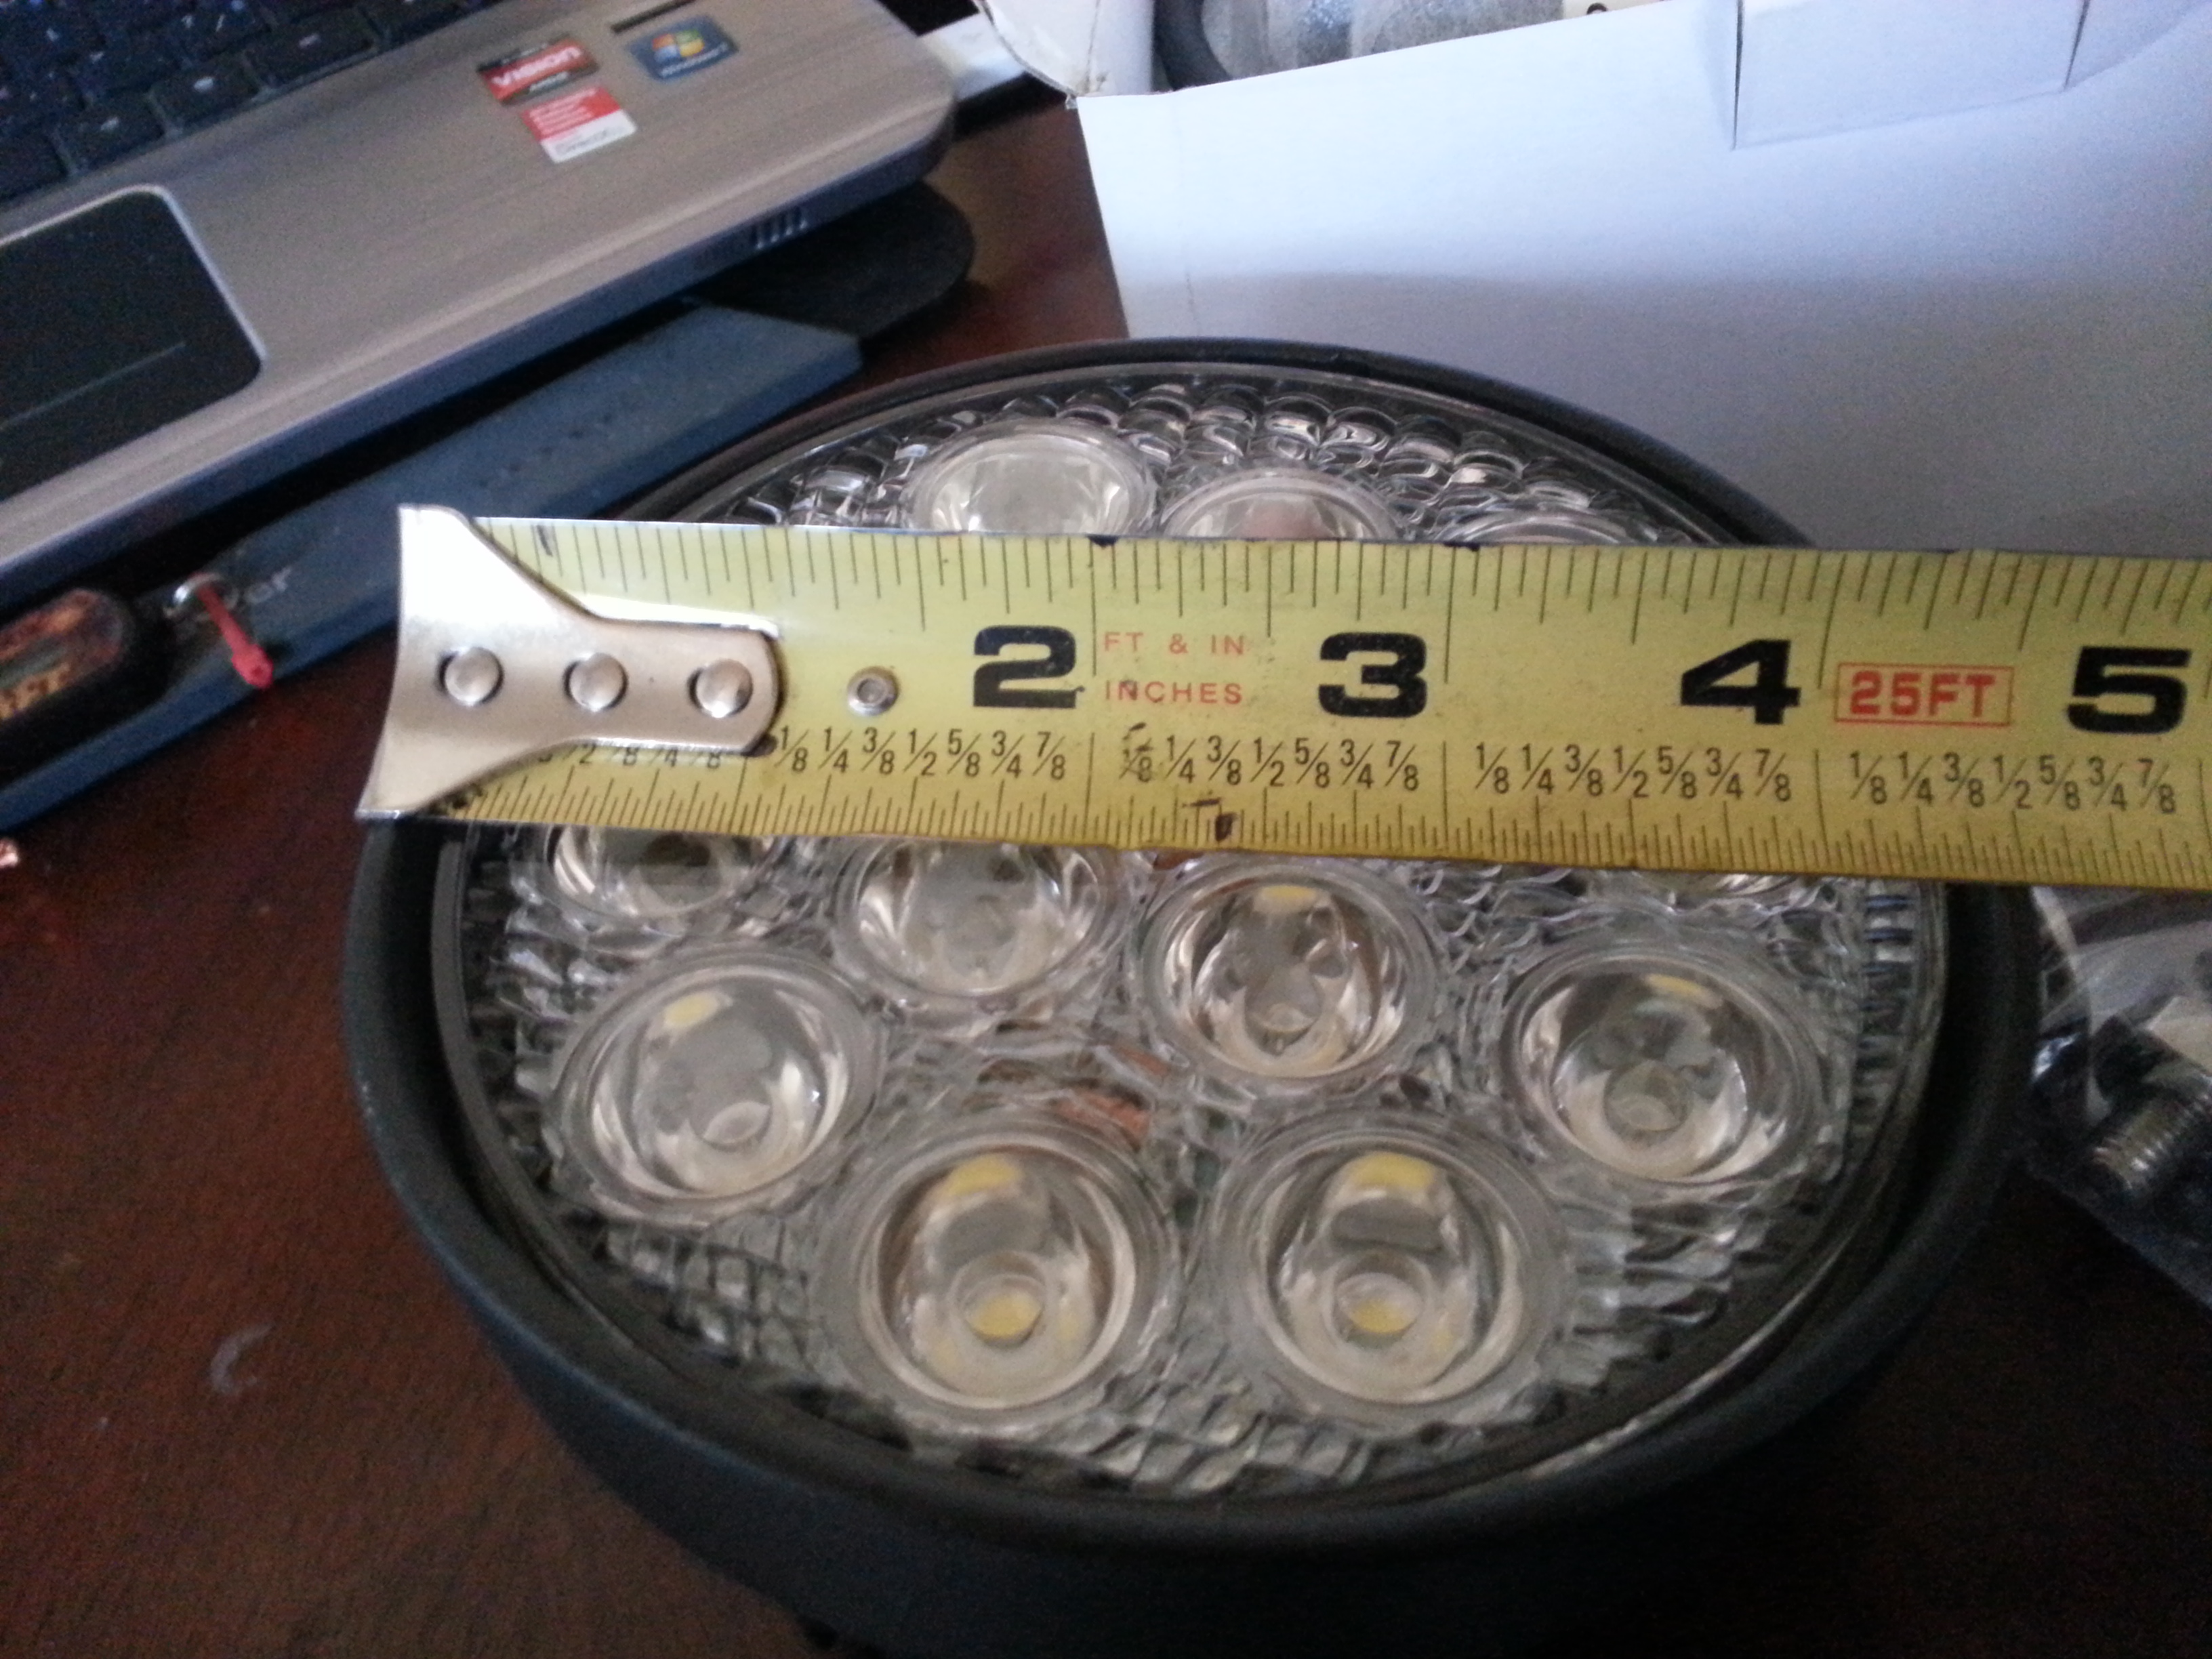
Also my dad came home and told me he found me some hole saws. 3", 4" and 4-1/4". I know i said earlier that my LED lights at 4-1/2" from outer rim to outer rim. but i re measured and the actual light part measures 4-1/4" so i am good on this size. So looks like i owe my pops about $15ish for these. I think he bought them at Harbor freight. not sure. sorry guys.
After 4 long hours of scetching stuff up and redoing i finally came across one design that i loved! I dont have a side view yet. But this is what i have so far. Front view with the extra 8" lights in the center grill area with grill guard. And the top view which does not include the bumper with the grill guard yet. I couldnt draw it in because it got in the way of the lines i needed to see. so whatever. you get the idea. thats what counts lol
EDIT: Each square on the graph paper = 2"x2"
Took off my front stock bumper and put the T.G. winch plate on. Then used a straight edge metal level to get accurate measurements.

Measured from the front side of the wheel well to the front of that level. It's 18" exact.

Also my dad came home and told me he found me some hole saws. 3", 4" and 4-1/4". I know i said earlier that my LED lights at 4-1/2" from outer rim to outer rim. but i re measured and the actual light part measures 4-1/4" so i am good on this size. So looks like i owe my pops about $15ish for these. I think he bought them at Harbor freight. not sure. sorry guys.

After 4 long hours of scetching stuff up and redoing i finally came across one design that i loved! I dont have a side view yet. But this is what i have so far. Front view with the extra 8" lights in the center grill area with grill guard. And the top view which does not include the bumper with the grill guard yet. I couldnt draw it in because it got in the way of the lines i needed to see. so whatever. you get the idea. thats what counts lol
EDIT: Each square on the graph paper = 2"x2"

Last edited by Redeth005; 09-21-2013 at 04:58 PM.
09-21-2013, 09:07 PM
#19
Registered User
Thread Starter
I just looked through about 30 pages on your thread beginning from the last page to somewhere in the middle. I dont think i passed it up. but yea i didnt find it. Think you can post the link to your pix of it? just curious to see it.
-----------------------------------------------------------------------------
I didnt get too many hours in to cutting out the parts to my prototype today but i did get the center of the bumper and possibly a skid plate thing to give a nicer look.
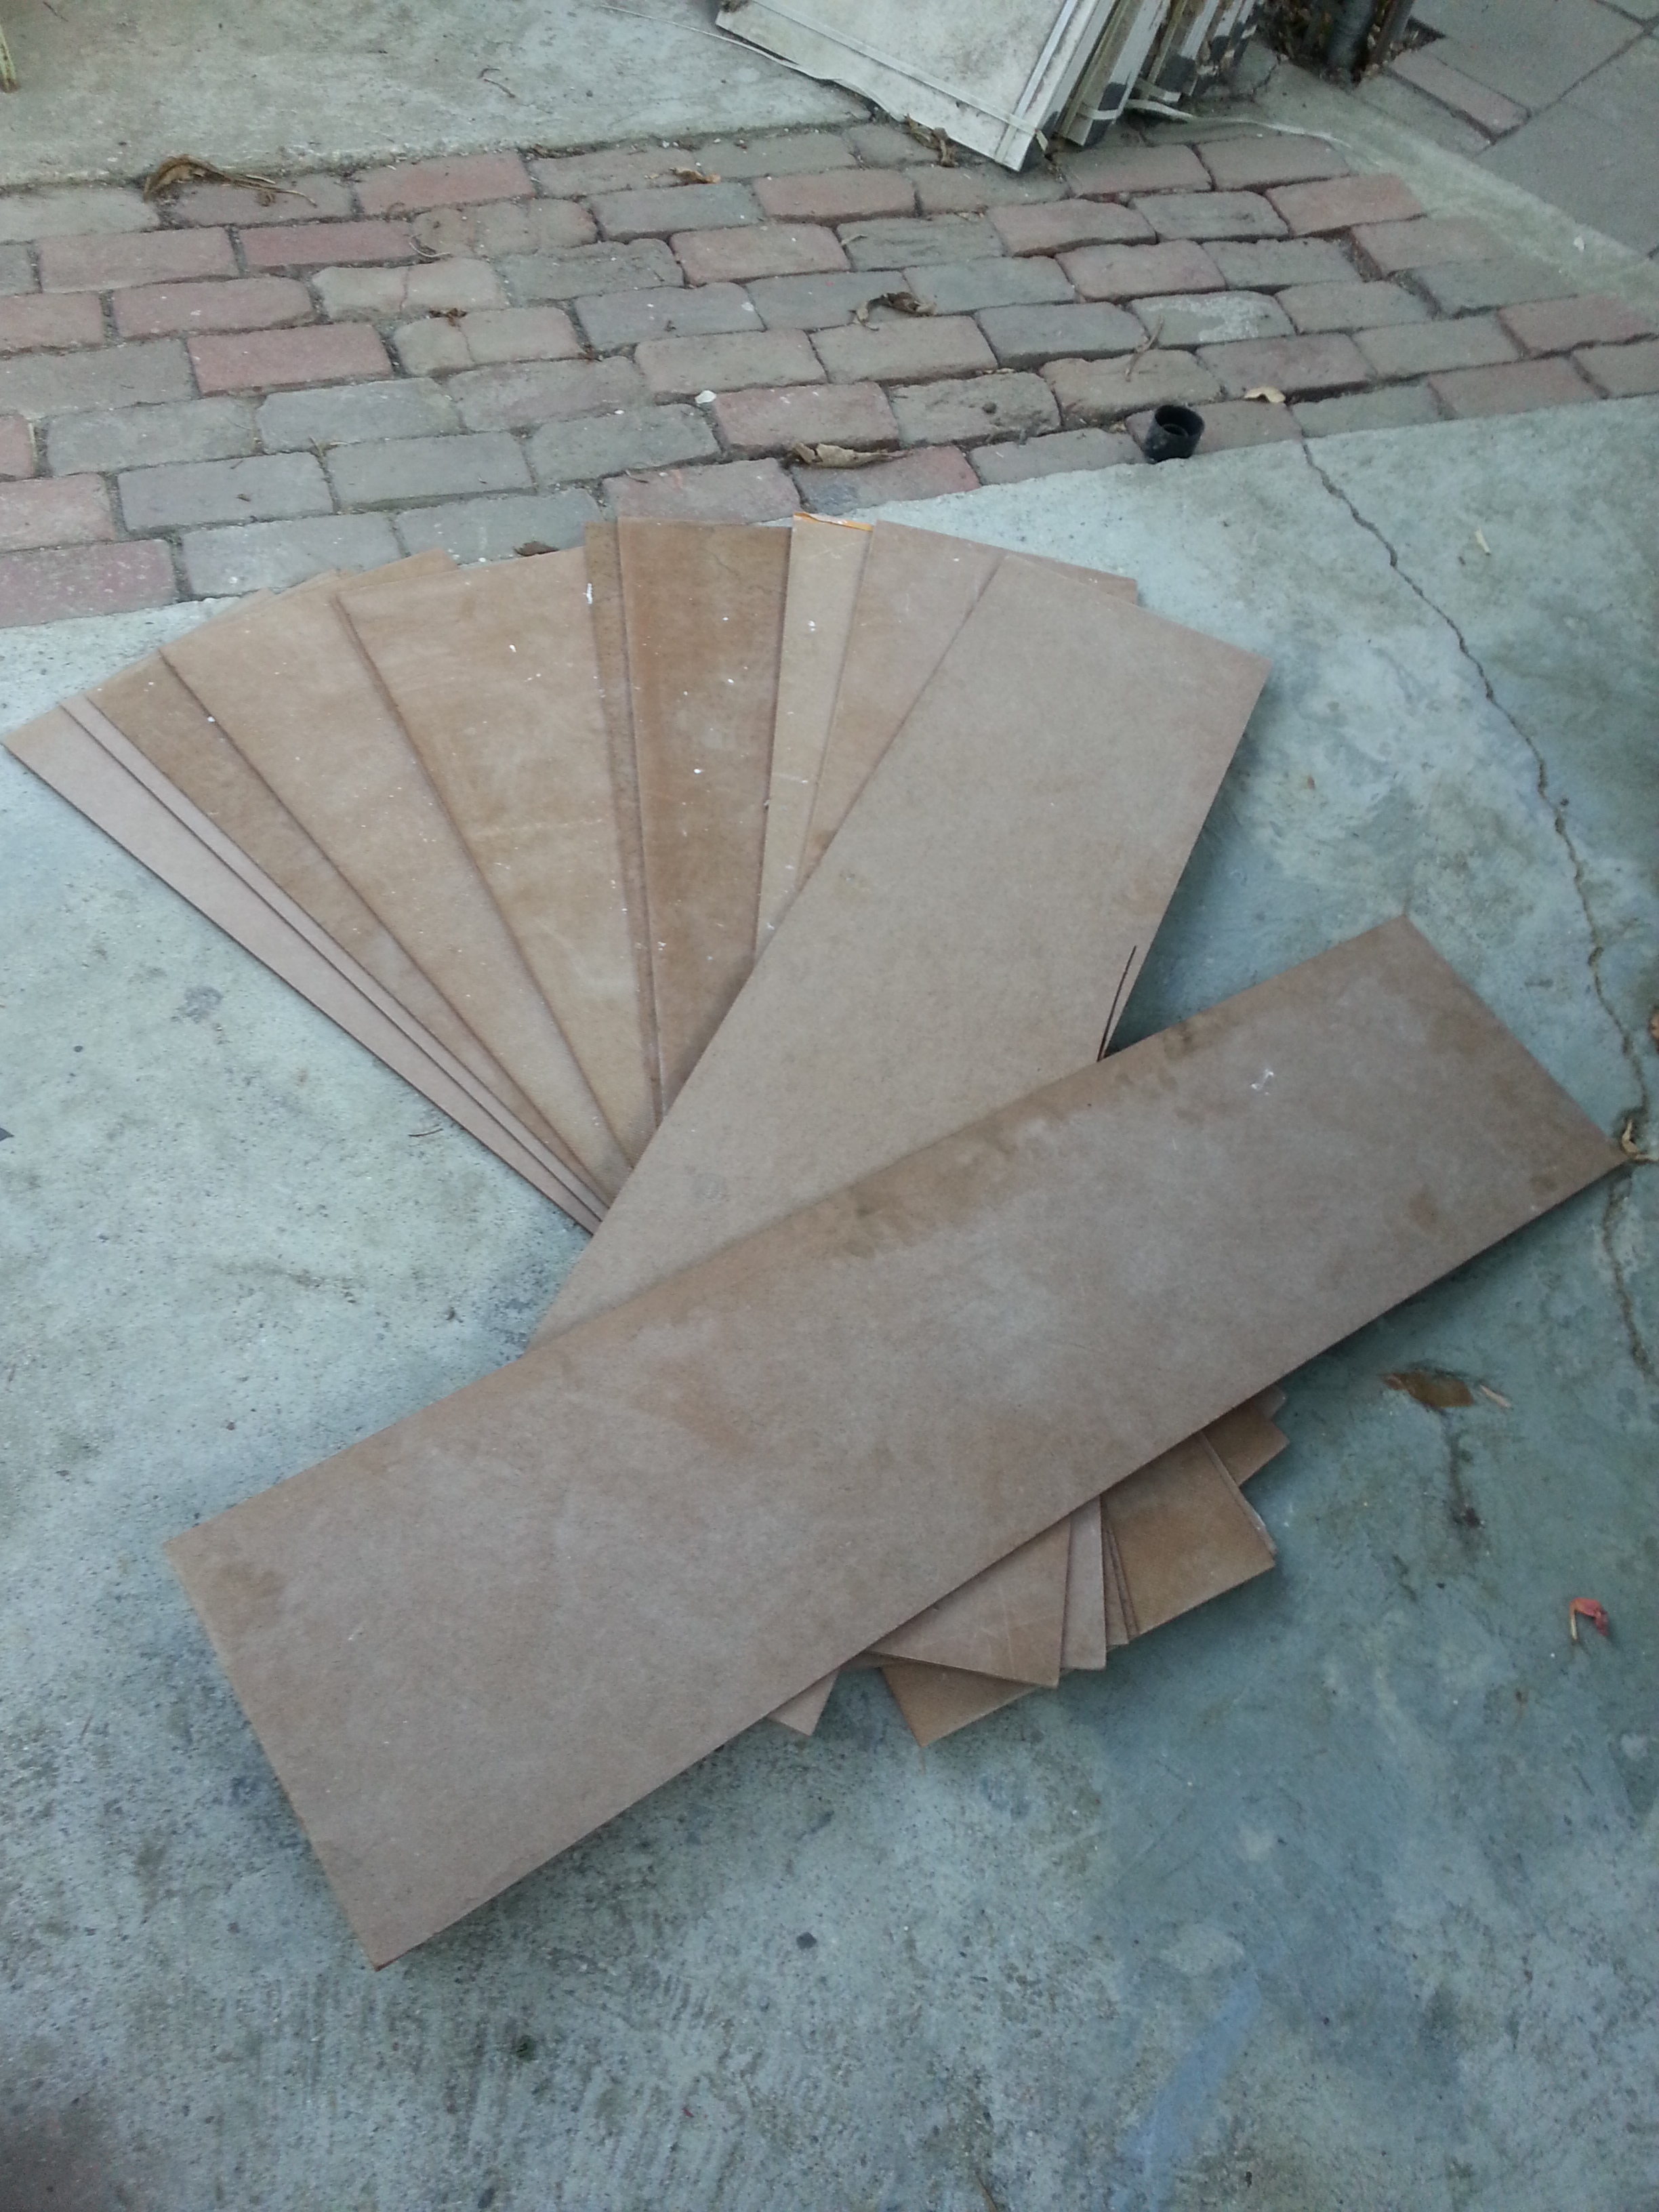
Startin' off with the 1/4" Masonite board.
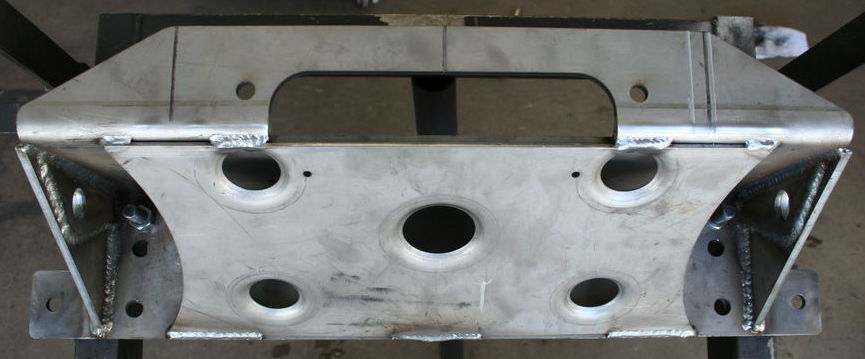
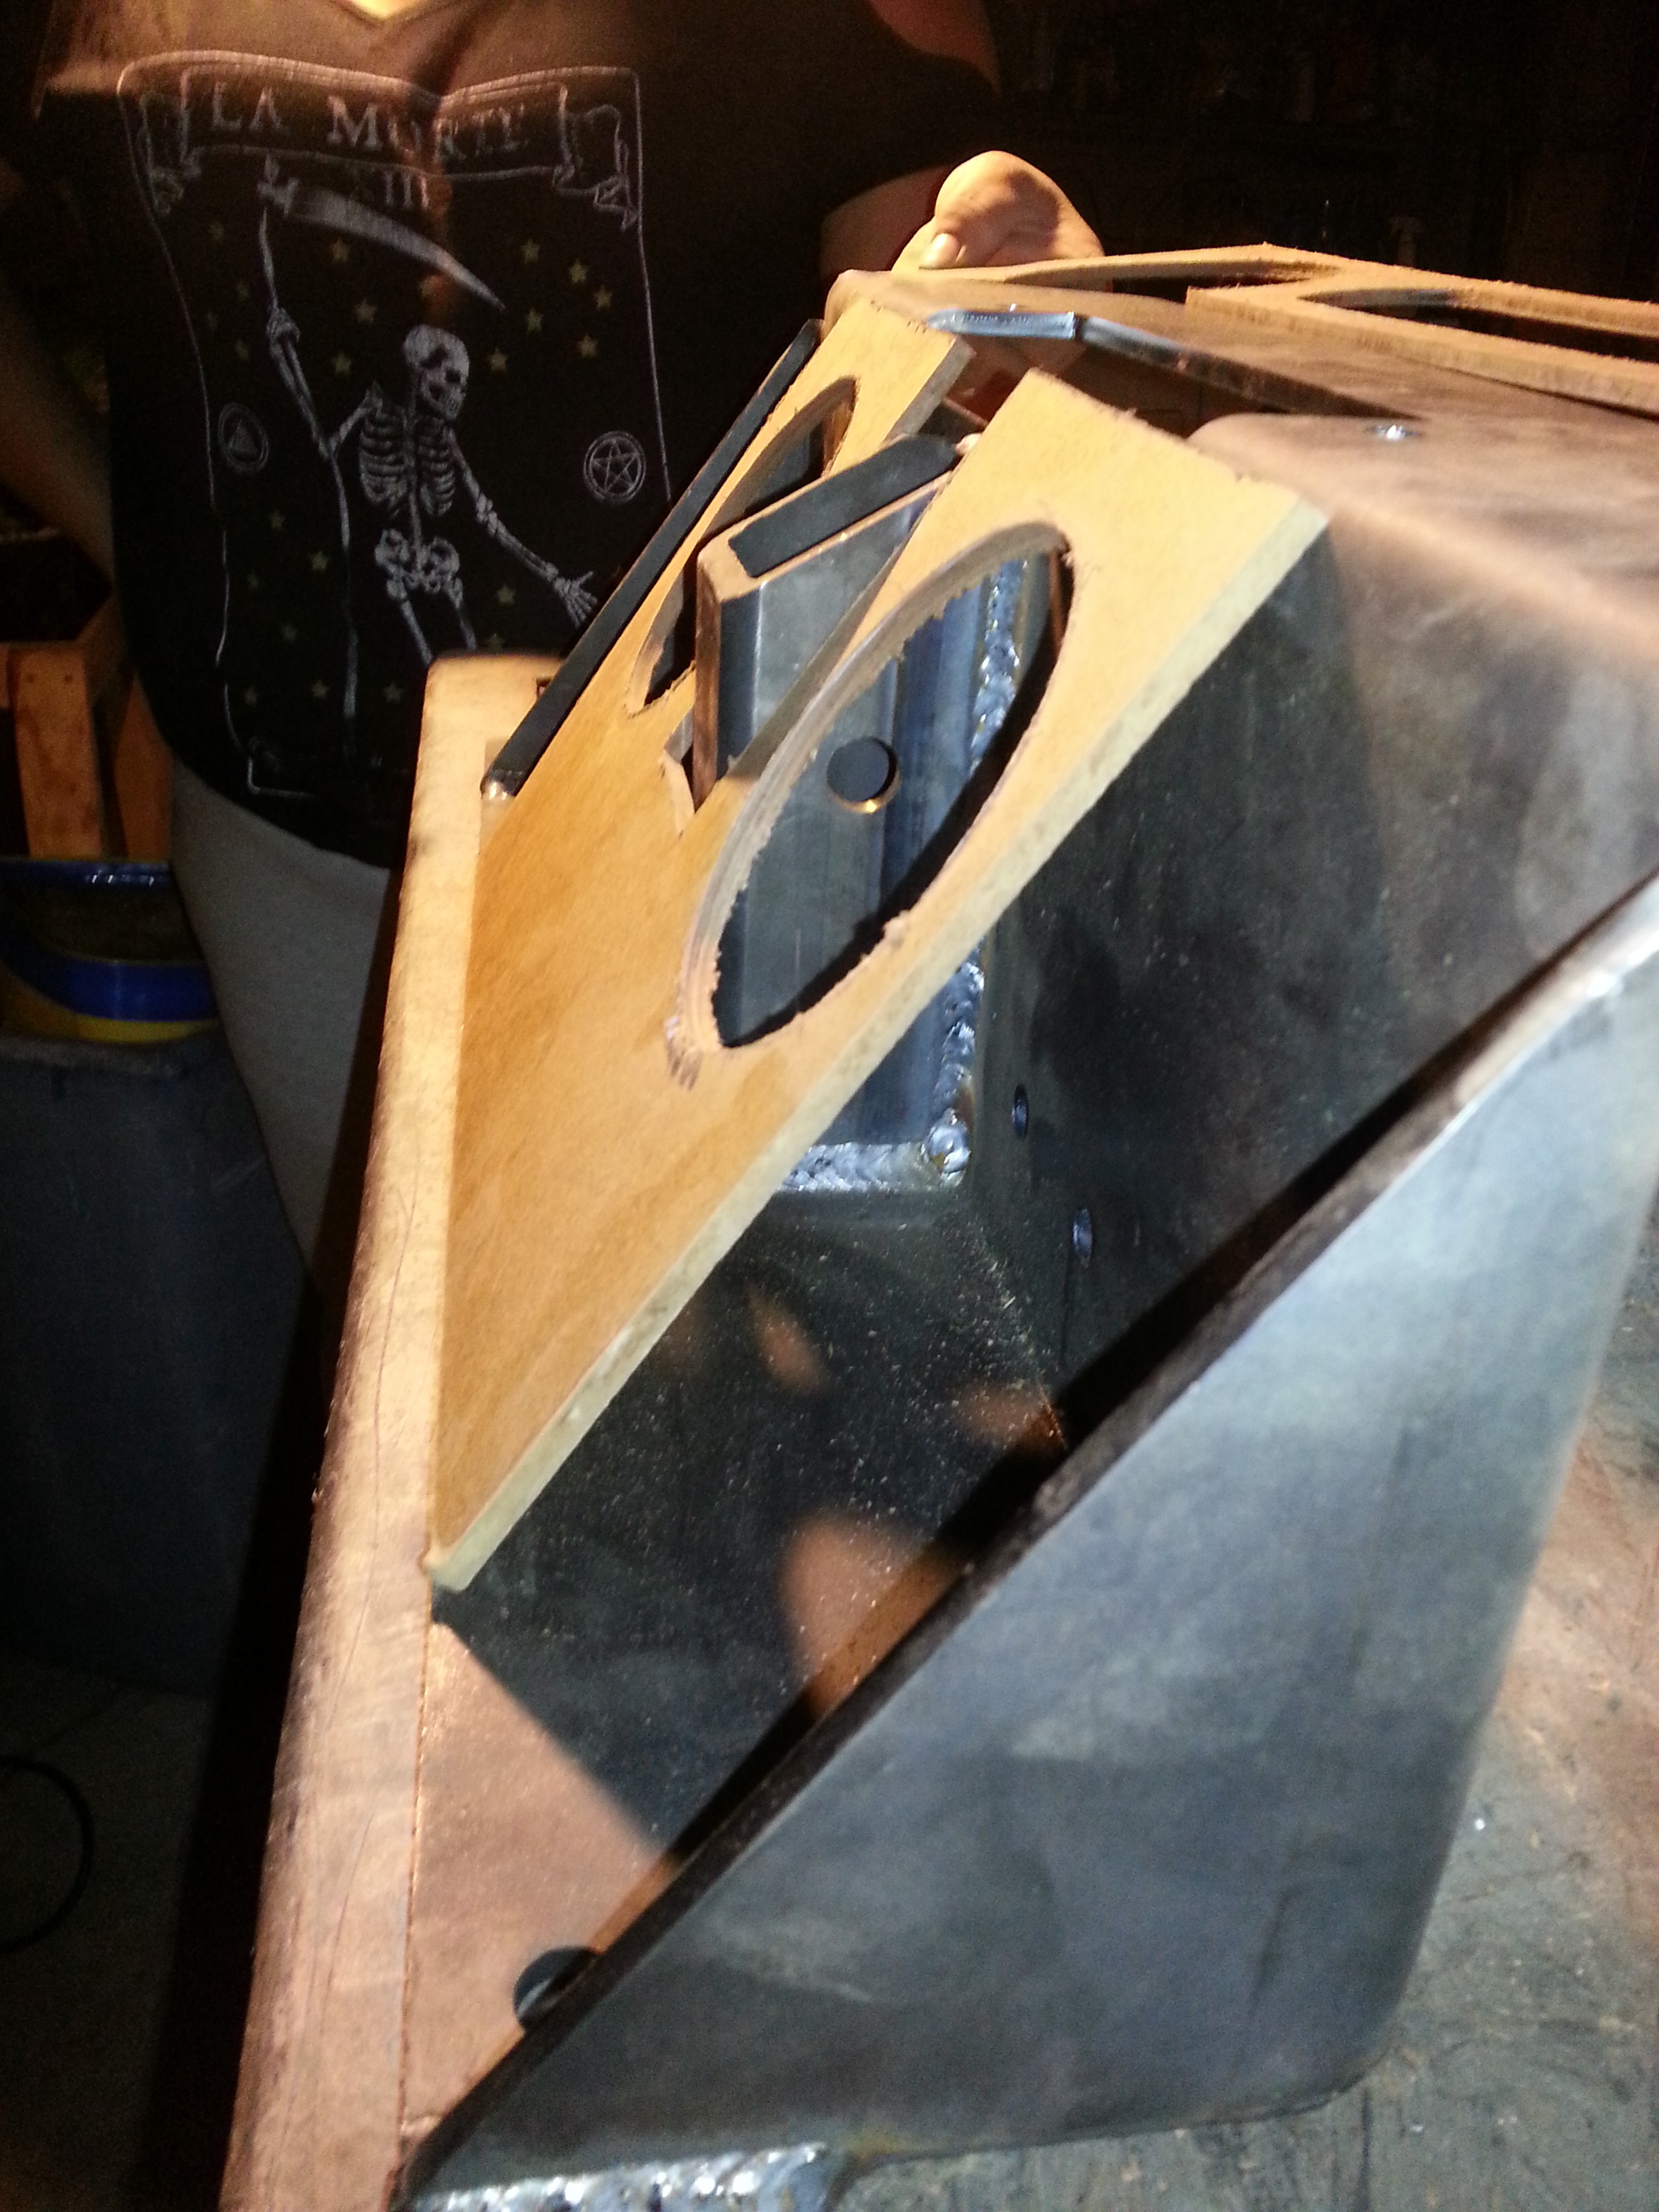
Air holes cut out on the center face of the bumper. Round holes are made by 4-1/4" hole saw. the oval one in the center was made by using the 2" hole saws then a jig-saw to cut from left to right.
The partial circles will later be cut onto the winch plate once i get the bumper made by plate steel. Going to need to weld it first then make the cut together to make them completely round.
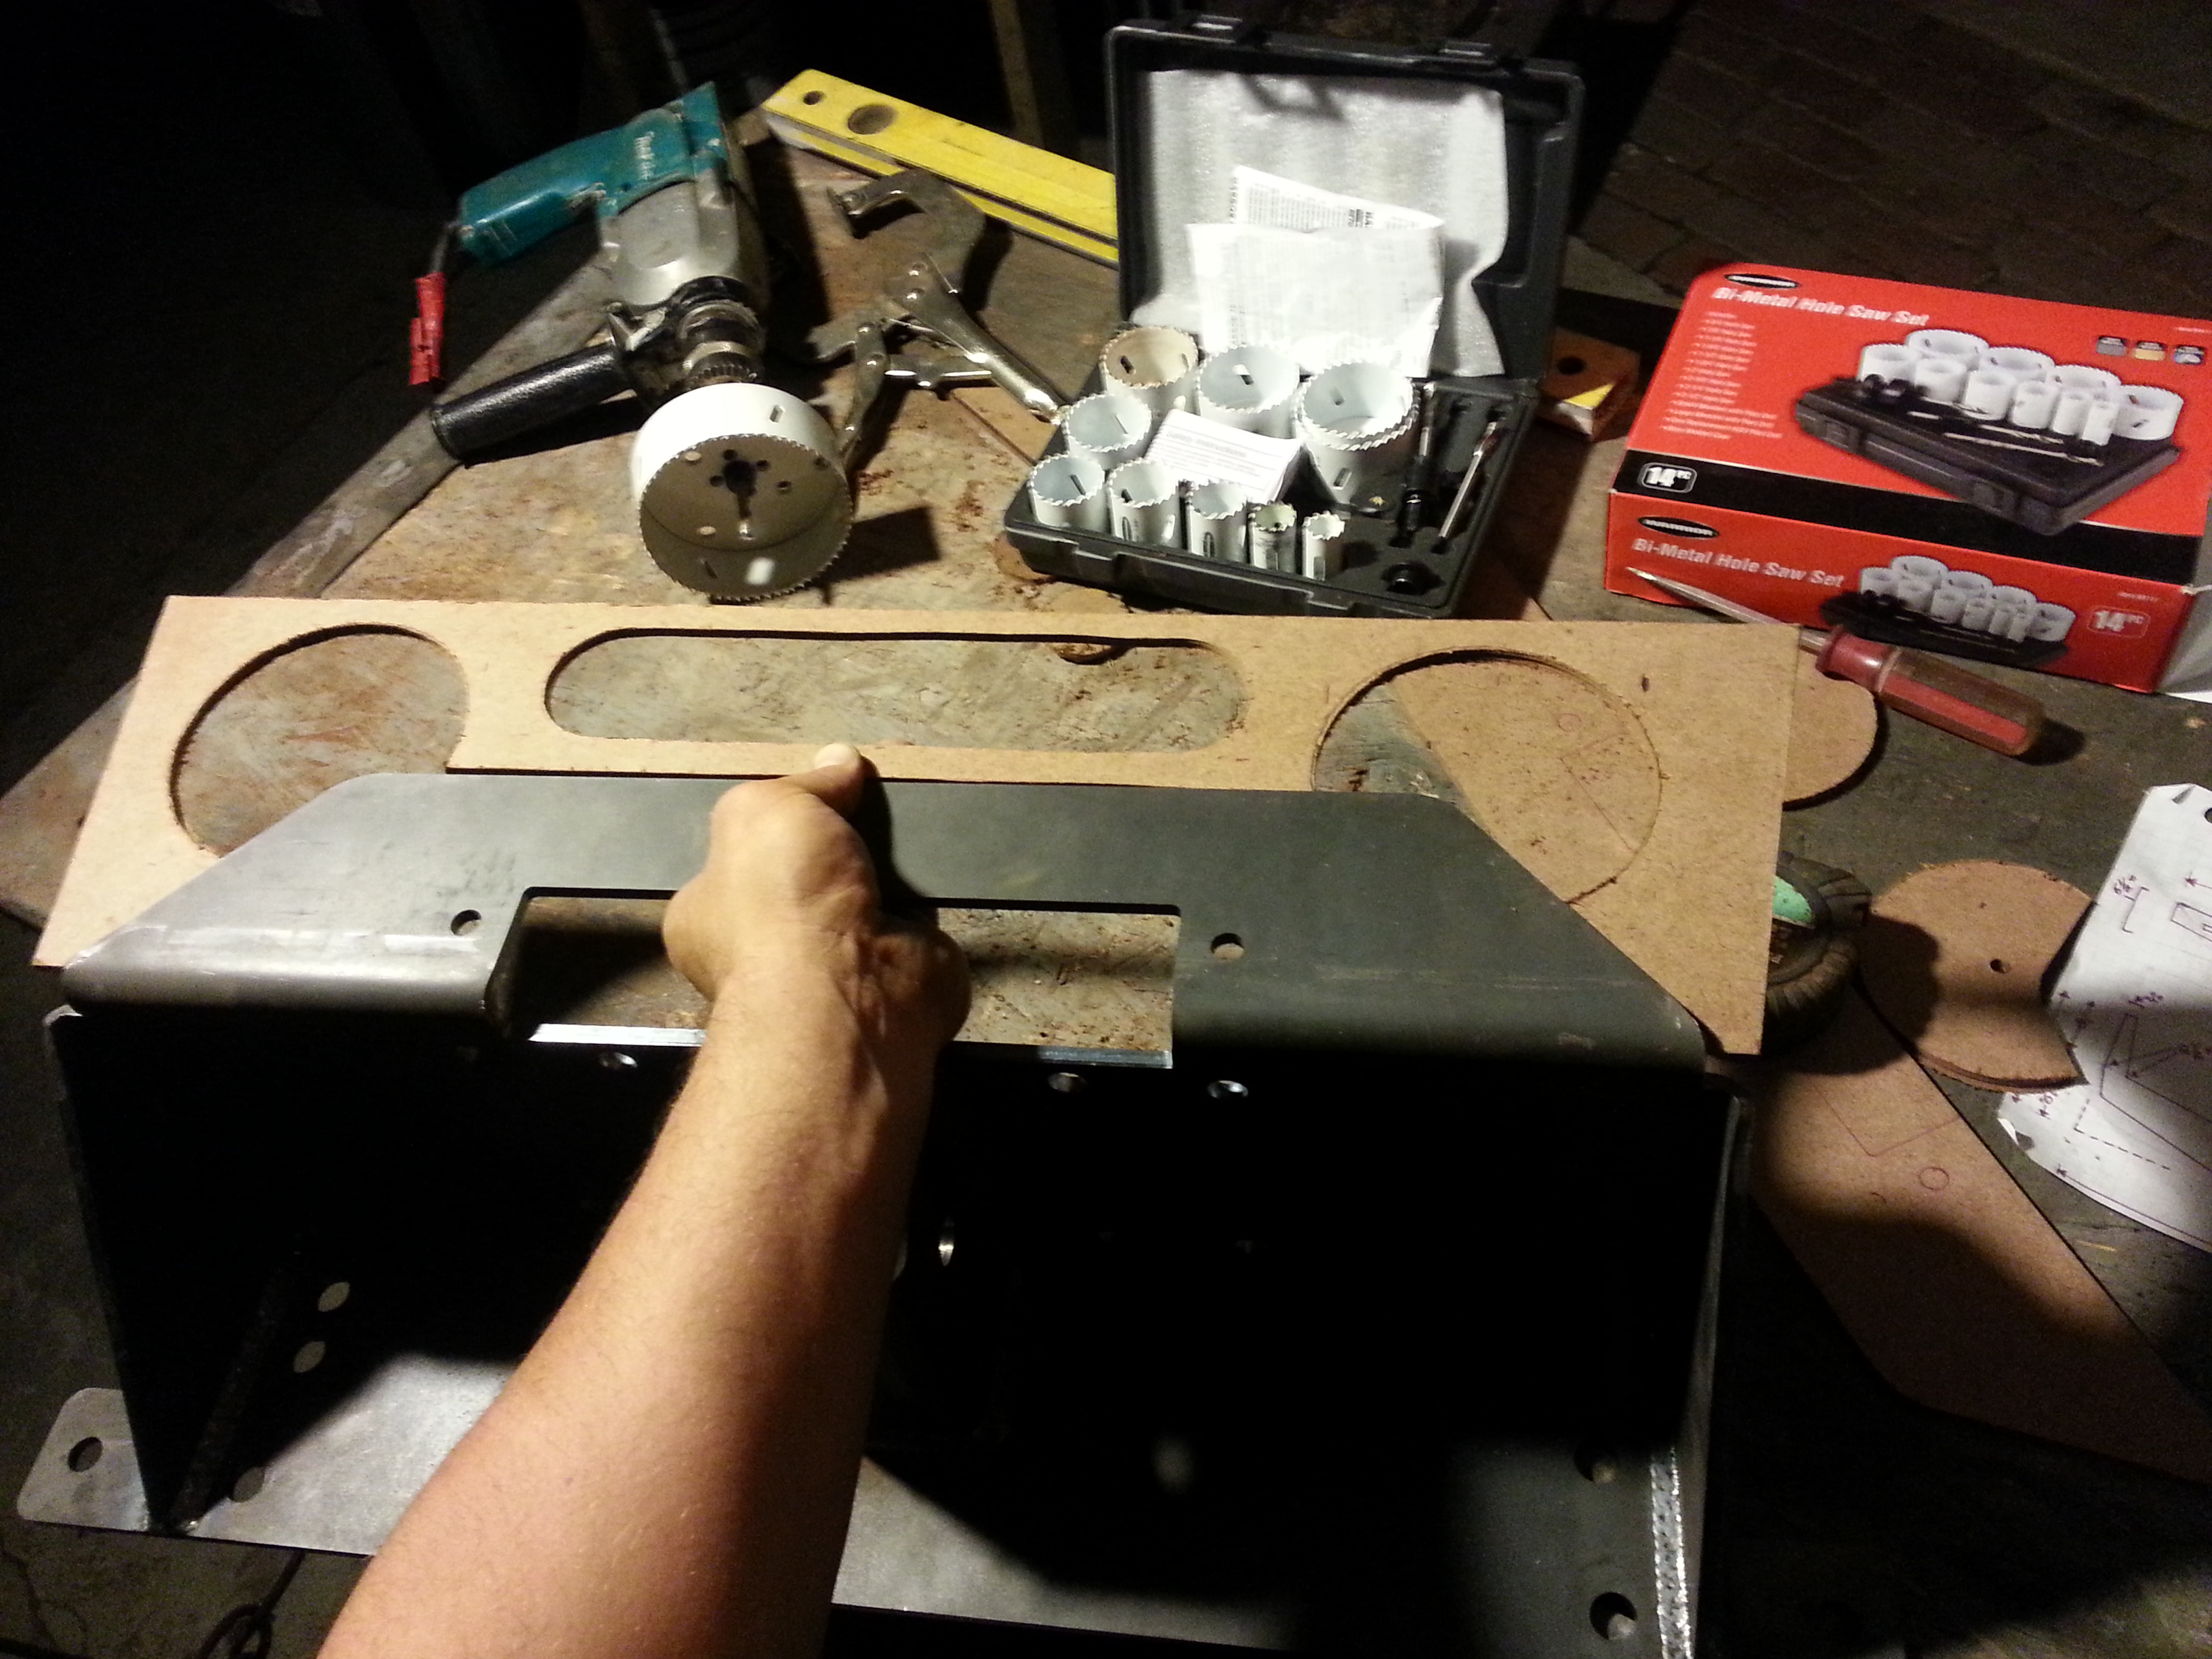
I also double checked to see how my LED lights were gonna fit with this 4-1/4" size. And as suspected they fit perfectly. [btw this is not where i'll have the lights; they will be placed on the side holes. This was just to make sure they were big enough]
Made a possible skid plate. Had to add holes so i could get to the hitch bolt and pin easier later on in the future. Not too sure how much i like the look of this one though. but it does look better then not having anything there at all.
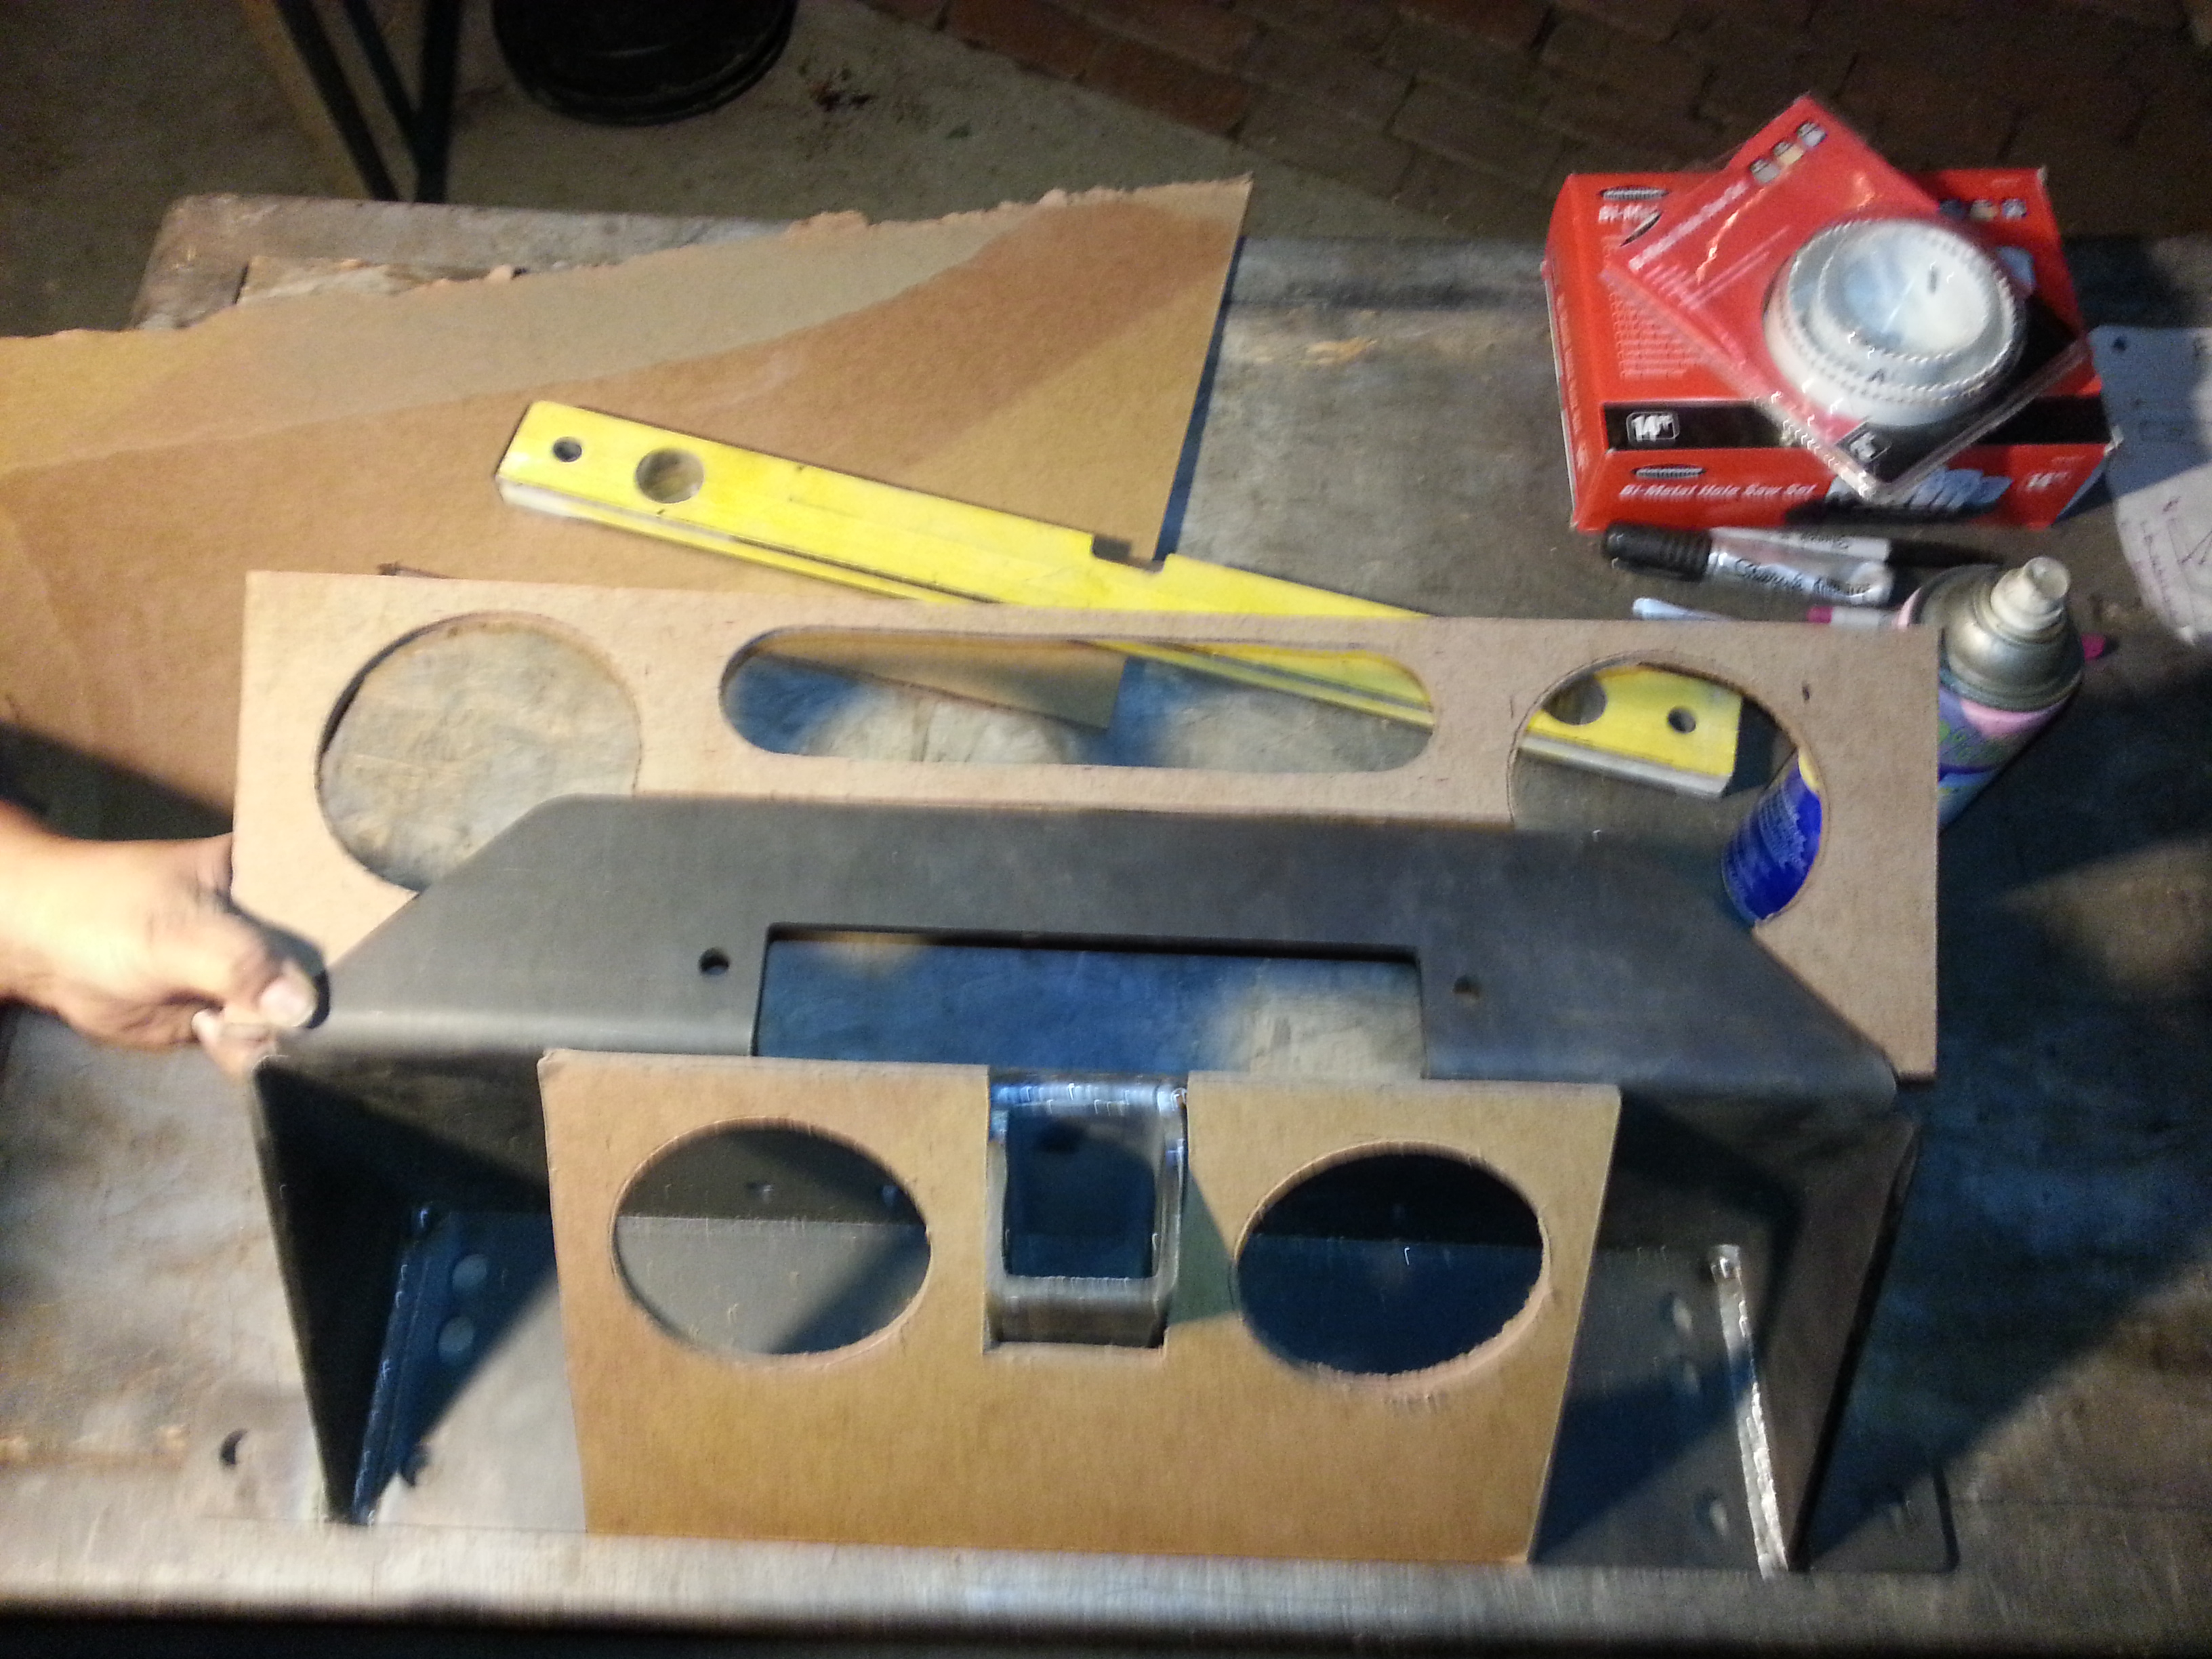
This is all that was accomplished today. Tomorrow i will try to get the sides and possibly the top side of the bumper too.
-----------------------------------------------------------------------------
I didnt get too many hours in to cutting out the parts to my prototype today but i did get the center of the bumper and possibly a skid plate thing to give a nicer look.
Startin' off with the 1/4" Masonite board.

Air holes cut out on the center face of the bumper. Round holes are made by 4-1/4" hole saw. the oval one in the center was made by using the 2" hole saws then a jig-saw to cut from left to right.
The partial circles will later be cut onto the winch plate once i get the bumper made by plate steel. Going to need to weld it first then make the cut together to make them completely round.

I also double checked to see how my LED lights were gonna fit with this 4-1/4" size. And as suspected they fit perfectly. [btw this is not where i'll have the lights; they will be placed on the side holes. This was just to make sure they were big enough]

Made a possible skid plate. Had to add holes so i could get to the hitch bolt and pin easier later on in the future. Not too sure how much i like the look of this one though. but it does look better then not having anything there at all.


This is all that was accomplished today. Tomorrow i will try to get the sides and possibly the top side of the bumper too.


