Intake/battery swap plus custom snorkel
 01-10-2010, 02:15 PM
#61
Registered User
Yeah, only bc vitaly put the hammer down. Chop chop!
 01-10-2010, 08:43 PM
#62
Contributing Member
Thread Starter
iTrader: (3)
Update, 10JAN10
Progress!!!
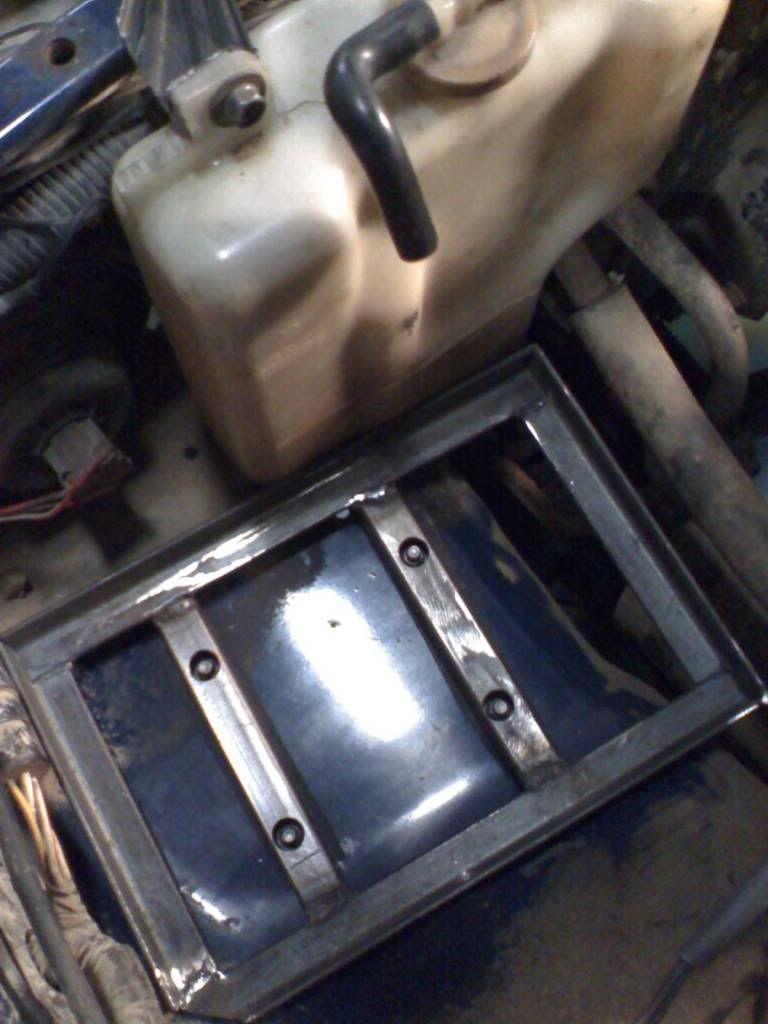
Today I got my new battery tray fabricated and mounted. I also modified my radiator overflow bottle mount bracket a smidgen to allow for the factory battery hold down bar to bolt to the existing nut that's there in the core support. The tray is held to the body by four bolts with fender washers and I put rubber stripping between the tray and body for some vib damping. I do have to add some small things to the battery tray and of course paint it. It is fully installed and holding the battery VERY securely!
I'm very happy with how it turned out. So, with the tray "done" and the filter box complete all that's left is to begin the wiring job.
01-16-2010, 07:41 PM
#67
Contributing Member
Thread Starter
iTrader: (3)
Update, 16JAN10
I did make some progress today mechanically, but not so much electrically.
Here's the new battery tray I made up. Still needs to be painted but I do like how it turned out. Simple. You can also note where I trimmed down the overflow mount to allow for the OEM battery hold down to clear and mount to the existing anchor nut. I may replace the little hose off the cap there with a longer one so it's doesn't dump all over the battery.
Here's a shot from the wheel well and the four mounting bolts with fender washers.
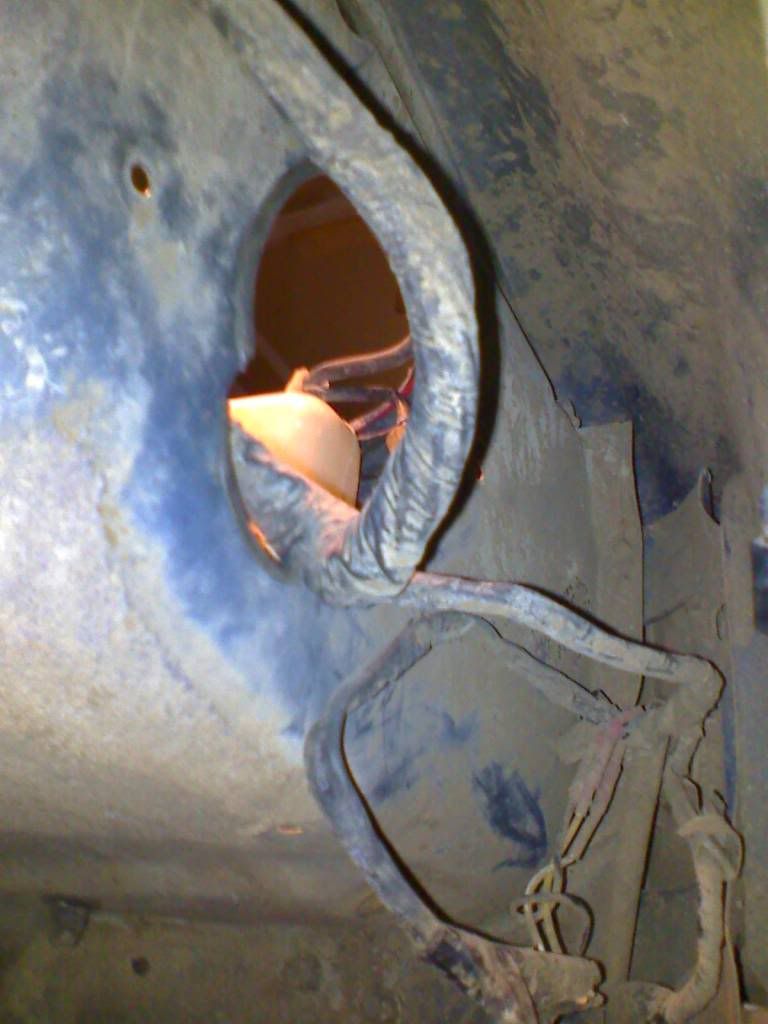
I began the fender exit air hose tubing adapter access hole by marking a base line off the filter box inlet. Since I'm WAY to cheap to buy a hole saw, I went ahead and drilled 1/2" holes in the perimeter and then used tin snips to remove whats left of the metal.
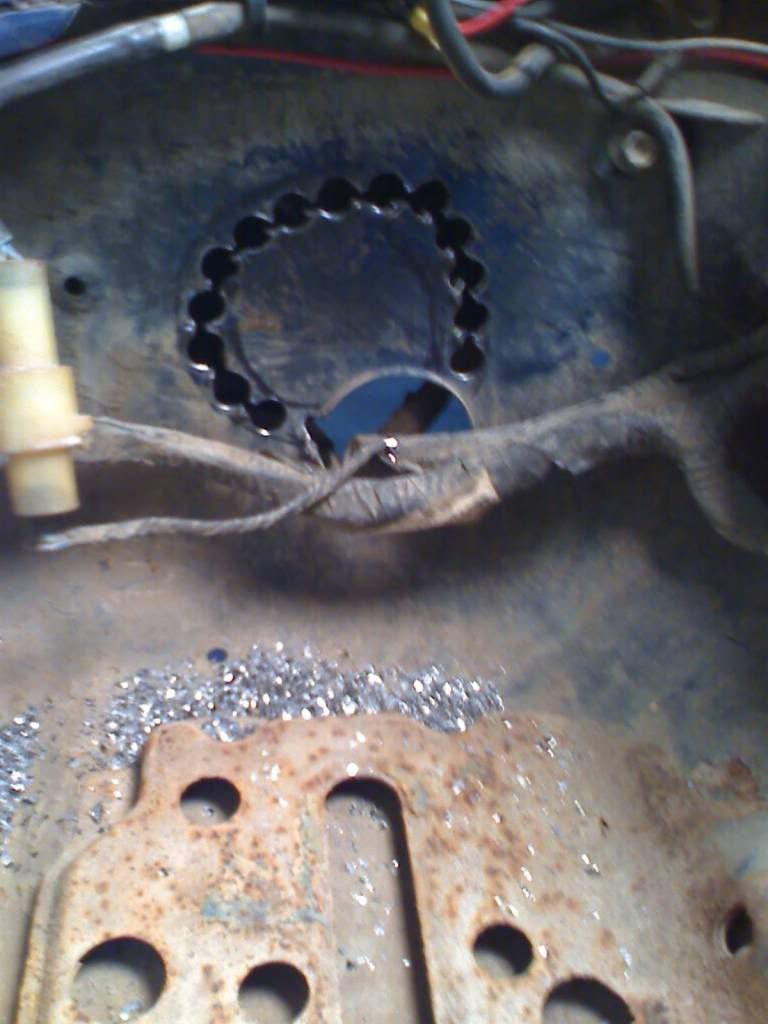
I then took my grinder and rounded out the hole being careful not to take out any wiring. I had some wee lattle rubber hose from who knows when and slit it down the middle as straight as I could. After I cut it down to size I pushed it over the edges of the hole to make one big grommet. I got the wiring loom to cooperate by gently massaging the thick wires and relocating one of the loom ties that's on the core support behind the windshield washer reservoir.

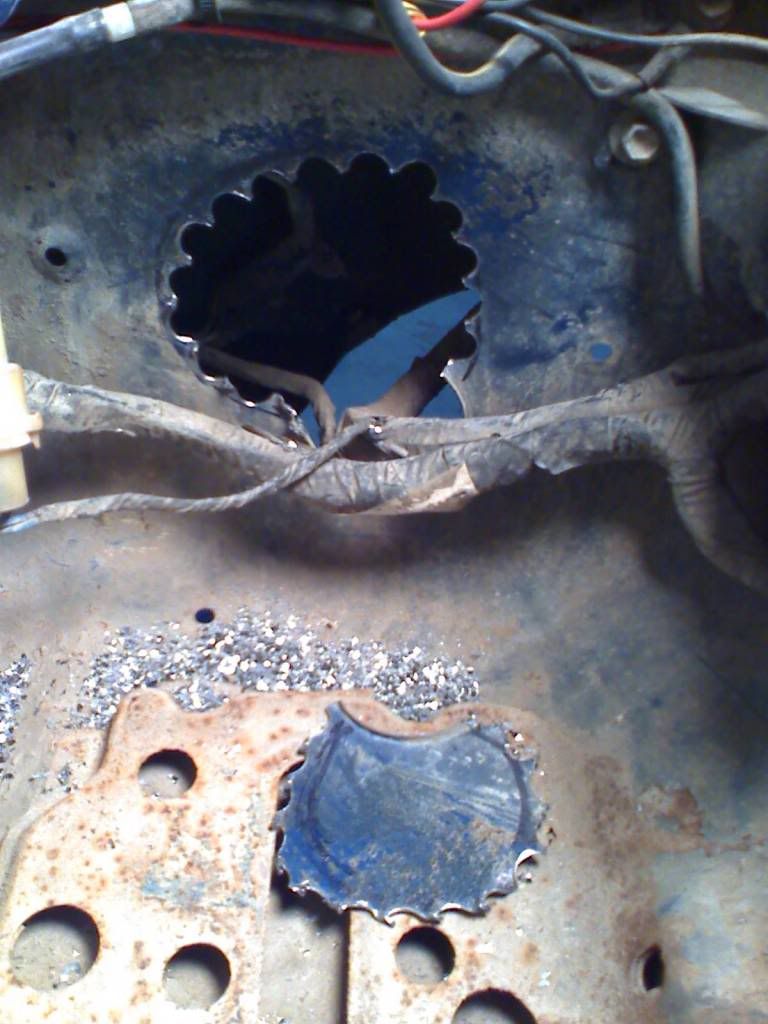
With the plastic fender liner removed you can see the exit.
WAH WAH WAAAAAAAH... <sigh> Well, apparently, I was a liiiiittle over zealous in my box fabrication. I thought that I had clearanced the original mockup foam box enough. I imagine that I did, but forgot to compensate for the hose adapters for the intake tube.
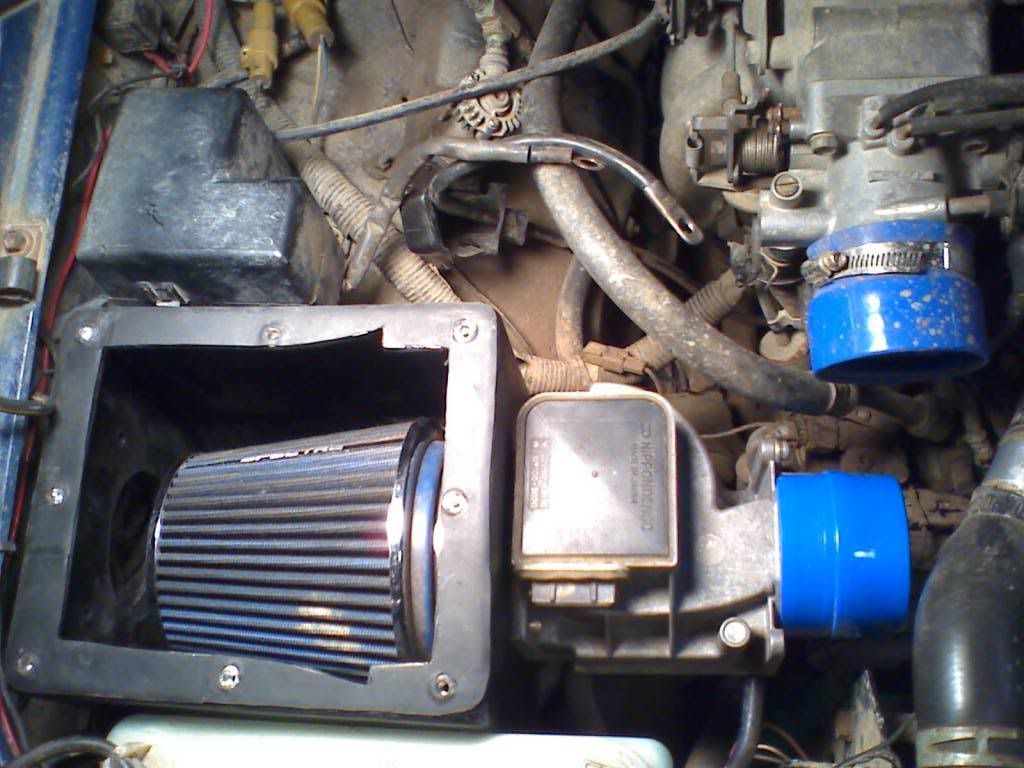
So, basically I have to come up with something REALLY clever to mate the intake up with the TB. idk. Also, I still have to replace the upper radiator hose and cut/modify that for my aux temp sender. Oh, and do the electrical too! LOL!!!
I also noticed that the aluminum rivnuts that I used for the box lid are, well, crap. We'll see how long they last. I may try to tighten them up being careful not to crack the fiberglass OR just make a new lid that clamps down or something. I'm a little concerned that the inlet on the filter box maybe too small still...
So, vitaly, how's that bumper of yours??

Here's the new battery tray I made up. Still needs to be painted but I do like how it turned out. Simple. You can also note where I trimmed down the overflow mount to allow for the OEM battery hold down to clear and mount to the existing anchor nut. I may replace the little hose off the cap there with a longer one so it's doesn't dump all over the battery.
Here's a shot from the wheel well and the four mounting bolts with fender washers.
I began the fender exit air hose tubing adapter access hole by marking a base line off the filter box inlet. Since I'm WAY to cheap to buy a hole saw, I went ahead and drilled 1/2" holes in the perimeter and then used tin snips to remove whats left of the metal.
I then took my grinder and rounded out the hole being careful not to take out any wiring. I had some wee lattle rubber hose from who knows when and slit it down the middle as straight as I could. After I cut it down to size I pushed it over the edges of the hole to make one big grommet. I got the wiring loom to cooperate by gently massaging the thick wires and relocating one of the loom ties that's on the core support behind the windshield washer reservoir.
With the plastic fender liner removed you can see the exit.
WAH WAH WAAAAAAAH...
<sigh> Well, apparently, I was a liiiiittle over zealous in my box fabrication. I thought that I had clearanced the original mockup foam box enough. I imagine that I did, but forgot to compensate for the hose adapters for the intake tube. So, basically I have to come up with something REALLY clever to mate the intake up with the TB. idk. Also, I still have to replace the upper radiator hose and cut/modify that for my aux temp sender. Oh, and do the electrical too! LOL!!!
I also noticed that the aluminum rivnuts that I used for the box lid are, well, crap. We'll see how long they last. I may try to tighten them up being careful not to crack the fiberglass OR just make a new lid that clamps down or something. I'm a little concerned that the inlet on the filter box maybe too small still...
So, vitaly, how's that bumper of yours??
01-17-2010, 09:35 AM
#70
Registered User
cool so your flip floping the locations......
do you plan to run a snokel out of some sort?
as far as hooking up that plumbing go to home depot and get some FERNCO ELBOWS they should work you might have to speical order a short sweep fernco elbow through a plumbing supply shop dependingon your measurements....
battery tray looks good and stout dont want your battery flopping around when you flop could arc and cause a fire losing the rig entirely due to a trail fire
01-17-2010, 09:57 AM
#73
Registered User
Nice work, good progress!! You are running out of real estate in there. Maybe if you had the "puppy filter" like I have then you wouldn't be running into this problem.
Sounds like bob has a line on how to get you connected again.
then you wouldn't be running into this problem. Sounds like bob has a line on how to get you connected again.
01-17-2010, 10:08 AM
#74
Contributing Member
Thread Starter
iTrader: (3)
cool so your flip floping the locations......
do you plan to run a snokel out of some sort?
as far as hooking up that plumbing go to home depot and get some FERNCO ELBOWS they should work you might have to special order a short sweep fernco elbow through a plumbing supply shop depending on your measurements....
battery tray looks good and stout dont want your battery flopping around when you flop could arc and cause a fire losing the rig entirely due to a trail fire
Yup, gonna try and running some tube inside the fender and out the cowling. We'll see. I'll try to make it to homedepot today and look for some fernco stuff.
Thanks! Yeah, it's a little tighter than I remembered! LOL!
Last edited by BigBluePile; 01-17-2010 at 10:09 AM.
01-17-2010, 01:53 PM
#75
Registered User
just so you know they make three types of DWV elbows
vent 90 - which is a very quick bend
regular 90 - which has a shallow bend
sweeping 90 - which has a deep sweeping bend
A spigot x hub vent 90 may just work shaving down the fitting may be needed but this fitting may be hard to find try Ferguson Enterprises or Keller supply if home depot and lowes fail you
now I measured the intakes OD it seems to be 2 7/8" thats not common to plumbing pipe
2" pipe OD is 2 1/2"
3" pipe OD is 3 1/2"
but a fernco rubber coupling can be heated to strectch if too small ( a bigger hose clamp is typically needed) or ratchet down on the hose clamp to seal if to big ( a smaller hose clamp is typically needed)
So I am saying I think a 2" rubber fernco regular 90 may work
or 2 - 2" rubber ferncos and a spigot x hub PVC or ABS 2" vent or regular 90
good luck man
Btw my EFI wiring is done on to the plumbing now wahoo!
Last edited by Plumbrbob; 01-17-2010 at 01:55 PM.
01-17-2010, 01:55 PM
#76
Registered User
oh yea you may be able to find something in the water pipe section 2 1/2" PVC 90 but connecting it may be diffucult you will have to stretch or shrink a fernco
01-17-2010, 02:39 PM
#77
Contributing Member
Thread Starter
iTrader: (3)
Rob, sounds good. I'll take a look at home depot and see what they have, maybe my local Ace might have something. Thanks for all the suggestions! If I can go with something rubber(fernco?) that will make it easier.
01-17-2010, 06:46 PM
#78
Registered User
fernco is the brand name of the fitting..its basically a rubber fitting or rubber coupling.... ace is spendy and limited on stock but its worth a try if its close by
The following users liked this post:
BigBluePile (02-25-2023)
01-17-2010, 06:57 PM
#80
Registered User
I told you this weekend trip could turn the tides on the mod race. But sounds like you got the materials to get going now!
The following users liked this post:
BigBluePile (02-25-2023)


