Toyota PickUp/4Runner Long Travel kit 86-95


 12-22-2012, 12:10 PM
#22
Registered User
JG,
Its looking pretty good! I like the boxed design. I hope I'm not coming off as a hater by calling this a "fly by night" but I've seen a few LTs for this application come and go. Its not a huge market, I sell 20 or so kits a year. I have heard Chaos is selling similar number. So lets say this decreasing market is consuming some 50 units. Its hard to say what the various "fly by nights" and "one off" builders are adding to that number but it can't be too many? I may make $300 in profit per kit x20 = $6k. Not much motivation to get too upset about another guy to share the pie with! This is not my day job, its just a hobbie. I think its cool to see these IFS rigs evolve and live on!
I have a few observations. I do not see Torsion Bar attachment options. Even if you match the $1K Blazeland price this means an automatic price jump to your customers of another $1k for Coil Over shocks, coil springs, and shock hoops- at a minimum! Coil over conversion is great for desert terrain but for trail or entry level it may not justify doubling the cost.
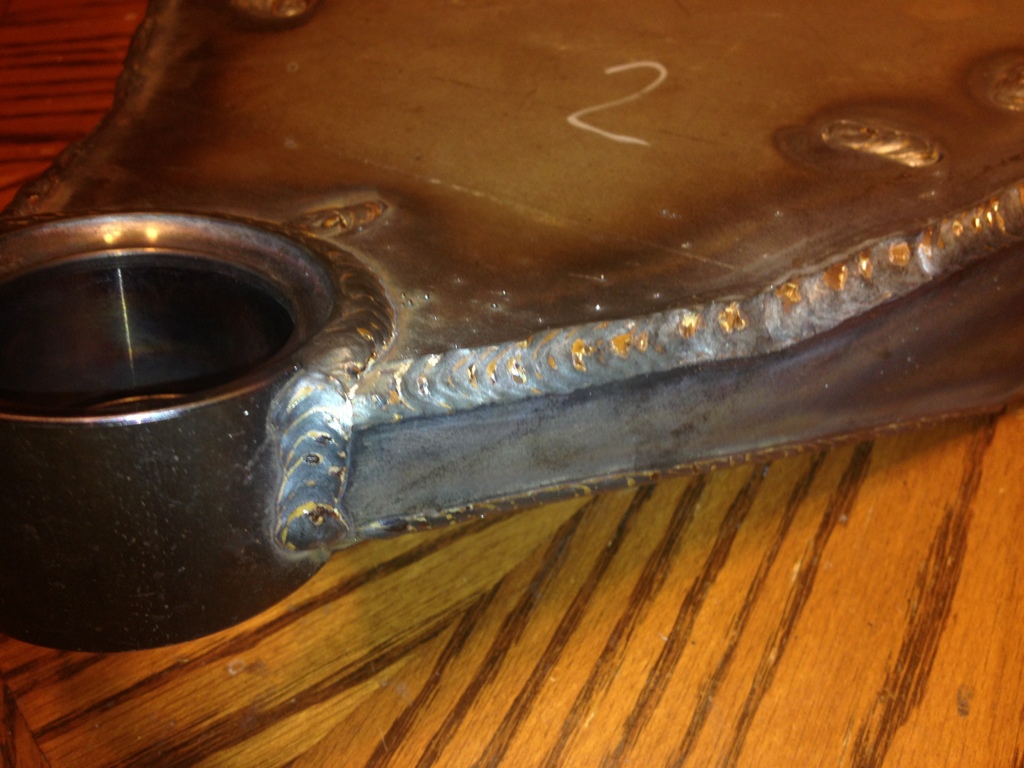
Next observation is bushing selection. I notice you are using the factory UCA cross shaft. What bushing assembly are you finding to do this? The factory bushing use a stepped and tapered profile along with some high quality hardware. This assembly supports lateral loads from braking much better than 90 degree shoulder bushings. The same argument can be said for the lower control arm bushings. The LCA factory bushings not only have tapers and steps they also use captured washers with knurls that create a large bearing surface. This grips the frame pocket and distributes the load, which creates a stronger assembly and holds the alignment cams locked into place.
I like using the factory upper and lower BJs for many reasons. Service life and replacement cost being a big one. I have yet to experience failure, neither from personal experience or from sixty odd customers over the past five years. I believe as long as you keep them in normal operating angles they hold up well. There is little need for maintenace as its a sealed and greasable unit.
I also like the factory Tie Rod Ends for the above mentioned reasons as well as you don't have to drill out the centerlink and steering arms to accept straight bolts. The tapered centerlink holes and rod ends are a nice design. The ability to replace the rod ends with over the counter low cost new ones is a good feature.
Suggestion on the LCA. You might consider adding adjustable wheel stops like on factory LCAs. These will protect steering coponents from breakage. And it allows you set them how ever you need to eliminate binding of various componets as well as tire rubbing issues.
Lastly, I am wondering if the pocket opening on the LCA is deep enough to allow removal and installation of the CV assembly. It looks a bit shallow which might create some difficulty in removal / installation.
So there you have my two cents! It will be interesting to see how your creation aligns? Post a computerized alignment spec so we can see the geometry characteristics. Keep us up to date with field testing. I think interested parties would like to see a few kits tested over time to get a feel for durability. For my design I spent around one year with 4-5 kits before I was confident to offer a production version. Even then I was a little nervous for a while. I think it was about two years and 20 kits till I really felt relaxed.
Its looking pretty good! I like the boxed design. I hope I'm not coming off as a hater by calling this a "fly by night" but I've seen a few LTs for this application come and go. Its not a huge market, I sell 20 or so kits a year. I have heard Chaos is selling similar number. So lets say this decreasing market is consuming some 50 units. Its hard to say what the various "fly by nights" and "one off" builders are adding to that number but it can't be too many? I may make $300 in profit per kit x20 = $6k. Not much motivation to get too upset about another guy to share the pie with! This is not my day job, its just a hobbie. I think its cool to see these IFS rigs evolve and live on!
I have a few observations. I do not see Torsion Bar attachment options. Even if you match the $1K Blazeland price this means an automatic price jump to your customers of another $1k for Coil Over shocks, coil springs, and shock hoops- at a minimum! Coil over conversion is great for desert terrain but for trail or entry level it may not justify doubling the cost.
Next observation is bushing selection. I notice you are using the factory UCA cross shaft. What bushing assembly are you finding to do this? The factory bushing use a stepped and tapered profile along with some high quality hardware. This assembly supports lateral loads from braking much better than 90 degree shoulder bushings. The same argument can be said for the lower control arm bushings. The LCA factory bushings not only have tapers and steps they also use captured washers with knurls that create a large bearing surface. This grips the frame pocket and distributes the load, which creates a stronger assembly and holds the alignment cams locked into place.
I like using the factory upper and lower BJs for many reasons. Service life and replacement cost being a big one. I have yet to experience failure, neither from personal experience or from sixty odd customers over the past five years. I believe as long as you keep them in normal operating angles they hold up well. There is little need for maintenace as its a sealed and greasable unit.
I also like the factory Tie Rod Ends for the above mentioned reasons as well as you don't have to drill out the centerlink and steering arms to accept straight bolts. The tapered centerlink holes and rod ends are a nice design. The ability to replace the rod ends with over the counter low cost new ones is a good feature.
Suggestion on the LCA. You might consider adding adjustable wheel stops like on factory LCAs. These will protect steering coponents from breakage. And it allows you set them how ever you need to eliminate binding of various componets as well as tire rubbing issues.
Lastly, I am wondering if the pocket opening on the LCA is deep enough to allow removal and installation of the CV assembly. It looks a bit shallow which might create some difficulty in removal / installation.
So there you have my two cents! It will be interesting to see how your creation aligns? Post a computerized alignment spec so we can see the geometry characteristics. Keep us up to date with field testing. I think interested parties would like to see a few kits tested over time to get a feel for durability. For my design I spent around one year with 4-5 kits before I was confident to offer a production version. Even then I was a little nervous for a while. I think it was about two years and 20 kits till I really felt relaxed.
Last edited by BlazeN8; 12-22-2012 at 04:58 PM.
The following users liked this post:
Andrew Parker (09-11-2020)
12-23-2012, 09:07 PM
#23
Registered User
Thread Starter
Join Date: Mar 2011
Location: Riverside Ca
Posts: 38
Likes: 0
Received 0 Likes
on
0 Posts
Blazen8 right on on you two cents
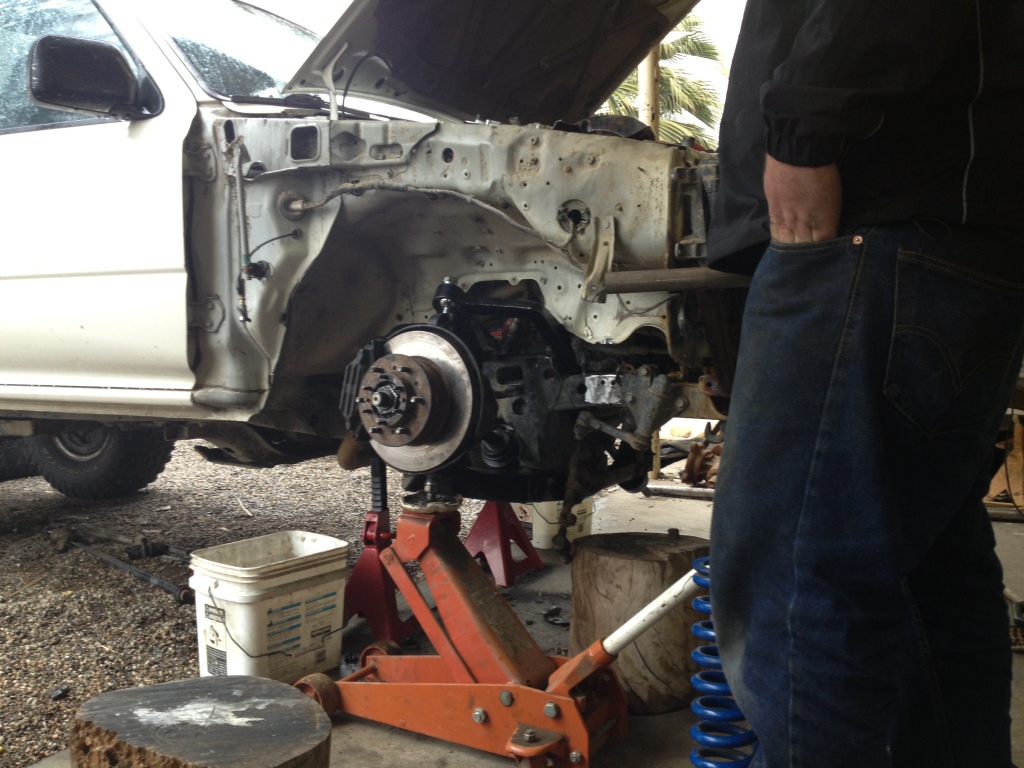
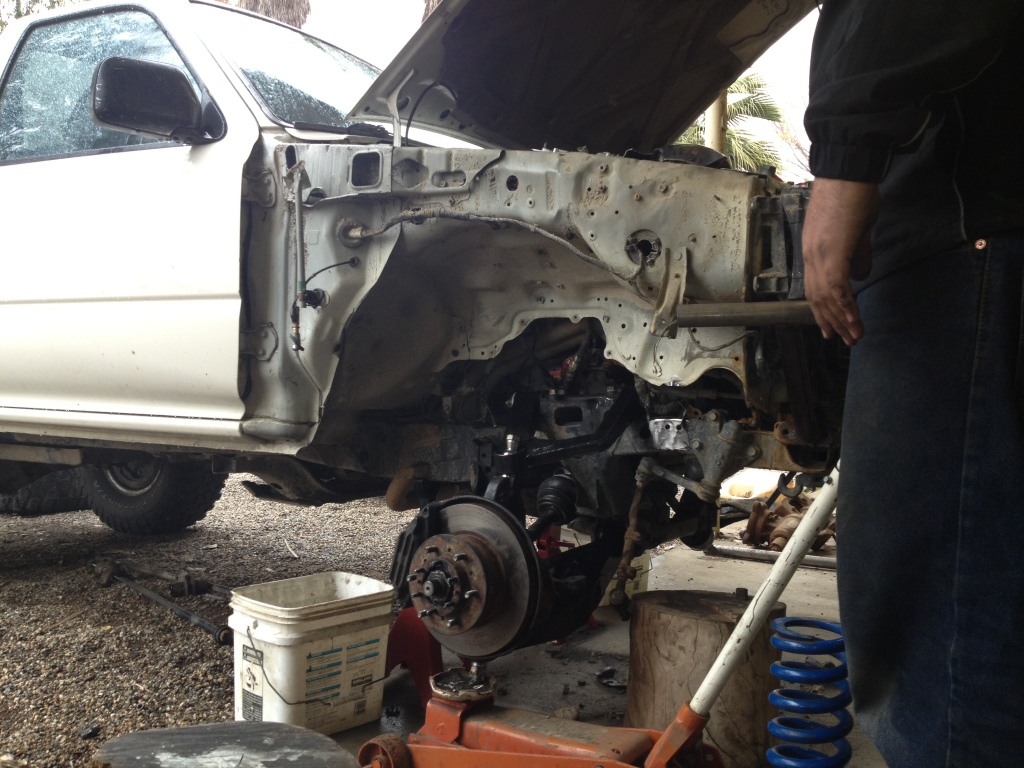
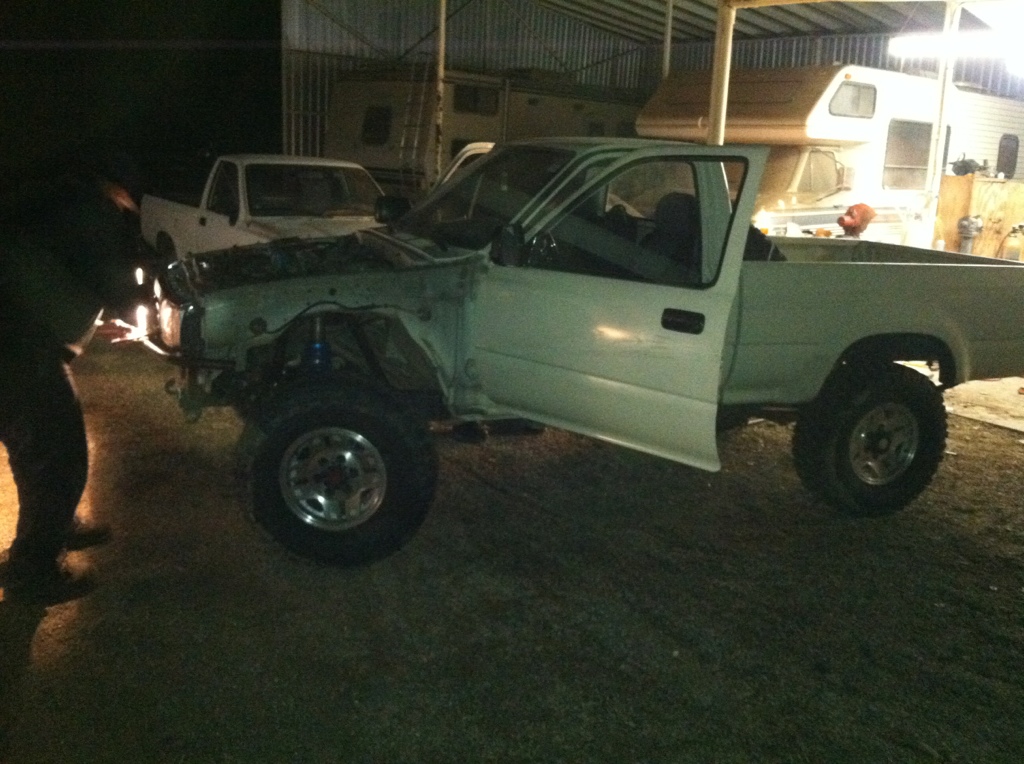
Our customer dropped his truck off to us yesterday
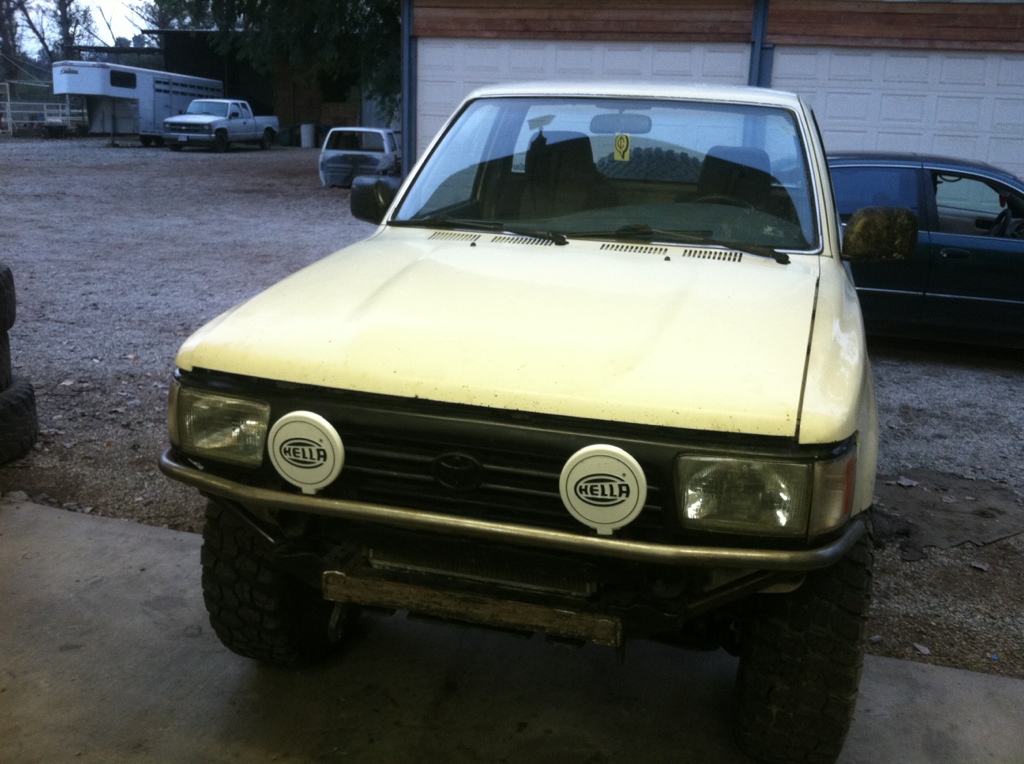
we have done 0 prior work to this truck, how you see is how we received it
We started the brake down of the truck
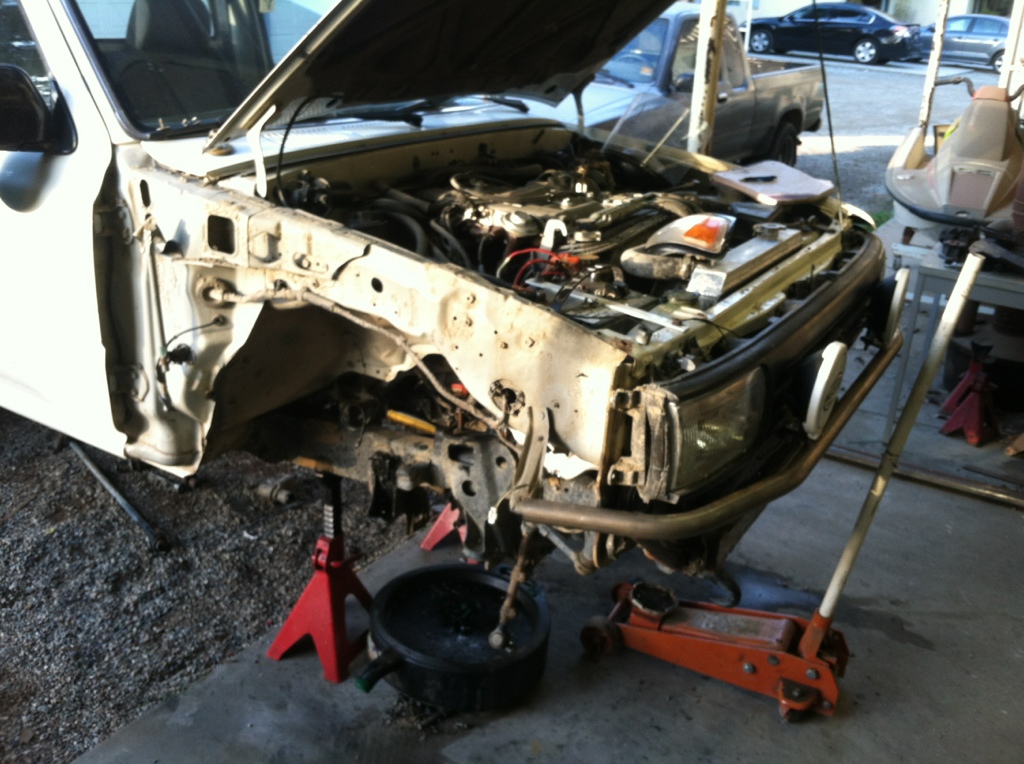
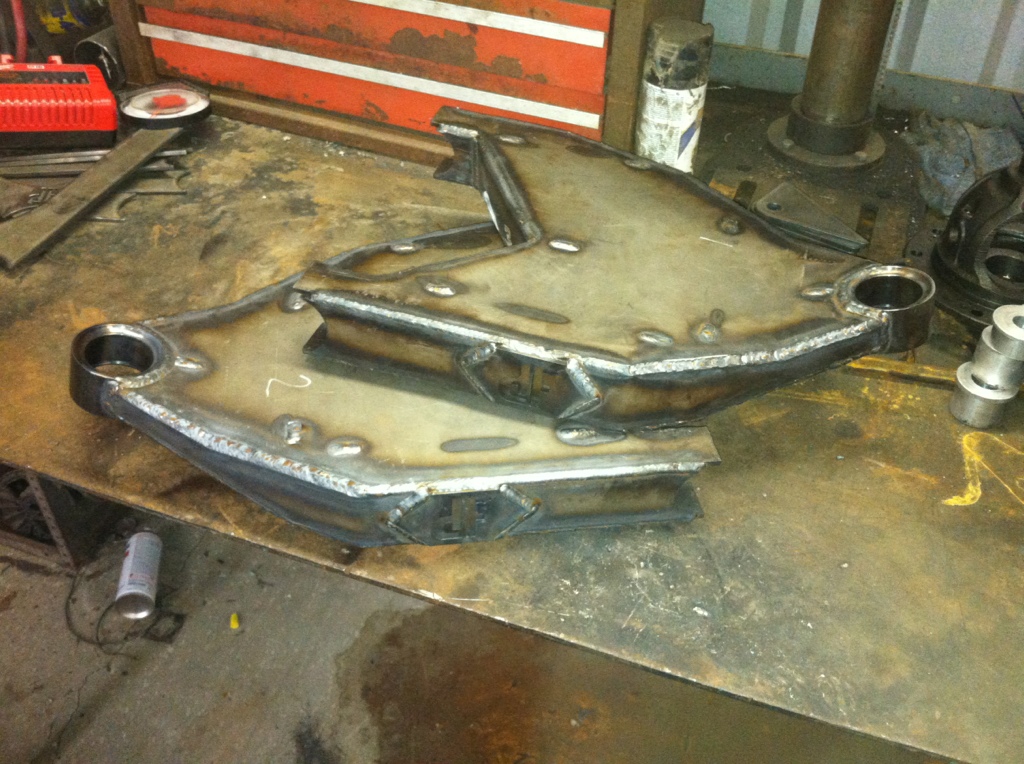
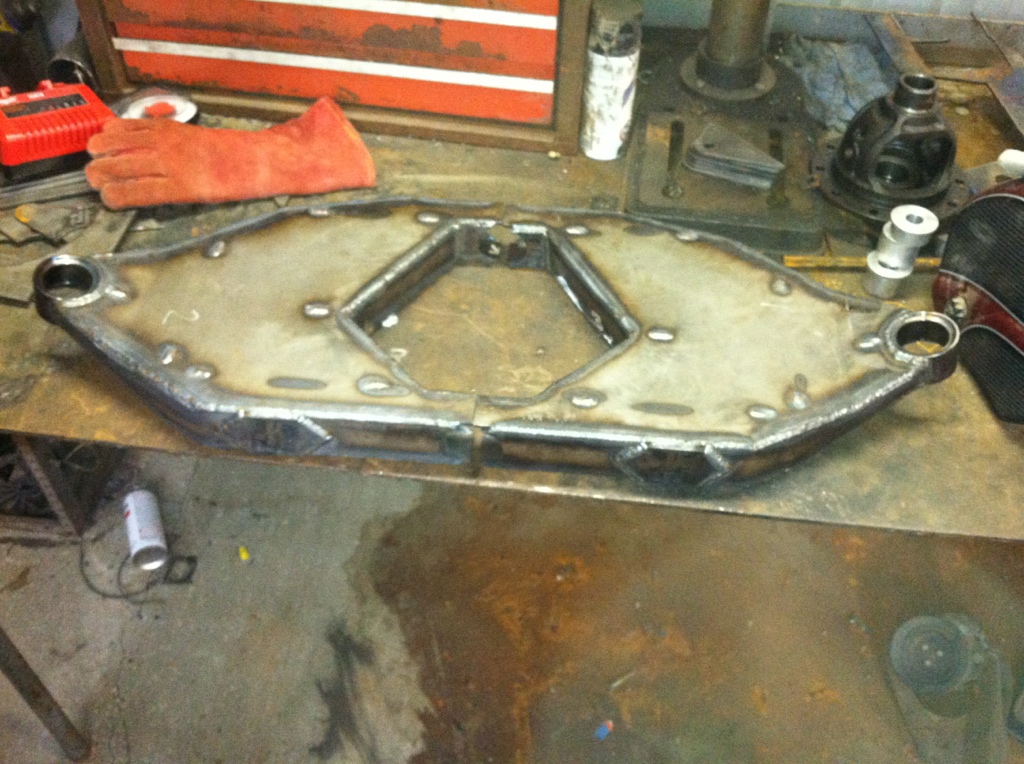
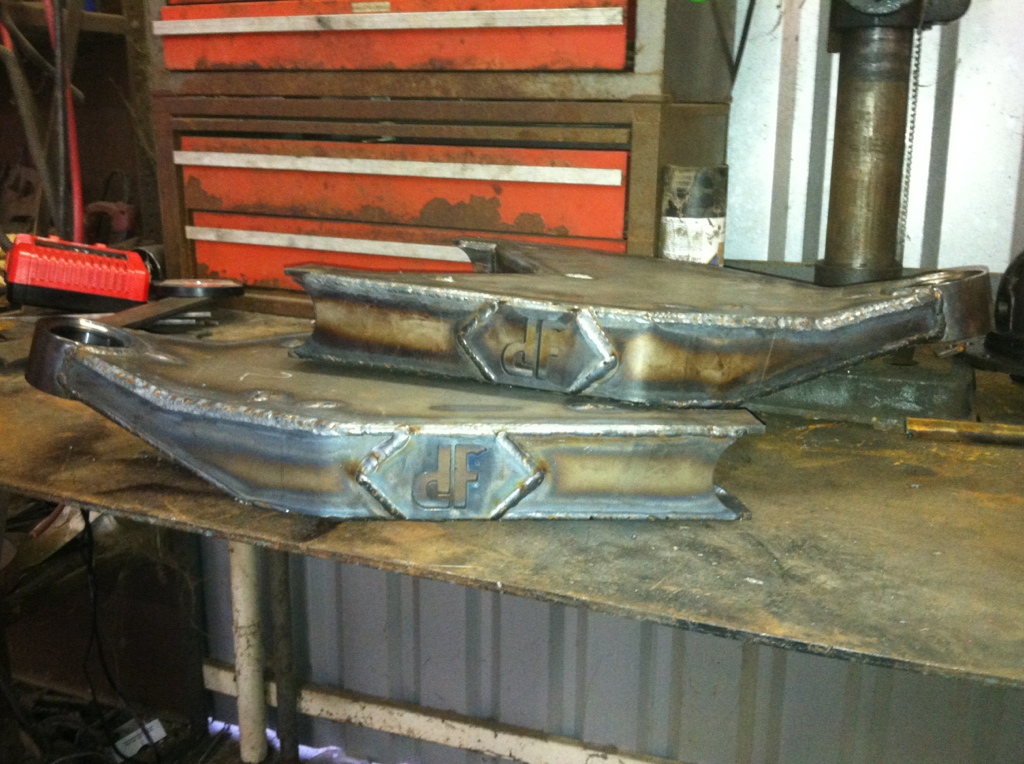
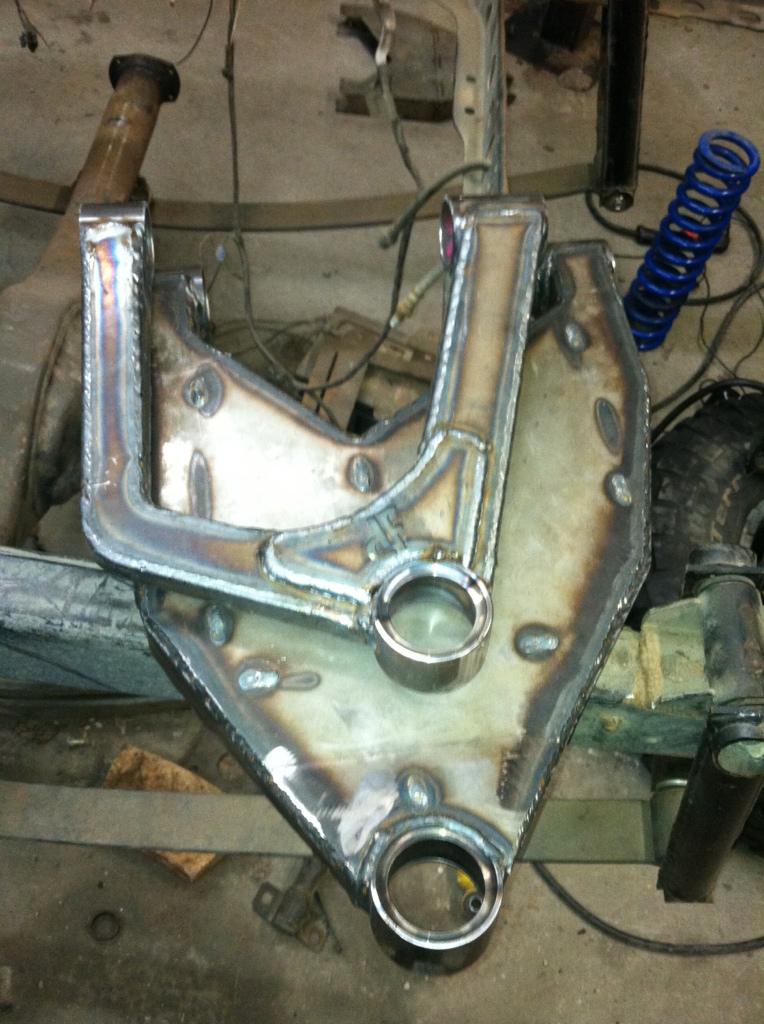
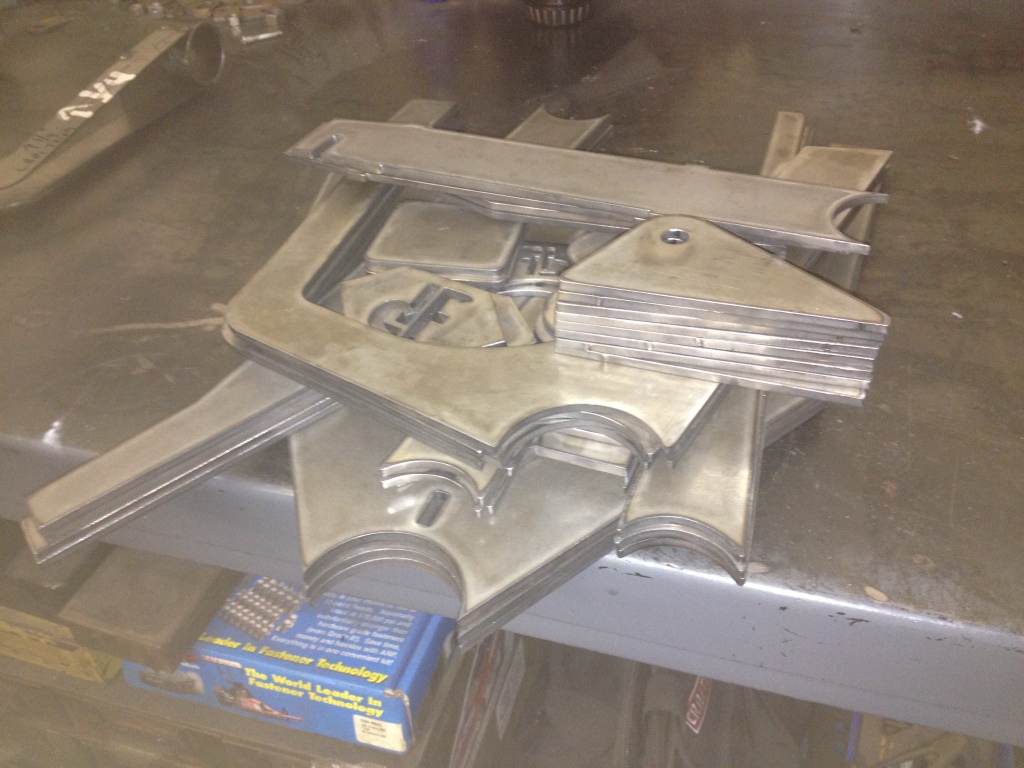
Here is our kit completely cut out, we will start the assemble after Christmas the next few days will be family time

This kit is designed to run a coilover and bypass shock but if a customer would like to run a torsion bar we can add that feature with no problem, we would just have to know when ordered.
Our customer dropped his truck off to us yesterday
we have done 0 prior work to this truck, how you see is how we received it
We started the brake down of the truck
Here is our kit completely cut out, we will start the assemble after Christmas the next few days will be family time
This kit is designed to run a coilover and bypass shock but if a customer would like to run a torsion bar we can add that feature with no problem, we would just have to know when ordered.
12-24-2012, 01:10 PM
#24
Registered User
No problem! Well if you get someone who is looking for something a bit less extreme and more budget friendly turn them onto Blazeland. I get people contacting me all the time who are looking for the next level and I send them to Chaos, but another alternative is always nice. Do you have a price structure figured out?

 12-31-2012, 07:13 AM
#31
Registered User
Welds look good! Its comming along! Throw a tape measure on there and post up some numbers. I see your cycling it at metal to metal on the factory bump and droop stop brackets- good! And the T-100 axle is in place. When you spin the hub is anything binding at stuff or droop in the CV? How are the Uniball clearances looking? I would think Uniballs should beat out factory B.J. working limits. Don't forget to turn the steering lock to lock as that is also a factor in finding what binds. Are you planning a heim joint steering linkage? How about wheel stops?
Here are a couple of photos I took of one of my early prototypes during mock up back in 2007. The UCA in this one didn't use the factory cross shaft and it had a little different UCA length as well as pivot location. The steering linkage was also moved further towards the middle on the centerlink. I dropped down the differential assembly 1.5" which helped but the CVs would still bind slightly. The angle was ok, the problem was it ran out of plunge and bottomed out. I built another version with longer UCAs / LCAs that corrected this but the track width was just getting too wide.
The photos below show 25.75" compressed and 12.75" extended- netting 13 inches of wheel travel. Because I wanted 4WD and I couldn't afford custom CVs I decided all the extra complications were not worth 1.5" inch of additional wheel travel so I went back to the traditional geometry using the factory cross shaft.
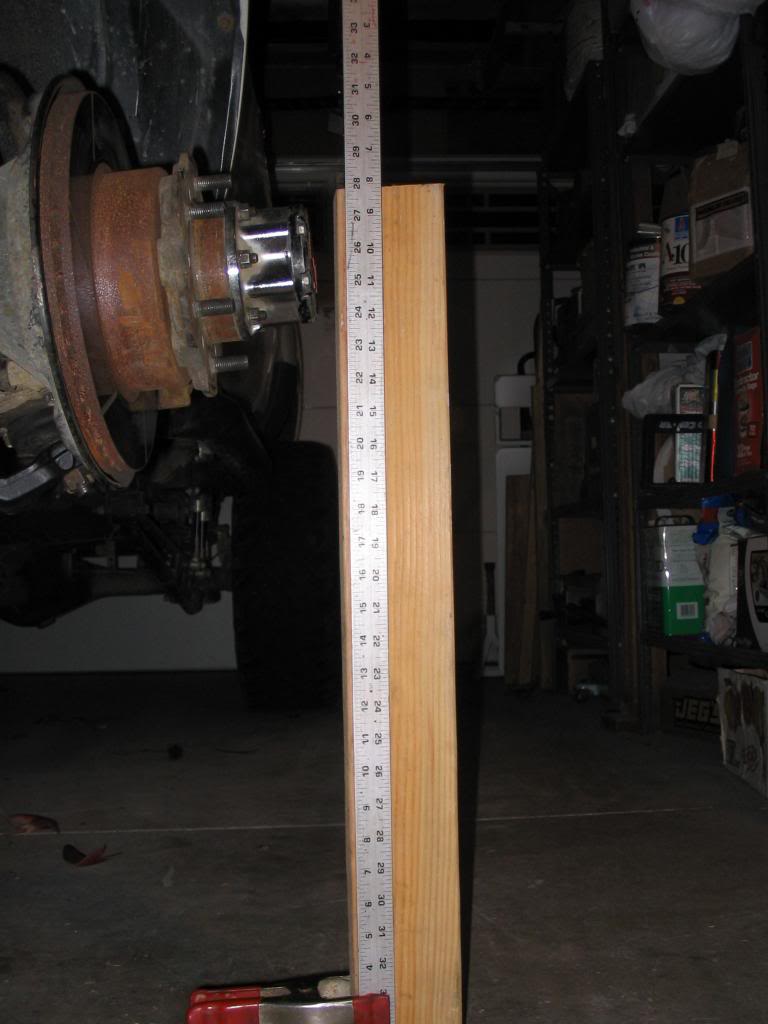
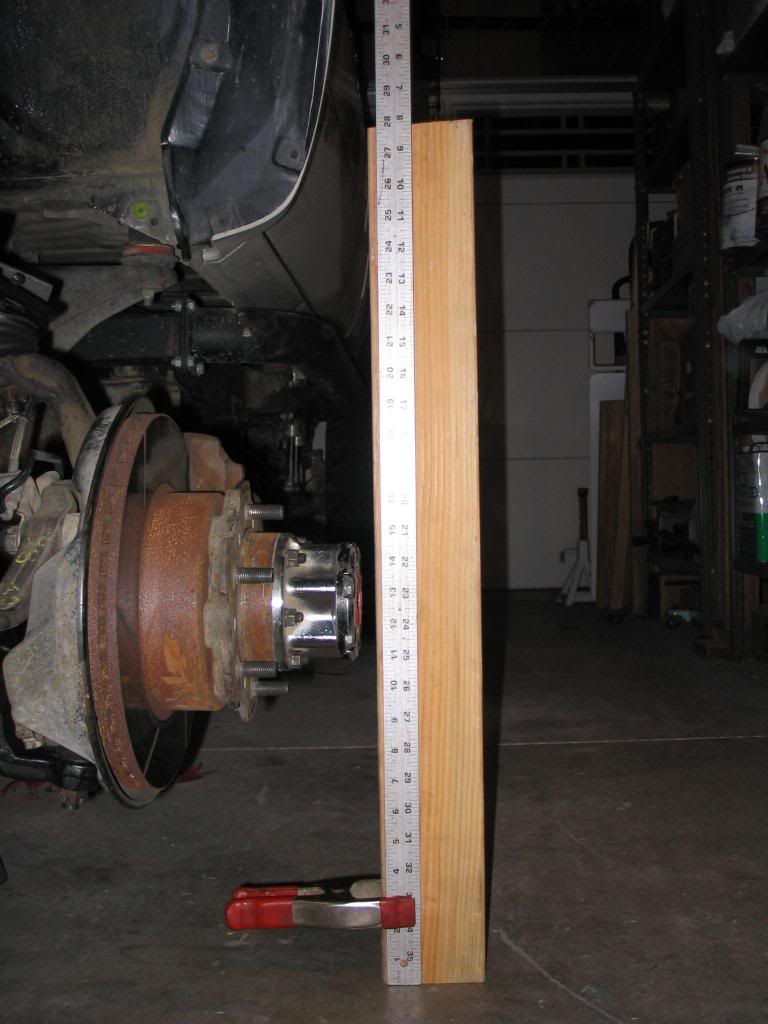
The following users liked this post:
Andrew Parker (09-11-2020)
01-07-2013, 06:07 AM
#33
Registered User
Thread Starter
Join Date: Mar 2011
Location: Riverside Ca
Posts: 38
Likes: 0
Received 0 Likes
on
0 Posts
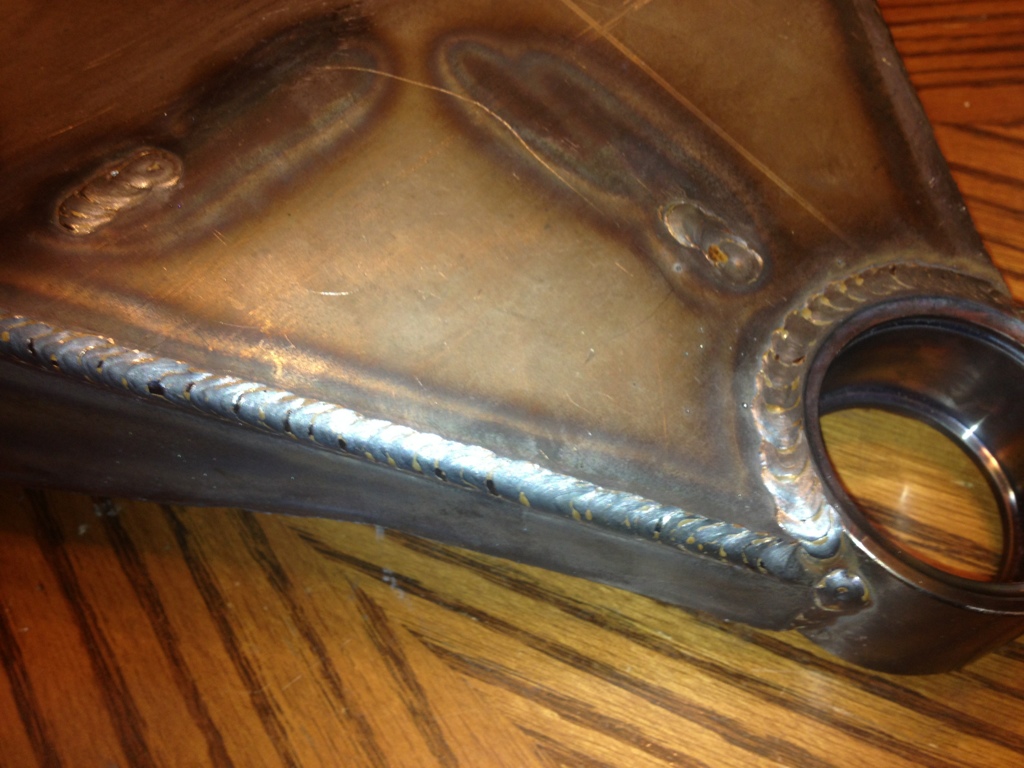
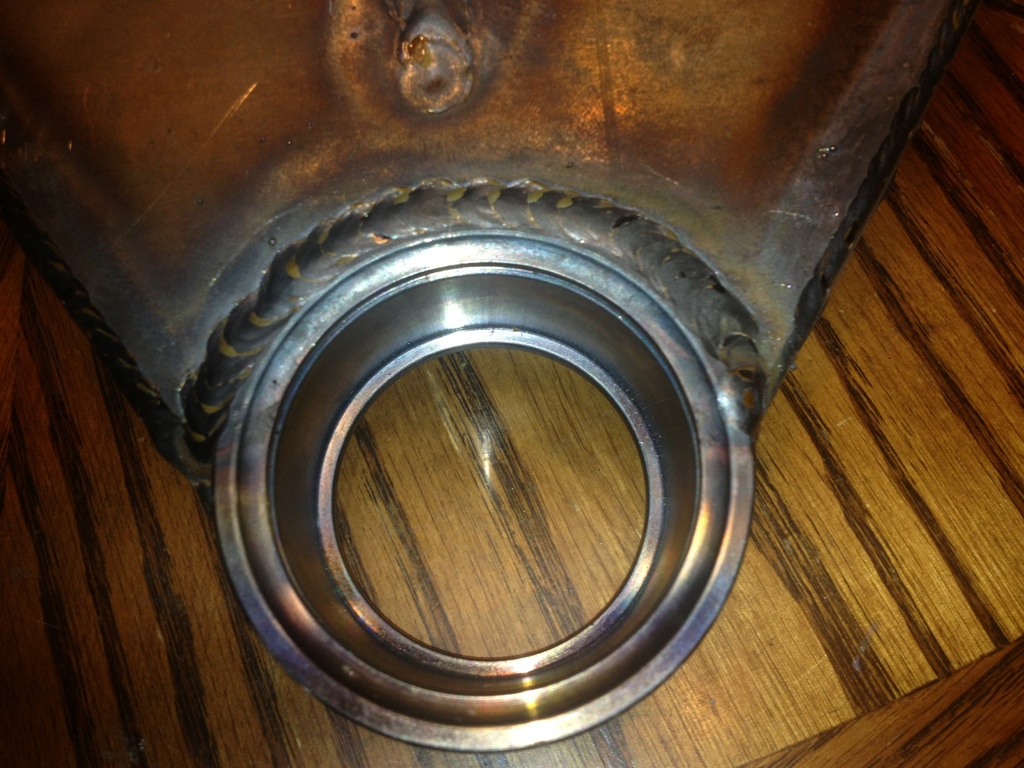
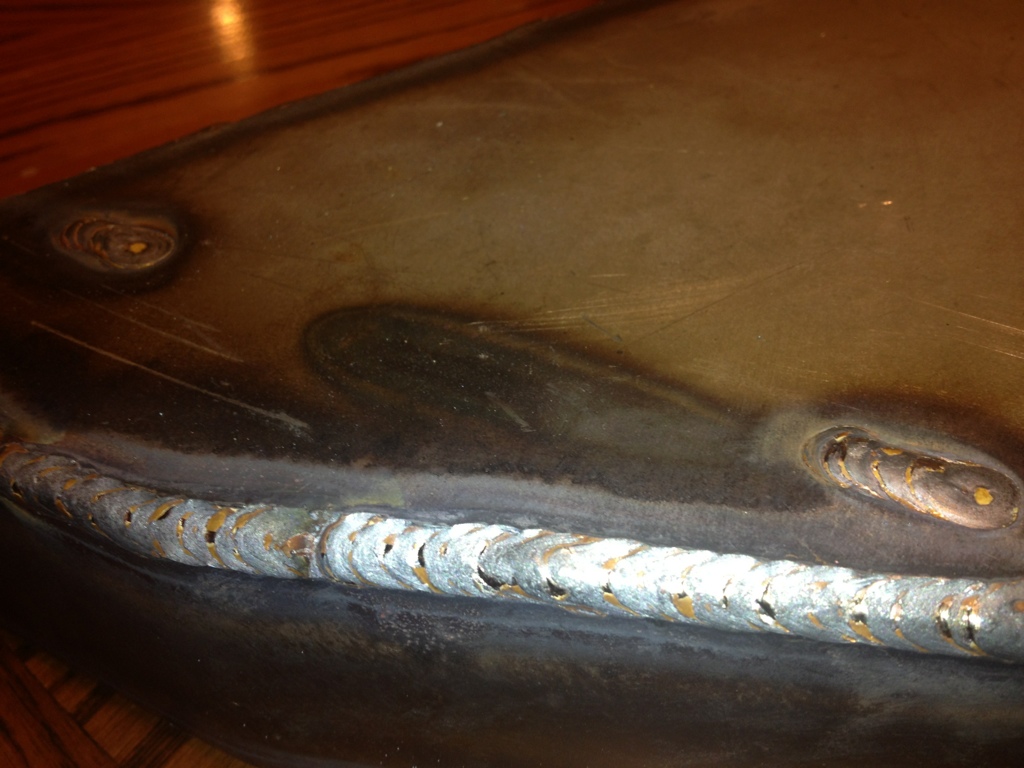
We finished this kit Friday Night and went for a test drive it did great. Did a small jump about 3' handled great.
The customer said he will install hydrobumps so for now it is using the stock bump stops, not strong enough at all. The kit uses a limit strap for droop. The upper uniball is using about 80% of cycling and the lower is about 50%. At full bump and droop nothing binds at all can turn axle by hand, fully turned, straight no issue. Before we can sell these we are still looking for a solution to the tie rod extension, we are using a temporary solution untill we receive the tooling to produce our own.
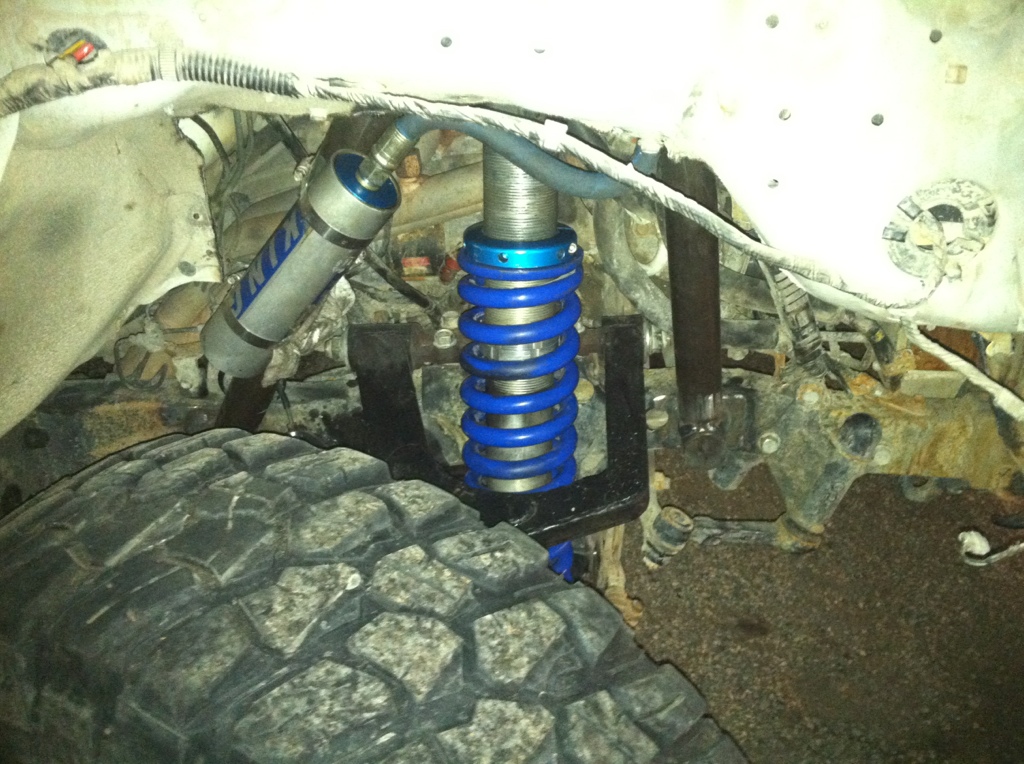
top of the engine cage before welded up did not take a pic of fully welded, my bad
these pics are of the truck when it first sat on her own the night we finished
This vid is a quick shot before the customer came to pick his truck up the next morning
http://www.youtube.com/watch?v=0mYKh...ature=youtu.be
So we do not have a set price yet still have to go over all of our numbers
The customer said he will install hydrobumps so for now it is using the stock bump stops, not strong enough at all. The kit uses a limit strap for droop. The upper uniball is using about 80% of cycling and the lower is about 50%. At full bump and droop nothing binds at all can turn axle by hand, fully turned, straight no issue. Before we can sell these we are still looking for a solution to the tie rod extension, we are using a temporary solution untill we receive the tooling to produce our own.
top of the engine cage before welded up did not take a pic of fully welded, my bad
these pics are of the truck when it first sat on her own the night we finished
This vid is a quick shot before the customer came to pick his truck up the next morning
http://www.youtube.com/watch?v=0mYKh...ature=youtu.be
So we do not have a set price yet still have to go over all of our numbers
01-07-2013, 06:41 PM
#34
Registered User
Jayglamis,
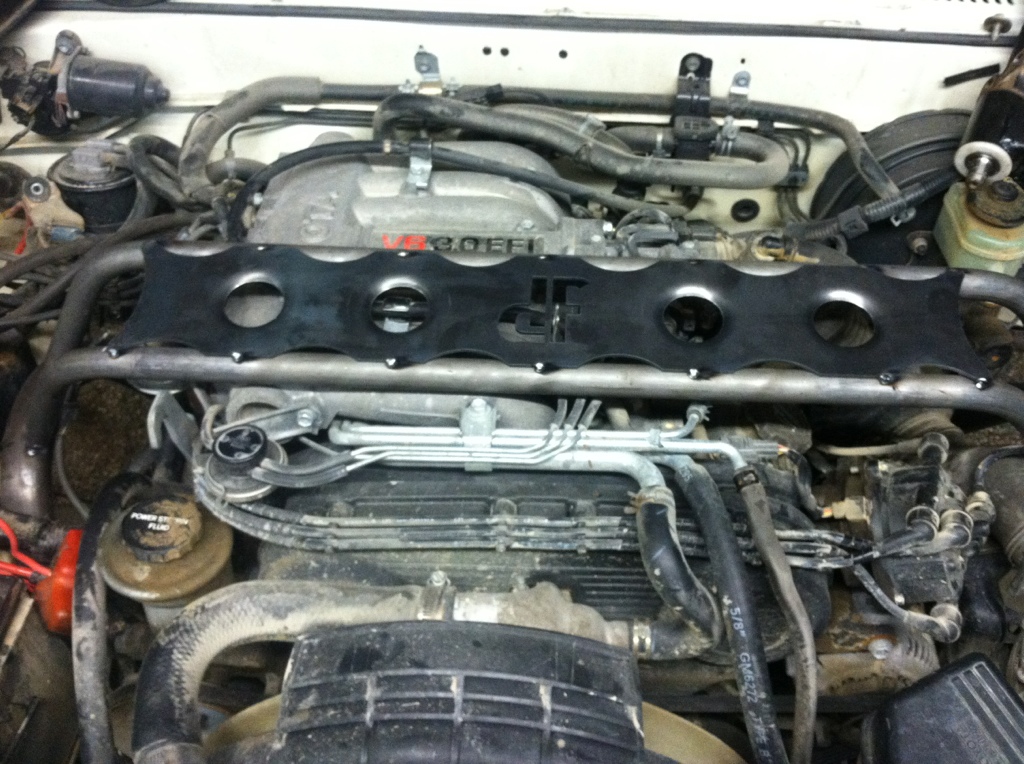
Good to see progress on your design! I like your shock hoop and engine cage! Is it designed to be removable? Its hard to see everything going on. The fender well trimming looks a little rough, was that you or did it come in that way? Anyway its just detail work and it looks like this truck is going to be used not shown. I'd still like to see some photos of the travel measurements; but its probably a moot point as your using the T-100 CVs. It would be cool to see a print out of a computerized alignment to see if your adjusting the caster or camber any differently than me.
Right on, video footage! If you have access to video editing you should make a slow motion clip of one of the bigger hits? You said the factoty bumps are way too weak, but they are missing completely in the front location? How did you come to that conclusion? As long as you use both front and rear bumps and have them positioned correctly the factory bump stops have not been a problem in my experience. All the other guys have been using them too? I agree though, hydro bumps will be a nice upgrade!
Yeah good point about geting the Tie Rod Adjusting Sleeves sorted out. The factory thin wall tubes sleeved like that are are the best way to make a temporary solution. The 17mm x 1.5 rod ends are a goofy size aren't they! A LH tap was an expensive custom built tap. I have to have my RH and LH jam nuts built to spec as well as the adjusting sleeves. Originally I had a source that carried the jam nuts but the supplier went belly up. You might be better off with a custom linkage and heim joints on the rod ends. Especailly if you figure out a way to go over 12-13" of wheel travel. Check with Rough Stuff, he has been posting steering linkage builder parts here on YT.
A couple of last questions, did you consider adding aux. shock tabs for secondary bypass shocks in your design? Are you going to be omitting the steering stops on the LCAs? And lastly, keep up the good work!
01-09-2013, 07:07 PM
#35
Registered User

Join Date: Jan 2013
Posts: 9
Likes: 0
Received 0 Likes
on
0 Posts
The engine cage cross bars will be removable but wasn't completed yet due to me needing the truck for school . And the fender wells are now also trimmed and cleaned up and like Jason said the stock bumps are to weak for this setup to actually perform like it was built but I now have hydro bumps I just haven't fabbed a mount yet that will probably happen this weekend. Not to sure on how to post pics onto the thread on an iPad but you can check em out in my albums on my profile ill upload more tomorrow
Last edited by yotarunner83; 01-09-2013 at 07:23 PM.


Thread
Thread Starter
Forum
Replies
Last Post
DacodaYota
Looking For A Mechanic/Fabricator/Shop
2
09-02-2015 02:13 PM


