
 02-09-2016, 04:27 PM
Last edit by: IB Advertising
See related guides and technical advice from our community experts:
Browse all: Toyota Tundra 4WD - Four Wheel Drive Guides
- Toyota Tundra 4WD General Information
Important information to help you understand your Tundra.
- Toyota Tundra: Tundra 4WD Actuator Problems
Guide to diagnose trouble and recommended solutions.
- Toyota Tundra How to Replace Transfer Case Motor Actuator
Step by step instructions for do-it-yourself repairs.
Browse all: Toyota Tundra 4WD - Four Wheel Drive Guides

Tundra 4wd conversion
01-16-2009, 10:14 AM
#1
Registered User
Thread Starter
Join Date: Jan 2009
Location: Aspen CO
Posts: 23
Likes: 0
Received 0 Likes
on
0 Posts
Tundra 4wd conversion
Spurred on by caligula455's venture into the unknown and doing his own 4wd conversion I decided to start my own.
So heres the story! Bought my truck in Texas thus the 2wd option and the 3.42 gears (A01A). But it does have a 3in body lift (a little extra room to do the mechanics work) so it looks 4wd. Moved to Grand Junction Colorado. Not a ton of snow and really no hills so 2wd still is acceptable since I have some BFG All terrains on it she can still get around. Got a promotion and had to move to Aspen..... NOT 2wd friendly up here! So I started looking at new trucks. Drooled over a 2008 TRD tundra double cab SR5 untill the time came to talk trade-in. As it turns out Aspen Toyota dealers can leagly laugh at you if you own a 2wd truck. Started looking around, doing some homework and found Caligula's thread on his conversion and the rest is history! I am an aircraft mechanic so I just happen to have a hangar and a shop that are going to come in real handy since its about 10 degrees here.
Parts I got:
L/H and R/H control arms
Front CV halfshafts
Front Diff 4.10
Tranny w/ mount
Transfercase
Wiring loom (I will remove what wires I need and weave them into my existing loom)
rear drive shaft
Tranny cross member
4x4 ecu
Dash bezel w/ 4x4 buttons
Still waiting on
4.10 gears for the rear
Ill get pics up asap
 01-19-2009, 10:12 AM
#2
Registered User
Thread Starter
Join Date: Jan 2009
Location: Aspen CO
Posts: 23
Likes: 0
Received 0 Likes
on
0 Posts
Fluids
Went out yesterday and picked up
Royal purple 75w90 diff fluid with the limited slip additive (I have no idea if mine is L.S.)
L/H and R/H upper ball joints
tranny filter
Mobil 1 synthetic ATF
I need the mounting hardware for the front diff. 2 Long bolts that go thru the diff and the frame, and upper and lower isolator shims (rubber washers) If anyone has this stuff contact me and ill buy it from you!!! because the yard cut the bolts off with a torch.
01-19-2009, 11:08 AM
#3
Registered User
Thread Starter
Join Date: Jan 2009
Location: Aspen CO
Posts: 23
Likes: 0
Received 0 Likes
on
0 Posts
Starting it.
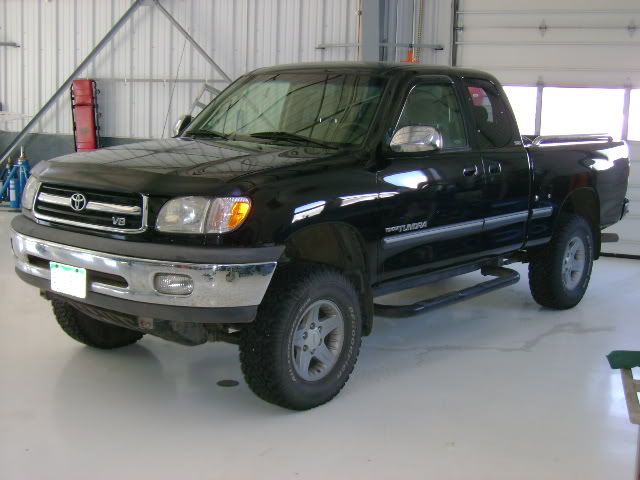
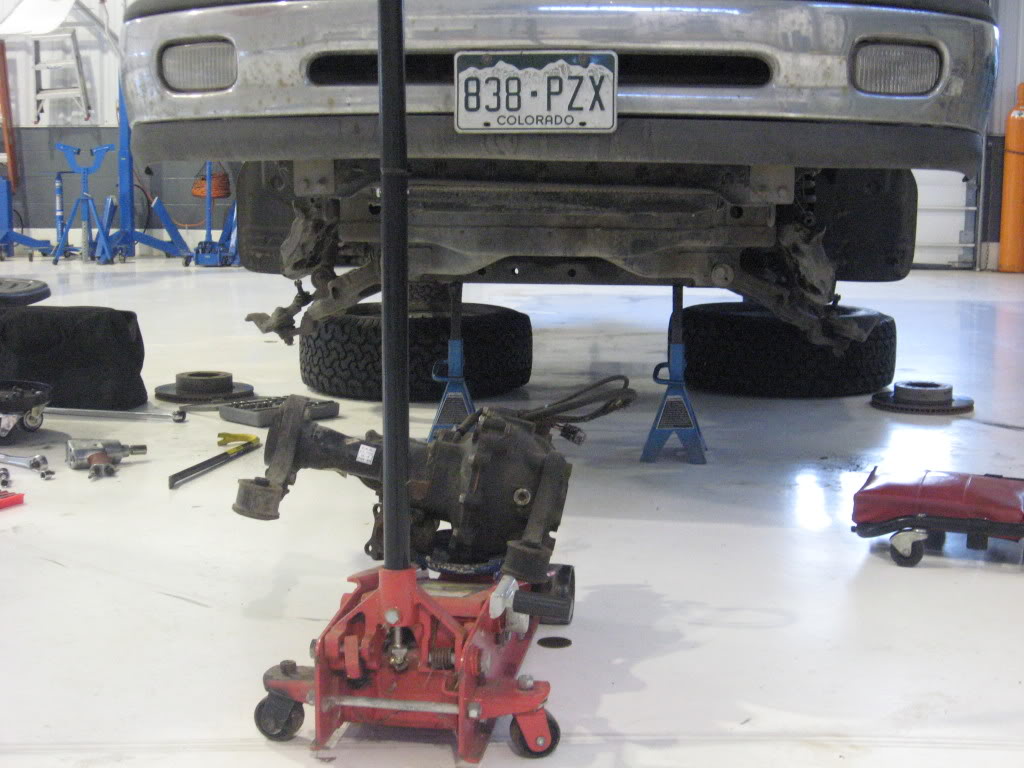
Here is my 2000 tundra SR5 Access cab.
It has a 3in body lift and a leveling kit. So I will have a little bit more clearance while i am doing the work under it.
Pics I have taken of the parts.
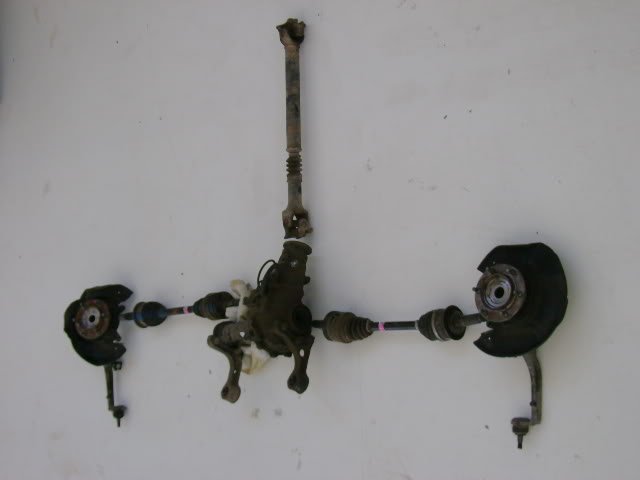
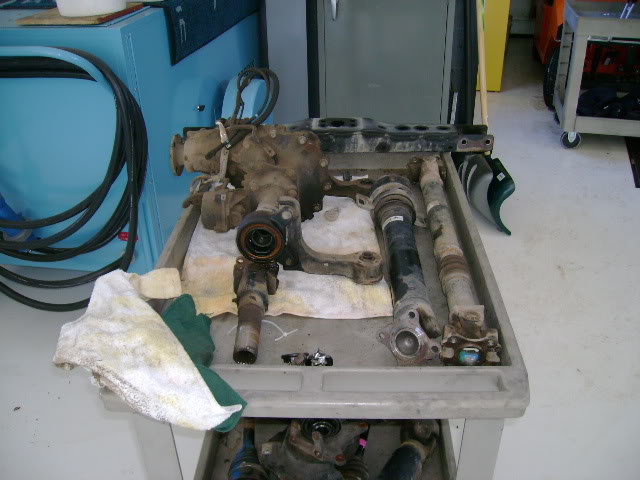
Here are the front drivetrain components
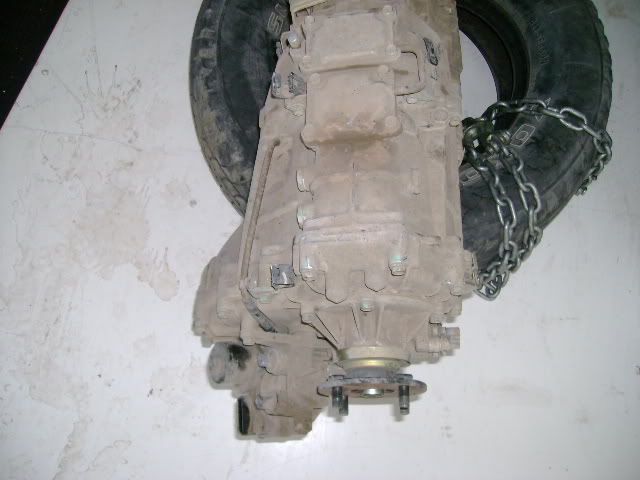
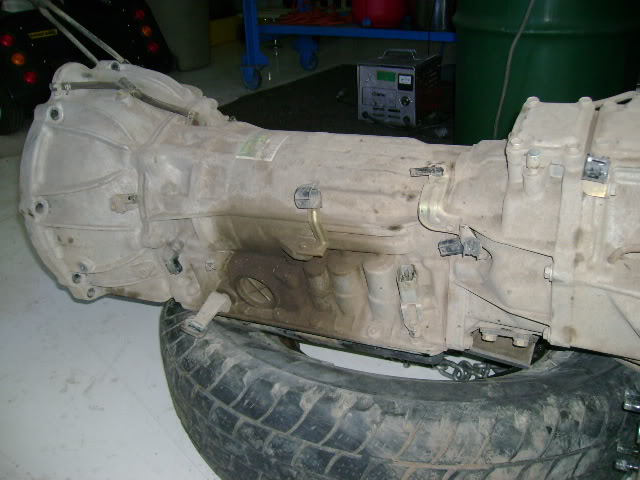
Transfercase off of a 2000 tundra
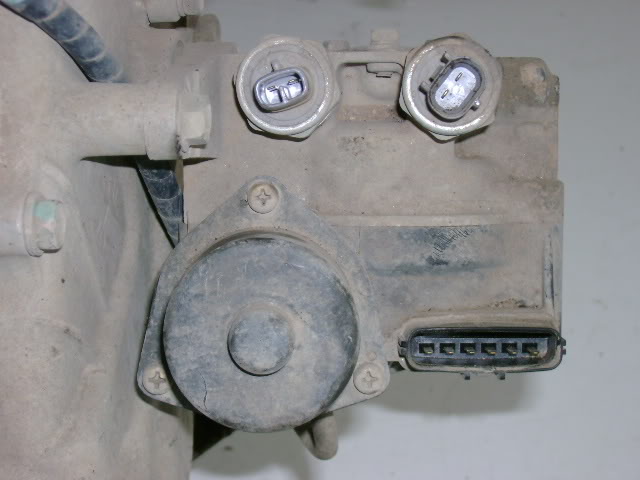
Close up of the electronics that will have to be wired in.
Side shot of the tranny and transfer case. All of these cannon plugs will plug right into the existing harness.
Front Diff. w/ ADD The ADD will also have to be wired in.
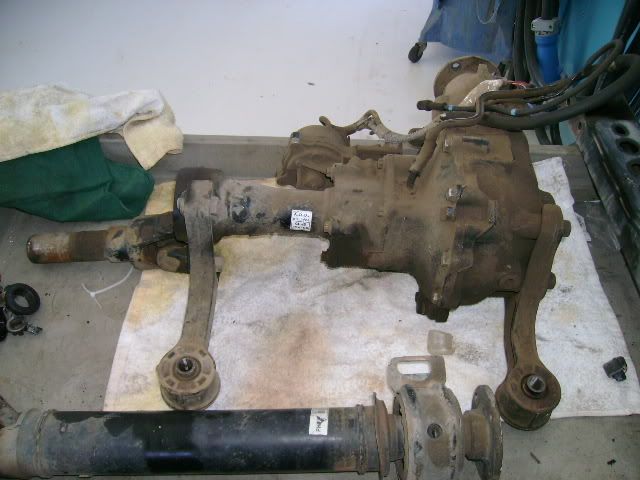
Front diff, fwd driveshaft, and (fwd section of the rear driveshaft which I have 2 of now so if anyone needs one let me know)
I wanted to document this really well so if you check out the photobuck page there are also alot of reference pics.
http://s641.photobucket.com/albums/uu136/Jwbenninger/
It has a 3in body lift and a leveling kit. So I will have a little bit more clearance while i am doing the work under it.
Pics I have taken of the parts.
Here are the front drivetrain components
Transfercase off of a 2000 tundra
Close up of the electronics that will have to be wired in.
Side shot of the tranny and transfer case. All of these cannon plugs will plug right into the existing harness.
Front Diff. w/ ADD The ADD will also have to be wired in.
Front diff, fwd driveshaft, and (fwd section of the rear driveshaft which I have 2 of now so if anyone needs one let me know)
I wanted to document this really well so if you check out the photobuck page there are also alot of reference pics.
http://s641.photobucket.com/albums/uu136/Jwbenninger/
01-19-2009, 02:07 PM
#4
Registered User
Join Date: Apr 2008
Posts: 57
Likes: 0
Received 0 Likes
on
0 Posts
I just bought a drop kit which came with longer bolts and spacers. you probably want one anyway to prevent CV boot wear, and it was $20 i think.
01-19-2009, 04:12 PM
#6
Contributing Member
Join Date: Jun 2007
Location: Where it always works if you work it, in Sunny Selinsgrove, PA
Posts: 2,336
Likes: 0
Received 2 Likes
on
2 Posts
though you should pressure wash all the crap off of your parts, makes for a cleaner install, plus it looks cool for the photo opps haha
01-19-2009, 06:50 PM
#7
Registered User
Thread Starter
Join Date: Jan 2009
Location: Aspen CO
Posts: 23
Likes: 0
Received 0 Likes
on
0 Posts
Cool where did you get the drop kit!!
I would have had the parts pressure washed already but I have had a plane in my hangar since I picked up the parts and the owners tend to get cranky if I splatter paint their plane with road grime!! But i think its empty this weekend, which is cool because I wanted to get the front installed since I cant go to X-games!
I would have had the parts pressure washed already but I have had a plane in my hangar since I picked up the parts and the owners tend to get cranky if I splatter paint their plane with road grime!! But i think its empty this weekend, which is cool because I wanted to get the front installed since I cant go to X-games!
Trending Topics
01-20-2009, 08:47 AM
#8
Registered User
Thread Starter
Join Date: Jan 2009
Location: Aspen CO
Posts: 23
Likes: 0
Received 0 Likes
on
0 Posts
Wiring
Now time to do the wiring.
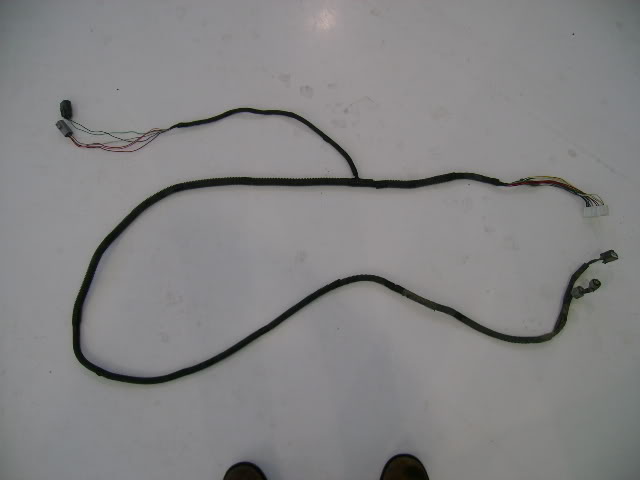
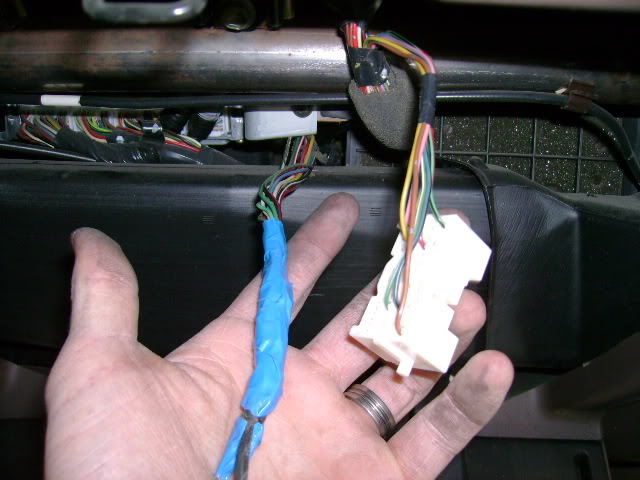
Here is what I started with
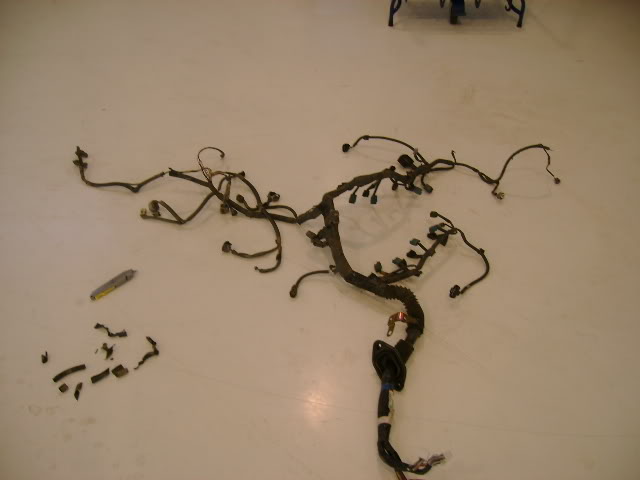
After alot of cutting and unweaving I managed to seperate the 4wd sections I needed from the rest.
Look at Caligula455's thread on his conversion he has a great picture of the wiring that needs to be added.
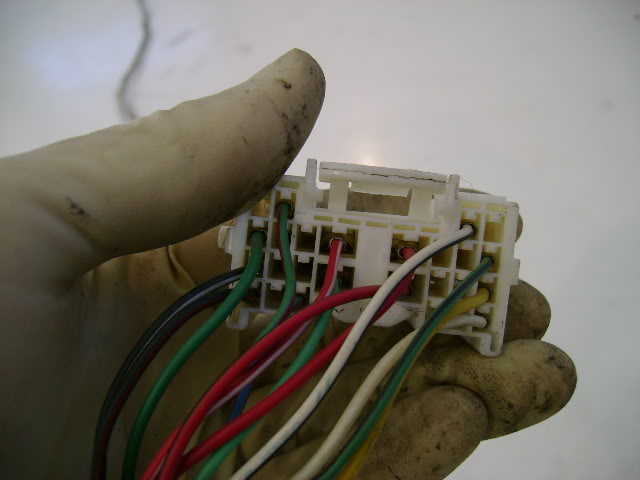
Here is the plug from under the dash with just the 4WD wiring still installed.
Here are the plugs for the transfer case that need to be installed
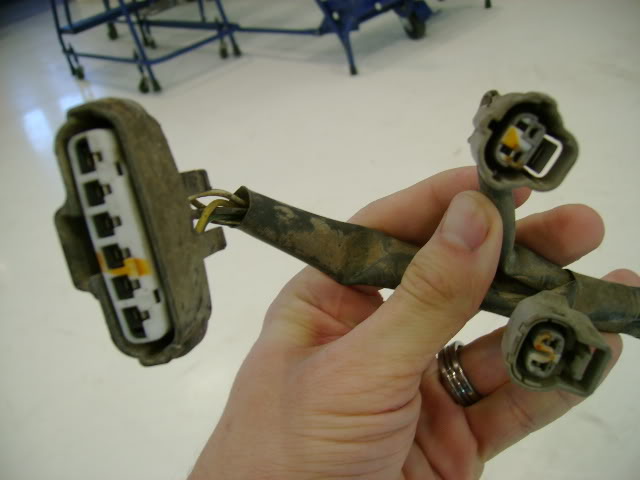
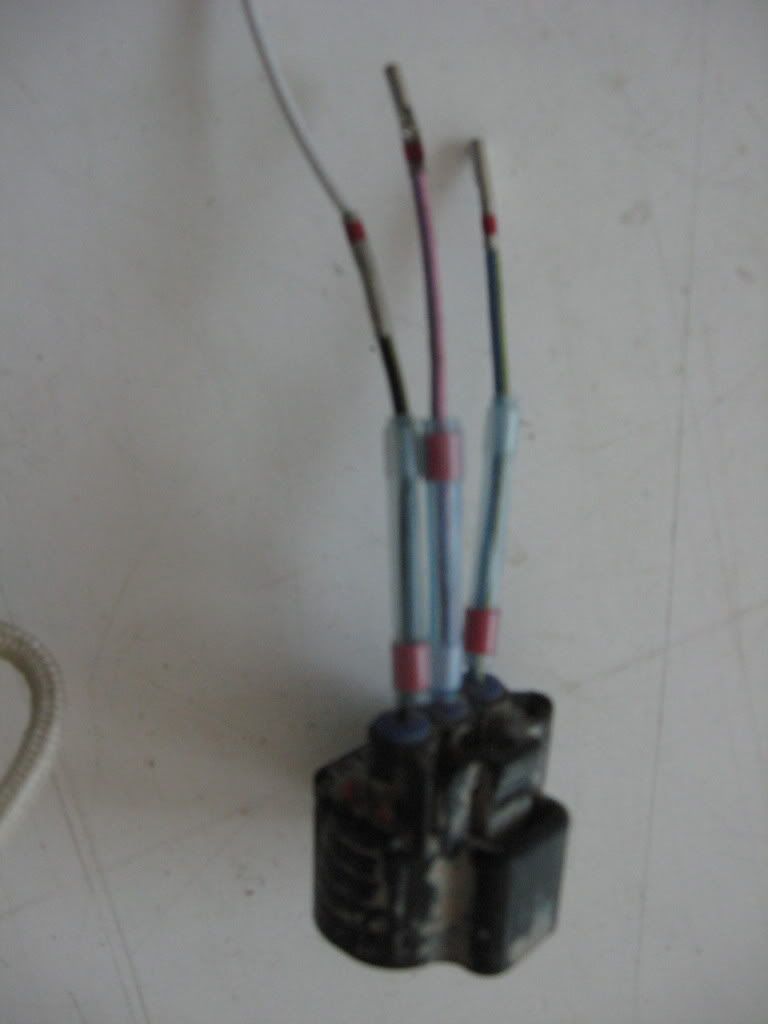
The wiring for the ADD stops at the back of the engine block right at the wiring harness in 2 seperate plugs. It must have another section that joins the 2. I dont have that section so I will have to make my own.
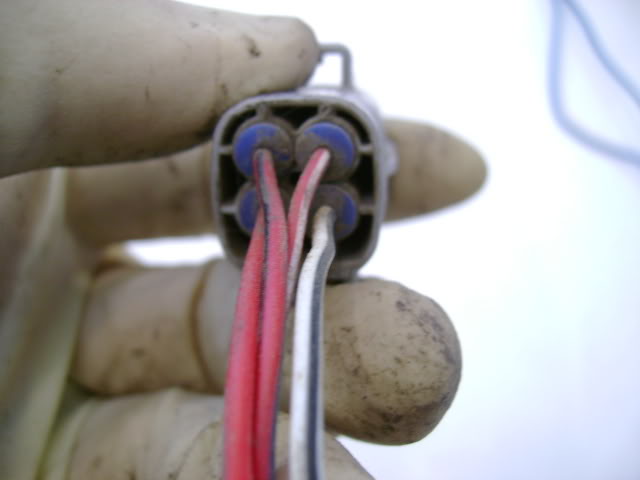
Here is what I am going to call ADD plug 1. All 4 of these wires go directly to the ADD and come from the dash plug.
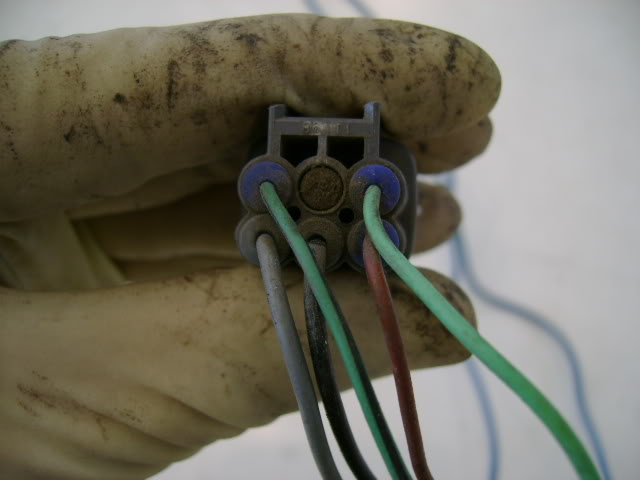
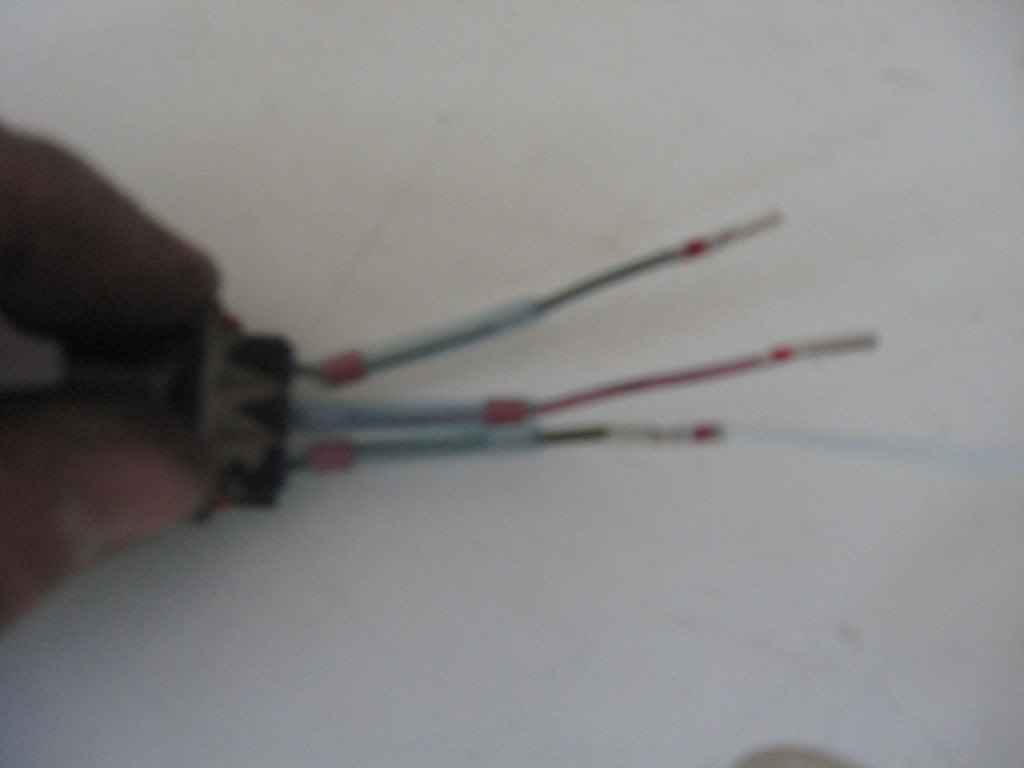
Here is where is gets interesting... This is ADD plug 2. Only the 2 green wires go to the ADD and come from the dash plug. The brown is a ground for the shielded wires (black and brown) But i dont know what those wires go to. Further investigation is required. The wiring diagram in the back of my Haynes manual is useless for this application.
But I have the wiring seperated and ready.
More details after this weekend.
Here is what I started with
After alot of cutting and unweaving I managed to seperate the 4wd sections I needed from the rest.
Look at Caligula455's thread on his conversion he has a great picture of the wiring that needs to be added.
Here is the plug from under the dash with just the 4WD wiring still installed.
Here are the plugs for the transfer case that need to be installed
The wiring for the ADD stops at the back of the engine block right at the wiring harness in 2 seperate plugs. It must have another section that joins the 2. I dont have that section so I will have to make my own.
Here is what I am going to call ADD plug 1. All 4 of these wires go directly to the ADD and come from the dash plug.
Here is where is gets interesting... This is ADD plug 2. Only the 2 green wires go to the ADD and come from the dash plug. The brown is a ground for the shielded wires (black and brown) But i dont know what those wires go to. Further investigation is required. The wiring diagram in the back of my Haynes manual is useless for this application.
But I have the wiring seperated and ready.
More details after this weekend.
01-20-2009, 11:18 AM
#9
Registered User
Join Date: Apr 2008
Posts: 57
Likes: 0
Received 0 Likes
on
0 Posts
The wiring for the ADD stops at the back of the engine block right at the wiring harness in 2 seperate plugs. It must have another section that joins the 2. I dont have that section so I will have to make my own.
Here is what I am going to call ADD plug 1. All 4 of these wires go directly to the ADD and come from the dash plug.
Here is where is gets interesting... This is ADD plug 2. Only the 2 green wires go to the ADD and come from the dash plug. The brown is a ground for the shielded wires (black and brown) But i dont know what those wires go to. Further investigation is required. The wiring diagram in the back of my Haynes manual is useless for this application.
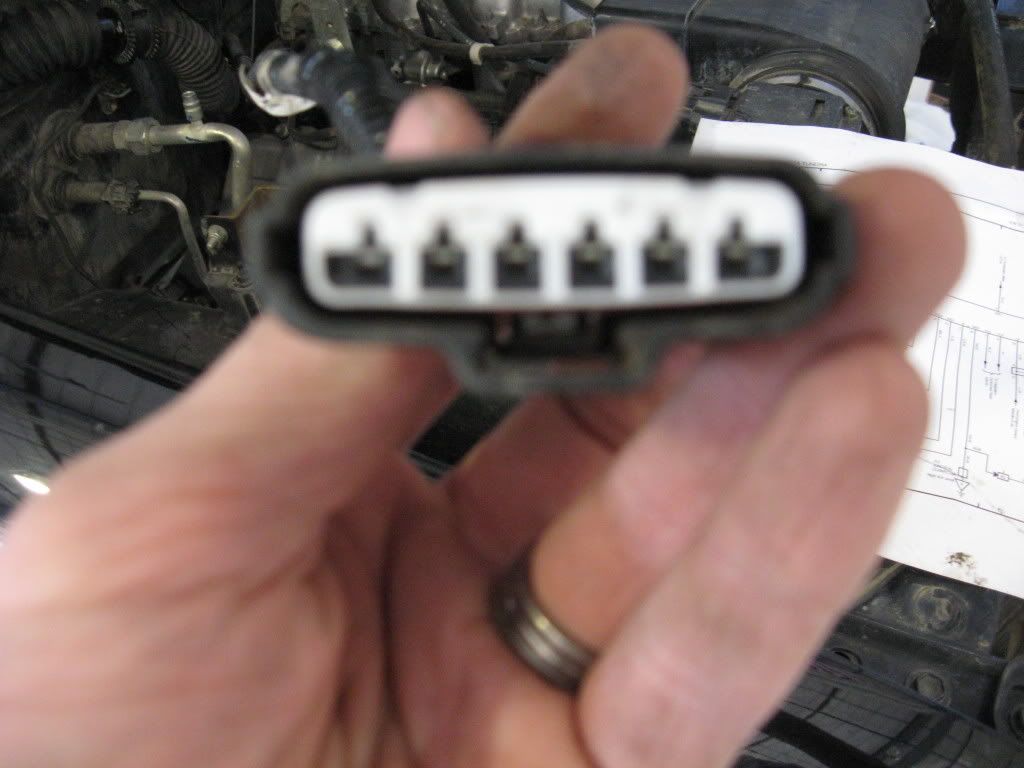
the short answer is that all 6 conductors that leave the ADD go to that dash connector, they are split between EC1 and EC3 which are the four and six conductor connecors you show there. i just cut off everything past the ADD connector and spliced in wiring directly to the dash connector pins.
01-20-2009, 12:05 PM
#10
Registered User
Thread Starter
Join Date: Jan 2009
Location: Aspen CO
Posts: 23
Likes: 0
Received 0 Likes
on
0 Posts
I think that there are a few more of those pins in the grey connector that sits beside the white plug behind the glove box. Take a look in your truck and let me know if those will work for you. The larger ones are in the outboard edges of the grey plug.
01-20-2009, 01:18 PM
#11
Registered User
Thread Starter
Join Date: Jan 2009
Location: Aspen CO
Posts: 23
Likes: 0
Received 0 Likes
on
0 Posts
Thanks to Caligula455 I found that the 2 extra shielded wires are for knock sensors 1 and 2. They exist in a 2wd so, I am going to completely bypass ADD plug 1 and 2 from the 4WD and run the loom directly to the ADD.
01-21-2009, 01:21 PM
#12
Registered User
Thread Starter
Join Date: Jan 2009
Location: Aspen CO
Posts: 23
Likes: 0
Received 0 Likes
on
0 Posts
Wiring
I ran the wiring thru the firewall today.
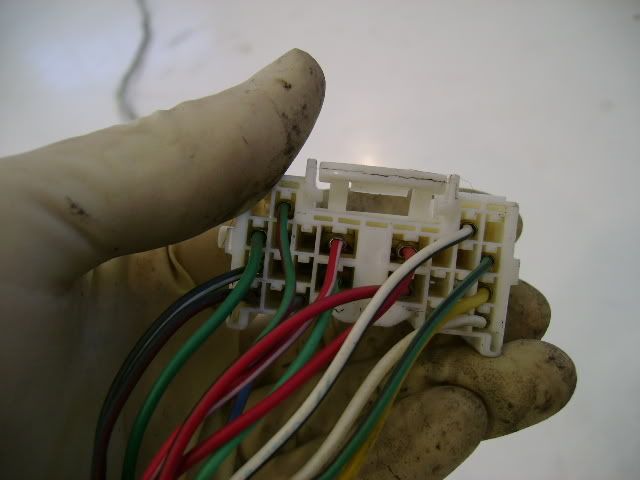
This is the plug that the wiring needs to be run into. To remove and insert the leads you must open the trap door on the top of the plug.
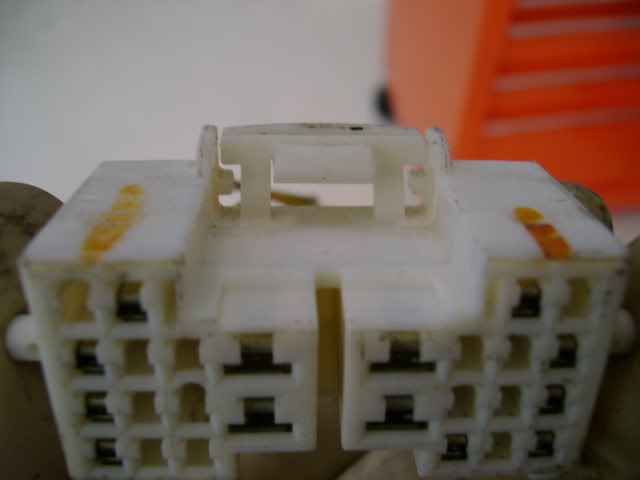
Here is the top of the plug with the door closed.
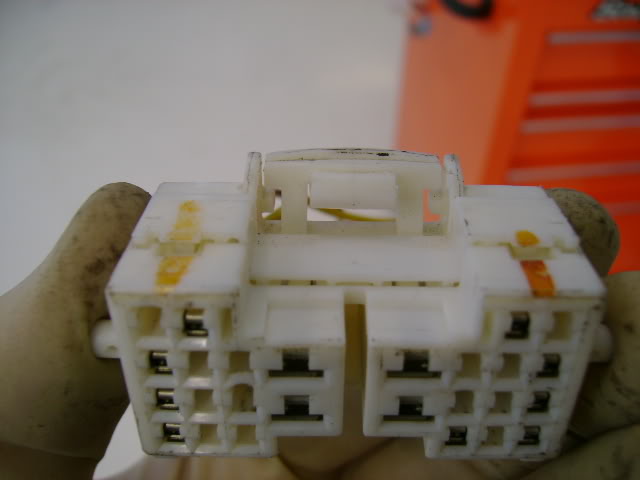
Here it is open. Then you can use a small screwdriver in the front of the plug and pull the inserts out the back.
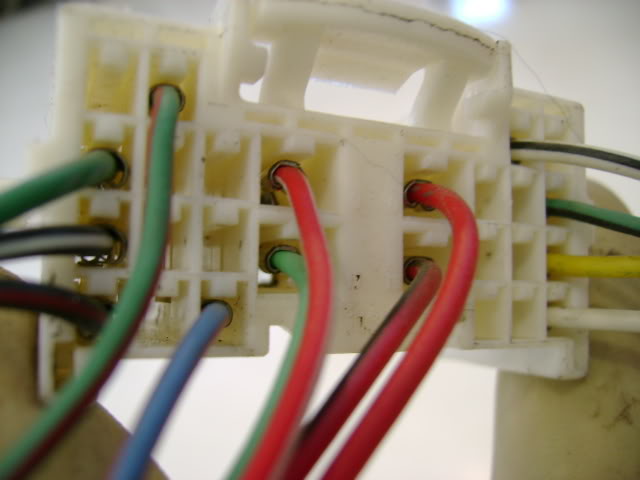
Here are the locations of the 4wd wiring in the plug. Just remove the inserts from this plug and insert into the same location on the 2wd plug.
Here is the complete wiring harness for the 4WD system.
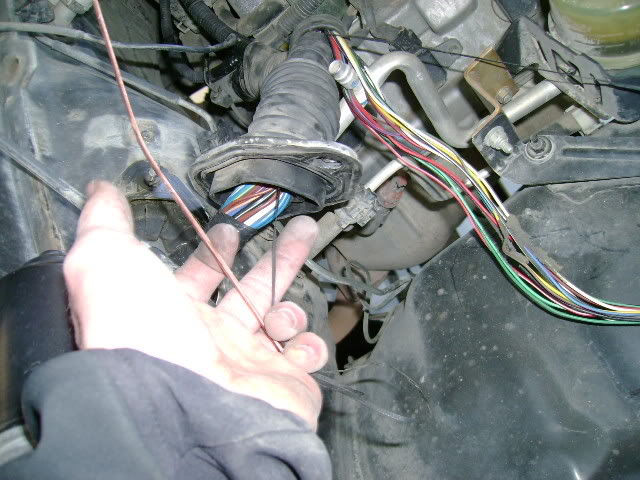
I ran the 4wd harness thru the rubber corrigation of the stock harness.

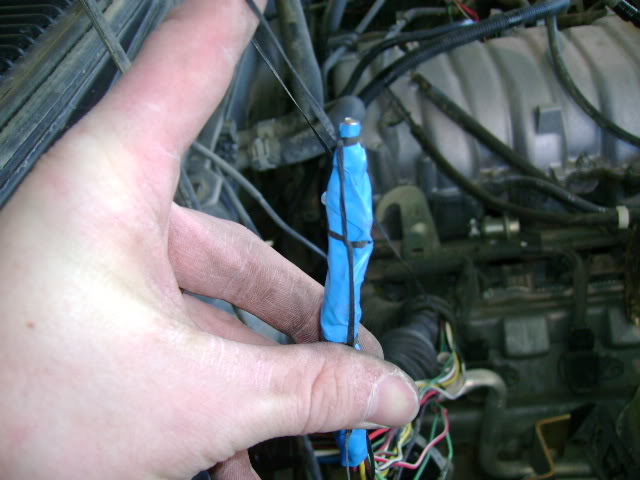
I used a small section of stiff wire and some string to thread the wiring thru the harness. Make sure to stagger and tape up the inserts to make the bundle as small as possible.
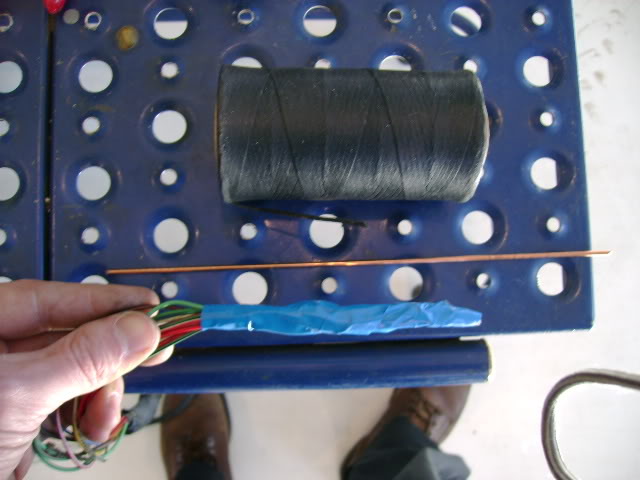
Use the wire to start the string thru the harness
Then tie the string to the wire like this. I tie the string back about 4 in then make a few logging loops to make sure the wiring follows the string. This also helps distribute the force if you have to pull hard.
Here is the wiring run into the cab beside the 2WD plug
This is the plug that the wiring needs to be run into. To remove and insert the leads you must open the trap door on the top of the plug.
Here is the top of the plug with the door closed.
Here it is open. Then you can use a small screwdriver in the front of the plug and pull the inserts out the back.
Here are the locations of the 4wd wiring in the plug. Just remove the inserts from this plug and insert into the same location on the 2wd plug.
Here is the complete wiring harness for the 4WD system.
I ran the 4wd harness thru the rubber corrigation of the stock harness.
I used a small section of stiff wire and some string to thread the wiring thru the harness. Make sure to stagger and tape up the inserts to make the bundle as small as possible.
Use the wire to start the string thru the harness
Then tie the string to the wire like this. I tie the string back about 4 in then make a few logging loops to make sure the wiring follows the string. This also helps distribute the force if you have to pull hard.
Here is the wiring run into the cab beside the 2WD plug
01-22-2009, 08:47 AM
#13
Registered User
Thread Starter
Join Date: Jan 2009
Location: Aspen CO
Posts: 23
Likes: 0
Received 0 Likes
on
0 Posts
Pretty Lights
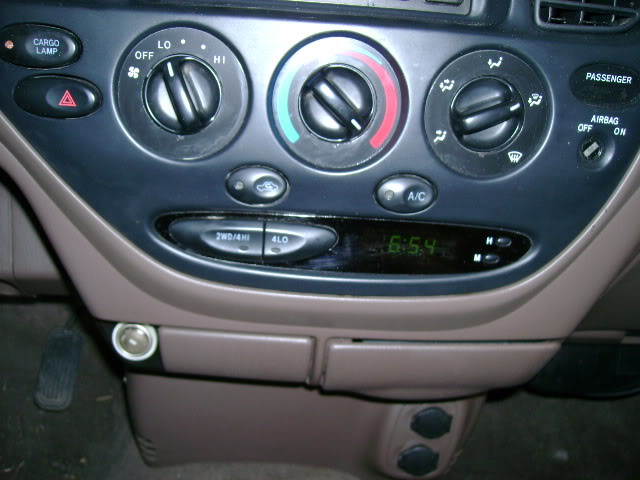
Here is the install of the 4wd computer and buttons
The Bezel is held in with 5 screws. 2 abovel the vents (you have to move the vents out of the way to remove them), and 3 behind the climate control knobs. Then just pull, unplug and replace. Its that simple!
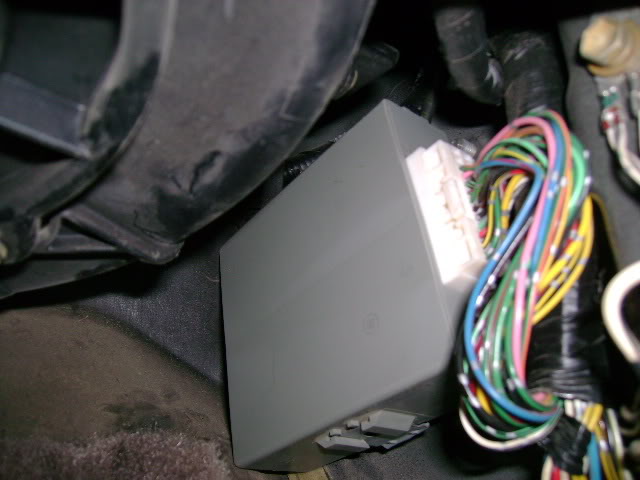
Then remove the passengers kick panel and plug the 4WD computer into the plug that is just back there hangin out.
Now put in the key and watch the pretty lights on the new buttons flash!
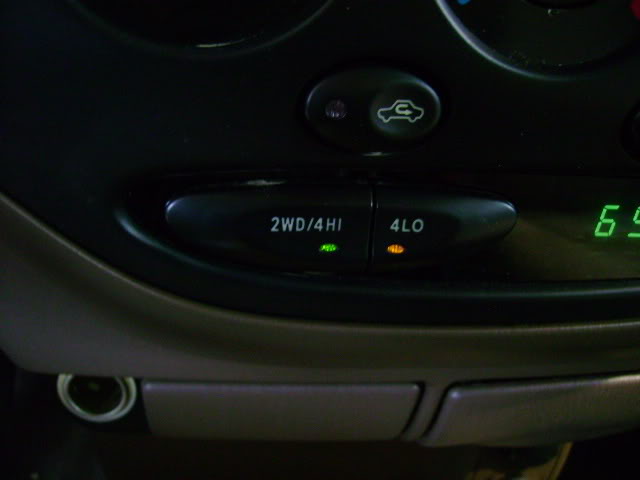
And on the dash!!
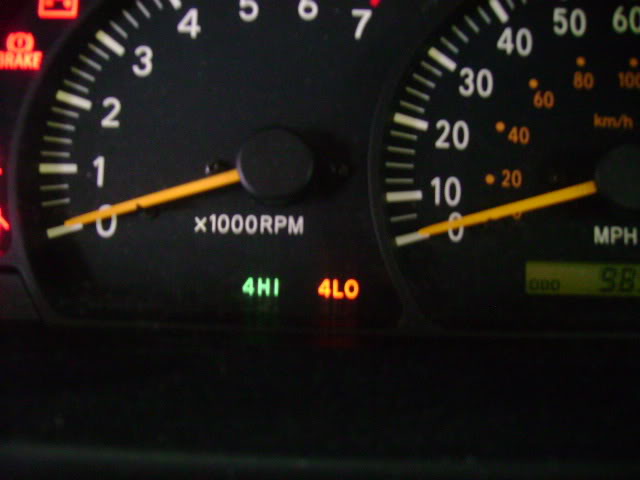
Hopefully if i did all the wiring correctly the flashing will stop as soon as i plug in the the components. Keep your fingers crossed!!
The Bezel is held in with 5 screws. 2 abovel the vents (you have to move the vents out of the way to remove them), and 3 behind the climate control knobs. Then just pull, unplug and replace. Its that simple!
Then remove the passengers kick panel and plug the 4WD computer into the plug that is just back there hangin out.
Now put in the key and watch the pretty lights on the new buttons flash!
And on the dash!!
Hopefully if i did all the wiring correctly the flashing will stop as soon as i plug in the the components. Keep your fingers crossed!!
01-22-2009, 11:30 AM
#14
Contributing Member
Join Date: Jun 2007
Location: Where it always works if you work it, in Sunny Selinsgrove, PA
Posts: 2,336
Likes: 0
Received 2 Likes
on
2 Posts
just out of curiosity, did you have to change the instrument cluster, or were the indicators already installed from factory? I take it the wiring to the cluster was already in place haha
01-23-2009, 03:52 AM
#16
Registered User
Join Date: Apr 2008
Posts: 57
Likes: 0
Received 0 Likes
on
0 Posts
01-23-2009, 10:07 AM
#17
Contributing Member
Join Date: Jun 2007
Location: Where it always works if you work it, in Sunny Selinsgrove, PA
Posts: 2,336
Likes: 0
Received 2 Likes
on
2 Posts
thats pretty cool! back in the day the 2wd cluster was sometimes different from the 4wd cluster. What's really awesome is that Toyota has built the truck to be easy to convert, which a lot of times is worth doing rather than "trading up".
03-11-2009, 11:25 AM
#19
Registered User
Thread Starter
Join Date: Jan 2009
Location: Aspen CO
Posts: 23
Likes: 0
Received 0 Likes
on
0 Posts
Last Chapter
Sorry I has taken me so long to get this up but work has been crazy!!
Make a long story short ITS DONE. IT WORKS GREAT! AND IT WASNT REALLY THAT BAD....In a shop with some friends help.....
So I left off just having the wiring run into the dash. So from there, I only have to modify 2 more plugs.
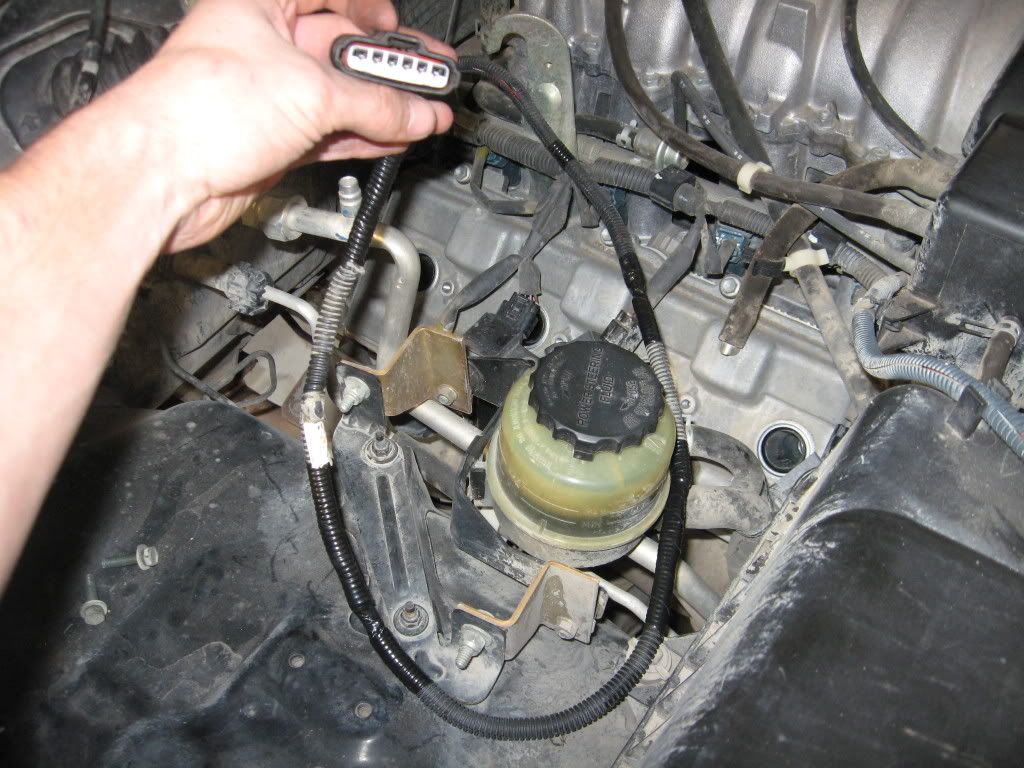
After installing the new tranny and transfer case you have to lengthen one plug because the 2wd Tranny has the sensor at the back of the tranny and the 4wd tranny has it on the transfercase on the opposite side. So cut it off, again stagger your cuts, and add some wire..DONE, all the other wiring for the tranny is the same and the wiring I added, since it was from a stock wiring harness fit great. BTW make sure not to damage to small plastic clips that hold your O2 sensor wiring to the cross member, you will need those clips to re-route the wiring along the transfercase. Mine still had the stock brackets and the plastic clips snapped right in.
The only other wiring I had to modify was for the front diff ADD, On the stock 4wd truck the engine wiring harness had the knock sensor wiring and some of the ADD wiring going thru the same plug. Well my 2wd has a seperate plug for the knock sensor and I didnt feel like cutting into something I didnt have to. The ADD has about a 1 ft wire lead coming from the control to another plug. So i just removed both plug ends and attached my wiring directly to the ADD lead. I can still detach the wiring at the ADD and I didnt have to mess with any of my Knock sensor wiring.
Here is the plug that will go into the ADD in the front diff
Here is the plug attached to the wiring I installed into the dash earlier.
WIRING DONE!!
Now for the fun stuff, I put new bearing into my truck when I did the front end because I needed to swap over the break backing plates and I couldnt figure out a way to remove the hubs and save the bearings. My truck has alot of miles on it so I i figured it was worth it. But just as a side note those bearings are expensive about 150 buck a peice and you only get 1 shot to install them so if you dont know what your doing have a shop do it.
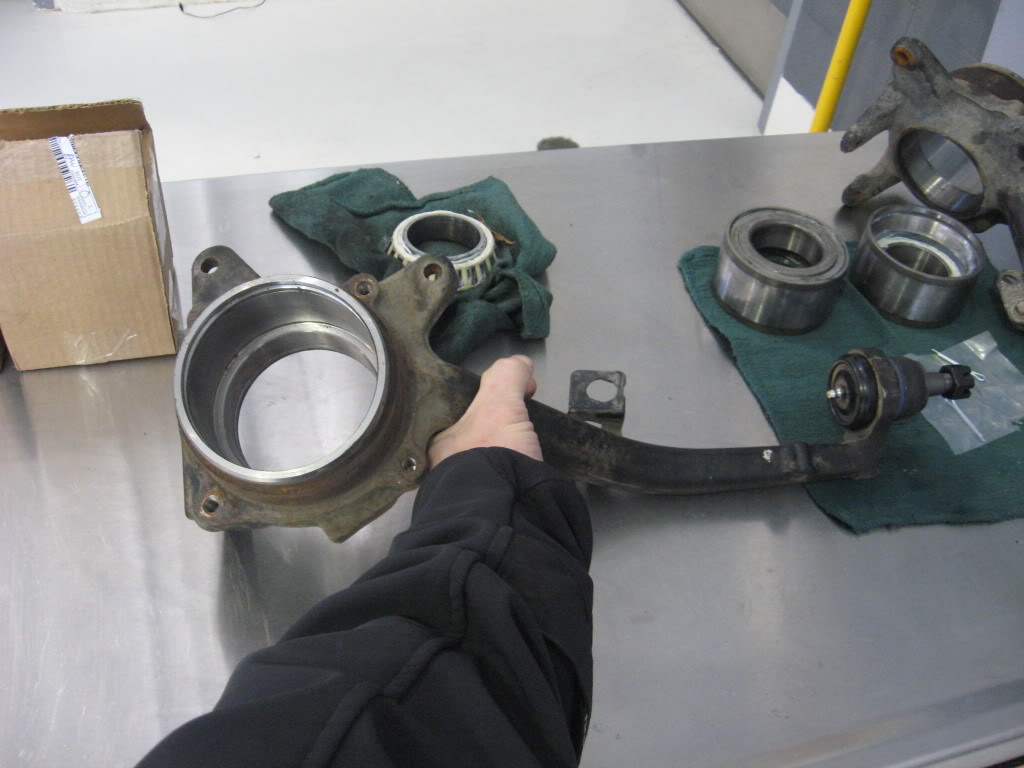
Here is the control arm with no bearing in it.
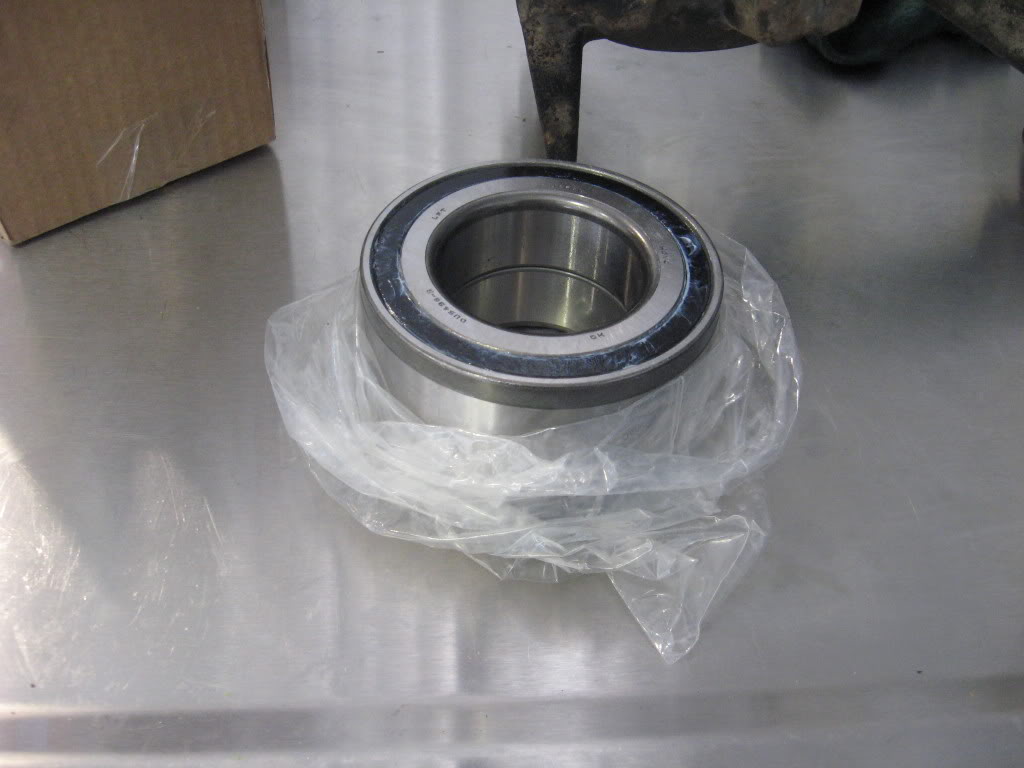
New bearing
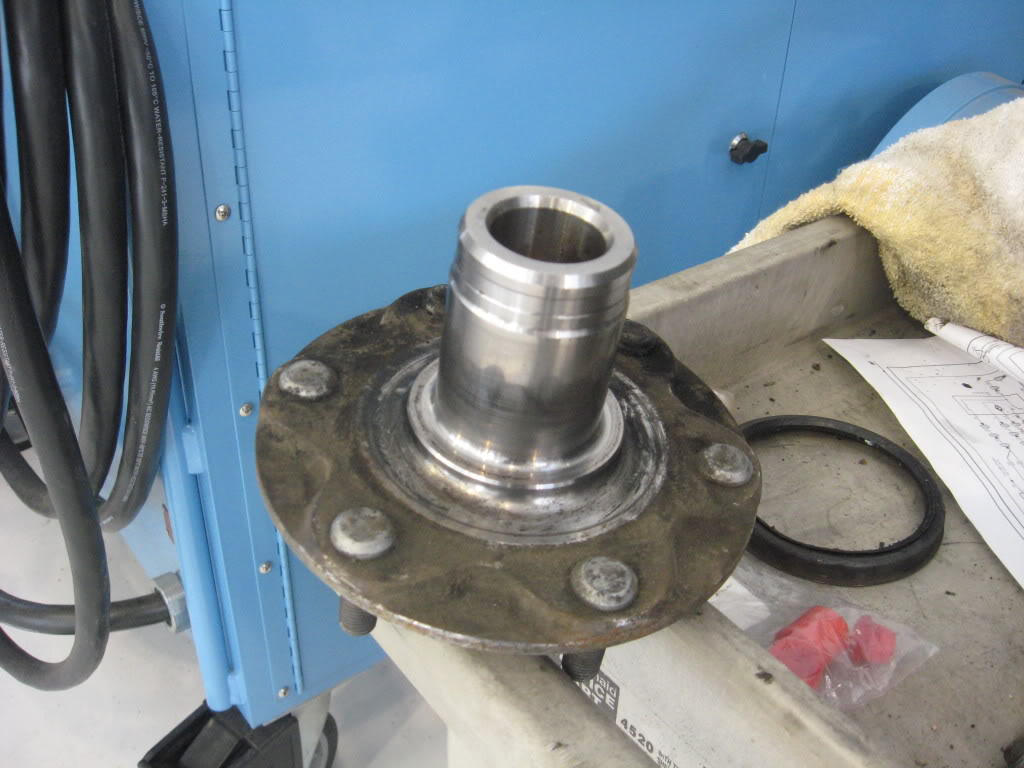
4WD hub
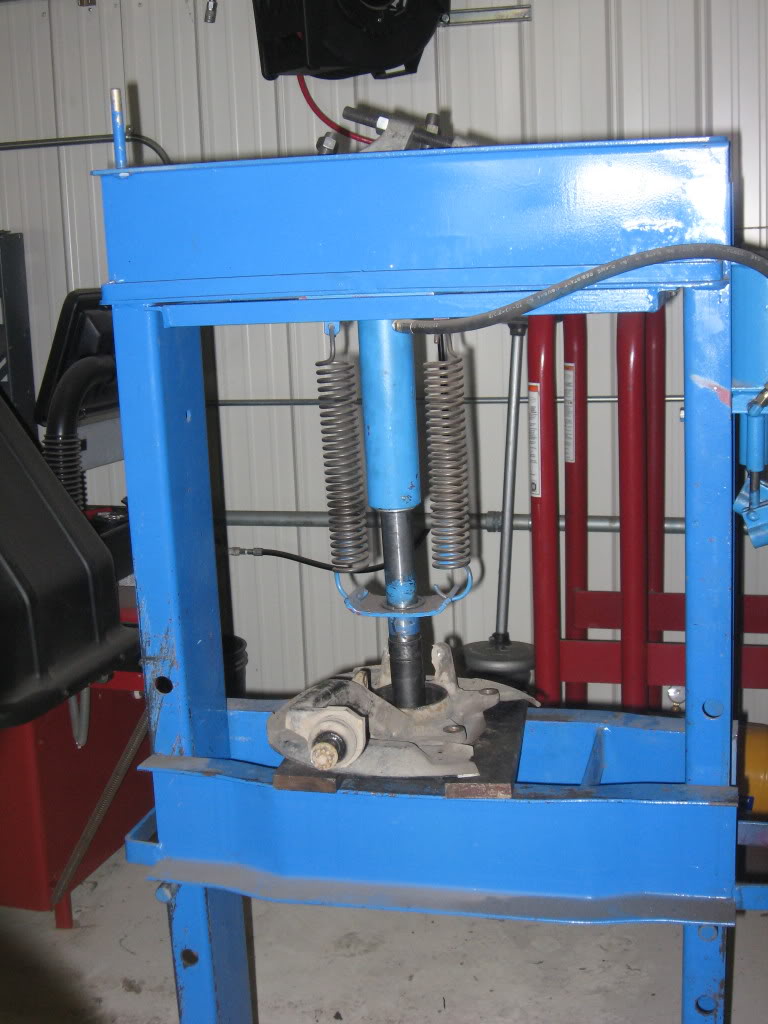
Shop press
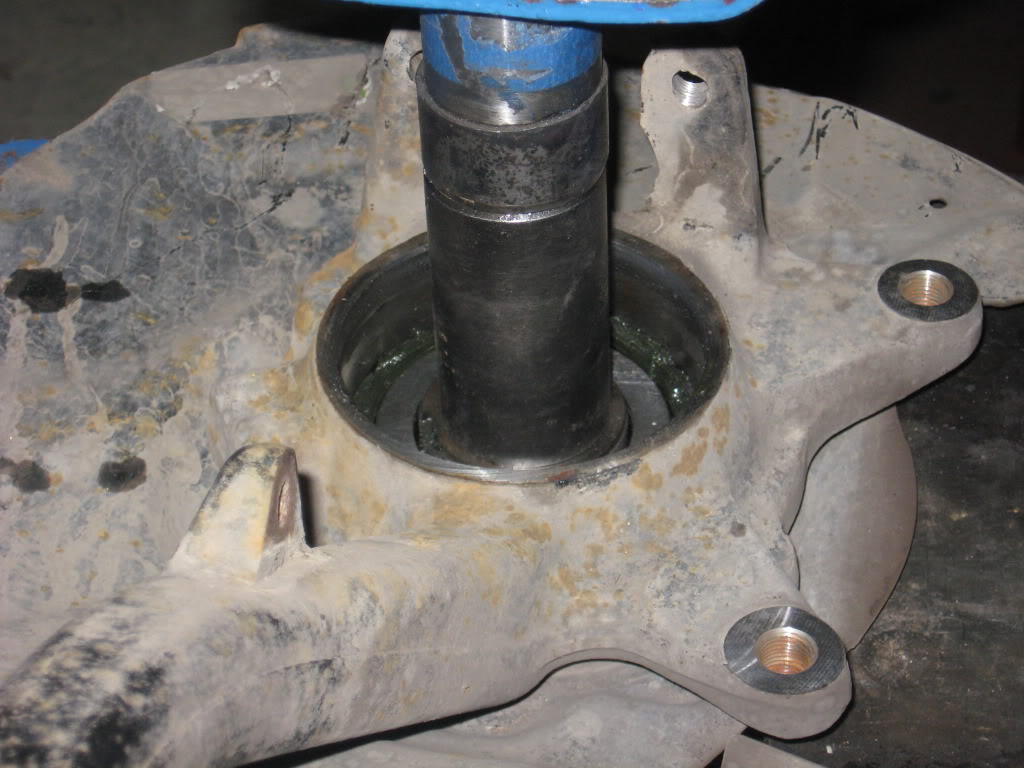
Pressing out the hub
Hub being stubborn
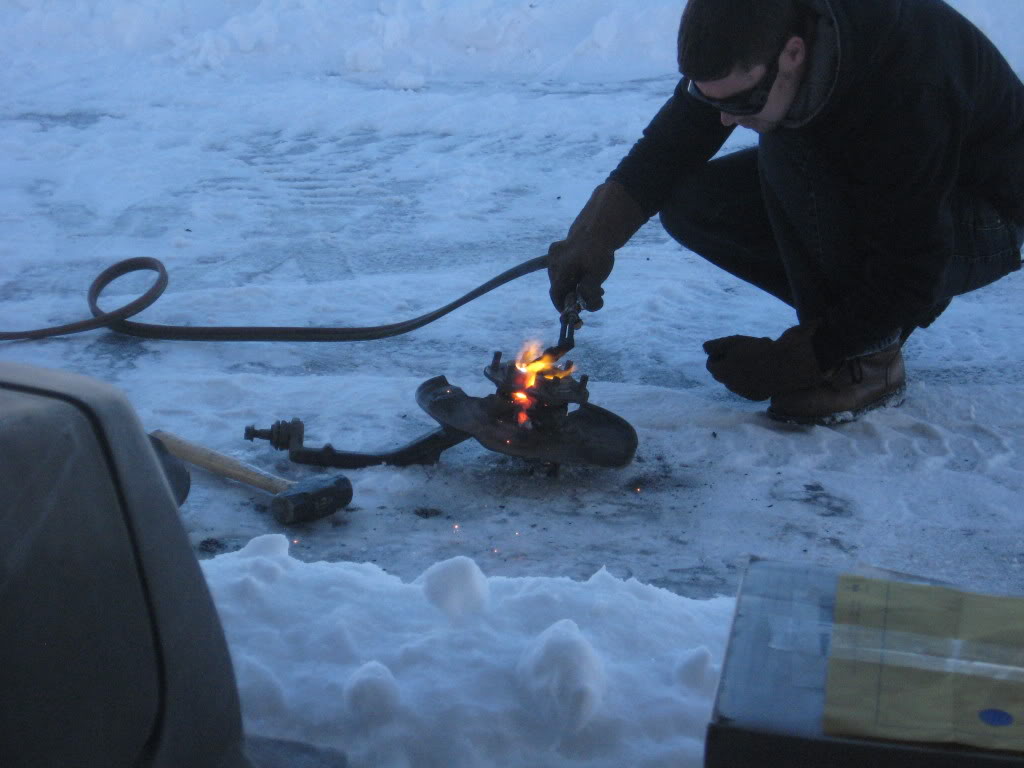
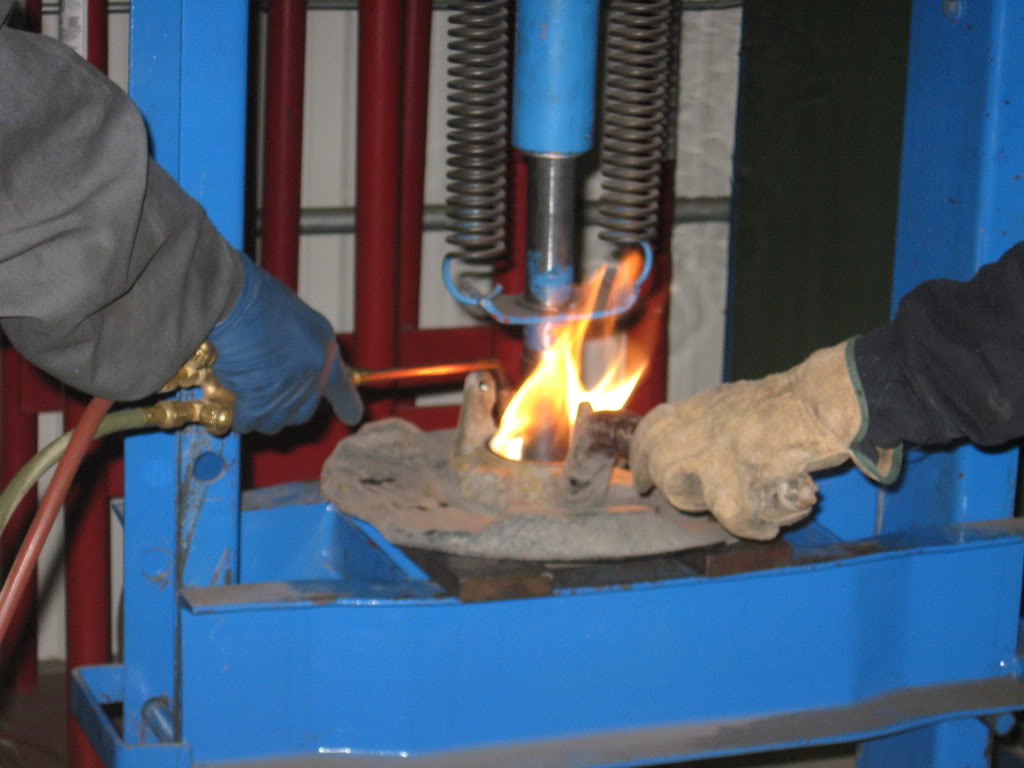
Getting my backing plates off of the 2wd control arm.... hub wouldnt come out so I cut them off with a torch.
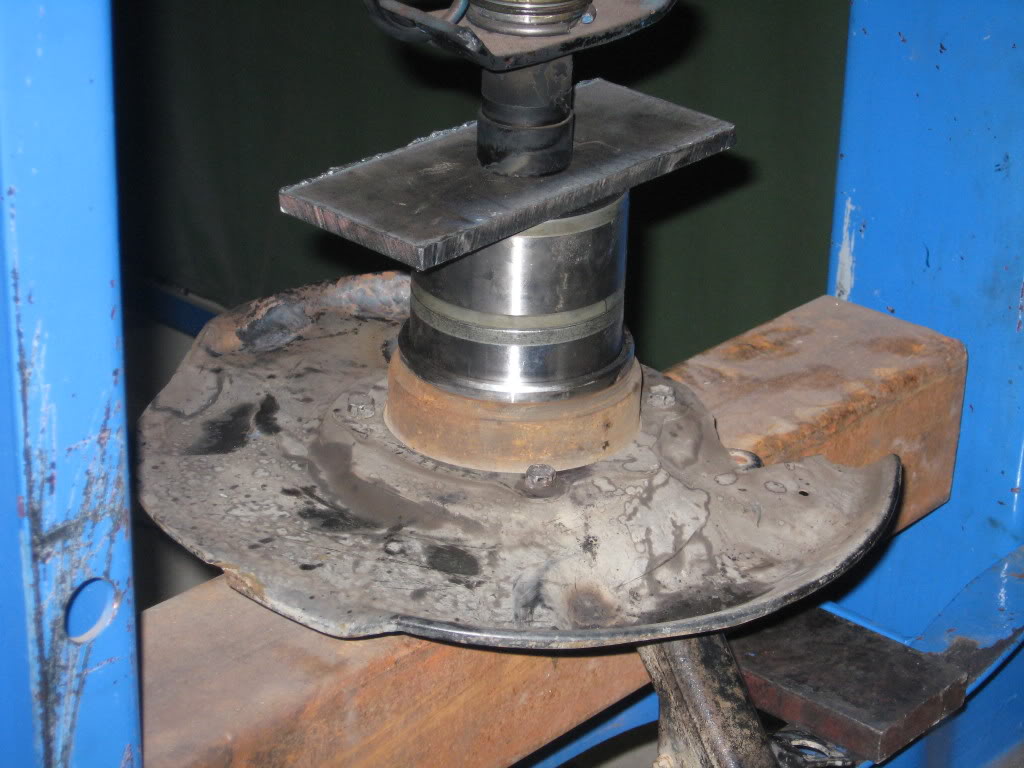
Pressing in the new bearing after I installed the backing plates on the 4wd control arms....NOTE the old bearings worked great to press in the new ones.
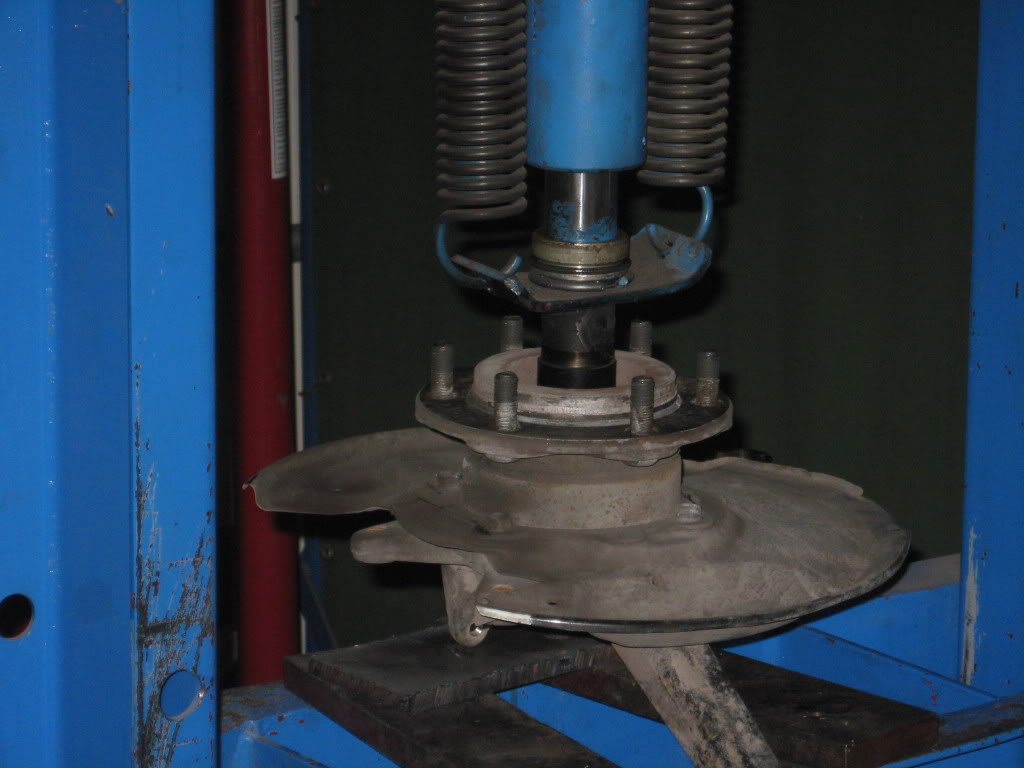
Pressing the 4wd hubs into the new bearings.
Ok now that the control arms are built up I installed the front diff. This was VERY simple because it all just bolted right up the the frame. Installed the front CV shafts and front control arms.
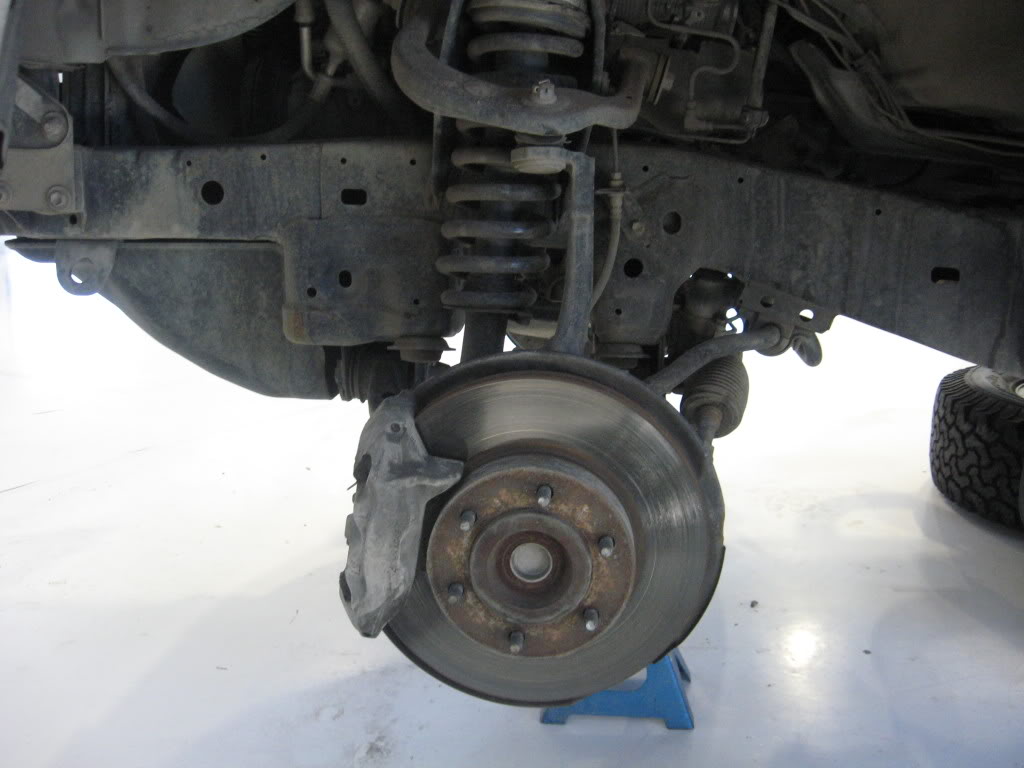
2wd control arms before tear down
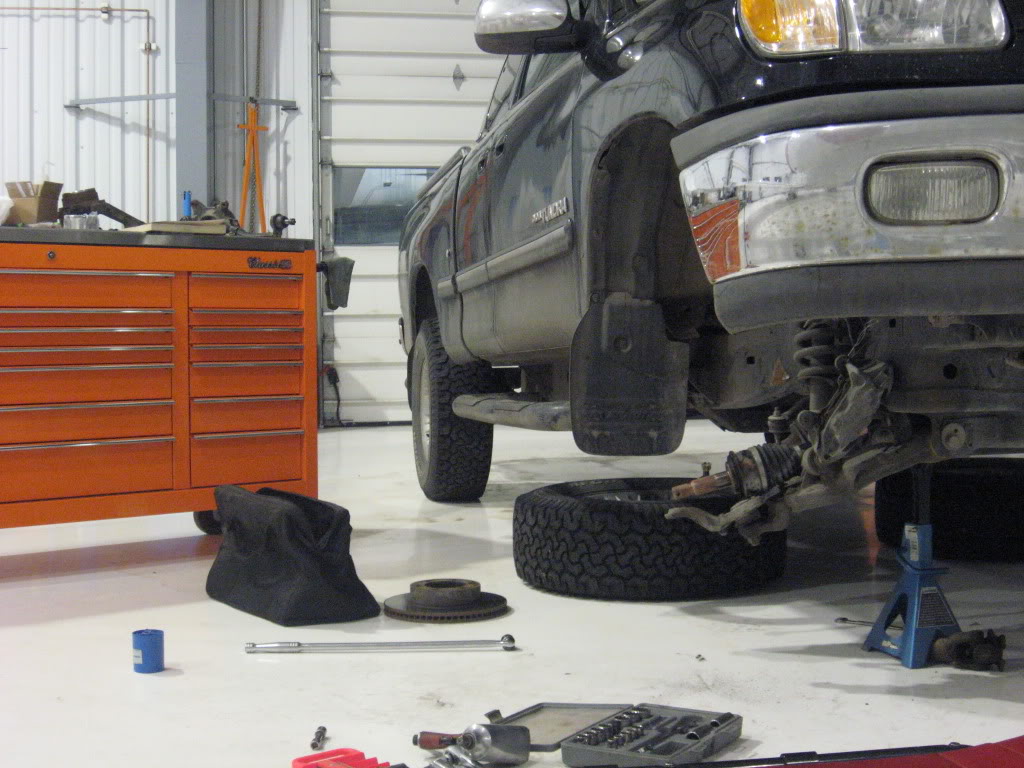

Torn down front end
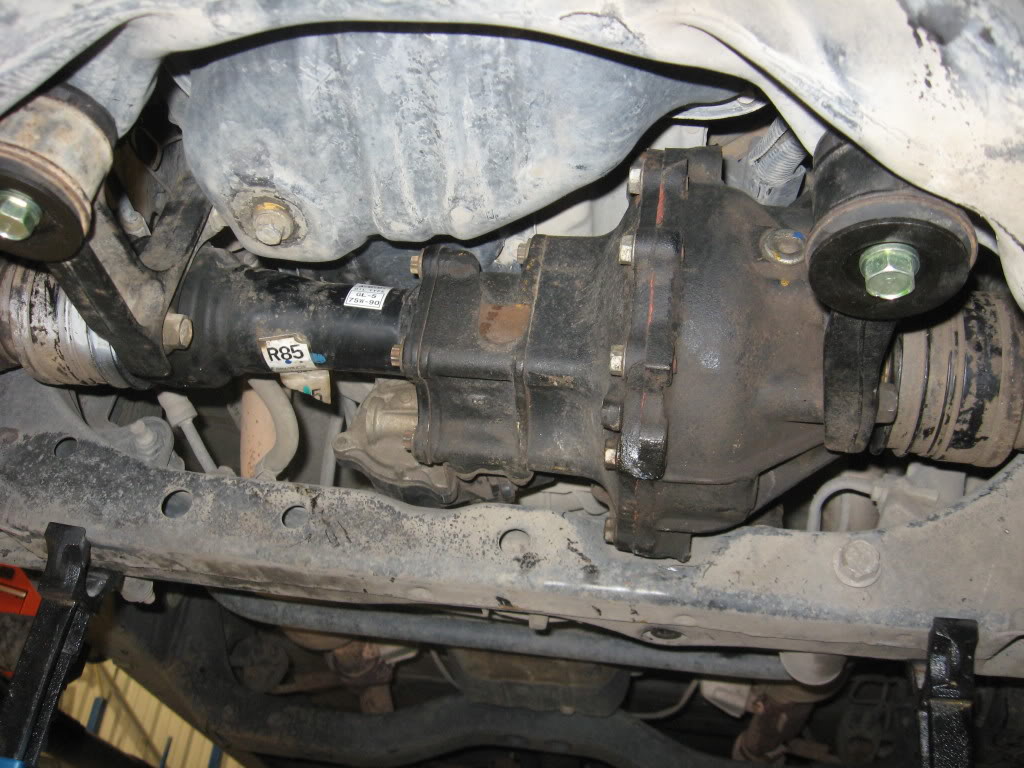
Front Diff slides right in
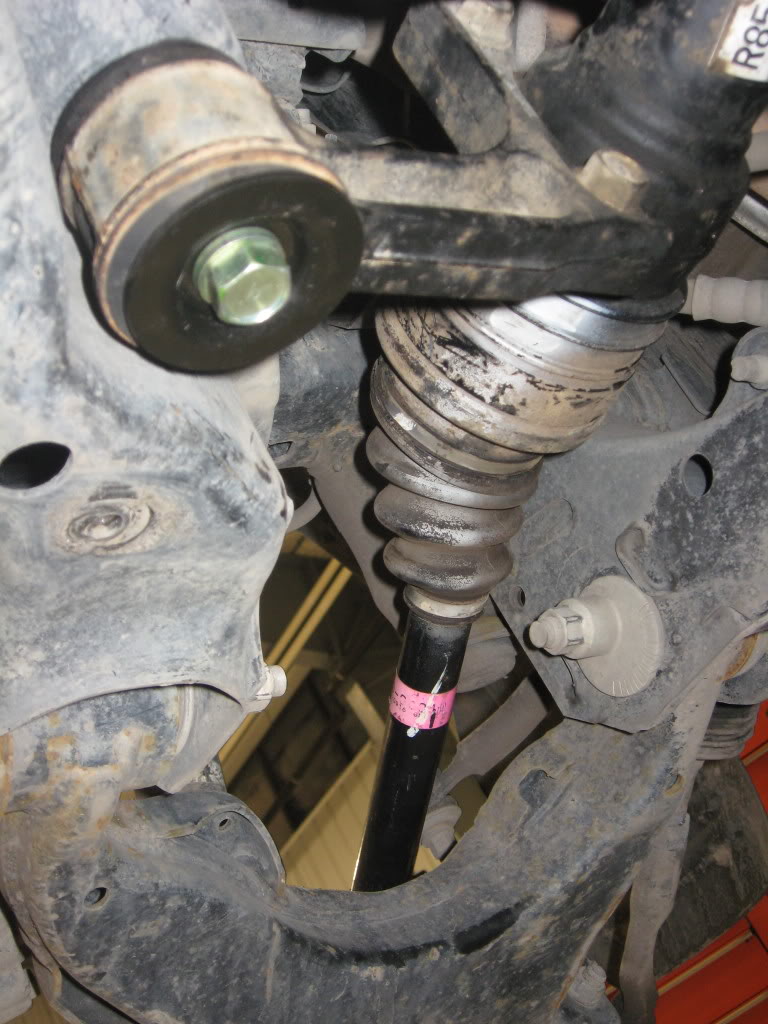
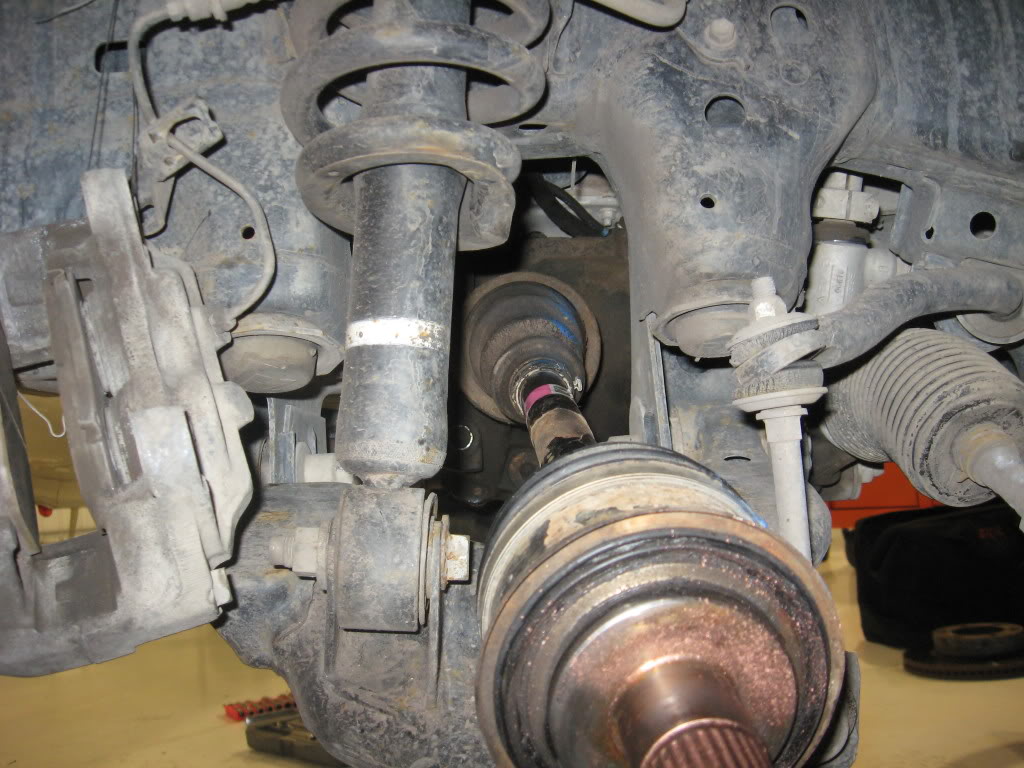
Then the CV shafts
Then just bolt up the lower ball joint to the 4wd control arms. Slide the cv shaft into the hub, hand tighten nut it will hold it in the hub, then bolt on the upper ball joint. Torque every thing to specs, and install the brake caliper and tires and all the other stuff you took apart to get the control arm off. I put the tires back on here for safety reasons.
FRONT END DONE
now the tranny.
Removeing the 2wd tranny CAKE, easy as any other tranny I ever took off.
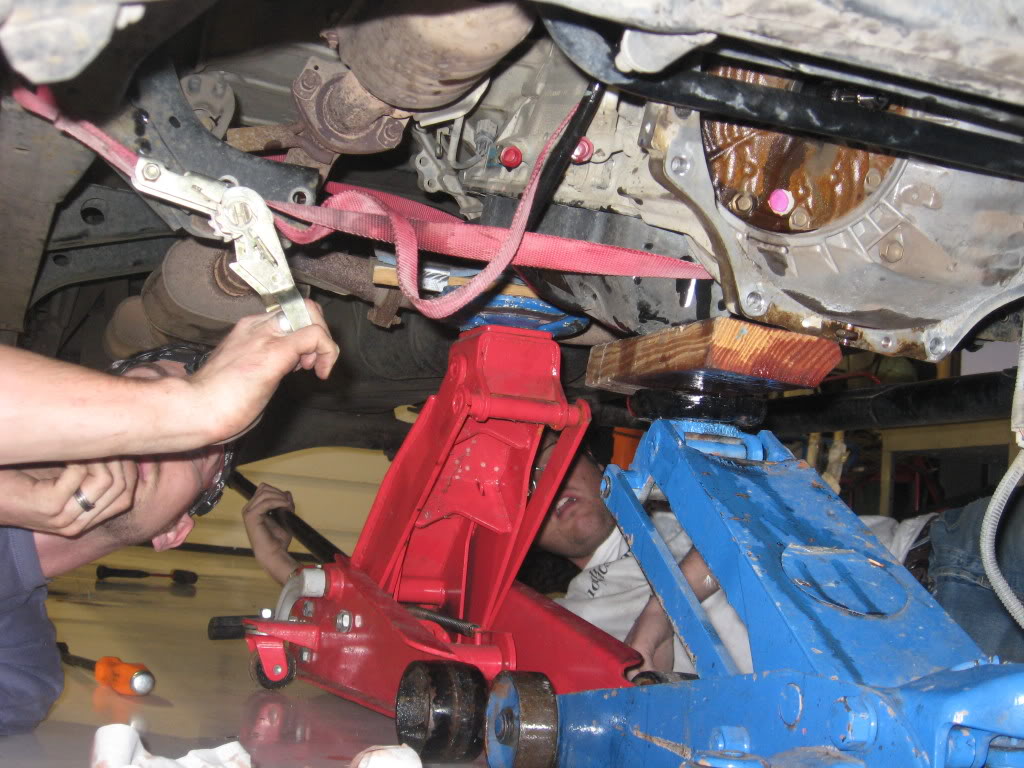
Installing the 4wd tranny not so much. As it turns out the 2wd tranny will drop right out with out removing the exhaust y pipe. The 4wd tranny however will not go back in......easily. As I have said before my truck has around 100000 miles on it, so if you have every worked with an old rusty exhaust you know that if you try and remove it you will break something... But do yourself a favor and just take it off. Trying to get the tranny and transfer case up to where it needed to be was almost impossible with the exhaust in the way. It took 2 floor jacks and 3 people the better part of 3 hours to get it done and we almost dropped it a few times... NOT WORTH IT. This would have been the easiest project except for that. But after the carnage was over it all went back together perfectly.
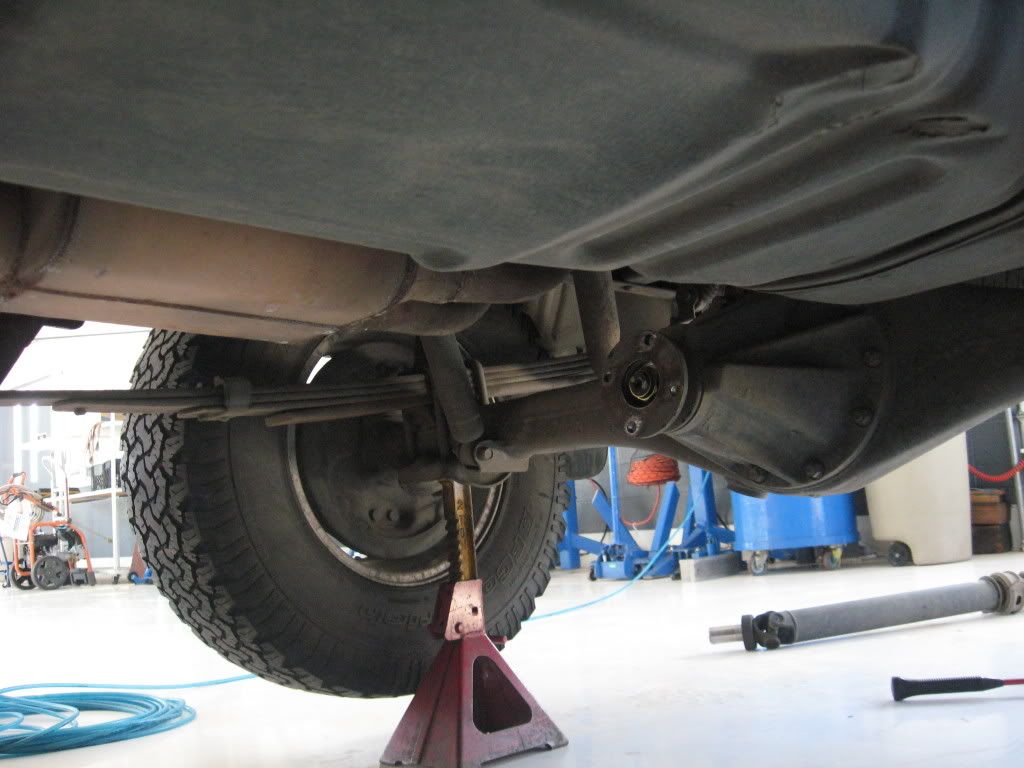
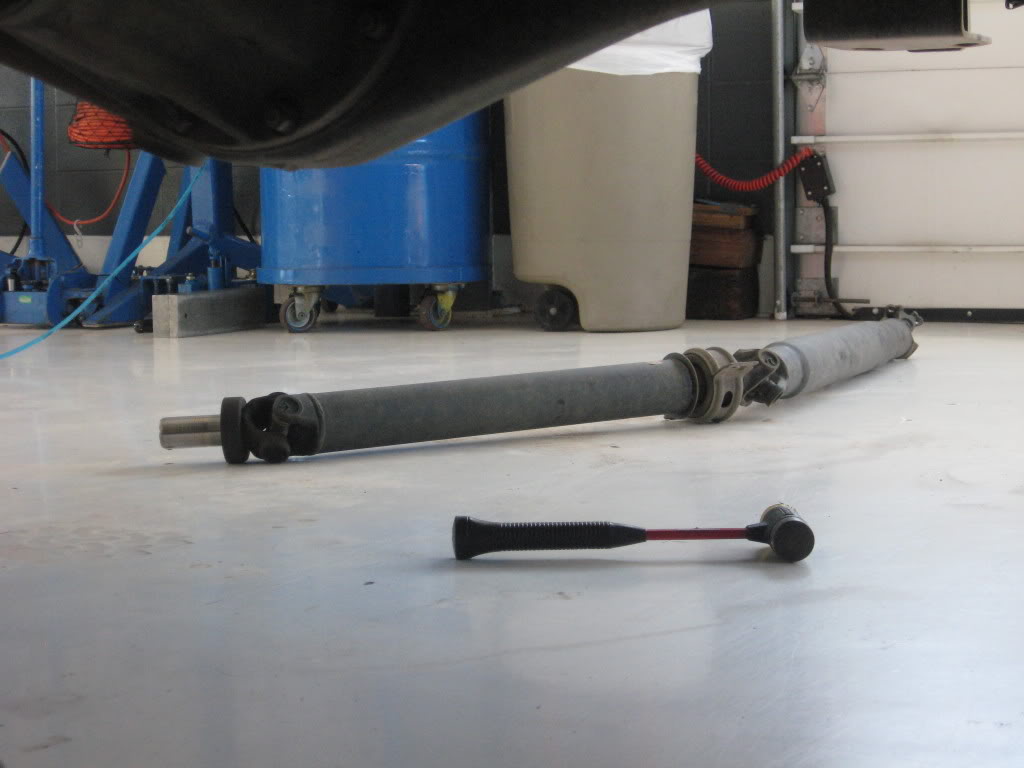
Step 1 remove 2wd driveshaft
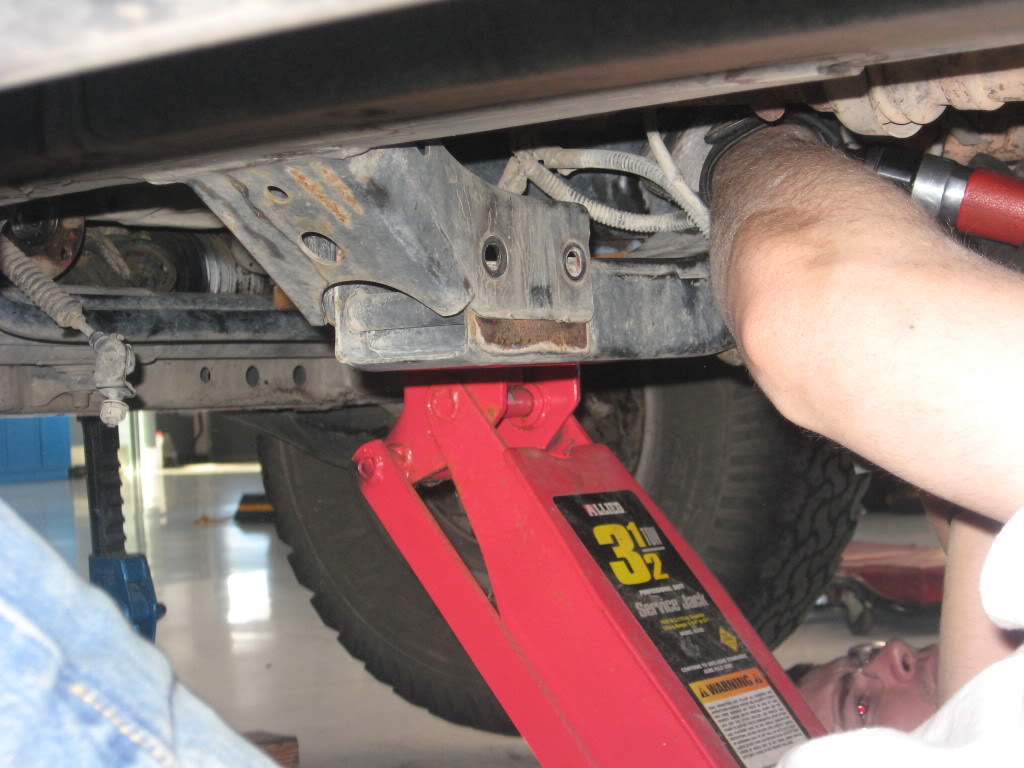
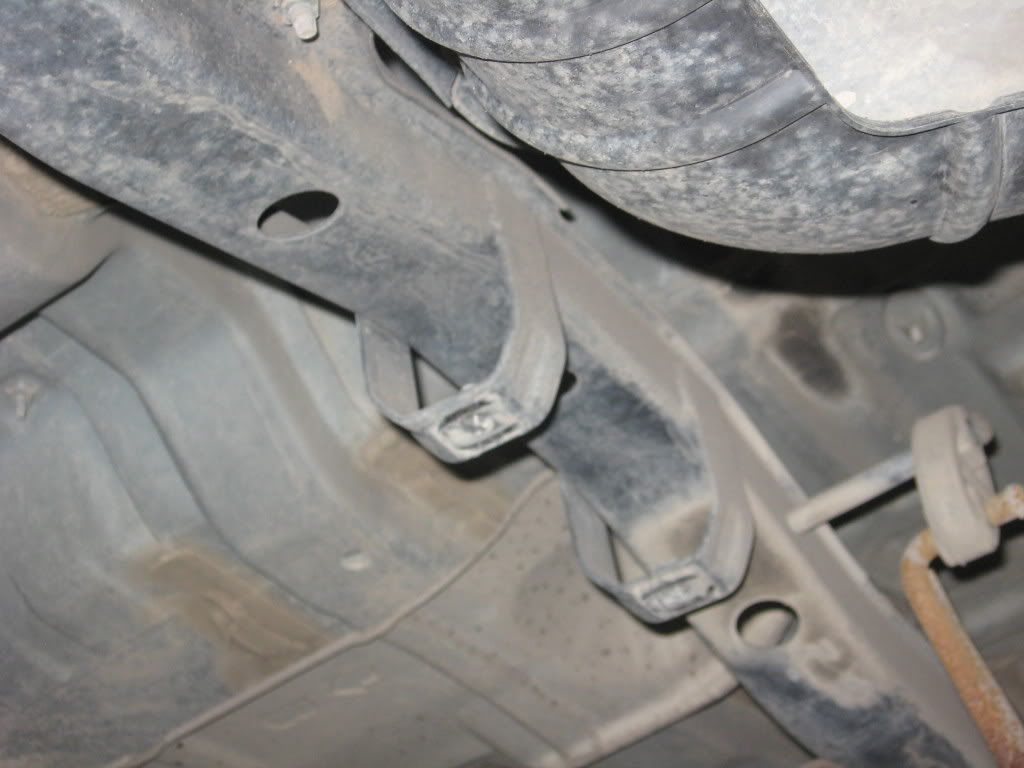
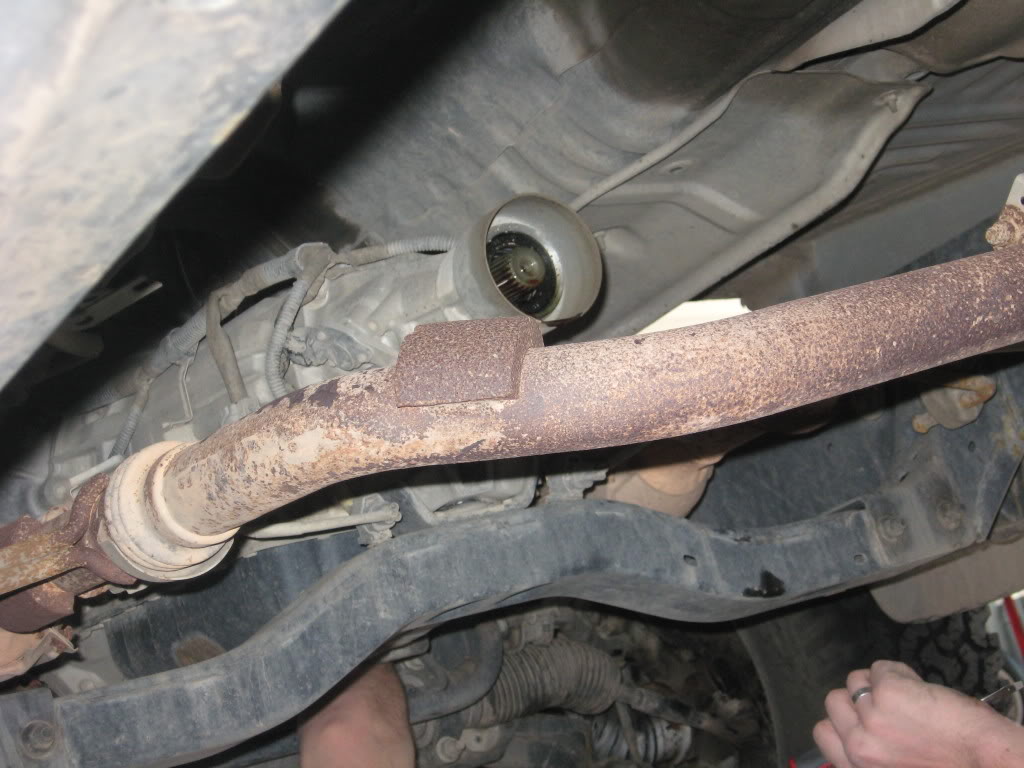
Then cross member, make sure to support the tranny
Bell housing bolts, torque converter bolts, draining the fluid, and a few other mount botls and you are ready to drop it out
Redneck tranny jack, and alot of grunting, swearing, thinking and more swearing and presto the 4wd tranny falls right in. Start all bolts loosly then torque to specs.
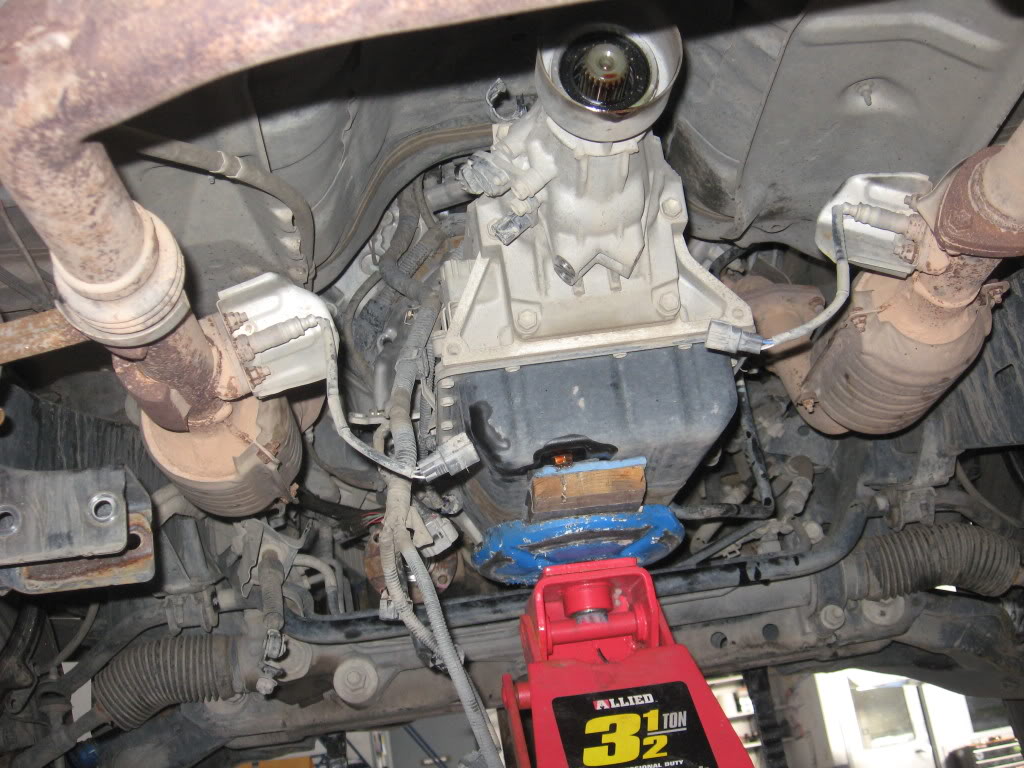
And i found out after spinning the front diff and the rear diff, that the gear ratio in the front end matched my stock one from the rear so no need to swap ring and pinion!!! Gotta love the YOTA!!
Now install the 4wd cross member and tranny mount, slap in the front and rear driveshafts. again start everythign loose and then torque.
Now fill or top off all the fluids.
Now for the most important part...
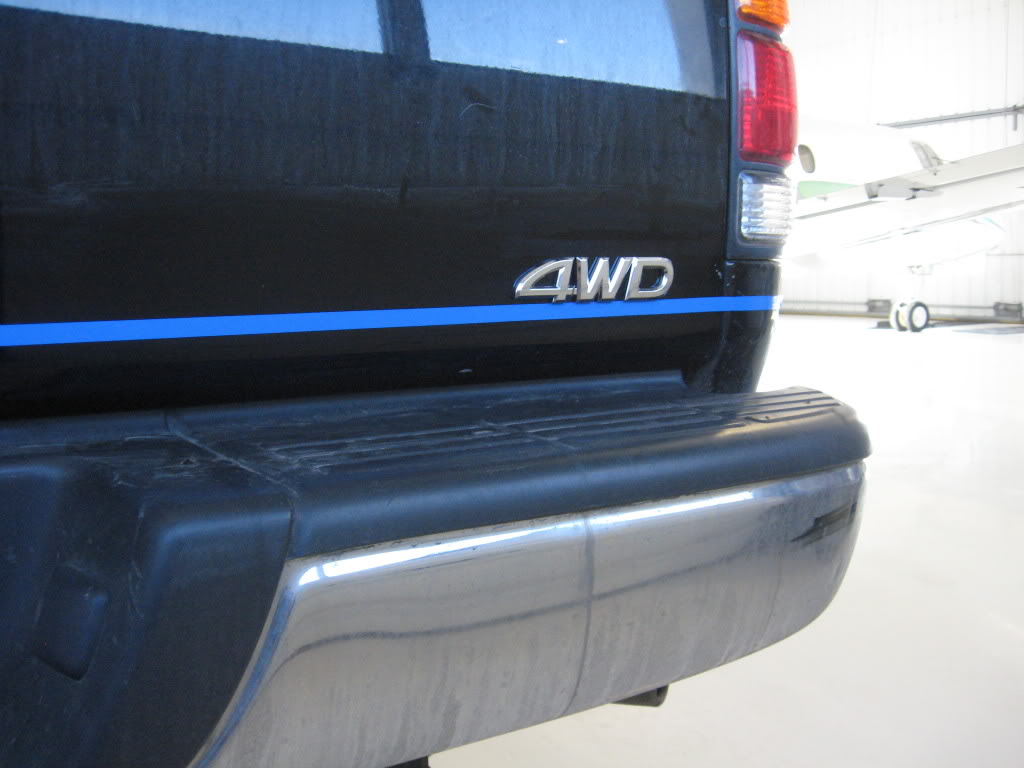
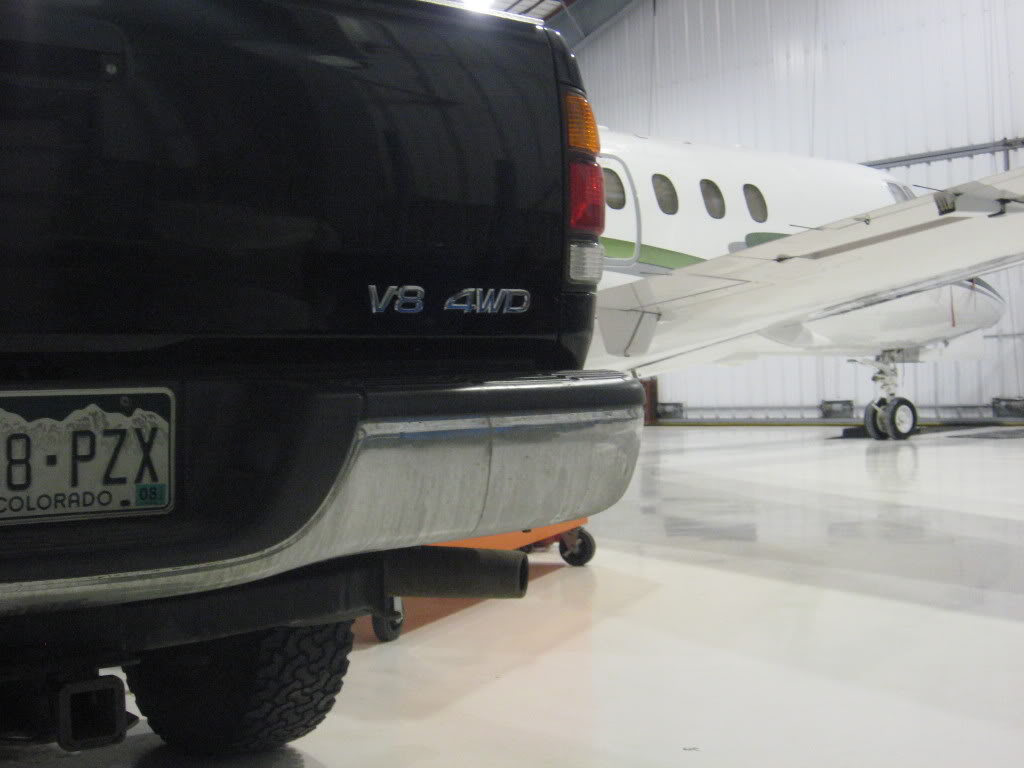
I wanted the truck to look stock so I decided to move my V8 badge.
So I straight lined everything with tape, moved the V8 badge and added a new shiny 4WD badge!! YEA
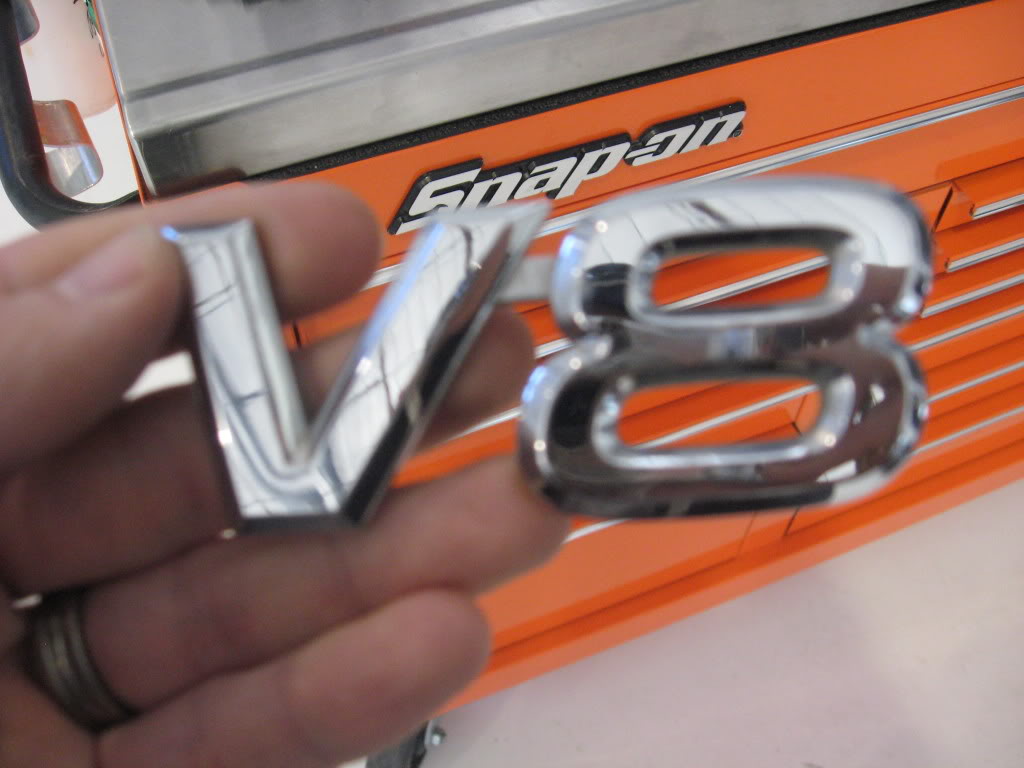
GOTTA keep that!!
YOTA 4WD CONVERSION DONE!!!
Make a long story short ITS DONE. IT WORKS GREAT! AND IT WASNT REALLY THAT BAD....In a shop with some friends help.....
So I left off just having the wiring run into the dash. So from there, I only have to modify 2 more plugs.
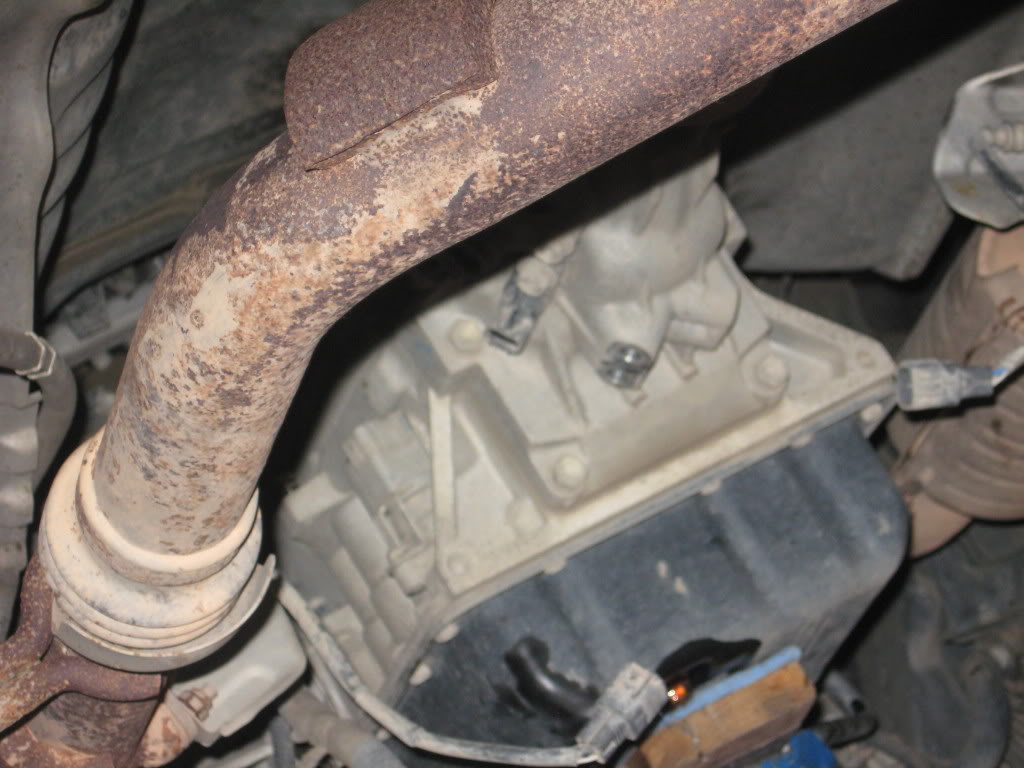
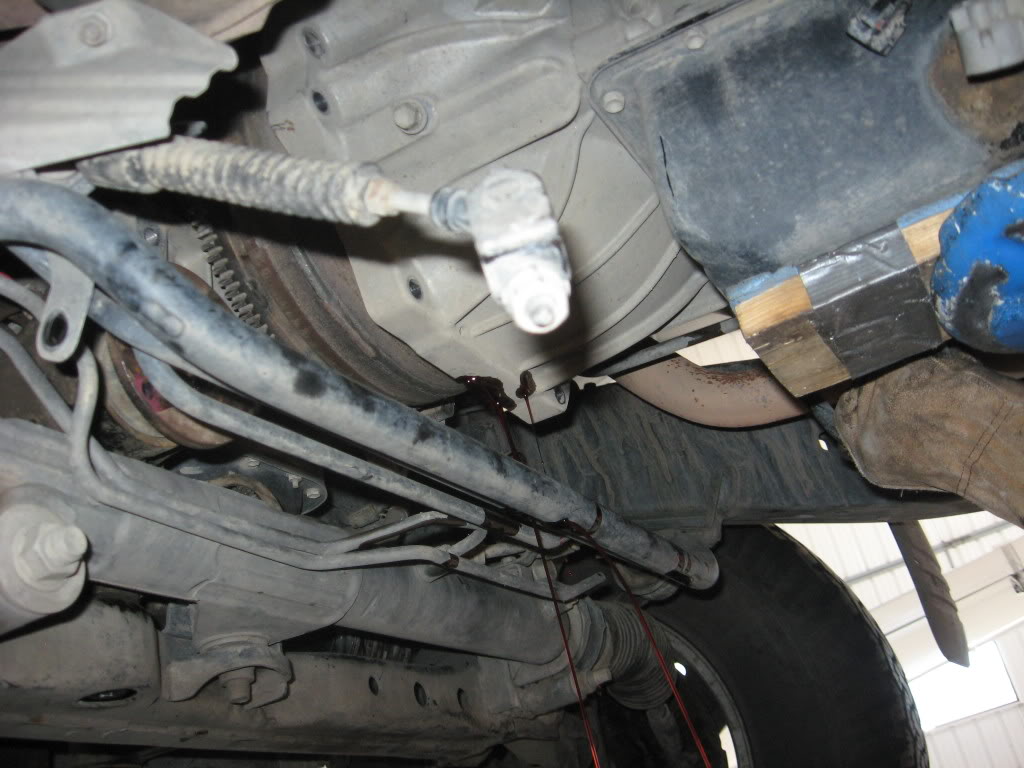
After installing the new tranny and transfer case you have to lengthen one plug because the 2wd Tranny has the sensor at the back of the tranny and the 4wd tranny has it on the transfercase on the opposite side. So cut it off, again stagger your cuts, and add some wire..DONE, all the other wiring for the tranny is the same and the wiring I added, since it was from a stock wiring harness fit great. BTW make sure not to damage to small plastic clips that hold your O2 sensor wiring to the cross member, you will need those clips to re-route the wiring along the transfercase. Mine still had the stock brackets and the plastic clips snapped right in.
The only other wiring I had to modify was for the front diff ADD, On the stock 4wd truck the engine wiring harness had the knock sensor wiring and some of the ADD wiring going thru the same plug. Well my 2wd has a seperate plug for the knock sensor and I didnt feel like cutting into something I didnt have to. The ADD has about a 1 ft wire lead coming from the control to another plug. So i just removed both plug ends and attached my wiring directly to the ADD lead. I can still detach the wiring at the ADD and I didnt have to mess with any of my Knock sensor wiring.
Here is the plug that will go into the ADD in the front diff
Here is the plug attached to the wiring I installed into the dash earlier.
WIRING DONE!!
Now for the fun stuff, I put new bearing into my truck when I did the front end because I needed to swap over the break backing plates and I couldnt figure out a way to remove the hubs and save the bearings. My truck has alot of miles on it so I i figured it was worth it. But just as a side note those bearings are expensive about 150 buck a peice and you only get 1 shot to install them so if you dont know what your doing have a shop do it.
Here is the control arm with no bearing in it.
New bearing
4WD hub
Shop press
Pressing out the hub
Hub being stubborn
Getting my backing plates off of the 2wd control arm.... hub wouldnt come out so I cut them off with a torch.
Pressing in the new bearing after I installed the backing plates on the 4wd control arms....NOTE the old bearings worked great to press in the new ones.
Pressing the 4wd hubs into the new bearings.
Ok now that the control arms are built up I installed the front diff. This was VERY simple because it all just bolted right up the the frame. Installed the front CV shafts and front control arms.
2wd control arms before tear down
Torn down front end
Front Diff slides right in
Then the CV shafts
Then just bolt up the lower ball joint to the 4wd control arms. Slide the cv shaft into the hub, hand tighten nut it will hold it in the hub, then bolt on the upper ball joint. Torque every thing to specs, and install the brake caliper and tires and all the other stuff you took apart to get the control arm off. I put the tires back on here for safety reasons.
FRONT END DONE
now the tranny.
Removeing the 2wd tranny CAKE, easy as any other tranny I ever took off.
Installing the 4wd tranny not so much. As it turns out the 2wd tranny will drop right out with out removing the exhaust y pipe. The 4wd tranny however will not go back in......easily. As I have said before my truck has around 100000 miles on it, so if you have every worked with an old rusty exhaust you know that if you try and remove it you will break something... But do yourself a favor and just take it off. Trying to get the tranny and transfer case up to where it needed to be was almost impossible with the exhaust in the way. It took 2 floor jacks and 3 people the better part of 3 hours to get it done and we almost dropped it a few times... NOT WORTH IT. This would have been the easiest project except for that. But after the carnage was over it all went back together perfectly.
Step 1 remove 2wd driveshaft
Then cross member, make sure to support the tranny
Bell housing bolts, torque converter bolts, draining the fluid, and a few other mount botls and you are ready to drop it out
Redneck tranny jack, and alot of grunting, swearing, thinking and more swearing and presto the 4wd tranny falls right in. Start all bolts loosly then torque to specs.
And i found out after spinning the front diff and the rear diff, that the gear ratio in the front end matched my stock one from the rear so no need to swap ring and pinion!!! Gotta love the YOTA!!
Now install the 4wd cross member and tranny mount, slap in the front and rear driveshafts. again start everythign loose and then torque.
Now fill or top off all the fluids.
Now for the most important part...
I wanted the truck to look stock so I decided to move my V8 badge.
So I straight lined everything with tape, moved the V8 badge and added a new shiny 4WD badge!! YEA
GOTTA keep that!!
YOTA 4WD CONVERSION DONE!!!


