aa1911's '08 Sequoia SR5 4x4 and 5.7L monster machine
 02-25-2012, 07:05 PM
#41
so with the extra weight, before and after ground to fender height only dropped 1/4", not lying there; hardly moved the suspension. In due time I'm expecting more sag of course but no rub or any issues. did a 10 min test drive today and she does great.
And a huge thanks to Vital for the help today! Had 4 of us working this joker today, certainly recommend at least 3 to do this install.
Anyway, tired and my wireless isn't working so gonna veg out on the couch and do the write up tomorrow.... I took quite a few pics, gonna try and put it together in a detailed job so future Sequoia owners can benefit.
Woooo Hooooo!!!
 02-25-2012, 11:09 PM
#44
so with the extra weight, before and after ground to fender height only dropped 1/4", not lying there; hardly moved the suspension. In due time I'm expecting more sag of course but no rub or any issues. did a 10 min test drive today and she does great.
And a huge thanks to Vital for the help today! Had 4 of us working this joker today, certainly recommend at least 3 to do this install.
Anyway, tired and my wireless isn't working so gonna veg out on the couch and do the write up tomorrow.... I took quite a few pics, gonna try and put it together in a detailed job so future Sequoia owners can benefit.
Woooo Hooooo!!!
And a huge thanks to Vital for the help today! Had 4 of us working this joker today, certainly recommend at least 3 to do this install.
Anyway, tired and my wireless isn't working so gonna veg out on the couch and do the write up tomorrow.... I took quite a few pics, gonna try and put it together in a detailed job so future Sequoia owners can benefit.
Woooo Hooooo!!!
02-26-2012, 05:21 PM
#45
OK, will start with some initial removal of the stock junk front end....
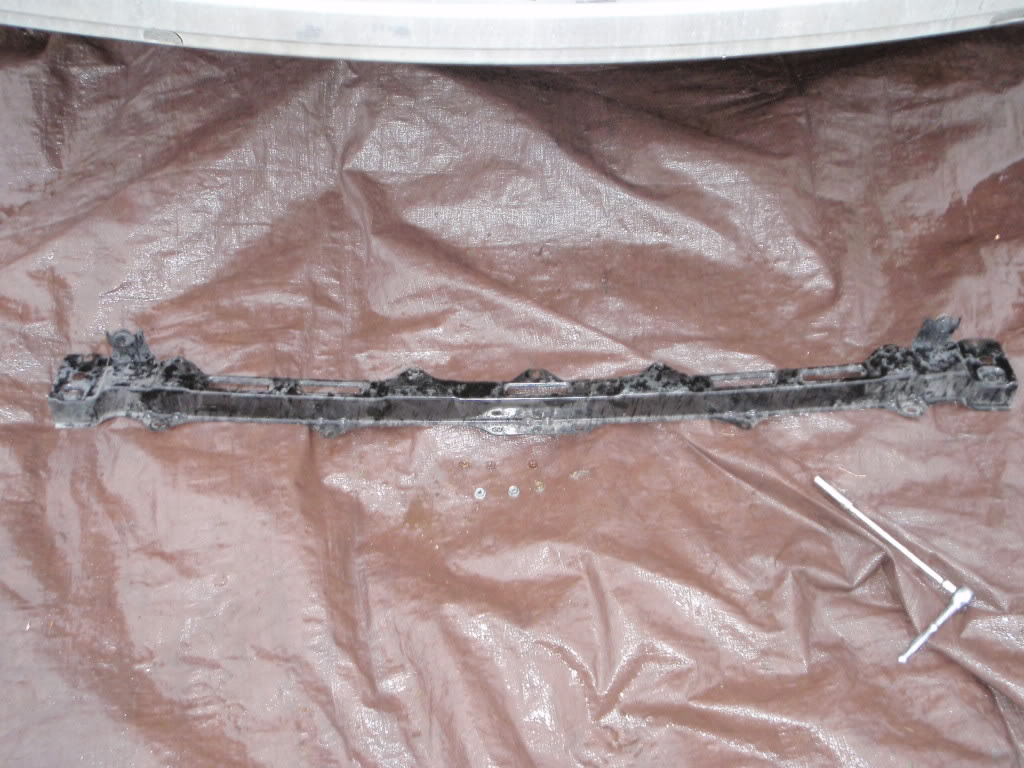
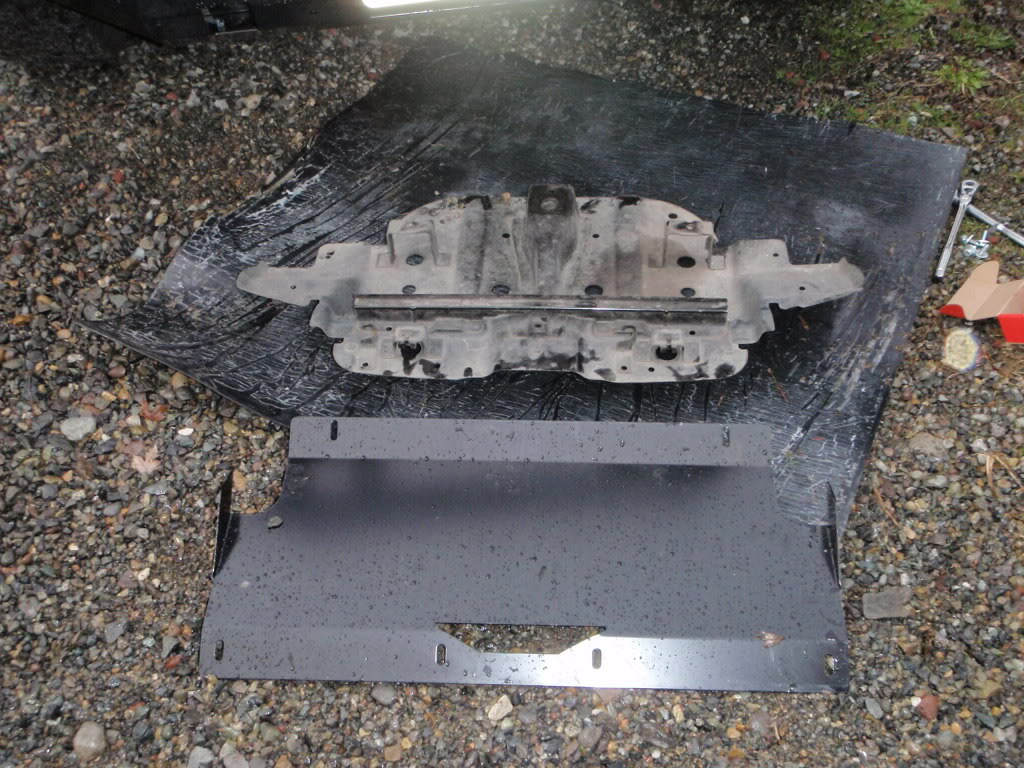
Skid plate off first, 5 bolts; 3 in rear, two front on crossbrace. Someone used and impact gun on these, jeez. They are 12mm.
lower inner fender liners were the first thing to go; these do not get re-used. Here's a side shot also showing the stock plastic 'bumper'
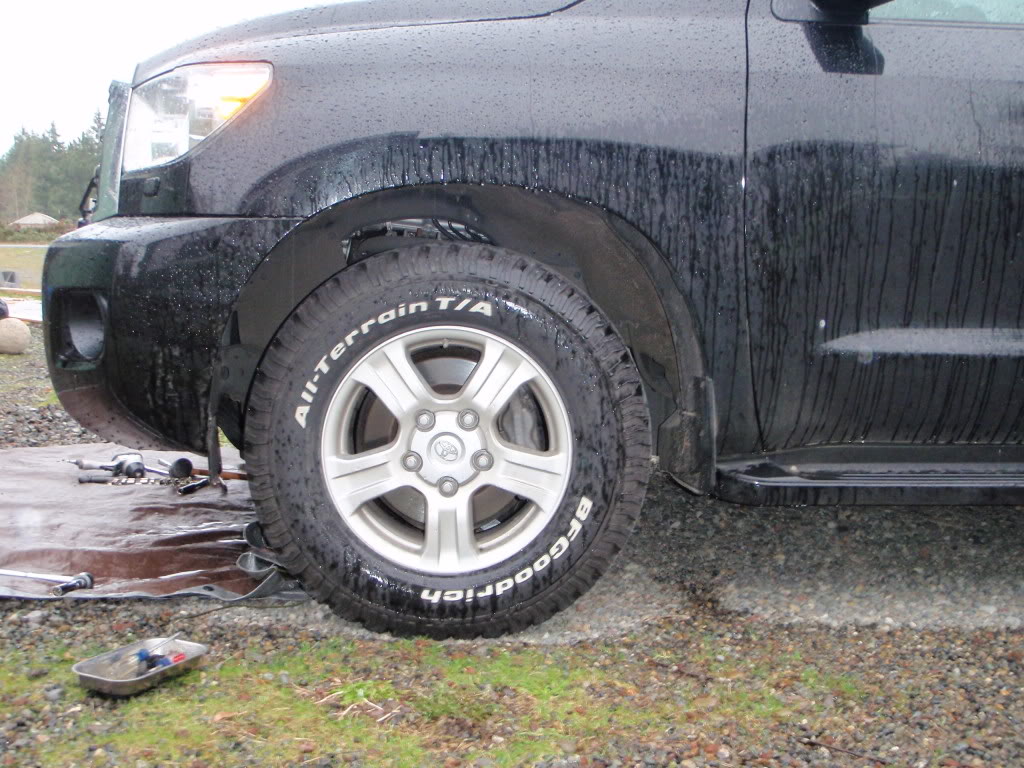
lower inner fender liner; just held in with 3 plastic tabs; two have 'screw' slots but are worthless. Pull the center piece with a screwdriver out about 1/4" and then pry on the whole thing, comes out clean.
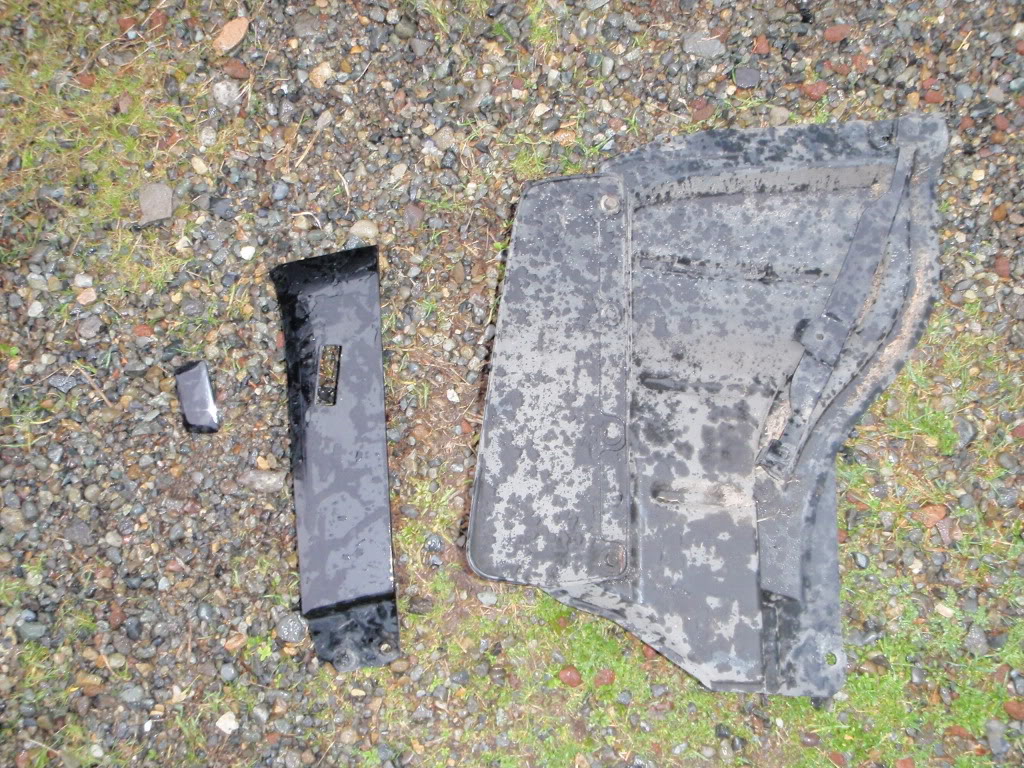
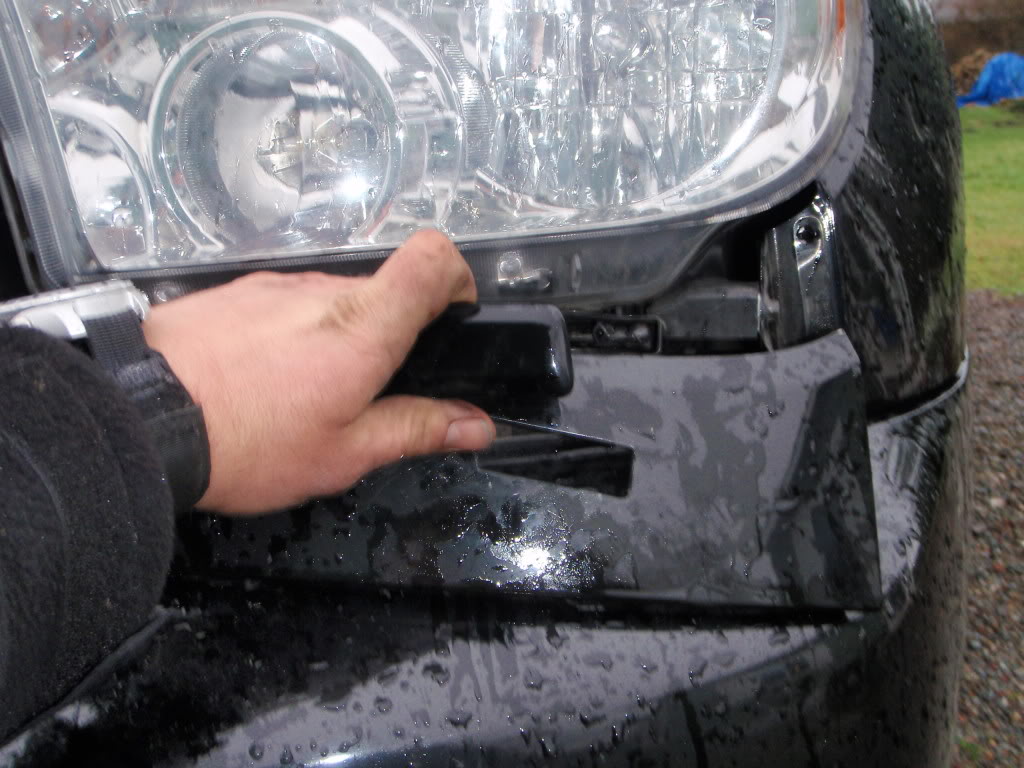
removed the trim below headlights; two plastic tabs on each towards the center, pull straight out; the small rectangular deal is some sort of add on that I don't have and not really sure what it is but carefully removed with a small screwdriver on the release tabs.
Skid plate off first, 5 bolts; 3 in rear, two front on crossbrace. Someone used and impact gun on these, jeez. They are 12mm.
lower inner fender liners were the first thing to go; these do not get re-used. Here's a side shot also showing the stock plastic 'bumper'
lower inner fender liner; just held in with 3 plastic tabs; two have 'screw' slots but are worthless. Pull the center piece with a screwdriver out about 1/4" and then pry on the whole thing, comes out clean.
removed the trim below headlights; two plastic tabs on each towards the center, pull straight out; the small rectangular deal is some sort of add on that I don't have and not really sure what it is but carefully removed with a small screwdriver on the release tabs.
02-26-2012, 05:28 PM
#46
Also, I did disconnect the neg battery terminal to avoid any airbag deployment! could not find the fuse so just yoinked it all to be safe.
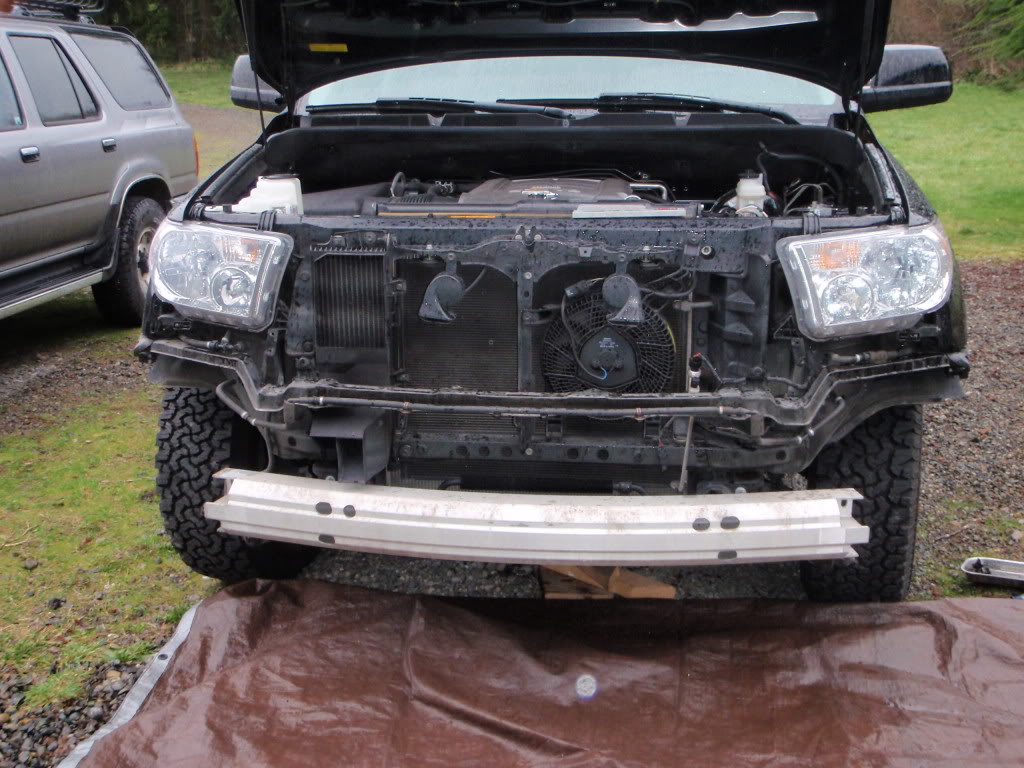
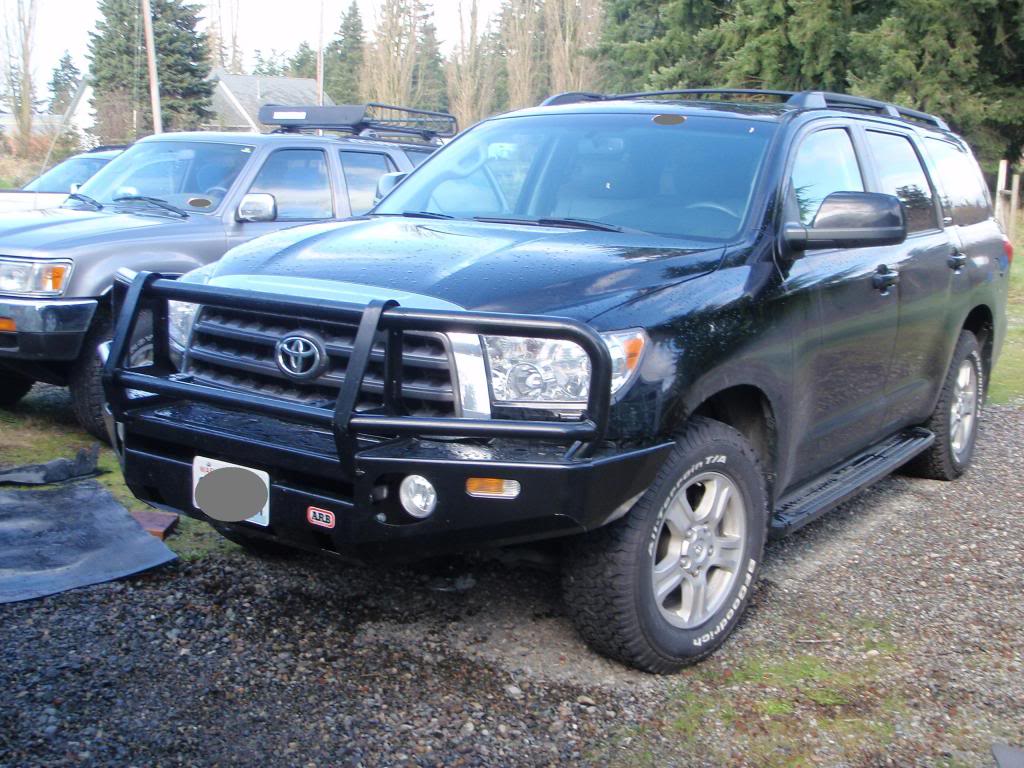
removed the bumper cover/trim, held in place with 7 or 8 plastic tabs; same deal, pry the center part up first and then the whole rivet thing pulls out clean. Here's the real bumper, some alloy crap held on with M12 flange nuts (3 each side?)
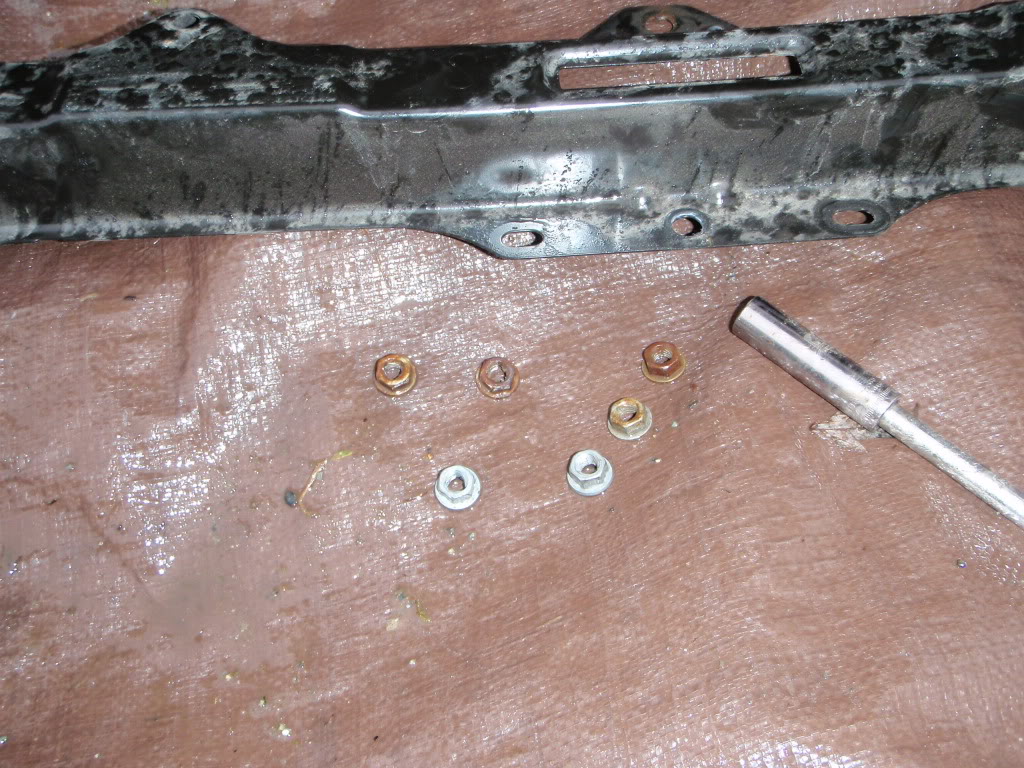
the stock mounts get removed, these are held on with large flange nuts also, 14mm wrench for those; flange nuts do get re-used here, save them for the new mounts.
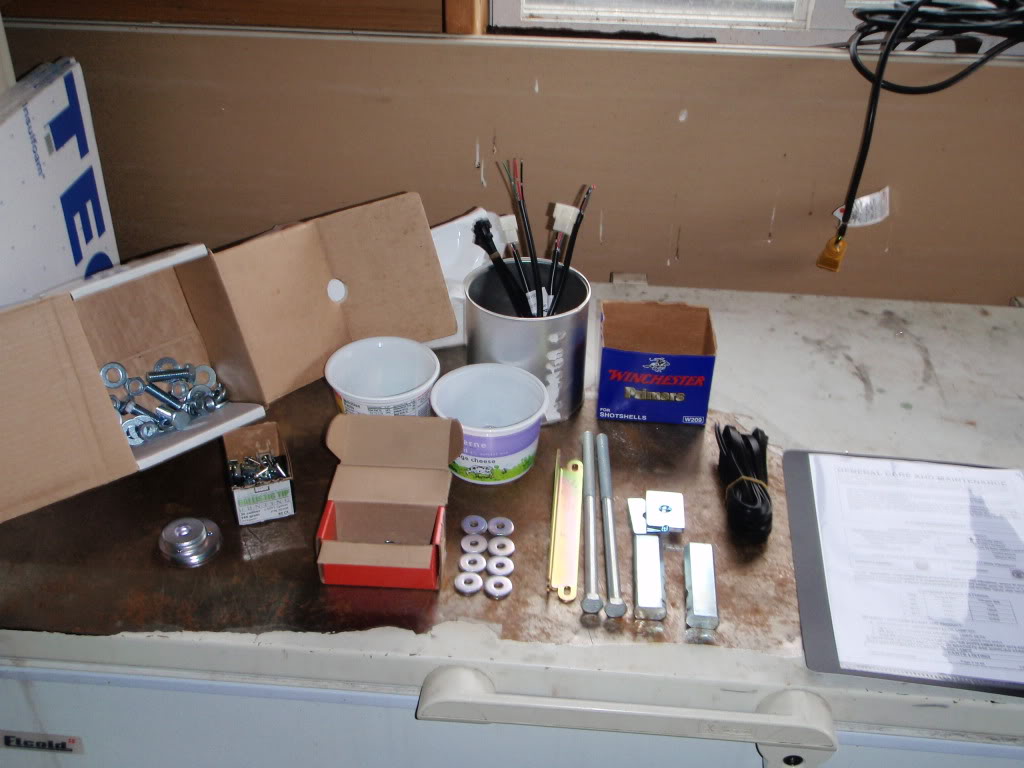
also, had all my bolts from the bag install kit layed out and organized with my instructions....
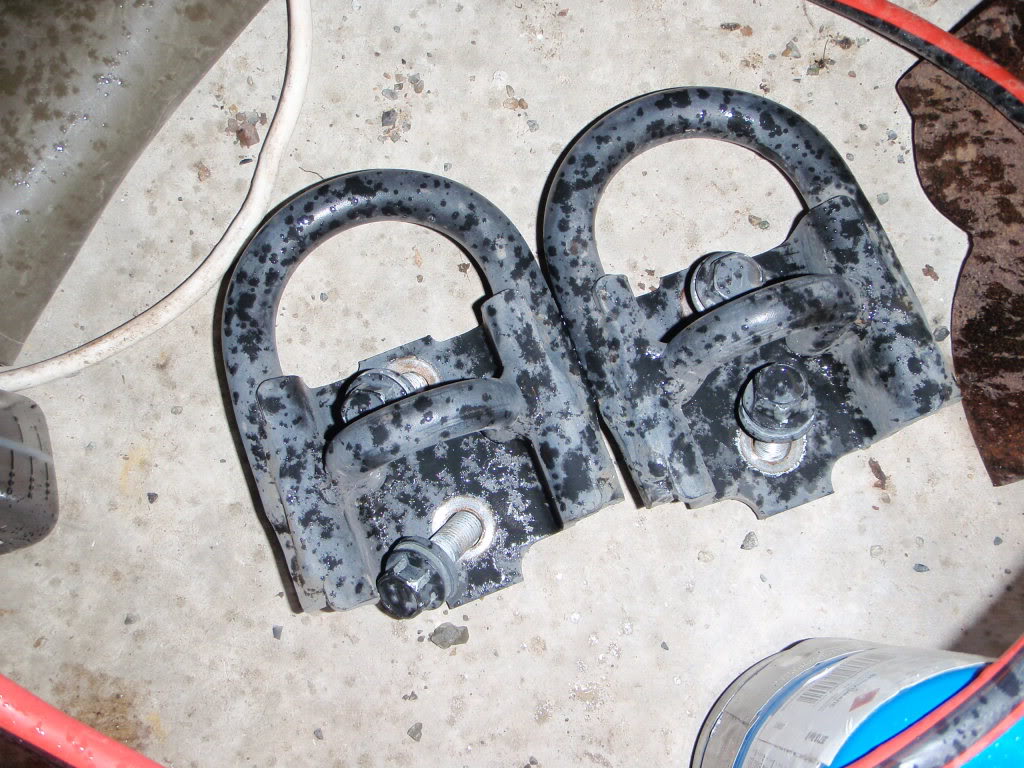
Remove stock tow hooks, two 17mm nuts, these also get reused.
removed the bumper cover/trim, held in place with 7 or 8 plastic tabs; same deal, pry the center part up first and then the whole rivet thing pulls out clean. Here's the real bumper, some alloy crap held on with M12 flange nuts (3 each side?)
the stock mounts get removed, these are held on with large flange nuts also, 14mm wrench for those; flange nuts do get re-used here, save them for the new mounts.
also, had all my bolts from the bag install kit layed out and organized with my instructions....
Remove stock tow hooks, two 17mm nuts, these also get reused.
02-26-2012, 05:32 PM
#47
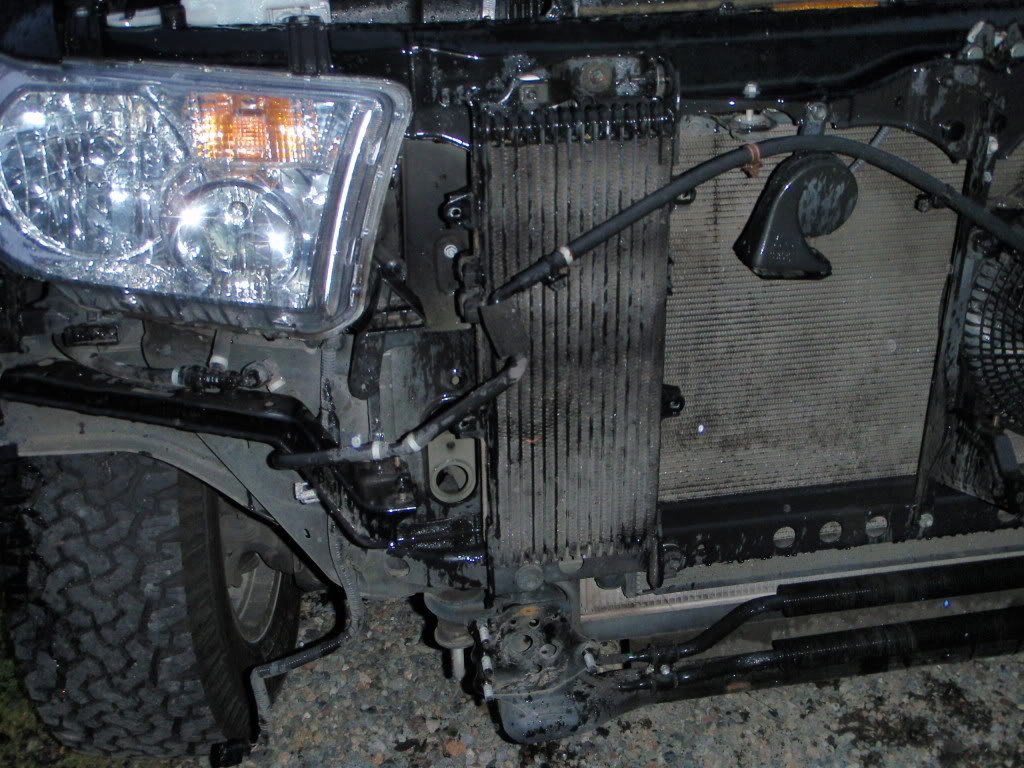
also, there is a thin stamped bracket accross the front holding a hose line, remove connectors for the hoses to free hose, then use 10mm socket to remove the 5 flange nuts holding it in place; This DOES fit back into place, but set aside until the bumper itself is on initially at least.
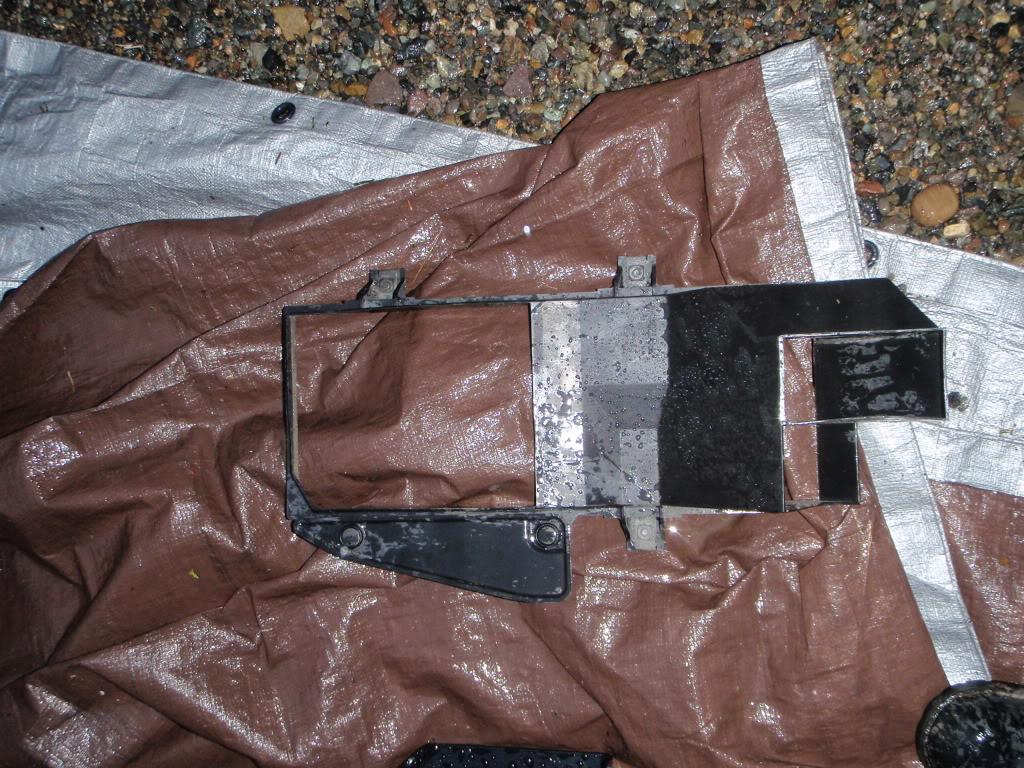
This thing got in the way of the pass side bracket, thought about trimming it but decided to just get rid of it altogether; it's a 'guard' for the tranny cooler radiator.
bracket fitted up...

This thing got in the way of the pass side bracket, thought about trimming it but decided to just get rid of it altogether; it's a 'guard' for the tranny cooler radiator.
bracket fitted up...
02-26-2012, 05:36 PM
#48
oops, 6 nuts holding that small brace...
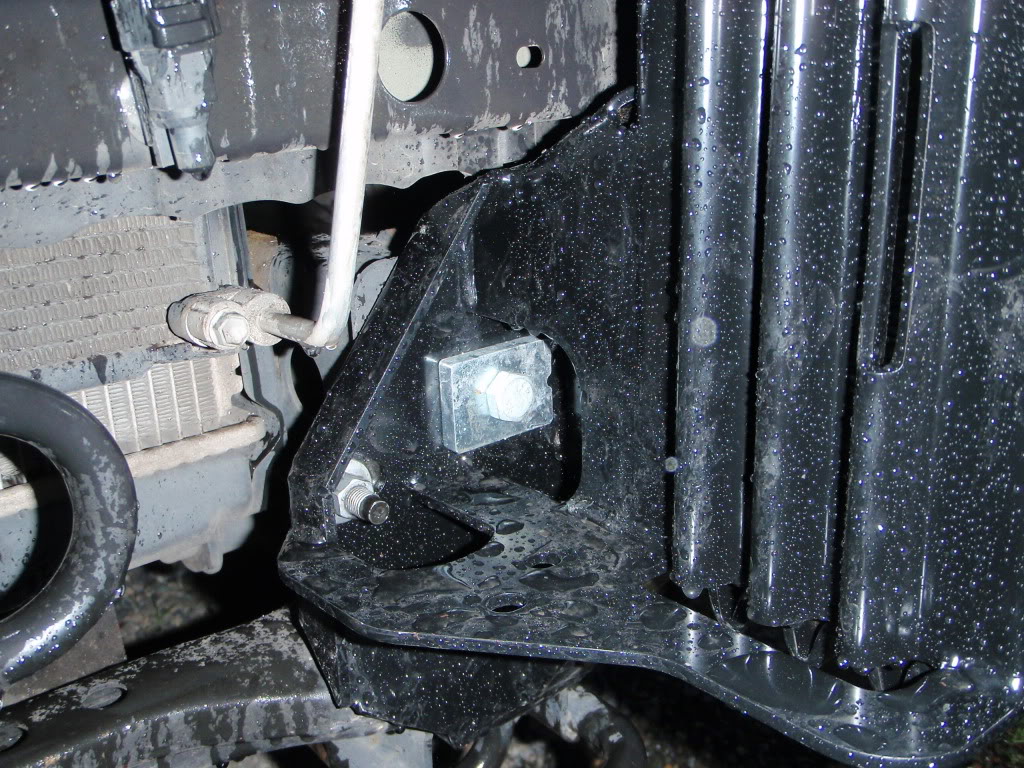
Now here's where the tundra/sequoia instructions differ; the chassis nut (large rectangular chunk) that goes thru the frame and is secured with the super long bolts provided is installed backwards on the sequoia; the nut will be on the bracket, not from the other side; the frame must be different from the tundras.... does the same thing tho, no issue...
here it is with the 8mm plate installed as a 'washer' or spacer.
 I believe that one was an 18mm wrench, no room for a socket either
Now here's where the tundra/sequoia instructions differ; the chassis nut (large rectangular chunk) that goes thru the frame and is secured with the super long bolts provided is installed backwards on the sequoia; the nut will be on the bracket, not from the other side; the frame must be different from the tundras.... does the same thing tho, no issue...
here it is with the 8mm plate installed as a 'washer' or spacer.
I believe that one was an 18mm wrench, no room for a socket either
02-26-2012, 05:42 PM
#49
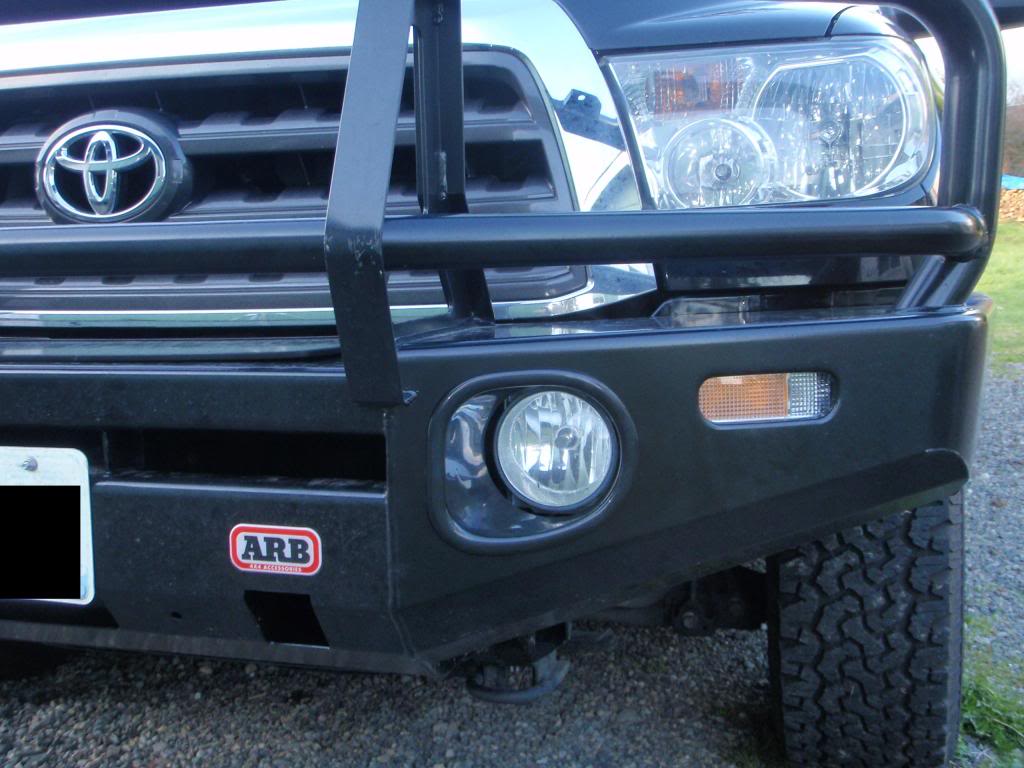
didn't take much pics of the lights intalling into the new bumper but it's pretty straightforward; install the OE fog lights to the new bracket provided, bolt it to the bumper from the inside with the adjustment screw fitted in there; I still have not put the plastic inserts in yet, cut the centers out and then they get glued in to the bumper hole with sikaflex or whatever it's called... later...

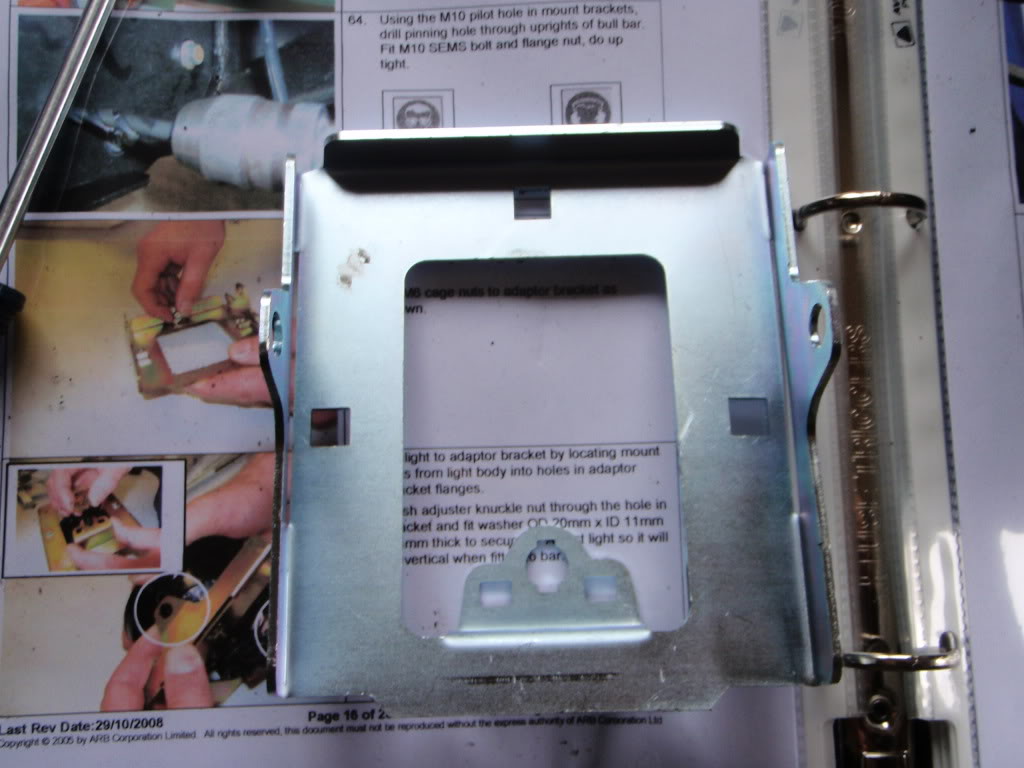
this is the bracket you install the OE fog lamps too...
the other turn signal lights, the original screws and clips do not get reused; take them apart and pop the nuts into the inside of the bumper and use the new (shorter) screws to secure them; pretty loose/crappy IMO but they are inside and protected at least. The other funny thing is that I don't have turn signals down there on the OE bumper so they are just there for show until I wire them to the existing ones located in the headlight cluster.
02-26-2012, 05:48 PM
#50
then it was go time, the distance between outside of brackets needs to be 930mm (36.6"). Leave the nuts on the brackets loose enough for some wiggle room. This is where you need a couple of people to help, get the bumper positioned and with at least two people holding it, and one pounding and pushing with a rubber mallet, shimmy the bumper onto the brackets and get it roughly aligned; start your bolts to secure the bumper to relieve the two 'holders'...
The bumper secures to the brackets with 3 large bolts on each side; then it's tighten brackets snug, start tightening the 3 bolts on the bumper itself and use a hammer and man strength to get the bumper aligned and straight; should be a 25mm (1") gap or so; get them even on each side and torque your brackets, final check, then torque the 3 bumper bolts on each side.
in progress...

Then the skid plate, jeez....
The bumper secures to the brackets with 3 large bolts on each side; then it's tighten brackets snug, start tightening the 3 bolts on the bumper itself and use a hammer and man strength to get the bumper aligned and straight; should be a 25mm (1") gap or so; get them even on each side and torque your brackets, final check, then torque the 3 bumper bolts on each side.
in progress...
Then the skid plate, jeez....
 02-26-2012, 05:57 PM
#52
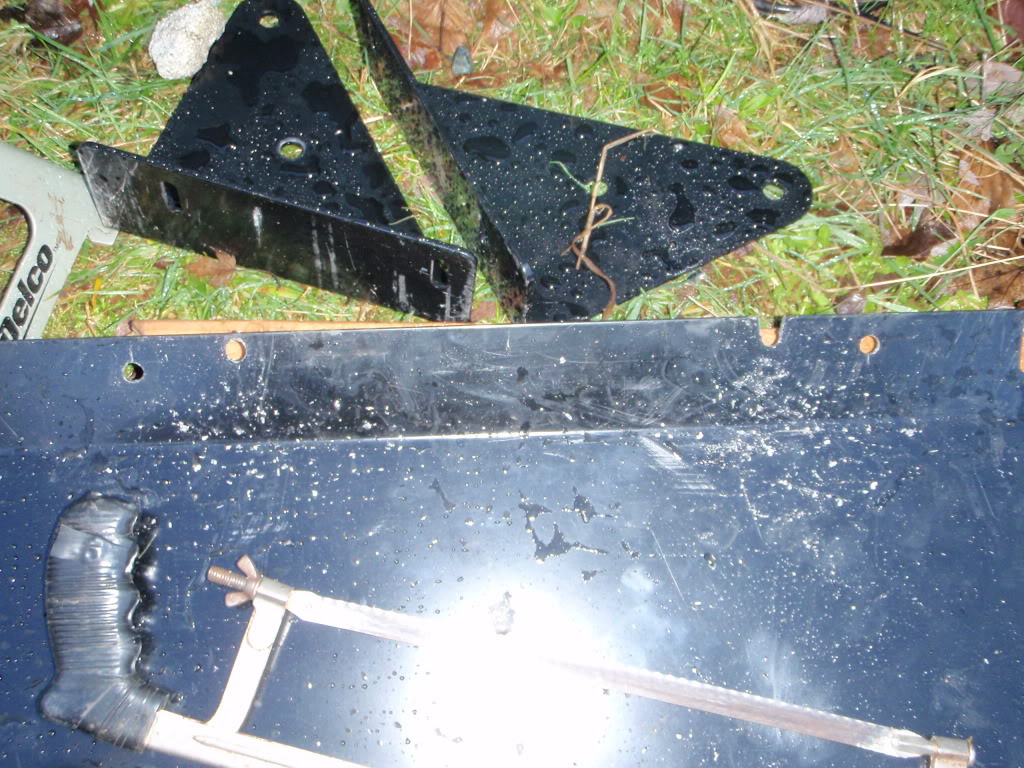
Almost forgot (lack of pics) there is the brace to install once the bumper is actually installed; it's a squished A shaped brace held with 3 bolts on front of bumper underside and 2 bolts each side on top of brackets....
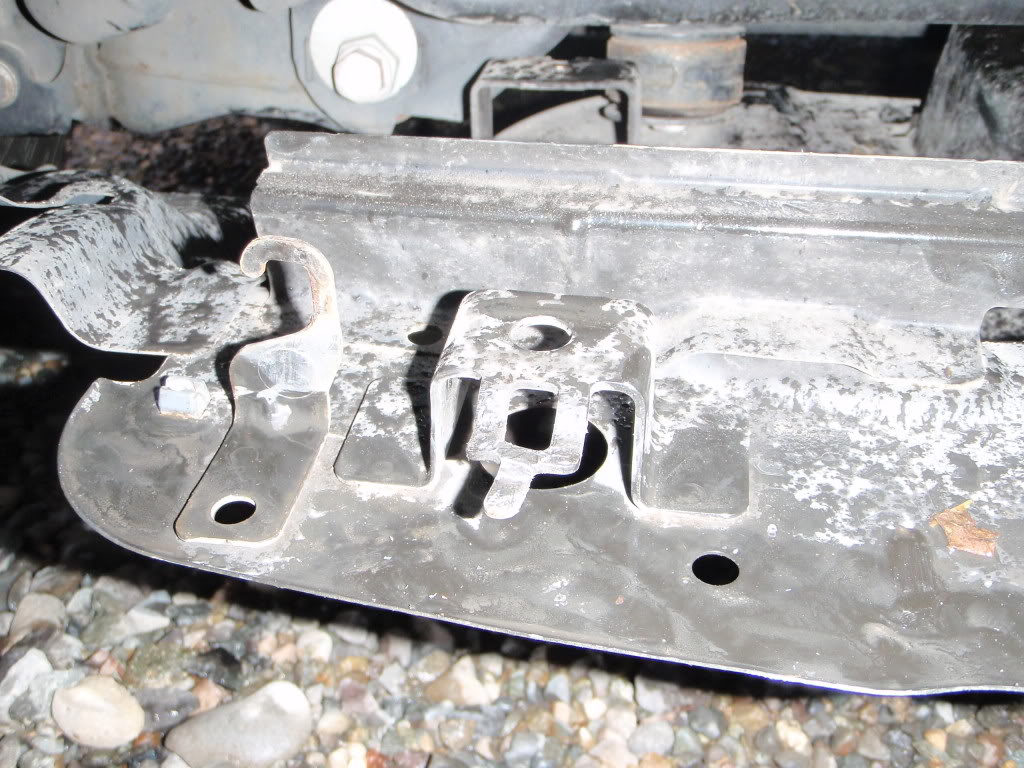
so the skid plate on the sequoia must be different from the tundras; had to drill new holes to fit the stock front two skidplate bolts. BUT, then there are the hangers, so cut out notches for them as well so I could keep them; also had to bend down the front tabs on the stock skidplate to clear the stone guard.
Stone guard is secured with 4 bolts up front, then the 2 stock skid plate but it doesn't mate up well at all; the way it sits now, the stock skid plate 'juts' out under the stone guard so it will catch on anything it touches; will probably end up just fabbing up a new skid plate, the stock one sucks anyway; thin and just won't work right with the stone guard. But for now, she's OK...
15.5" spread on the stock skid plate bolt holes.... had to drill those...
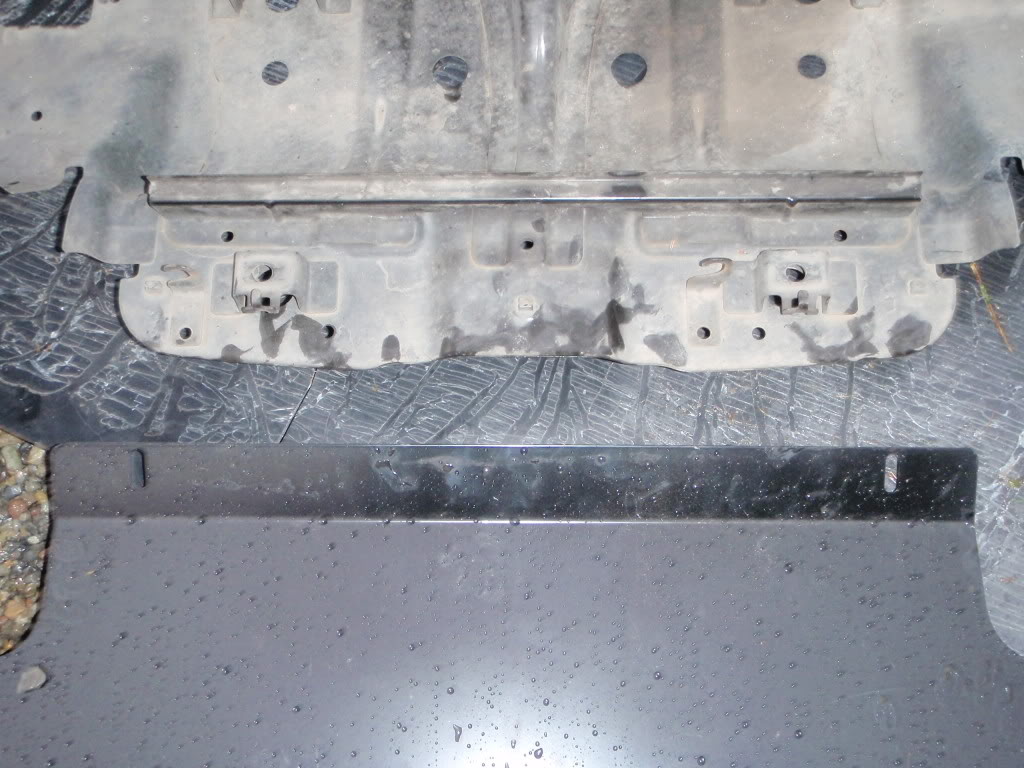
more holes and hacksaw to make grooves to fit around the 'hangers' on the stock skidplate....
these are the tabs I had to bend down...
so the skid plate on the sequoia must be different from the tundras; had to drill new holes to fit the stock front two skidplate bolts. BUT, then there are the hangers, so cut out notches for them as well so I could keep them; also had to bend down the front tabs on the stock skidplate to clear the stone guard.
Stone guard is secured with 4 bolts up front, then the 2 stock skid plate but it doesn't mate up well at all; the way it sits now, the stock skid plate 'juts' out under the stone guard so it will catch on anything it touches; will probably end up just fabbing up a new skid plate, the stock one sucks anyway; thin and just won't work right with the stone guard. But for now, she's OK...
15.5" spread on the stock skid plate bolt holes.... had to drill those...
more holes and hacksaw to make grooves to fit around the 'hangers' on the stock skidplate....
these are the tabs I had to bend down...
02-26-2012, 06:06 PM
#53
and if you noticed, I drilled the hole for the groove on the pass side wrong; they aren't centered/symmetrical, oops.... an extra hole.... I guess it will improve airflow, hahahaha!
from stock holes (new ones I cut into the stone guard), go exactly 2" off to clear the skidplate hooks/hangers.
Sooooo.... anyway, pretty sure I forgot a thing or two, did as many pics as I could but ya know how it is at install time; just trying to get her done (in the rain, snow, sleet and other crap we endured at intervals...)
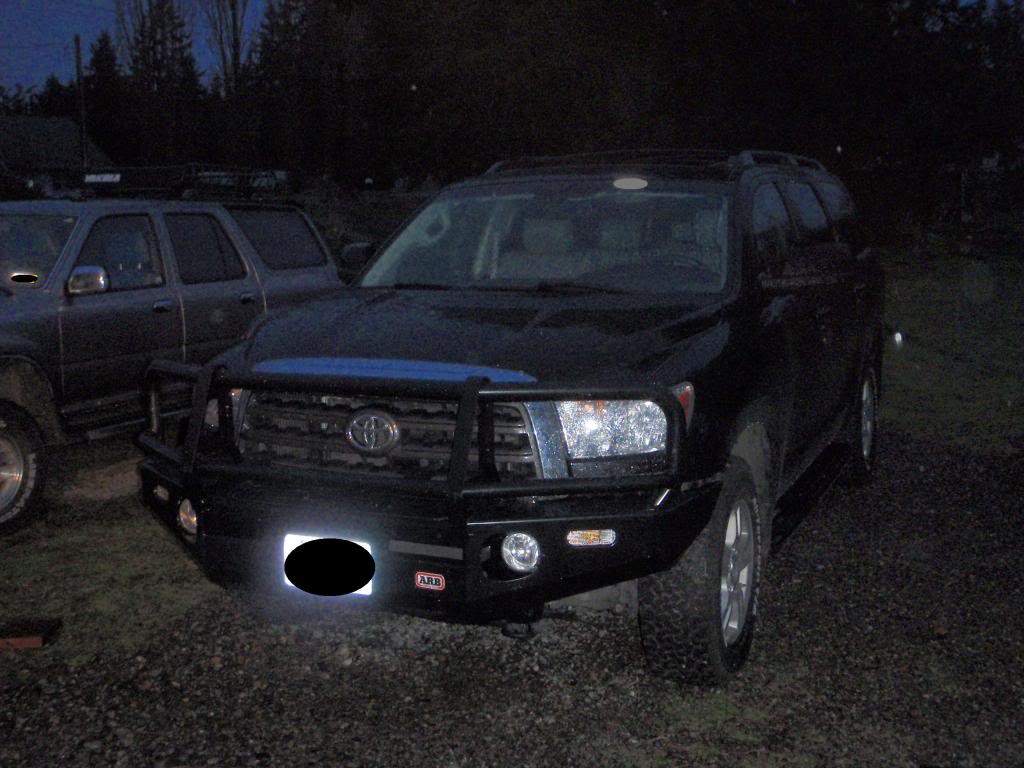
before ground to fender height:
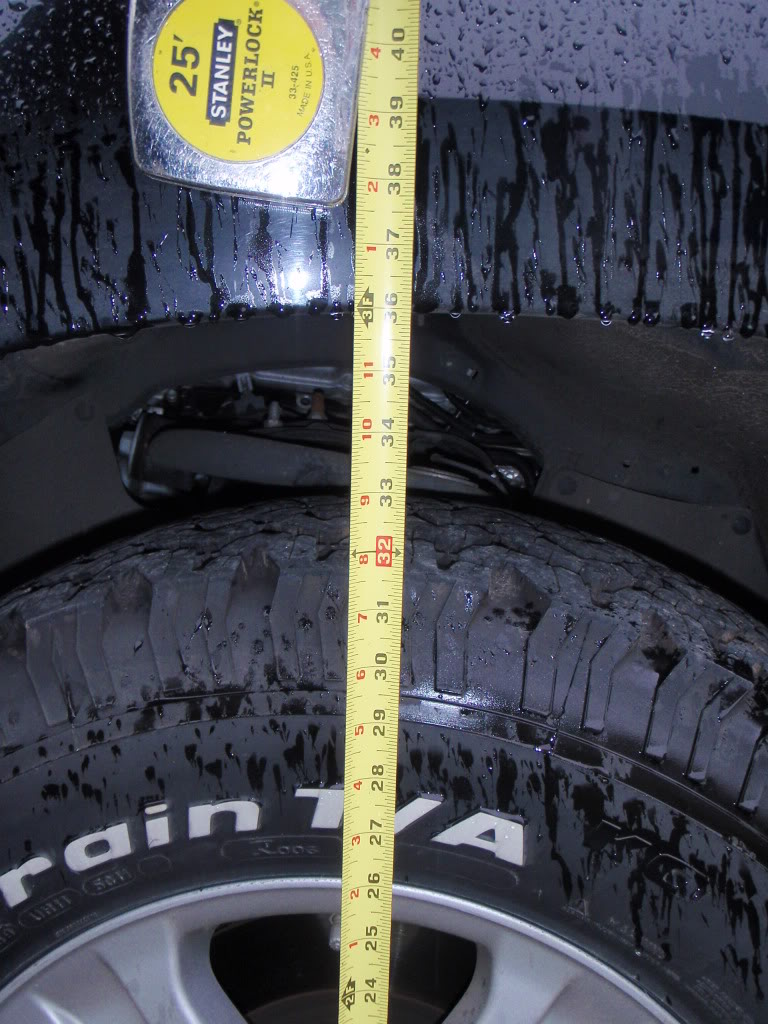
and after, not bad at all!
as I mentioned earlier, I expect more sag as time goes on but there is no rub, drove her 200 miles so far and all is perfect; good handling still, and the cop I passed in Issaquah today was totally eyeballing my rig as I rolled past... JEALOUS! hahahhaa.. sorry, but this thing is just beautiful and god help the poor soul that gets in front of it!
I think the police should all have these bumpers....
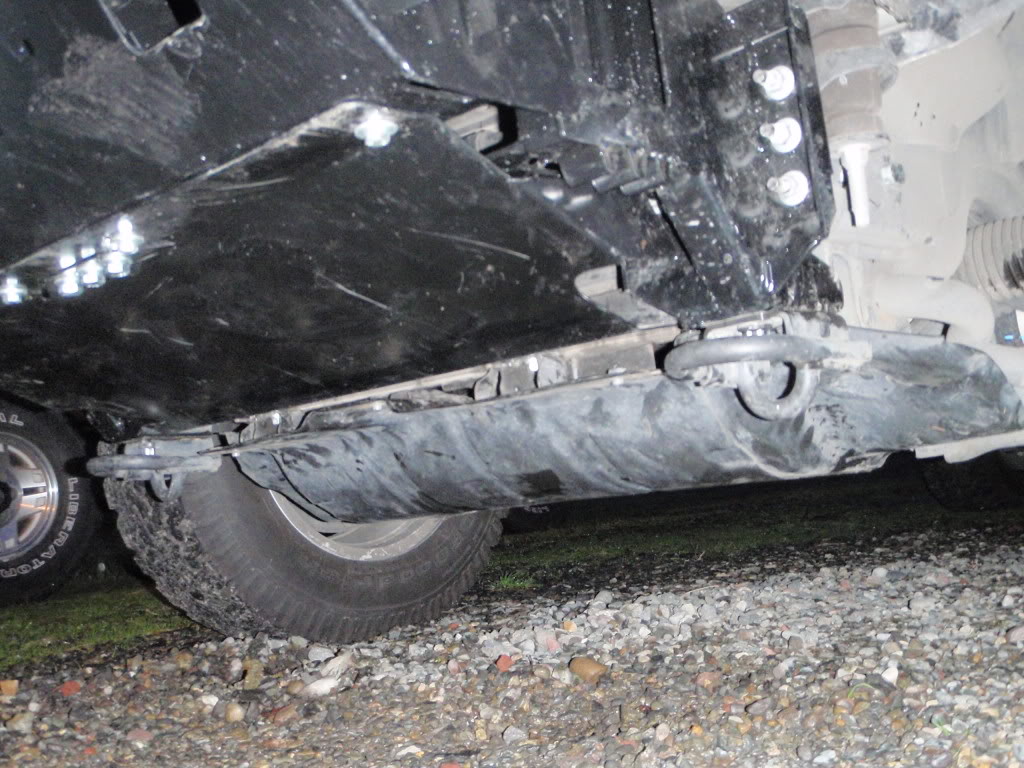
here's the skidplate/stone guard hack job I did...
and one final shot as it was getting dark....
from stock holes (new ones I cut into the stone guard), go exactly 2" off to clear the skidplate hooks/hangers.
Sooooo.... anyway, pretty sure I forgot a thing or two, did as many pics as I could but ya know how it is at install time; just trying to get her done (in the rain, snow, sleet and other crap we endured at intervals...)
before ground to fender height:
and after, not bad at all!
as I mentioned earlier, I expect more sag as time goes on but there is no rub, drove her 200 miles so far and all is perfect; good handling still, and the cop I passed in Issaquah today was totally eyeballing my rig as I rolled past... JEALOUS! hahahhaa.. sorry, but this thing is just beautiful and god help the poor soul that gets in front of it!
I think the police should all have these bumpers....
here's the skidplate/stone guard hack job I did...
and one final shot as it was getting dark....
03-03-2012, 10:56 PM
#54
totally bored with the 381hp... need SC soon! hahaha!
so on a totally unrelated topic, I have a bumper and front end trim for sale... and Bilstien shocks and stock springs for my '00 Taco... ha!
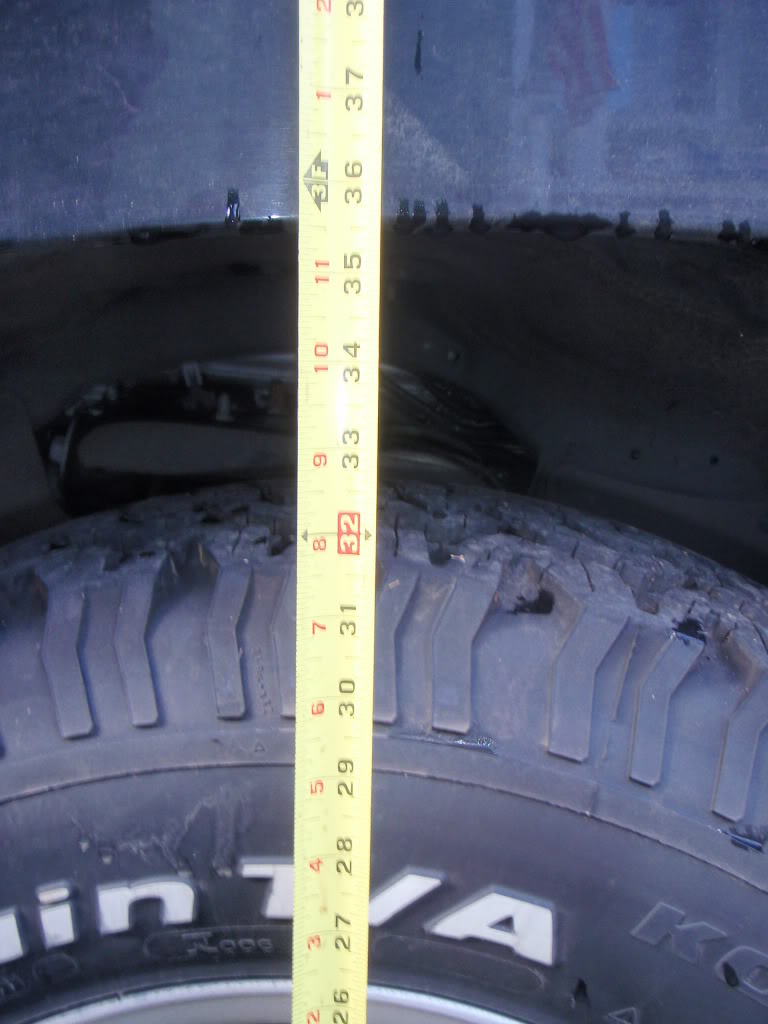
runnin' good, will take new measurements of the ground to fender clearance again to show what we're ringing in at after over a week....
so on a totally unrelated topic, I have a bumper and front end trim for sale... and Bilstien shocks and stock springs for my '00 Taco... ha!
runnin' good, will take new measurements of the ground to fender clearance again to show what we're ringing in at after over a week....
03-20-2012, 10:42 AM
#55
front end hasn't really drooped yet; measured her yesterday, still holding at 35.5" and lookin' good!
The top winch 'rain cover' piece only has two bolts, think I will drill two more as the ends flop around; kinda defeats the purpose of the cover and rubber seal if it lifts up and rain gets in...
need to get some lights on there and wire up the aux turn signals....
thinking about buying a set of these:

I have the rectangular ones on my truck but I think I will go with the larger round ones on this monster. I think I will stick with two lights, the stock headlights are stupid bright already, these will just increase my range a tad with the 100w's in there.
The top winch 'rain cover' piece only has two bolts, think I will drill two more as the ends flop around; kinda defeats the purpose of the cover and rubber seal if it lifts up and rain gets in...
need to get some lights on there and wire up the aux turn signals....
thinking about buying a set of these:
I have the rectangular ones on my truck but I think I will go with the larger round ones on this monster. I think I will stick with two lights, the stock headlights are stupid bright already, these will just increase my range a tad with the 100w's in there.
04-06-2012, 06:25 PM
#56
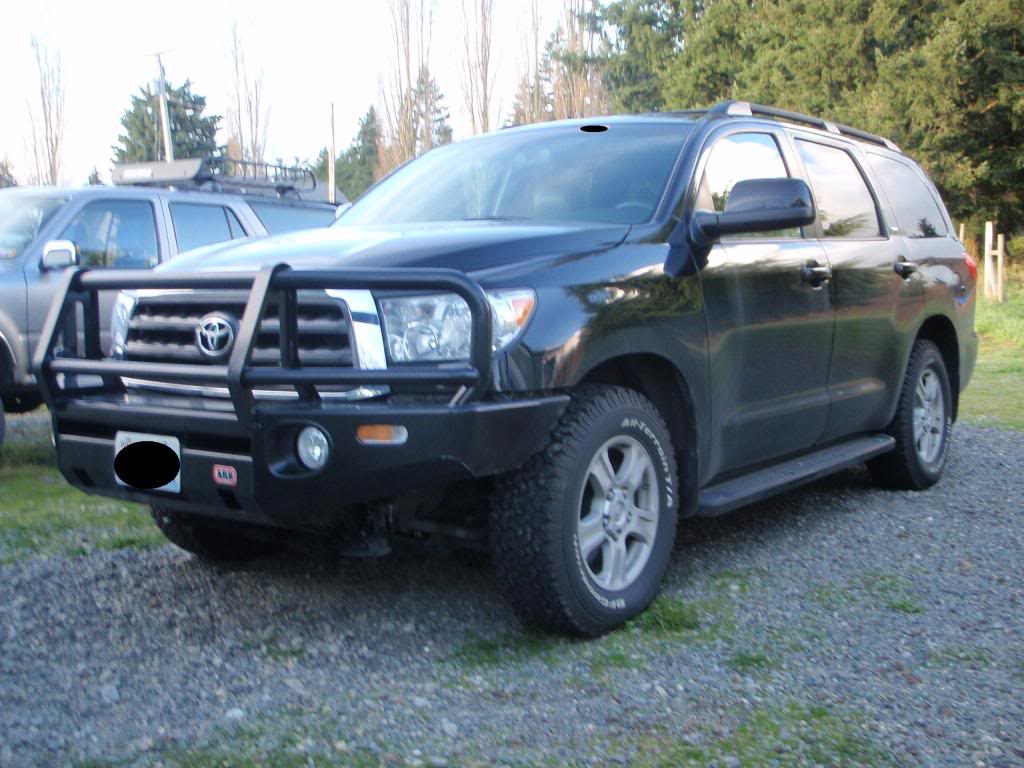
finally got around to putting the fog light inserts into the bumper; used some RTV sealant to glue 'em in place. The install instructions from ARB called for Sikaflex and home depot does NOT have it, at least not in Lacey, WA. RTV should be plenty adequate I think... drove around Oly today in the beast, she's a smooth runnin' machine.
It's amazing how many idiots will still pull out in front of this thing, almost like they have a death wish or just hate their car or something. Must..... feed...... Sequoia...... Smart cars...... hahahaa
and another glamor shot....
contacted IPT a couple weeks ago, they gave me a very reasonable quote for doing the valve body mod in the auto tranny; just under $700 plus return shipping, figure with fluids and whatnot, will be about a $1000 mod in all. Worth it I think for reliability especially when I get the money to SC this beast.
time and money, time and money...... and more money..... jeez
04-07-2012, 03:07 PM
#58
thanks!
got around to doing the turn signal wiring; used my DMM to isolate the 3 wire plug; top one was the indicator (+), middle was ground, and bottom wire was the extra running light/normally on (+).
spliced in using wire strippers and soldered the connections and just used some 14g extra wire for the ground to chassis instead of the plug.
Everything works good, now I have matching blinkers in the bumper, woot woot...
04-09-2012, 11:43 AM
#59
bought an oil filter wrench and a new filter cartridge from toyota (assenmacher wrench), don't buy the wrench at toyota! it's $25, can be had for $16 on Amazon.com... there's also a guy on tundrasolutions forums that makes a custom tool for this for even less, looks like a U shape 'fork' that indexes on the wings of the filter housing.
nobody local stocks or is even able to order 0w30 or 5w-30 redline oil, freakin' ridiculous. Found a case (12 x 1 qts) of 5w30 on amazon (thru redline themselves) for $131 delivered so will be doing an oil change once that shows up on both this and my taco...
nobody local stocks or is even able to order 0w30 or 5w-30 redline oil, freakin' ridiculous. Found a case (12 x 1 qts) of 5w30 on amazon (thru redline themselves) for $131 delivered so will be doing an oil change once that shows up on both this and my taco...
04-14-2012, 06:10 PM
#60
OK, oil showed up yesterday, finally ready for an oil change. Probably will change it out in a week or two, only have about 3k miles on the Honda fluid. The dealership we bought it from overfilled the crap out of it, want to take care of that.
even though the owner's manual calls for 5w-20, 30 will be better for this engine and all our yotas will drink the same earl now.
Also got some MT-90 for my Taco 5speed tranny, woo hoo!
need to do a coolant flush also...
even though the owner's manual calls for 5w-20, 30 will be better for this engine and all our yotas will drink the same earl now.
Also got some MT-90 for my Taco 5speed tranny, woo hoo!
need to do a coolant flush also...


