toyotafiberglass.com - Colorado Zack --> Hi clearance 4runner
 07-05-2015, 05:20 PM
#41
Super Moderator
Staff
iTrader: (1)
Join Date: Aug 2008
Location: Anderson Missouri
Posts: 11,788
Likes: 0
Received 21 Likes
on
19 Posts
I have not used ACC carpet. Is there alot of trimming to do? Most of the other brands I have tried, there is about 2 inches extra all the way around. They have the form fitted good but still alot of trimming to do. I will give ACC a shot the next time I buy carpet.
 07-06-2015, 12:44 PM
#42
Registered User

Join Date: May 2005
Location: Boulder, CO
Posts: 11
Likes: 0
Received 0 Likes
on
0 Posts
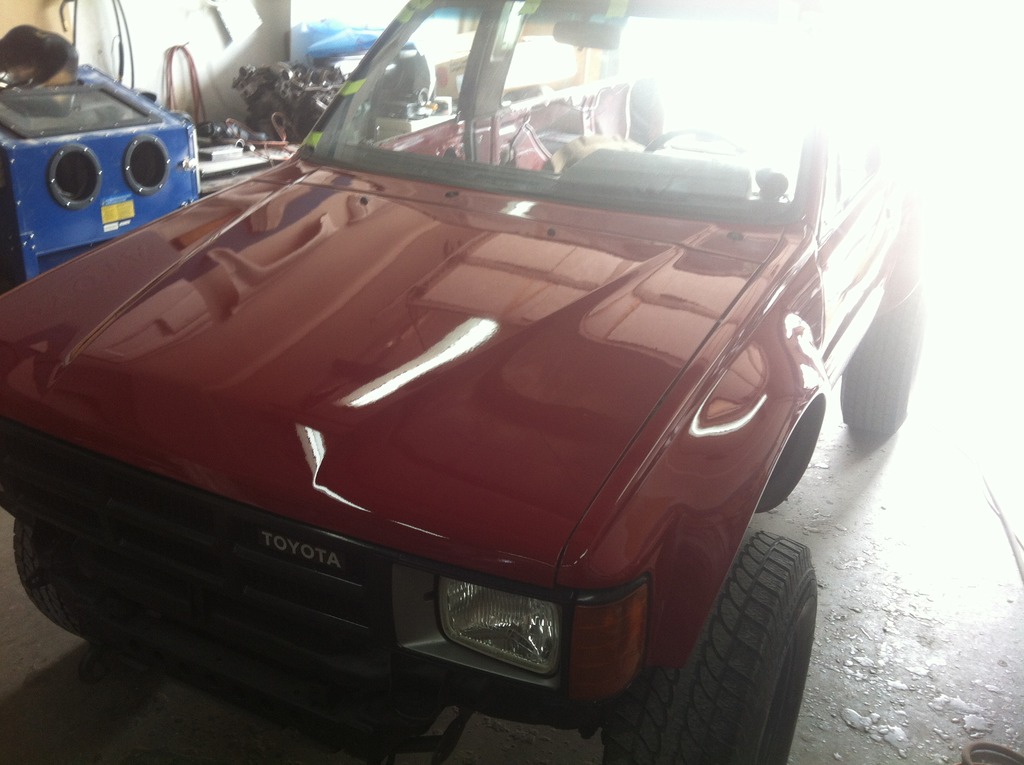
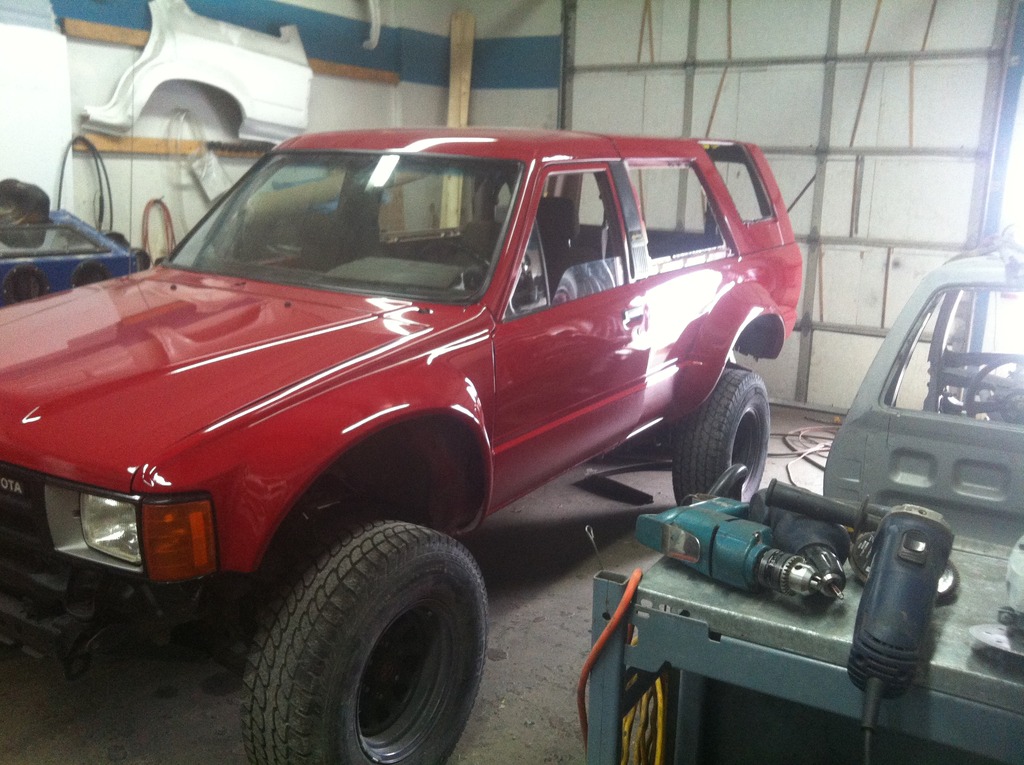
OH YEAH!!! Looking good Corey, shiny and blazing red, just like I had hoped. I'm getting more excited by the day, can't wait to see it with the proper tires and wheels.
 07-07-2015, 07:09 AM
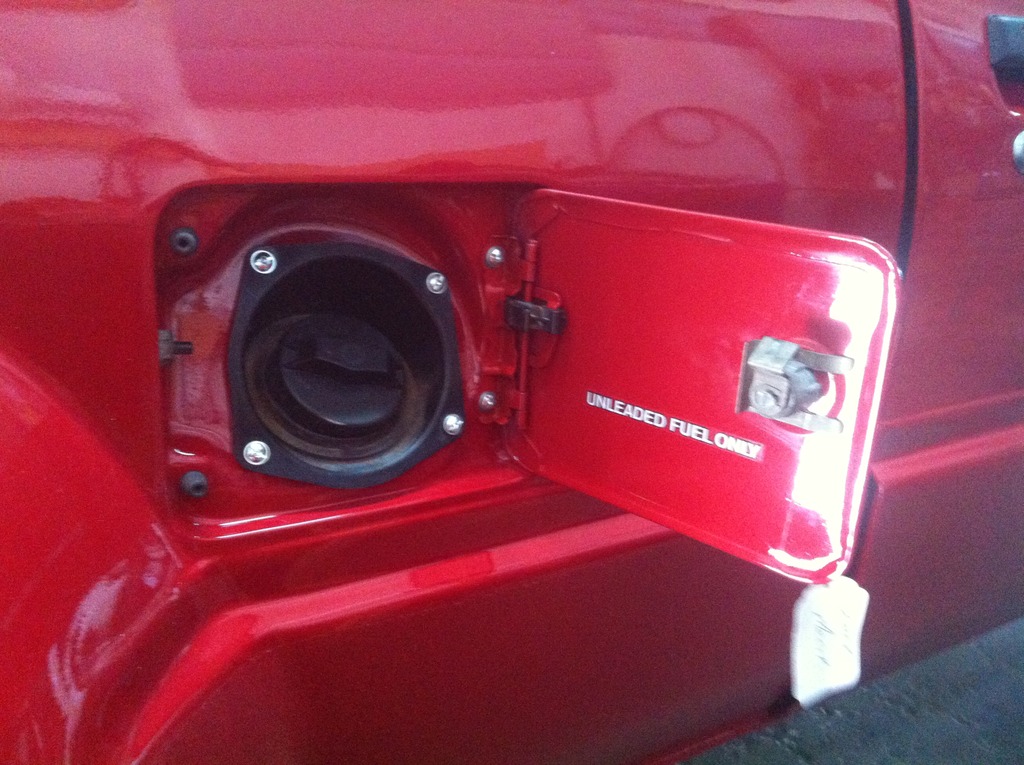
#45
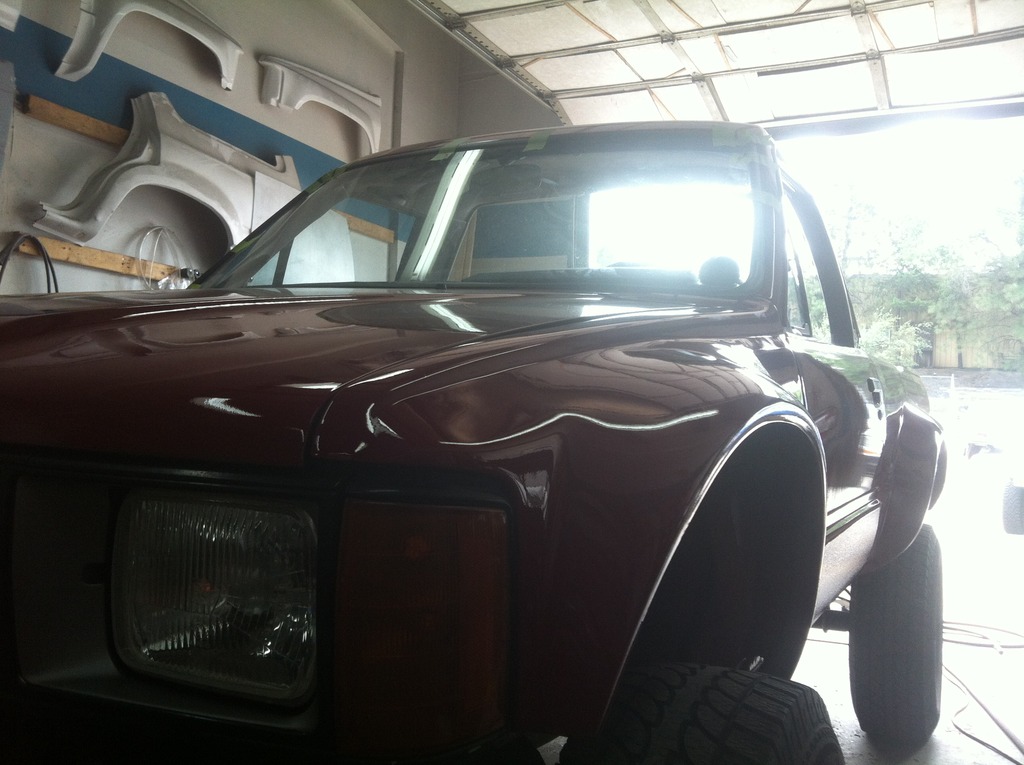
Nice clean body gaps! That Unleaded Fuel Only sticker reminds me that I need to put mine on - not that I ever encounter leaded fuel. I hope I didn't lose the one you sent me! If I did I may be coming to you for another one and a Precision 4x4 sticker to sport on my truck as well!
07-08-2015, 05:46 PM
#47
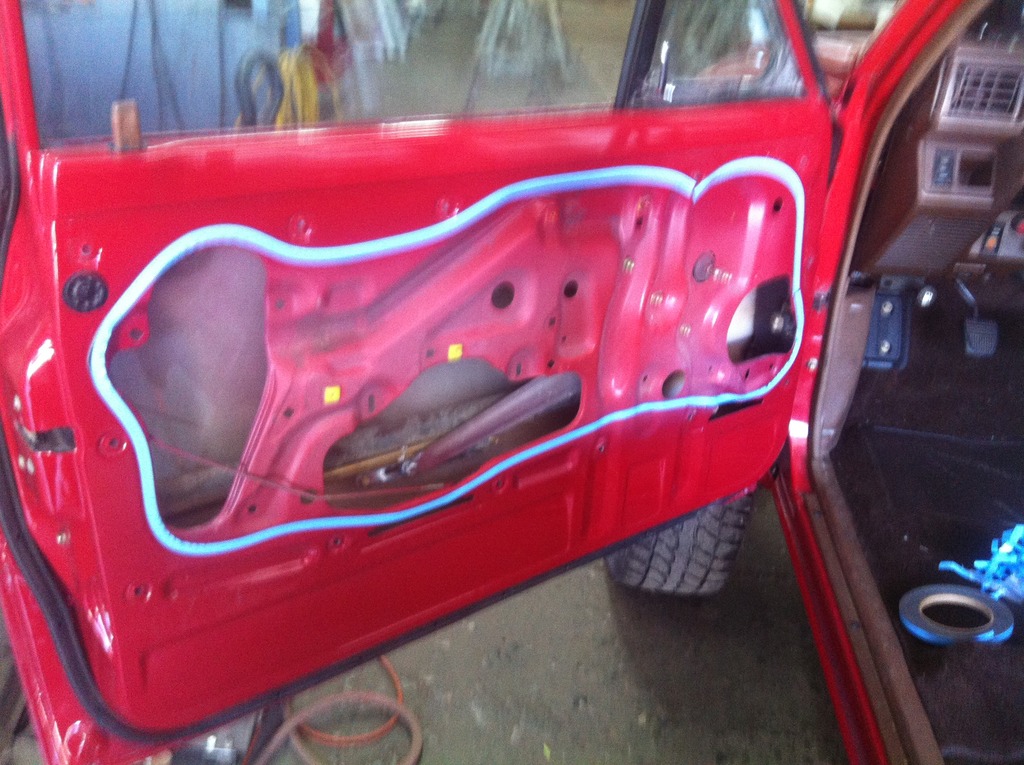
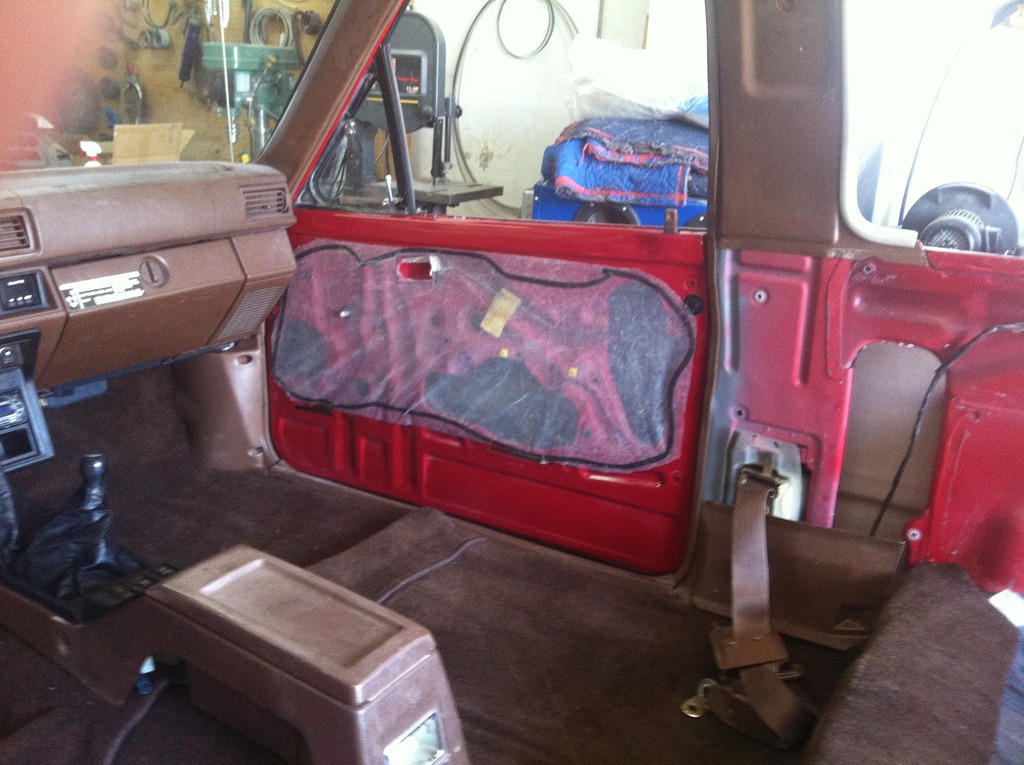
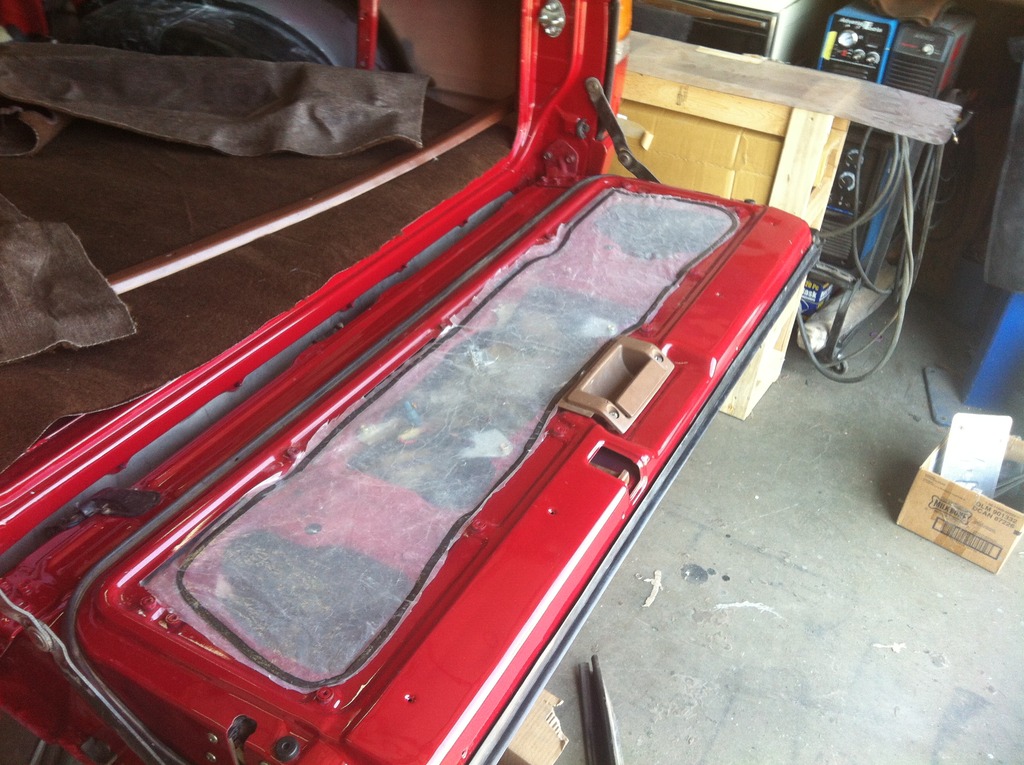
doors are back together , window tracks greased and working smoooooth
added some new door seals on all 3 doors ....

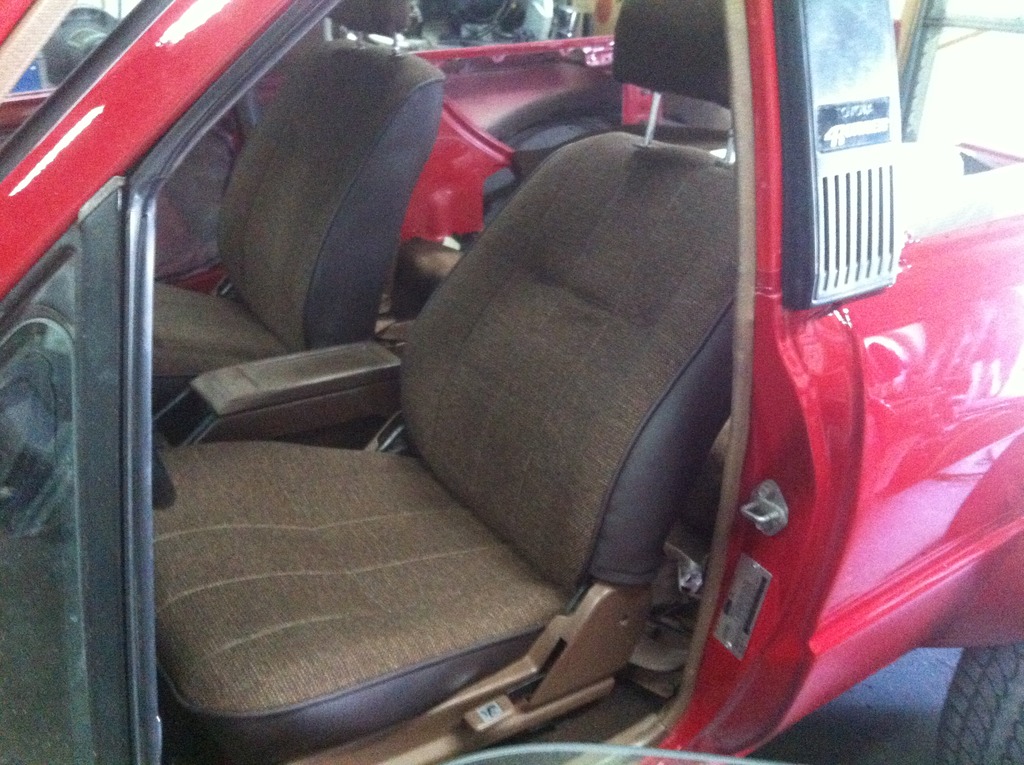
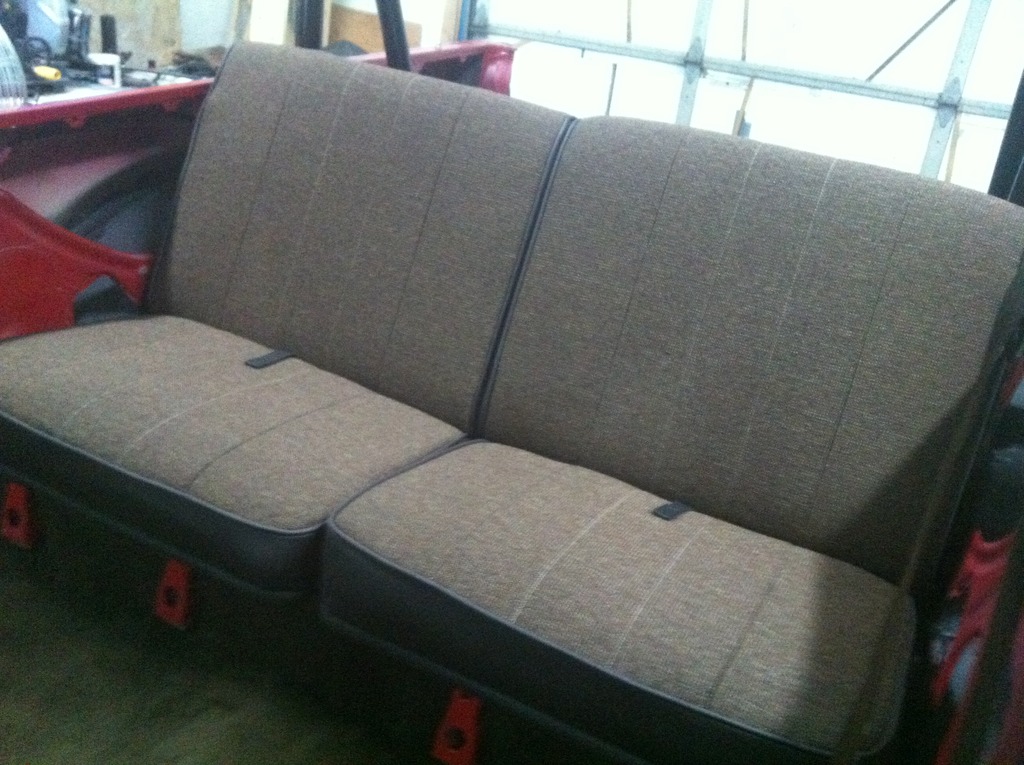
and .. also front seats are done ...
added some new foam , as Zack was saying they weren't comfortable anymore . Zack has the roof off quite a bit , so he wanted a product that would work in the out door environment .. the main "fabric" is rated @ 400,000 rubs , and the vinyl is 200,000 .. so should be wear really well and last a long time .
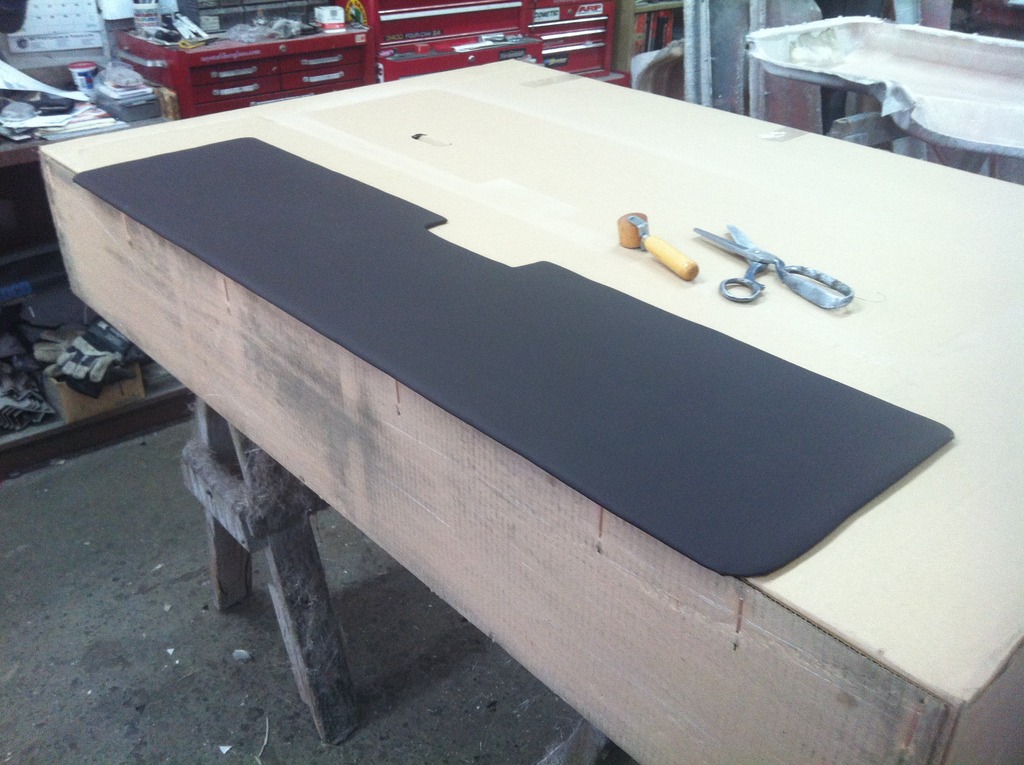
interior panels will be custom made to match
.
added some new door seals on all 3 doors ....
and .. also front seats are done ...
added some new foam , as Zack was saying they weren't comfortable anymore . Zack has the roof off quite a bit , so he wanted a product that would work in the out door environment .. the main "fabric" is rated @ 400,000 rubs , and the vinyl is 200,000 .. so should be wear really well and last a long time .
interior panels will be custom made to match
.

 07-14-2015, 05:15 PM
#49
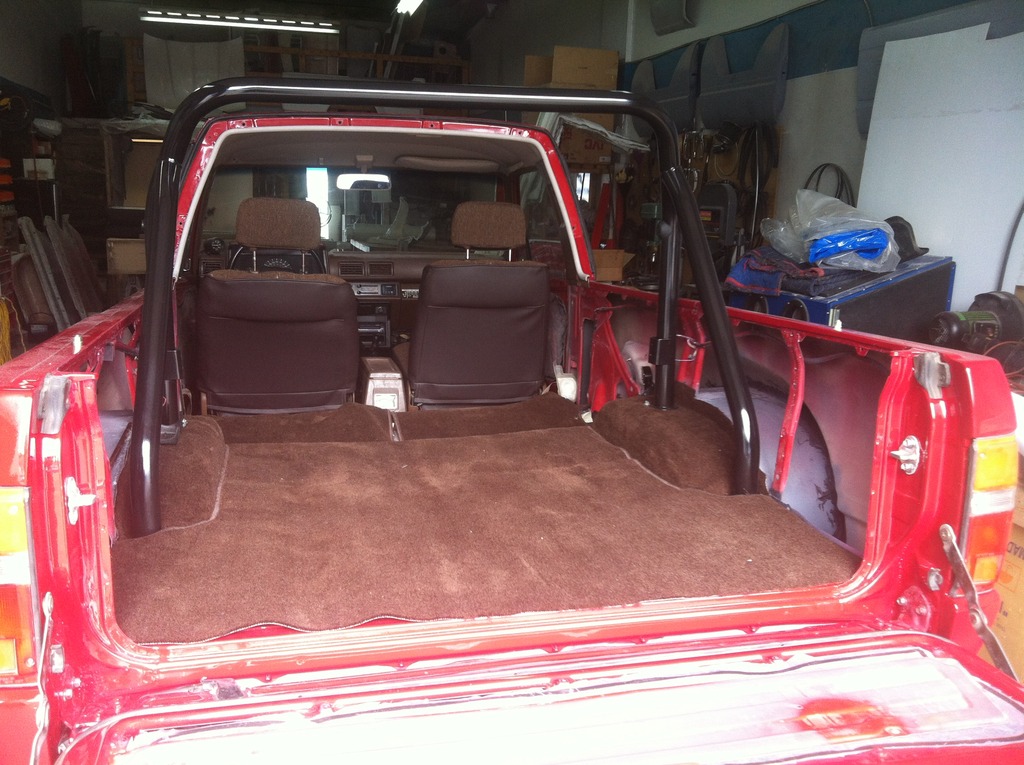
back seats are in ..
and back carpet kit .. is sitting in place
Zack wanted the front bumper painted ..
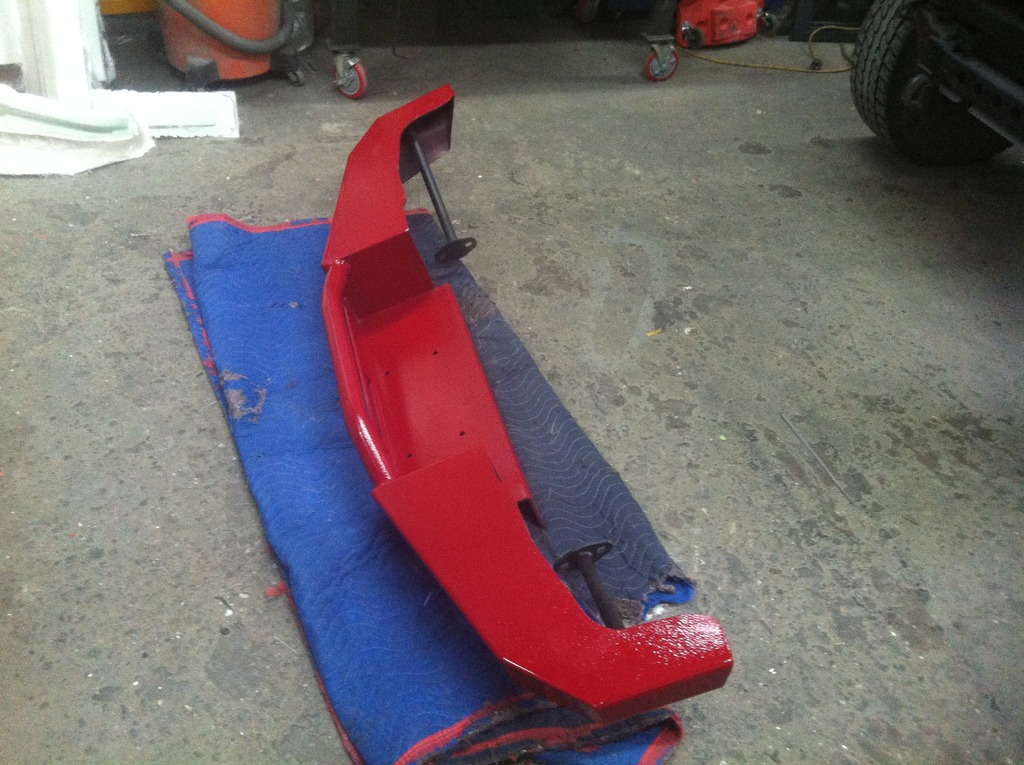
and installed
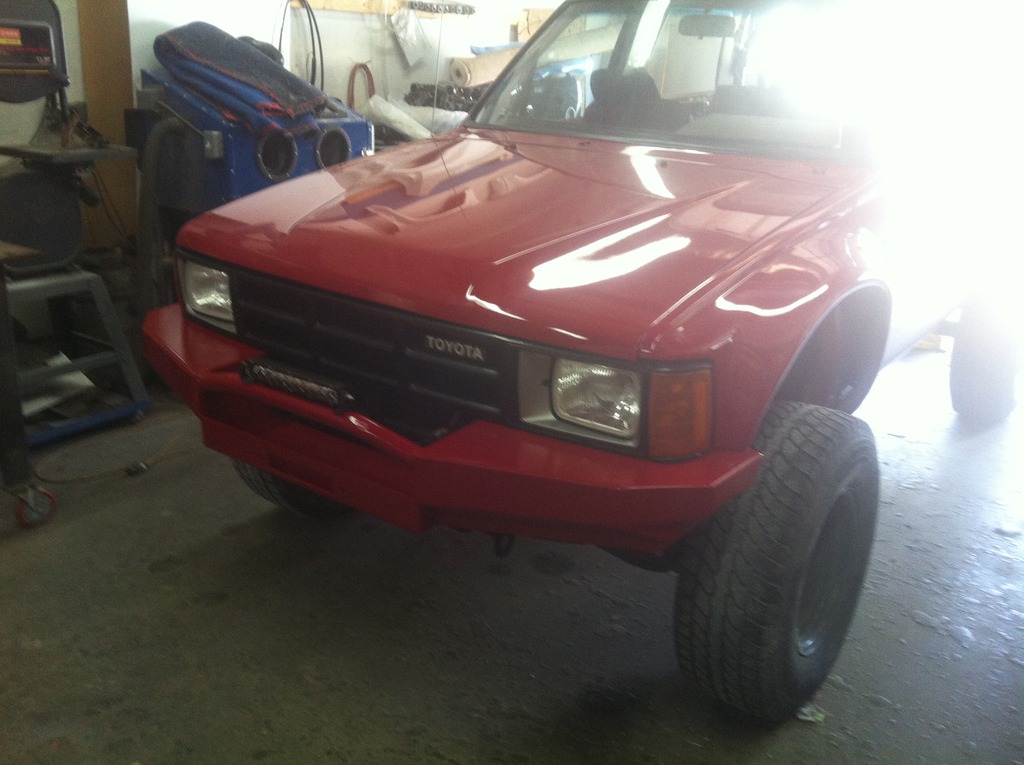
canopy now back in place and bolted as well
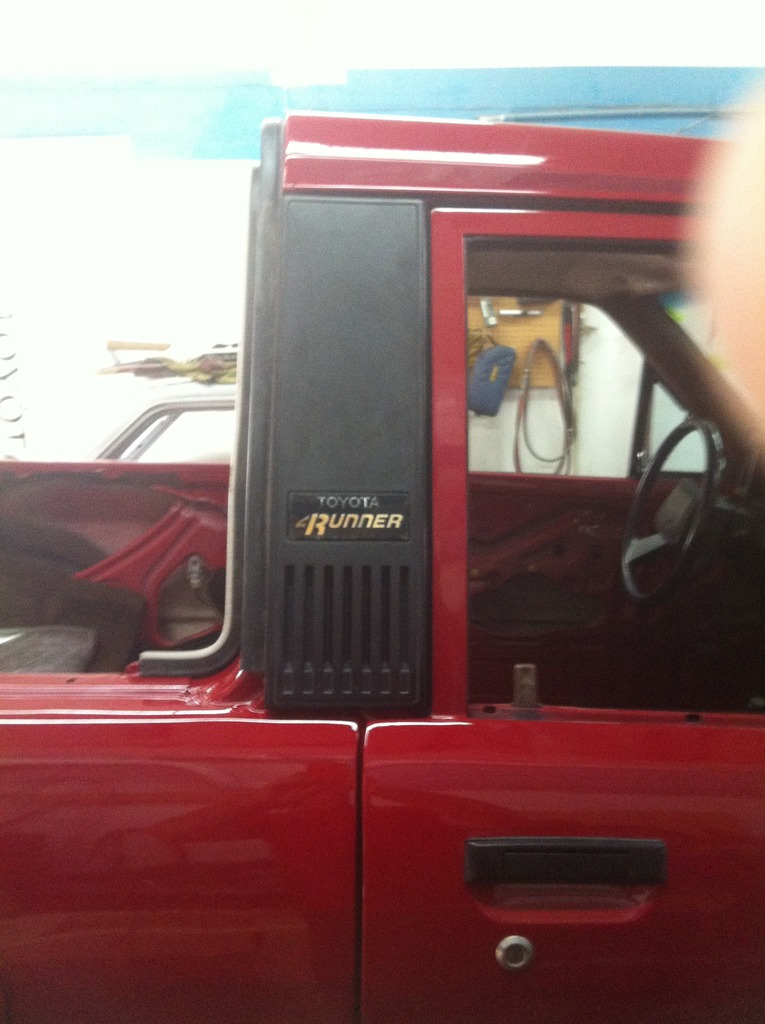
and our FRP L trims painted to match and installed
.
and back carpet kit .. is sitting in place
Zack wanted the front bumper painted ..
and installed
canopy now back in place and bolted as well
and our FRP L trims painted to match and installed
.
Last edited by slacker; 07-14-2015 at 05:17 PM.
07-15-2015, 04:55 AM
#50
Registered User
Join Date: Jun 2009
Location: Virginia Beach, VA
Posts: 572
Likes: 0
Received 0 Likes
on
0 Posts
so did you build those seat covers yourself, or did you get them as a kit? my seats are super uncomfy too so I've been looking for ways to upgrade to different seats or repair the one I have.
07-15-2015, 05:36 AM
#51
This thing is coming together beautifully!! I really like that style bumper on that truck - solid and beefy yet non-obtrusive! Looks like you used chip guard on it too (good idea!), but what kind do you use? The kind that goes under the paint or the clear over the paint? I think we need to convince Zack to snag a chrome grille and headlight doors - That would really set off that front end nicely with the color matched bumper! (Zack, I'm pretty good at spending my own money but I'm REEEEALLY good at spending other people's money LOL)
On another note, Corey, I should be sending you some cash today or tomorrow to square up.
On another note, Corey, I should be sending you some cash today or tomorrow to square up.
 07-15-2015, 05:52 PM
#53
This thing is coming together beautifully!! I really like that style bumper on that truck - solid and beefy yet non-obtrusive! Looks like you used chip guard on it too (good idea!), but what kind do you use? The kind that goes under the paint or the clear over the paint? I think we need to convince Zack to snag a chrome grille and headlight doors - That would really set off that front end nicely with the color matched bumper! (Zack, I'm pretty good at spending my own money but I'm REEEEALLY good at spending other people's money LOL)
On another note, Corey, I should be sending you some cash today or tomorrow to square up.
On another note, Corey, I should be sending you some cash today or tomorrow to square up.
I cant remember the product line at the moment , but yes , it is sprayed on the body/bumper , and then top coated , and cleared just like the truck .
thanks for sending the balance , you are a man of your word , but I still haven't got the templates for the 79-83 door panels .
they just un-bolt from the inside , and then you have to push , as they are held in with butle tape
.
07-16-2015, 01:29 PM
#55
Registered User
Join Date: May 2005
Location: Boulder, CO
Posts: 11
Likes: 0
Received 0 Likes
on
0 Posts
"I think we need to convince Zack to snag a chrome grille and headlight doors - That would really set off that front end nicely with the color matched bumper! (Zack, I'm pretty good at spending my own money but I'm REEEEALLY good at spending other people's money LOL)"
I know what you mean, I'm quite good at spending my own (obviously), but boy can I spend the monopoly sort like a pro.
I hear what you're saying about the chrome, but when you see it all done with the wheels and stripes I think the black will have been the correct choice (I hope). As I told Corey, I have a vision and while my budget doesn't allow for all of it right now...think matching plate style rear bumper and sliders all color matched....I think it will still be sweet. Going for a big tired, but low lift kind of matchbox car look, ultimately it will be an adventure-mobile for my 5 1/2 year old and I, so it can't be tooooo nice.
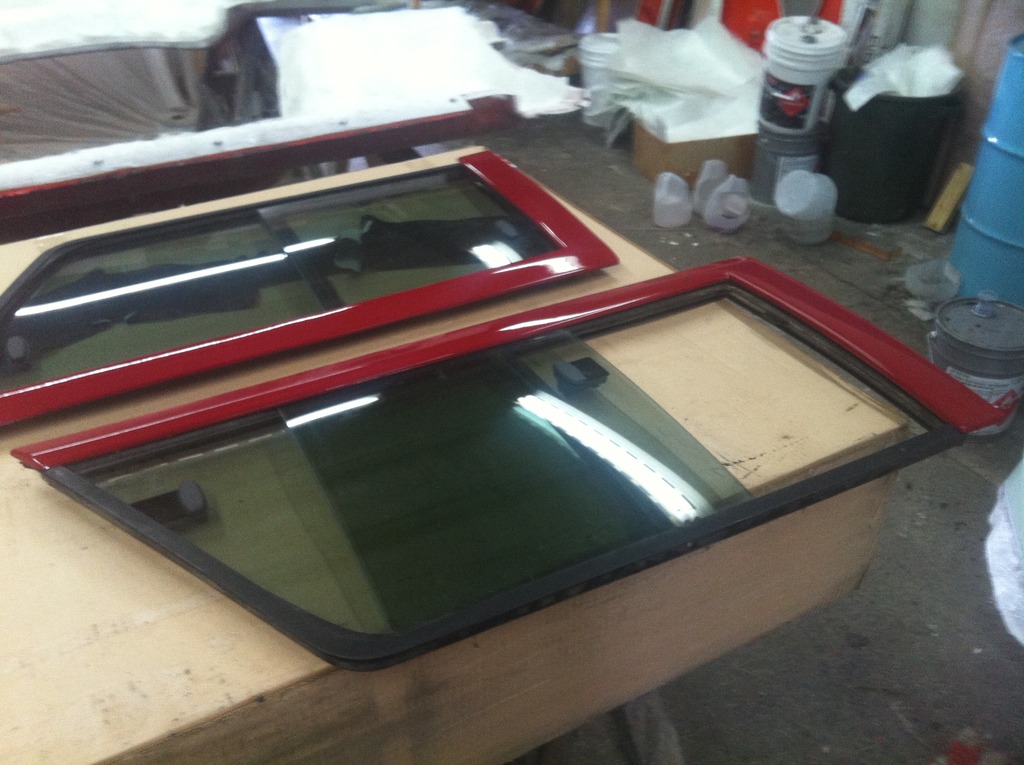
Looking very good Corey! I love the red L trim on the rear windows.
I know what you mean, I'm quite good at spending my own (obviously), but boy can I spend the monopoly sort like a pro.
I hear what you're saying about the chrome, but when you see it all done with the wheels and stripes I think the black will have been the correct choice (I hope). As I told Corey, I have a vision and while my budget doesn't allow for all of it right now...think matching plate style rear bumper and sliders all color matched....I think it will still be sweet. Going for a big tired, but low lift kind of matchbox car look, ultimately it will be an adventure-mobile for my 5 1/2 year old and I, so it can't be tooooo nice.
Looking very good Corey! I love the red L trim on the rear windows.
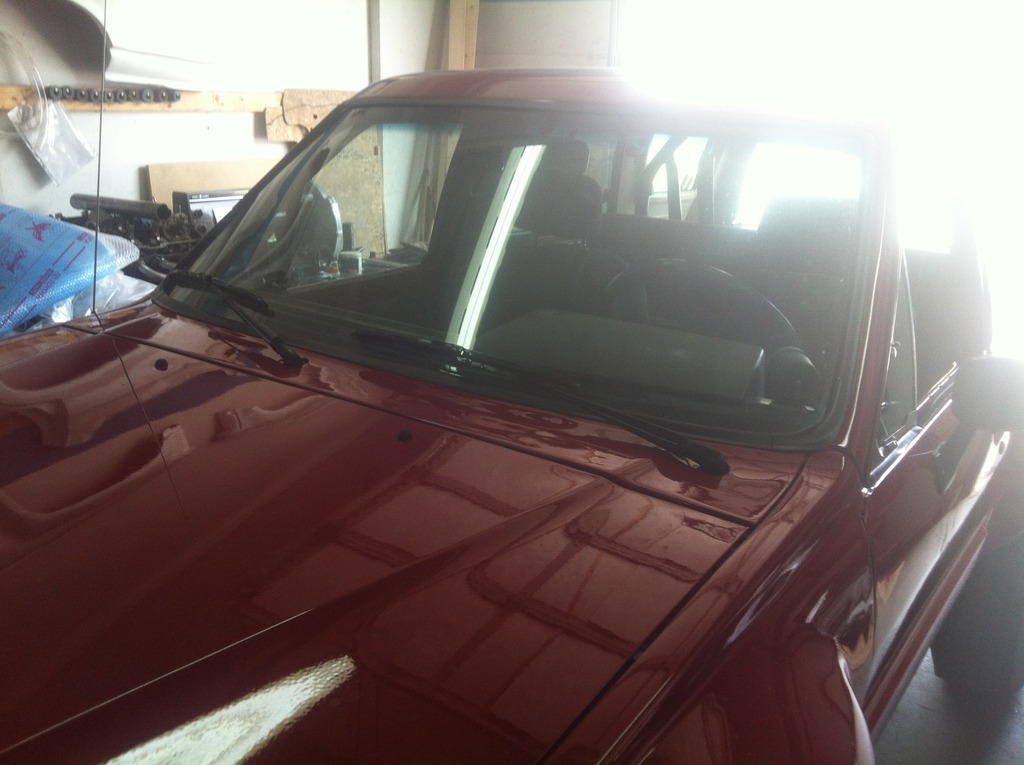
07-21-2015, 05:31 PM
#58
working on the smalls
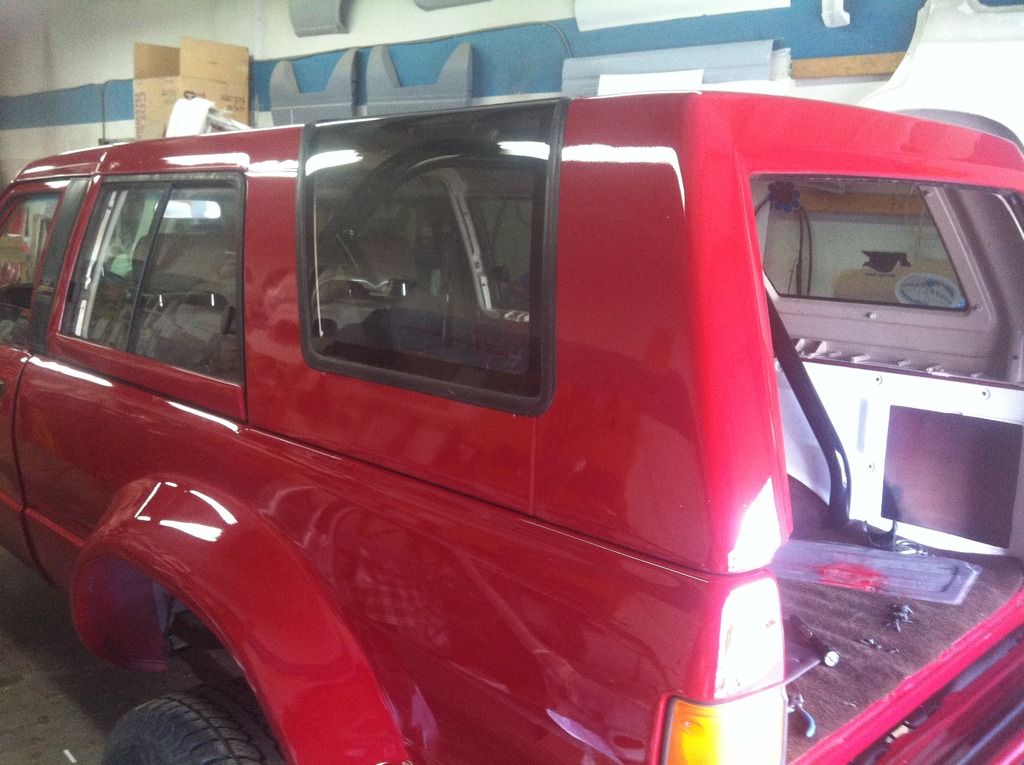
1/4r windows in ...
wipers and mirrors
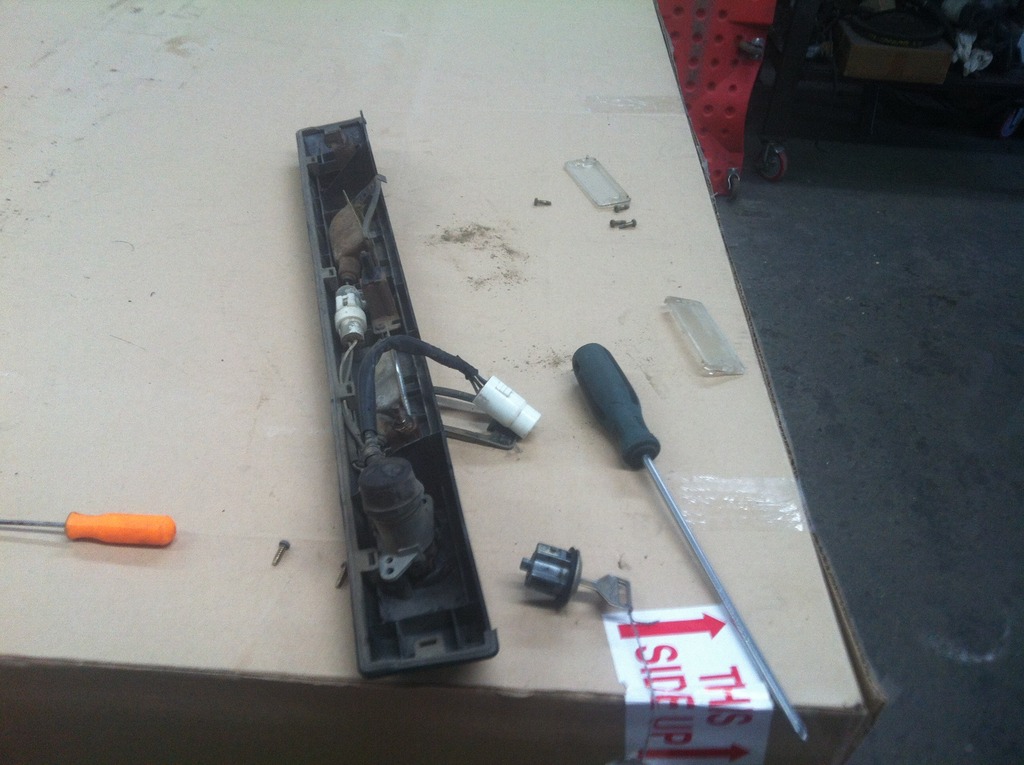
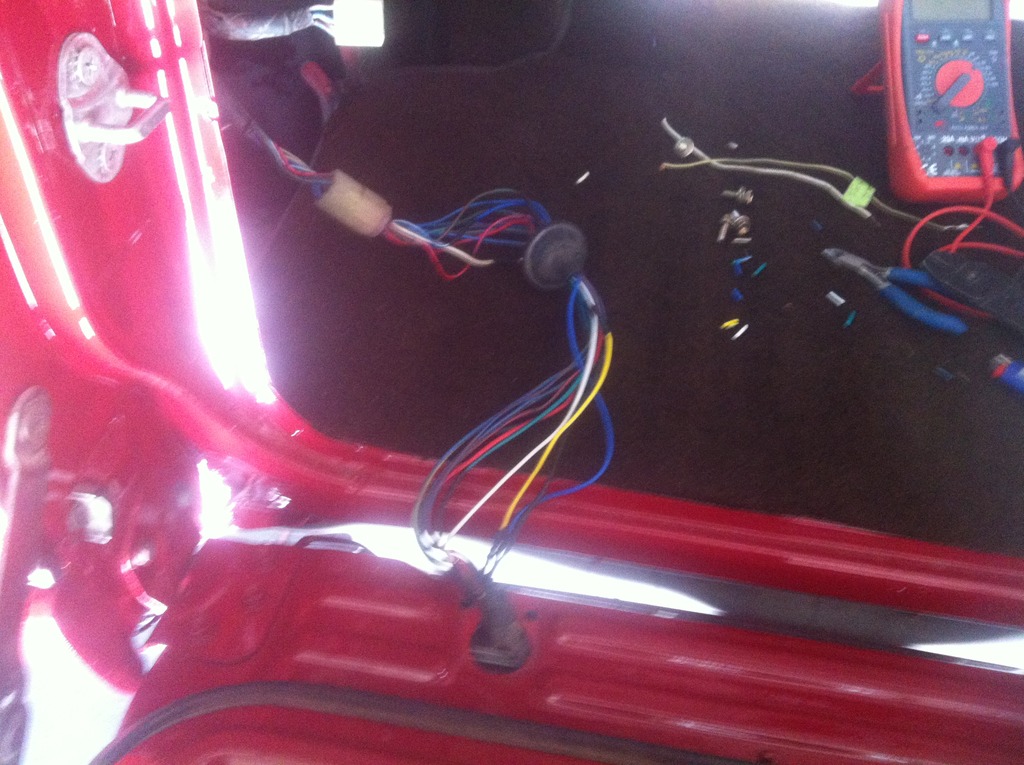
also went to try the rear window with the key , and dag namit ! it didn't work , so I tore it all a part again . on initial inspection , I noticed the ground wiring was not in great shape
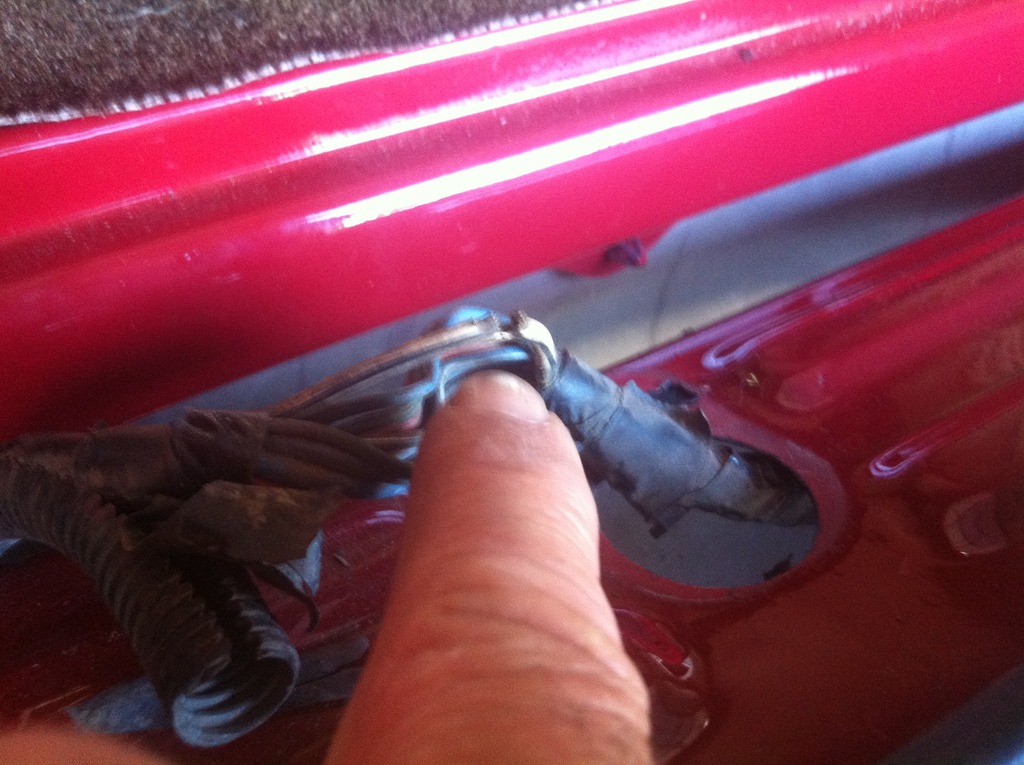
somebody , some where down the line ? .. used a test light on the wires . a lot of the wires had "pin" holes .and The wires we're very badly deteriorated , so I ended up splicing NEW wire and re looming
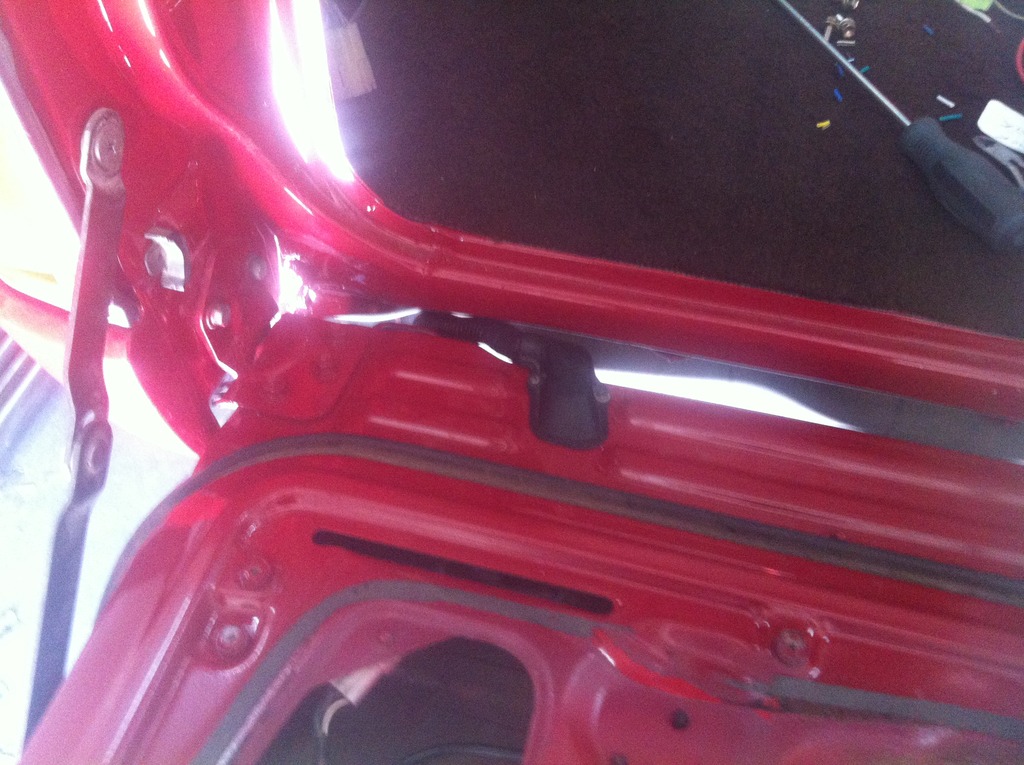
new back up bulbs , cleaned the lenses , and lubed the lock
I don't remember if the window was working or not when I got it , I think it was ? but the stress of gate removal was maybe what did it in .. in any case .. it works perfect now !!
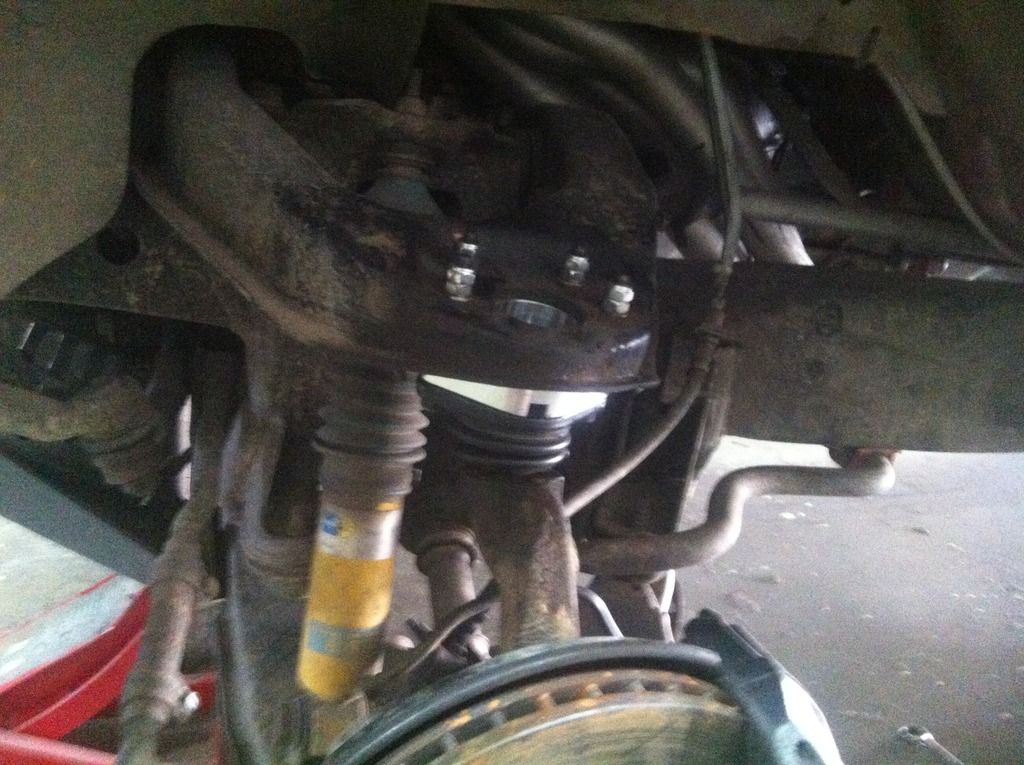
new ball joint spacers installed
.
1/4r windows in ...
wipers and mirrors
also went to try the rear window with the key , and dag namit ! it didn't work , so I tore it all a part again . on initial inspection , I noticed the ground wiring was not in great shape
somebody , some where down the line ? .. used a test light on the wires . a lot of the wires had "pin" holes .and The wires we're very badly deteriorated , so I ended up splicing NEW wire and re looming
new back up bulbs , cleaned the lenses , and lubed the lock
I don't remember if the window was working or not when I got it , I think it was ? but the stress of gate removal was maybe what did it in .. in any case .. it works perfect now !!
new ball joint spacers installed
.
07-21-2015, 08:10 PM
#59
Registered User
Join Date: May 2005
Location: Boulder, CO
Posts: 11
Likes: 0
Received 0 Likes
on
0 Posts
Yeah, yeah, yeah. I can feel all of your glaring eyeballs about the ball joint spacers. While I AM going all in here with Corey, it is still a limited budget build, and believe me, a TC Caddy kit is on the to do list, hopefully in the not too distant future.
Corey, I'm loving the progress pictures, and FWIW that wasn't me with the test light on those rear wires so it's been like that for over 10 years...thanks for saving me a headache down the road.
I noticed 2 things in the pictures...
-is that a different anti-rattle device for the tailgate support? something specific to the fiberglass setup?
-Can you do something about those horrible stickers on the rear side glass before the final glamour shots.
07-22-2015, 03:42 PM
#60
Zack
good eye .... yes , the original plastic ones are real delicate , and break easily . I think 3 of the 4 of yours were broken . these are rubber , and should last way longer , and work much better .
The wires were obviously done a long time ago , I had to cut and replace almost a foot of about 6 wires . the corrosion had "greened" the copper wire that much .
I also removed the switch on the back of the cylinder , cleaned the contacts in the switch , and put it all back together .. you will have pics on your CD , but I didn't bother posting all that stuff here . your CD contains 150 pics so far .
sure , I'll peel the stickers off the side window for you
.
good eye
.... yes , the original plastic ones are real delicate , and break easily . I think 3 of the 4 of yours were broken . these are rubber , and should last way longer , and work much better . The wires were obviously done a long time ago , I had to cut and replace almost a foot of about 6 wires . the corrosion had "greened" the copper wire that much .
I also removed the switch on the back of the cylinder , cleaned the contacts in the switch , and put it all back together .. you will have pics on your CD , but I didn't bother posting all that stuff here . your CD contains 150 pics so far .
sure , I'll peel the stickers off the side window for you
.


