"Petey" Frontier 4x4's 3rd Gen 4Runner
 02-11-2014, 07:05 PM
#41
Registered User
Thread Starter
Join Date: Feb 2007
Posts: 127
Likes: 0
Received 0 Likes
on
0 Posts
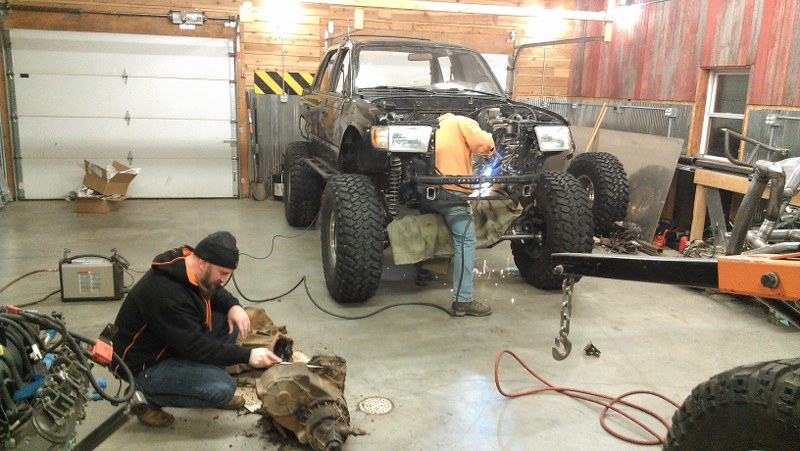
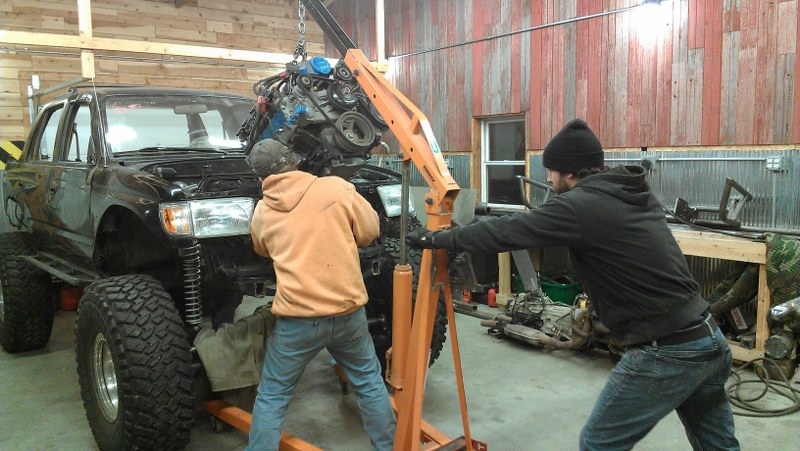
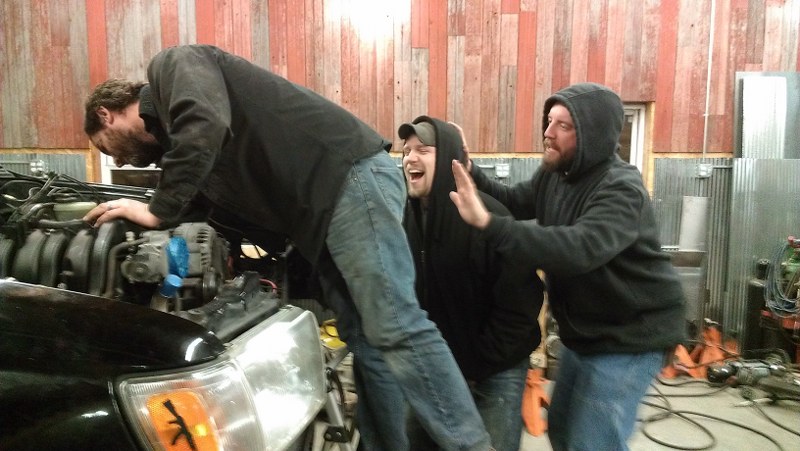
The following Friday I had some friends come over and we got the new t-cases cleaned up, doubler installed, and motor in place. Called it a night at 4am.
Scott getting rid of the old motor mounts and Art cleaning up the 203 and 205.
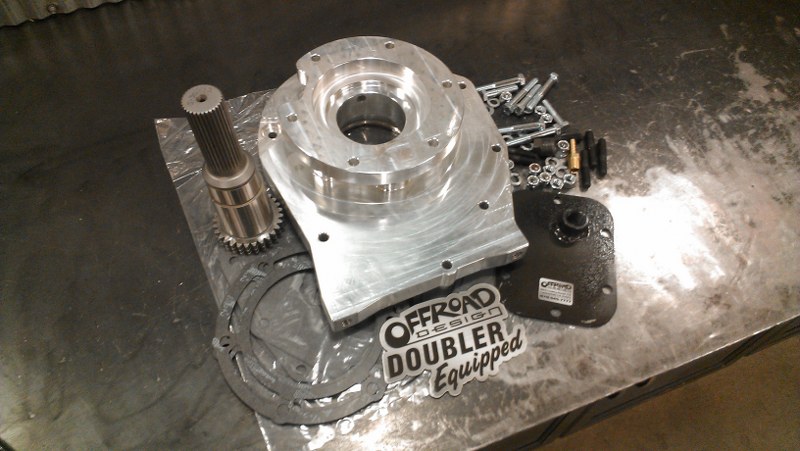
GM 203 to Ford 205 doubler from Offroad Design rotated up so the 205 is flat with the 203.
Transmission that Advance Transmission out of Knoxville built for me. I just told them what I'm running and build me something that will hold up to it. It's a TH350 with billet sprag. GM made a few different flywheel and torque converter patterns.
10.75" - Small GM, TH350, 700r
11.5" - Large GM, TH400, 6.0 LQ4 using the HD transmissions
11" - LSX motors, 5.3, 5.7. 6.0 LQ9, etc using the lighter duty transmissions.
The 6.0 LQ9 that I'm using comes with the LSX pattern so I swapped a 6.0 LQ4 on it that is the large GM pattern and using a TH400 torque convereter. The converter is a Dacco DC540 which is a stock stall HD converter.

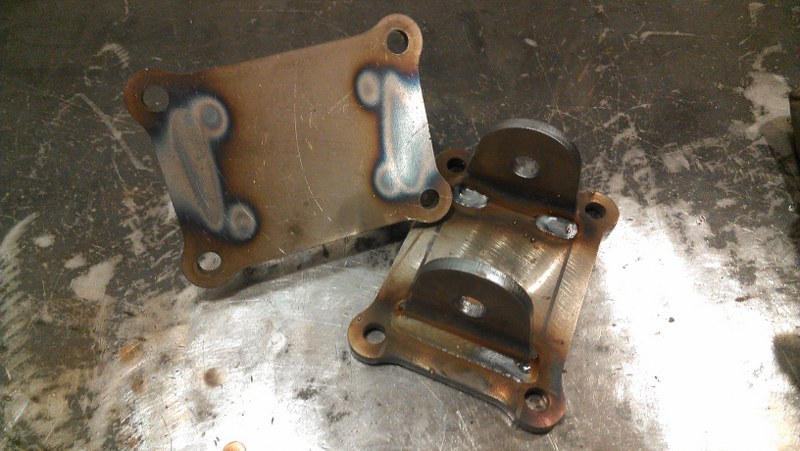
LS motor mount kit from Liquid Iron Industries.

Welded up
Scott getting rid of the old motor mounts and Art cleaning up the 203 and 205.
GM 203 to Ford 205 doubler from Offroad Design rotated up so the 205 is flat with the 203.
Transmission that Advance Transmission out of Knoxville built for me. I just told them what I'm running and build me something that will hold up to it. It's a TH350 with billet sprag. GM made a few different flywheel and torque converter patterns.
10.75" - Small GM, TH350, 700r
11.5" - Large GM, TH400, 6.0 LQ4 using the HD transmissions
11" - LSX motors, 5.3, 5.7. 6.0 LQ9, etc using the lighter duty transmissions.
The 6.0 LQ9 that I'm using comes with the LSX pattern so I swapped a 6.0 LQ4 on it that is the large GM pattern and using a TH400 torque convereter. The converter is a Dacco DC540 which is a stock stall HD converter.
LS motor mount kit from Liquid Iron Industries.
Welded up
 02-11-2014, 07:06 PM
#42
Registered User
Thread Starter
Join Date: Feb 2007
Posts: 127
Likes: 0
Received 0 Likes
on
0 Posts
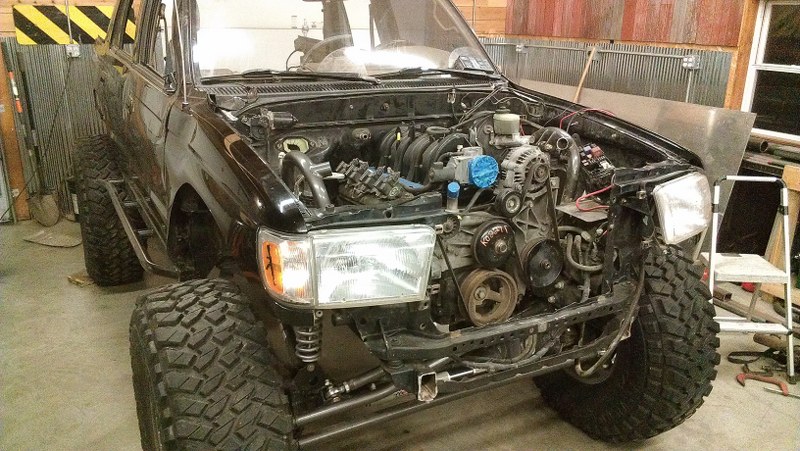
Salvage yard broke the intake where they always do. The stud that hold the front engine cover bolt is snapped off.
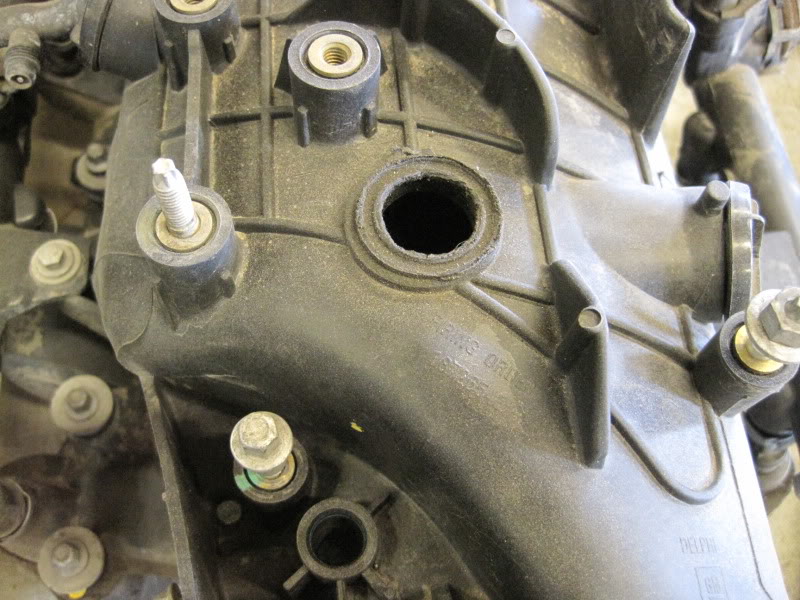
So they didn't have any other good ones and ended up getting me a stock aftermarket replacement. I'm not to pumped about running non oem stock parts but I don't have much of a choice at this point.
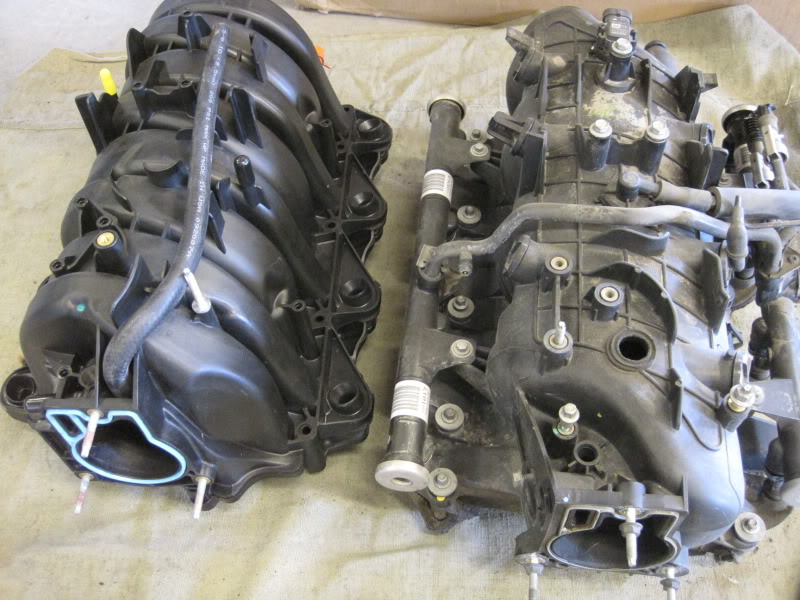
It all hooks up the same but uses different gaskets, bolts, vacuum fittings, etc. It's shaped different also. I'll probably end up swapping it out for a good oem since stuff like this bugs the crap out of me.
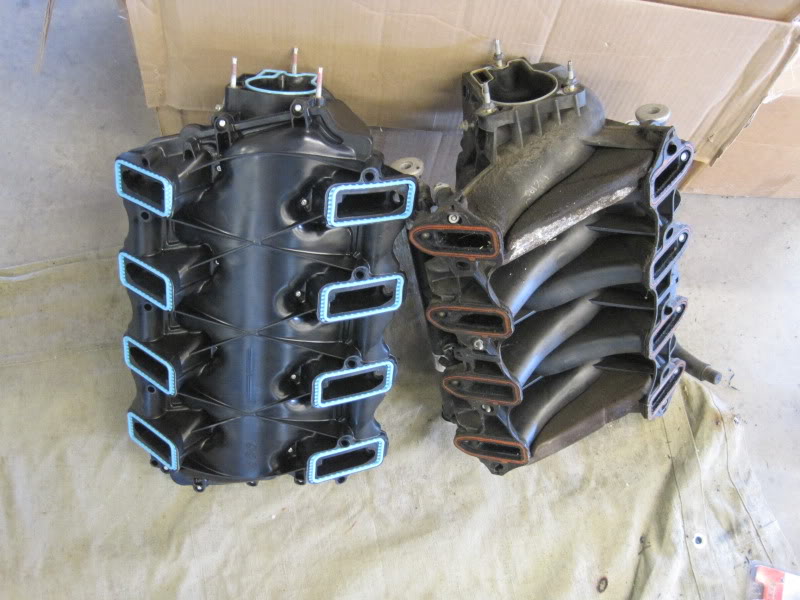
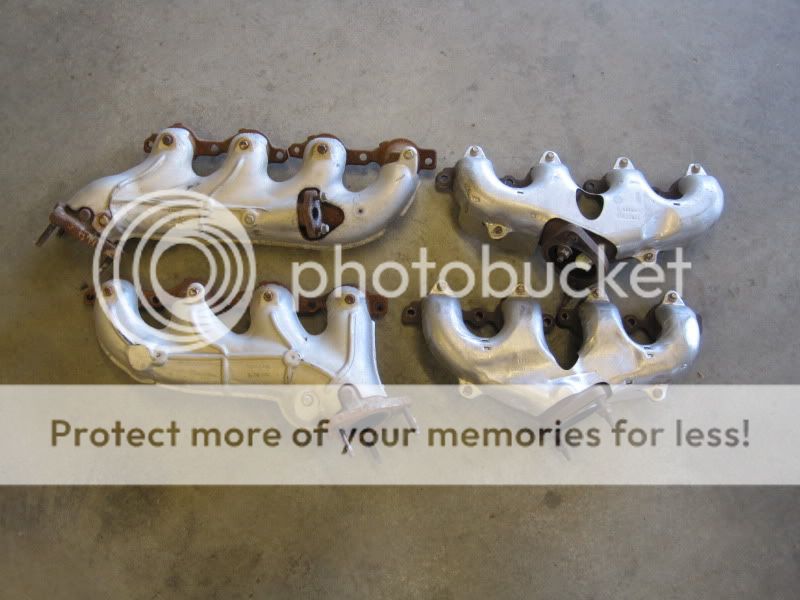
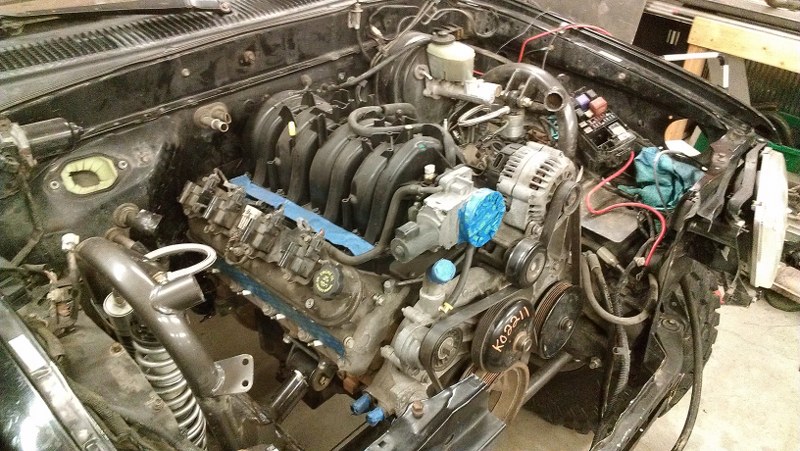
I'm tossing the stock truck manifolds for C6 manifolds off a corvette. They both drop down at the same angle right behind the motor mounts. They also incorporate the 02 sensor which will save me a step later and also clean things up.
So they didn't have any other good ones and ended up getting me a stock aftermarket replacement. I'm not to pumped about running non oem stock parts but I don't have much of a choice at this point.
It all hooks up the same but uses different gaskets, bolts, vacuum fittings, etc. It's shaped different also. I'll probably end up swapping it out for a good oem since stuff like this bugs the crap out of me.
I'm tossing the stock truck manifolds for C6 manifolds off a corvette. They both drop down at the same angle right behind the motor mounts. They also incorporate the 02 sensor which will save me a step later and also clean things up.
02-11-2014, 07:07 PM
#43
Registered User
Thread Starter
Join Date: Feb 2007
Posts: 127
Likes: 0
Received 0 Likes
on
0 Posts
Scott and I seeing how it's going to fit. We ended up pounding the fire back some on passenger side to clear the head and also a little around the 203 shifters and some by the driver side of the 205.
That kind of sucked lifting the 205 in place.
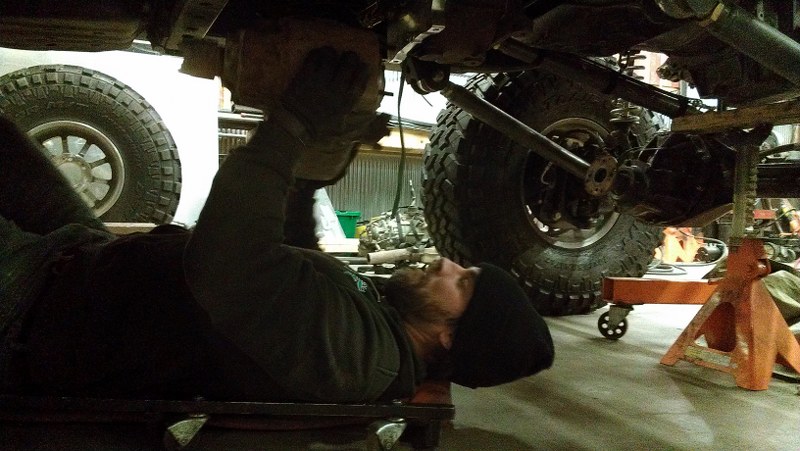
Motorin', I don't what it is about 3am but things get weird!
That kind of sucked lifting the 205 in place.
Motorin', I don't what it is about 3am but things get weird!
02-11-2014, 07:13 PM
#44
Registered User
Thread Starter
Join Date: Feb 2007
Posts: 127
Likes: 0
Received 0 Likes
on
0 Posts
The next day I started on the motor mounts. Lots of measuring to get it where I wanted. It's about 1/4" towards the passenger side. Transfer case bottoms are even with the crossmember by the gas tank. Frame rail was plated and some tube ran between the motor mounts and frame.
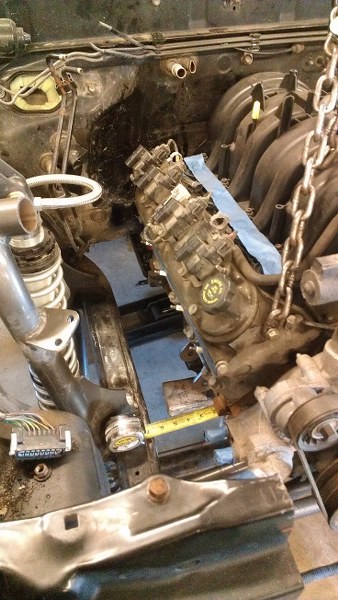
I'm changing the radiator up some, this is to show clearance with the stock one in stock location.
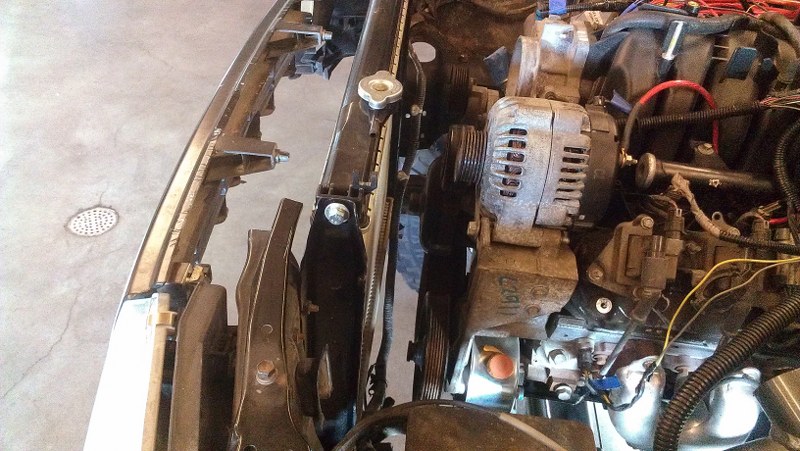
I'm changing the radiator up some, this is to show clearance with the stock one in stock location.
02-11-2014, 08:01 PM
#45
Registered User
Thread Starter
Join Date: Feb 2007
Posts: 127
Likes: 0
Received 0 Likes
on
0 Posts
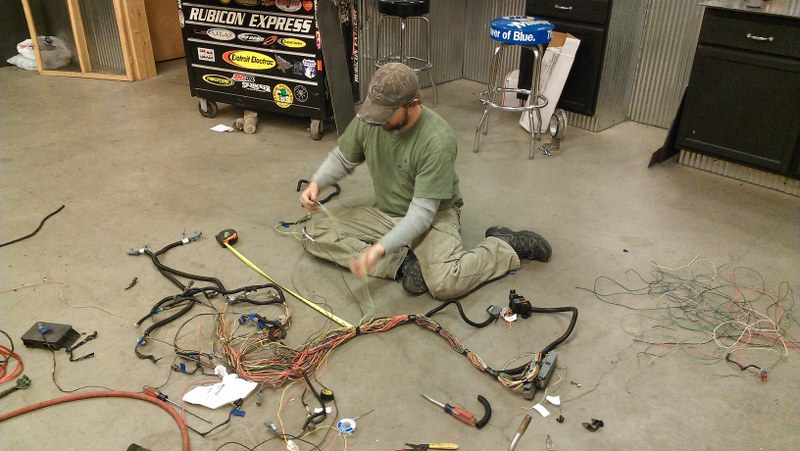
I had BD Turnkey do the harness and tune back when I originally got the motor. We plugged everything in and it fired but died. Somehow the passlock was missed and never got disabled on the original tune. So I sent it back the next day, Monday, to get fixed and sent back. It would take at least a week before I got it back so I started getting the wiring in the final place the next weekend, two weeks ago.
Tristan came over and gave me a hand with laying out the wiring to make it look better than factory. The ECM ended up where the air bag was. The TAC for drive by wire fit perfectly where the factory 3.4 ECM used to be, and the engine fuses and relays went where the upper glove box cover was.
Tristan moving a few wires around to fit the main harness along the firewall.
ECM mounted in a bracket I got. The factory airbag cover easily comes off by releasing the tabs from inside. Easy to reach by opening glove box. The weatherpack terminals are for fuel pump, switched power, and OBD power/data.
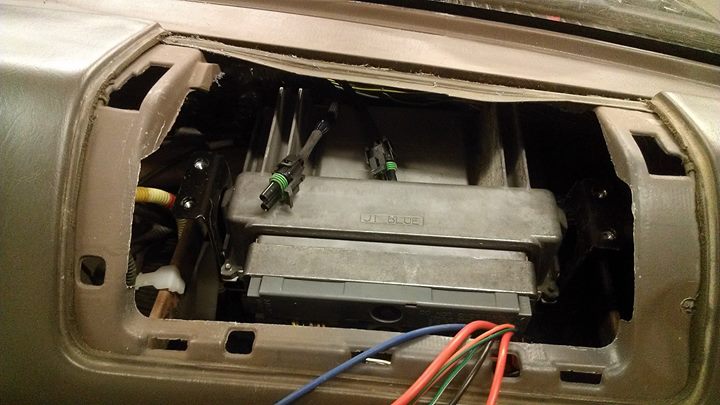
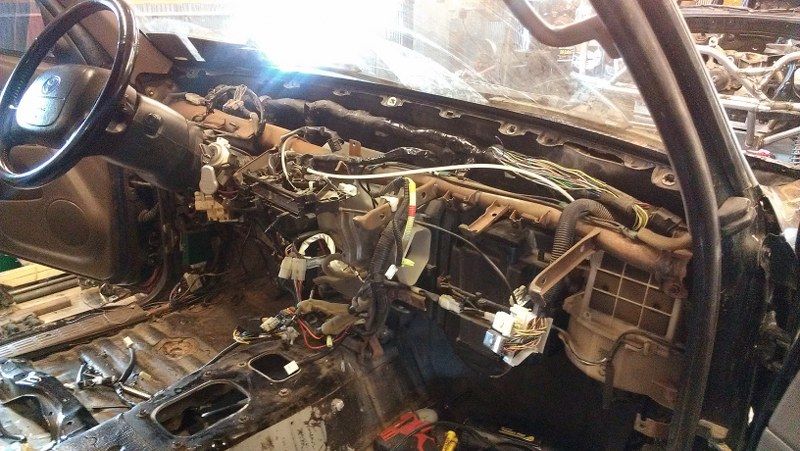
All mounted up. I'll tape up wires more once I test and tune.
Tristan came over and gave me a hand with laying out the wiring to make it look better than factory. The ECM ended up where the air bag was. The TAC for drive by wire fit perfectly where the factory 3.4 ECM used to be, and the engine fuses and relays went where the upper glove box cover was.
Tristan moving a few wires around to fit the main harness along the firewall.
ECM mounted in a bracket I got. The factory airbag cover easily comes off by releasing the tabs from inside. Easy to reach by opening glove box. The weatherpack terminals are for fuel pump, switched power, and OBD power/data.
All mounted up. I'll tape up wires more once I test and tune.
02-11-2014, 08:02 PM
#46
Registered User
Thread Starter
Join Date: Feb 2007
Posts: 127
Likes: 0
Received 0 Likes
on
0 Posts
ECM worked this time and it ran and sounded good. I got the exhaust done last weekend. 2.5" into a Magnaflow Y pipe to 3" to Spintech muffler. These mufflers sound badass.

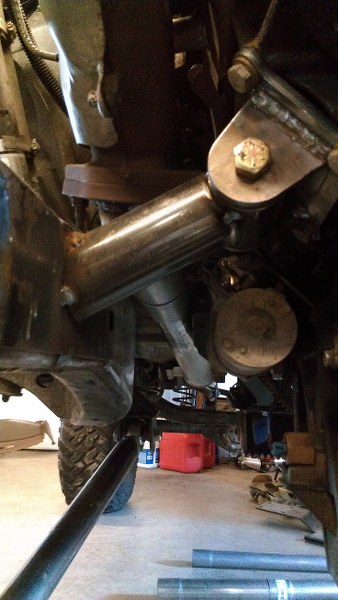
Chrome cover is just to make sure I clear the torque converter. There will be a band clamp on passenger side where it slips together and also driver side where it comes down towards the ground. And another 3" clamp half way to the muffler. This will allow me to take off the entire welded Y section easily.
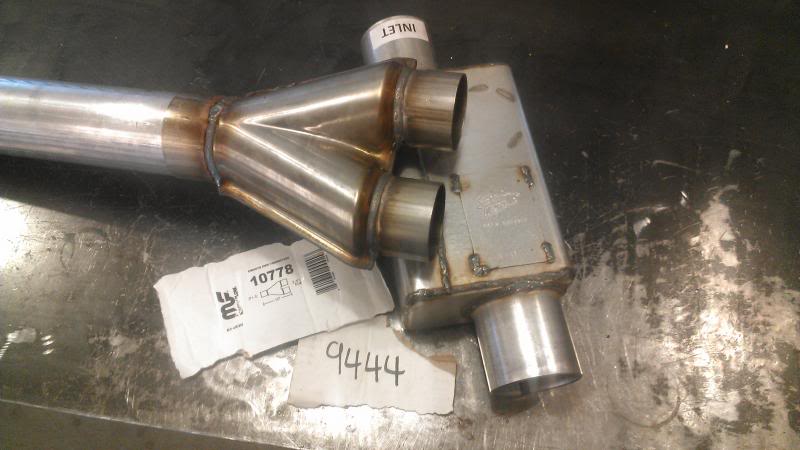
Chrome cover is just to make sure I clear the torque converter. There will be a band clamp on passenger side where it slips together and also driver side where it comes down towards the ground. And another 3" clamp half way to the muffler. This will allow me to take off the entire welded Y section easily.
02-11-2014, 08:04 PM
#47
Registered User
Thread Starter
Join Date: Feb 2007
Posts: 127
Likes: 0
Received 0 Likes
on
0 Posts
That's where I'm at as of today. I plan to go back and put some more detail and part numbers in the previous posts.
Extra Artec upper link brackets to go 4 link front and rear and ram mount for full hydro showed up Friday but I'm going to wait until cage, bumpers, and body work is done first. I need to get this and the Tacoma done for BMR in Disney, OK at the end of March. Current 3-link actually looks like it will clear just fine. I will probably still need to get my fuel cell swapped in by then since the factory pump is about 10 lbs low on fuel pressure. Also need to get radiator, intake, and crossmember finished up.
Extra Artec upper link brackets to go 4 link front and rear and ram mount for full hydro showed up Friday but I'm going to wait until cage, bumpers, and body work is done first. I need to get this and the Tacoma done for BMR in Disney, OK at the end of March. Current 3-link actually looks like it will clear just fine. I will probably still need to get my fuel cell swapped in by then since the factory pump is about 10 lbs low on fuel pressure. Also need to get radiator, intake, and crossmember finished up.
 02-12-2014, 05:58 AM
#49
Registered User
Thread Starter
Join Date: Feb 2007
Posts: 127
Likes: 0
Received 0 Likes
on
0 Posts
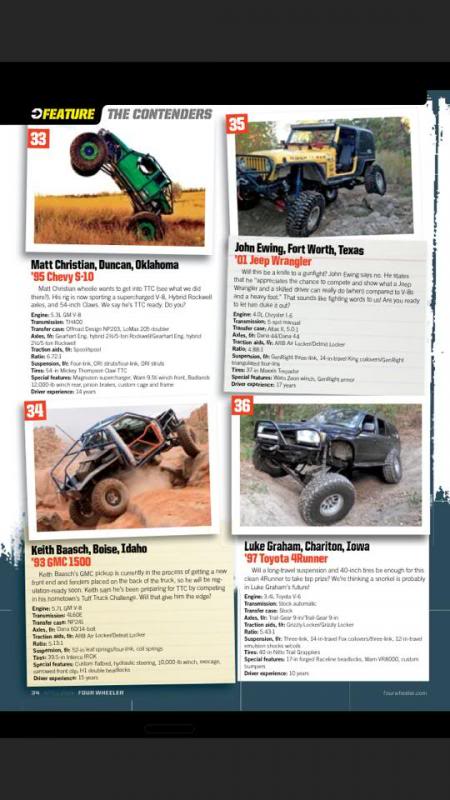
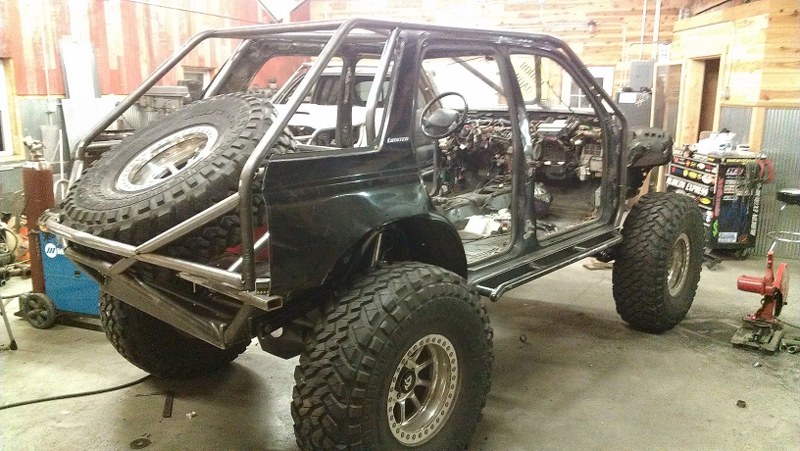
And yes, I did make it into Four Wheeler mag for Top Truck, so please vote #36! Specs are a little different from when I submitted.
Specs are a bit different now from what's in the mag.
Specs:
Motor: 6.0 LQ9
Transmission: TH350
T-case: 203/205 doubler
Axles: Trail-Gear 9"
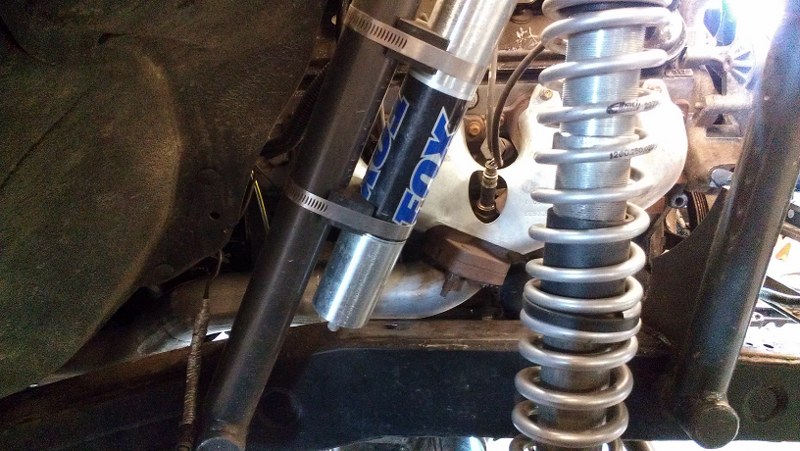
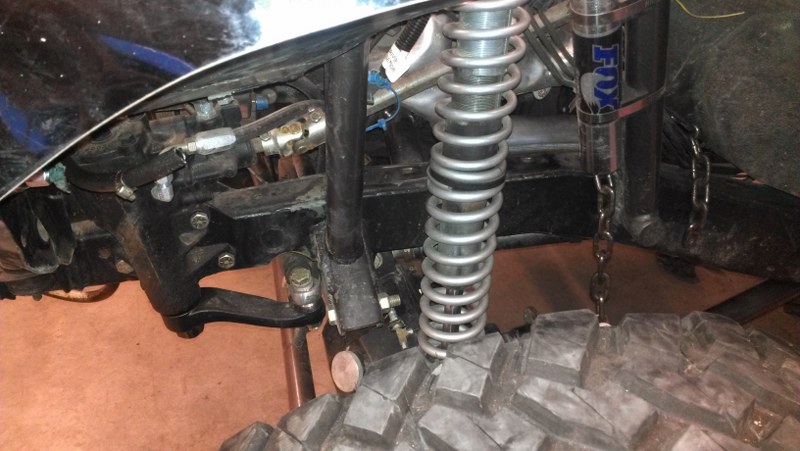
Suspension: 4 link front/rear, Fox shocks
Steering: PSC full hydro
Tires: 40" Nitto Trail-Grappler
Wheels: Raceline 17" forged Liberator beadlocks
Specs are a bit different now from what's in the mag.
Specs:
Motor: 6.0 LQ9
Transmission: TH350
T-case: 203/205 doubler
Axles: Trail-Gear 9"
Suspension: 4 link front/rear, Fox shocks
Steering: PSC full hydro
Tires: 40" Nitto Trail-Grappler
Wheels: Raceline 17" forged Liberator beadlocks
Last edited by Frontier4x4; 02-12-2014 at 06:48 AM.
02-25-2014, 08:20 AM
#50
Registered User
Thread Starter
Join Date: Feb 2007
Posts: 127
Likes: 0
Received 0 Likes
on
0 Posts
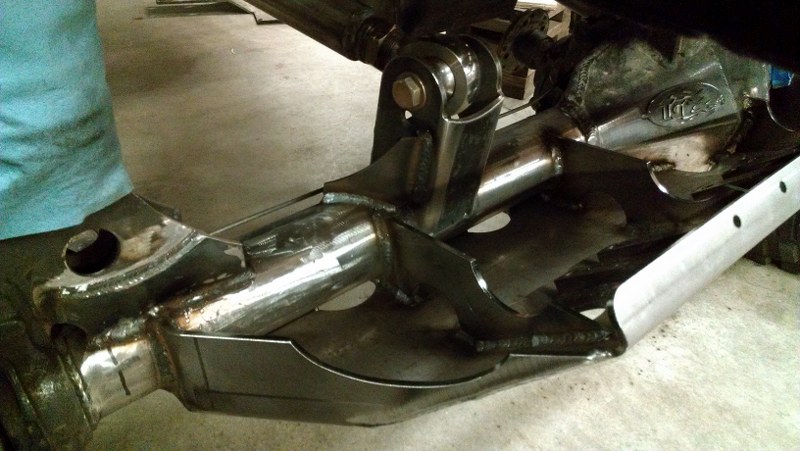
Artec universal ram mount and the extra brackets for 4 link.
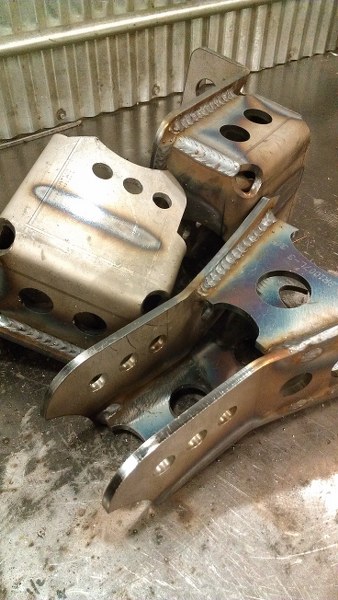
Upper mounts on and link built.
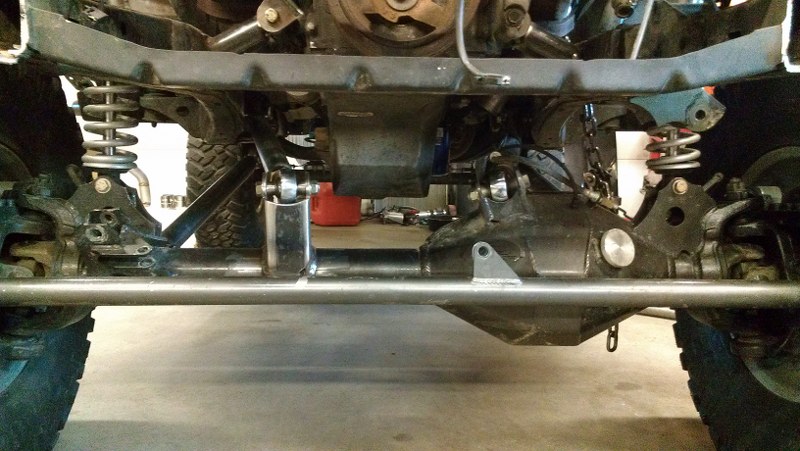
PSC full hydro, double ended cylinder
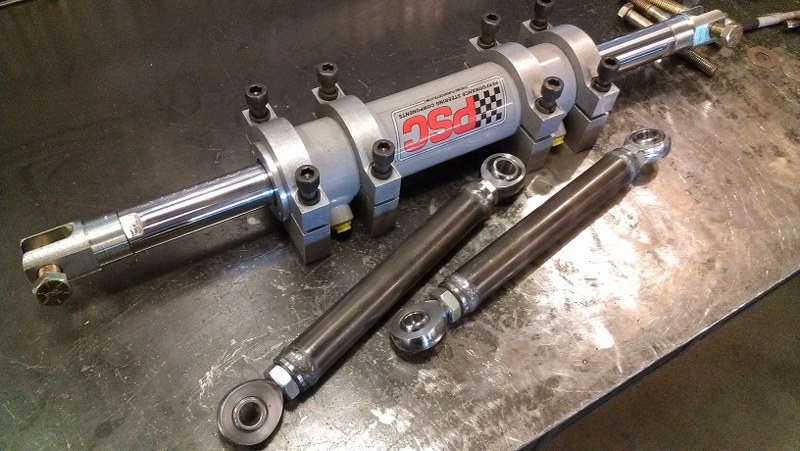
Fit to axle and ram mounted.


Welded on. Also added gussets to both sides of upper link and capped off the lower coilover mount where the panhard used to be.
Upper mounts on and link built.
PSC full hydro, double ended cylinder
Fit to axle and ram mounted.
Welded on. Also added gussets to both sides of upper link and capped off the lower coilover mount where the panhard used to be.
02-25-2014, 08:22 AM
#51
Registered User
Thread Starter
Join Date: Feb 2007
Posts: 127
Likes: 0
Received 0 Likes
on
0 Posts
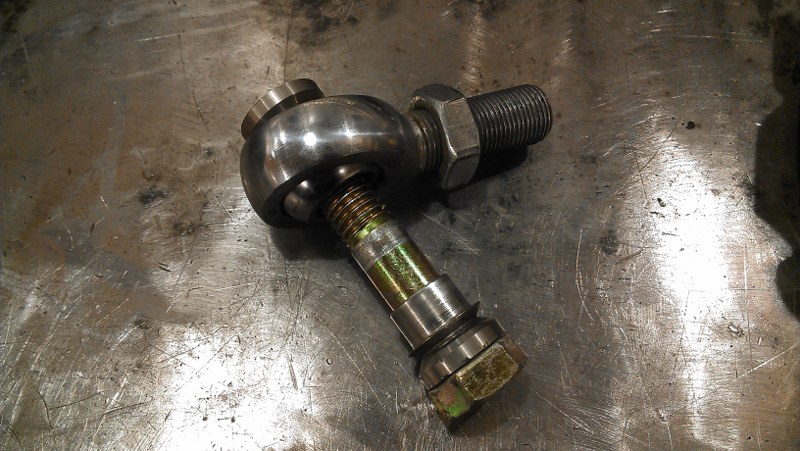
Here's something I didn't expect when I put it together last year. I used these 3/4" to 5/8" stainless misalignment spacers on my tie rod. At the pitman arm and high steer arm. They are really thin in the middle and turned into crush sleeves. I had to beat the crap out of them to get them off.
02-25-2014, 08:58 PM
#52
Registered User
Thread Starter
Join Date: Feb 2007
Posts: 127
Likes: 0
Received 0 Likes
on
0 Posts
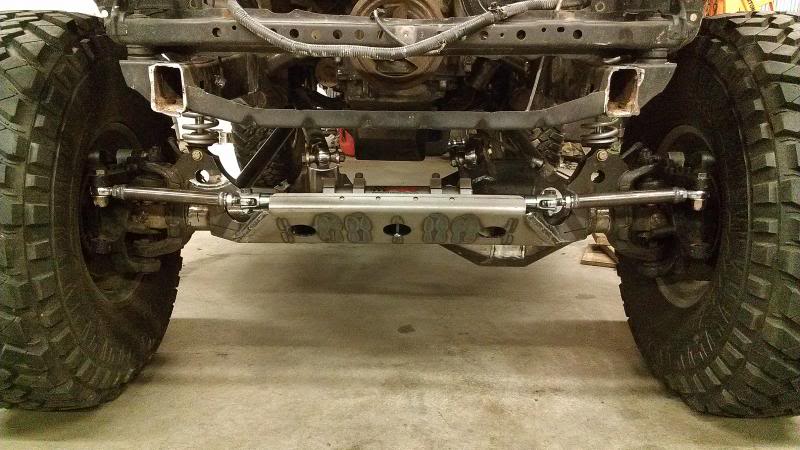
All bolted up and tightened down. Picture is a little deceiving, ram is just behind high steer arm mount and slightly lower. Looks like it is way in front in the pic for some reason.
02-27-2014, 07:26 PM
#53
Registered User
Thread Starter
Join Date: Feb 2007
Posts: 127
Likes: 0
Received 0 Likes
on
0 Posts
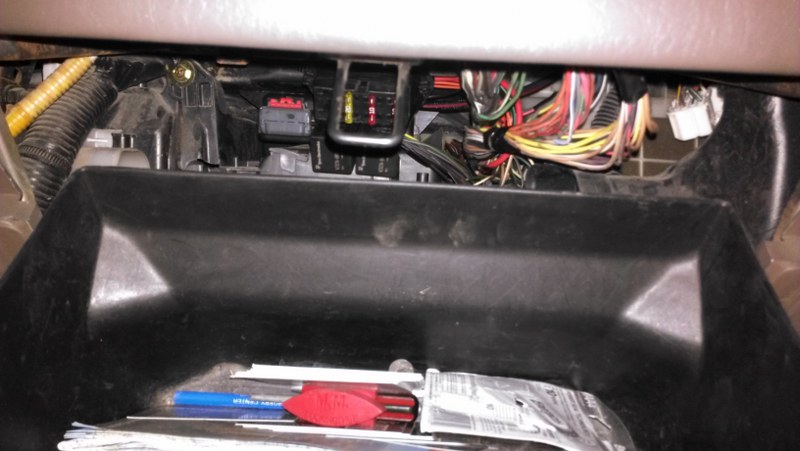
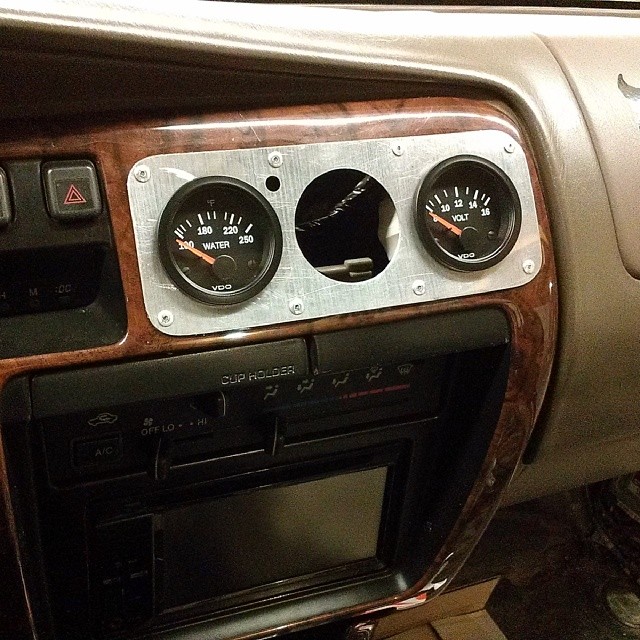
I ran out of gas welding a bunch of Tacoma stuff up so put a gauge panel together tonight. Waiting on the oil pressure. The hole by water is for a bright led when I have the fans off for submarine mode.
03-10-2014, 08:59 AM
#54
Registered User
Thread Starter
Join Date: Feb 2007
Posts: 127
Likes: 0
Received 0 Likes
on
0 Posts
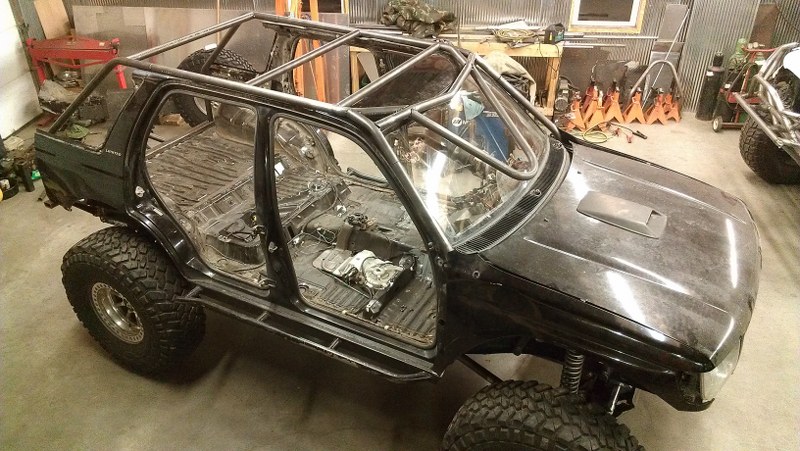
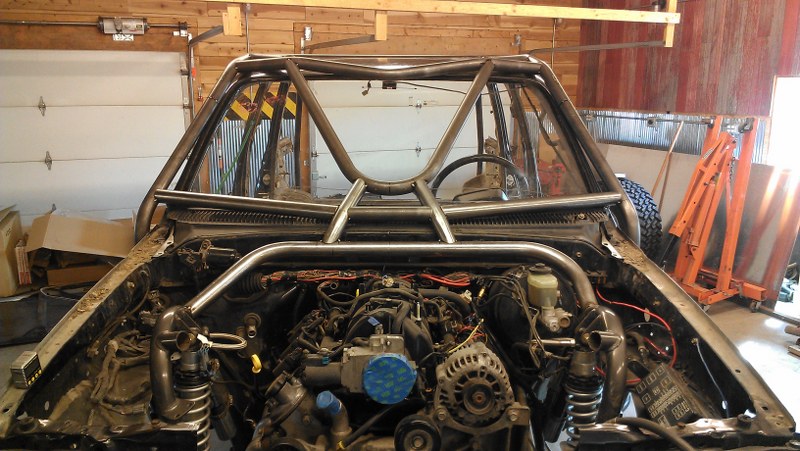
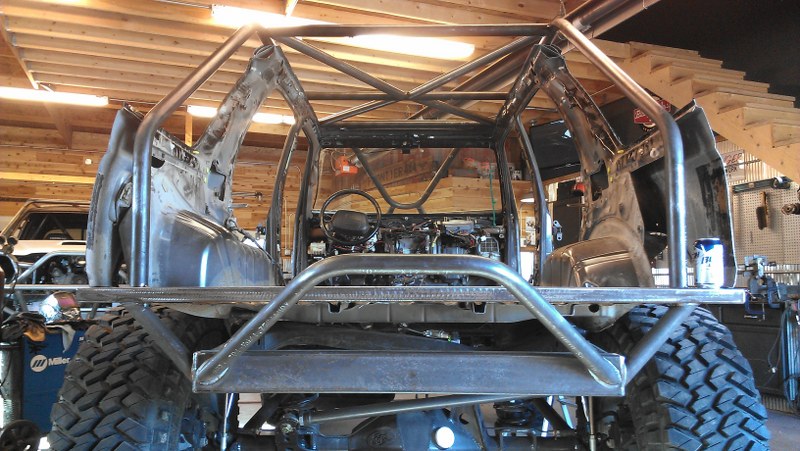
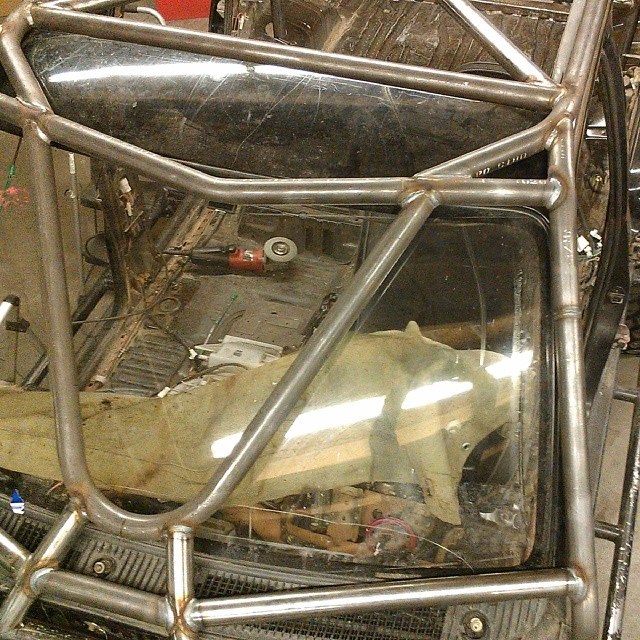
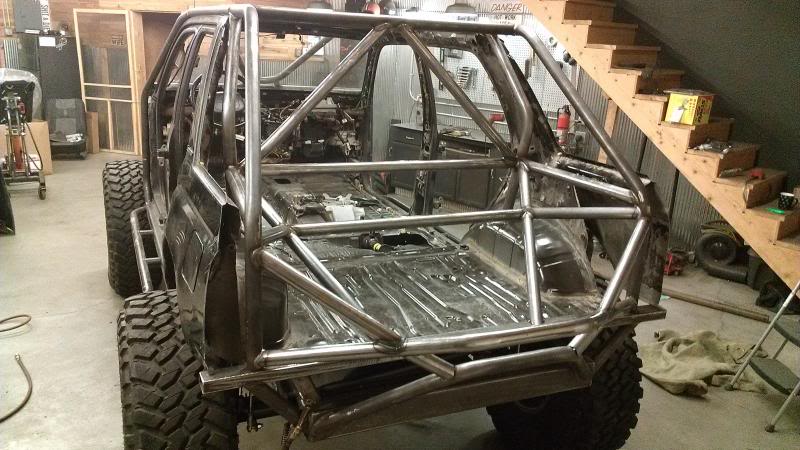
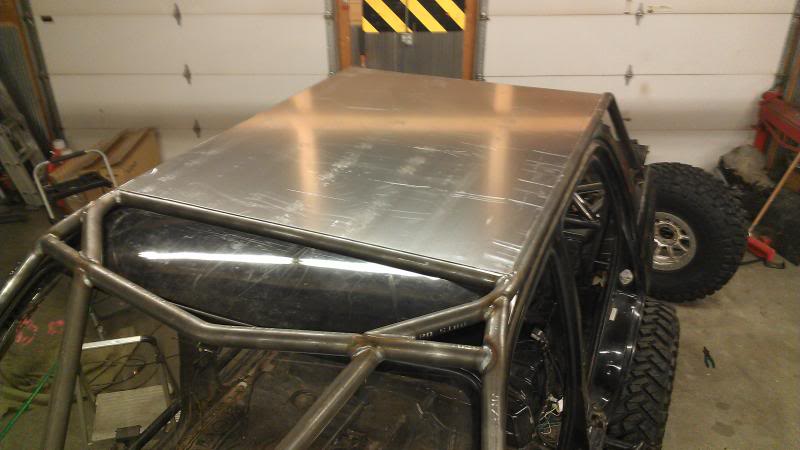
Started on cage this weekend and got it mostly done. All 1.75x.120" DOM, 100' so far. I gained a few inches of headroom by getting rid of the sunroof, it was close. The top will get a 1/8" piece of aluminum. With the way I cut it on the sides it's going to blend in really good and stay dry. The top of the tube is about half inch higher than the middle of the factory roof. I have to finish behind the front seats when they show up, the engine cage, and front bumper. I will weld what I can then pull it all off to weld the inside and put a new windshield in. After cage is back on I'll build some tail lights and weld up the sheet metal.

 03-12-2014, 06:35 AM
#57
Registered User
Thread Starter
Join Date: Feb 2007
Posts: 127
Likes: 0
Received 0 Likes
on
0 Posts
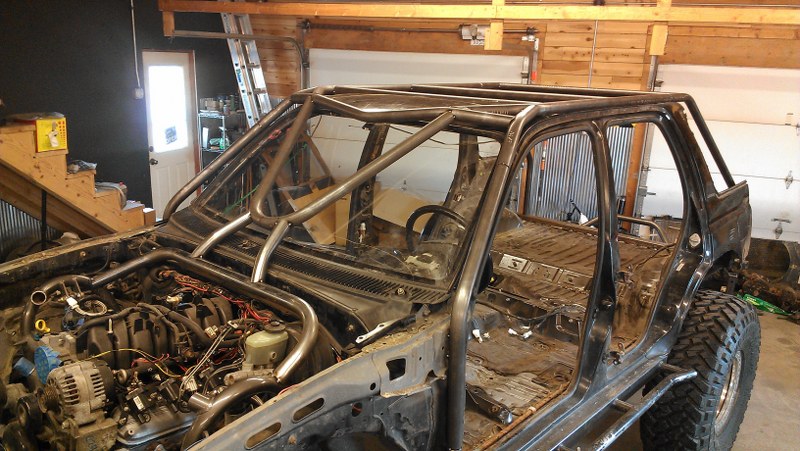
Rear tube is pretty much done. I need to finish off the the bumper part and build tail lights.
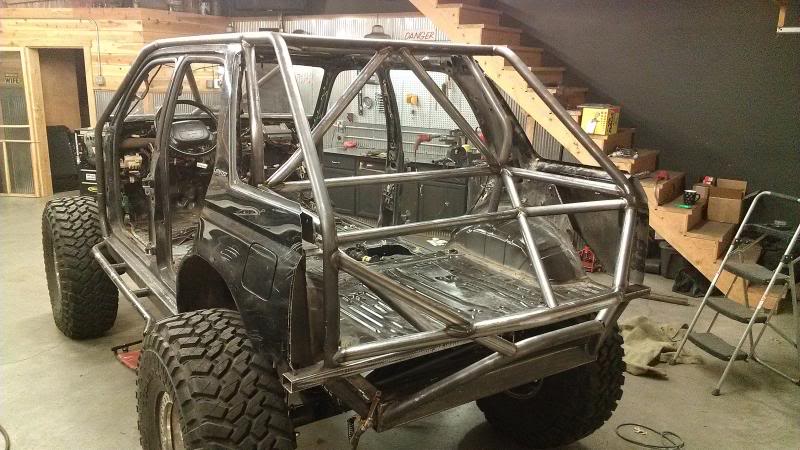
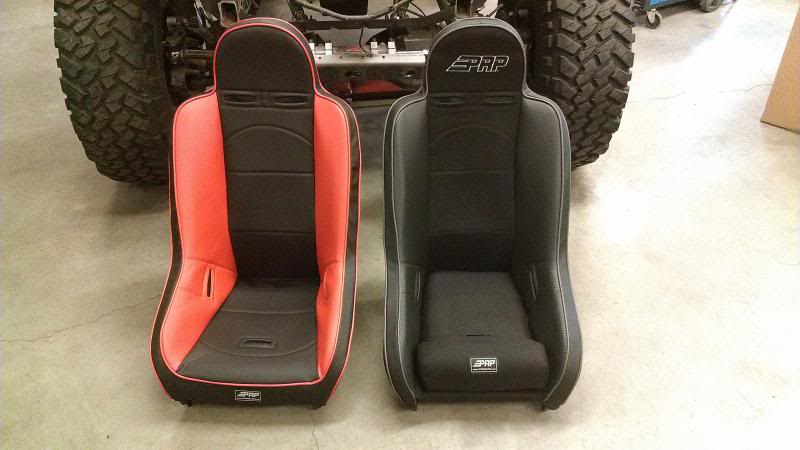
PRP seats came in so now I can finish the tube behind front seats. I'm running the Competition Pro in black carbon fiber, black cordura, and daytona black. Tyler's seats were with these, they are Competition High Back in carbon fiber red and daytona black.
Cut the roof out last night. 1/8" 3003 aluminum.
03-26-2014, 06:03 AM
#59
Registered User
Thread Starter
Join Date: Feb 2007
Posts: 127
Likes: 0
Received 0 Likes
on
0 Posts
For those that haven't been following on instagram or facebook, I did make it to Disney, OK for BMR and everything worked great. Still ready to wheel. I'll update the thread soon. I'm still working on getting caught back up from the wrench fest and being gone.


Thread
Thread Starter
Forum
Replies
Last Post
RedRunner_87
95.5-2004 Tacomas & 96-2002 4Runners (Build-Up Section)
84
06-01-2021 01:51 PM
Steezy96yota
86-95 Trucks & 4Runners (Build-Up Section)
1
07-06-2015 10:00 AM


