aa1911's Taco OME suspension install/upgrade
 04-06-2012, 06:15 PM
#41
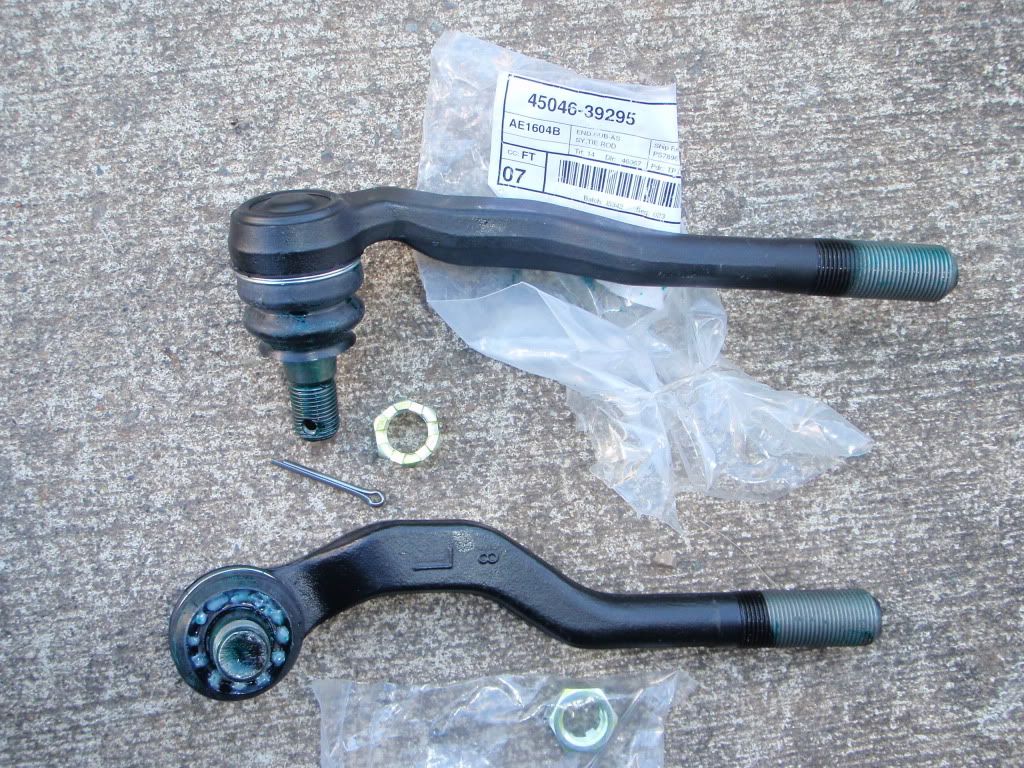
no worries, think I will tackle this project tomorrow, weather is supposed to be awesome all weekend. Took some pics for you guys, new inners, outers and boots, woo hoo!
Thanks Vital, will post up my progress, looks like a fairly easy fix from searching around on YT and looking in the Haynes.
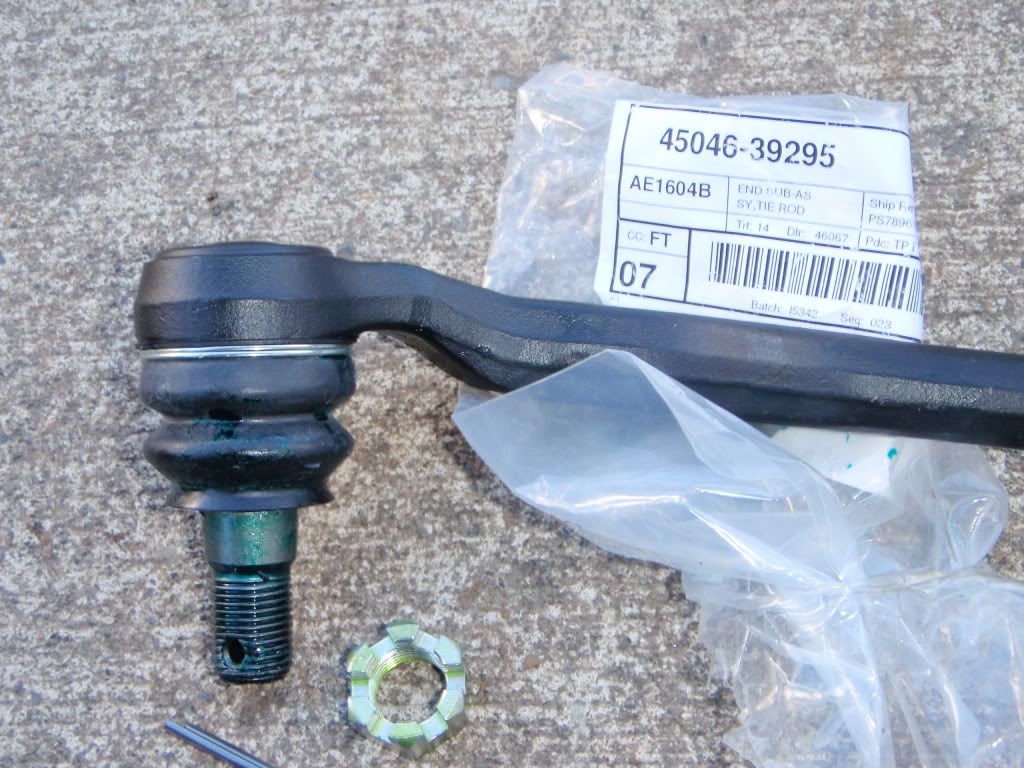
Here's the outers I picked up last week:
close up:
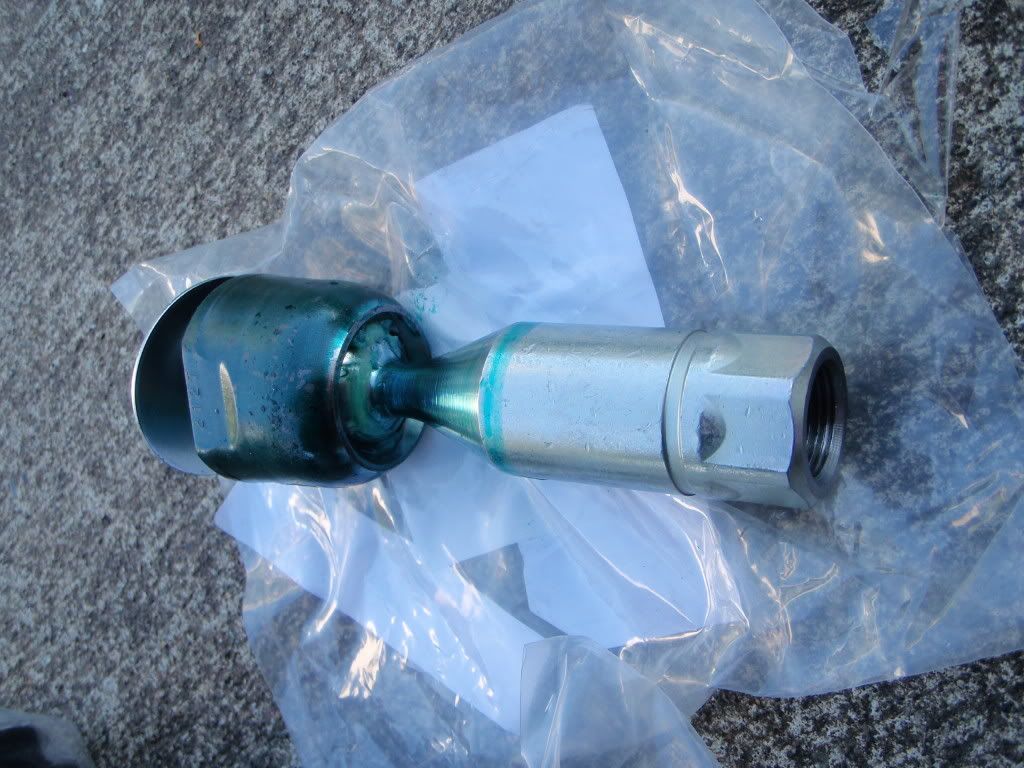
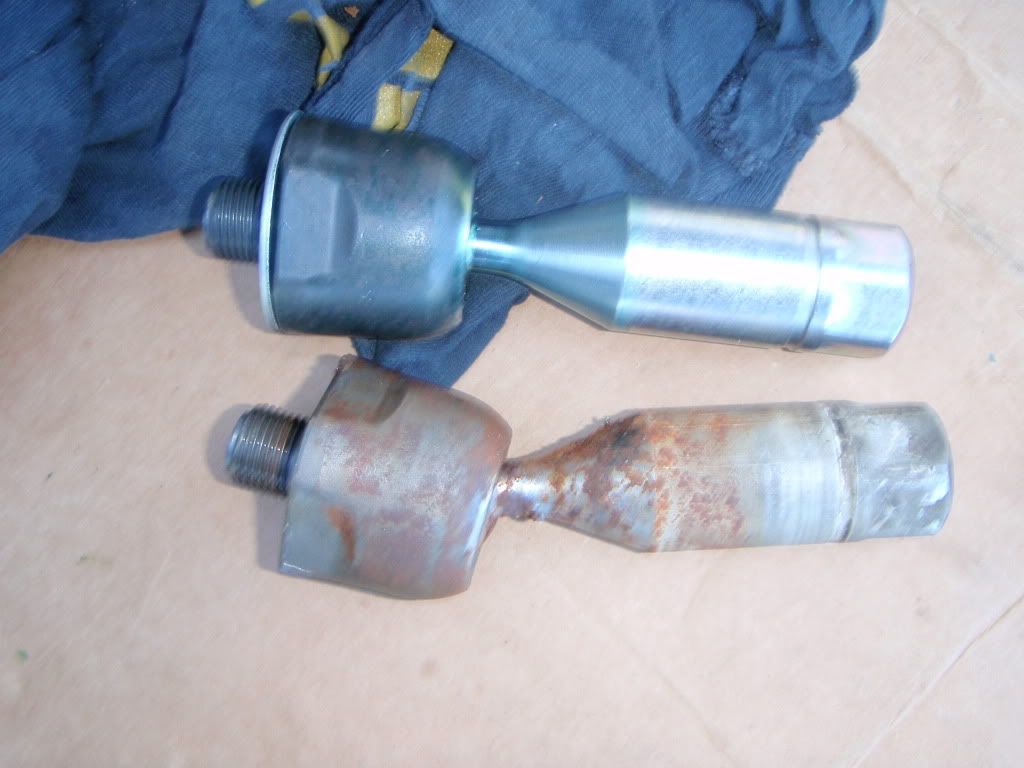
and the inners...
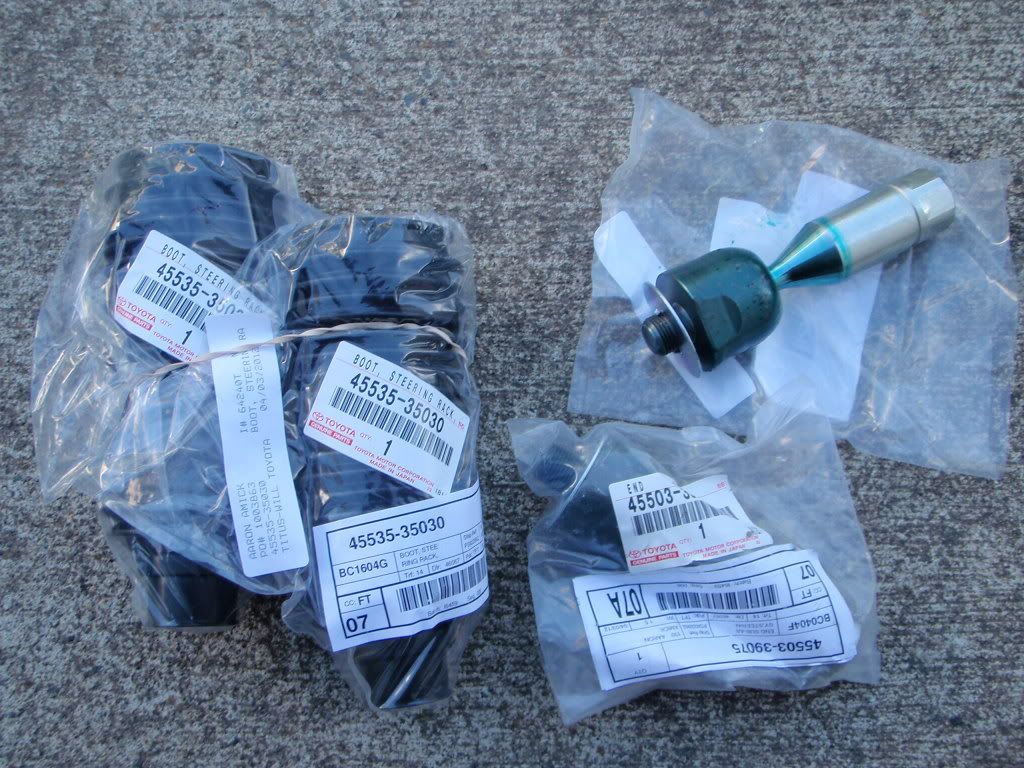
these babies are expensive.... $120 each, ouch...
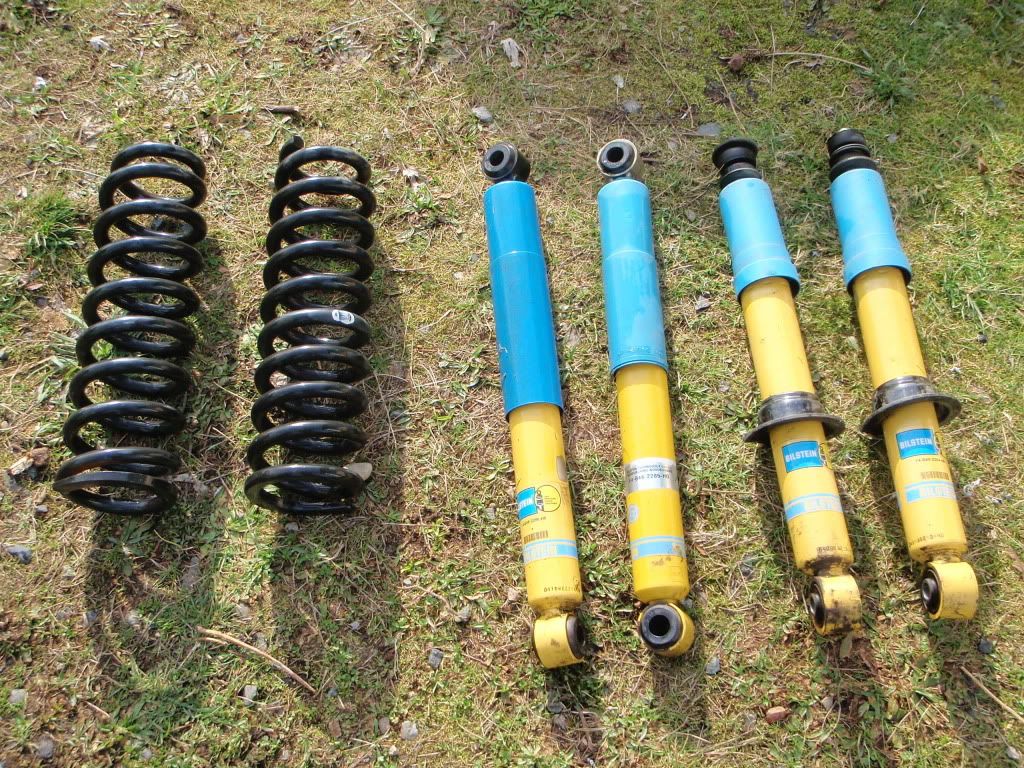
and i still have the stock springs/bilstein 5100 series HD's to get rid of, anyone want these, make a fair offer and they're yours. shocks have 29k miles on them over about a 2 year period.
will post up progress tomorrow, I should go spray the bolts with some PB blaster tonight while I think of it....
Thanks Vital, will post up my progress, looks like a fairly easy fix from searching around on YT and looking in the Haynes.
Here's the outers I picked up last week:
close up:
and the inners...
these babies are expensive.... $120 each, ouch...
and i still have the stock springs/bilstein 5100 series HD's to get rid of, anyone want these, make a fair offer and they're yours. shocks have 29k miles on them over about a 2 year period.
will post up progress tomorrow, I should go spray the bolts with some PB blaster tonight while I think of it....
 04-07-2012, 03:13 PM
#42
OK, got these babies in today, great weather gave me a chance to do these. Pulled the wheels after jacking her up with my new hi-lift I got for Christmas and got to work; only took about an hour, went pretty smooth.
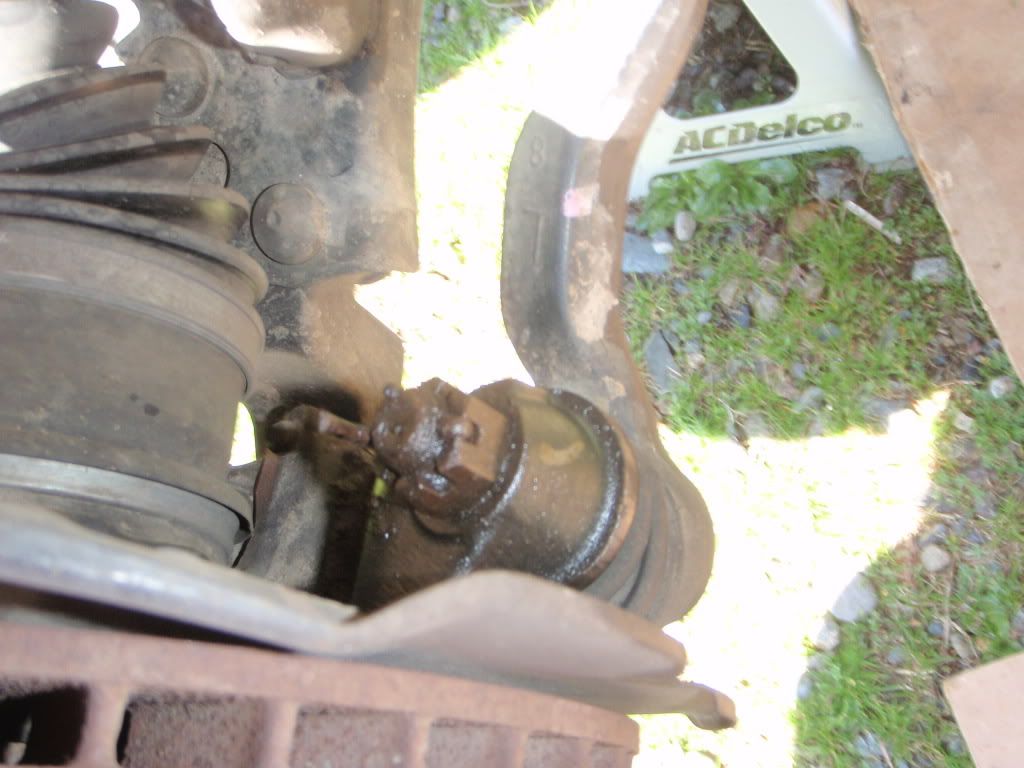
The passenger side inner tie rod was hammered dog doo doo, bigtime. shake, rattle and roll, all i can say is wow.
all my goodies layed out...

yikes!
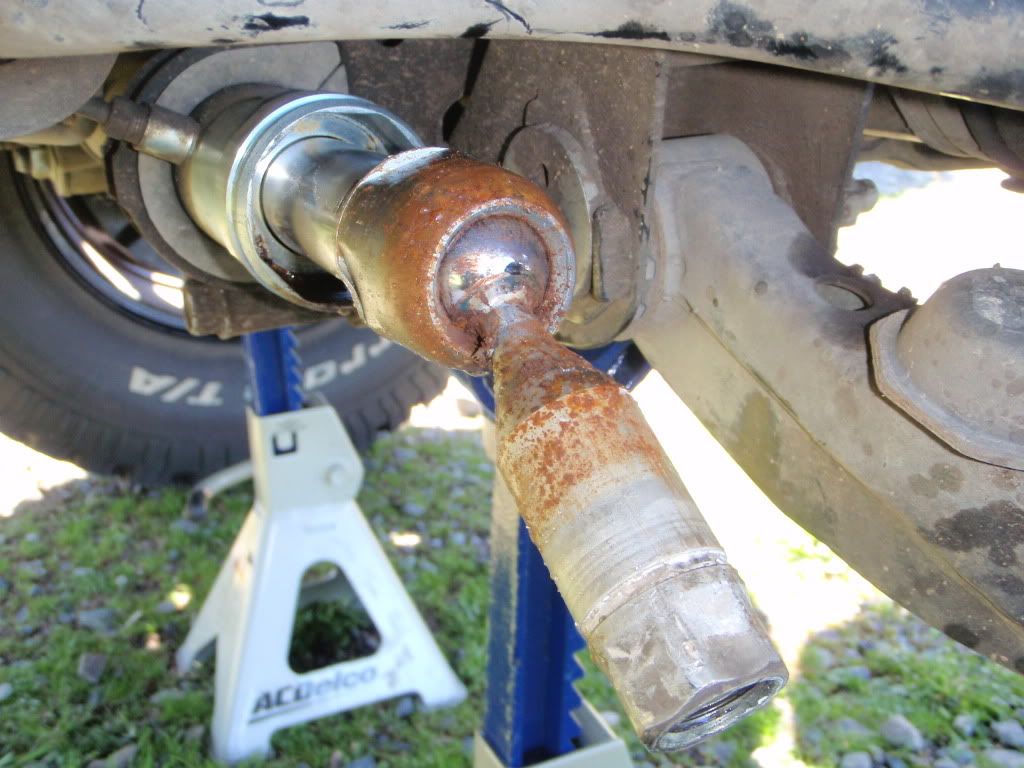

this was the orginal setup...
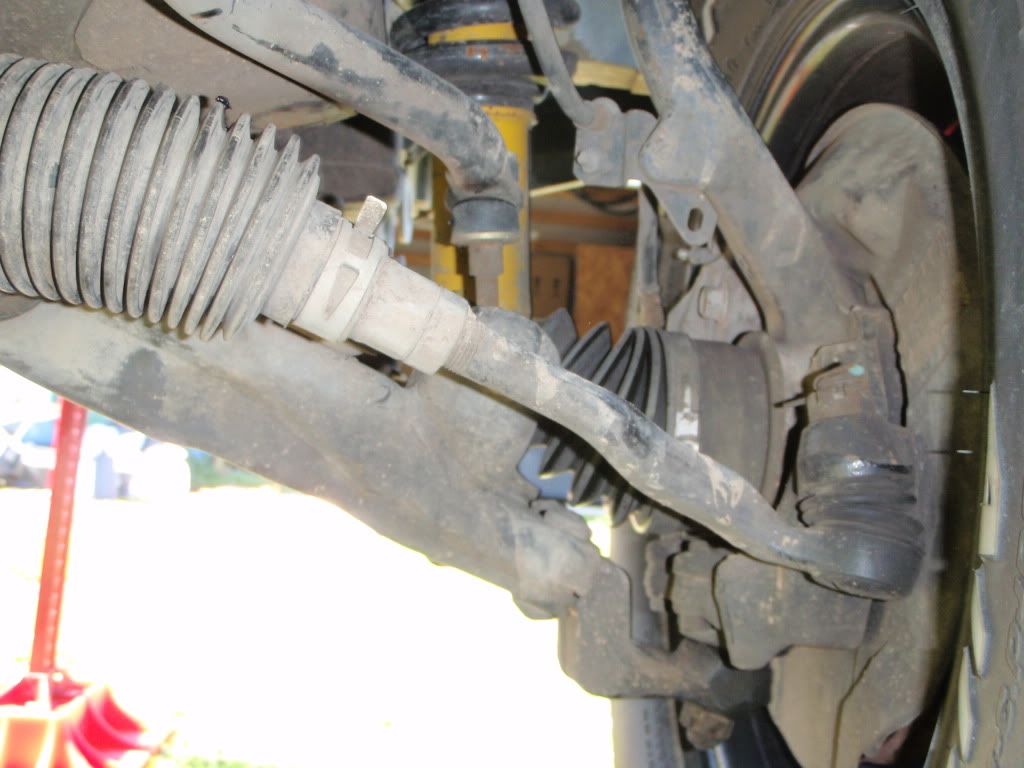
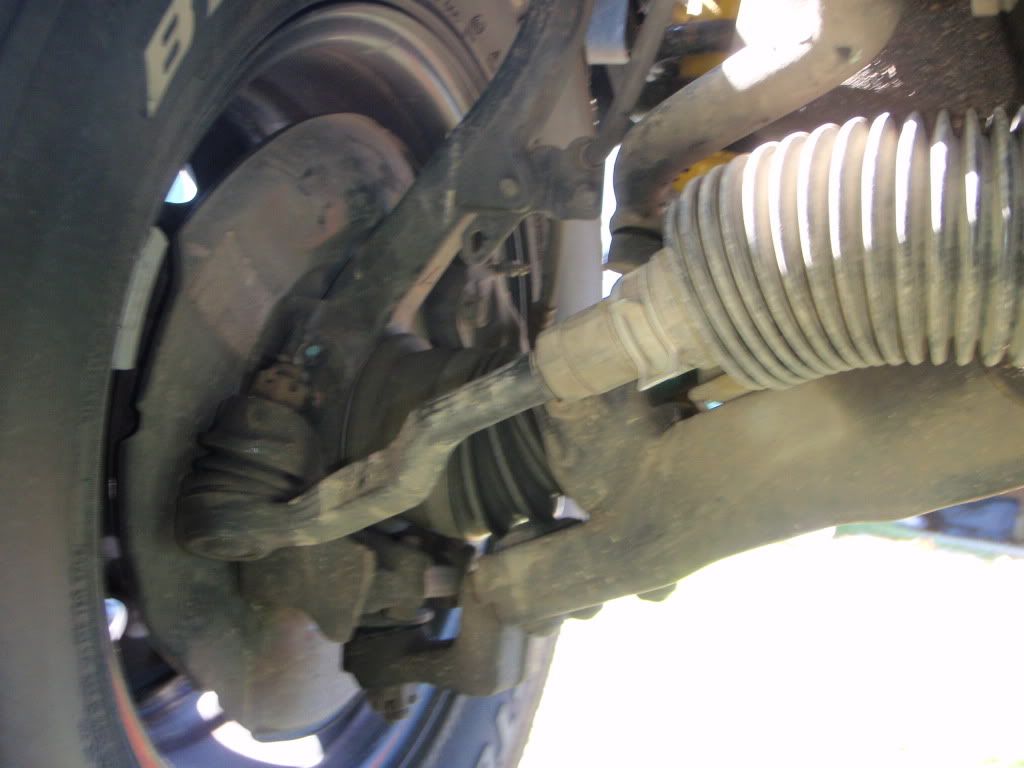
and driver side...
more to follow...
The passenger side inner tie rod was hammered dog doo doo, bigtime. shake, rattle and roll, all i can say is wow.
all my goodies layed out...
yikes!
this was the orginal setup...
and driver side...
more to follow...
04-07-2012, 03:20 PM
#43
old and new outer TRE's...
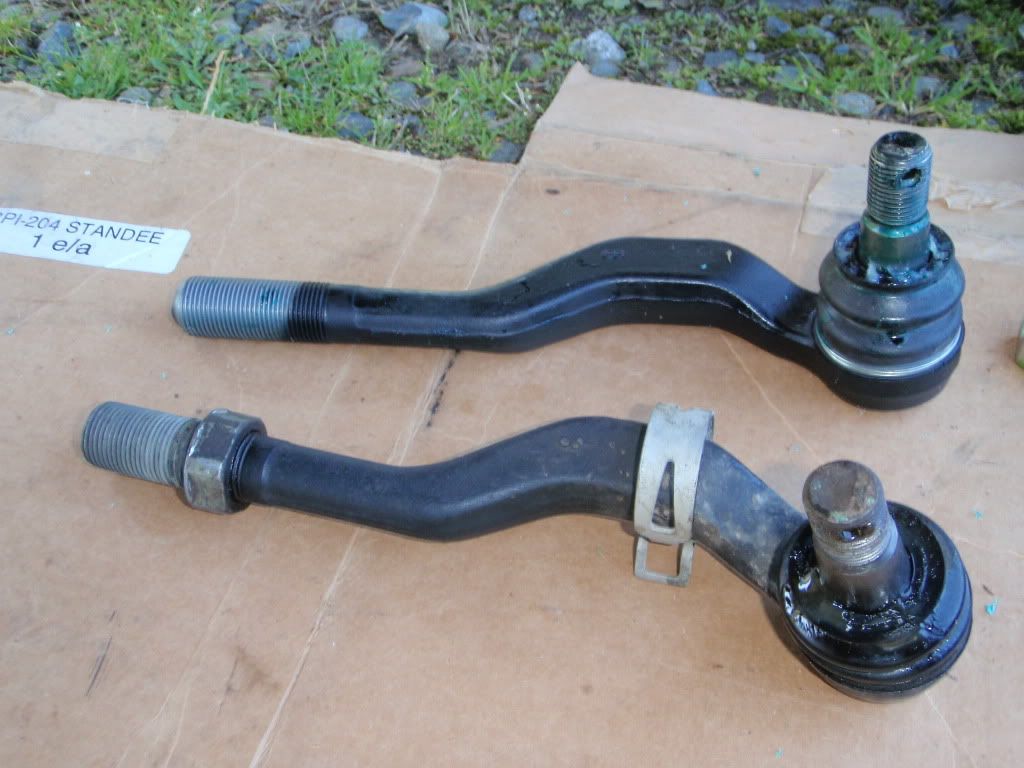
slightly different on the end but no issue. otherwise identical
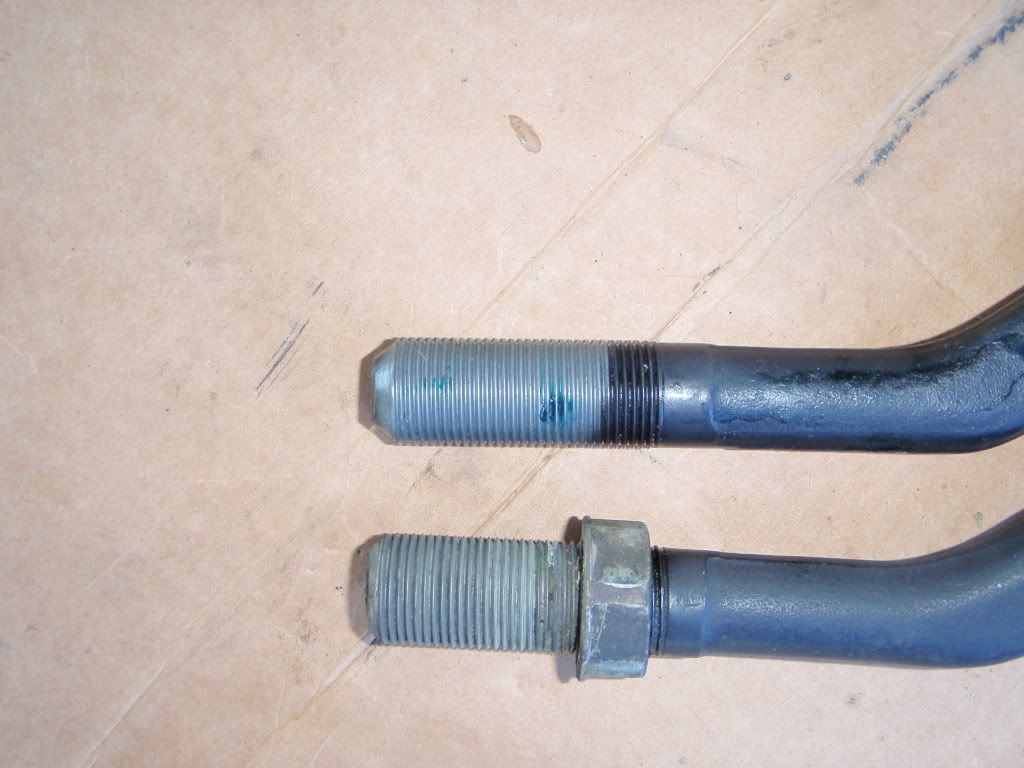
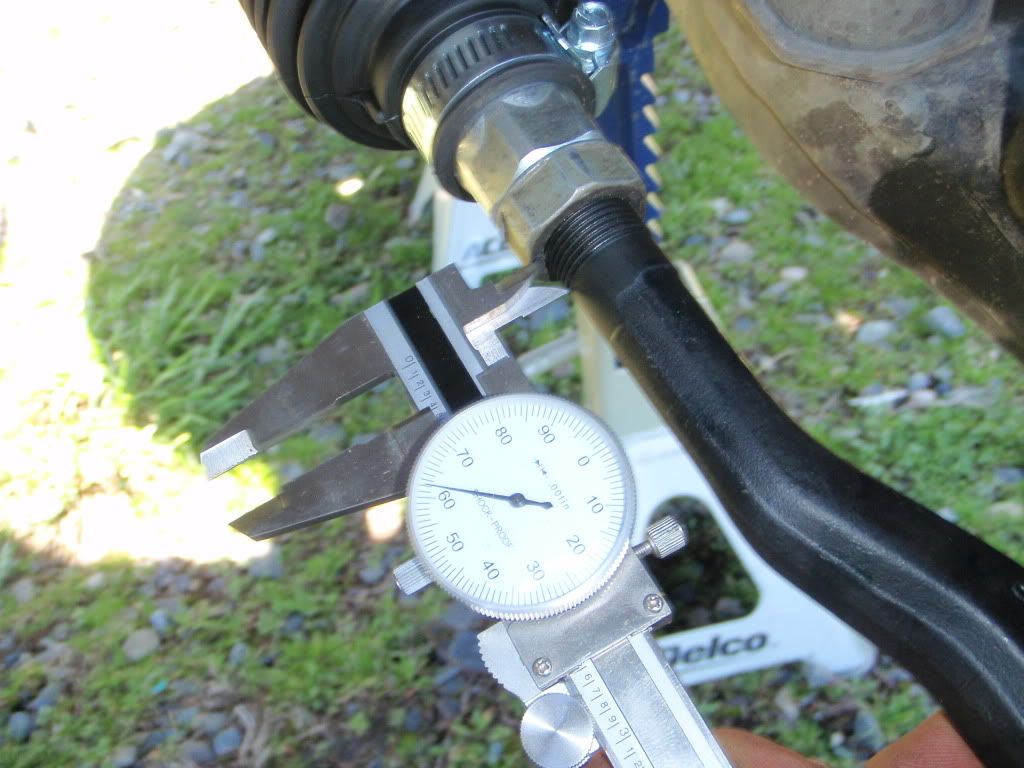
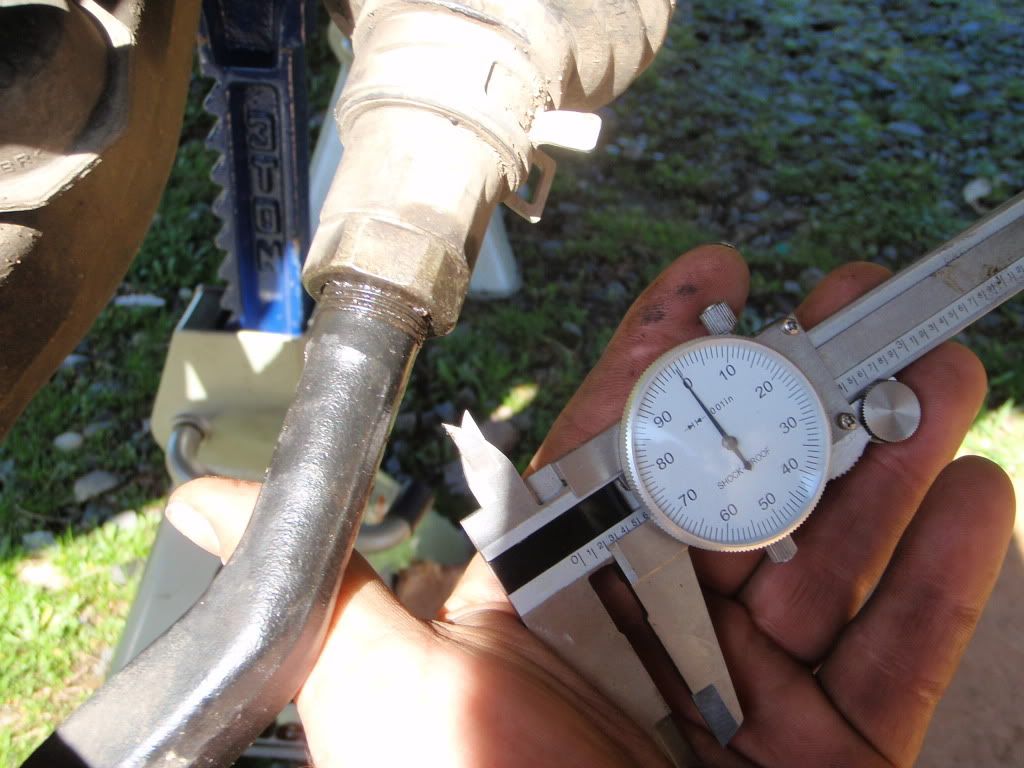
oh yeah, don't forget to measure the old threads; right side was 0.363" from nut to end of thread, driver side was 0.200"
expensive pieces... totally necessary though, especially the pass side...
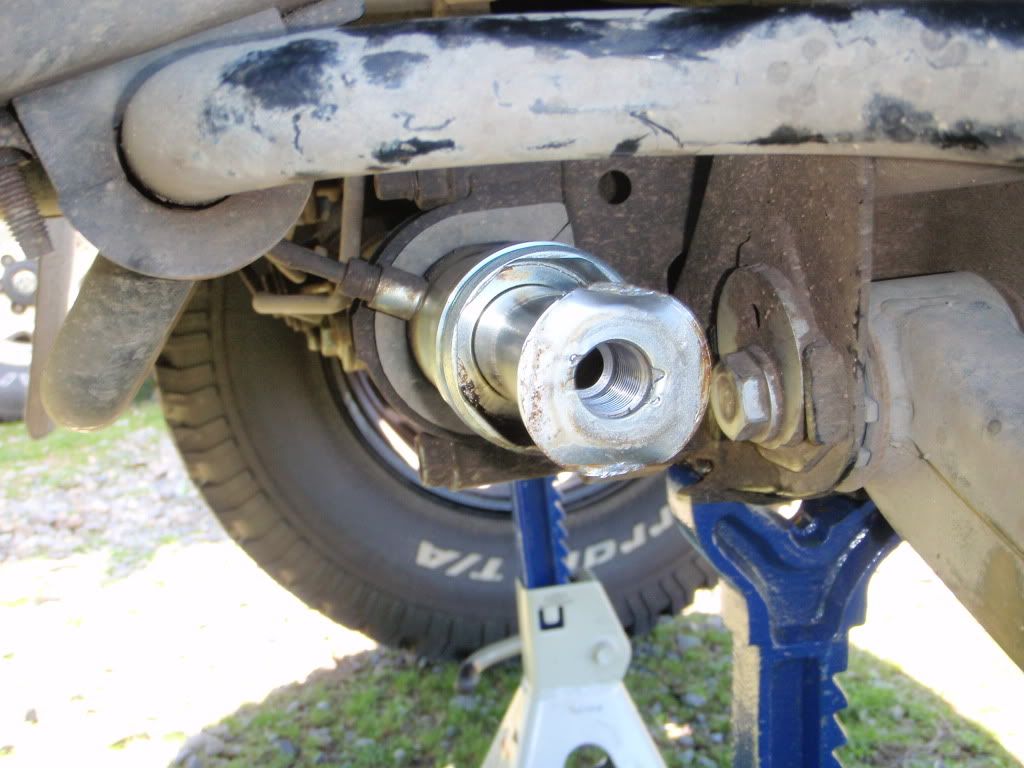
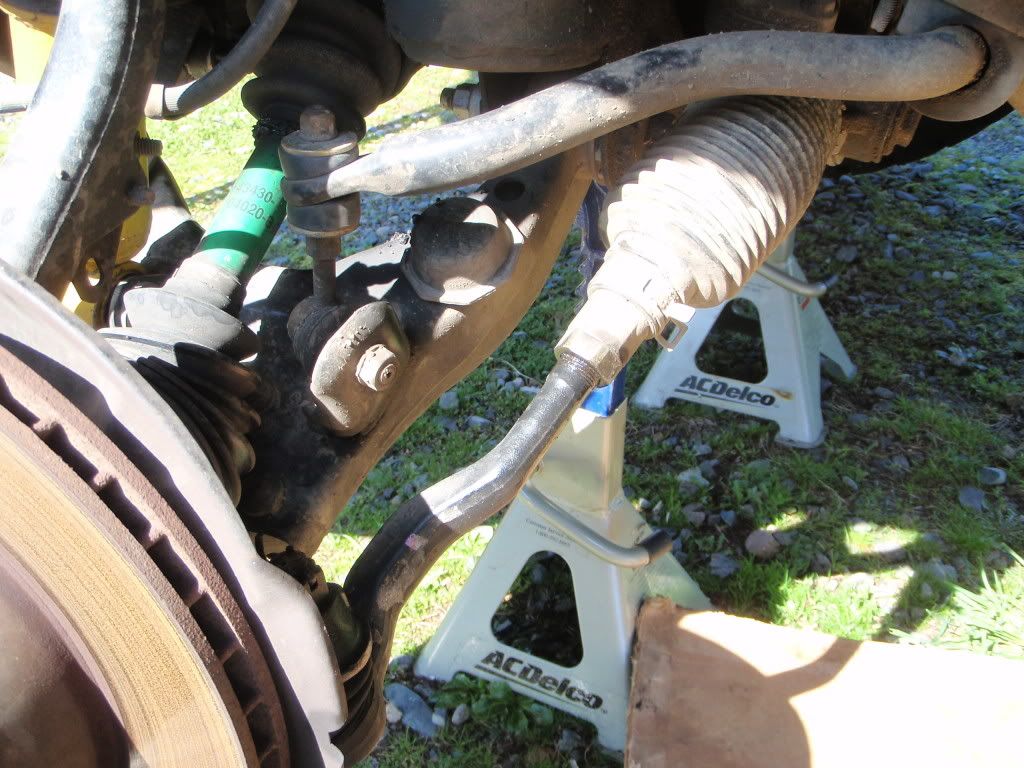
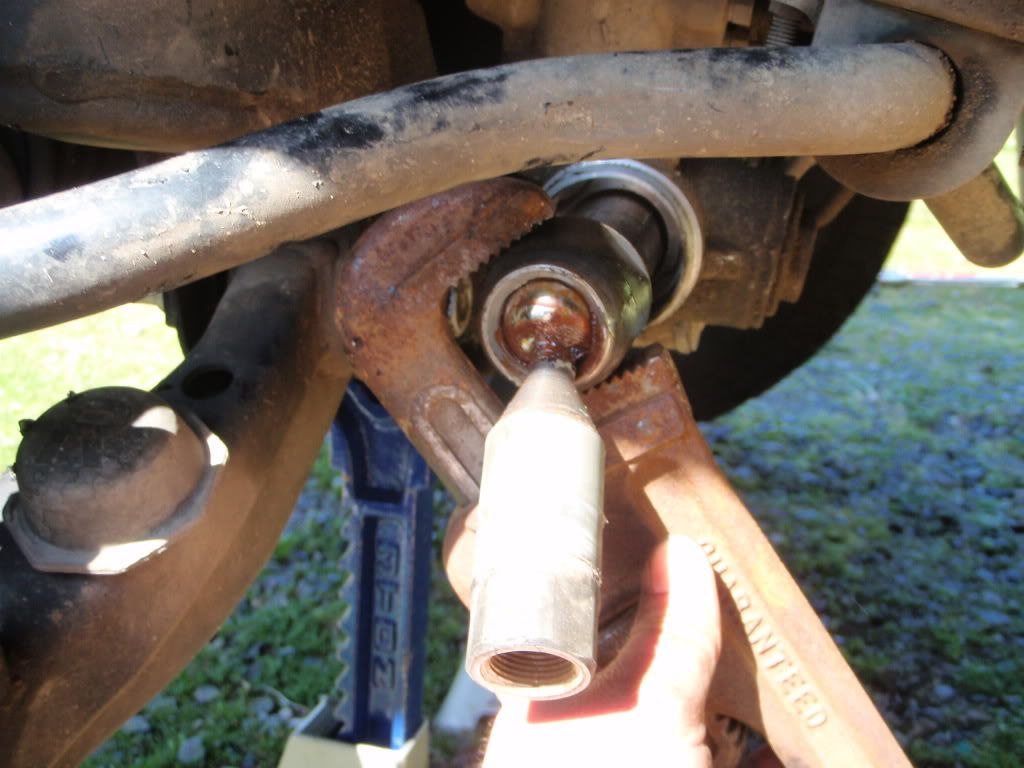
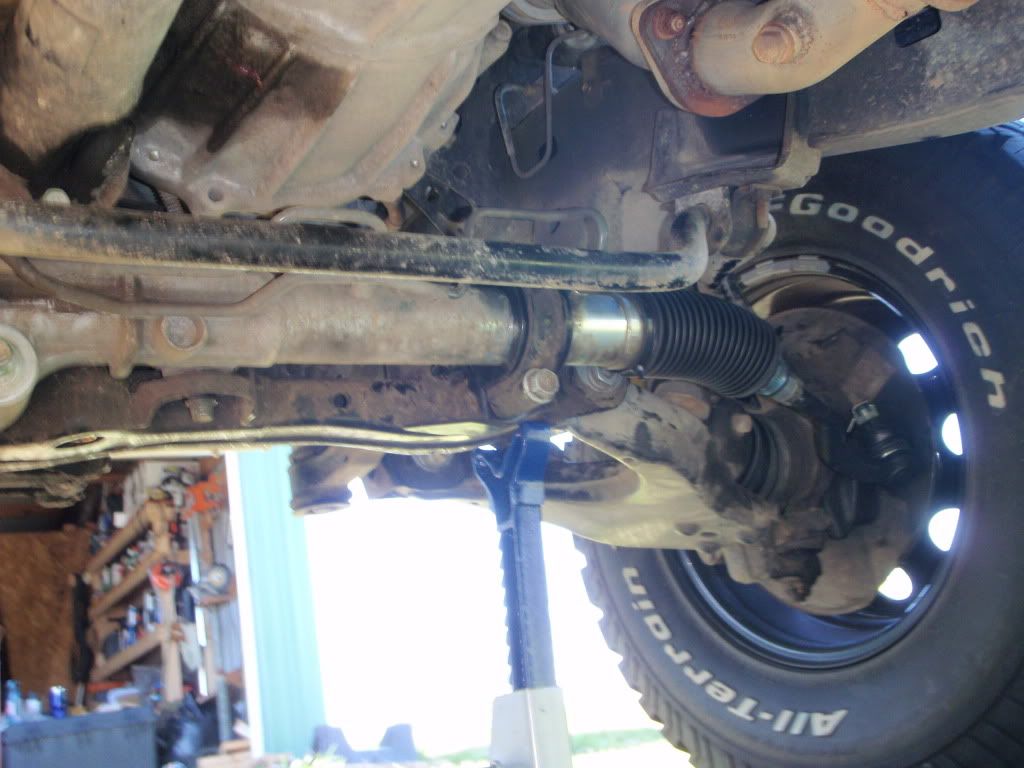
and the new inner in place... need to use a hammer and peen over the washer on each side of the "nut" or ball joint housing thingamajigger....
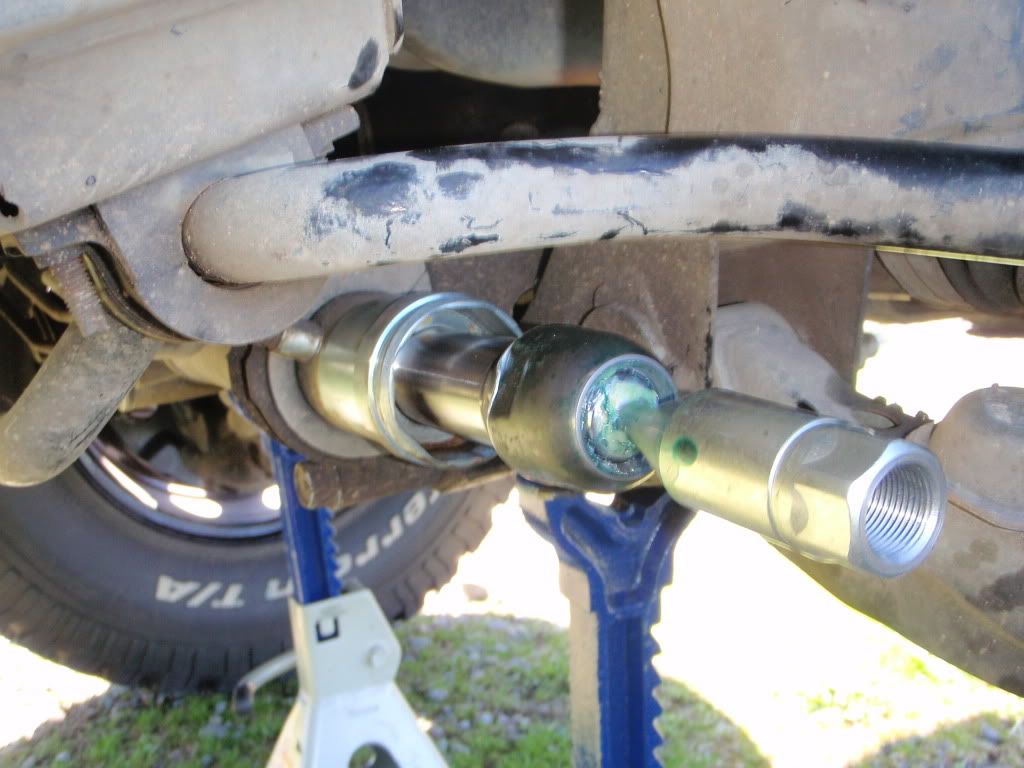
torque spec was something like 67 ft/lbs according to the haynes, got it close
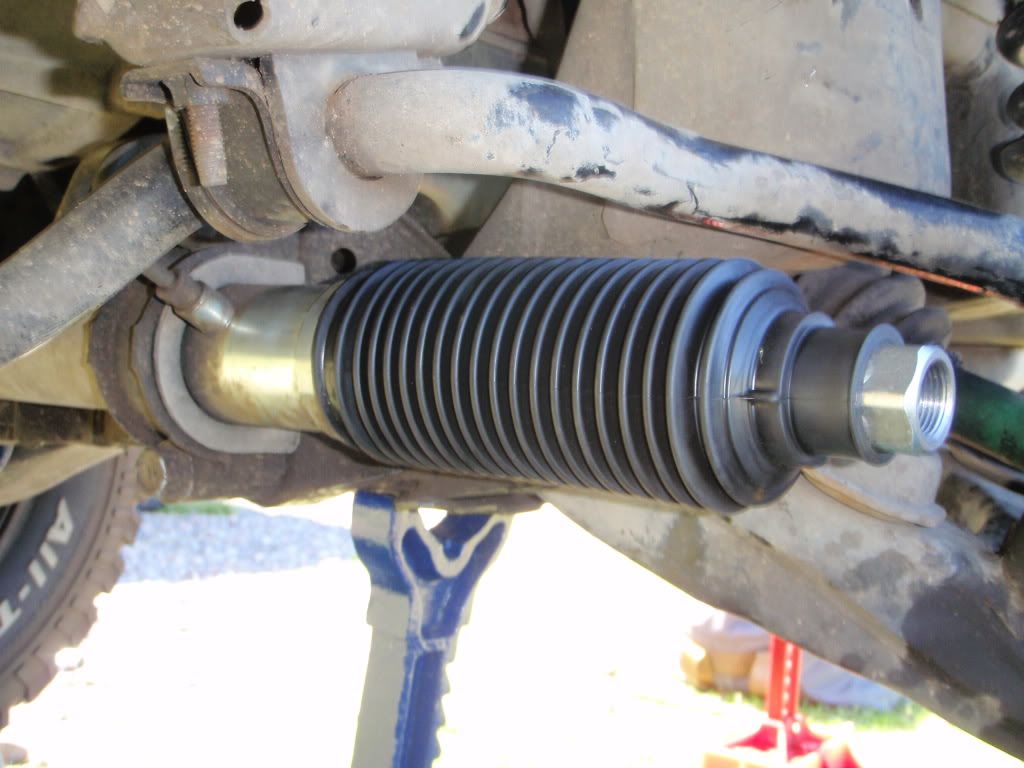
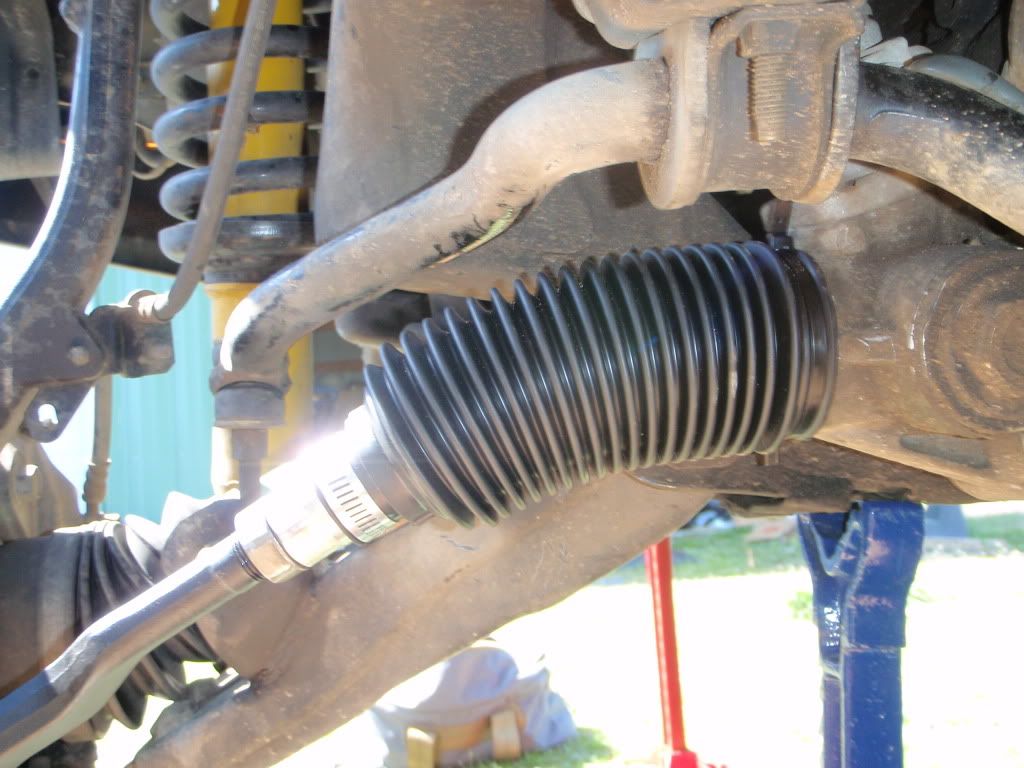
put the new boot on, lookin' pretty.... wound up using actualy hose clamps on the small outside end and just used 2 medium zip ties on the inside/larger end. looks good...
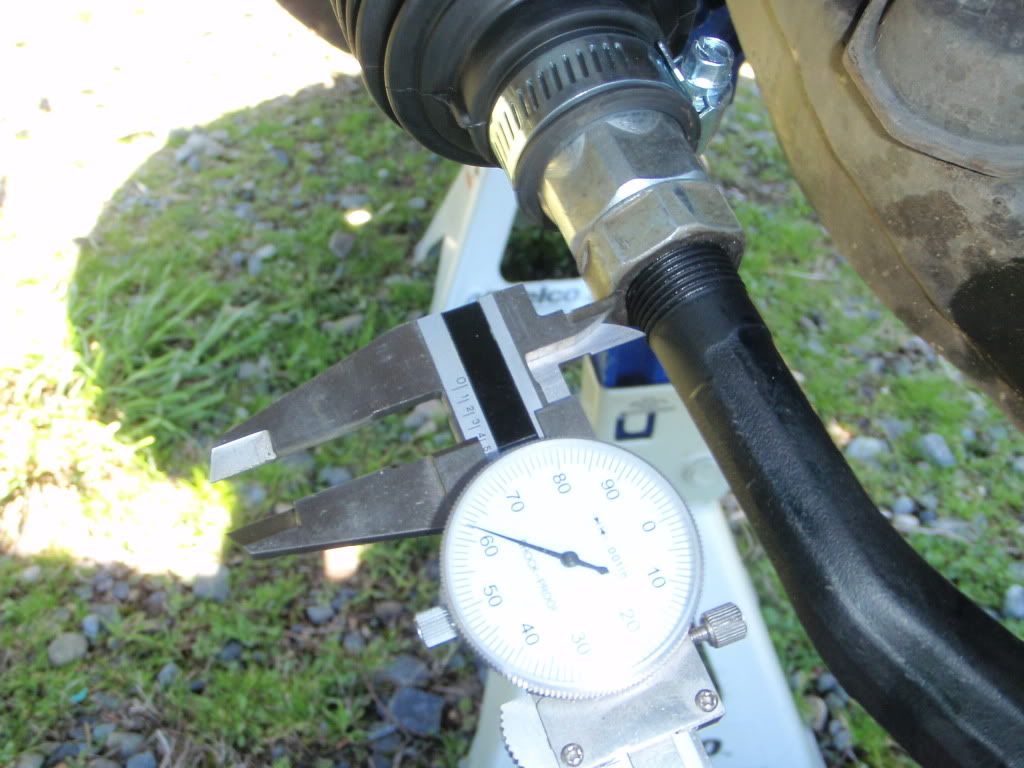
installed the new TRE, same same on the measurement
and still more to follow....
slightly different on the end but no issue. otherwise identical
oh yeah, don't forget to measure the old threads; right side was 0.363" from nut to end of thread, driver side was 0.200"
expensive pieces... totally necessary though, especially the pass side...
and the new inner in place... need to use a hammer and peen over the washer on each side of the "nut" or ball joint housing thingamajigger....
torque spec was something like 67 ft/lbs according to the haynes, got it close
put the new boot on, lookin' pretty.... wound up using actualy hose clamps on the small outside end and just used 2 medium zip ties on the inside/larger end. looks good...
installed the new TRE, same same on the measurement
and still more to follow....
04-07-2012, 03:30 PM
#44
^^ 41 ft/lbs is the recommended torque on the nut I believe btw...
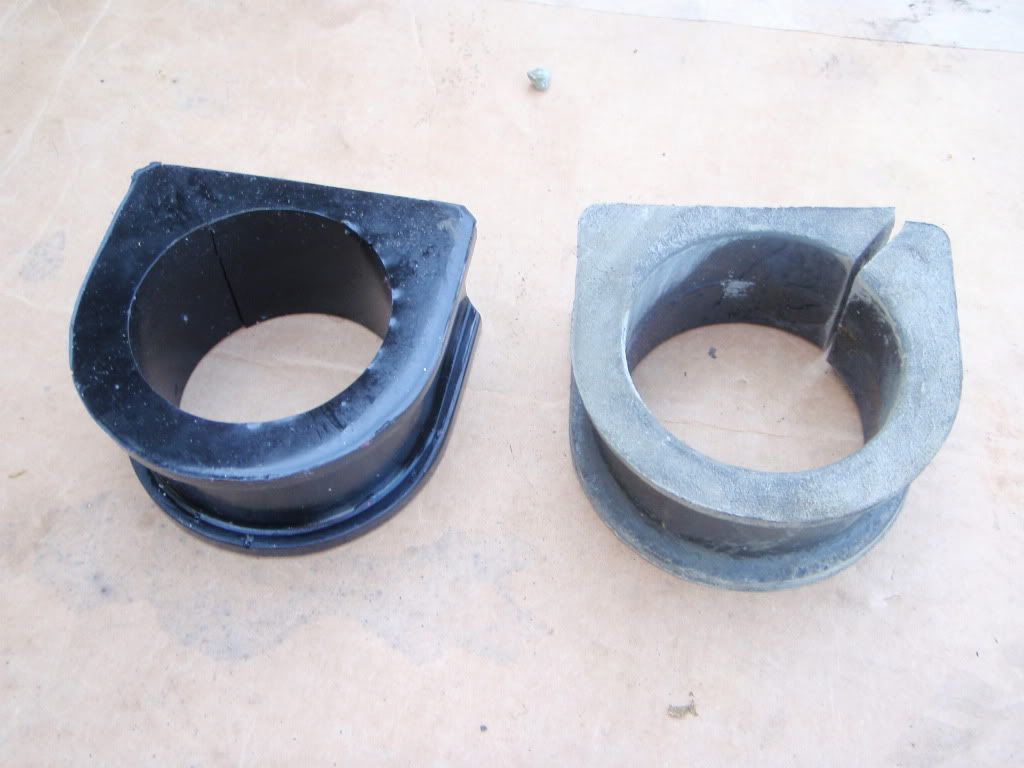
decided to finally install another bushing from my Energy suspension master kit
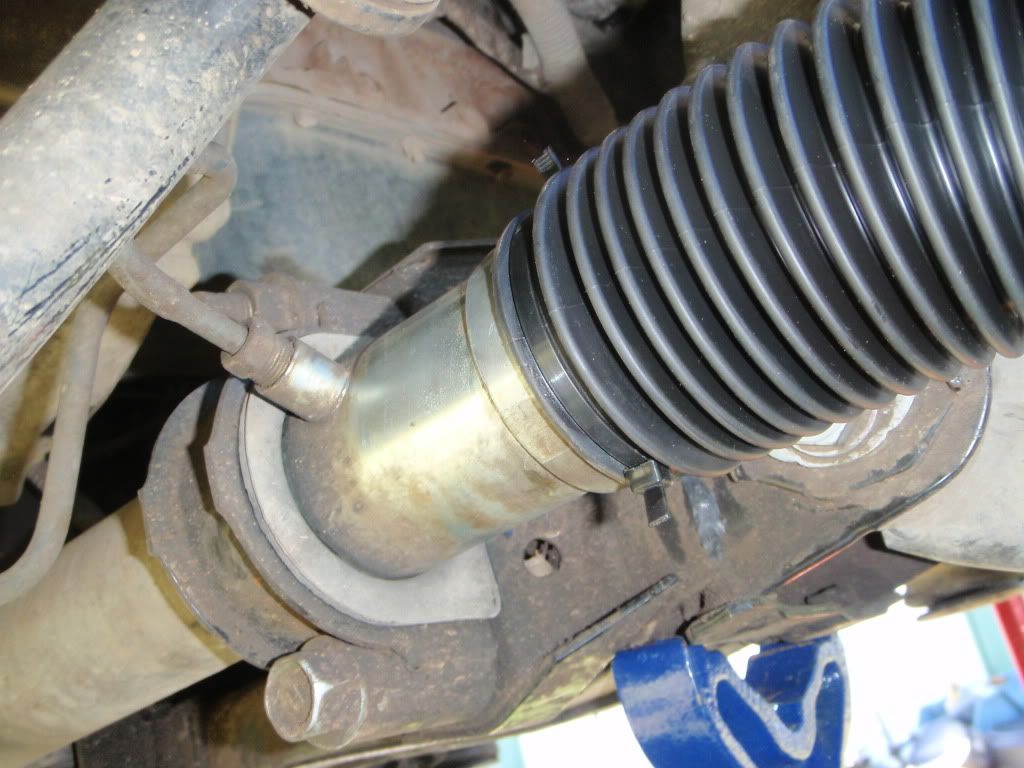
so pretty....
installed:
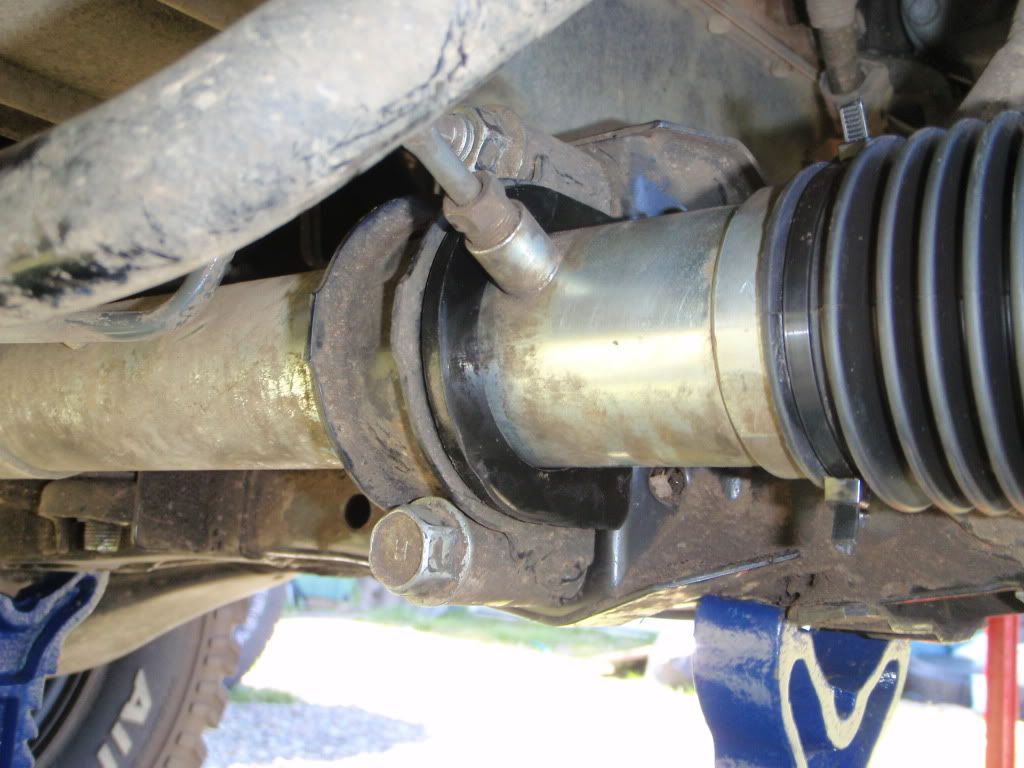
moved to the driver side and repeated...
inner on this side was not all that bad but it went anyway, only a matter of time before it wobbles too... had just a little bit of oil/grease leak but not bad; the seals in the rack were mostly clean and shiny.
here's the tabs to bend back with a screwdriver/hammer on the old one...
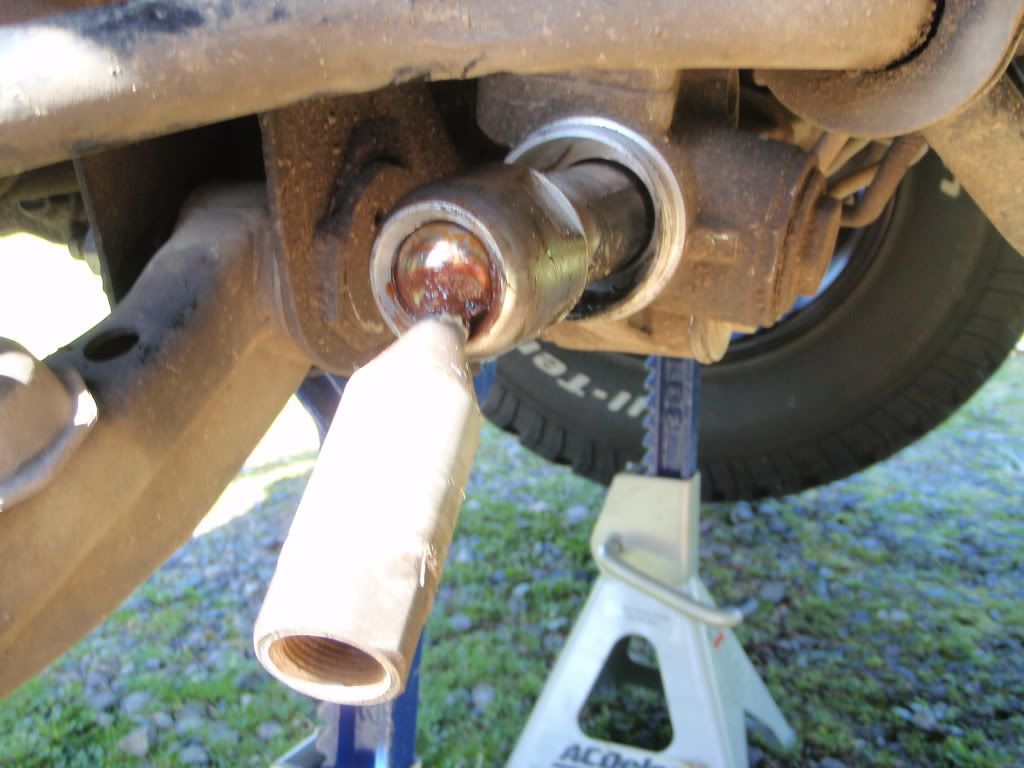
used a BFpipeWrench to grab onto the inner tie rod on the joint
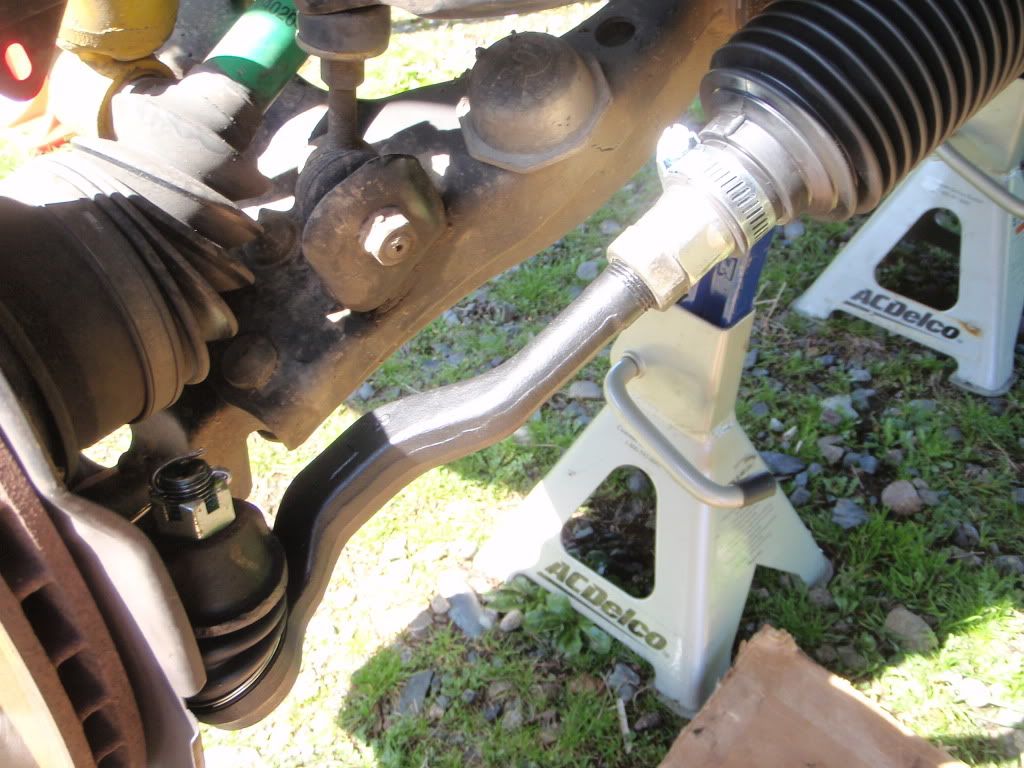
new one installed...

hammer the washer tabs down...

measure....
new boot...
driver side finished...

ahhh... time for a cold one...
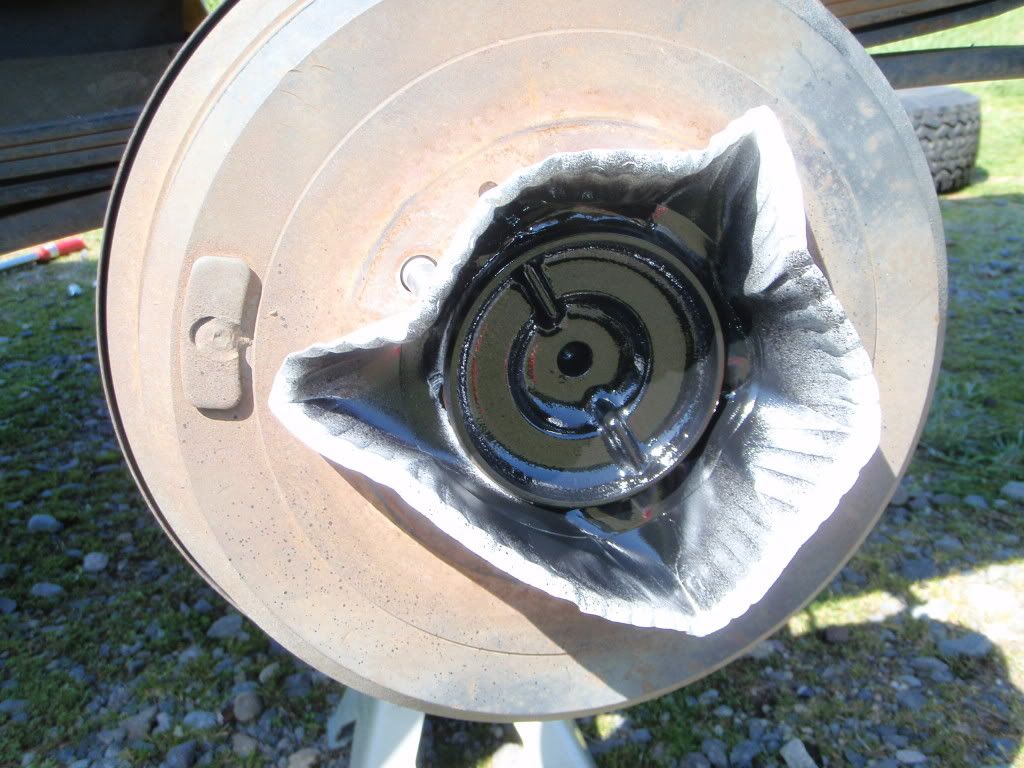
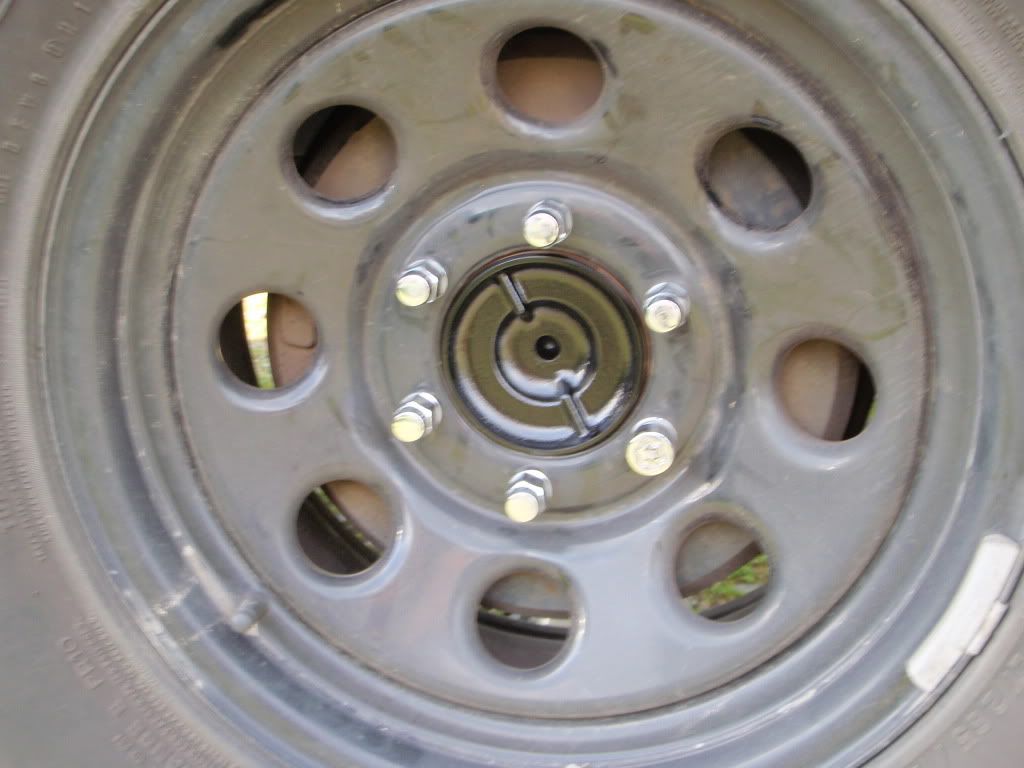
decided to paint my rear wheel center hubs that are just bare rust hued metal...
decided to finally install another bushing from my Energy suspension master kit
so pretty....
installed:
moved to the driver side and repeated...
inner on this side was not all that bad but it went anyway, only a matter of time before it wobbles too... had just a little bit of oil/grease leak but not bad; the seals in the rack were mostly clean and shiny.
here's the tabs to bend back with a screwdriver/hammer on the old one...
used a BFpipeWrench to grab onto the inner tie rod on the joint
new one installed...
hammer the washer tabs down...
measure....
new boot...
driver side finished...
ahhh... time for a cold one...
decided to paint my rear wheel center hubs that are just bare rust hued metal...
04-07-2012, 03:36 PM
#45
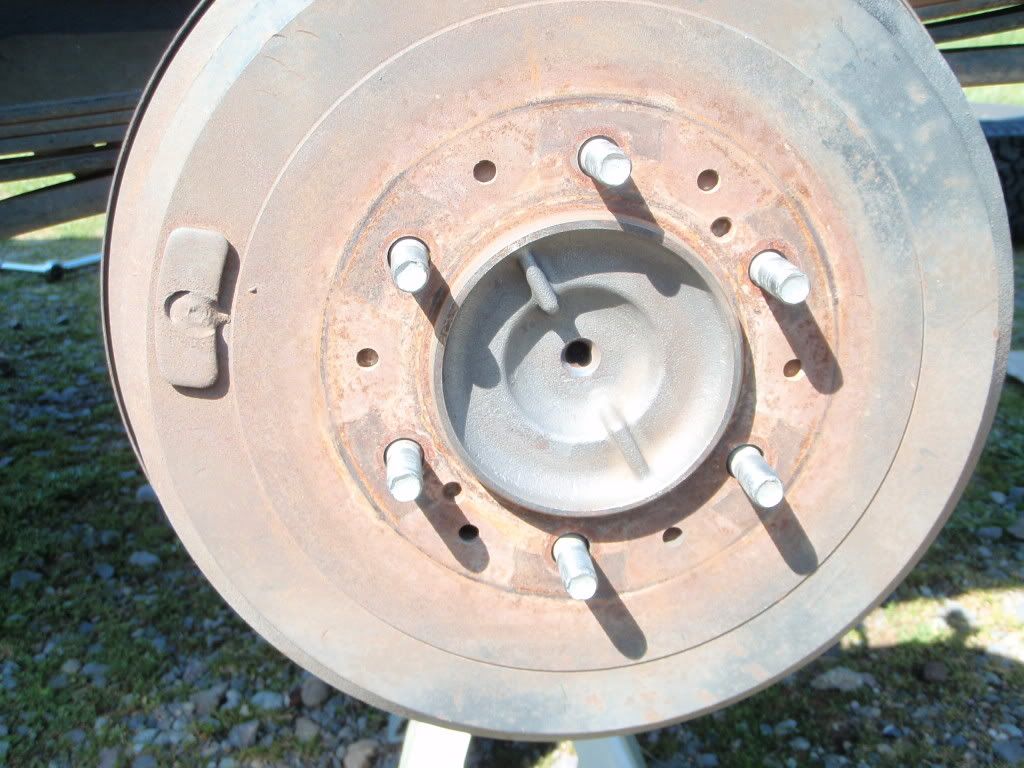
measured the diameter and cut out a circle the same size in a paper plate to prevent overspray...
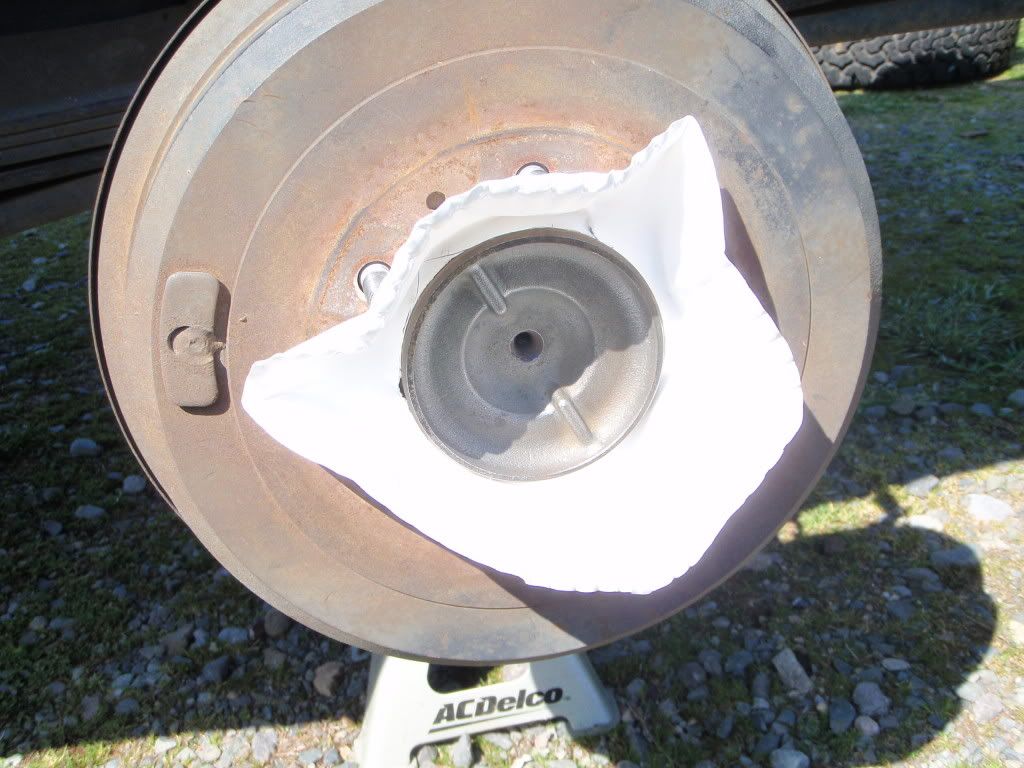
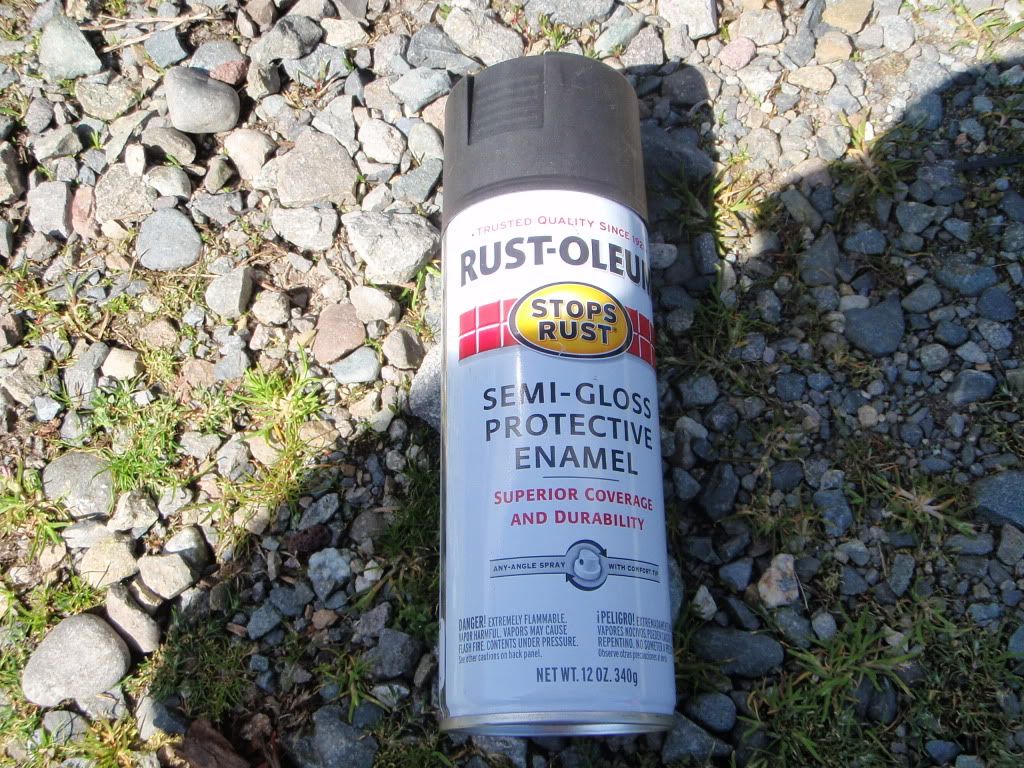
used a wire brush and then some rubbing alcohol/rags to clean it up. didn't bother with primer, just used some semi-gloss black that should match the wheels pretty close.
lookin' pretty...
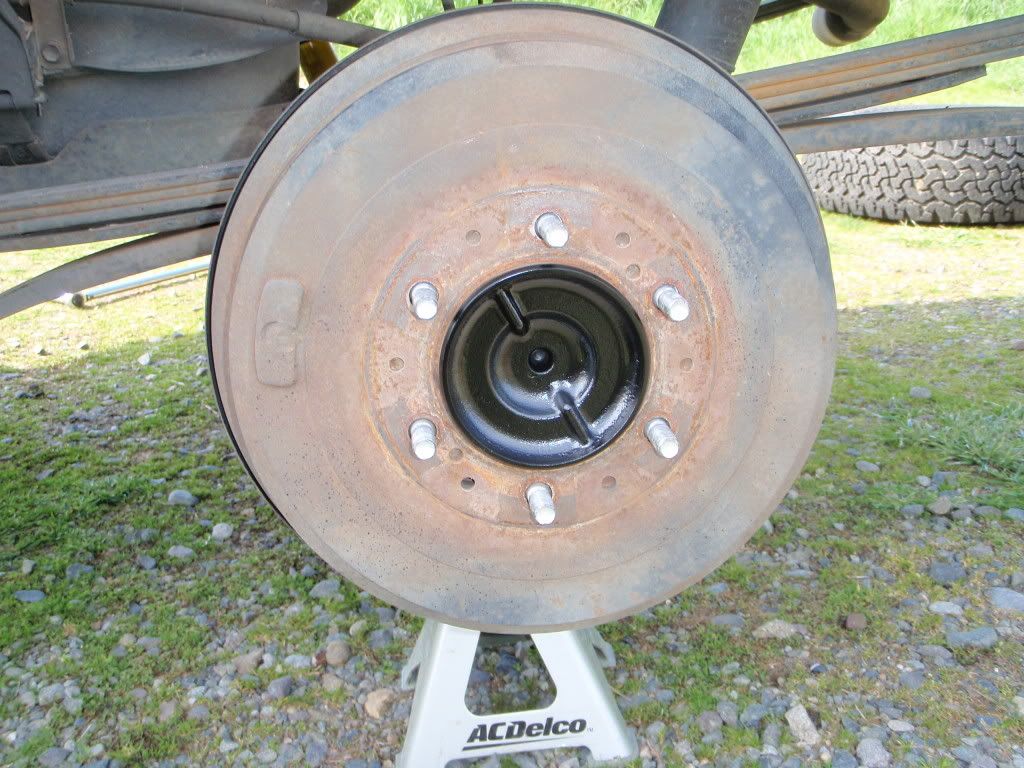
not too bad... they will blend in once they are both dirty again...
finally got to try out the wheel lift attachment:
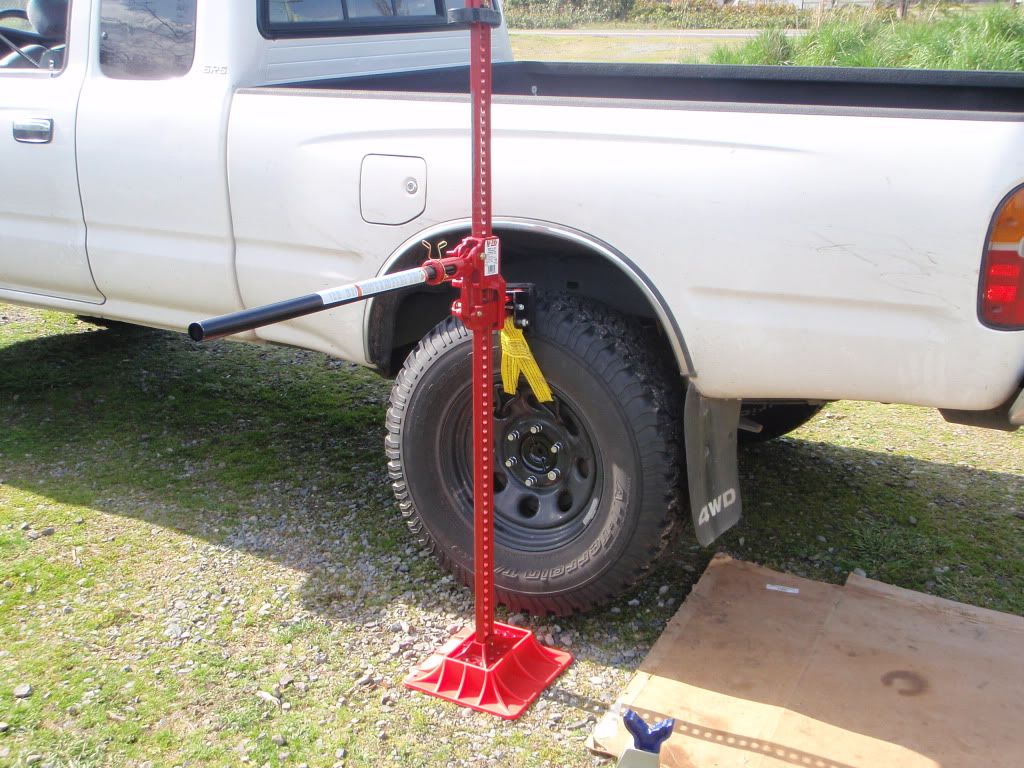
this attachment rocks, super easy and fast to use.
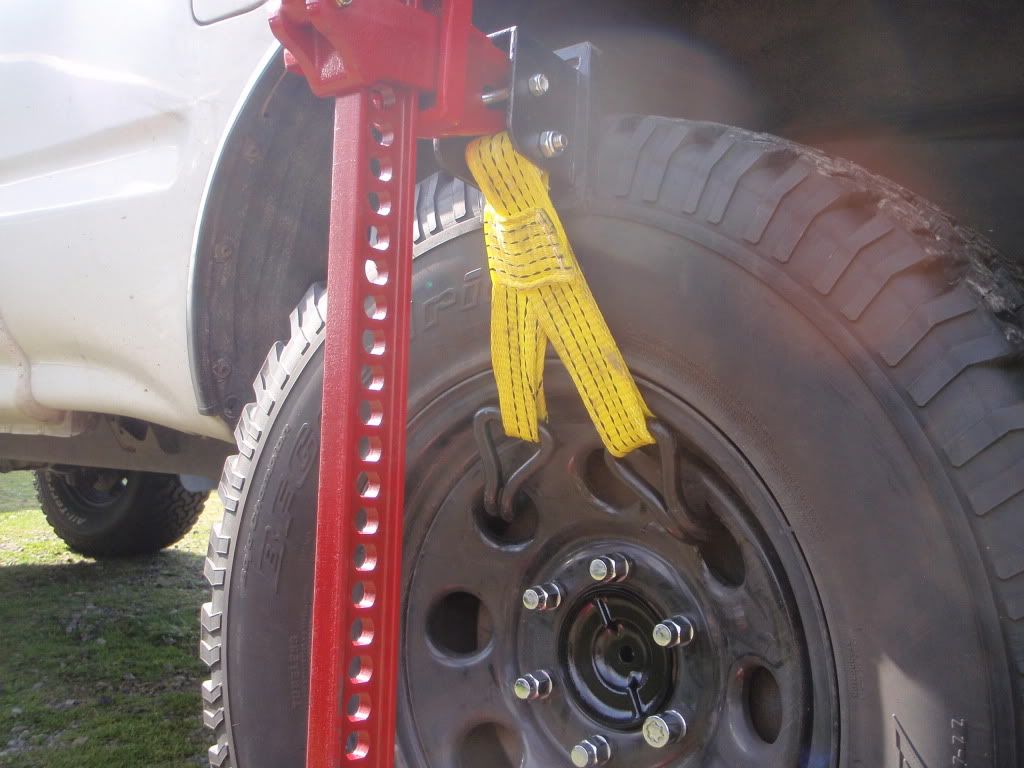
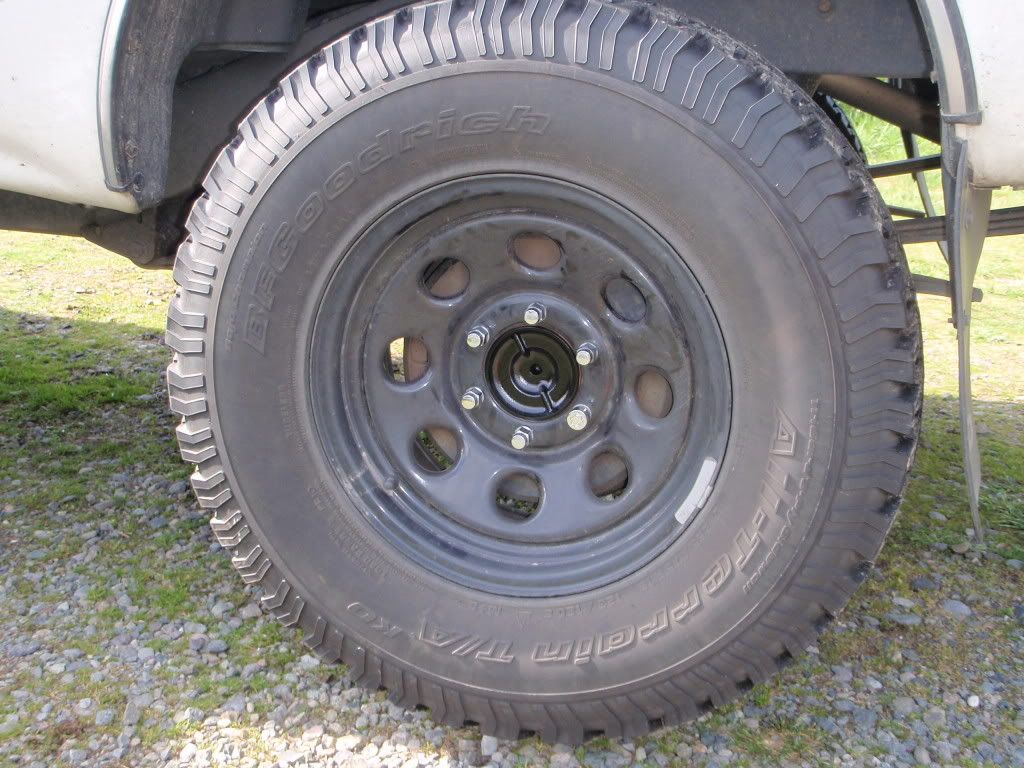
one last shot...
wheel lug nuts all torqued down to about 115 ft/lbs, she's ready for alignment now that the slop is all gone. This was about as easy a project as one could hope for, went very smooth and was glad I didn't run into any hang ups.
The CV boots are spitting grease and are all dry-rotted, will need to replace those very soon before they tear, crap... oh well...
04-07-2012, 03:47 PM
#46
time to call the shop and re-schedule my alignment finally, can't wait to road test. Going to let the loctite sit overnight before I go cruising anywhere to be on the safe side. I have a feeling just doing that right inner piece will make the big difference, it was terrible.
The outer's were not all that bad but not great either; for $35 each for OEM Toyota, totally worth it.
maybe the new bushing on the steering rack will help with the 'feel' in the wheel so to speak...
any questions or comments are more than welcome fellas, this was the first i've messed with tie-rods, pretty simple and easy to do if you ask me (thanks to YT). hopefully my pics and semi-write up will help someone down the road. it's all about paying it forward!
04-07-2012, 04:47 PM
#47
Contributing Member
Join Date: Nov 2010
Location: Columbia River Gorge, Oregon...east side
Posts: 5,125
Likes: 0
Received 2 Likes
on
2 Posts
Nice work and pics! Did you use the pipe wrench to tighten the inners back up? If you are getting up in miles on the lower ball joints, you may want to consider changing them out as revenentative maintenance. Another easy, peazy job to do.
04-07-2012, 05:28 PM
#48
thanks! yes, i used the humongous pipe wrench to tighten down the new inners, perfect tool almost; it really grabs on just right and didn't mar it up at all either. they're hard as can be.
yeah, I've been eyeballing the BJ's along with the CV boots, the rubber is starting to go on everything. I checked them when I put the new springs in at the beginning of this thread and they didn't seem too bad. Holding and wiggling the wheel from the 12 and 6 o'clock position, there is no movement so figure they are holding on. For sure will need replaced before too long though.
I plan on ordering some replacement CV boots this week, may price ball joints and pick some up. Front end components will also be wearing faster now that I have oversized/overweight tires/wheels. the cragar's and going from 31 to 32's added a ton of weight.
I'm sure most of the front driveline needs rebuilt and tightened up, never been done in 12 years and counting!
Going to test drive my handiwork tomorrow, gotta hit up home depot for some lumber so will need the truck anyway to haul stuff. hopefully I can get in the shop for alignment by monday or tuesday.
04-08-2012, 01:01 PM
#50
sweet, thanks for lookin' those up. not too bad, not sure if I will do these now or wait. I am for sure ordering new CV boots, may do ball joints while I'm in there.
drove about 50 miles today in the Taco, steering feels unbelievably better. the truck doesn't wander any more and is much more responsive to small inputs from the wheel.
success! still need an alignment though, no idea if it's close or not. just glad to have a tight steering rack again, it really made a huge difference replacing all of the old beat up tie rod/joints.
04-08-2012, 01:19 PM
#51
Contributing Member
Join Date: Nov 2010
Location: Columbia River Gorge, Oregon...east side
Posts: 5,125
Likes: 0
Received 2 Likes
on
2 Posts
It's nice when new parts make a notable difference. Didn't have to look 'em up, just pulled out my TW invoice from this past fall when I changed mine. 
04-08-2012, 01:31 PM
#52
nice. how difficult is it to replace the BJ's, never messed with them either yet.. i tried to remove the upper one i think when I did my suspension (to install an Energy Suspension bushing I believe?) and it was freakin' welded in there, not moving.
new parts always feels great, especially in my DD. makes driving to and from work a real pleasure.
I'm going to hang onto that pass side inner to show everyone at the shop this week, I should take a video of it clanking around and post it. it was unbelievable
new parts always feels great, especially in my DD. makes driving to and from work a real pleasure.
I'm going to hang onto that pass side inner to show everyone at the shop this week, I should take a video of it clanking around and post it. it was unbelievable
04-08-2012, 01:58 PM
#53
Contributing Member
Join Date: Nov 2010
Location: Columbia River Gorge, Oregon...east side
Posts: 5,125
Likes: 0
Received 2 Likes
on
2 Posts
The lower ones are super easy....undo the tie rod end, undo the big nut holding LBJ to lower control arm, remove 4 bolts on LBJ....reverse using blue lock-tite on 4 LBJ bolts and torque to spec. Think it took about 1-1.5 hours for me to do both.
http://www.ncttora.com/fsm/2000/Repa...Joint/remo.pdf
Uppers are more of a pain. It takes a Ball Joint Press to press the UBJ out of the spindle. O'Reillys etc. have them on the loan program.
http://www.ncttora.com/fsm/2000/Repa...Joint/remo.pdf
Uppers are more of a pain. It takes a Ball Joint Press to press the UBJ out of the spindle. O'Reillys etc. have them on the loan program.
Last edited by rworegon; 04-08-2012 at 02:00 PM.
04-09-2012, 11:38 AM
#54
cool, thanks for the info!
may hold off for a bit on these but will be doing them before too long here.
called the shop and aligment is scheduled for tomorrow finally, woo hoo!
next major purchase for this will hopefully be a rear locker, can't decide between detroit true track or a regular detroit. leaning towards the true track as this is my DD, but in due time.
need to focus on the rear window in the 4runner, relays are shot...
04-10-2012, 04:49 PM
#55
allright, all aligned and runnin' straight and smooth now!
I do have to replace the other two steering rack bushings though, the wheel will go off-center (it still tracks straight) which is kinda obnoxious, it's from the worn out bushings. There's obvious movement in the steering rack due to them, noticed it when I was torquing on the inner tie rods but wasn't sure how much was normal.
anyway, I already have the bushings in the energy suspension master kit so will get around to replacing those shortly and the shop even told me to come back for a final check for free once the new bushing were in.
the tires were off quite a bit on camber, very positive angle on both; this was quite visible after the supsension install so no surprise there.
she's flat and straight, runnin' smooth! I even washed her the other day, that only happens about twice a year, hahaha
next is CV boots, I think the axles are fine so i might just get the two piece deals to slap on as a temporary fix until the axles need replaced. still deciding on that though...
04-14-2012, 06:02 PM
#57
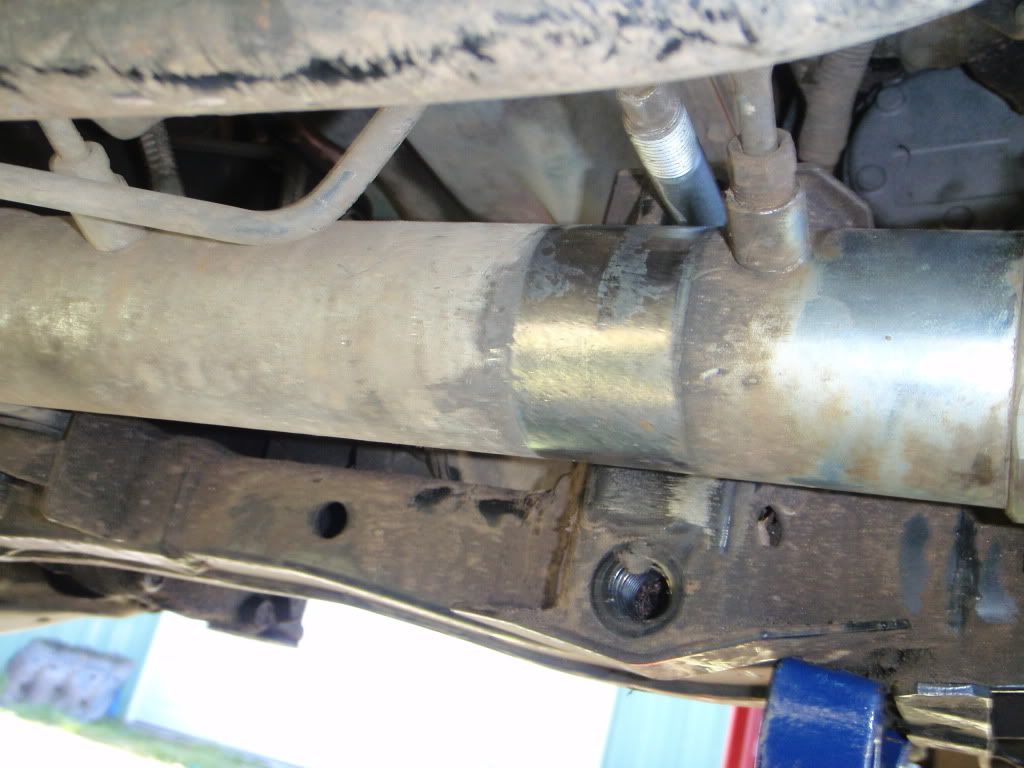
So, messed around today with the remaining two bushings on the steering rack and there doesn't look like a good way to replace them without removing the whole rack and possibly the tie rod ends again.
the cross bolt that is parallel with the ground (front to rear) won't come all the way out now because of the diff drop, it hits the front diff. Wouldn't be all that hard but not sure I want to mess with it right now.
The shop did offer to re-check it for free though, maybe I should quit being lazy and just yoink it. The energy suspension bushings I'm not sure are an exact fit and the small vertical one might be missing, can't tell until I pull the old ones completely out. They don't look too aweful bad but the new ones would probably tighten her up even more.
hmmmmm.....
05-17-2012, 10:00 AM
#58
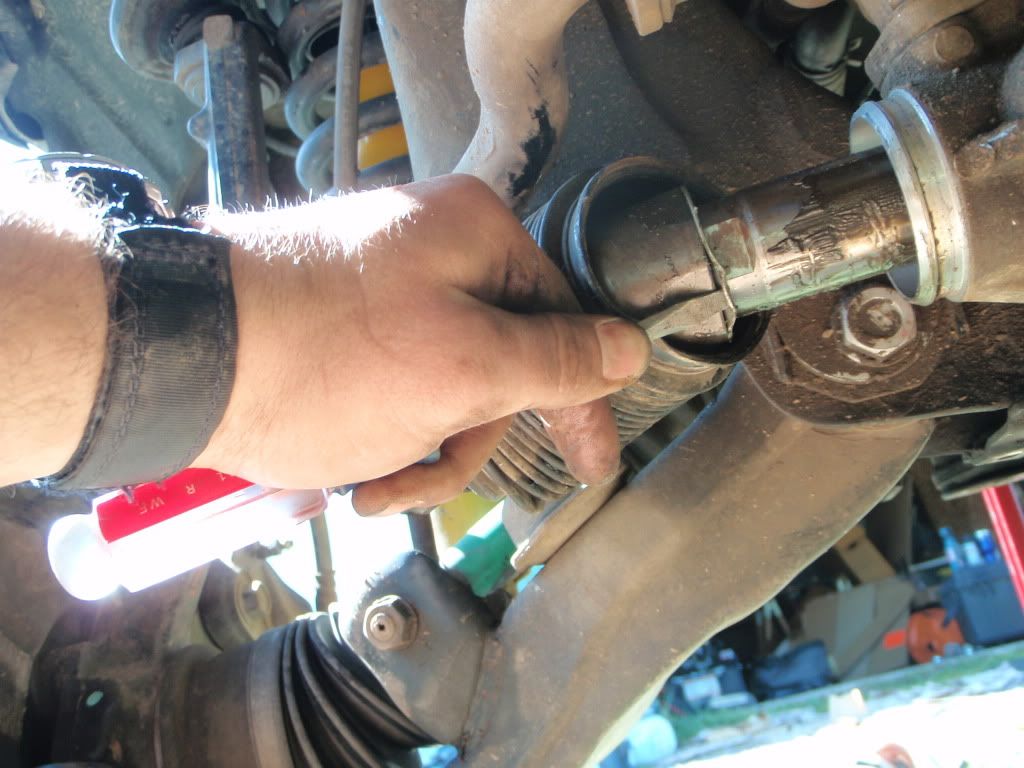
crap, my driver side inner CV boot finally let go; separated completely from the bottom (smaller) clamp, spewed grease all over.
I have not torn it apart yet but I'm guessing that the joints are probably not in that great of shape, remanufactured OEM from 1sttoyotaparts look like they run $125 each. OEM new are almost $400 each! ouch....
I knew this was coming, time to order more front end pieces, dang. Feels good to have new parts in there though, it's not like I'm ever selling this thing and I drive the piss out of it every day.
Think I will pull one tonight and see what condition the joints are in before I shell out for new axle assemblies...
05-17-2012, 02:15 PM
#59
Contributing Member
Join Date: Nov 2010
Location: Columbia River Gorge, Oregon...east side
Posts: 5,125
Likes: 0
Received 2 Likes
on
2 Posts
You can buy the boot kit from 1st and go that route assuming the joints have not been wheeled terribly hard. I replaced the boots on both sides last weekend....not terribly tough to do, just messy.
05-21-2012, 09:51 AM
#60
Yeah, I think the boot kit was only $30 or so. I looked long and hard at possibly doing a manual hub swap, I really want them but don't have the time or $$ right now; down the road at some point will bring some Aisins to stop the CV's from spinning all the time.
I went ahead and ordered remanned OEM assemblies, I was going to pull one to see what they looked like but based on my driving x12 years of age, I'm guessing they're not in great shape. It's time for new ones; once they show up I will yoink mine and take them in to get the $75x2 core back.
I wiped the intitial grease off of the frame rail and lower arm and whatnot, went back after about 100 miles of driving and hit it again, looks like it's done spitting grease. I'm only driving it because I'm getting new ones, kinda hilarious. Purposely avoiding any gravel or dirt areas to limit the amount of crap getting into that joint; want to hit it with grease but it will just spit it again.
Waiting on the remans to show up, will post up some pics. Also picked up a 35mm socket for the hub nut, I hope that's the right size just from reading around the 'net. I have everything else I believe. I called to confirm that they were completed and booted assemblies and was assured so...
Also gonna pull the steering rack and replace the last two bushings in there while I'm tearing apart the front end again.


