The official 01-04 Tacoma Clip conversion thread!
 01-10-2009, 06:47 AM
#1
Registered User
Thread Starter
Join Date: Jul 2008
Location: GA
Posts: 171
Likes: 0
Received 0 Likes
on
0 Posts
The official 01-04 Tacoma Clip conversion thread!
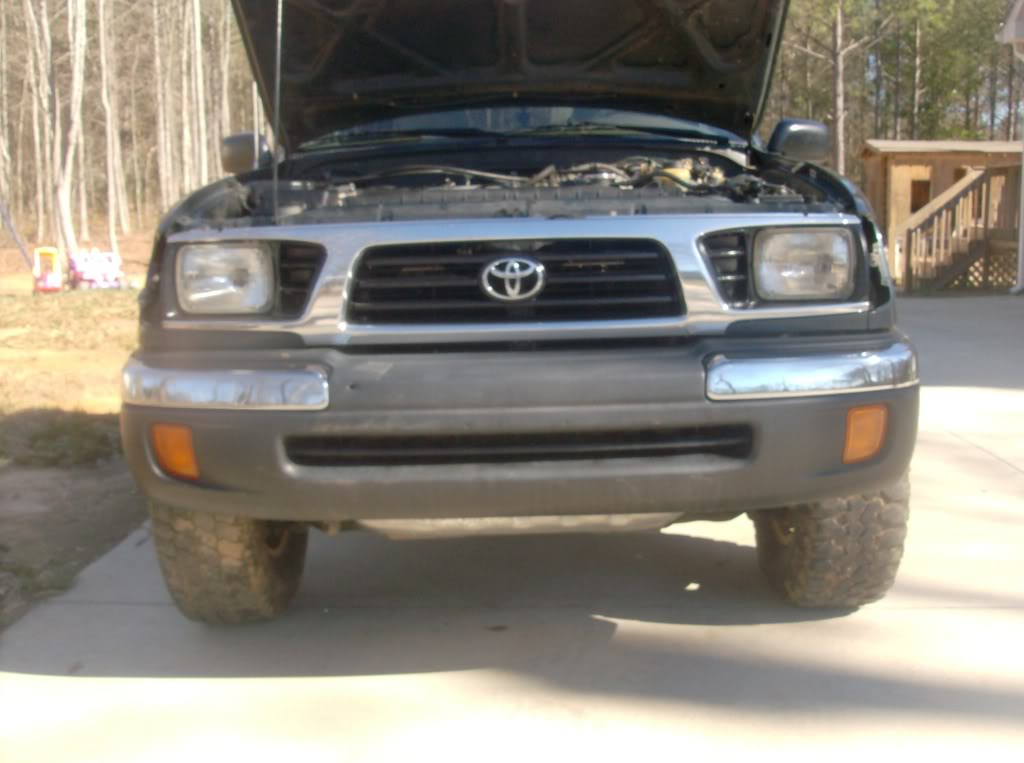
Here is the build up of the 01-04 Tacoma front clip conversion done on a 95.5-97 Tacoma. You will need a hood, grille, headlights, corner lights, bumper, valance, bumper lights,bumper brackets, and the core support for the 01-04 model years. Trust me, go the extra mile and change the core support, about 20 spotwelds need to be drilled out to get it off. You won't have to worry about the headlight locations if you change the support. plus it looks cleaner, and no need to get out the sawz-all. Another area of controversy is the fenders. If you are somewhat of a fabricator you can make the brackets for the headlights, or go the safe route and buy new fenders too, but at 65 bucks each, I will try to make mine work.
Here is what you will start off with...plain ole boring, right?
You will need to dis-charge the A/C system to remove the condenser to begin removing the core support. You can loosen the bolt on the coupling and let it bleed out slowly or have it done by a pro...your choice. This is your view with the stock front clip removed. Go ahead and remove the bolts that secure the core support to the frame.
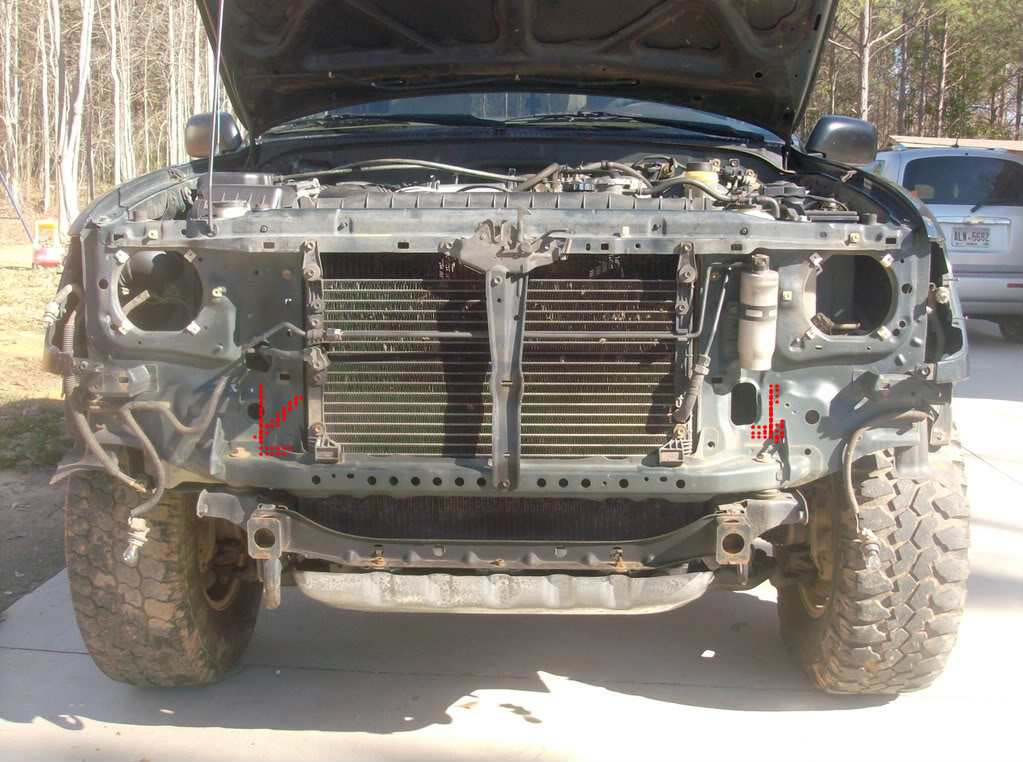
For the next step, remove the fenders and the center hood latch support, the hood latch itself, and the A/C condenser. Now you can start drilling the spot welds, it is easy to see them, just look along the edges of the headlight openings and look for small circles about the size of a pencil eraser, they will be at every spot where the core support meets the body. There are some in both wheelwells also. With everything out of the way, your clip should look like this...
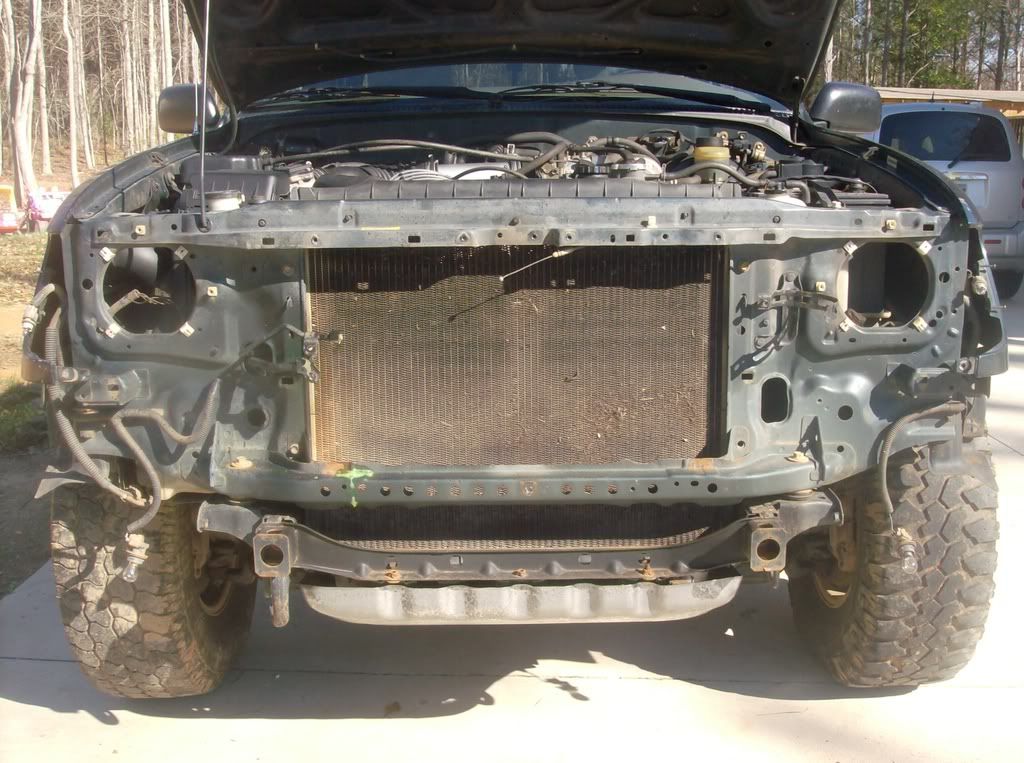
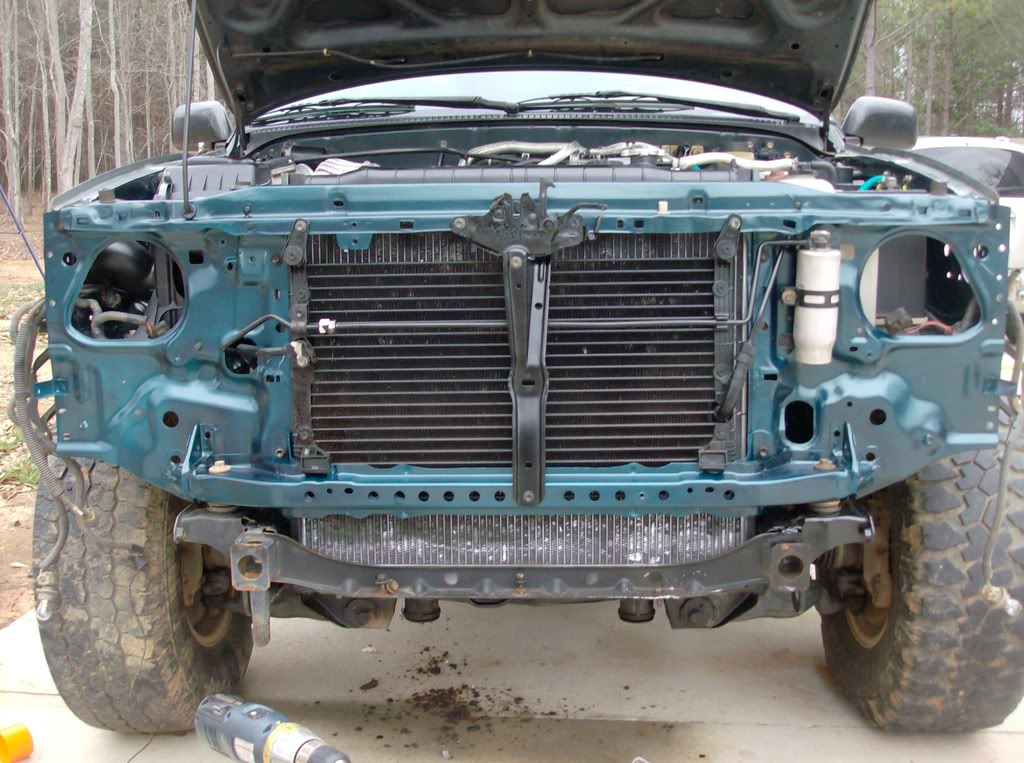
After drilling the welds, some of them may need some "assistance" in letting go, but a hammer and a flat screwdriver does the job. On mine I had to fight with some seam sealer behind the driver side headlight opening. Toyota done this to prevent water from intruding into the engine bay. I will be using clear silicone to seal this back up,once mine is done...But here is the view with the core support removed. I will add more as I go, but this is where I am right now.
Here is what you will start off with...plain ole boring, right?
You will need to dis-charge the A/C system to remove the condenser to begin removing the core support. You can loosen the bolt on the coupling and let it bleed out slowly or have it done by a pro...your choice. This is your view with the stock front clip removed. Go ahead and remove the bolts that secure the core support to the frame.
For the next step, remove the fenders and the center hood latch support, the hood latch itself, and the A/C condenser. Now you can start drilling the spot welds, it is easy to see them, just look along the edges of the headlight openings and look for small circles about the size of a pencil eraser, they will be at every spot where the core support meets the body. There are some in both wheelwells also. With everything out of the way, your clip should look like this...
After drilling the welds, some of them may need some "assistance" in letting go, but a hammer and a flat screwdriver does the job. On mine I had to fight with some seam sealer behind the driver side headlight opening. Toyota done this to prevent water from intruding into the engine bay. I will be using clear silicone to seal this back up,once mine is done...But here is the view with the core support removed. I will add more as I go, but this is where I am right now.
Last edited by project91; 01-10-2009 at 07:05 AM.


Trending Topics
01-10-2009, 04:46 PM
#8
Registered User
Thread Starter
Join Date: Jul 2008
Location: GA
Posts: 171
Likes: 0
Received 0 Likes
on
0 Posts
01-25-2009, 03:49 PM
#9
Registered User
Thread Starter
Join Date: Jul 2008
Location: GA
Posts: 171
Likes: 0
Received 0 Likes
on
0 Posts
UPDATE!!
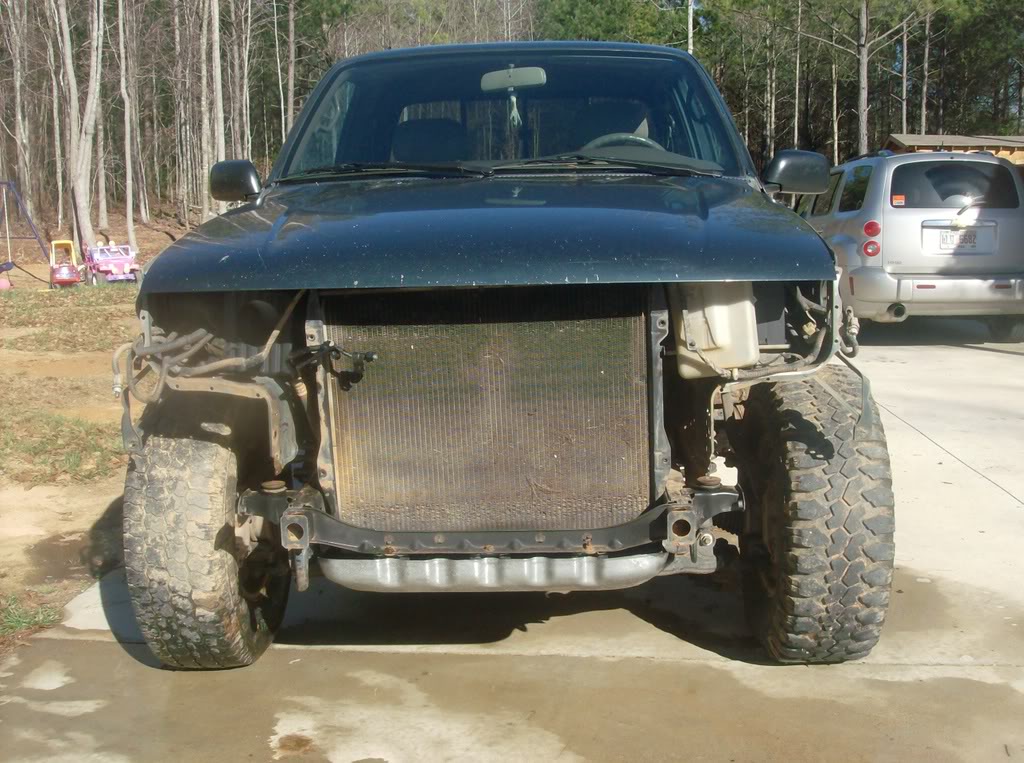
I installed the core support today, this was actually for an 03, but any 01-04 will do. I intend on riveting mine in, hey rivets hold the sheet metal on airplanes, it should hold this core support in, right!! Plus, I don't have a wire welder(yet) which would have been my second option. Here is the pic with the new core support in, with all my brackets and stuff installed after being cleaned up and painted. STAY TUNED!
I installed the core support today, this was actually for an 03, but any 01-04 will do. I intend on riveting mine in, hey rivets hold the sheet metal on airplanes, it should hold this core support in, right!! Plus, I don't have a wire welder(yet) which would have been my second option. Here is the pic with the new core support in, with all my brackets and stuff installed after being cleaned up and painted. STAY TUNED!
Last edited by project91; 01-25-2009 at 03:51 PM.
01-25-2009, 05:05 PM
#11
Registered User
Thread Starter
Join Date: Jul 2008
Location: GA
Posts: 171
Likes: 0
Received 0 Likes
on
0 Posts
Compare the 1 and a half seconds of hissing to the numerous cans of spray paint you have released into the ozone and be surprised. Lets remember this is a build thread, not a bash thread. Intended for reference only. Not a mandatory order of operations. Keep your thoughts to yourself.
Last edited by project91; 01-25-2009 at 05:07 PM.
01-25-2009, 05:17 PM
#12
Compare the 1 and a half seconds of hissing to the numerous cans of spray paint you have released into the ozone and be surprised. Lets remember this is a build thread, not a bash thread. Intended for reference only. Not a mandatory order of operations. Keep your thoughts to yourself.
On with the build! More pics kthx

Last edited by DeathCougar; 01-25-2009 at 05:19 PM.
01-27-2009, 09:39 AM
#14
Registered User
Thread Starter
Join Date: Jul 2008
Location: GA
Posts: 171
Likes: 0
Received 0 Likes
on
0 Posts
UPDATED!!
Imstalled the hood and the grille today. I had to space the hood latch off the core support so the hood would latch closed, since the hood is longer. With the 96 fenders it lines up good. Just needs some tweaking to line up gaps. I took the brackets that mount the lower front corners of the fender to the original core support off and riveted them into place on the 04 support. Worked great. Next Step is headlights, corners, bumper and valance and bumper lights...then thats it!!
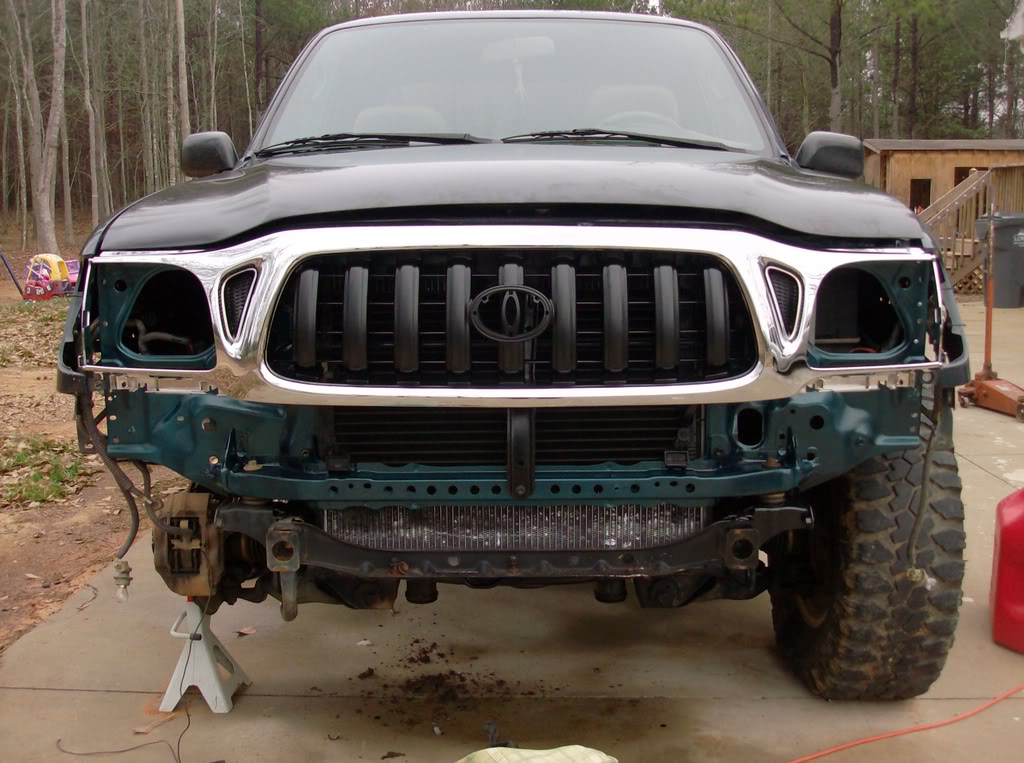
Imstalled the hood and the grille today. I had to space the hood latch off the core support so the hood would latch closed, since the hood is longer. With the 96 fenders it lines up good. Just needs some tweaking to line up gaps. I took the brackets that mount the lower front corners of the fender to the original core support off and riveted them into place on the 04 support. Worked great. Next Step is headlights, corners, bumper and valance and bumper lights...then thats it!!
01-27-2009, 12:06 PM
#16
Registered User
Join Date: Apr 2005
Location: Godfrey, Illinois
Posts: 940
Likes: 0
Received 0 Likes
on
0 Posts
Here's a clean swap that was done on a '95 from CarDomain for more info:
http://www.cardomain.com/ride/2249910


http://www.cardomain.com/ride/2249910
01-27-2009, 04:17 PM
#18
Registered User
Join Date: Nov 2006
Location: Ohio
Posts: 321
Likes: 0
Received 0 Likes
on
0 Posts
Here's a clean swap that was done on a '95 from CarDomain for more info:
http://www.cardomain.com/ride/2249910
http://www.cardomain.com/ride/2249910
01-27-2009, 05:46 PM
#19
He didn't paint the chrome. The front grilles come in two options; Chrome, and Painted. He ordered a non-chrome one and had it painted when the truck was painted.
I would have ordered the bumper the same way, since the chrome bumper looks silly with the painted grille.
I would have ordered the bumper the same way, since the chrome bumper looks silly with the painted grille.
01-27-2009, 08:27 PM
#20
Registered User
Thread Starter
Join Date: Jul 2008
Location: GA
Posts: 171
Likes: 0
Received 0 Likes
on
0 Posts
1..the radiator was vatted and pressure tested to clean it..not sure what that was. They told me it was from the small clearance between the a/c condenser and the radiator, plus the heat cycles leave condensation on the fins..so moist environment =moss.Its gone now.
2..The grille was barely in. the hood had just been put on..the fenders were loose...so seriously who tries to align gaps and clearances with the fenders not secure...(I just wanted to hurry up and take a photo and post it.)I myself said thats a bad picture as soon as I hit "reply", but oh well, its a work in progress.
2..The grille was barely in. the hood had just been put on..the fenders were loose...so seriously who tries to align gaps and clearances with the fenders not secure...(I just wanted to hurry up and take a photo and post it.)I myself said thats a bad picture as soon as I hit "reply", but oh well, its a work in progress.


