DIY - $10 Deckplate How-To
 04-15-2012, 08:44 AM
#1
Registered User
Thread Starter

Join Date: May 2011
Location: Lee's Summit, MO
Posts: 16
Likes: 0
Received 0 Likes
on
0 Posts
DIY - $10 Deckplate How-To
I wanted to dive into the deckplate but got impatient needing to wait for a delivery and couldn't find anything at the local boat stores. So I hit one of the local hardware stores. When walking around the PVC / Irrigation / Toilet area, I found a 4" Pressure Tester (go here for info: http://www.lowes.com/pd_23521-138-33...%3D2&facetInfo=)
Parts Needed - two pieces about 5 bucks each:

Not wanting to simply insert the Oatey tester into a chopped up air box, I thought a better seal would be in order. I found a 4" adapter/fitting piece (apologies, because I cannot find a link to this guy anywhere). Find something similar, then chop off the two ends so that it kind of resembles a top hat. This will ensure it does not slip into the box, but yet has enough surface area for the Oatey tester be able to expand to do its job. Discard the two ends.
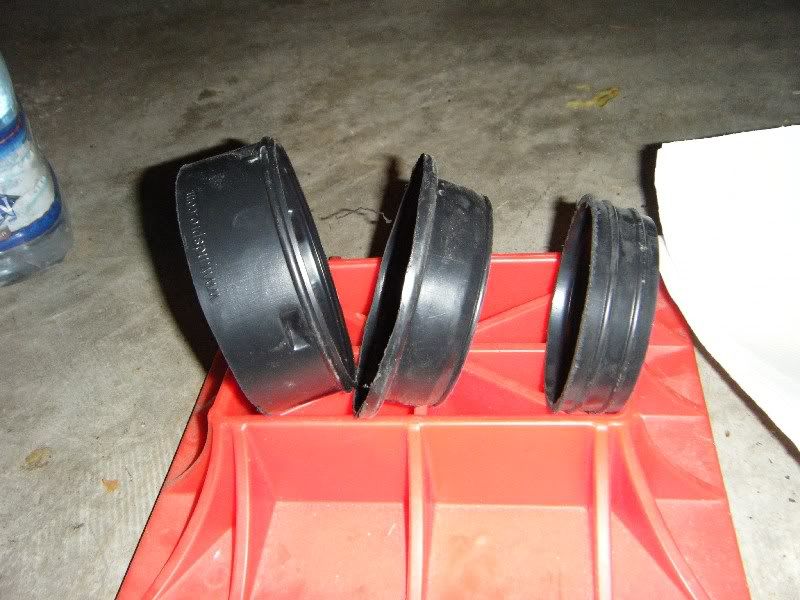
Trim and test fit the pressure tester into the newly created section.
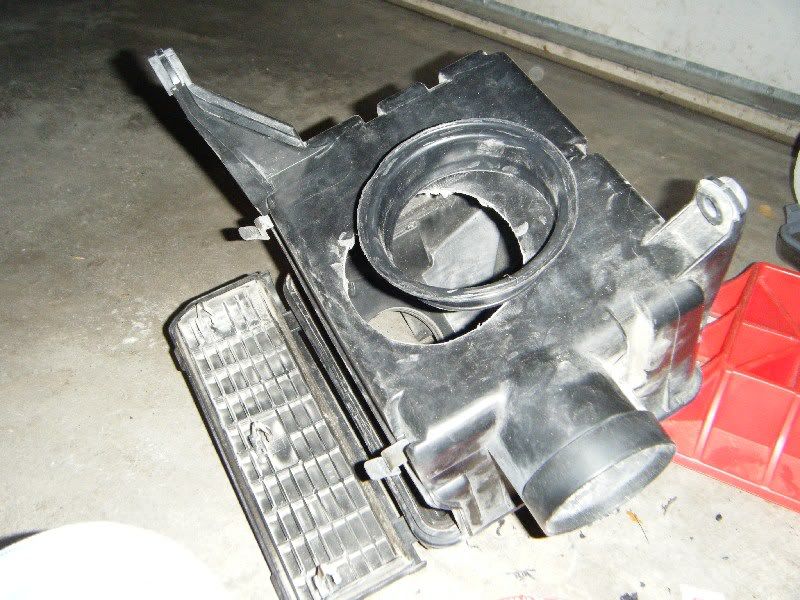
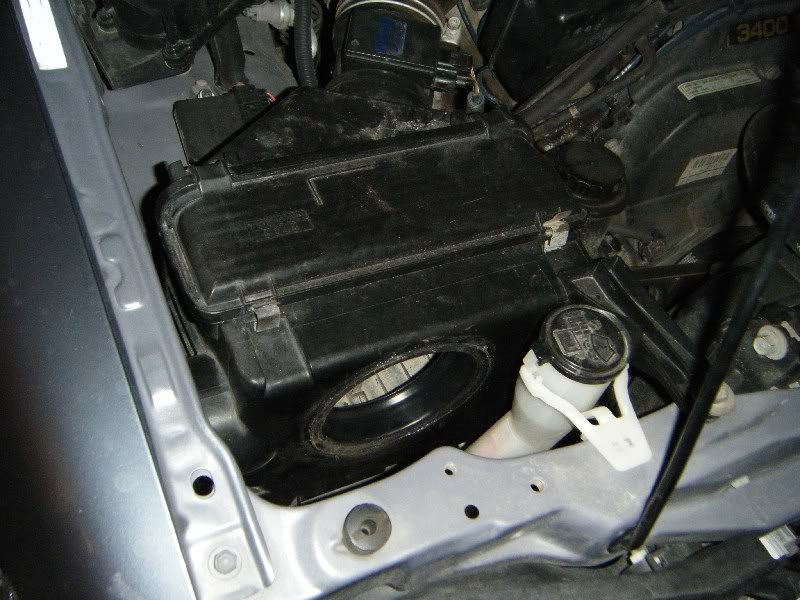
Remove the airbox, go choppy-choppy on the 'front' side of it with the 'ol Dremel. Use the piece to get a good idea of the size hole needed. I noticed it needed to be a bit off center, closer to the outside and top. I figured this would allow easier access to the hole as well.
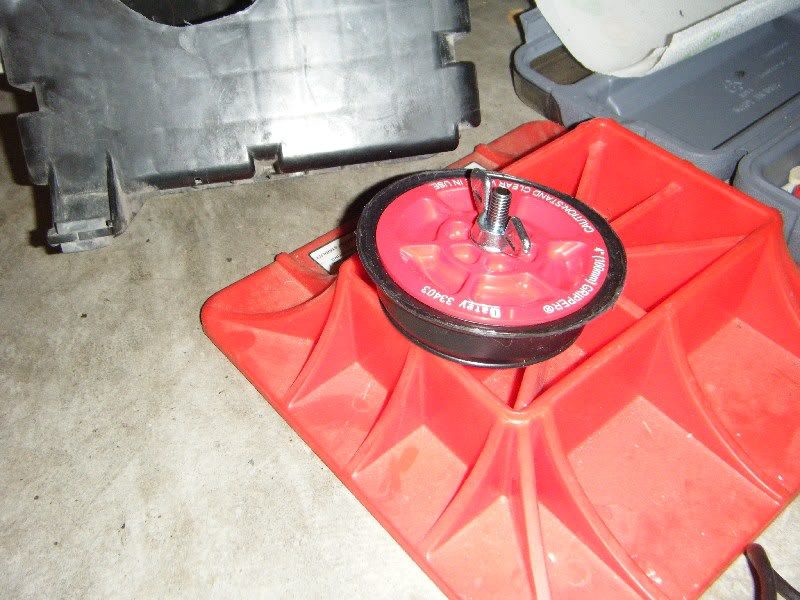
I then installed the trimmed piece using a plastic epoxy. It's a pretty tight fit, but I wanted to make sure it doesn't goes anywhere. Then install the Oatey pressure tester into it to get it all snugged down. I then waited to the next morning to ensure a good epoxy seal.
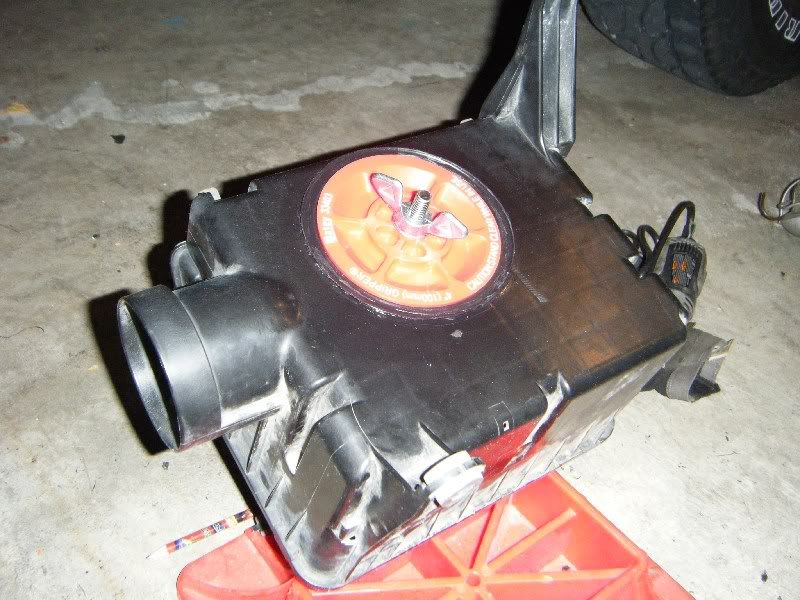
The next morning, all was right in the world. I cleaned up the airbox, got all the shavings and such out of it, and reinstalled. Pretty straightforward.
I tried the pressure tester piece and it too fit like a glove.
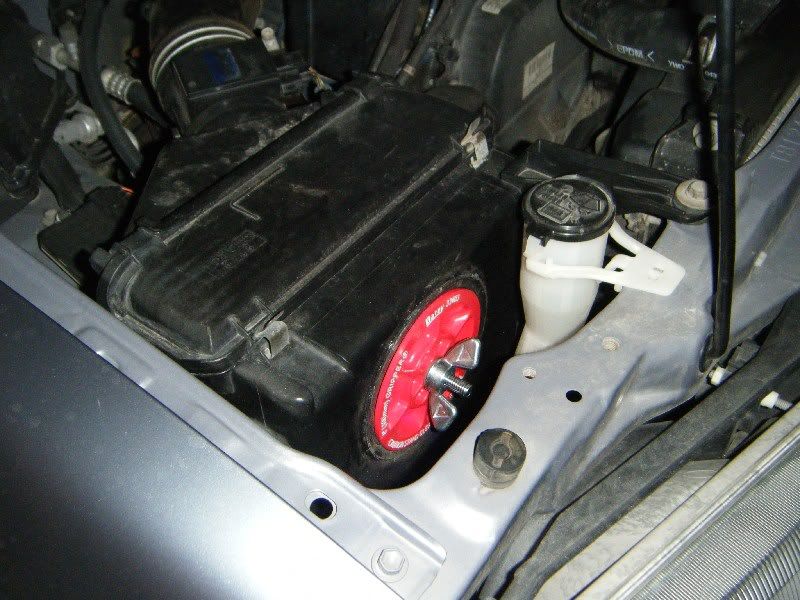
I've since gotten a K&N filter which also made a big difference after doing this. A nice project, cost about 10 bucks to build (not counting the K&N). Throttle response is much quicker and it actually gives a pretty nice growl when hitting the gas with a little authority. I rarely do this though... just my nature I guess. If/when needed, just pop the pressure tester in there, crank on the wing nut a couple times, and you're sealed up and ready to get wet. Enjoy!
-Eric
Parts Needed - two pieces about 5 bucks each:
Not wanting to simply insert the Oatey tester into a chopped up air box, I thought a better seal would be in order. I found a 4" adapter/fitting piece (apologies, because I cannot find a link to this guy anywhere). Find something similar, then chop off the two ends so that it kind of resembles a top hat. This will ensure it does not slip into the box, but yet has enough surface area for the Oatey tester be able to expand to do its job. Discard the two ends.
Trim and test fit the pressure tester into the newly created section.
Remove the airbox, go choppy-choppy on the 'front' side of it with the 'ol Dremel. Use the piece to get a good idea of the size hole needed. I noticed it needed to be a bit off center, closer to the outside and top. I figured this would allow easier access to the hole as well.
I then installed the trimmed piece using a plastic epoxy. It's a pretty tight fit, but I wanted to make sure it doesn't goes anywhere. Then install the Oatey pressure tester into it to get it all snugged down. I then waited to the next morning to ensure a good epoxy seal.
The next morning, all was right in the world. I cleaned up the airbox, got all the shavings and such out of it, and reinstalled. Pretty straightforward.
I tried the pressure tester piece and it too fit like a glove.
I've since gotten a K&N filter which also made a big difference after doing this. A nice project, cost about 10 bucks to build (not counting the K&N). Throttle response is much quicker and it actually gives a pretty nice growl when hitting the gas with a little authority. I rarely do this though... just my nature I guess. If/when needed, just pop the pressure tester in there, crank on the wing nut a couple times, and you're sealed up and ready to get wet. Enjoy!
-Eric
 04-20-2012, 03:15 AM
#4
04-22-2012, 12:16 PM
#5

It seems like you are implying that putting a hole in front of the air filter will be detrimental. Mind explaining your reasoning? 
So increasing potential airflow through the front of the box in front of the air filter is bad, but increasing potential airflow through the side of the box, still in front of the air filter is good?
04-22-2012, 12:43 PM
#6
Contributing Member
It seems like you are implying that putting a hole in front of the air filter will be detrimental. Mind explaining your reasoning?
So increasing potential airflow through the front of the box in front of the air filter is bad, but increasing potential airflow through the side of the box, still in front of the air filter is good?
So increasing potential airflow through the front of the box in front of the air filter is bad, but increasing potential airflow through the side of the box, still in front of the air filter is good?
Pulling air from the fender is nice clean cool air, air from the front of the airbox is hot, "dirty" engine bay air.
The fender port is not restrictive once the elbow is removed so putting another hole in the box will not gain you any power. The hotter air from the engine bay will cause a loss of power though.
I tested this out back to back on the dyno except I was using one of those way overpriced cold air intakes. Lost power over stock with elbow remove.
04-22-2012, 12:54 PM
#7
I agree there.
I've used sceitntifc method to disprove this in the past. No need to remove anything.
Correct.

Trending Topics
04-22-2012, 12:58 PM
#8
yeah, similar to a lot of "Cold Air Intakes", they actually loose power because of the hot air in the engine bay vs. relatively coler air in the fender. cold air is mo' betta... cold air = denser air; more air + more fuel = more power.
good job on the install though, looks clean!
I will be going back to the stock airbox at some point, I built my own "CAI" but even with the shield and insulation, I'm betting my intake temps are much higher with all the engine bay air. My meth injection pretty much takes care of that though...
good job on the install though, looks clean!
I will be going back to the stock airbox at some point, I built my own "CAI" but even with the shield and insulation, I'm betting my intake temps are much higher with all the engine bay air. My meth injection pretty much takes care of that though...
04-22-2012, 12:59 PM
#9
Contributing Member
The air in front of the airbox gets no real airflow from the truck moving, it is all but sealed off. The only airflow it really gets is air coming from the radiator fan, which is not cool air I will add. I have also felt the difference and it is noticeable even when moving well over 5mph.
Deckplate mod does not make more power, it does make more sound which makes most people think it makes more power though, I feel for this as well with my cold air intake until I both dynoed it and tested it with a gtech (real world test since it measures the gforce). Both agreed that elbow removed is the best setup.
Real world dyno test, Cold air intake vs stock airbox with elbow removed:

High speed fan was setup in front of the truck to mimic airflow for cooling but it would also have the same effect on the airbox area
Last edited by Texas_Ace; 04-22-2012 at 01:01 PM.
04-22-2012, 01:00 PM
#10
I agree that at highway speeds it may not be a huge difference but cruising between stoplights will be for certain a big difference in temps.
I've got my entire intake and isolator box wrapped in hot water heater insulation from home depot to keep as much heat from the engine bay out of the intake.
I've got my entire intake and isolator box wrapped in hot water heater insulation from home depot to keep as much heat from the engine bay out of the intake.
04-22-2012, 05:13 PM
#11
Would be better off wrapping your battery. Might get a year more out of it.
04-22-2012, 06:03 PM
#12
Registered User
Join Date: Nov 2011
Location: Atlanta, GA
Posts: 86
Likes: 0
Received 0 Likes
on
0 Posts
Back to the original post, I love the pressure tester thingy. I have a PVC cap that I put over the deck plate mod, just prior to a water crossing. I put it inside the deckplate(between filter and mod), since I have mesh wire over the outside of the deckplate. Keeps the big stuff off the filter (i.e. leaves). You have great ideas. Thanks.
And....
I'll trust what ever Texas Ace says about the 3.4. Likely the only video you will ever see of a T4R on a dragstrip. Thanks for all the info, T.A.!
04-24-2012, 11:11 PM
#13
Registered User
Join Date: Feb 2008
Location: Fletcher Hills, CA
Posts: 199
Likes: 0
Received 0 Likes
on
0 Posts
Living undead deck-plate threads.
I can't believe they still allow threads about the deck-plate/air box/dyno/clean air/elbow mods. YotaTech needs a forum called Fight Club for this one.
Eight horsepower on the dyno:
http://www.off-road.com/trucks-4x4/t...cks-52540.html
STICK
PS: Hah hah hah hah [evil laughter]!
Eight horsepower on the dyno:
http://www.off-road.com/trucks-4x4/t...cks-52540.html
STICK
PS: Hah hah hah hah [evil laughter]!
04-25-2012, 05:52 AM
#14
Contributing Member
I can't believe they still allow threads about the deck-plate/air box/dyno/clean air/elbow mods. YotaTech needs a forum called Fight Club for this one.
Eight horsepower on the dyno:
http://www.off-road.com/trucks-4x4/t...cks-52540.html
STICK
PS: Hah hah hah hah [evil laughter]!
Eight horsepower on the dyno:
http://www.off-road.com/trucks-4x4/t...cks-52540.html
STICK
PS: Hah hah hah hah [evil laughter]!
They also had the velocity stack setup which is well known to flow better then the normal deckplate mod done here and still only equaled the elbow removal.....

Last edited by Texas_Ace; 04-25-2012 at 05:53 AM.
04-25-2012, 08:01 AM
#15
Registered User
Join Date: Feb 2008
Location: Fletcher Hills, CA
Posts: 199
Likes: 0
Received 0 Likes
on
0 Posts
Elbow on.
Good point with the elbow, but it's still on there for the stack mod story. The photo on the couch is of someone else's air box that I bogarted from the interweb. I am thrilled to find another velocity stack fan, though. Cheers!
STICK
STICK
 04-26-2012, 08:10 AM
#18
Contributing Member
The key is that the elbow is free, super simple and is consistent. The deckplate takes work, is not undoable and not as consistent.

Thread
Thread Starter
Forum
Replies
Last Post
Esibnitsud
86-95 Trucks & 4Runners
0
07-30-2015 08:19 PM


