Auto Dimming Mirror Install Project
 09-19-2007, 08:49 PM
#1
Auto Dimming Mirror Install Project
As promised, I am starting my Auto Dimming mirror install. So here you go! Remember this will be a long post and has almost 30 pictures and thats only about half the install!
As a disclaimer, do this upgrade/modification at your own risk. You will be dealing with many things including your windshield, electrical as well as removing interior components.
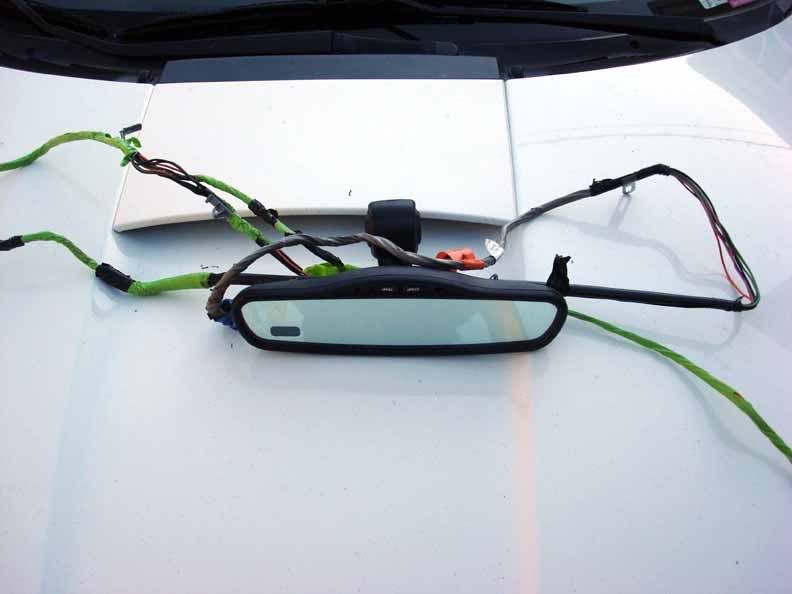
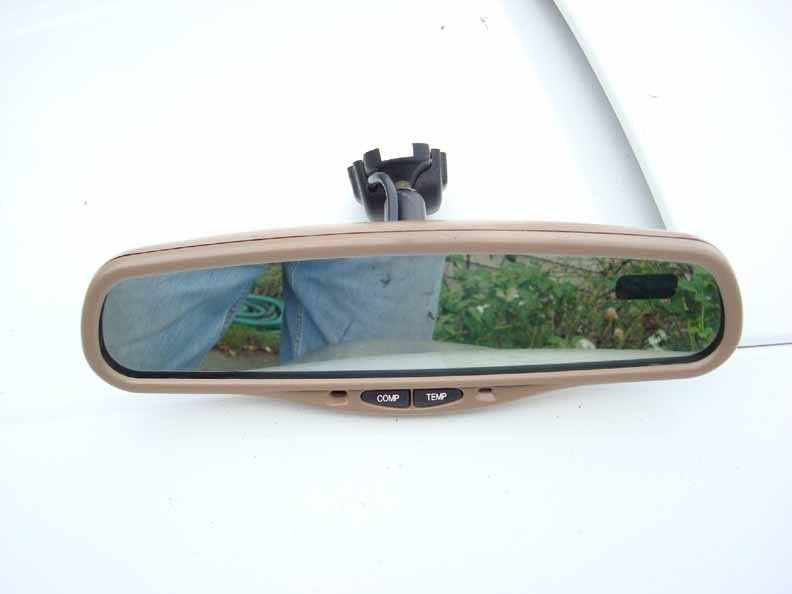
Some background, I installed a Hilux Surf Field Monitoring Unit a few months ago and was really happy with the new addition that Toyota should have put in Gen 3's here in the US, but I had some issues with my unit and could not correct the inaccuracies of the Temperature sensor. The issue was in the circuit board and no adjustment to compensate for it. During one of my trips to the local bone yard looking for Limitedpieces for another project (Limited SR5 install) I noticed this mirror in a GMC Suburban. I found out this is a model Gentex GNTX-177.
Seems Gentex and Donnally make almost all the electronic mirrors for most all auto manufacturers. I then removed the mirror and button mount. I also then spent the better part of an afternoon removing the entire wire harness for this mirror.
I also needed the sensor and on most GMC/Chevy trucks this will be found located on the center forward radiator support.
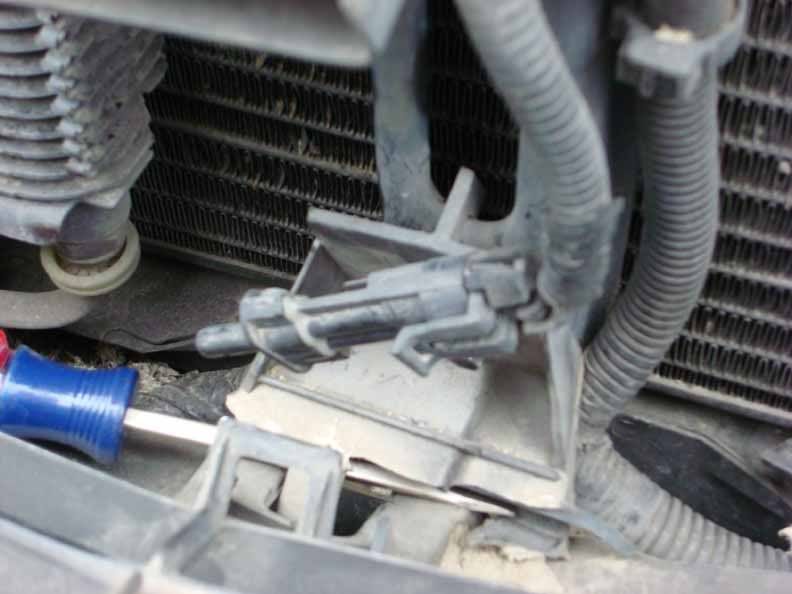
Some these are directly mounted to the pillar and others are on a plastic mount. This one just happened to be found on a palstic mount and came out of a 1998 Yukon.
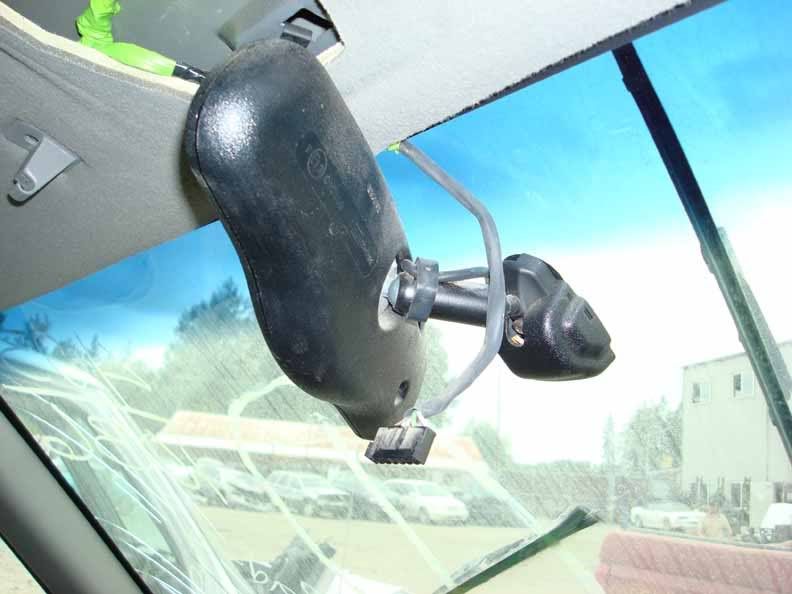
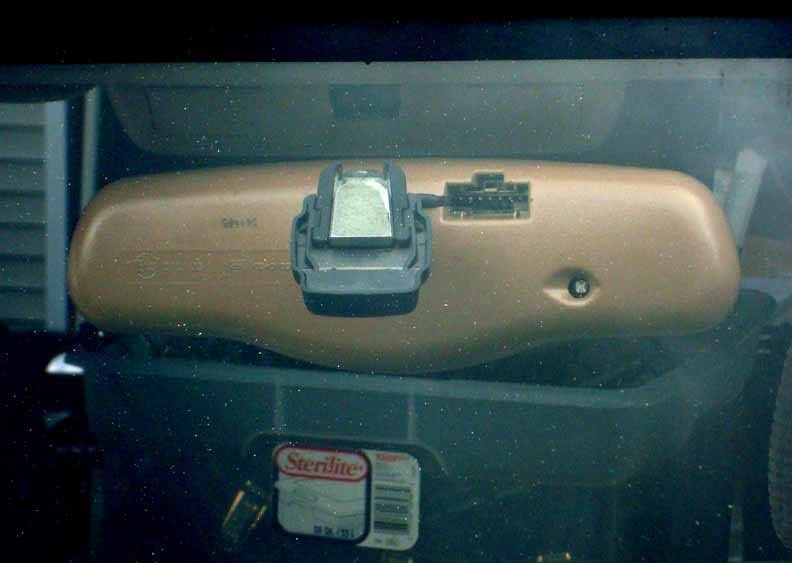
Step 1. Remove the FMU and OEM (modified) mirror and mount from the overhead.
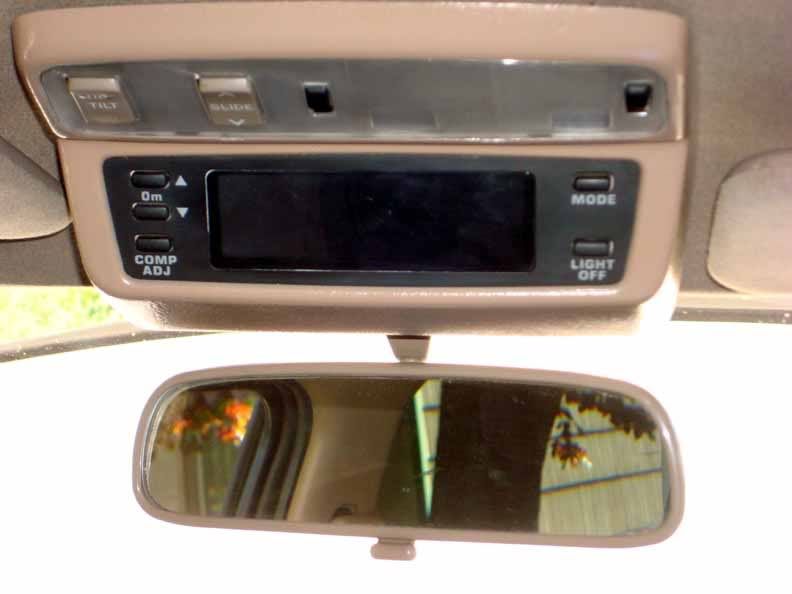
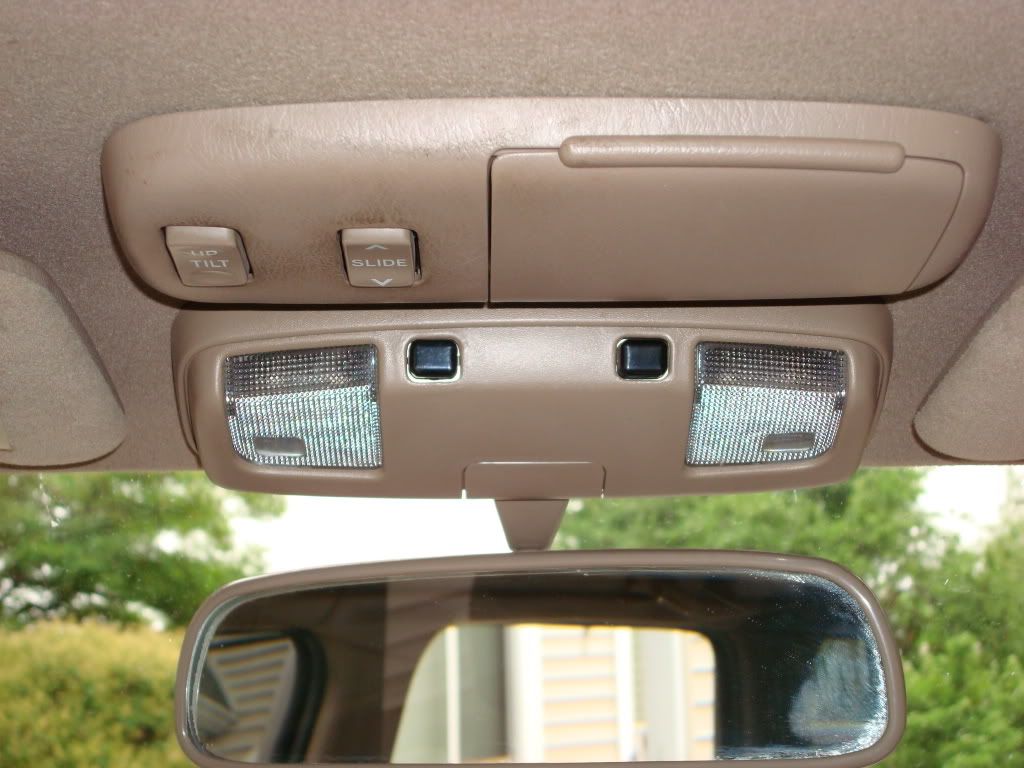
The FMU was pretty easy as I only had to remove one screw. For anyone else who is just removing their old OEM mirror, you will need to remove the plastic cover that just clips over the headliner mounted mirror. Most likely your overhead looks similar to this:
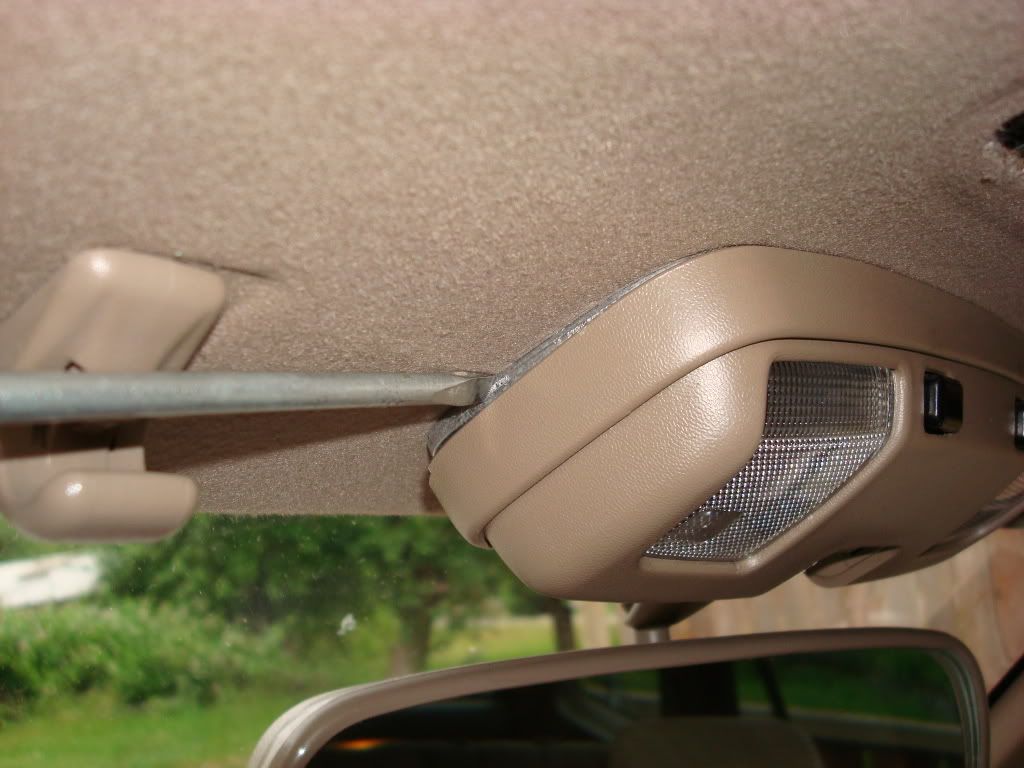
Simply remove the small collar that surrounds the base of the mirror and you will be able to pry off the outer cover as well

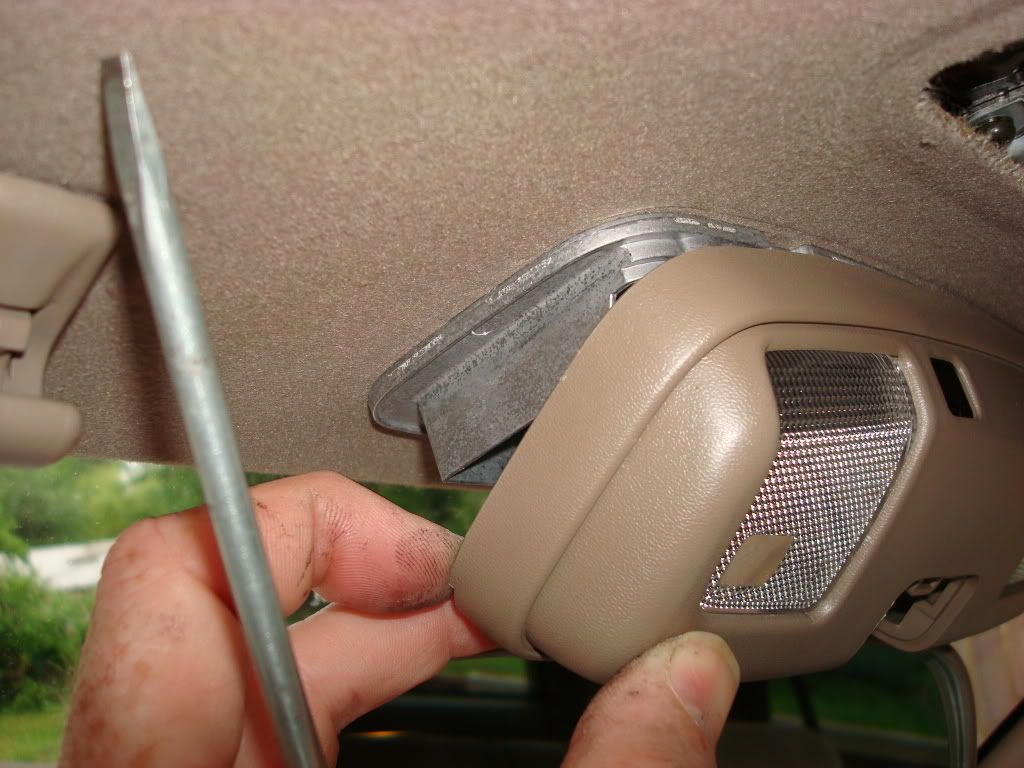
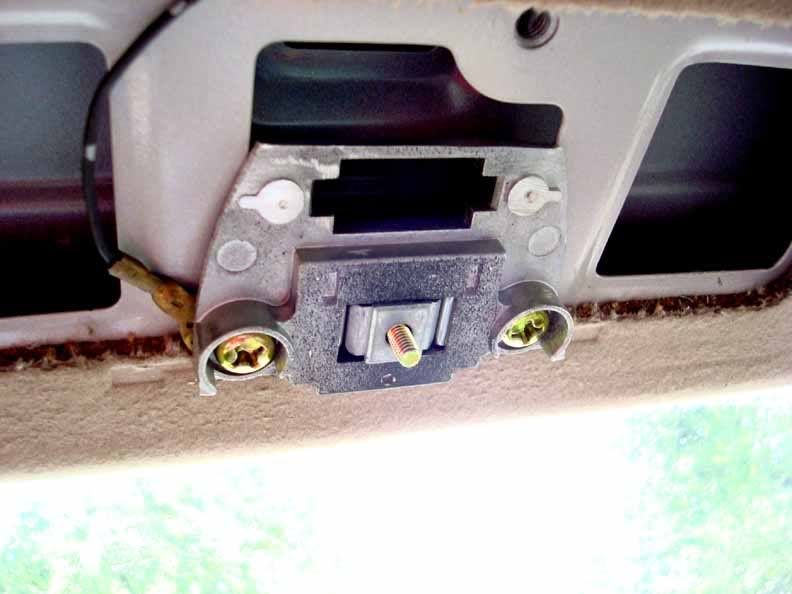
Once the cover is removed, unscrew the OEM mount. There are two screws that hold it in place. After you remove the mirror, you will be re-installing this mount as it also holds your map lights.
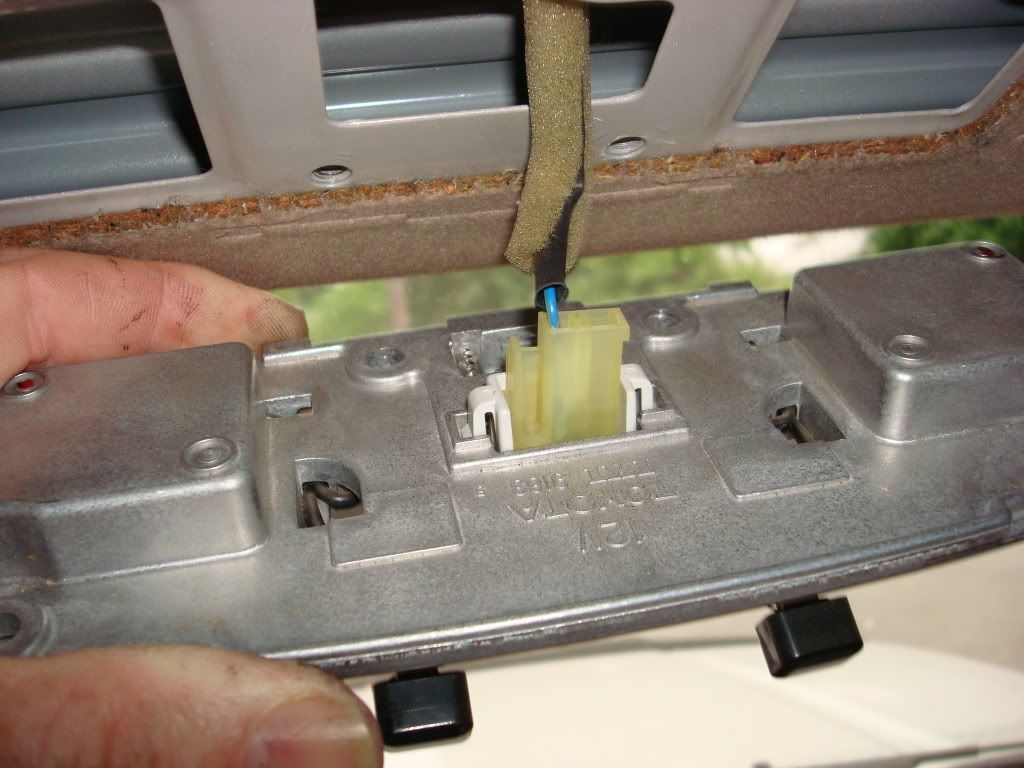
The OEM mirror is held in place by a roller clip with two spring clips. Remove the single screw and then the mirror will drop out. If you chose not to save these pieces then don't fuss if you drop them. I chose to put them back in place but its your call.
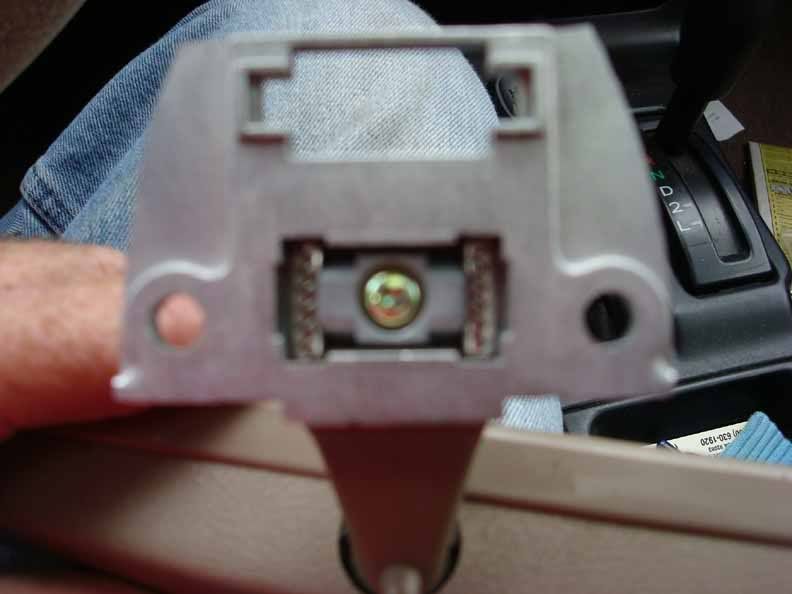
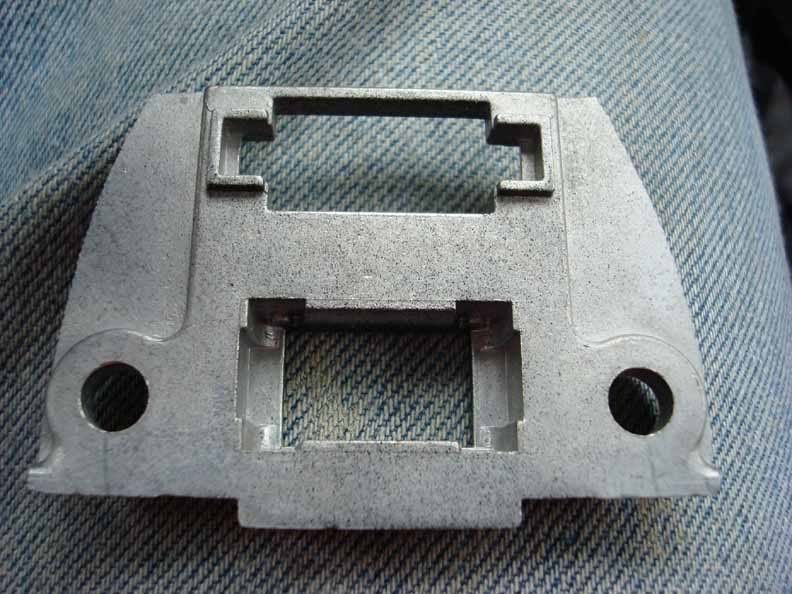
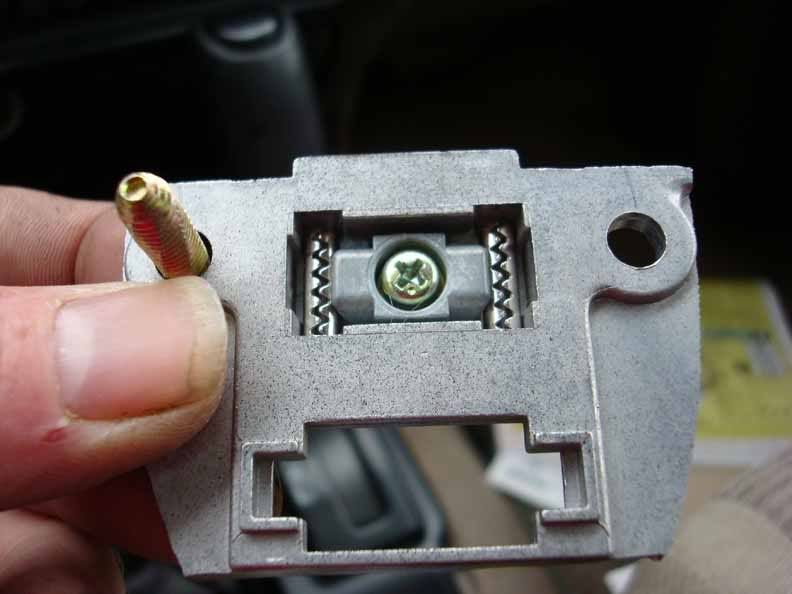
Remember, if you don't want to save the cam clamp and spring pins then you don't have to do this step in the above picture. I chose to keep them and show them in place with the first hold down screw in place ready to screw back in to the head liner. Your mount bracket will be much bigger as mine was modified for my FMU install. Here is the OEM bracket back in the headliner.
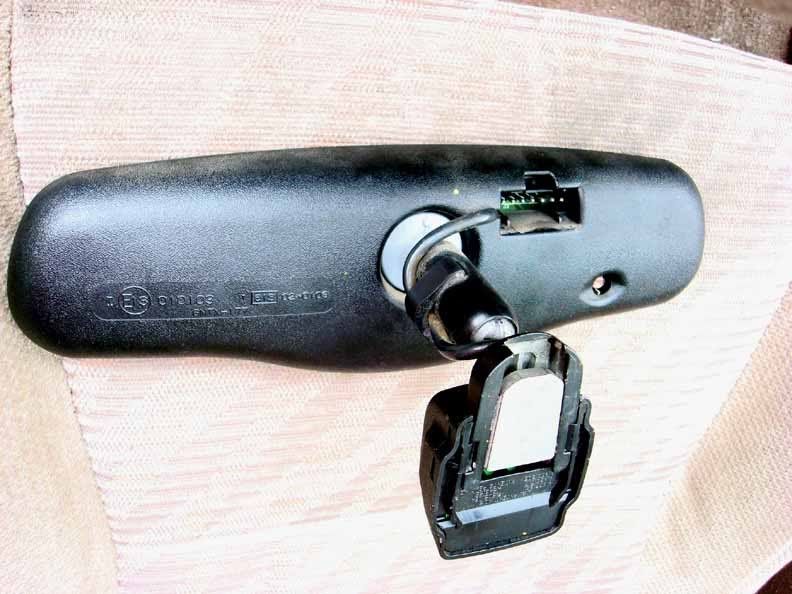
Take the GNTX-177 with the button installed and position it where you think it will be best suited to your needs.
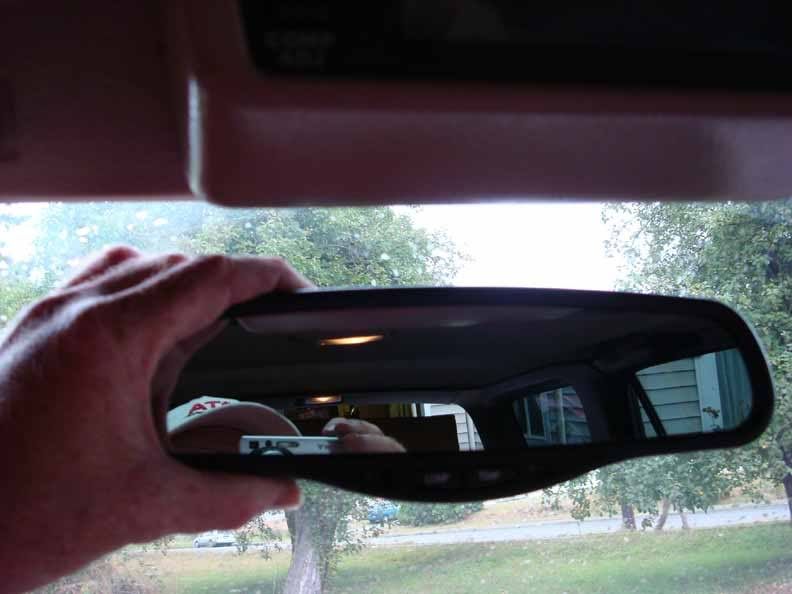
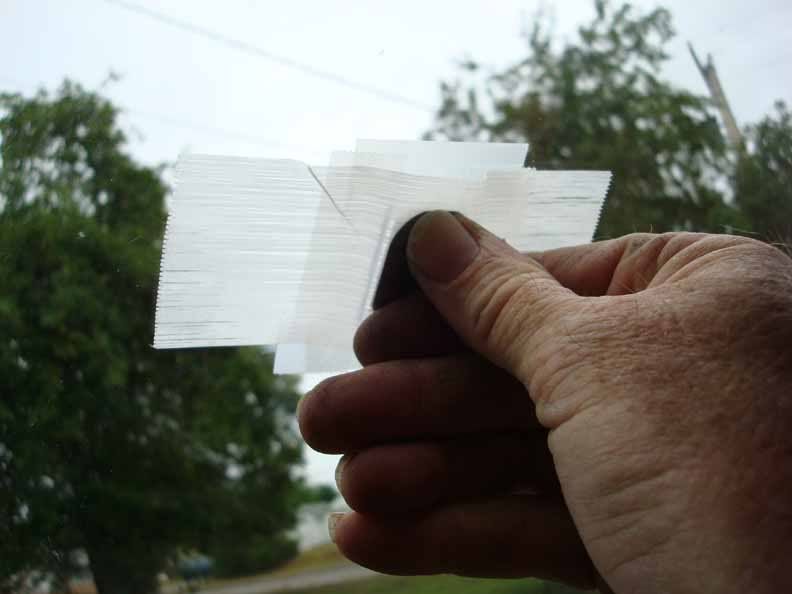
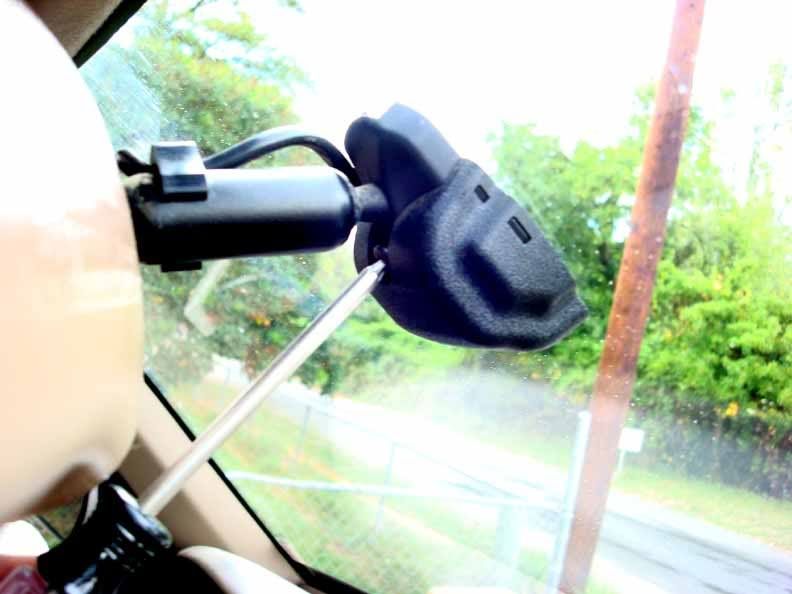
While holding the mirror, you can either use a piece of tape or have a partner using a piece of tape on the outside note/mark where the button is located on the windshield.
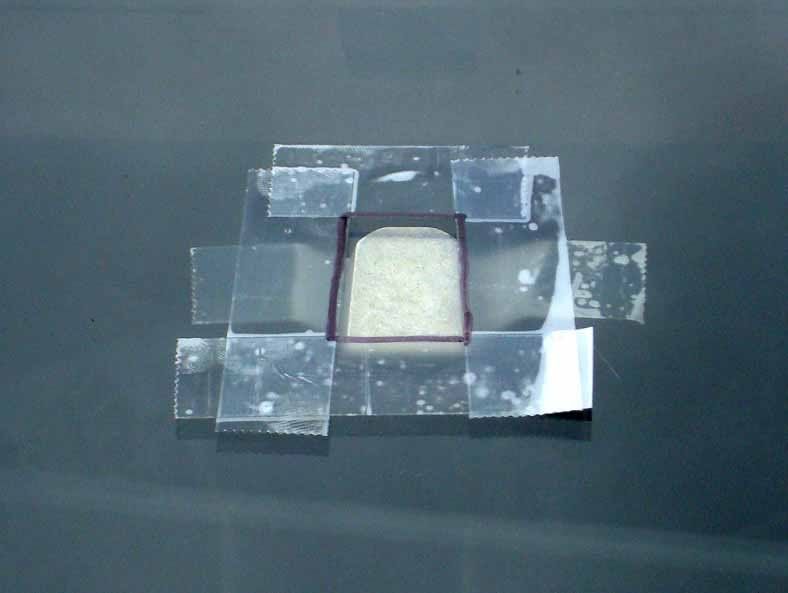
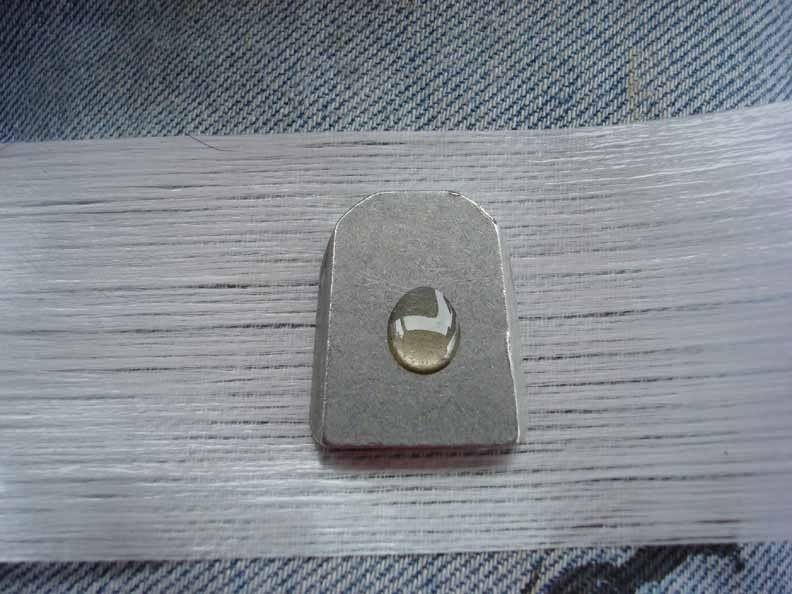
Next you will need to mark the location of where the button will be glued. I recommend you tape the button in place where you desire it on the inside of the glass. There is a centerline mark on the top edge of the windshield. It will look like a small black arrow point. Measure down from that spot to where you marked the location of the button. Place the button at that location and hold with tape. Next from the outside, lay down a tape outline on the edge of the button.
The next step is very critical. I used a very high quality mirror mounting adhesive. There are serveral available but I used Permatex. It was less then $4 at AutoZone.
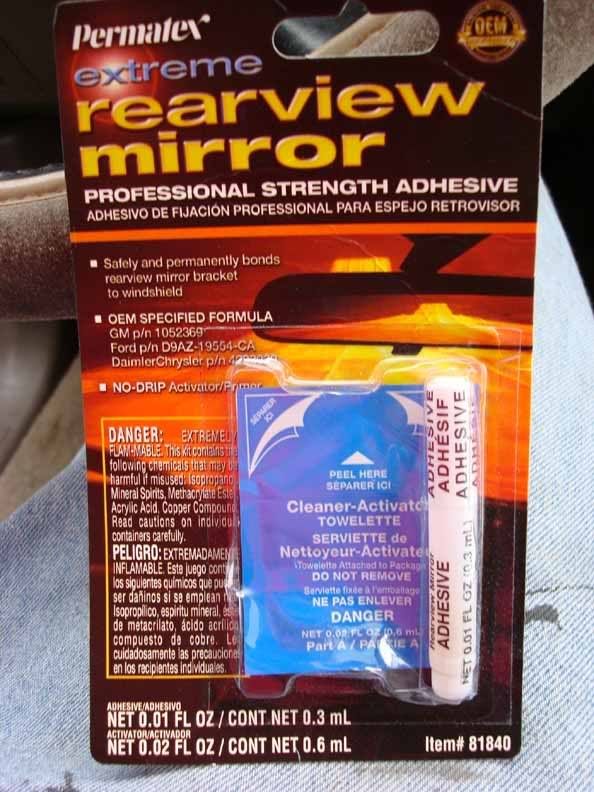
Be sure to follow the directions EXACTLY! One other word of caution, ensure you are placing the button correctly, right side up and glue side to the glass. If you screw this up, you won't be able to mount your mirror, you won't be able to remove the button and if you try, you will probably break your windshield. There is a cleaner/primer pad in the kit. Throughly clean the spot that is outlined with the tape. Allow to dry thoughly.
Remove the button from the mirror mount and place on a large piece of heavy tape such as duct tape or reenfored packing tape. Apply a large dab of adhesive to the button about an 1/8 to 1/4".
Too much and it will ooze out from behind the button when pressed against the windshield, too little and you won't get a good bond.
Remember which way is up and then align the button with the taped area on the windshield. Press firmly into position. You will be able to move it slightly but once you begin pressing on the button, don't pull back as you will create air under the button and the adhesive is setting while you are doing this.
You will need to keep pressure on the button for about a minute and then press the tape in place to help maintain the pressure against the windshield. The directions state you can attach the mirror after 15 minutes, I chose to let it set for at least 12 hours. I left mine for almost 24. Remove the tape and your set to go!

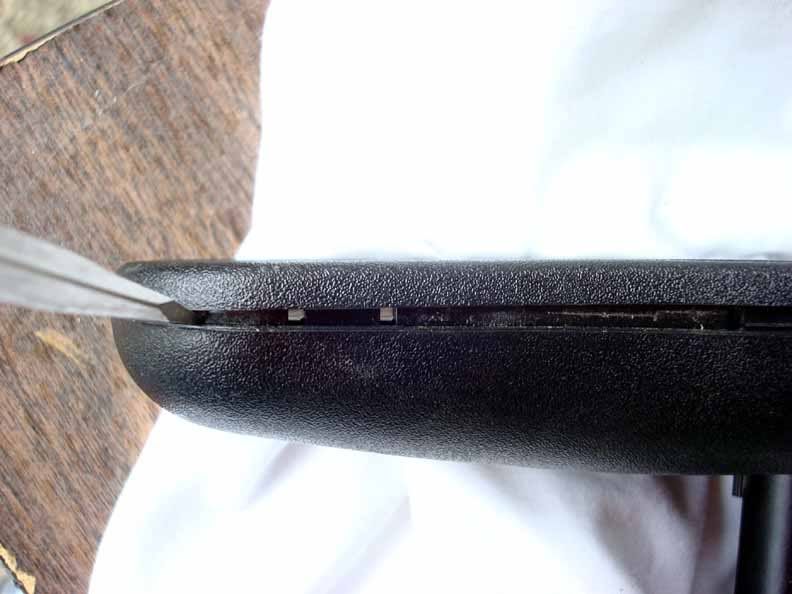
I decided to paint the housing of my mirror to match the FMU and other interior beige/tan plastic parts. You don't have to do this but it is really easy to do so it will look just like the OEM mirror removed. Take a small flat blade screw driver and starting on the top of th emirror about mid point, press the tip of the blade into the seam and give a gentle twist. The casing should spread out some and the clips should just pop open. Work your way around the entire mirror untill you get all the internal clips.
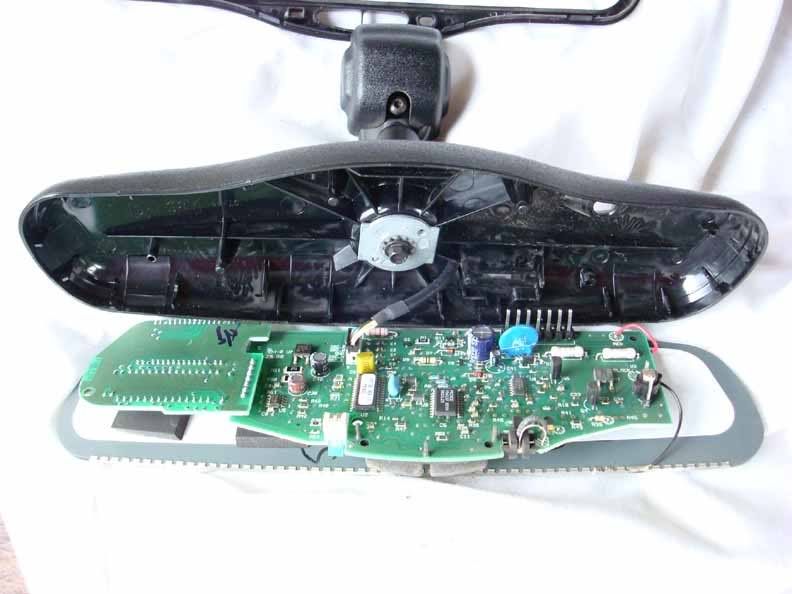
The mirror will come apart and you will have the interior exposed. Be careful and not pull too much on these pieces trying to remove them. There is a small connector going from the small cable that enters the back of the case and connects to the circuit board. Very gently, pull the connector out of the circuit board.

With this disconnected you can then place the mirror and electronics aside. Remove the lock bolt from the back of the mirror casing. It should be a 1/4 inch bolt. Slip the cable out of the case as well. I used alcohol to wipe down the case parts and bezel. After drying I then primered the pieces and then painted them with a plastics enamel paint designed for plastics. Set that aside for at least 24 hours.
Once completely dry, reassemble the mirror. Take care as getting the wire back in the correct spot was a bit tricky but I was able to press it back in the correct spot so the connector for the external inputs would plug in correctly to the back of the case. Ensure the sensors are placed correctly in the case and the circuit boards are seated properly. The case halves just snap together.
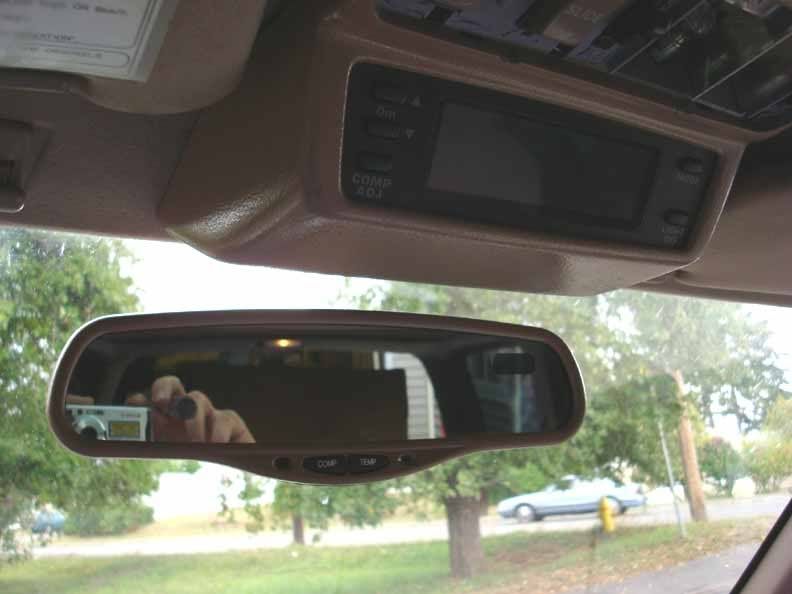
Slide the mirror onto the button and tighten the set screw. You will need a #25 Torx bit driver to remove the mirror from the button and then to install it.
Now you are ready to begin installation of the harness.
I will be continuing this project over the next several days. Between work and my kids I hope to have this completed some time this weekend. Stay tuned!
As a disclaimer, do this upgrade/modification at your own risk. You will be dealing with many things including your windshield, electrical as well as removing interior components.
Some background, I installed a Hilux Surf Field Monitoring Unit a few months ago and was really happy with the new addition that Toyota should have put in Gen 3's here in the US, but I had some issues with my unit and could not correct the inaccuracies of the Temperature sensor. The issue was in the circuit board and no adjustment to compensate for it. During one of my trips to the local bone yard looking for Limitedpieces for another project (Limited SR5 install) I noticed this mirror in a GMC Suburban. I found out this is a model Gentex GNTX-177.
Seems Gentex and Donnally make almost all the electronic mirrors for most all auto manufacturers. I then removed the mirror and button mount. I also then spent the better part of an afternoon removing the entire wire harness for this mirror.
I also needed the sensor and on most GMC/Chevy trucks this will be found located on the center forward radiator support.
Some these are directly mounted to the pillar and others are on a plastic mount. This one just happened to be found on a palstic mount and came out of a 1998 Yukon.
Step 1. Remove the FMU and OEM (modified) mirror and mount from the overhead.
The FMU was pretty easy as I only had to remove one screw. For anyone else who is just removing their old OEM mirror, you will need to remove the plastic cover that just clips over the headliner mounted mirror. Most likely your overhead looks similar to this:
Simply remove the small collar that surrounds the base of the mirror and you will be able to pry off the outer cover as well
Once the cover is removed, unscrew the OEM mount. There are two screws that hold it in place. After you remove the mirror, you will be re-installing this mount as it also holds your map lights.
The OEM mirror is held in place by a roller clip with two spring clips. Remove the single screw and then the mirror will drop out. If you chose not to save these pieces then don't fuss if you drop them. I chose to put them back in place but its your call.
Remember, if you don't want to save the cam clamp and spring pins then you don't have to do this step in the above picture. I chose to keep them and show them in place with the first hold down screw in place ready to screw back in to the head liner. Your mount bracket will be much bigger as mine was modified for my FMU install. Here is the OEM bracket back in the headliner.
Take the GNTX-177 with the button installed and position it where you think it will be best suited to your needs.
While holding the mirror, you can either use a piece of tape or have a partner using a piece of tape on the outside note/mark where the button is located on the windshield.
Next you will need to mark the location of where the button will be glued. I recommend you tape the button in place where you desire it on the inside of the glass. There is a centerline mark on the top edge of the windshield. It will look like a small black arrow point. Measure down from that spot to where you marked the location of the button. Place the button at that location and hold with tape. Next from the outside, lay down a tape outline on the edge of the button.
The next step is very critical. I used a very high quality mirror mounting adhesive. There are serveral available but I used Permatex. It was less then $4 at AutoZone.
Be sure to follow the directions EXACTLY! One other word of caution, ensure you are placing the button correctly, right side up and glue side to the glass. If you screw this up, you won't be able to mount your mirror, you won't be able to remove the button and if you try, you will probably break your windshield. There is a cleaner/primer pad in the kit. Throughly clean the spot that is outlined with the tape. Allow to dry thoughly.
Remove the button from the mirror mount and place on a large piece of heavy tape such as duct tape or reenfored packing tape. Apply a large dab of adhesive to the button about an 1/8 to 1/4".
Too much and it will ooze out from behind the button when pressed against the windshield, too little and you won't get a good bond.
Remember which way is up and then align the button with the taped area on the windshield. Press firmly into position. You will be able to move it slightly but once you begin pressing on the button, don't pull back as you will create air under the button and the adhesive is setting while you are doing this.
You will need to keep pressure on the button for about a minute and then press the tape in place to help maintain the pressure against the windshield. The directions state you can attach the mirror after 15 minutes, I chose to let it set for at least 12 hours. I left mine for almost 24. Remove the tape and your set to go!
I decided to paint the housing of my mirror to match the FMU and other interior beige/tan plastic parts. You don't have to do this but it is really easy to do so it will look just like the OEM mirror removed. Take a small flat blade screw driver and starting on the top of th emirror about mid point, press the tip of the blade into the seam and give a gentle twist. The casing should spread out some and the clips should just pop open. Work your way around the entire mirror untill you get all the internal clips.
The mirror will come apart and you will have the interior exposed. Be careful and not pull too much on these pieces trying to remove them. There is a small connector going from the small cable that enters the back of the case and connects to the circuit board. Very gently, pull the connector out of the circuit board.
With this disconnected you can then place the mirror and electronics aside. Remove the lock bolt from the back of the mirror casing. It should be a 1/4 inch bolt. Slip the cable out of the case as well. I used alcohol to wipe down the case parts and bezel. After drying I then primered the pieces and then painted them with a plastics enamel paint designed for plastics. Set that aside for at least 24 hours.
Once completely dry, reassemble the mirror. Take care as getting the wire back in the correct spot was a bit tricky but I was able to press it back in the correct spot so the connector for the external inputs would plug in correctly to the back of the case. Ensure the sensors are placed correctly in the case and the circuit boards are seated properly. The case halves just snap together.
Slide the mirror onto the button and tighten the set screw. You will need a #25 Torx bit driver to remove the mirror from the button and then to install it.
Now you are ready to begin installation of the harness.
I will be continuing this project over the next several days. Between work and my kids I hope to have this completed some time this weekend. Stay tuned!
Last edited by Ritzy4Runner; 09-19-2007 at 08:55 PM.


Thread
Thread Starter
Forum
Replies
Last Post
RedRunner_87
95.5-2004 Tacomas & 96-2002 4Runners (Build-Up Section)
84
06-01-2021 01:51 PM
Yota.Jay
General Electrical & Lighting Related Topics
28
10-22-2015 01:08 PM


