When you click on links to various merchants on this site and make a purchase, this can result in this site earning a commission. Affiliate programs and affiliations include, but are not limited to, the eBay Partner Network.
The last several months I've been extremely busy with both school and work, and have unfortunately neglected to update this thread. I have done a lot of work since the last update so I will more likely summarize all this work with a progression of pictures rather than going into extreme detail.
At the same time I was working on the truck itself, refinishing the frame, cleaning and painting, rebuilding hubs, brakes, axles, etc.
My redneck method for getting to the frame underneath the cab. I refinished the frame and also replaced the bushing with new polyurethane.
Got the gas tank cleaned painted and installed. Plumbed with nice new fuel hose and a new fuel filter.
Got the bed back on for the first time in a long time. Also done thanks to my trusty engine hoist.
Began rebuilding the front end. This is before.
Stripped down to the spindle.
New brake rotors, bearing and races installed.
Also rebuilt the hubs and painted the dials. All new brakes installed. New larger 90's calipers, larger 1" bore master cylinder, and stainless steel brake lines.
I also installed a larger dual diaphragm booster that I got from the junk yard, but later I found out it wasn't working so I had to reinstall my stock one. Brakes still work as well as I would ever need them to, so it will be interesting to see how much better the larger booster will be whenever I find another one of those.
When I went to rebuild the rear end (bearing were 100% trashed. Metal on metal) none of the brake parts I had bought matched the brakes that were on there. This was when I realized that the rear axle under my truck was an '85 or earlier rear axle. The PO of this truck has hobbled together so much bs on this thing that I wasn't even surprised. But because I wanted it to be right, I began looking for a new rear end. This ended up being the best route anyway because the existing one was just total trash.
I found one from a pickup that the yard said had just 98,000 miles on it. After pulling it apart, I believe them too. It was it great condition. I could also tell the PO of this part took care of his truck because the rear end had synthetic gear oil in it. That stuff isn't cheap.
All this and the yard only wanted $150 for the year end. The only bad part was that I had to drive 300 miles to get it. This made for quite a story too. I made it to the yard fine, but as soon as I was leaving, I noticed some shifting problems with the old hauler, my 1997 Honda Odyssey with just about 300,000 on the clock. Great vehicle, been in the family since new so it's been well maintained and we've never had any problems with it. Anyway, one of the transmission solenoids failed and the transmission went into "limp" mode, which means stuck in 3rd gear, 300 miles away from home. Needless to say that was a long trip home, going down the interstate at 50mph with the little 4banger wailing.
But I got my new axle home.
Bringing it home. Minivans do make pretty good haulers
Yet another use for the engine hoist
Cleaned all the dirt off
Painted
Old diff vs new. Notice the corrosion on the teeth of the old diff
You do great work. I absolutely love what you have done. My dad had a red 86 4x4 just like yours except he had a 22re. Only difference. Either way great job and keep it up.
Thanks guys, I really appreciate it. There were a lot of things I wish I could have done better, but I can still say I did the best I could with the resources that I had.
So next I rebuilt the rear axle. It probably didn't need it, but I already had all the parts so I went ahead and did it. Just something I won't have to worry about in a long time. I didn't get any pictures of replacing the axle shaft bearings because that's a rather intensive process (I did it without a press) and I was quite absorbed in it. If you're interested in how it's done without the special service tools, there's a good writeup on 4x4wire.
After replacing the bearings, I redid the rear brakes. They got new shoes, hardware, and larger bore wheel cylinders for a land cruiser.
The old:
The new:
When replacing the shoes I discovered that the Advanced Auto parts brand shoes I had bought were, like so many other auto parts, simply a re-boxed part. But this time it worked in my favor. The shoes were actually OEM Toyota! I had priced factory Toyota shoes at my dealer which they priced at $120, so I passed. So I got the "nicer" Advance Auto house brand shoes for $25, which ended up having a Toyota logo stamped into the metal.
So needless to say, I was a happy camper to find that out.
Great build so far!! You are seriously doing some great work. I love your meticulous attention to detail. It looks like you could eat off every part that you have gone through so far.
I cannot wait to see more. Makes me feel like my Runner is a POS. haha
The Pickup truthfully is nowhere near as nice as it looks in the pictures. That's kind of a general rule I've found, that things usually look better in pictures. And I guess the truck will never look as good to me since I know all its little imperfections.
Thanks again Terry, I really appreciate all your continued help and support.
I'll get around to another update. Keep in mind that I still have caught up to the present yet, these updates are a recap of the work that went on while I was busy neglecting this thread. I assure you all that good things are still currently happening!
So after rebuilding the hubs and brakes, I hooked up and plumbed the brake hydraulics, cleaned up the cab a bit and reinstalled the seat, and coasted her back down the (very steep) driveway and into the garage to begin the engine install.
Reinstalled some do-dads in the engine compartment that had been removed for painting.
Cleaned and painted the floor pan with some flat black Rustoleum.
The truck back in the garage! Finally! This was around the beginning of August, which here in Mississippi is HOT. I got to borrow this air conditioning unit which was a lifesaver! I was able to get the garage down to ~70 degrees, compared to the 95-100 outside. MS actually broke a record this summer for the most consecutive days above 95 degrees... So got to go from working in the sun and the heat to an airconditioned garage. It was luxury. I was also able to keep working past dark. Garages are awesome.
A little side note: The truck finally has a name! I'm not the type of person to normally name things, so I never gave the truck a name. Normally I just refer to it as "piece of s**t" "pile of crap" or something along those lines.
Recently, however, a friend of mine began calling it "Big Nasty." He thought I would be offended by the name, but I really liked it and since then it has just stuck.
So ladies(?) and gentlemen, I introduce to you Big Nasty!
Any of you take advantage of these parts deals this Black Friday? I must admit that I did.
I went into Black Friday with a little too much Toyota on the mind and cash in the wallet... I am planning on running 33s so I will need to regear. I am also interested in some sort of locker, and since this will be my DD, specifically a selectable locker. So naturally, a new fully assembled 4.88 ARB diff is exactly what I needed. Yotamasters had a smoking deal on one with $250 off. The assembled diff was just barely more than what just the locker would cost from ARB. Of course, I just couldn't resist. So I am now the proud owner of a new ARB air locker.
I should be much less likely to get stuck for two reasons: The increased traction from the locker, and the reduced weight of my back pocket....
I have another confession. I am yet another victim of the Yotatech community. I came to Yotatech as someone who simply wanted to rebuild their Toyota Pickup to use as a daily driver. Someone who had little interest in offroading, but did appreciate having the offroad capability of 4wd.
But one thing led to another...
I bought a tube bumper from Addicted Offroad because I wanted more protection than just the stock sheetmetal bumper. But that bumper only compounded the sagging of the 30 year old suspension. I needed to replace the suspension, but the only offerings were lifted suspension kits. Reluctantly I bought I lift kit. After I installed the lift kit I began noticing that those 31" tires began looking pretty small. I actually began offroading the truck and realized how much better it would be with some sort of locker, and that I really did need at least 33s, as well as a tube bumper in the rear and rock sliders. And what's tube bumpers and rock sliders without tube doors? It goes on and on....
One thing led to another, and this truck is well on its way to becoming somewhat of a rockcrawler (minus the IFS). It's a slippery slope I tell ya. Once you get on, it's nearly impossible to get back.
Big Nasty is starting to look great. It can grow into a bigger project then what you first intended it to be. I still get a smile on my face when chugging down the road and remembring what all was involved to get it to where it is and driving. I think you are going to find the same reward as well. Since you have taken it down so far, you have been able to fix several issues that you wont need to deal with later on.
Thanks Terry, you sure are right about that one. I have to admit, if I had any clue about how much work this would be when I first got into it, I probably wouldn't have ever pulled the trigger. But it's in the paying off phase right now, and I'm glad that I did it.
On to another update (I'm still a decent ways off from the actual present).
With the truck in the garage and school fast approaching, it was finally time to get the engine back in.
First, I had to take care of some electrical.
The factory radio was an awful mess, so I just ripped out the whole thing and I'll start over and install a new system later.
Wiring is a huge pet peeve of mine. I can't stand hacking into factory wiring, splicing, tapping, all that is bad news and creates a mess that will most likely cause problems later. Because I plan on adding some accessories later, I installed an auxiliary fuse box in the cab. It is a Painless unit that gets power directly from the battery. It has a relay that is wired to the ignition power, so you have three fuses that are ignition hot, and four more that are constant hot. I already used one of the ignition hot circuits to wire up some gauges.
Here is the fuse box. This was the best place I could find for it. I had a heck of a time mounting it there though.
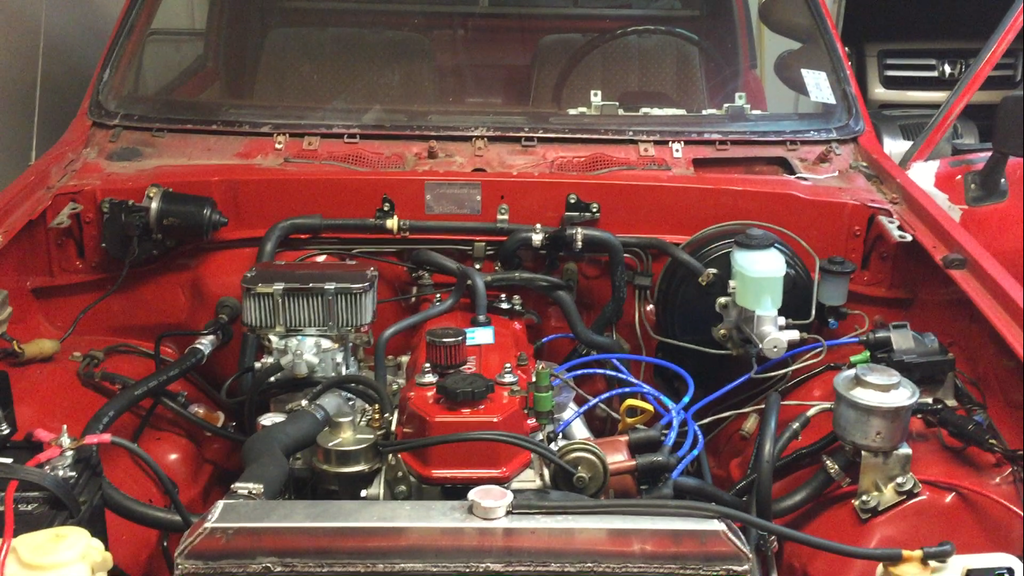
I also installed a gauge pillar with two aftermarket gauges. One is a wideband AFR, or Air to Fuel ratio gauge. That has helped greatly with tuning the carburetor. The other is an autometer temperature gauge, because the factory temp gauge had been acting up and I wanted a gauge that I knew was accurate.
Here are most of the wires run for the gauges
And here's all the junk I had to fit behind the pillar.
For some reason I don't have a picture of the gauges installed, but I can get one later.
After I got all the electrical worked out, I could finally get the engine back in.
Ready to take the engine off the stand, its home for the last 6 months...
The new home awaits
Clutch installed
Lowering her in!
And she's in! I was able to install the engine by myself (it was about 2am) without much trouble. I was just very patient and took my time, and eased it in little by little, making adjustments along the way.
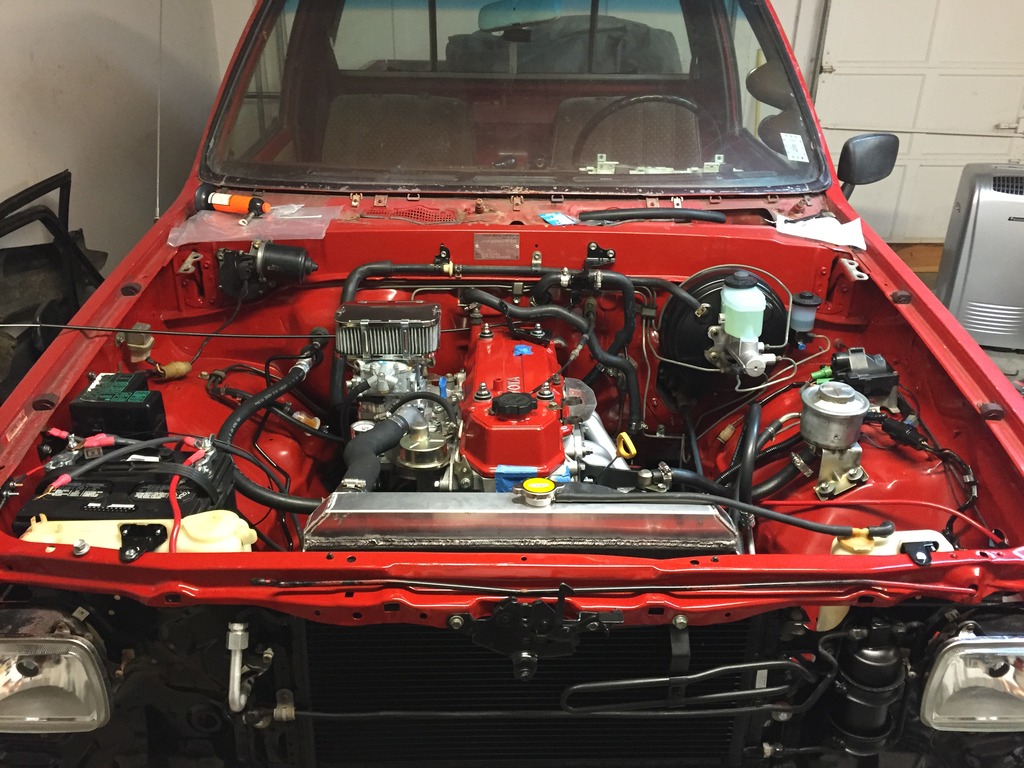
After installing the engine, I got everything plumbed up and ready to fire
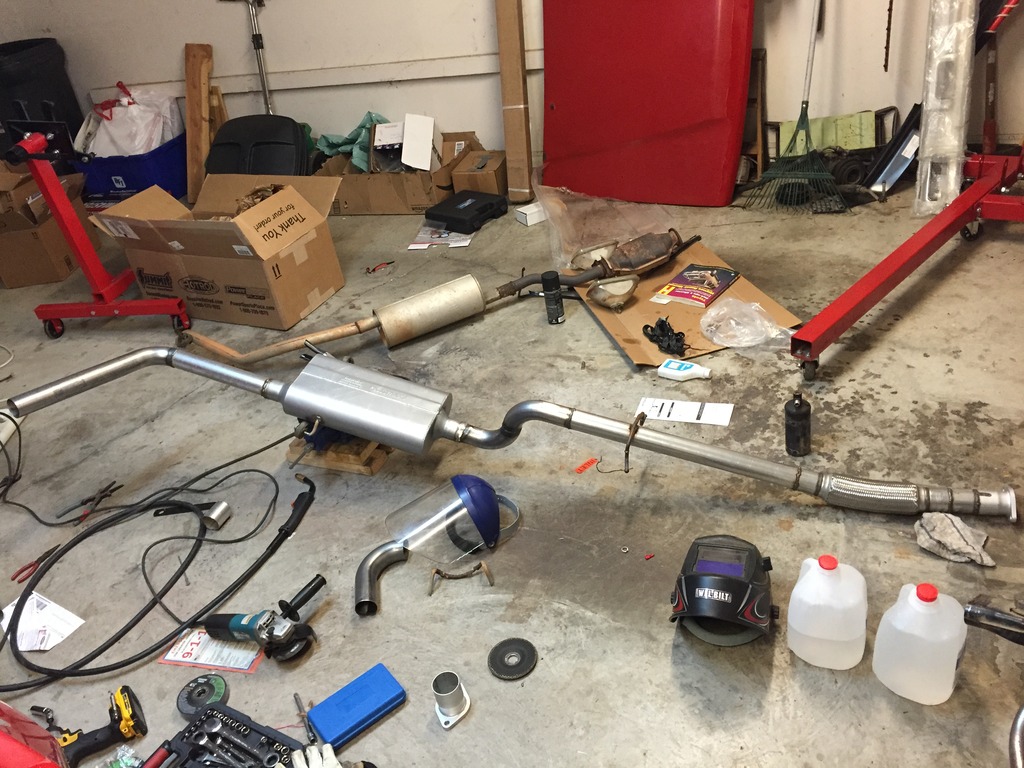
I also assembled my own exhaust. I used exhaust tube from summit racing and flowmaster 50 muffler.
Then I filled it up with Joe Gibbs break in oil and Toyota Red coolant, pulled the coil wire and cranked it until I had oil pressure, then reconnected the coil wire and she fired right up! Here it is running for the first time
Driving it for the first time after almost a year of work was really an exhilarating experience. It was nowhere near the tired old truck that I remembered before. My little 22r may only making a little over 100hp, but it's 100 pissed off horsepower!
Some side notes that I don't think I've mentioned yet:
I'm building this as an expedition type rig, so I'll definitely be adding some accessories later on. Because of that I decided to go with a 100 amp GM alternator. I did some research and found that one off and '86 4cyl Camaro was clocked correctly with the correct pulley that I needed. I was able to get a Duralast gold from autozone for $75 with an online coupon code. I also upgraded the charging wire with a thicker gauge cable. So far it has worked great.
Another thing I put a good bit of work into was the air conditioning system. I live in Mississippi, where summer is the more than half of the year and its not uncommon to have 100* with 100% humidity. So when it came to air conditioning, I really wasn't going to mess around. the existing compressor bombed and sent crap all through the system so most of the existing components were unusable. I bought a new (remanned) Denso compressor, new Denso evaporator, new aftermarket condenser, and new hoses. The only pieces of the A/C the I reused were the hard lines, which I made sure to flush well with solvent. I decided to go ahead and convert to R134a to make my life easier if I had a problem later on. I talked to a tech on the phone over at Denso who gave me a lot of advice on the conversion. I also found the Toyota bulletin that gave the instructions to their mechanics on how to perform the conversion. I followed this to the T.
If anyone needs the instructions I can give them to you, but basically I added the lubricant, vacuumed down the system for a few hours, let it sit for 24 hours to make sure it held vacuum, and then added coolant. The system performed as well as any that I've ever known, and so far (about 4 months) I haven't had any leaks. This was very rewarding, considering that A/C is one of those areas that experts usually don't recommend doing at home. But if you're a meticulous person who is willing to put in the time and effort to do it right, then it should work out fine.
The truck is coming along exceptionally well. That ENGINE SOUNDS AWESOME! I know exactly what you mean about A/C. I'm from Arkansas and I share that same sentiment. A/C is a must. I'm definitely interested in the a/c conversion info if you are willing to share.
Thanks, I appreciate it! Oh yeah, definitely. My theory is to do everything the right way the first time, so that you have the least chance of having to redo it later on. A/C is one of the areas that really demands that approach.
As far as the conversion is concerned, here is the link to the Toyota service bulletin for the conversion. http://tms.cleanautoalliance.org/documents/ac002t98.pdf
This has all of the specific types and quantities of oil and refrigerant and all the steps necessary for the conversion. If you have any other questions about it I'd be glad to help you find an answer.
One interesting note about the A/C retrofit is that Toyota didn't start retrofitting vehicles until after November 1998 (the release date of that bulletin), almost 5 years after vehicles began running R134. This is a testament to the integrity of the brand. While many other brands just started throwing R134 into anything with R12 without much regard to how it would hold up, Toyota waited and watched, and only began doing retrofits once they had enough data and a protocol that they were sure would be reliable.
Just an interesting bit of information that I found in my research that verifies the quality of the Toyota brand.
 11-11-2015, 09:16 AM