Toms 87 4Runner Build
 12-19-2015, 12:07 AM
#61
Super Moderator
Staff
Thread Starter
iTrader: (1)
Join Date: Aug 2008
Location: Anderson Missouri
Posts: 11,788
Likes: 0
Received 21 Likes
on
19 Posts
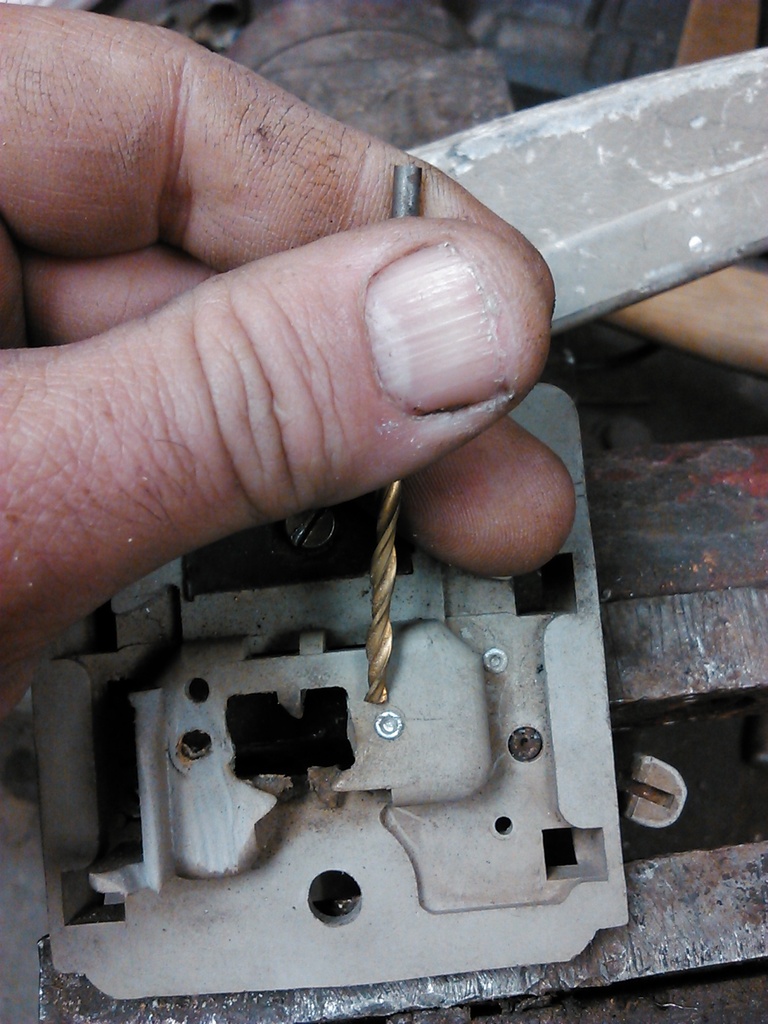
First I drilled out 6 rivets using the smallest bit possible. You can see where the factory bulb got hot and melted the housing. I will be using an LED.
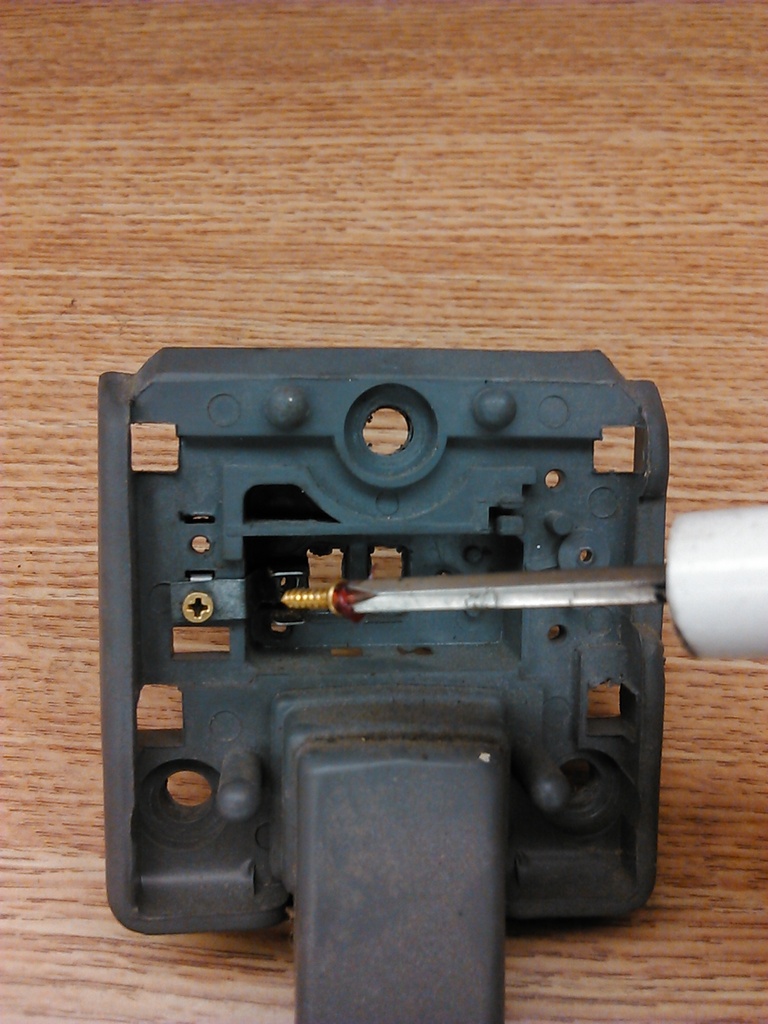
Started moving one piece at a time. For the deeps spots that I could not get my finger in I used grease to hold the screw on. I will clean it with an electrical cleaner at a later time and also use a strong glue in place to help secure the contacts more securely.
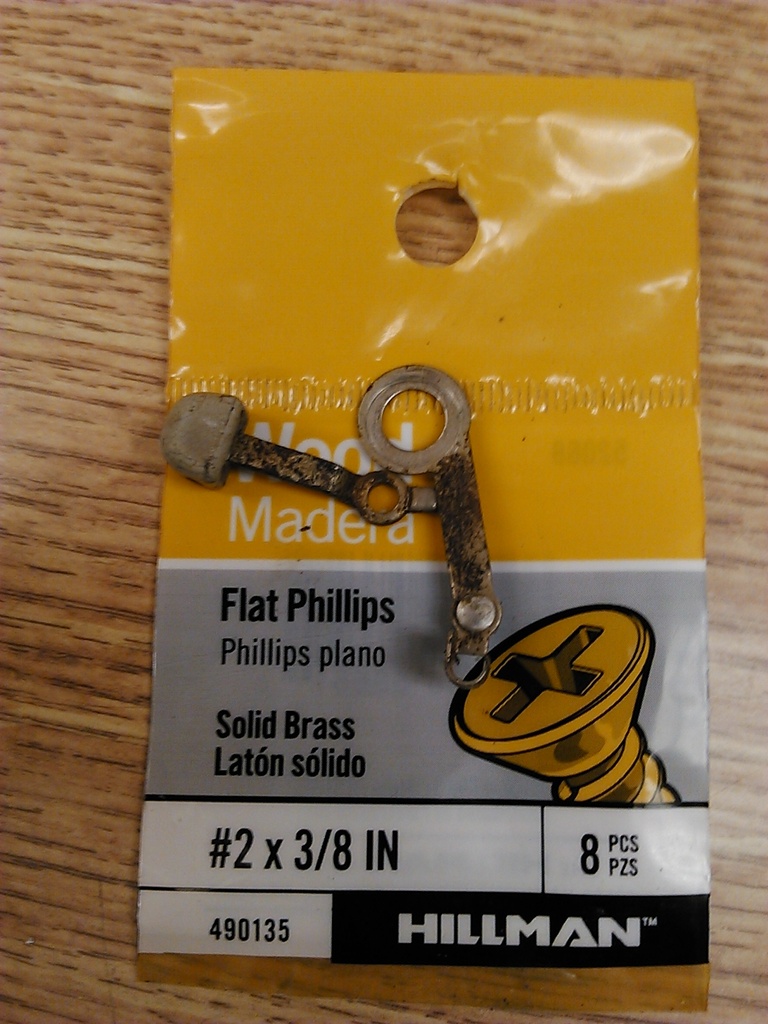
Here is the screws I used. I also ran any piece with rust on it under the bench wire brush wheel.
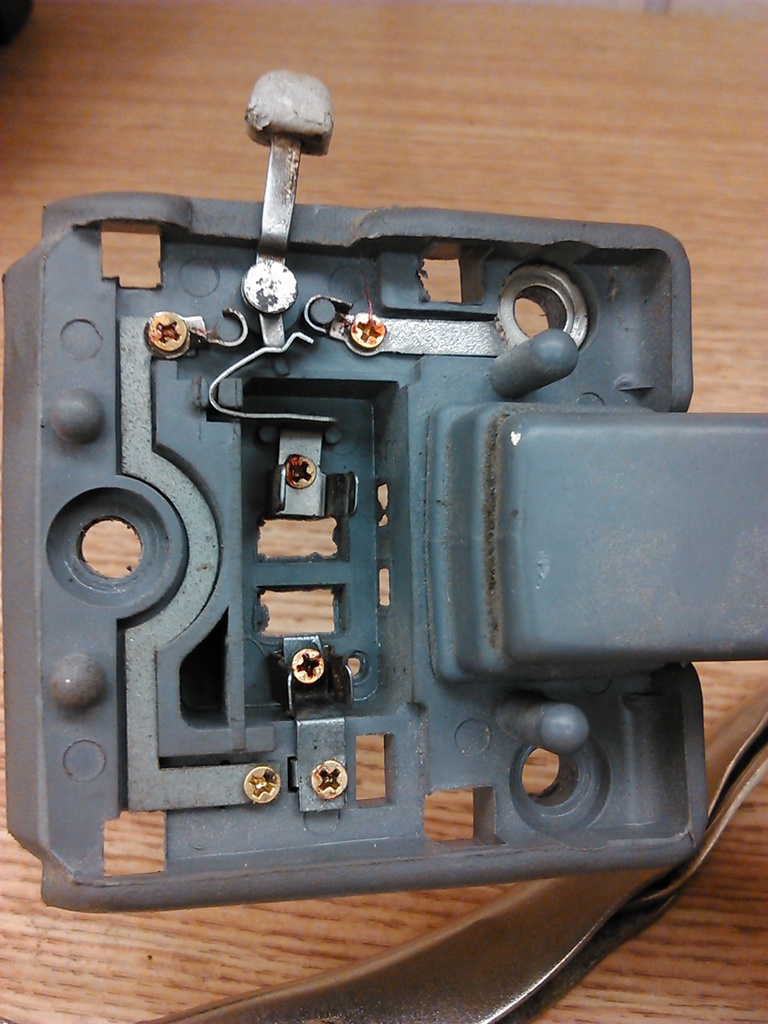
Here is all of the old pieces in the new dummy mirror mount.

 12-19-2015, 07:12 AM
#62
Registered User
Great write up I will be adding these to my runner as well I always feel like there's not enough light or it makes more shadows making it more difficult to see. I would really like to get some cheap led strips and ad them under the dash both sides and add them under the seats as well and eventually the cargo area
01-07-2016, 10:09 AM
#63
Super Moderator
Staff
Thread Starter
iTrader: (1)
Join Date: Aug 2008
Location: Anderson Missouri
Posts: 11,788
Likes: 0
Received 21 Likes
on
19 Posts
Hello punks is 4x4... I also found an LED that works great for the domelight. I put one in my 85 and so much better. Below is another upgrade I am so glad I have in my trucks that some don't come with and think you will like it as well.
01-07-2016, 10:22 AM
#64
Super Moderator
Staff
Thread Starter
iTrader: (1)
Join Date: Aug 2008
Location: Anderson Missouri
Posts: 11,788
Likes: 0
Received 21 Likes
on
19 Posts
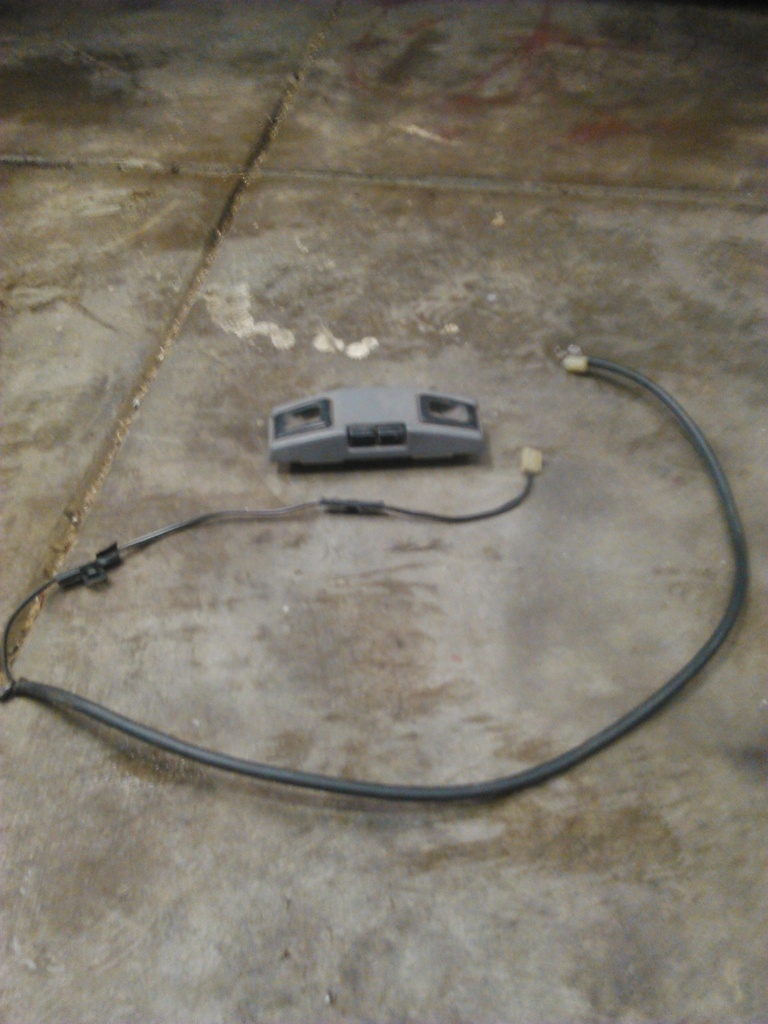
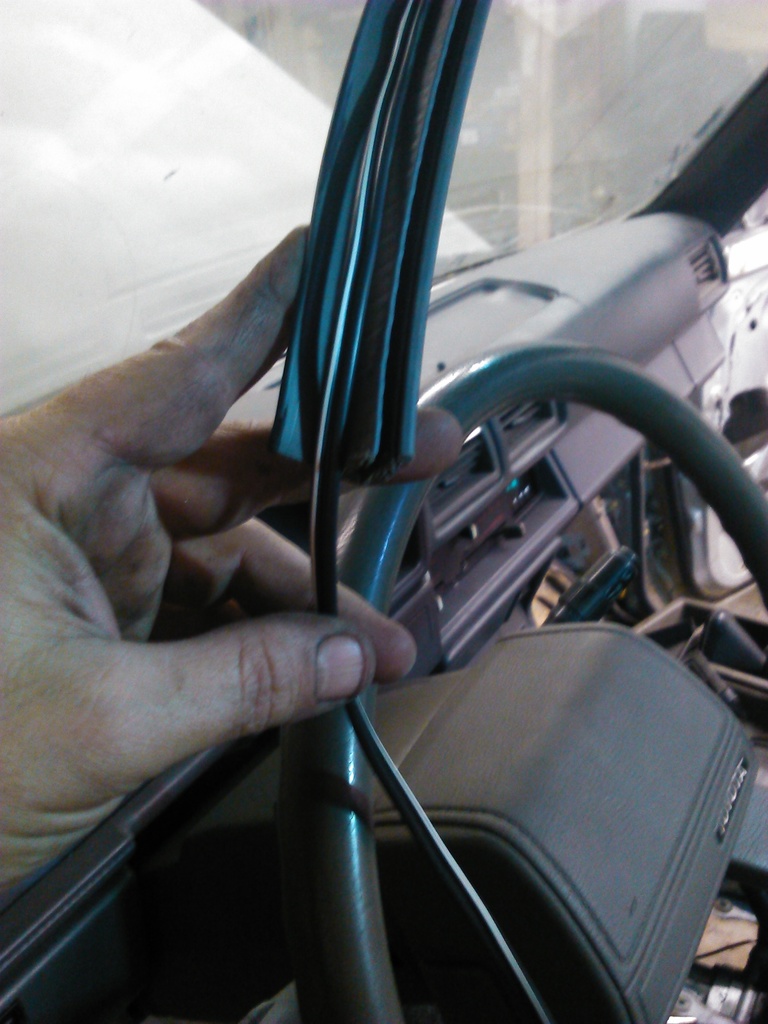
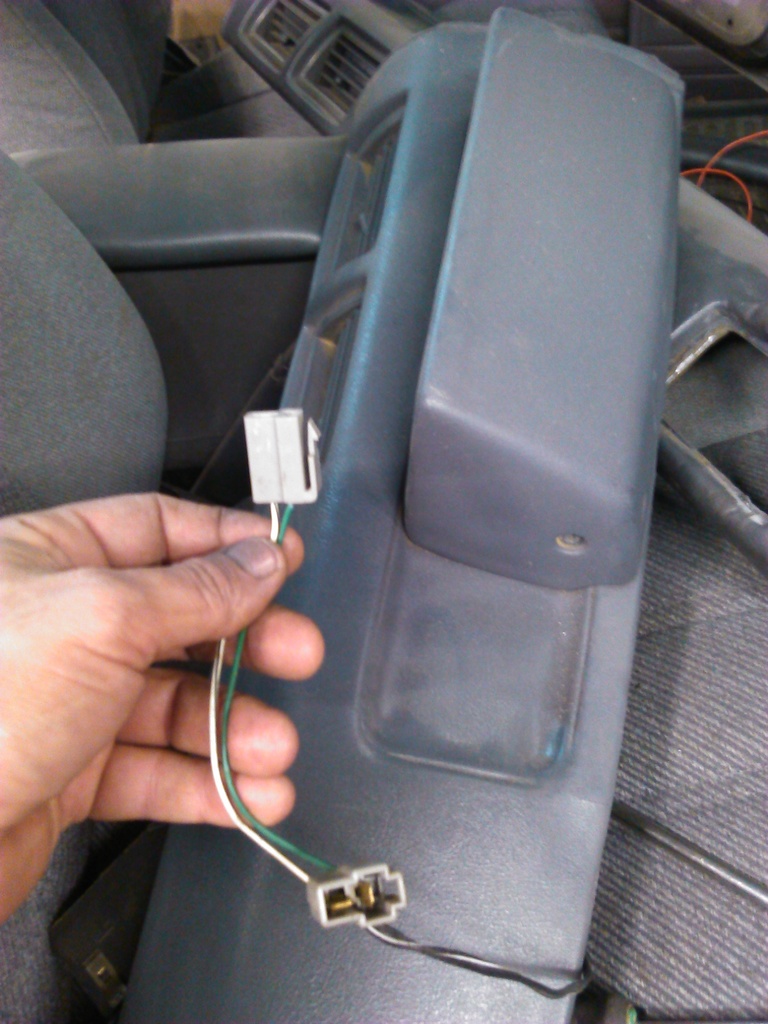
I am installing the map light before finishing up the dome light. I will show the bracket in the next few pictures. Here is the map light and I got the wire from the boneyard, I think you could also use a wire from a seat belt for the same connector in a pinch.
You will need to remove the drivers A-pillar trim. Pop the top and middle clips loose by inserting a screw driver and finding the tabs and twist. The bottom tab will just lift up 1/4 to 1/2 inch.
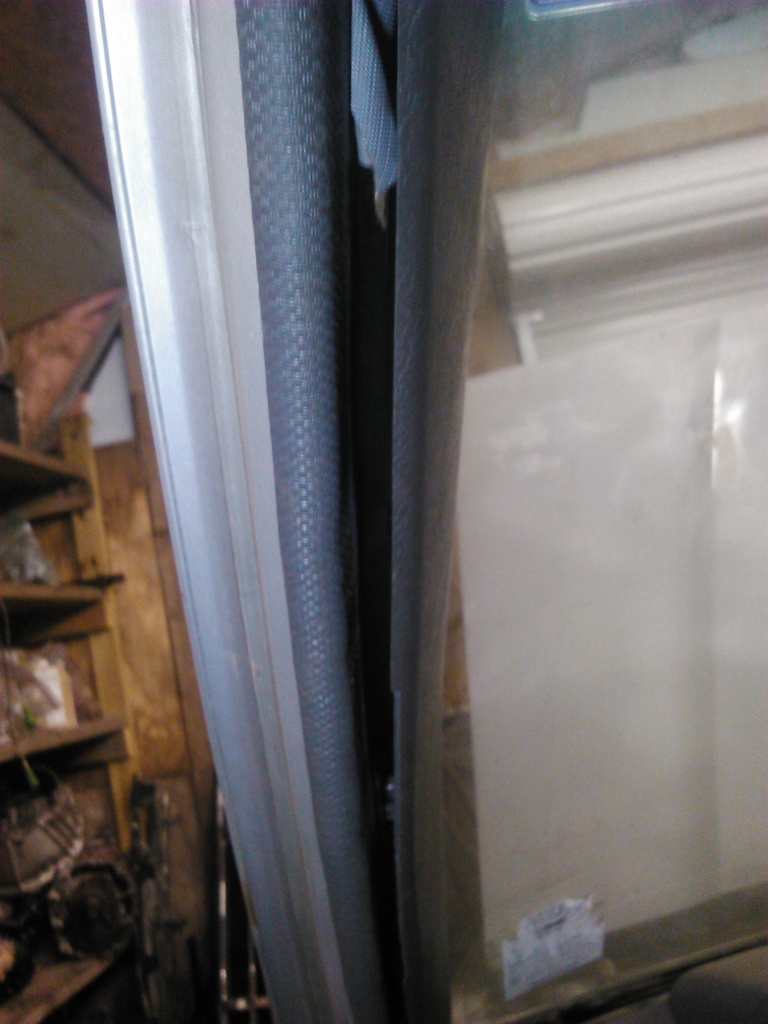
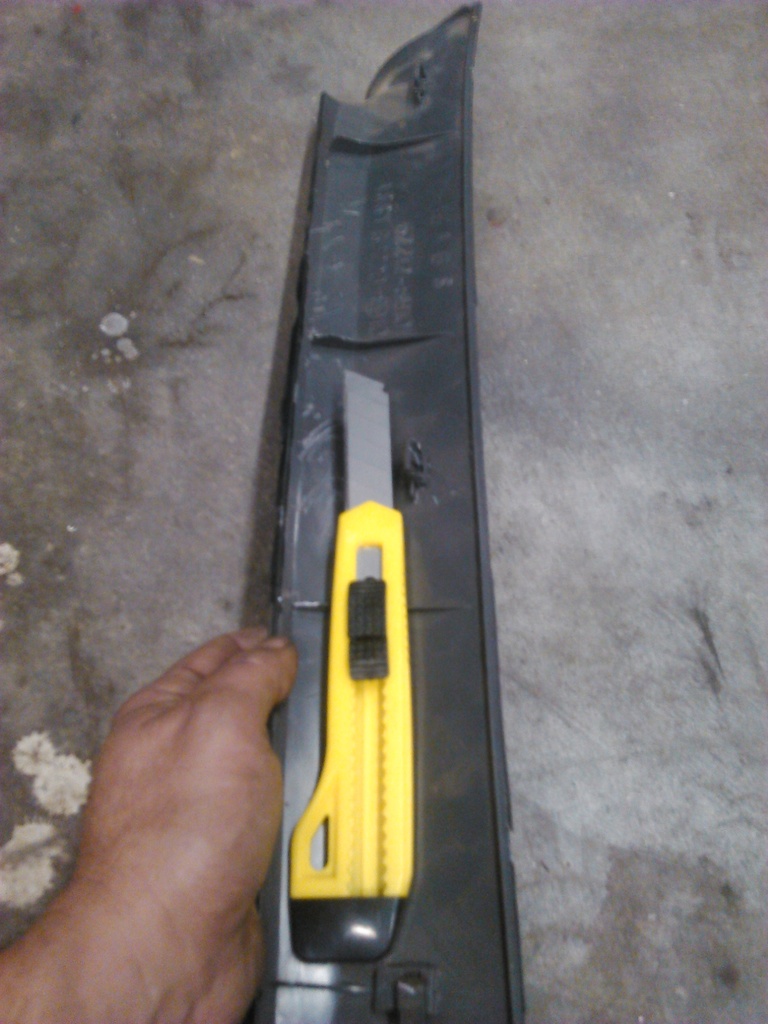
This truck as had the windshield replaced in the past. One problem I have run into when they replace a windshield is that they put to much glue for the glass and it sticks to the A-pillar trim. A Dollar General one dollar razor knife works great for cutting the glue from the trim. You can see the black glue on the trim where I had to cut it.
You have to drill a hole thru the metal frame and there is a channel just below the windshield. Be careful when drilling and make sure you are not drilling to high and get into the windshield. I run the wire thru the hole and feed the wire leads, leaving plenty of slack for the connector to the map light.
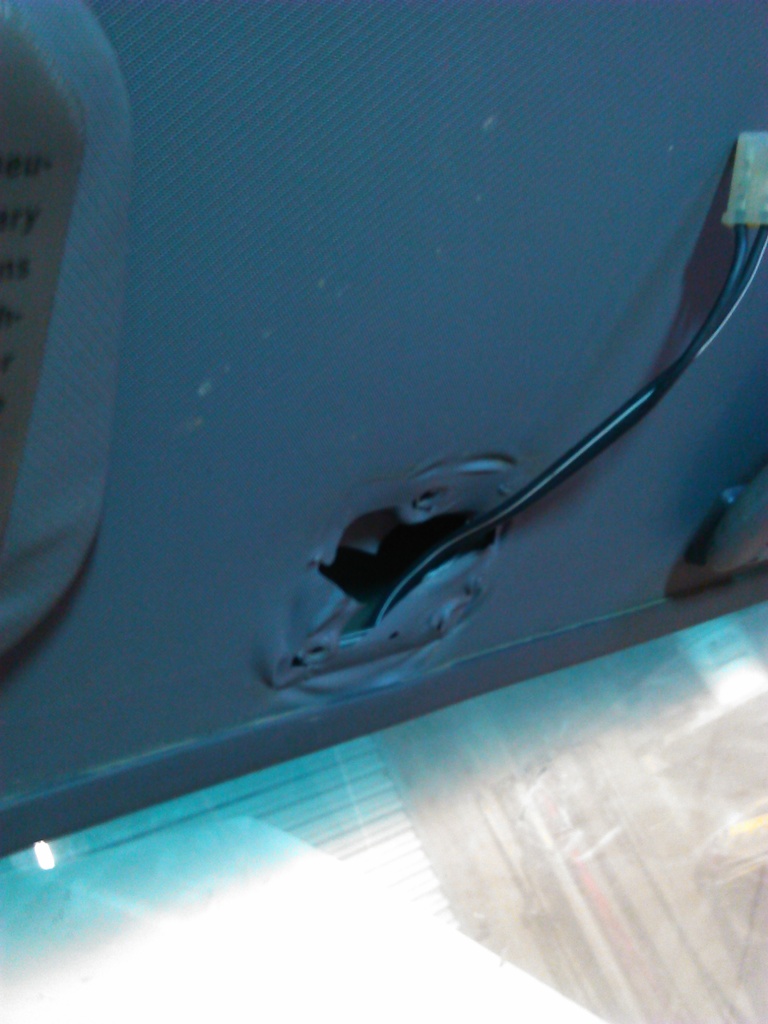
Run you wire on top of the pinch weld of the rubber trim and it will fit flush against the pinch weld and you will never know it back there.
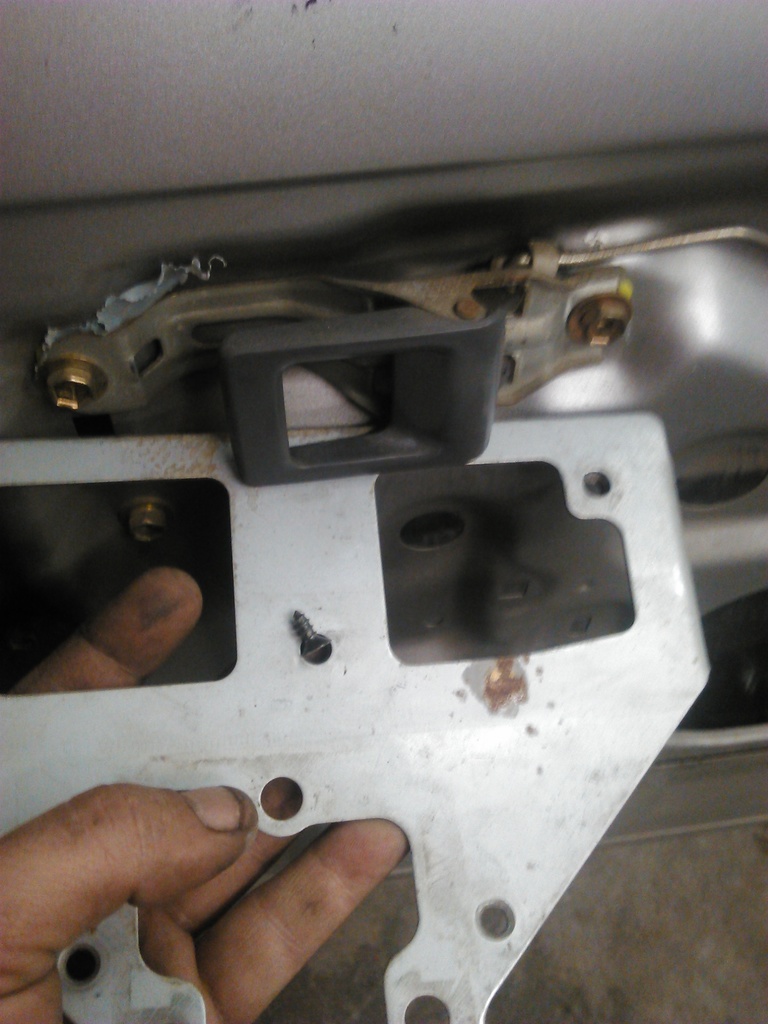
You will need to pull the headliner down and insert it above the headliner but below the metal roof. I will get a picture of the bracket later as I forgot to get a picture of it. I use the dome light screws to hold it into place for cutting the holes for the map light. I start with and X and then remove enough of the headliner for the map light to fit.
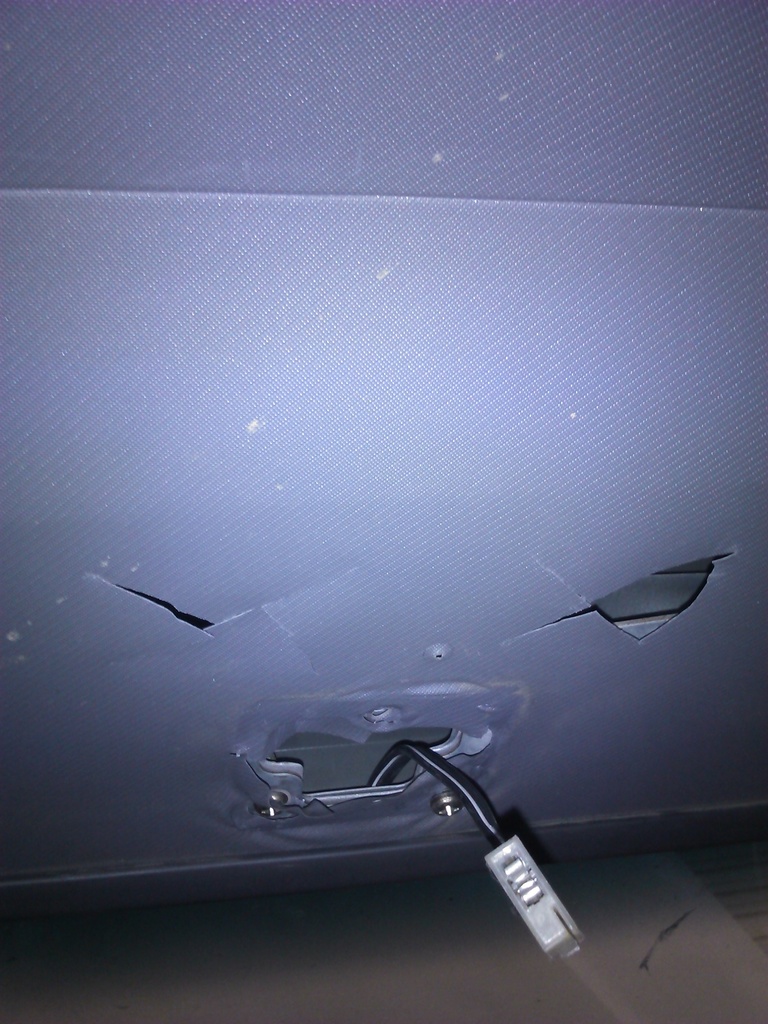
Here is the bracket that goes in between the headliner and roof.
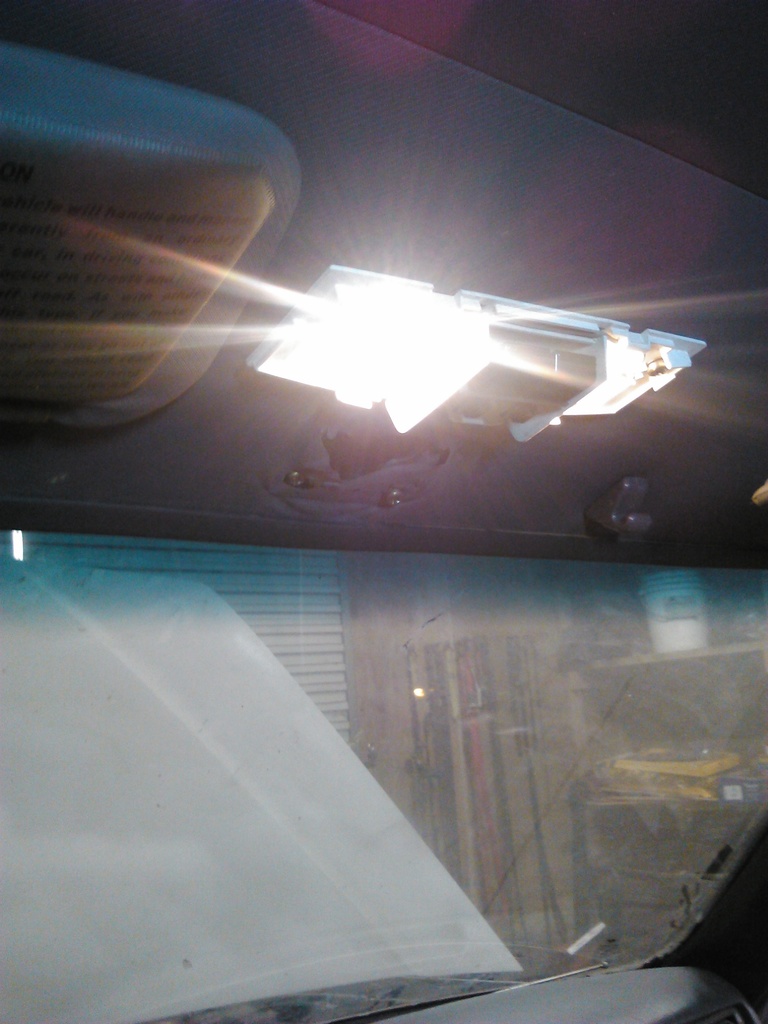
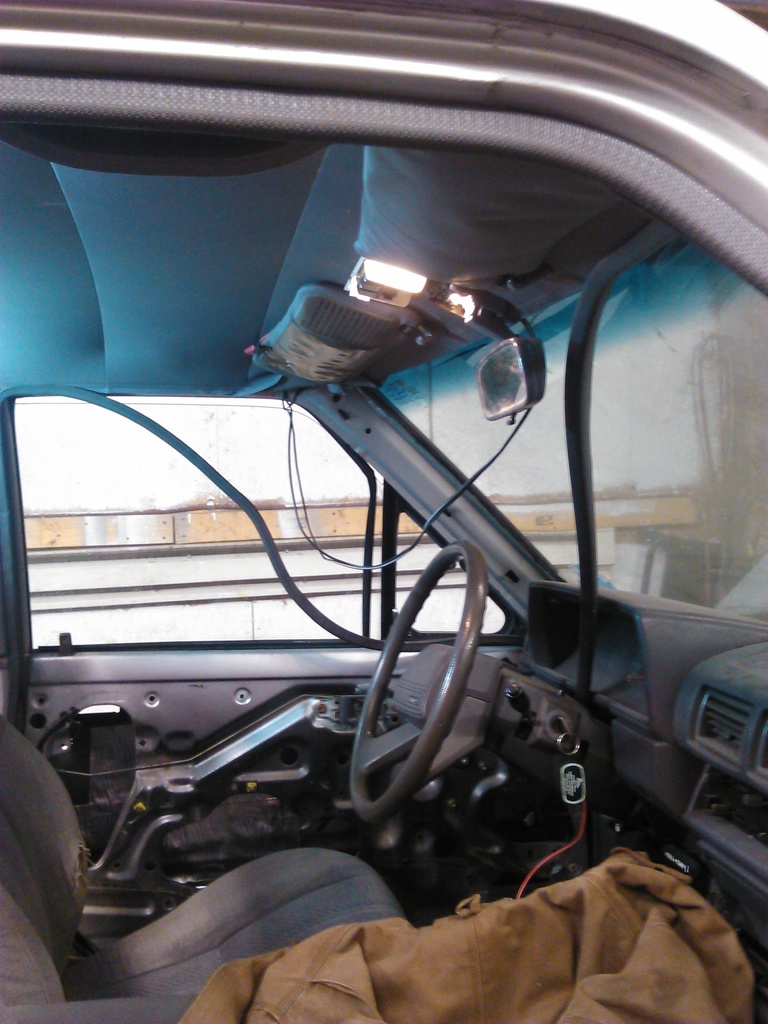
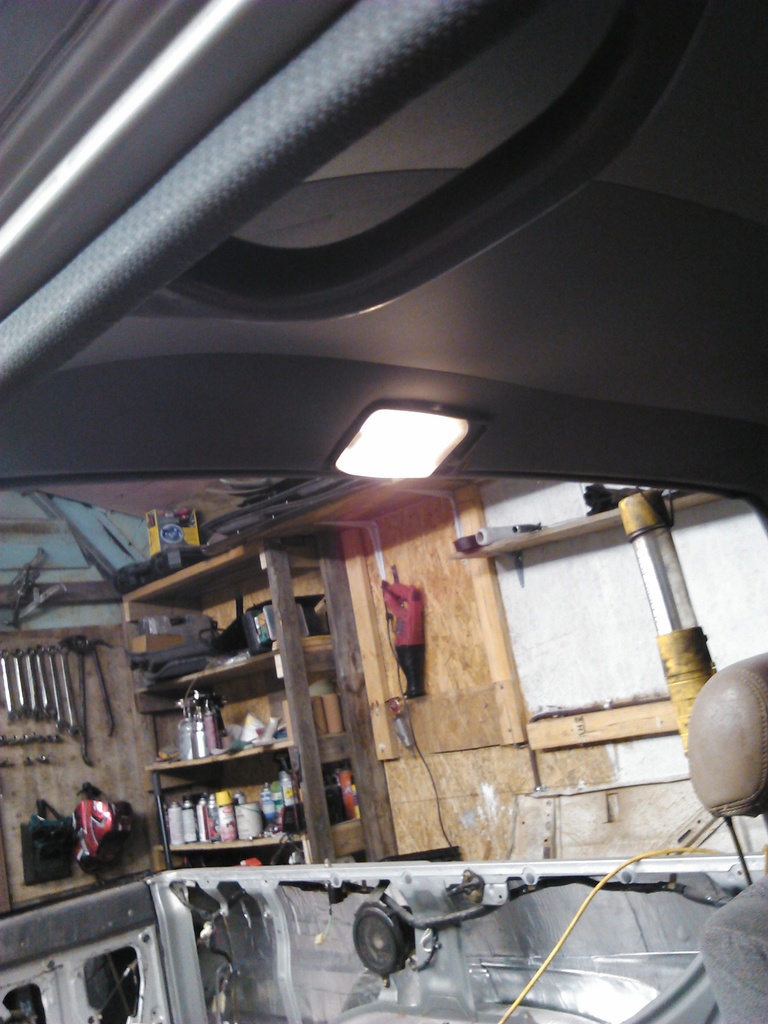
Here are the lights working. I will get pictures of how I got it wired in here shortly.
The seat belt plug wont work. I found another light plug and got the dome light working. I still need to get a screw that holds the map light to the bracket and a dome light cover. I made a dummy dome light work by moving all of the contacts from a broken light to a dummy socket. I would suggest finding a good standard cab dome light if possible. Also I am adding the dome light connector to my list of salvage yard parts to stock up on.
Here is how I tapped the connector into the map light harness. I offset the splices and soldered them together. Then I wrapped with electrical tape. Normally I would use heat shrink but it is to tight of an area to get the heat shrink in.
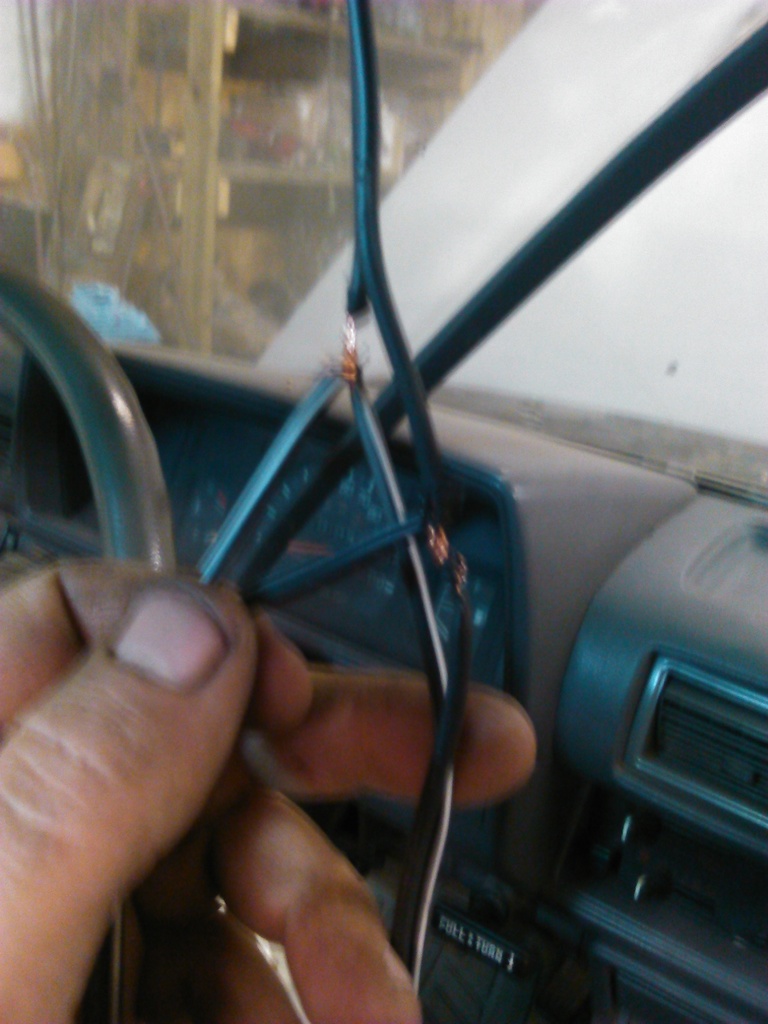
May not be able to see but on the corner of the windshield, I was able to solder, tape and tuck the wiring up into a hole in the cab frame. The wiring is black with white stripe and black wire to black wire. The screws that hold the map light and dome light also act as a ground. I used my coat to catch any solder that normally will drip down.
Here are both lights working.

You will need to remove the drivers A-pillar trim. Pop the top and middle clips loose by inserting a screw driver and finding the tabs and twist. The bottom tab will just lift up 1/4 to 1/2 inch.

This truck as had the windshield replaced in the past. One problem I have run into when they replace a windshield is that they put to much glue for the glass and it sticks to the A-pillar trim. A Dollar General one dollar razor knife works great for cutting the glue from the trim. You can see the black glue on the trim where I had to cut it.

You have to drill a hole thru the metal frame and there is a channel just below the windshield. Be careful when drilling and make sure you are not drilling to high and get into the windshield. I run the wire thru the hole and feed the wire leads, leaving plenty of slack for the connector to the map light.

Run you wire on top of the pinch weld of the rubber trim and it will fit flush against the pinch weld and you will never know it back there.

You will need to pull the headliner down and insert it above the headliner but below the metal roof. I will get a picture of the bracket later as I forgot to get a picture of it. I use the dome light screws to hold it into place for cutting the holes for the map light. I start with and X and then remove enough of the headliner for the map light to fit.

Here is the bracket that goes in between the headliner and roof.

Here are the lights working. I will get pictures of how I got it wired in here shortly.

The seat belt plug wont work. I found another light plug and got the dome light working. I still need to get a screw that holds the map light to the bracket and a dome light cover. I made a dummy dome light work by moving all of the contacts from a broken light to a dummy socket. I would suggest finding a good standard cab dome light if possible. Also I am adding the dome light connector to my list of salvage yard parts to stock up on.
Here is how I tapped the connector into the map light harness. I offset the splices and soldered them together. Then I wrapped with electrical tape. Normally I would use heat shrink but it is to tight of an area to get the heat shrink in.

May not be able to see but on the corner of the windshield, I was able to solder, tape and tuck the wiring up into a hole in the cab frame. The wiring is black with white stripe and black wire to black wire. The screws that hold the map light and dome light also act as a ground. I used my coat to catch any solder that normally will drip down.
Here are both lights working.

Last edited by Terrys87; 01-08-2016 at 09:14 AM.
01-07-2016, 10:41 AM
#65
Super Moderator
Staff
Thread Starter
iTrader: (1)
Join Date: Aug 2008
Location: Anderson Missouri
Posts: 11,788
Likes: 0
Received 21 Likes
on
19 Posts
I had some other information here and moved it up to the previous post. I got my 85 done with exception of stripes, wheel, ac, carpet, and repaint the interior. I am going to try and wrap this project up in a month if all goes as planned. I am trying to get some vacation time in and will spend some of that time on this one. I have a red 87 that I could start on but think I am going to hold off on it for a while.
I used to check the back rows of car lots or find a truck sitting some where and do some repairs and then sell it. I think it was the find that was exciting (until I found what all was wrong, lol) and usually could get one done in a quick amount of time. I wont go in as deep as I normally do on them. I could usually get around a Ford or a Dodge truck fairly quick. I think my biggest reason I liked them was the distributor was to the front instead of the rear like on a Chevy. Been scanning craigslist and seen a few Toyota floating around, just have to wait and see what comes up.
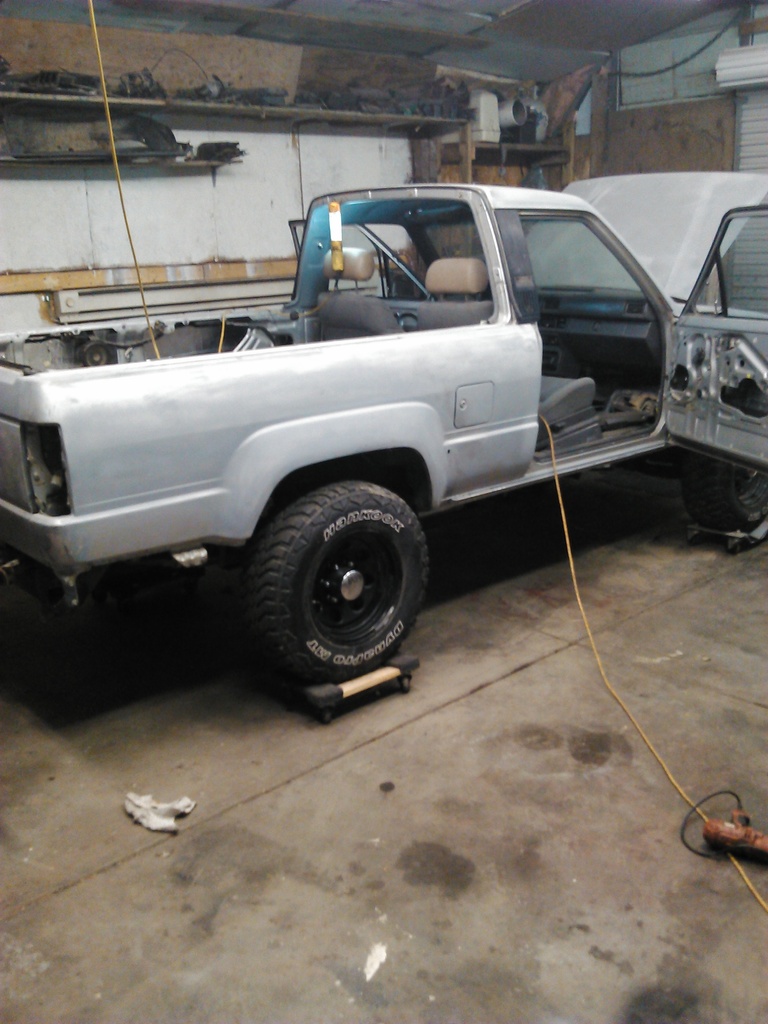
I did get the runner on rollers and if all goes well have no intentions of moving anything else until this one is done.
I used to check the back rows of car lots or find a truck sitting some where and do some repairs and then sell it. I think it was the find that was exciting (until I found what all was wrong, lol) and usually could get one done in a quick amount of time. I wont go in as deep as I normally do on them. I could usually get around a Ford or a Dodge truck fairly quick. I think my biggest reason I liked them was the distributor was to the front instead of the rear like on a Chevy. Been scanning craigslist and seen a few Toyota floating around, just have to wait and see what comes up.
I did get the runner on rollers and if all goes well have no intentions of moving anything else until this one is done.

Last edited by Terrys87; 01-07-2016 at 01:11 PM.
01-07-2016, 01:39 PM
#66
Super Moderator
Staff
Thread Starter
iTrader: (1)
Join Date: Aug 2008
Location: Anderson Missouri
Posts: 11,788
Likes: 0
Received 21 Likes
on
19 Posts
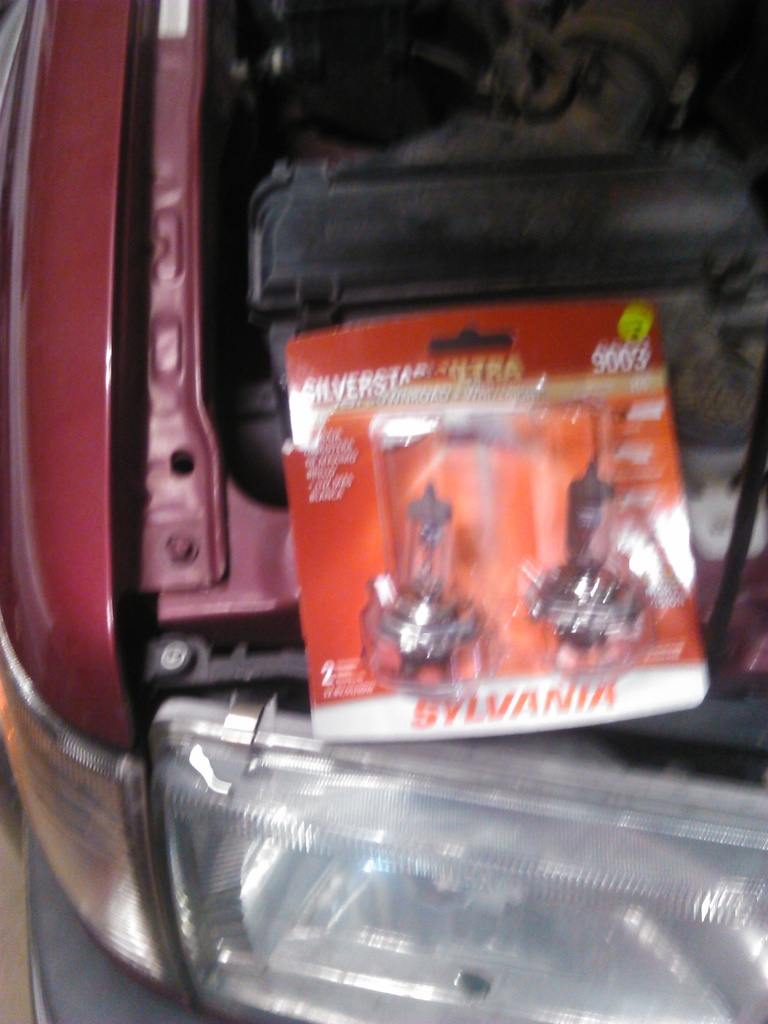
I did have to change out my head lights on my 3rd gen runner. Actually easier then having to remove the grill on the older trucks but was surprised at the cost of the new bulbs. I cant complain as these have lasted 10 years and is the first time one has gone out. I change them out in pairs as usually bulbs burn out and shortly the next one will.
 01-08-2016, 09:10 AM
#67
Super Moderator
Staff
Thread Starter
iTrader: (1)
Join Date: Aug 2008
Location: Anderson Missouri
Posts: 11,788
Likes: 0
Received 21 Likes
on
19 Posts
The top light is the one for a 1st gen runner and the bottom light is for a 2nd gen runner. I have found 1st gen lights not broken and the first time I go to switch positions, the switch breaks. The 2nd gen looks like it will work and is nearly the same. I have never installed a 2nd gen into a 1st gen and know it is done. Doesn't look to hard to do. I got it painted but it is not the correct gray but will get it installed here in a few if all goes well. Previous owner has installed some LEDs that are bright but look bad the way they added them.
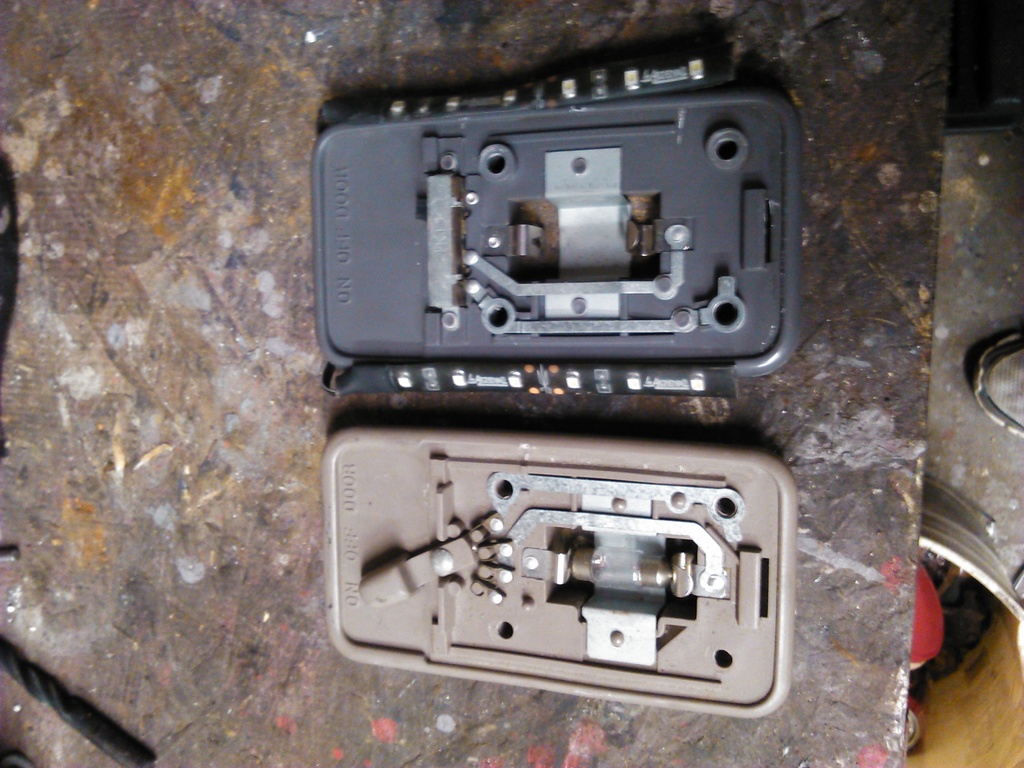
Got the rear dome light in. I painted it gray and it is a shade off but don't think many would notice. I will see if I can find a color that matches a little closer at a later time. The metal up in the cab needs to be widen to make it fit. I was going to try using a grinder but was afraid sparks would get up in the insulation so filed and did some bending to make it fit.

Got the rear dome light in. I painted it gray and it is a shade off but don't think many would notice. I will see if I can find a color that matches a little closer at a later time. The metal up in the cab needs to be widen to make it fit. I was going to try using a grinder but was afraid sparks would get up in the insulation so filed and did some bending to make it fit.

Last edited by Terrys87; 01-08-2016 at 11:32 AM.
01-08-2016, 09:11 AM
#68
Super Moderator
Staff
Thread Starter
iTrader: (1)
Join Date: Aug 2008
Location: Anderson Missouri
Posts: 11,788
Likes: 0
Received 21 Likes
on
19 Posts
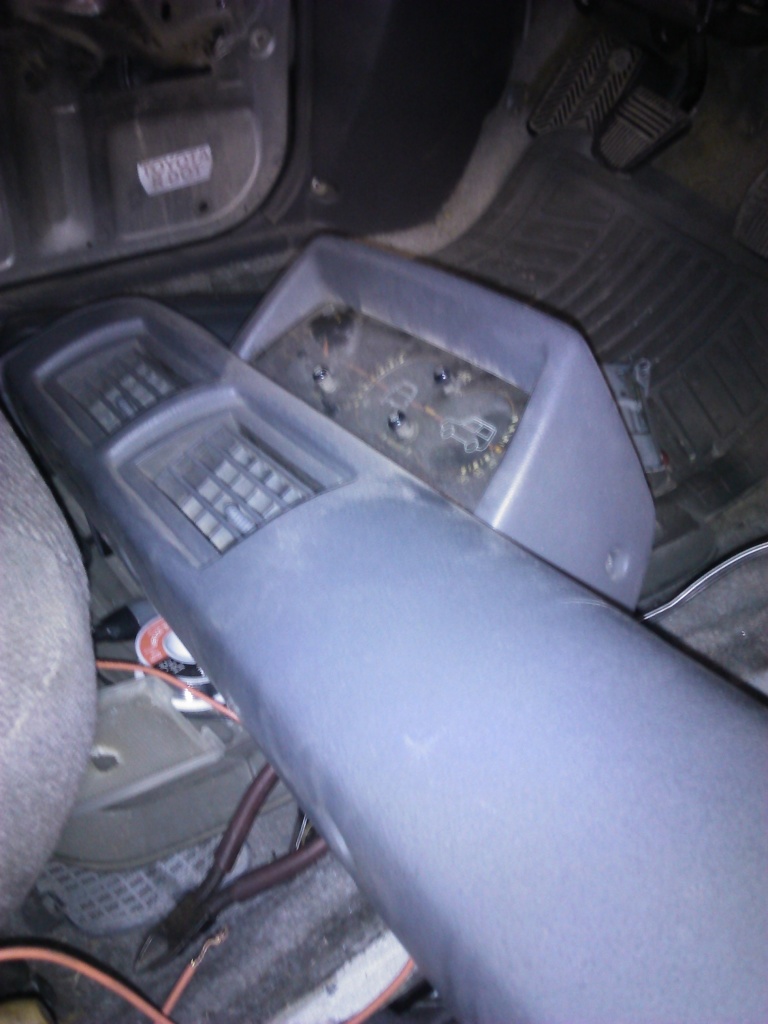
I have never installed a Inclinometer as they just don't exist around here. Tom found a complete dash and Inclinometer. Where do these plugs go? Anybody know? I cannot find the connectors in the Main Harness. Are they more in the center or closer to the passenger side?
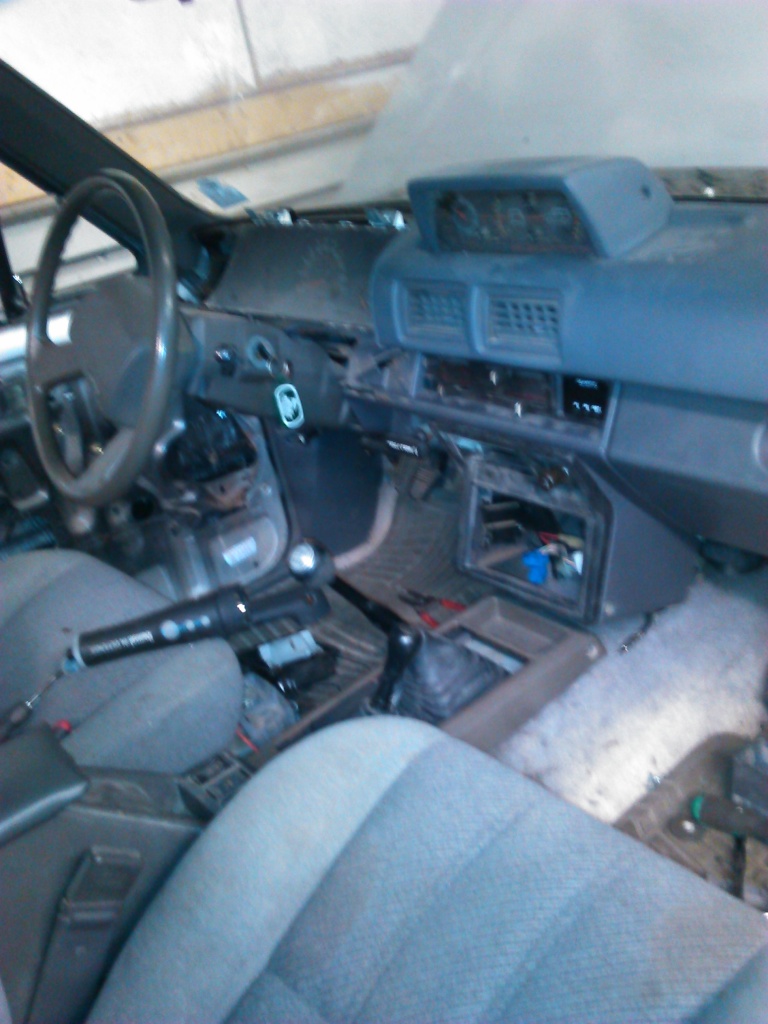
I just have the pad and inclinometer just sitting in place. This is a very base model truck so it is getting a little closer to being an SR5. It has the map light, inclinometer, and I will start getting a SR5 cluster gauge ready for it. It will eventually get stripes and wheel and that will make it as much of an SR5 that I have seen come from the factory.


I just have the pad and inclinometer just sitting in place. This is a very base model truck so it is getting a little closer to being an SR5. It has the map light, inclinometer, and I will start getting a SR5 cluster gauge ready for it. It will eventually get stripes and wheel and that will make it as much of an SR5 that I have seen come from the factory.

Last edited by Terrys87; 01-08-2016 at 11:35 AM.
01-09-2016, 12:51 AM
#69
Hi Terry. You sure make alot of progress on alot of rigs, I can barely handle working on one, lol. I look forward to seeing your progress on your interior. I am thinking about painting mine and changing it to grey.
I remember Richard (Redeth) installing an inclinometer in his 4runner, and I think he just tapped into wiring for the light on the cigarette lighter, that way the inclinometer lights up when you turn on your lights, I also believe the dash light dimmer will then work as well. I found some info on 4Crawlins site, if you scroll down towards the bottom of the page he list 3 ways you can wire it up, #3 is what I described above and sounds like the best way, hope this helps ya!
http://www.4crawler.com/4x4/CheapTri...l#Installation
Last edited by rustED; 01-09-2016 at 09:58 AM.
 01-10-2016, 12:33 AM
#71
Super Moderator
Staff
Thread Starter
iTrader: (1)
Join Date: Aug 2008
Location: Anderson Missouri
Posts: 11,788
Likes: 0
Received 21 Likes
on
19 Posts
Hello Ed.. On the interior color change, it isn't hard but if you are going to pull and paint your head liner, do it on a warm day and don't let it sit out for more then a day or so as it will start shrinking and is a royal pain to get back in after it has been out for a while. I think SEM is the brand of interior paint and they make a light gray and a dark gray that is very close to the factory color. Not an exact match but if you do the complete interior it wont matter. Pulling the headliner is not a big job at all and I have done it but on my 85, I left it out to long and am gradually getting it back to how it should be. I wont make that mistake again.
Hello maddad4x4...A BIG THANKS!!! Now that you have mentioned it, I am sure I almost know how it is connected. I am not at the truck right now but know the plugs and I am betting it is coming off of the power to the heater control display light and then you connect the display and inclineometer to the source.
Toyota use basically the same setup for wiper delay. Once you mentioned the heater controls, it made it click for me am sure how it is done now. I have searched Yotatech and several other forums to find the information and could not find a picture anywhere. Thanks again!!!
01-12-2016, 05:43 AM
#72
Another thread by the master, always like reading your threads informative and entertaining. Sure wish i can get my butt into gear. I've got some many projects I can't finish one. LOL
I've been taking your advice while I on hiatus and doing little things specifically things I already have available to me unless it something i really need.
I've been taking your advice while I on hiatus and doing little things specifically things I already have available to me unless it something i really need.
01-21-2016, 05:47 AM
#73
Super Moderator
Staff
Thread Starter
iTrader: (1)
Join Date: Aug 2008
Location: Anderson Missouri
Posts: 11,788
Likes: 0
Received 21 Likes
on
19 Posts
Thanks junk4u...Seems like I get hung up from time to time as well. I just recently enjoyed seeing the highs and lows I went thru on my 85 build. Some of the snags I ran into on that build and some of the things I learned on it.
These builds can take some money but there really are numerous fixes that dont cost anything but just take time. Each fix makes it that more enjoyable when done. I remember people telling me it cost a fortune to do and it really doesnt break the bank at a slow and steady pace.
These builds can take some money but there really are numerous fixes that dont cost anything but just take time. Each fix makes it that more enjoyable when done. I remember people telling me it cost a fortune to do and it really doesnt break the bank at a slow and steady pace.
01-21-2016, 06:03 AM
#74
Super Moderator
Staff
Thread Starter
iTrader: (1)
Join Date: Aug 2008
Location: Anderson Missouri
Posts: 11,788
Likes: 0
Received 21 Likes
on
19 Posts
We got some ice yesterday and snow today. The brats dont have school today so will be interesting to see how that goes. Sometimes they will wrestle all day long and then other times World War III can break out and I get to be the referee. I tell them all I had was bicycles and Tonka Toys when I was a kid and all the things they have to keep them occupied sure makes me scratch my head.
I used to despise winter but I do like having my little shop stove to warm it up out there. I got the coffee pot going and it takes about 30 minutes for it to warm up. Once it is warm out there, I dont have to worry about what the weather is outside and sure beats being couped up in the house.
I did a few hours of looking how to hook up the Inclinometer on the internet. I checked several sites and could find bits and pieces of information on how to hook it up and could not find anything. Clicking on a link on Pirate got me a virus so got that fixed.
Once maddad4x4 told me of how it connected, it clicked with me and I knew what he was talking about. A BIG Thank You to maddad4x4.
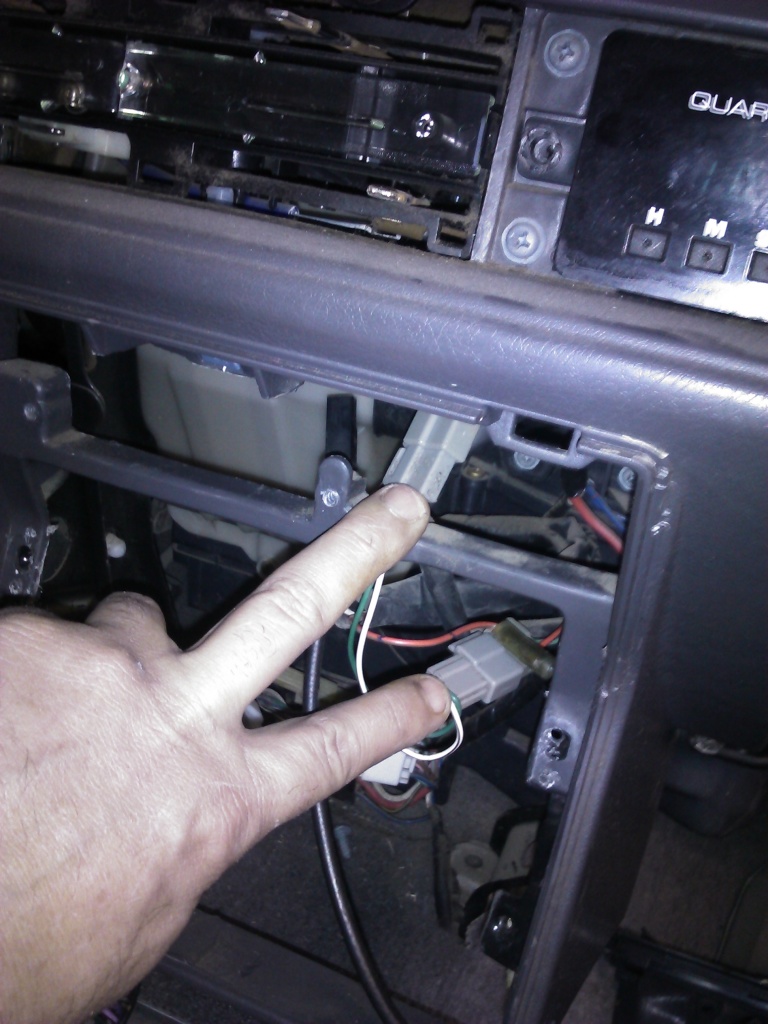
Here it is connected up. I tried to get a picture of the Inclinometer lit up in the dark but the picture would not come out. It is on the headlight switch so does dim when turned on.
You disconnect the plug from the heater panel light and then connect the Inclinometer which has two plugs. One is male and one is female and you cant mess it up. Cant believe I could not find a picture or information for such a common upgrade. Here is how it is done.
Got the dash pad in, the replacement heater control cover was broken and have another one installed and started putting the transmission cover back on.
I used to despise winter but I do like having my little shop stove to warm it up out there. I got the coffee pot going and it takes about 30 minutes for it to warm up. Once it is warm out there, I dont have to worry about what the weather is outside and sure beats being couped up in the house.
I did a few hours of looking how to hook up the Inclinometer on the internet. I checked several sites and could find bits and pieces of information on how to hook it up and could not find anything. Clicking on a link on Pirate got me a virus so got that fixed.
Once maddad4x4 told me of how it connected, it clicked with me and I knew what he was talking about. A BIG Thank You to maddad4x4.
Here it is connected up. I tried to get a picture of the Inclinometer lit up in the dark but the picture would not come out. It is on the headlight switch so does dim when turned on.

You disconnect the plug from the heater panel light and then connect the Inclinometer which has two plugs. One is male and one is female and you cant mess it up. Cant believe I could not find a picture or information for such a common upgrade. Here is how it is done.

Got the dash pad in, the replacement heater control cover was broken and have another one installed and started putting the transmission cover back on.

Last edited by Terrys87; 01-21-2016 at 09:39 AM.
01-25-2016, 10:39 PM
#76
Super Moderator
Staff
Thread Starter
iTrader: (1)
Join Date: Aug 2008
Location: Anderson Missouri
Posts: 11,788
Likes: 0
Received 21 Likes
on
19 Posts
Thanks maddad4x4.. You saved me a lot of trouble as I was just sure there was another wire that I was missing and was ready to tear the dash apart to find it. Glad the information on my threads help as I have tried to spend a lot of time trying to make them useful and how to fix several things that are not always in the manuals.
01-25-2016, 10:43 PM
#77
Super Moderator
Staff
Thread Starter
iTrader: (1)
Join Date: Aug 2008
Location: Anderson Missouri
Posts: 11,788
Likes: 0
Received 21 Likes
on
19 Posts
I was at my local mechanic shop with my brother to get a yearly inspection done and seen this Toyota camper sitting there. I know that campers have the overhead and helps keep the dash pad from the weather. Sure enough it was in perfect condition. Campers make for some great parts. I would stay away from the motor as the camper is just to much weight for a 22r with an automatic transmission but thought I would put out there about parts from a camper. This is the first one I have seen with a 4 speed manual transmission,
Perfect dash, the seats and doors are a little out of fashion but make for other great parts. It was a little messy inside.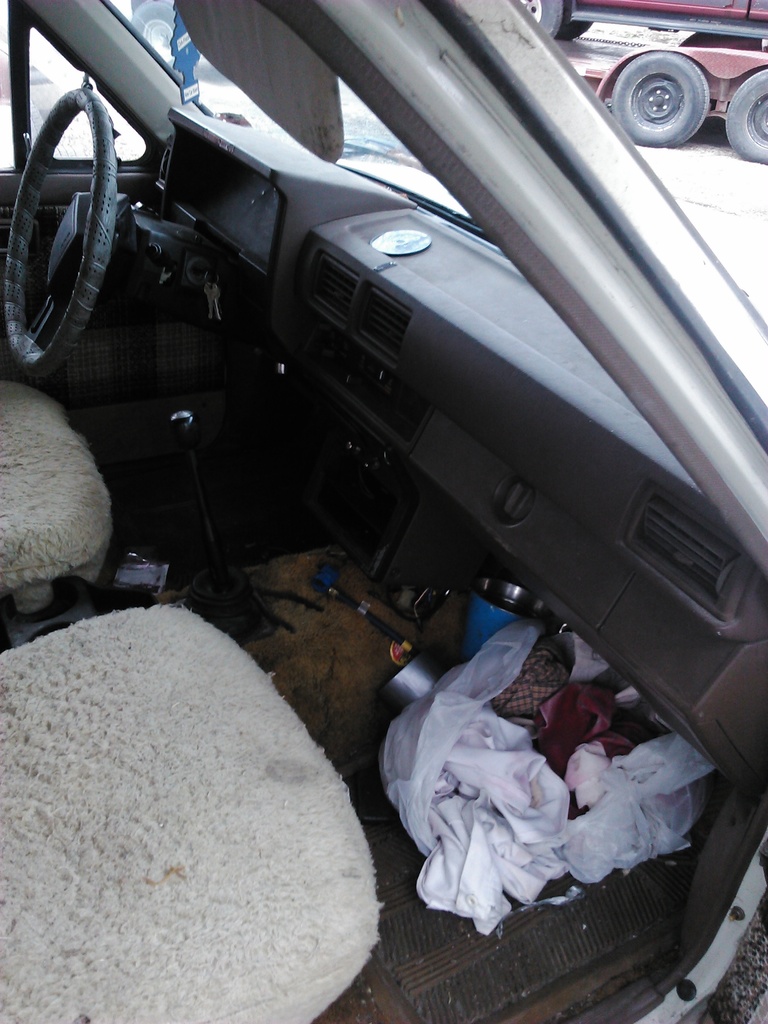
I have been looking for something a little more economical to drive and thought of a 70-80 Celica. I choked when I seen what the prices are going for them and had to hit myself in the chest a few times to start breathing again. Great looking little cars but was shocked on some of the prices I have seen on them.
Perfect dash, the seats and doors are a little out of fashion but make for other great parts. It was a little messy inside.

I have been looking for something a little more economical to drive and thought of a 70-80 Celica. I choked when I seen what the prices are going for them and had to hit myself in the chest a few times to start breathing again. Great looking little cars but was shocked on some of the prices I have seen on them.
Last edited by Terrys87; 01-26-2016 at 10:50 AM.
 01-28-2016, 11:41 PM
#79
Super Moderator
Staff
Thread Starter
iTrader: (1)
Join Date: Aug 2008
Location: Anderson Missouri
Posts: 11,788
Likes: 0
Received 21 Likes
on
19 Posts
Thanks Snowking...It is a nice truck and will be nicer when done. They always look like something you find in the salvage yard when I am half way thru one but that is what it takes to tear one down to get somethings fixed on them. I havent seen a truck this old yet with out some kind of issue and then what the previous owners do them is another thing that has to be fixed. Even as nice as this is, it was buggered up in a few areas. I will eventually get it done. Welcome to Yotatech.
01-28-2016, 11:51 PM
#80
Super Moderator
Staff
Thread Starter
iTrader: (1)
Join Date: Aug 2008
Location: Anderson Missouri
Posts: 11,788
Likes: 0
Received 21 Likes
on
19 Posts
I did not get to work on it this week as we had a few off for work due to being sick or something like that. Been trying to get a vacation so I can get a few things done that I would like to do but having to cover for them. I have gone 5 years without missing a day of work so dont fully understand that at times. I missed a day a while back but that was the first time in nearly 2 years.
This week and a couple of weeks from now I have to get some training done and setting in classes is not my cup of tea. I would just as soon be at work. Oh well, going to try and get my classes done and wont have to deal with it for a while.
Yesterday I had to go to Springfield for class and after class I was able to go to a boneyard not far from where class is at and was able to get a passenger vent and some rock guards for my 85. I had just enough time to get those items before the yard closed. I will be going there again for class and am hoping I get a little more time in the yard the next time. Will just have to see how thing go.


