Toms 87 4Runner Build
 04-07-2015, 07:53 PM
#41
Super Moderator
Staff
Thread Starter
iTrader: (1)
Join Date: Aug 2008
Location: Anderson Missouri
Posts: 11,788
Likes: 0
Received 21 Likes
on
19 Posts
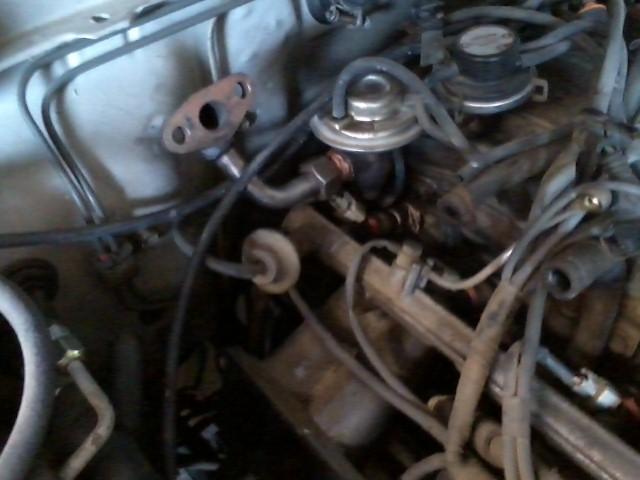
Re installed the EGR.
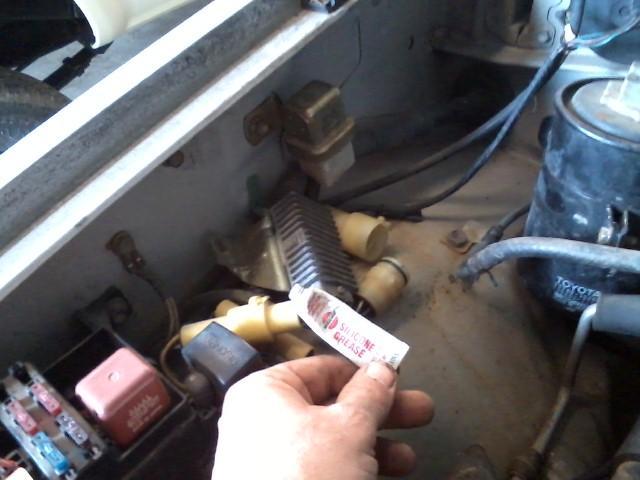
Re installed the Starter Relay. I do all electrical contacts with electric grease.
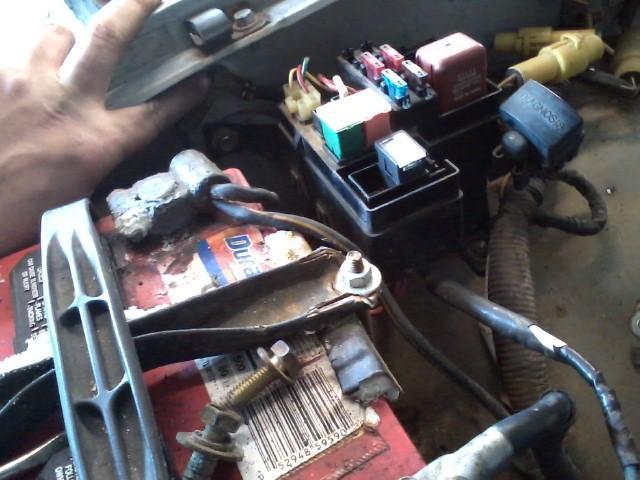
I move the Headlight ground wire to the battery ground wire trying to shorten the path for ground. Cleaned the terminals and the body ground. You can see how it is corroded on the top one.
Here it is completed. I move the fusebox out of the way and cut the wiring harness cover back an inch or so to extend the headlight ground wire to the battery.

Re installed the Starter Relay. I do all electrical contacts with electric grease.

I move the Headlight ground wire to the battery ground wire trying to shorten the path for ground. Cleaned the terminals and the body ground. You can see how it is corroded on the top one.

Here it is completed. I move the fusebox out of the way and cut the wiring harness cover back an inch or so to extend the headlight ground wire to the battery.

Last edited by Terrys87; 04-09-2015 at 10:05 AM.
 04-09-2015, 10:05 AM
#42
Super Moderator
Staff
Thread Starter
iTrader: (1)
Join Date: Aug 2008
Location: Anderson Missouri
Posts: 11,788
Likes: 0
Received 21 Likes
on
19 Posts
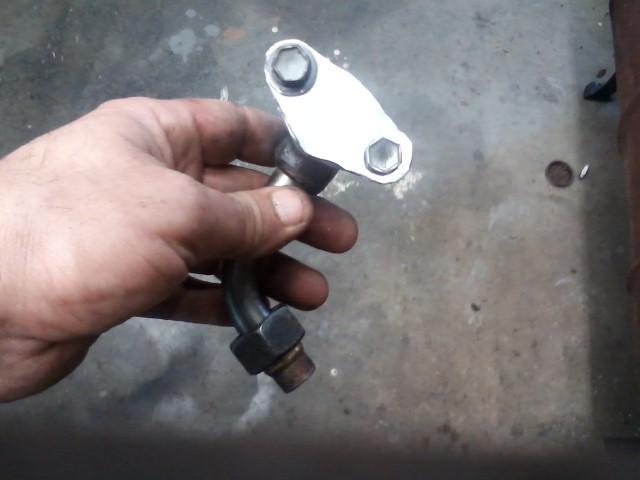
Made a block off plate for the EGR.
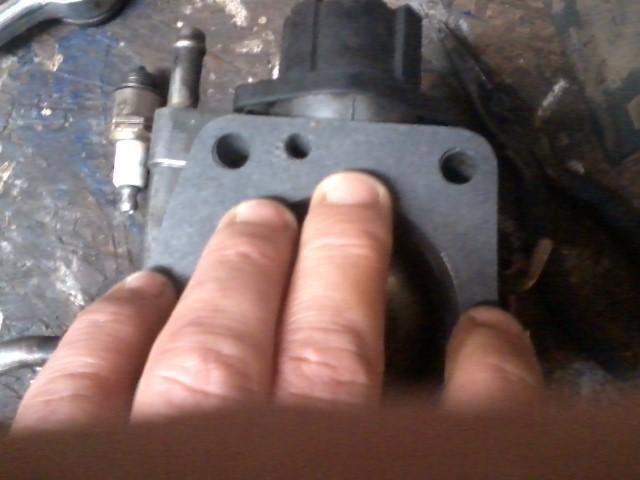
When using aftermarket gaskets, double check all holes are punced in. A good practice to get into anytime swapping any gasket.
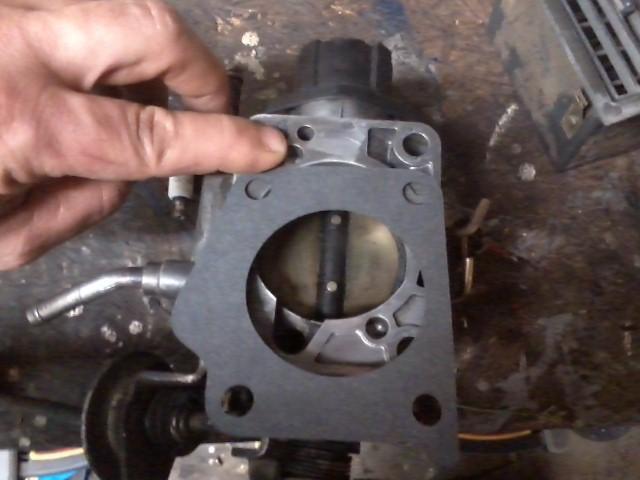
Here you can see the hole I added.
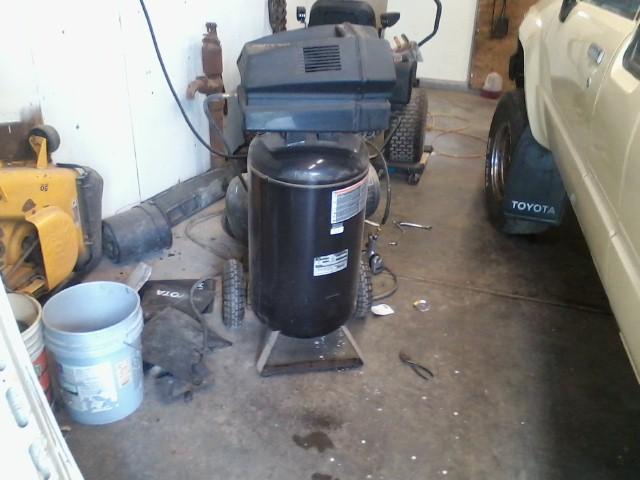
Got a new air compressor. Will be clearing the vaccum lines next. Truck does already seem to run smoother.
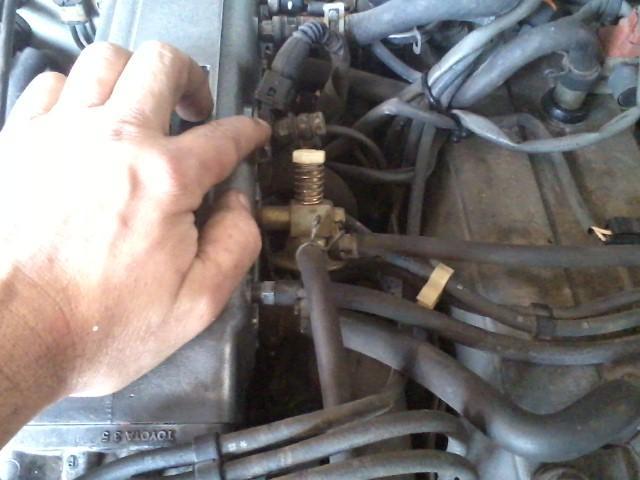
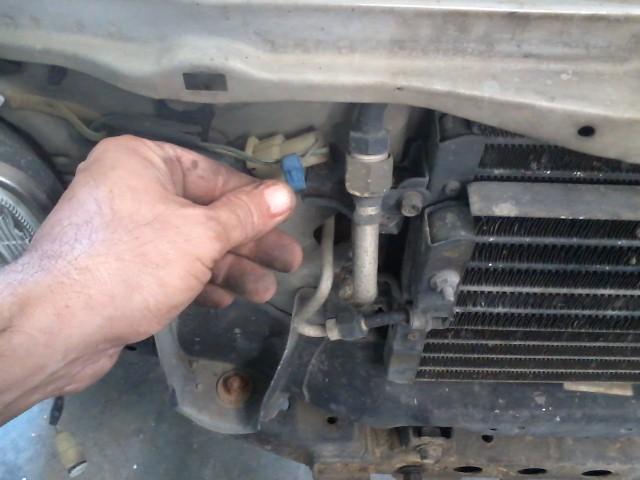
Anytime you disconnect the Cold Start Injector, upon start up make sure it is not leaking. Use new brass crush washers.
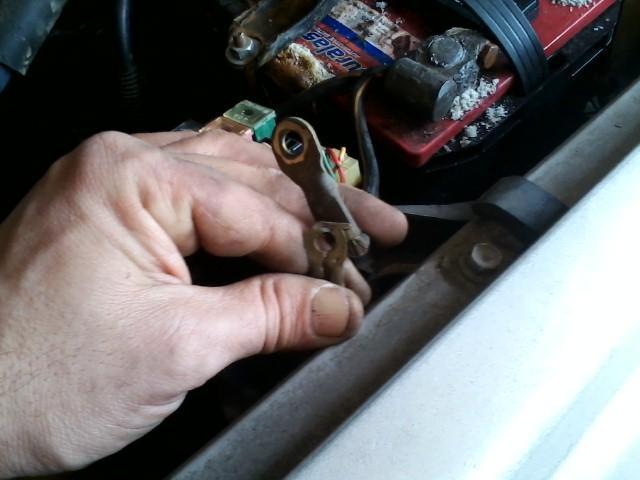
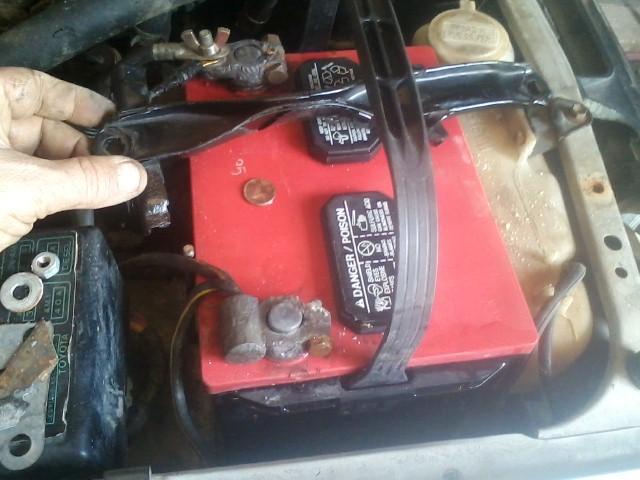
Just pulling it into my garage when I first got the truck, this connection broke. It is the 80 fusible link. Tom was lucky it did not break on the way here. It will shut off all power. Replaced with the gold connector.

Gave battery a bath. Seen on Power Block TV to glue a penny in between the terminals to keep the corrosion in one area. Thought I would give it a try. Cleaned everything up. Stilll need to replace the Negative terminal as it is shot. Will do that later.
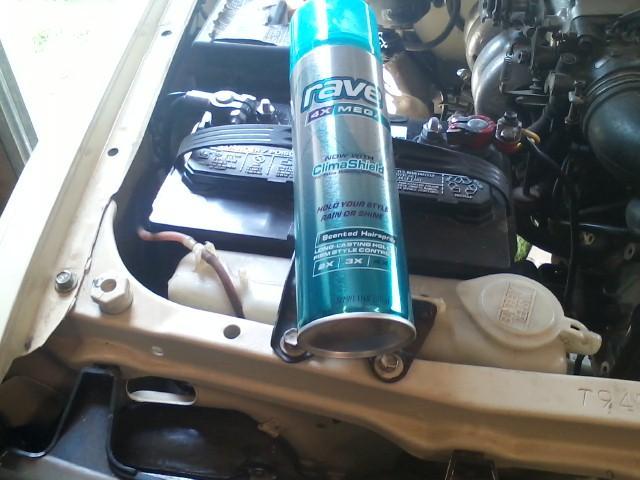
Also I coat my terminals with hair spray to cut down on corrosion. Seen that on Power Block TV. I use the biggest Cold Cranking Amp battery I can find. Guess the new Gel Batterys are good but out of my price range. I have 1000 Cranking Amp and it is rated for 800 Cold Cranking Amp. Never a problem in cold weather for me in severe cold. This also a deep cycle battery. Now need to get the hair spray back in the house before Misty misses it. She wonders why a can doesnt last that long. I dont know either, lol.
Got two noises I have been trying to track down. One sounds like the fan but putting the stethoscope on it the front end of the motor, I am suspecting the alternator. Will start removing belts and seeing what happens for that noise. For the other noise, it is either the tcase or transmission. When driving you can hear it. I put it on jackstands hoping that would tell me which one it is quick. It didnt, No noise, so apparently it has to be under a load. I am suspecting tcase but will have to do some more trouble shooting. Chaisng noises can be difficult.

When using aftermarket gaskets, double check all holes are punced in. A good practice to get into anytime swapping any gasket.

Here you can see the hole I added.

Got a new air compressor. Will be clearing the vaccum lines next. Truck does already seem to run smoother.

Anytime you disconnect the Cold Start Injector, upon start up make sure it is not leaking. Use new brass crush washers.

Just pulling it into my garage when I first got the truck, this connection broke. It is the 80 fusible link. Tom was lucky it did not break on the way here. It will shut off all power. Replaced with the gold connector.

Gave battery a bath. Seen on Power Block TV to glue a penny in between the terminals to keep the corrosion in one area. Thought I would give it a try. Cleaned everything up. Stilll need to replace the Negative terminal as it is shot. Will do that later.

Also I coat my terminals with hair spray to cut down on corrosion. Seen that on Power Block TV. I use the biggest Cold Cranking Amp battery I can find. Guess the new Gel Batterys are good but out of my price range. I have 1000 Cranking Amp and it is rated for 800 Cold Cranking Amp. Never a problem in cold weather for me in severe cold. This also a deep cycle battery. Now need to get the hair spray back in the house before Misty misses it. She wonders why a can doesnt last that long. I dont know either, lol.

Got two noises I have been trying to track down. One sounds like the fan but putting the stethoscope on it the front end of the motor, I am suspecting the alternator. Will start removing belts and seeing what happens for that noise. For the other noise, it is either the tcase or transmission. When driving you can hear it. I put it on jackstands hoping that would tell me which one it is quick. It didnt, No noise, so apparently it has to be under a load. I am suspecting tcase but will have to do some more trouble shooting. Chaisng noises can be difficult.
Last edited by Terrys87; 05-22-2015 at 04:58 AM.
04-19-2015, 11:05 AM
#43
Super Moderator
Staff
Thread Starter
iTrader: (1)
Join Date: Aug 2008
Location: Anderson Missouri
Posts: 11,788
Likes: 0
Received 21 Likes
on
19 Posts
I took Toms truck to a body shop to have them to repair the panel for me. I have heard of all of the horror stories of Toyota sheet metal and just from working on the floor board of my 85, I will take them at their word on it. I keep burning thru on my floor board and figured if I welded on the side of his runner, I would burn up the quarter panel. I know when to pass off certain jobs.
The body shop I used uses very little bondo. he just uses it for skim coats. He used short strand fiber glass to cover the repair. I told him I would finish the repair.
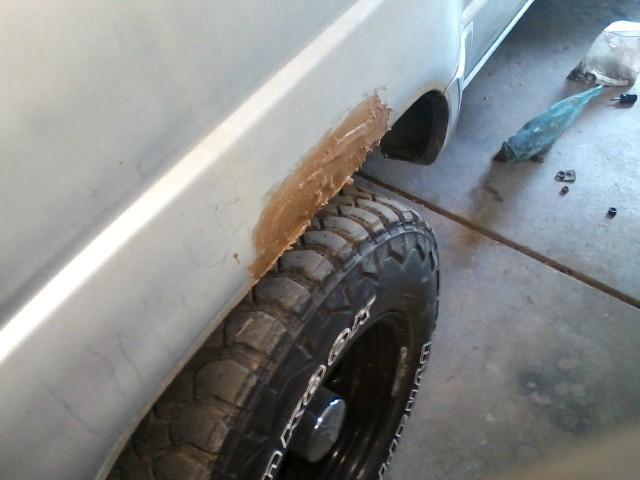
I know fiber glass is itchy but thought that this little bit would not make me itch. Wrong!!! I have a little pin hole to cover and it should be done. Got one bigger dent on the hood and the rest are just door dings. Hoping to make some progress on it this week. I cant strip it down just yet as we are getting hail in the next few days and will have to keep one of my trucks in the shop to keep them covered.
 04-26-2015, 06:14 AM
#44
Super Moderator
Staff
Thread Starter
iTrader: (1)
Join Date: Aug 2008
Location: Anderson Missouri
Posts: 11,788
Likes: 0
Received 21 Likes
on
19 Posts
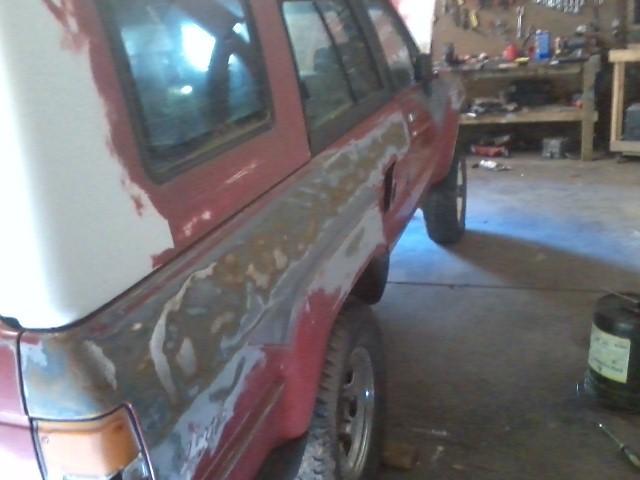
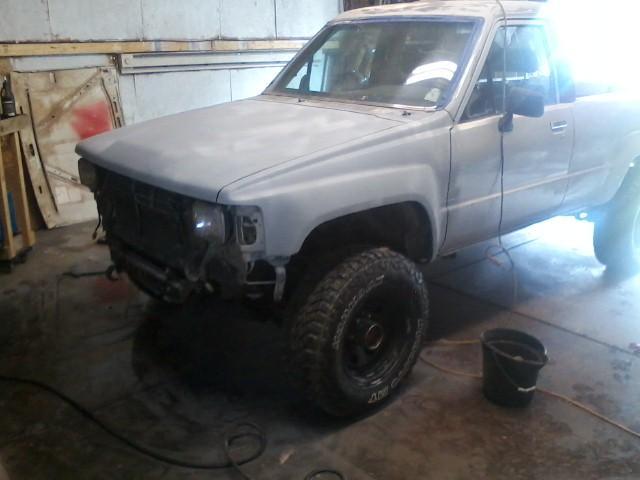
Got the passenger side roughed in. Had 5 dents in the quarter panel, 7 in the door and 2 in the fender. Just need to block it out but will do the rest of the truck when I get it stripped down and finish the rest of the truck. Hood and cab is the next worse area but the rest is in great shape.

 04-30-2015, 11:23 AM
#45
Super Moderator
Staff
Thread Starter
iTrader: (1)
Join Date: Aug 2008
Location: Anderson Missouri
Posts: 11,788
Likes: 0
Received 21 Likes
on
19 Posts
Started to work on getting the patina off of the tailgate. It is a popular thing on older trucks, a fad I would like to see go away someday, just never was to fond of patina.
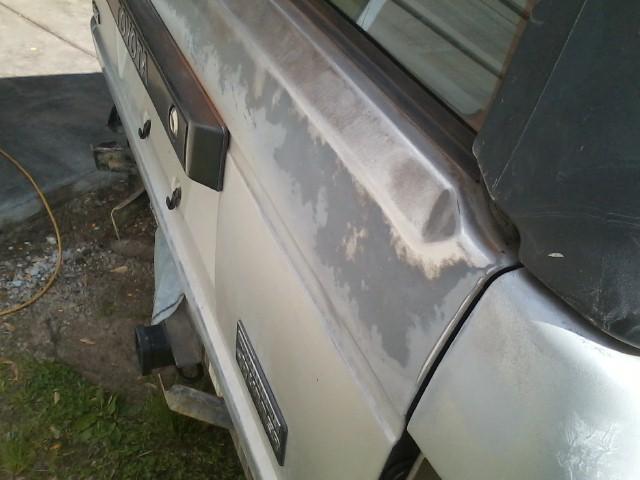
Silver paint in the 80s was not the best. Here is almost like reversed paint chips. Been working on getting the dead paint off and get down to good paint.
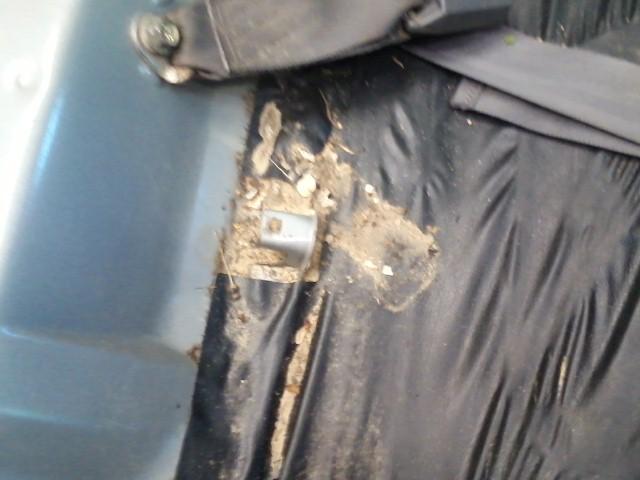
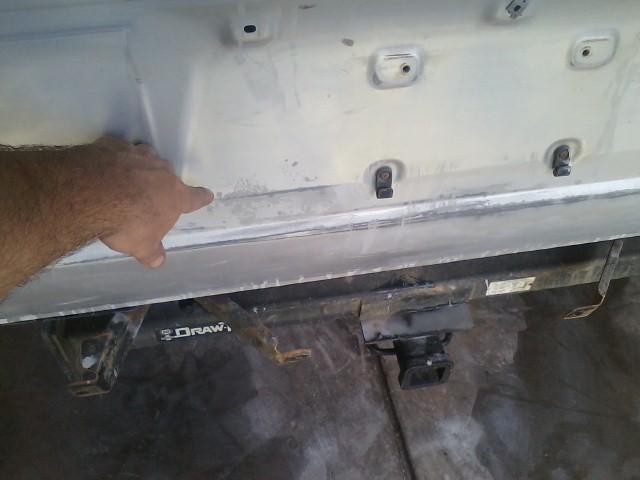
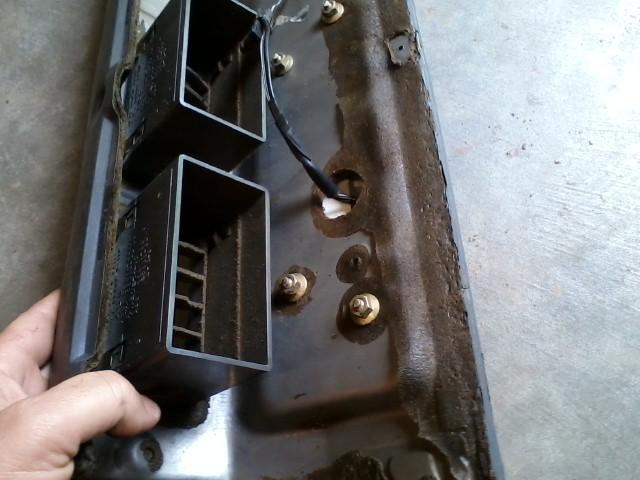
I think I posted this in the Cheap Mods Thread. I have bought 2 new End Caps in the past and later to have them to fly off going down the road. Here you can see where rust is getting behind the bracket that is attached to the End Cap. Also the rear mounting point is broken. I use carriage bolts to permantly mount them to the bumper. Looks like factory and no more lost End Caps.
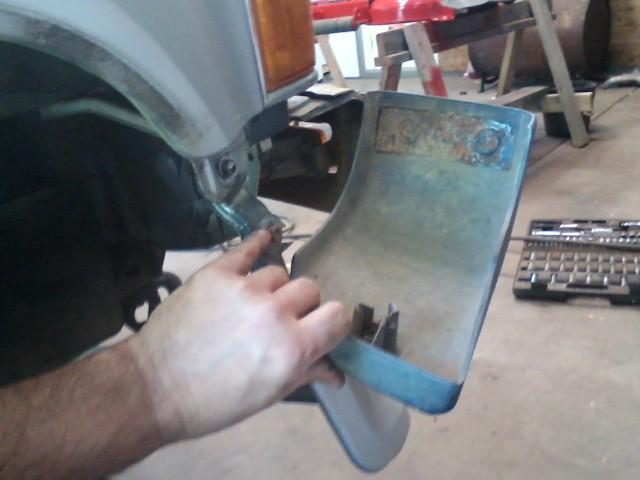
Here is what is behind the mounting bracket to the End Cap. I really dont know what was holding it on. The rear was broken and the rust really fell out when I took the End Cap off.

Not sure why someone tapped into the horn wiring. I have spent alot of time taking these back to factory wiring with a few exceptions (headlights, ignition..) I dont think I have seen a truck yet with some kind of butchering on the wiring.
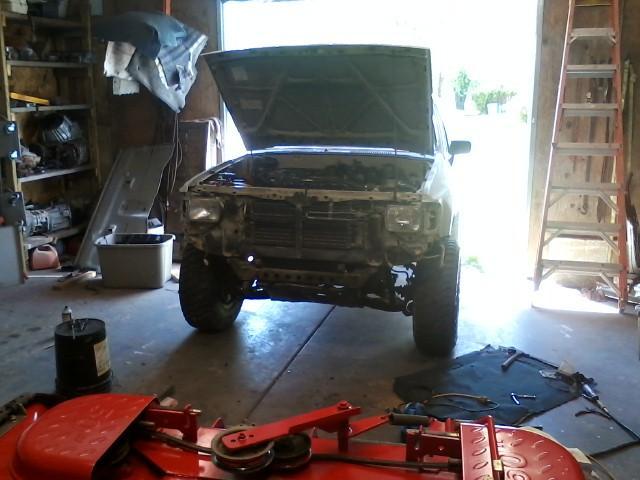
Got another project I have been on a while. Painted up a riding mower. Hope to start getting the runner stripped down tomorrow if all goes well. Will also take it to the car wash and get it cleaned up underneath so as not to deal with dust to much. Front skid pan has had a rough life. It is dinged up a little bit.

Silver paint in the 80s was not the best. Here is almost like reversed paint chips. Been working on getting the dead paint off and get down to good paint.

I think I posted this in the Cheap Mods Thread. I have bought 2 new End Caps in the past and later to have them to fly off going down the road. Here you can see where rust is getting behind the bracket that is attached to the End Cap. Also the rear mounting point is broken. I use carriage bolts to permantly mount them to the bumper. Looks like factory and no more lost End Caps.

Here is what is behind the mounting bracket to the End Cap. I really dont know what was holding it on. The rear was broken and the rust really fell out when I took the End Cap off.

Not sure why someone tapped into the horn wiring. I have spent alot of time taking these back to factory wiring with a few exceptions (headlights, ignition..) I dont think I have seen a truck yet with some kind of butchering on the wiring.

Got another project I have been on a while. Painted up a riding mower. Hope to start getting the runner stripped down tomorrow if all goes well. Will also take it to the car wash and get it cleaned up underneath so as not to deal with dust to much. Front skid pan has had a rough life. It is dinged up a little bit.
 05-01-2015, 02:08 PM
#46
Super Moderator
Staff
Thread Starter
iTrader: (1)
Join Date: Aug 2008
Location: Anderson Missouri
Posts: 11,788
Likes: 0
Received 21 Likes
on
19 Posts
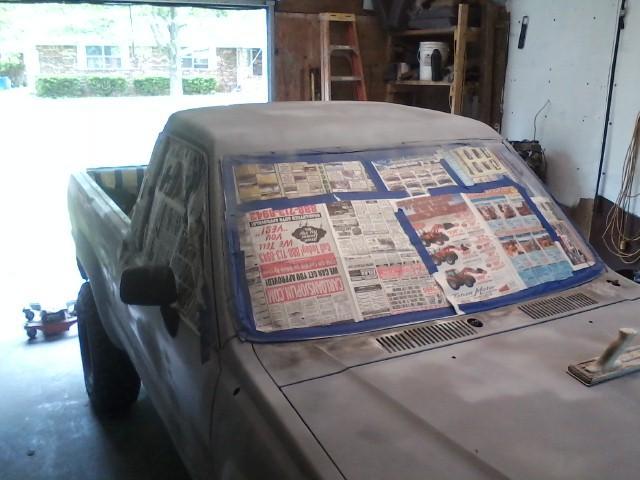
Got some more work done. Got the interior pulled out and if all goes well I will hopefully paint a week from now. Weather and a few other things need to fall into place. My neighbor was a paint and body man for 40 years and will have to work our schedules. I have never run paint, but clear coat is the one I have problems with. Sometimes it goes on like glass and other times it orange peels on me and I get to spend alot of time working it out. I have run clear in the past but it is one that can be a pain to get worked out. Looking forward to some of his tips.
Interior is stripped out.

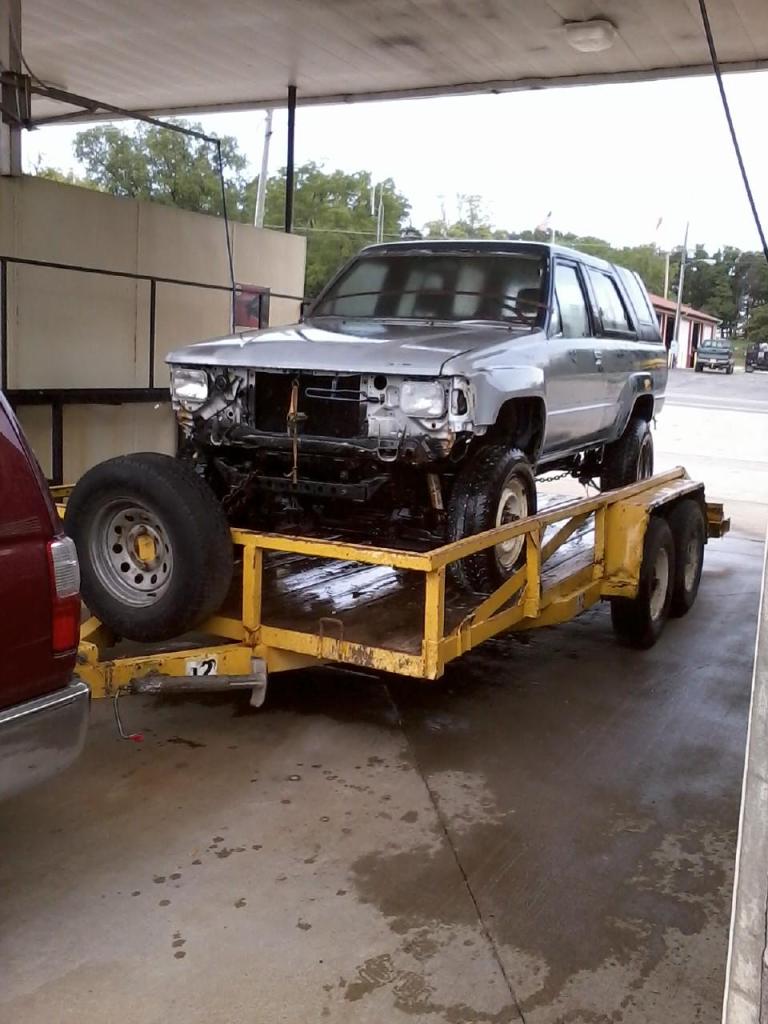
Tom bought this truck out of the salvage yard for parts for the pickup that I did a while back. It was cheaper to buy the whole truck then pieces at a time. He was just going to leave it at the yard and asked if I would like it so literally it was loaded with a fork lift onto my trailer.

It is still aways off from me building it but I am going to do some prep work on it. I need to pull the tranny and tcase for the silver runner and I want to pull the fuel tank and some other things while I have it in the shop. I was going to let one of the brats fix it but I want a fully loaded SR5 to match my truck and to help compare on getting all of the options working. I will use my 86 to fix this one and one of the kids can fix my 86. My 86 has been great but it is a base model with a few options that I have added. This build wont happen for a while but can start getting a few of the things.
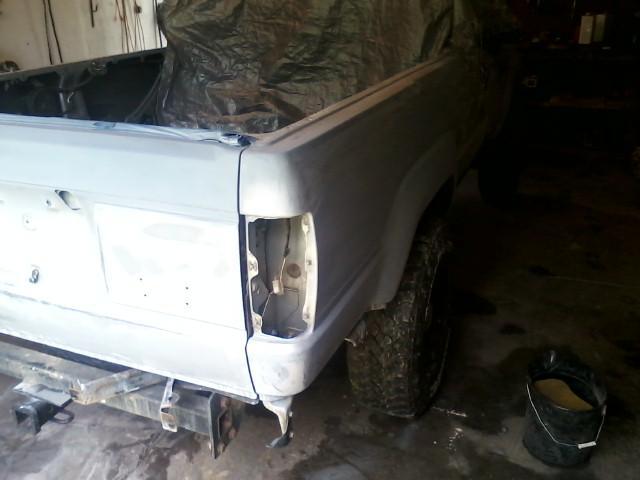
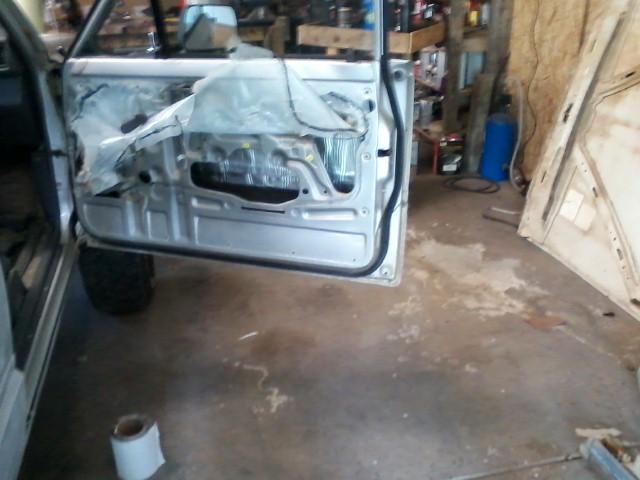
It looks rough but minus the fenders and some butchered up wiring it is in great shape. Butchered wiring is something I have gotten down well for fixing and have most of it anyways.
Justin got loose with a sander. I will cover it with some primer while it is shop. This build wont happen for awhile but is getting on the list. It will be looking like Chefyotas when completed.
Interior is stripped out.

Tom bought this truck out of the salvage yard for parts for the pickup that I did a while back. It was cheaper to buy the whole truck then pieces at a time. He was just going to leave it at the yard and asked if I would like it so literally it was loaded with a fork lift onto my trailer.

It is still aways off from me building it but I am going to do some prep work on it. I need to pull the tranny and tcase for the silver runner and I want to pull the fuel tank and some other things while I have it in the shop. I was going to let one of the brats fix it but I want a fully loaded SR5 to match my truck and to help compare on getting all of the options working. I will use my 86 to fix this one and one of the kids can fix my 86. My 86 has been great but it is a base model with a few options that I have added. This build wont happen for a while but can start getting a few of the things.
It looks rough but minus the fenders and some butchered up wiring it is in great shape. Butchered wiring is something I have gotten down well for fixing and have most of it anyways.
Justin got loose with a sander. I will cover it with some primer while it is shop. This build wont happen for awhile but is getting on the list. It will be looking like Chefyotas when completed.
 05-07-2015, 10:09 AM
#47
Super Moderator
Staff
Thread Starter
iTrader: (1)
Join Date: Aug 2008
Location: Anderson Missouri
Posts: 11,788
Likes: 0
Received 21 Likes
on
19 Posts
Got tied up on getting the transmission out of the red runner and getting the fuel tank out of it. I will eventually build it at a later time. I did start a build thread on it but it will be sitting for a few more months.
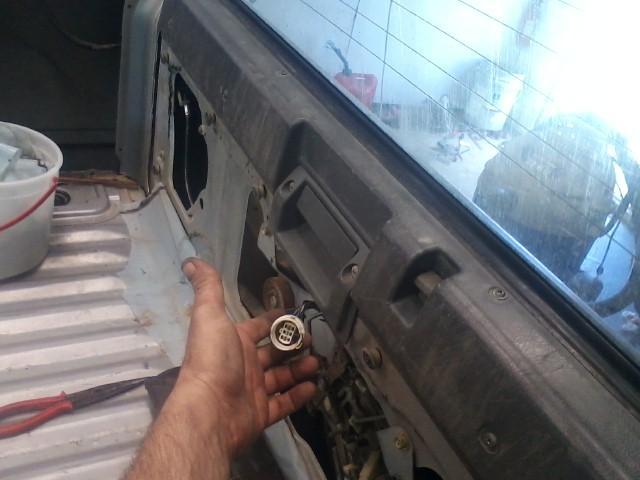
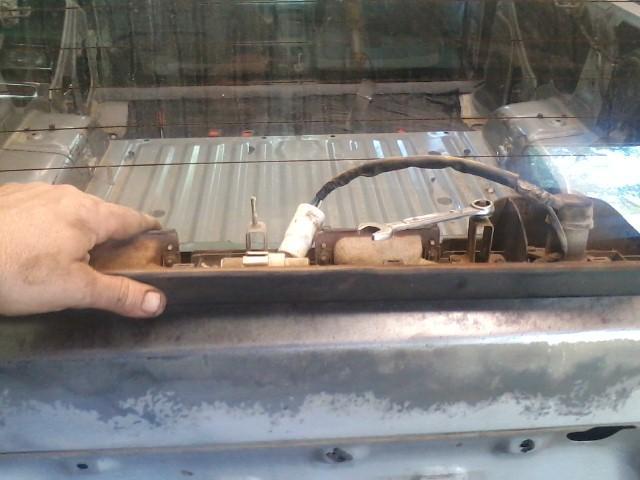
I need to lift the rear glass to access the light assembly in the back. I use a jumper wire for a permanent or temporary way of getting the glass up when the top is off. In the picture, I am using the brown wire as a jumper and running it to ground. That bypasses the safety switches.
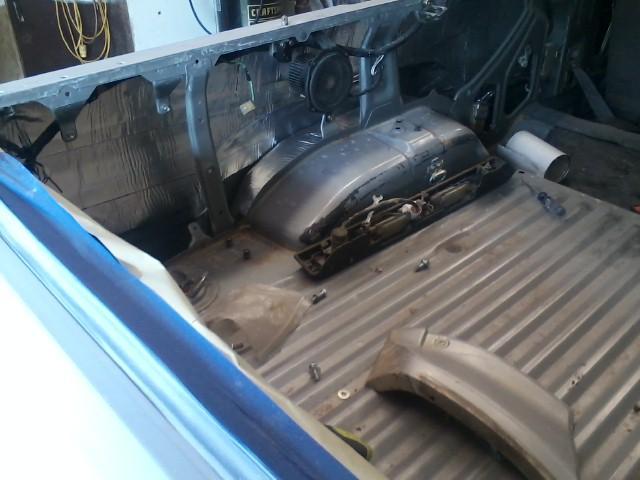
One reason I do like to go indepth on a build is you never know what you will find and a good way to get it cleaned up. A lot of sand was in the back end. Not as bad as my 86 was but still a bunch of sand. First time I have seen the plastic that covers the access panel on one of these trucks.
This is just some of the sand on top. The wheel wells had a ton in there.
I need to lift the rear glass to access the light assembly in the back. I use a jumper wire for a permanent or temporary way of getting the glass up when the top is off. In the picture, I am using the brown wire as a jumper and running it to ground. That bypasses the safety switches.
One reason I do like to go indepth on a build is you never know what you will find and a good way to get it cleaned up. A lot of sand was in the back end. Not as bad as my 86 was but still a bunch of sand. First time I have seen the plastic that covers the access panel on one of these trucks.

This is just some of the sand on top. The wheel wells had a ton in there.

Last edited by Terrys87; 05-07-2015 at 10:19 AM.
05-07-2015, 10:48 AM
#48
Super Moderator
Staff
Thread Starter
iTrader: (1)
Join Date: Aug 2008
Location: Anderson Missouri
Posts: 11,788
Likes: 0
Received 21 Likes
on
19 Posts
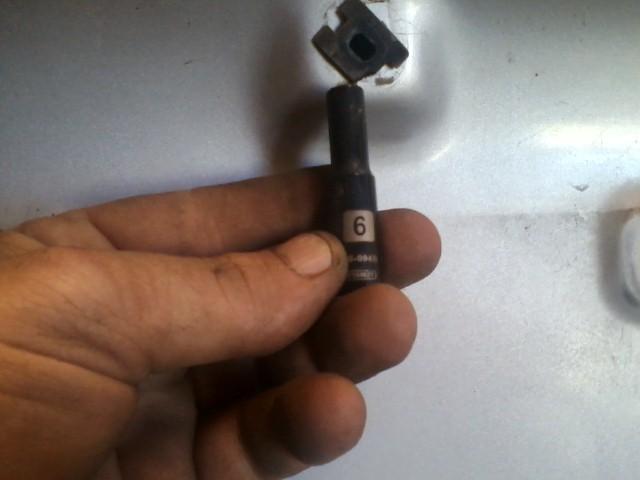
Been a while since I pulled the License Plate Light assembly out so am making this a reminder for me. Jump the Safety Switches, and use a 6 mm deep well for the center tab, a 10mm wrench from the sides to get the nut off.
6mm deepwell for center tab.
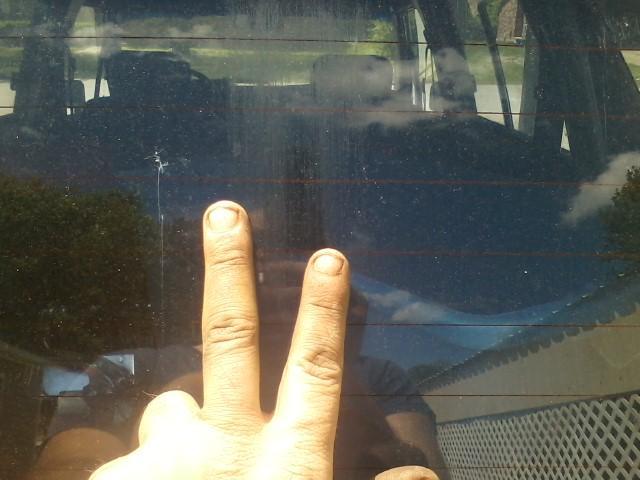
This plug was laying loose and is what causes the streak in the back glass. Mistys runner has it bad. Toms was laying loose and you can see some faint scratches in the back glass.
Faint scratches and a memo for the 10mm wrench.
What Mistys looks like and more normal to see.
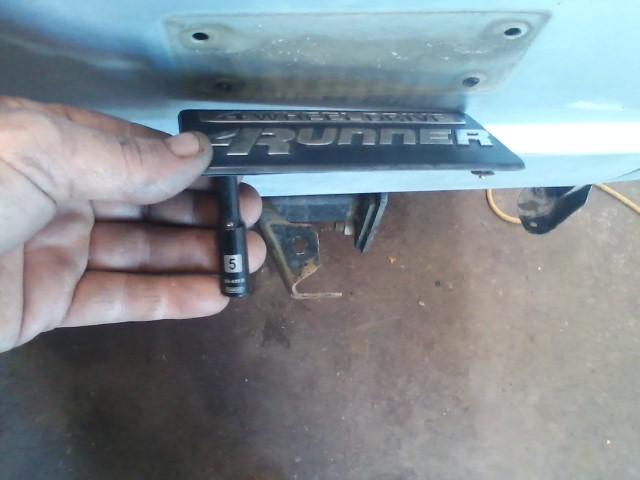
Another memo for me. Use a 5mm socket from the rear to squeeze the plastic tabs in to get the badge off.
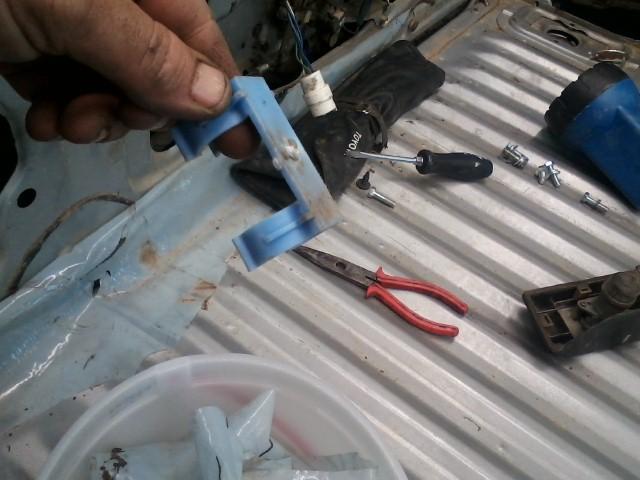
Found the holder that holds the License plate light. It is broken and was laying in the bottom of the tail gate.
6mm deepwell for center tab.

This plug was laying loose and is what causes the streak in the back glass. Mistys runner has it bad. Toms was laying loose and you can see some faint scratches in the back glass.

Faint scratches and a memo for the 10mm wrench.

What Mistys looks like and more normal to see.

Another memo for me. Use a 5mm socket from the rear to squeeze the plastic tabs in to get the badge off.

Found the holder that holds the License plate light. It is broken and was laying in the bottom of the tail gate.

Last edited by Terrys87; 11-18-2015 at 10:45 AM.
05-08-2015, 10:52 AM
#49
Super Moderator
Staff
Thread Starter
iTrader: (1)
Join Date: Aug 2008
Location: Anderson Missouri
Posts: 11,788
Likes: 0
Received 21 Likes
on
19 Posts
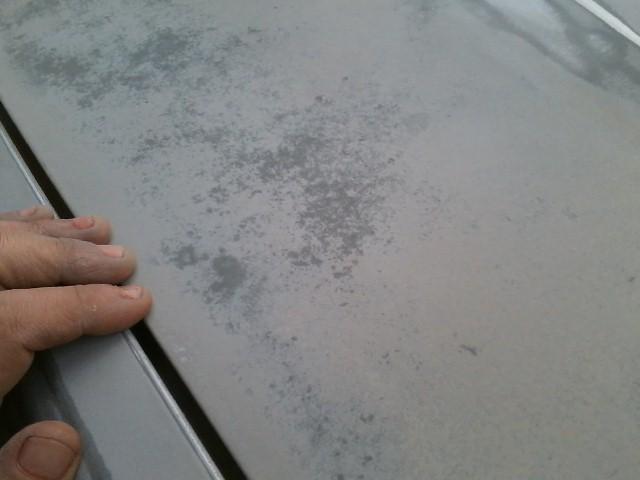
I will be working 12 hour days this week but my plan is to try and get atleast one panel ready at a time until my next days off. I was wanting to paint this week but it didnt happen. Still doing body work. 1980s silver paint was not the best. Seems like the more I sand, the more minor cracks in the old paint I find. Got most of the dody work done with exception of hood and roof top.
Here you can see the paint flake off and has some minor cracks in it.
Passenger rear quarter panel mostly done.
Drivers rear quarter mostly done. In the back ground you can see the red runner. Once I get Toms done, it will go on the right side of the shop. That is the project side. When painting, everything gets evicted out of the shop.
Here you can see the paint flake off and has some minor cracks in it.

Passenger rear quarter panel mostly done.

Drivers rear quarter mostly done. In the back ground you can see the red runner. Once I get Toms done, it will go on the right side of the shop. That is the project side. When painting, everything gets evicted out of the shop.

Last edited by Terrys87; 05-08-2015 at 10:57 AM.
05-10-2015, 07:51 AM
#50
Super Moderator
Staff
Thread Starter
iTrader: (1)
Join Date: Aug 2008
Location: Anderson Missouri
Posts: 11,788
Likes: 0
Received 21 Likes
on
19 Posts
I have a transmission or transfer case issue with this runner. I pulled the transmission and transfer case out of the red runner and got it cleaned up. I have spent hours scrubbing one of these things getting them clean and the high pressure at the carwash doesnt do anything for cleaning either. I have tried all the cleaners out there, Purple Power, Simple Green, industrial cleaners. Out of desperation I wanted to try something else.
Easy Off Oven Cleaner and some steel wool pads work great. I got the transmission wet and let the Easy Off soak about 5 minutes and with a wire brush in some areas and a steel wool, it cleaned up quick.
My new parts cleaning material.
I have run into this issue in the past and helped a few others find their issue. I think it is the Eng Fuse that will blow. What happens is the Reverse Light Switch rubs against the case and shorts out. All your guages go to zero with exeception of the speedometer. I just wrap it with electrical tape and fasten it down real good.

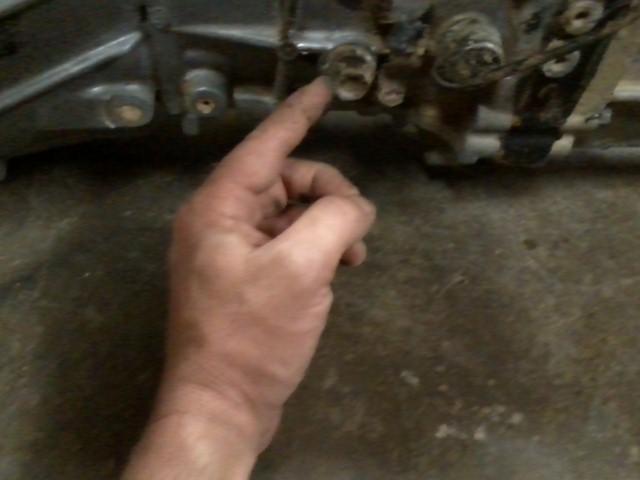
I was asked if you fill the transmission and tcase in the same fill plug. You fill them seperate.
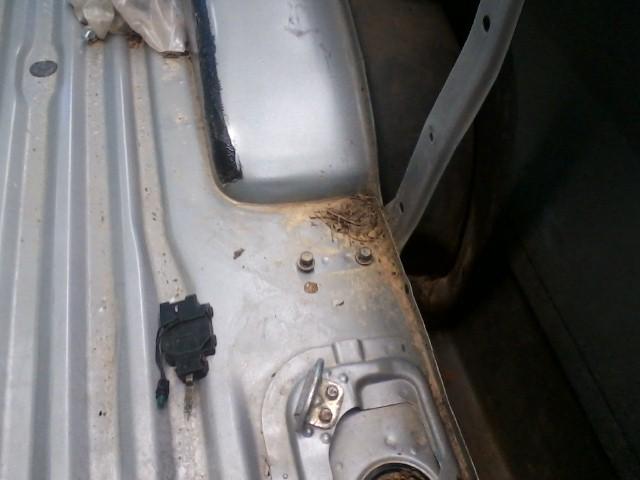
Transmission Fill Plug on Drivers Side.
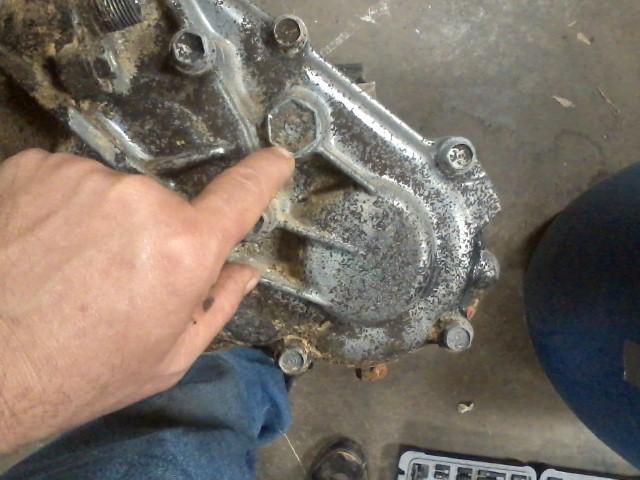
Transmission Drain plug on bottom.
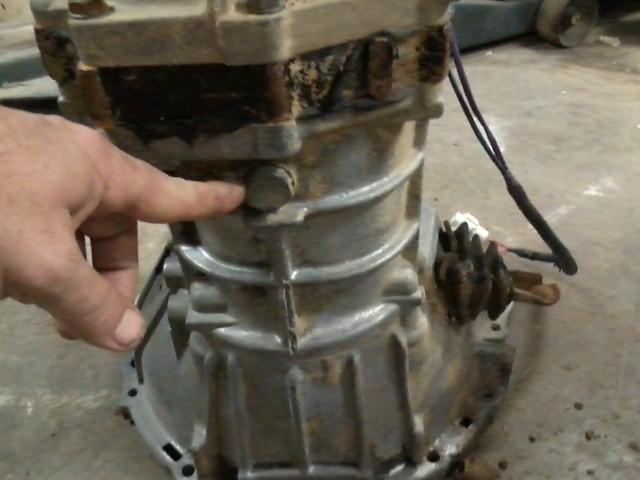
Transfer Case Fill plug on back side of output shaft.
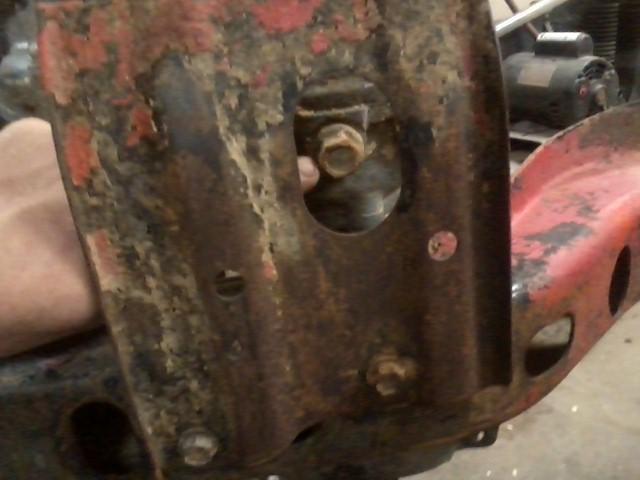
Transfer Case Drain Plug is thru skid plate.
Easy Off Oven Cleaner and some steel wool pads work great. I got the transmission wet and let the Easy Off soak about 5 minutes and with a wire brush in some areas and a steel wool, it cleaned up quick.
My new parts cleaning material.

I have run into this issue in the past and helped a few others find their issue. I think it is the Eng Fuse that will blow. What happens is the Reverse Light Switch rubs against the case and shorts out. All your guages go to zero with exeception of the speedometer. I just wrap it with electrical tape and fasten it down real good.

I was asked if you fill the transmission and tcase in the same fill plug. You fill them seperate.
Transmission Fill Plug on Drivers Side.

Transmission Drain plug on bottom.

Transfer Case Fill plug on back side of output shaft.

Transfer Case Drain Plug is thru skid plate.

Last edited by Terrys87; 05-14-2015 at 01:36 AM.
05-14-2015, 01:34 AM
#51
Super Moderator
Staff
Thread Starter
iTrader: (1)
Join Date: Aug 2008
Location: Anderson Missouri
Posts: 11,788
Likes: 0
Received 21 Likes
on
19 Posts
Well my plan of getting a panel done a day this week did not work out. Been working overtime and when done I with work was ready for bed. Will be working over this week so not sure how things are going to go but am going to give it a try to get something done on my days off. Now it is cool and rainey.
I did get some Peel and Seal on the passenger side. One roll for the rear quarter panel. I got a roll for the doors and know it will take a row for the other quarter panel. I have done this on my runners and before when trying to talk to the kids in the back had to yell back to them. Now we can have a normal converstaion.
Passenger quarter panel.
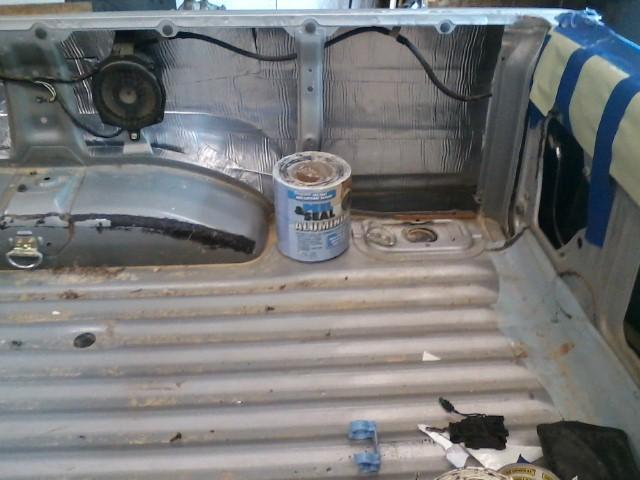
Passenger door.
The PO covered the top with primer. Priner works for a temporary cover but eventually will come back with rust if left uncovered to long and can be worse then before.
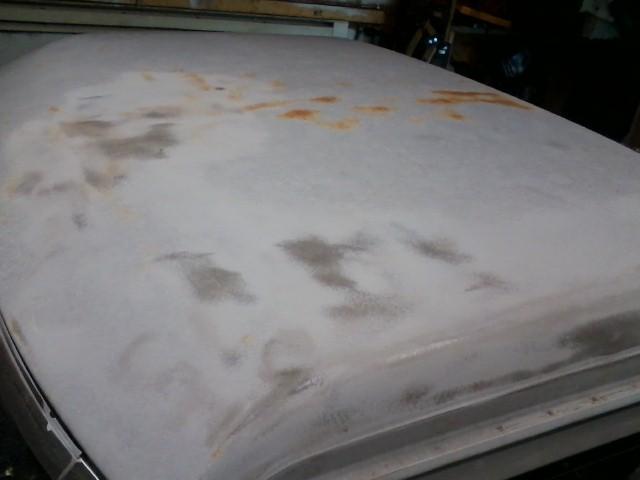
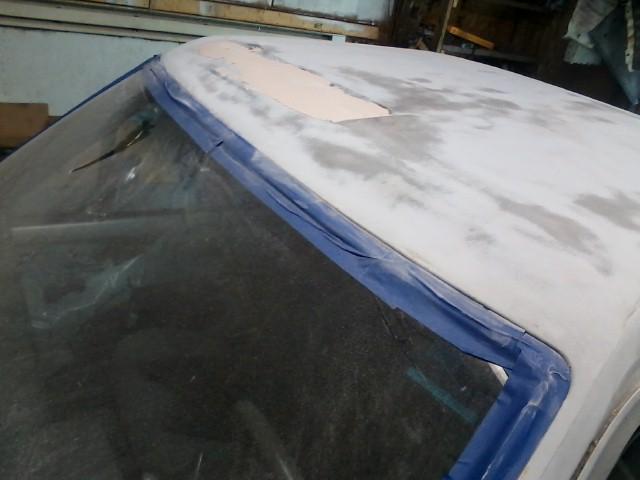
Got 4 dings in the roof, I just treated them as one dent. Got all of the old primer removed and the rest of the cab roof is in great shape.
The old paint is really cracked. I dont like to take one to bare metal as the factory paint is applied in the best conditions with heaters and what ever else they have for making the paint stick well. Home shop paint is never as good as factory. Is even recommended not to take it to bare metal if not need be. On the hood and top part of the fenders I basically had to.
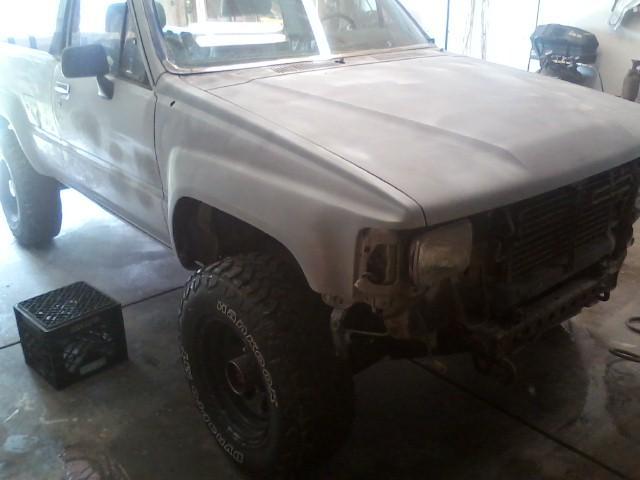
Got the drivers fender and hood mostly done. I will need to block it out but got the hood and fender smoothed.
Same for passenger side fender and hood.
While waiting for primer and filler to dry, I did get the drivers side and door Peeled and Sealed.
I did get some Peel and Seal on the passenger side. One roll for the rear quarter panel. I got a roll for the doors and know it will take a row for the other quarter panel. I have done this on my runners and before when trying to talk to the kids in the back had to yell back to them. Now we can have a normal converstaion.
Passenger quarter panel.

Passenger door.

The PO covered the top with primer. Priner works for a temporary cover but eventually will come back with rust if left uncovered to long and can be worse then before.

Got 4 dings in the roof, I just treated them as one dent. Got all of the old primer removed and the rest of the cab roof is in great shape.

The old paint is really cracked. I dont like to take one to bare metal as the factory paint is applied in the best conditions with heaters and what ever else they have for making the paint stick well. Home shop paint is never as good as factory. Is even recommended not to take it to bare metal if not need be. On the hood and top part of the fenders I basically had to.
Got the drivers fender and hood mostly done. I will need to block it out but got the hood and fender smoothed.

Same for passenger side fender and hood.

While waiting for primer and filler to dry, I did get the drivers side and door Peeled and Sealed.

Last edited by Terrys87; 11-18-2015 at 02:16 PM.
05-15-2015, 07:46 AM
#52
Super Moderator
Staff
Thread Starter
iTrader: (1)
Join Date: Aug 2008
Location: Anderson Missouri
Posts: 11,788
Likes: 0
Received 21 Likes
on
19 Posts
Got the cab roof smoothed out. Starting to get to the doors. The cowl should go easy as I dont see any damage on it. It did have some surface rust and the paint was cracked on it as well. I just took it down to metal.
Getting these mirror covers off is nearly impossible with out breaking the top two tabs off as they are just old and brittle. I got this one off without breaking either of them. The other one I did break one tab off. I will just use a drop of super glue to hold it on until I can find a cover to replace it with. My 85 has the cover missing on one of the mirrors and havent had much luck finding a good one yet. I use a part until I eventually find one. The top mirror will eventually get replaced as you can see it is cracked in the corner. I keep loose parts taped up together so as not to go chasing loose parts when reassembling.
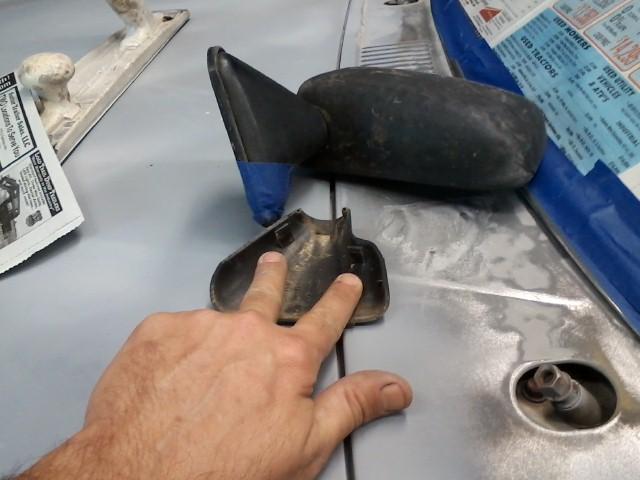
These trucks come in three different ways. No screens, screens with no fine mesh screen over the screen and some with a fine mesh screen over the screen. This truck came with the fine mesh screen covering. This is a base model truck so really no reason or rhym as to which truck gets which covering. As you can see on the drivers side, I have never seen that hole covered which does explain why the AC system gets so dirty in these trucks. ( I show how to clean the AC system in these trucks earlier in this build) toyotafiberglass sells a complete cowl that prevents this from happening.

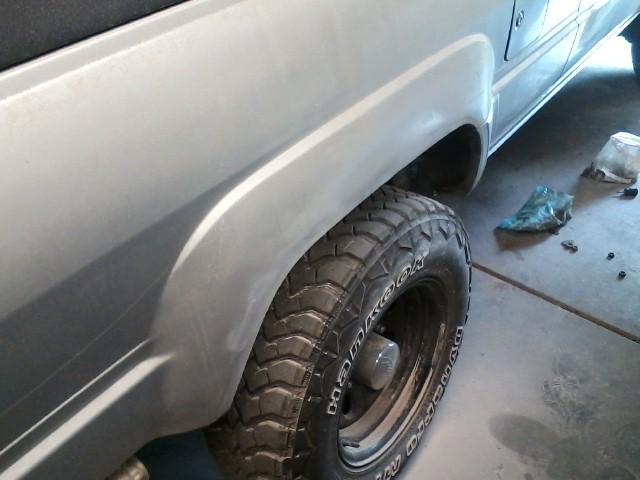
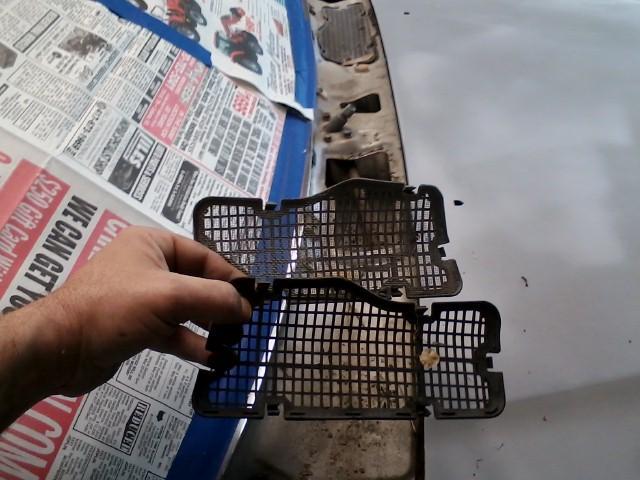
May not show in the picture but the top cover has a fine wire mesh over the screen. This is one I try to grab out of the salvage yard when I find them and this shows some of the dirt that gets in behind the cowl. A sign to look for of dirt build up in the cowl or AC system is to pull the mud flap and inner fender and see if the debris has fallen down there. If so, most likely you have a dirty AC system and it can cause body rot in the cowl area and be a reason for wet floors.
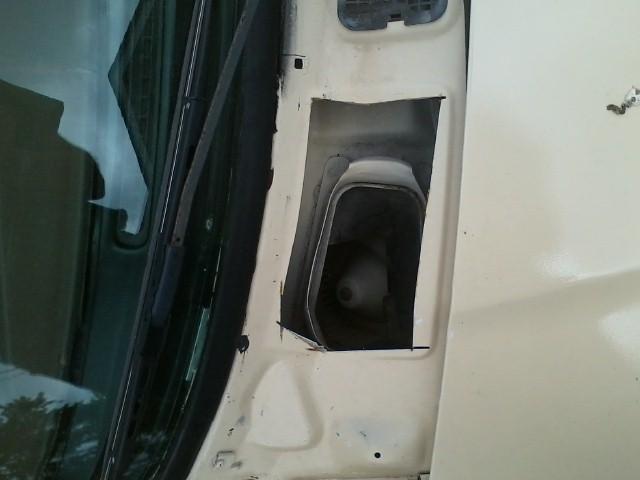
This is on my 85. It had so much dirt build up on it, I had to cut the panel to get the trash out. You can see what I call a stove pipe that keeps the dirt from getting down into your blower/AC system. What I cant show is on the very edges of the cowl is how the water and debris is supposed to go down the rear of the inner fender to get out.
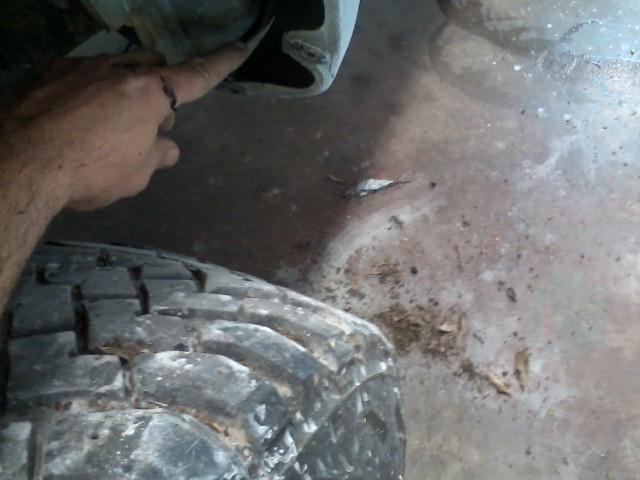
I had already cleaned the behind the mudflap but just cleaning the cowl area out, you can see some of the dirt I got out of the cowl on the ground. Here is where to look for debris.

Getting these mirror covers off is nearly impossible with out breaking the top two tabs off as they are just old and brittle. I got this one off without breaking either of them. The other one I did break one tab off. I will just use a drop of super glue to hold it on until I can find a cover to replace it with. My 85 has the cover missing on one of the mirrors and havent had much luck finding a good one yet. I use a part until I eventually find one. The top mirror will eventually get replaced as you can see it is cracked in the corner. I keep loose parts taped up together so as not to go chasing loose parts when reassembling.

These trucks come in three different ways. No screens, screens with no fine mesh screen over the screen and some with a fine mesh screen over the screen. This truck came with the fine mesh screen covering. This is a base model truck so really no reason or rhym as to which truck gets which covering. As you can see on the drivers side, I have never seen that hole covered which does explain why the AC system gets so dirty in these trucks. ( I show how to clean the AC system in these trucks earlier in this build) toyotafiberglass sells a complete cowl that prevents this from happening.

May not show in the picture but the top cover has a fine wire mesh over the screen. This is one I try to grab out of the salvage yard when I find them and this shows some of the dirt that gets in behind the cowl. A sign to look for of dirt build up in the cowl or AC system is to pull the mud flap and inner fender and see if the debris has fallen down there. If so, most likely you have a dirty AC system and it can cause body rot in the cowl area and be a reason for wet floors.

This is on my 85. It had so much dirt build up on it, I had to cut the panel to get the trash out. You can see what I call a stove pipe that keeps the dirt from getting down into your blower/AC system. What I cant show is on the very edges of the cowl is how the water and debris is supposed to go down the rear of the inner fender to get out.

I had already cleaned the behind the mudflap but just cleaning the cowl area out, you can see some of the dirt I got out of the cowl on the ground. Here is where to look for debris.

Last edited by Terrys87; 05-15-2015 at 08:30 AM.
05-15-2015, 09:26 AM
#53
Super Moderator
Staff
Thread Starter
iTrader: (1)
Join Date: Aug 2008
Location: Anderson Missouri
Posts: 11,788
Likes: 0
Received 21 Likes
on
19 Posts
I meant to mention it earlier but I have suspected this door being replaced at one time. Probably had some damage when it was new and insurance would fix one. A tell tale sign is the Toyota part tag and the black on the door and what is behind the Peel and Seal. Nothing wrong with it but something to look for when looking at a truck. All doors on other trucks I have seen are some what the color on the inside as the outside.
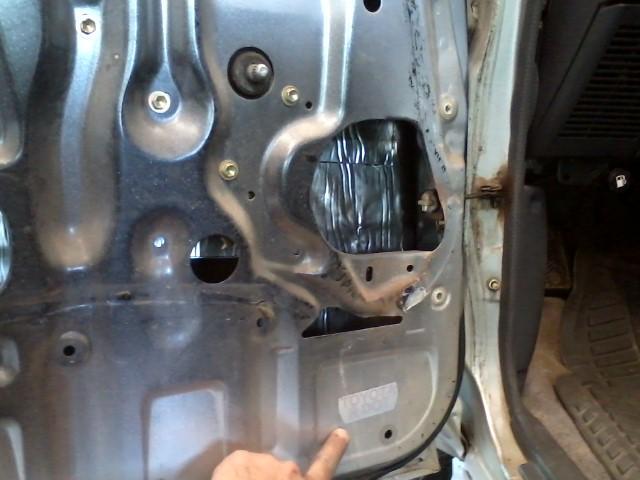
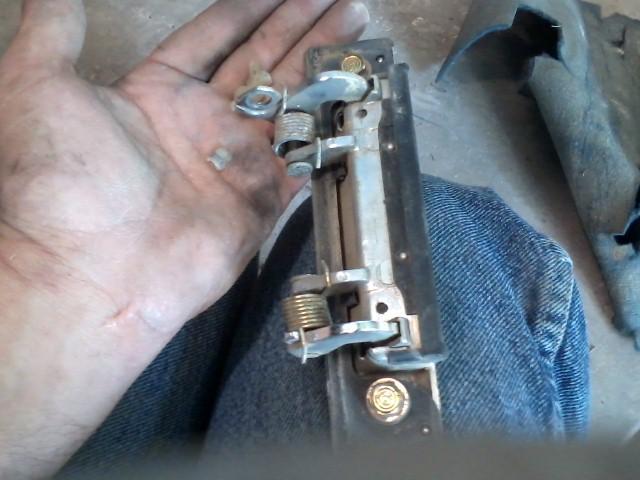
Here is an issue I have with Mistys and with this truck. The window jumps out of the track. I have not found a good fix for it yet. I have glued hers in and it still jumps the track. Also the door handles and door locks I store in the door that they come out of. The locks pop right out. The door handles I have yet to get one out with out breaking the clips.
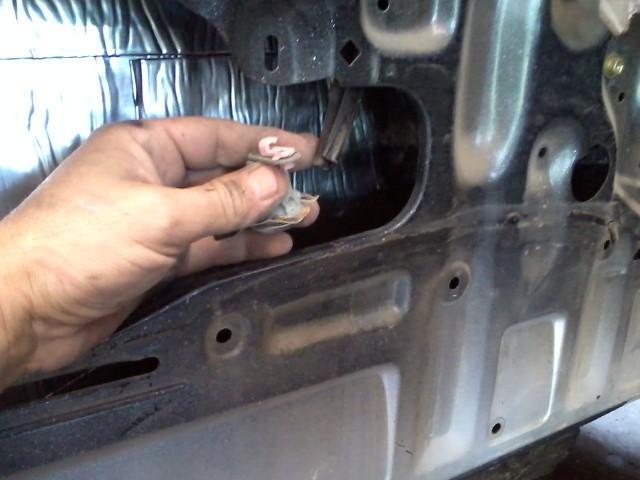
Clip I am talking about. Dont think I have ever gotten one of these out with out breaking it on the door handle. The clips are side specific. I get mine from Toyota but seems like you can get a bag of them off of ebay and will be looking into that.
Not the first clip I have broken and wont be the last. Goes togther in about 5 seconds when reassembling. Not so much when disassembling.
Got the doors done. Had to take alot of the old paint off of the top of them as it was cracking. Drivers side.
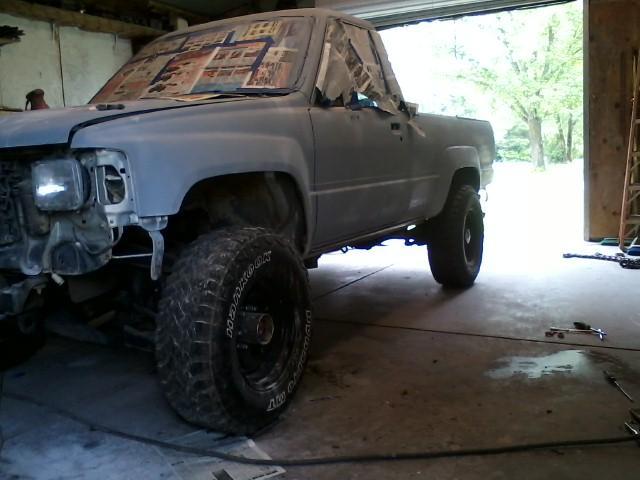
Just need to do the tail gate and give it a good blocking all over. It is a little smoother then what I started with. Passenger side.


Here is an issue I have with Mistys and with this truck. The window jumps out of the track. I have not found a good fix for it yet. I have glued hers in and it still jumps the track. Also the door handles and door locks I store in the door that they come out of. The locks pop right out. The door handles I have yet to get one out with out breaking the clips.

Clip I am talking about. Dont think I have ever gotten one of these out with out breaking it on the door handle. The clips are side specific. I get mine from Toyota but seems like you can get a bag of them off of ebay and will be looking into that.
Not the first clip I have broken and wont be the last. Goes togther in about 5 seconds when reassembling. Not so much when disassembling.

Got the doors done. Had to take alot of the old paint off of the top of them as it was cracking. Drivers side.

Just need to do the tail gate and give it a good blocking all over. It is a little smoother then what I started with. Passenger side.

Last edited by Terrys87; 05-15-2015 at 10:53 AM.
06-05-2015, 06:05 AM
#54
Super Moderator
Staff
Thread Starter
iTrader: (1)
Join Date: Aug 2008
Location: Anderson Missouri
Posts: 11,788
Likes: 0
Received 21 Likes
on
19 Posts
Been working alot of overtime as one guy has been on sick leave for quite sometime. When I have had a little time I have been working on my boat and camper. The more things you get, the more things you get to work on. I am taking a vactaion some time in June and starting to get things ready for that. I plan on gettting some time at the lake but want to spend a few days out in the shop when I get back then.
Tom found a perfect dash and an inclinometer. I have yet to find an inclinometer. I have found some great dashes in the past.
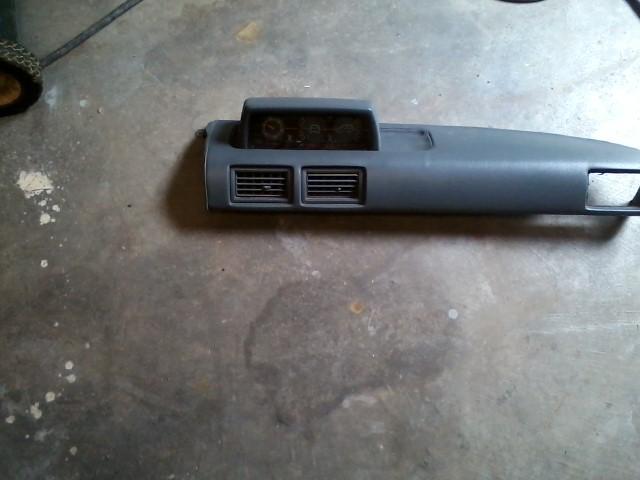
Mostly a reference for me as to how one is mounted.
Tom found a perfect dash and an inclinometer. I have yet to find an inclinometer. I have found some great dashes in the past.

Mostly a reference for me as to how one is mounted.
 06-22-2015, 06:36 AM
#55
Super Moderator
Staff
Thread Starter
iTrader: (1)
Join Date: Aug 2008
Location: Anderson Missouri
Posts: 11,788
Likes: 0
Received 21 Likes
on
19 Posts
Been working over alot lately but did get some more final sanding done. Shouldnt be much more left to do before paint. One thing I do is take them to the carwash to try and get as much loose dirt out as possible to cut down the chance of blowing any dust into the paint.
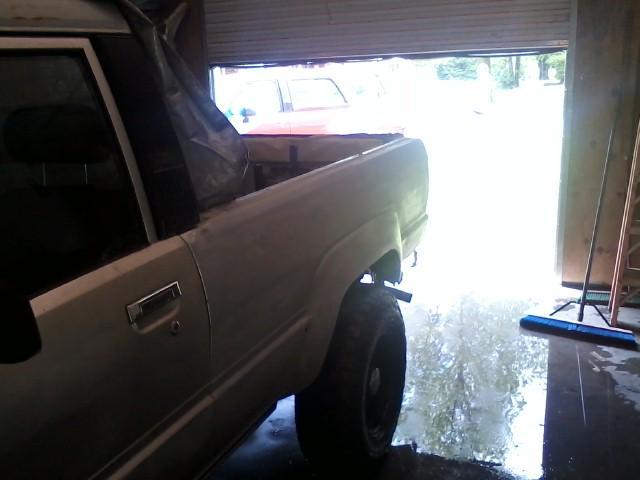
Toms getting the wash.

This was my 86 when I did it. When they are in primer you cant really tell any difference in the trucks. Nearly three years ago when I did my 86. Just doenst seem possible that it has been that long ago.
Toms getting the wash.

This was my 86 when I did it. When they are in primer you cant really tell any difference in the trucks. Nearly three years ago when I did my 86. Just doenst seem possible that it has been that long ago.
08-13-2015, 10:22 AM
#56
Super Moderator
Staff
Thread Starter
iTrader: (1)
Join Date: Aug 2008
Location: Anderson Missouri
Posts: 11,788
Likes: 0
Received 21 Likes
on
19 Posts
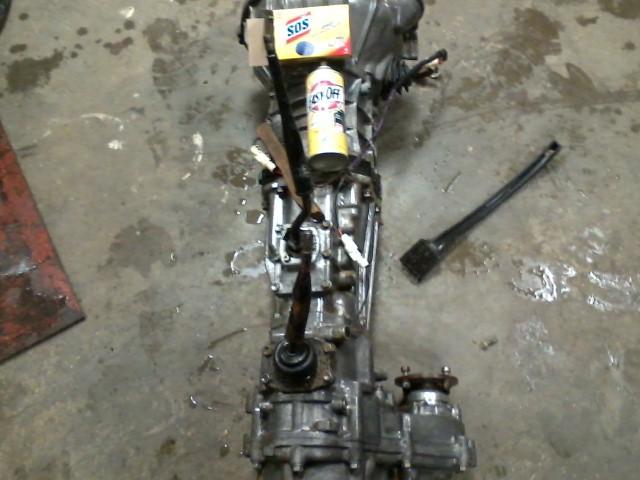
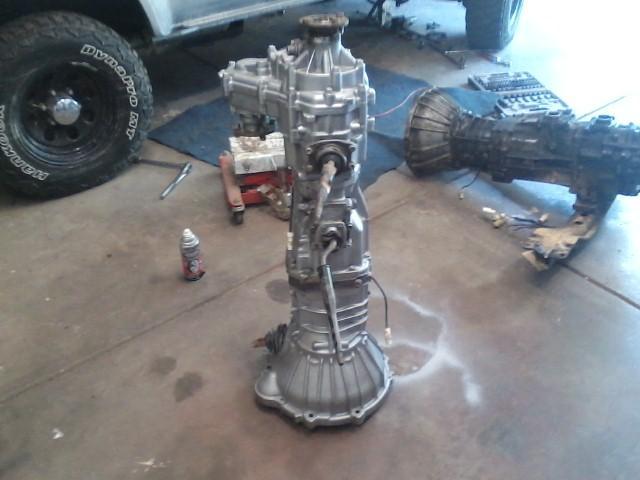
Got the old transmission out of Toms truck. I am going to use the transmission out of the red runner I have and install the complete transmission and transfer case as one unit. I like to keep the two together as they are already worn to each other. I looked at Toms orginal transmission to this runner and just dont feel good using it. The transfer case is probably rebuildable but for the cost of parts probably would be best just to get another transfer case. Something I will look into at a later time and see what Marlin Crawler sells the parts for.
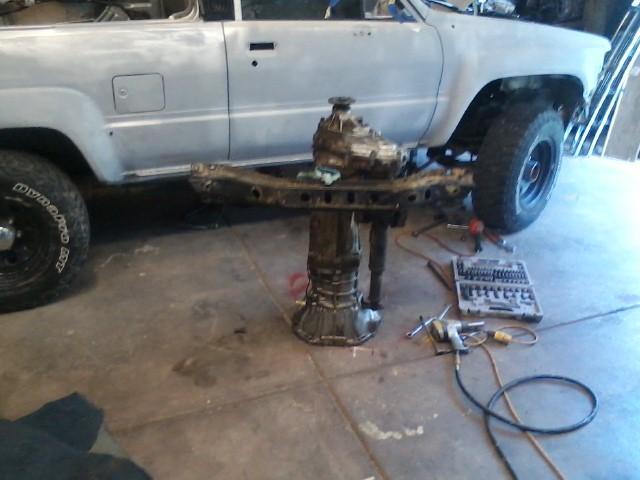
Here I have the replacement for ready to go in. I use Easy Off oven cleaner for cleaning all of the gunk off. It is the best cleaner for build up gunk. Just watch where you spray it on such as wiring or rubber.

Here I have the replacement for ready to go in. I use Easy Off oven cleaner for cleaning all of the gunk off. It is the best cleaner for build up gunk. Just watch where you spray it on such as wiring or rubber.
 10-08-2015, 12:23 PM
#57
Super Moderator
Staff
Thread Starter
iTrader: (1)
Join Date: Aug 2008
Location: Anderson Missouri
Posts: 11,788
Likes: 0
Received 21 Likes
on
19 Posts
I got up this morning and had to start a fire in the stove to get the chill out of the air. Started to get the transmission back in well enough to test it and see if it is a good one and went to the parts store for some gear oil. When coming back from the store, I seen a guy working on his truck and he was trying to find out why it stopped running. I had him to crank it and could tell it was not under any compression. Troubleshooting revealed that the timing chain had broken. We removed the valve cover and the chain was on the top sprocket. First time I had ever seen a chain not fall to the bottom.
Then went had lunch with Misty and by the time I got home it was just to hot to work in the shop. I did try to start it and see if the transmission was good but the battery was down. If all goes well I will get out early in the morning and hope I have a good transmission and can get it finished up. A friend of mine has a lift and we can get a transmission from start to finish in a couple of hours. By myself and not having a lift is normally a 6 hour job. Lifts are so nice.
Then went had lunch with Misty and by the time I got home it was just to hot to work in the shop. I did try to start it and see if the transmission was good but the battery was down. If all goes well I will get out early in the morning and hope I have a good transmission and can get it finished up. A friend of mine has a lift and we can get a transmission from start to finish in a couple of hours. By myself and not having a lift is normally a 6 hour job. Lifts are so nice.
Last edited by Terrys87; 10-08-2015 at 02:04 PM.
10-15-2015, 11:07 AM
#58
Super Moderator
Staff
Thread Starter
iTrader: (1)
Join Date: Aug 2008
Location: Anderson Missouri
Posts: 11,788
Likes: 0
Received 21 Likes
on
19 Posts
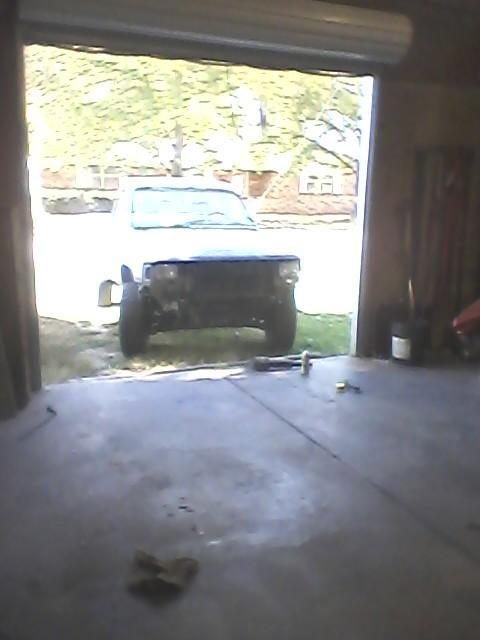
I finally got the transmission in and was able to test drive it around the block. I could only get it up to 25mph and I was able to test the transfer case and all seems to be normal. I don't have it together enough to be legal to drive it but feel it will be ok.
I still need to get the front shaft in and am letting it do a little soaking in Easy Off as it is grungy as most are. Just the little bit I did cleaned it up real quick. Still going to have to get the correct bolts that hold the transmission to the motor as someone has the wrong ones in it. I just have enough to hold it together for now.
Trans in and test drive done. A bad picture but it is moving under its own power again.
 12-17-2015, 07:11 AM
#59
Super Moderator
Staff
Thread Starter
iTrader: (1)
Join Date: Aug 2008
Location: Anderson Missouri
Posts: 11,788
Likes: 0
Received 21 Likes
on
19 Posts
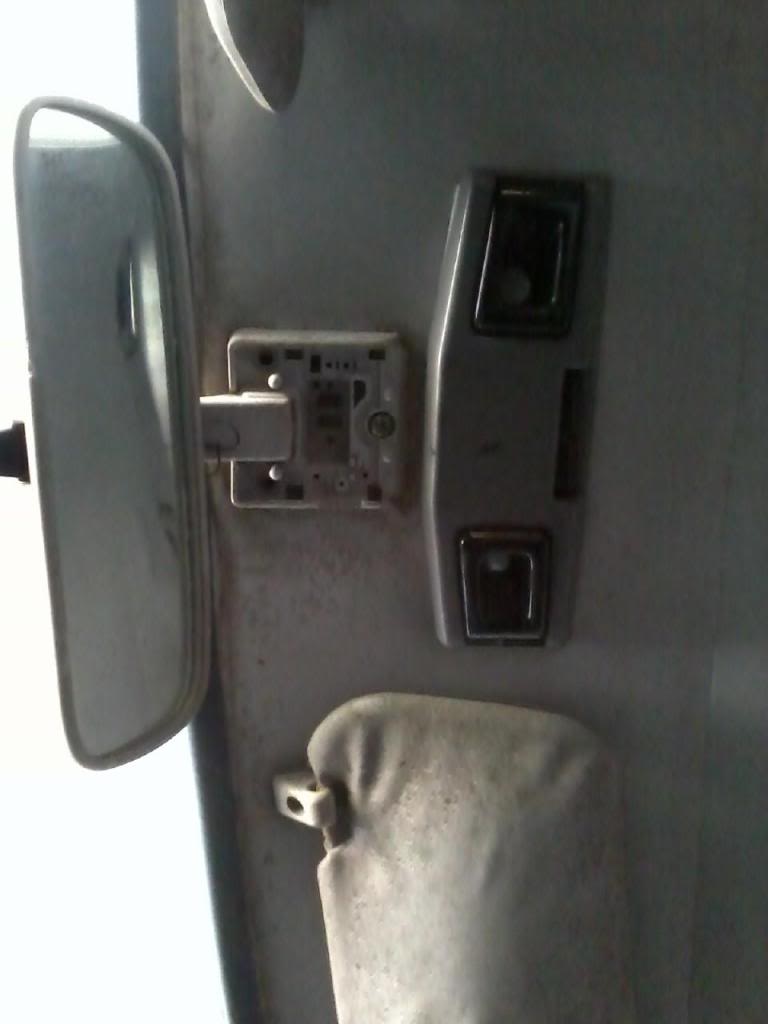
Toms truck is a very base model truck. He wants the available SR5 options on it. His did not come with the maplights. I am copying this from my 86 build for a refresher and info how to do it.
I had the windshield out and so I peeled the headliner back a little and slid it in. Then put the trimming back in to hold the liner back in place.
Then where the mirror goes I usd the mirror screws to hold it so I could cut the liner for the recess for the light assembly.
Here it is mounted. I still need to run the wiring. I have always added a standard cab pick up to my 4runners or extended cab trucks as the light that mounts in the center isnt much use for the driver. I run the wire to the top left corner for electrical. I show this in my 88 build and when I do it on this one I will update it. Been cleaning the headliner and have aways to go.
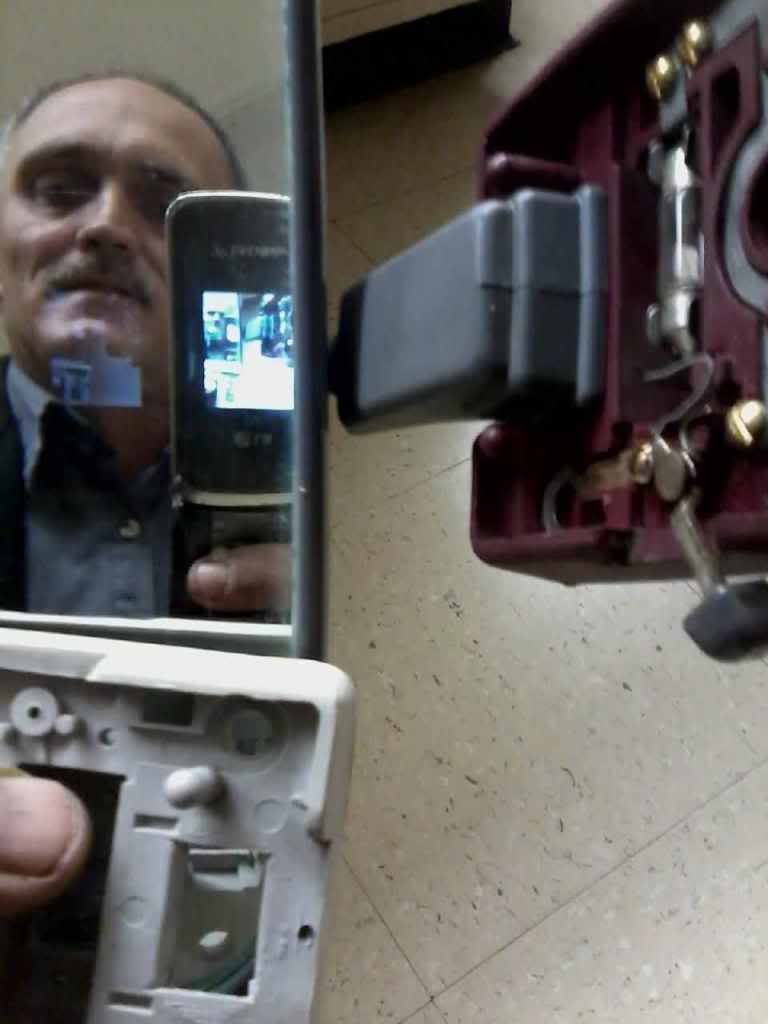
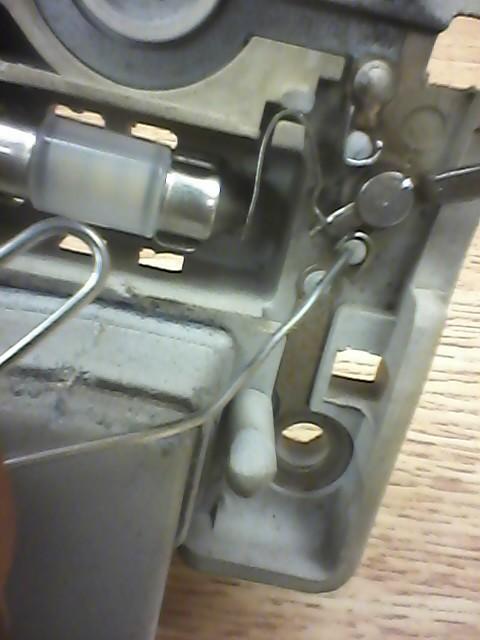
I got a dome light from the boneyard and it has gotten hot!!! One of the pins will not conduct electric so I am going to take the contacts out of the bad one and install it in a dummy holder. All of the pins cut outs are there but I will need to get some brass screws. This picture is just a refresher for me. Copied from my 86 thead to remind me of which screws I need.
I had the windshield out and so I peeled the headliner back a little and slid it in. Then put the trimming back in to hold the liner back in place.
Then where the mirror goes I usd the mirror screws to hold it so I could cut the liner for the recess for the light assembly.
Here it is mounted. I still need to run the wiring. I have always added a standard cab pick up to my 4runners or extended cab trucks as the light that mounts in the center isnt much use for the driver. I run the wire to the top left corner for electrical. I show this in my 88 build and when I do it on this one I will update it. Been cleaning the headliner and have aways to go.
I got a dome light from the boneyard and it has gotten hot!!! One of the pins will not conduct electric so I am going to take the contacts out of the bad one and install it in a dummy holder. All of the pins cut outs are there but I will need to get some brass screws. This picture is just a refresher for me. Copied from my 86 thead to remind me of which screws I need.
Last edited by Terrys87; 12-17-2015 at 07:13 AM.
12-17-2015, 07:22 AM
#60
Super Moderator
Staff
Thread Starter
iTrader: (1)
Join Date: Aug 2008
Location: Anderson Missouri
Posts: 11,788
Likes: 0
Received 21 Likes
on
19 Posts
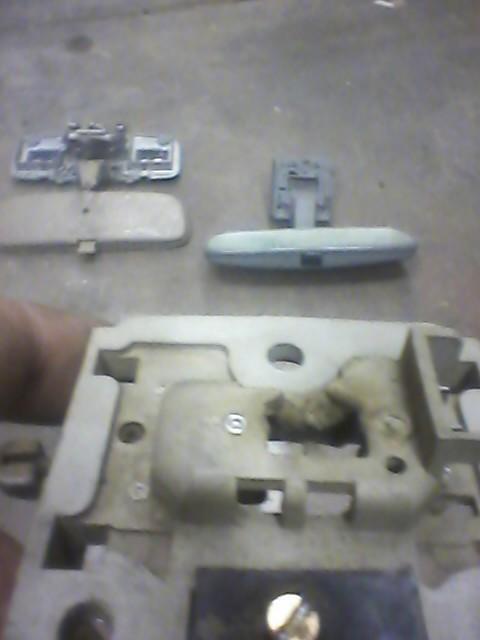
I will be adding the dome light from an 89-95 runner as it has a better switch. I know Chefyota and will check his thread for what is needed to make it work. I have never installed one of these.
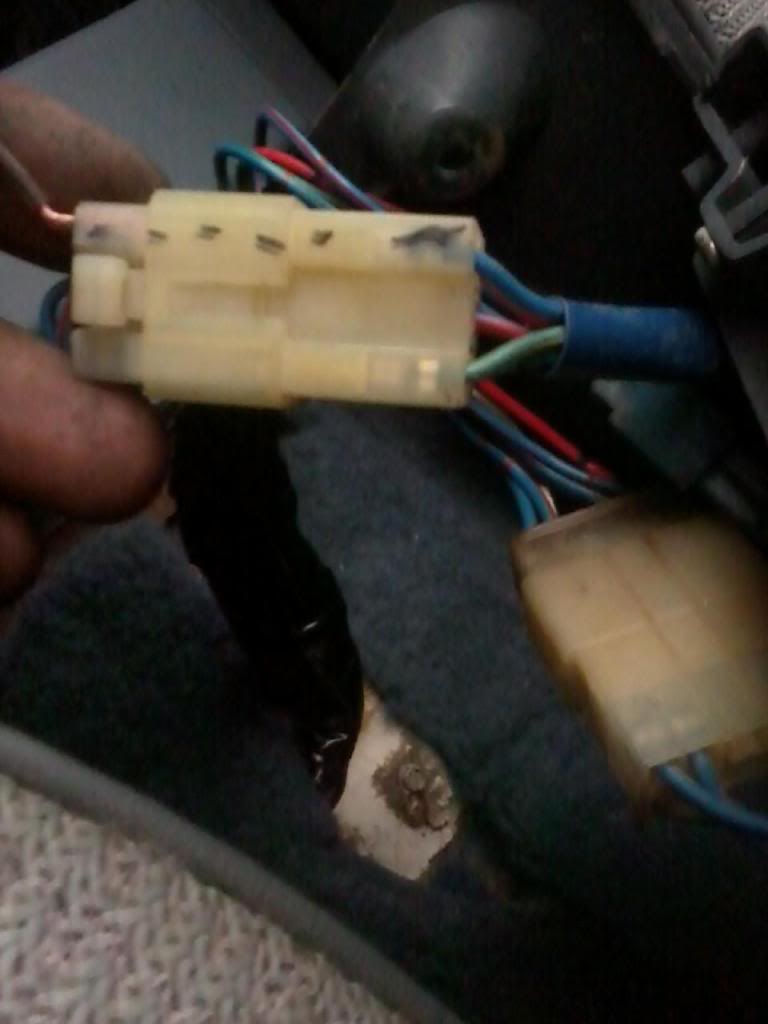
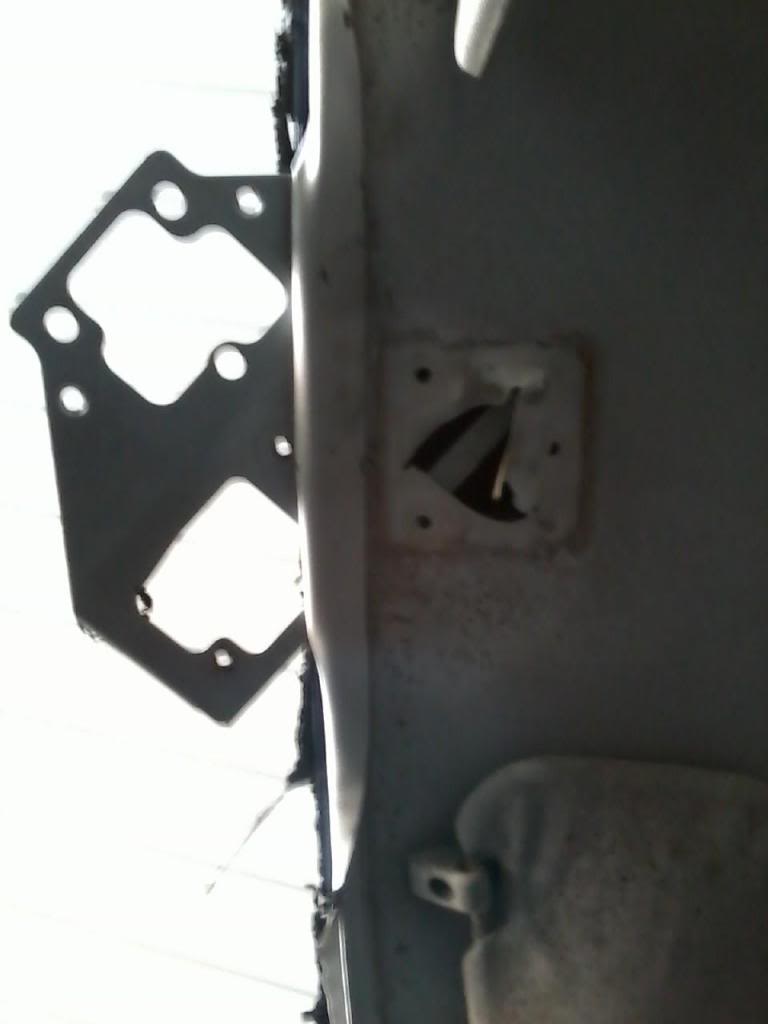
Here is what is needed for the maplight. The black wire with the white stripe is the hot wire. It is grounded thru the cab with one of the mounting bolts.
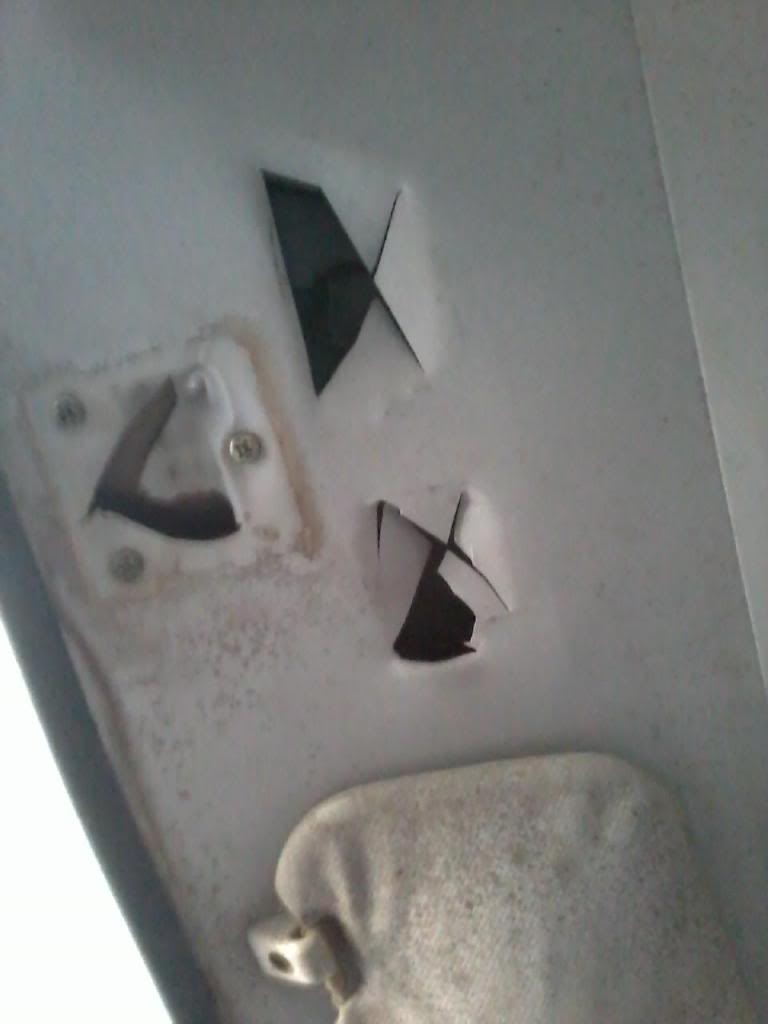
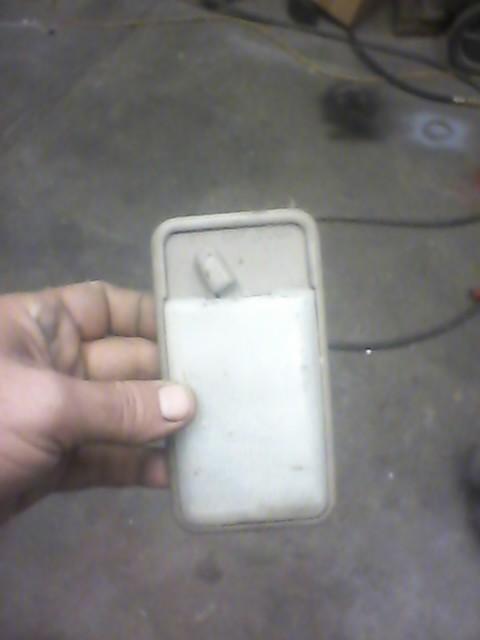
Here you can see the replacement got hot. I could not tell it when I got it out of the boneyard. It is from a standard cab. I replaced my bulb in my 85 with a LED bulb which is brighter and not hot. I will move the contacts from this mount to a dummy mount which has the cutouts. Brass screw pic above is a reminder for me as to which ones I have used in the past.

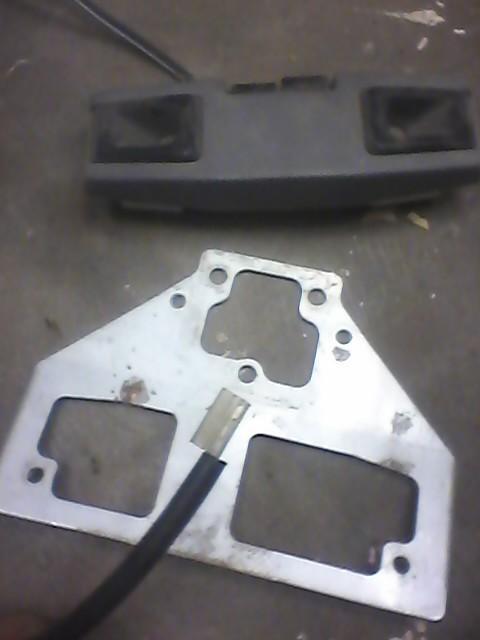
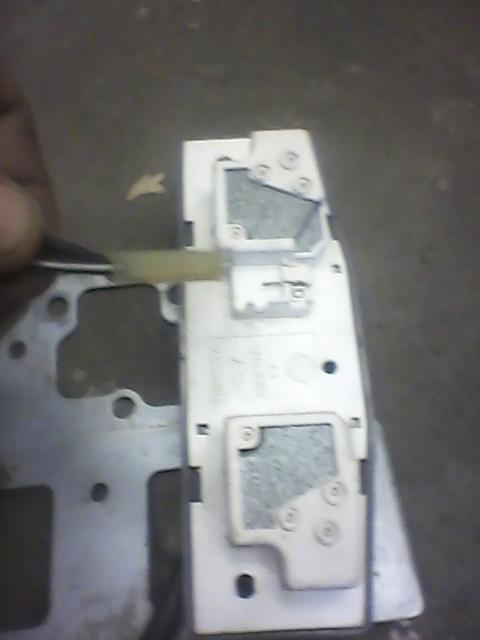
I got a 89-95 runner maplight and was going to try and install in one of my trucks but would be to much fabricating so will use the mirror for my truck and the contacts to fix the burnt contact in the dummy light mount.
Only a single wire powers the maplight, ground is thru cab.
Here is the LED bulb I got from Oriellys PN# Sylvania DE3175

Here is what is needed for the maplight. The black wire with the white stripe is the hot wire. It is grounded thru the cab with one of the mounting bolts.

Here you can see the replacement got hot. I could not tell it when I got it out of the boneyard. It is from a standard cab. I replaced my bulb in my 85 with a LED bulb which is brighter and not hot. I will move the contacts from this mount to a dummy mount which has the cutouts. Brass screw pic above is a reminder for me as to which ones I have used in the past.

I got a 89-95 runner maplight and was going to try and install in one of my trucks but would be to much fabricating so will use the mirror for my truck and the contacts to fix the burnt contact in the dummy light mount.

Only a single wire powers the maplight, ground is thru cab.

Here is the LED bulb I got from Oriellys PN# Sylvania DE3175

Last edited by Terrys87; 12-17-2015 at 07:28 AM.


