Toms 87 4Runner Build


 02-15-2015, 06:22 AM
#22
Super Moderator
Staff
Thread Starter
iTrader: (1)
Join Date: Aug 2008
Location: Anderson Missouri
Posts: 11,788
Likes: 0
Received 21 Likes
on
19 Posts
Thanks old87yota.. I have learned a few things on these and try to pass on what I can. Doing my part to keep them on the road a little longer. It takes a littel time but I will get it finished up here in the near future and I think the paint scheme is going to look better then it did when it left the factory.
 02-15-2015, 06:23 AM
#23
 03-17-2015, 11:05 AM
#24
Super Moderator
Staff
Thread Starter
iTrader: (1)
Join Date: Aug 2008
Location: Anderson Missouri
Posts: 11,788
Likes: 0
Received 21 Likes
on
19 Posts
I started working on the 4Runner Badge restoration. Problem I am having is finding paint that is gold enough to match what the factory used. I used some Gold paint but dont like the results of it. Here is a start. I tried several other ways of getting the old paint out and a paper clip and lightly rubbing under hot water worked best for me.
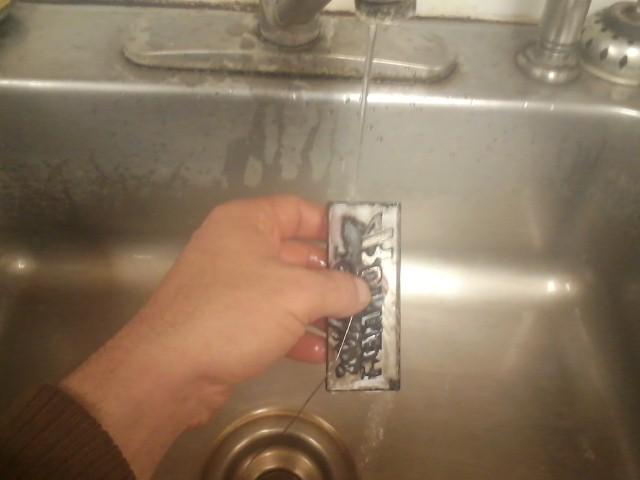
Using a Qtip and some thinner I cleaned the badge out and then rinsed again. Th colors in the picture is what I tried to use and wasnt gold enough. When I find a color that will work, The whole back piece gets covered with a layer of black paint. Coloring the TOYOTA in chrome or silver paint is going to be the most difficult. I will be out in town this weekend and will see what else I can find. Any suggestions on brand and color?
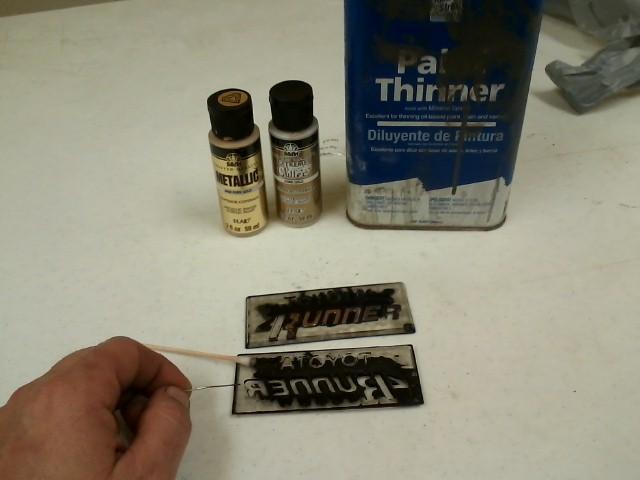

Using a Qtip and some thinner I cleaned the badge out and then rinsed again. Th colors in the picture is what I tried to use and wasnt gold enough. When I find a color that will work, The whole back piece gets covered with a layer of black paint. Coloring the TOYOTA in chrome or silver paint is going to be the most difficult. I will be out in town this weekend and will see what else I can find. Any suggestions on brand and color?
 03-17-2015, 10:52 PM
#25

Use the hobby stuff testors!
03-19-2015, 06:39 PM
#26
Super Moderator
Staff
Thread Starter
iTrader: (1)
Join Date: Aug 2008
Location: Anderson Missouri
Posts: 11,788
Likes: 0
Received 21 Likes
on
19 Posts
Thanks 84 yota dude... I will give that a try. I should be back in town in the next few days and see what I can find. Once I find some that is the right color, that will wrap up that project.
03-19-2015, 07:07 PM
#27
Super Moderator
Staff
Thread Starter
iTrader: (1)
Join Date: Aug 2008
Location: Anderson Missouri
Posts: 11,788
Likes: 0
Received 21 Likes
on
19 Posts
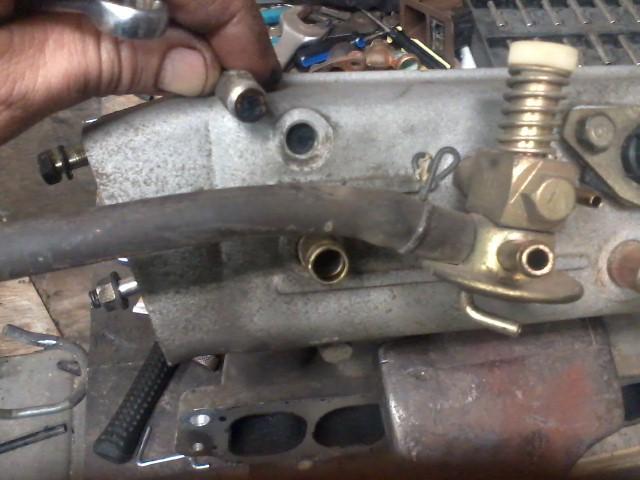
I am making this post for a guy to help him in swapping out his injectors and will be turning it into a thread later on for several other fixes such as Cleaning the EGR, Plenum, and Swapping Injectors.
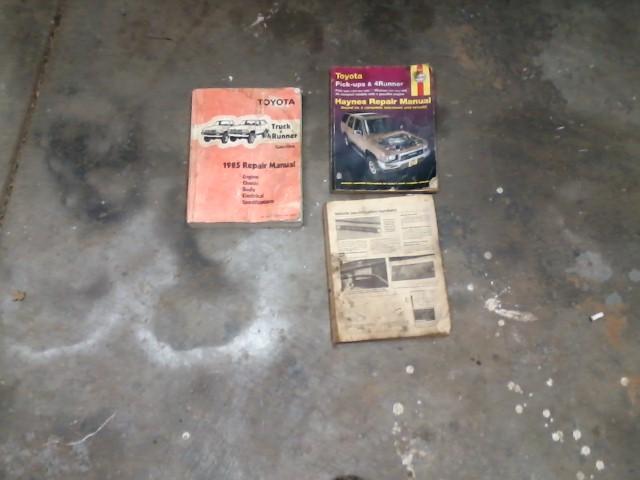
I do have a Factory Service Manual. I two Haynes Manual, one is worn out and is what I use the most for quick references. Several knock the Haynes but it is most easily available and once you learn how to use it, it is as good as a FSM in my opinion.
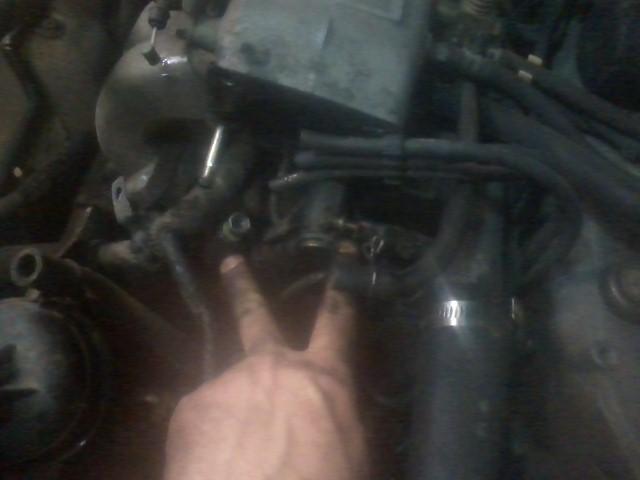
Disconnect battery and remove the Plenum air tube.
I use my fingers for a reference when I need to know which vacuum line goes where. These trucks have to many hoses to mark each one on this post. The newer the truck, the more hoses Toyota added.
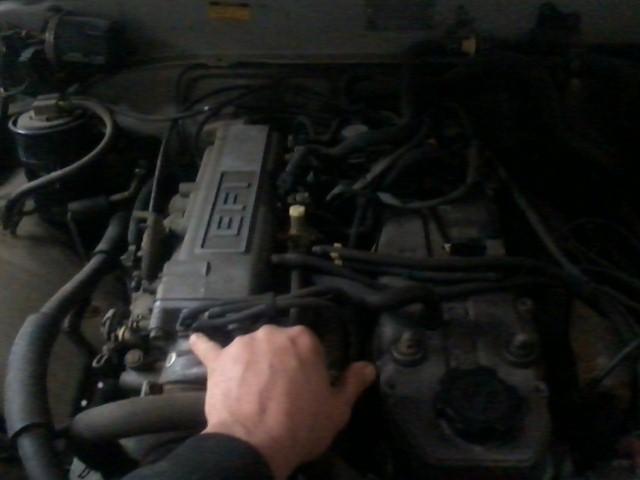
Another way and a reference for me is to use a marker.
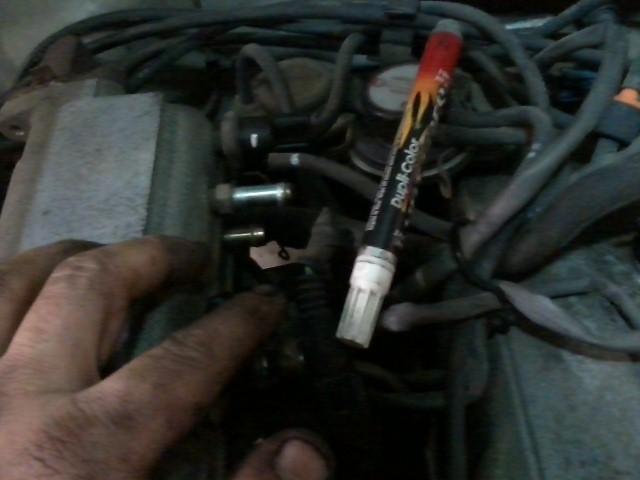
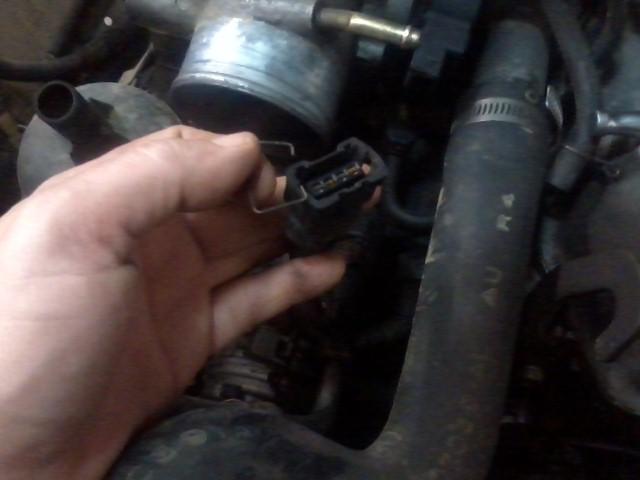
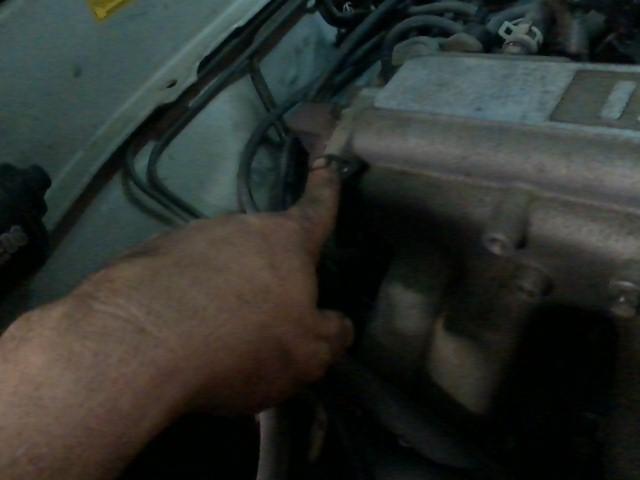
Using a small flat blade, lift up on one corner of the wire clip that holds the Throttle Position Sensor on and work it all the way around the clip to remove from sensor.
I see these damaged all the time. Not sure why when done right there is no damage. You do need to be careful as the plastic is brittle and will break.
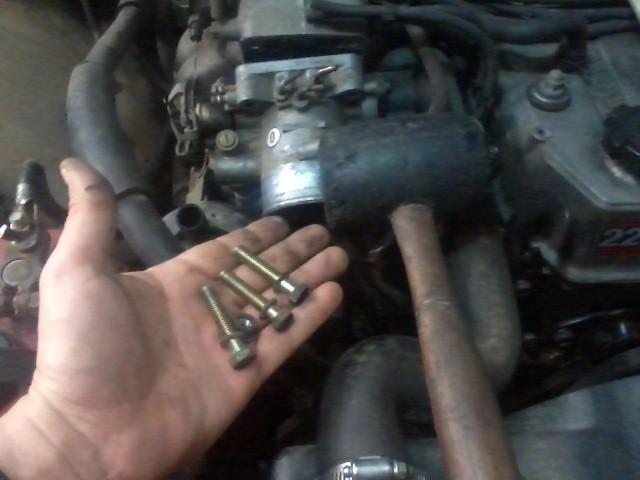
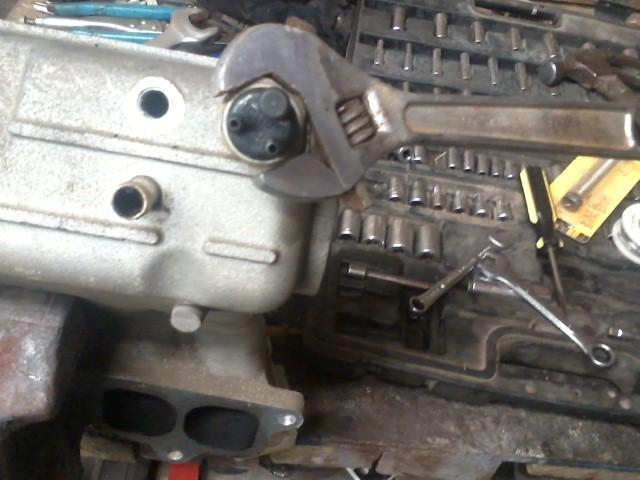
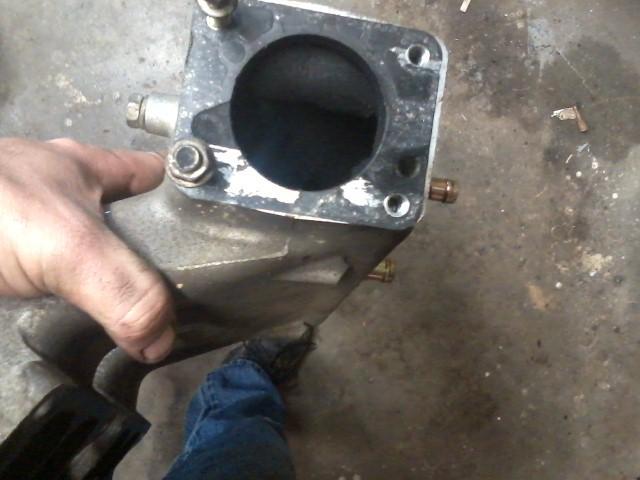
Remove 3 bolts and 1 nut to get the Throttle Body off. You may need to tap the Throttle Body assembly with a rubber mallet to break the seal.
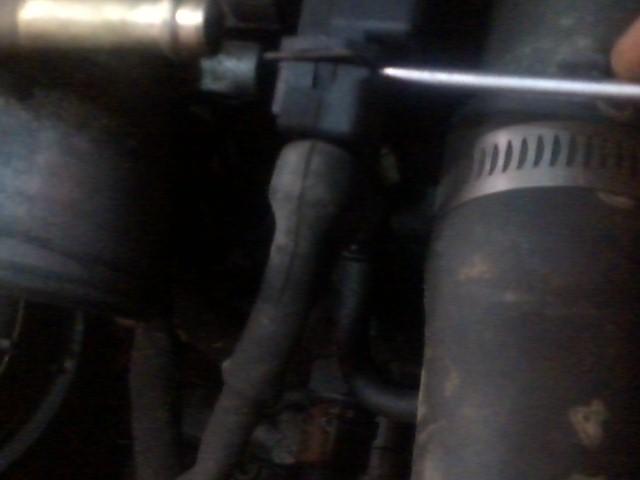
Removing this bolt and sliding the bulb out of the way does help with getting access for the hose clamp in the next step.
This water hose can be a pain in the rear to get off.
And this hose.
Here I use two of the bolts that I used to take off the Throttle Body Assembly to plug the water lines to keep from getting antifreeze all over the floor.
Do NOT mess with the Throttle Position Sensor. It is a pain in the rear to reset. I have Toyota to set mine. It sounds easy to do but not for me. Just need an Allen Wrench and some feeler gauges but still is to difficult for me. Numerous threads on the TPS. Search 4crawler for more info.

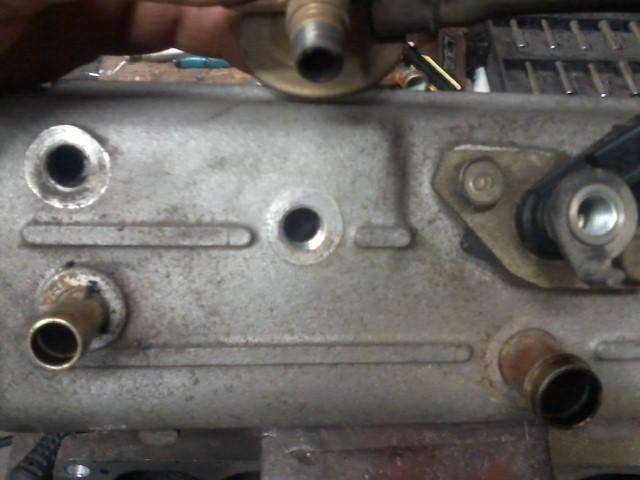
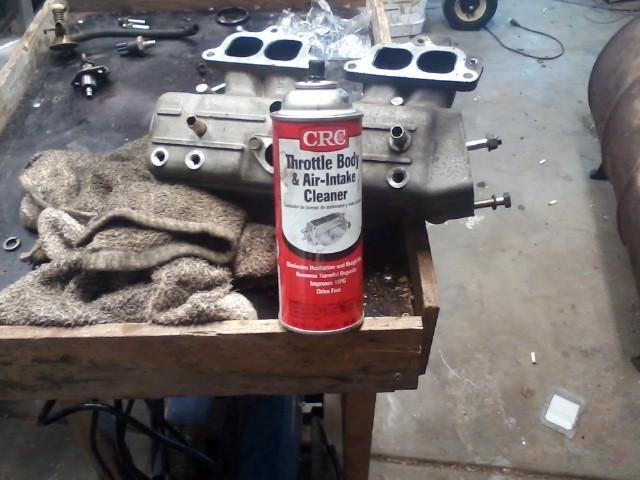
With cleaner, make sure all air ports are cleaned.

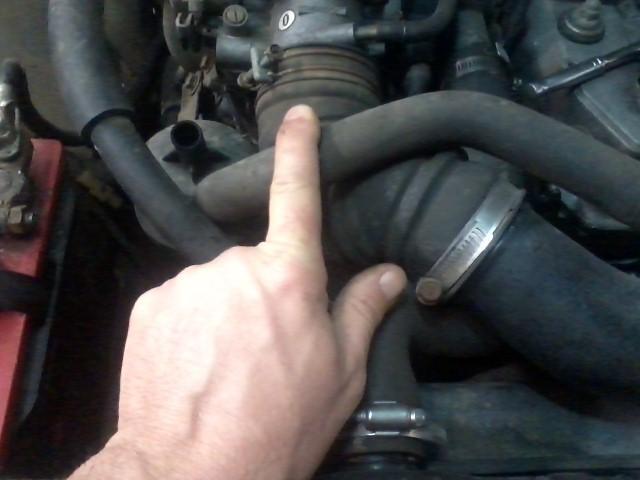
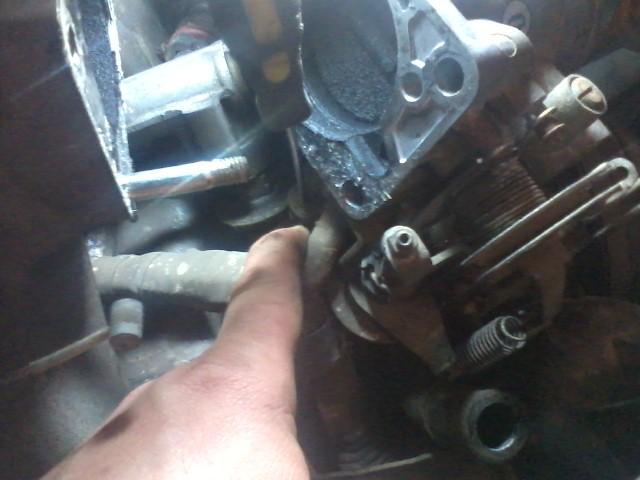
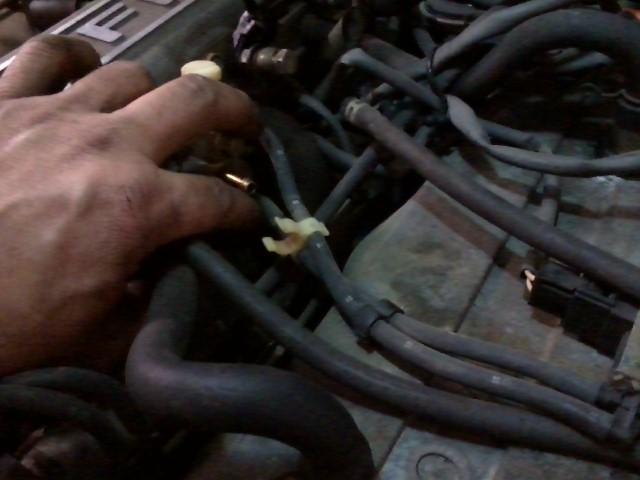
These 3 metal lines go to where my thumb is at. Can be hard to see when dirty.
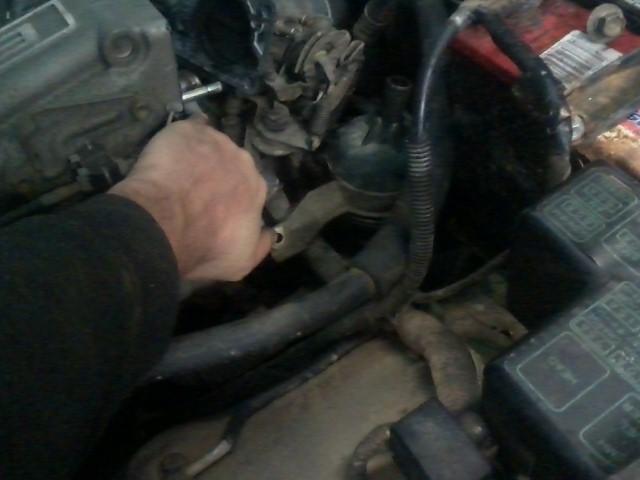
Several different set ups on these for the Throttle cable. I just remove the bolt holding it on to the Plenum and then reinstall the bolts when it is off to keep track of them.
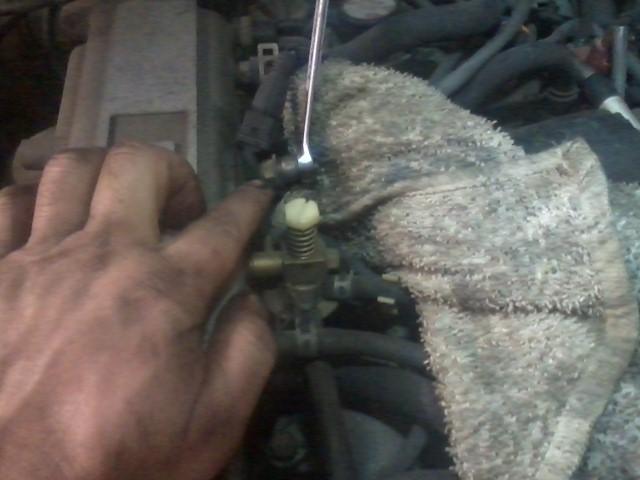
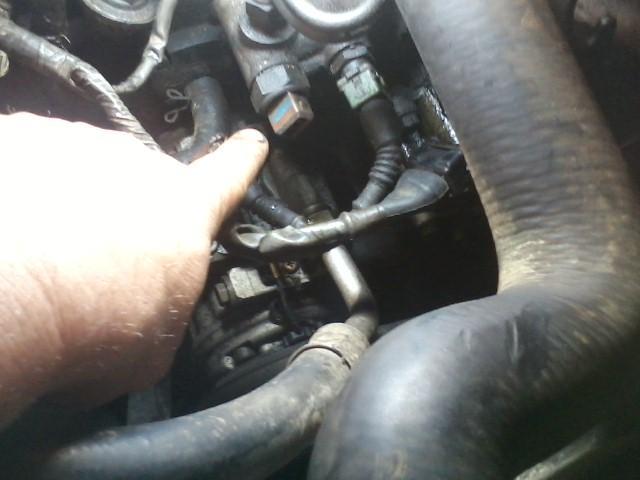
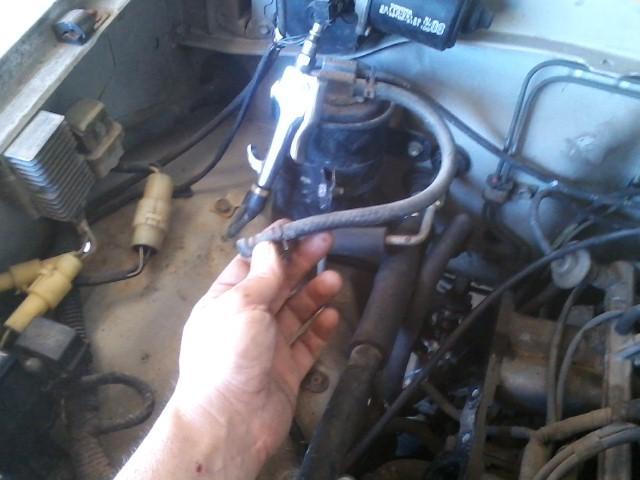
With a rag under the Cold Start Injetor, remove the bolt. Manuals say to disconnect the fuel pump connector at the tank and crank until the truck runs out of gas. That is a real pain to do and this way works for me. This will relieve the fuel pressure.
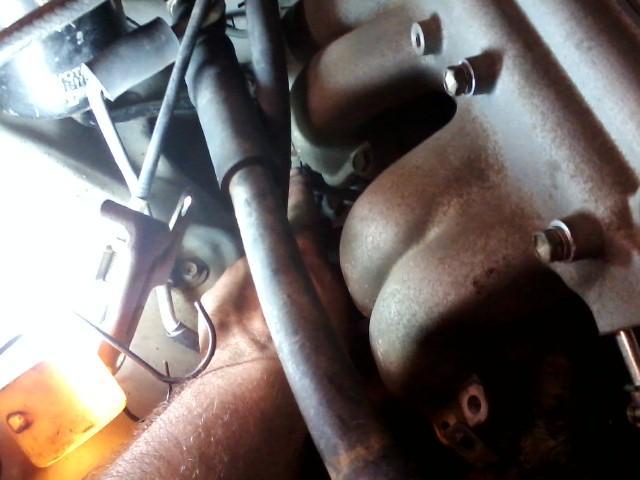
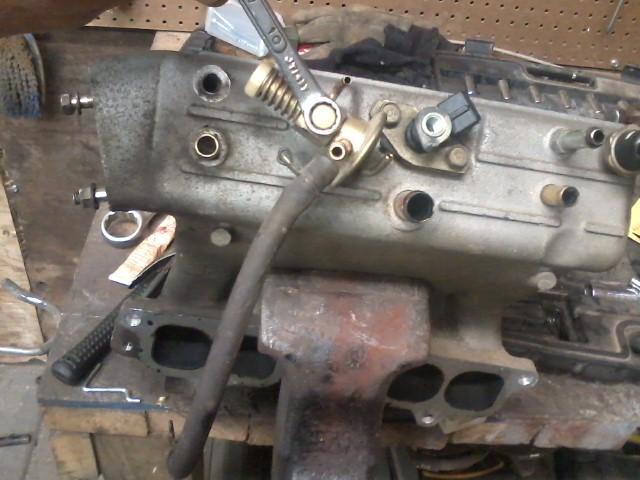
Remove these two bolts to get the Plenum off.
Remove clip and gently bend the metal line back a little bit for the Plenum to come off.
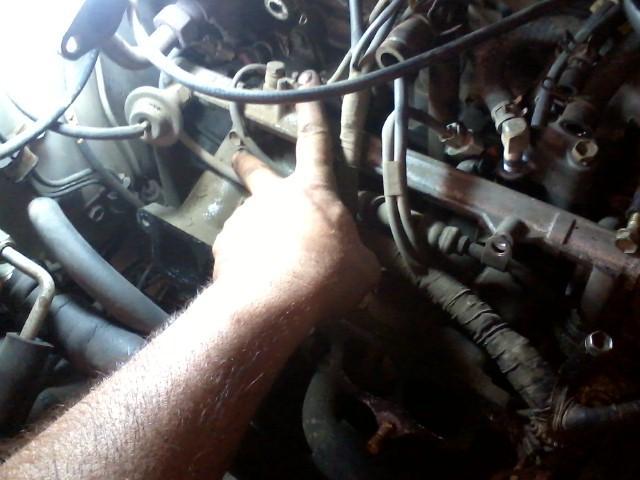
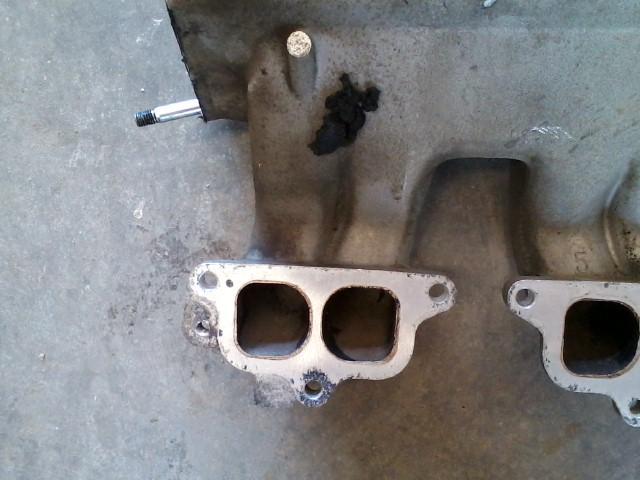
Remove the 6 bolts that hold the Plenum to the Intake. There are 2 nuts at the bottom. This rear nut is for the ground for the Injectors.
Here is Plenum off with attachments. I will clean each line and piece later on.
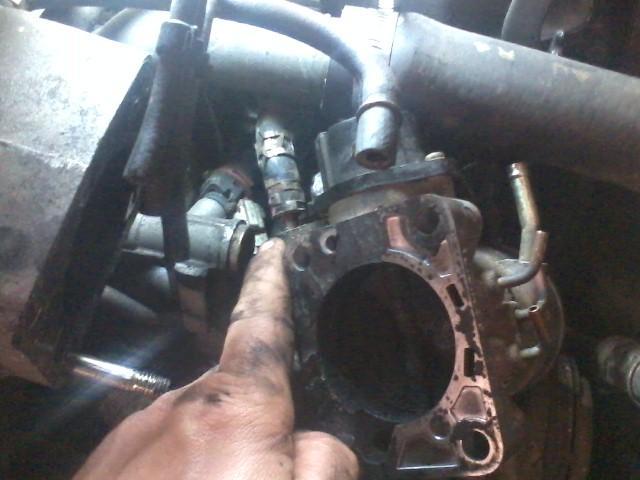
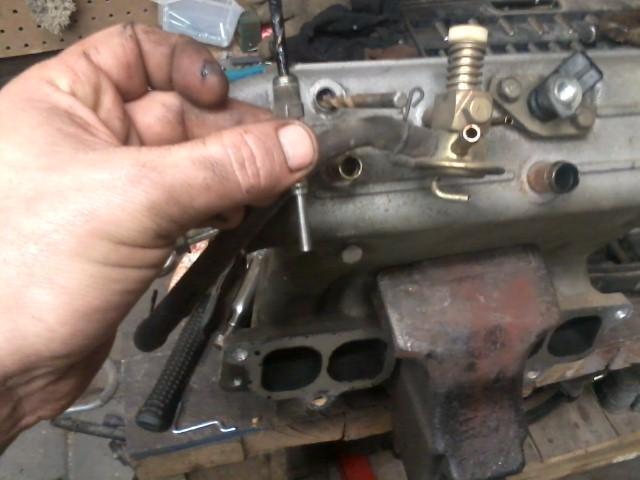
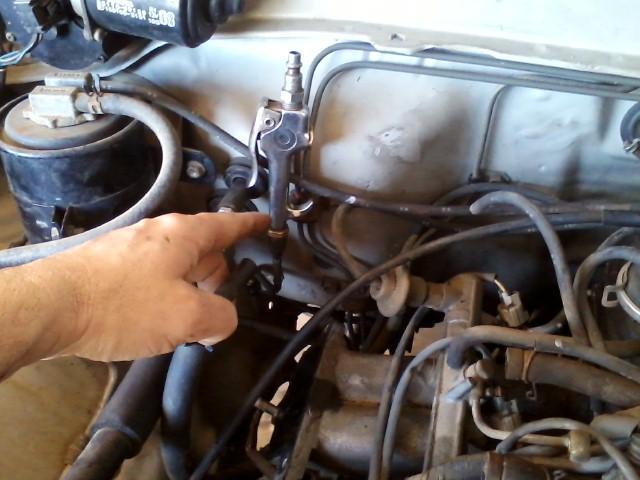
To get to the Injectors, remove this 10mm bolt and slightly bend the line up to get access to the 12mm bolt that holds the Fuel Rail on.
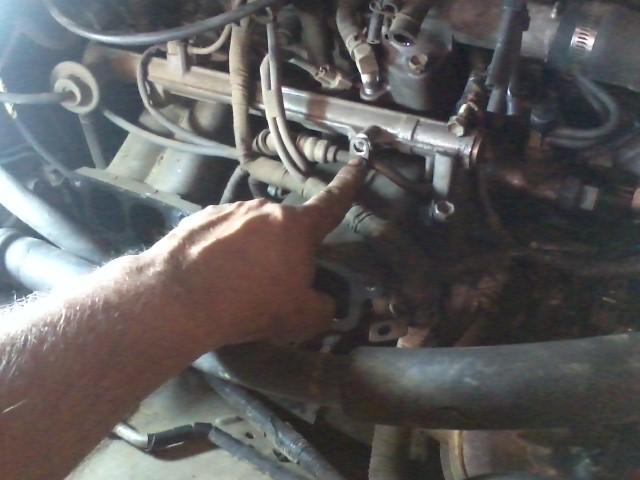
Remove the rear 12mm bolt. Disconnect the Injector connectors and lift the fuel rail off. The Injectors may stay on the motor or come off with the Fuel Rail. I will post more later but this is what is needed to swap injectors.
I do have a Factory Service Manual. I two Haynes Manual, one is worn out and is what I use the most for quick references. Several knock the Haynes but it is most easily available and once you learn how to use it, it is as good as a FSM in my opinion.

Disconnect battery and remove the Plenum air tube.

I use my fingers for a reference when I need to know which vacuum line goes where. These trucks have to many hoses to mark each one on this post. The newer the truck, the more hoses Toyota added.

Another way and a reference for me is to use a marker.

Using a small flat blade, lift up on one corner of the wire clip that holds the Throttle Position Sensor on and work it all the way around the clip to remove from sensor.

I see these damaged all the time. Not sure why when done right there is no damage. You do need to be careful as the plastic is brittle and will break.

Remove 3 bolts and 1 nut to get the Throttle Body off. You may need to tap the Throttle Body assembly with a rubber mallet to break the seal.

Removing this bolt and sliding the bulb out of the way does help with getting access for the hose clamp in the next step.

This water hose can be a pain in the rear to get off.

And this hose.

Here I use two of the bolts that I used to take off the Throttle Body Assembly to plug the water lines to keep from getting antifreeze all over the floor.

Do NOT mess with the Throttle Position Sensor. It is a pain in the rear to reset. I have Toyota to set mine. It sounds easy to do but not for me. Just need an Allen Wrench and some feeler gauges but still is to difficult for me. Numerous threads on the TPS. Search 4crawler for more info.

With cleaner, make sure all air ports are cleaned.

These 3 metal lines go to where my thumb is at. Can be hard to see when dirty.

Several different set ups on these for the Throttle cable. I just remove the bolt holding it on to the Plenum and then reinstall the bolts when it is off to keep track of them.

With a rag under the Cold Start Injetor, remove the bolt. Manuals say to disconnect the fuel pump connector at the tank and crank until the truck runs out of gas. That is a real pain to do and this way works for me. This will relieve the fuel pressure.

Remove these two bolts to get the Plenum off.

Remove clip and gently bend the metal line back a little bit for the Plenum to come off.

Remove the 6 bolts that hold the Plenum to the Intake. There are 2 nuts at the bottom. This rear nut is for the ground for the Injectors.

Here is Plenum off with attachments. I will clean each line and piece later on.

To get to the Injectors, remove this 10mm bolt and slightly bend the line up to get access to the 12mm bolt that holds the Fuel Rail on.

Remove the rear 12mm bolt. Disconnect the Injector connectors and lift the fuel rail off. The Injectors may stay on the motor or come off with the Fuel Rail. I will post more later but this is what is needed to swap injectors.
 03-19-2015, 08:00 PM
#28
Anytime, talk about some carbon build up!
03-19-2015, 08:54 PM
#29
Registered User
Join Date: Jan 2014
Posts: 5
Likes: 0
Received 0 Likes
on
0 Posts
WOWWW Terry, this is great. My injectors arrived today, and I should be able to start on this on Monday I hope, and I will be glued to this build for sure. What a great job you do Pardner, you should open up a Master Yota Tech School !! 
Rick
Rick
03-20-2015, 06:17 AM
#30
Super Moderator
Staff
Thread Starter
iTrader: (1)
Join Date: Aug 2008
Location: Anderson Missouri
Posts: 11,788
Likes: 0
Received 21 Likes
on
19 Posts
Hello 84 yota dude... One of these days I will learn to wearsome gloves to keep that stuff off of my hands. One of these days, lol.
Helllo Old Tow... I put these up for you. Yours is a 90s? so there will be some differences such as plug connectors and you will have more emissions stuff. I havent worked on newer 22res in sometime but not much more involved and what I post will be close enough to get you over any hump you may run into. Some of the pictures are not the best but I cant open the shop door as it is to cold to get natural light.
Helllo Old Tow... I put these up for you. Yours is a 90s? so there will be some differences such as plug connectors and you will have more emissions stuff. I havent worked on newer 22res in sometime but not much more involved and what I post will be close enough to get you over any hump you may run into. Some of the pictures are not the best but I cant open the shop door as it is to cold to get natural light.
03-20-2015, 06:32 AM
#31
Super Moderator
Staff
Thread Starter
iTrader: (1)
Join Date: Aug 2008
Location: Anderson Missouri
Posts: 11,788
Likes: 0
Received 21 Likes
on
19 Posts
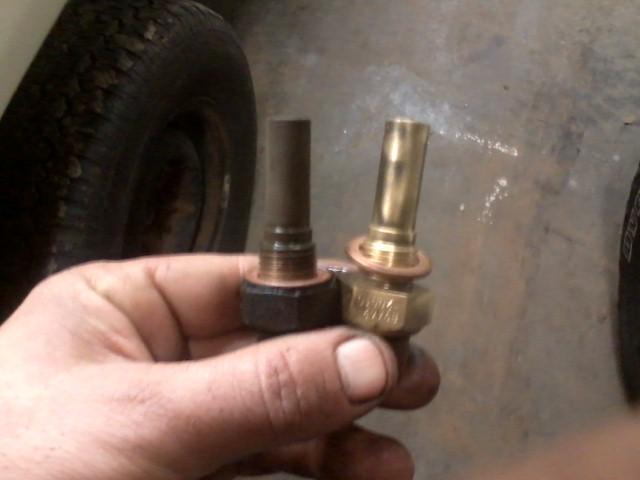
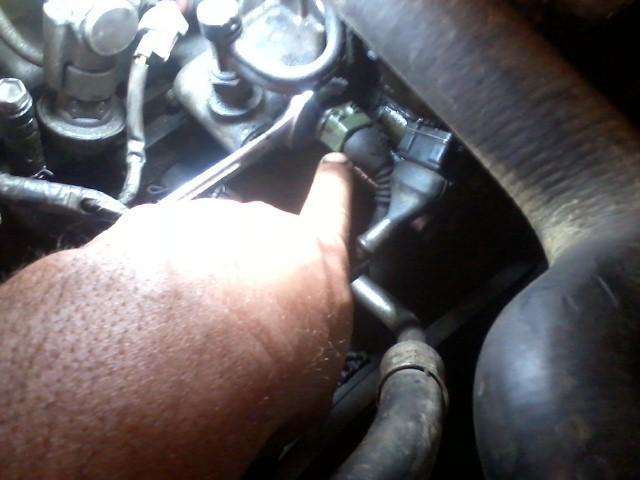
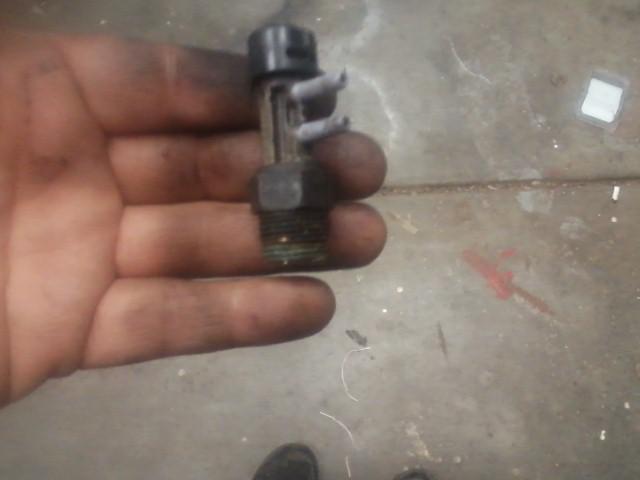
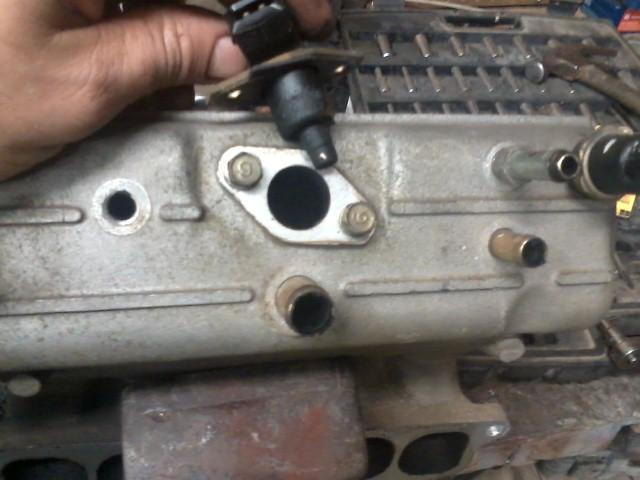
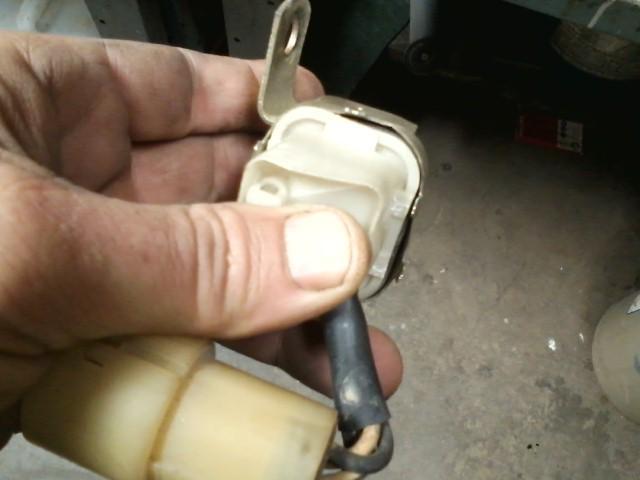
Cleaning Sensors. The Brown one is your Cold Start Injector Timing Switch. This I have had to fail and never the Cold Start Injector in my experience. After removing the clip I use a 24mm deep well socket to remove it.
I have seen them a lot more dirty then this, here is a good one to the one I just pulled out. I know this one is good and will post how to test later on. One I always try to get when I find them in the boneyard.
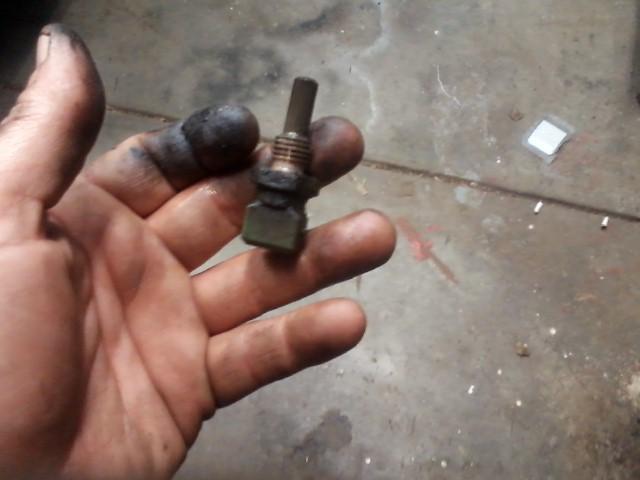
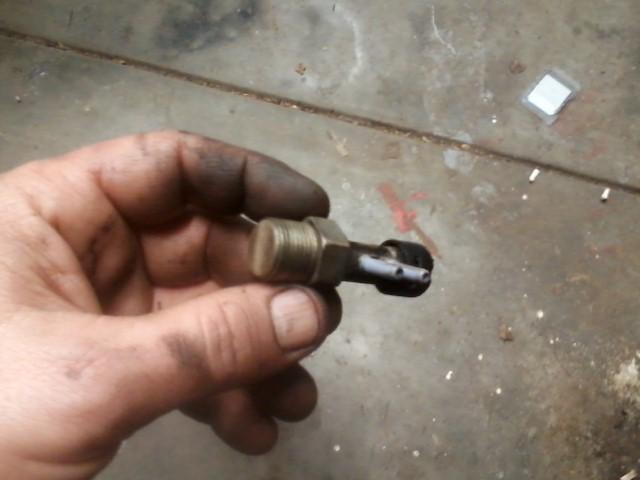
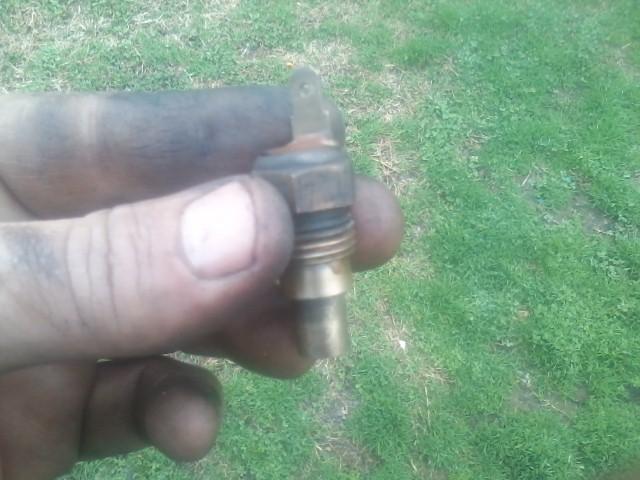
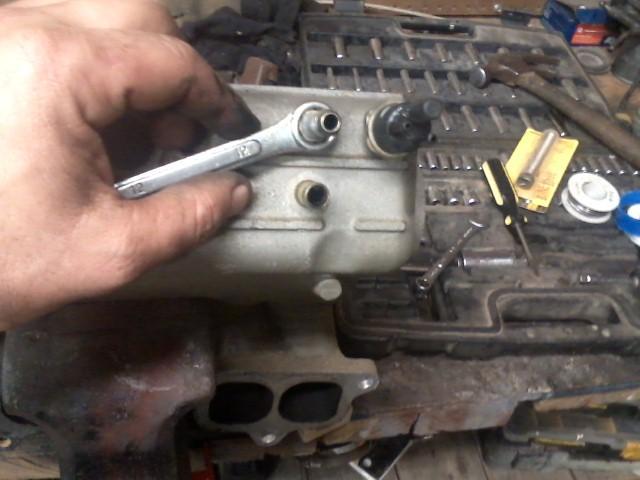
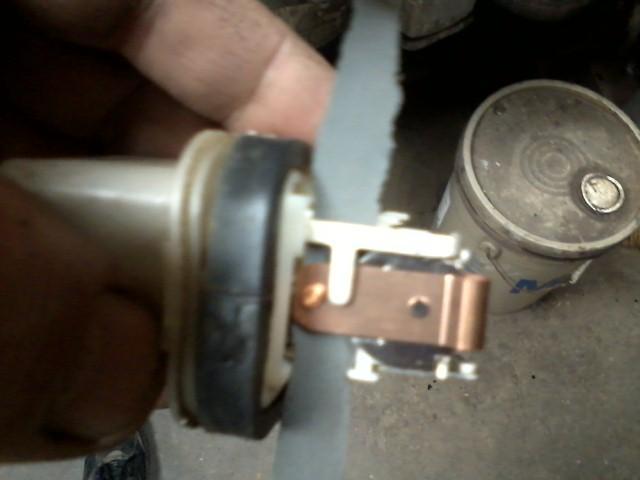
Here is the Water Thermo Switch, never had one of these to fail, just need cleaning. I have to use a 19mm open end wrench to turn it to get access to the wire clip.
Here it is pulled and dirty.
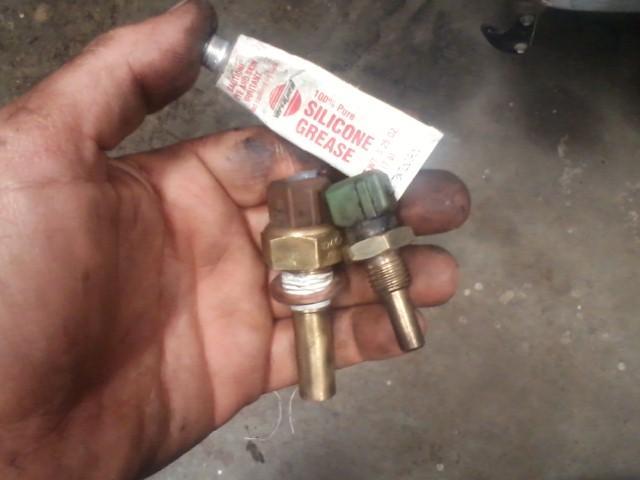
One of the manuals says to wrap the threads on the CSI Timing Swith with plumbers tape. Not the others. I also put dielectric grease on the contacts before installing them.
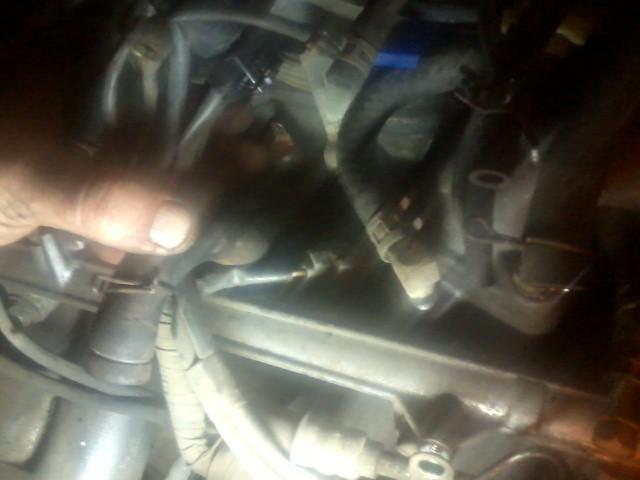
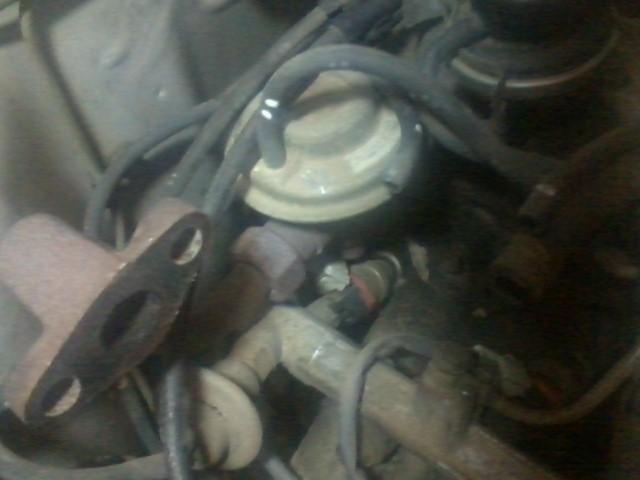
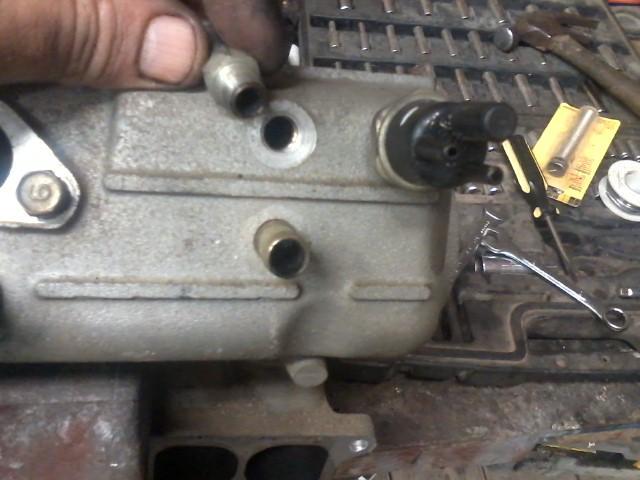
Not sure what this one does but I always give it a good cleaning. It does not go in deep and sits above the CSI Timing Switch. Check to see if air can blow thru it. 17mm will pull it out.
Dirty, I just clean all these sensors with a brass toothbrush.
Cleaned
Cant really get a good picture, but this is the Temperture sensor. It has the blue connector on all years if I am correct. Located between cylinders 2 and 3. Use a 17mm deep well with extention to get.
Cleaning this one has fixed some of my temperture gauge issues in the past.
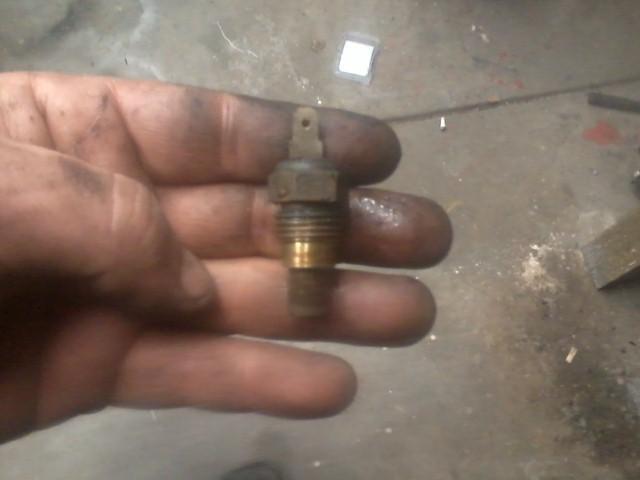
Cleaned, I also use a brush on the contact and will add dielectric grease to the blue connector.
Maybe you can see it here.

I have seen them a lot more dirty then this, here is a good one to the one I just pulled out. I know this one is good and will post how to test later on. One I always try to get when I find them in the boneyard.

Here is the Water Thermo Switch, never had one of these to fail, just need cleaning. I have to use a 19mm open end wrench to turn it to get access to the wire clip.

Here it is pulled and dirty.

One of the manuals says to wrap the threads on the CSI Timing Swith with plumbers tape. Not the others. I also put dielectric grease on the contacts before installing them.

Not sure what this one does but I always give it a good cleaning. It does not go in deep and sits above the CSI Timing Switch. Check to see if air can blow thru it. 17mm will pull it out.

Dirty, I just clean all these sensors with a brass toothbrush.

Cleaned

Cant really get a good picture, but this is the Temperture sensor. It has the blue connector on all years if I am correct. Located between cylinders 2 and 3. Use a 17mm deep well with extention to get.

Cleaning this one has fixed some of my temperture gauge issues in the past.

Cleaned, I also use a brush on the contact and will add dielectric grease to the blue connector.

Maybe you can see it here.
 03-20-2015, 07:47 AM
#32
Super Moderator
Staff
Thread Starter
iTrader: (1)
Join Date: Aug 2008
Location: Anderson Missouri
Posts: 11,788
Likes: 0
Received 21 Likes
on
19 Posts
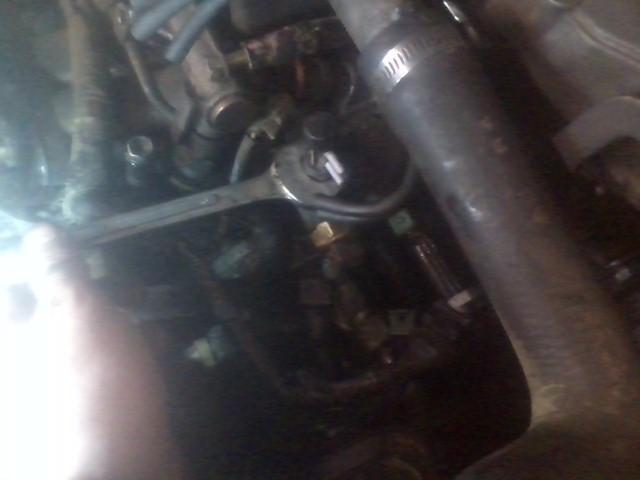
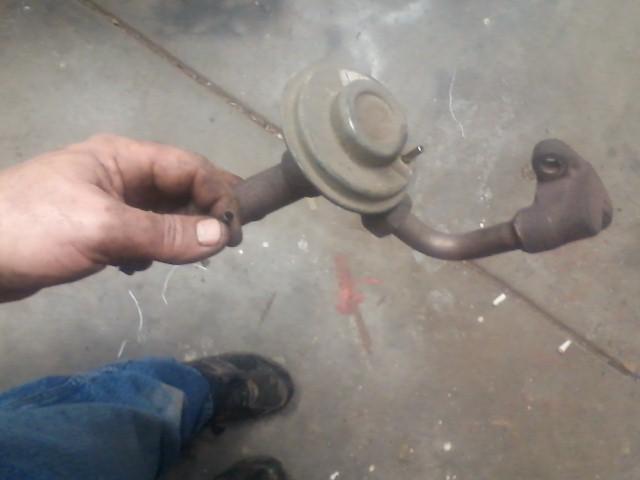
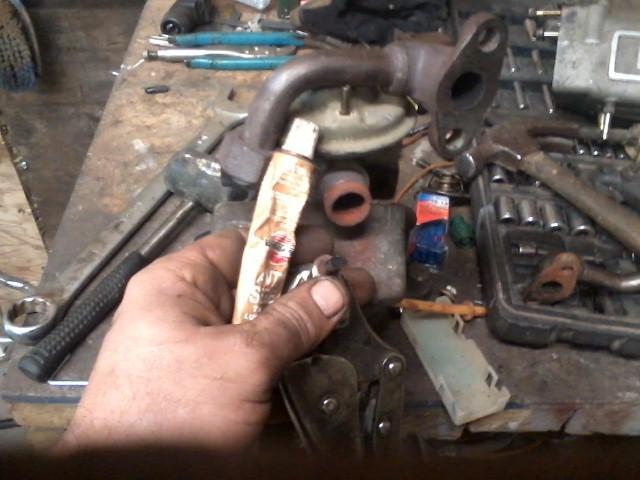
Here is the EGR. It is held on with two bolts and one nut. A 12mm socket and various extentions will get it but still can be a pain to get off. I put 2 hash lines for a reminder of where the hose goes to.
Here it is off.
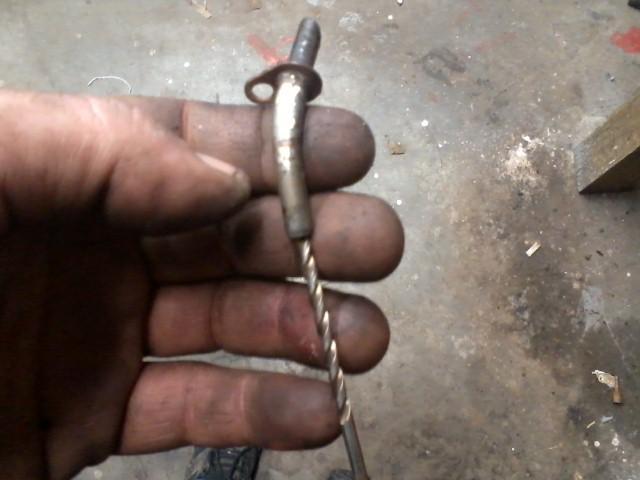
I have done enough of these to know you will not get the screw out with a screw driver. Use vise grips to get a hold of the screw to get it out. Leave the carbon in the tube at this time and will explain in why in the next few post.
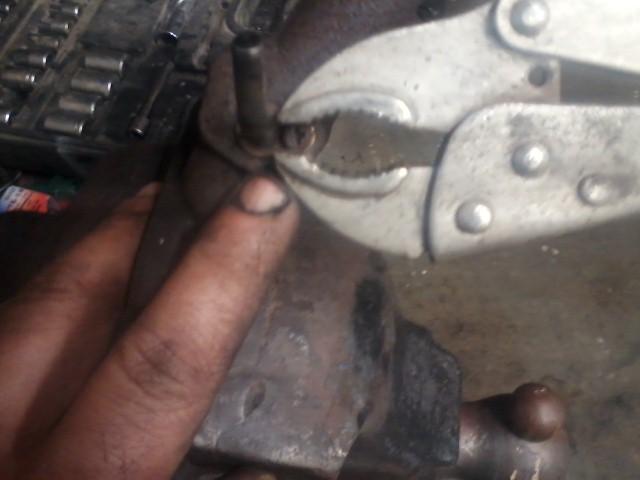
This tube will be clogged and hard to get out of the EGR. You have to get a good clamp force on the tube and the carbon will keep it from crushing the tube.
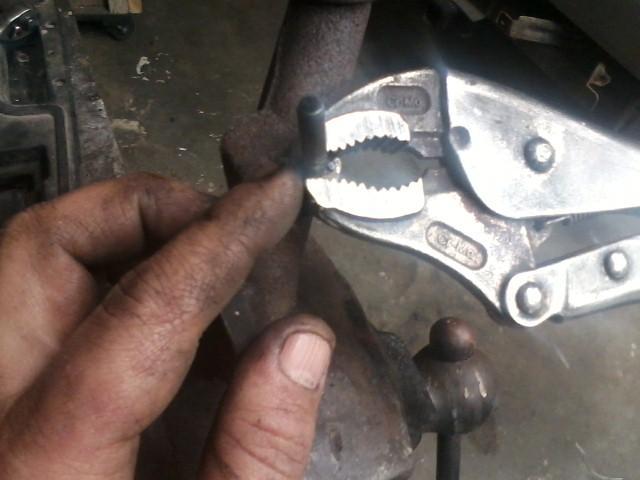
Using a twisting and tapping on the vise grips will get the tube out. It is glued in there with the carbon.
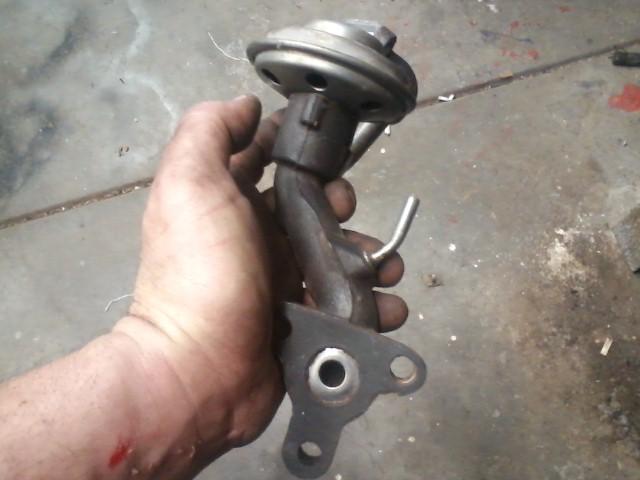
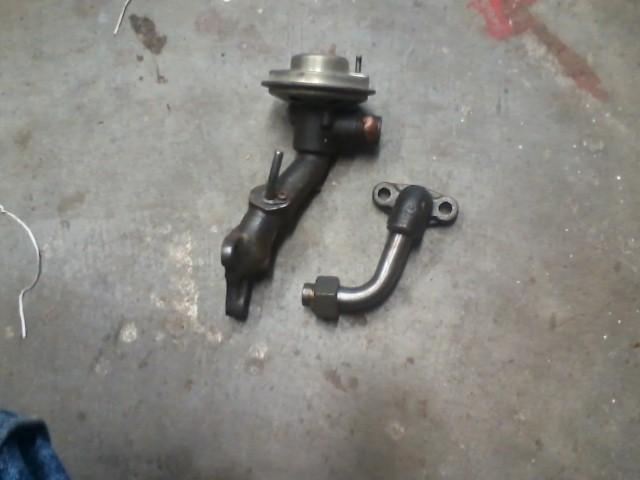
Getting this pipe off can be hard as well. Do not get aggressive with it you can break the threads off of the EGR, these are expensive. I use a wrench and gentle taps with a rubber hammer to break the tube loose. You can soak with PB Blaster if time allows.
When reassembing after cleaning, use Antiseaze on threads.
To clean the carbon out of the tube, I use a drill bit and just clean it that way.
Clean out the EGR with wire, air hose... until you can get air flowing thru the assembly. By putting a vacuum on the hoses you can hear and see the valve operate.
I run the whole assembly under a wire brush and then coat with WD-40. Not sure how long it will last but trying to keep it from rusting up looking better. Also I will cover the threads with the anti seize when I install the EGR.

Here it is off.

I have done enough of these to know you will not get the screw out with a screw driver. Use vise grips to get a hold of the screw to get it out. Leave the carbon in the tube at this time and will explain in why in the next few post.

This tube will be clogged and hard to get out of the EGR. You have to get a good clamp force on the tube and the carbon will keep it from crushing the tube.

Using a twisting and tapping on the vise grips will get the tube out. It is glued in there with the carbon.

Getting this pipe off can be hard as well. Do not get aggressive with it you can break the threads off of the EGR, these are expensive. I use a wrench and gentle taps with a rubber hammer to break the tube loose. You can soak with PB Blaster if time allows.

When reassembing after cleaning, use Antiseaze on threads.

To clean the carbon out of the tube, I use a drill bit and just clean it that way.

Clean out the EGR with wire, air hose... until you can get air flowing thru the assembly. By putting a vacuum on the hoses you can hear and see the valve operate.

I run the whole assembly under a wire brush and then coat with WD-40. Not sure how long it will last but trying to keep it from rusting up looking better. Also I will cover the threads with the anti seize when I install the EGR.
 03-20-2015, 08:37 AM
#33
Super Moderator
Staff
Thread Starter
iTrader: (1)
Join Date: Aug 2008
Location: Anderson Missouri
Posts: 11,788
Likes: 0
Received 21 Likes
on
19 Posts
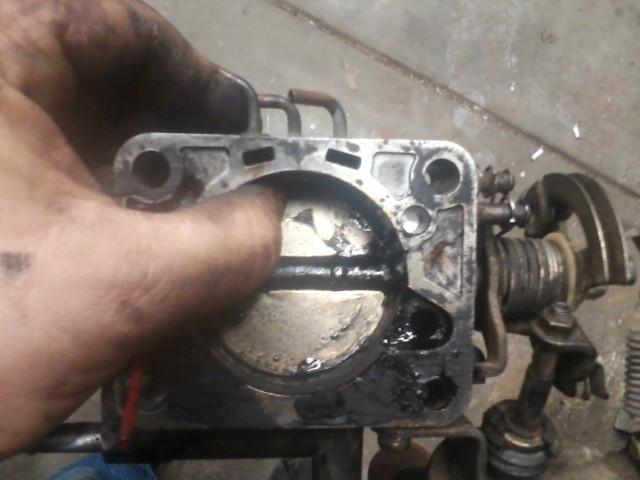
Cleaning Plenum. Use a 10mm wrench and remove the first small tube. It will be clogged. The hoses on these will also be clogged. You will need to clear all them as well.
I clear the tube and hole in the Plenum with a drill bit. All I am doing now is just getting the carbon out of the hole as I will be taking the Plenum to the carwash at a later time.
10mm to remove the AC valve assembly.
Not showing but is clogged as well.
10mm to remove the Cold Start Injector. I have never had one of these to fail. It will be the Timing Switch that controls it that fails. It can be difficult at times to get out if the carbon builds up around it.
I just cleaned with a wire brush and install the two screws to where they belong so as not to loose them.
This tube and hole will be clogged. I use this tube for a diff extention as I am backing my boat into the water and it does get over the axle. Another part I grab from the salvage when I find one.
It was clogged.
I dont have a wrench this big but a cresent wrench will work.
Was not clogged but did have build up in it.

Not as bad as some I have seen. I have removed chunks of carbon in the past.
I run a long screw driver down to make sure there is no blockage. I have seen them blocked in the past.

Here I am pre soaking for a while then I will run it to the carwash to get it cleaned.

I clear the tube and hole in the Plenum with a drill bit. All I am doing now is just getting the carbon out of the hole as I will be taking the Plenum to the carwash at a later time.

10mm to remove the AC valve assembly.

Not showing but is clogged as well.

10mm to remove the Cold Start Injector. I have never had one of these to fail. It will be the Timing Switch that controls it that fails. It can be difficult at times to get out if the carbon builds up around it.

I just cleaned with a wire brush and install the two screws to where they belong so as not to loose them.

This tube and hole will be clogged. I use this tube for a diff extention as I am backing my boat into the water and it does get over the axle. Another part I grab from the salvage when I find one.

It was clogged.

I dont have a wrench this big but a cresent wrench will work.

Was not clogged but did have build up in it.

Not as bad as some I have seen. I have removed chunks of carbon in the past.

I run a long screw driver down to make sure there is no blockage. I have seen them blocked in the past.

Here I am pre soaking for a while then I will run it to the carwash to get it cleaned.
 03-20-2015, 09:28 AM
#34
Registered User
Join Date: Jan 2014
Posts: 5
Likes: 0
Received 0 Likes
on
0 Posts
Hello 84 yota dude... One of these days I will learn to wearsome gloves to keep that stuff off of my hands. One of these days, lol.
Helllo Old Tow... I put these up for you. Yours is a 90s? so there will be some differences such as plug connectors and you will have more emissions stuff. I havent worked on newer 22res in sometime but not much more involved and what I post will be close enough to get you over any hump you may run into. Some of the pictures are not the best but I cant open the shop door as it is to cold to get natural light.
Helllo Old Tow... I put these up for you. Yours is a 90s? so there will be some differences such as plug connectors and you will have more emissions stuff. I havent worked on newer 22res in sometime but not much more involved and what I post will be close enough to get you over any hump you may run into. Some of the pictures are not the best but I cant open the shop door as it is to cold to get natural light.
Mine is an 89, but I think from 89 - 95 are all the same from what I read....
Much Thanks Terry,
Rick
03-22-2015, 12:01 PM
#35
Super Moderator
Staff
Thread Starter
iTrader: (1)
Join Date: Aug 2008
Location: Anderson Missouri
Posts: 11,788
Likes: 0
Received 21 Likes
on
19 Posts
Hello Old Tow... There is not much more difference that you will see, you should get a new crush washer for the Cold Start Injector and a couple of new gaskets. I have reused some gaskets in a pinch but I also have several kits left from other builds so usually have a few floating around. I will also post a few other things that you can do while under the hood that helps on down the road. I have a picture of an air gun in 2 fuel lines. I would bet your Return Line is clogged. Seen it on several trucks. More are clogged then not. My air tank needs work and I am getting parts for it tomorrow so will be a little bit longer on the re assemble. I miss my air tank.
When you get everything re-assembled, you will need to burp your system. Raise the front end up as high as you can and let the motor run with the radiator cap off and let the thermostat cycle a few times. First one or two burps of the water wont be to hot but watch the 3r and 4th burp. You will get a rough idle with air in the system.
When you get everything re-assembled, you will need to burp your system. Raise the front end up as high as you can and let the motor run with the radiator cap off and let the thermostat cycle a few times. First one or two burps of the water wont be to hot but watch the 3r and 4th burp. You will get a rough idle with air in the system.
Last edited by Terrys87; 03-22-2015 at 12:19 PM.
03-22-2015, 12:09 PM
#36
Super Moderator
Staff
Thread Starter
iTrader: (1)
Join Date: Aug 2008
Location: Anderson Missouri
Posts: 11,788
Likes: 0
Received 21 Likes
on
19 Posts
I took the Plenum to the car wash and with high pressure water cleared out the ports and cleaned it inside. Before I went I did get a picture of some of the chunks of carbon I got out. I have gotten bigger chunks before. You can see where some of the runners cleaned up nice.
I use low air pressure to see if my vent line is cleared. If not I start filling it with Marvel Mystery Oil and letting it soak. Remove your gas cap when doing this check. You will hear the air bubble in the tank and flowing thru the line. Reason I dont use high pressure is so as not to compress the clog if clogged. This one comes off of the Charcoal Canisiter. Air Gun is showing which line to clear. My air tank is down.
This is the Return Line which will probably be clogged and goes to the "J" line at the Fuel Pump Bracket Assembly. The rubber hose is the larger of the two coming off of the Fuel Rail.

I use low air pressure to see if my vent line is cleared. If not I start filling it with Marvel Mystery Oil and letting it soak. Remove your gas cap when doing this check. You will hear the air bubble in the tank and flowing thru the line. Reason I dont use high pressure is so as not to compress the clog if clogged. This one comes off of the Charcoal Canisiter. Air Gun is showing which line to clear. My air tank is down.

This is the Return Line which will probably be clogged and goes to the "J" line at the Fuel Pump Bracket Assembly. The rubber hose is the larger of the two coming off of the Fuel Rail.
 03-23-2015, 09:18 AM
#37
Super Moderator
Staff
Thread Starter
iTrader: (1)
Join Date: Aug 2008
Location: Anderson Missouri
Posts: 11,788
Likes: 0
Received 21 Likes
on
19 Posts
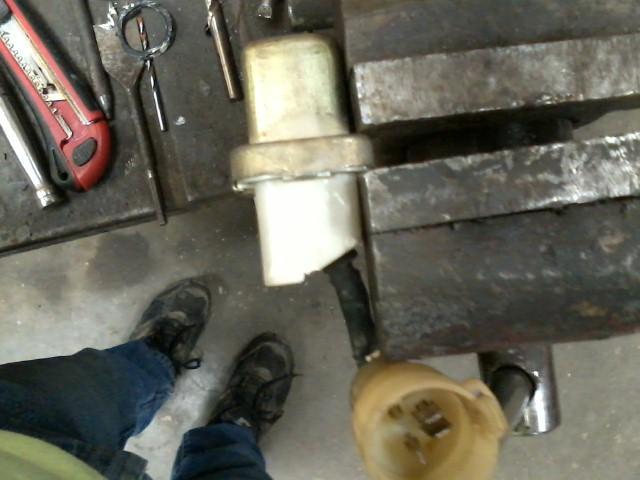
Did some more work on the passenger side that I like to go thru on my trucks. Got this from Rad4Runner. The contacts get carbon build up from arching and can cause hesitation in starting. Most of this is on my other threads but another way for me to find it when I need it.
Bend the 6 tabs up on the cover. The rubber inside the cover can stick and I use a jewelers screw drive to break the seal.
I use a small piece of sandpaper to clean the contacts. 1500 grit here.
Another view.
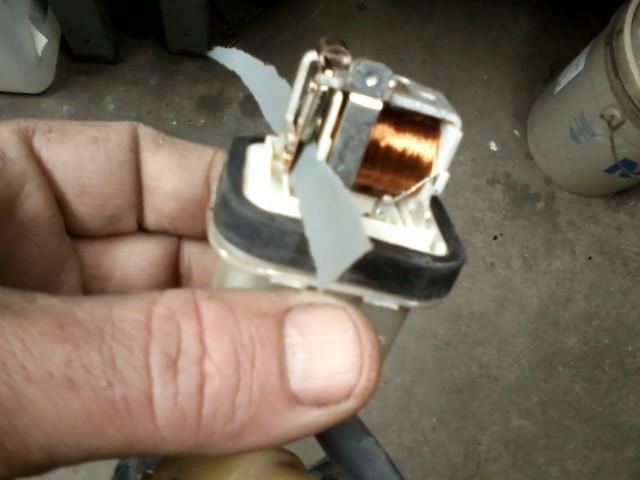
Here I use a vise to help act as a press and put the cover back on.
Bend the 6 tabs up on the cover. The rubber inside the cover can stick and I use a jewelers screw drive to break the seal.

I use a small piece of sandpaper to clean the contacts. 1500 grit here.

Another view.

Here I use a vise to help act as a press and put the cover back on.
 03-23-2015, 09:21 AM
#38
Super Moderator
Staff
Thread Starter
iTrader: (1)
Join Date: Aug 2008
Location: Anderson Missouri
Posts: 11,788
Likes: 0
Received 21 Likes
on
19 Posts
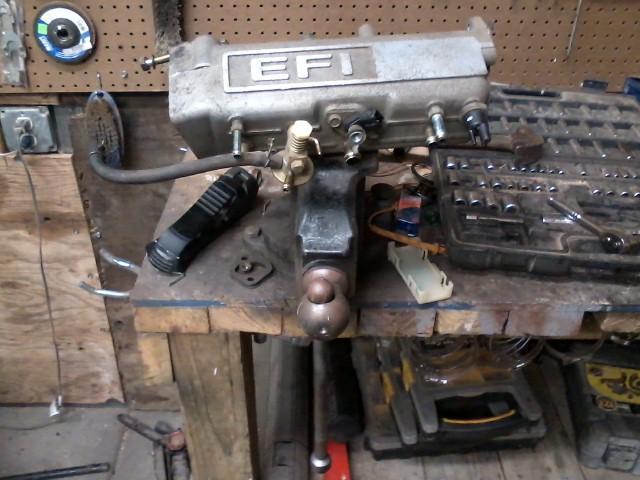
Been asked in the past how I get the Plenum shiney. I just use a drill and a wire brush.
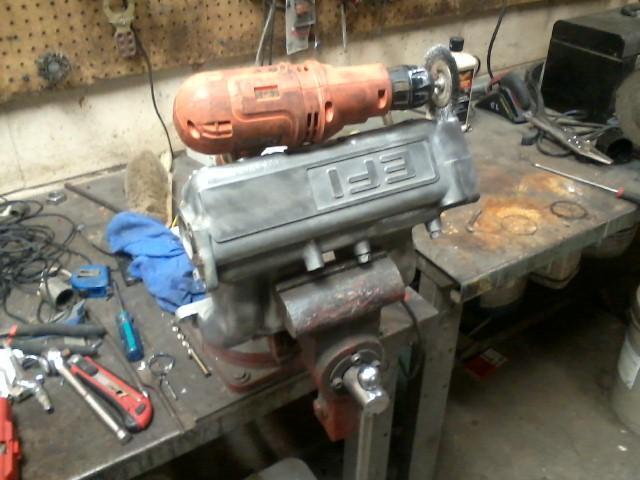
A subtle look by painting the EFI black.
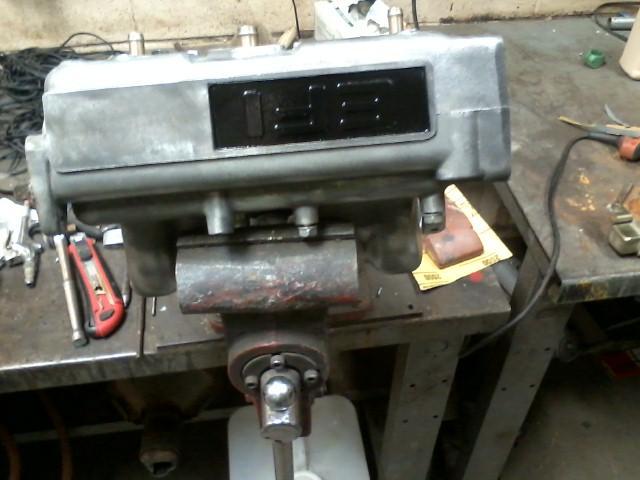
A sanding block and some paer will keep it above the stuff I want to stay black. Went over everything with Clear Coat. I just used rattle can paint and works great.
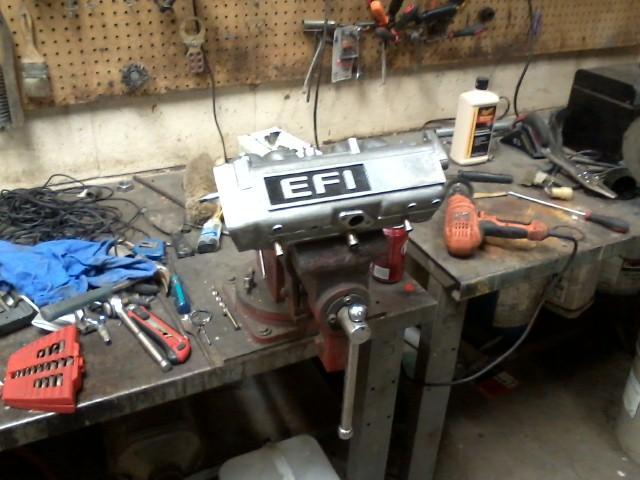

A subtle look by painting the EFI black.

A sanding block and some paer will keep it above the stuff I want to stay black. Went over everything with Clear Coat. I just used rattle can paint and works great.
 03-23-2015, 11:04 PM
#39
Registered User
Join Date: Jan 2014
Posts: 5
Likes: 0
Received 0 Likes
on
0 Posts
Hello Old Tow... There is not much more difference that you will see, you should get a new crush washer for the Cold Start Injector and a couple of new gaskets. I have reused some gaskets in a pinch but I also have several kits left from other builds so usually have a few floating around. I will also post a few other things that you can do while under the hood that helps on down the road. I have a picture of an air gun in 2 fuel lines. I would bet your Return Line is clogged. Seen it on several trucks. More are clogged then not. My air tank needs work and I am getting parts for it tomorrow so will be a little bit longer on the re assemble. I miss my air tank.
When you get everything re-assembled, you will need to burp your system. Raise the front end up as high as you can and let the motor run with the radiator cap off and let the thermostat cycle a few times. First one or two burps of the water wont be to hot but watch the 3r and 4th burp. You will get a rough idle with air in the system.
When you get everything re-assembled, you will need to burp your system. Raise the front end up as high as you can and let the motor run with the radiator cap off and let the thermostat cycle a few times. First one or two burps of the water wont be to hot but watch the 3r and 4th burp. You will get a rough idle with air in the system.
Thanks so much for all of your help Terry. I won't be able to start on it now until after Easter, but I am sure I can get it done with all of your outstanding instructions. Your the TOP man ! ...... God Bless....Rick
03-28-2015, 09:11 AM
#40
Super Moderator
Staff
Thread Starter
iTrader: (1)
Join Date: Aug 2008
Location: Anderson Missouri
Posts: 11,788
Likes: 0
Received 21 Likes
on
19 Posts
Hello Rick.. I am not setting any speed records myself but hope to get this reassembled in the next few days. Changing the fuel filter, setting your valves, and timing will make a difference on these trucks start up. Will still do a few other small things to make it a little more solid and will post them when I do them.
You will find a hundered things that need worked on these trucks and most are easily done. Even though your truck is the next generation of trucks, just about everything is the same on them. Only big difference is how the dash comes apart. It starts from the passenger side and works over to the drivers side on yours. Each of my builds below have information on how to do certain things and most can be done for free or very little cost listed on the first page of each build. It all will add up to a nice little truck when done.
On your truck I would take it to Toyota and see if it has had the Drag Link ( cant think of what Toyota calls it) recall done on it. Your generation 4x4 had a recall done on them and Toyota still honors that recall. Just have them to pull your VIN number on their computer and they can tell you if it has been done and they wont charge you to replace that part. If you need tie rod ends, I think they will charge you for that.


