Terrys87 88 4Runner Restoration/Build thread
 03-28-2011, 12:53 AM
#81
Super Moderator
Staff
Thread Starter
iTrader: (1)
Join Date: Aug 2008
Location: Anderson Missouri
Posts: 11,788
Likes: 0
Received 21 Likes
on
19 Posts
I took the Runner to work and no more gas leaks. I havent filled the tank and checked my mileage, but I have put 200 miles on it since I got it running and it seems to be doing pretty decent on the mileage.
It sat for a couple of years before I got it and it felt as if I was on square tires. They are getting smoother now. I have one out of balance. The tires need to be replaced eventually, but for now they will work. It does ride like a lumber truck. Shocks would be a plus.
I hadnt checked the heater and found it didnt work and froze my butt off. Got to work and checked the cable that goes under the hood to the fire wall and it was disconnected. Must have gotten disconnected when installing or removing the head. Should be a warmer ride on the way home. The controls to the vents are not working so that will be another project down the road.
It was nice having bright lites on the way to work. I work the night shift and have some rural roads to drive and there are plenty of deer to dodge along the way. Its just nice to get a small fix done. Helps to feel like some kind of accomplishment.
I've got to start to dig up some information on my flatbeds hesitation and why the backglass is not working. But the list did get a little shorter.
 03-29-2011, 06:31 AM
#82
Super Moderator
Staff
Thread Starter
iTrader: (1)
Join Date: Aug 2008
Location: Anderson Missouri
Posts: 11,788
Likes: 0
Received 21 Likes
on
19 Posts
Back hatch not working
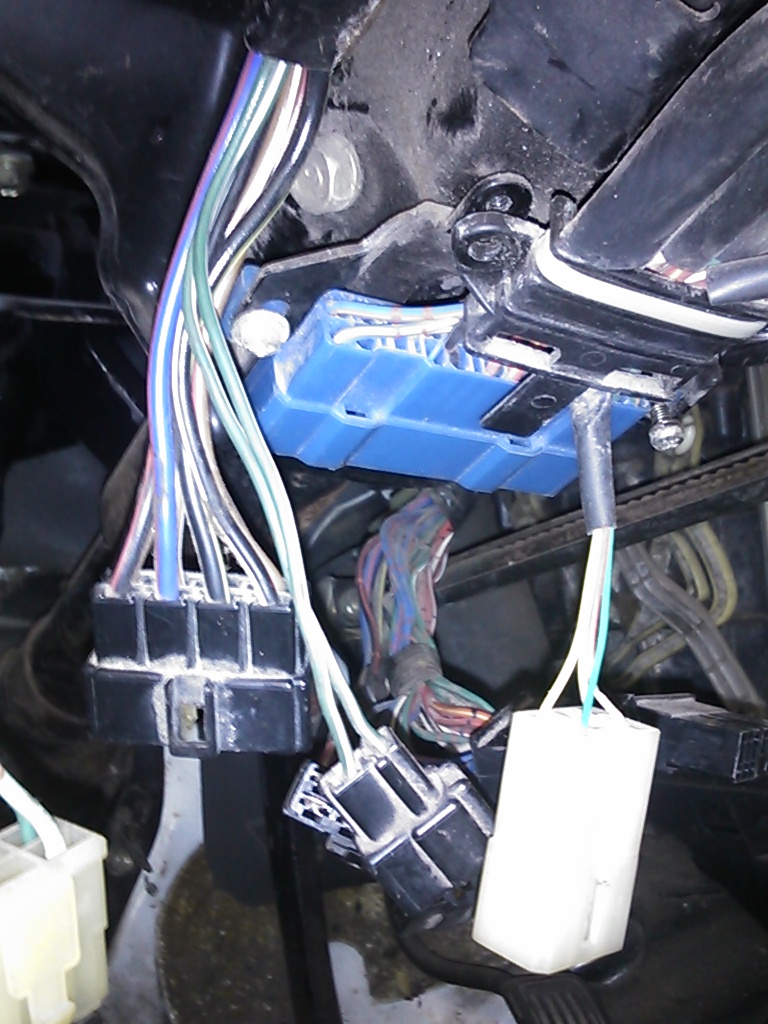
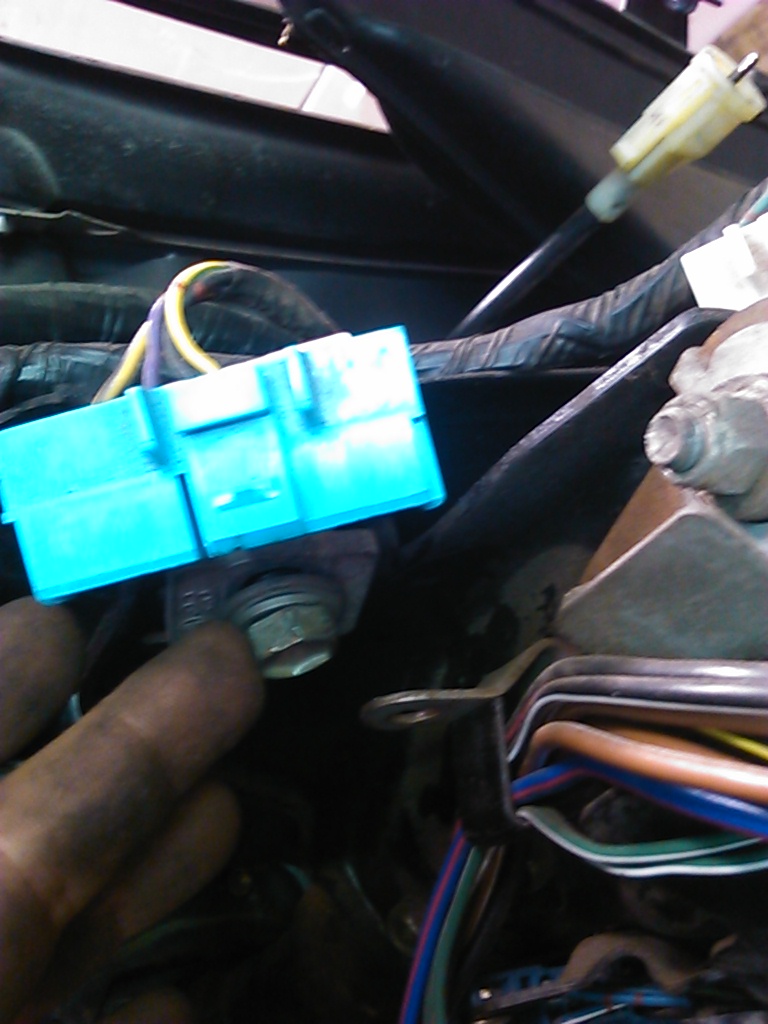
I got my window to go up. I have a temporary wiring directly to the motor. I attched some clips
to the blue connector coming directly off of the motor. A wire on each one. I made them long
enough to reach my cigarette lighter power plug and ground one to the body. By switching from
the Power and to the Ground will control which way the window goes. When I did this, I found
out real quick that my motor is good. Now I am checking my relays and switches. There are
several threads on this but took me quite awhile to find them. Also alot of corrrosion was on the
track inside of the tailgate. Also, my inside handle release would not open. The cable to the
handle needed adjusted and now it works.
Last edited by Terrys87; 03-29-2011 at 06:33 AM.
03-29-2011, 06:42 AM
#83
Registered User
Terry I went throught this exact issue with my 4runner. I trouble shot the rear window untill I was blue in the face and gave up (I hate electrical problems). In the end I rewired the window completely, by passing all of the saftey crap and mine works great now. I made rewiring it more difficult than it had to be since I wanted to keep the factory switch, but you can buy a DPDT switch from Radio Shack and be done with it. You can find out how I did it in my thread and I can make you a diagram if you want.
03-30-2011, 04:43 AM
#84
Super Moderator
Staff
Thread Starter
iTrader: (1)
Join Date: Aug 2008
Location: Anderson Missouri
Posts: 11,788
Likes: 0
Received 21 Likes
on
19 Posts
Hello Rob, I did get a lot of ideas from you and Twistedyota. I am going to try and fix it like the factory, but if that doesnt work I am going to go your route. It is like a Chinese calculator back there.
I was messing around with removing some of the old stereo system, alarm system and working on my back hatch problem and have a interior panel off, when I noticed a good size dent that I could easily get too. It popped out nicely. One less thing I will need to work on. I took pictures but with white it doesnt show up. Just doing an update on progress.
Am going to try and get some more work done on the back hatch.
03-31-2011, 04:23 AM
#86
Registered User
Terry let me know if you need and parts for your tail gate, I have some laying around. I read in Twisted thread that you might need some tracks? I'll have to look but I am pretty sure I have a set if not 2.
03-31-2011, 10:13 AM
#87
Super Moderator
Staff
Thread Starter
iTrader: (1)
Join Date: Aug 2008
Location: Anderson Missouri
Posts: 11,788
Likes: 0
Received 21 Likes
on
19 Posts
Hey Rob. Thanks, I may be doing that. I plan on looking at it Mondy or Tuesday and will see what I might need. It keeps jamming up. I have the original tail gate and my spare but I may have to piece it together. Still looking for information about getting it apart and together. I have to work this weekend, so it will give me some time to start learning.
03-31-2011, 10:22 AM
#88
Super Moderator
Staff
Thread Starter
iTrader: (1)
Join Date: Aug 2008
Location: Anderson Missouri
Posts: 11,788
Likes: 0
Received 21 Likes
on
19 Posts
Body Swap / Frame Swap
I have talked to a couple of other people on here about doing frame swap or body swaps. I have done two and tried to write out a nice way of doing this. I did the swaps before finding Yotatech and wish I would of taken pictures. I figured I would put this in my thread so if others do a search on it, it might make finding this thread easier and so I can call it up quick if I need it. I havent done a 4runner but the steps would be about the same. If you can pull a motor or tranny you can swap bodies/frames. It s very doable and nothing to be afraid of.
I did the 22re's. Apparently a 3.0 and 22res frame arent interchangeable without redoing the motor mounts. I am sure everythign here would apply to a 3.0, but I havent done this so will not say for sure. 84-88 Pickup frames and 89-95 frames are not interchange able from what I have been told.
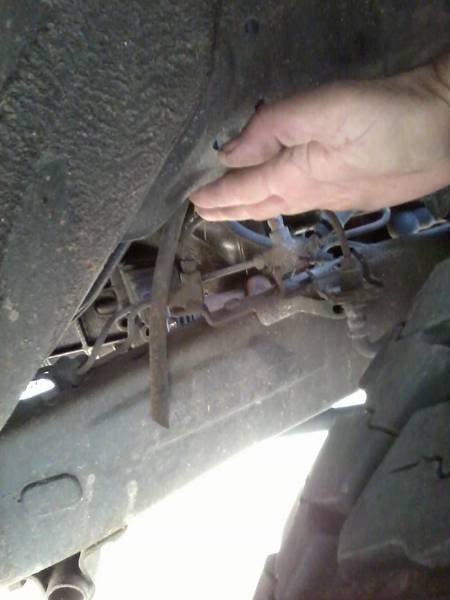
On the 84-89 4runner behind the Drivers rear tire is a wire disconnect point, for the tailgate and lights that would make separating the wires for body removal. Im sure a 90-95 4Runner would be the same, but I havent done one so cant say for sure.
Fierohinks has some pic in his thread for some ideas and what things will look like. https://www.yotatech.com/forums/f116...s-pics-228184/
Dutchbelly has some good pics of doing a Frame swap...... https://www.yotatech.com/forums/f199...ild-up-234352/
I didnt have a lift, so if you were going to leave the drive train in, there are some steps that would be different and I will try and write them up as best as I can at a later time.
First I center the Steering Wheel and remove the motor and tranny. If you have a lift and can get the body high enough this would really help, but this is how I have to do this.
Getting the Steering Wheel and wheels straight just makes it alot easier for later. When I take the cab off and put it back on is when I install and remove the Steering Rod is probably the most hardest. You may find another way, but this works for me.
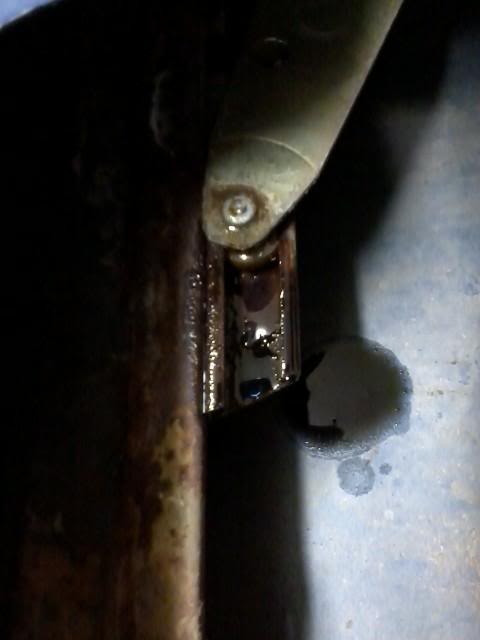
Then on the frame by the right front tire you have 2 brake lines to disconnect. This is the best place to do it as it keeps the lines on the cab intact and the frame lines will stay intact. This will take care of your brake issues. ( Pic at bottom)
I then disconnect the Wiring harness under the Passenger side seat and this will let the cab come off with out any problems other than you front blinkers and I take the Front Bumper off just so I dont have to lift the cab so high. Leave the wiring harness to the Tail lights/ Fuel Pump on the back half of the frame til later. You can get it when you take the bed off. All of your electrical and computer wires will come with the cab. This is set up quite nice. Just mark all of your wires and such when you pull your motor. When you pull your motor, you will have taken care of alot of other steps like fuel lines.
You have 6 bolts that hold the cab to the frame. The cab and front end come off in one piece. I already have the hood off. I leave fenders, doors, and interior in. 2 bolts by the Radiator, 2 bolts behind the front tires, and 2 bolts toward the rear of the cab is all that hold the cab to the frame. You can tell them as they sit on the outside of the frame and have rubber bushings. You may have to lift your carpet to hold them with wrench to take the nut off.
You have 8-10 bolts that hold the bed on. They have a tab that sticks in the bed so you dont have to have a wrench to hold the top. You should take some PB Blaster a nite or two ahead of time before you do this as most or all of the bolts will break. They are special so you will need to get some from Toyota or the salvage. This is a good time to remove the 3 screws that hold your gas tank fill tube to the bed or body of a 4Runner. Also I have had problems of these nuts backing off when I have had a bed bolt off before so I would suggest using locktite. I use 4 concrete blocks and set the bed on these with the floor of the bed on the blocks so I dont have to worry about damaging the bed sides.
Once all of this is done, I use some concrete blocks and 4x4 wood to support the cab. If your rocker panels are in good shape you can rest it on the wood. If not you might want to support it using blocks of wood between the 4x4 and floor. I set the concrete blocks about a foot from the cab to clear the front tires. This way could be a little unstable so be careful or you might have some other way of doing this. Here is whereI get 3 other guys to help lift the cab. 2 lifting and 2 setting up the stand for the cab. The back is heavy, but the front is light. I go about a foot high off of the frame for everything to clear, but work the frame out slowly and make sure it is high enough. I back the frame out as the front part of the frame is lower than the back part.
I get the new frame with axles in them or you can just put yours in. Put the wiring harness for the back part of the truck and fuel tank in and hopefully you will have brake lines and fuel lines already on or you will get to do that too. Try and get a frame with this stuff already on It will save you a lot of time. Put your exhaust in before you move the new frame under the cab.
Before I start all of this, I try to have the new frame prepped as far as I can. Without counting motor/tranny removal and having the frame ready. I have done this in about 20 total hours using basic tools in a weekend by myself except lifting the cab and body. Cutting torch for bolts, air tools, and a lift would be soooo nice. If you can get the body high enough it would make swapping alot easier, but I dont have access to a lift so this is how I do it. The first time I did this I was intimidated, but by the time I had the old frame out I wasnt in the least bit concerened. If you can pull a motor and tranny out, you wont have any problems. You will be quite surprised when you do it. Any questions that come up, feel free to ask.
If you are going to use a lift and keep the drive train in you will need to
Disconnect your fuel line from fuel filter.
Remove your electrical lines from your injectors and sensors.
Disconnect your electrical lines from your transmission, O2 sensor and transfer case.
I mentioned it earlier, but remove 3 screws that hold your fuel tank to the bed/ body. You can remvoe the lines at the tank, but I feel this is easier.
On a 4Runner you will have to go up between the body an frame and remove 2 bolts to get the fuel filler assembly out.
These are some steps that are different from pulling the motor. Im sure there are more steps but this will get you started in the right direction.
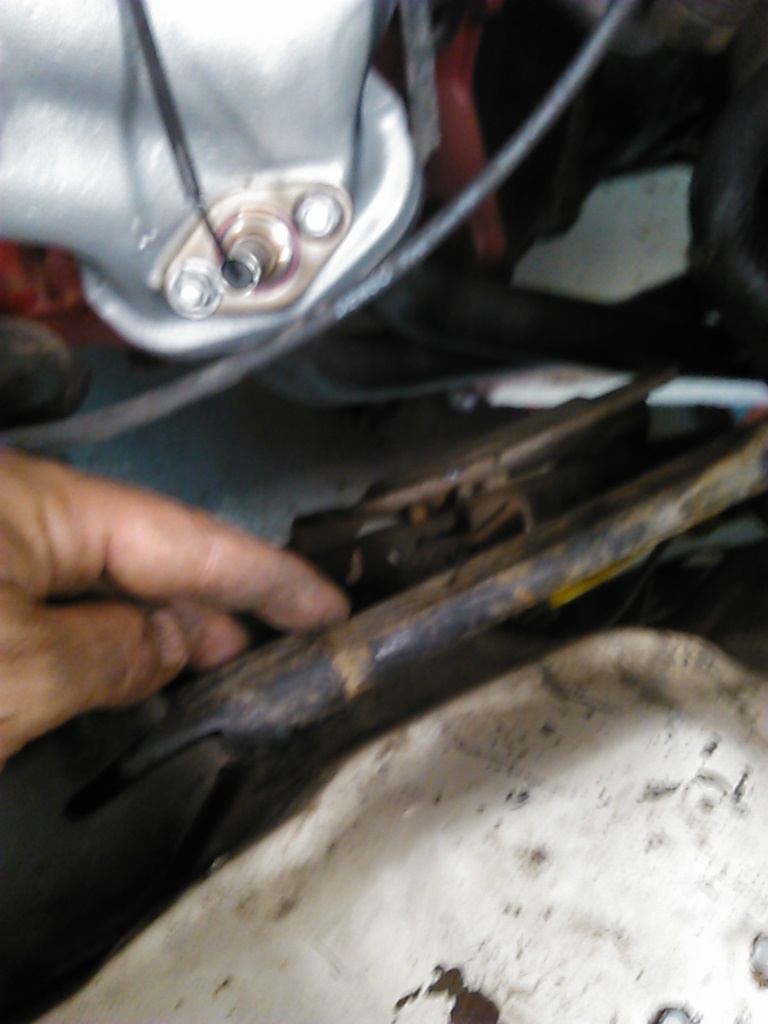
Here is a great place to disconnect your brake and clutch line. By the Passenger front tire.
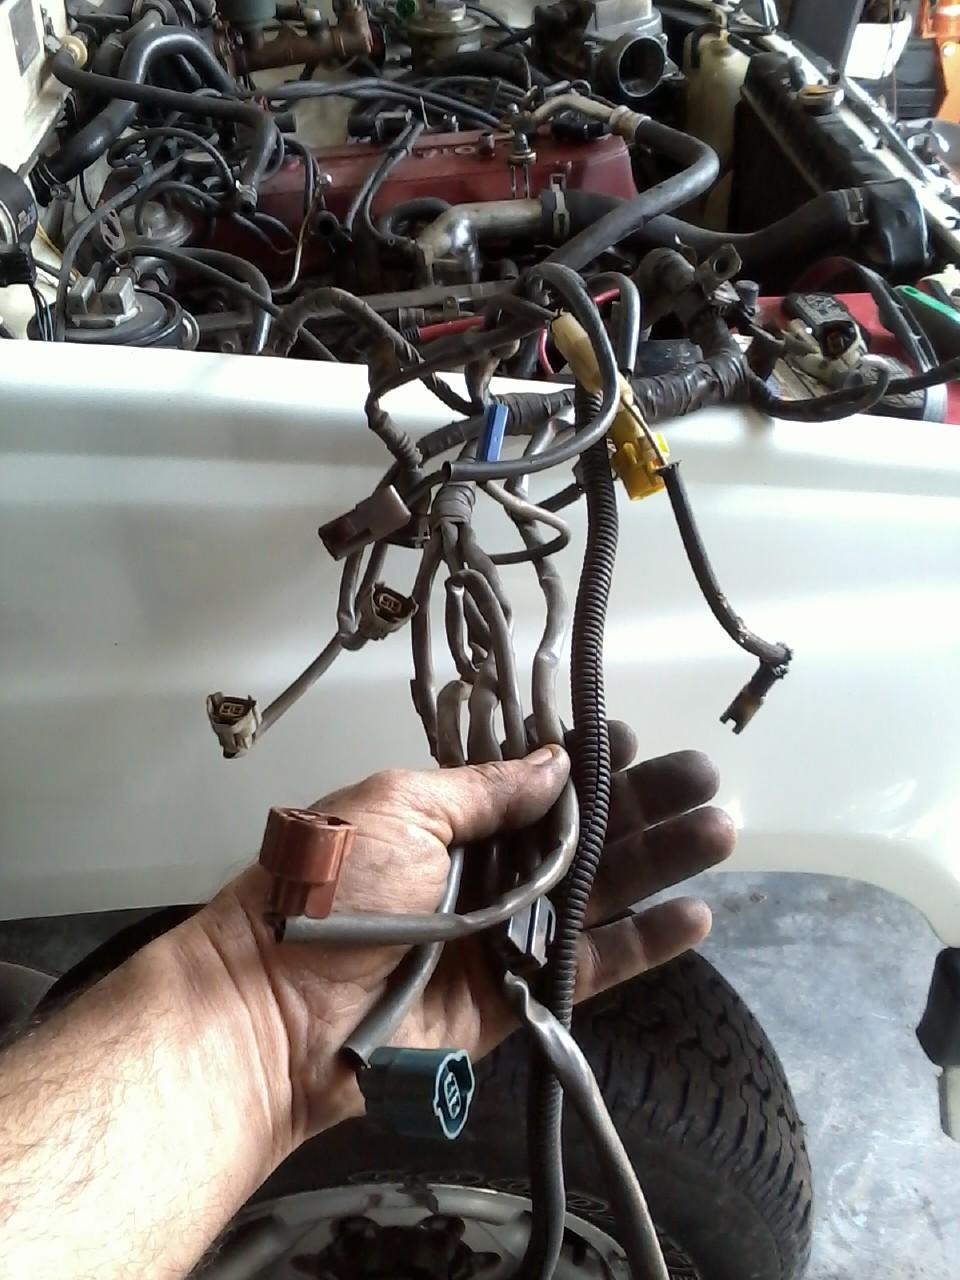
Wiring harness with tranny and tcase conrectors.
wiring harness.
Steps without having to pulldrive train.
Disconnect steering linkage at gear box or firewall
6 bolts that hold the body on.
Wiring harness all the way to the tranny and lay it over the fender.
I would pull radiator for more clearance
Brake and clutch line behind right rear front tire
Ebrake at the crossmember
I would disconnect the fuel line from the fuel filter
Remove tranny and tcase sticks so they dont get damaged.
Disconnect wring harness under cab under passenger seat.
Front bumper for easier clearance, may not be needed though.
Speedometer cable
Throttle cable
Disonnect Power Steering Resivoir.
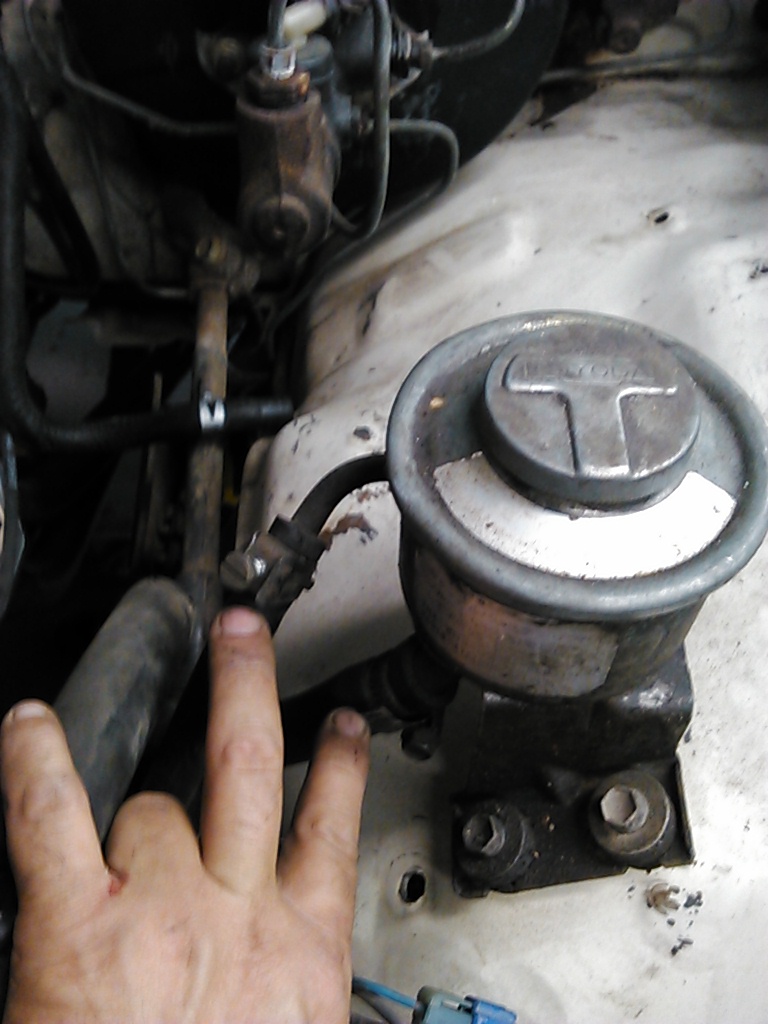
Disconnect Popwer Steering Cooler.

Disconnect Steering Rod. Remove bolt. Shaft should collapse but most likely wont.
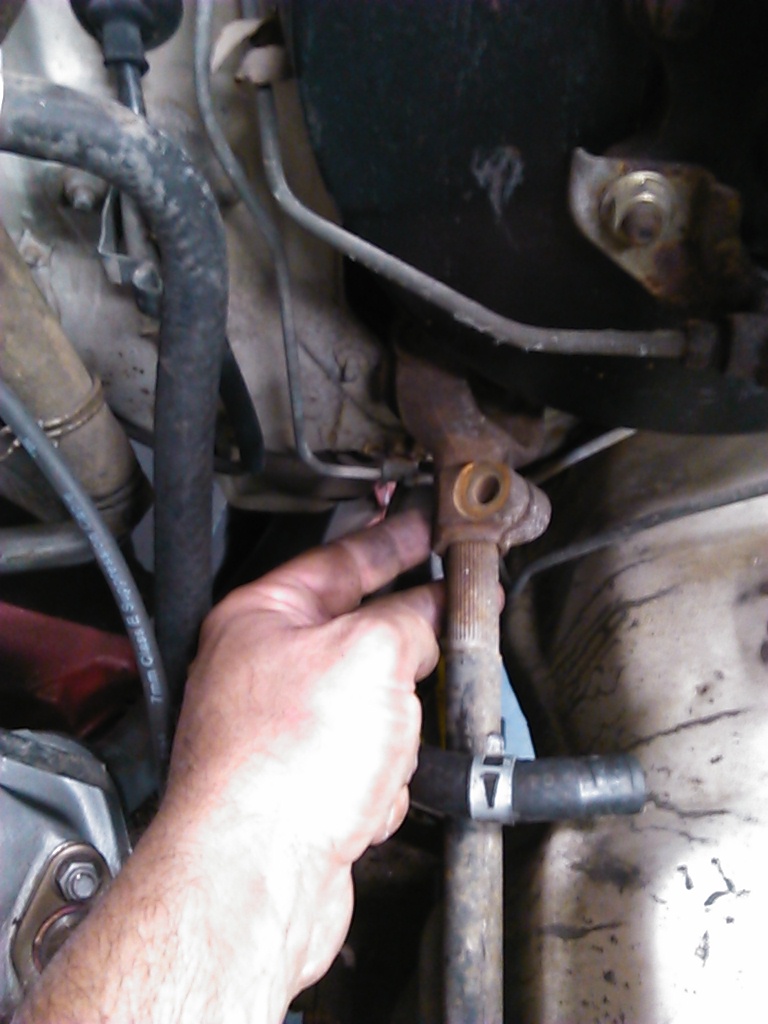
Remove the nut and bolt at the gear box.
Here is where it should collapse in the event of a collision. Usually frozen and have to soak with PB Blaster to get it to break loose.
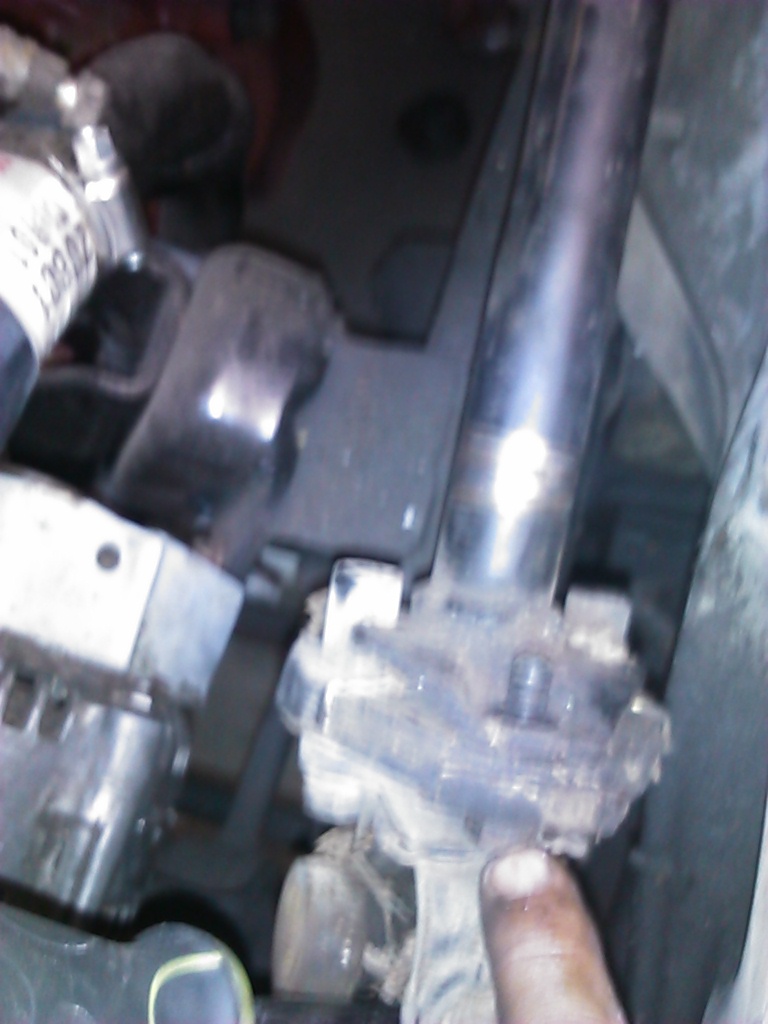
If you need to remove the Steering Column, disconnect the wiring harness.
Remove these two bolts that hold column to main bar.
I did the 22re's. Apparently a 3.0 and 22res frame arent interchangeable without redoing the motor mounts. I am sure everythign here would apply to a 3.0, but I havent done this so will not say for sure. 84-88 Pickup frames and 89-95 frames are not interchange able from what I have been told.
On the 84-89 4runner behind the Drivers rear tire is a wire disconnect point, for the tailgate and lights that would make separating the wires for body removal. Im sure a 90-95 4Runner would be the same, but I havent done one so cant say for sure.
Fierohinks has some pic in his thread for some ideas and what things will look like. https://www.yotatech.com/forums/f116...s-pics-228184/
Dutchbelly has some good pics of doing a Frame swap...... https://www.yotatech.com/forums/f199...ild-up-234352/
I didnt have a lift, so if you were going to leave the drive train in, there are some steps that would be different and I will try and write them up as best as I can at a later time.
First I center the Steering Wheel and remove the motor and tranny. If you have a lift and can get the body high enough this would really help, but this is how I have to do this.
Getting the Steering Wheel and wheels straight just makes it alot easier for later. When I take the cab off and put it back on is when I install and remove the Steering Rod is probably the most hardest. You may find another way, but this works for me.
Then on the frame by the right front tire you have 2 brake lines to disconnect. This is the best place to do it as it keeps the lines on the cab intact and the frame lines will stay intact. This will take care of your brake issues. ( Pic at bottom)
I then disconnect the Wiring harness under the Passenger side seat and this will let the cab come off with out any problems other than you front blinkers and I take the Front Bumper off just so I dont have to lift the cab so high. Leave the wiring harness to the Tail lights/ Fuel Pump on the back half of the frame til later. You can get it when you take the bed off. All of your electrical and computer wires will come with the cab. This is set up quite nice. Just mark all of your wires and such when you pull your motor. When you pull your motor, you will have taken care of alot of other steps like fuel lines.
You have 6 bolts that hold the cab to the frame. The cab and front end come off in one piece. I already have the hood off. I leave fenders, doors, and interior in. 2 bolts by the Radiator, 2 bolts behind the front tires, and 2 bolts toward the rear of the cab is all that hold the cab to the frame. You can tell them as they sit on the outside of the frame and have rubber bushings. You may have to lift your carpet to hold them with wrench to take the nut off.
You have 8-10 bolts that hold the bed on. They have a tab that sticks in the bed so you dont have to have a wrench to hold the top. You should take some PB Blaster a nite or two ahead of time before you do this as most or all of the bolts will break. They are special so you will need to get some from Toyota or the salvage. This is a good time to remove the 3 screws that hold your gas tank fill tube to the bed or body of a 4Runner. Also I have had problems of these nuts backing off when I have had a bed bolt off before so I would suggest using locktite. I use 4 concrete blocks and set the bed on these with the floor of the bed on the blocks so I dont have to worry about damaging the bed sides.
Once all of this is done, I use some concrete blocks and 4x4 wood to support the cab. If your rocker panels are in good shape you can rest it on the wood. If not you might want to support it using blocks of wood between the 4x4 and floor. I set the concrete blocks about a foot from the cab to clear the front tires. This way could be a little unstable so be careful or you might have some other way of doing this. Here is whereI get 3 other guys to help lift the cab. 2 lifting and 2 setting up the stand for the cab. The back is heavy, but the front is light. I go about a foot high off of the frame for everything to clear, but work the frame out slowly and make sure it is high enough. I back the frame out as the front part of the frame is lower than the back part.
I get the new frame with axles in them or you can just put yours in. Put the wiring harness for the back part of the truck and fuel tank in and hopefully you will have brake lines and fuel lines already on or you will get to do that too. Try and get a frame with this stuff already on It will save you a lot of time. Put your exhaust in before you move the new frame under the cab.
Before I start all of this, I try to have the new frame prepped as far as I can. Without counting motor/tranny removal and having the frame ready. I have done this in about 20 total hours using basic tools in a weekend by myself except lifting the cab and body. Cutting torch for bolts, air tools, and a lift would be soooo nice. If you can get the body high enough it would make swapping alot easier, but I dont have access to a lift so this is how I do it. The first time I did this I was intimidated, but by the time I had the old frame out I wasnt in the least bit concerened. If you can pull a motor and tranny out, you wont have any problems. You will be quite surprised when you do it. Any questions that come up, feel free to ask.
If you are going to use a lift and keep the drive train in you will need to
Disconnect your fuel line from fuel filter.
Remove your electrical lines from your injectors and sensors.
Disconnect your electrical lines from your transmission, O2 sensor and transfer case.
I mentioned it earlier, but remove 3 screws that hold your fuel tank to the bed/ body. You can remvoe the lines at the tank, but I feel this is easier.
On a 4Runner you will have to go up between the body an frame and remove 2 bolts to get the fuel filler assembly out.
These are some steps that are different from pulling the motor. Im sure there are more steps but this will get you started in the right direction.
Here is a great place to disconnect your brake and clutch line. By the Passenger front tire.
Wiring harness with tranny and tcase conrectors.
wiring harness.
Steps without having to pulldrive train.
Disconnect steering linkage at gear box or firewall
6 bolts that hold the body on.
Wiring harness all the way to the tranny and lay it over the fender.
I would pull radiator for more clearance
Brake and clutch line behind right rear front tire
Ebrake at the crossmember
I would disconnect the fuel line from the fuel filter
Remove tranny and tcase sticks so they dont get damaged.
Disconnect wring harness under cab under passenger seat.
Front bumper for easier clearance, may not be needed though.
Speedometer cable
Throttle cable
Disonnect Power Steering Resivoir.

Disconnect Popwer Steering Cooler.

Disconnect Steering Rod. Remove bolt. Shaft should collapse but most likely wont.

Remove the nut and bolt at the gear box.

Here is where it should collapse in the event of a collision. Usually frozen and have to soak with PB Blaster to get it to break loose.

If you need to remove the Steering Column, disconnect the wiring harness.

Remove these two bolts that hold column to main bar.

Last edited by Terrys87; 09-09-2014 at 09:42 AM.
04-01-2011, 12:02 PM
#89
Super Moderator
Staff
Thread Starter
iTrader: (1)
Join Date: Aug 2008
Location: Anderson Missouri
Posts: 11,788
Likes: 0
Received 21 Likes
on
19 Posts
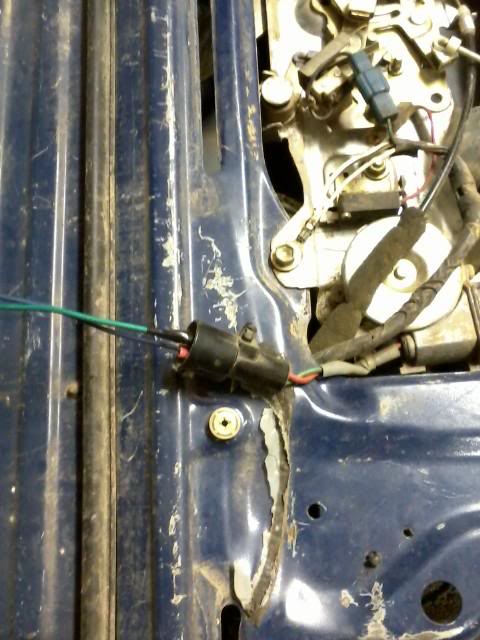
In post #80 I was describing some of the problems I was having with my flat bed. It has been driving me nuts. Dont know how it has happened, but a corner on the #1 Fuel Injector connector has broken off as the plastic is really brittle. I eventually need to replace those connectors as they are all brittle.
It apparently was getting a good enough connection to make it run, at idle it sounded good and revving it up. So the last thing on my mind was an injector problem. Im guessing maybe the air flow or something under there caused the connector to the injector to seperate when going down the hiway that it would cut out. But when I gave it gas it must have made the flow of electricity jump the gap.
I actually found it by poking around on some vacuum hoses while running and bumped the connector and heard it start to cut out. I reseated it and took it for a drive and couldnt get it to act up. Put 30 miles and it runs like a champ. Couldnt get it to run bad.
The fix usually isnt difficult, but finding the problem is. I stuck an 83 Celica 5 Speed in it as it had a 4 speed before. It is my work truck and gets really great mileage and is actually fun to drive.
I bought it when the gas went sky high the first time 3 or 4 years ago not thinking much about it. When I first brought it home, the wife was less then thrilled, (ok.. she was PO'ed) but I went thru it and done quite a bit to it. Its actually grown on me. I am surprised at how many offers I get to sell it. Alot of farmers around here like their flat beds, and after owning this one, I was surprised at how handy they do come in for working or hauling items that a standard bed just cant do as easily.
It took all day to find and fix, but it is a big relief.
Last edited by Terrys87; 04-01-2011 at 12:07 PM.
04-01-2011, 12:07 PM
#90
Registered User
Those injector connectors are famous for getting brittle and breaking. I know what you mean about finding the problem being the hardest part. Good job gettingit fixed.
04-04-2011, 11:54 PM
#91
Super Moderator
Staff
Thread Starter
iTrader: (1)
Join Date: Aug 2008
Location: Anderson Missouri
Posts: 11,788
Likes: 0
Received 21 Likes
on
19 Posts
I was having a difficult time rolling my windows up and down and it was suggested to me to give this a try. It worked out well for me and thought I would pass the info on to others. I just sprayed the rubber tracks in the doors and a little extra to run down to where I couldnt reach. Worked the window up and down a few times.
Fix: I have had windows that I was afraid of breaking the window crank and put this silicon in the rubber/felt tracks for the windows, and no joking, I can roll the window up and down with my thumb and forefinger. Also works great for the backhatch and I have it listed in my thread in othe places too.
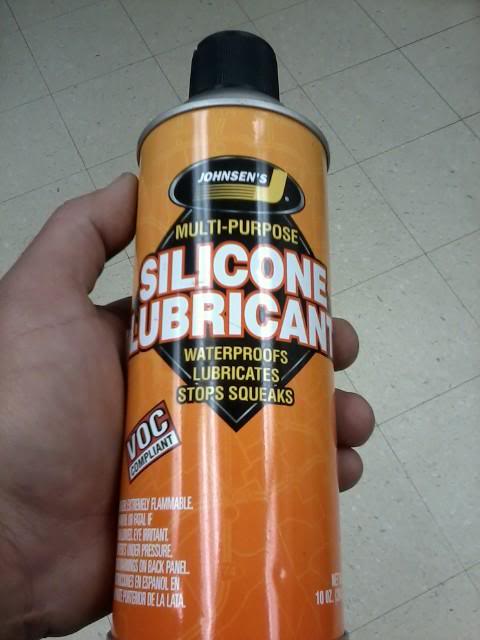
Fix: I have had windows that I was afraid of breaking the window crank and put this silicon in the rubber/felt tracks for the windows, and no joking, I can roll the window up and down with my thumb and forefinger. Also works great for the backhatch and I have it listed in my thread in othe places too.
Last edited by Terrys87; 03-02-2016 at 04:43 AM.
04-05-2011, 08:08 AM
#92
Registered User
hey terry its not prctical for alot of people but Im so not looking foward to the back glass problems on mine that I realy want to do the p/u tailgate swap while I have it all tore down and before paint lol. and the silicone spray is a great trick for sticky windowws I have been doing it for years has always worked great, except on this international that I drive every day and I think its beyond help haha
04-10-2011, 02:37 AM
#93
Super Moderator
Staff
Thread Starter
iTrader: (1)
Join Date: Aug 2008
Location: Anderson Missouri
Posts: 11,788
Likes: 0
Received 21 Likes
on
19 Posts
Hey Jason.. Hows it going? I wish I had known about it earlier. It has made the window experience alot better. I hear you on the International truck. About 6 months ago I was pushing a Freightliner all over Afghanistan and now been moving trucks all over Missouri. Government sure over pays for junk trucks. I had one up to 60 miles an hour and barely able to keep it on the road.
I wanted to take a break from mechanicing and decided to do body work. Here is the first coat. I got it really close without having to use to much bondo. The deepest is about 3/8 inch about the size of a quarter. It is the biggest dent I got, about 4 inches caved in, so decided to start it first. I was able to remove the interior panel and work it out. I havent gotten a picture of it yet finished but am getting this one close to being done.
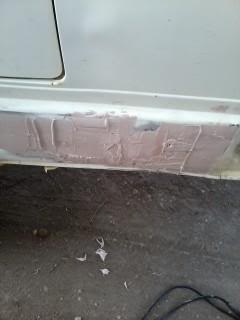
I wanted to take a break from mechanicing and decided to do body work. Here is the first coat. I got it really close without having to use to much bondo. The deepest is about 3/8 inch about the size of a quarter. It is the biggest dent I got, about 4 inches caved in, so decided to start it first. I was able to remove the interior panel and work it out. I havent gotten a picture of it yet finished but am getting this one close to being done.
Last edited by Terrys87; 04-10-2011 at 04:49 AM.
04-10-2011, 02:48 AM
#94
Super Moderator
Staff
Thread Starter
iTrader: (1)
Join Date: Aug 2008
Location: Anderson Missouri
Posts: 11,788
Likes: 0
Received 21 Likes
on
19 Posts
I am helping a friend get his 82 Toy done and here is a before and after picture of his fender. It is still not 100% done but at least it is usable.
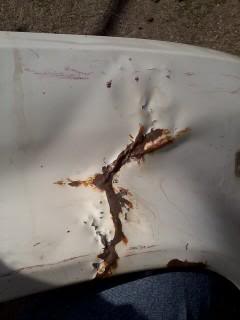
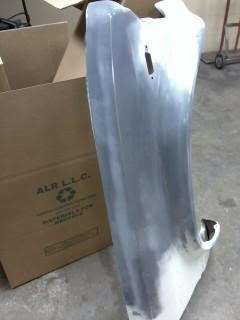
Probably should of taken the picture in the same position as before. If you look at the first one you can see hail damage along with the wrinkle. He hasnt been able to find one in this area and I wanted to try and see if I could work it out. It was a challenge for me and took longer then I thought it would. A pro probably would of had it done it a couple of hours. I could only wish for a few hours. But am happy with how it has turned out
Probably should of taken the picture in the same position as before. If you look at the first one you can see hail damage along with the wrinkle. He hasnt been able to find one in this area and I wanted to try and see if I could work it out. It was a challenge for me and took longer then I thought it would. A pro probably would of had it done it a couple of hours. I could only wish for a few hours. But am happy with how it has turned out
Last edited by Terrys87; 04-10-2011 at 02:56 AM.
04-11-2011, 02:50 AM
#95
Super Moderator
Staff
Thread Starter
iTrader: (1)
Join Date: Aug 2008
Location: Anderson Missouri
Posts: 11,788
Likes: 0
Received 21 Likes
on
19 Posts
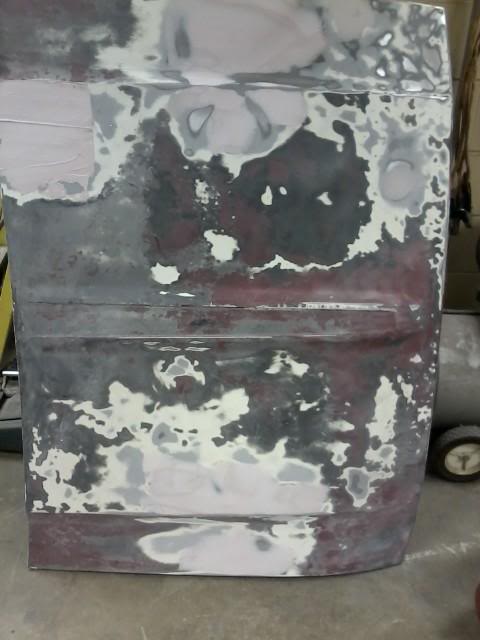
It may not look like much. But it has been 1 1/2 to 2 years since I had done bodywork. The saying "if you dont use it, you lose it." comes to mind. Im not a body man by trade and is something I am still learning. But the last time I did it I was faster and better.
But yesterday some things started to come back to me. I think today I will be able to get it finished. I will finish this up and get back on my 4Runner.
This hood is for the same truck that the fender is for. It was a little frustrating between the hood and fender, but it did me some good and think it will help get my project moving a little faster. I am still a long ways from being done with this hood and will post pics when finished.
04-12-2011, 03:04 AM
#96
Super Moderator
Staff
Thread Starter
iTrader: (1)
Join Date: Aug 2008
Location: Anderson Missouri
Posts: 11,788
Likes: 0
Received 21 Likes
on
19 Posts
I got to work on the hood some more. For the shape it was in, I think it turned out really well. I put the first coat of primer on then wet sanded. Had a couple of rough edges and found 4 pinholes. So it shouldnt take to long and will have this finished.
I should be starting on mine again soon. This hood and fender gave me a refresher, as it has been a while since I had done body work. It should get me moving along quicker with mine.

I should be starting on mine again soon. This hood and fender gave me a refresher, as it has been a while since I had done body work. It should get me moving along quicker with mine.
04-13-2011, 04:15 PM
#100
Super Moderator
Staff
Thread Starter
iTrader: (1)
Join Date: Aug 2008
Location: Anderson Missouri
Posts: 11,788
Likes: 0
Received 21 Likes
on
19 Posts
Thanks Guys.. I put a lot of work into it and it is for a friend who has helped me quite a bit so I wanted it better than what mine would of been. My goal when I do something like that is for it to look like it has never been repaired.
Once he gets it on his truck and we do the final sanding and painting, I think it is going to look great. I appreciate the compliments.
Once he gets it on his truck and we do the final sanding and painting, I think it is going to look great. I appreciate the compliments.


