Terrys87 86 4Runner with a 2nd Chance
 01-11-2012, 12:33 AM
#1
Super Moderator
Staff
Thread Starter
iTrader: (1)
Join Date: Aug 2008
Location: Anderson Missouri
Posts: 11,788
Likes: 0
Received 21 Likes
on
19 Posts
Terrys87 86 4Runner with a 2nd Chance
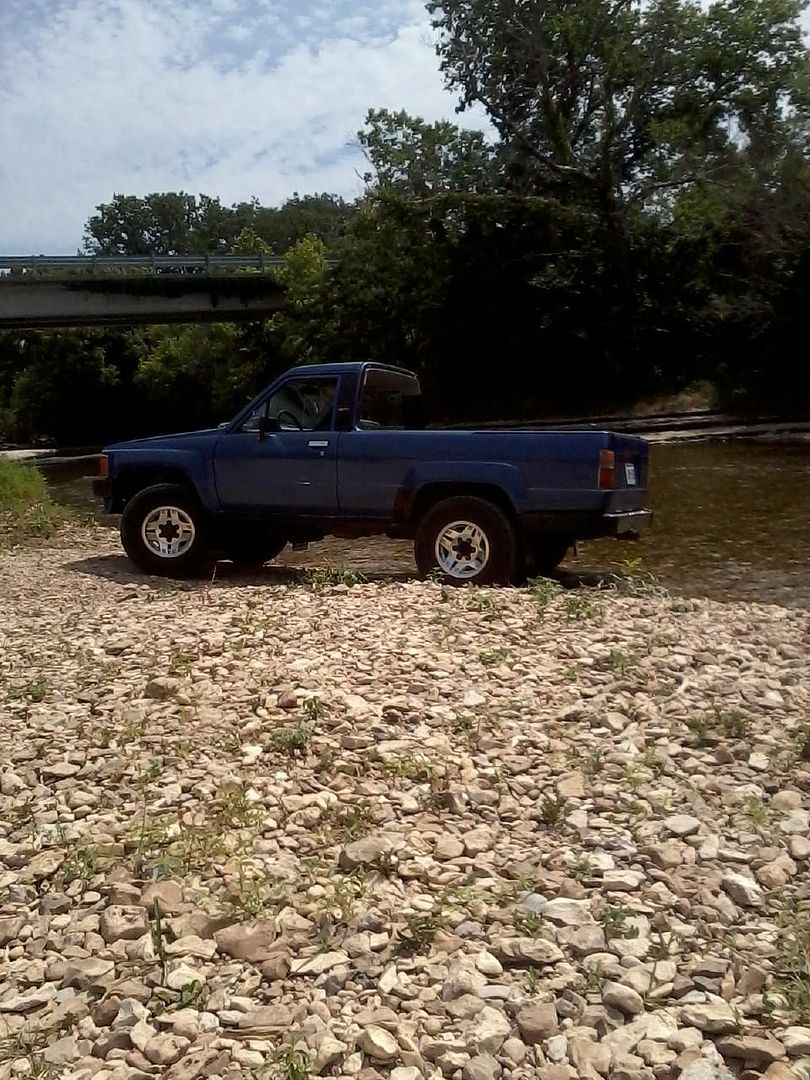
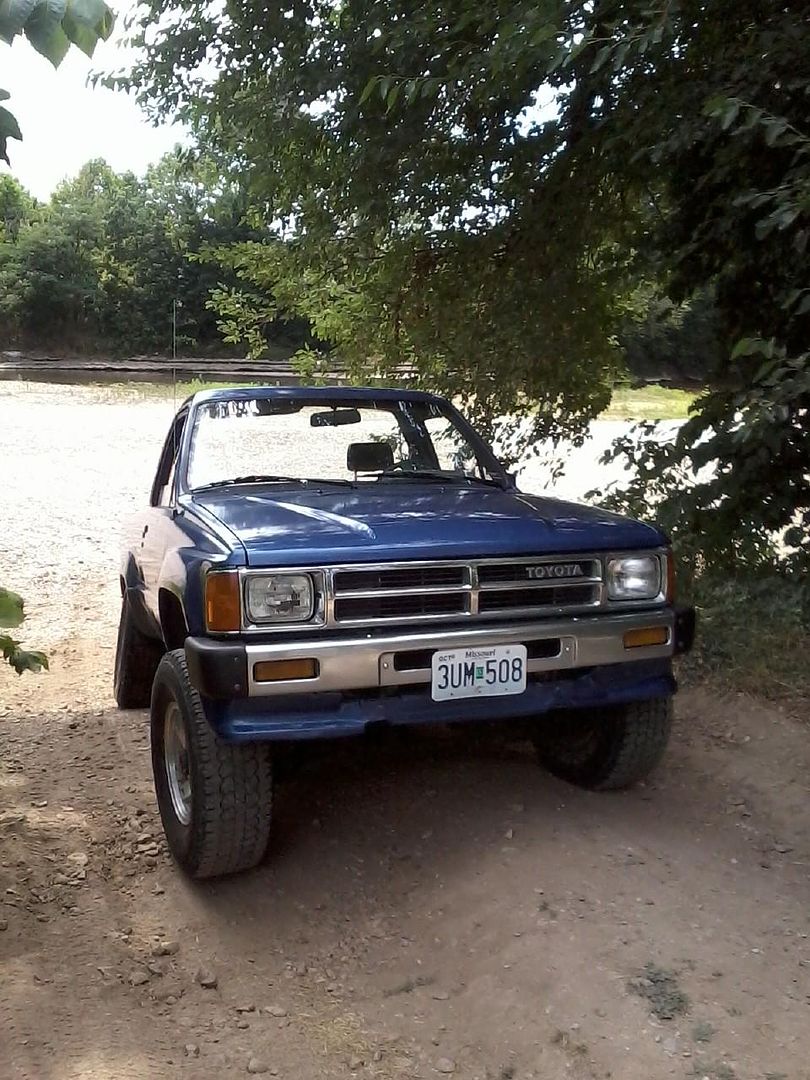
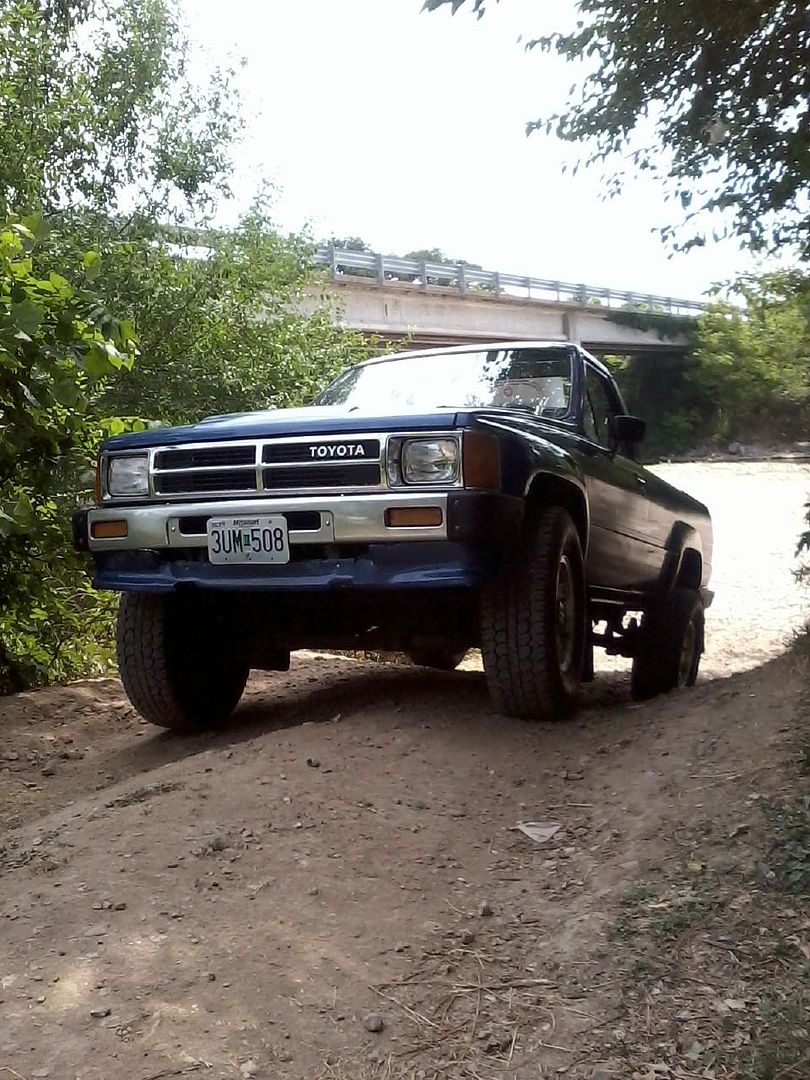
Hello..My name is Terry. Just wanted to post my new build. It is an 86 4Runner, 22re with a 5 speed. I bought it as a parts truck for my 88 4Runner as a parts truck. This 4Runner is actually in better shape then what my 88 was and would of gotten built instead of the 88 at the time, but I had some title issues which is now straightened out.
Since I couldnt couldnt get the title for it at the time, I used it for parts. The owner I got it from used it as parts for his 87 pickup for the front end as he had wrecked it and the transmission was bad. I got it from him for the backglass and fuel tank and was told the motor was good for $400.
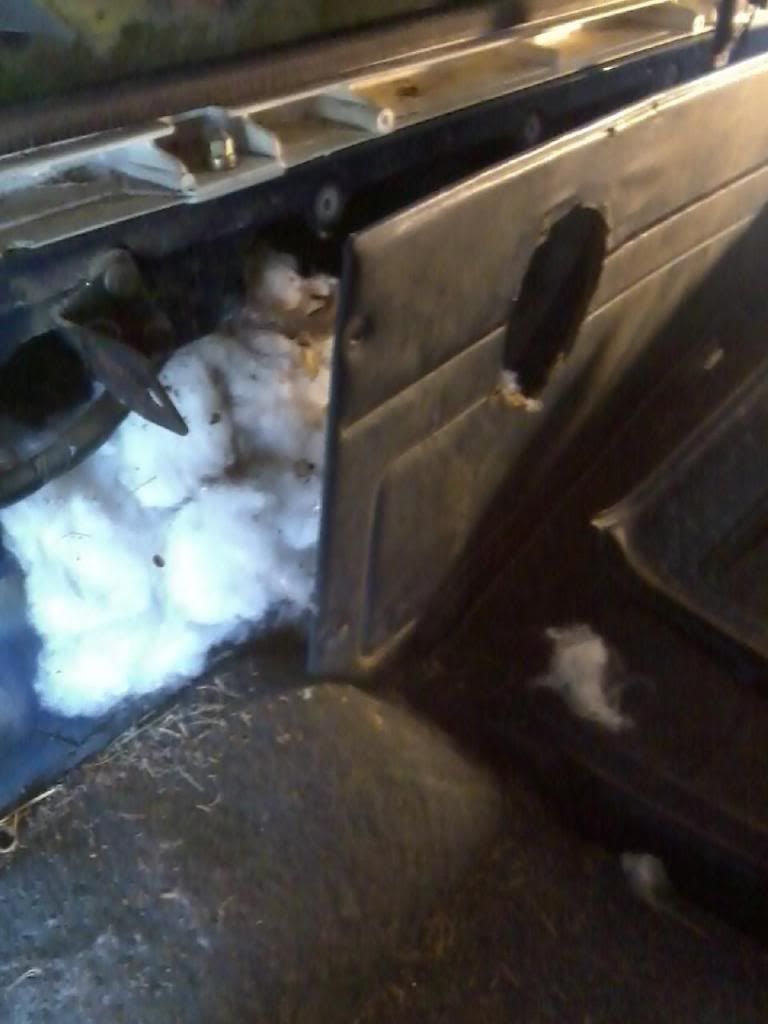
It was in better shape the what it is now as I had it setting in a field and the biggest field mouse that was the same size as a rat did some damage to the wiring.
I have done several Toyota trucks which can be seen in my Yotatech Photo Album. The first one 87 two wheel drive truck, is my avatar which I orginally bought for fuel mileage. After buying it, I started learning bodywork. Later on while getting gas, a guy told me my frame was broken. Got to looking and it was rotted in two.
Out of desperation, I had to learn how to swap frames. Not hard at all. Next I found a 89 standard cab 4x4 22re needing head work and body work. Really like how it turned out. Sold it and bought a 91 extended cab that needed head work and body work.
I then found Yotatech and got to seeing these 1st gens with the two door and top comes off and wanted one. Not many around here, never really paid attention to them and then started wanting one. Got the 88 4Runner and it was in bad condition. Just as soon as I got the 88 running and looking good the wife started driving it and basically took it over. Really enjoyed that build and truck. Which gives me an excuse to start another build.
So since I like blue and had this one and basically finishing the 88. I am starting on this one.
I always seen people do frame off restores, build motors and paint and was something I have always wanted to do. After doing the previous trucks and pushed myself to learn all of this, I really liked that I could take a truck in really bad condition and make something out of it.
I wont be doing a frame off restore on this truck. Current plans are to get it back to factory looking condition and a good solid dependable truck. Once I get it looking good and running good I will look at future plans. I eventually want a rear locker and maybe some 33s on it.
I did buy a 87 4Runner that was rusted in two and stripped everything off of it so I have 95% of the parts for this one to get it back togther. I will post pictures of the interior after I get it cleaned up, as my mouse friend has stuffing that someone in the past has used to insulate the rear quarter panels with and he left some evidence that he lived in the truck for awhile. He has since been evicted.
I started the 88 on 1/11/11 and basically done with it. Starting this one today, 1/11/12. Basically just lucked into falling that way. I tried to make my 88 build and will do this build to show that a build can be done for a reasonable amount if you do it yourself and dont get in any big hurry. Staying stock keeps it in my price range. CHEAP!!
I would like to do all of the big upgrades, but IFS works for what I do. I do take mine out wheeling occasionally on power line trails and have been in some mud.
I am also currently doing a frame off on a 79/82/83 pickup. Since it is rare to see one of these trucks around here, I really want it to be as clean condition wise as possible. So will be jumping between these two trucks. This 86 will be in great shape eventually. I liked how the 88 turned out and really am hoping for the same on this one.
I want some good before pics. One regret I have had not having pics of how a project looked before and what it ended up to be.
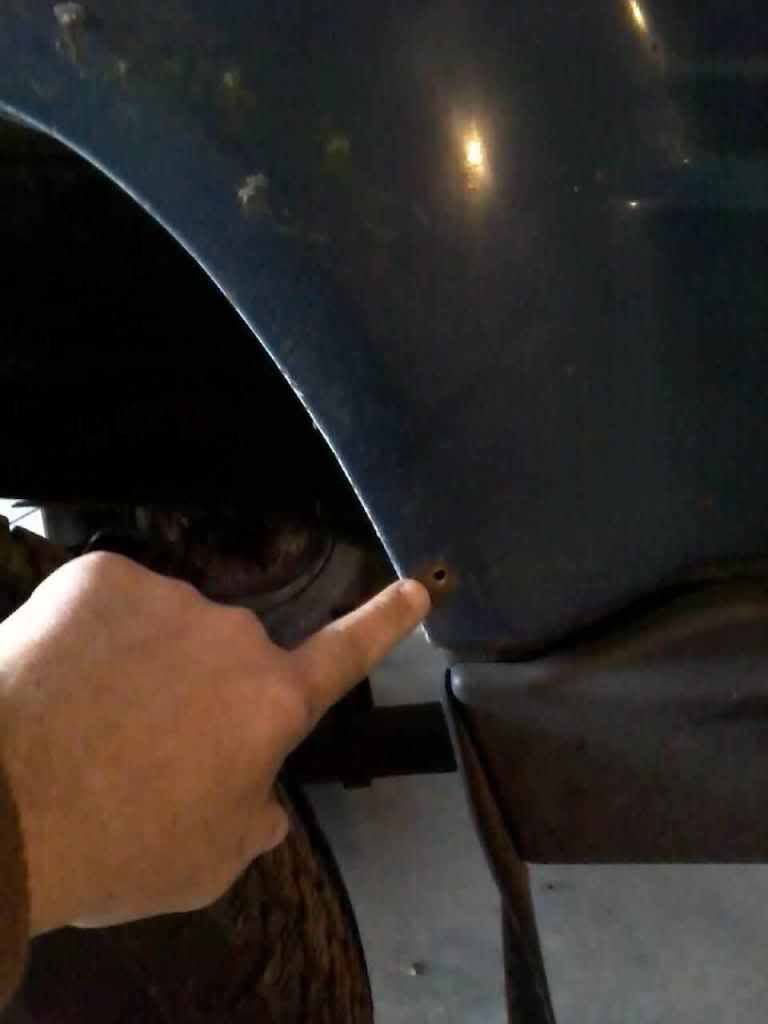
Only rust hole in body.
Drivers front.

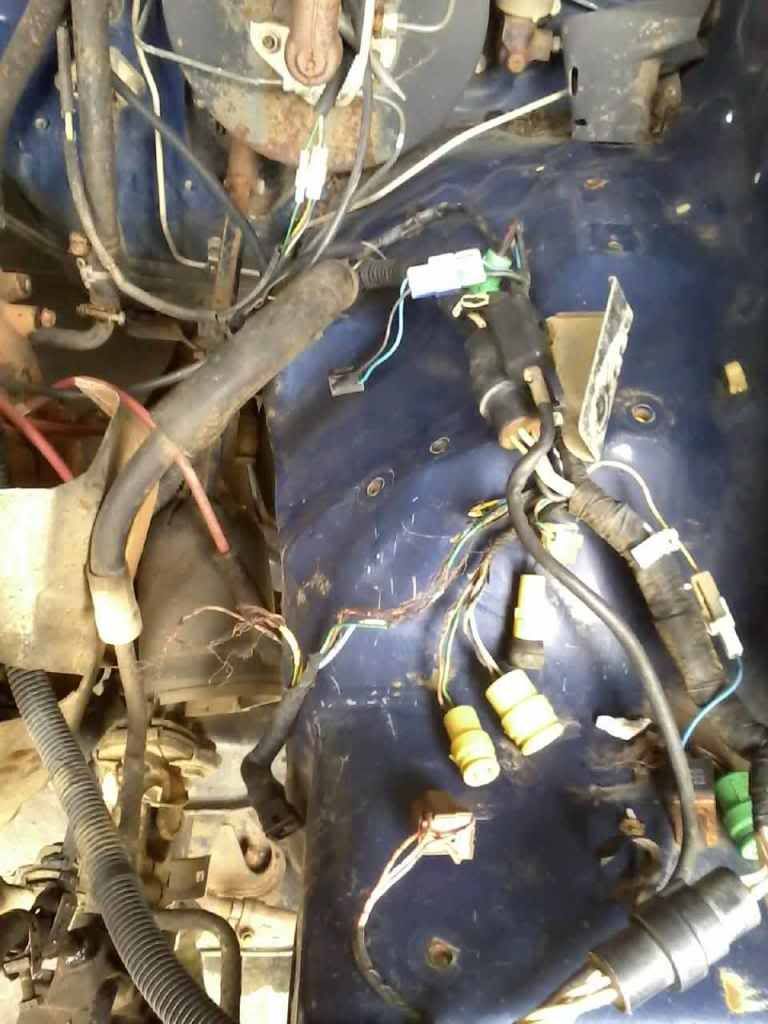
Wire damage from mouse.
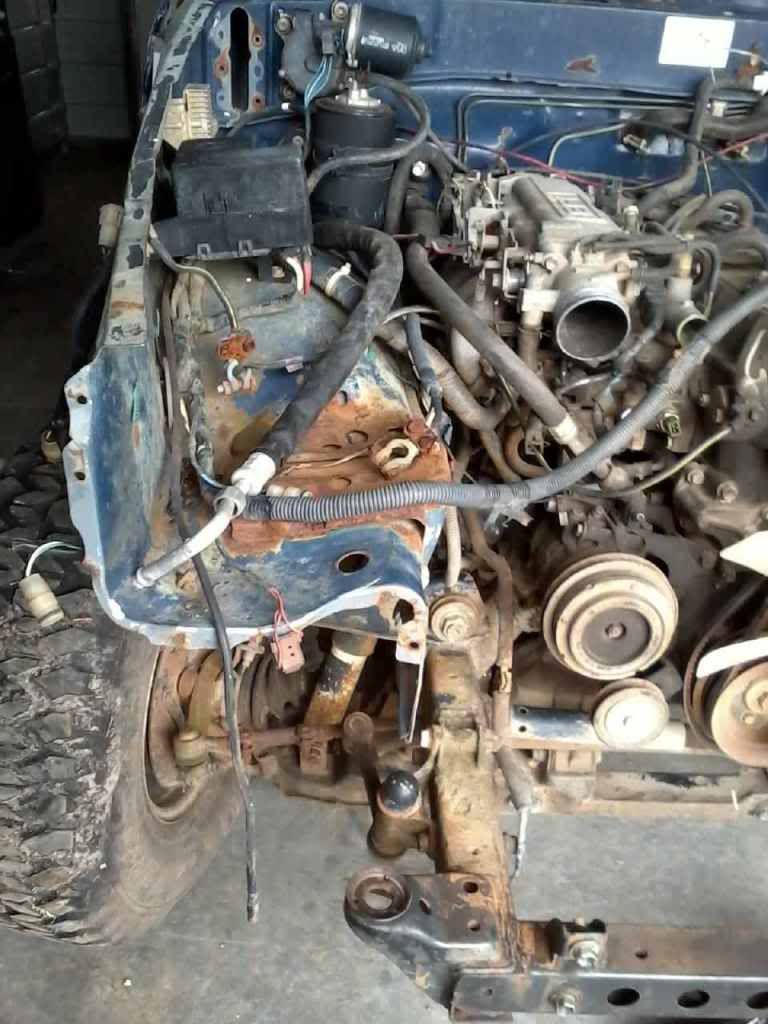
Damage where PO bumped it with tractor,
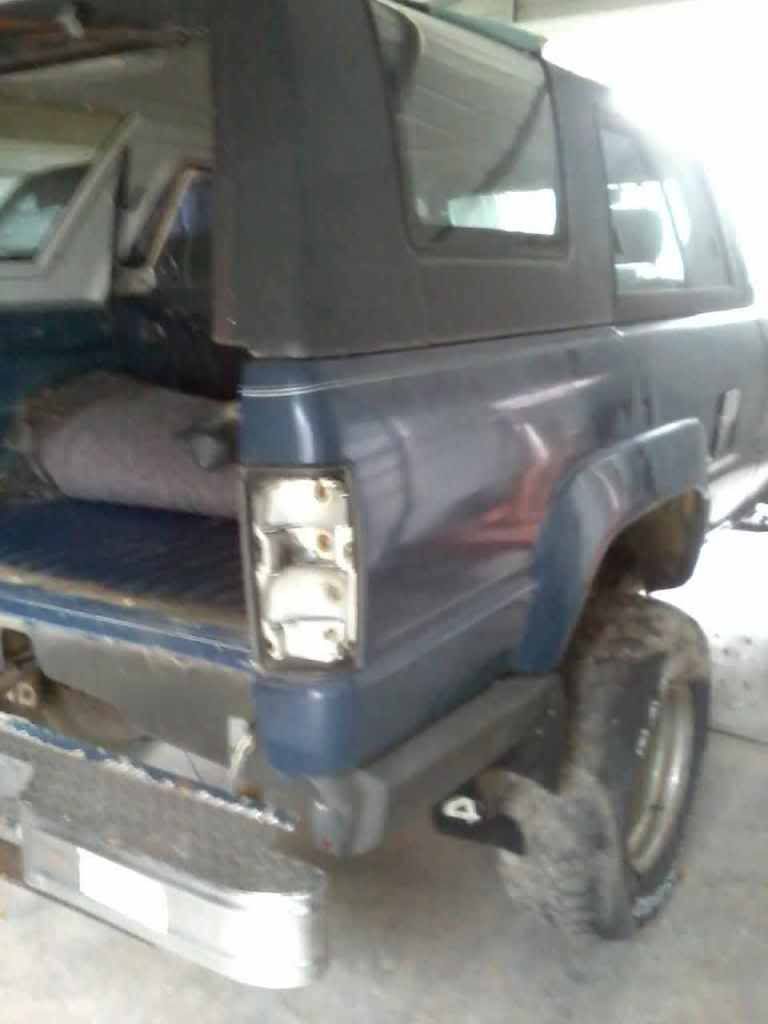
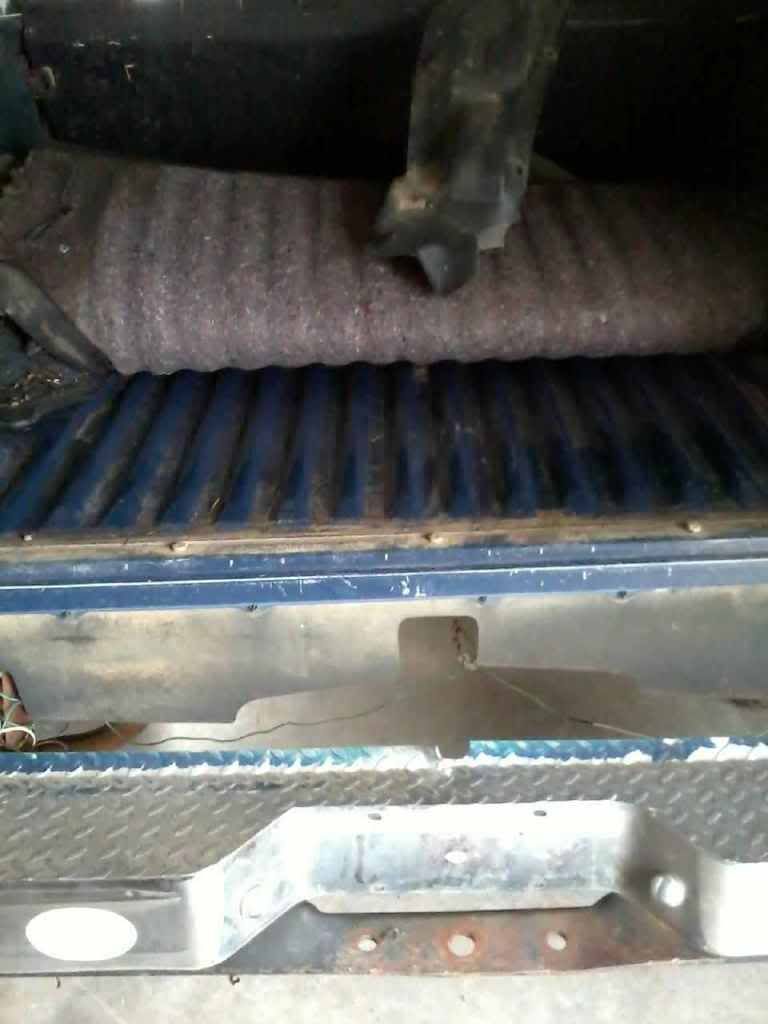
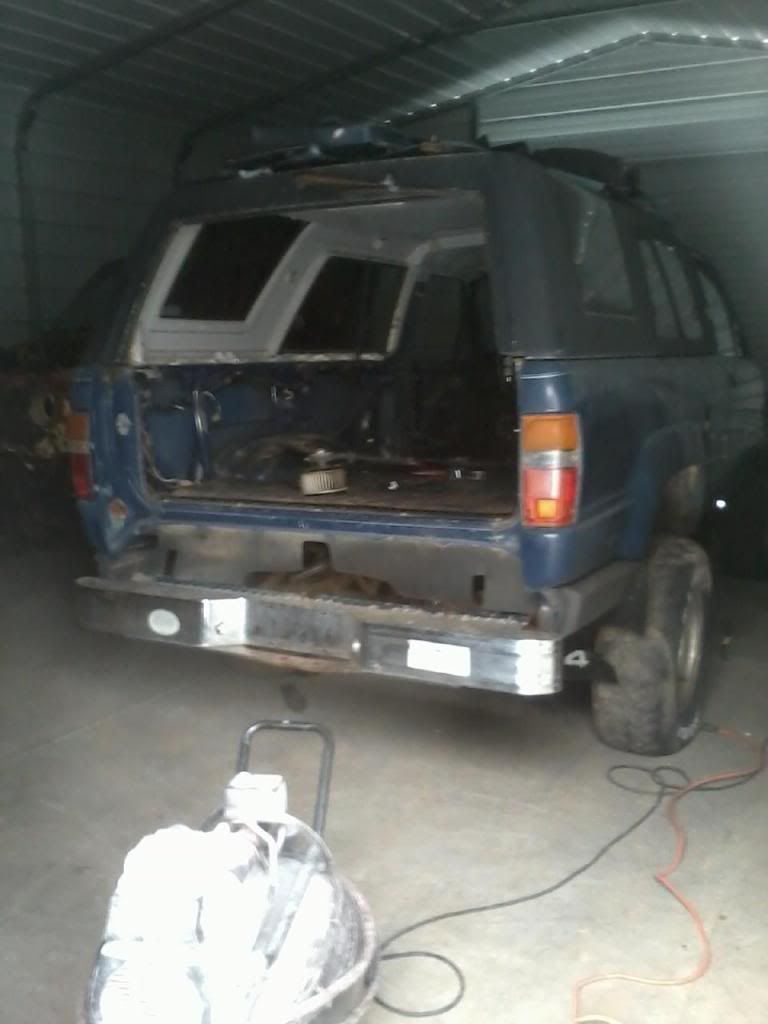
Condition of back end. I used the backhatch on the 88. Have all parts need for back end.
Truck is orginally from Florida. Think I am starting to like the Florida type. Gun rack in truck. Only broken piece of trim that I have noticed for the back.
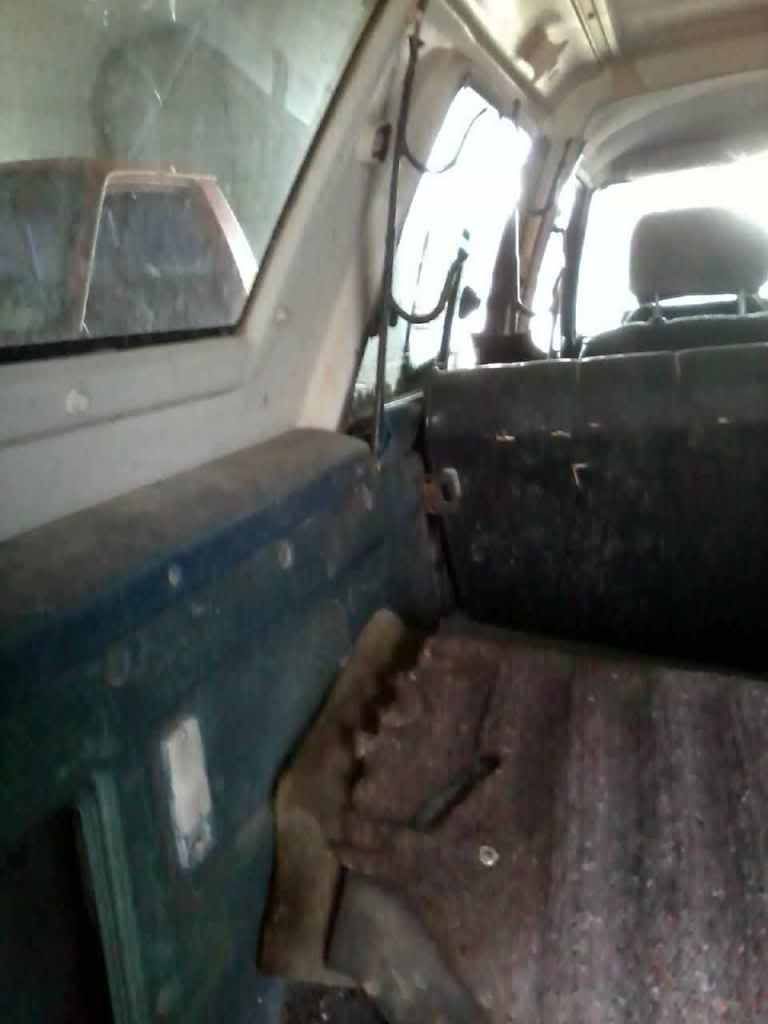
Was really surprised at condition of truck floor and color.
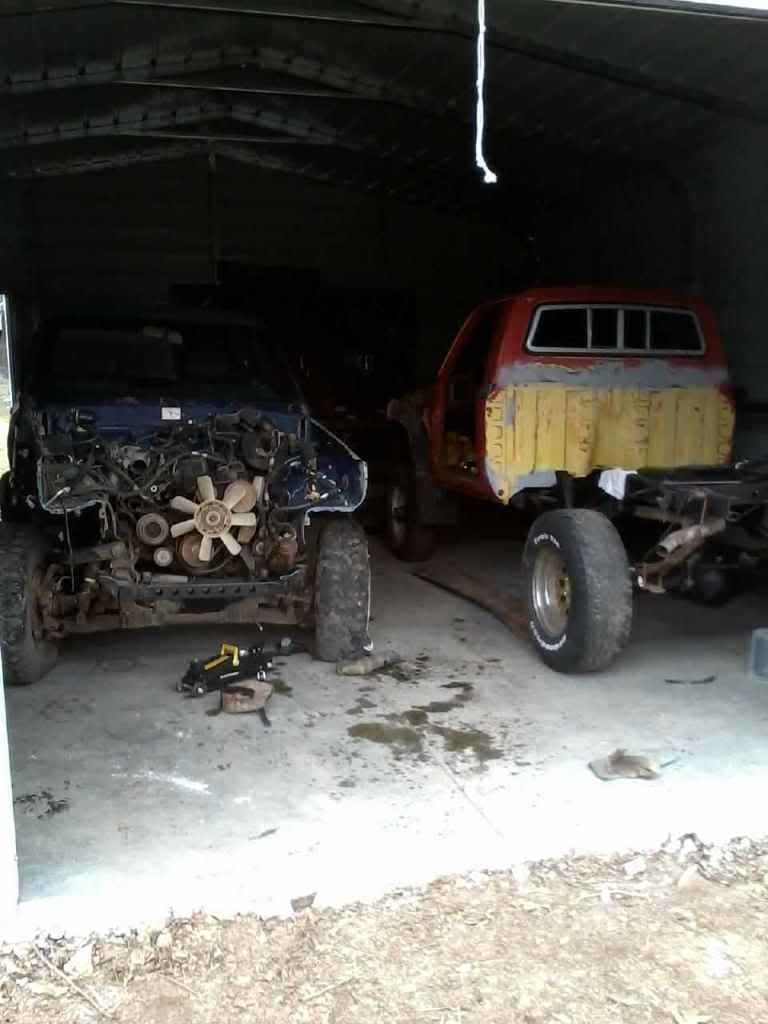
Both projects in shop.
Page 1 #8 Tail Light Conversion kit. https://www.yotatech.com/forums/f199.../#post51850717
Page 6 #105 Old and new style block differences. https://www.yotatech.com/forums/f199...l#post51865315
............#110 Removing Input Shaft Bearing. https://www.yotatech.com/forums/f199...l#post51866005
Page 7 #121 Picture of Fuse Cover in cab. https://www.yotatech.com/forums/f199...l#post51873772
............#130 Circuit Opening Relay and Wiper Relay. https://www.yotatech.com/forums/f199...l#post51874993
Page 10 #187 Maplight Install. https://www.yotatech.com/forums/f199...l#post51882262
Page 12 #226 Ground Wire Trick for Tailgate. https://www.yotatech.com/forums/f199...l#post51886756
Page 13 #255 Clearing the Fuel Return Line. https://www.yotatech.com/forums/f199...l#post51891043
Page 15 #282 Injector Information page. https://www.yotatech.com/forums/f199...l#post51892835
Page 16 #312 Diagnostic Jumper/Timing. https://www.yotatech.com/forums/f199...l#post51895203
Page 18 #341 Fixing/Adding Standard Cab Rearview Mirror. https://www.yotatech.com/forums/f199...l#post51898805
...........#350 Clearing Blinker Lenses. https://www.yotatech.com/forums/f199...l#post51899553
Page 21 #403 Helpful Youtube Videos. https://www.yotatech.com/forums/f199...l#post51905483
Page 24 #477 Diff Breather Extention. https://www.yotatech.com/forums/f199...l#post51914655
Page 39 #762 How I do my Bumper End Caps. https://www.yotatech.com/forums/f199...l#post51990242
...........#767 Rebuilding Front Brake Calipers. https://www.yotatech.com/forums/f199...l#post51992699
...........#775 Replacing Outer Axle Seal. https://www.yotatech.com/forums/f199...l#post51993295
Page 40 #789 Starter and Alternator Rebuild Videos. https://www.yotatech.com/forums/f199...l#post51994693
Page 44 #874 Door Pocket Upgrade (Vinyl). https://www.yotatech.com/forums/f199...l#post52003782
Page 47 #930 Door Pocket Upgrade (Cloth). https://www.yotatech.com/forums/f199...l#post52025955
Page 53 #1054 and #1055 SR5 Guage info. https://www.yotatech.com/forums/f199...l#post52067799
Page 56 #1109 Removing Window Crank.https://www.yotatech.com/forums/f199...l#post52075032
Page 59 #1167 Removing "L" Trims. https://www.yotatech.com/forums/f199...l#post52080046
Page 60 #1186 Cleaning Windshield Cowl. https://www.yotatech.com/forums/f199...l#post52081142
Page 61 #1205 Replacing Seat Cable. https://www.yotatech.com/forums/f199...l#post52082716
Page 62 #1223 Brake Cylinder Difference https://www.yotatech.com/forums/f199...l#post52084917
Page 63 #1248 85/86 Fuel Pump Bypass. https://www.yotatech.com/forums/f199...l#post52091744
Page 65 #1289 22r Fuel Filter https://www.yotatech.com/forums/f199...l#post52094698
Page 66 #1306 Various Links. https://www.yotatech.com/forums/f199...l#post52095625
Page 73 #1454 Making tach work on SR5 Guage. https://www.yotatech.com/forums/f199...l#post52117333
Page 77 #1522 Parts Page. https://www.yotatech.com/forums/f199...l#post52129628
Page 78 #1557 Injectors differences. https://www.yotatech.com/forums/f199...l#post52136639
Page 82 #1624 Cleaning Intake Assembly. https://www.yotatech.com/forums/f199...l#post52147101
...........#1629 Cleaning EGR. https://www.yotatech.com/forums/f199...l#post52147848
Page 83 #1643 Steps to Disassemble Dash (22r to 22re converion, Blower Cleaning, heater Controls...Lots of information starting from here and onto following pages.) https://www.yotatech.com/forums/f199...l#post52150377
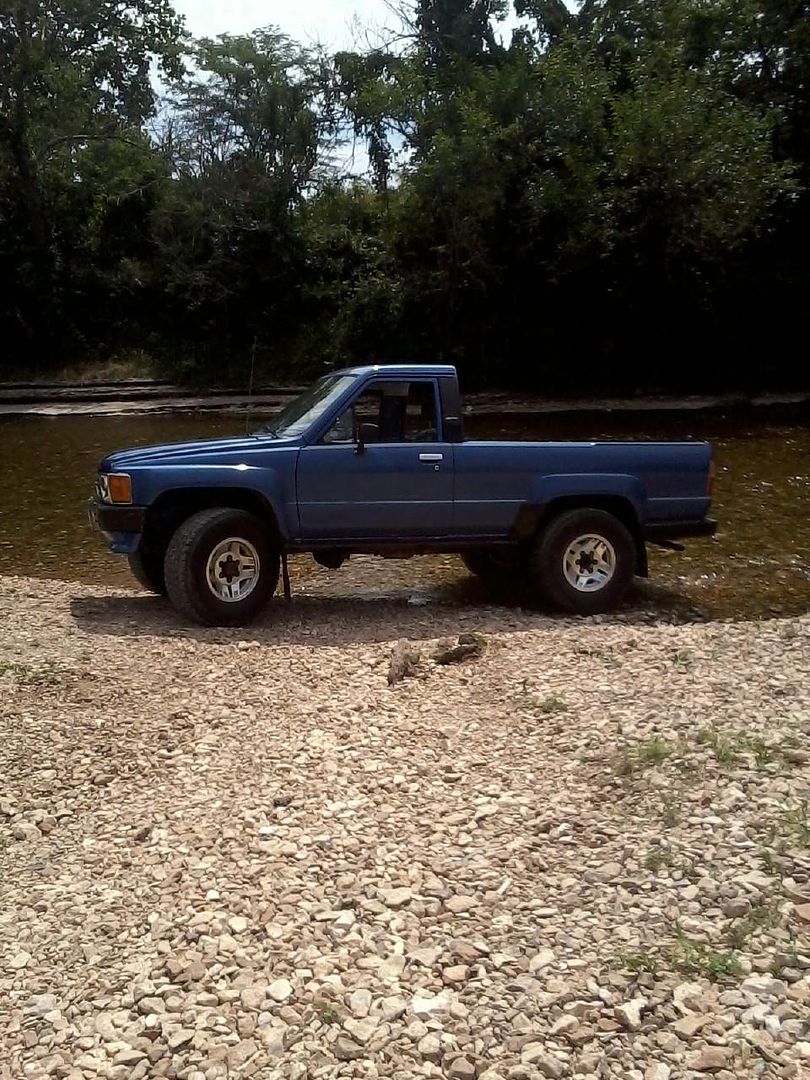
Here is what it is looking like now.
Since I couldnt couldnt get the title for it at the time, I used it for parts. The owner I got it from used it as parts for his 87 pickup for the front end as he had wrecked it and the transmission was bad. I got it from him for the backglass and fuel tank and was told the motor was good for $400.
It was in better shape the what it is now as I had it setting in a field and the biggest field mouse that was the same size as a rat did some damage to the wiring.
I have done several Toyota trucks which can be seen in my Yotatech Photo Album. The first one 87 two wheel drive truck, is my avatar which I orginally bought for fuel mileage. After buying it, I started learning bodywork. Later on while getting gas, a guy told me my frame was broken. Got to looking and it was rotted in two.
Out of desperation, I had to learn how to swap frames. Not hard at all. Next I found a 89 standard cab 4x4 22re needing head work and body work. Really like how it turned out. Sold it and bought a 91 extended cab that needed head work and body work.
I then found Yotatech and got to seeing these 1st gens with the two door and top comes off and wanted one. Not many around here, never really paid attention to them and then started wanting one. Got the 88 4Runner and it was in bad condition. Just as soon as I got the 88 running and looking good the wife started driving it and basically took it over. Really enjoyed that build and truck. Which gives me an excuse to start another build.
So since I like blue and had this one and basically finishing the 88. I am starting on this one.
I always seen people do frame off restores, build motors and paint and was something I have always wanted to do. After doing the previous trucks and pushed myself to learn all of this, I really liked that I could take a truck in really bad condition and make something out of it.
I wont be doing a frame off restore on this truck. Current plans are to get it back to factory looking condition and a good solid dependable truck. Once I get it looking good and running good I will look at future plans. I eventually want a rear locker and maybe some 33s on it.
I did buy a 87 4Runner that was rusted in two and stripped everything off of it so I have 95% of the parts for this one to get it back togther. I will post pictures of the interior after I get it cleaned up, as my mouse friend has stuffing that someone in the past has used to insulate the rear quarter panels with and he left some evidence that he lived in the truck for awhile. He has since been evicted.
I started the 88 on 1/11/11 and basically done with it. Starting this one today, 1/11/12. Basically just lucked into falling that way. I tried to make my 88 build and will do this build to show that a build can be done for a reasonable amount if you do it yourself and dont get in any big hurry. Staying stock keeps it in my price range. CHEAP!!
I would like to do all of the big upgrades, but IFS works for what I do. I do take mine out wheeling occasionally on power line trails and have been in some mud.
I am also currently doing a frame off on a 79/82/83 pickup. Since it is rare to see one of these trucks around here, I really want it to be as clean condition wise as possible. So will be jumping between these two trucks. This 86 will be in great shape eventually. I liked how the 88 turned out and really am hoping for the same on this one.
I want some good before pics. One regret I have had not having pics of how a project looked before and what it ended up to be.
Only rust hole in body.
Drivers front.
Wire damage from mouse.
Damage where PO bumped it with tractor,
Condition of back end. I used the backhatch on the 88. Have all parts need for back end.
Truck is orginally from Florida. Think I am starting to like the Florida type. Gun rack in truck. Only broken piece of trim that I have noticed for the back.
Was really surprised at condition of truck floor and color.
Both projects in shop.
Page 1 #8 Tail Light Conversion kit. https://www.yotatech.com/forums/f199.../#post51850717
Page 6 #105 Old and new style block differences. https://www.yotatech.com/forums/f199...l#post51865315
............#110 Removing Input Shaft Bearing. https://www.yotatech.com/forums/f199...l#post51866005
Page 7 #121 Picture of Fuse Cover in cab. https://www.yotatech.com/forums/f199...l#post51873772
............#130 Circuit Opening Relay and Wiper Relay. https://www.yotatech.com/forums/f199...l#post51874993
Page 10 #187 Maplight Install. https://www.yotatech.com/forums/f199...l#post51882262
Page 12 #226 Ground Wire Trick for Tailgate. https://www.yotatech.com/forums/f199...l#post51886756
Page 13 #255 Clearing the Fuel Return Line. https://www.yotatech.com/forums/f199...l#post51891043
Page 15 #282 Injector Information page. https://www.yotatech.com/forums/f199...l#post51892835
Page 16 #312 Diagnostic Jumper/Timing. https://www.yotatech.com/forums/f199...l#post51895203
Page 18 #341 Fixing/Adding Standard Cab Rearview Mirror. https://www.yotatech.com/forums/f199...l#post51898805
...........#350 Clearing Blinker Lenses. https://www.yotatech.com/forums/f199...l#post51899553
Page 21 #403 Helpful Youtube Videos. https://www.yotatech.com/forums/f199...l#post51905483
Page 24 #477 Diff Breather Extention. https://www.yotatech.com/forums/f199...l#post51914655
Page 39 #762 How I do my Bumper End Caps. https://www.yotatech.com/forums/f199...l#post51990242
...........#767 Rebuilding Front Brake Calipers. https://www.yotatech.com/forums/f199...l#post51992699
...........#775 Replacing Outer Axle Seal. https://www.yotatech.com/forums/f199...l#post51993295
Page 40 #789 Starter and Alternator Rebuild Videos. https://www.yotatech.com/forums/f199...l#post51994693
Page 44 #874 Door Pocket Upgrade (Vinyl). https://www.yotatech.com/forums/f199...l#post52003782
Page 47 #930 Door Pocket Upgrade (Cloth). https://www.yotatech.com/forums/f199...l#post52025955
Page 53 #1054 and #1055 SR5 Guage info. https://www.yotatech.com/forums/f199...l#post52067799
Page 56 #1109 Removing Window Crank.https://www.yotatech.com/forums/f199...l#post52075032
Page 59 #1167 Removing "L" Trims. https://www.yotatech.com/forums/f199...l#post52080046
Page 60 #1186 Cleaning Windshield Cowl. https://www.yotatech.com/forums/f199...l#post52081142
Page 61 #1205 Replacing Seat Cable. https://www.yotatech.com/forums/f199...l#post52082716
Page 62 #1223 Brake Cylinder Difference https://www.yotatech.com/forums/f199...l#post52084917
Page 63 #1248 85/86 Fuel Pump Bypass. https://www.yotatech.com/forums/f199...l#post52091744
Page 65 #1289 22r Fuel Filter https://www.yotatech.com/forums/f199...l#post52094698
Page 66 #1306 Various Links. https://www.yotatech.com/forums/f199...l#post52095625
Page 73 #1454 Making tach work on SR5 Guage. https://www.yotatech.com/forums/f199...l#post52117333
Page 77 #1522 Parts Page. https://www.yotatech.com/forums/f199...l#post52129628
Page 78 #1557 Injectors differences. https://www.yotatech.com/forums/f199...l#post52136639
Page 82 #1624 Cleaning Intake Assembly. https://www.yotatech.com/forums/f199...l#post52147101
...........#1629 Cleaning EGR. https://www.yotatech.com/forums/f199...l#post52147848
Page 83 #1643 Steps to Disassemble Dash (22r to 22re converion, Blower Cleaning, heater Controls...Lots of information starting from here and onto following pages.) https://www.yotatech.com/forums/f199...l#post52150377
Here is what it is looking like now.


Last edited by Terrys87; 10-01-2017 at 02:02 PM.
 01-11-2012, 12:43 AM
#2
Super Moderator
Staff
Thread Starter
iTrader: (1)
Join Date: Aug 2008
Location: Anderson Missouri
Posts: 11,788
Likes: 0
Received 21 Likes
on
19 Posts
Immediate plans are to pull the motor and clean the engine bay and motor. Then pull the top off and get the interior stripped and get it sanitary in there and start getting the electrical wire looked at and get some Peel and Seal on the insides and floor.
Alot of the things I have done to the 88 will follow this build as well. It does help having done one before and knowing the ins and outs on one of these.
I really think I can have this truck at least running under its own power in the next couple of months. To keep cost down, I will see how the motor runs when I get the truck back together. May kick myself in the butt for not breaking it down now and going through it, but if need be later on, I will.
01-11-2012, 09:34 AM
#4
Registered User
Oh goodie, a fresh build. Subscribed 
Will you be rebuilding the engine?
Will you be rebuilding the engine?
 01-12-2012, 04:01 AM
#6
Super Moderator
Staff
Thread Starter
iTrader: (1)
Join Date: Aug 2008
Location: Anderson Missouri
Posts: 11,788
Likes: 0
Received 21 Likes
on
19 Posts
Hello Jason...lol,, I was the first post on your 97 build.
Hello coryc85...I probably should tear the motor down, but I am going to take a chance and see if it will be ok not without rebuilding. I really want to get this truck on the road soon. I do have plans of pulling it out and fixing some leaks I have on it. Biggest reason for pulling it is just to clean up the engine and engine bay.
Thanks RMP8080..I plan on both looking and running great when done. The pickup is going to be done in more detail.
01-12-2012, 04:41 AM
#7
Super Moderator
Staff
Thread Starter
iTrader: (1)
Join Date: Aug 2008
Location: Anderson Missouri
Posts: 11,788
Likes: 0
Received 21 Likes
on
19 Posts
I got off of work yesterday and spent 8 hours working on the runner. I pulled all of the carpet out and was really surprised at how clean it came. I have done this to other trucks I have owned and am always surprised at how much dirt comes out. I will eventually replace all of the carpet but now it is clean and will work for now. Looks and smells so much better.
I removed 3 big bags of pillow stuffing that the PO had used for sound deadner in the side panels.
A PO had put in several plastic pinch splices for trailer lights and I removed ALOT of stereo wires. So I spent alot of time going back and repairing alot of wire damage. Still got to repaire some damage from the mouse. The electrical is my biggest concern on this build.
I do have a complete wiring harness I can put in if I had to but really dont want to go that route. So far it doesnt look that bad. I did pull the dash pad off to look for more wire damage and want to try and fix my dash pad as it has some cracks in it.
To pull the dash pad, you have to remove the far right vent and I tried patiently to work it out and CRACK!!! It busted in 3 pieces.grrr... I have a spare and will be using some interior paint to freshen up the interior. I used interior paint on my 88 build and got great results.
My rear panels are in great shape. Just a little faded. The center panels in the passenger are in great shape but some one cut them up putting in speakers. I will eventually replace them. I am going to put in the side pockets and might luck out that the pockets will fill in the holes but am not counting on it.
If I had some Peel and Seal, I could start putting some of the interior back together, but it isnt in the budget this week so I will be working on some things that dont cost for now. The Peel and Seal really seems to help with noise and acting as a good insulation.
In some ways this is going so much faster as I did some of these projects one at a time on the 88 and now I am able to wrap some of this build all at one time.
Doesnt look like much for 8 hours. Yesterday we had 50 degress, today snow. If I can get the shop warm, I plan on working on some wiring and pulling the motor and doing some cleaning.
3 bags of pillow stuffing and cut up panels.
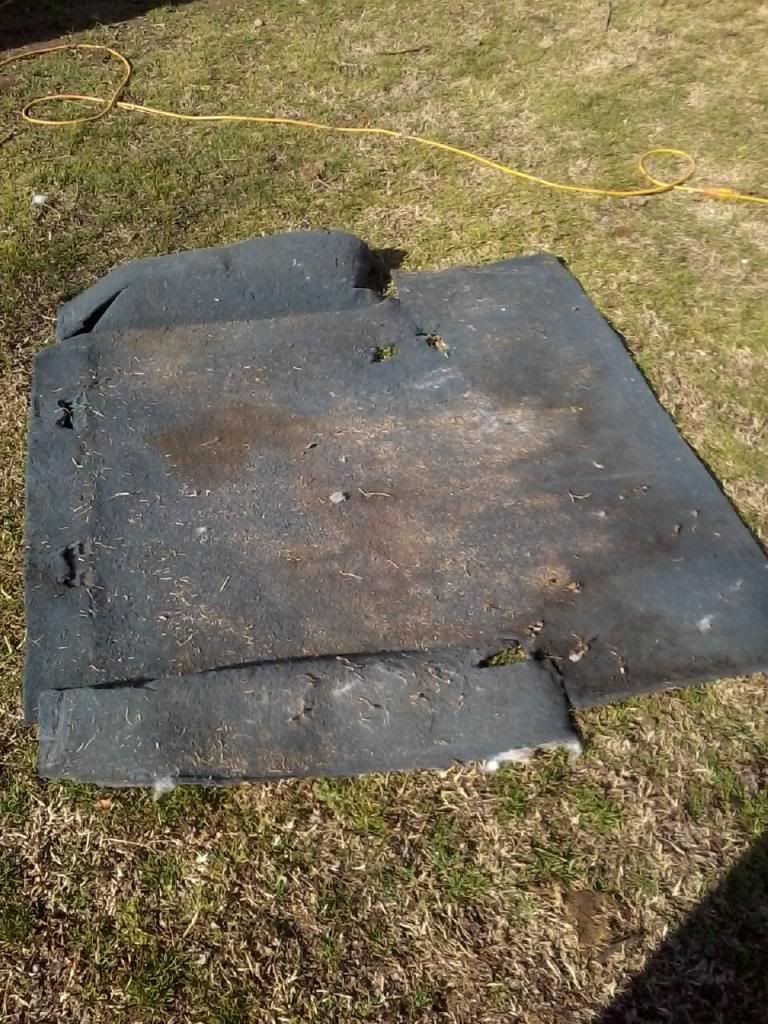
Dirty trunk carpet.
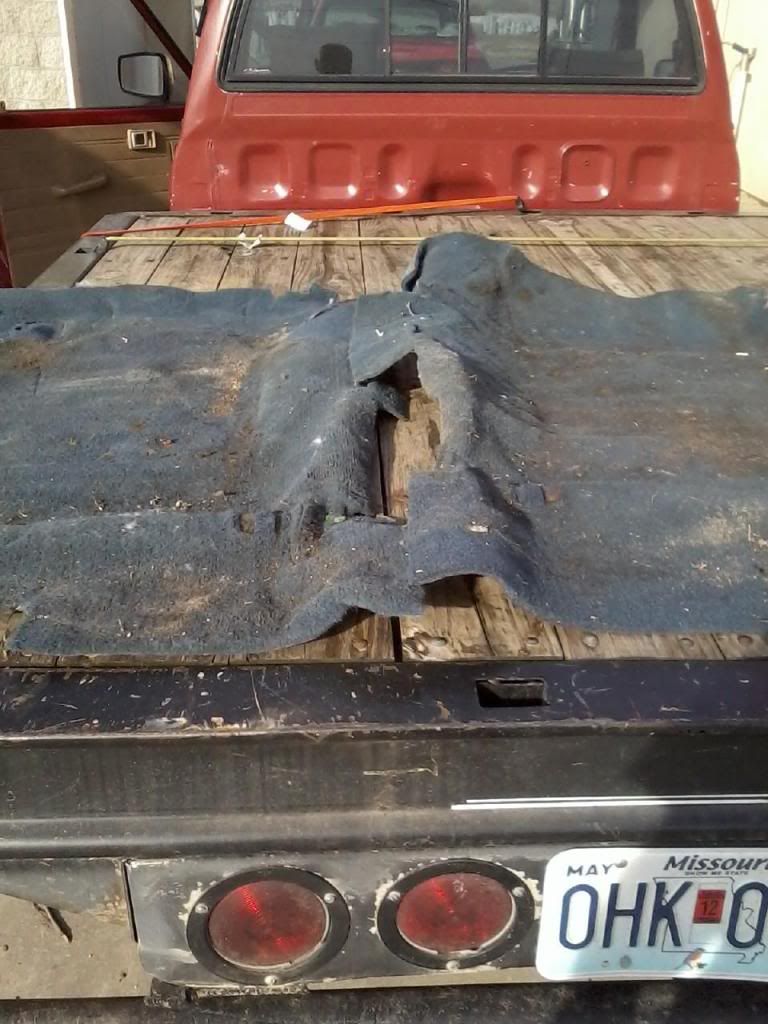
Dirty passenger carpets.
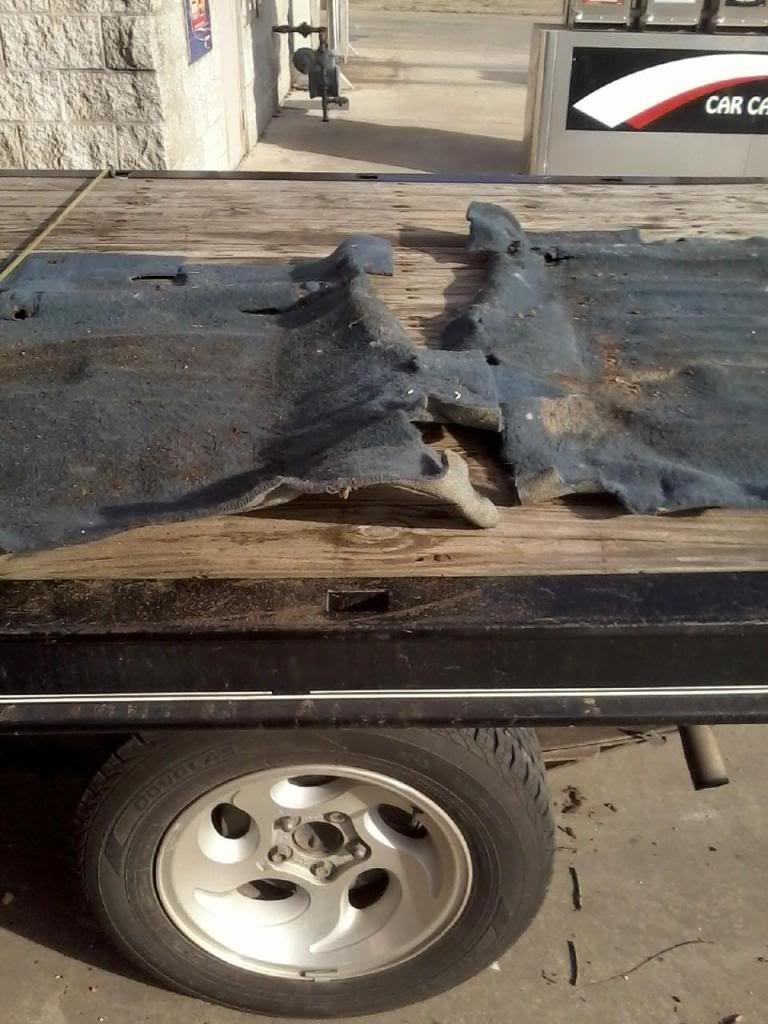
Dirty front carpets.
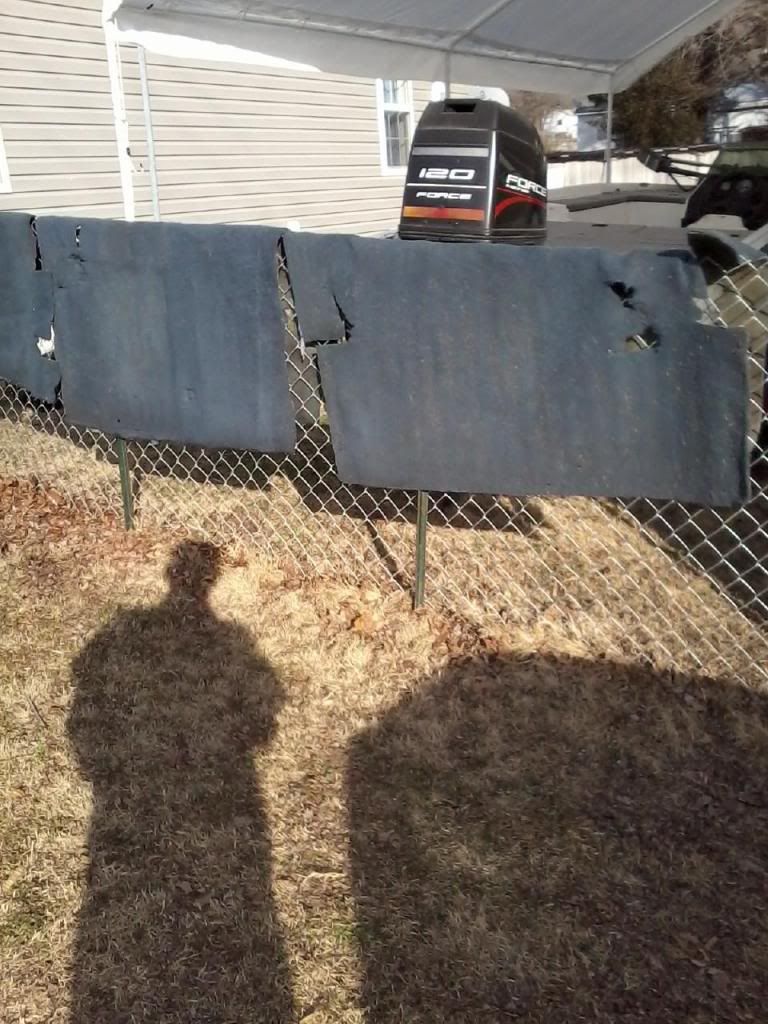
Cleaned and drying. Still have some hay from a hay bale sitting in the back when I got it. Should come out with a good vacuum.
I removed 3 big bags of pillow stuffing that the PO had used for sound deadner in the side panels.
A PO had put in several plastic pinch splices for trailer lights and I removed ALOT of stereo wires. So I spent alot of time going back and repairing alot of wire damage. Still got to repaire some damage from the mouse. The electrical is my biggest concern on this build.
I do have a complete wiring harness I can put in if I had to but really dont want to go that route. So far it doesnt look that bad. I did pull the dash pad off to look for more wire damage and want to try and fix my dash pad as it has some cracks in it.
To pull the dash pad, you have to remove the far right vent and I tried patiently to work it out and CRACK!!! It busted in 3 pieces.grrr... I have a spare and will be using some interior paint to freshen up the interior. I used interior paint on my 88 build and got great results.
My rear panels are in great shape. Just a little faded. The center panels in the passenger are in great shape but some one cut them up putting in speakers. I will eventually replace them. I am going to put in the side pockets and might luck out that the pockets will fill in the holes but am not counting on it.
If I had some Peel and Seal, I could start putting some of the interior back together, but it isnt in the budget this week so I will be working on some things that dont cost for now. The Peel and Seal really seems to help with noise and acting as a good insulation.
In some ways this is going so much faster as I did some of these projects one at a time on the 88 and now I am able to wrap some of this build all at one time.
Doesnt look like much for 8 hours. Yesterday we had 50 degress, today snow. If I can get the shop warm, I plan on working on some wiring and pulling the motor and doing some cleaning.
3 bags of pillow stuffing and cut up panels.
Dirty trunk carpet.
Dirty passenger carpets.
Dirty front carpets.
Cleaned and drying. Still have some hay from a hay bale sitting in the back when I got it. Should come out with a good vacuum.
Last edited by Terrys87; 01-12-2012 at 04:43 AM.
Trending Topics
01-12-2012, 06:47 AM
#8
Super Moderator
Staff
Thread Starter
iTrader: (1)
Join Date: Aug 2008
Location: Anderson Missouri
Posts: 11,788
Likes: 0
Received 21 Likes
on
19 Posts
Today we are getting snow and it is cold. Tried working in shop for a little bit and froze out. Did get tail lights and bulbs in. Still got to fix tail light harness and passenger tail light has a crack in it, but it will make me legal. One small step closer.
To save the next guy some trouble or make your job easier. Here is a conversion kit for the runners and believe it would work for the trucks. PN#43315
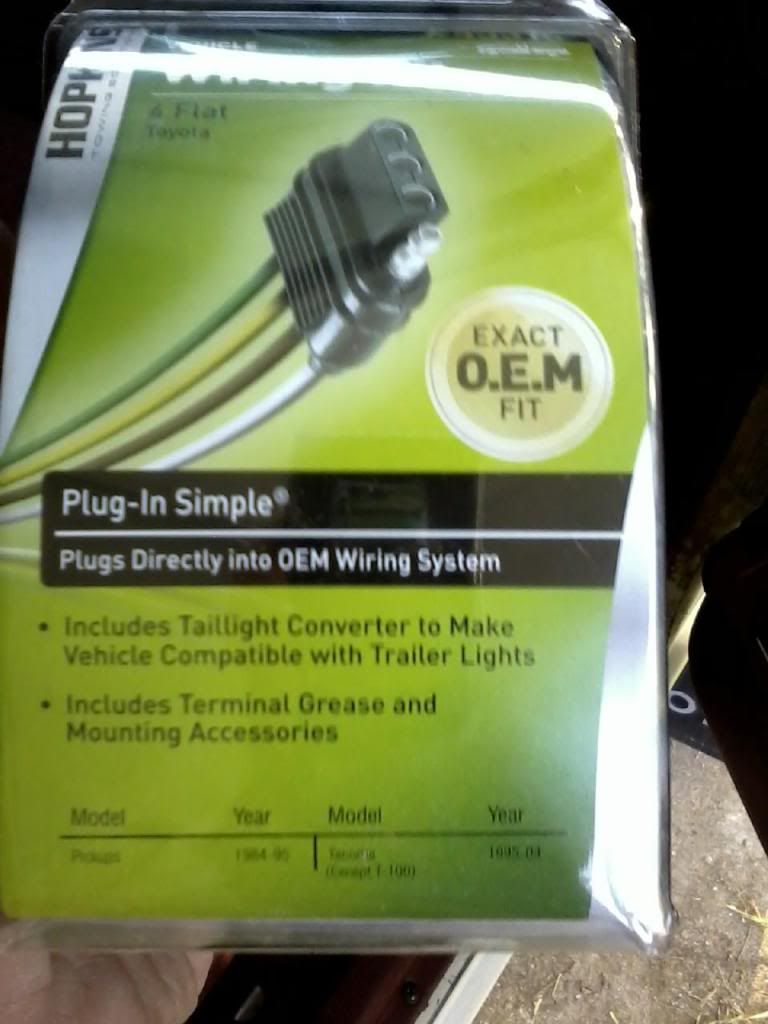
To save the next guy some trouble or make your job easier. Here is a conversion kit for the runners and believe it would work for the trucks. PN#43315
Last edited by Terrys87; 04-11-2015 at 12:56 PM.
01-12-2012, 03:47 PM
#10
Registered User
Subscribed. I'm glad to see you do another restoration. What color is the interior? In some pics it looks blue, in others it looks gray.
01-12-2012, 04:01 PM
#11
Registered User
iTrader: (2)
Join Date: Dec 2009
Location: Pleasanton, CA - SF Bay Area
Posts: 2,159
Likes: 0
Received 7 Likes
on
5 Posts
Nice project Terry -looking forward to seeing what you do and what ideas I can steal later 
Good luck!
BTW where did you find that aftermarket OEM wiring solution? Didn't see a link...
Good luck!
BTW where did you find that aftermarket OEM wiring solution? Didn't see a link...
01-12-2012, 05:17 PM
#12
Super Moderator
Staff
Thread Starter
iTrader: (1)
Join Date: Aug 2008
Location: Anderson Missouri
Posts: 11,788
Likes: 0
Received 21 Likes
on
19 Posts
Hello RMP8080.. The electrical is going to be my biggest concern on this project just due to the PO and the mouse. But I do have determination and patience. I did see the mouse got my AC plug and clock plug which will be easy fixes and under the hood doesnt look to bad.
Hello Nervo...It is a dark blue interior. Its not showing in the picture but the door panel is dark blue and light blue. I am thinking of going to a all dark blue on the panel. If I can get to Kansas City, there is a SR5 in a salvage yard that I tried to hide the interior panels on. It would look really nice with it.
I really hope this runner runs and drives as nice as the 88. It has been my most rewarding restore. Just needs the seats and AC to truly finish it up. Because the 88 is so fun to drive is my reason for doing this one for me. I did have my eye on a 87 Extra cab. Thanks for subscribing.
Thanks Philbert.. I got mine from Oriellys. I dont know if you have them in California. I dont recall seeing one when I was there. But I am sure Kragens or Checkers could get them for you. It is really nice having it. No splicing. It is truly a plug and play. It does have a little black box that is part of the assembly. I put this on my 88s build and will eventually add it to this truck. The black box if I recall right I just zip tied it up under the rear part of the frame.
I dont have a truck, but I always have to pull a trailer at least once or twice a week and it works great.
I tried to make my 88 build helpful from repairs to upgrade ideas. I posted them on the first post on where to find them. I am hoping I can make this build as informative as the other. I am always looking for ideas that make these a little more dependable, pleasureable or useful to drive.
01-13-2012, 01:01 PM
#14
Super Moderator
Staff
Thread Starter
iTrader: (1)
Join Date: Aug 2008
Location: Anderson Missouri
Posts: 11,788
Likes: 0
Received 21 Likes
on
19 Posts
Thanks Jason.. I have a little incentive to get it done. The cab floor in my flatbed has really started rusting bad lately in the past year. I have gone thru this truck from one end to the other and it has been needing rocker panels for some time now. I have some brand new ones for it from Wolf Steel. Just never got them on. Now with how bad it is breaking out with rust, I really need the runner going. I really think I can have it running fairly soon.
01-13-2012, 01:06 PM
#15
Super Moderator
Staff
Thread Starter
iTrader: (1)
Join Date: Aug 2008
Location: Anderson Missouri
Posts: 11,788
Likes: 0
Received 21 Likes
on
19 Posts
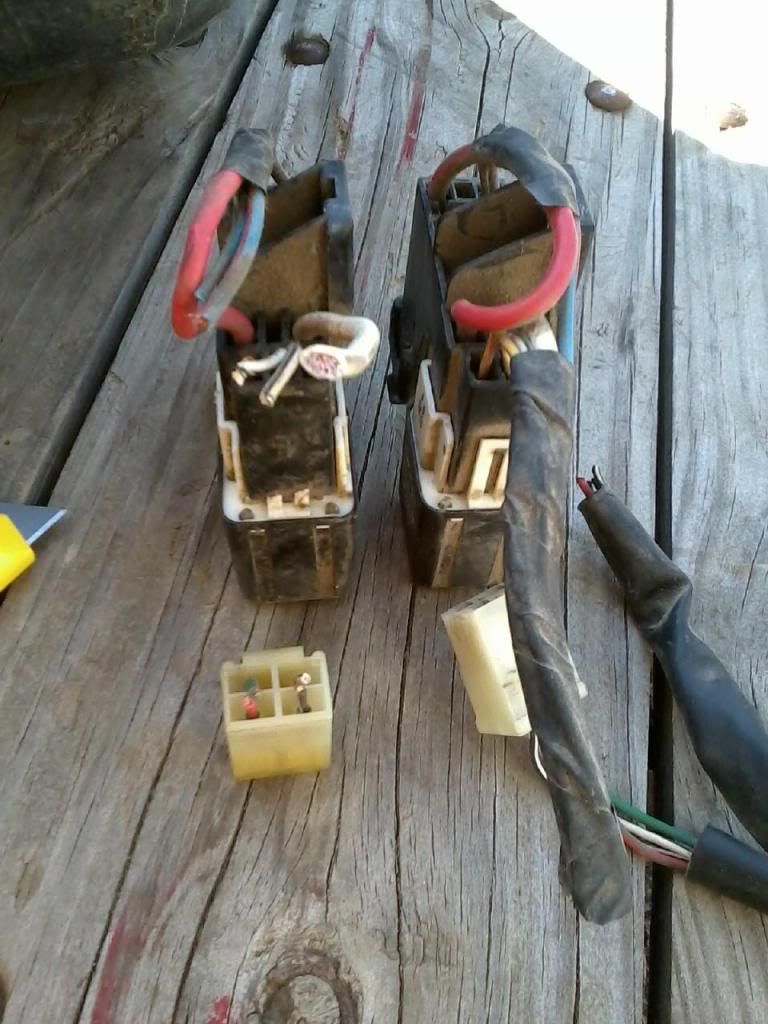
I have been working on getting some of the wiring fixed. The mouse got my clock, heater fuse assembly and air conditoner switch. I just had to replace the switch with a spare and got it fixed.
Did get the clock and heater fuse repaired. Did some soldering and wrapped it up. I feel pretty good about it.
Also started to repairing the AFM wires. Just got to more to go, but being bent over was getting to my back. I will finish it tomorrow.
The ones on the left is what the mouse got. The Right ones are the replacemnets and are now DONE!!
01-14-2012, 04:45 AM
#17
Super Moderator
Staff
Thread Starter
iTrader: (1)
Join Date: Aug 2008
Location: Anderson Missouri
Posts: 11,788
Likes: 0
Received 21 Likes
on
19 Posts
Thanks Zelephant.. I will eventually just get another cab for it. Maybe it will have more options then what this one has. It is a bare bone cab. No AC, Power Steering or anything else. I have added quite a bit to it.
01-14-2012, 04:53 AM
#18
Super Moderator
Staff
Thread Starter
iTrader: (1)
Join Date: Aug 2008
Location: Anderson Missouri
Posts: 11,788
Likes: 0
Received 21 Likes
on
19 Posts
Got a few things going on, so spending on the runner is out for this week. Works out though, thats when I get alot of the freebies things accomplished like cleaning and repairing things I can without spending.
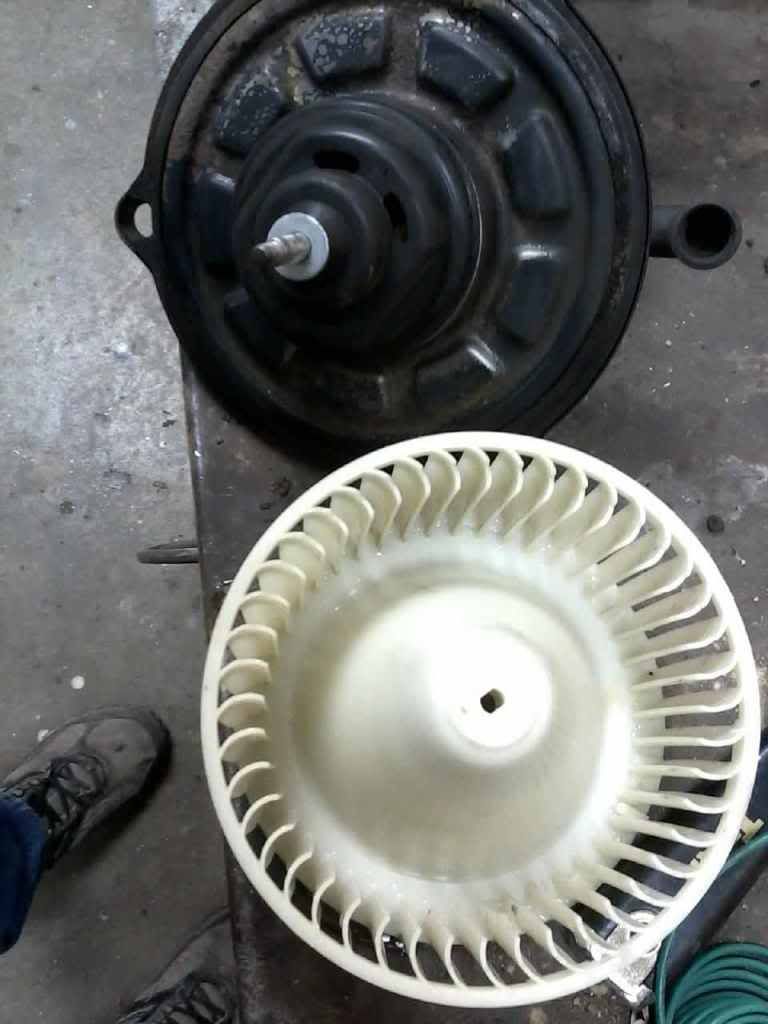
The windshield cowl is missing and had a lot of leaves and such down in the vent and blower motor. I did this on the 88 also. While having the dash apart, I cleaned the blower motor and getting some of the ventilation pipes cleaned also. They do get a lot of dust build up in there. Have ran ater through them before and looked like mud coming out of them. Seems to help keep the truck smelling fresh on previous projects. Was surprised at how much dust came out of blower motor from the brushes also.
Also started getting the core support panel ready. It has some rust but I will get some patch panels in it later on. Drilling spot welds is a first for me. It is slow going but will get it done eventually. Little by little. Also plan on spending a little time on the 83 doing body work. Got supplies and plenty of elbow grease. Just want to keep moving.
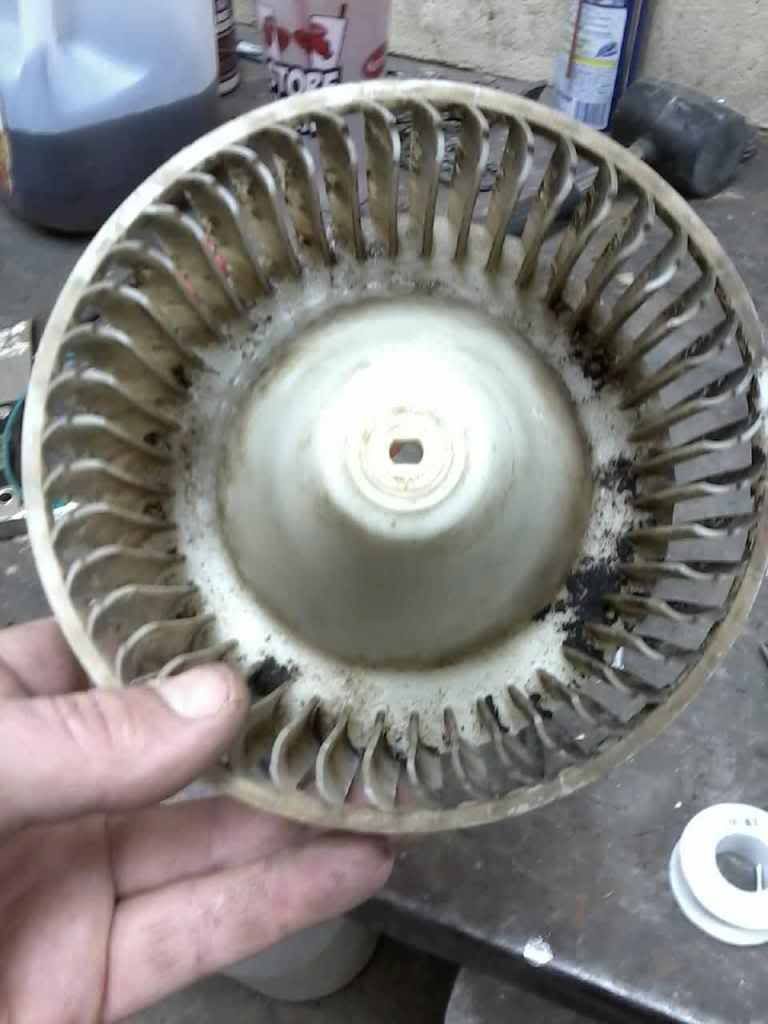
Took an air hose and blew the dust out of the motor while at it. I use a 5 gallon bucket of water and air hose and cleans small item really well.
Not the best picture, but removing the inner fender well from the core support. Drilling out rivets.

The windshield cowl is missing and had a lot of leaves and such down in the vent and blower motor. I did this on the 88 also. While having the dash apart, I cleaned the blower motor and getting some of the ventilation pipes cleaned also. They do get a lot of dust build up in there. Have ran ater through them before and looked like mud coming out of them. Seems to help keep the truck smelling fresh on previous projects. Was surprised at how much dust came out of blower motor from the brushes also.
Also started getting the core support panel ready. It has some rust but I will get some patch panels in it later on. Drilling spot welds is a first for me. It is slow going but will get it done eventually. Little by little. Also plan on spending a little time on the 83 doing body work. Got supplies and plenty of elbow grease. Just want to keep moving.
Took an air hose and blew the dust out of the motor while at it. I use a 5 gallon bucket of water and air hose and cleans small item really well.
Not the best picture, but removing the inner fender well from the core support. Drilling out rivets.
Last edited by Terrys87; 07-10-2013 at 01:53 AM.


