Red Leaders 1990 22RE/5-speed build thread!
 05-05-2014, 06:57 PM
#21
Registered User
Thread Starter
Join Date: Feb 2014
Posts: 173
Likes: 0
Received 0 Likes
on
0 Posts
Hey guys,
Haven't updated in a while - a lot of late nights have kept me busy!
I've made a lot of progress and things are almost together.
Where I left of was the conundrum with the head gasket. I wanted to clean in between the head and the gasket, but wasn't sure what to use. Then I got an idea....

That's right. Coffee filters. They are super thin and don't tear away like paper towels.
I dipped them in acetone and would slide them between the head/gasket -


Don't know if it is kosher or not, but I reused the bolt studs in the old water pump -

Twisted off with vise grips -

After getting head/gasket area clean, I wanted to use something to keep it from leaking, but not go crazy with RTV. Permatex mades a copper gasket spray and I think it worked great. Here is the prep -

Everything slid back together A-ok. I wanted to get pictures of the Ultra Grey on the timing cover, but I was working within a very time timeframe. But here is the cover and the water pump back on -

Whew! I think it worked okay!
As a side note, I got the Engnbldr kit and the gaskets that came with it. I fubar'd up one of the gaskets and creased it pretty bad. I started thinking 'should I just smear a lot of ultra grey around that area and hope for the best? Wisdom got the better of me and I had to wait a few days while the OEM gaskets arrived at the dealership. I should have gotten a picture of it when I picked it up, but they had one of the gaskets folded in half in the plastic!!! talk about a big fail. It wasn't creased, but it was an accident waiting to happen. I could have basically laid a candy bar on the gasket and it would have crushed it haha.
Haven't updated in a while - a lot of late nights have kept me busy!
I've made a lot of progress and things are almost together.
Where I left of was the conundrum with the head gasket. I wanted to clean in between the head and the gasket, but wasn't sure what to use. Then I got an idea....
That's right. Coffee filters. They are super thin and don't tear away like paper towels.
I dipped them in acetone and would slide them between the head/gasket -
Don't know if it is kosher or not, but I reused the bolt studs in the old water pump -
Twisted off with vise grips -
After getting head/gasket area clean, I wanted to use something to keep it from leaking, but not go crazy with RTV. Permatex mades a copper gasket spray and I think it worked great. Here is the prep -
Everything slid back together A-ok. I wanted to get pictures of the Ultra Grey on the timing cover, but I was working within a very time timeframe. But here is the cover and the water pump back on -
Whew! I think it worked okay!
As a side note, I got the Engnbldr kit and the gaskets that came with it. I fubar'd up one of the gaskets and creased it pretty bad. I started thinking 'should I just smear a lot of ultra grey around that area and hope for the best? Wisdom got the better of me and I had to wait a few days while the OEM gaskets arrived at the dealership. I should have gotten a picture of it when I picked it up, but they had one of the gaskets folded in half in the plastic!!!
talk about a big fail. It wasn't creased, but it was an accident waiting to happen. I could have basically laid a candy bar on the gasket and it would have crushed it haha.
Last edited by Red Leader; 05-05-2014 at 07:15 PM.
 05-05-2014, 07:11 PM
#22
Registered User
Thread Starter
Join Date: Feb 2014
Posts: 173
Likes: 0
Received 0 Likes
on
0 Posts
Next up was the oil pan - yay
[IMG]http://images9.fotki.com/v174/photos/9/1862059/12852409/P4243256-vi.jpg[IMG]
All the nasty bits from that stupid timing guide in the bottom of of the pan -

I had no idea how to get the pan off without taking off the oil pick up tube as well, so with the pan dropped maybe an inch or two, I wriggled a wrench in there are broke loose the 4 bolts and it dropped out with the pan.

I used some engine cleaner on the outside of the case. It had grease on it - that nasty, baked on super hard glue like grease
If you use this stuff, do yourself a favor and open up the garage or shop area. The smell permeates EVERYTHING and the smell even soaked down into our basement. I have no idea how
Here is the bottom of the block, rarin' to go, pickup tube installed. NOTE: If you do this, go ahead and order the pick up tube gasket along with the timing cover parts. It seemed like I was getting hung up for 2-3 days at a time with a little part here or there that I forgot to have on hand.

While I was under there I got a good glimpse of what the ultra grey did when I re-torqued the timing cover. At first I was concerned that maybe I didn't used enough or waited too long to tighten everything down. But I was greeted by this nice little 1/32" bead of ultra grey on the inside - it was very consistent. I was happy

I did hurriedly take this picture of the oil pan with ultra grey right before I put it on - I wanted the record just in case I screwed it up
Getting the pan on was intense. When I took it off, the oil pickup tube came with it. But after reading the stories (horrors) of smearing the rtv all over the place trying to get the pan back on, I realized try to put the oil pickup tube back in place with 1-2" to spare, right next to a smeared up layer of rtv was probably going to be the most frustrating thing imaginable. I decided to drop the front diff even further. Basically, I disconnected everything, except for the CV joints. The front crossmember had to get hammered out. Yep that is going to be fun putting that back in there. I did about 4-5 dry test runs seeing if I could easily and repeatedly get the pan in and out with the oil pick up tube in place. My results, were mixed But it all went together in the end. I think I ended up torquing the nuts a little tighter than the 9 ft lbs (more like 10-12) but it was because I was freaking out a little with rtv smearing around and grease chunks dropping into my eye and trying to get all those little bolts back in that I just did them all with a regular socket wrench.

[IMG]http://images9.fotki.com/v174/photos/9/1862059/12852409/P4243256-vi.jpg[IMG]
All the nasty bits from that stupid timing guide in the bottom of of the pan -
I had no idea how to get the pan off without taking off the oil pick up tube as well, so with the pan dropped maybe an inch or two, I wriggled a wrench in there are broke loose the 4 bolts and it dropped out with the pan.
I used some engine cleaner on the outside of the case. It had grease on it - that nasty, baked on super hard glue like grease
If you use this stuff, do yourself a favor and open up the garage or shop area. The smell permeates EVERYTHING and the smell even soaked down into our basement. I have no idea how
Here is the bottom of the block, rarin' to go, pickup tube installed. NOTE: If you do this, go ahead and order the pick up tube gasket along with the timing cover parts. It seemed like I was getting hung up for 2-3 days at a time with a little part here or there that I forgot to have on hand.
While I was under there I got a good glimpse of what the ultra grey did when I re-torqued the timing cover. At first I was concerned that maybe I didn't used enough or waited too long to tighten everything down. But I was greeted by this nice little 1/32" bead of ultra grey on the inside - it was very consistent. I was happy
I did hurriedly take this picture of the oil pan with ultra grey right before I put it on - I wanted the record just in case I screwed it up
Getting the pan on was intense. When I took it off, the oil pickup tube came with it. But after reading the stories (horrors) of smearing the rtv all over the place trying to get the pan back on, I realized try to put the oil pickup tube back in place with 1-2" to spare, right next to a smeared up layer of rtv was probably going to be the most frustrating thing imaginable. I decided to drop the front diff even further. Basically, I disconnected everything, except for the CV joints. The front crossmember had to get hammered out. Yep that is going to be fun putting that back in there. I did about 4-5 dry test runs seeing if I could easily and repeatedly get the pan in and out with the oil pick up tube in place. My results, were mixed
But it all went together in the end. I think I ended up torquing the nuts a little tighter than the 9 ft lbs (more like 10-12) but it was because I was freaking out a little with rtv smearing around and grease chunks dropping into my eye and trying to get all those little bolts back in that I just did them all with a regular socket wrench.
05-05-2014, 07:16 PM
#23
Registered User
Thread Starter
Join Date: Feb 2014
Posts: 173
Likes: 0
Received 0 Likes
on
0 Posts
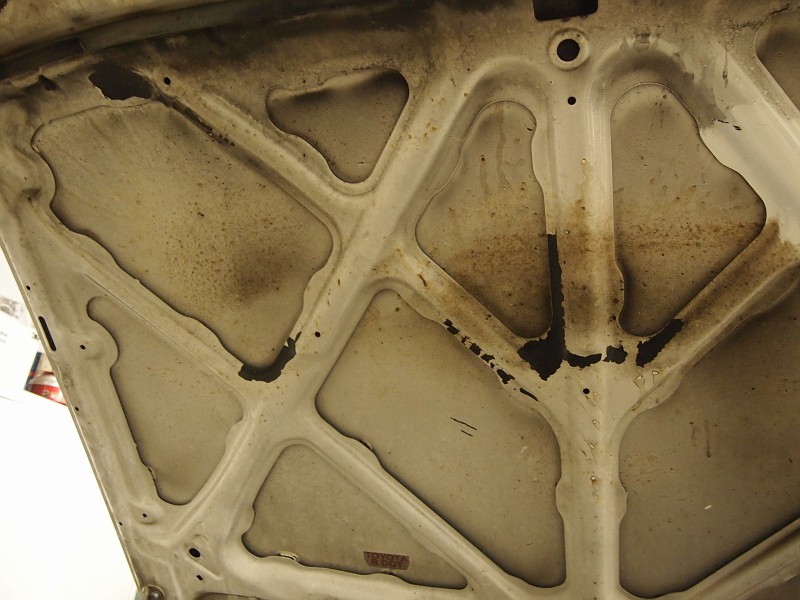
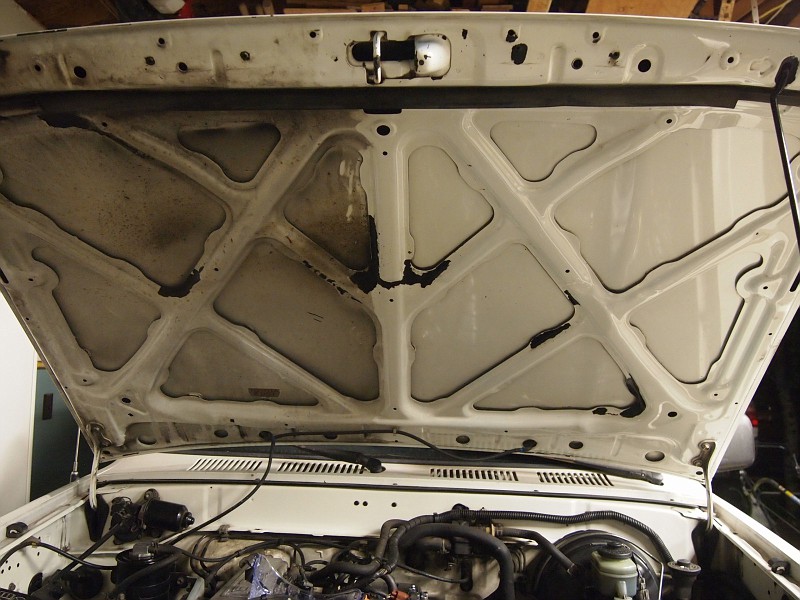
This has been taking forever because I decided I wanted to clean up the engine bay while I'm in there and have the extra room. Here is a before picture, just for reference -

I started to clean up the individual components.
Alternator, before -


Whoops, didn't get any after pics! I'll take some soon, although it is now installed
More pictures to come...
I started to clean up the individual components.
Alternator, before -
Whoops, didn't get any after pics! I'll take some soon, although it is now installed
More pictures to come...
Last edited by Red Leader; 05-05-2014 at 07:40 PM.
05-05-2014, 07:39 PM
#24
Registered User
Thread Starter
Join Date: Feb 2014
Posts: 173
Likes: 0
Received 0 Likes
on
0 Posts
Making the valve cover pretty
SO, I saw a random post on some forum of a guy's 22RE and his valve cover was beautiful. It was this dull shiny color that was a great balance between the old dull, dirty color and a full-polish job. It just had that 'right' look to it.
He said he used a wire wheel and then coated it in clear. I thought I might follow in his footsteps a little bit.
Here are some before pictures of the valve cover -


Ugh, nasty -

So my brother-in-law (auto mechanic, likes wrenching in his spare time as well) came over and helped be out. He helped swap out the shifter seats for a Marlin Crawler nylon set (feels great!) and then helped polish up the cover. I finished it up a day or two later and then prepped for some paint to highlight the Toyota logo -

I had some el cheapo gloss black, but then I found this in the paint cabinet and thought it would probably be the safer choice -

And the 'after' -

That is the clean side of the vehicle. This is what is lurking underneath -


Every time I get down there I come up looking like I just worked a 48 hour shift on an oil rig
He said he used a wire wheel and then coated it in clear. I thought I might follow in his footsteps a little bit.
Here are some before pictures of the valve cover -
Ugh, nasty -
So my brother-in-law (auto mechanic, likes wrenching in his spare time as well) came over and helped be out. He helped swap out the shifter seats for a Marlin Crawler nylon set (feels great!) and then helped polish up the cover. I finished it up a day or two later and then prepped for some paint to highlight the Toyota logo -
I had some el cheapo gloss black, but then I found this in the paint cabinet and thought it would probably be the safer choice -
And the 'after' -
That is the clean side of the vehicle. This is what is lurking underneath -
Every time I get down there I come up looking like I just worked a 48 hour shift on an oil rig
Last edited by Red Leader; 05-05-2014 at 07:40 PM.
05-07-2014, 09:56 AM
#26
Registered User
Thread Starter
Join Date: Feb 2014
Posts: 173
Likes: 0
Received 0 Likes
on
0 Posts
Thanks FGZ! Appreciate the encouragement.
Brother in law helped me get the diff all put back up there. Actually he did most of the work and I just made things look pretty
In other news, we looked and saw that this 4runner had the original spark plug wires on it. 1989. It has 243,000 miles on it. Whoa.
Brother in law helped me get the diff all put back up there. Actually he did most of the work and I just made things look pretty
In other news, we looked and saw that this 4runner had the original spark plug wires on it. 1989. It has 243,000 miles on it. Whoa.
05-11-2014, 12:18 PM
#27
Registered User
Thread Starter
Join Date: Feb 2014
Posts: 173
Likes: 0
Received 0 Likes
on
0 Posts
Alright, in preparation for starting, I had to do some research on priming the oil pump. I picked up some assembly lube and packed the oil pump, which I removed for probably the 5th or 6th time haha.


I think the idea is that you fill in all the voids and it creates a vacuum to assist in getting the oil into the engine more quickly. The good news is that even if I didn't do anything perfect, I was not at great risk since the engine already had oil in it before, so I was not working with totally dry surfaces.
Where it was going -

And here is my brother-in-law helping with the front end assembly! Water pump studs, new hoses, belts, fan, shroud, radiator, new thermostat (dual stage - Thanks FGZ for the tip!), and then a coolant and oil fill. I was going to go the extra mile and do a coolant flush, but I'll do that in the near future if I switch over to Toyota red coolant. I just want to get this thing on the road!
Well, we were ready to crank it over and...nothing. Battery was low
We had enough for headlights but not enough to turn it over. Hooked up the battery charger and let it run for a while. Break time? Nope! We started detailing the engine bay.
My BIL's handiwork-

For being 25 years old, it looks awesome underneath all that grime!
Here is the engine bay, in process -

After a while, we decided to test the battery and had enough for a crank! We turned it over a few times with the EFI fuse pulled and the plugs out so it could turn and cycle some oil without having to feel the full weight of trying to start.
A little more charge, fuse put in, plugs in, and it fired up in 1 second!


We rolled it down the driveway to burp the coolant and set the heater on high. Meanwhile, I thought it would be a good idea to wipe up (as best as I could) 25 years of muck and grease that we had pulled, scraped, brushed, and wiped off.
What was left on the floor...it seemed like it was going to come alive at any second...

Literally, it was a huge flippin' ball of grease. It weighed several pounds. It landed with a thud in the trashcan
Here is a shot from the side, all tucked away nice and tight in the garage

And one last shot of where we are at with the engine bay -

Soon it will be clean enough eat on!
That's all for now! More to come soon!
I think the idea is that you fill in all the voids and it creates a vacuum to assist in getting the oil into the engine more quickly. The good news is that even if I didn't do anything perfect, I was not at great risk since the engine already had oil in it before, so I was not working with totally dry surfaces.
Where it was going -
And here is my brother-in-law helping with the front end assembly! Water pump studs, new hoses, belts, fan, shroud, radiator, new thermostat (dual stage - Thanks FGZ for the tip!), and then a coolant and oil fill. I was going to go the extra mile and do a coolant flush, but I'll do that in the near future if I switch over to Toyota red coolant. I just want to get this thing on the road!
Well, we were ready to crank it over and...nothing. Battery was low
We had enough for headlights but not enough to turn it over. Hooked up the battery charger and let it run for a while. Break time? Nope! We started detailing the engine bay.
My BIL's handiwork-
For being 25 years old, it looks awesome underneath all that grime!
Here is the engine bay, in process -
After a while, we decided to test the battery and had enough for a crank! We turned it over a few times with the EFI fuse pulled and the plugs out so it could turn and cycle some oil without having to feel the full weight of trying to start.
A little more charge, fuse put in, plugs in, and it fired up in 1 second!
We rolled it down the driveway to burp the coolant and set the heater on high. Meanwhile, I thought it would be a good idea to wipe up (as best as I could) 25 years of muck and grease that we had pulled, scraped, brushed, and wiped off.
What was left on the floor...it seemed like it was going to come alive at any second...
Literally, it was a huge flippin' ball of grease. It weighed several pounds. It landed with a thud in the trashcan
Here is a shot from the side, all tucked away nice and tight in the garage
And one last shot of where we are at with the engine bay -
Soon it will be clean enough eat on!
That's all for now! More to come soon!
05-11-2014, 04:19 PM
#28
Registered User
iTrader: (1)
Join Date: Nov 2012
Location: Elko NV, at the foot of the Rubys
Posts: 358
Likes: 0
Received 0 Likes
on
0 Posts
Excellent work, show room quality if you ask me! Glad it fired up right away, that is awesome. That ball of grease had me laughing. I know one day I am going to end up pulling that much gunk out of my engine bay too lol.
Always a great feeling when something starts working! What's up next?
Always a great feeling when something starts working! What's up next?
05-11-2014, 05:04 PM
#29
Registered User

Great detailing work! That will pay off every time you look at the truck for months and years to come. I don't know what's more satisfying, though - the detailing or having the truck running again!
05-11-2014, 06:12 PM
#30
Registered User
Thread Starter
Join Date: Feb 2014
Posts: 173
Likes: 0
Received 0 Likes
on
0 Posts
Excellent work, show room quality if you ask me! Glad it fired up right away, that is awesome. That ball of grease had me laughing. I know one day I am going to end up pulling that much gunk out of my engine bay too lol.
Always a great feeling when something starts working! What's up next?
Always a great feeling when something starts working! What's up next?
Thanks for the kind words! I'm glad to have it this clean, but very grateful to only have to do it once really - I'm doing it the hard way, without a pressure washer, just a rag and degreaser.
It is making some loud ticking when revved up, I think beyond what it should, so I still need to do timing and valve adjustment - those should be next. Also, I am deciding not really to drive it until I get the clutch bracket fixed - definitely have a good crack going but I don't think it has fully gone 'pop' yet and don't want to risk it. I know a guy who is a fabricator that can help me with professional quality work. I could probably get by borrowing a welder and doing it myself, but I don't want my lack of skills causing problems down the road.
Also, I'm on the hunt for some 'dog leg' donor panels for the rust issue. Once I have some pieces cut and prepped I'm taking it into the operating room
 05-11-2014, 06:14 PM
#31
Registered User
Thread Starter
Join Date: Feb 2014
Posts: 173
Likes: 0
Received 0 Likes
on
0 Posts
I'm not going to clean the distributor cap and wires - those will get replaced. The wires are original to the vehicle - 1989 and 243k miles!!!
05-29-2014, 06:09 PM
#32
Registered User
Thread Starter
Join Date: Feb 2014
Posts: 173
Likes: 0
Received 0 Likes
on
0 Posts
Initial compression test-
Cylinder 1 : 165
Cylinder 2 : 148
Cylinder 3 : 166
Cylinder 4 : 138
I'm trying some BG 109 to see how it may improve compression especially on #s 2 and 4.
Cylinder 1 : 165
Cylinder 2 : 148
Cylinder 3 : 166
Cylinder 4 : 138
I'm trying some BG 109 to see how it may improve compression especially on #s 2 and 4.
05-29-2014, 06:14 PM
#33
Registered User
Or something I read recently about water injection...
sb5walker recommends it often
And the instruction post by Noltz
sb5walker recommends it often
And the instruction post by Noltz
05-29-2014, 08:35 PM
#34
Registered User
Thread Starter
Join Date: Feb 2014
Posts: 173
Likes: 0
Received 0 Likes
on
0 Posts
Did a lot of things tonight...
set the timing (was at 12 degrees, now down to 5)
adjusted the valves
changed the PCV
compression test
ran the 109 for about 20 min
changed oil to Rotella 15w-40
I've got a pretty prominent ticking sound, but I think it is the exhaust manifold. I tried the screwdriver-stethescope trick and the tone and timing of the sound matched exactly when I held it to the manifold. Not to mention, one of the studs for the manifold broke (a long time ago, I presume) and I found it resting in the engine bay while doing a deep cleaning. So maybe that has something to do with it? It is loud and kind of annoying, but I'll be happy if it is the exhaust and no the valves or something.
And got started attacking the rust in the windshield channel.
Once I got inside, the wife and I had a little talk. So we have a '98, a '97 and then this '90. One of them will have to go. We have to keep the '98 because that is the wifey's. And while it has the most mileage, it is supremely reliable.
So it is down to the '97 and this '90. I'm torn...
the '97....
5VZ...nuff said
lower miles...186k
Will need a front end kit sometime in the next year. Water pump leaks, and it has a sqeaking belt.
There is also this really faint knocking sound from the engine. It really scared me at first because I thought it was a rod, but I don't think it is. It is way too consistent and not really getting any worse...so...?
Also needs rust repair on the 'dog leg' area. It came from Maryland, so it has some rust issues.
Starts great, runs great, has lots of power.
Whine from the rear diff - possible pinion bearing going out
1st is really hard to shift into when cold, possible pilot bearing starting to go
OBDII so I can pick up a scanner...
Parts sharing/testing between it and the '98
The '90...
New front end...lots of new stuff...PCV, air filter, oil pump, water pump, front seal, dizzy o-rings, cap, rotor, plugs, adjustments, etc. Clutch bracket repaired and reinforced
higher miles...243k
Makes a grinding sound if you shift too fast into 1st gear
Uneven compression - we'll see what happens
Had a really fun time working with the relatives (both brother-in-laws) on it
slow, but fun to drive
actually drives really nice and tight
better mileage?
some real body rust that needs fixing - front fenders, rear doglegs and front windshield pillars.
LOT of hours into it so far...
Cheaper to run and insure
a future SAS is way more approachable
I just don't know what to do. I can technically drive both right now, so I can easily compare. The '90 is still in it's 'vetting' process when I learn more about it and figure out how reliable it is.
I'd appreciate any thoughts anyone has...
I'm feeling sad about the inevitable decision
07-08-2014, 07:42 PM
#35
Registered User
Thread Starter
Join Date: Feb 2014
Posts: 173
Likes: 0
Received 0 Likes
on
0 Posts
Wow, I haven't updated this in a while! I have been busy with other things...like working on my yota!
Tonight I got the parking brake adjusted. It would roll on a hill when engaged without being in gear. In a couple of days I'll be changing out the rear diff seal as it has been leaking for a while and the last thing I want to do is burn it up.
Also, engine is all back together and totally humming. The tick I heard was just valves - no biggie. I adjusted them several times and have them now at a point where I can just barely hear them...I like that.
Got new wires, new cap, rotor...basically all new wear parts for the ignition. Some things I'd still like to do would be to get new contacts for the starter and pick up some extra parts at the junkyard, like an igniter, AFM, fuel pump, etc.
The truck was down for a while because I discovered soon after doing the timing chain build that the clutch pedal bracket was broken. Got that out, welded up, reinforced and put back in. I'm planning to do a writeup on that for others, with plenty of pictures.
Most recently, I've been trying to do some mileage tests. As crazy as it sounds, I am setting a goal for myself of 30mpg, which would be amazing in a 4x4 4runner. I think I am going to get close. I've taken off the rear bumper + tow hitch (100lbs right here), running boards (45lbs), mud flaps, rear spoiler. The 4runner already came with an A/C delete so I don't have to worry about any of that. I removed the P/S belt have the tires inflated to 45psi. We'll see how much mileage we can squeeze out of it.
In other news I traded some 3rd gen fender trim panels and stuff and got some steelies. I'm going to clean them up, probably paint them white, and then I'll be looking for some tires. Gonna go for some pizza cutters, probably 215/85r16 or 225/75r16. I'm thinking it will look pretty cool.
Right now, my biggest enemy is rust. The rust around the front fenders is no biggie, new fenders will take care of that. The rear dogleg area is a concern, but it isn't too bad as it is not through the underskin and I've recently spotted some 2nd gens in the junkyard that I can cut donor pieces from. The biggest area of concern is the windshield channel. I will have to pull the windshield. There are several holes around the channel and I noticed that when I took off the clutch bracket, the inner sheetmetal had some rust on it. Need to check the floorboards!!! There is a nice 4runner in the junkyard that I am planning to take the entire windshield channel from. I may just get that whole thing welded in place, along with the outer A-pillar skin and drip channels. That will provide a good opportunity to see inside the A-pillars and gauge their condition. I want that to be solid.
I have never done any of this before. Should be fun!
Also, in other news, I was able to find some ultra-rare split front windows from another '90 4runner! I snagged them and this one will be getting a split window conversion. I will also take a lot of pictures and do a writeup on it. Since I don't have A/C, that front window will be a breath of fresh air, literally
The plan will be to park this one after driving it for a while and pull the windshield and get the rusty channel taken care of. I'm most likely going to pull the carpet too and check things out. This runner has been down multiple times for several things - timing chain, clutch bracket, exhaust manifold stud bolt and gasket, and soon to be the windshield, but once all that is done, we'll be ready to start 'building'! I already picked up a roof rack and am keeping my eyes open for a '90-91' rear swing out tire carrier (+ internal bracket) and accompanying tailgate.
That's all for now, pictures to come soon!
Last edited by Red Leader; 07-08-2014 at 08:01 PM.
07-15-2014, 06:30 PM
#36
Registered User
Thread Starter
Join Date: Feb 2014
Posts: 173
Likes: 0
Received 0 Likes
on
0 Posts
Did the vent window conversion (well, half of it anyway!) -


Here is the write-up:
https://www.yotatech.com/forums/f116...-guide-281903/
Here is the write-up:
https://www.yotatech.com/forums/f116...-guide-281903/
07-15-2014, 06:51 PM
#37
Registered User
Thread Starter
Join Date: Feb 2014
Posts: 173
Likes: 0
Received 0 Likes
on
0 Posts
WHOOHOO! I found me a spare tire carrier!
I was checking the junkyard listings and realized a week ago why I wasn't getting any more alerts - they time out after 30 days. So I set up a new one for 2nd gen 4runners and got an alert yesterday around 3pm (they close at 4:30pm) that a '90 had popped into the yard. I worked my schedule around today to stop by really quick to check it out and found this beauty -

It will need a little clean up, but it is complete! Total cost - $26. I got the attachment plate and the trim piece off the tailgate as well, but will eventually go back for a compatible tailgate. The tire swing tailgates have a reinforcement in the center where the locking plate mounts to. Not to mention the reverse lights on the sides.
Usually, when I find these, the swing is gone, the locking plate is gone, and the trim piece is gone. So I grabbed those parts and will keep an eye out for the tailgate. Even if all the pieces are gone, it will still work. This takes the pressure off keeping an eagle eye out for one, since I've already seen about 4 of these 4runners with the swing-compatible tailgate (just nothing else). I'll wait to find one in really nice condition and then grab it.
I will probably go back to this one and cut out the mounting bracket behind the sheet metal and drill out the spot welds.
I'm thinking of using some high strength urethane or epoxy glue to hold the bracket in there, that way I won't damage the paint on the outside from the heat of welds and any minor inconsistencies in the way that the bracket conforms to the inside corner of the sheet metal will actually be spread out and cushioned by the glue that is formed to both sides. The bolts go through the outer sheet metal and mount to this piece, so it is a solid mount up, the welds/glue just keep it all from sliding around.
Once I pull the bracket I will take some pictures.
As soon as I am able to find a tailgate, I'll get to work on this conversion!
I was checking the junkyard listings and realized a week ago why I wasn't getting any more alerts - they time out after 30 days. So I set up a new one for 2nd gen 4runners and got an alert yesterday around 3pm (they close at 4:30pm) that a '90 had popped into the yard. I worked my schedule around today to stop by really quick to check it out and found this beauty -
It will need a little clean up, but it is complete! Total cost - $26. I got the attachment plate and the trim piece off the tailgate as well, but will eventually go back for a compatible tailgate. The tire swing tailgates have a reinforcement in the center where the locking plate mounts to. Not to mention the reverse lights on the sides.
Usually, when I find these, the swing is gone, the locking plate is gone, and the trim piece is gone. So I grabbed those parts and will keep an eye out for the tailgate. Even if all the pieces are gone, it will still work. This takes the pressure off keeping an eagle eye out for one, since I've already seen about 4 of these 4runners with the swing-compatible tailgate (just nothing else). I'll wait to find one in really nice condition and then grab it.
I will probably go back to this one and cut out the mounting bracket behind the sheet metal and drill out the spot welds.
I'm thinking of using some high strength urethane or epoxy glue to hold the bracket in there, that way I won't damage the paint on the outside from the heat of welds and any minor inconsistencies in the way that the bracket conforms to the inside corner of the sheet metal will actually be spread out and cushioned by the glue that is formed to both sides. The bolts go through the outer sheet metal and mount to this piece, so it is a solid mount up, the welds/glue just keep it all from sliding around.
Once I pull the bracket I will take some pictures.
As soon as I am able to find a tailgate, I'll get to work on this conversion!
Last edited by Red Leader; 07-15-2014 at 06:52 PM.
11-19-2016, 06:23 PM
#39
Registered User
Thread Starter
Join Date: Feb 2014
Posts: 173
Likes: 0
Received 0 Likes
on
0 Posts
WOW, I haven't updated in forever.
Well, she stays! I'm really glad too because I love driving it and wrenching on it. I'm not sure how updated my last post was, but here is just some of the work that I've done:
Full front rebuild (timing cover, oil pump, water pump, new front seal, timing chain and metal backed guide)
Dual-stage thermostat
New hoses
valve adjustment
new spark plugs
new exhaust manifold gaskets and studs
adjusted e-brake
valve cover gasket
New distributor rotor and cap
new spark plugs and wires
rust repair including -
both doglegs
both rear quarters
front drivers corner under fender
Complete rebuild of windshield channel from clean metal
rebuild of front drip rails
New front fender on passenger side
New rear quarter glass on passenger side (busted out from speaker - was non-original and poorly done so I'm glad I replaced it!)
New windshield
Welded up the clutch bracket a while back and got a new spring and some new bushings for it.
Starter relay mod
brand new ignition switch (back electrical part)
Rebuilt starter solenoid
Brand new Aisin clutch with quality bearings
Newer weather stripping for door surrounds
Newer genuine Toyota updated front oil seal (seal from Engnbldr was coming loose and the thing was just puking oil everywhere!)
Marlin Crawler shift seats
Fixed small vacuum leak and adjusted idle (also removed dashpot as it was created false high-idle)
Fixed leaking windshield wash system
Just changed the oil today and flushing radiator is tomorrow
Things next up:
Fix rust on passenger front corner
Fix rust on doors
New front drivers fender
Grease all joints
Treat rust forming on backside of weld repair of windshield channel
Use corrosion inhibitor on frame and windshield channel (outside) as preventative maintenance
Swap tailgate with tire swing tailgate I have
Repair wing window rubber
Peel off door trim adhesive
Goo-gone on the back windshield (lame sticky residue from peeling off window tint)
Clean up and paint steel rims for prep for tires
New shoes!
Kill switch
For all the work I've put into it, you'd be hard pressed to tell haha, but with the rust repairs getting done, a good spit shine and new wheels/tires, it will look 100x better.
Pics to come soon.
11-19-2016, 11:46 PM
#40
Super Moderator
Staff
iTrader: (1)
Join Date: Aug 2008
Location: Anderson Missouri
Posts: 11,788
Likes: 0
Received 21 Likes
on
19 Posts
You have gotten quite a bit done on your runner and it does look good under the hood. Great job on that. Not an easy task to get all of that done. I liked the coffee filter idea.


