Numbchux' 1987 4Runner Build-Up Thread
 04-26-2012, 07:44 AM
#41
Registered User
Join Date: Apr 2012
Posts: 94
Likes: 0
Received 0 Likes
on
0 Posts
Bumper looks sick!!! Been tossin around some ideas for my rear bumper but that looks pretty clean. Why couldn't you use the stock runner fittings for the ps pump? Is the od of the Chevy line bigger than the toy line?
 04-27-2012, 01:05 PM
#43
Registered User
Thread Starter

Just had this done:

and, installed:
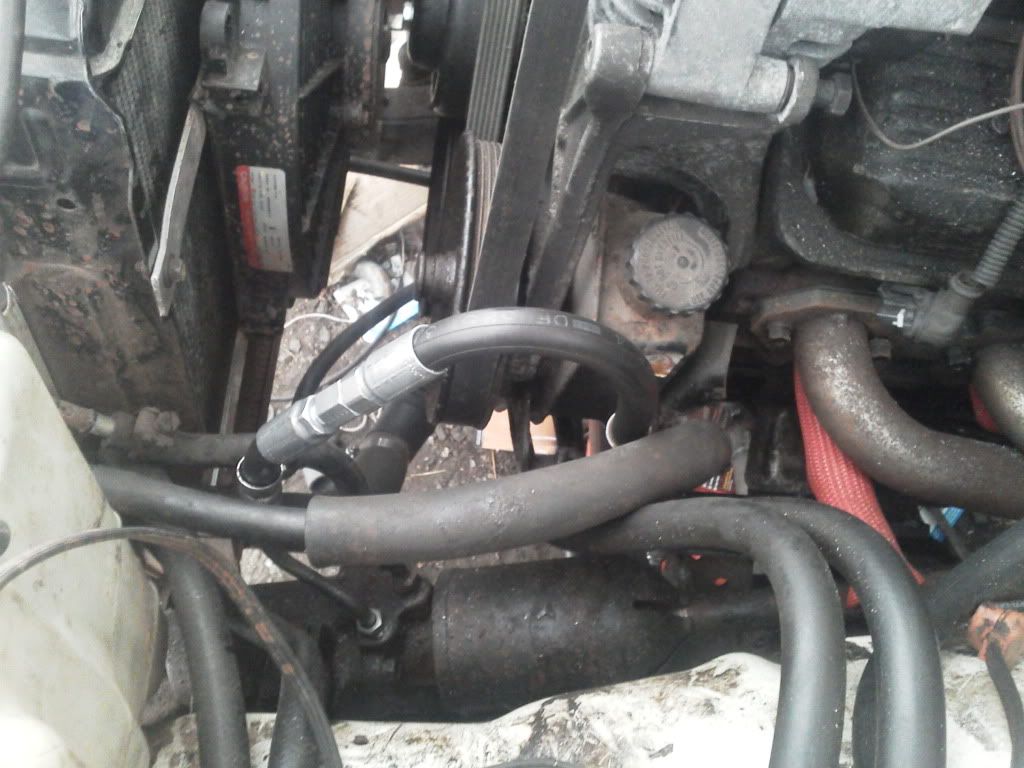
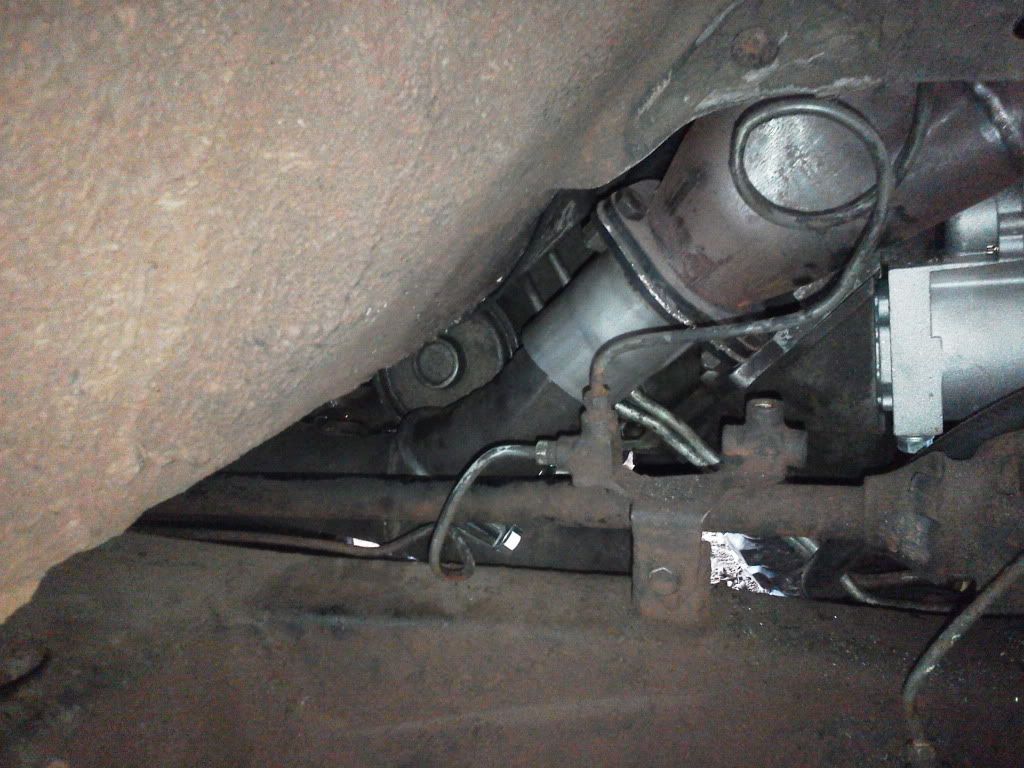
As I was installing it, I realized the FJ80 fitting was actually a 5/8" hex, which is the same size as the chevy pump side fitting. So the power steering line can be removed/installed with one tool....
Off to buy a battery, and let it idle for a bit to get up to temperature and see if the gauges work and such.
and, installed:
As I was installing it, I realized the FJ80 fitting was actually a 5/8" hex, which is the same size as the chevy pump side fitting. So the power steering line can be removed/installed with one tool....
Off to buy a battery, and let it idle for a bit to get up to temperature and see if the gauges work and such.
04-27-2012, 06:52 PM
#44
Registered User
Thread Starter
New battery in. Engine runs and idles. Tach does not work, but the signal modulator does. So I'm guessing the signal modulator puts out a low voltage signal, and the gauge is looking for a higher voltage signal. Subaru digital gauge clusters have the same issue....might see if I can use a resistor to fix that.
Oil pressure gauge doesn't work. Must be a wiring issue. Will verify once the cluster comes out. The GM fuel pump is controlled from the oil pressure sender, so I'm not to worried about it.
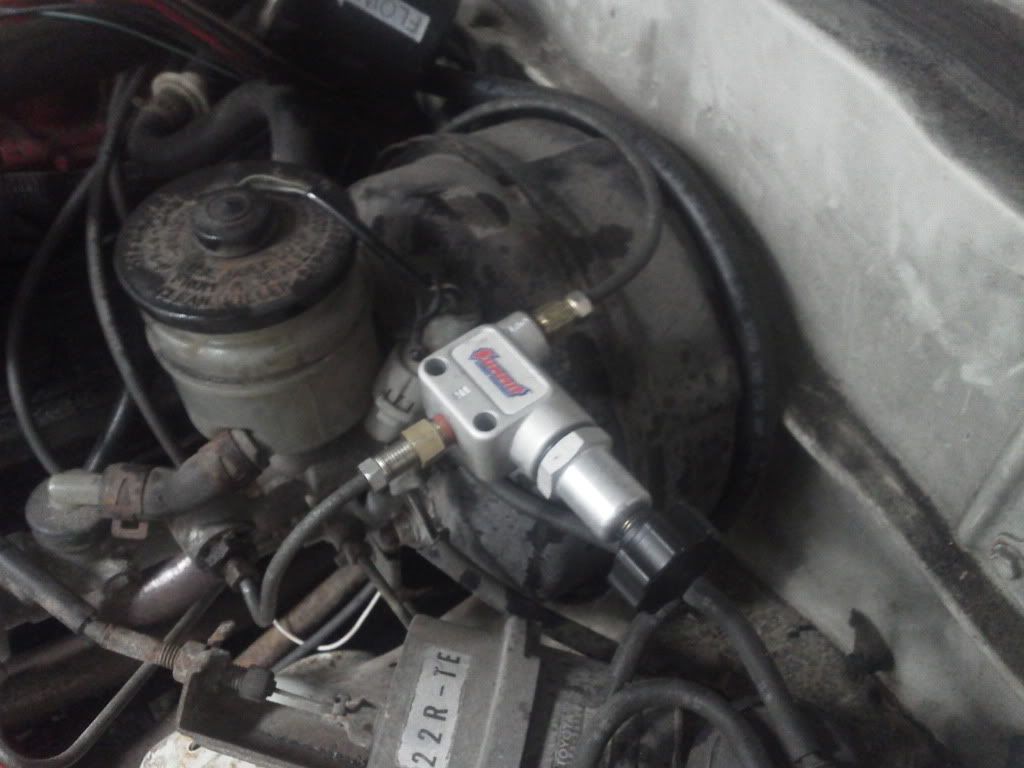
Brake proportioning valve installed, brakes bled:
Oil pressure gauge doesn't work. Must be a wiring issue. Will verify once the cluster comes out. The GM fuel pump is controlled from the oil pressure sender, so I'm not to worried about it.
Brake proportioning valve installed, brakes bled:
04-28-2012, 03:12 PM
#45
Registered User
Thread Starter
Coolant in it, and let it run for awhile today. Temp gauge works just fine, so that's the important one.
The electric fan I had on the truck with the 4-cyl doesn't seem to have survived not being used in almost 3 years. It barely moves. I'll pull it off and see if it can be disassembled and cleaned. Otherwise....I need a new one.
Might not have ignition on one of the driver's side cylinders. Many fireballs come out of that header :twisted.gif:. Once stuff is cooled off, I'm going to pull the plugs on that side and see if I can find anything.
Radiator hoses are all connected, and full. System pressurizes. I had a couple loose clamps, but got that taken care of pretty quickly.
Since the brakes work now, I stood on them, and put the transmission in gear. Truck moves forward and backward a bit. Then I topped off the transmission fluid. Gas tank is still sitting on the ground, and I didn't bother to move stuff out of the way, so I didn't try to move it very far.
Next. Finish gas tank install. Pull front driveshaft so I can finish the exhaust crossover. Finish rest of exhaust. Wrap up the wiring a bit. Test drive.
05-01-2012, 06:28 AM
#46
Registered User
Join Date: Apr 2012
Posts: 94
Likes: 0
Received 0 Likes
on
0 Posts
Lookin good man keep it up. That almost sounds like leaky poppet on that bank  just from what I've read researching these motors that seems to be a common symptom for leaking poppet injectors. I could be wrong tho hope u get it worked out.
just from what I've read researching these motors that seems to be a common symptom for leaking poppet injectors. I could be wrong tho hope u get it worked out.
05-07-2012, 07:52 AM
#48
Registered User
Thread Starter
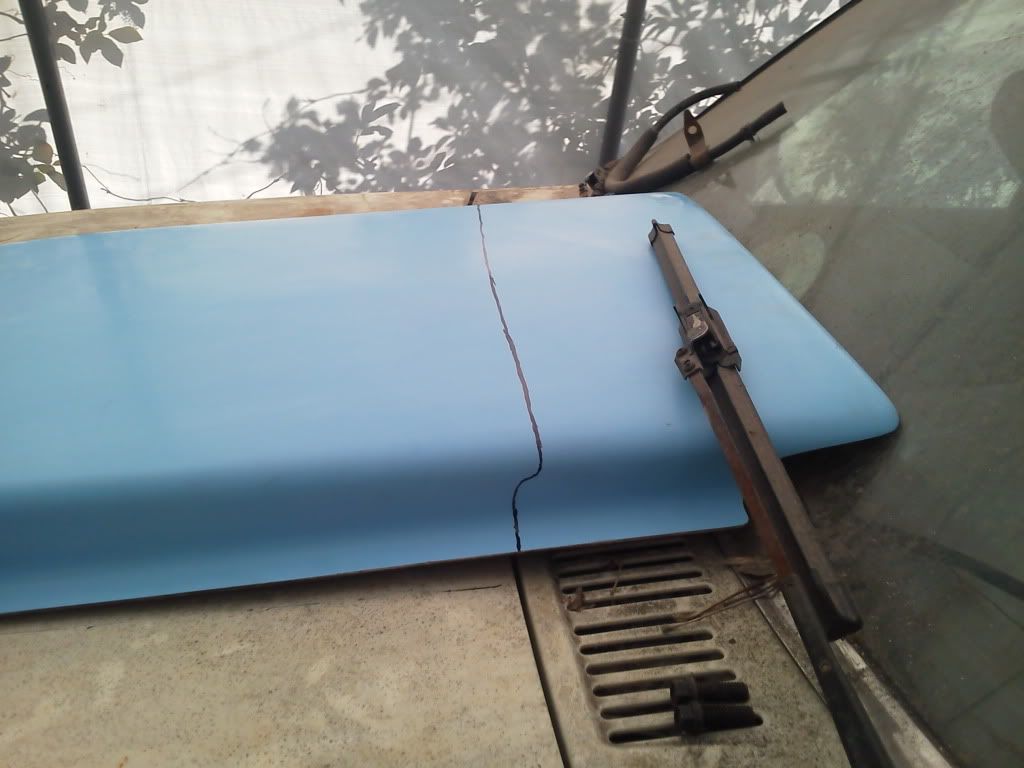
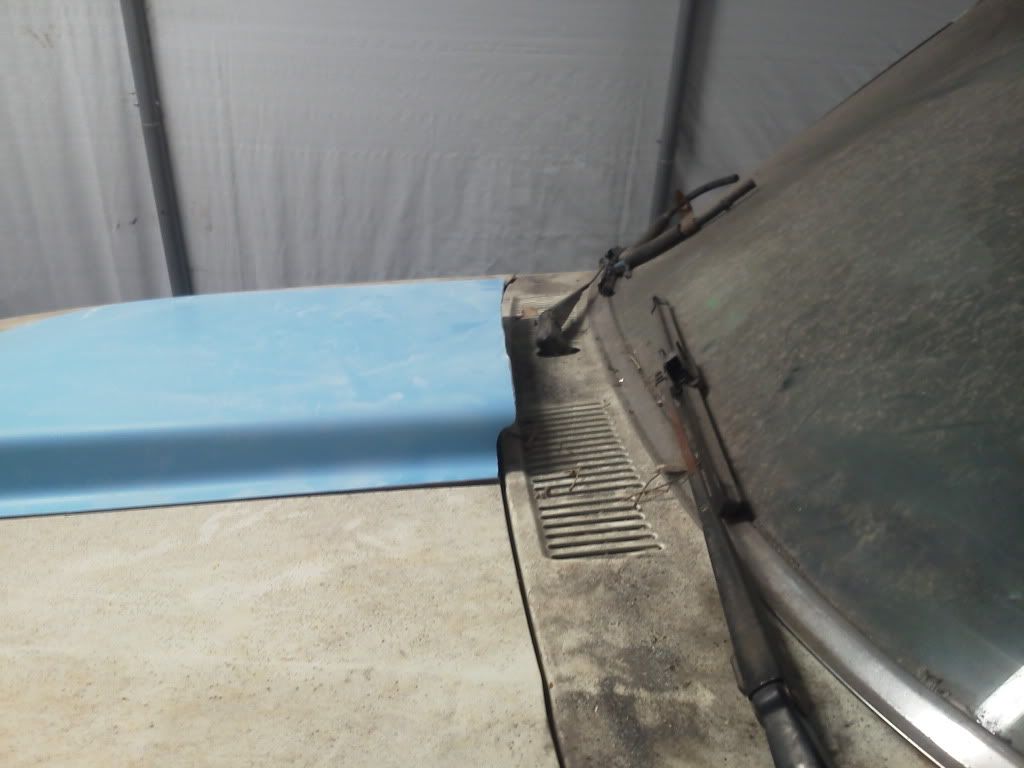
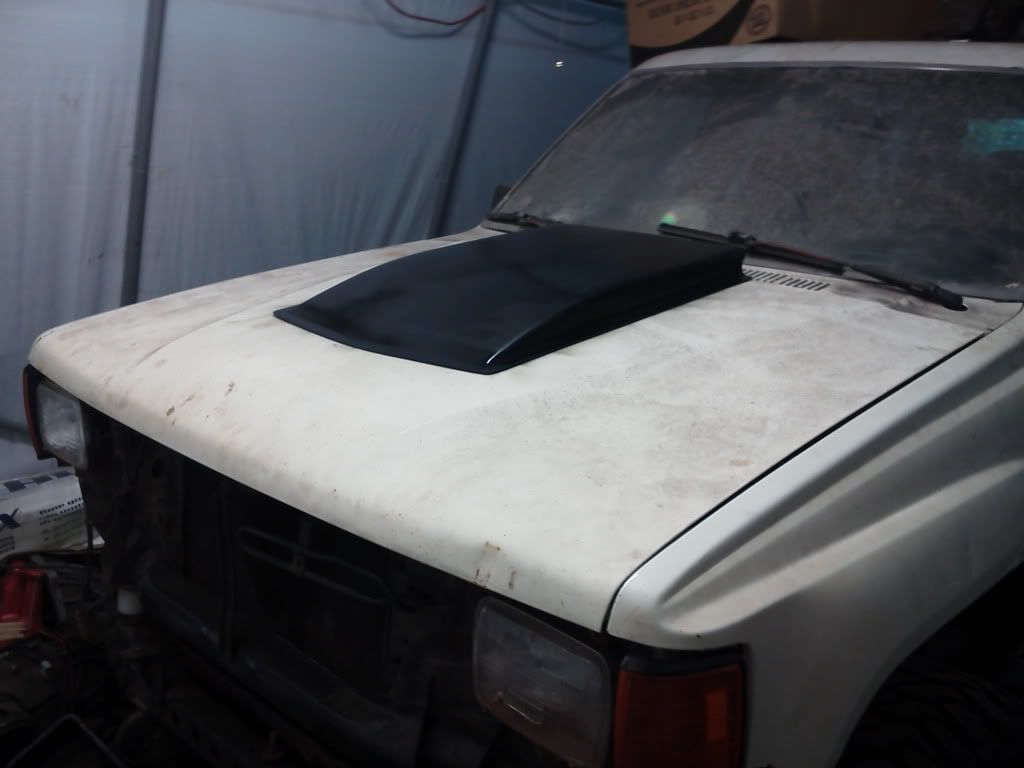
Hood cowl arrived today
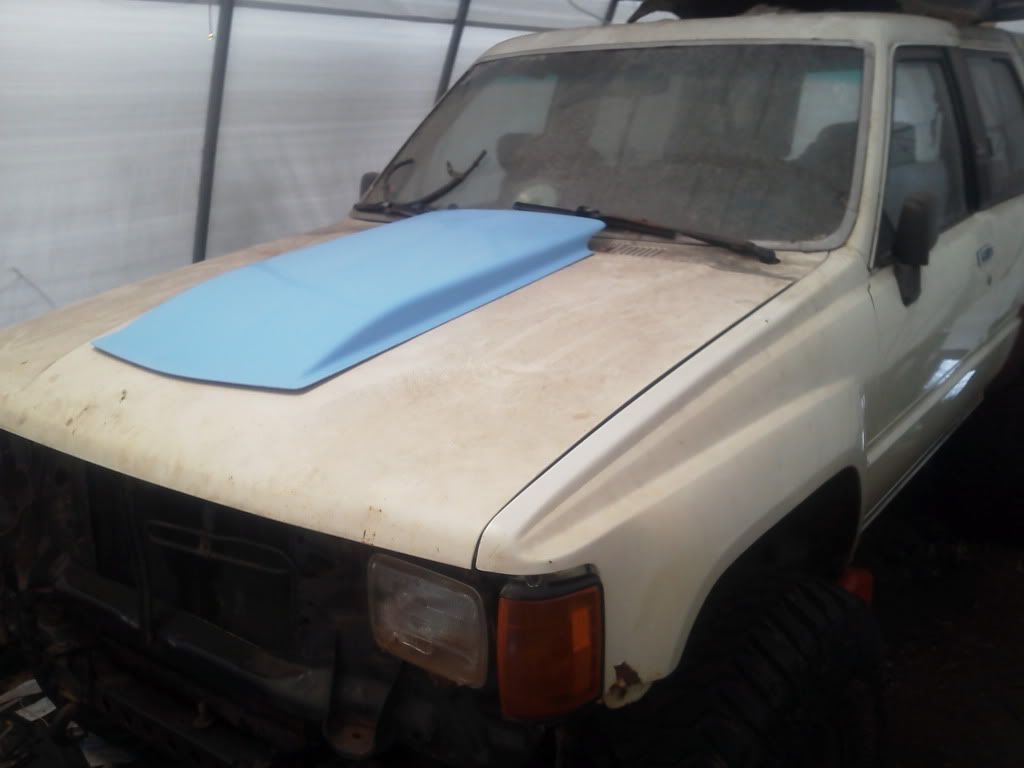
Debating whether to cut it down a bit. It doesn't need to extend that far forward on the hood. I could cut it back, and then it would lay flat more easily.
But, it does look pretty good as-is. Might be able to sand down the flange a bit to match the shape of the hood.
05-10-2012, 05:18 PM
#49
Registered User
Thread Starter
Well, the cowl as-is will hit the windshield once the hood is open, so it's got to be cut back. So it might as well be cut back quite a bit for a better fit...
Also made progress on the exhaust. Welded a reducer onto the flange on the passenger side. And reusing the Y-pipe that was on the Blazer (cut shorter, of course). Since space is so tight, I'm just going to use slip fittings and muffler clamps to put it together. It might leak some, but it'll do, and remain serviceable.
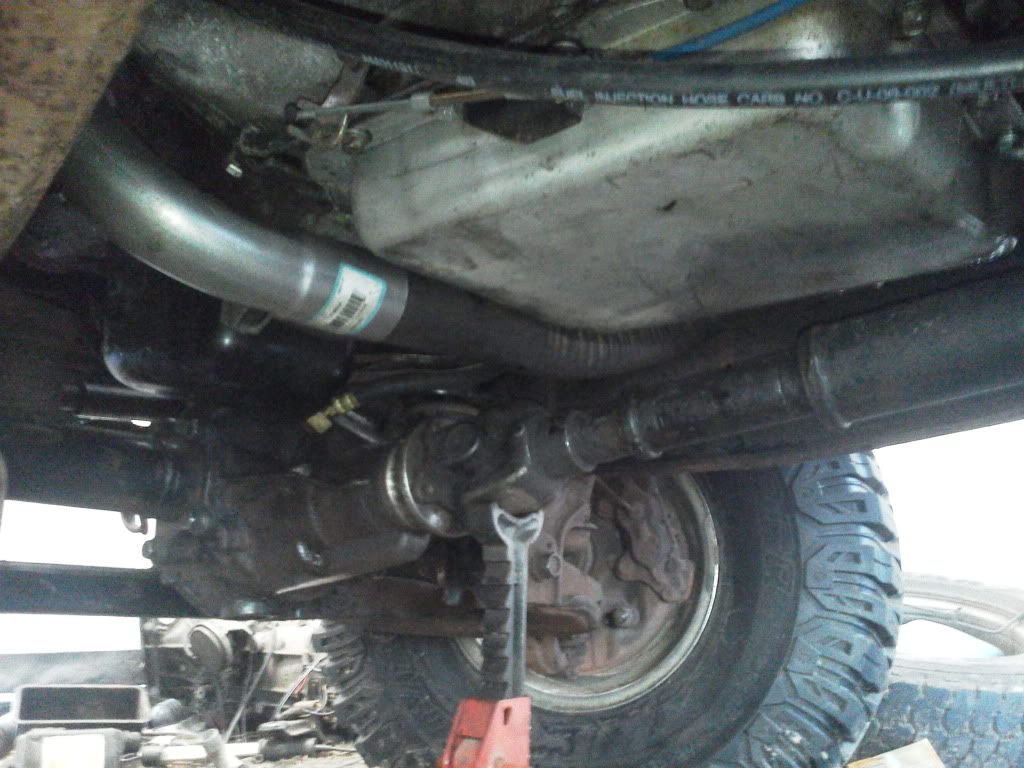
Also made progress on the exhaust. Welded a reducer onto the flange on the passenger side. And reusing the Y-pipe that was on the Blazer (cut shorter, of course). Since space is so tight, I'm just going to use slip fittings and muffler clamps to put it together. It might leak some, but it'll do, and remain serviceable.
 05-17-2012, 11:12 PM
#52
Registered User
Thread Starter
Yep, blazeland is the plan....
But, had a hangup today. While mocking up gas tank mounts, the fuel line cracked less than an inch from the tank. So I have to find and purchase a fuel pump bracket, and remove this one without ruining the tank.....ugh
But, had a hangup today. While mocking up gas tank mounts, the fuel line cracked less than an inch from the tank. So I have to find and purchase a fuel pump bracket, and remove this one without ruining the tank.....ugh
06-02-2012, 06:04 PM
#54
Registered User
Thread Starter
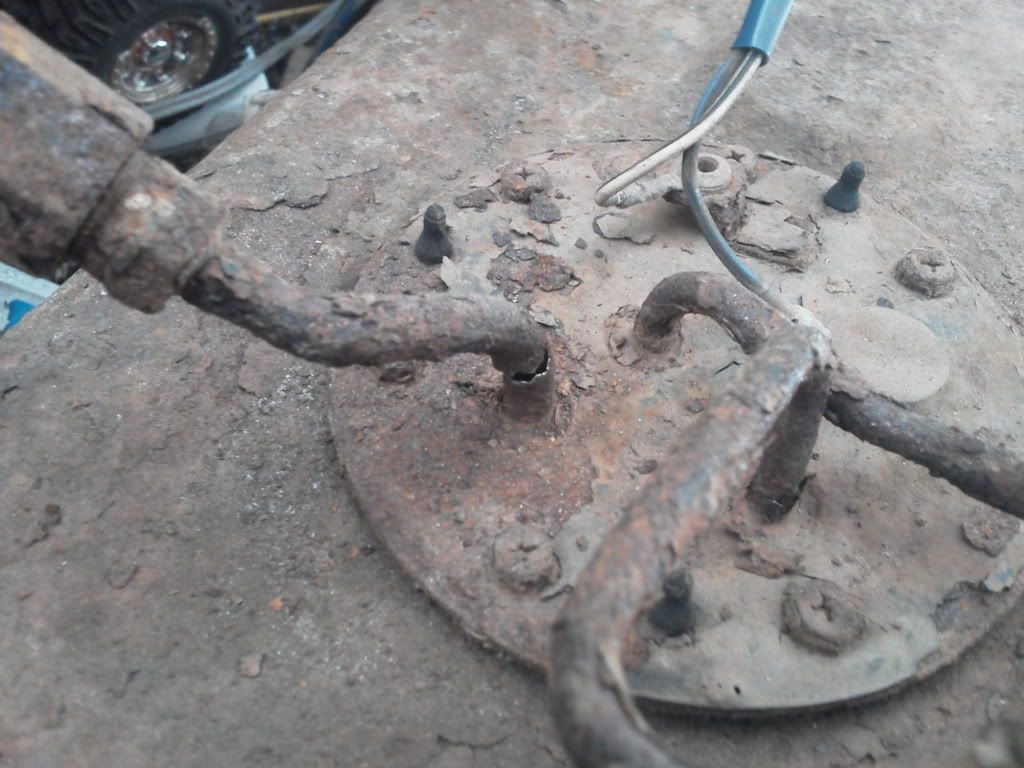
Compression fitting, bulkhead fitting, right angle, and hose barb.....
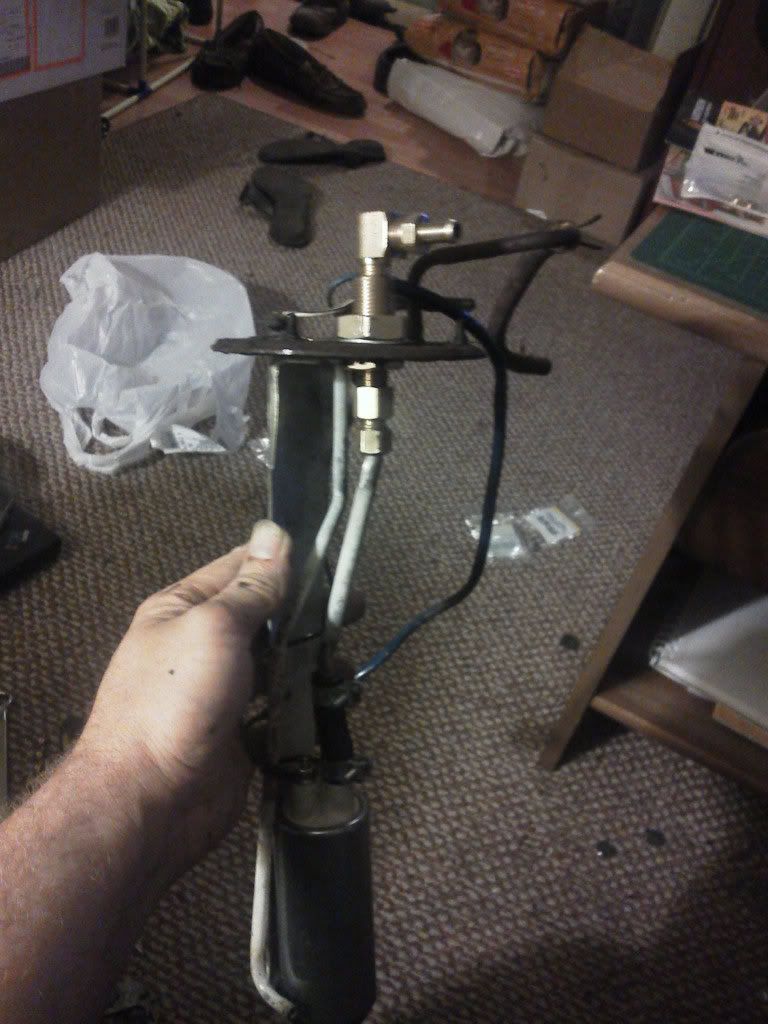
Since I had it apart, I mounted my new fuel pump down in the tank in place of the old one.
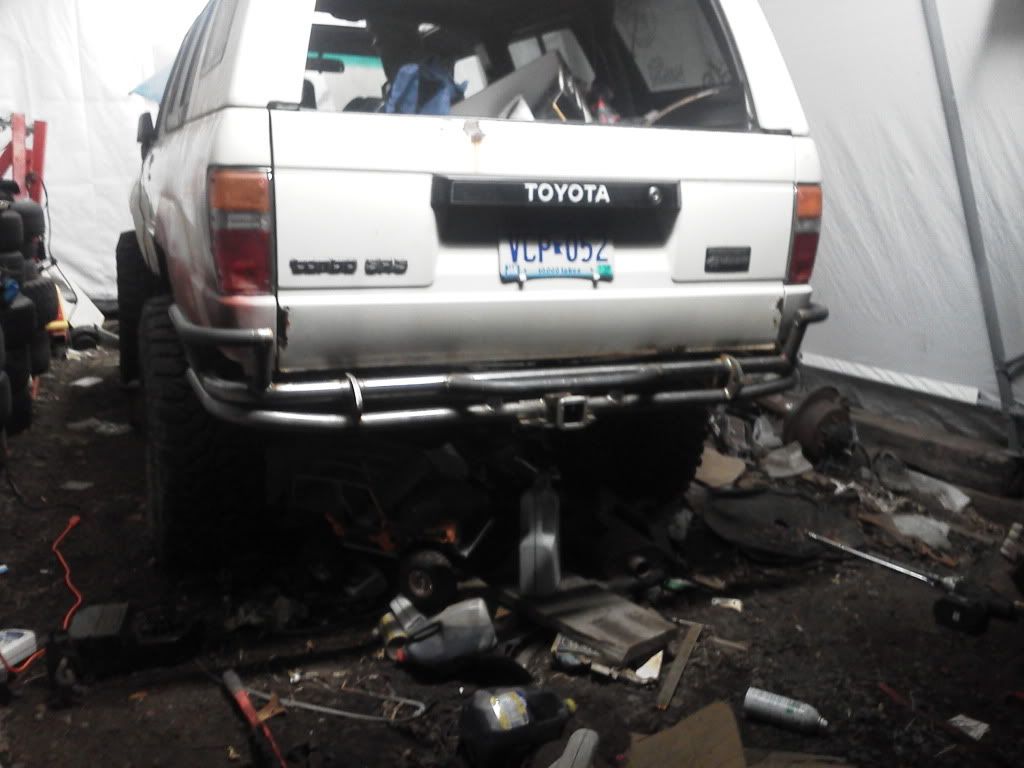
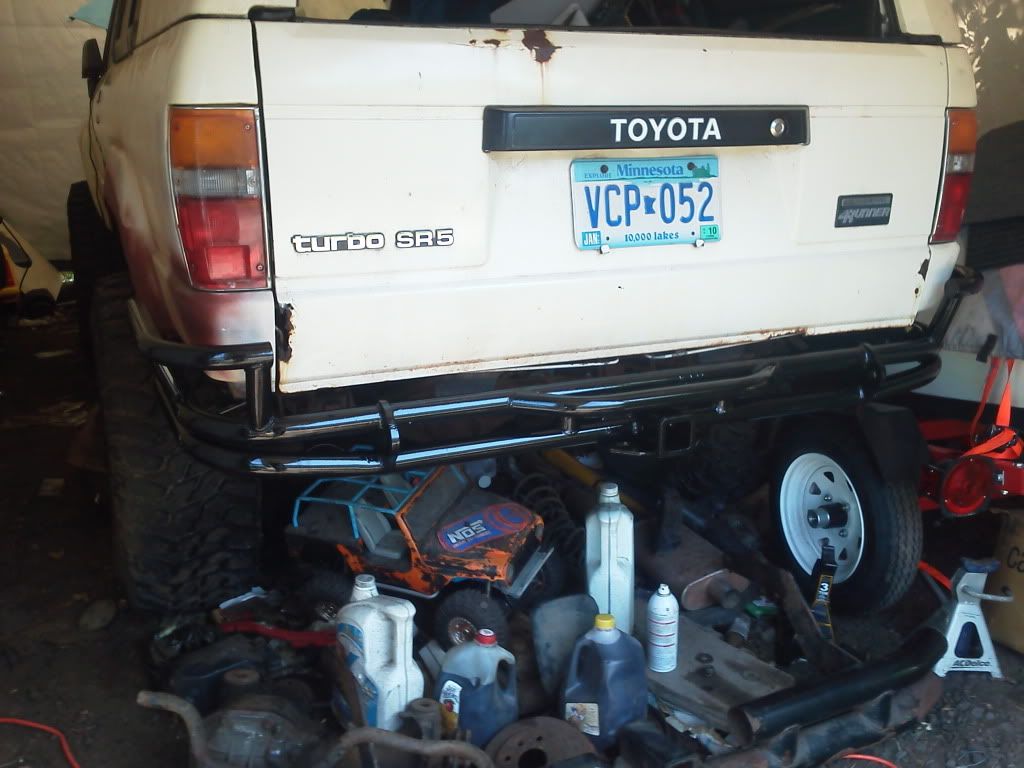
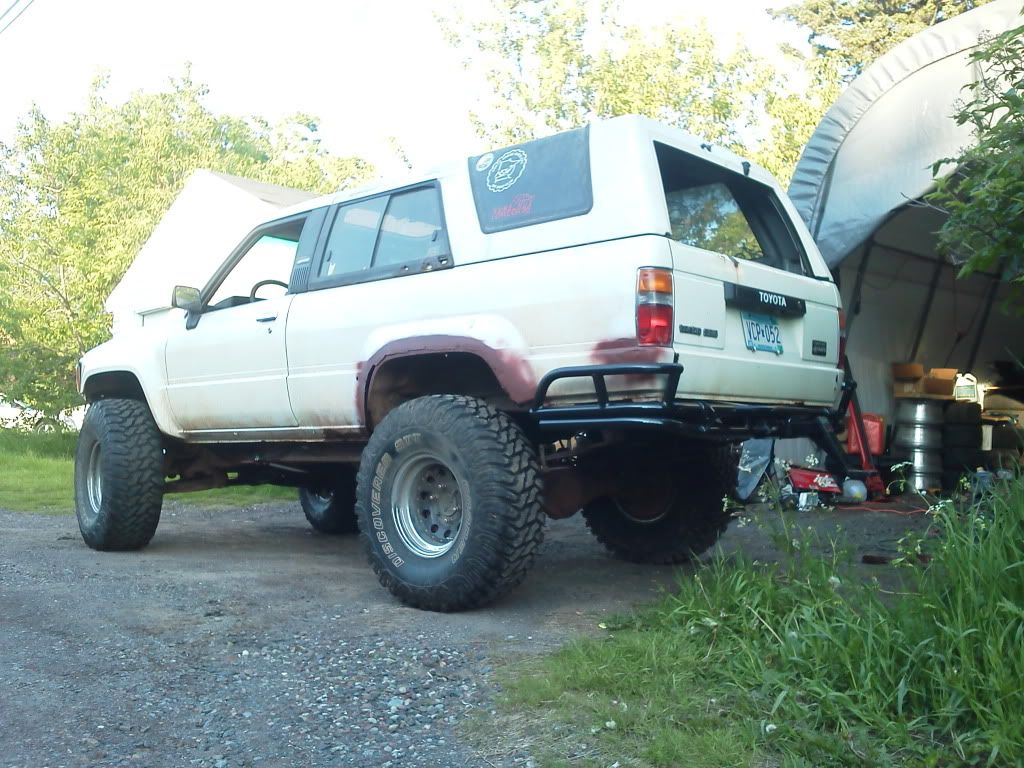
Old "Genuine Steel" rear bumper:
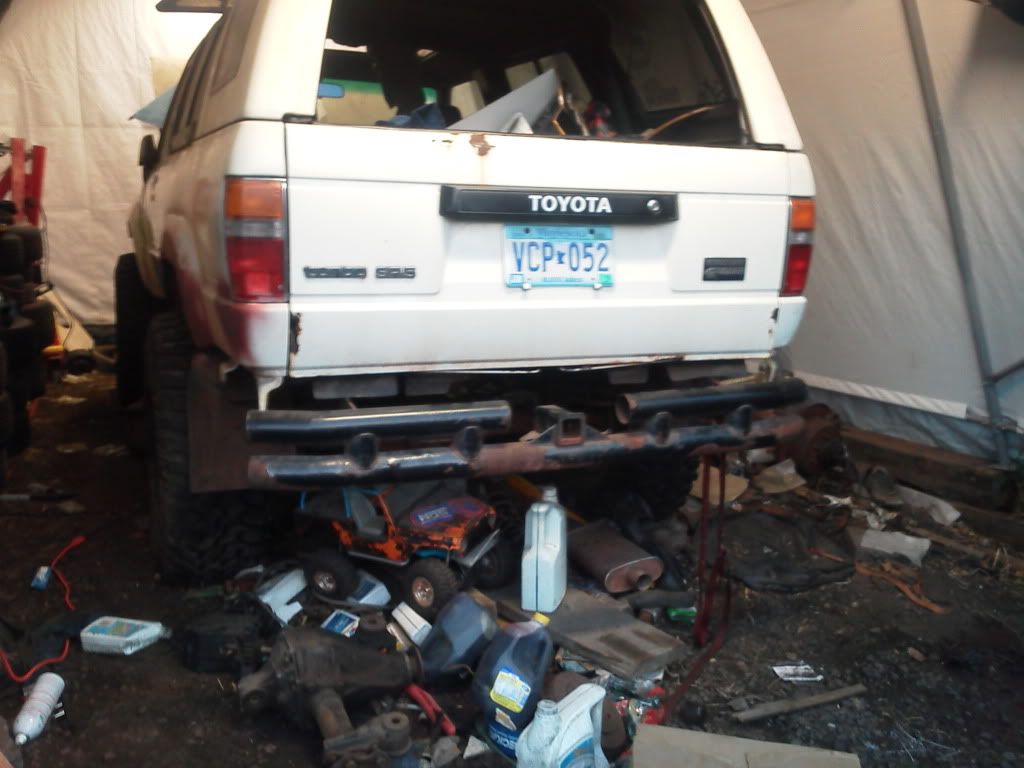
New 4xInnovations one. Designed for a 2" Body Lift, with VERY beefy tow points which are solid mounted to the frame without relying on welds at all, and a class 2 rated 2" receiver hitch.
And with some POR15
Some rattlecan paint to come later, this combination will prevent rust, and be easy to effectively touch up.
Also did a test-fit. If I adjust my radiator fan mounts, and lower the fan to the bottom of the rad, it will give a lot more clearance from the water pump.
06-03-2012, 08:19 AM
#55
Registered User
Join Date: Apr 2012
Posts: 94
Likes: 0
Received 0 Likes
on
0 Posts
Ahh got ya. What size pump did you go with. I'm doing the same swap in my 90 runner. If you got a chance checkout my build thread https://www.yotatech.com/forums/f199.../#post51925662
That bumper looks sweet dude, tucked up nice and high too.
That bumper looks sweet dude, tucked up nice and high too.
Last edited by clarion69374; 06-03-2012 at 08:20 AM.
06-03-2012, 12:29 PM
#56
Registered User
Thread Starter
I'm using this pump:
http://www.summitracing.com/parts/TFS-25004P
works great inline, not ideal for in-tank. I've heard the stock blazer pump works pretty well in-tank, but my donor didn't have a tank or pump, and I really didn't want to open up my tank, so I bought an inline pump.
http://www.summitracing.com/parts/TFS-25004P
works great inline, not ideal for in-tank. I've heard the stock blazer pump works pretty well in-tank, but my donor didn't have a tank or pump, and I really didn't want to open up my tank, so I bought an inline pump.
06-04-2012, 08:12 PM
#57
Registered User
Thread Starter
Tank is mounted, now on the driver's side. Old rear mount cut off, and clamped to the round crossmember with some reinforcing straps.
Today, I bought a chunk of 16g steel, cut it to a 6x8" rectangle, and with some measuring, test-fitting, drilling, pounding, more cutting, and a little self-etching primer......
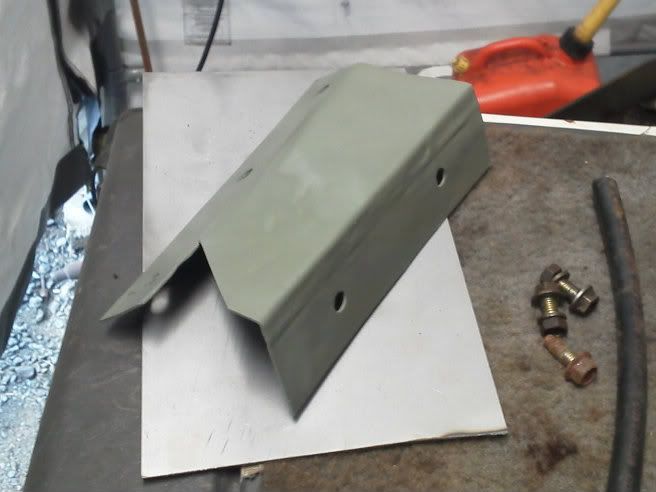
Front mount, goes over the "horseshoe" crossmember, and bolts through 2 preexisting holes on the front side.
High-pressure fuel line is connected (low pressure will be later, I'll leave it off until I've made sure there is fuel going through the system). Fuel filler extension is hooked up.
Today, I bought a chunk of 16g steel, cut it to a 6x8" rectangle, and with some measuring, test-fitting, drilling, pounding, more cutting, and a little self-etching primer......
Front mount, goes over the "horseshoe" crossmember, and bolts through 2 preexisting holes on the front side.
High-pressure fuel line is connected (low pressure will be later, I'll leave it off until I've made sure there is fuel going through the system). Fuel filler extension is hooked up.
Last edited by Numbchux; 06-04-2012 at 08:14 PM.
06-06-2012, 08:00 PM
#58
Registered User
Thread Starter
It moved under it's own power today.
I hooked up the wiring (now using stock fuel pump wiring, as it's in the tank now). Then I poured a few gallons of gas in there. After priming the pump a few times, gas came out of the return. So, since I knew it was hooked up correctly, and pumping, I connected the return line.
Once it was running, I moved some crap around, and backed the truck out into the daylight. First time it's moved under it's own power in almost 3 years.
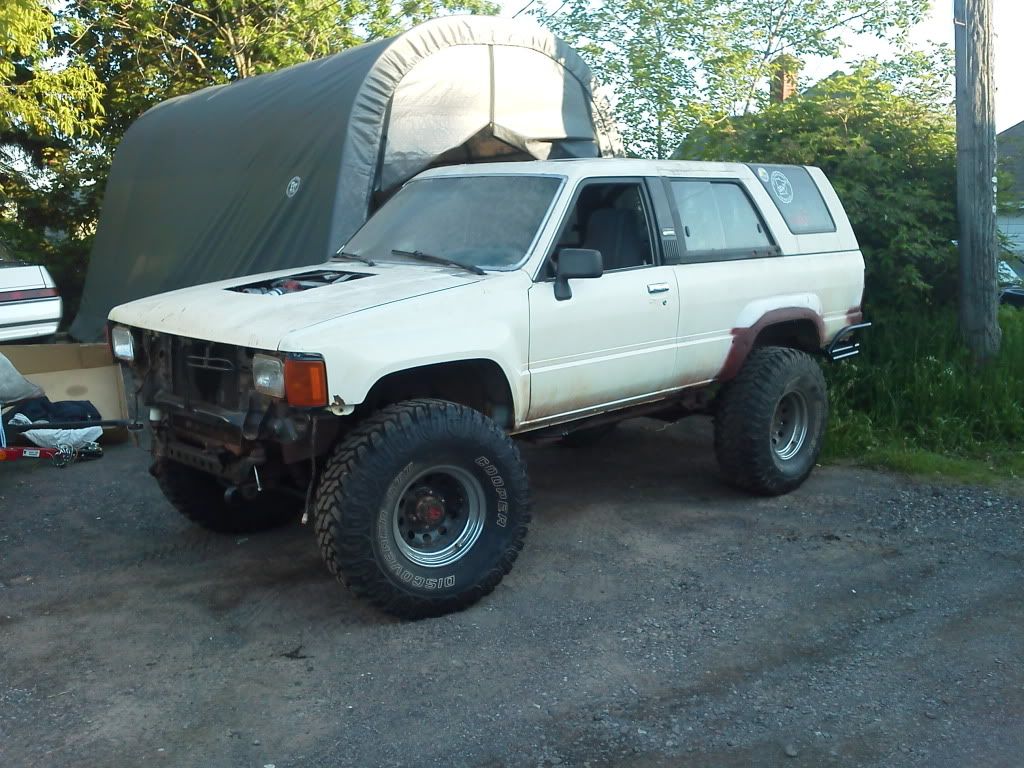
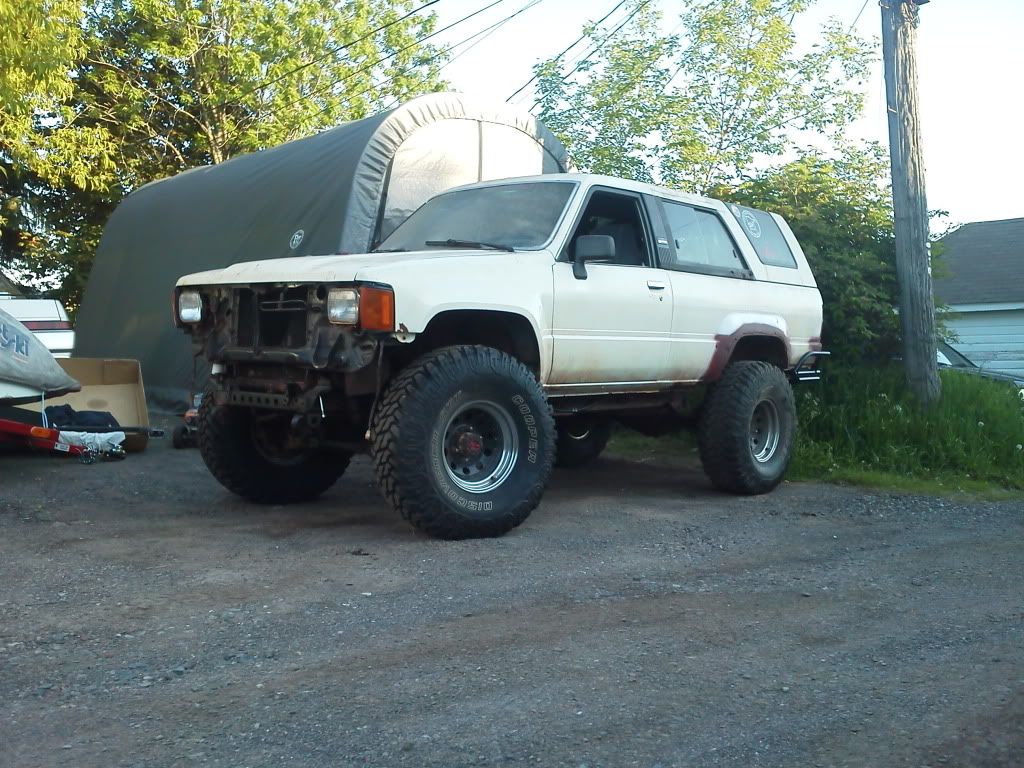
Looks sweet, IMO. Loving that rear bumper in the daylight
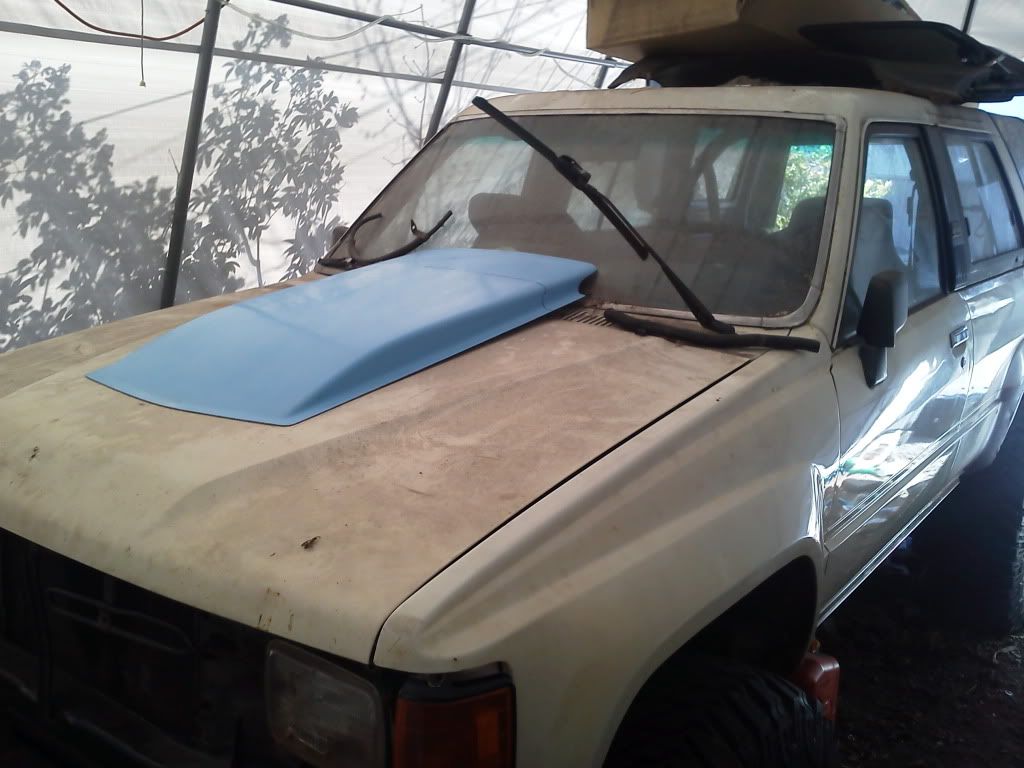
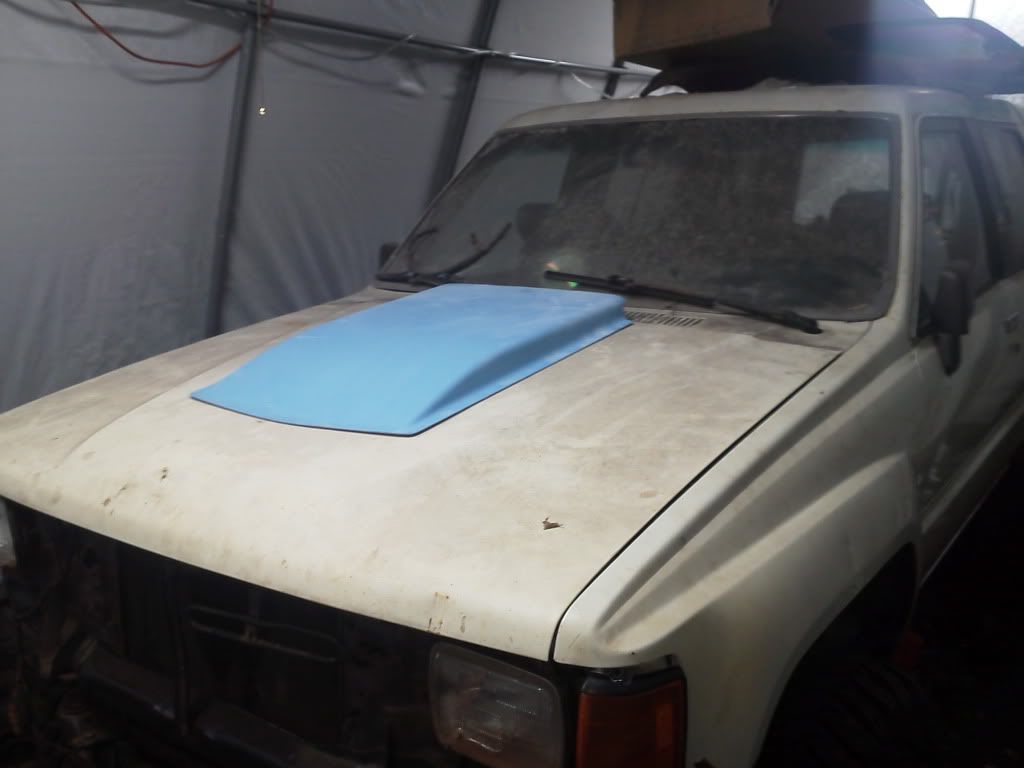
Set the cowl on it again to get a look at it with the rest of the truck
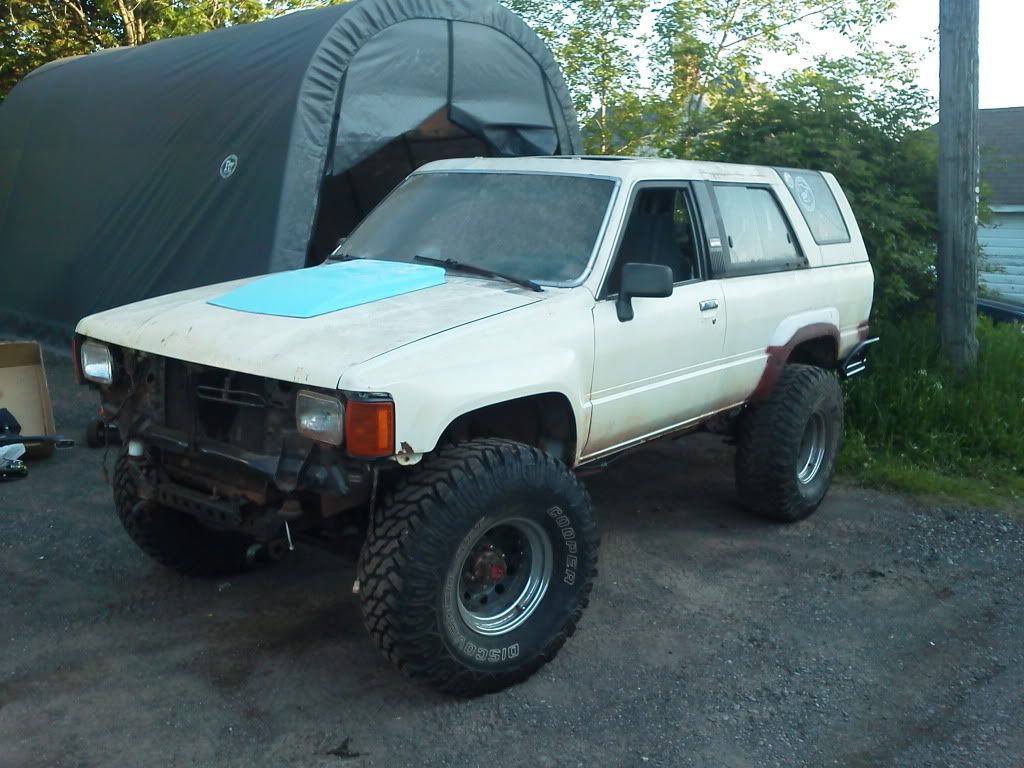
Then after putting it away, I wired in the alternator and a couple other piddly things. Then I painted the cowl black, and set it on there again:
I think I'm going to paint the center section of the hood black as well.
I hooked up the wiring (now using stock fuel pump wiring, as it's in the tank now). Then I poured a few gallons of gas in there. After priming the pump a few times, gas came out of the return. So, since I knew it was hooked up correctly, and pumping, I connected the return line.
Once it was running, I moved some crap around, and backed the truck out into the daylight. First time it's moved under it's own power in almost 3 years.
Looks sweet, IMO. Loving that rear bumper in the daylight
Set the cowl on it again to get a look at it with the rest of the truck
Then after putting it away, I wired in the alternator and a couple other piddly things. Then I painted the cowl black, and set it on there again:
I think I'm going to paint the center section of the hood black as well.
06-07-2012, 09:46 AM
#59
Registered User
Join Date: Apr 2012
Posts: 94
Likes: 0
Received 0 Likes
on
0 Posts
Looking GOOD!! Ya I think an inline pump is my ticket until I do my tank swap. I'm sure you've stated in earlier posts but did you relocate the tank to just have the fill door on the drivers side? Can you post pics of your fuel line connection at the the manifold? Just wanna see if it's similar to mine. Also are you using the stock Toyota wiring to wire in fuel pump and alternator?
Last edited by clarion69374; 06-07-2012 at 09:48 AM.
06-07-2012, 04:47 PM
#60
Registered User
Thread Starter
Fill door is in the same place. I plan to use an FZJ-80 Rear axle, which has the rear diff offset to the passenger side. Well, since I'm redoing the gas tank mounts now (body lift) along with shock mounts, fuel lines, and exhaust. There's really no reason why it had to stay where it is. I just bought some 2" fuel filler hose from rockauto, and extended it. Then I will put the stock heatshield that came off the driver's side, and mount it under the filler/vent lines, just for good measure, since the muffler will sit right underneath.
I'm using the chevy fuel pump relay, but re-using the toyota power wire from the passenger footwell to the pump.
And yes, toyota wiring for the alternator. Just grabbed the signal wire coming from the charge light, and the load wire and wired them in just like stock. The GM alternator (this one at least, it's off a slightly newer blazer) has the same wires, so it was very simple.
the 2 shorter lines in the middle are my fuel lines:
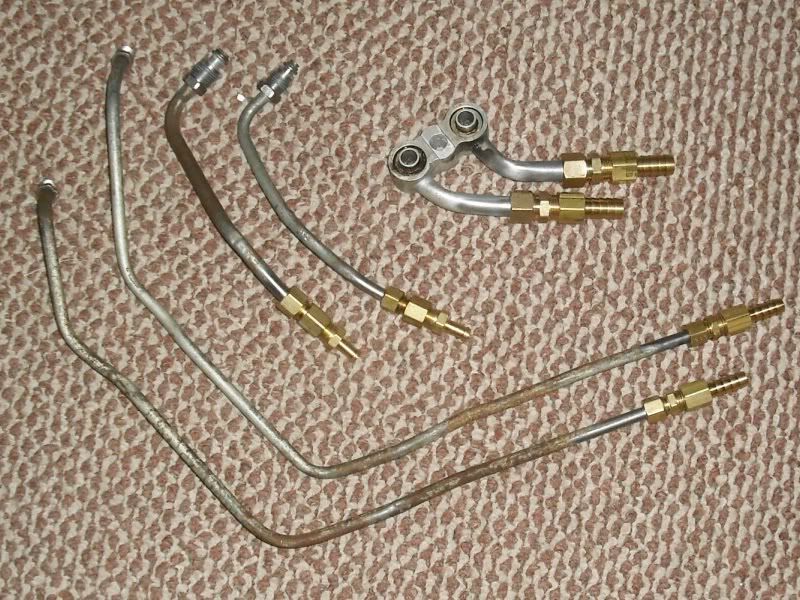
They're pretty hidden on the truck now. But it's the stock chevy flare/flare nut, with a compression fitting to hose barb adapter, and then soft line from there to the tank.
I'm using the chevy fuel pump relay, but re-using the toyota power wire from the passenger footwell to the pump.
And yes, toyota wiring for the alternator. Just grabbed the signal wire coming from the charge light, and the load wire and wired them in just like stock. The GM alternator (this one at least, it's off a slightly newer blazer) has the same wires, so it was very simple.
the 2 shorter lines in the middle are my fuel lines:
They're pretty hidden on the truck now. But it's the stock chevy flare/flare nut, with a compression fitting to hose barb adapter, and then soft line from there to the tank.


