Nervo19's 89 4Runner 22RE Slow Rehab
 10-23-2014, 05:43 AM
#1
Registered User
Thread Starter
Nervo19's 89 4Runner 22RE Slow Rehab
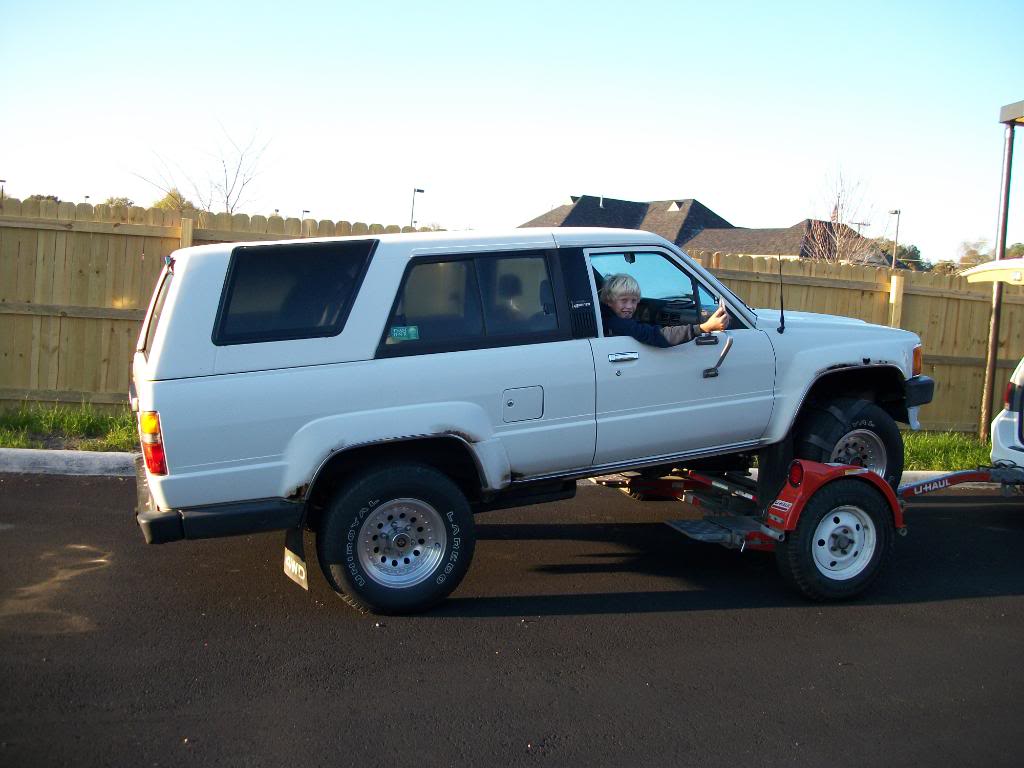
And I do mean slow. I came on here about four years ago to figure out how to install a tow hitch on my 2000 4Runner. I used to have an 88 4Runner I bought new. It was a DLX with vinyl floor, stripped down except for A/C. I put a Kayline top on it and kept that on for five or six years. I bought it for $12,500 and sold it after eight years at 100,000 miles for $8,900. It was replaced by a new white 1997 4Runner. That got wrecked so I got the black 2000 SR5. I soon realized I NEEDED a 1st gen again.
I found this about three hours from me, 89 DLX, vinyl floors, nearly identical to my first 4Runner:
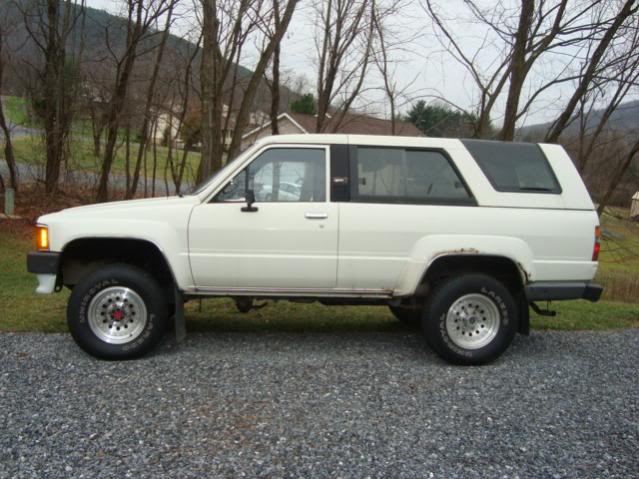
I found this about three hours from me, 89 DLX, vinyl floors, nearly identical to my first 4Runner:

 10-23-2014, 05:47 AM
#2
Registered User
Gotta love the 1st gen runners! I love my 86 DLX but mine has carpet and ac. With the vinyl in the cargo area. Are you gonna restore it or make it a weekend wheeler?
The following users liked this post:
944run (03-26-2019)
10-23-2014, 05:54 AM
#3
Registered User
Thread Starter
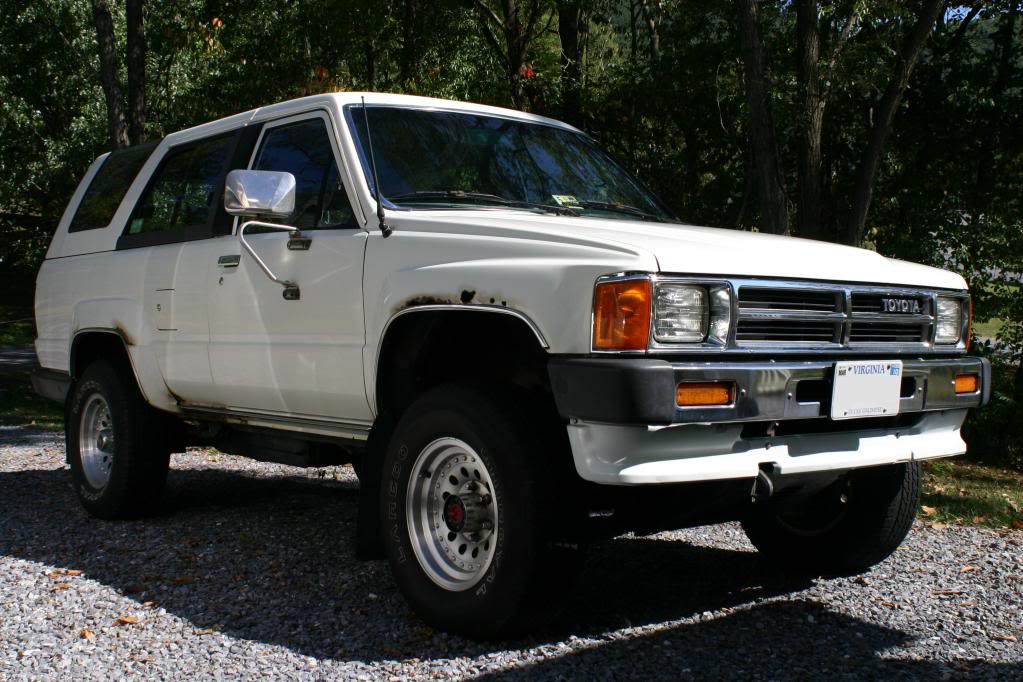
For some reason I'm not able to post multiple pictures. Above is how it looked when PO got it from his father in law in 2008. He added mirrors from an old Landcruiser. It looked like this when I got it:
Underside was not too terrible. I think it was undercoated at one time.
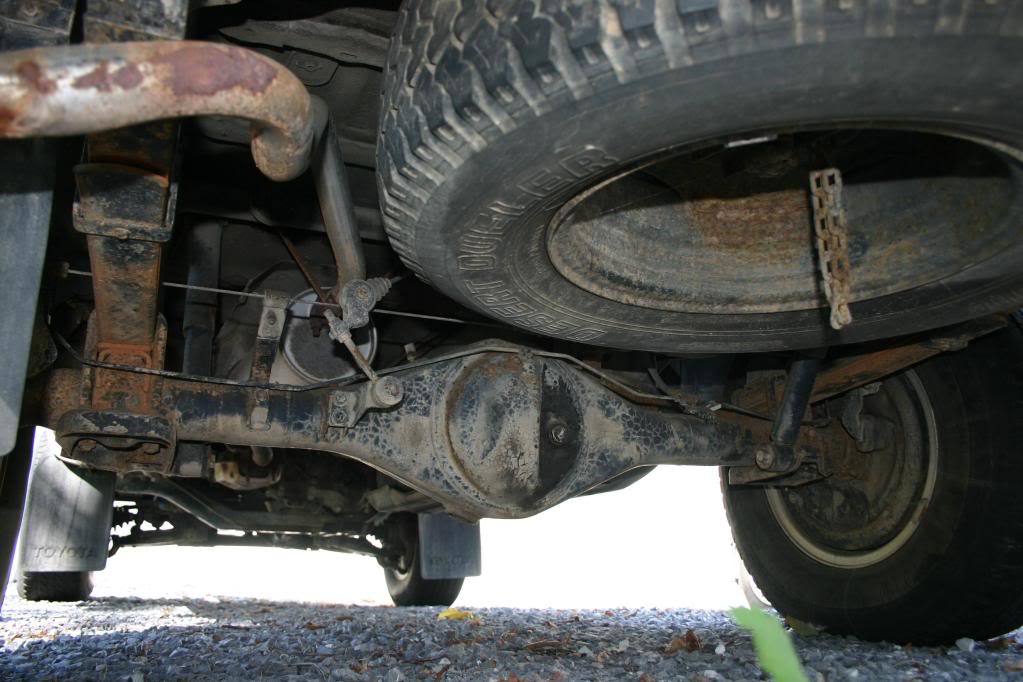


Underside was not too terrible. I think it was undercoated at one time.
 10-23-2014, 05:59 AM
#4
Super Moderator
Staff
iTrader: (1)
Join Date: Aug 2008
Location: Anderson Missouri
Posts: 11,788
Likes: 0
Received 21 Likes
on
19 Posts
Great to see you start a build. I remember you linked me to PB when you was first starting on it and you have brought it a long ways. Looking good. It is nice to see where you were and when you get it to where you want it to be. You will like having a record of it. Looking forward to your build.
10-23-2014, 06:09 AM
#5
Registered User
Thread Starter
So I towed it home three hours from the mountains of VA. I live in the Richmond area. PO disconnected the drive shaft for me:
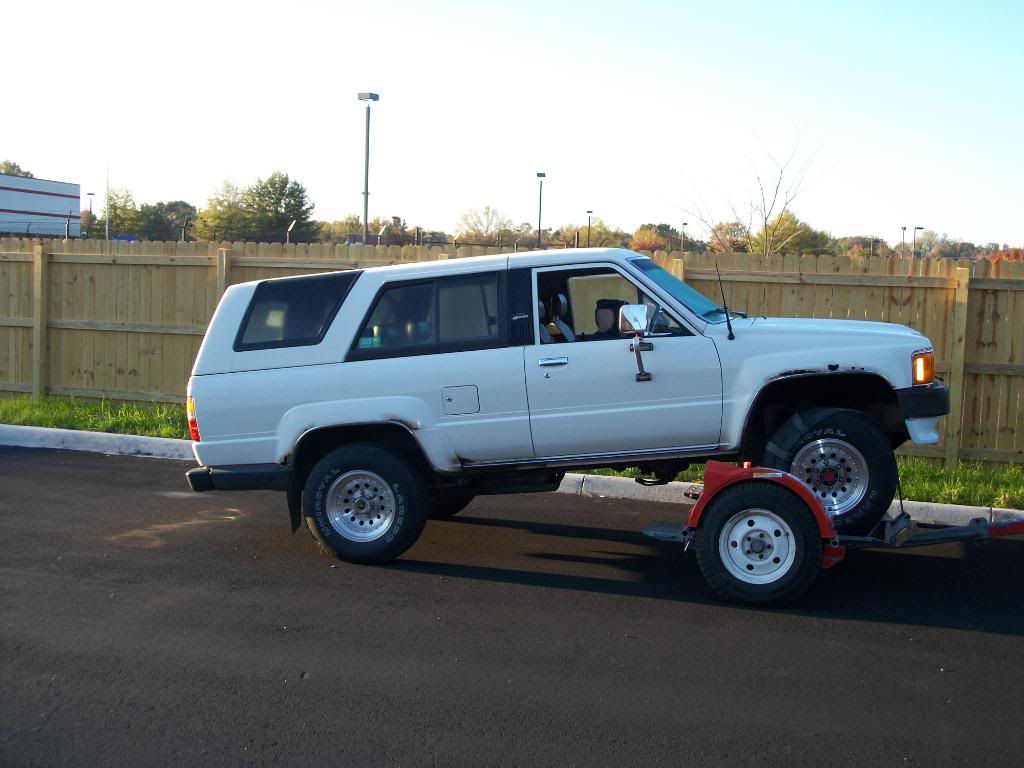
He did not ride like this:
PO gave me a new eBay clutch, I think it was Excedy, are they any good? Too late, it was installed. New clutch, rear main seal, head gasket, oil pan gasket and...wiper blades. The tires were dry rotted so 31's:
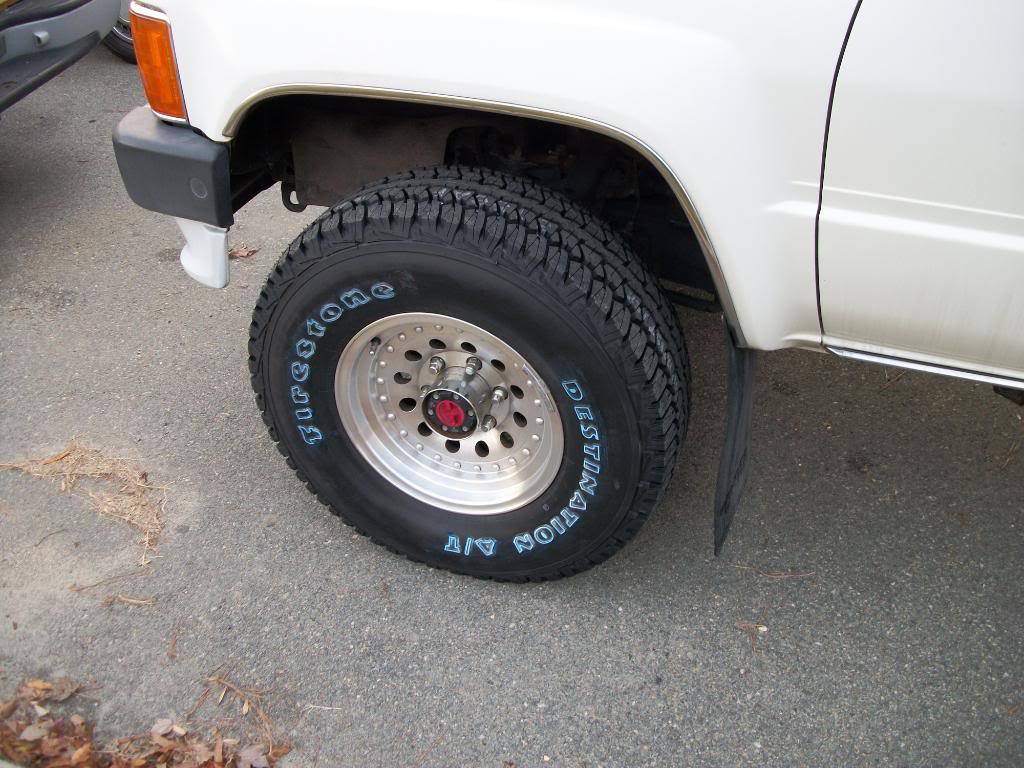
I love Outlaw II rims. They were on my '88 too. So 80's. These are actually Sears knock offs called "Z Racing."
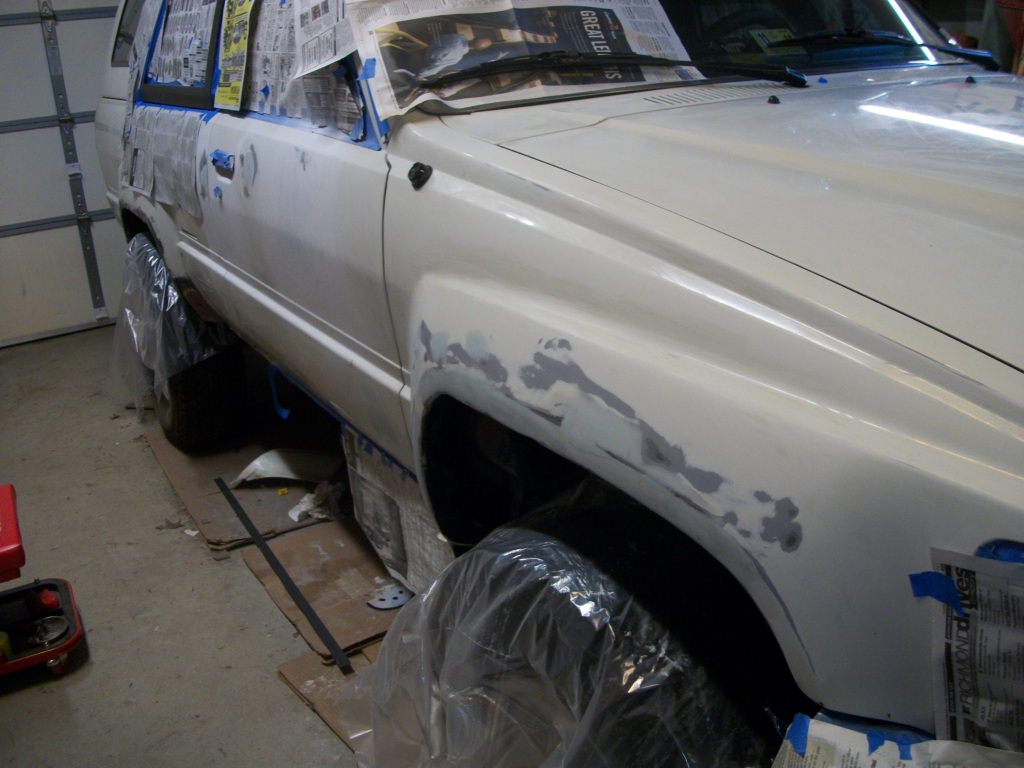
This is my first body work on anything ever. It had the dent everyone has. I drilled a small hole and pulled the dent and finished it with "Rage" body filler. It sands much better than traditional Bondo. Sprayed white primer. I replaced the faded tail light lenses.

He did not ride like this:

PO gave me a new eBay clutch, I think it was Excedy, are they any good? Too late, it was installed. New clutch, rear main seal, head gasket, oil pan gasket and...wiper blades. The tires were dry rotted so 31's:

I love Outlaw II rims. They were on my '88 too. So 80's. These are actually Sears knock offs called "Z Racing."
This is my first body work on anything ever. It had the dent everyone has. I drilled a small hole and pulled the dent and finished it with "Rage" body filler. It sands much better than traditional Bondo. Sprayed white primer. I replaced the faded tail light lenses.
 10-23-2014, 06:52 AM
#6
Registered User
Thread Starter
If anyone knows how to make my Photobucket pictures smaller, let me know. I'm sorry they are so huge.
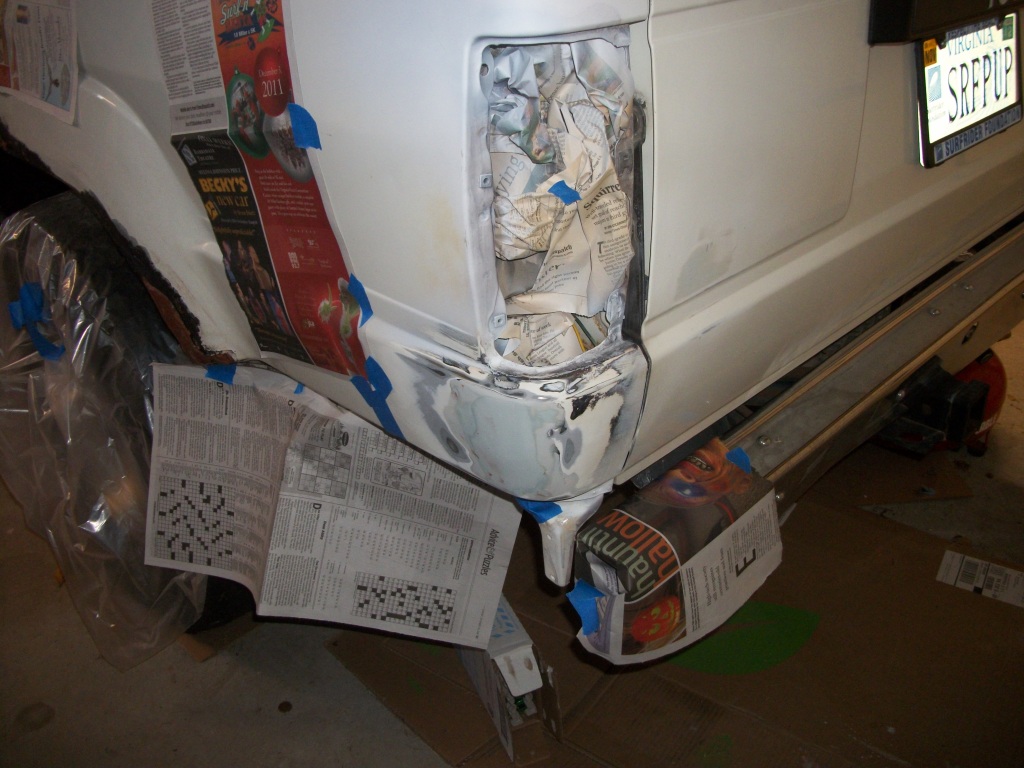
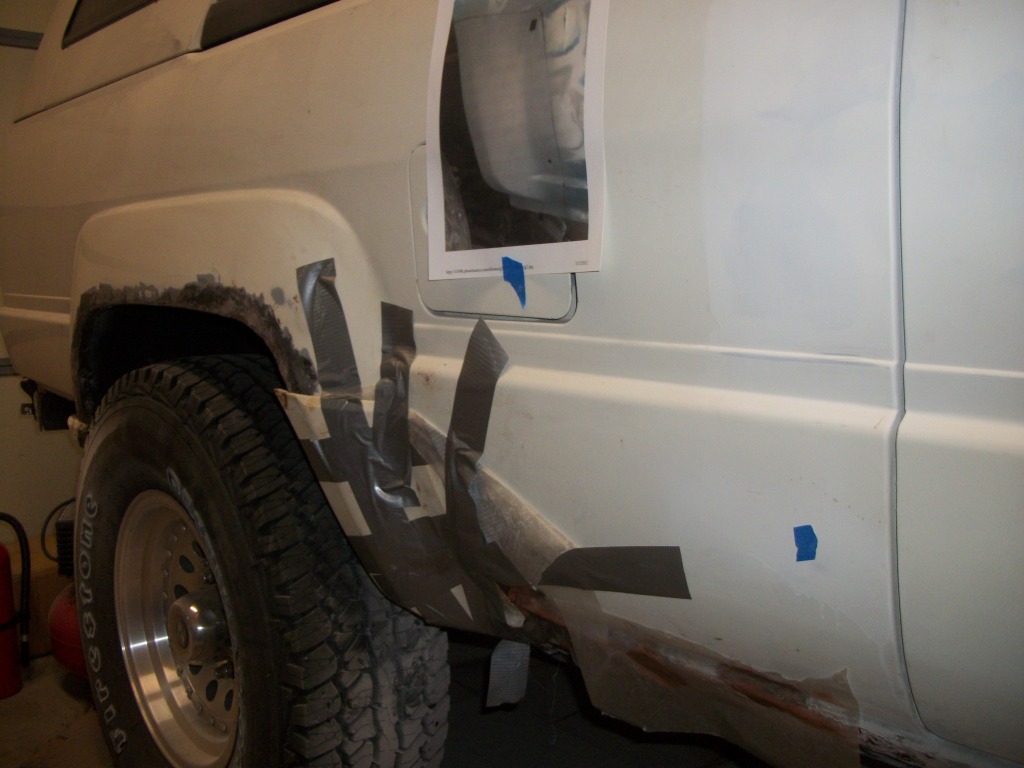
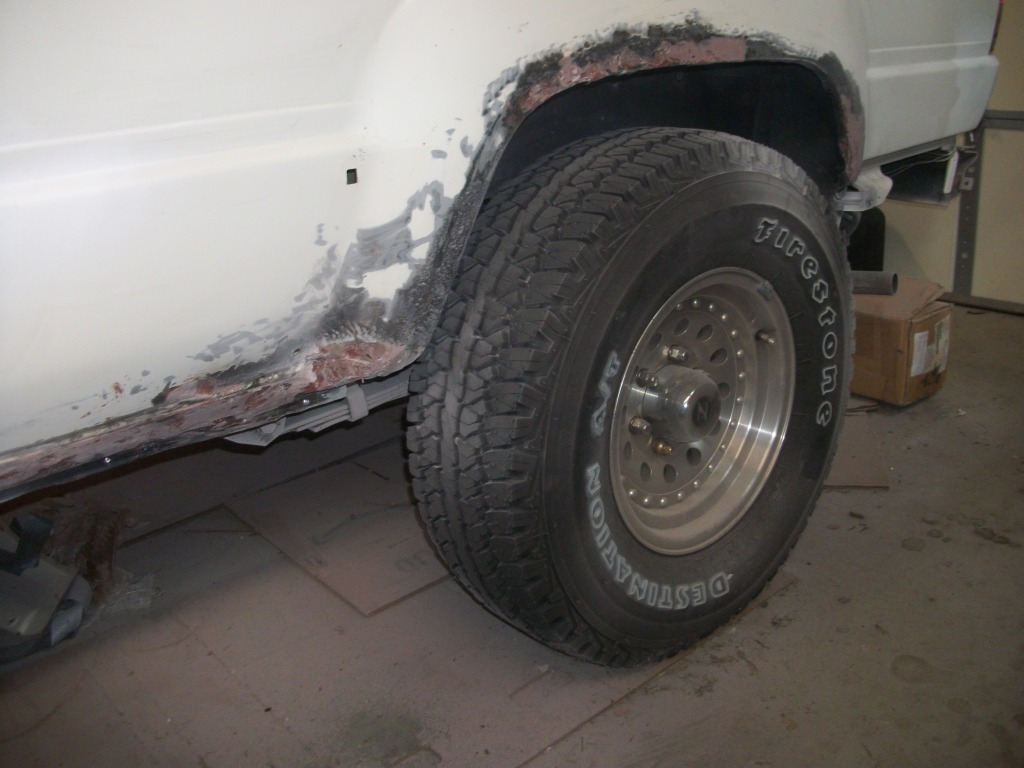
PO's father in law was a park ranger and I guess he drove it a lot on dirt roads. You see all the rust on the fender bottoms. The chrome wheel trim was literally holding the edges together in some places. When I took the gravel guard off the passenger side the metal was gone and there was a red dirt clod the size of my fist where metal used to be.
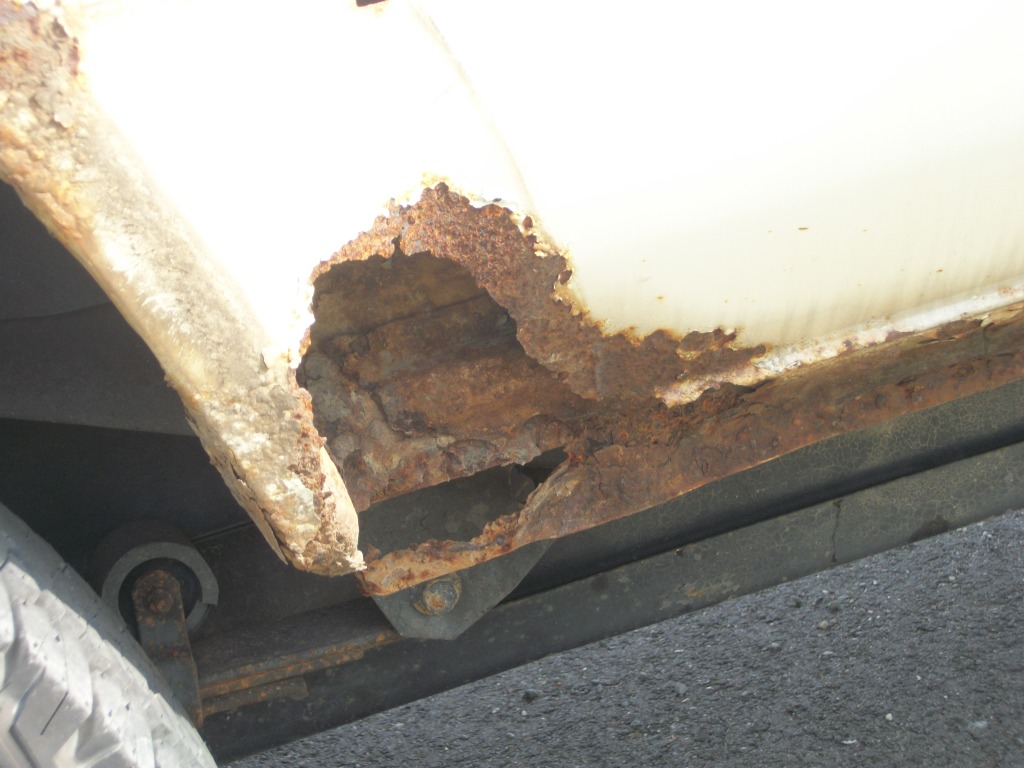
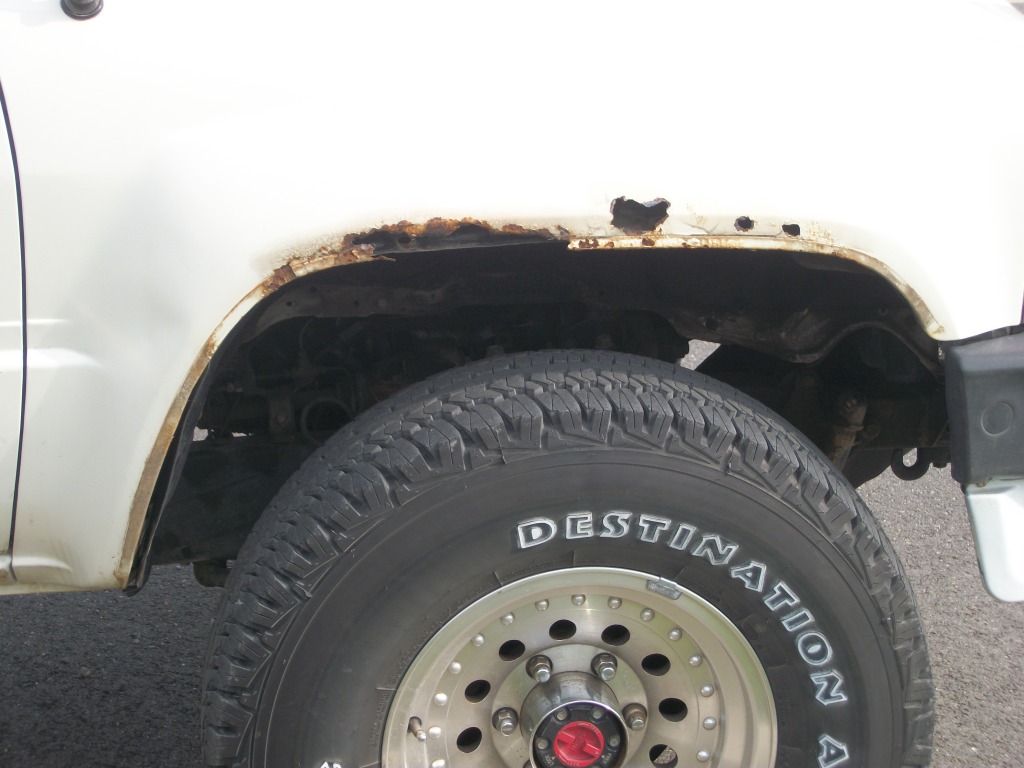
I got a bunch of Eastwood products. I brushed Naval Jelly on the rust and drove to the car wash. I sprayed rust converter on the cleaned metal and the rust encapsulator (or the reverse order- whatever the directions said.)
I pulled off the rear panels and applied fiberglass mat from the back side. I wet the mat with West System epoxy and filler. Make it up to sort of peanut butter consistency. Wear latex gloves. Smoosh and sculpt it with wax paper from the kitchen.
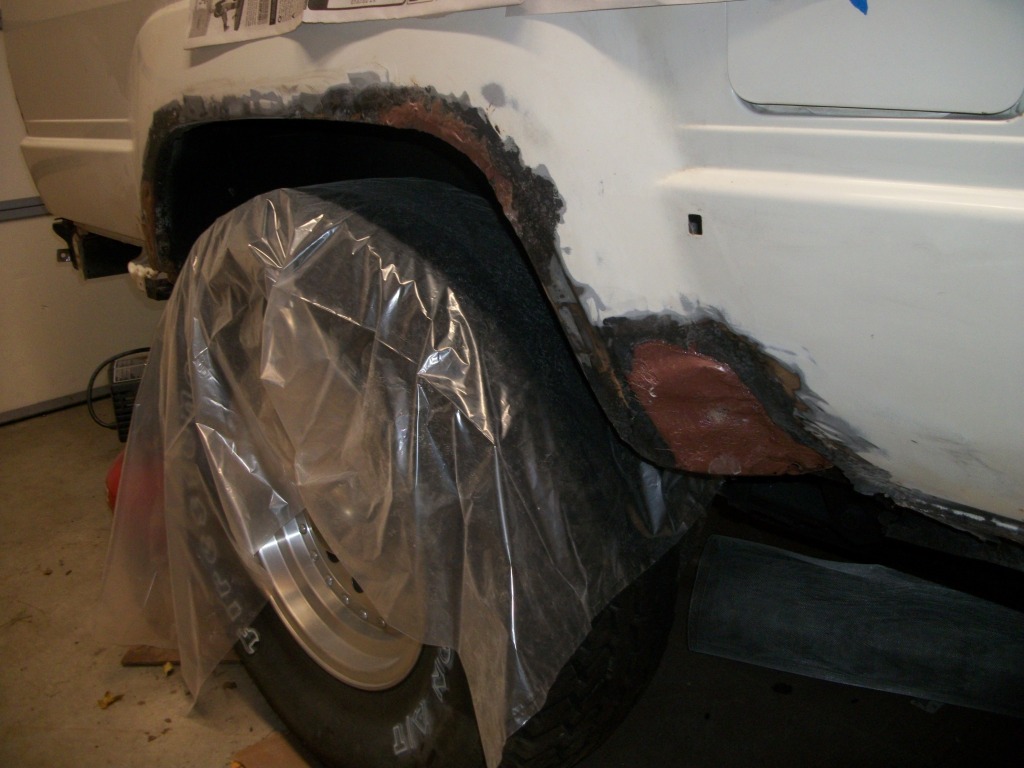
I did the same with this front fender and topped it with a thin layer of Rage. I forgot to mention to take the fender liners off first.
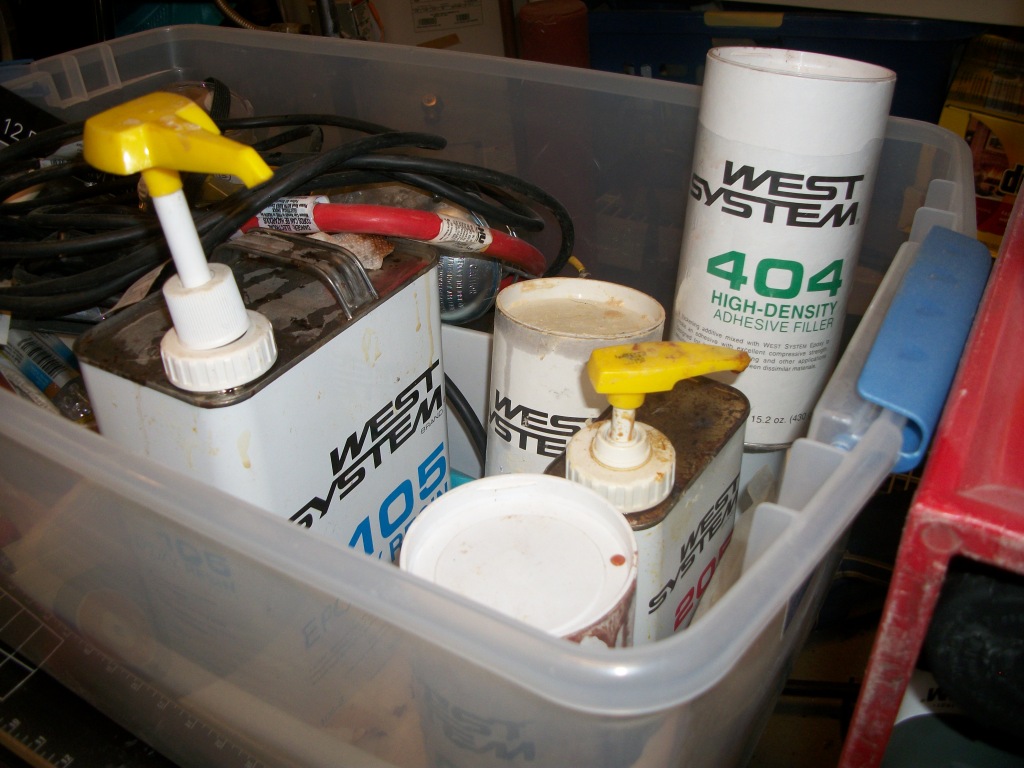
This is the stuff I use. You get it at boat stores. I like Jamestowndistributors.com. They frequently have free shipping and they're cheaper than West Marine. The tops look rusty because they floated around in Hurricane Irene. I lost a ton of tools and momentum. Grr.
White trash repairs. I used wax paper and the old gravel guard to cold mold the dog leg. It came out great. There's two layers of mat and it's hollow just like sheet metal would be so water vapor can escape. Terry87 very graciously sent me pictures of intact dog leg areas. Thanks Terry.
Okay this is the other side. All it needs is a little grinding and some Rage and primer. At the bottom pinch weld you see a couple of rivets. The pinch weld was gone in some areas. I got 1/2" sticks of mystery metal (soft steel) at Home Depot, drilled every 4" and riveted it to what was left. It gives the fiberglass some where to attach.
Mission creep. I painted the L trim with satin black Rustoleum.
Derusted the battery tray. This is factory matching from paintscratch.com. It's more tan than it should be.
PO's father in law was a park ranger and I guess he drove it a lot on dirt roads. You see all the rust on the fender bottoms. The chrome wheel trim was literally holding the edges together in some places. When I took the gravel guard off the passenger side the metal was gone and there was a red dirt clod the size of my fist where metal used to be.


I got a bunch of Eastwood products. I brushed Naval Jelly on the rust and drove to the car wash. I sprayed rust converter on the cleaned metal and the rust encapsulator (or the reverse order- whatever the directions said.)
I pulled off the rear panels and applied fiberglass mat from the back side. I wet the mat with West System epoxy and filler. Make it up to sort of peanut butter consistency. Wear latex gloves. Smoosh and sculpt it with wax paper from the kitchen.

I did the same with this front fender and topped it with a thin layer of Rage. I forgot to mention to take the fender liners off first.

This is the stuff I use. You get it at boat stores. I like Jamestowndistributors.com. They frequently have free shipping and they're cheaper than West Marine. The tops look rusty because they floated around in Hurricane Irene. I lost a ton of tools and momentum. Grr.

White trash repairs. I used wax paper and the old gravel guard to cold mold the dog leg. It came out great. There's two layers of mat and it's hollow just like sheet metal would be so water vapor can escape. Terry87 very graciously sent me pictures of intact dog leg areas. Thanks Terry.

Okay this is the other side. All it needs is a little grinding and some Rage and primer. At the bottom pinch weld you see a couple of rivets. The pinch weld was gone in some areas. I got 1/2" sticks of mystery metal (soft steel) at Home Depot, drilled every 4" and riveted it to what was left. It gives the fiberglass some where to attach.

Mission creep. I painted the L trim with satin black Rustoleum.

Derusted the battery tray. This is factory matching from paintscratch.com. It's more tan than it should be.

Last edited by Nervo19; 01-21-2016 at 05:53 AM.
10-23-2014, 07:06 AM
#7
Registered User
Thread Starter
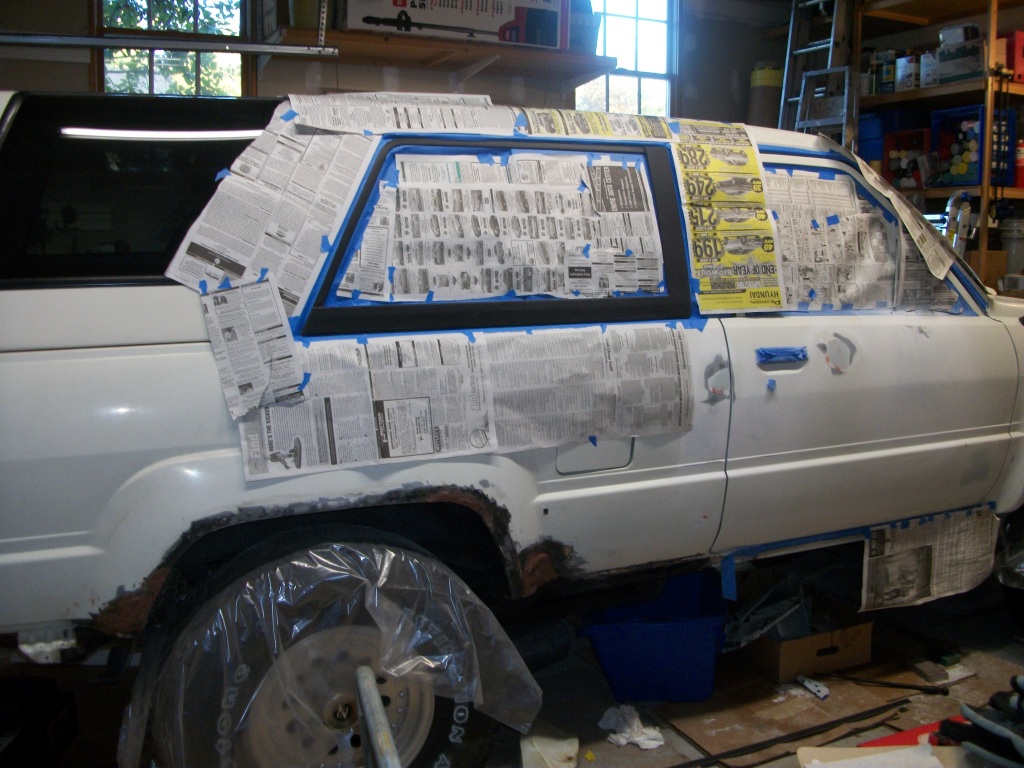
It's my 16 year old son's DD now. I want to make it look good and be a safe ride for him. I have teens 16, 15 and 14. My daughter is rebellious and wants a Jeep. She has no money though so no worries. I had hoped to wait and do a complete finished build before I posted a thread but it still is not repainted. White primer looks surprisingly good though.
My 88 was medium blue metallic. It is the best color. This is going to be repainted white. The carpet was an option. I went from a well optioned Honda Accord to a stripped down 4Runner. $12,500 seemed like a lot of money. Well optioned SR5's were about $18k at the time.
Trending Topics
10-23-2014, 07:18 AM
#8
Registered User
Thread Starter
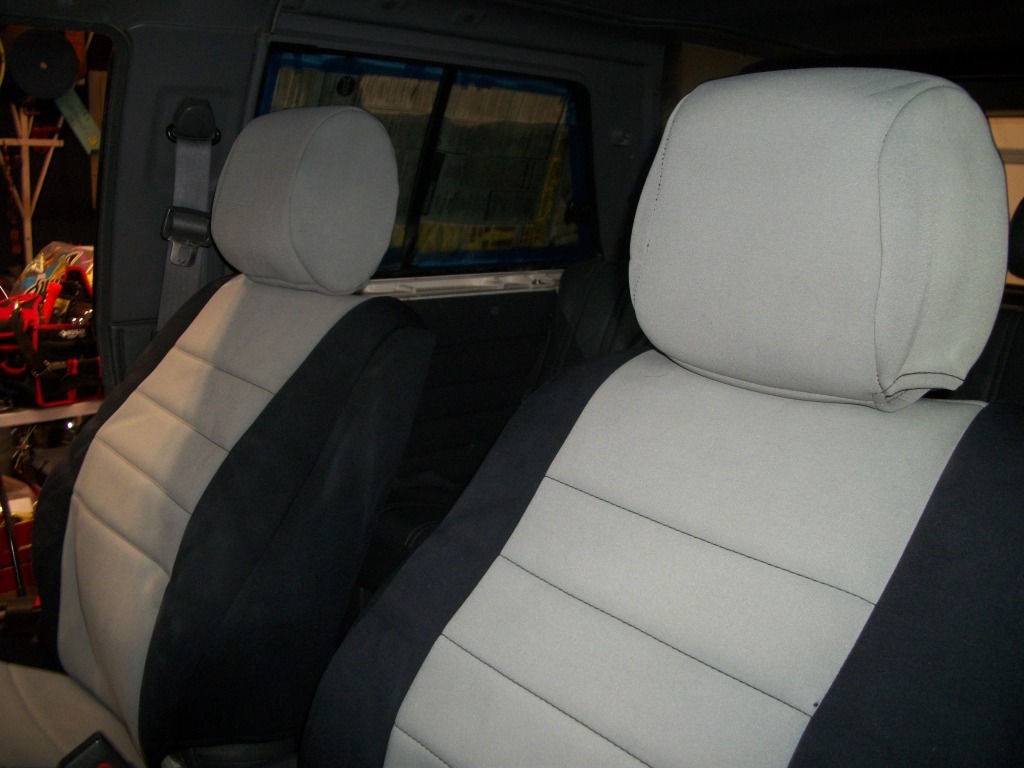
My stripped DLX came with vinyl seats. They are cold in winter. In the 80's I kept gray sheepskin's on them. They were custom and costly. PO of this had some eBay covers to hide a tear on the drivers seat. The rest of the seats are excellent. I learned on here that Toyota TRD seat covers from 2005 or so fit our seats. Hmmm. So when a front pair of Wet Okoles from a 2004 Tacoma came on Craigslist I took a chance. They fit. I took the seats out to put them on and also installed 4Crawler seat lifts.

Last edited by Nervo19; 03-31-2015 at 03:49 PM.
10-23-2014, 07:51 AM
#9
Registered User
Thread Starter

I got red door pockets off eBay and painted them with Duplicolor vinyl paint in graphite gray.

Sound proofed the doors with Protecto Wrap from Home Depot, roofing section.


This how I marked the door panel for the door pockets. Borrow ugly lipstick from daughters room. Rub on screw holes, transfer red to panel

These are the "omega" clips that hold the window roller handle on. To get the handle off you slip a rag between the handle and door and see saw back and forth 'til the clip lets go. They always fly away. I got a pack of 50 from eBay for my next entry into the door. To get handles back on you position the clip on the handle and push it on and it clicks. I could not figure out how to get it back on and did a web search. I felt stupid when I found the answer. Thought I'd mention it.

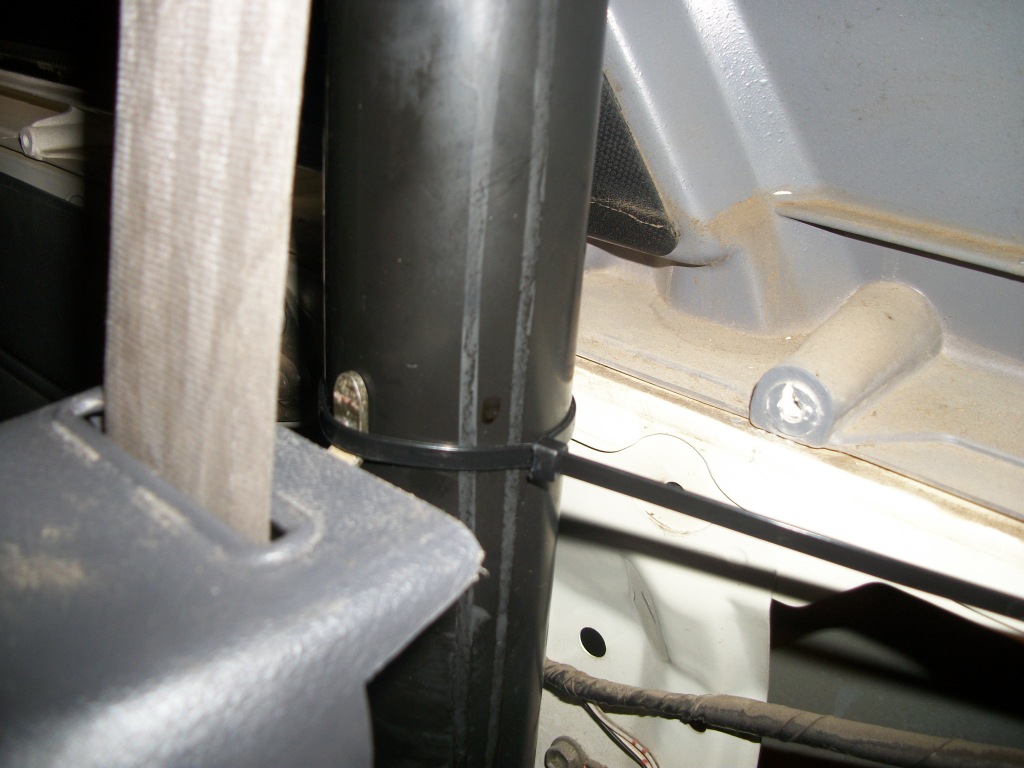
I got front seat belts from a 1993 truck to put in the rears. I got both male and female ends. They have covers over the rolling part. My old rear laps looked like this, the female part is smaller that the Toyta female end. I think these were put in at the Baltimore port:

To clean new/old belts I extended it from its housing and put on a clamp to hold the belt free. I washed them in Simple Green.


 10-23-2014, 08:04 AM
#10
Registered User
Thread Starter
There's a little tab at the top of the '93 seatbelt housing. I used a wire tie to attach it and clipped the excess. The rest of it is bolted.
Paging through eBay one day...I was bored so I entered "88 4Runner" "used" and looked at newest listings. Someone had an inclinometer for $39. It had the mount and the wire pig tail. He spelled it something crazy like "incline-o-meter" so no one else saw it. I waited it out and got it for $39. Lucky me. I did not want to put a hole in my perfect dash and no one will probably use this at night anyway so industrial Velcro. Home Depot. NOTE: Part number for new Clinometer screws is 83891-16010 Genuine Toyota Knob, Clinometer (toyotapartsdeal.com) They are $3.19 each.
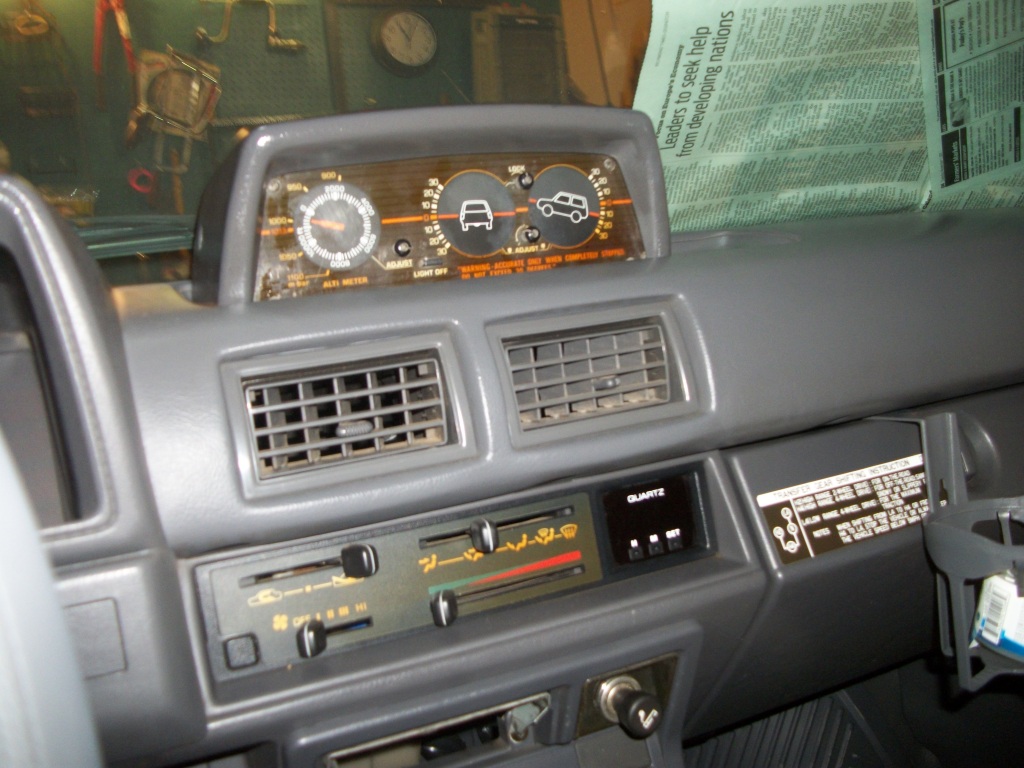
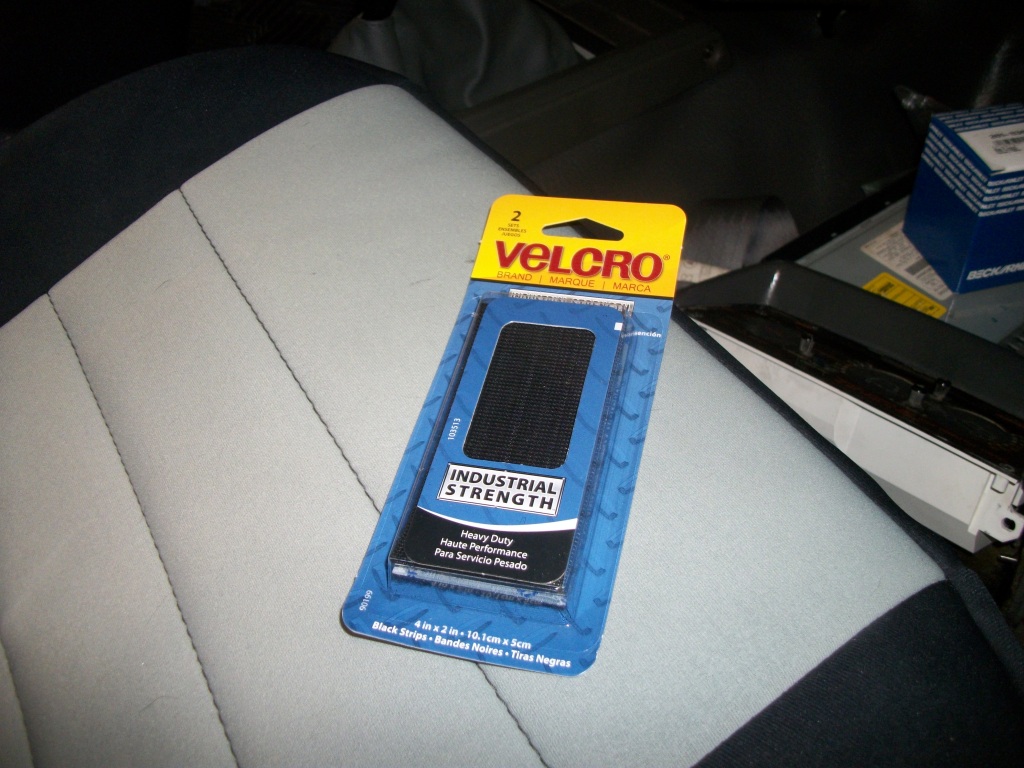
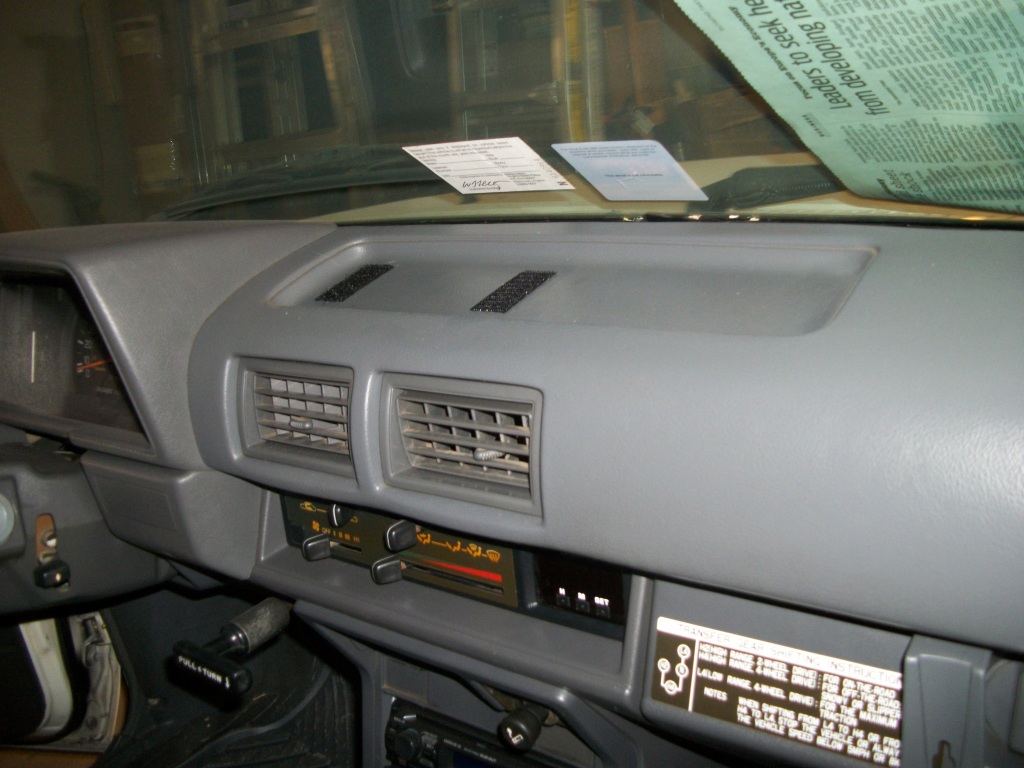

Paging through eBay one day...I was bored so I entered "88 4Runner" "used" and looked at newest listings. Someone had an inclinometer for $39. It had the mount and the wire pig tail. He spelled it something crazy like "incline-o-meter" so no one else saw it. I waited it out and got it for $39. Lucky me. I did not want to put a hole in my perfect dash and no one will probably use this at night anyway so industrial Velcro. Home Depot. NOTE: Part number for new Clinometer screws is 83891-16010 Genuine Toyota Knob, Clinometer (toyotapartsdeal.com) They are $3.19 each.


Last edited by Nervo19; 07-19-2023 at 11:11 PM. Reason: add info
10-23-2014, 08:16 AM
#11
Registered User
Thread Starter
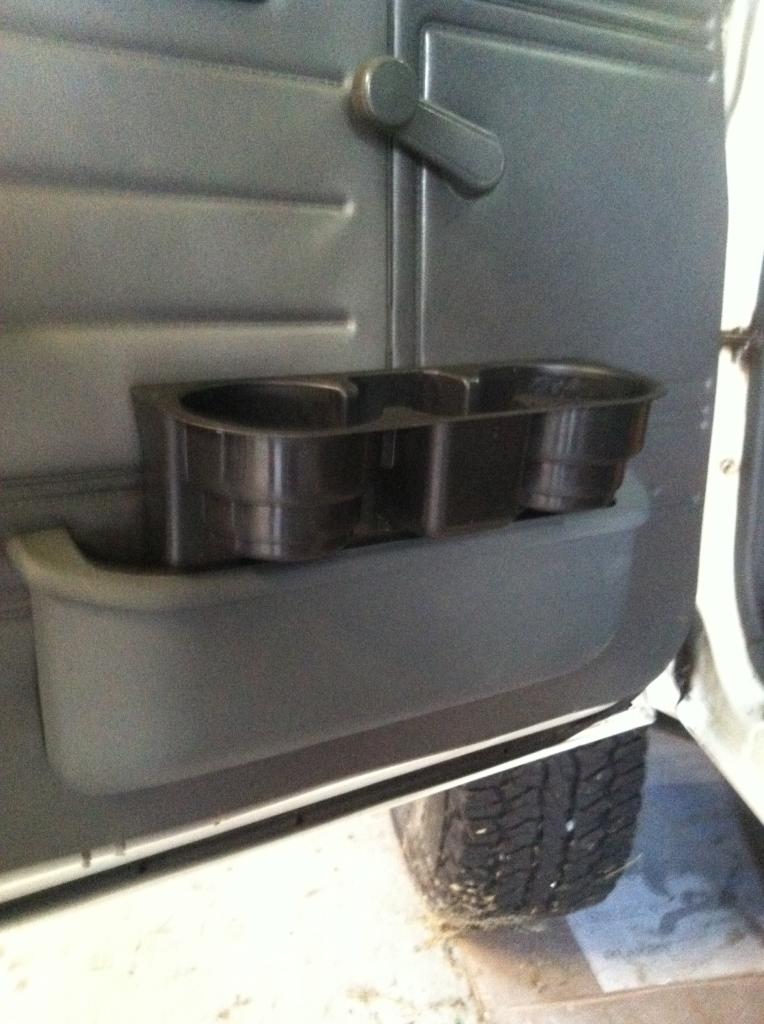
Cupholders. I had the $1.00 holder mounted on the glove compartment but it broke. I got the Wedge but it was too tall for the door pockets. I cut an inch of the bottom and wedged it with pipe insulation. Works fine.
Bed Bath and Beyond had these for back to school. I think they are meant for dorm bunk beds. They are a gray that matches. They were $12.99 but with a 20% coupon it was only about $10.
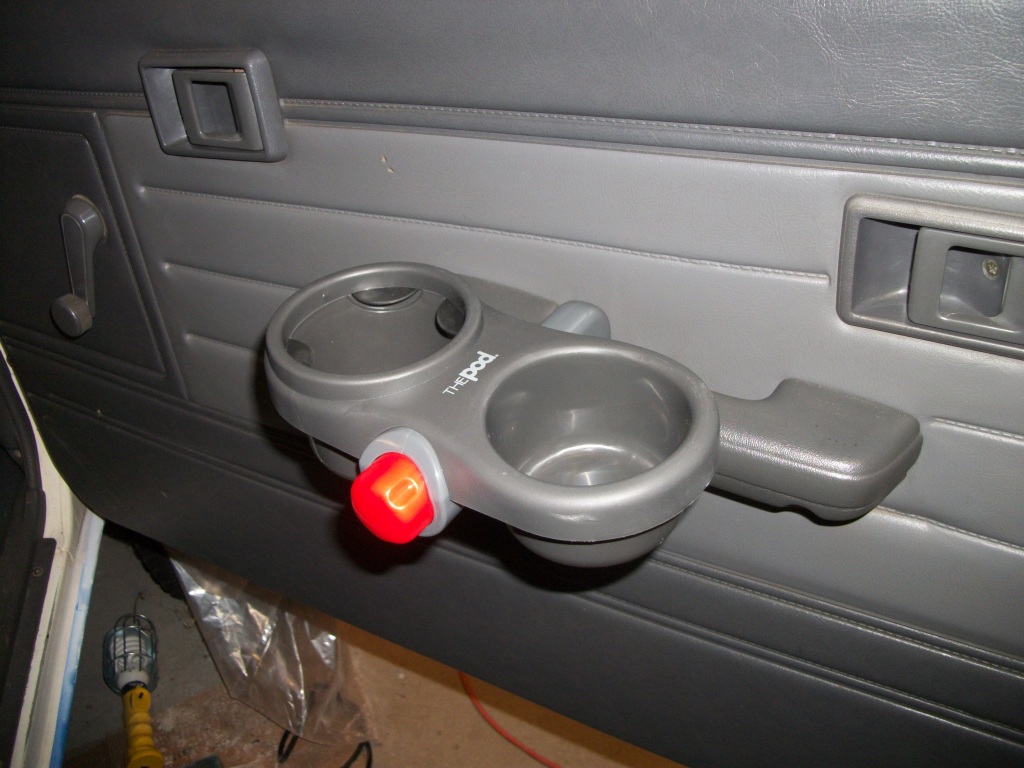


Bed Bath and Beyond had these for back to school. I think they are meant for dorm bunk beds. They are a gray that matches. They were $12.99 but with a 20% coupon it was only about $10.


 10-23-2014, 09:00 AM
#12
Registered User
It's my 16 year old son's DD now. I want to make it look good and be a safe ride for him. I have teens 16, 15 and 14. My daughter is rebellious and wants a Jeep. She has no money though so no worries. I had hoped to wait and do a complete finished build before I posted a thread but it still is not repainted. White primer looks surprisingly good though. My 88 was medium blue metallic. It is the best color. This is going to be repainted white. The carpet was an option. I went from a well optioned Honda Accord to a stripped down 4Runner. $12,500 seemed like a lot of money. Well optioned SR5's were about $18k at the time.
10-23-2014, 09:09 AM
#13
Registered User
Thread Starter
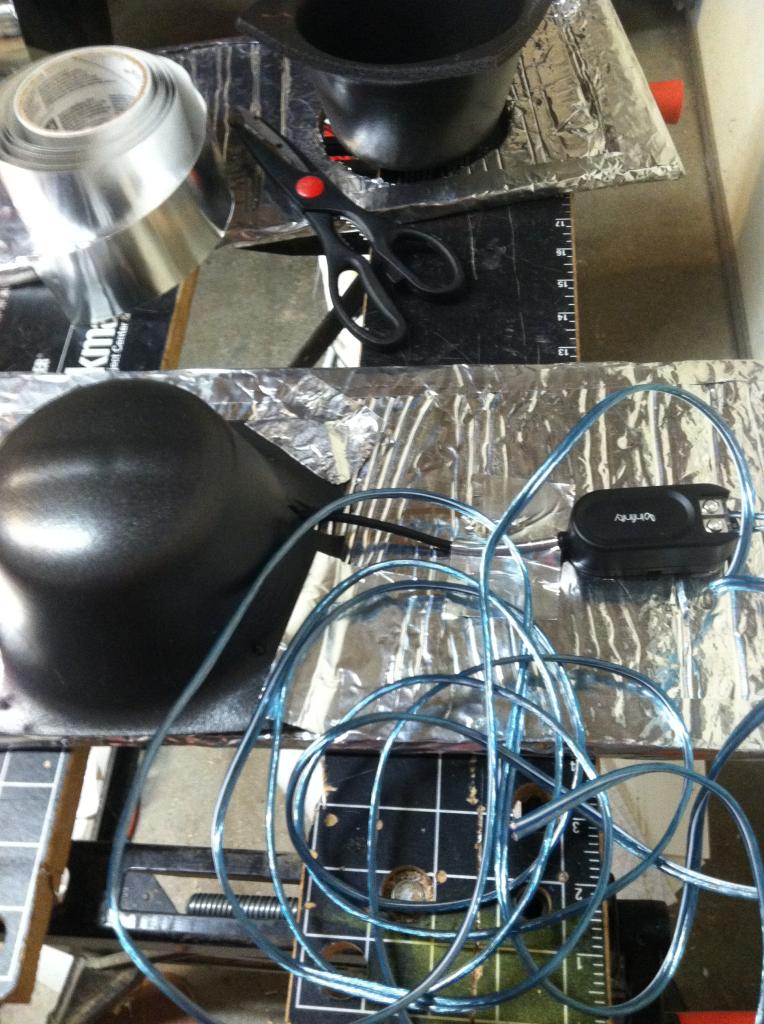
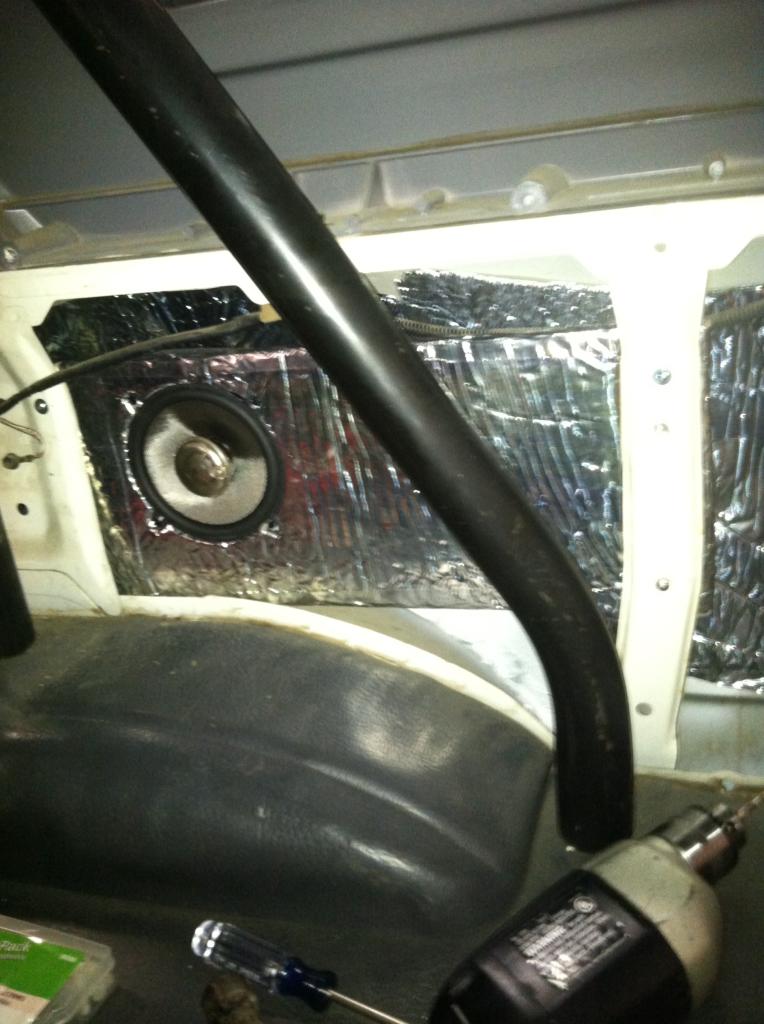
PO had installed a new stereo and 4" Pioneer speakers. It plays iPhone okay. I got caught up in the Infinity hoopla from the other 4Runner forum and got some for front and back.
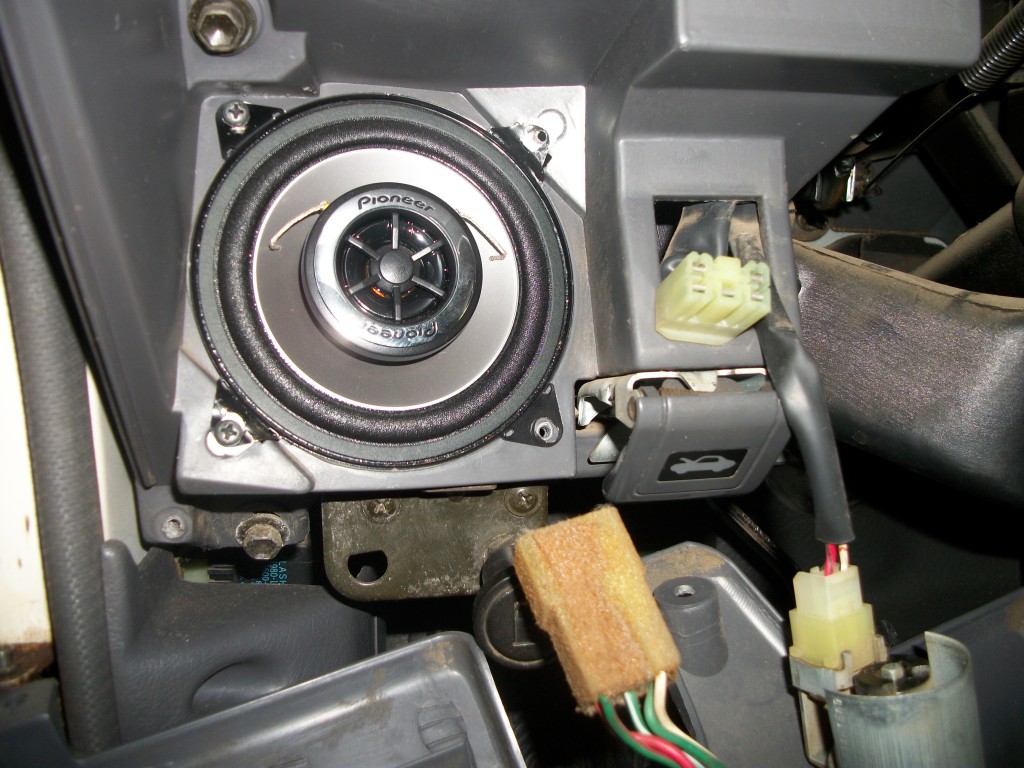
Old Pioneer on left, new Infinity Kappa on right
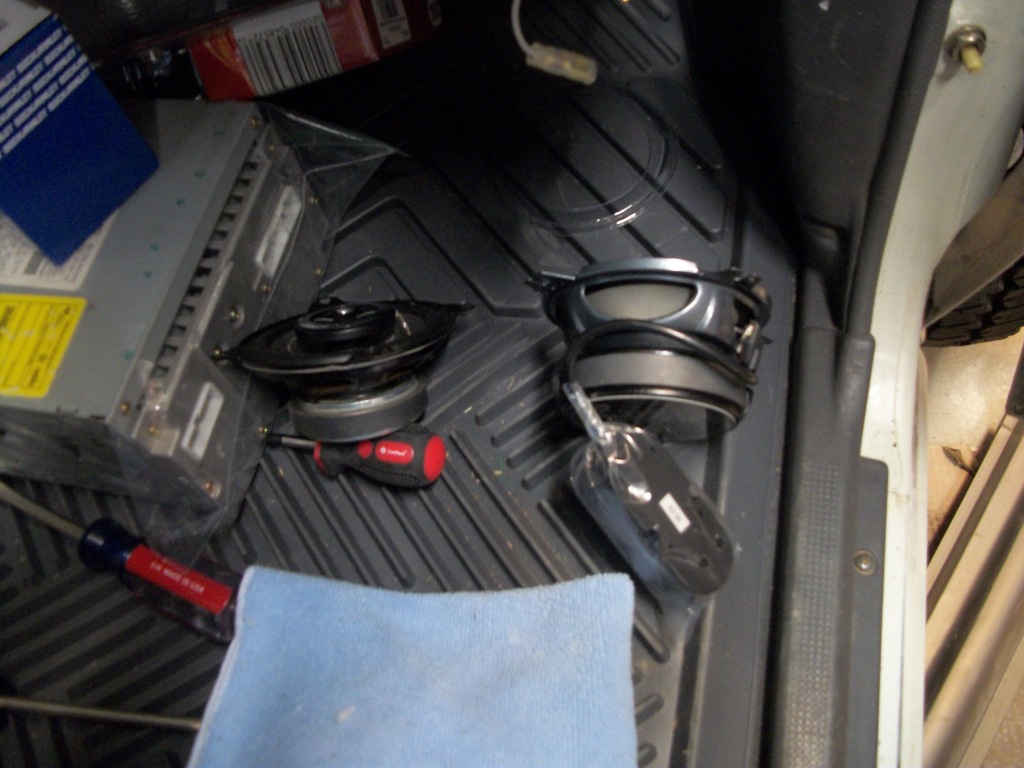
Crutchfield says they don't fit. They do. Very easy installation and I
recommend them.
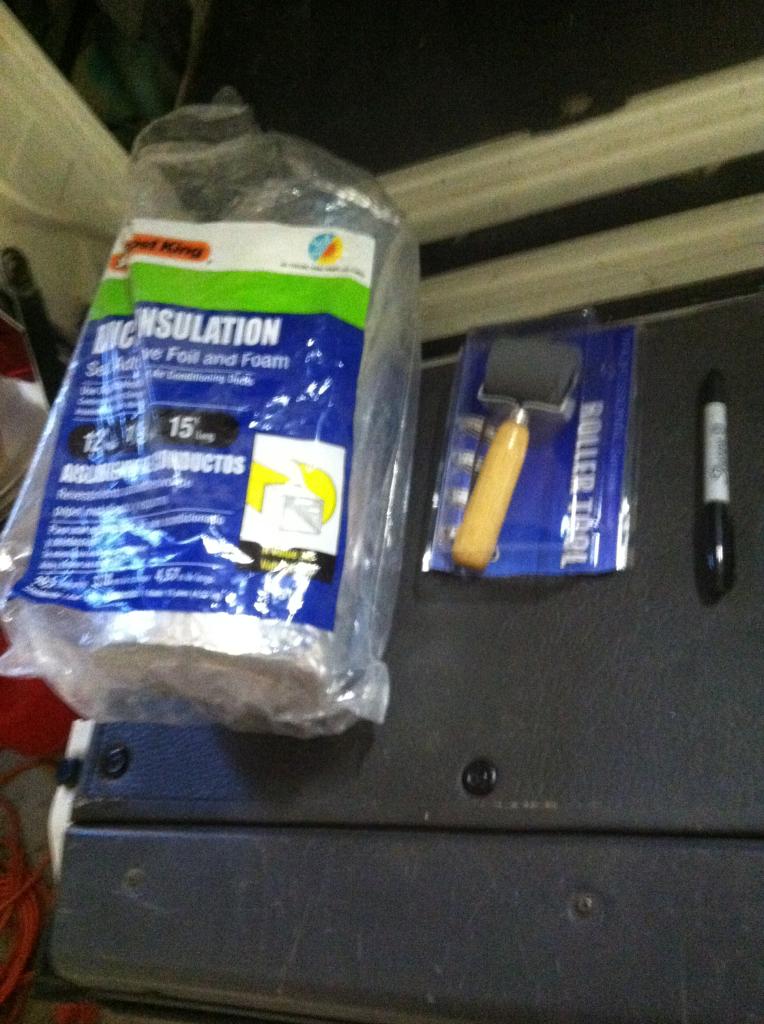
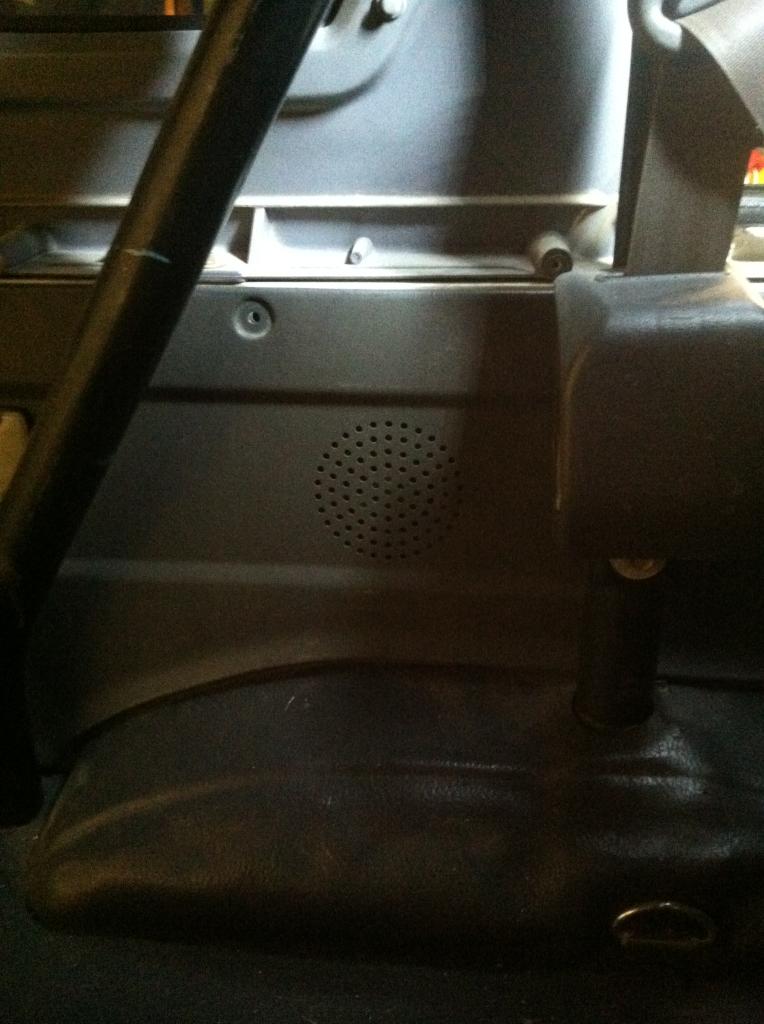
The DLX does not come with rear speakers and there is no wiring for them. First I lined the rear cargo sides with Frost King insulation from 's Home Depot. The roller is from Amazon and it's sold for sound deadener; it cost about $4.
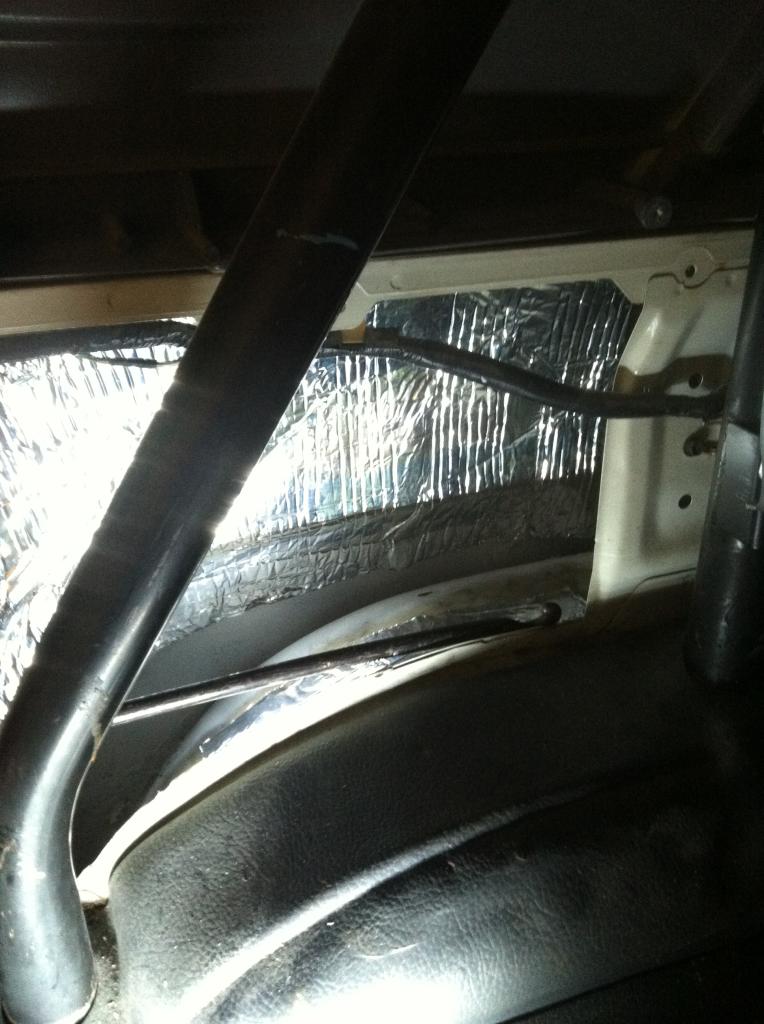
Lined the rear. It stands a bit above the fender so I can monitor for rust. I put a small strip of Frost King below the jack rod to prevent rattle
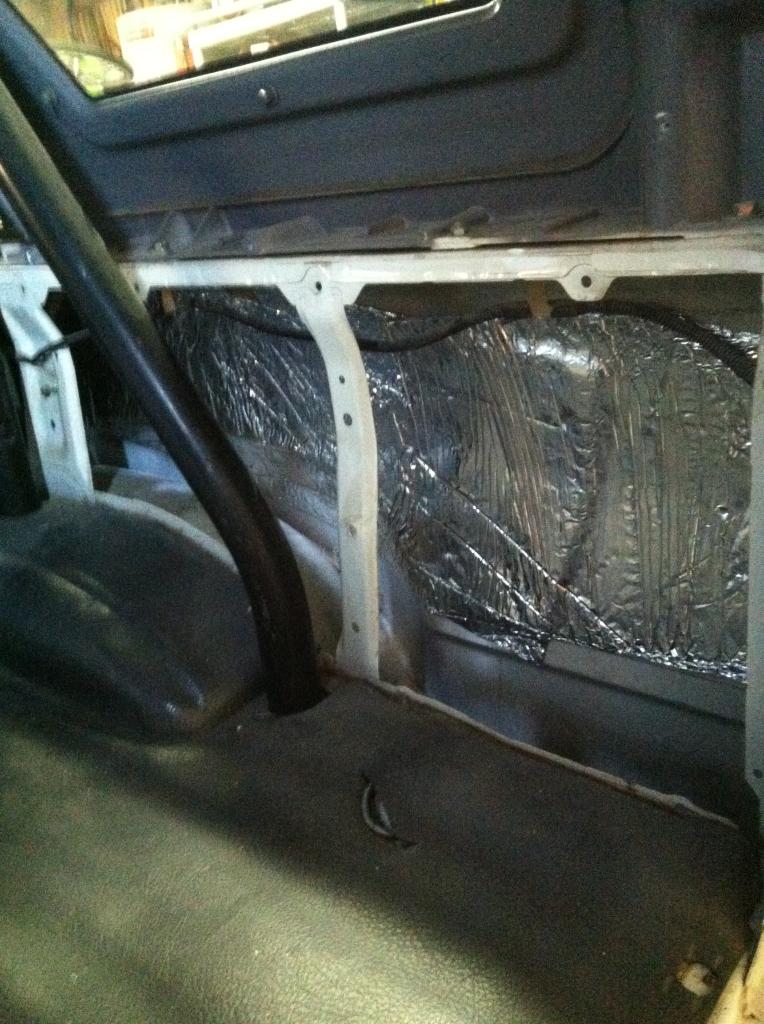
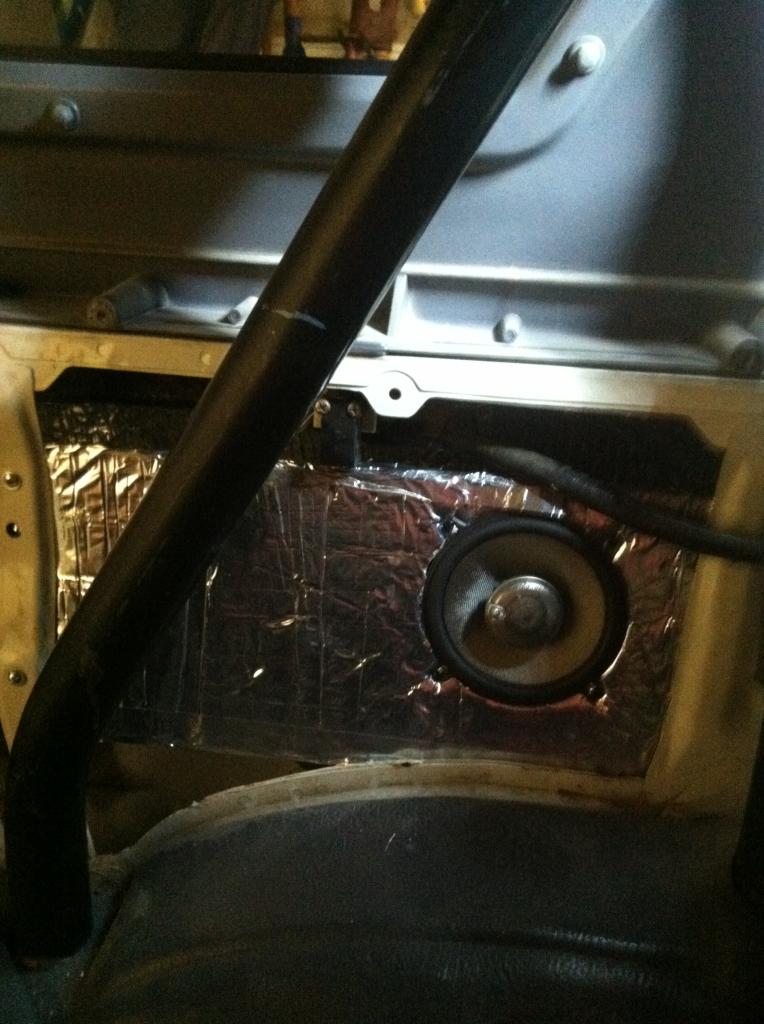
The rears are 5 1/2" Infinity Kappas. I cut 1/4" luan plywood to 8" x 23" (IIRC) and mounted it temporarily. I put the rear plactic panels over and sent a wire through the center of the factory speaker holes. The wire had a gob of red lipstick and marked where the center of my hole needed to be. I removed the plywood, cut the hole for the speaker and wrapped the plywood with Frost King. The rear of the speaker is covered with $4 Boom Mat speaker baffles. This is a panel from the rear.
I nipped the end off plastic drywall anchors and mounted the speaker plywood in three places. It is not in contact with the fender. It is suspended.
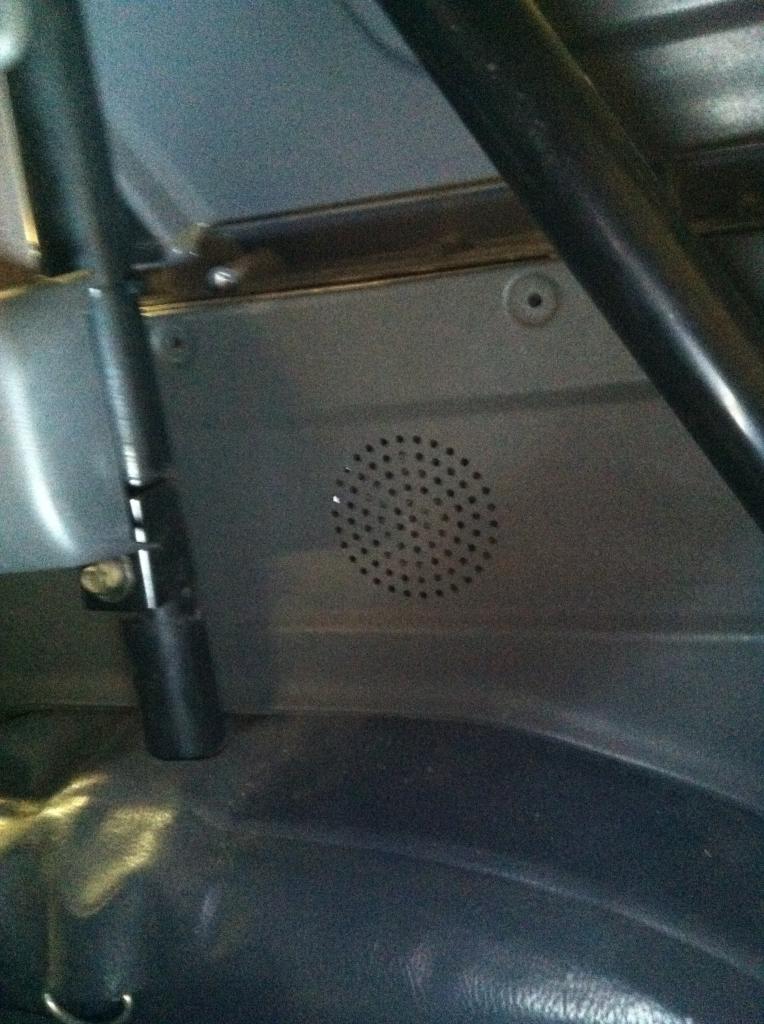
The speakers are invisible to thieves
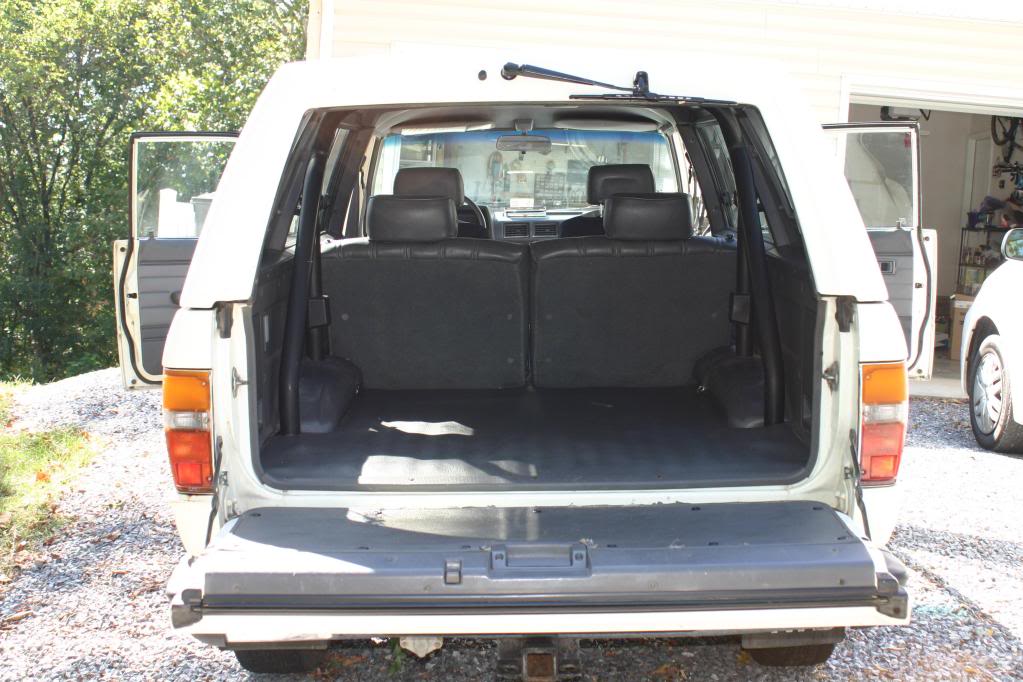
Since I was running speaker wire to the front it was a good time to take off the back seat panels. I had thought I would have to remove the rear seats but I didn't. The front seat belts needed to be unbolted. ChefYota sold me rear seat pockets a long time ago. They were a SR5 luxury. I repainted them with Duplicolor. I kind of winged the location of the buckets. Also Frost Kinged the inside.
Hint: do not use permanent Sharpie to mark cut lines. It cleaned up a little with alcohol but still.

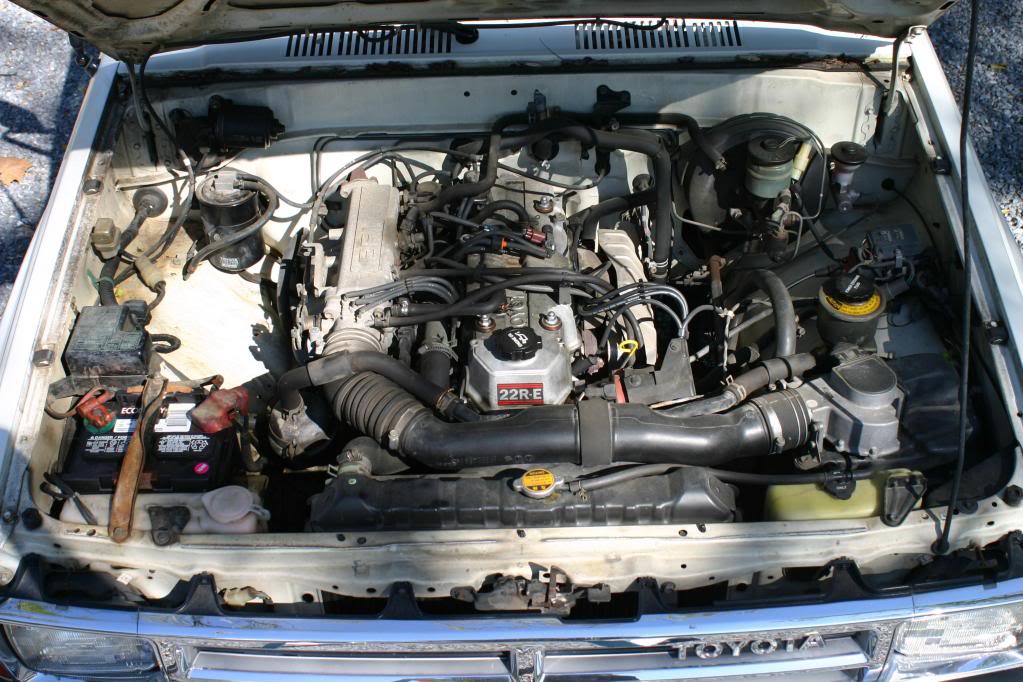
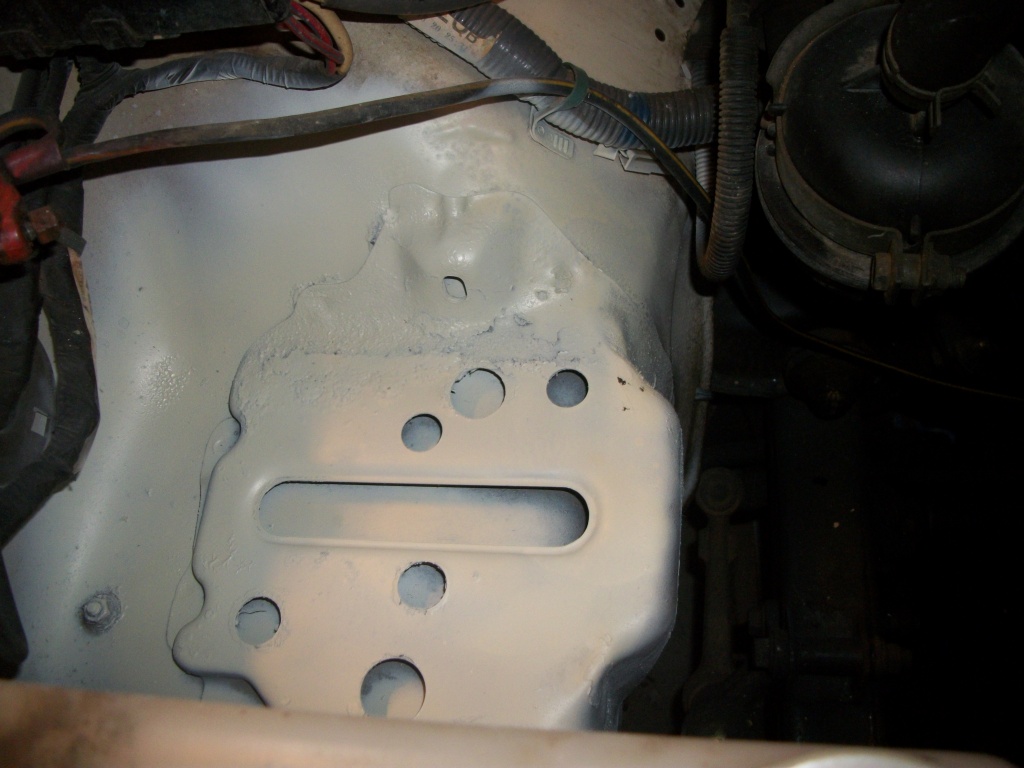
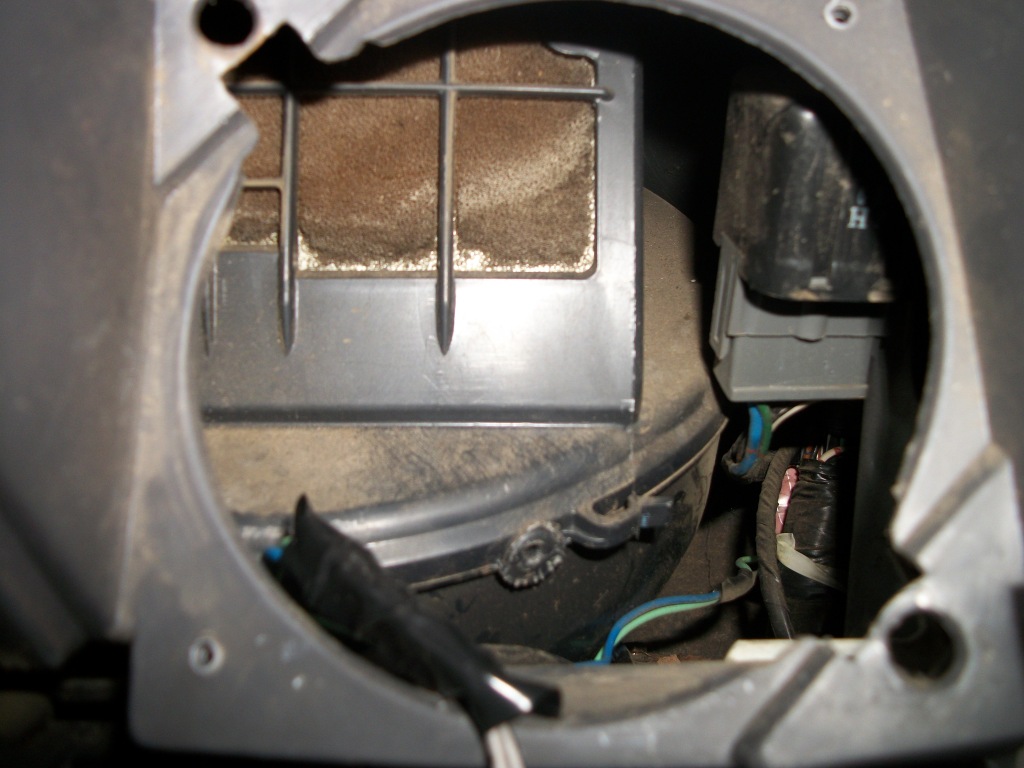
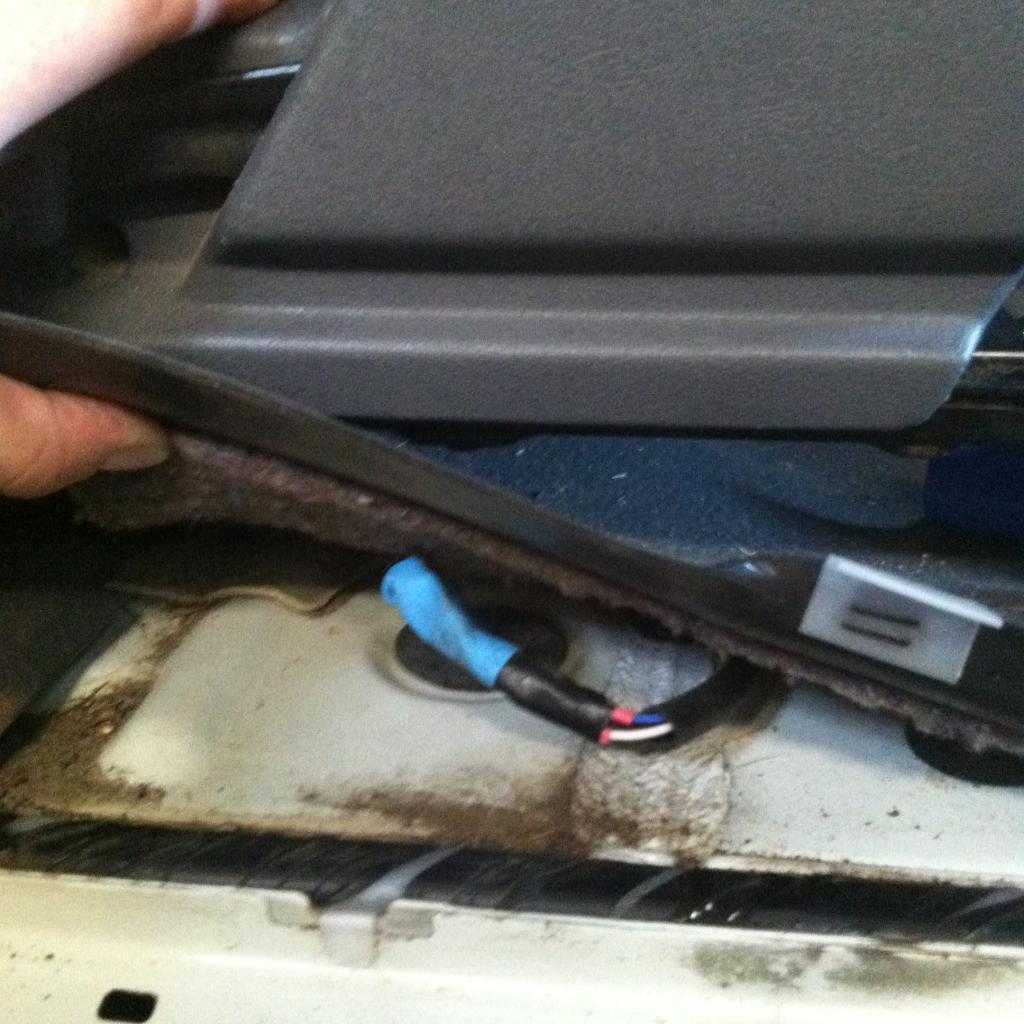
I pulled up the threshold plastic to run speaker wires. The blue plug here is where the O2 sensor exits the vehicle in 1988-1989 4Runners. It goes to the catalytic converter.
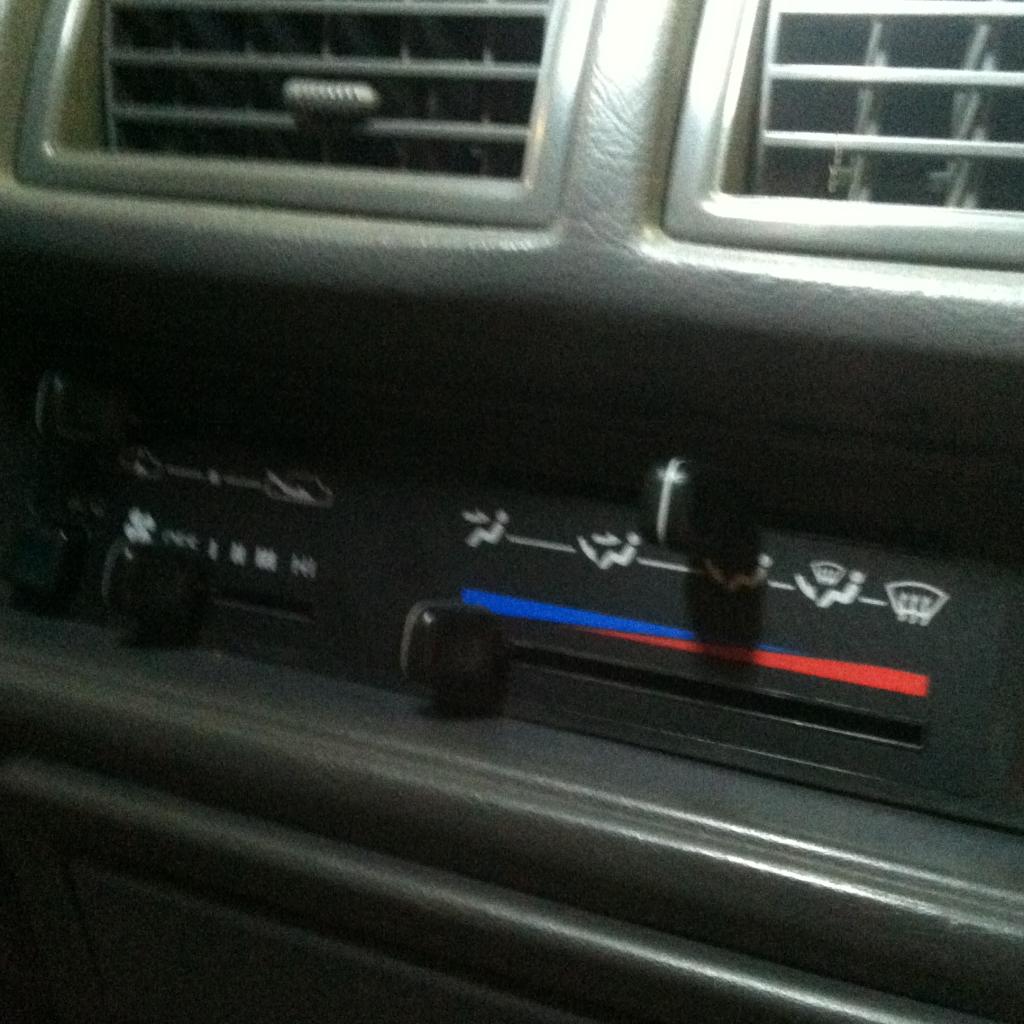
Old heater bezel was cracked. I got a new one a while back. They are only about $25 new from a Toyota parts place on line. Someone on eBay is selling them for $56. Don't pay that!
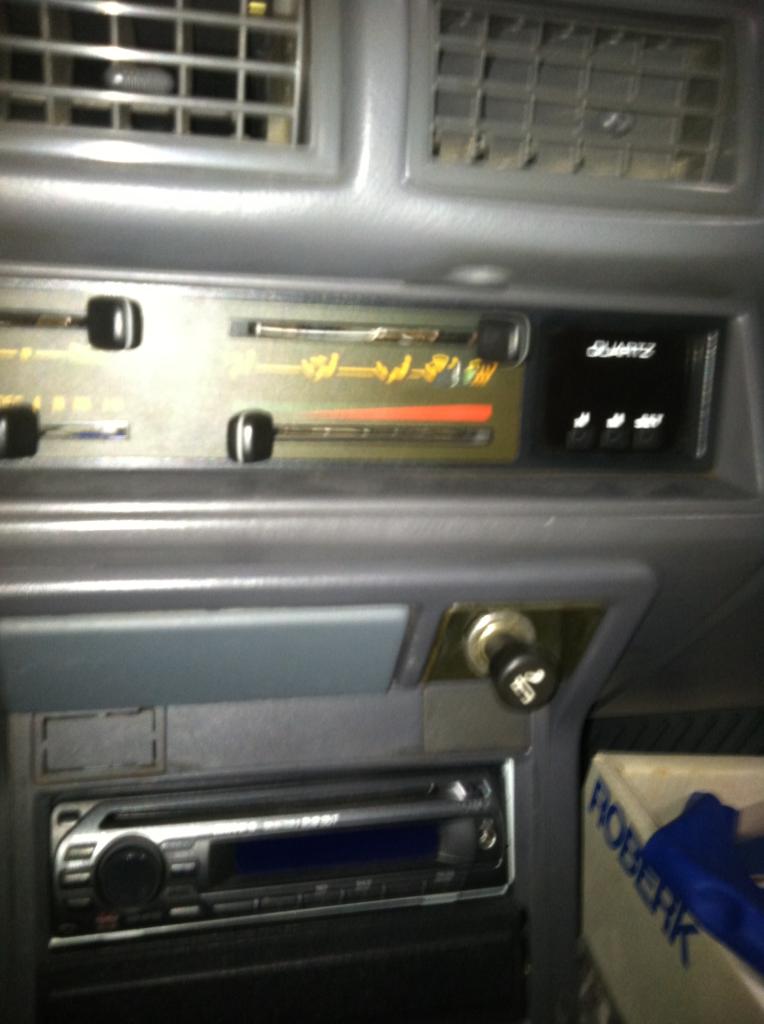
With a tiny screwdriver to pry out the old bezel it only takes about two minutes to change


Old Pioneer on left, new Infinity Kappa on right

Crutchfield says they don't fit. They do. Very easy installation and I
recommend them.
The DLX does not come with rear speakers and there is no wiring for them. First I lined the rear cargo sides with Frost King insulation from 's Home Depot. The roller is from Amazon and it's sold for sound deadener; it cost about $4.

Lined the rear. It stands a bit above the fender so I can monitor for rust. I put a small strip of Frost King below the jack rod to prevent rattle


The rears are 5 1/2" Infinity Kappas. I cut 1/4" luan plywood to 8" x 23" (IIRC) and mounted it temporarily. I put the rear plactic panels over and sent a wire through the center of the factory speaker holes. The wire had a gob of red lipstick and marked where the center of my hole needed to be. I removed the plywood, cut the hole for the speaker and wrapped the plywood with Frost King. The rear of the speaker is covered with $4 Boom Mat speaker baffles. This is a panel from the rear.

I nipped the end off plastic drywall anchors and mounted the speaker plywood in three places. It is not in contact with the fender. It is suspended.


The speakers are invisible to thieves


Since I was running speaker wire to the front it was a good time to take off the back seat panels. I had thought I would have to remove the rear seats but I didn't. The front seat belts needed to be unbolted. ChefYota sold me rear seat pockets a long time ago. They were a SR5 luxury. I repainted them with Duplicolor. I kind of winged the location of the buckets. Also Frost Kinged the inside.

Hint: do not use permanent Sharpie to mark cut lines. It cleaned up a little with alcohol but still.

I pulled up the threshold plastic to run speaker wires. The blue plug here is where the O2 sensor exits the vehicle in 1988-1989 4Runners. It goes to the catalytic converter.

Old heater bezel was cracked. I got a new one a while back. They are only about $25 new from a Toyota parts place on line. Someone on eBay is selling them for $56. Don't pay that!

With a tiny screwdriver to pry out the old bezel it only takes about two minutes to change

Last edited by Nervo19; 10-23-2014 at 10:21 AM.
10-23-2014, 10:38 AM
#14
Registered User
Thread Starter
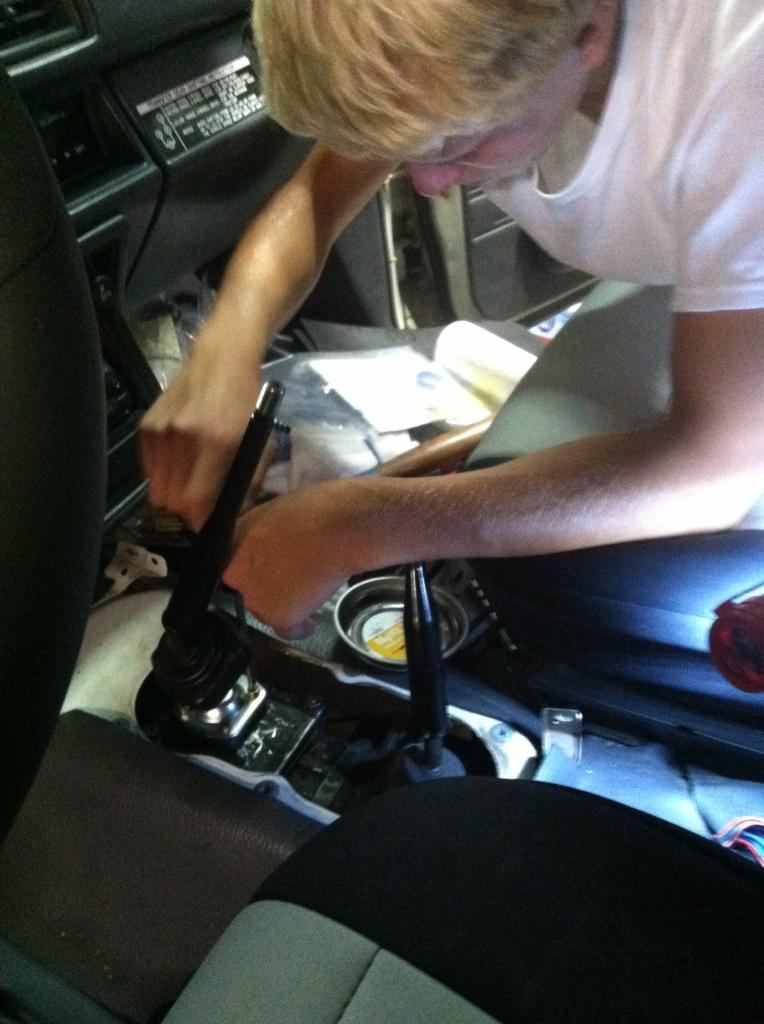
I had some shifting problems and decided to change out the shifter seat. I got the pieces from Marlin Crawler. I have a W56 transmission and I should have used the white seat but I ordered the red one. The red one shifts fine. It looks like 89 was a transition year and I just got lucky. I didn't have any snap ring pliers so I didn't change the 4WD one. This is the old seat. It doesn't look bad. Truck has about 148k on it. It was not shifting well.
I cleaned the rubber boot and wiped on some Meguiars Tire Shine. It looks new.
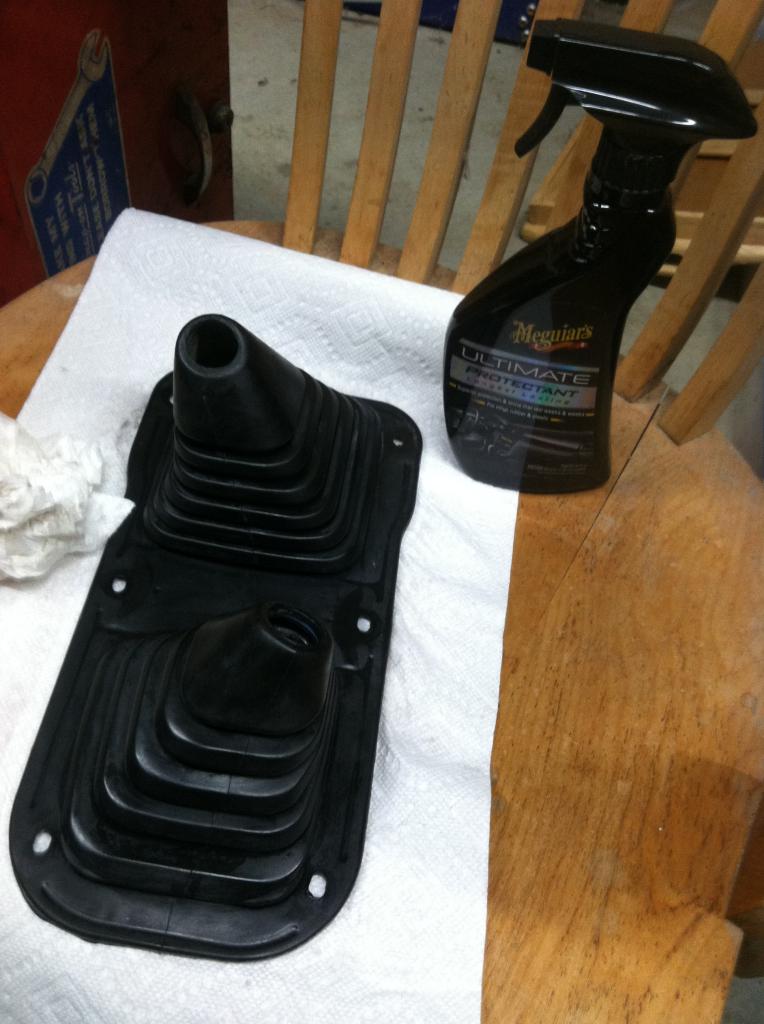
The metal trim ring wasn't bad but I sprayed it with some silver hammer finish paint.
My younger son is taking small engine repair and welding. Where was he when I was using fiberglass? Oh yeah, Middle school. He got the shifter back in.
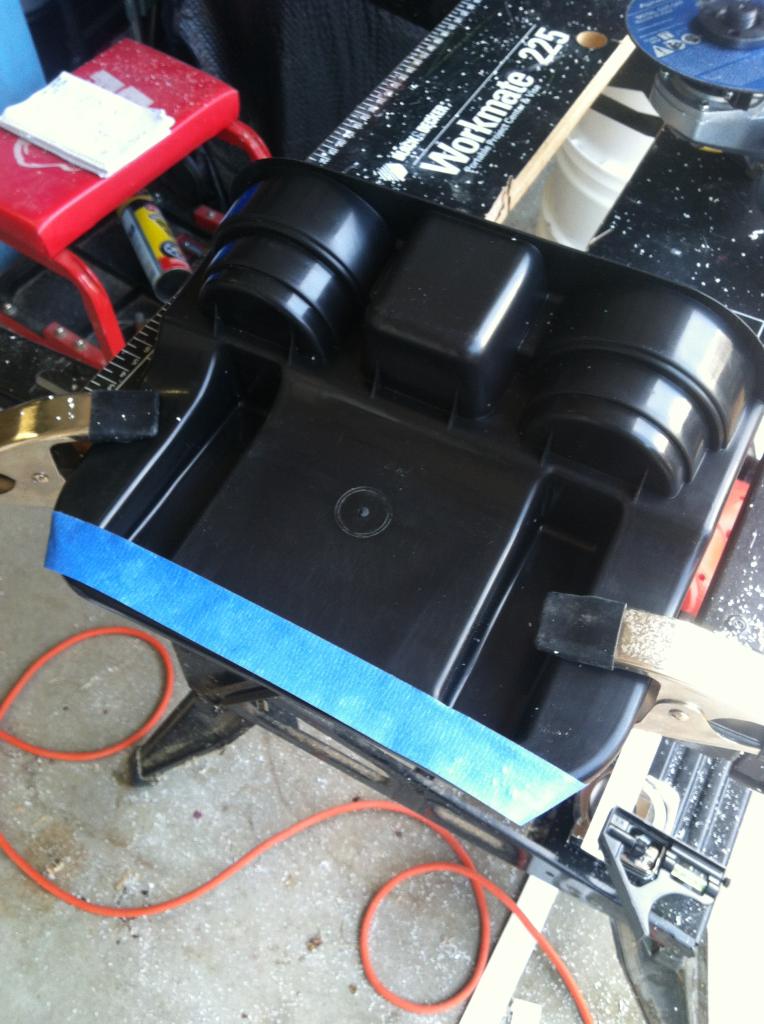
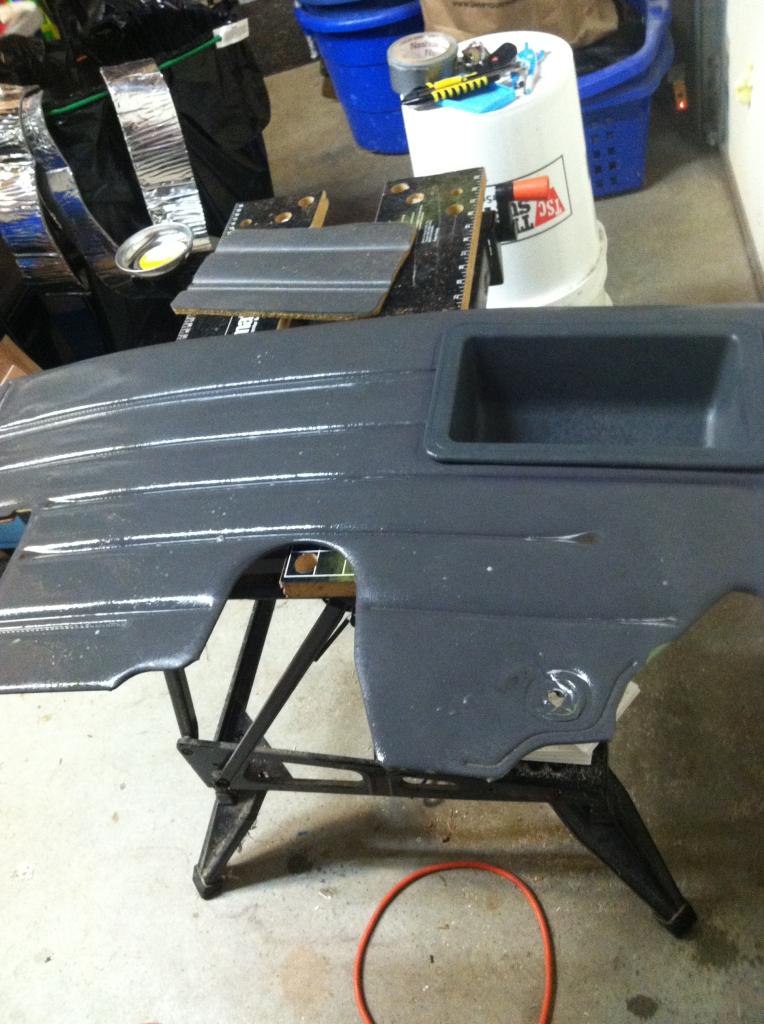
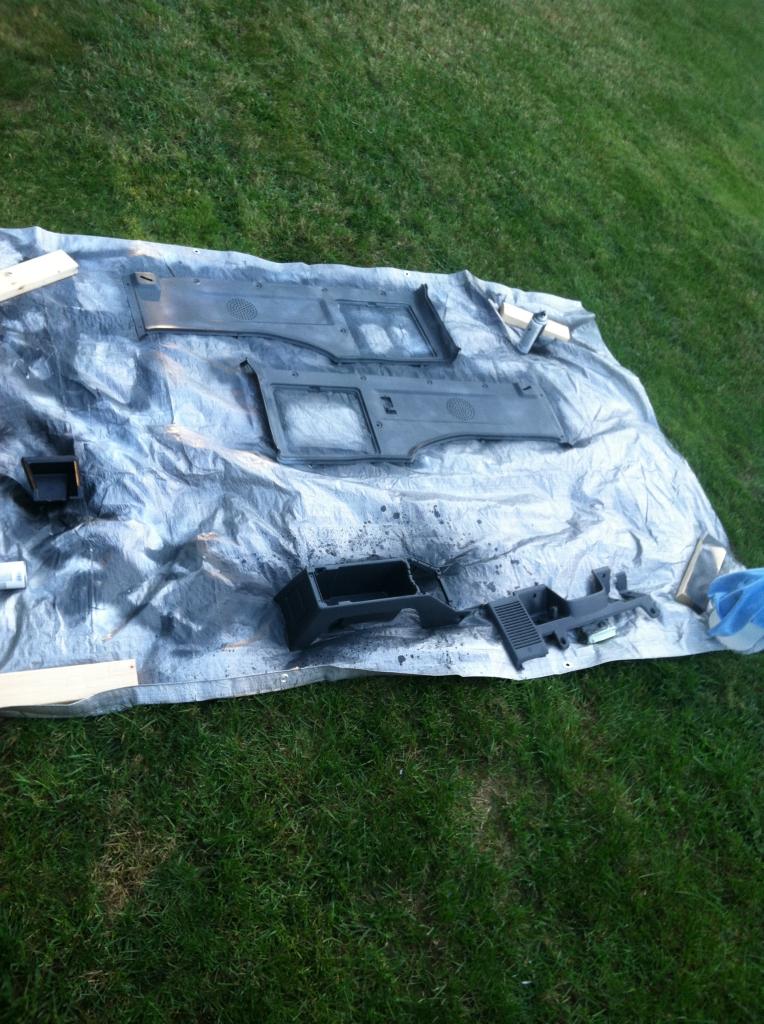
I'm painting some interior parts. I'm rebuilding a double decker console I got. It was painted black but I'm getting it back to gray. Progress is stalled because I got some peelage. I'm going to have to sand some and recoat. This is pretty much where I am now.

I cleaned the rubber boot and wiped on some Meguiars Tire Shine. It looks new.

The metal trim ring wasn't bad but I sprayed it with some silver hammer finish paint.

My younger son is taking small engine repair and welding. Where was he when I was using fiberglass? Oh yeah, Middle school. He got the shifter back in.

I'm painting some interior parts. I'm rebuilding a double decker console I got. It was painted black but I'm getting it back to gray. Progress is stalled because I got some peelage. I'm going to have to sand some and recoat. This is pretty much where I am now.
 10-23-2014, 11:09 AM
#15
Registered User
Thread Starter
That isn't the license number any more. I hope to get some smaller mirrors on soon. They are stainless.
 10-24-2014, 09:49 AM
#16
Registered User
Thread Starter
Trying to shrink pictures 640x400 Better?

 10-25-2014, 12:01 AM
#18
Super Moderator
Staff
iTrader: (1)
Join Date: Aug 2008
Location: Anderson Missouri
Posts: 11,788
Likes: 0
Received 21 Likes
on
19 Posts
The 600x400 is great. You have done a great job in bringing this runner back up. I think when you add the SR5 options and other upgrades, just make you a little more appreciative then if you just had an SR5. Those are things you will still enjoy long after you have done them. I always end up with base models. I like the drink holder you have on your doors. I have never seen them before and will be checking into them Thanks for posting those. You have a lot of work into this truck and great job. Always like seeing the kiddos involved in projects. They catch on quick and you never know what it may lead them into and the skills that they may have.
Last edited by Terrys87; 10-25-2014 at 12:03 AM.
10-25-2014, 01:34 PM
#19
Registered User
Thread Starter
I never heard of doing Peel n' Seal until KiyoBrown's build:
https://www.yotatech.com/forums/f199...thread-219271/
If you do a search for Peel n' Seal on Google there are a ton of good threads about it. The stuff I use is really to go around house doors and windows but for some reason Home Depot has it in the roofing section. I was just watching "This Old House" today and they were using my brand, Protecto Wrap in Boston. I used one roll in the two front doors and one roll of the Frost King in the rear sides, speaker boards and back seat sides. The doors have a nice substantial thunk when you closed them rather than the tin sound they used to have. You can do one area at a time. I recommend some interior panel tools so you don't break a lot of clips. I got these "trim tools" from Harbor Freight. They are $7.99 now. Autozone also sells something similar:


