Grego92's Retroactive and Current Build Up
 07-19-2012, 08:46 AM
#61
Registered User
Thread Starter
iTrader: (4)
Join Date: May 2010
Location: People's Republic of California
Posts: 720
Likes: 0
Received 15 Likes
on
12 Posts
Thanks guys...I'm gonna add some more details and photos and put a how to on the open forum for guys to search in future.
Mark, I got the boot off of ebay, kind of pricey but nice quality $50 shipped from the UK. He ships fast though.
http://www.ebay.com/itm/TOYOTA-4-RUN...item35a84ac655
Mark, I got the boot off of ebay, kind of pricey but nice quality $50 shipped from the UK. He ships fast though.
http://www.ebay.com/itm/TOYOTA-4-RUN...item35a84ac655
 07-19-2012, 11:40 PM
#62
Thanks, Grego! Got it bookmarked now... kept losing it, lol.... Gonna hold off on that buy until I see how much I'm into on the front end and Con-Ferr install... Then hold off from there for a bit! hahaha. I WILL be grabbing that! And it is NOT pricey compared to some, ya know? I would love one in charcoal gray.... but s'all good.... Between that and black... Gray definitely
08-20-2012, 09:41 PM
#63
Registered User
Thread Starter
iTrader: (4)
Join Date: May 2010
Location: People's Republic of California
Posts: 720
Likes: 0
Received 15 Likes
on
12 Posts
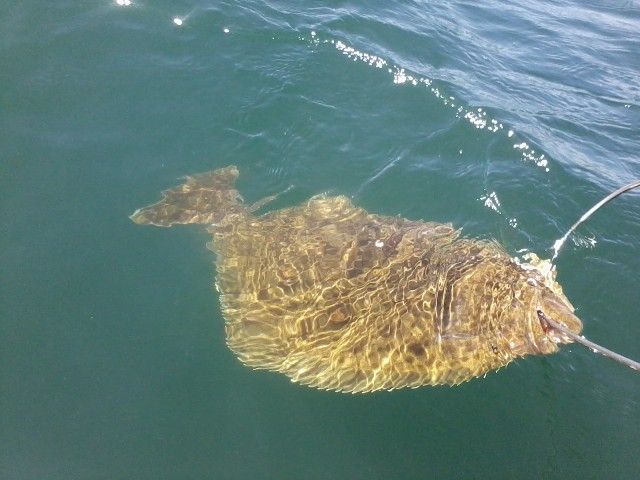
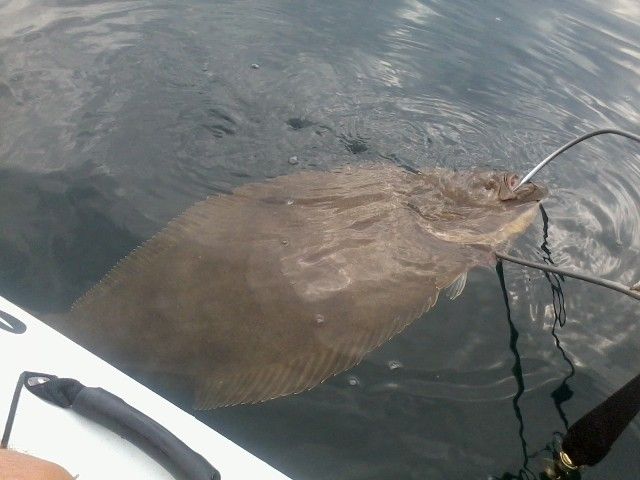
Been a month since I posted anything....that's because I haven't done anything! hahahha. Just taking a break from the truck, doing some yak fishing and camping up in the sierras. Here's some photos for entertainment purposes.
Couple 20lb'ish lb. halibut off of Torrance Beach
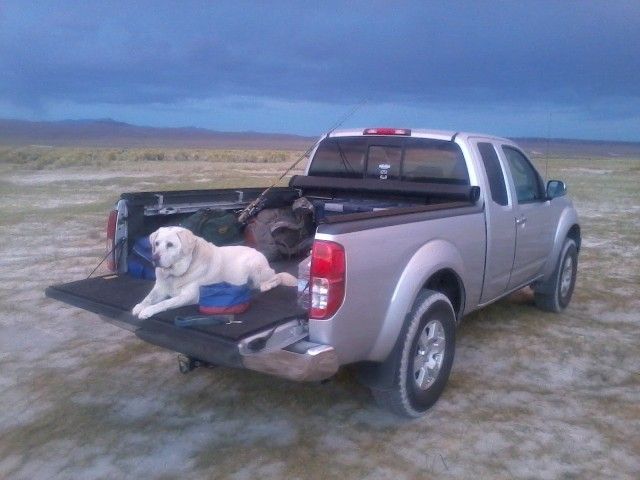
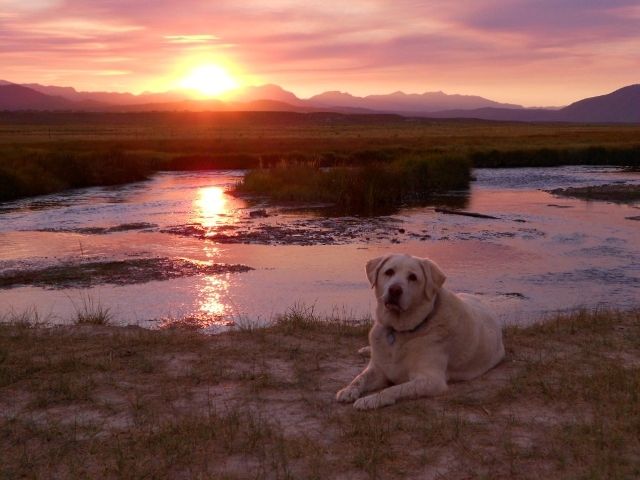
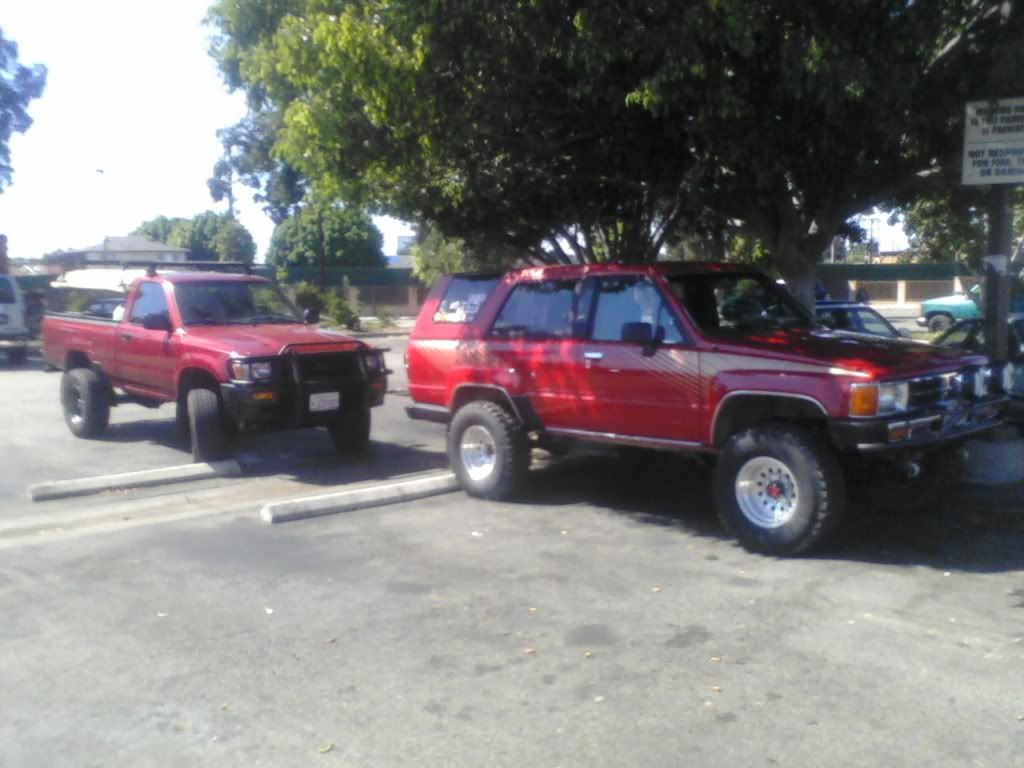
Pics from the sierras....left the yota at home and took the fronty, I needed the extra cab space for my Codi dog.
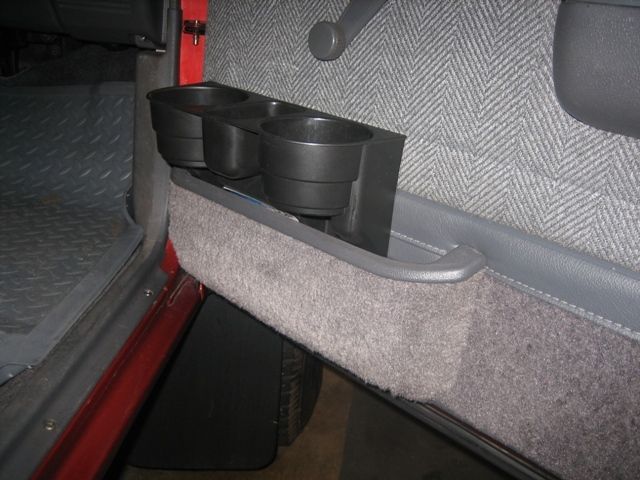
But I am doing some things now that I've gotten back and relaxed. For instance the Toyotech cup holder mod! Genius idea!!! Only the tech savy should attemp this mod though

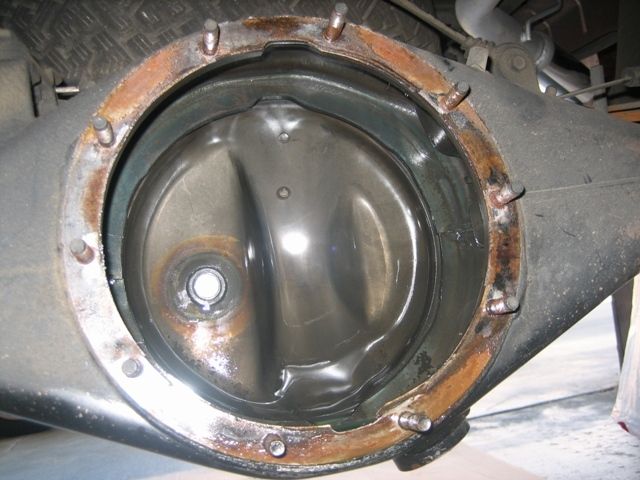
AND.....started the repair on my leaking rear differential. I was going to add a locker at the same time, but with the wedding coming up I gotta pinch pennies. So many unexpected costs are coming up and I have a feeling it isn't going to end yet.
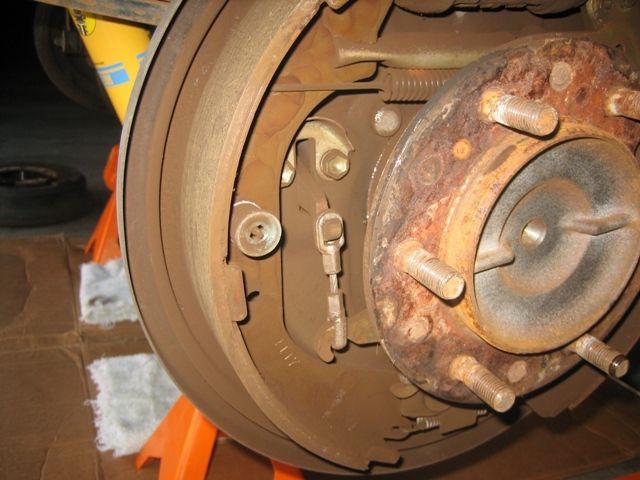
I actually cleaned it up and put it back on already, the fipg is drying and I'm waiting on some new filler/drain plugs and gaskets. I also ordered new drum shoes and hardware kits but the original pads are still looking great?! Should I replace them? or just clean off all the break dust with a can of brake cleaner and wait until i need to change them.
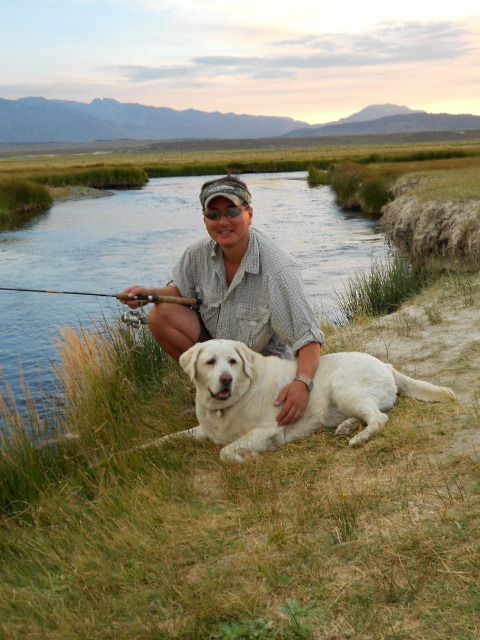
Since this entire post is pretty much off topic, here is a pic of my fiance, Chai


Couple 20lb'ish lb. halibut off of Torrance Beach
Pics from the sierras....left the yota at home and took the fronty, I needed the extra cab space for my Codi dog.
But I am doing some things now that I've gotten back and relaxed. For instance the Toyotech cup holder mod! Genius idea!!! Only the tech savy should attemp this mod though
AND.....started the repair on my leaking rear differential. I was going to add a locker at the same time, but with the wedding coming up I gotta pinch pennies. So many unexpected costs are coming up and I have a feeling it isn't going to end yet.
I actually cleaned it up and put it back on already, the fipg is drying and I'm waiting on some new filler/drain plugs and gaskets. I also ordered new drum shoes and hardware kits but the original pads are still looking great?! Should I replace them? or just clean off all the break dust with a can of brake cleaner and wait until i need to change them.
Since this entire post is pretty much off topic, here is a pic of my fiance, Chai
Last edited by Grego92; 08-20-2012 at 09:46 PM.
08-20-2012, 10:04 PM
#64
Wow, Grego, CONGRATZ! She's a cutie!
Looked like a GREAT TIME! Did you do Owens River fishing there? Or was that coming out of the Alabama Hills? That wide open spot looked kinda like Owens Valley/Near Owens Dry Lake.... but I'll just wait for you to tell me! lol... I LOVE the Sierras... Something about that WIDE open stretch of the 395hwy and Olancha Area... JUST BEAUTIFUL! Love camping over there... But sadly, even that has been trashed/let go badly at Dirty Sock Warm Spring, etc.
Again, Congratz! AND< ................. > I would leave the shoes for now, personally..... IF the drums look to not have any fingernail noticeable grooves. I usually check, clean em up if they're solid and slap em back together.
I think I have a Warped Front Rotor... THANKS for reminding me! lol... Hoping it's not a caliper... but dont' see how... Lifetime Warranty Altrom Stuff from Napa... So should be ok if it's not turnable. (I learned with some stores to have them mic'd and make sure... If they can be turned they wont warranty them out and give you new ones. hahaha. Weird, cuz my pads are FINE, ... discs seem to be wearing great... But I have a "shush-shush-shush" jerking, very SLIGHT, but there, when I brake and am down to low MPH's.. . Didn't wanna take the hubs apart again..... (bearings, etc.)... They're 10K mi. with new Koyo Bearings and races, seals, etc... GRRR! Maybe I can have them turned on there? Know anyone? hahaha.
Looked like a GREAT TIME! Did you do Owens River fishing there? Or was that coming out of the Alabama Hills? That wide open spot looked kinda like Owens Valley/Near Owens Dry Lake.... but I'll just wait for you to tell me! lol... I LOVE the Sierras... Something about that WIDE open stretch of the 395hwy and Olancha Area... JUST BEAUTIFUL! Love camping over there... But sadly, even that has been trashed/let go badly at Dirty Sock Warm Spring, etc.
Again, Congratz! AND< ................. > I would leave the shoes for now, personally..... IF the drums look to not have any fingernail noticeable grooves. I usually check, clean em up if they're solid and slap em back together.
I think I have a Warped Front Rotor... THANKS for reminding me! lol... Hoping it's not a caliper... but dont' see how... Lifetime Warranty Altrom Stuff from Napa... So should be ok if it's not turnable. (I learned with some stores to have them mic'd and make sure... If they can be turned they wont warranty them out and give you new ones. hahaha. Weird, cuz my pads are FINE, ... discs seem to be wearing great... But I have a "shush-shush-shush" jerking, very SLIGHT, but there, when I brake and am down to low MPH's..
. Didn't wanna take the hubs apart again..... (bearings, etc.)... They're 10K mi. with new Koyo Bearings and races, seals, etc... GRRR! Maybe I can have them turned on there? Know anyone? hahaha.
08-21-2012, 10:43 PM
#65
Registered User
Thread Starter
iTrader: (4)
Join Date: May 2010
Location: People's Republic of California
Posts: 720
Likes: 0
Received 15 Likes
on
12 Posts
Thanks! she's a keeper for sure.
Yup, the Owens valley is where those pics were taken. We took a drive down from the mammoth area and did a little stream fishing. Plenty of trout to be caught there, I just haven't caught anything big yet from there.
The shoes have some uneven wear on the forward shoes, and from what I've read not too much of a concern but still shouldn't wear like that. I think the springs or pins or something or another may be wearing out, can't remember what I read...hahhahhaa. Just read enough to convince me to change the shoes and hardware while I'm in there. Since I already have them anyhow and plus I went and bought one of those cheap drum brake tool kits from HF that was on sale, might as well try it out if I can figure out how to use them!
I never changed drum brakes, so I'm sure it will be an adventure and learning experience.....the halibut will have another day to live! muuuaaahhahhahahhaaaa
Last edited by Grego92; 08-21-2012 at 10:44 PM.
08-21-2012, 11:24 PM
#66
YES.... I just tore down my front end(removing CV's for rebooting... And WOW, the triangular pin-spring that sits ON TOP of the vented portion of the rotors?(yeah, mine isn't the drums making drama, lol)... That pin, IT SNAPPED! I think I found my 'shush-shushhh-shushhhhh-shushhhhhhhhh' as I come to stops, type of 'wave' like a warped rotor. Anyway, ... the spring is, indeed, snapped. AND, the other one on the side, the longer one? SNAPPED! HOLY CRAPLULA, this could have been worse, ya know? THANK GOD, the rotor snapped it off and sent it to the road... Otherwise, 'SKEEEEEEEEEEEEEEEEEEEEEET' groove into the rotor! VERY doubtful they'd warranty that... Maybe they would, I don't know, but they'd have been REALLY hard to turn. Funny thing, too.... I have them off months ago to take a look, cuz ... well, just a lil squeeky. BUT NOTHING, I swear. But I grabbed a "Brake Spring Kit from Napa for an 87 4Runner... sitting in my shed, waiting to be put on/brakes all cleaned up and KEEP ROLLIN! lol. The rotors look NEW! Gotta love Altrom-or-OEM parts like Rotors/calipers... THEY WORK LONG TIME! lol.
CONGRATULATIONS, ONCE AGAIN, GREGO... you're a solid/very nice dude,.... and it's a GREAT thing to have a solid nice gal to share this journey with, ya know?
CONGRATULATIONS, ONCE AGAIN, GREGO... you're a solid/very nice dude,.... and it's a GREAT thing to have a solid nice gal to share this journey with, ya know?
Last edited by ChefYota4x4; 08-21-2012 at 11:25 PM.
09-06-2012, 07:08 PM
#67
Registered User
First of all great looking dog! Love to see people making dogs part of the family.
2nd of all WOW!!!!!!! DUDE YOUR TRUCK LOOKS AWESOME. Now i officially know 2 guys with extremely clean trucks. I mean i know many others with clean trucks. But you and Chefyota both have extremely clean trucks. RBX too, but damn your guys's engines look sooooooo CLEAN! very nice man. BTW after seeing your engine pix on pg 1 i see why you put that post on my page lol. "if my motor is gonna look like this i think ill pass on the off road trip" or w/e it was. cant think of it exactly off the top of my head lol
3rd KICK ASS job on the door panels talk about reconstructing your own! I love seeing creative stuff like what you did on those. Great job man.
LOVE THE DOG btw!!!!
Last edited by Redeth005; 09-06-2012 at 07:11 PM.
09-08-2012, 11:07 AM
#68
Registered User
Thread Starter
iTrader: (4)
Join Date: May 2010
Location: People's Republic of California
Posts: 720
Likes: 0
Received 15 Likes
on
12 Posts
Thanks Richard, LOVE my Lab, he's been the best dog I've ever had. He's getting old though, going on 13 but still plays around like a puppy. I've had a Boxer, Cocker Spaniel, and an Akita before him, and he is by far the best all around. I think only my Akita showed more loyalty (albeit a little too much, no one could jokingly grab me around him or he'd get ready to take them down). When that sad time comes, I will get another english lab. The english/european are more stout, broader chests, shorter legs, and a box shaped head.
On to the truck. So what I've done lately is fixed the rear differential leak using fipg. Since I had to remove the axles to do that I also replaced the inner axle seals as preventive maintenance. Also, replaced the drum brakes, master cylinder, and wheel cylinders. Bleeding that system was a PITA. I went and bought the system that uses a compressor from Harbor Freight. With the coupon it was $25, and I highly recommend it.
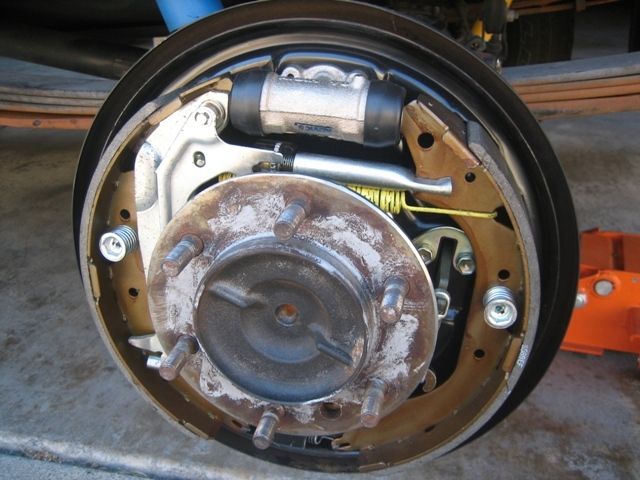
Drum Brakes BEFORE:
Drum Brakes and new Aisin Wheel Cylinders AFTER:
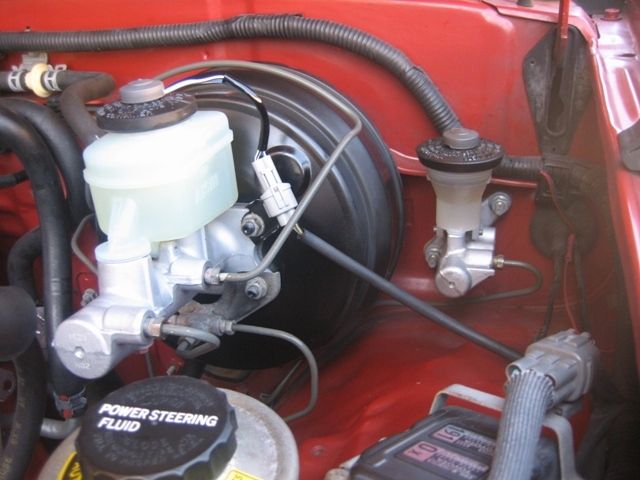
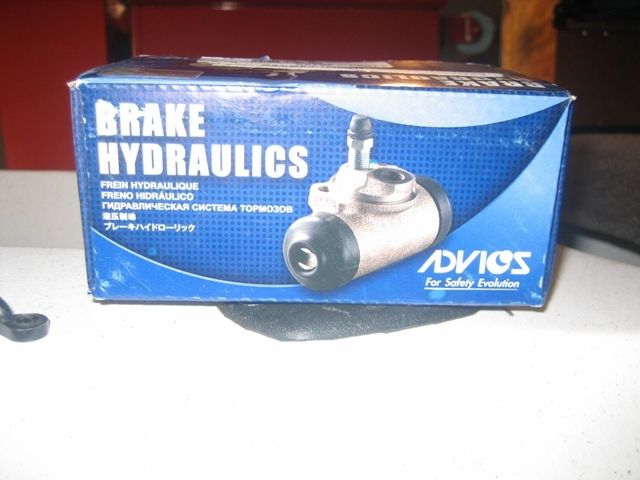
New Aisin Master Cylinder
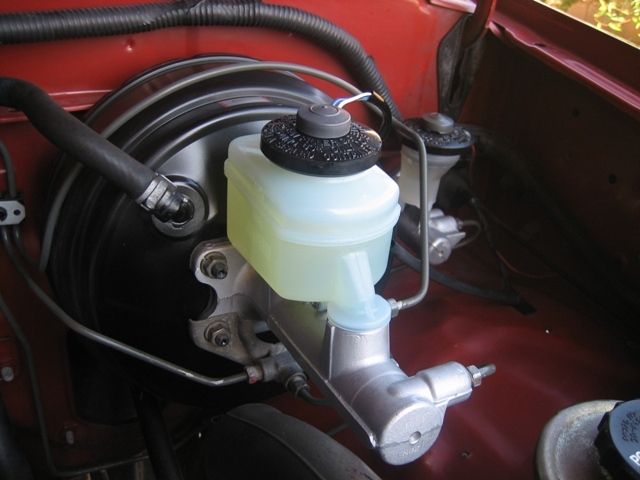
What I noticed was the Aisin parts came in a box labeled "Advics". I'm assuming that is the new name? I have no idea. But the master and wheel cylinders were still engraved with Aisin.
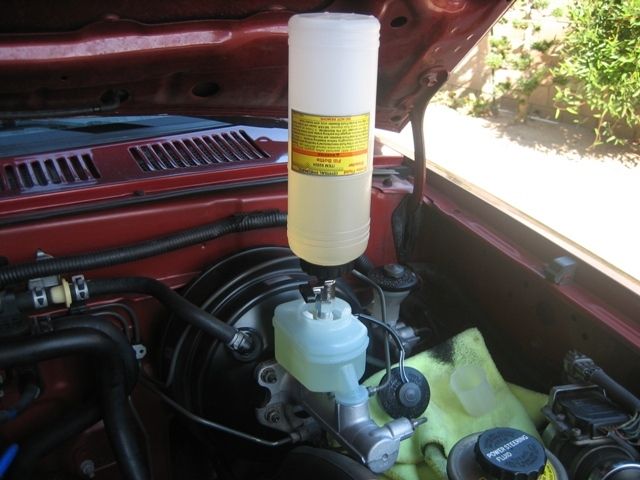
The fill bottle from the HF kit. Awesome product, it keeps filling the reservoir as you bleed.
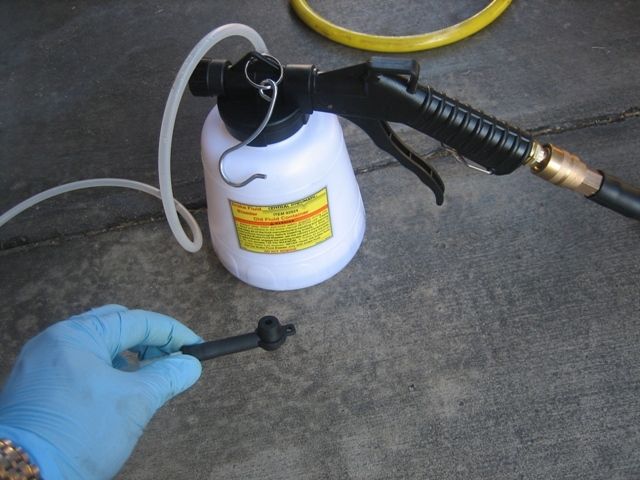
The vacuum piece that you hook up to the bleeder. I figured out that it worked great so long as you didn't open the bleeder screw too much and just a little pull on the trigger to keep a constant vacuum just enough to suck the fluid out. If you open the screw up too much it seems like the bubbles will never stop coming out.
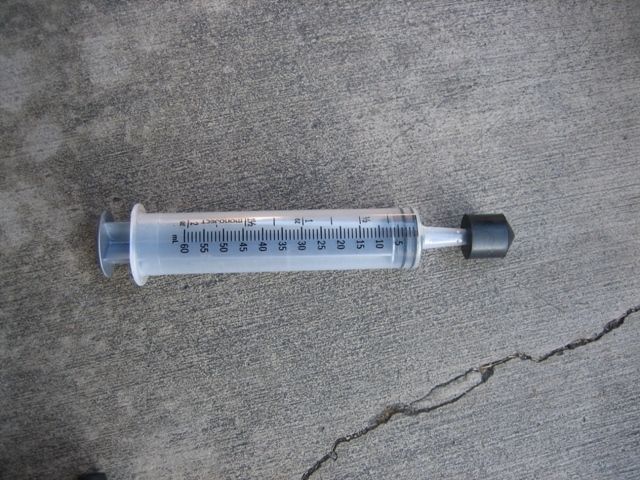
This syringe was the best thing to use to bench bleed the master cylinder.
On to the truck. So what I've done lately is fixed the rear differential leak using fipg. Since I had to remove the axles to do that I also replaced the inner axle seals as preventive maintenance. Also, replaced the drum brakes, master cylinder, and wheel cylinders. Bleeding that system was a PITA. I went and bought the system that uses a compressor from Harbor Freight. With the coupon it was $25, and I highly recommend it.
Drum Brakes BEFORE:
Drum Brakes and new Aisin Wheel Cylinders AFTER:
New Aisin Master Cylinder
What I noticed was the Aisin parts came in a box labeled "Advics". I'm assuming that is the new name? I have no idea. But the master and wheel cylinders were still engraved with Aisin.
The fill bottle from the HF kit. Awesome product, it keeps filling the reservoir as you bleed.
The vacuum piece that you hook up to the bleeder. I figured out that it worked great so long as you didn't open the bleeder screw too much and just a little pull on the trigger to keep a constant vacuum just enough to suck the fluid out. If you open the screw up too much it seems like the bubbles will never stop coming out.
This syringe was the best thing to use to bench bleed the master cylinder.
Last edited by Grego92; 09-08-2012 at 11:10 AM.
 09-08-2012, 08:46 PM
#70
UPDATES! lol..... Gotta see a video of that seat installed and 'ELECTRO-WORKIN-ITS-MAGIC!' lol....
GREAT seeing you again, today, Grego... IT'S SO MUCH BETTER going with others, ya know? Well, .... most often. This was one of those cases. All of us have gotten goodies recently
GREAT seeing you again, today, Grego... IT'S SO MUCH BETTER going with others, ya know? Well, .... most often. This was one of those cases. All of us have gotten goodies recently
09-08-2012, 09:09 PM
#71
Registered User
OH CRAP! wow Greg Sick job on those drum brakes. They look great! Mine look more like your before picture lol. BTW It was nice to meet you today. Definitely didnt expect to run into more then one yotatech guy there at the junk yard on the same day lol. And thanks for your help. I doubt i would have been able to get that Steeringbox off myself without your/Mark's help. We definitely need to go offroading together in the near future.
BTW here are my 2 dogs. I love them so much. The smaller one is a 1.5year old Pit-bull/German Shepherd mix. The big one is a 7 or 8 year old Rottweiler. I love these dogs so much. They have always been so loving, protective and have always been the best hiking buddies to take on that 12 mile hike i told you about. This is actually a picture of them on that hiking trip. Its funny how they literally patrol the area when we go hiking. My big dog stays next to me as the little one runs up a few yards ahead of us, Then she stops and looks around turns around to face us and gives the big dog the "ok look" and then when we catch up to the small one will do it again. Sometimes its the other way around. It's like they have this little system between the 2 of them that i never taught them. They just picked it up themselves it was kind of weird because they just started doing that out of nowhere. But for some reason i think they do that to protect us. i just think its too adorable lol but i do feel safe when i go hiking with them. haha Plus i especially like taking them because they can carry extra waters in those backpacks i bought them. before i used to have the big Rottie carry my first aid kit. But ever since we started doing the 12mile hike more often i started making them carry their own waters and their own dog food. They love it. I wanna take the smaller one on an offroad trip one of these days. The bigger one gets too motion sick and will never be able to handle the movement in the truck lmao!!!
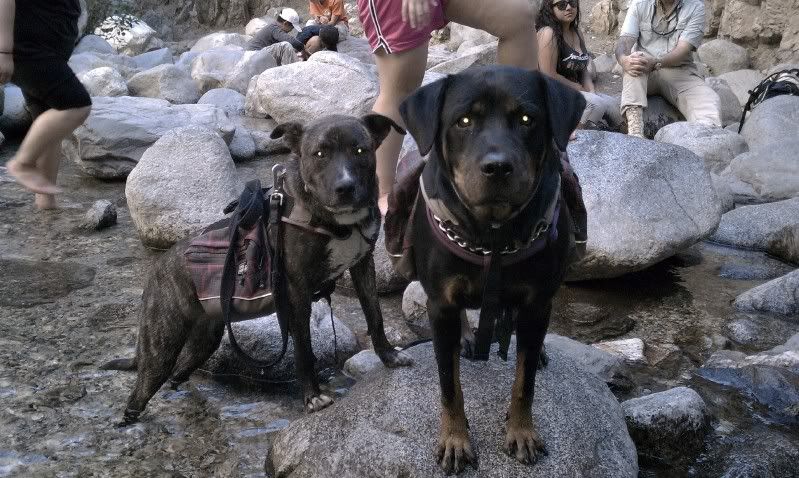
BTW here are my 2 dogs. I love them so much. The smaller one is a 1.5year old Pit-bull/German Shepherd mix. The big one is a 7 or 8 year old Rottweiler. I love these dogs so much. They have always been so loving, protective and have always been the best hiking buddies to take on that 12 mile hike i told you about. This is actually a picture of them on that hiking trip. Its funny how they literally patrol the area when we go hiking. My big dog stays next to me as the little one runs up a few yards ahead of us, Then she stops and looks around turns around to face us and gives the big dog the "ok look" and then when we catch up to the small one will do it again. Sometimes its the other way around. It's like they have this little system between the 2 of them that i never taught them. They just picked it up themselves it was kind of weird because they just started doing that out of nowhere. But for some reason i think they do that to protect us. i just think its too adorable lol but i do feel safe when i go hiking with them. haha Plus i especially like taking them because they can carry extra waters in those backpacks i bought them. before i used to have the big Rottie carry my first aid kit. But ever since we started doing the 12mile hike more often i started making them carry their own waters and their own dog food. They love it. I wanna take the smaller one on an offroad trip one of these days. The bigger one gets too motion sick and will never be able to handle the movement in the truck lmao!!!
Last edited by Redeth005; 09-08-2012 at 09:14 PM.
09-09-2012, 08:30 AM
#72
Registered User
Thread Starter
iTrader: (4)
Join Date: May 2010
Location: People's Republic of California
Posts: 720
Likes: 0
Received 15 Likes
on
12 Posts
Nice meeting you yesterday Richard! that was some fun getting that steering gear off, well, it was fun watching you guys! 
Nice dogs! but they look MEAN!!! dang! Cracking up about your dogs trading off taking point, I think they're a lot smarter than we think.
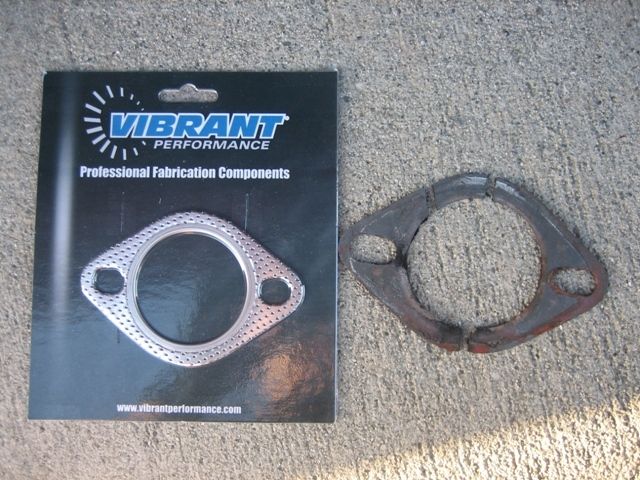
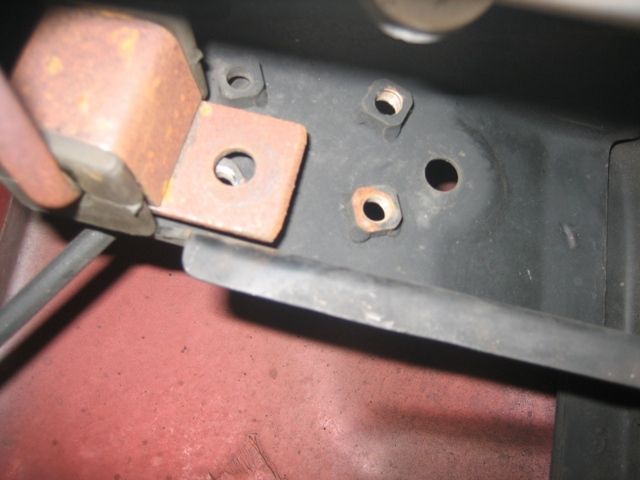
While we were at the yard talking story in the parking lot, I was amazed how quiet Mark's (Chef's) engine was!!! I was jealous! Mark started listening to mine and said "sounds like you have exhaust leaks". After some close examination Eagle Eye Mark identified an exhaust leak by the cat...condensation was spitting out. So I fixed that this morning which quieted things down a bit, but while doing that I found a bigger culprit! The screw from the hanger had fallen out right above it! So that was causing some noise also and probably would helped vibrate the gasket loose and eventually cracked it. That was all good news since it was an easy fix.
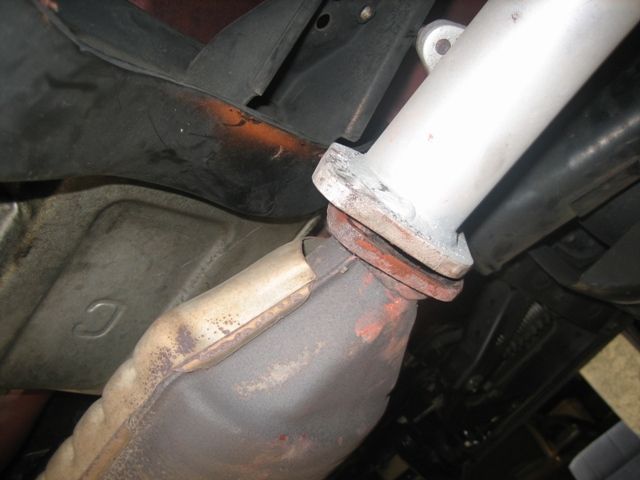
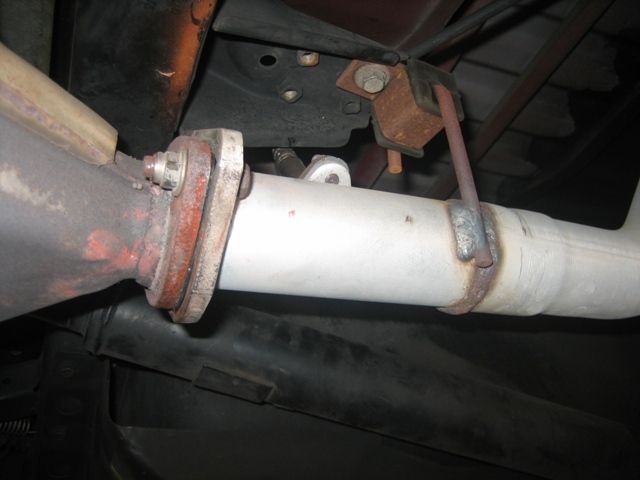
All Fixed!
NOW FOR THE BAD NEWS!!
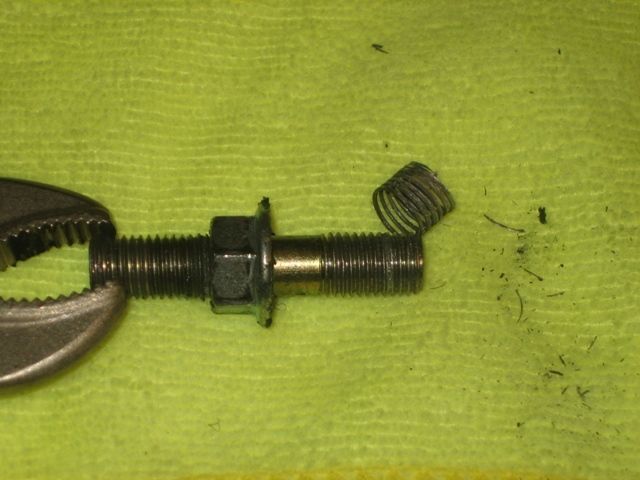
Mark also said it sounded like I had leaks around the header. So I also started checking my header bolts, and sure as heck 4 of them could be turned using just a 3/8 wrench. So I torqued 3 of them up and THEN found this one..............
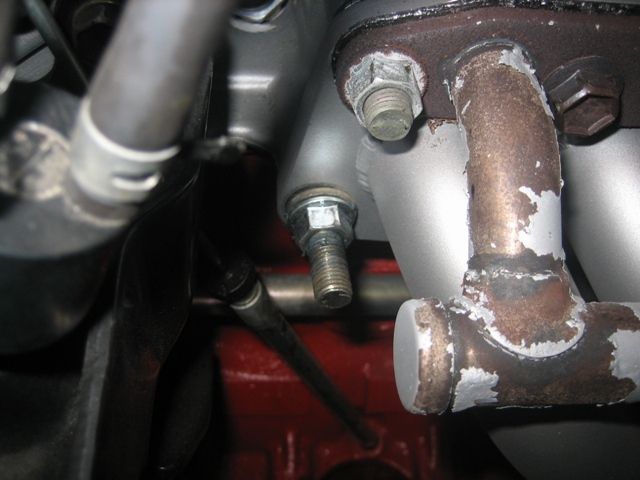
You can see it is slightly bent. At first I thought it was just stripped and added a locking washer to see if that would help....nope that stud is going to break off soon. I have to get it out and probably tap it larger and use a bigger stud. Any suggestions? At least I found another reason why my engine is so damn noisy compared to Chef's
Nice dogs! but they look MEAN!!! dang! Cracking up about your dogs trading off taking point, I think they're a lot smarter than we think.
While we were at the yard talking story in the parking lot, I was amazed how quiet Mark's (Chef's) engine was!!! I was jealous! Mark started listening to mine and said "sounds like you have exhaust leaks". After some close examination Eagle Eye Mark identified an exhaust leak by the cat...condensation was spitting out. So I fixed that this morning which quieted things down a bit, but while doing that I found a bigger culprit! The screw from the hanger had fallen out right above it! So that was causing some noise also and probably would helped vibrate the gasket loose and eventually cracked it. That was all good news since it was an easy fix.
All Fixed!
NOW FOR THE BAD NEWS!!
Mark also said it sounded like I had leaks around the header. So I also started checking my header bolts, and sure as heck 4 of them could be turned using just a 3/8 wrench. So I torqued 3 of them up and THEN found this one..............
You can see it is slightly bent. At first I thought it was just stripped and added a locking washer to see if that would help....nope that stud is going to break off soon. I have to get it out and probably tap it larger and use a bigger stud. Any suggestions? At least I found another reason why my engine is so damn noisy compared to Chef's
09-09-2012, 08:44 AM
#73

 09-09-2012, 08:49 AM
#74
nice job on the brake job. all new stuff is nice. i run mine till they leak lol anyways if the stud is just bent on the outside, dont know how. why not install a new stud and be done. or find exactly how long the hole is and use a bolt instead of a stud and nut
just saw the updated picture. you sure thats not a heilcoil?
just saw the updated picture. you sure thats not a heilcoil?
09-09-2012, 09:03 AM
#75
Registered User
Thread Starter
iTrader: (4)
Join Date: May 2010
Location: People's Republic of California
Posts: 720
Likes: 0
Received 15 Likes
on
12 Posts
No, it's the aluminum from the head....kinda looks like it though don't it. What would you do toyo? I wonder if there are deeper threads and like you said try using a longer bolt instead of a stud.
09-09-2012, 09:37 AM
#76
Hey buddy..... Great news you found some things... And shucks.... you're makin me blush, haha...
OK, ..... first, I HAVE a Helicoil-Napa Kit and I HAVE a 13/32nds Drill Bit/SHORTY EVEN(had it custom made)... Anyway, I have the full kit and you can VERY much so borrow the drill bit and tap... I also have a T/Manual handle drill to tap them out....
Lemme know, you'd be welcome to pick it up.... (I have no idea if you've done any.... but I'd gladly show you how if you need it.).... My REAR most upper one went on me.... PITA! MUCH harder spot to get into than that one^^^.... Should be pretty cake ....... BTW, .... my lower rear most one is 'spinning' now..... <<<<< Pouts WITH ya! hahaa.
OK, ..... first, I HAVE a Helicoil-Napa Kit and I HAVE a 13/32nds Drill Bit/SHORTY EVEN(had it custom made)... Anyway, I have the full kit and you can VERY much so borrow the drill bit and tap... I also have a T/Manual handle drill to tap them out....
Lemme know, you'd be welcome to pick it up.... (I have no idea if you've done any.... but I'd gladly show you how if you need it.).... My REAR most upper one went on me.... PITA! MUCH harder spot to get into than that one^^^.... Should be pretty cake
....... BTW, .... my lower rear most one is 'spinning' now..... <<<<< Pouts WITH ya! hahaa.
09-09-2012, 09:44 AM
#77
PS> I'll take a pic of one of my helicoil inserts... NOT SURE that is one or not... It's POSSIBLE it backed out... Or jumped a thread(IF it didn't get tapped right???) Just seems a lil unlikely to me... BUT, it also seems odd to have such a perfect 'CURL' of 'SHAVING', ya know? Hmmmmmm....
I'm sure the Heli could work it's way out on the bolt IF it's corroded on there enough/with enough electrolysis, etc.? Thought it was almost all stainless/aluminum... BUT, you have OEM studs.... or LCE? OEM are NOT stainless iirc. LCE are..... LCE are longer, too... which I would think you'd used. PERSONALLY? I think it's a Catch 22 on the "Pull all the studs when you have the head off for rebuild" and "Replace them if you're removing the header after a longggg while".... Because Aluminum STRIPS OUT, period! It freezes up over those old exhaust studs..and OOPS! lol... Sure, lots of mine came out problem free... at least 2 DID NOT, ya know?... as I've had to tap out one and will soon be doing another.
I'm sure the Heli could work it's way out on the bolt IF it's corroded on there enough/with enough electrolysis, etc.? Thought it was almost all stainless/aluminum... BUT, you have OEM studs.... or LCE? OEM are NOT stainless iirc. LCE are..... LCE are longer, too... which I would think you'd used. PERSONALLY? I think it's a Catch 22 on the "Pull all the studs when you have the head off for rebuild" and "Replace them if you're removing the header after a longggg while".... Because Aluminum STRIPS OUT, period! It freezes up over those old exhaust studs..and OOPS! lol... Sure, lots of mine came out problem free... at least 2 DID NOT, ya know?... as I've had to tap out one and will soon be doing another.
09-09-2012, 09:51 AM
#78
I will find the tap size for ya.... If it IS indeed tapped to the ready for the appropriate heli..... you should be able to find out by trying to insert another Heli(or maybe see if that size tap-out bolt fits?/I'd be CAREFUL on that... but it's worth seeing... .... If it takes, you know it's been done... IF NOT, even if it appears stuck in there,... NOT hard to pick it out, and you'll have a drill in there anyway, if so, so no biggie, right?
Might first; chase the thread size and pitch of the 'TAP' it would be... just to see if it's already been drilled out... And you can ALSO CLEARLY tell, usually, if it's been drilled out in there to a larger hole for the tap, ya know? I mean.... IF THAT WAS a heli... the drill bit meant to prep that hole for the tap should fit RIGHT IN THEREjust trying to turn it in there by hand, not powered)... But not in another, ya get me? BUT, just shaving out the threads like that... that doesn't mean the drill bit will fit in there... Itwouldn't.
As I said... I have that bit, if you don't... PRETTY sure it's 13/32nds
Last edited by ChefYota4x4; 09-09-2012 at 12:48 PM.
09-09-2012, 12:49 PM
#80
Registered User
Thread Starter
iTrader: (4)
Join Date: May 2010
Location: People's Republic of California
Posts: 720
Likes: 0
Received 15 Likes
on
12 Posts
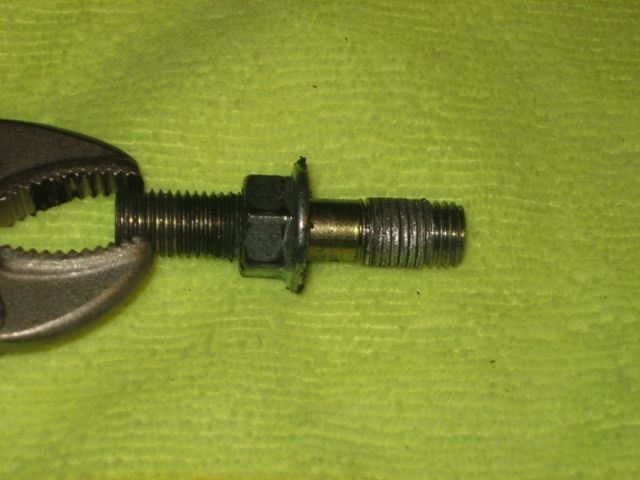
It's not a helicoil that came out, it's aluminum and thin. So soft that I easily stretched it out. This is not the first time I've encountered this. It's the exact same thing that happened to my cam cap bolt holes, took the aluminum threads right out. That's when I had the famous "vellios" machine shop helicoil that hole and they screwed it up by not first removing the pins that help line up the caps, so the pins widened which wouldn't let the caps fit. I had to remove the pins and luckily the dealer sells them.
Below is a helicoil that I was going to use on the cam cap hole but decided to let a "pro" do it.
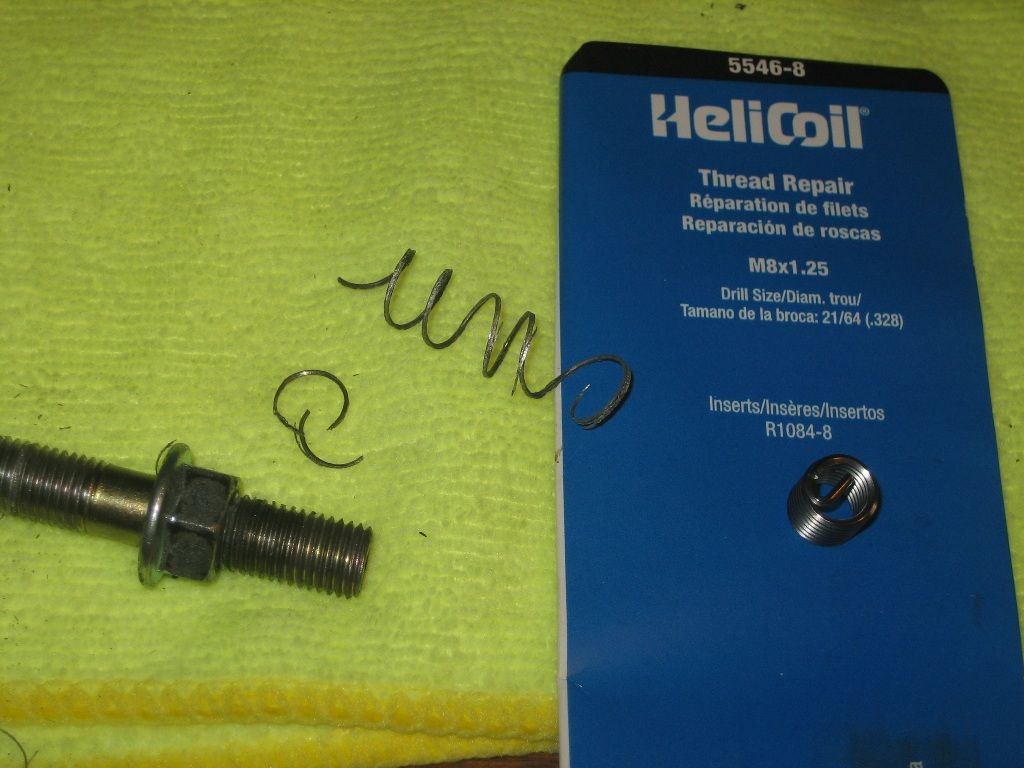
It is not a helicoil that came out, it is the original head and I had the head done when rebuilding, and I did not have any helicoils put in the holes for the LCE studs.
I was able to get my camera down there and I do see some threading left. I think I'm going to chase it first and see if I have enough to get a bolt down there, if not, helicoil it is.
Thanks for the offer Mark, probably could use some help if that time comes. Gotta find the size and pitch to chase the hole, anyone know off the top of their head?
Below is a helicoil that I was going to use on the cam cap hole but decided to let a "pro" do it.
It is not a helicoil that came out, it is the original head and I had the head done when rebuilding, and I did not have any helicoils put in the holes for the LCE studs.
I was able to get my camera down there and I do see some threading left. I think I'm going to chase it first and see if I have enough to get a bolt down there, if not, helicoil it is.
Thanks for the offer Mark, probably could use some help if that time comes. Gotta find the size and pitch to chase the hole, anyone know off the top of their head?


