CO_94_pu's 1994 truck Build-Up Thread
 03-07-2013, 06:44 PM
#81

Productive day got the whole list done
Productive day got the whole list completed, and found something to hammer on too.
Rain(T-storm?!) tomarrow, then snow but we might get into the 60's next week going to feel like a heat wave!
Didn't get to the rear rims, ran out of time sort of and didn't think it a good idea to pull and strip them. Rain & snow and truck on jackstands in the dirt seems a bad idea. Which just reminded me I ment to get a picture of how bad it sunk overnight, glad I put the tires on temporarily, had to lift up abit on the control arms to get the tires under it
TODO:
rear passenger side

rear driver side

All the rims except the drivers front looked about this bad
Passenger before, (not specific, AKA you've seen this pic before)

Driver before, (same bumper smile/frown post)

I was just planning todo the lugs in flat black so they didn't look like junk next to the new paint but decided why not and threw some of the candy apple red on them over the black. The color really stands out in the sun. I don't think I'll try blending it on the fender like I wanted to.
AFTER!
D-side


You can really see how the red pops in the sunlight in this one.

P-side
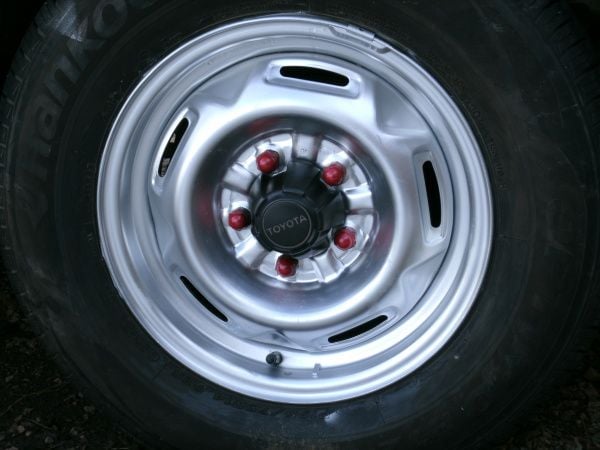

Single coated the backsides of the rims in black, double coated the front in AL. Double coated the nuts in black, then two more of the red metallic, and a coat of clear to finish.
Got the shell sealed at the front, and did a little tugging on the not so straight forward wall to get it to meet the shell. Bed rail still isn't straight or flat but it meets the weather strip atleast now. Should be reasonably weather tight now. Still a minor issue with the front window gasket thing, rusted out clips in the gasket along the P-side bottom. These "clips" are like a heavy duty type stable maybe out of spring steel so in theory they are replacable.
Got the shell evened out, aka straight, and tight to the cab also aligned with the back edge of the bed. Cut four blocks from a 1x2 to use as locators, so I don't have to fuss with getting it lined up every time I take it off. But while getting ready to screw them in place I broke my drill bit, not paying attention and pushed too hard on an odd angle Oops. Didn't go dig out self tapping screws , as digging thru the coffee cans full of misc hardware isn't "fun" and it was dark by this time.
Didn't do the full brake pedal inspection, just made sure it was at about the right height. I didn't want to mess with the floor mats carpet and under-vinyl. And made sure the return spring wasn't sagging. Seems fine.
Caliper inspect, yuck, 5-10 years of baked on misc road water and such. Ran out of brake cleaner again, I use it for too much non-brake stuff (Clearing rattle can nibs, cleaning around the oil fill cap, ect), so didn't have anything to atleast give it a once over with. Rotors need gauged soon, inside has a noticable lip forming
Need to pull and inspect the front wheel bearings and cups and repack them, had noticable play and looked a little dry with some off color grease in spots on the hub cap. On a semi related side not, WTH doesn't look like my nearest auto store stocks NLGI#2 #@$! Will have to try the M&P hardware or the tractor shop. Did a "by ear" adjustment since I don't have a spring scale currently.
Repaired some PO damage to the camper shell. CL guy or the PO before that, used a pair of visegrips or pliers to bend the weather strip on the hatch. It was bend up/outwards and wasn't sealing against the tailgate, ripples and nasty plier teeth marks. Got it mostly straight and ripple free, now it sits nice and tight against the tailgate. You can't see daylight thru it anymore and it should be a lot quieter now that the latchs hold it solid.
Was going to try getting the bumper valance center screws in but didn't get to it, I uh kinda forgot I was going to try with a longer wrench like my adjustable. Thinking a longer handle might do it, an obstruction aka door-latch wrench would certainly work but I don't have those anymore.
Need to redo the center cap lettering, not sure what color those are supposed to be. White? Also maybe wet sand and clear coat them, they're starting to show UV damage. Where did the plastics guy go Can you rebake ABS to fix that, it's that crystaline brittle look, not sure if outgassing is a problem or if the "rubber" is. Preliminary research says the polymer chains loosen and will re curl when exposed to increasing temps... Anyways yeah I need to redo the lettering on my center caps but not sure what color they're supposed to be looks like a grey or creame color, but I don't know if thats dirt or my eyes
Oh and find a proper screw for the D-side marker light before it rubs another giant spot on the bumper.
Materials list: Screw, NLGI#2, spring scale, dye and a trough big enough to fit my dash board in.
I'm curious to know, if anyone has extra 90's trim pieces laying around, how they fair in bleach or "rit color remover" with and without acetone. Maybe I can get something other than black for a dash that would kickass! But since I'm on the "ramen noodle budget" I don't think I'll be expermenting anytime soon.
Rain(T-storm?!) tomarrow, then snow but we might get into the 60's next week going to feel like a heat wave!
Didn't get to the rear rims, ran out of time sort of and didn't think it a good idea to pull and strip them. Rain & snow and truck on jackstands in the dirt seems a bad idea. Which just reminded me I ment to get a picture of how bad it sunk overnight, glad I put the tires on temporarily, had to lift up abit on the control arms to get the tires under it
TODO:
rear passenger side
rear driver side
All the rims except the drivers front looked about this bad
Passenger before, (not specific, AKA you've seen this pic before)
Driver before, (same bumper smile/frown post)
I was just planning todo the lugs in flat black so they didn't look like junk next to the new paint but decided why not and threw some of the candy apple red on them over the black. The color really stands out in the sun. I don't think I'll try blending it on the fender like I wanted to.
AFTER!
D-side
You can really see how the red pops in the sunlight in this one.
P-side
Single coated the backsides of the rims in black, double coated the front in AL. Double coated the nuts in black, then two more of the red metallic, and a coat of clear to finish.
Got the shell sealed at the front, and did a little tugging on the not so straight forward wall to get it to meet the shell. Bed rail still isn't straight or flat but it meets the weather strip atleast now. Should be reasonably weather tight now. Still a minor issue with the front window gasket thing, rusted out clips in the gasket along the P-side bottom. These "clips" are like a heavy duty type stable maybe out of spring steel so in theory they are replacable.
Got the shell evened out, aka straight, and tight to the cab also aligned with the back edge of the bed. Cut four blocks from a 1x2 to use as locators, so I don't have to fuss with getting it lined up every time I take it off. But while getting ready to screw them in place I broke my drill bit, not paying attention and pushed too hard on an odd angle Oops. Didn't go dig out self tapping screws , as digging thru the coffee cans full of misc hardware isn't "fun" and it was dark by this time.
Didn't do the full brake pedal inspection, just made sure it was at about the right height. I didn't want to mess with the floor mats carpet and under-vinyl. And made sure the return spring wasn't sagging. Seems fine.
Caliper inspect, yuck, 5-10 years of baked on misc road water and such. Ran out of brake cleaner again, I use it for too much non-brake stuff (Clearing rattle can nibs, cleaning around the oil fill cap, ect), so didn't have anything to atleast give it a once over with. Rotors need gauged soon, inside has a noticable lip forming
Need to pull and inspect the front wheel bearings and cups and repack them, had noticable play and looked a little dry with some off color grease in spots on the hub cap. On a semi related side not, WTH doesn't look like my nearest auto store stocks NLGI#2 #@$! Will have to try the M&P hardware or the tractor shop. Did a "by ear" adjustment since I don't have a spring scale currently.
Repaired some PO damage to the camper shell. CL guy or the PO before that, used a pair of visegrips or pliers to bend the weather strip on the hatch. It was bend up/outwards and wasn't sealing against the tailgate, ripples and nasty plier teeth marks. Got it mostly straight and ripple free, now it sits nice and tight against the tailgate. You can't see daylight thru it anymore and it should be a lot quieter now that the latchs hold it solid.
Was going to try getting the bumper valance center screws in but didn't get to it, I uh kinda forgot I was going to try with a longer wrench like my adjustable. Thinking a longer handle might do it, an obstruction aka door-latch wrench would certainly work but I don't have those anymore.
Need to redo the center cap lettering, not sure what color those are supposed to be. White? Also maybe wet sand and clear coat them, they're starting to show UV damage. Where did the plastics guy go
Can you rebake ABS to fix that, it's that crystaline brittle look, not sure if outgassing is a problem or if the "rubber" is. Preliminary research says the polymer chains loosen and will re curl when exposed to increasing temps... Anyways yeah I need to redo the lettering on my center caps but not sure what color they're supposed to be looks like a grey or creame color, but I don't know if thats dirt or my eyes Oh and find a proper screw for the D-side marker light before it rubs another giant spot on the bumper.
Materials list: Screw, NLGI#2, spring scale, dye and a trough big enough to fit my dash board in.
I'm curious to know, if anyone has extra 90's trim pieces laying around, how they fair in bleach or "rit color remover" with and without acetone. Maybe I can get something other than black for a dash that would kickass! But since I'm on the "ramen noodle budget" I don't think I'll be expermenting anytime soon.
 03-08-2013, 06:41 PM
#83
Decided, again, napa's website sucks. Found wheel bearing grease instock and not in tractor quantities, same stuff I have in my grease gun and spare tubes on the work bench. Ooops, guess I could have done the repack. Then I wouldn't of had as much time to spend hammering, and hammering is more fun and visually rewarding
Ordered a brake rebuild kit, and a tailgate handle. Nothing fancy I'm afraid but it'll keep my hand out of the tailgate hole and give me piece of mind incase I tear anything working with the calipers. Didn't pay for fancy shipping so they probably won't be here untill it's snowing again however.
Found a self tapping screw and got the camper shell locating blocks attached, it's not pretty but I was just aiming for functional for now. Will try to remember to pick up two sticks of 1x2", that will look better and be a nice drop in fit if I bevel half of the outside edge.
Also decided it's way to cold to sleep on/in that bed the cold soaks right thru the rubber bed mat, will have to see about picking up a little bit of 1-2" fanfold.
Moisture missed me by atleast a few miles, might of been able to get the rims painted Oh well, gives me something todo while I wait for parts after the storm passes.
Still can't find pictures of the hub covers from mid 90's, all the brochures have the spoke mags or the turbine mags, or the "new" toyota logo which wasn't painted. Guess maybe I'll go with white since I have that in a paint pen it'll be easier that doing the acrylic stuff again since the Titanium white I have is such a pain to get all the lumps out of.
Ordered a brake rebuild kit, and a tailgate handle. Nothing fancy I'm afraid but it'll keep my hand out of the tailgate hole and give me piece of mind incase I tear anything working with the calipers. Didn't pay for fancy shipping so they probably won't be here untill it's snowing again however.
Found a self tapping screw and got the camper shell locating blocks attached, it's not pretty but I was just aiming for functional for now. Will try to remember to pick up two sticks of 1x2", that will look better and be a nice drop in fit if I bevel half of the outside edge.
Also decided it's way to cold to sleep on/in that bed the cold soaks right thru the rubber bed mat, will have to see about picking up a little bit of 1-2" fanfold.
Moisture missed me by atleast a few miles, might of been able to get the rims painted
Oh well, gives me something todo while I wait for parts after the storm passes.Still can't find pictures of the hub covers from mid 90's, all the brochures have the spoke mags or the turbine mags, or the "new" toyota logo which wasn't painted. Guess maybe I'll go with white since I have that in a paint pen it'll be easier that doing the acrylic stuff again since the Titanium white I have is such a pain to get all the lumps out of.
03-08-2013, 07:58 PM
#84
Registered User
Our napa sucks too. So are you planning on putting a camper shell on it and living out of it too?? haha! Still to early in the year to be doing that. Post a pic of the center cap your looking for...
03-08-2013, 09:20 PM
#85
I was out there in a pair of sweatpants doing the shell locators and thought "Holy crap, don't sit down. Brrr!"
I got the shell for a couple reasons. Primarily it keeps the bed from becoming a bath tub in the snow and rain, since I don't have covered parking. It lets me haul my rc sailplane without having to box or crate up the wing. Lets me haul my trike w/o worrying about it "walking off" or the seat cover blowing off. And apparently I wanted a 1st gen 4runner and just didn't know it yet

It is a hightop shell like the picture I posted awhile back from the toyota reference website. So You can sit up, stoop your way in and out(I tend to scrape my back or bang my head alot cause I forget it comes down a little at the back.
I haven't had the shell too long and haven't got around to checking how the trike fits in. I know to get it in my sister-in-law's SUV I need to pull the rear tire so the seat back clears thru the drop in the back gate.

If you're going to have a camper shell you might as well go camping, right! It's been awhile I must say. I have maybe 3-4 tents and I don't think I have a single pole left anymore. Of course tents kind of suck, fire smoke, morning dew, body stink all that not so fun stuff.
A sleeping platform would be a nice thing, maybe, but I'm still not sold. Out of sight stowage, vs lost height. Expense and weight, vs useable space. Lack of a garage to store it should I need to haul some garden stuff..
My girl isn't the camping type really, her idea of camping is grampa's 50' rv
 Not to mention she doesn't get a lot of time of, she's a nurse, and would much rather have the comfy bed.. I could maybe talk her into it alittle easiler if I there was something a little more substancial than a piece of nylon between use and the critters. Anyways yeah it's been awhile since I got to watch the sun rise from the continental divide on a nice mnt top.
The caps are in the rim photos, I'm colorblind so Uhm.. Greyish not white, something.. Doesn't help the one I got a flash photo of isn't the one I cleaned more than just a quick dip and scrub. Judging from the first pic of the unwashed ones, I'd say it's road grime grey
I don't mind my steelies, but noticed all the pamphlet pics had mags or maybe full caps where I just have vanity rings on the rears(Tire shop lost my front ones and it took me a week to notice *shrug*). Kind of wish I'd of noticed my spares don't match sooner, there used to be a semi-local CL ad guy had stacks of toyota steelies for 5$ a piece.
03-09-2013, 05:56 AM
#86
Registered User
I here ya on old school...i have no smartphone, flat screen tv (19' w vcr and a badass collection of vcr tapes) but id be lost without my computer and getting on yotatech or craigslist or slacker radio NO FACEBOOK though. Your centercaps are black, which i personally do not have but i can keep an eye out for ya. I also have a topper for my 88 truck which i occasionally will sport for camping or like you mentioned to keep weather out. You dont have your location posted so i forgot where your at.
03-09-2013, 03:04 PM
#87
Sorry misunderstanding. My hub/center covers are still intact, I just need to find the original color for the lettering. So I can refurbish em before UV clear coat.
Well they said rain yesterday and snow today but I'm getting abit of both today. Ice one side and driping/melting crap on the other side of the truck. Good time to inspect the weather strips.
Small gap in the front P-side, crazing in the gelcoat goes all the way thru to the fiberglass at the top corners of the rear lift window, horrible wicking thru the base frame , all the windows seem to be holding better since tightening the screws(these have been re-chaulked by a PO, just didn't get the screws tight).
Nothing todo 30mph gust and wet heavy snow For some reason my gate handle didn't ship yesterday, no shipping on weekends from rockauto's warehouses BOOOO.
Well they said rain yesterday and snow today but I'm getting abit of both today. Ice one side and driping/melting crap on the other side of the truck. Good time to inspect the weather strips.
Small gap in the front P-side, crazing in the gelcoat goes all the way thru to the fiberglass at the top corners of the rear lift window, horrible wicking thru the base frame , all the windows seem to be holding better since tightening the screws(these have been re-chaulked by a PO, just didn't get the screws tight).
Nothing todo 30mph gust and wet heavy snow
For some reason my gate handle didn't ship yesterday, no shipping on weekends from rockauto's warehouses BOOOO.
03-11-2013, 05:20 PM
#88
Got my caliper seals. again nothing fancy like OEM, rebadged beckly/arn. Looks like maybe an opened returned item, bag seal broke couple of finger prints in what looks like white lithium grease, that has been on the shelf ssince the 90's(olde tape really, olde with an E). Everything is there, even a dab of lube in a packet, the piston seals had stuck together. If i was a newbie I'd of thought they were the wrong parts but non-powdered rubber tends to want to stick to it's self, +1 for experience.
Got a liter of brake fluid, spec sheet doesn't say the capacity Some glycol caliper lube, note there is a TSB they've switched to a silicone based grease presumably fluid also. And a cone bearing packer, just felt like being lazy maybe, it was cheaper than a bag-o-rags. Another can of brake cleaner, on sale for less than 3$ nice should have got 3-4 Was going to pick up wheel bearing grease but when I got there I recognized the package as whats already in my lube gun, bonus(?).
New marker bulb i couldn't find at the salvage yard, grr 1.75$ again, it's not even a HD bulb! And the missing screw for the lamp, flatheads are for prying not screws people, think they didn't charge me for that too lazy to walk over and get the part# off the bin. Screw doesn't solve my lamp rubbing the bumper issue, not sure if it's the bumper or the fender that needs adjusted but I'm not beating on my freshly painted bumper so I'll blame the fender.
On a fender note, they're really cheap at rock auto 30-60$ but then they add on 75 for shipping DOH.
Forgot to get caliper paint, might forgo the full cleaning and just see how lubing the pins works out. I've got to drive to denver tomarrow night and want to atleast get the bearings relubed. A full clean, paint and bleed job on the brakes might take longer than I have
Parked in the mud to give the snow drift a chance to melt, hope I can get back out.
Got a liter of brake fluid, spec sheet doesn't say the capacity
Some glycol caliper lube, note there is a TSB they've switched to a silicone based grease presumably fluid also. And a cone bearing packer, just felt like being lazy maybe, it was cheaper than a bag-o-rags. Another can of brake cleaner, on sale for less than 3$ nice should have got 3-4 Was going to pick up wheel bearing grease but when I got there I recognized the package as whats already in my lube gun, bonus(?).New marker bulb i couldn't find at the salvage yard, grr 1.75$ again, it's not even a HD bulb! And the missing screw for the lamp, flatheads are for prying not screws people, think they didn't charge me for that too lazy to walk over and get the part# off the bin. Screw doesn't solve my lamp rubbing the bumper issue, not sure if it's the bumper or the fender that needs adjusted but I'm not beating on my freshly painted bumper so I'll blame the fender.
On a fender note, they're really cheap at rock auto 30-60$ but then they add on 75 for shipping DOH.
Forgot to get caliper paint, might forgo the full cleaning and just see how lubing the pins works out. I've got to drive to denver tomarrow night and want to atleast get the bearings relubed. A full clean, paint and bleed job on the brakes might take longer than I have
Parked in the mud to give the snow drift a chance to melt, hope I can get back out.
03-14-2013, 07:22 PM
#89
Did some dye tests today. Didn't go as well as I'd hoped.
Some of the trim is PP(polypropylene), A-pillers, kick-panels, rocker trim, seat trim, seatbelt covers. Pretty much everything but the upper and center dash.
To dye PP it must be chlorinated.. Found this on the web, it is aimed at PP fabric and yard.
The first one is bleach thats not so hard, the second is hydrogen-chloride thats not so easy. RIT has a color stripper that might work, didn't get any and have no idea of the formula.
Looks like paint for those. It's the same material as the light bezel which takes the flat black really well, I've knicked that bezel with a screw driver and it didn't chip has good color "penetration".
Did an ABS thumbdrive case. Well tested on.
The PC guys use liquid RIT and water only. The RC guys use powdered RIT and acetone. I tryed both.
Scarlet..
100ml A, 150 W, 100 D, room temp wasn't taking color
200ml A, 150 W, 100 D, room temp wasn't taking color or wasn't taking color fast enough, increased temp to ~130-135 with a hot water bath.
Formula #2 was taking color, not a deep color(not enough D?), but was too soft handling left finger prints thread left impressions.
50/50 Black-Water, hot water bath @130 + microwave(unknown temp) pre drip.
Produced a darking of the prior pink color(maybe grey now?) while ABS was still semi soft.
After several rinses and some time in the black it became fully solid again. Sanded off the color on one side to compare color and penetration. And put it back in the black with hot bath. It only took a little color and it looked more green than anything else(Yay color blind, doing color work).
Water and dye works for the PC guys at sub boiling temps. ~30% Acetone works for the RC guys ~@140.
I did come up with atleast one solution for a large enough tub, metal garbage can can be cut in half and welded to form a large trough. Not sure which would be cheaper buying a trash can, or sourcing a 6ft length of sheetmetal and (literally) rolling my own.
Might just go with paint or interior spray, for simplicity. Considering dyeing the seat fabrics black or red also, but I need to find a spot for a test swatch.
Inconclusion, dye tests were "meh.."
Back to the show, or atleast the teasers. I'll have some more photos soon.
Striped out the, lower trim, seats, and carpet.
Rinsed the carpet, it's getting a soap soak now. Will get atleast one more rinse and maybe scrubbing before I haul it to the car wash to hit it with the power washer.
Got lots of plastic to wash, still need to get the seat belt covers off the retainers and motors.
Lubing my brake pins may or may not of made my brake drag worse but atleast they're not stuck like they were.
Want to get new seals and wheel bearings. Turns out they're all original a new set of timkens would probably make it alot happier. Didn't have the seals on hand (of course) so decided to hillbilly repack the inner bearing without pulling it or the less than superb seal.
 it rolls down the big hill again w/o bleeding off all it's speed. Some more front end love might even get it back to picking up speed like it was before I added the shell.
Have to hold off on paint and body some more, rain inbound. Should have checked the forecast before I got started this evening, I might of dealt with the mud and got the back rims painted.
O2 code is back again, Yeah I know change it but I fear it's going to want a new pipe which means I'd have to deal with my other exhaust issues which I'm not ready for yet. Will give a once over at the diag port and see whats going on, maybe tomarrow.
Anyways pictures tomarrow so long as I remeber to take them and the batteries don't give me too much grief.
Some of the trim is PP(polypropylene), A-pillers, kick-panels, rocker trim, seat trim, seatbelt covers. Pretty much everything but the upper and center dash.
To dye PP it must be chlorinated.. Found this on the web, it is aimed at PP fabric and yard.
chlorinated with sodium hypochlorite solution of concentration 10 g/l at pH 4.5 adjusted with HCl for 45 minutes at room temperature
Looks like paint for those. It's the same material as the light bezel which takes the flat black really well, I've knicked that bezel with a screw driver and it didn't chip has good color "penetration".
Did an ABS thumbdrive case. Well tested on.
The PC guys use liquid RIT and water only. The RC guys use powdered RIT and acetone. I tryed both.
Scarlet..
100ml A, 150 W, 100 D, room temp wasn't taking color
200ml A, 150 W, 100 D, room temp wasn't taking color or wasn't taking color fast enough, increased temp to ~130-135 with a hot water bath.
Formula #2 was taking color, not a deep color(not enough D?), but was too soft handling left finger prints thread left impressions.
50/50 Black-Water, hot water bath @130 + microwave(unknown temp) pre drip.
Produced a darking of the prior pink color(maybe grey now?) while ABS was still semi soft.
After several rinses and some time in the black it became fully solid again. Sanded off the color on one side to compare color and penetration. And put it back in the black with hot bath. It only took a little color and it looked more green than anything else(Yay color blind, doing color work).
Water and dye works for the PC guys at sub boiling temps. ~30% Acetone works for the RC guys ~@140.
I did come up with atleast one solution for a large enough tub, metal garbage can can be cut in half and welded to form a large trough. Not sure which would be cheaper buying a trash can, or sourcing a 6ft length of sheetmetal and (literally) rolling my own.
Might just go with paint or interior spray, for simplicity. Considering dyeing the seat fabrics black or red also, but I need to find a spot for a test swatch.
Inconclusion, dye tests were "meh.."
Back to the show, or atleast the teasers. I'll have some more photos soon.
Striped out the, lower trim, seats, and carpet.
Rinsed the carpet, it's getting a soap soak now. Will get atleast one more rinse and maybe scrubbing before I haul it to the car wash to hit it with the power washer.
Got lots of plastic to wash, still need to get the seat belt covers off the retainers and motors.
Lubing my brake pins may or may not of made my brake drag worse
but atleast they're not stuck like they were.Want to get new seals and wheel bearings. Turns out they're all original
a new set of timkens would probably make it alot happier. Didn't have the seals on hand (of course) so decided to hillbilly repack the inner bearing without pulling it or the less than superb seal. it rolls down the big hill again w/o bleeding off all it's speed. Some more front end love might even get it back to picking up speed like it was before I added the shell.Have to hold off on paint and body some more, rain inbound. Should have checked the forecast before I got started this evening, I might of dealt with the mud and got the back rims painted.
O2 code is back again, Yeah I know change it
but I fear it's going to want a new pipe which means I'd have to deal with my other exhaust issues which I'm not ready for yet. Will give a once over at the diag port and see whats going on, maybe tomarrow.Anyways pictures tomarrow so long as I remeber to take them and the batteries don't give me too much grief.
Last edited by Co_94_PU; 03-14-2013 at 07:23 PM. Reason: silly typo's
03-16-2013, 05:54 PM
#90
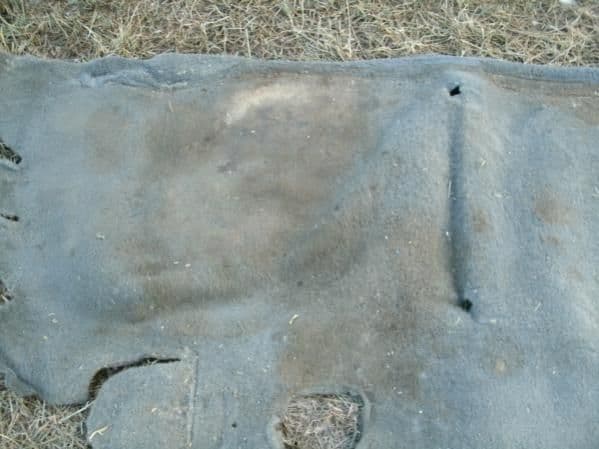
Interior floor.
All this had worked it's way thru the carpet(dealer installed) down to the vinyl(factory installed). I don't think it's ever even been vacuumed.

14mm socket hiding.

Here you can see there are two different widths of forward seat mounts

You know you own a toyota when you have this wear spot under the trottle pedal and more than 90% of your parts are factory installed

Thats wore thru the carpet reinforcement rubber, the carpet, the vinyl floor, and the factory sound dampener!! Shweeeet!
Before

Little bit of what it should look like, hiding under the rocker trim.

After.

This is the area above that was so hard and caked it was cracking.

It's a night and day difference in person. It's several pounds lighter clean Makes you wanna take your shoes off and enjoy the plushness. Could still probably do for an industrial vacuuming.
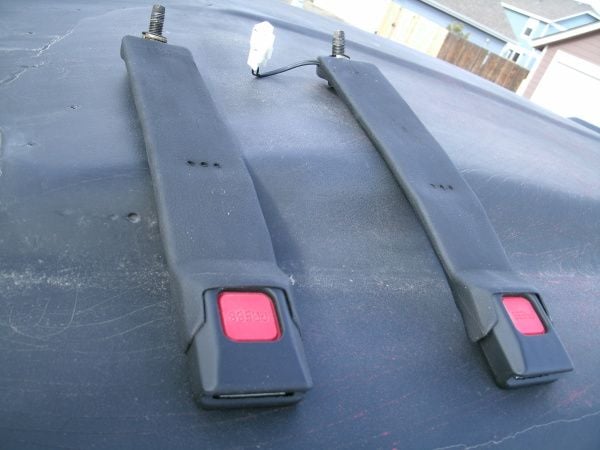
No bucket style seat belt mounts

But I do have the ones for the center console.

Not sure what all those are for offhand. Two at the front, two (slightly larger?) at the back, and a large bore just ahead of the rear ones. All factory taped.
Put down your dinner if you're eating and swallow.

Kinda makes me want to go wash my hands, and I know they're clean.
Anyways on to refurb.
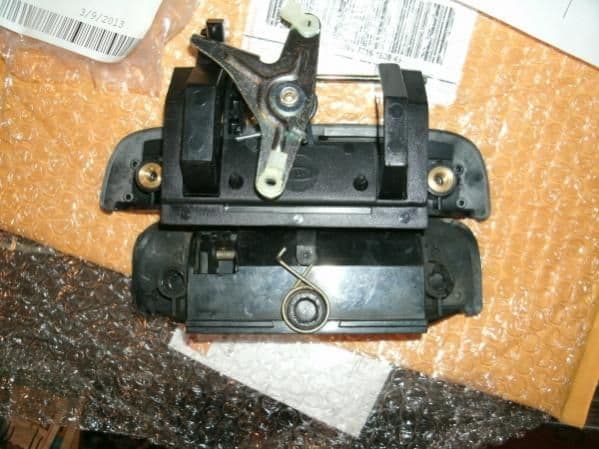
Remove the button side of the seatbelt latch, bottom might come off first depending how gross they are. The 4runner donors came apart as expected, button side first.
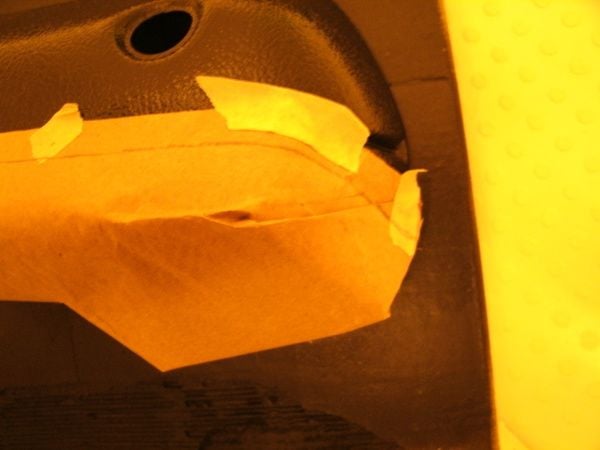
Start at the rear with a spudger/thin-screwdriver. Pinch the area above and below the prying device so the plastic doesn't split.

Work the prying device past the first clip, this clip holds the backside to the strap metal piece. ( Lost a picture or two somewhere, location is given in the last photo ) Release the two clips on each side.
Pinch the seatbelt strap so the covers will clear. Mine was crunchy enough to hold it's shape after pinching it with a pair of pliers.
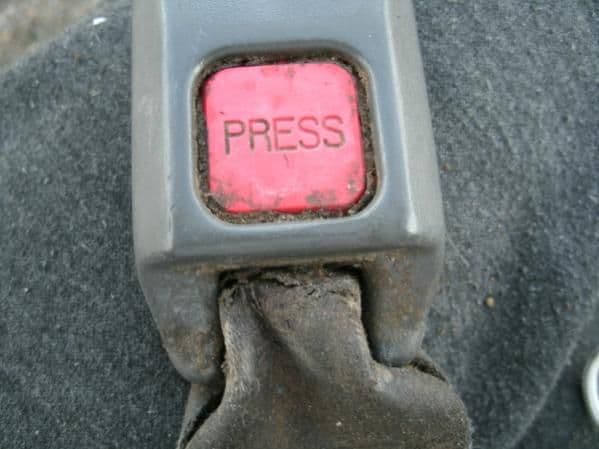
This is the back side, which in my case came off first since it was full of years worth of coffee spills and other unpleasentness.
From left to right you see one intact clip, one broken clip, and the rectangle the back side clip fits into. The back side clip only attaches to the metal not the plastic button cover,(Sorry lost the side by side cover pics I guess).

The button side cover will lift up from the strap side, then tap it toward the other end to release from the backside and buckle metal.
Release the two tabs on the backside cover.
And scrub, scuff, and prep for new color.
I blew the mechanicals out with parts cleaner, lubed all the moving bits with a dap of white-lithium on a cotton swab, and reassembled. Better than new, factory doesn't lube them
Not completely happy with the lower center dash. I accidently grabbed 60 grit to clean up the scuff marks and other imperfections, if you look too close you can tell it was the wrong sand paper. It's passable, most of it is on the inside of the pocket and it sits really low anyway. I'll get another chance for perfection when the upper dash gets done.

Had to hit every store in the village before I found the right sized nuts for the seatbelt mounting. 12x1.25mm


Then my welder wire jamed, and the trigger is flakey(needs rewired), and I had to rerun the welding wire three times before it'd go thru without jaming up and making me start over. I'm'a blame the less than stellar welds on being "so done with this crap", but really whos ever going to see em but me and well you guys Couple dabs of locktite should keep em in place till I get around to tacking them to the body(aka never gonna happen my jack stands aren't that tall).
I was kinda groovin' along and almost for got to grab some pictures!

Salvaged a patch from the extra carpet tucked up onto the firewall, stitched this in last night. Should atleast slow some of the dirt down on it's way to the body.

Glad to have the bucket/console style belts on. Now I don't have to dig for them under whatever gets stuffed on top of them, usually my coat at the least.

And finished

Can't remember what year the toyota floor mats are, 79 or early 80s. These need some love one of these days too. There is another on the drivers side, it's missing two pieces of the "carpet". And tweety bird is my goto for keeping my head and butt out of the dirt when I have to crawl under my 2wd
I also pulled the shifter boot for a good scrubbing(Looked alot like the seat belt bracket), and installed the black passenger side vent ( Did that awhile back and might of forgot to mention it, definately never got a picture ).
Not sure what to tackle next. Maybe the arm rests, not too thrilled about hand stitching those and not sure sure I have any black piping trim. Maybe the seat trim recolor. Not alot left on the interior, dash, various trim bits, and new carpet one of these days.
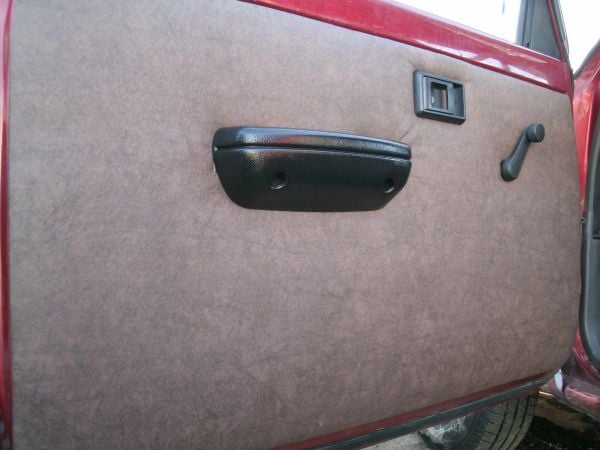
Still need to do my door vapor barrier, this is what made me think of tackling the armrests. Will get the barrier done so I can put the clips back on the window handles because I'm getting tired of picking them up off the floor when I close the door a little too hard.
Will have to go find my checklist :wabbit:
14mm socket hiding.
Here you can see there are two different widths of forward seat mounts
You know you own a toyota when you have this wear spot under the trottle pedal and more than 90% of your parts are factory installed
Thats wore thru the carpet reinforcement rubber, the carpet, the vinyl floor, and the factory sound dampener!! Shweeeet!
Before
Little bit of what it should look like, hiding under the rocker trim.
After.
This is the area above that was so hard and caked it was cracking.
It's a night and day difference in person. It's several pounds lighter clean
Makes you wanna take your shoes off and enjoy the plushness. Could still probably do for an industrial vacuuming.No bucket style seat belt mounts
But I do have the ones for the center console.
Not sure what all those are for offhand. Two at the front, two (slightly larger?) at the back, and a large bore just ahead of the rear ones. All factory taped.
Put down your dinner if you're eating and swallow.
Kinda makes me want to go wash my hands, and I know they're clean.
Anyways on to refurb.
Remove the button side of the seatbelt latch, bottom might come off first depending how gross they are. The 4runner donors came apart as expected, button side first.
Start at the rear with a spudger/thin-screwdriver. Pinch the area above and below the prying device so the plastic doesn't split.
Work the prying device past the first clip, this clip holds the backside to the strap metal piece. ( Lost a picture or two somewhere, location is given in the last photo ) Release the two clips on each side.
Pinch the seatbelt strap so the covers will clear. Mine was crunchy enough to hold it's shape after pinching it with a pair of pliers.
This is the back side, which in my case came off first since it was full of years worth of coffee spills and other unpleasentness.
From left to right you see one intact clip, one broken clip, and the rectangle the back side clip fits into. The back side clip only attaches to the metal not the plastic button cover,(Sorry lost the side by side cover pics I guess).
The button side cover will lift up from the strap side, then tap it toward the other end to release from the backside and buckle metal.
Release the two tabs on the backside cover.
And scrub, scuff, and prep for new color.
I blew the mechanicals out with parts cleaner, lubed all the moving bits with a dap of white-lithium on a cotton swab, and reassembled. Better than new, factory doesn't lube them
Not completely happy with the lower center dash. I accidently grabbed 60 grit to clean up the scuff marks and other imperfections, if you look too close you can tell it was the wrong sand paper. It's passable, most of it is on the inside of the pocket and it sits really low anyway. I'll get another chance for perfection when the upper dash gets done.
Had to hit every store in the village before I found the right sized nuts for the seatbelt mounting. 12x1.25mm
Then my welder wire jamed, and the trigger is flakey(needs rewired), and I had to rerun the welding wire three times before it'd go thru without jaming up and making me start over. I'm'a blame the less than stellar welds on being "so done with this crap", but really whos ever going to see em but me and well you guys
Couple dabs of locktite should keep em in place till I get around to tacking them to the body(aka never gonna happen my jack stands aren't that tall).I was kinda groovin' along and almost for got to grab some pictures!
Salvaged a patch from the extra carpet tucked up onto the firewall, stitched this in last night. Should atleast slow some of the dirt down on it's way to the body.
Glad to have the bucket/console style belts on. Now I don't have to dig for them under whatever gets stuffed on top of them, usually my coat at the least.
And finished
Can't remember what year the toyota floor mats are, 79 or early 80s. These need some love one of these days too. There is another on the drivers side, it's missing two pieces of the "carpet". And tweety bird is my goto for keeping my head and butt out of the dirt when I have to crawl under my 2wd
I also pulled the shifter boot for a good scrubbing(Looked alot like the seat belt bracket), and installed the black passenger side vent ( Did that awhile back and might of forgot to mention it, definately never got a picture ).
Not sure what to tackle next. Maybe the arm rests, not too thrilled about hand stitching those and not sure sure I have any black piping trim. Maybe the seat trim recolor. Not alot left on the interior, dash, various trim bits, and new carpet one of these days.
Still need to do my door vapor barrier, this is what made me think of tackling the armrests. Will get the barrier done so I can put the clips back on the window handles because I'm getting tired of picking them up off the floor when I close the door a little too hard.
Will have to go find my checklist :wabbit:
03-16-2013, 08:23 PM
#91
Found some reference info needs saving, feel free to ignore
TSB for paint codes & mix numbers various suppliers, 1994 paint codes
No need to buy whole new distributor for a dead NE sensor
85-87 Got new temp senders & start time switch in 89, to fix rough idle and hard start..
TSB link
TSB by make link toyotapart.com, lacks a Hilux/pckup section lame but cool infos..
Code:
CODE,COLOR,BASF,DUPONT,PPG,SHERWIN-WILLIAMS,SIKKENS,SPIES-HECKER
3K3,Garnet Pearl,22304,W9512,4478,40888,TOY205,97765
Code:
22R�E 19250�35180, Signal Generator Assembly
85-87 Got new temp senders & start time switch in 89, to fix rough idle and hard start..
TSB link
TSB by make link toyotapart.com, lacks a Hilux/pckup section lame but cool infos..
03-18-2013, 03:09 PM
#94
Registered User
iTrader: (2)
Join Date: Dec 2009
Location: Pleasanton, CA - SF Bay Area
Posts: 2,159
Likes: 0
Received 7 Likes
on
5 Posts
Didn't know you had a build thread and just read through it....great work on everything!
And since you'd asked for it a while back....ATTABOY!
Thanks for all your help on my head gasket thread - keep rolling on your build!
And since you'd asked for it a while back....ATTABOY!
Thanks for all your help on my head gasket thread - keep rolling on your build!
03-18-2013, 08:32 PM
#96
Registered User
Nice clean up man. u can definitely tell the huge difference in the pix. i bet its even better in person huh lol. Also very nice job on stitching up that hole. i never would have thought about doing that.
Last edited by Redeth005; 03-18-2013 at 08:34 PM.
03-18-2013, 08:58 PM
#97
Well one of the Rockauto warehouse goons send me the wrong tailgate handle. Customer service thinks they got it sorted and are sending me the right one.
Upper one is for a 95 tacoma, even said so on the package once you got the other labels someone slaped on out of the way.
Two days of 40mph winds had me cooped up looking for things todo. Figured I'd have a go at the armrest recover. Made up three different templates and couldn't find one I liked completely. There are too many compound curves. Might be able to do it with fabric instead of paper for templating, definately with a lycra/spandex, but all I have on hand is some vinyl and canvas scraps. Might work ok with the vinyl also, w/o having to stitch a seam.
Decided maybe I'd just do the top section and paint the rest. So i sprayed em. Then after the black decided I'd see how it looked with a clear coat since it worked so well on the shifter handle.
These aren't rubber covered like I thought they were, they are blown molded polypropolene like the other trim bits.
W/O Flash

W/ Flash

If I decide I don't like the look & feel, or think they'll show wear too badly, I will add the covers on the top section which will add some much needed padding. It still has a compound curve but it's a small area and just two stitch lines.
1: Attach cord or elastic along bottom of fabric, hem stitch.
2: Poke holes thru PP at corners, or carve out the extra so the "seam" in the PP goes all the way to the back.(Holes is the better idea I think, you can just secure it with knots at each end instead of gluing it down)
3: Spray glue down padding and trim the corners/edges, and around the door pull area.
4: Attach lower seam and with cord/elastic along "seam" in PP.
5: Attach fabric to top section, create "envelop folds" at the front and back
6: Button hole stitch the folds to the cord.
7: "V" slit the fabric over the door pull area, leave cut short to avoid pading showing thru.
8: Pull center of V cut tight and spray glue to inside of pull area.
9-10: Pull corners of V cut tight and to the front/rear, spray glue into place.
Inside/underside of pattern. Shows the general shape and layout. Note fold detail at left corner this is step 9-10.

Door side of pattern, inplace on armrest. Inside V notch, and rear fold detail.

Corner detail. This one is slightly out of place to show the area that needs notched. And shows the envelope fold. Pencil line along the length shows the fold for the cord hem/pocket.
Ideally you'd use a good upholstery foam for the padding(I only have quilting batting on hand), and bevel the corners so they're not sharp.
You can dress up the cord hem with some "fabric piping", I can't find a good picture of this. It's the old school stiff stuff around seats.
Actually
for making your own,so you can match it to any fabric you might choose and aren't stuck with the basic colors the store might have.. Essentially it's just a cord with fabric wraped around it and stitched so it has fabric on either side of the cord to attach to whatever.
You can dress up the door pull also(in case you can't hide the cuts. Glue piping along the top edge(Pic#2), and place another cut of fabric over top of it attached with spray glue.
Thanks for stopping by Any questions comments or concerns feel free to voice em.
PS. detail for stiching carpets. Trim off the first row of loops and some along the sides, so you have a flat surface to mate under the other. Ideally you'd use carpet tape which is a super strength heat activated bond, but I don't have my carpet laying stuff any more, it's seriously STRONG if you ever seen a carpet being stretched it stands up to that.. I used a mix of stitch types cause I was getting tired of doing it
Running stitch. or overcast stitch. Is what I used, don't really remeber what it's "supposed" to be we always just used the heat tape. But I'm sure someone told me at one point.

Once you have it stitched you can come back and trim off any of the raggity edges.
Upper one is for a 95 tacoma, even said so on the package once you got the other labels someone slaped on out of the way.
Two days of 40mph winds had me cooped up looking for things todo. Figured I'd have a go at the armrest recover. Made up three different templates and couldn't find one I liked completely. There are too many compound curves. Might be able to do it with fabric instead of paper for templating, definately with a lycra/spandex, but all I have on hand is some vinyl and canvas scraps. Might work ok with the vinyl also, w/o having to stitch a seam.
Decided maybe I'd just do the top section and paint the rest. So i sprayed em. Then after the black decided I'd see how it looked with a clear coat since it worked so well on the shifter handle.
These aren't rubber covered like I thought they were, they are blown molded polypropolene like the other trim bits.
W/O Flash
W/ Flash
If I decide I don't like the look & feel, or think they'll show wear too badly, I will add the covers on the top section which will add some much needed padding. It still has a compound curve but it's a small area and just two stitch lines.
1: Attach cord or elastic along bottom of fabric, hem stitch.
2: Poke holes thru PP at corners, or carve out the extra so the "seam" in the PP goes all the way to the back.(Holes is the better idea I think, you can just secure it with knots at each end instead of gluing it down)
3: Spray glue down padding and trim the corners/edges, and around the door pull area.
4: Attach lower seam and with cord/elastic along "seam" in PP.
5: Attach fabric to top section, create "envelop folds" at the front and back
6: Button hole stitch the folds to the cord.
7: "V" slit the fabric over the door pull area, leave cut short to avoid pading showing thru.
8: Pull center of V cut tight and spray glue to inside of pull area.
9-10: Pull corners of V cut tight and to the front/rear, spray glue into place.
Inside/underside of pattern. Shows the general shape and layout. Note fold detail at left corner this is step 9-10.
Door side of pattern, inplace on armrest. Inside V notch, and rear fold detail.
Corner detail. This one is slightly out of place to show the area that needs notched. And shows the envelope fold. Pencil line along the length shows the fold for the cord hem/pocket.
Ideally you'd use a good upholstery foam for the padding(I only have quilting batting on hand), and bevel the corners so they're not sharp.
You can dress up the cord hem with some "fabric piping", I can't find a good picture of this. It's the old school stiff stuff around seats.
Actually
You can dress up the door pull also(in case you can't hide the cuts. Glue piping along the top edge(Pic#2), and place another cut of fabric over top of it attached with spray glue.
Thanks for stopping by
Any questions comments or concerns feel free to voice em. PS. detail for stiching carpets. Trim off the first row of loops and some along the sides, so you have a flat surface to mate under the other. Ideally you'd use carpet tape which is a super strength heat activated bond, but I don't have my carpet laying stuff any more, it's seriously STRONG if you ever seen a carpet being stretched it stands up to that.. I used a mix of stitch types cause I was getting tired of doing it
Running stitch. or overcast stitch. Is what I used, don't really remeber what it's "supposed" to be we always just used the heat tape. But I'm sure someone told me at one point.
Once you have it stitched you can come back and trim off any of the raggity edges.
03-18-2013, 11:50 PM
#98
More "don't lose me info"
I've been thinking maybe a LSD will take care of some of my 4x4 envy, if nothing else it should cut down on the haveing to shovel stuff on one side and then the other and then the first and back and forth stuff..
Gear ID info
Early to mid 80s celica/cressida ect rwds with w58 or similar trannys.
NAP
F (7.5")
50(3.400), 38(3.417)
3(2 pinion LSD)
USA
A(7.5")
01(3.42)
C(2 pinion LSD)
~60$ if I can find one at the upullandpay in good condition.
~50 in measuring tools. Dial, base, caliper
ZUK's rebuild page appears it'll drop right in to my diff' housing but I haven't pestered ZUK for info.
I'd rather not rebuild one, but in a pinch I could manage I guess. I'd ask the old man todo it but he'd say just take it to someone most likely
03-19-2013, 03:47 PM
#99
Before

After

Might have to give the window crank another coat of black and clearcoat them also.
Ran out of primer, can't do my rear rims without it. For some reason I have a can of rustoleum flat black instead of a spare can of DTM primer DOH.
After
Might have to give the window crank another coat of black and clearcoat them also.
Ran out of primer, can't do my rear rims without it. For some reason I have a can of rustoleum flat black instead of a spare can of DTM primer DOH.
03-26-2013, 06:48 PM
#100
Well spring is here and winter finally showed up full time, figures..
Been a week since I've got to do anything but thinking. Rain snow and mud got me couped up.
Got a few ideas on wrapping the door mounted armrests, but since it requires cutting the tops off I'm reluctant to turn the ones I have into guinea pigs. And I don't have the tools I want either. The basic idea is to manufacture inserts similar to the SR5 armrest out of wood or mdf. This should also work well on the SR5 style.
Using a seperate upper section removes the ugly area inside the door pull and should produce more appealing corners. Also it allows for cushion density choices and profile changes. If you had a good source of wood burl they'd look pretty hot too with the vaneered dashes from the 80's or 2000's if left uncovered and varished.
Since this is theory not practice, no step by step photos sorry.
1: Bolt/Screw them to a slide (to keep straight), and run thru a bandsaw to remove tops. Sawing thru the upper lower line.
2: Scan cross section into computer.
3: Create two templates, one for outline, one for rabbet.
3: Trace and jigsaw out templates
4: Attach outline template with screws to backer material(wood/mdf), or trace. Then cut
5: Attach rabbet template and router out a rabbet to resess the backer board.
6: Cut two triangle brackets and attach to bottom of backer.(Screwed thru lower back section to retain)
7: Corner trim/sculpt and seal the backer.
8: Attach and trim/sculpt cushion. HD foam base, and medium or light foam in layers.
9: Apply covering material, canvas, vinyl, suede ect. Contact cement to foam, and staples to backer.
10: Add cord trim around edge to hide join edge, attach with staples to backer.
Corner folds:I don't feel I can describe that properly, but thankfully many already have!
Here is a video example
And a little PDF howto that turned up in a search
http://www.rowleycompany.com/images/...ery_Corner.pdf
And a slightly more detailed example.
http://littlegreennotebook.blogspot....-corners.html#
Next month might be a little slow on the progress, due to funding issues, since registrations due I won't have much available for parts or materials.
I'll accept donations or guinea-pigs just PM me..
Still lots of body work and panel beating todo, and the dash refinish. Which I have the supplies for those already, just need some dry warm weather or shelter
Got a few ideas on wrapping the door mounted armrests, but since it requires cutting the tops off I'm reluctant to turn the ones I have into guinea pigs. And I don't have the tools I want either. The basic idea is to manufacture inserts similar to the SR5 armrest out of wood or mdf. This should also work well on the SR5 style.
Using a seperate upper section removes the ugly area inside the door pull and should produce more appealing corners. Also it allows for cushion density choices and profile changes. If you had a good source of wood burl they'd look pretty hot too with the vaneered dashes from the 80's or 2000's if left uncovered and varished.
Since this is theory not practice, no step by step photos sorry.
1: Bolt/Screw them to a slide (to keep straight), and run thru a bandsaw to remove tops. Sawing thru the upper lower line.
2: Scan cross section into computer.
3: Create two templates, one for outline, one for rabbet.
3: Trace and jigsaw out templates
4: Attach outline template with screws to backer material(wood/mdf), or trace. Then cut
5: Attach rabbet template and router out a rabbet to resess the backer board.
6: Cut two triangle brackets and attach to bottom of backer.(Screwed thru lower back section to retain)
7: Corner trim/sculpt and seal the backer.
8: Attach and trim/sculpt cushion. HD foam base, and medium or light foam in layers.
9: Apply covering material, canvas, vinyl, suede ect. Contact cement to foam, and staples to backer.
10: Add cord trim around edge to hide join edge, attach with staples to backer.
Corner folds:I don't feel I can describe that properly, but thankfully many already have!
Here is a video example
http://www.rowleycompany.com/images/...ery_Corner.pdf
And a slightly more detailed example.
http://littlegreennotebook.blogspot....-corners.html#
Next month might be a little slow on the progress, due to funding issues, since registrations due I won't have much available for parts or materials.
I'll accept donations or guinea-pigs just PM me..Still lots of body work and panel beating todo, and the dash refinish. Which I have the supplies for those already, just need some dry warm weather or shelter


