Andersej: 1993 2nd Gen 4runner
 06-17-2014, 02:24 PM
#41
Registered User
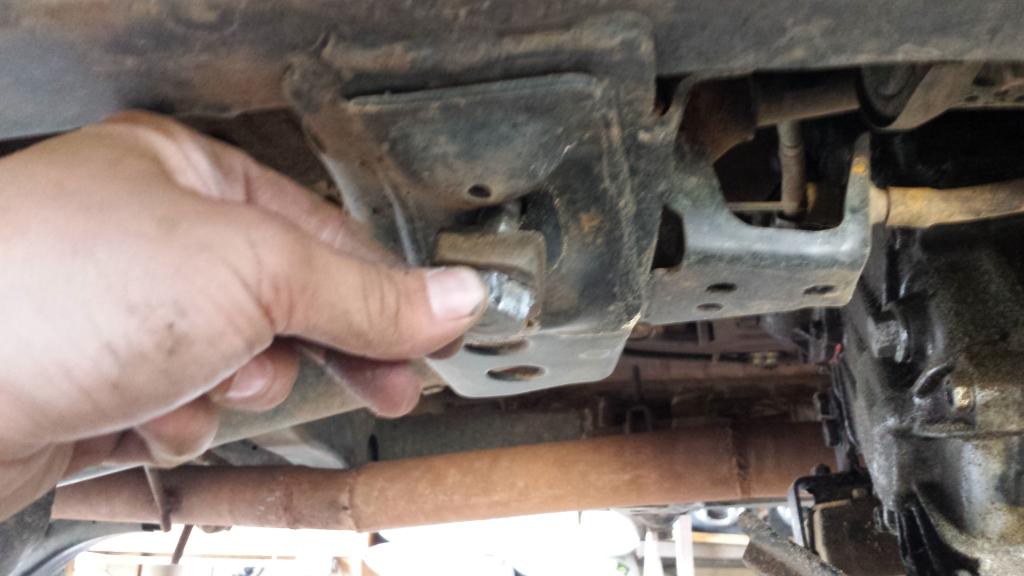
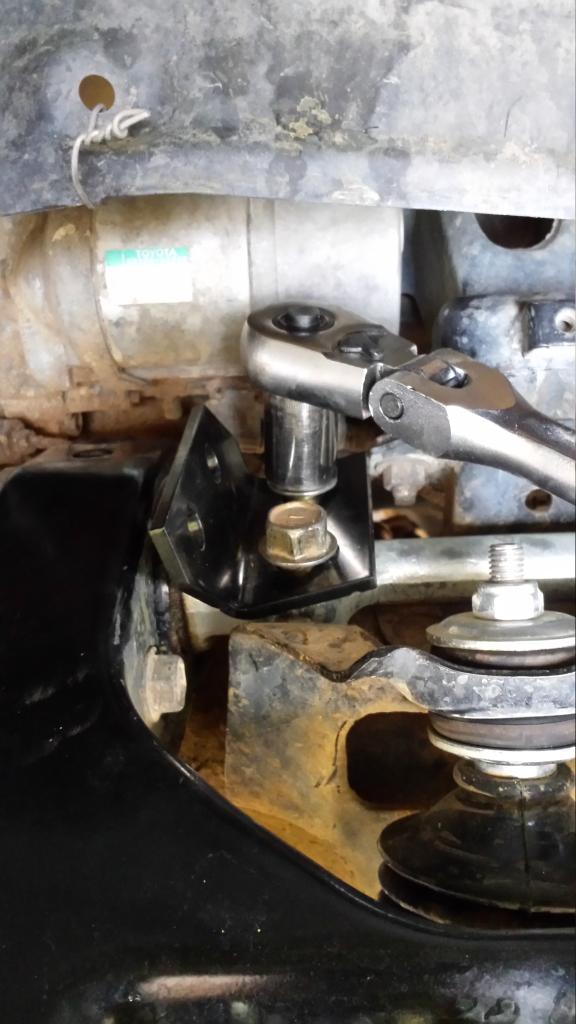
I ran across a picture of what I was explaining in regards to the T-Bar adjusting bolt. What you are seeing is the torsion bar anchoring bracket and the bolt assembly. I removed the bracket when I converted to coil over. Your years details look slightly different but the concept is the same.

Be careful cranking the torsion bar to the max. If you go to far and gall up the threads it may be difficult and dangerous to to unload as the bolt will break and shoot through the floor pan. I recommend that when ever you adjust the torsion bars do it with the suspension at full droop and the weight unloaded. Use a floor jack on the center of the front cross member like you showed in one of your pictures.
A trick to get more pre-load to the torsion bar adjusting bolt is to add shims below the head of the adjusting bolt. Slugs or stack 1/2" washers. I had a batch of slugs cut with some laser cutting (3/8" plate) and made a shim stack 1-1/8" high. I was able to get a good bit more pre-load but the suspension was stiff and sagged fairly quickly. Adding more and more pre-load to a spring has a different effect than changing the spring rate.
Stock Torsion bars (22mm) just don't work with Long Arms, the leverage is just too much. Aftermarket T-Bars (24-26mm) will do the trick. I heard Kartek (google it) has Sway-A-Way T-bars in stock now after a long back order. But if your going Coil Over Conversion I guess that is a moot point. I'd love to sell you a shock hoop but an aftermarket sway bar is a big bang for your buck. Find some used ones, even better.
 06-17-2014, 03:57 PM
#42
Registered User
Thread Starter
Join Date: Dec 2011
Posts: 228
Likes: 0
Received 0 Likes
on
0 Posts
I ran across a picture of what I was explaining in regards to the T-Bar adjusting bolt. What you are seeing is the torsion bar anchoring bracket and the bolt assembly. I removed the bracket when I converted to coil over. Your years details look slightly different but the concept is the same.

Be careful cranking the torsion bar to the max. If you go to far and gall up the threads it may be difficult and dangerous to to unload as the bolt will break and shoot through the floor pan. I recommend that when ever you adjust the torsion bars do it with the suspension at full droop and the weight unloaded. Use a floor jack on the center of the front cross member like you showed in one of your pictures.
A trick to get more pre-load to the torsion bar adjusting bolt is to add shims below the head of the adjusting bolt. Slugs or stack 1/2" washers. I had a batch of slugs cut with some laser cutting (3/8" plate) and made a shim stack 1-1/8" high. I was able to get a good bit more pre-load but the suspension was stiff and sagged fairly quickly. Adding more and more pre-load to a spring has a different effect than changing the spring rate.
Stock Torsion bars (22mm) just don't work with Long Arms, the leverage is just too much. Aftermarket T-Bars (24-26mm) will do the trick. I heard Kartek (google it) has Sway-A-Way T-bars in stock now after a long back order. But if your going Coil Over Conversion I guess that is a moot point. I'd love to sell you a shock hoop but an aftermarket sway bar is a big bang for your buck. Find some used ones, even better.
Be careful cranking the torsion bar to the max. If you go to far and gall up the threads it may be difficult and dangerous to to unload as the bolt will break and shoot through the floor pan. I recommend that when ever you adjust the torsion bars do it with the suspension at full droop and the weight unloaded. Use a floor jack on the center of the front cross member like you showed in one of your pictures.
A trick to get more pre-load to the torsion bar adjusting bolt is to add shims below the head of the adjusting bolt. Slugs or stack 1/2" washers. I had a batch of slugs cut with some laser cutting (3/8" plate) and made a shim stack 1-1/8" high. I was able to get a good bit more pre-load but the suspension was stiff and sagged fairly quickly. Adding more and more pre-load to a spring has a different effect than changing the spring rate.
Stock Torsion bars (22mm) just don't work with Long Arms, the leverage is just too much. Aftermarket T-Bars (24-26mm) will do the trick. I heard Kartek (google it) has Sway-A-Way T-bars in stock now after a long back order. But if your going Coil Over Conversion I guess that is a moot point. I'd love to sell you a shock hoop but an aftermarket sway bar is a big bang for your buck. Find some used ones, even better.
 06-19-2014, 07:43 PM
#43
Registered User
Thread Starter
Join Date: Dec 2011
Posts: 228
Likes: 0
Received 0 Likes
on
0 Posts
Damn BlazeN8 vanished off the face of the earth! Been trying to contact him via email and phone to send off a money order to get a shock hoop kit from him. Hope everything is ok.
06-22-2014, 09:35 AM
#46
Registered User
Thread Starter
Join Date: Dec 2011
Posts: 228
Likes: 0
Received 0 Likes
on
0 Posts
Shock help!!!
Got a question for everyone. I plan on running the same suspension in the rear but I may have to either put in coil spacers or use different coils altogether like FJ's, OME or Downey. I have to match the height of my long arm in the front. So with that being said lets move on to the important part SHOCKS. I was thinking about purchasing these Fox 2.0 Factory Series Smooth Body Remote. What travel would I need and has anyone figured out what valving and rebound is good for 2nd gen 4runners? I want a balance between going fast at the dunes and crawling on rocks. Something that can function well at both.
07-14-2014, 08:30 PM
#49
Registered User
Thread Starter
Join Date: Dec 2011
Posts: 228
Likes: 0
Received 0 Likes
on
0 Posts
Waiting on my coilover from FOA but still had some fun this weekend.
93 Toyota 4runner Dune Jump:
This is with Stock Torsion bars Cranked all the way up and Bilstein 5100s shocks.
93 Toyota 4runner Dune Jump:
This is with Stock Torsion bars Cranked all the way up and Bilstein 5100s shocks.
Last edited by andersej; 07-18-2014 at 10:57 AM.
 07-18-2014, 10:43 AM
#51
Registered User
Thread Starter
Join Date: Dec 2011
Posts: 228
Likes: 0
Received 0 Likes
on
0 Posts
My FOA's are going to be here Monday!!! I'm going to attempt to make a detailed Shock Hoop install guide for future Blazeland Kit customers. I hope it turns out good 
07-21-2014, 07:33 PM
#52
Registered User
Thread Starter
Join Date: Dec 2011
Posts: 228
Likes: 0
Received 0 Likes
on
0 Posts
Blazeland Shock Hoop Install!!!
This is an attempt to make a semi decent write up for installing the Blazeland Shock Hoop kit from http://www.blazeland.us/
Hope it helps...
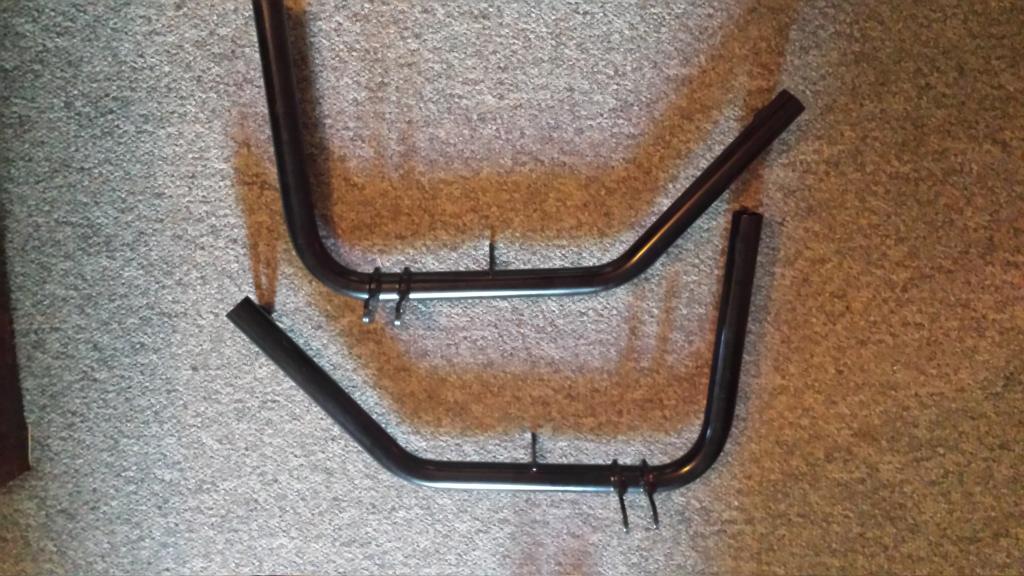
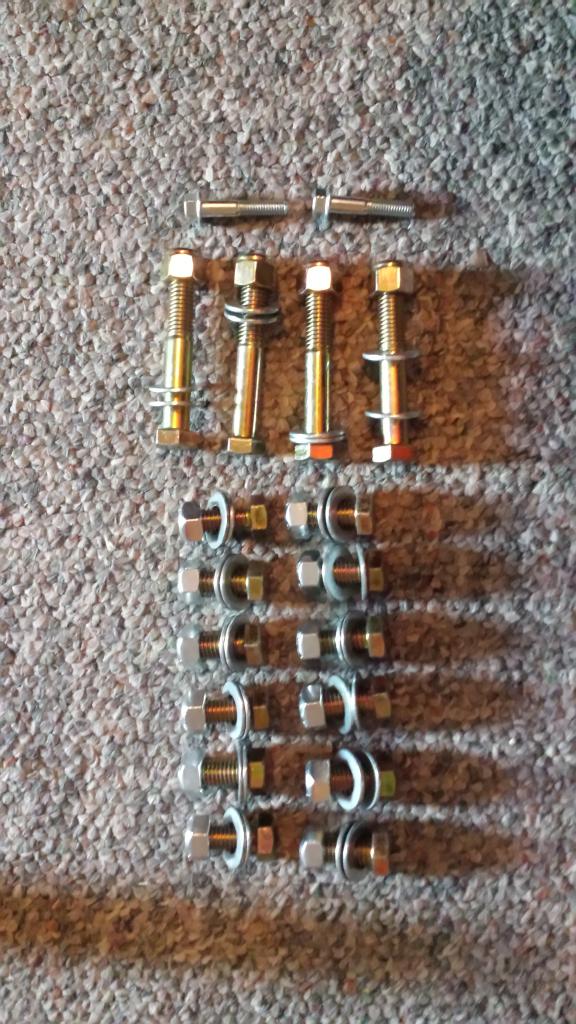
Lets take a look at the kit:
Comes with 2 shock hoops
4 upper brackets, 2 Front pitman brackets, 2 Middle Cross shaft brackets, and 2 Rear weld-on brackets
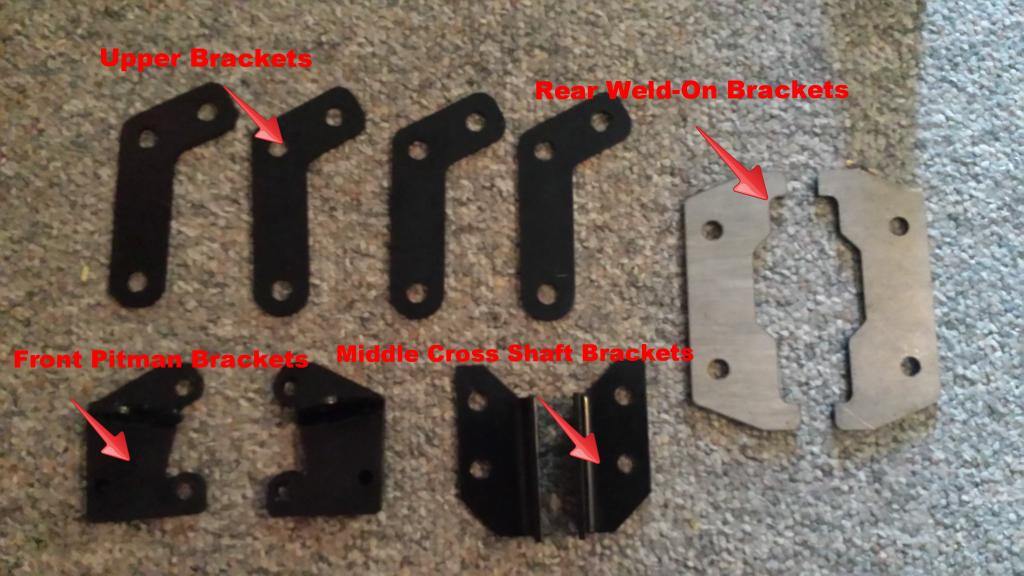
and finally the hardware.
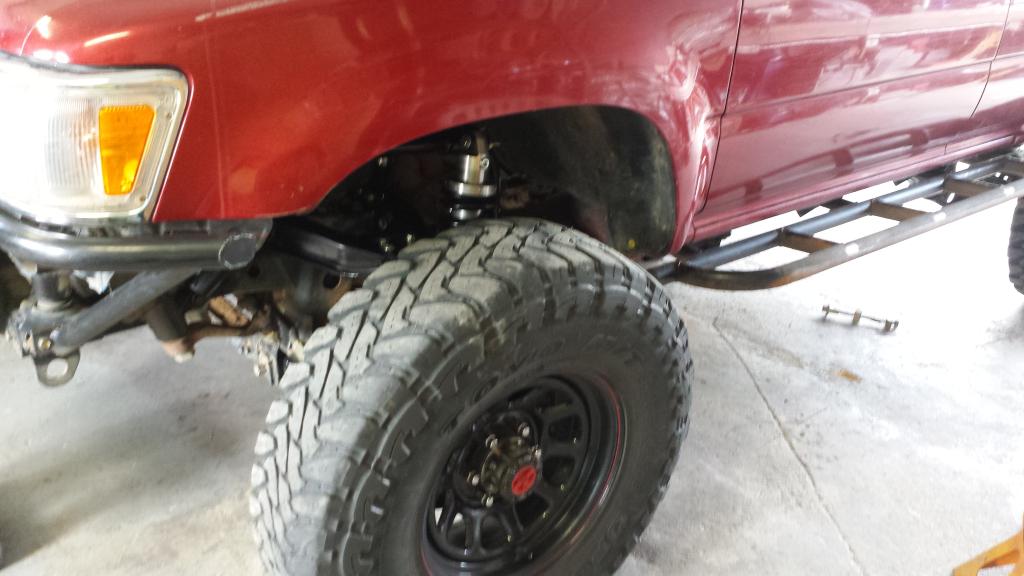
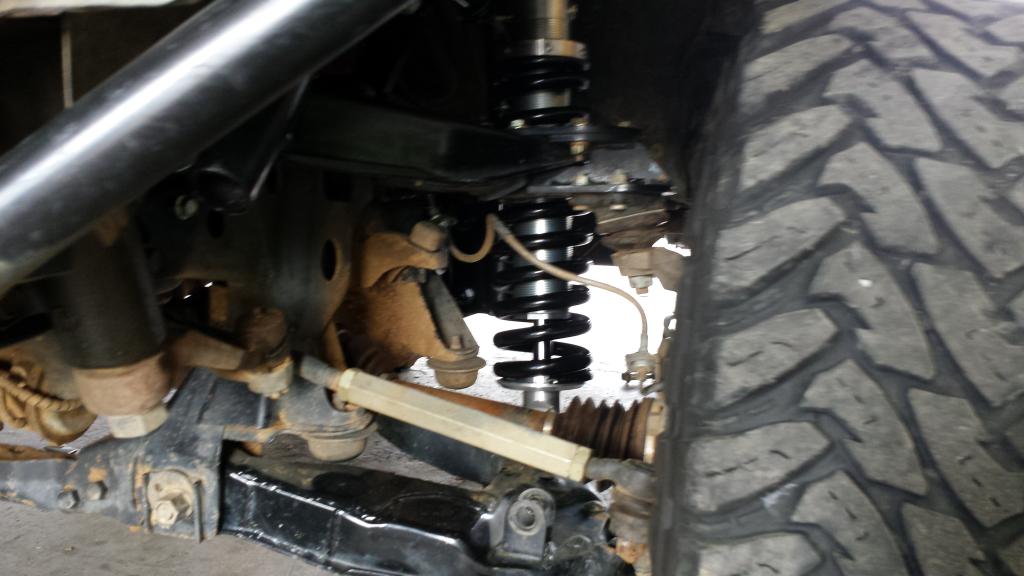
***Now you have to decide what coilovers you want to run. For my particular truck I went with FOA's 2.5 x 8in travel coilovers with 600lb springs. Bare in mind I have done a 3.4 swap, added a custom front bumper and a winch. So I went with a heavier spring setup than most. (I believe others are running 500lb springs)***
http://www.f-o-a.com/
There's a few things to start with before installing. Obviously with any project it's easier to work on things that have been washed off. I usually just make an effort to spray everything in the vicinity off with a hose a day prior to knock down any mud or sand etc.
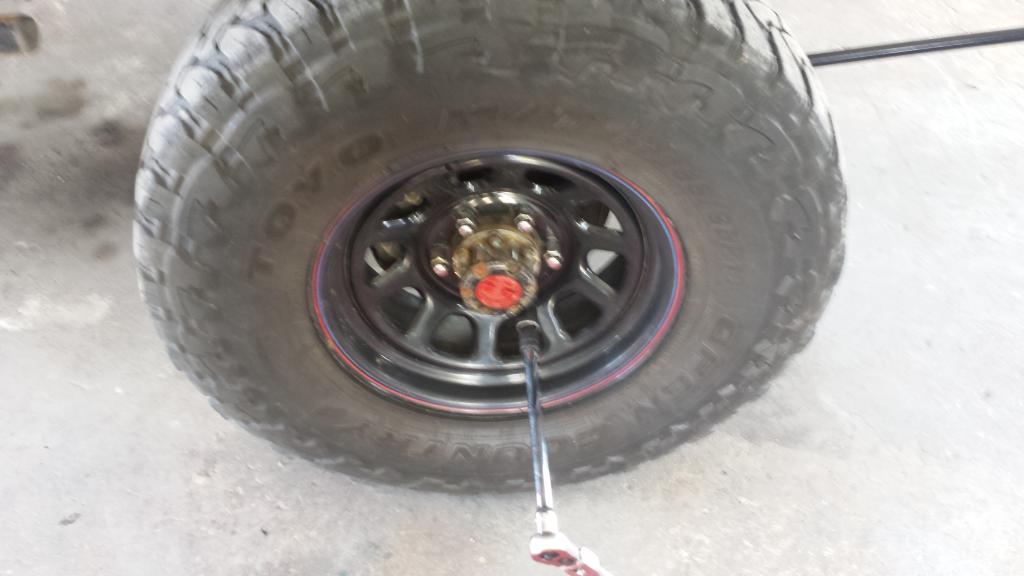
Take the wheel off (Duh)
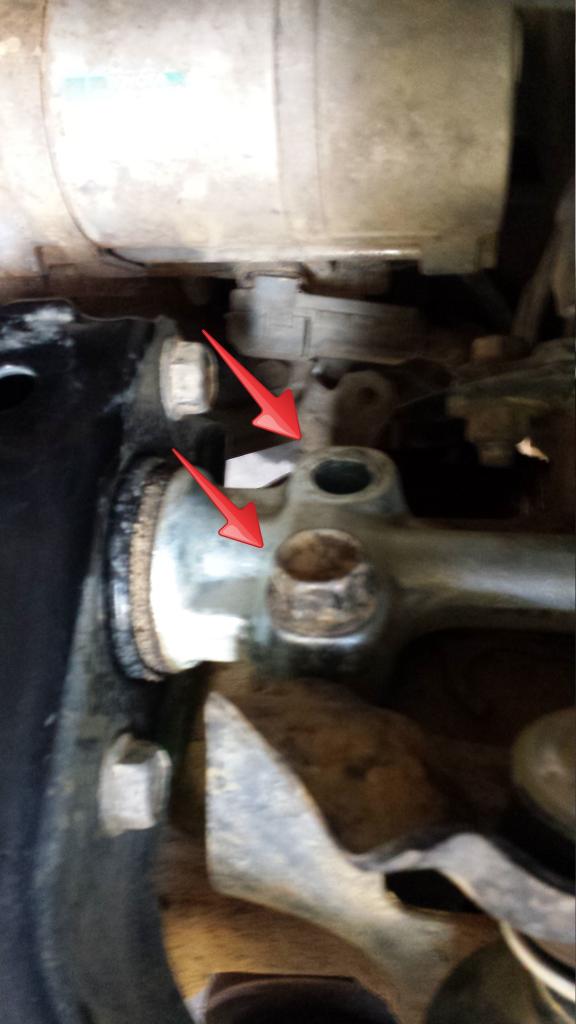
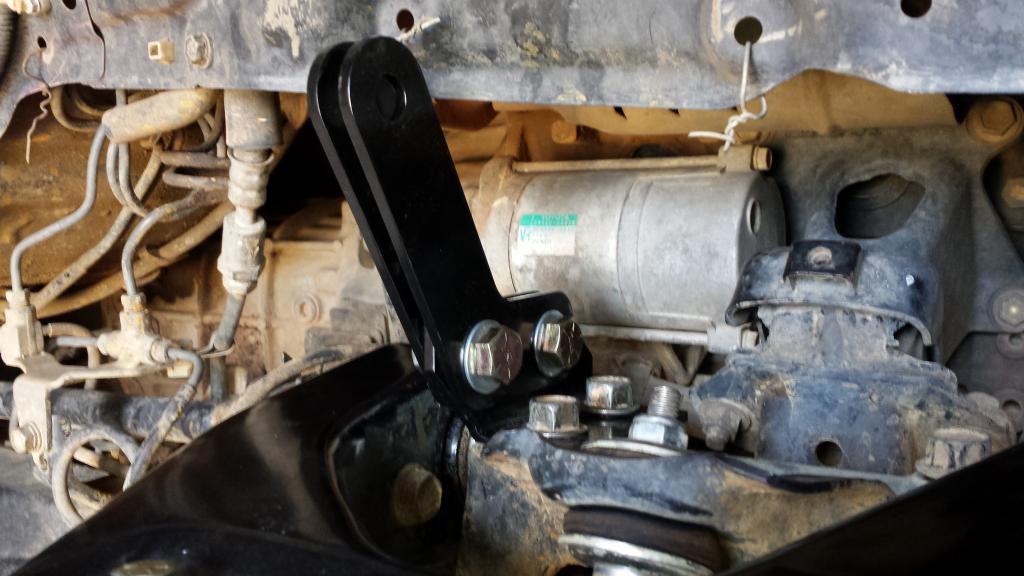
Remove torsion Bars- Start with adjuster bolt Loosen then remove.
You then have to snake out the torsion bars. The driver side was simple and come out from underneath. For the passenger side I had to remove a brake line bracket and remove the torsion bar forward from the wheel well. It was tricky but it finally came out.
Then its time for some Prep with a grinder (Both Sides)
Then remove the shock. Take off stud nut and then the bottom bolt/nut.
Hope it helps...
Lets take a look at the kit:
Comes with 2 shock hoops

4 upper brackets, 2 Front pitman brackets, 2 Middle Cross shaft brackets, and 2 Rear weld-on brackets
and finally the hardware.

***Now you have to decide what coilovers you want to run. For my particular truck I went with FOA's 2.5 x 8in travel coilovers with 600lb springs. Bare in mind I have done a 3.4 swap, added a custom front bumper and a winch. So I went with a heavier spring setup than most. (I believe others are running 500lb springs)***
http://www.f-o-a.com/
There's a few things to start with before installing. Obviously with any project it's easier to work on things that have been washed off. I usually just make an effort to spray everything in the vicinity off with a hose a day prior to knock down any mud or sand etc.
Take the wheel off (Duh)

Remove torsion Bars- Start with adjuster bolt Loosen then remove.

You then have to snake out the torsion bars. The driver side was simple and come out from underneath. For the passenger side I had to remove a brake line bracket and remove the torsion bar forward from the wheel well. It was tricky but it finally came out.
Then its time for some Prep with a grinder (Both Sides)

Then remove the shock. Take off stud nut and then the bottom bolt/nut.

Last edited by andersej; 07-21-2014 at 07:59 PM.
07-21-2014, 07:34 PM
#53
Registered User
Thread Starter
Join Date: Dec 2011
Posts: 228
Likes: 0
Received 0 Likes
on
0 Posts
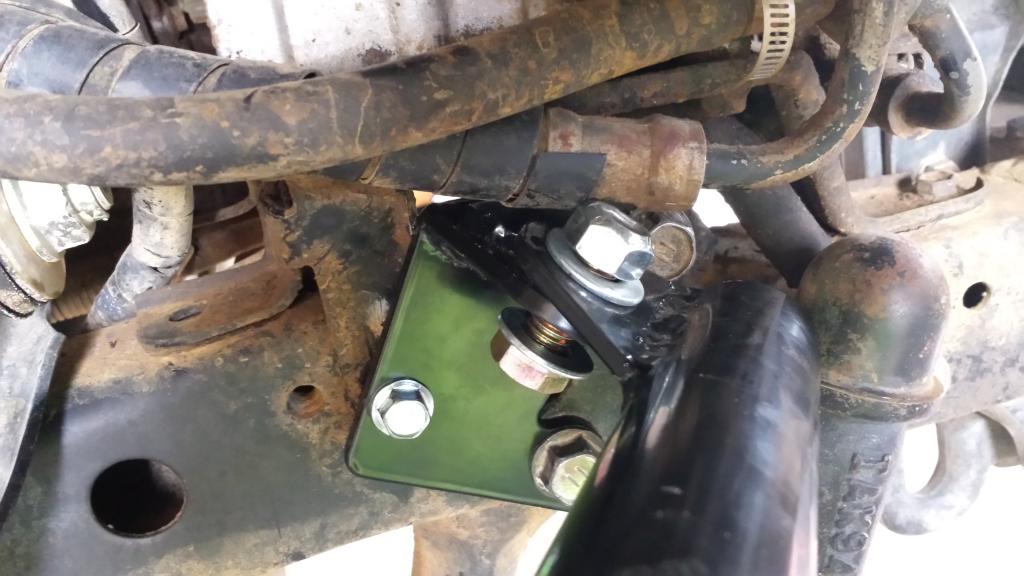
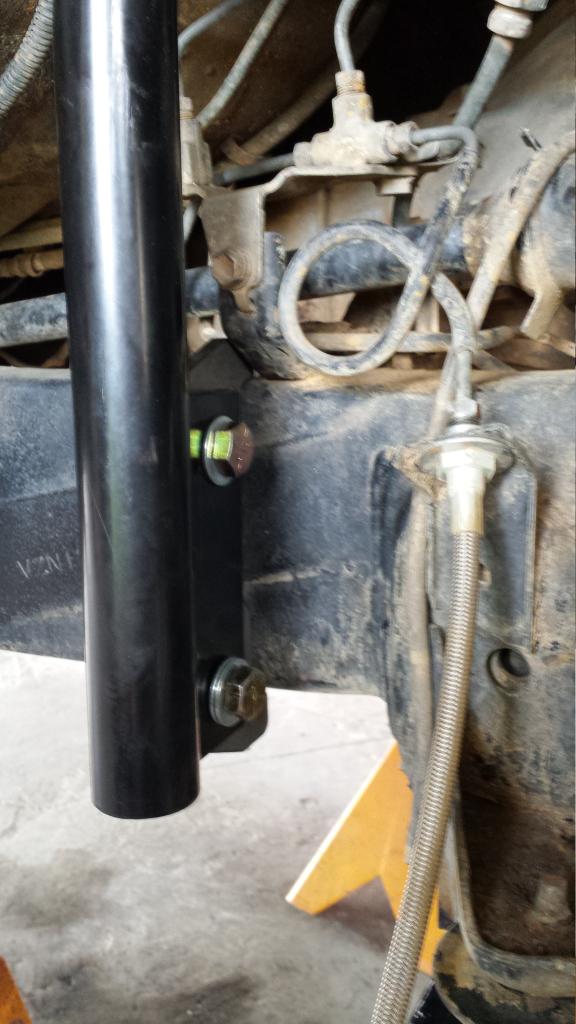
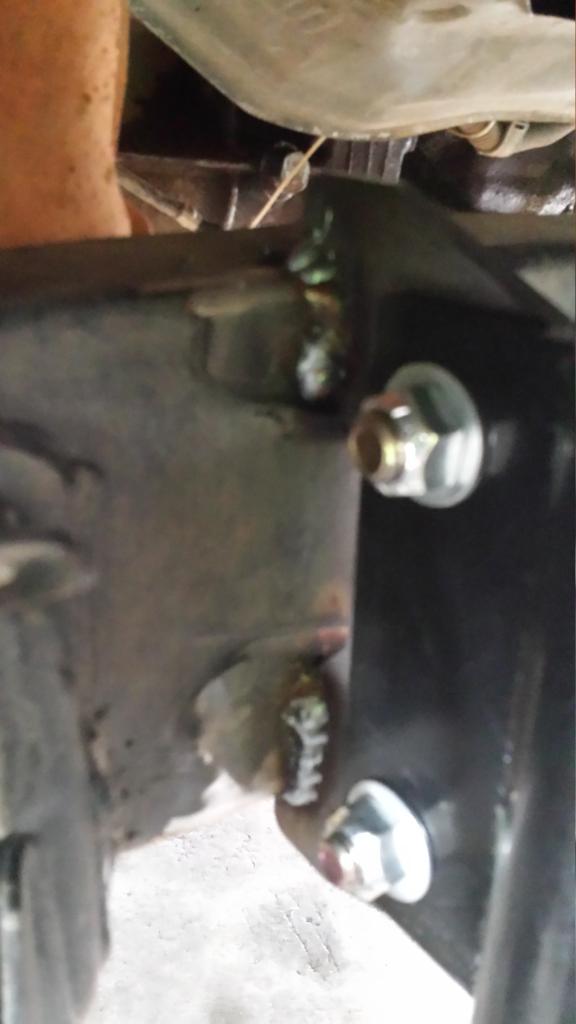
Now it's time to install the brackets.
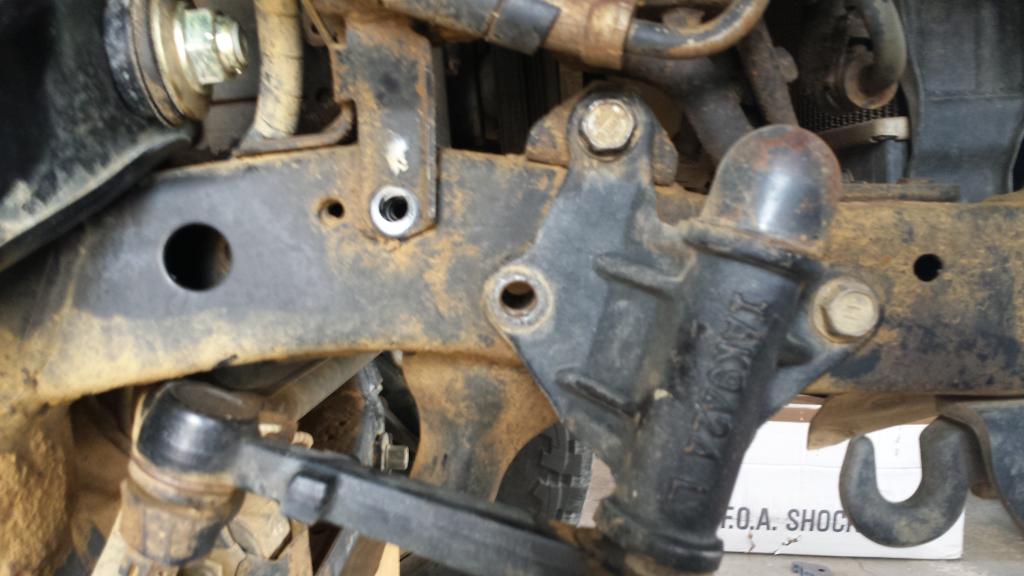
Lets start with the front pitman arm bracket.
Remove the two bolts shown.
Using same hardware install the bottom bolt/nut first (don't tighten)
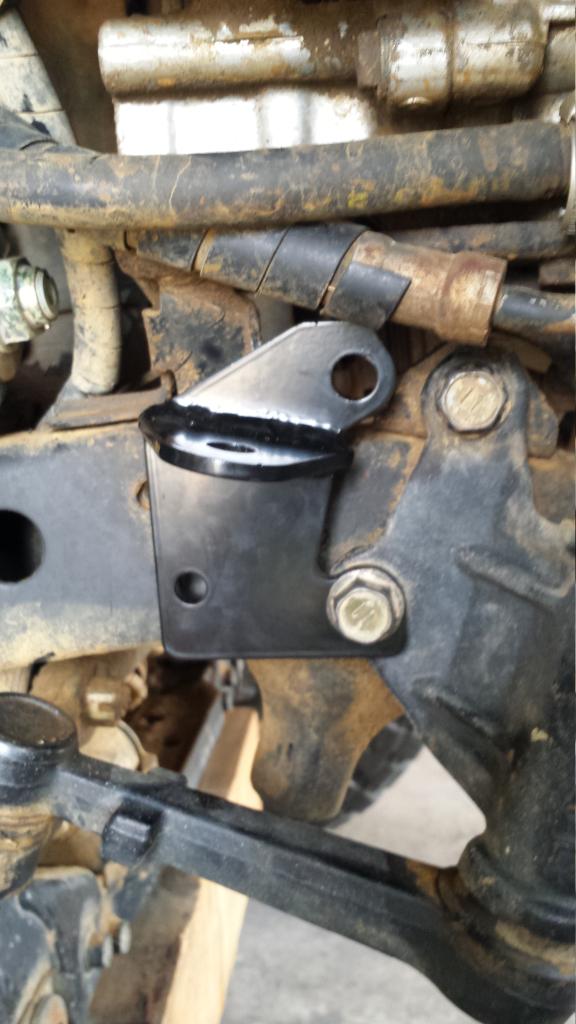
Then the top (don't tighten)
Last install the new bolt given in the kit and tighten all 3 down.
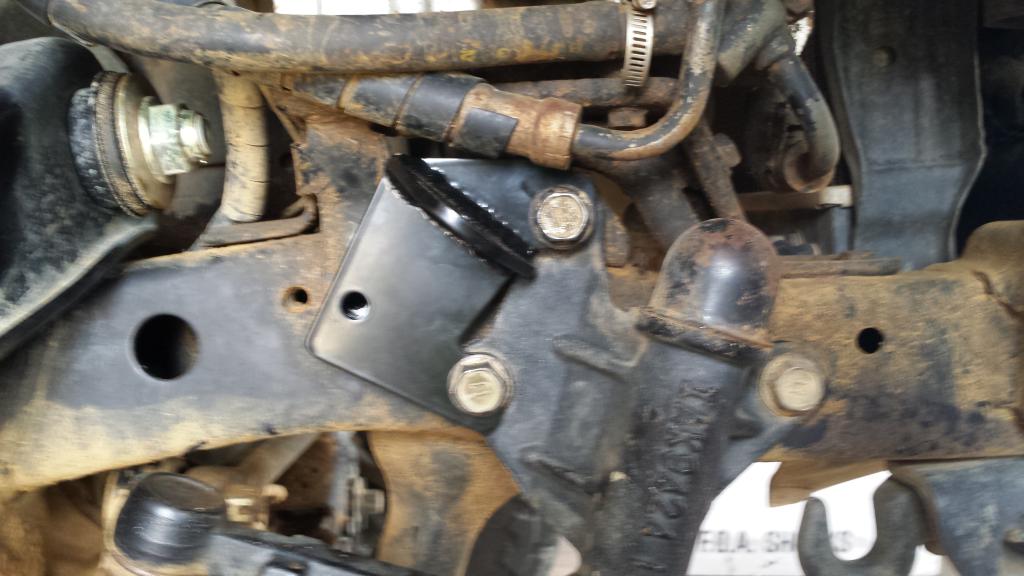
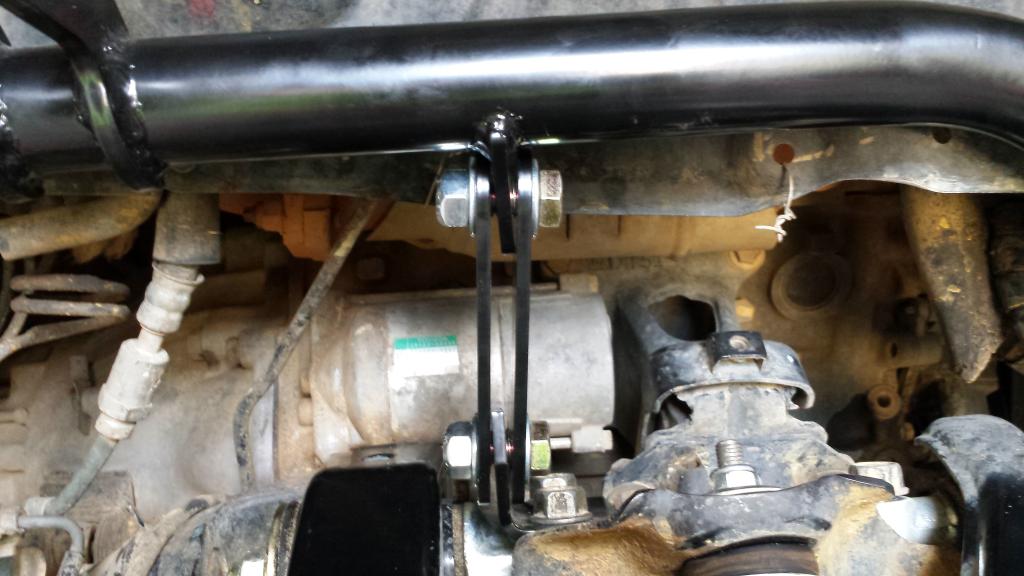
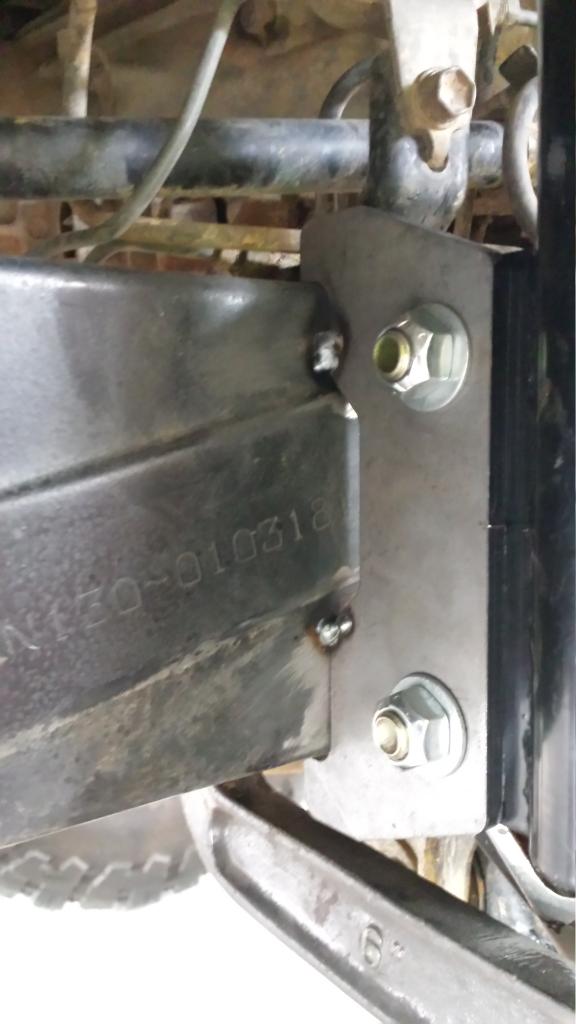
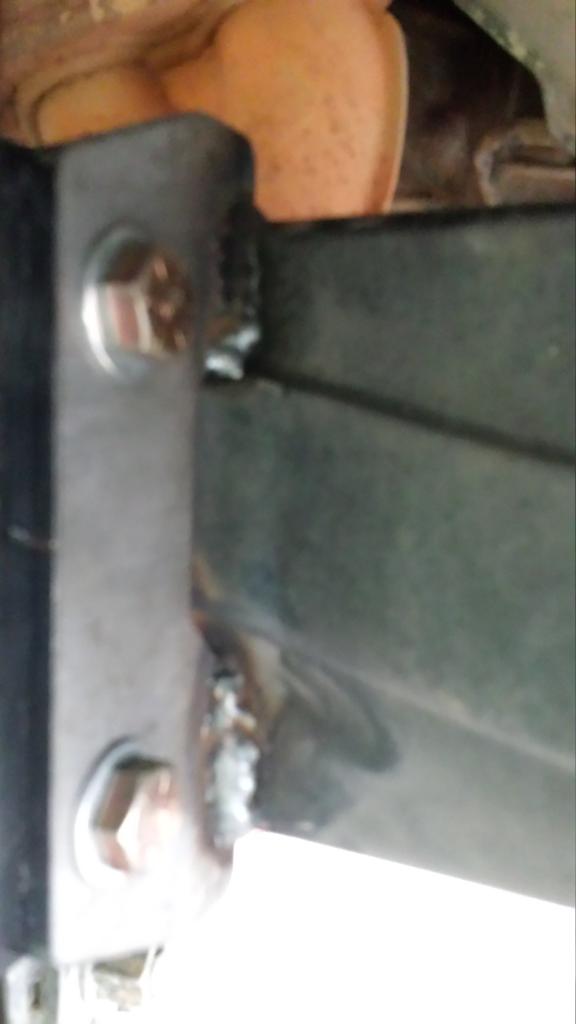
Lets move on to the middle cross shaft bracket.
First Loosen all 3 bolts on the cross shaft.
Then remove the 2 bolts shown.
Install middle cross shaft bracket and tighten all bolts back down.
Attach 2 upper brackets to middle cross shaft bracket (don't tighten).
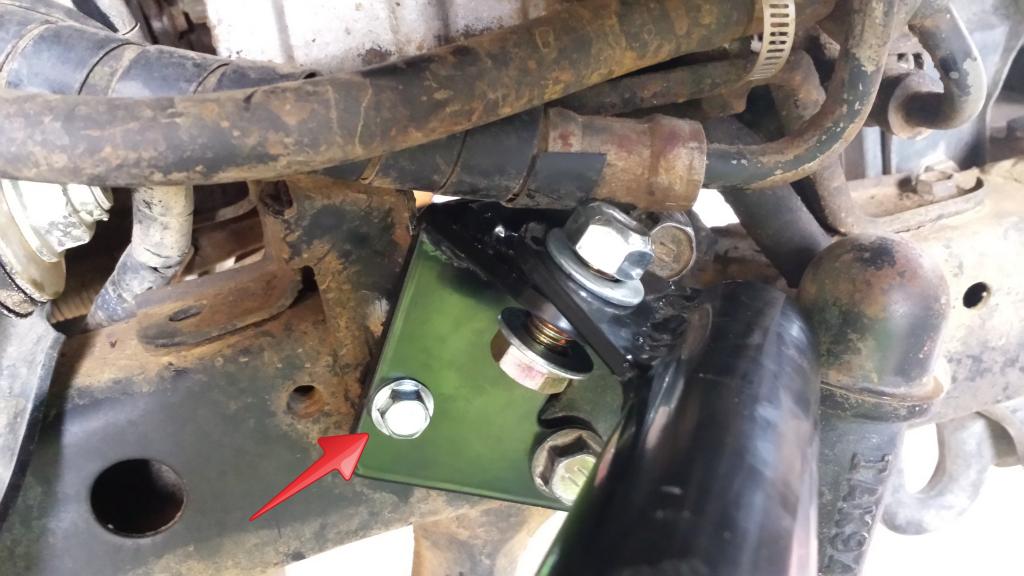
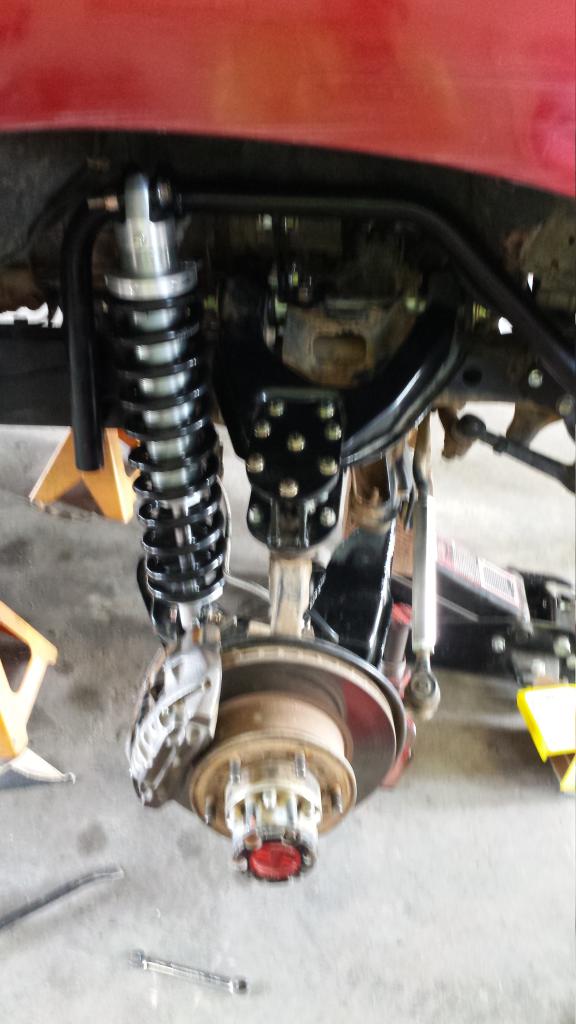
Now its time for the shock hoop.
Attach shock hoop to front pitman arm bracket first.(don't tighten)
Now attach shock hoop to upper brackets.
Then attach weld-on bracket to the shock hoop
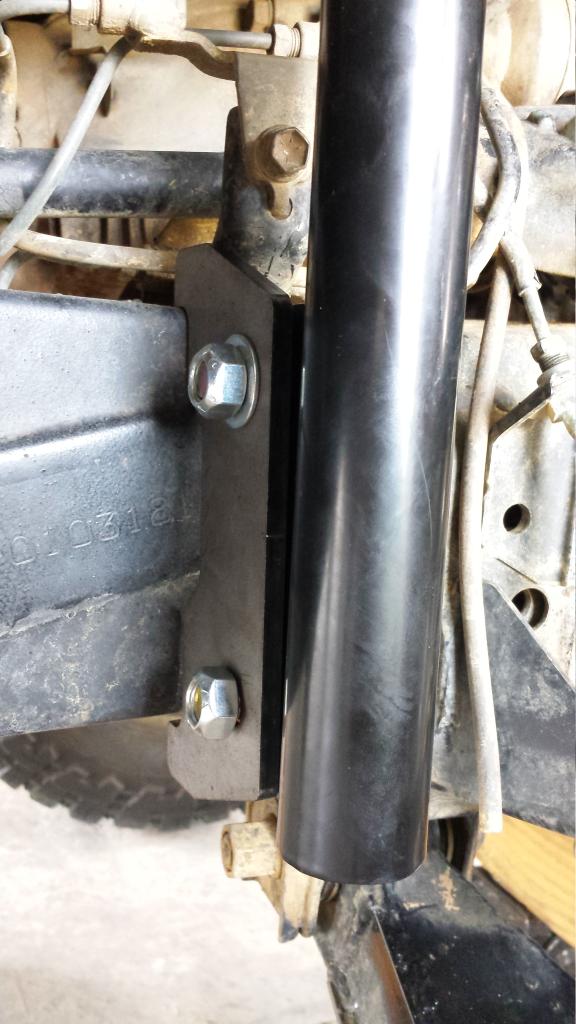
Tighten Down all brackets.
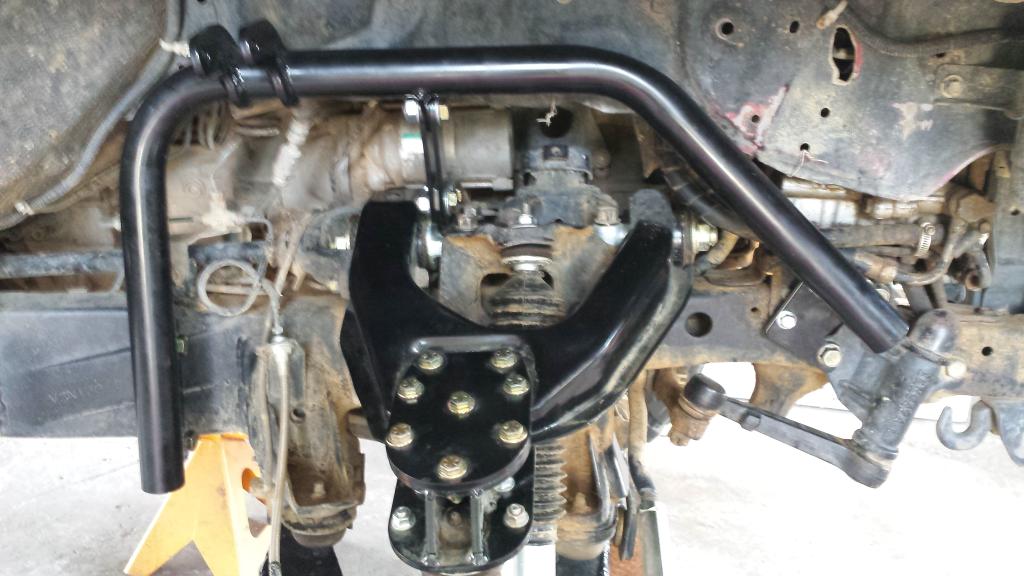
Using a C-clamp clamp down shock hoop to the frame.(If your worried about a little scratch from the c-clamp use a block of wood in between)

Tack the weld-on bracket in place.

At this time I decided to check to make sure the coilover fit properly (which it did).
Remove your C-clamp and weld on the bracket in the following locations ONLY.
Slap some paint of your choice on the brackets...
(I used rustoleum gloss black.)
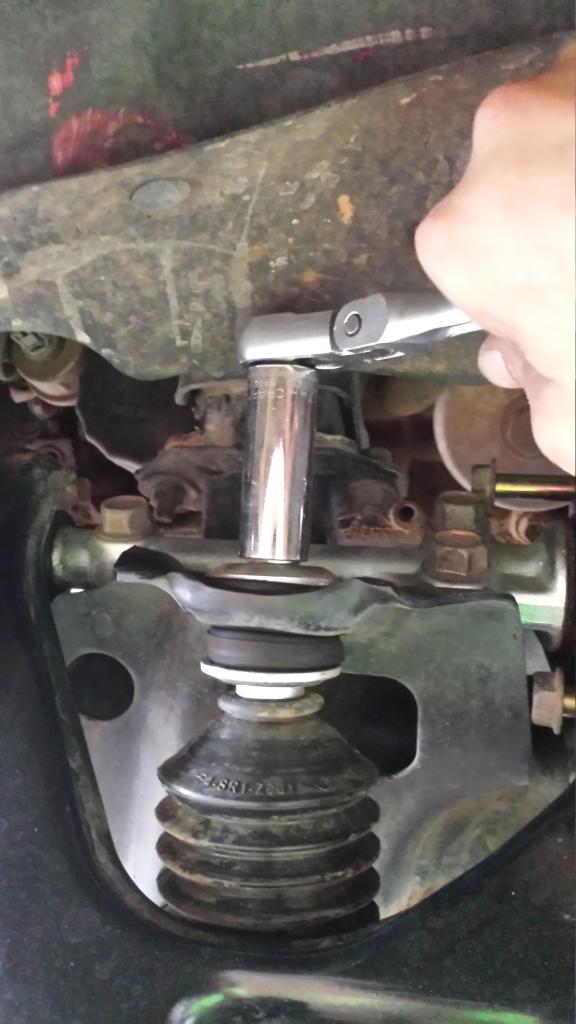
Now install coilovers using remaining hardware.
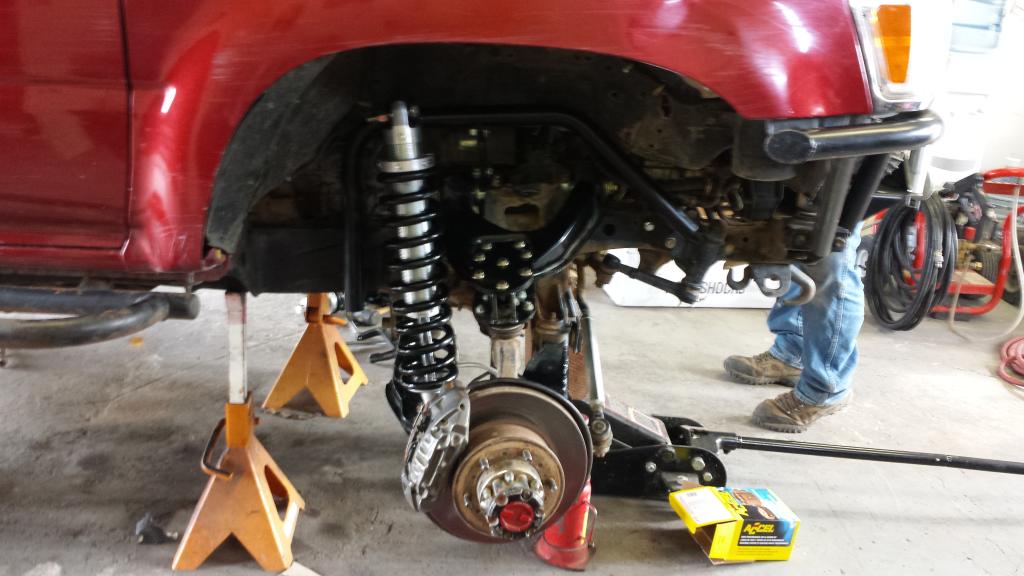
Now it's time for fine tuning!!
Enjoy!!!
Lets start with the front pitman arm bracket.
Remove the two bolts shown.

Using same hardware install the bottom bolt/nut first (don't tighten)

Then the top (don't tighten)

Last install the new bolt given in the kit and tighten all 3 down.

Lets move on to the middle cross shaft bracket.
First Loosen all 3 bolts on the cross shaft.
Then remove the 2 bolts shown.

Install middle cross shaft bracket and tighten all bolts back down.

Attach 2 upper brackets to middle cross shaft bracket (don't tighten).

Now its time for the shock hoop.
Attach shock hoop to front pitman arm bracket first.(don't tighten)
Now attach shock hoop to upper brackets.
Then attach weld-on bracket to the shock hoop


Tighten Down all brackets.

Using a C-clamp clamp down shock hoop to the frame.(If your worried about a little scratch from the c-clamp use a block of wood in between)

Tack the weld-on bracket in place.


At this time I decided to check to make sure the coilover fit properly (which it did).
Remove your C-clamp and weld on the bracket in the following locations ONLY.


Slap some paint of your choice on the brackets...
(I used rustoleum gloss black.)
Now install coilovers using remaining hardware.


Now it's time for fine tuning!!
Enjoy!!!
Last edited by andersej; 07-21-2014 at 08:33 PM.
07-21-2014, 09:46 PM
#54
Registered User
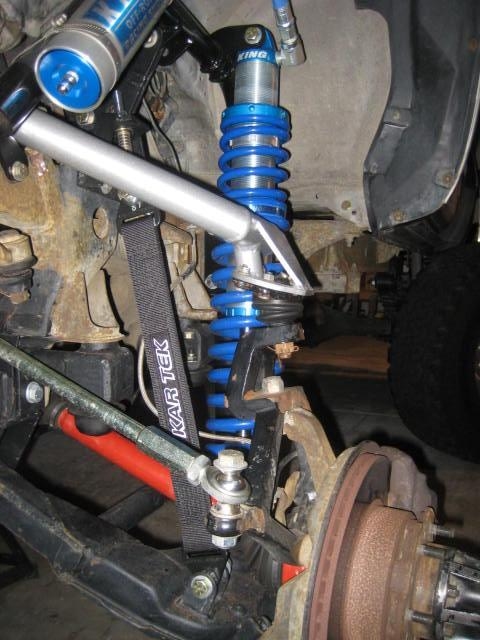
Looks great. Nice write up. The only aspect I see needing comment / correction on is the shock hoop could bolt below the Idler / Pitman brackets, not above. As you have it is fine as the weld bracket compensates either way you initially locate it. The hoops just slide in or out of place a bit easier from below the bracket.
I'll comp you a DIY weld up Idler Arm Brace in appreciation for the shock hoop install write up. Keep us posted on how the tuning goes. Also, I didn't catch what size tires and rims (width and backspace) you are running. One down side to locating the coil over behind the UCA is with some rim/tire combinations the tire contacts the coil at full droop with the wheel turned to the far right or left. Did you find and rubbing with your set up?
I'll comp you a DIY weld up Idler Arm Brace in appreciation for the shock hoop install write up. Keep us posted on how the tuning goes. Also, I didn't catch what size tires and rims (width and backspace) you are running. One down side to locating the coil over behind the UCA is with some rim/tire combinations the tire contacts the coil at full droop with the wheel turned to the far right or left. Did you find and rubbing with your set up?
Last edited by BlazeN8; 07-21-2014 at 09:57 PM.
07-22-2014, 06:52 AM
#55

Nice job on the write up, I have been waiting for this to see how it turned out! Quick question, I thought I had read somewhere that it was best to keep the stock torsion bar installed with the coilover setup?
07-22-2014, 12:21 PM
#57
Registered User
You can do it two ways.
A) coil over conversion- 400-700lb coil spring depending on weight/application.
B) coil over assist- 200-400 coil spring w/ stock T-bars.
The coil over conversion will put more loads on the shock hoops. Under severe duty a strut running over the engine connecting the hoops is a good idea. A engine cage would be even stronger. My shock hoops are lighter duty but have been holding up for the most part. The exception is "huck fest" big air on an early prototype using .095 wall pipe and not .120 wall DOM. Purposefully under built to see what would fail.
The coil over assist will reduce the loads to the shock hoop as the spring load is divided between the coil and the T-bars. The coil over assist is also nice as it gives two areas to make adjustments / tuning. T-bar and coil spring load up differently.
Either route will put more load on the upper BJ so adding a limit strap to control down travel will reduce the possibility of popping the ball joint "ball" from the socket. You would want to connect one end of the strap to the frame and the other end to the LCA. The old shock mounting tabs work well. For the upper attachment use an adjustable clevis for dialing in the droop stop.
Last edited by BlazeN8; 07-22-2014 at 12:38 PM.
07-22-2014, 06:59 PM
#59
Registered User
Thread Starter
Join Date: Dec 2011
Posts: 228
Likes: 0
Received 0 Likes
on
0 Posts
You can do it two ways.
A) coil over conversion- 400-700lb coil spring depending on weight/application.
B) coil over assist- 200-400 coil spring w/ stock T-bars.
The coil over conversion will put more loads on the shock hoops. Under severe duty a strut running over the engine connecting the hoops is a good idea. A engine cage would be even stronger. My shock hoops are lighter duty but have been holding up for the most part. The exception is "huck fest" big air on an early prototype using .095 wall pipe and not .120 wall DOM. Purposefully under built to see what would fail.
The coil over assist will reduce the loads to the shock hoop as the spring load is divided between the coil and the T-bars. The coil over assist is also nice as it gives two areas to make adjustments / tuning. T-bar and coil spring load up differently.
Either route will put more load on the upper BJ so adding a limit strap to control down travel will reduce the possibility of popping the ball joint "ball" from the socket. You would want to connect one end of the strap to the frame and the other end to the LCA. The old shock mounting tabs work well. For the upper attachment use an adjustable clevis for dialing in the droop stop.
 07-22-2014, 07:04 PM
#60
Registered User
Thread Starter
Join Date: Dec 2011
Posts: 228
Likes: 0
Received 0 Likes
on
0 Posts
Little update for you guys.
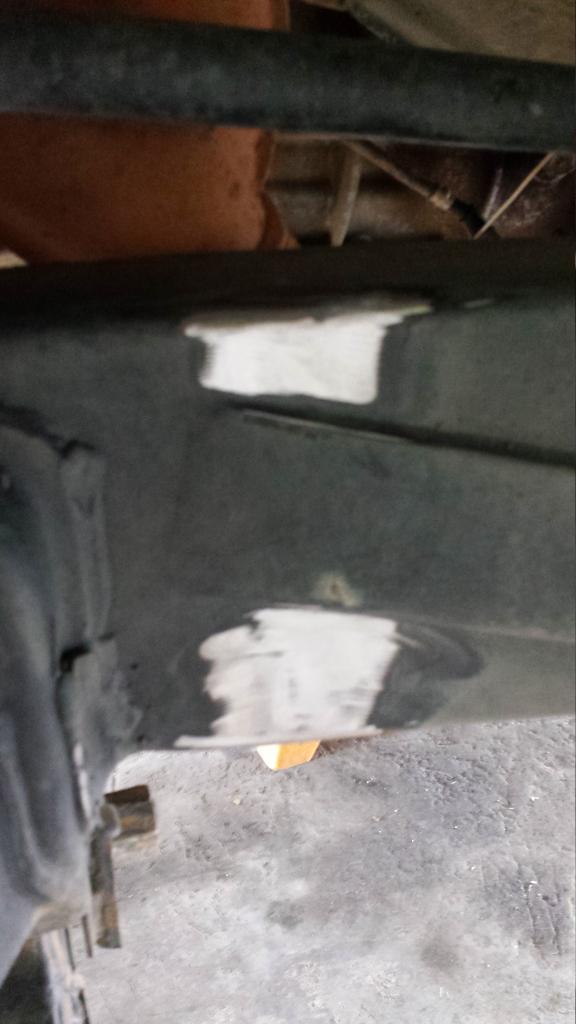
Ran into a slight problem during some test runs today. I found out that my springs were hitting my upper A-arms.
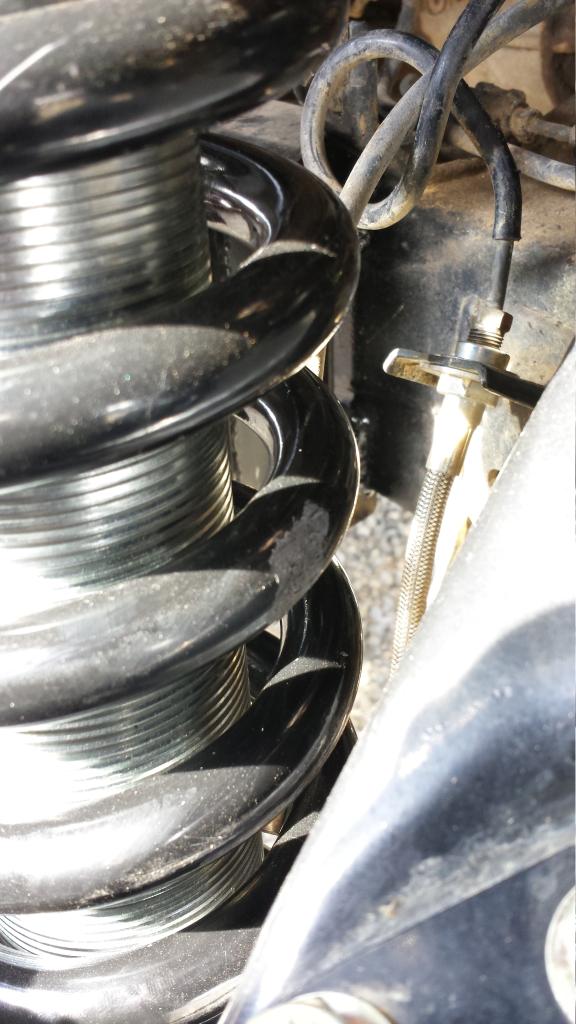
You can see the rub marks on the spring there and the edge of the a- arms. It was the same for both sides.
My guess is that from choosing a 2.5 in shock instead of a 2.0 is the problem.
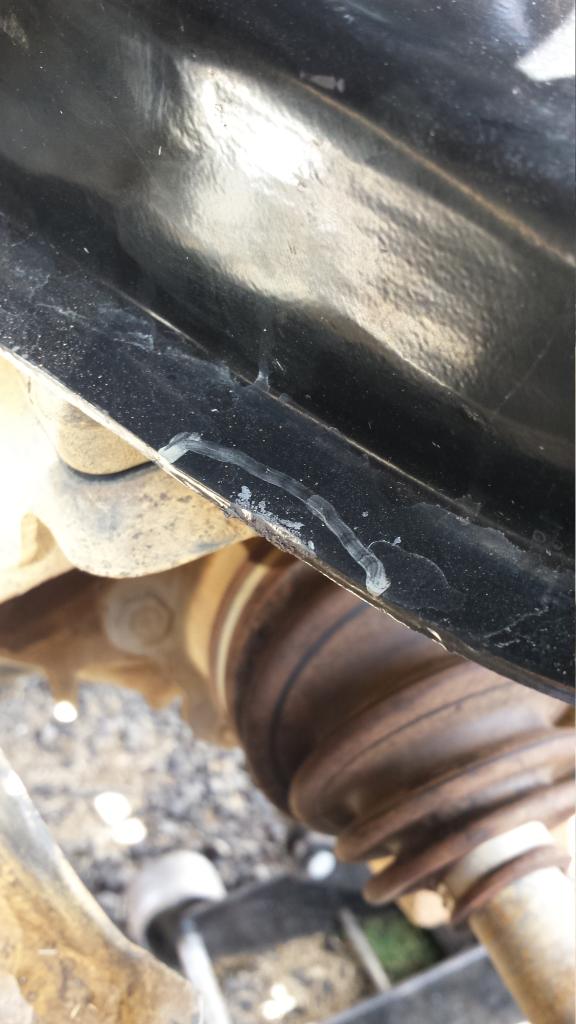
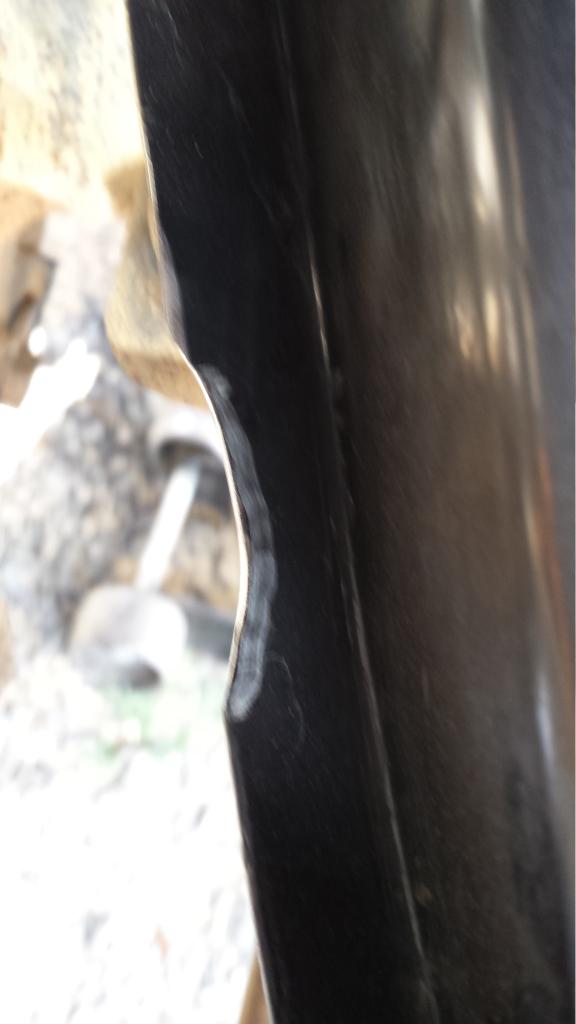
So I decided to grind out the area that hits on both sides.
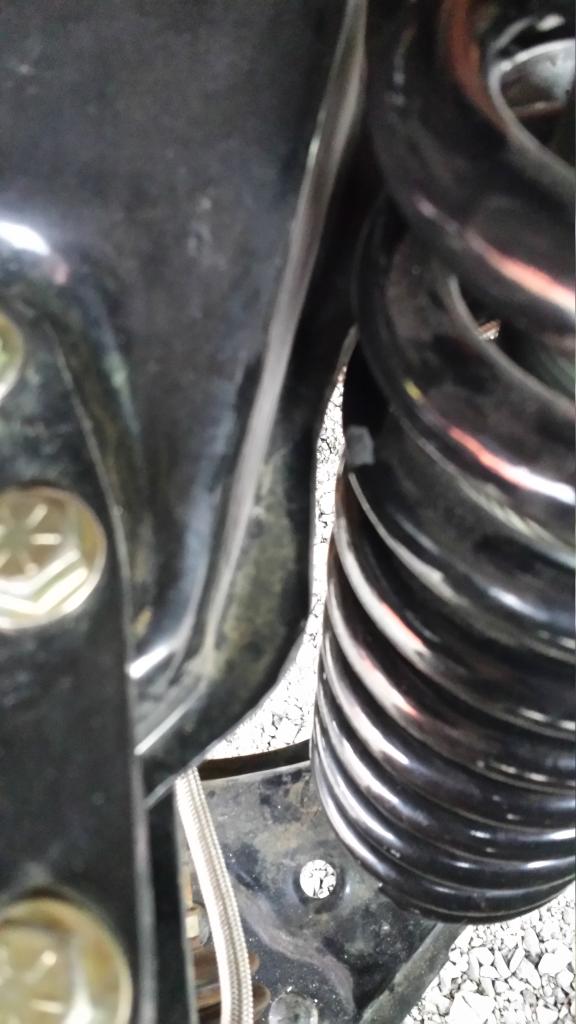
I also set my preload a little tighter after seeing the springs free hang at full droop.
I'll do some more testing tomorrow and see how it turns out.
Ran into a slight problem during some test runs today. I found out that my springs were hitting my upper A-arms.


You can see the rub marks on the spring there and the edge of the a- arms. It was the same for both sides.
My guess is that from choosing a 2.5 in shock instead of a 2.0 is the problem.
So I decided to grind out the area that hits on both sides.


I also set my preload a little tighter after seeing the springs free hang at full droop.
I'll do some more testing tomorrow and see how it turns out.


