When you click on links to various merchants on this site and make a purchase, this can result in this site earning a commission. Affiliate programs and affiliations include, but are not limited to, the eBay Partner Network.
So I decided to fix this ol runner up, I also decided to do a build thread as I have done on all of my Hondas on another tech forum.
Little background:
My grandfather bought this truck new in 1987 and last September gave it to me.
Just to get it out of Kingsport TN i had to replace the alternator and thermostat. On the way home it decided to burst the coolant hose located below the power steering pump so a couple hours in the walmart parking lot in Erwin TN with some walmart purchased tools and I was on my way again.
Here it is after arriving home.
I drove this around as the family get around car while saving up to purchase my house WITH A FREAKING GARAGE before fixing anything.
Here it is 4th of July with the family, he had NEVER taken the top off...I couldn't believe it.
I love this truck and since I use it to haul my kayak to the lake and river I want to make sure it is done right. I also want to hopefully let my grandfather see it somewhat restored before he passes. (he has had two heart attacks and with COPD we never know)
First thing, we gotta outfit the new garage with some tools. I already have a toolbox from my (short) days working at the Honda Dealership but being a dealership monkey i like my air tools. Low and behold harbor freight had a blowout sale and i got a compressor, jack, and stands for 250 bucks. Its not the compressor i want, but a steal non the less.
That's better.
Now to the fun part....rust...I hate rust, rust hates me, its mutual.
The bumper and valance bolts wouldnt come loose, so the hell with it, i took it off in one piece
The battery was sitting a couple inches above the tire, started to tear it out some
Major power steering leak caused the busted hose, and another one ready to go at the bottom of the radiator, along with a crack in the lower radiator tube.
drivers side timing chain guide is broken partially. 197k miles isnt bad though.
And some random tear apart pics. since I'm doing the inner fender on the pass side I decided to remove all the wiring from the bay and all of the accessories so I can patch and paint. I have worked for a while with a body man/friend and I have learned ALOT from him, hopefully it is enough.
My plans for this truck are as follows.
Fix rust and paint the truck
replace all bad motor parts and redo all the seals (minus rear main which was done at last clutch job)
tune up with new plugs, wires, dizzy cap, fuel filter.
I will clean and lap the valves and clean the intake and head.
Replace faulty VAFM
Fix interior components which rotted from sitting for two years
zuk mod
plans may change depending on what i find in motor. it has 197k miles and didn't burn ANY oil or coolant and ran pretty strong minus the dead spot in the VAFM
Probably going to do a single stage urethane. Probably a similar color to factory as to not have to do the jambs and such. Cant rule out a nice blue though (i love blue on these trucks)
i just got through pulling the head off and will put some more pics up in a little bit.
the list of broken things has increased
Bad:
Brake master cyl
two broken bolts on intake manifold where the heater return line goes
bad VAFM
bad wheel bearings
and i also had a weird gurgling noise out of the head when i was rotating the engine. not a compression or venting noise, but a gurgle. im wandering if i have some cracks in the head. will have to send off for checking.
I got the rest of the battery support off and tested out the new tool. But in the process found that the inner well is really rotten where it attaches to the radiator support, so i think I'm going to cut it out and just replace the whole front half.
I'm planning on swapping the intake and battery so i can take that moment to make a spot for fresh air for the intake.
And the reason it rotted so bad. ..the battery is to large and over hung the tray allowing the acid to run down. I will buy the appropriate battery.
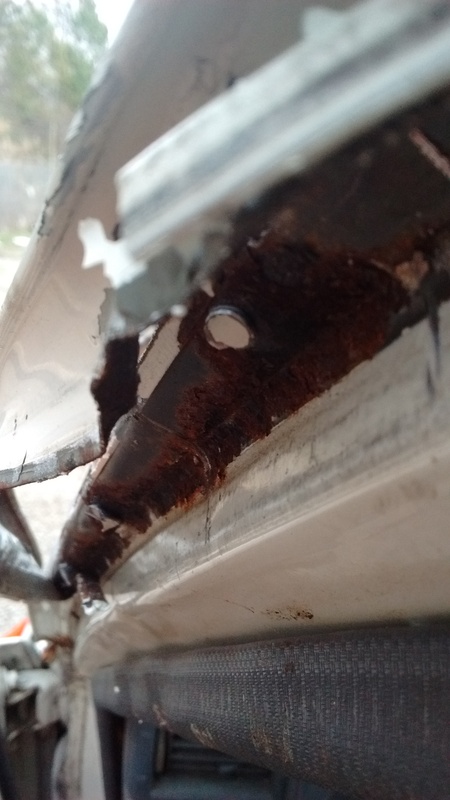
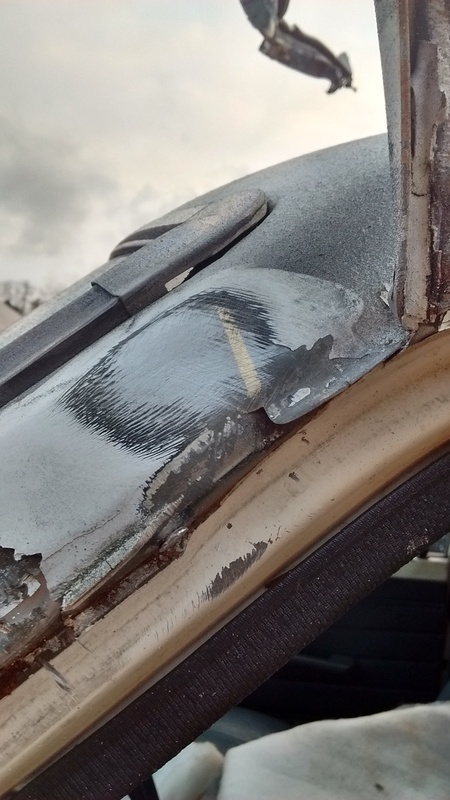
Just FYI, the cracked seam sealer that holds the rain gutter to the A-pillar will not let water into the truck. Well, not exactly. The rain gutter is spot welded to the outside of the A-pillar so the seam sealer just keeps water from getting between the rain gutter and the A-pillar. What happens is that when the seam sealer cracks water gets between the rain gutter and A-pillar and can cause rust which eventually leads to holes in the A-pillar. Slacker once suggested removing the rain gutter to resolve this problem. Here's some pictures I took while experimenting on a truck in the junkyard.
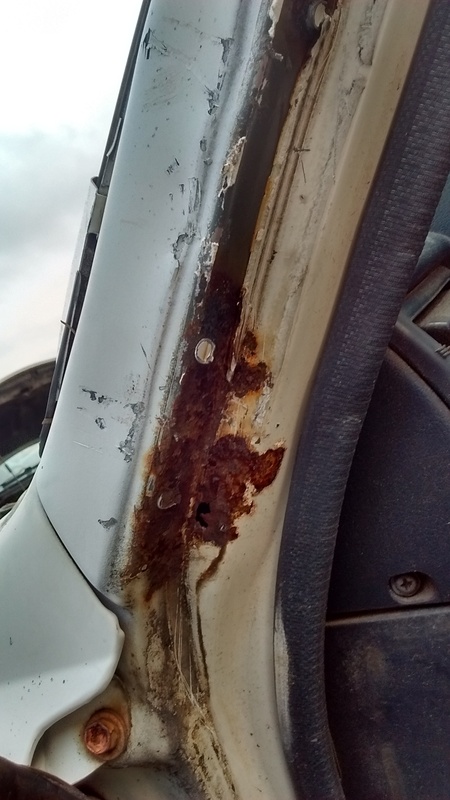
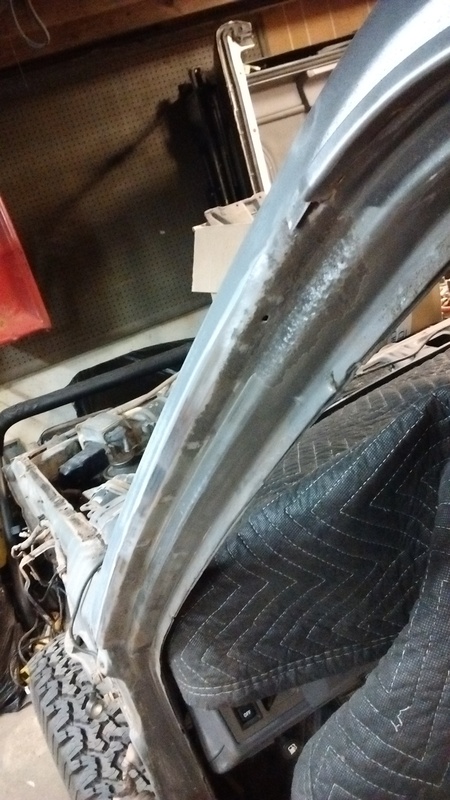
Here's my truck with the rain gutter removed and spot welds smoothed. You can see a couple little pinholes which have appeared. The nice thing is that this is a rare case where rust starts from the outside and works in. Typically it starts where you can't see it and works its way out. By the time you see it, it's already really bad.
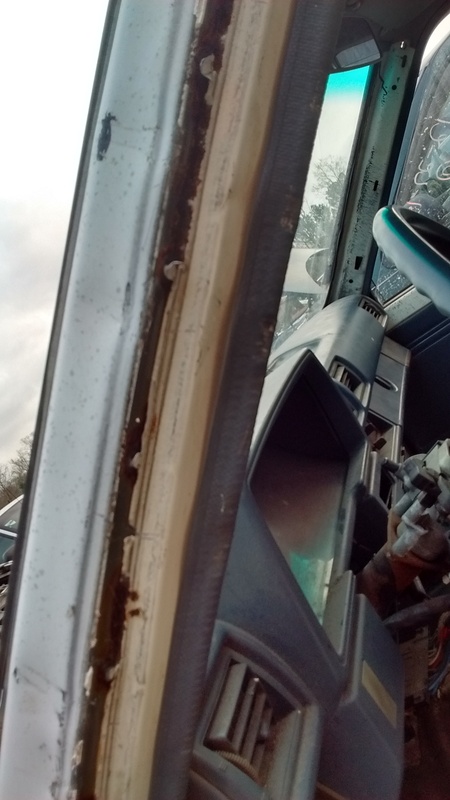
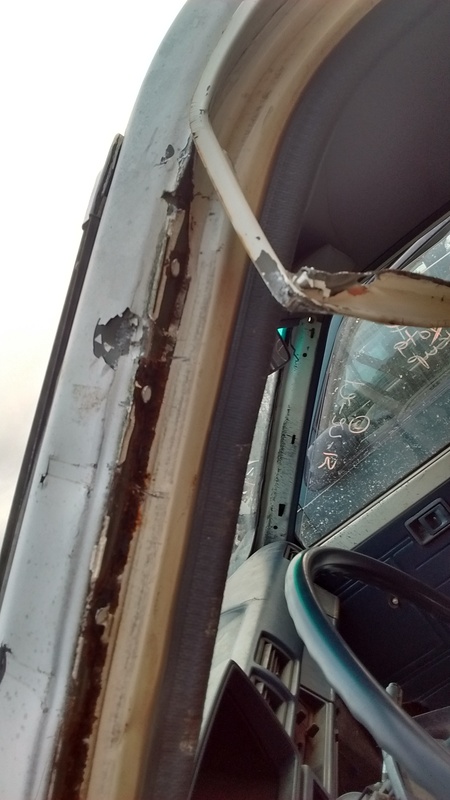
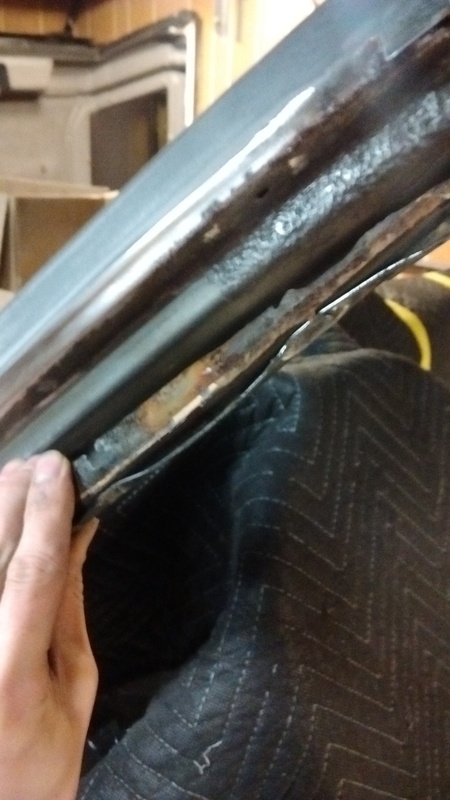
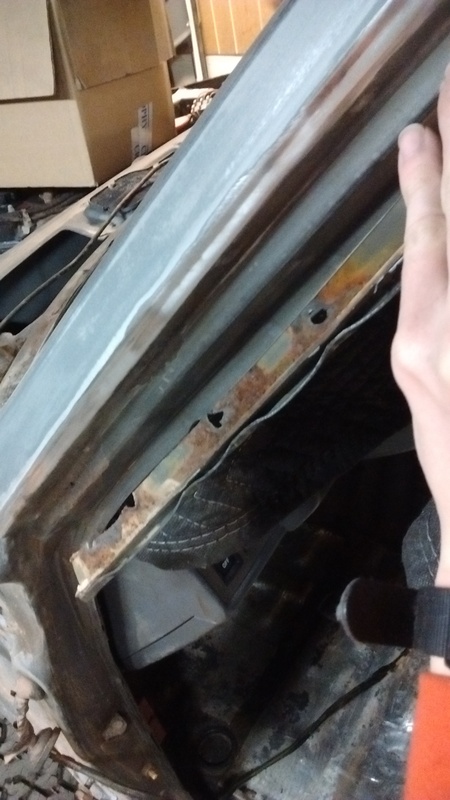
That picture i took doesn't show well but there are two holes. One in the gutter and one opposite that where the old windshield trim was. I believe they are both part of my leak.
I will remove the windshield and fix both
Did you also remove the gutter from the fiberglass top? It will look funny i think if you didn't
I only removed the rain gutter on the A-pillar. I left it in place along the roofline. I plan to run my Can-Back soft top since the 4Runner is my nice weather vehicle so I have no plans to do much work on the hardtop.
Well finally finished cutting the front section. And some of the radiator support. Now i need to get sheet metal and build them back.
This thing is a life saver.
Side note. I forgot to break the crank pulley loose before removing the head and wiring. Now i can't get it loose.
I had it in 4wd in gear, rear brake set, and someone holding the brakes while using my breaker with the jack handle on it and it still pulled the truck up on my 3/4 block of wood not to mention it slipped loose and hammered the inner fender on the drivers side due to the drivetrain pressure, luckily barely missing the fender.
My 1/2 impact is a big baby and won't budge it either.
Tried again with Jack stands for chocks and in 5th gear. Now the clutch won't hold the pressure I'm putting on it. Ahhhhhhhh
Great to hear you are getting your grandfathers truck and bringing it back to life. Nice looking runner you have. I had to pull a motor one time just for the fact I could not get enough leverage on it to break the bolt loose. Looking forward to your build.
A foot of snow on the ground and honda daddy mode minivan is not joy riding
Hey man, I hadn't realized you started your build! Really cool! I feel you on the snow- I can't get over to the garage I'm working in and it's killing me.
I think it's really great that this is a family truck, too- should help keep you inspired while you're working on it. It's cool seeing the family piled in the back with the top off. My kids can't wait to ride around with "no roof".
I'll be following your approach to fixing the rust around the a pillar, too.
On a side note, it makes me happy to see that when you opened a beer last week on my birthday you were likely drinking a good beer- that Beer Camp series is great!
Those kids love the roof off. The two year old just laughs the whole time.
The 2015 beer camp was good but the 2016 is amazingly good.
I have never done body work, just worked along side a guy who does. I ask questions and learn fairly well.
After breaking my last 6 point i decided to work on my welder.
I have never welded nor do i own one, i am making one out of microwave transformers. I am an appliance tech so i get these things all the time.
I made my first transformer last night. Produces 23vac on the secondaries draws 8a on the primary side.
Using a coat hanger and it works. Max amp draw with coat hanger dead shorted was 144.2 amps. One i finish my second trans it should produce around 44vac. Which is more than enough to weld with. I will also use real welding rods and not coat hangers.
 01-15-2016, 05:22 PM