duckhead's 91 pickup teardown and rebuild
 08-27-2015, 05:20 AM
#41
Super Moderator
Staff
iTrader: (1)
Join Date: Aug 2008
Location: Anderson Missouri
Posts: 11,788
Likes: 0
Received 21 Likes
on
19 Posts
You are getting after it real well. You will enjoy the experience when done and driving it down the road knowing you have touched every nut and bolt and it is your work that is getting you there and back. Great job you are doing.
 08-27-2015, 07:35 PM
#42
Registered User
Thread Starter

Join Date: Jun 2015
Location: WI
Posts: 147
Likes: 0
Received 0 Likes
on
0 Posts
Thanks bump! Yah I contemplated doing what I could but after reading a few builds on here and reading all 80 pages of a build slacker did I got a bit motivated. I also want this thing to last another 10 years so I was all in!
Couldn't agree more Terry and thanks!!! I wish I had a little more time this summer to at least get everything back on the truck. Gonna hafta hang it up in a few days...
08-27-2015, 07:49 PM
#43
Registered User
Thread Starter
Join Date: Jun 2015
Location: WI
Posts: 147
Likes: 0
Received 0 Likes
on
0 Posts
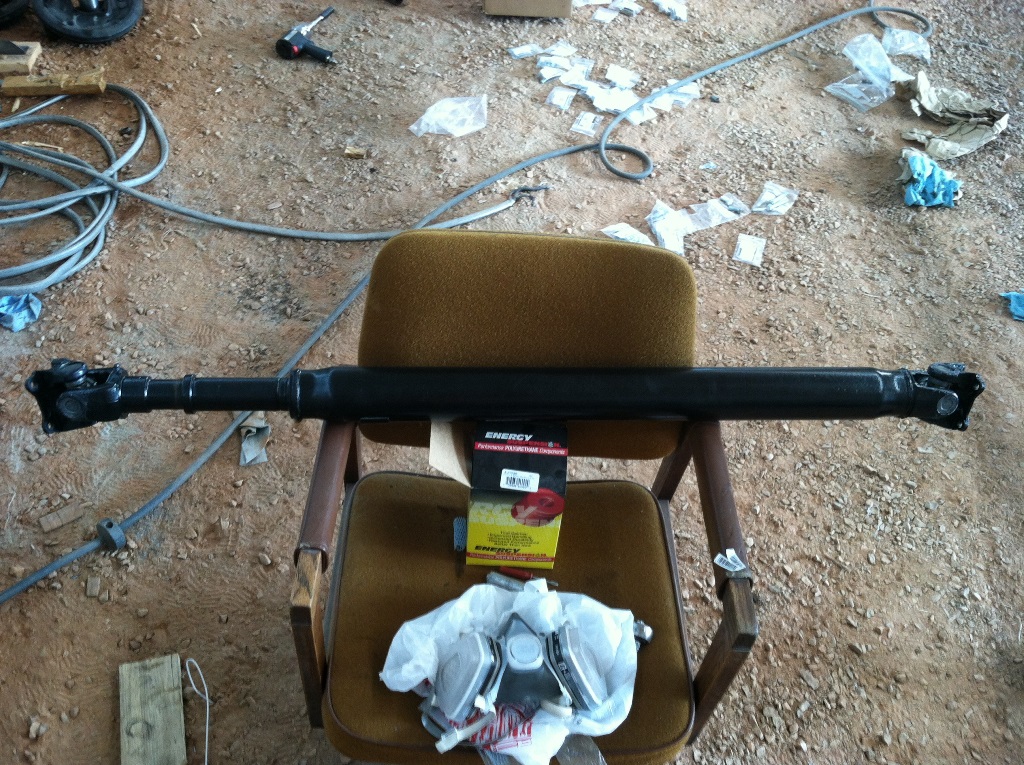
Got me some U-joints from Marlin Crawler and put em in my blasted then painted drive shaft.
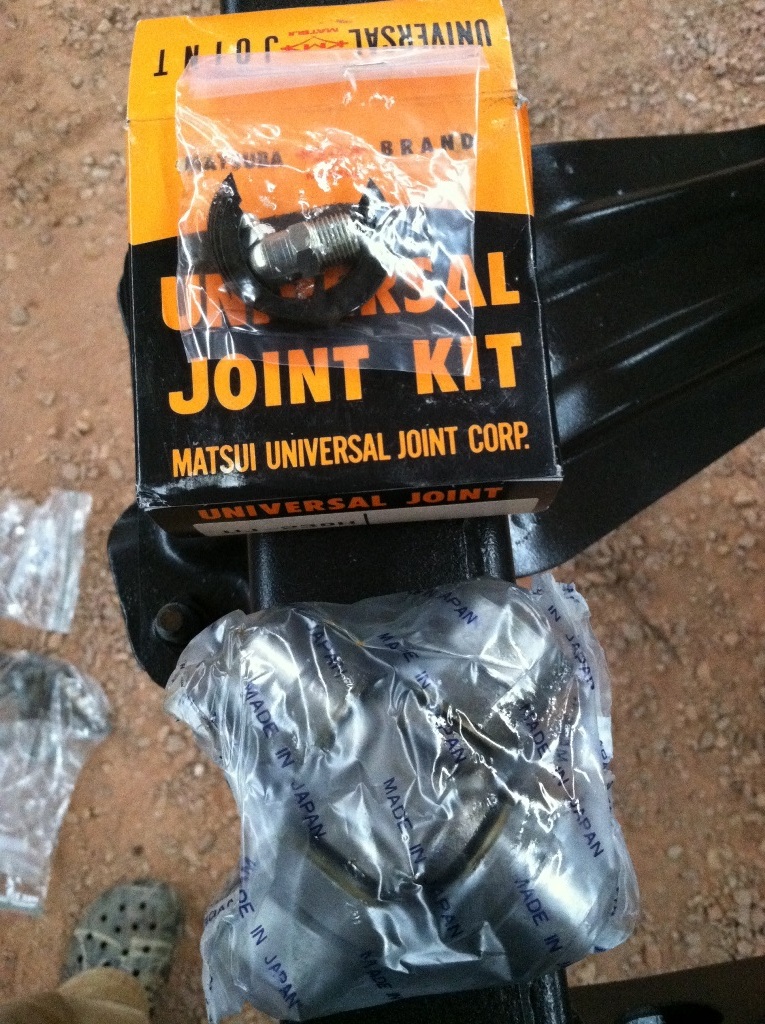
Ignore the mess
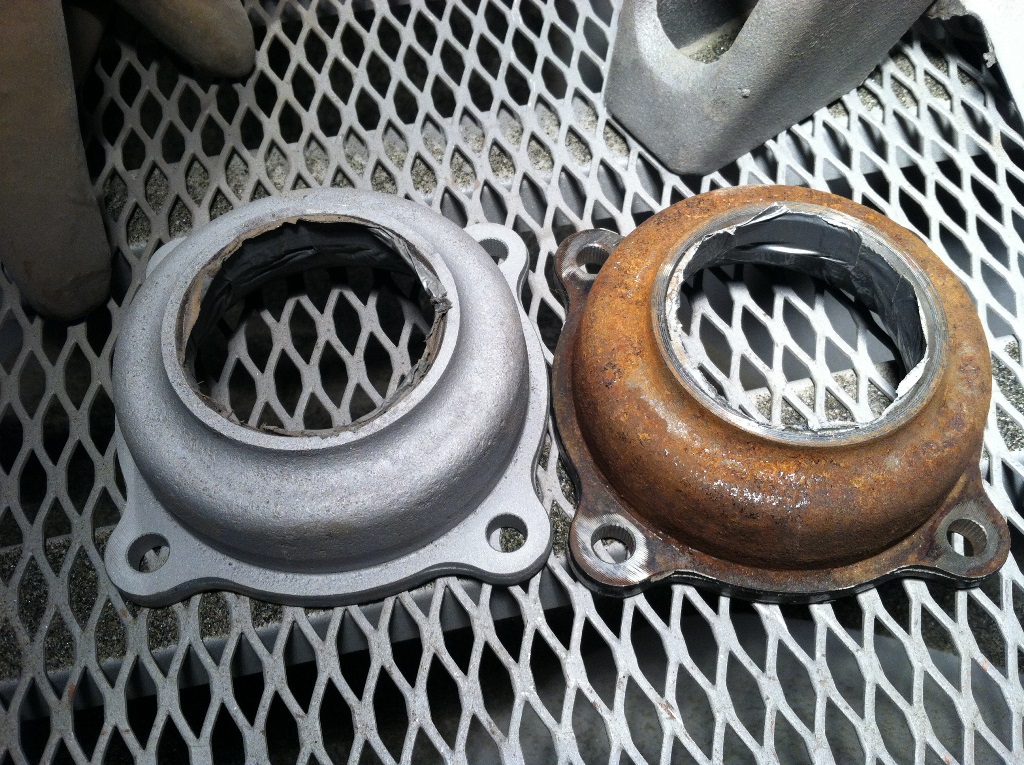
I had some more painting to do with a few parts but most importantly the front differential. When I took my CV shafts off I noticed some play in the passenger side. Well I had a problem that I thought was either a wheel weight issue or bad CV... When I go approximately 55mph the truck would shake. When I saw the play I thought BINGO!!! Yah well... do yourself a favor and read the FSM There's supposed to be play there. Oh well... replaced the seals in there at least as there was nothing wrong with it.
Here's the bearing cups on the rear end. I duct taped the cup to avoid blasting and for the prep to paint
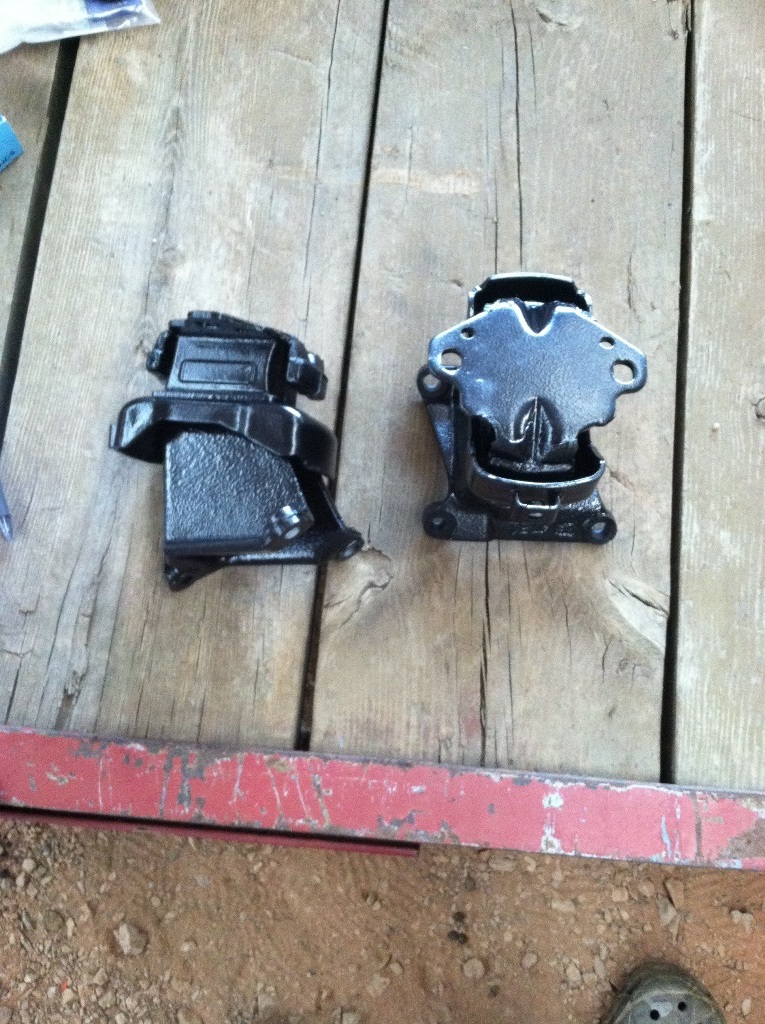
Motor mounts...
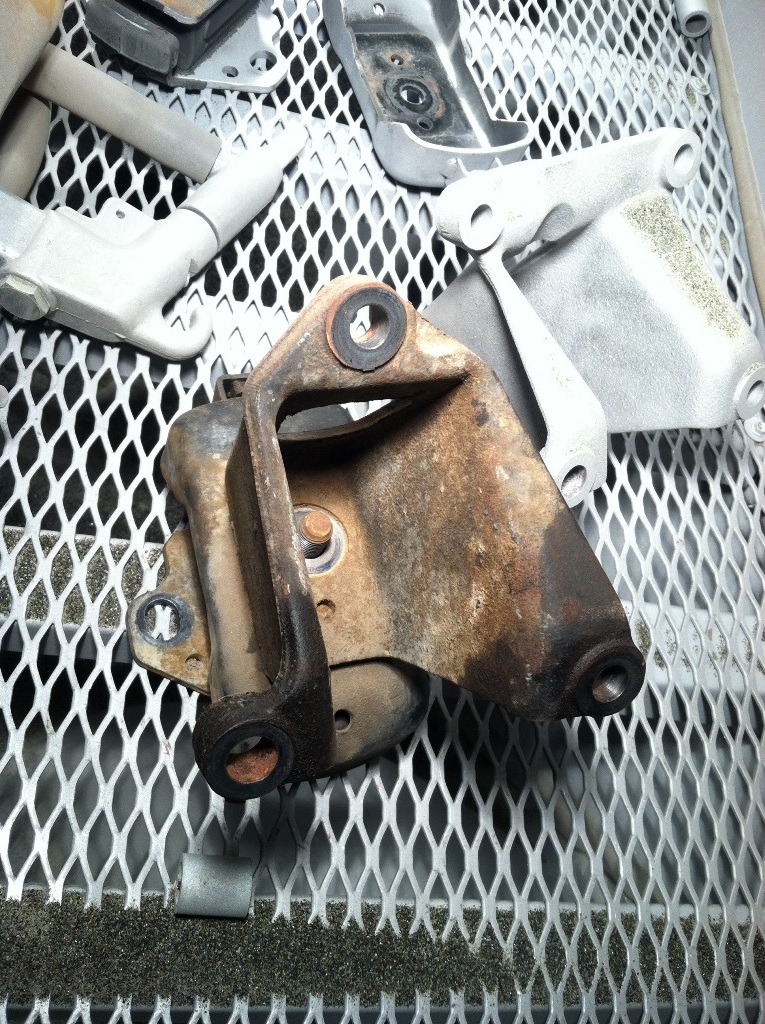
I bought new torsion bar bolts/nuts but need to reuse a couple pieces. They were rusted in pretty good so pressed em out, blasted em, and then painted.
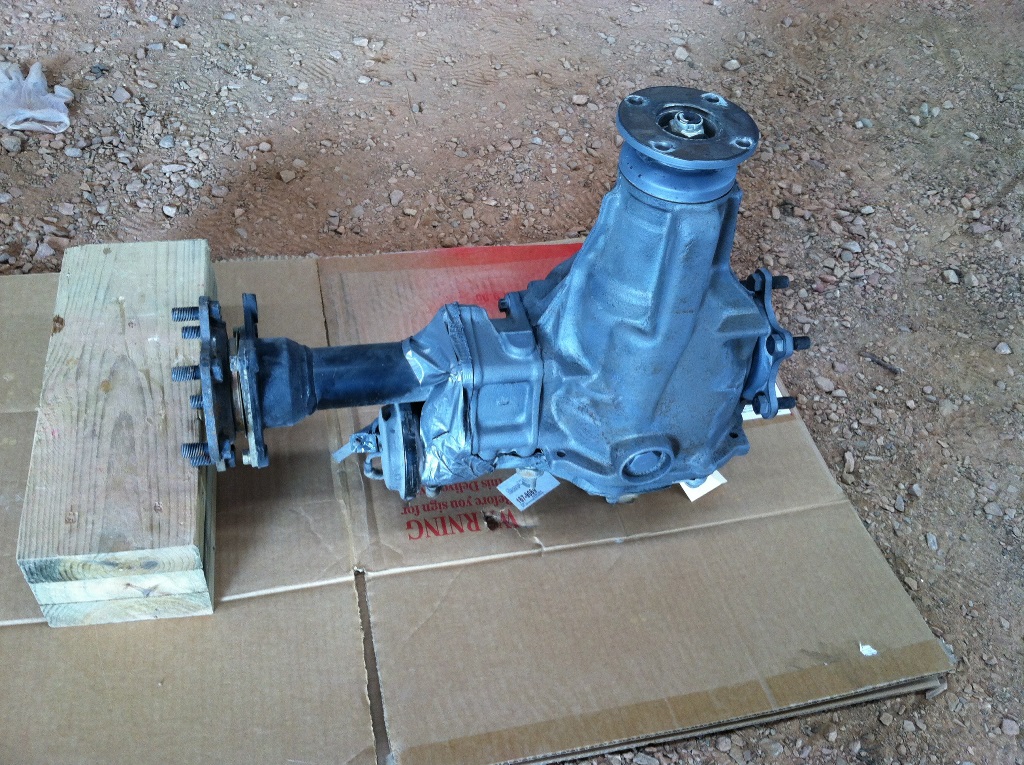
Here's the front differential blasted and metal prep'd
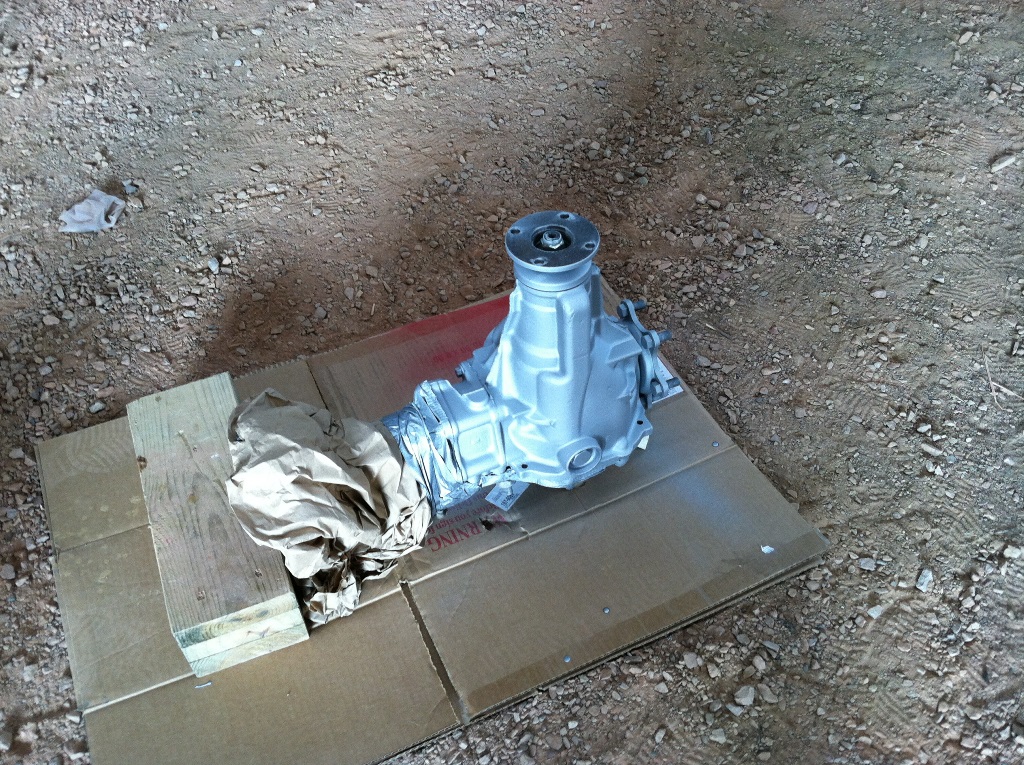
And painted silver
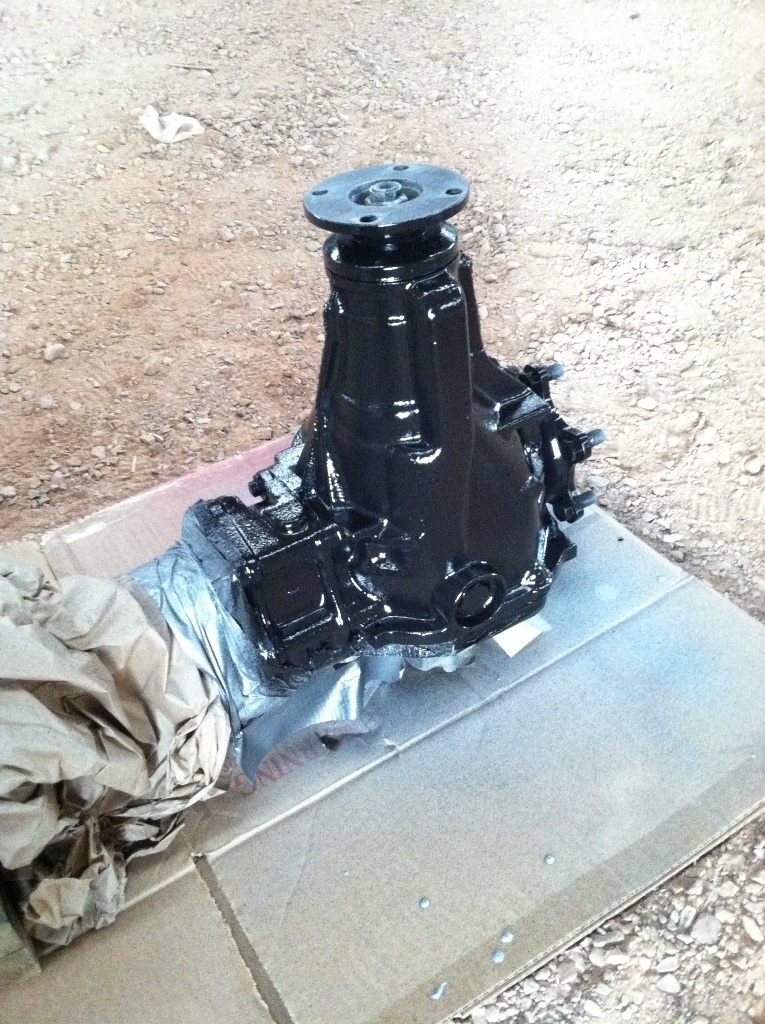
And black... (Same process for all parts )
)
Finally done with paint!!!!!!!! I can now focus on putting everything together. If only my CV axles were here
  They'll get here on Monday according to UPS.

Ignore the mess

I had some more painting to do with a few parts but most importantly the front differential. When I took my CV shafts off I noticed some play in the passenger side. Well I had a problem that I thought was either a wheel weight issue or bad CV... When I go approximately 55mph the truck would shake. When I saw the play I thought BINGO!!! Yah well... do yourself a favor and read the FSM
There's supposed to be play there. Oh well... replaced the seals in there at least as there was nothing wrong with it.Here's the bearing cups on the rear end. I duct taped the cup to avoid blasting and for the prep to paint

Motor mounts...

I bought new torsion bar bolts/nuts but need to reuse a couple pieces. They were rusted in pretty good so pressed em out, blasted em, and then painted.

Here's the front differential blasted and metal prep'd

And painted silver

And black... (Same process for all parts
)
Finally done with paint!!!!!!!!
I can now focus on putting everything together. If only my CV axles were here They'll get here on Monday according to UPS.
Last edited by duckhead; 08-27-2015 at 07:54 PM.
08-27-2015, 08:03 PM
#44
Registered User
Thread Starter
Join Date: Jun 2015
Location: WI
Posts: 147
Likes: 0
Received 0 Likes
on
0 Posts
Look what showed up from Denny's! I haven't opened it up yet but looks great and very well packaged. The timing cover was broke in shipment though but Denny is sending a replacement. Includes the gasket set from engine components. I was surprised to see "Made in China" for Denny's rep but I've read many people buy gaskets from this company with good results.
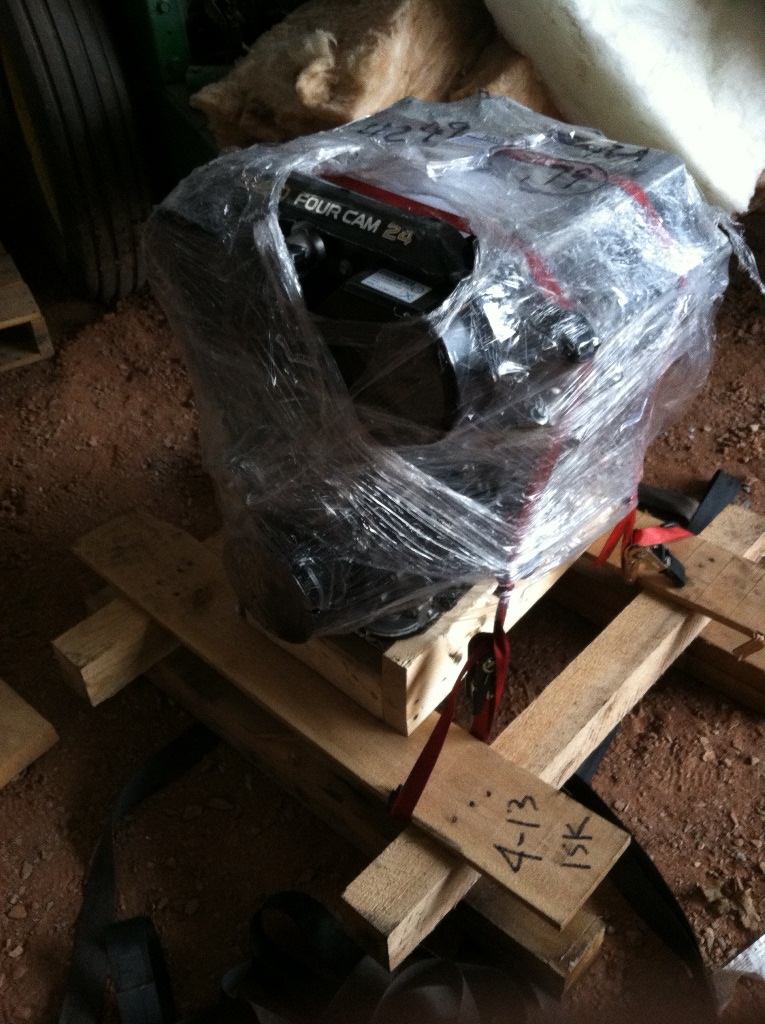
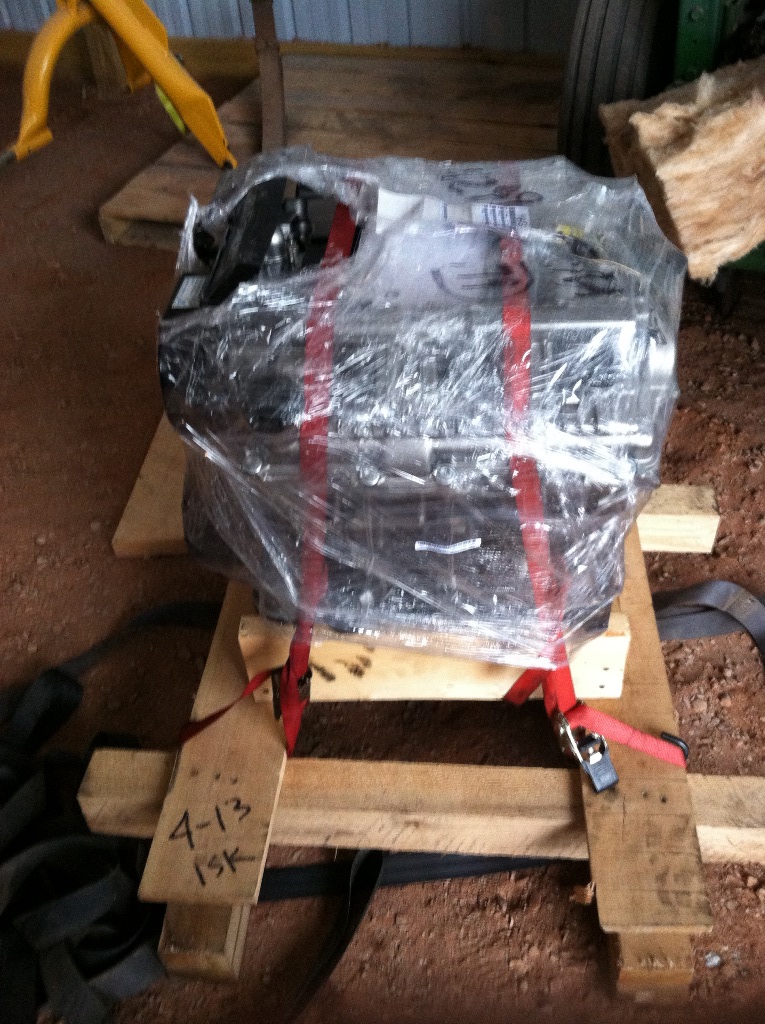
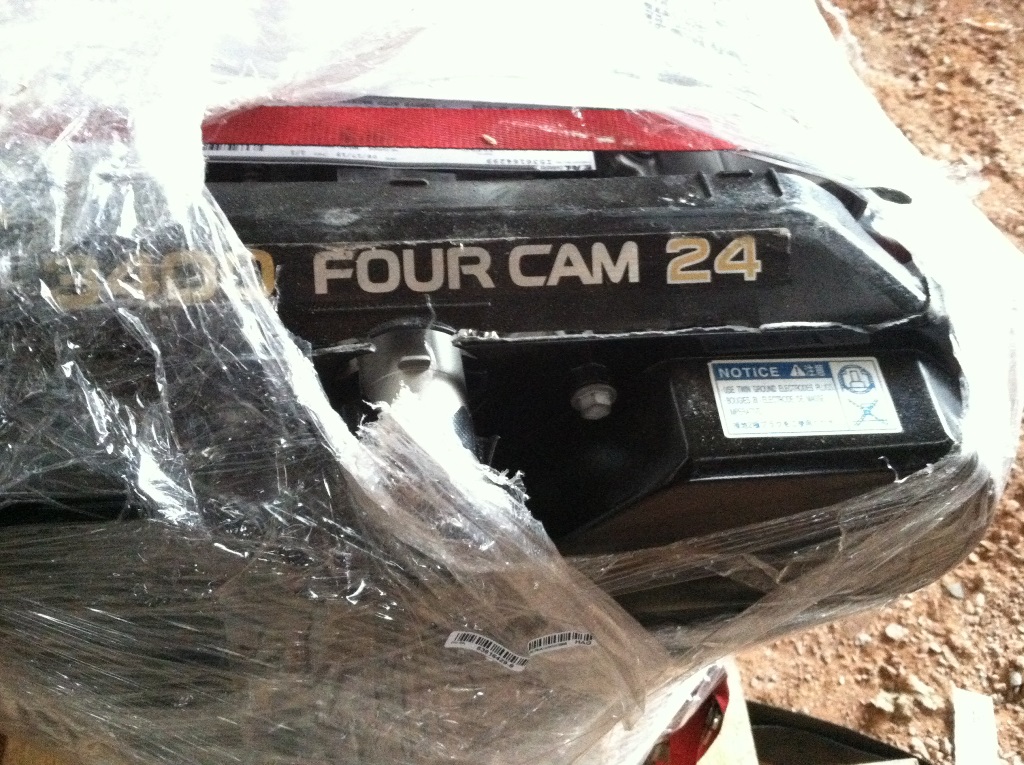

I haven't opened it up yet but looks great and very well packaged. The timing cover was broke in shipment though but Denny is sending a replacement. Includes the gasket set from engine components. I was surprised to see "Made in China" for Denny's rep but I've read many people buy gaskets from this company with good results.


 08-31-2015, 05:30 PM
#45
Registered User
Thread Starter
Join Date: Jun 2015
Location: WI
Posts: 147
Likes: 0
Received 0 Likes
on
0 Posts
Seems like there's a million disc conversion how to's out there so this isn't the whole deal but just a small snippet. I bought the trail gear kit and they have great instructions until you hit step 7;
https://www.trail-gear.com/TG/prodIn...144039-1-k.pdf
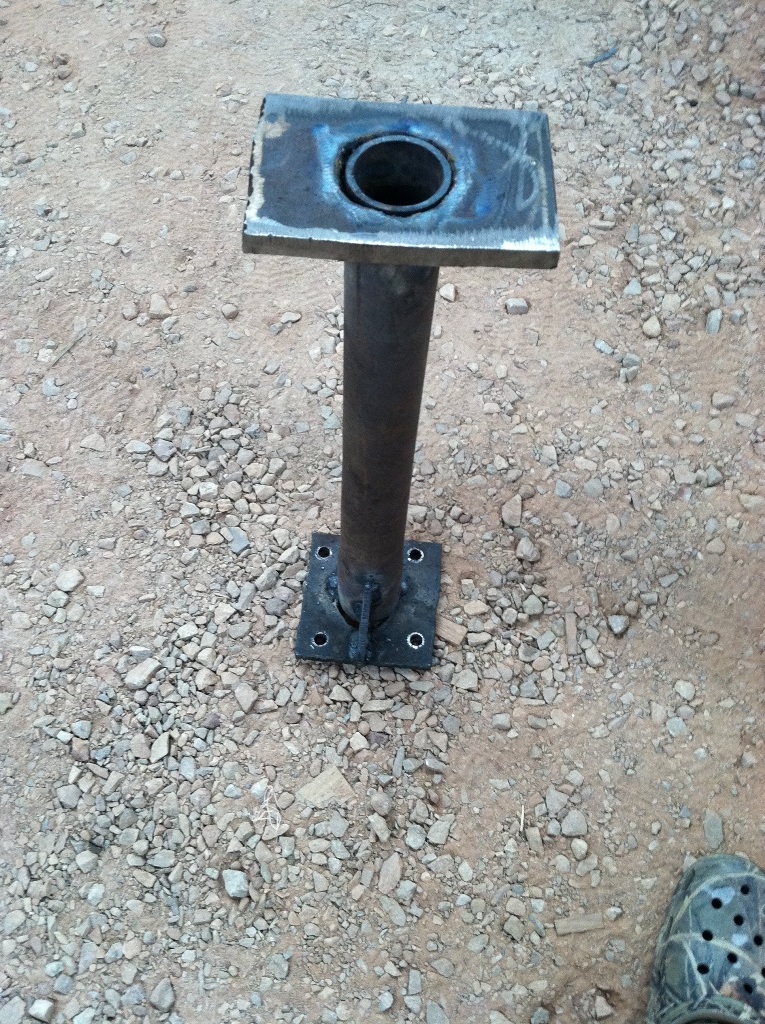
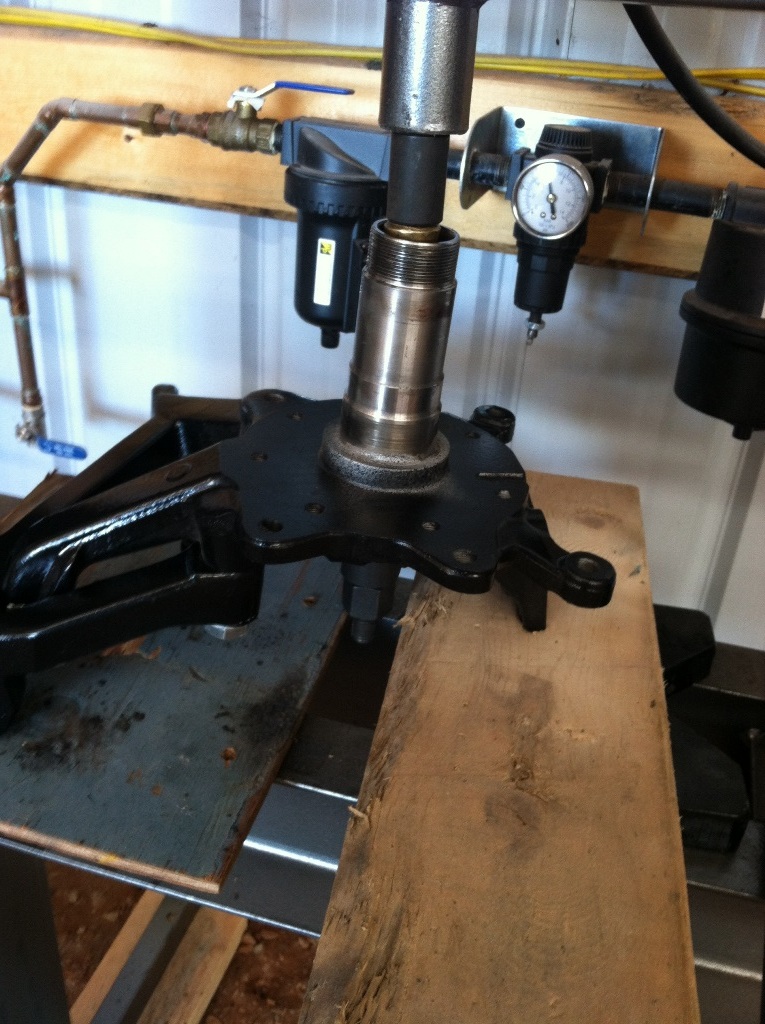
I needed an "SST" so here it is in all of its glory
Then bolt it up on the backing plate and press the axle out.
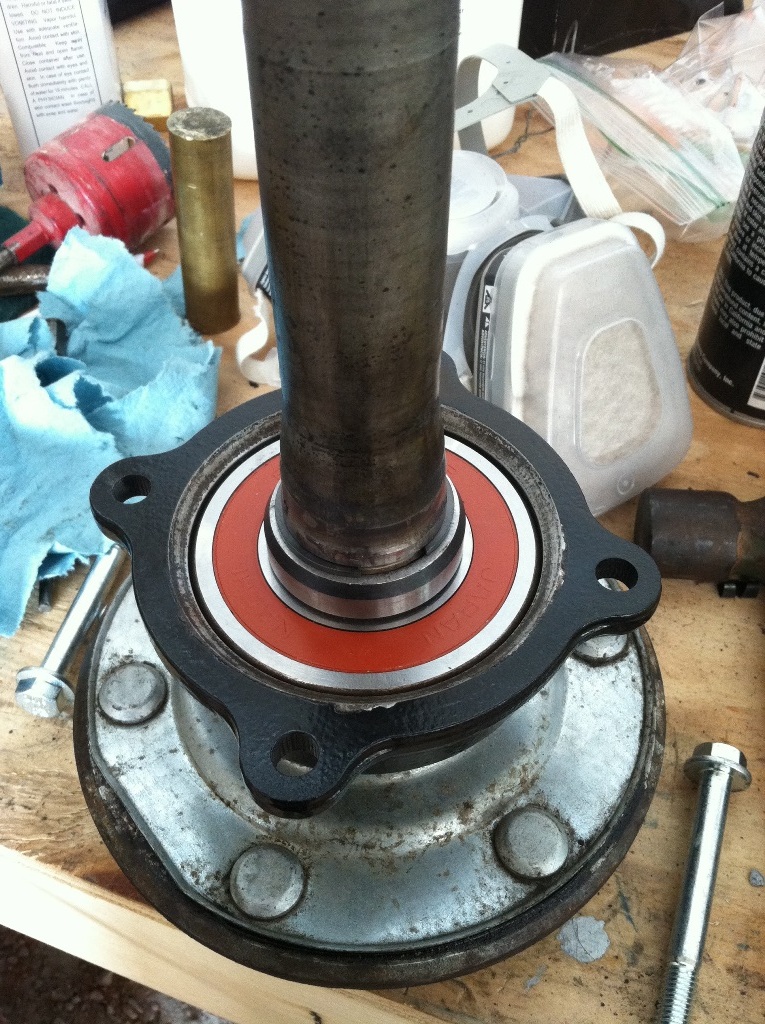
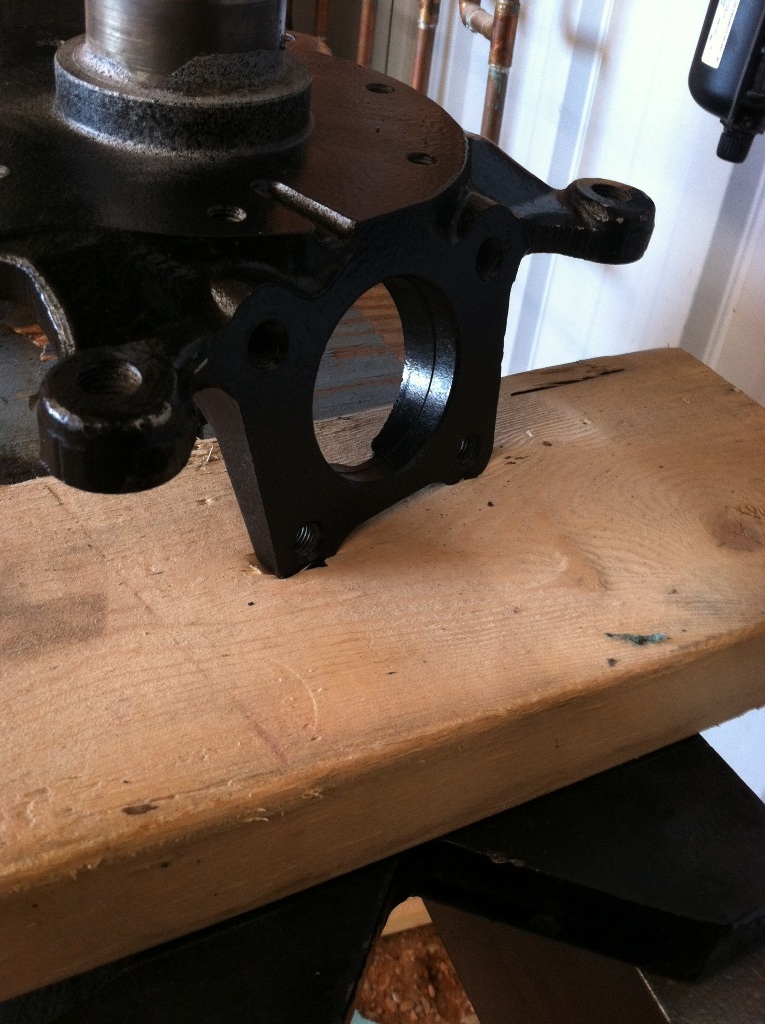
I used this chunk of steel with a 1/2" drive socket under the old bearing to press it out
Then I took a 3/4" drive socket and used my hands to smash the bearing cup out.
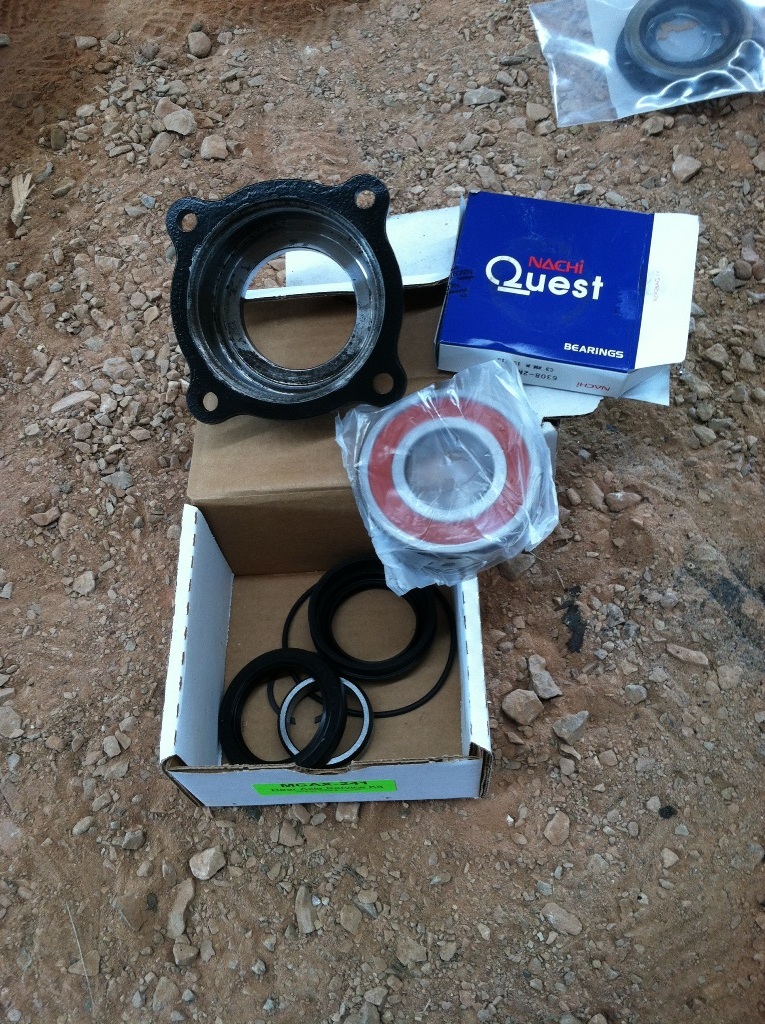
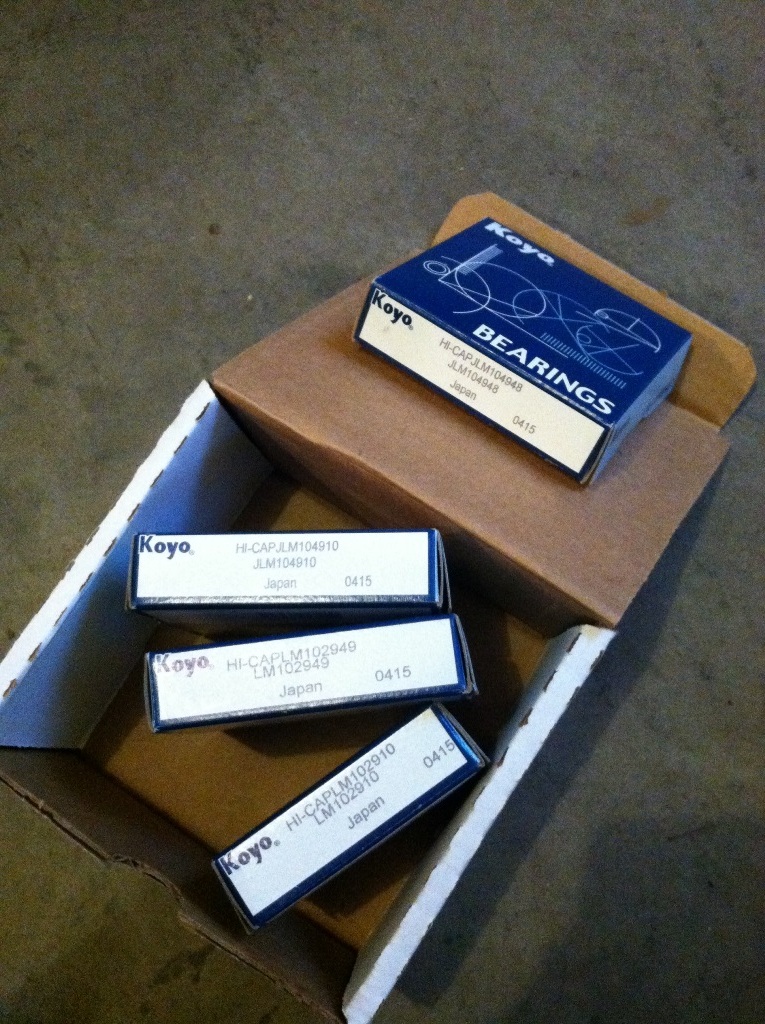
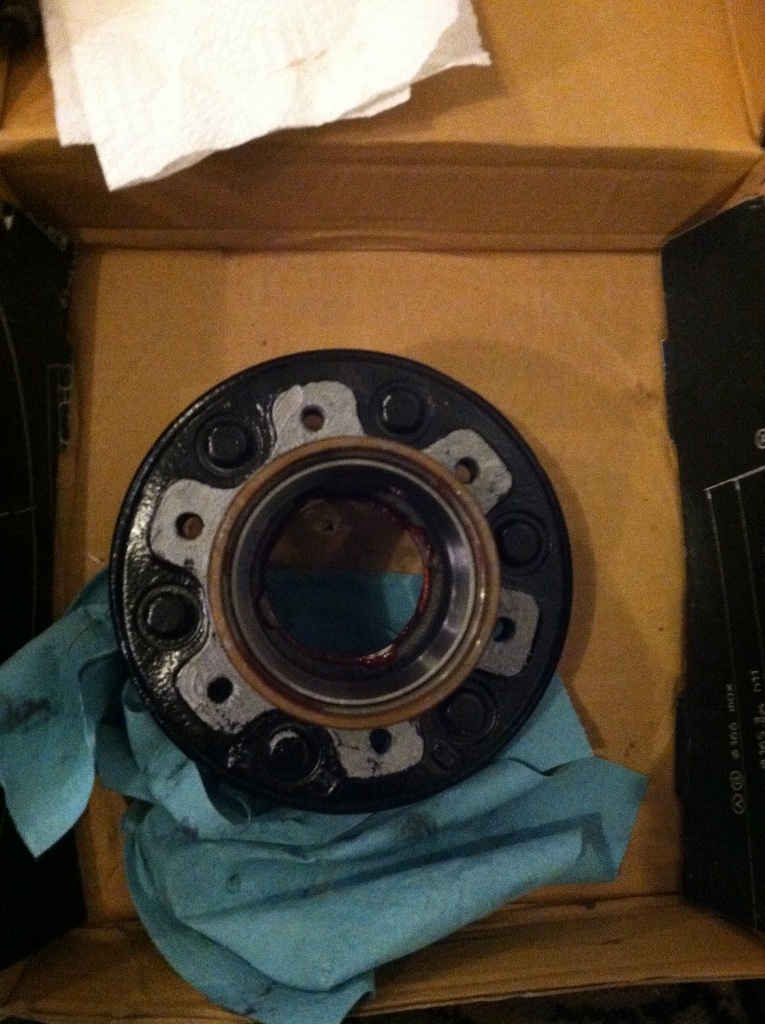
I posted earlier that I painted the bearing cup and here it is with the bearing kit from Marlin Crawler
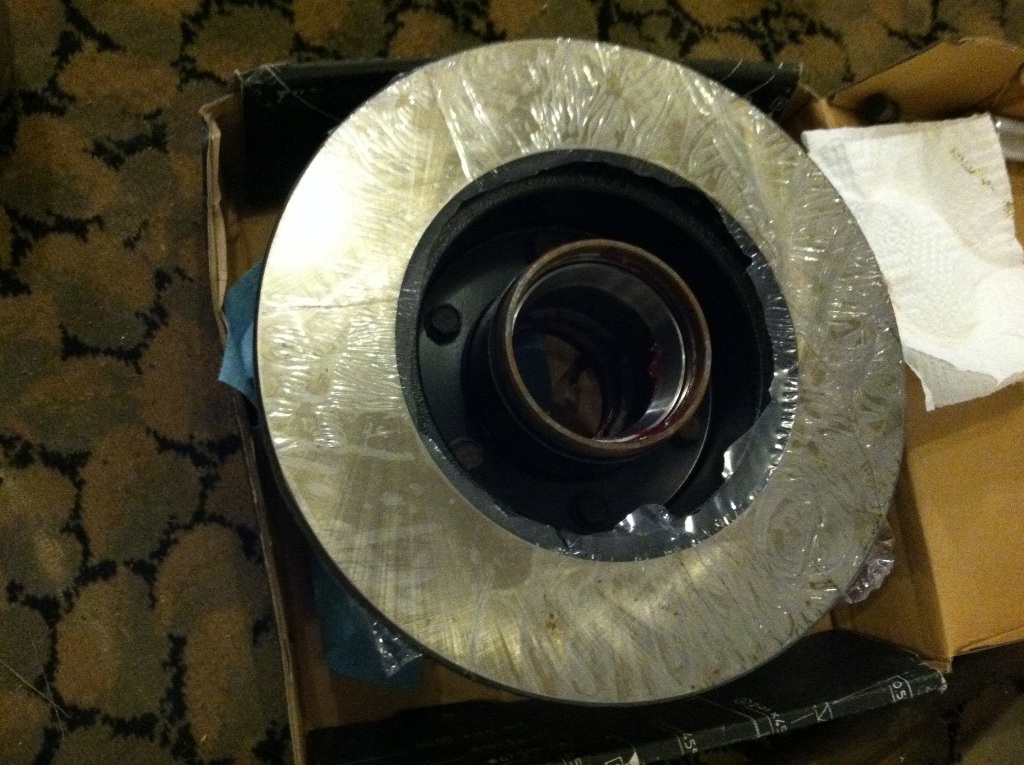
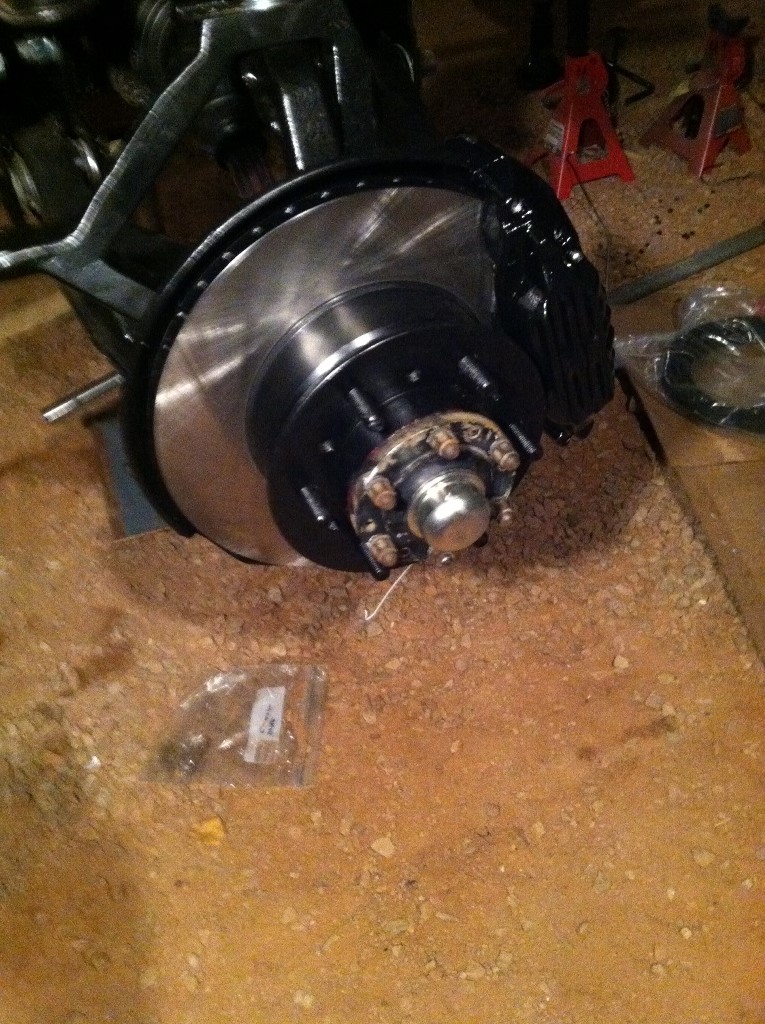
All in installed
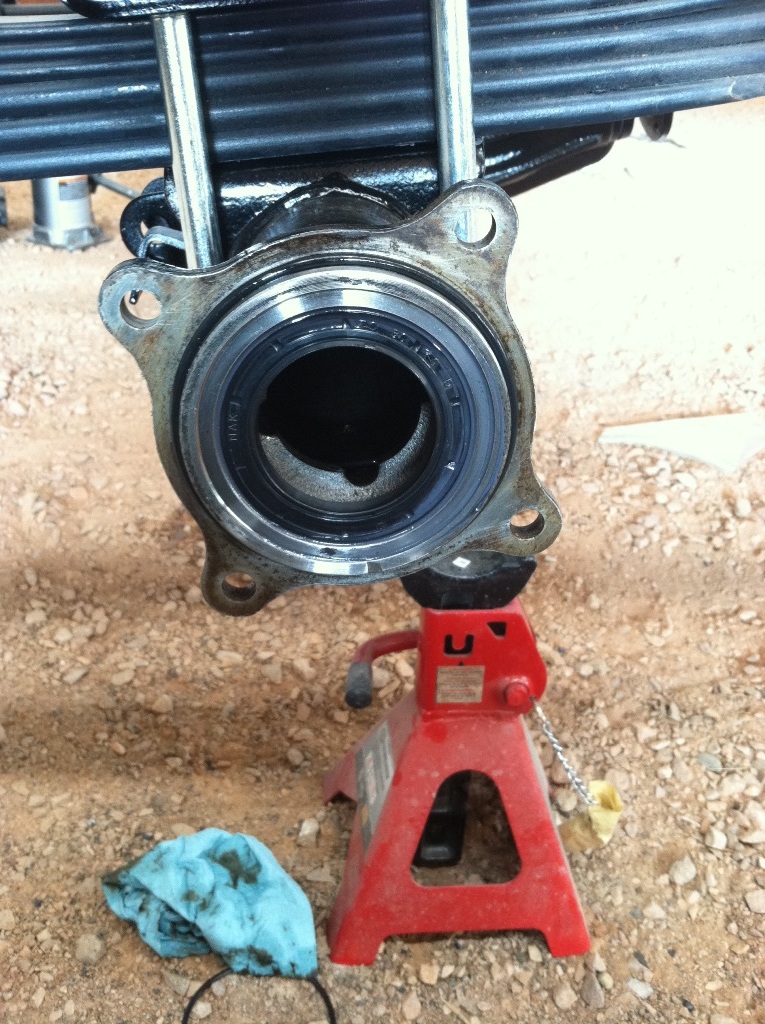
Seal installed
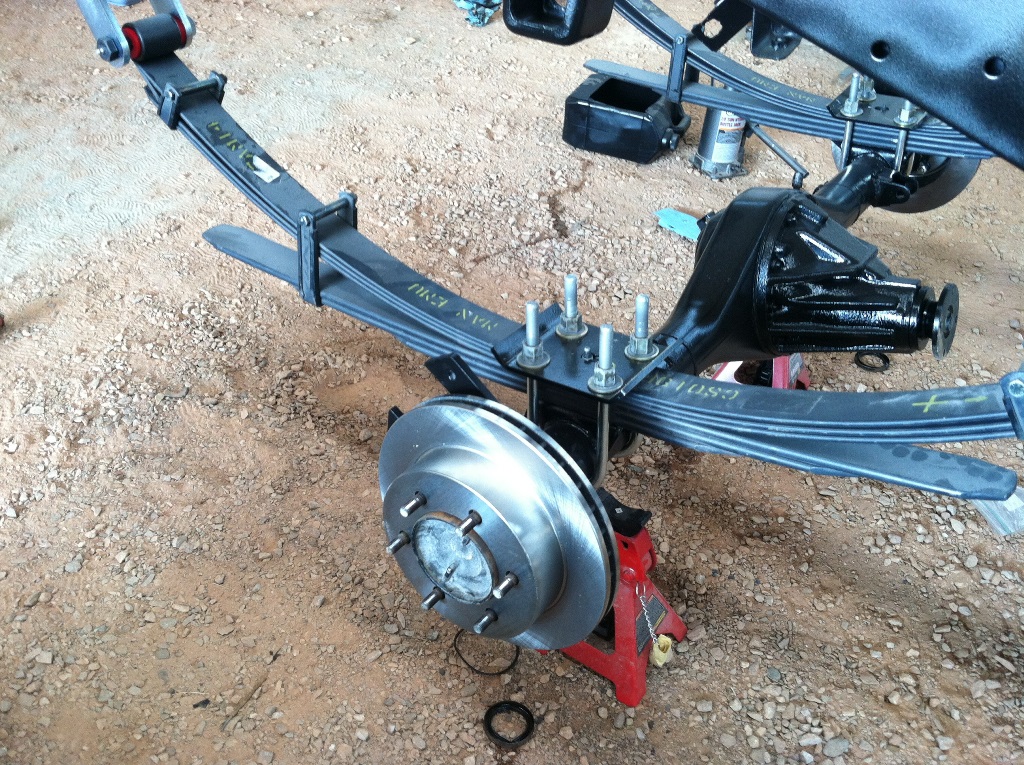
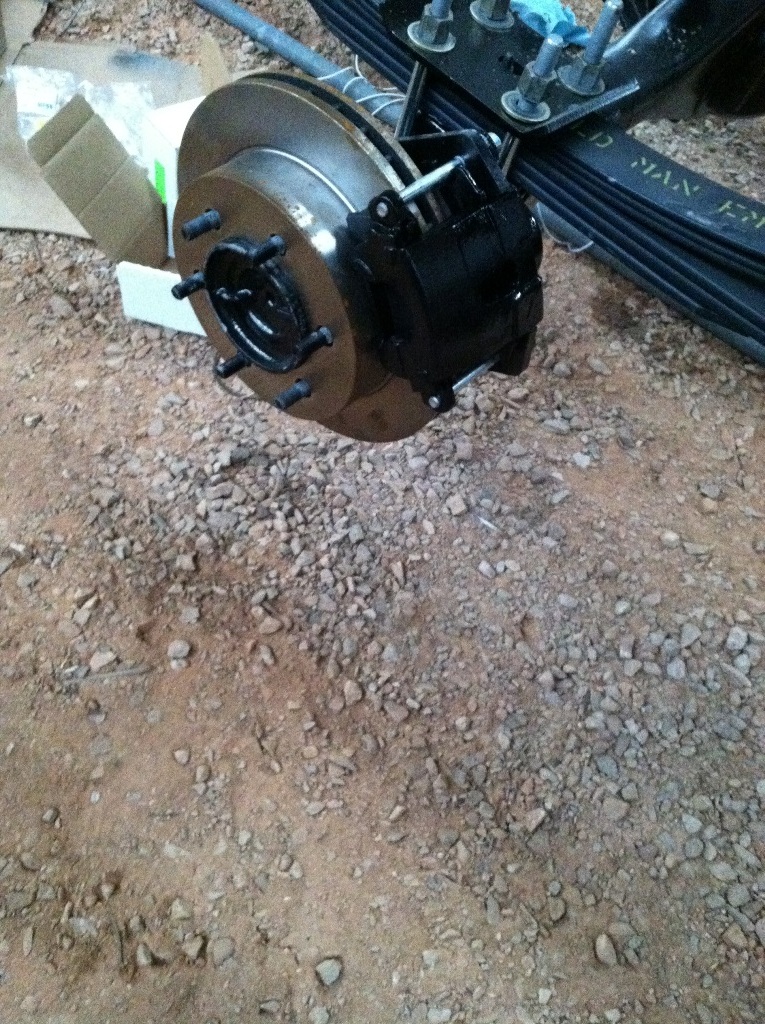
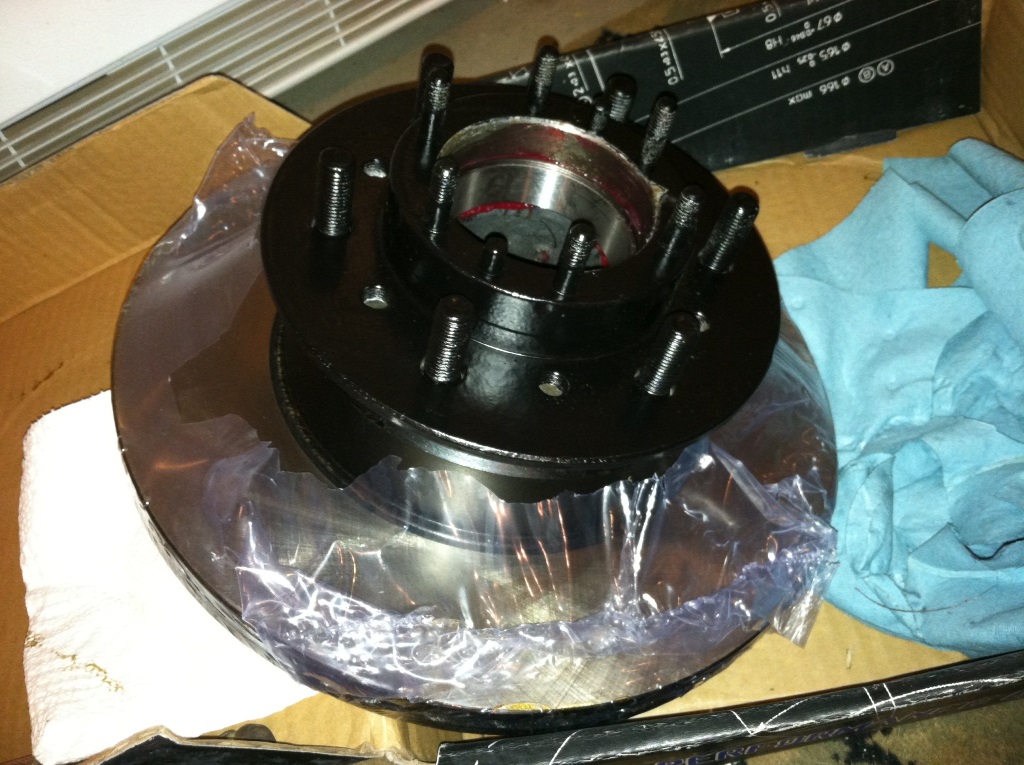
And caliper bracket + rotor on it!
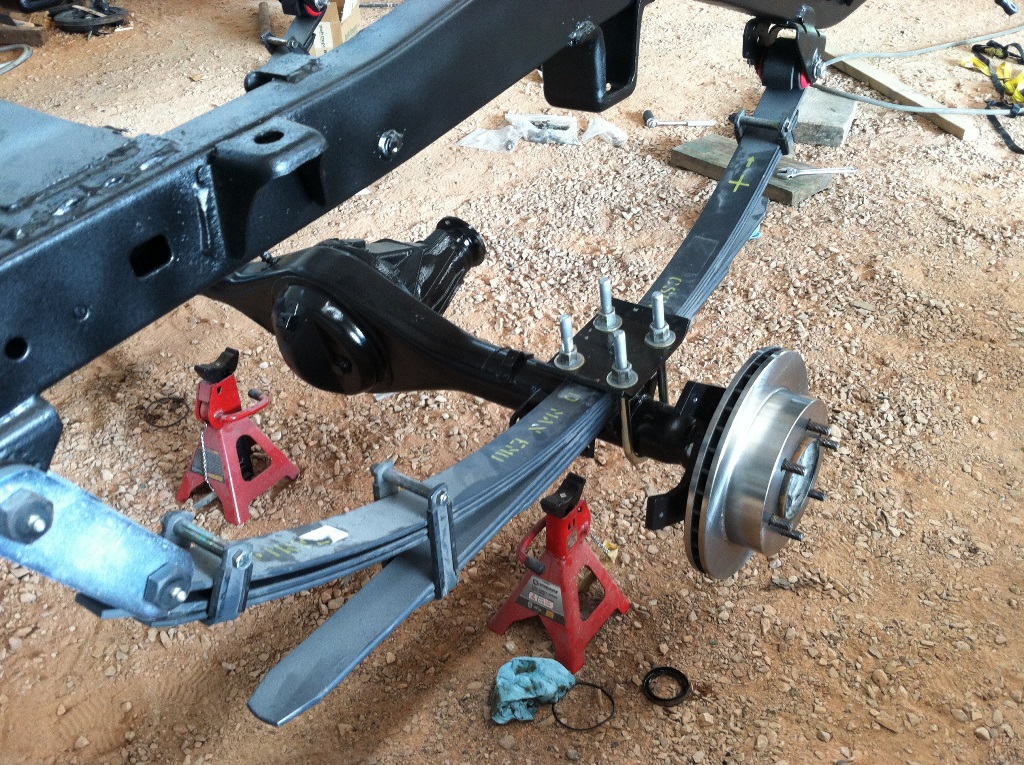
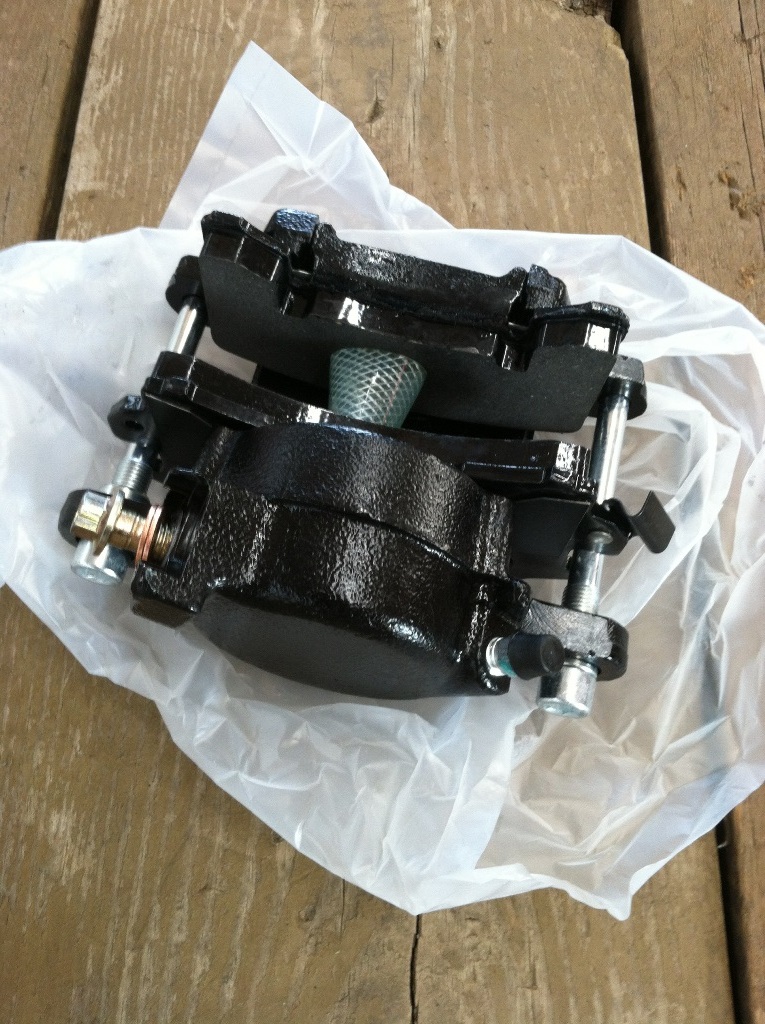
I didn't put the tire on it because I'm kicking around repainting the caliper. They do come painted black but I'm thinking about slapping some "better" paint on it. I'm not really sure if it's necessary so I'm gonna sit on it for a few days. This is one of the calipers Trail Gear has in the kit fresh out of the box.
Overall this was pretty easy to do but I think a press is a must. Unless of course you just cut the backing plate off but I've always wanted to do things "right". Who knows maybe I can sell some of these parts My only regret for this is not sandblasting the face of the axle. I forgot and wish I would have painted it but it's not like it's "seen". I more or less wanted to do it to kill the rust. Oh well... They lasted this long
https://www.trail-gear.com/TG/prodIn...144039-1-k.pdf
I needed an "SST" so here it is in all of its glory

Then bolt it up on the backing plate and press the axle out.

I used this chunk of steel with a 1/2" drive socket under the old bearing to press it out


Then I took a 3/4" drive socket and used my hands to smash the bearing cup out.

I posted earlier that I painted the bearing cup and here it is with the bearing kit from Marlin Crawler

All in installed

Seal installed

And caliper bracket + rotor on it!


I didn't put the tire on it because I'm kicking around repainting the caliper. They do come painted black but I'm thinking about slapping some "better" paint on it. I'm not really sure if it's necessary so I'm gonna sit on it for a few days. This is one of the calipers Trail Gear has in the kit fresh out of the box.

Overall this was pretty easy to do but I think a press is a must. Unless of course you just cut the backing plate off but I've always wanted to do things "right". Who knows maybe I can sell some of these parts
My only regret for this is not sandblasting the face of the axle. I forgot and wish I would have painted it but it's not like it's "seen". I more or less wanted to do it to kill the rust. Oh well... They lasted this long
Last edited by duckhead; 08-31-2015 at 05:34 PM.
08-31-2015, 05:47 PM
#46
Registered User
Thread Starter
Join Date: Jun 2015
Location: WI
Posts: 147
Likes: 0
Received 0 Likes
on
0 Posts
Got a few other things done too. Motor mounts are put back together;
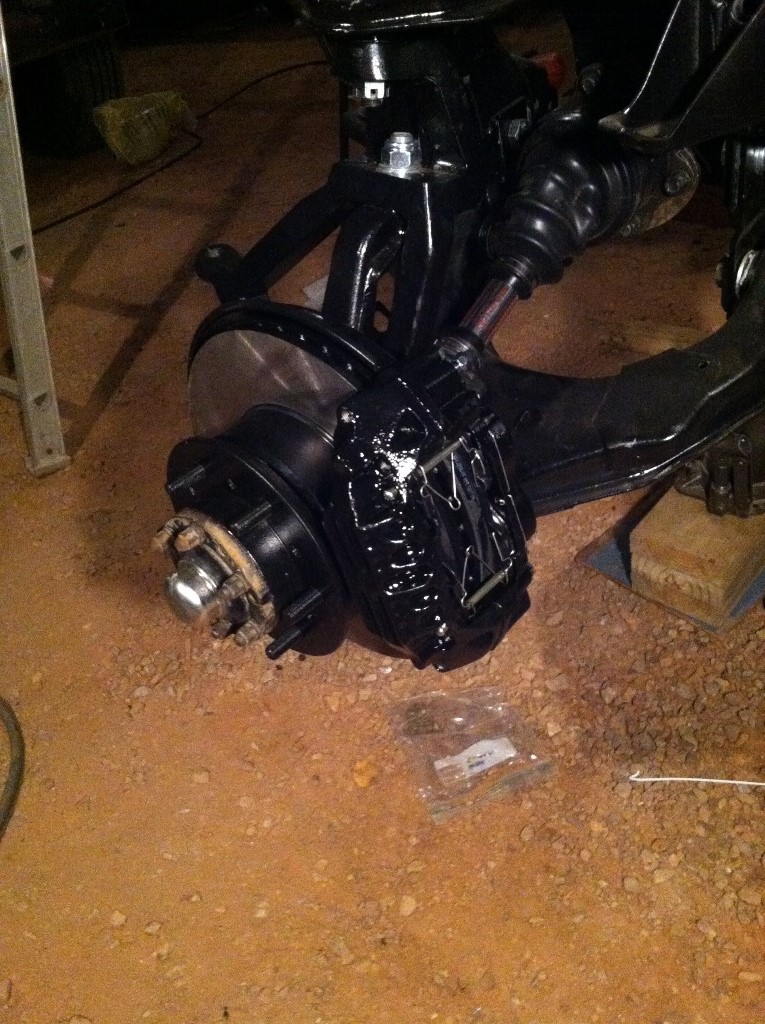
Knuckle is partially together. Still don't have my CV axles so this is where they're at right now. Also front stops are assembled and I'm holding off to put em on till the knuckles are on.
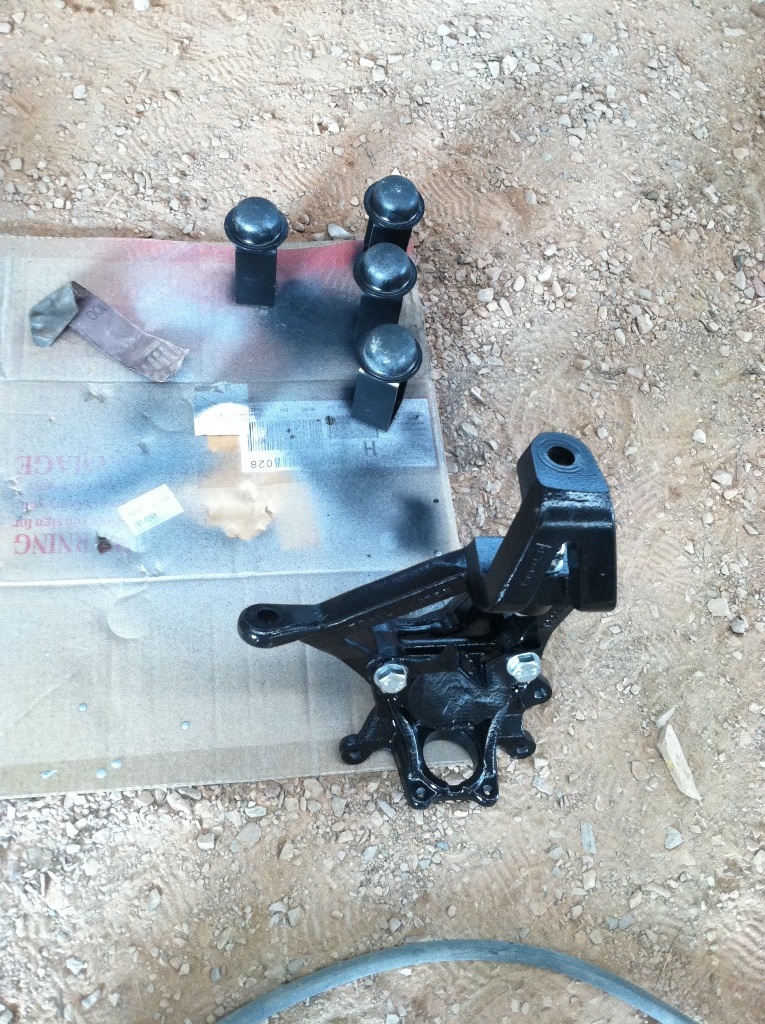
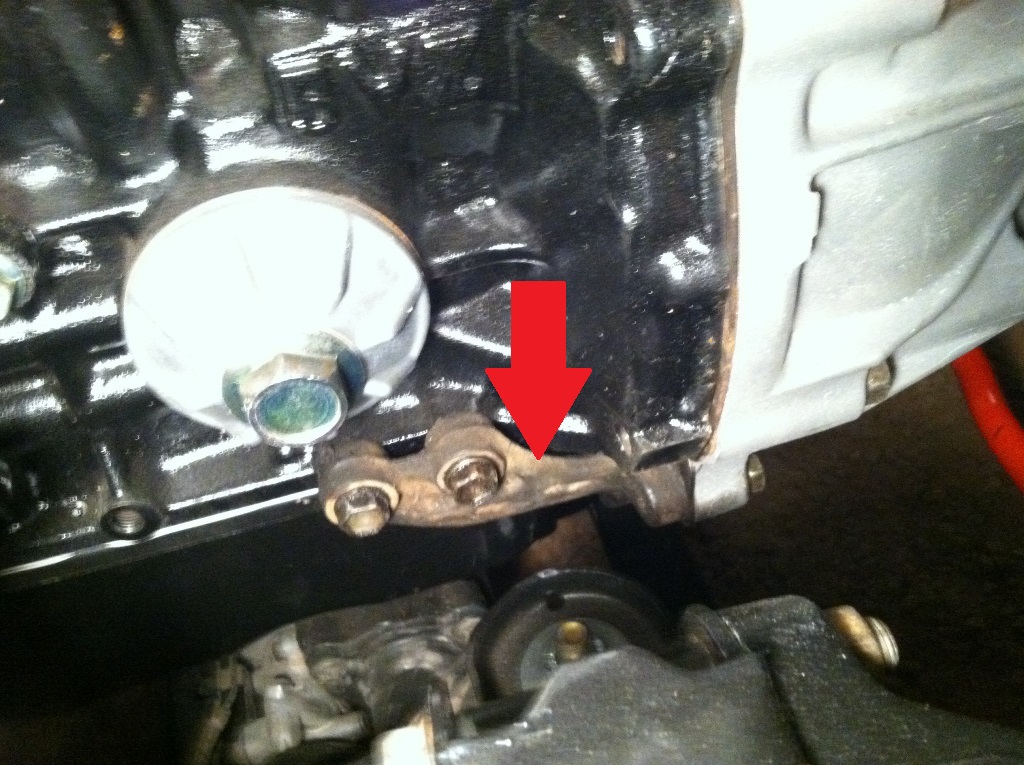
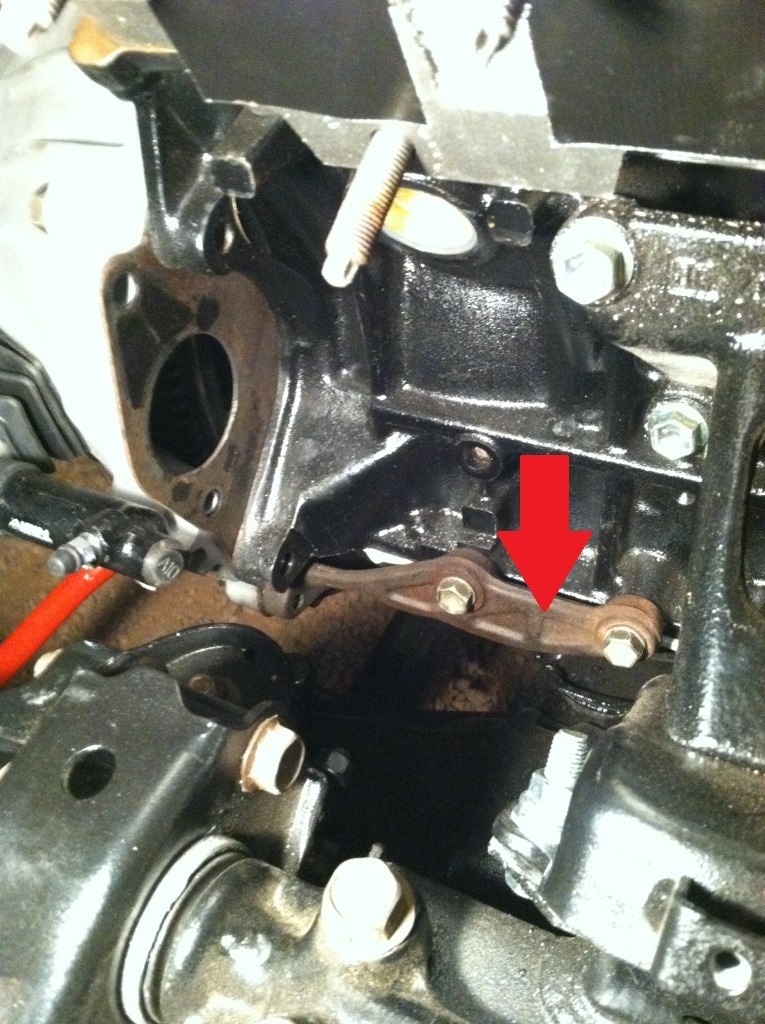
I experimented a bit with rattle can because I wanted to see how it would hold up compared to masterseries and I'm telling you right now I wish I wouldn't have. I bought Rustoleum Stops Rust black and primer. Here they are sprayed
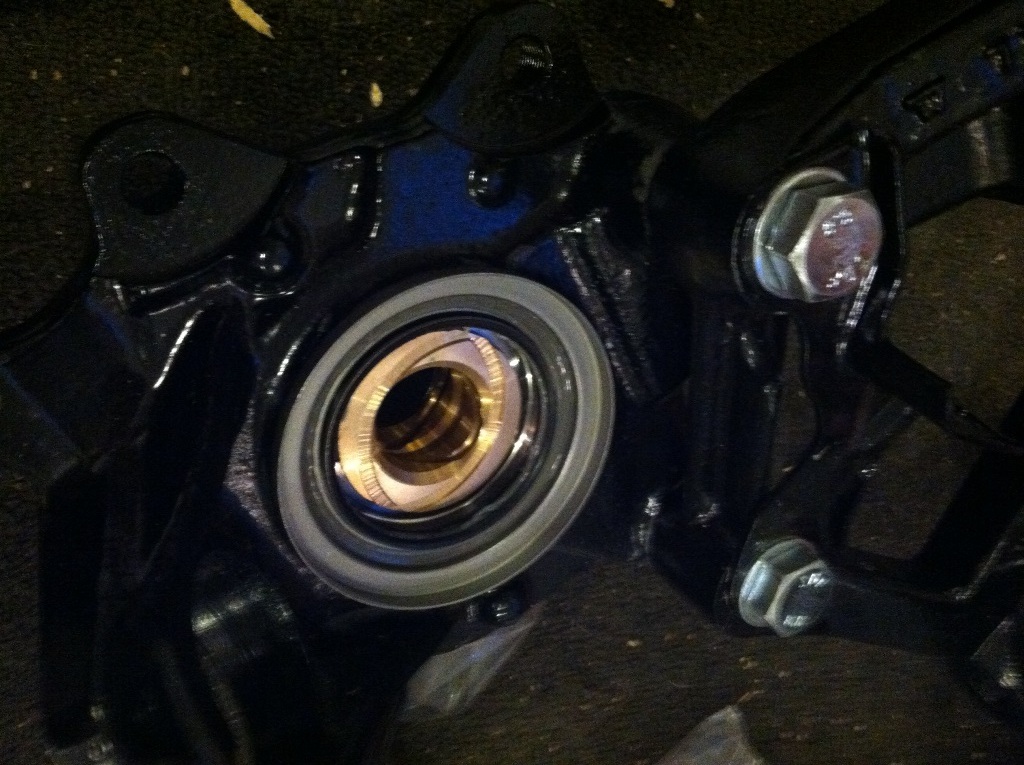
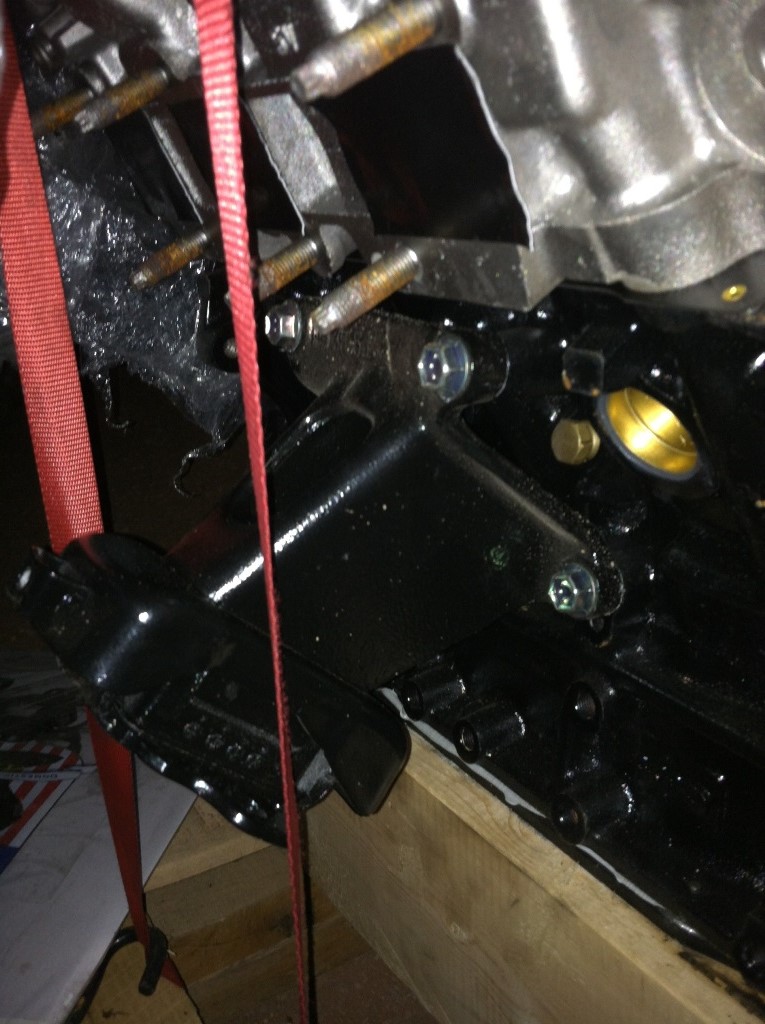
The wrench scratched right through the primer and the paint when tightening the 16mm bolts that hold the front differential frame together. These are the silver bolt heads above the two that are close to one another in the front. The new bolts should stick out.
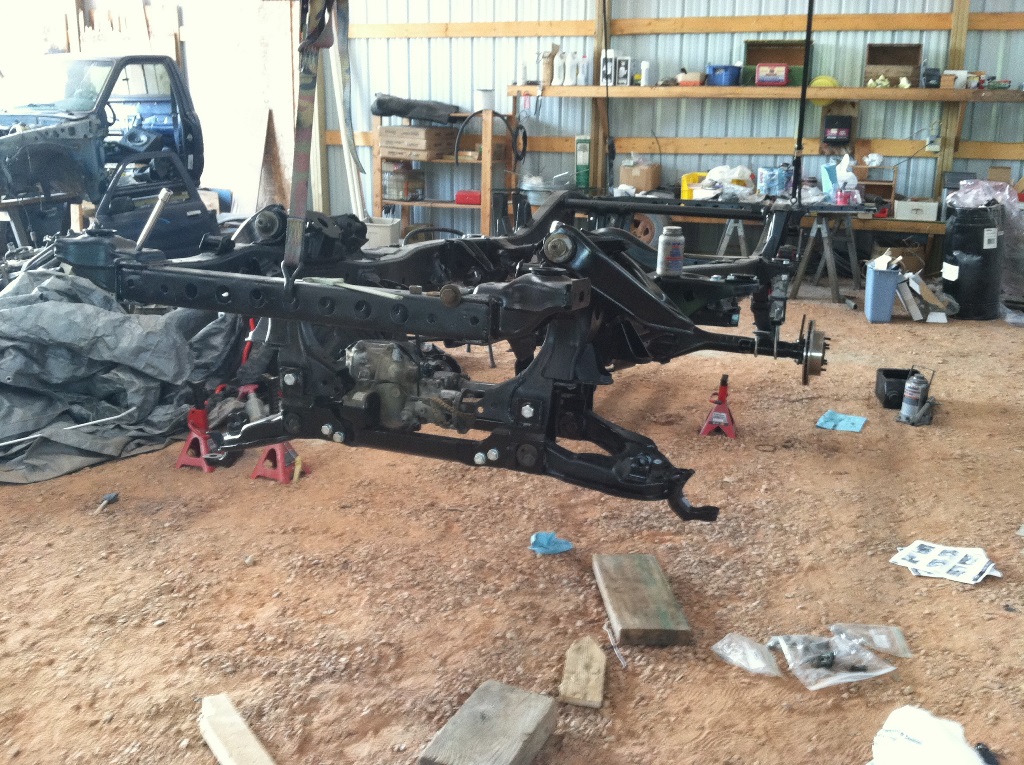
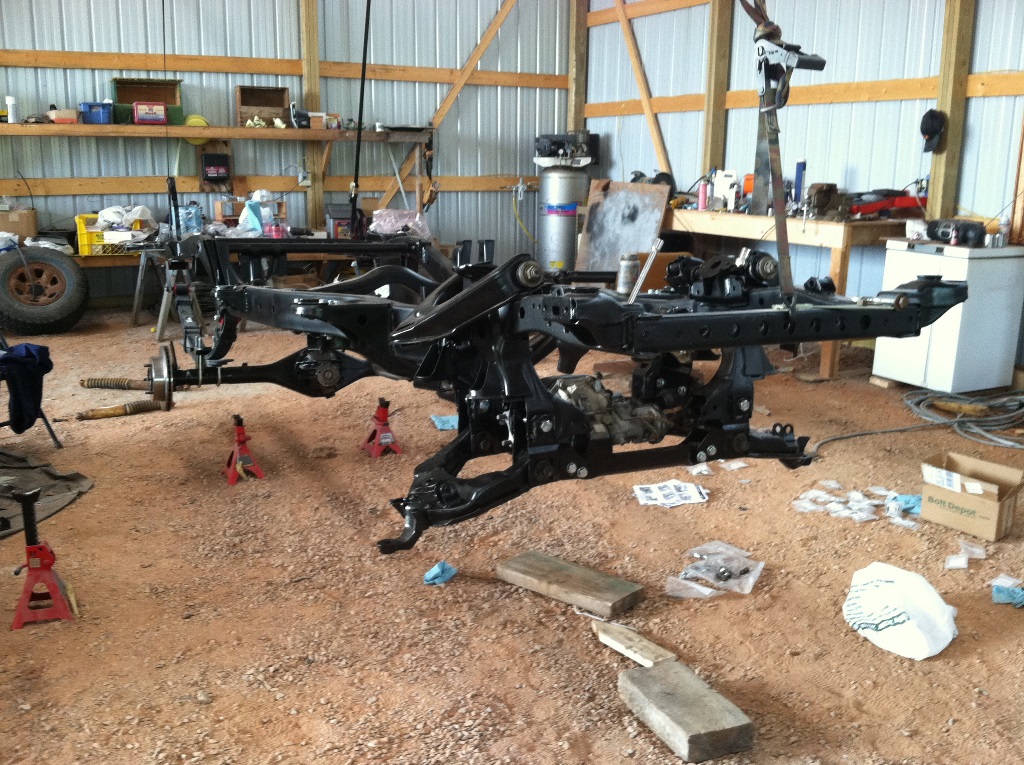
Anyway lesson learned... Use good paint if you have it! The above pictures show things are shaping up. Control arms are on and hopefully when I figure out what I'm gonna do with the caliper paint and I get my CV's she'll be rollin!!!

Knuckle is partially together. Still don't have my CV axles so this is where they're at right now. Also front stops are assembled and I'm holding off to put em on till the knuckles are on.

I experimented a bit with rattle can because I wanted to see how it would hold up compared to masterseries and I'm telling you right now I wish I wouldn't have. I bought Rustoleum Stops Rust black and primer. Here they are sprayed

The wrench scratched right through the primer and the paint when tightening the 16mm bolts that hold the front differential frame together. These are the silver bolt heads above the two that are close to one another in the front. The new bolts should stick out.


Anyway lesson learned... Use good paint if you have it! The above pictures show things are shaping up. Control arms are on and hopefully when I figure out what I'm gonna do with the caliper paint and I get my CV's she'll be rollin!!!
Last edited by duckhead; 08-31-2015 at 05:49 PM.
12-04-2015, 07:13 PM
#47
Registered User
Thread Starter
Join Date: Jun 2015
Location: WI
Posts: 147
Likes: 0
Received 0 Likes
on
0 Posts
Mannnnn.... It's been a while. I made it to the truck over Turkey break and I had some pictures from a bit ago. Figured I'd brush off the dust on this thread and add some things....
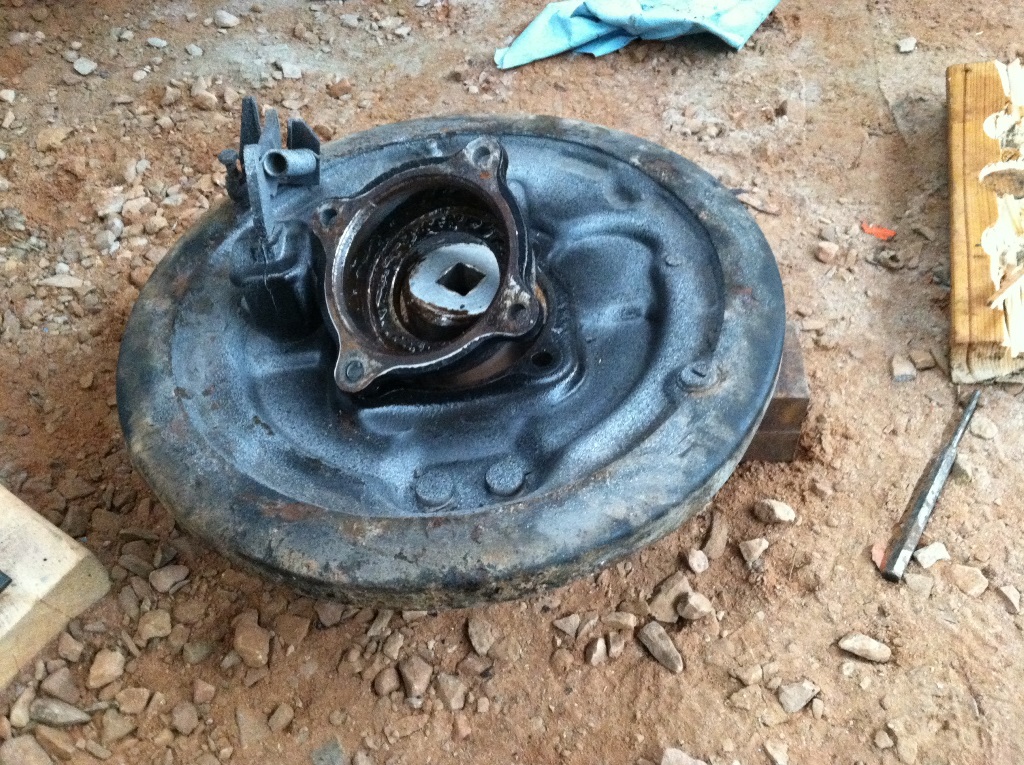
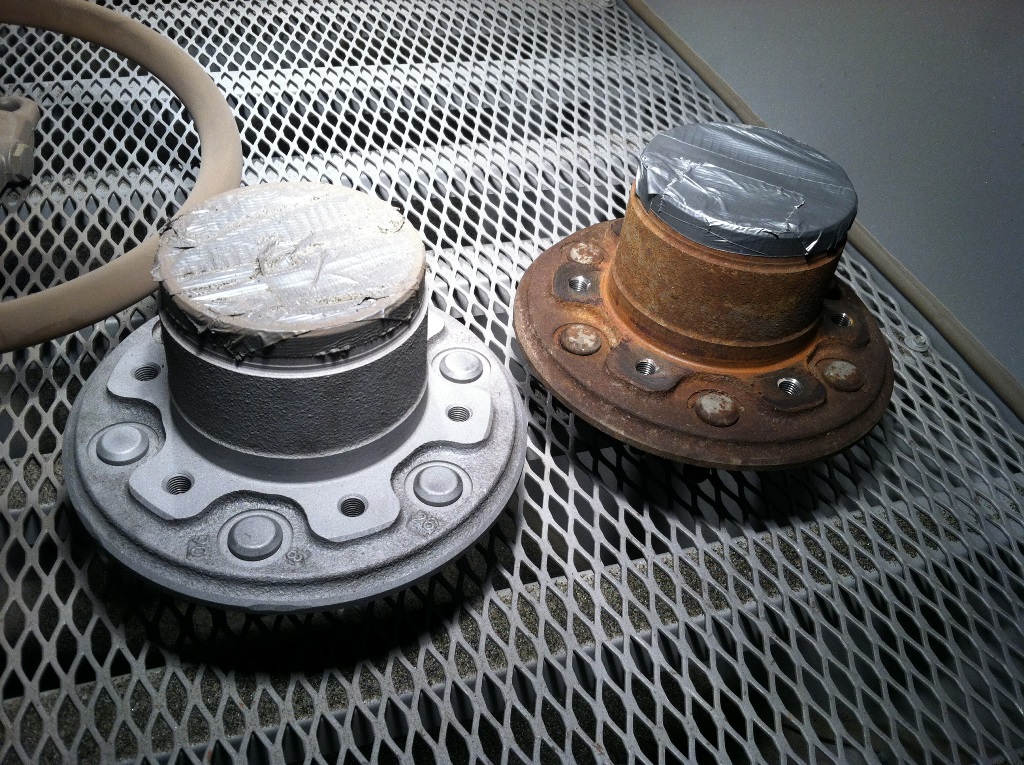
You ever feel like something just wasn't right? I did and I had to fix it... I couldn't get over those axle faces. Look at those nasty things
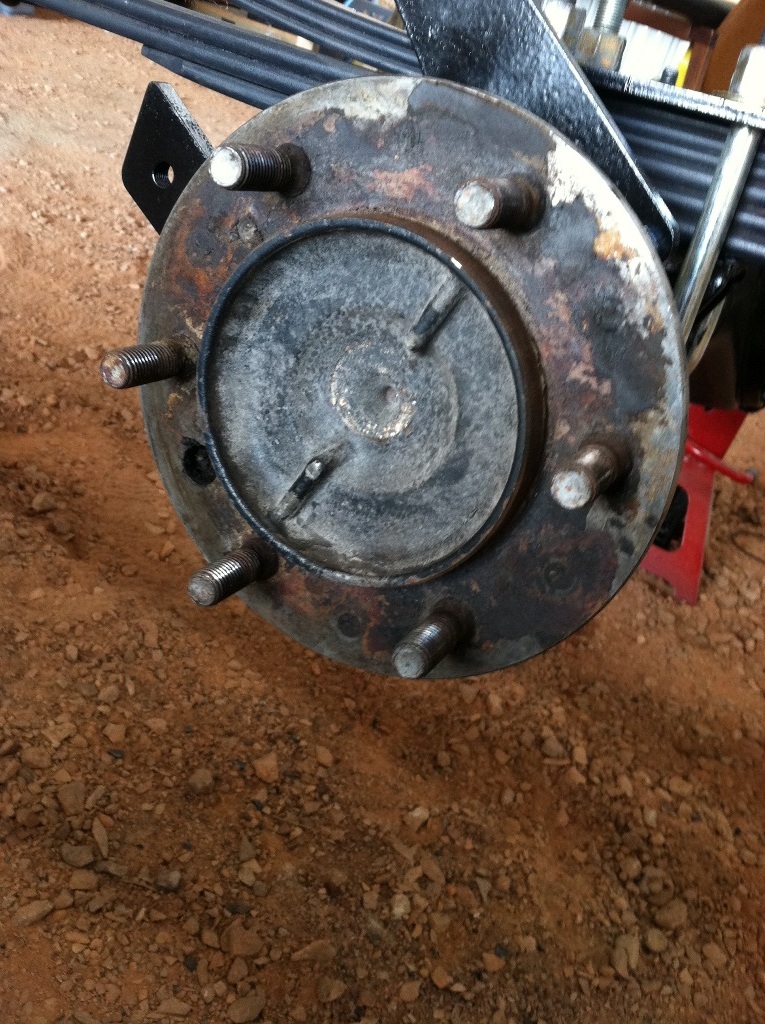
So I blasted em clean and prepped em for paint!
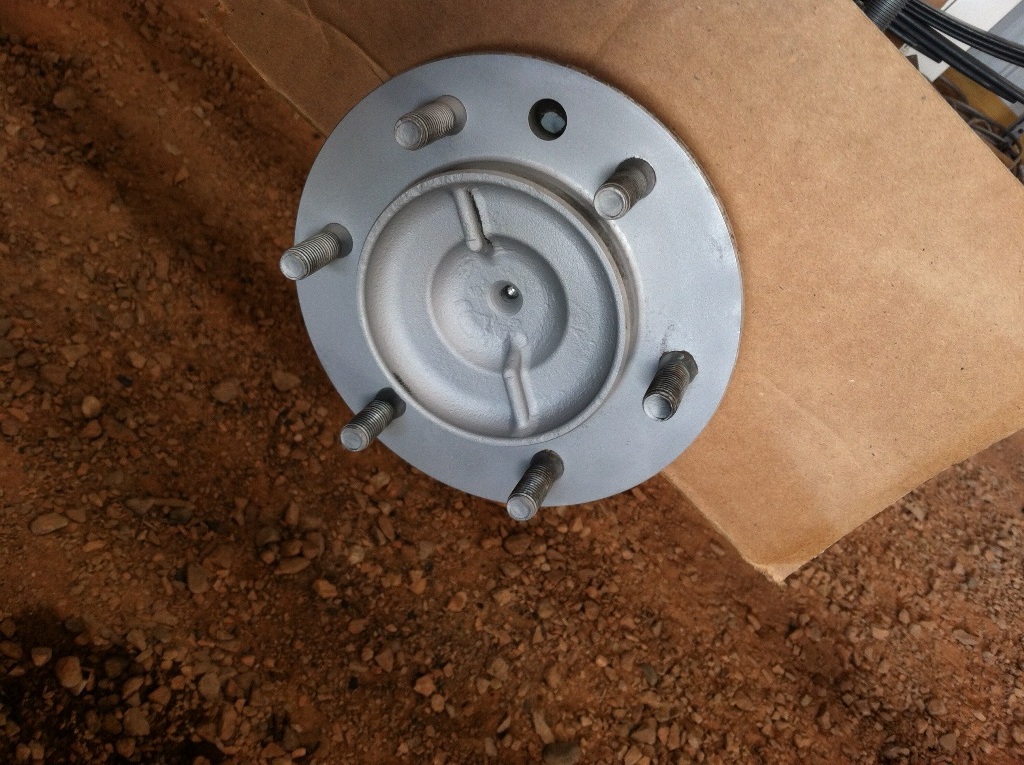
Hubs were giving me sour grapes too... So I knocked em out as well
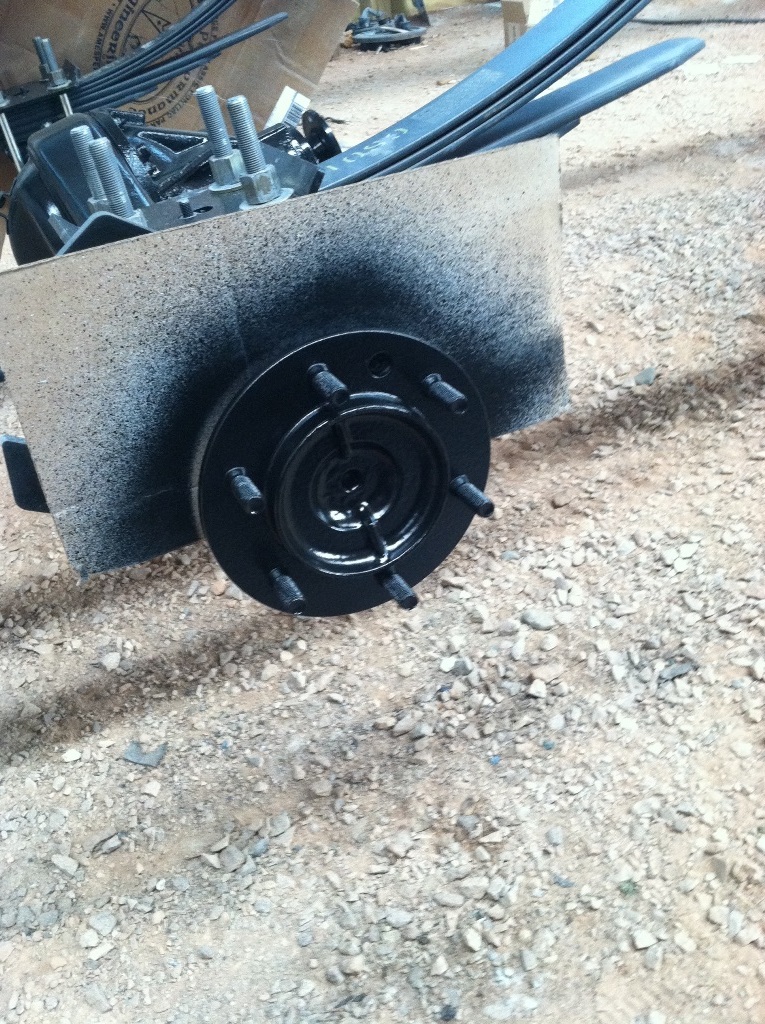
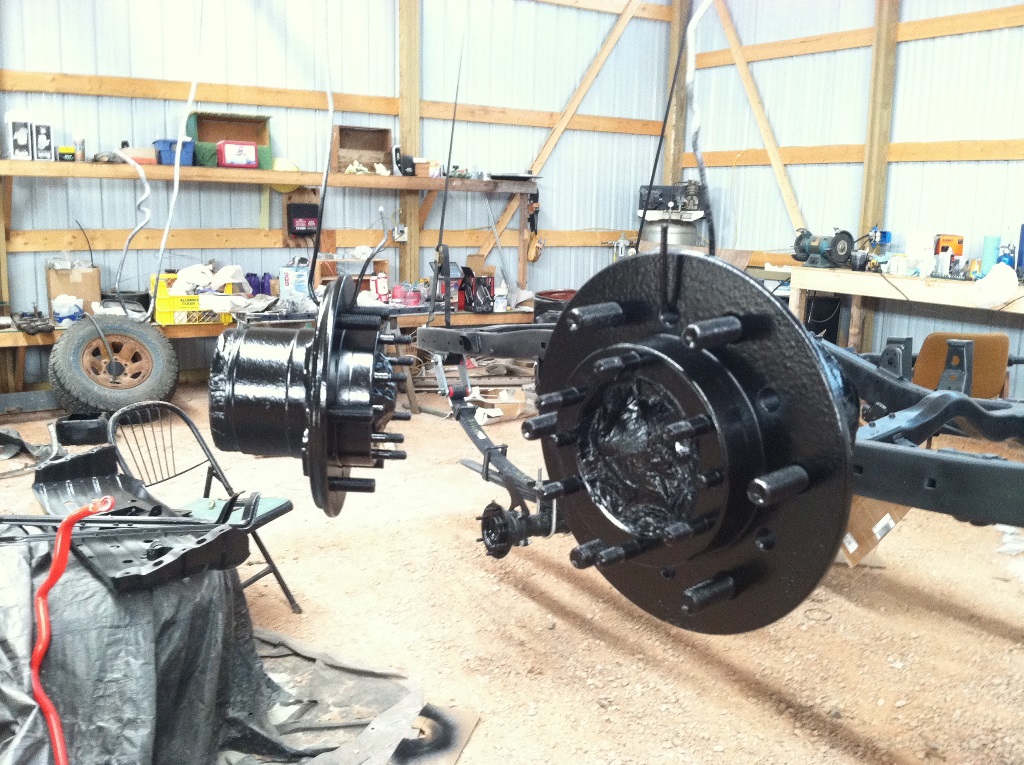
And here they are painted
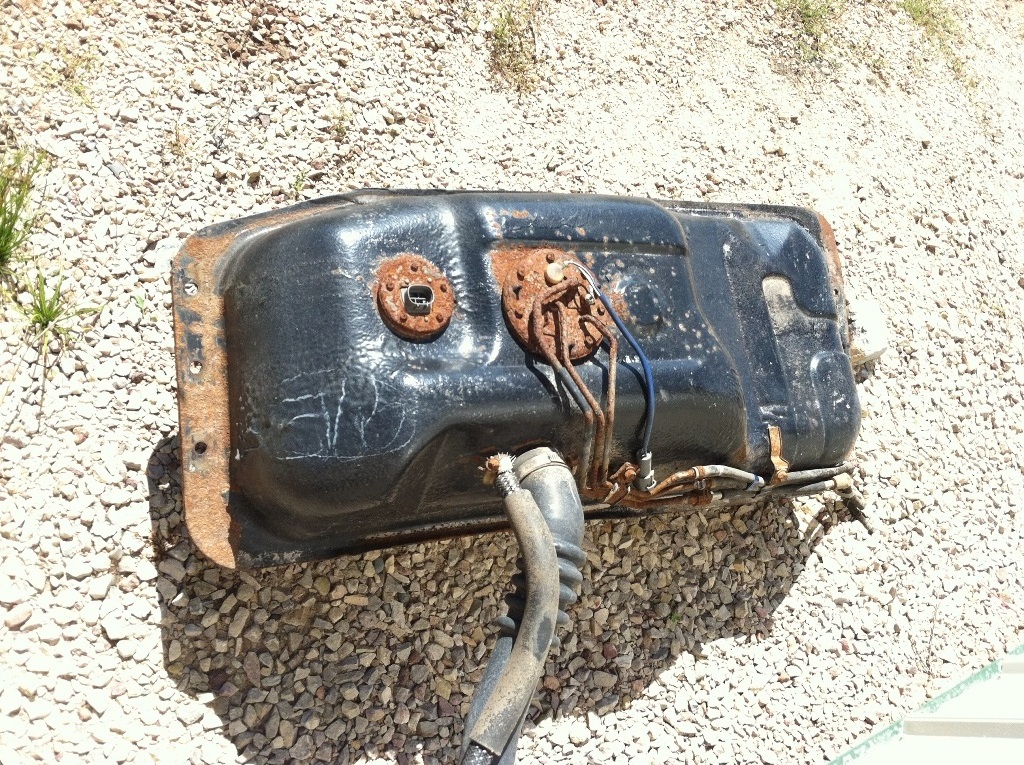
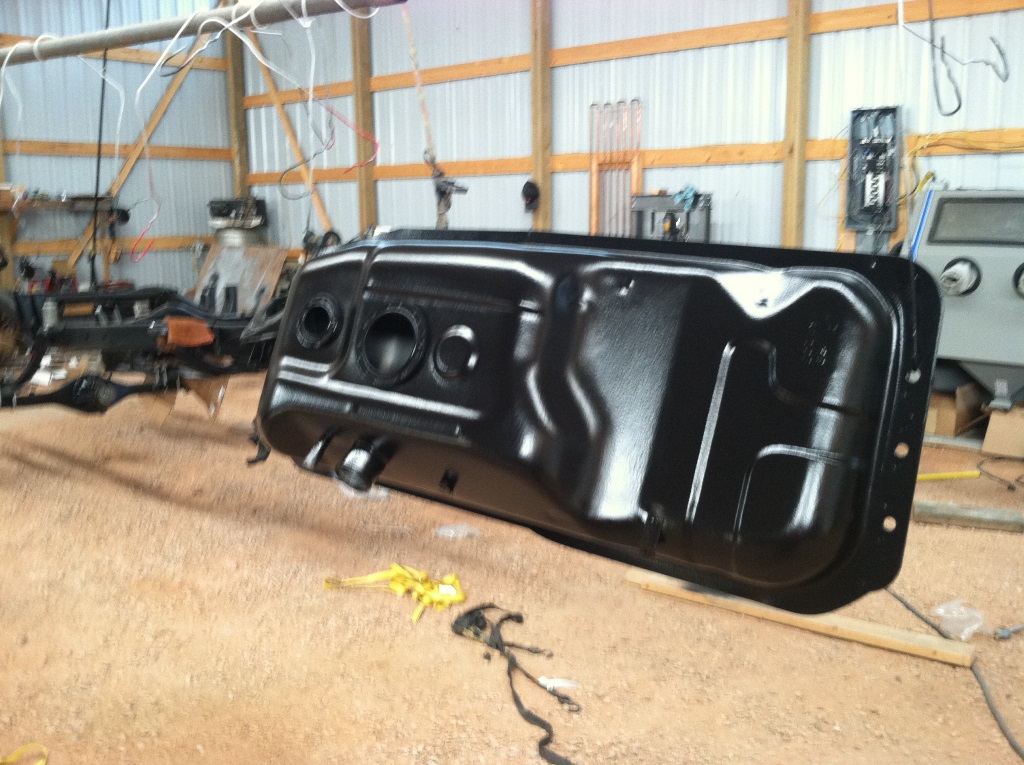
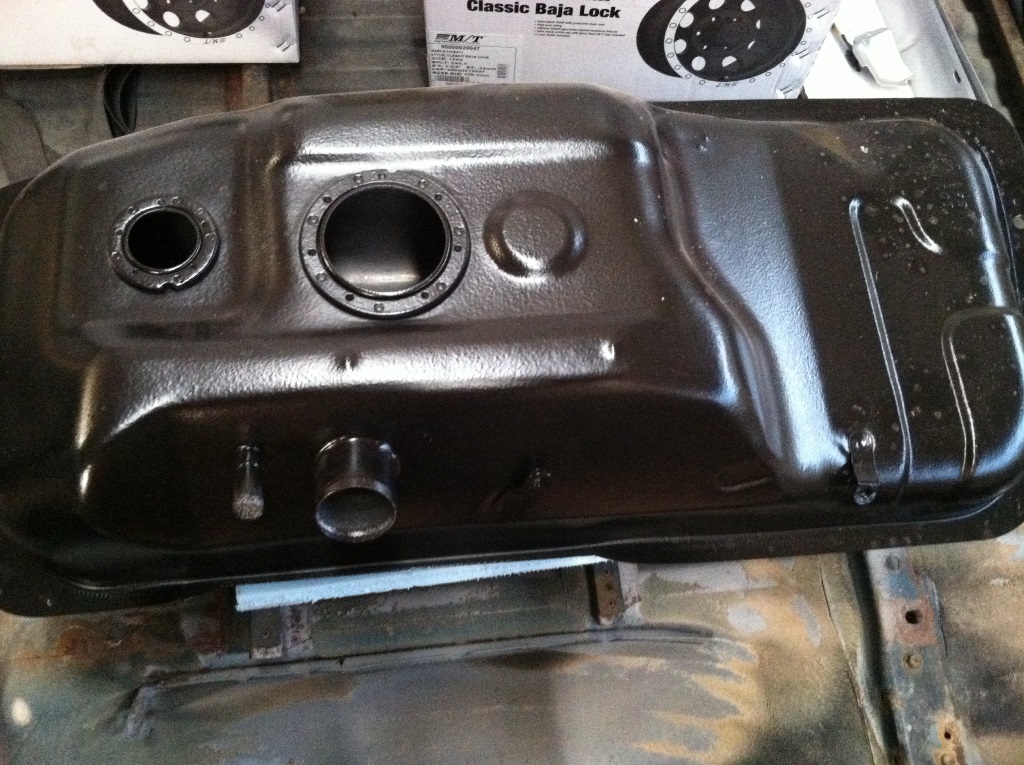
I probed around in here about gas tanks and I was seriously kicking around dropping the $$$ on a new one but it would have been around $500 So I was mulling it over on just renovating mine... and I decided on a spectre TO10B. I like that it has factory mounting locations. It's near identical to OEM tank but no drain plug which I already knew before hesitantly buying. I don't like this idea but I've never had to drain a tank. Nice to have the option though. So keep this in mind to those looking at buying these. I degreased the hell out of it and then painted it black. It says it isn't necessary but c'mon... It's Wisconsin. Anyone actually think a tank would survive these briny roads??? Old one was probably fine but... you know how it is

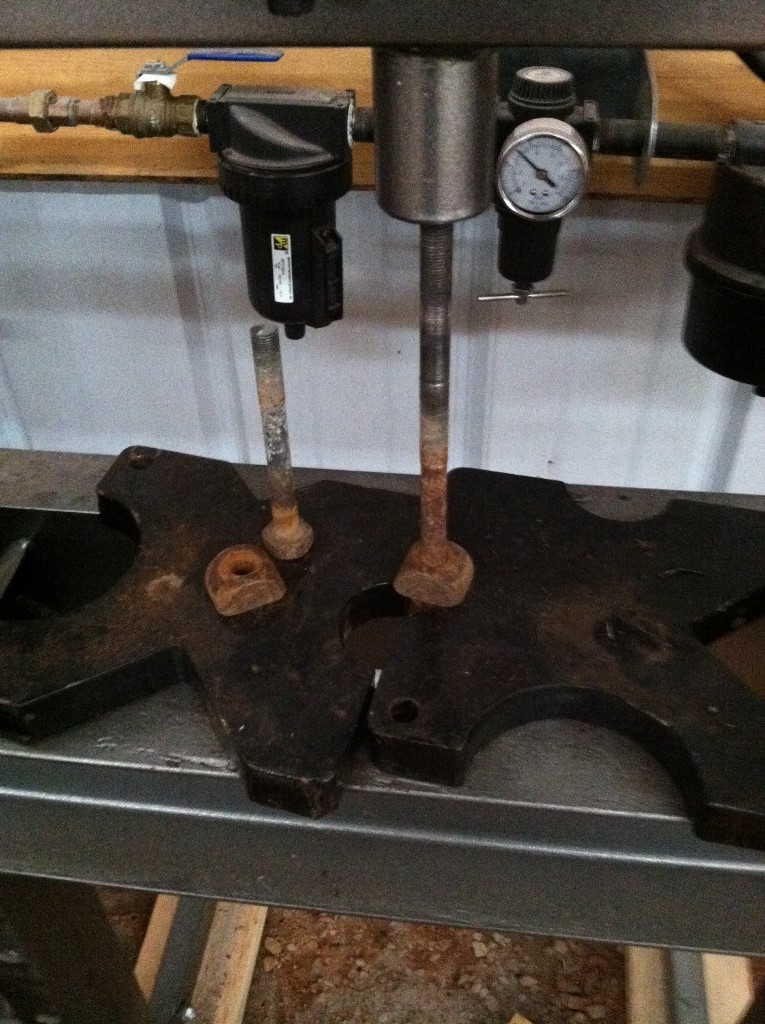
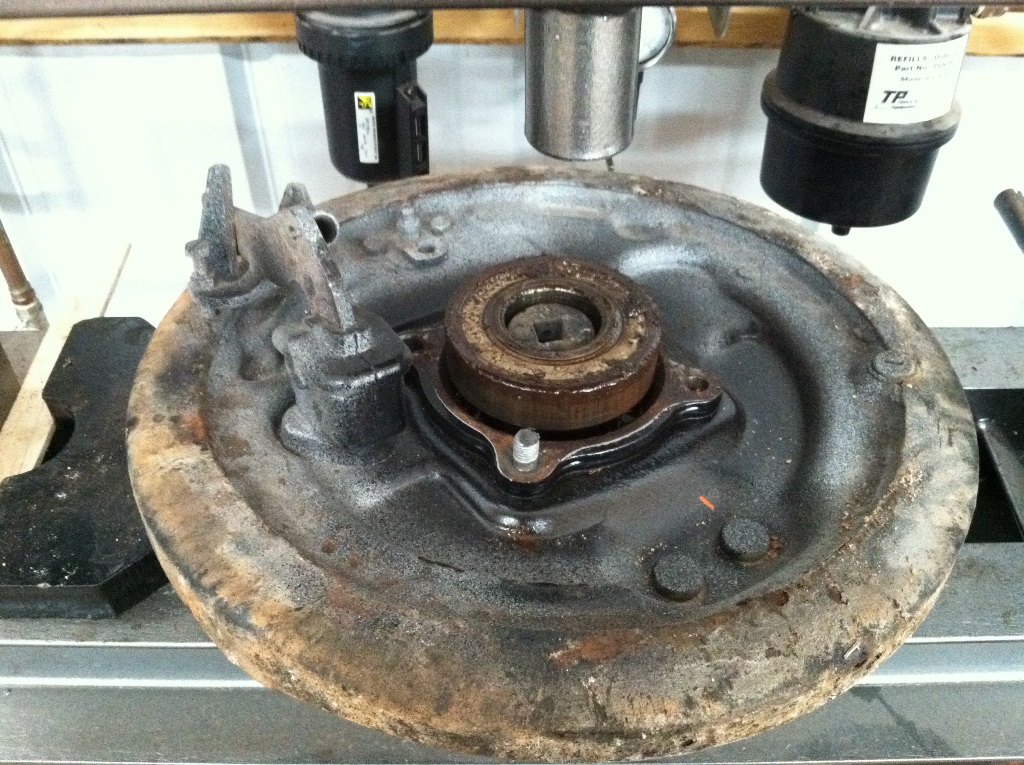
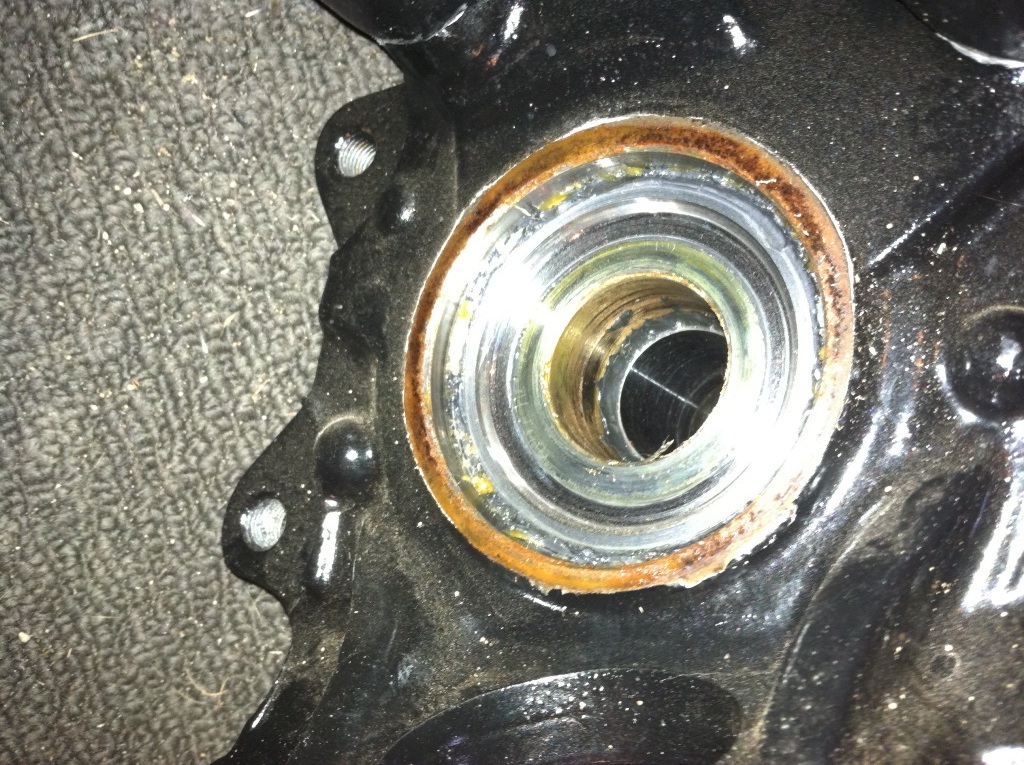
Now back to the front IFS knuckles... Once again my logic is that if I have them apart... do it once and shouldn't have to do it again. So I'm pulling out the brass thrust bushing and replacing those along with the seals as I already alluded to earlier. The bushings on the axle side are an absolute pain in the arse. I put the slide hammer in there and good luck to anyone that does this. If you can do it your more of a man than I'll ever be I pounded and pounded and pounded and stopped.
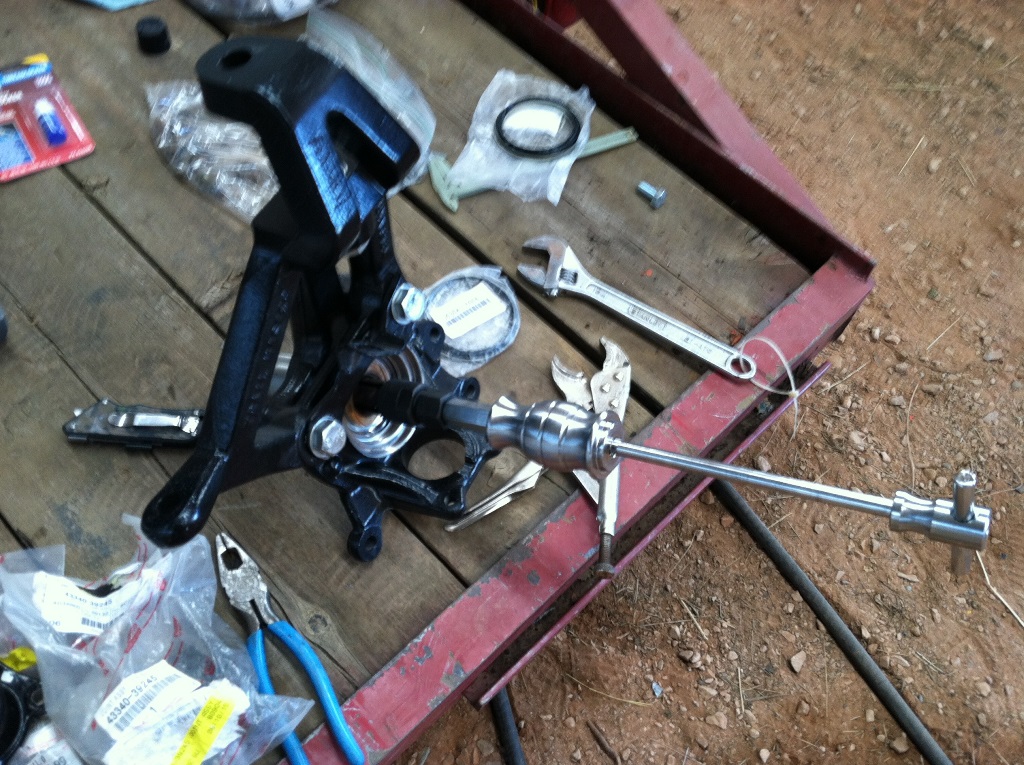
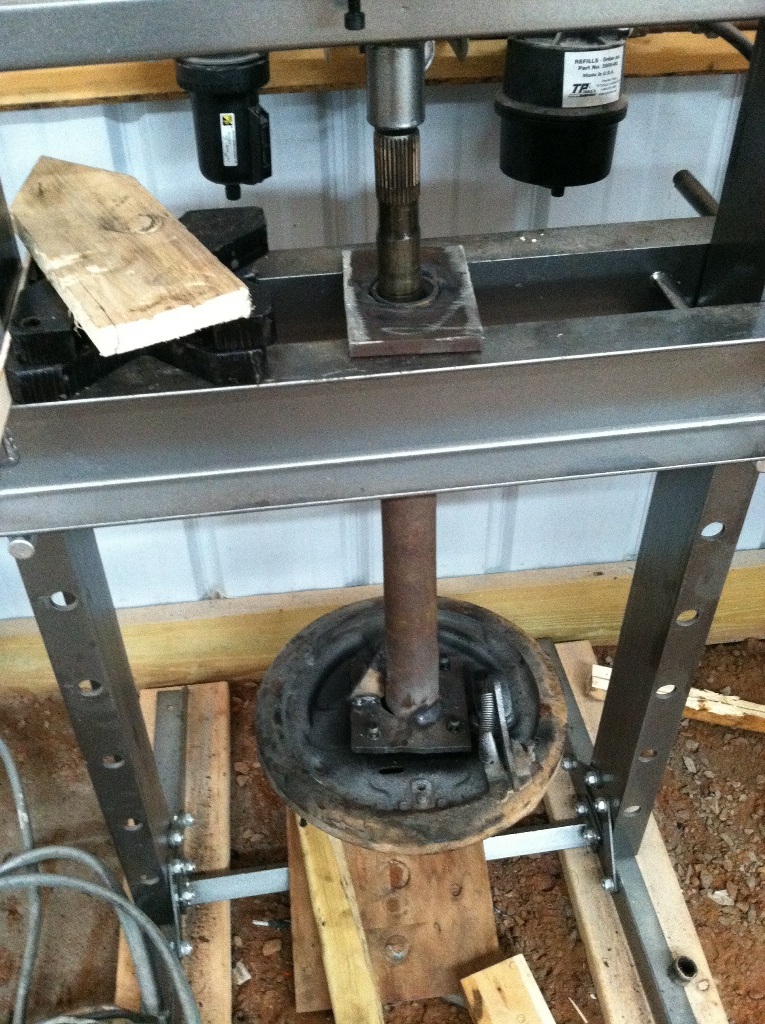
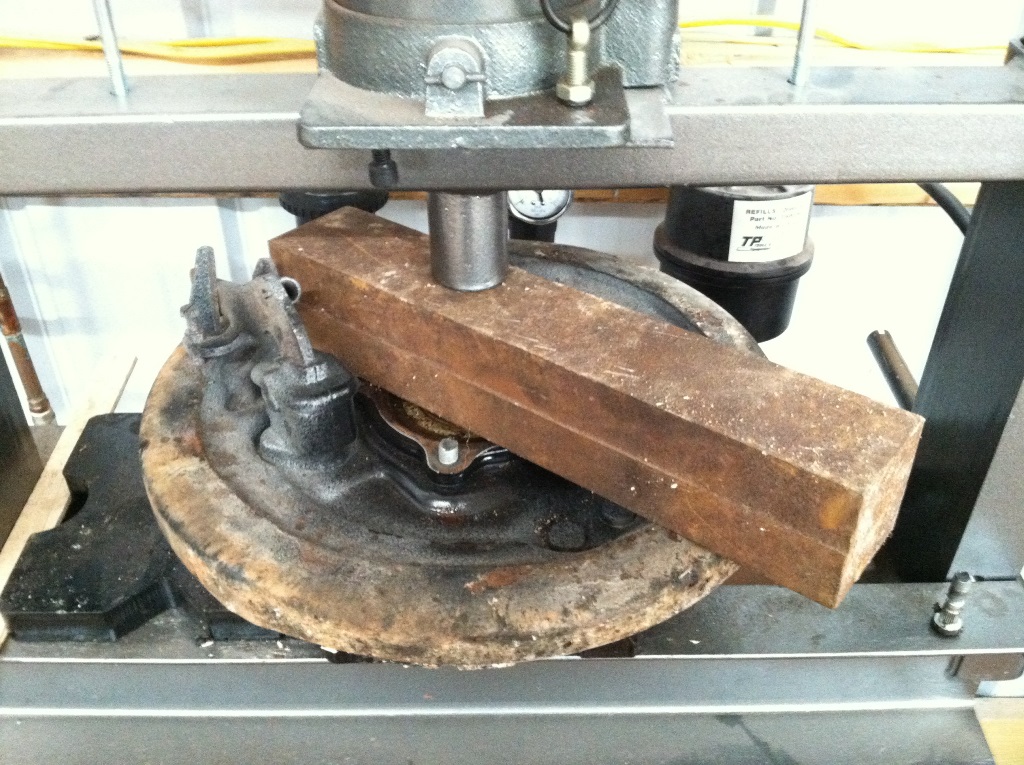
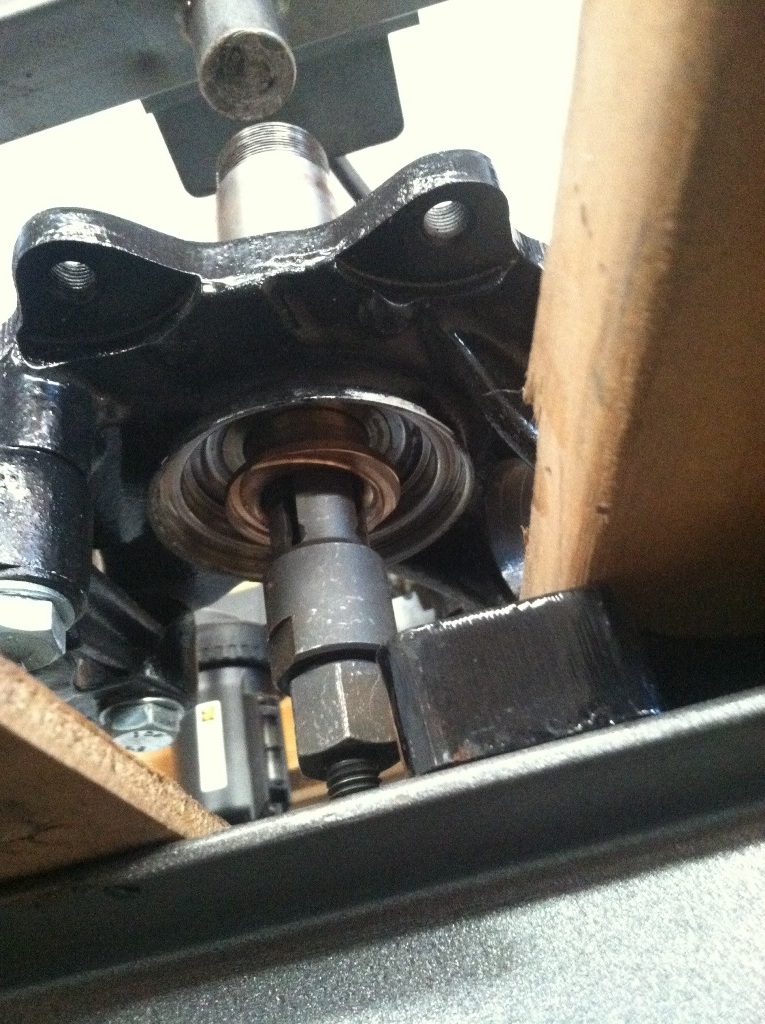
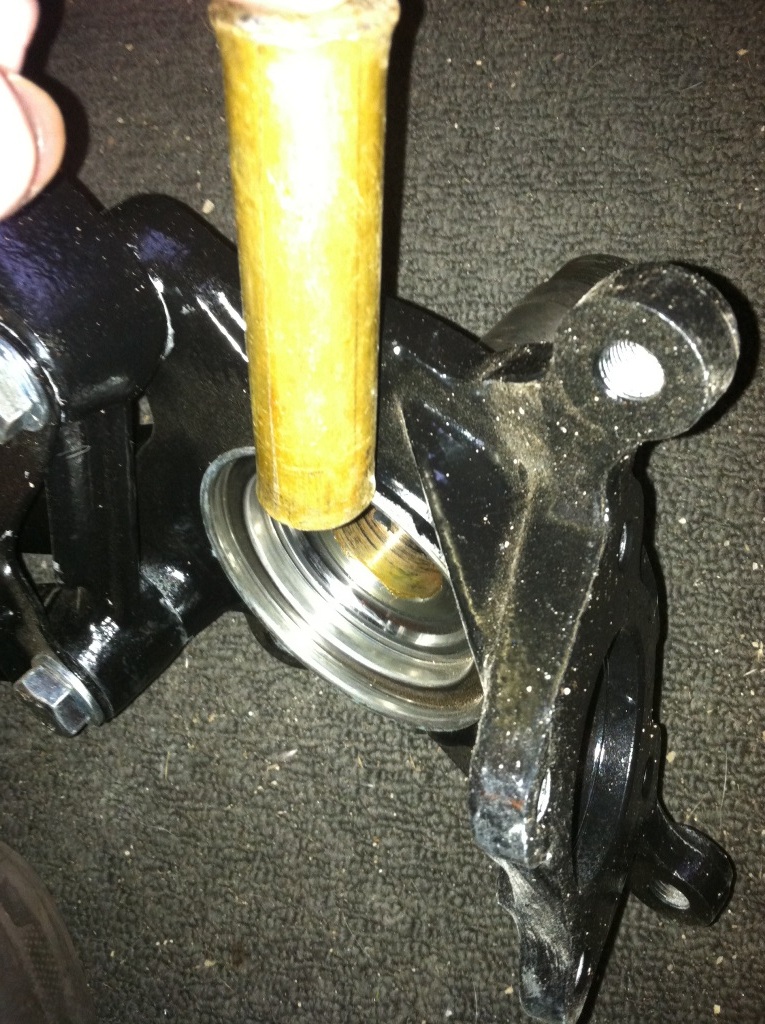
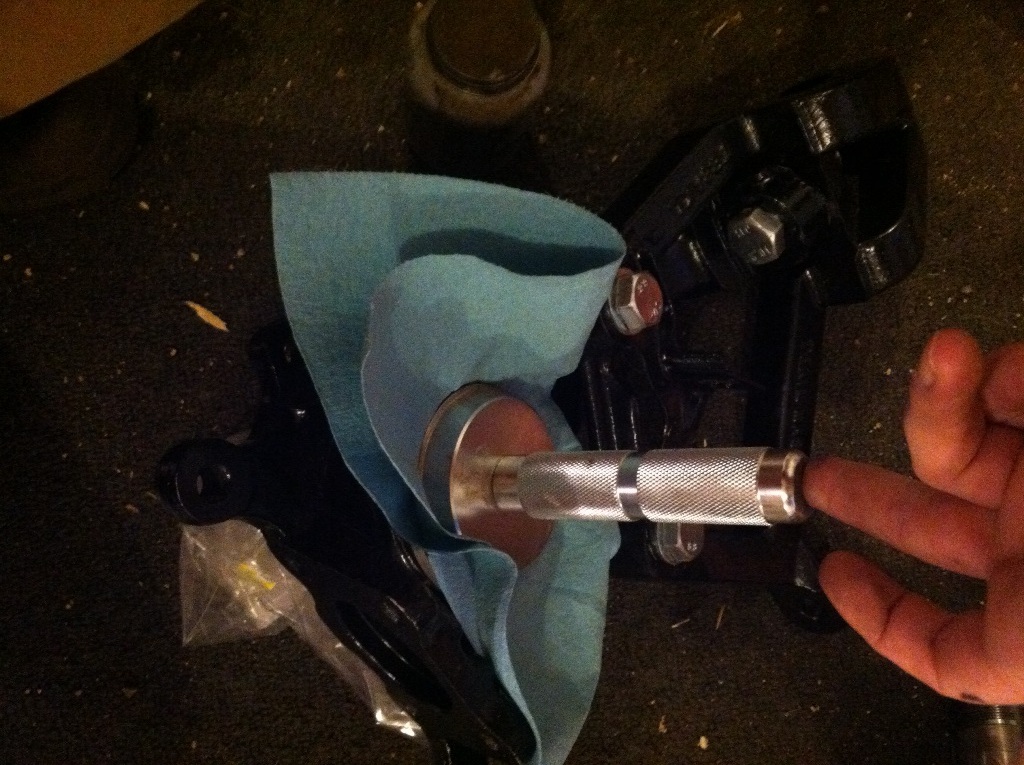
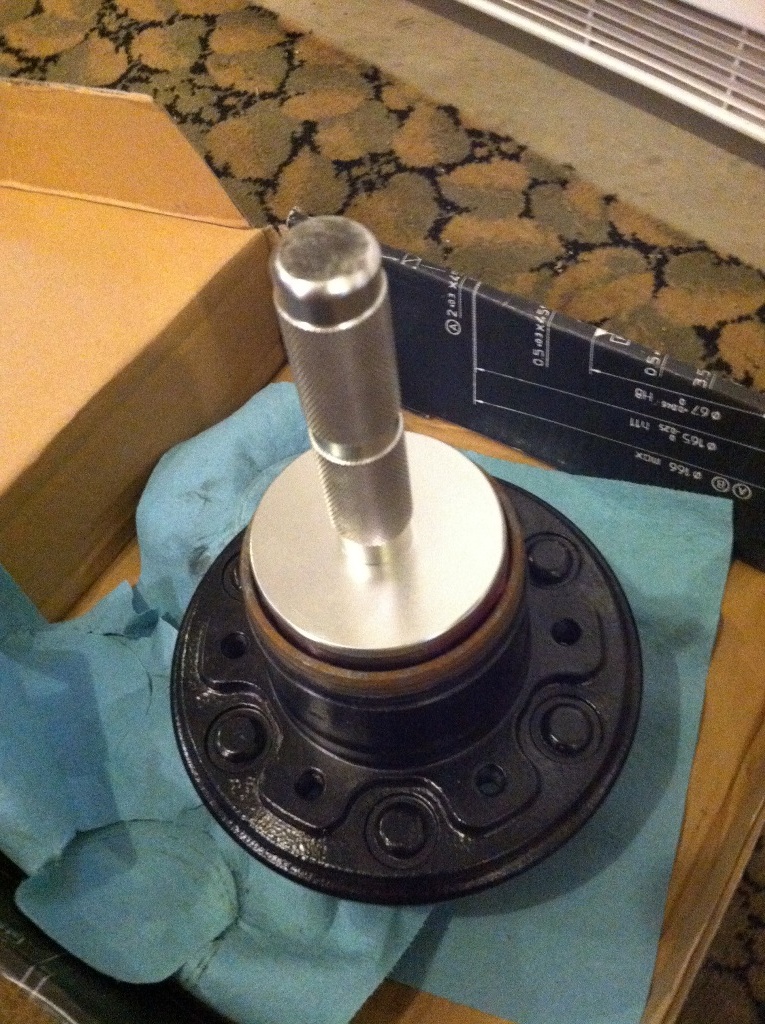
Press time... I read some things online where people slid a socket into it and it would catch on the brass allowing it to be pressed out. Mine must have been worn down because the socket would press right through the bushing. So I took the slide hammer attachment and opened it as far as I could get it. Make sure you open it as far as you can so it's good and tight. I didn't do this at first thinking I would possibly damage the walls and it just clipped right off the brass. Here's inside with the attachment opened up right behind the bushing;
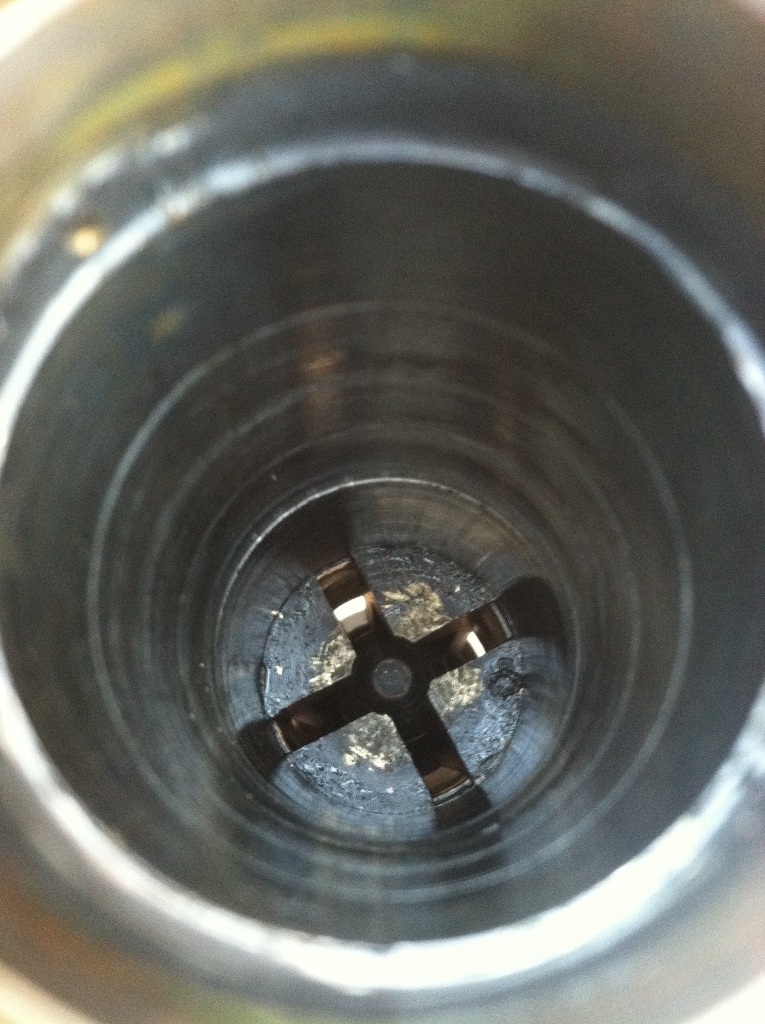
This picture has a brass rod pushing down but I swapped it out for a couple sockets stacked on top of each other. Make no mistake, those things are IN there. The knuckle sunk into the wood quite a bit before the bushings finally began popping out.
You ever feel like something just wasn't right? I did and I had to fix it... I couldn't get over those axle faces. Look at those nasty things

So I blasted em clean and prepped em for paint!

Hubs were giving me sour grapes too... So I knocked em out as well

And here they are painted


I probed around in here about gas tanks and I was seriously kicking around dropping the $$$ on a new one but it would have been around $500
So I was mulling it over on just renovating mine... and I decided on a spectre TO10B. I like that it has factory mounting locations. It's near identical to OEM tank but no drain plug which I already knew before hesitantly buying. I don't like this idea but I've never had to drain a tank. Nice to have the option though. So keep this in mind to those looking at buying these. I degreased the hell out of it and then painted it black. It says it isn't necessary but c'mon... It's Wisconsin. Anyone actually think a tank would survive these briny roads??? Old one was probably fine but... you know how it is 


Now back to the front IFS knuckles... Once again my logic is that if I have them apart... do it once and shouldn't have to do it again. So I'm pulling out the brass thrust bushing and replacing those along with the seals as I already alluded to earlier. The bushings on the axle side are an absolute pain in the arse. I put the slide hammer in there and good luck to anyone that does this. If you can do it your more of a man than I'll ever be
I pounded and pounded and pounded and stopped. 
Press time... I read some things online where people slid a socket into it and it would catch on the brass allowing it to be pressed out. Mine must have been worn down because the socket would press right through the bushing. So I took the slide hammer attachment and opened it as far as I could get it. Make sure you open it as far as you can so it's good and tight. I didn't do this at first thinking I would possibly damage the walls and it just clipped right off the brass. Here's inside with the attachment opened up right behind the bushing;

This picture has a brass rod pushing down but I swapped it out for a couple sockets stacked on top of each other. Make no mistake, those things are IN there. The knuckle sunk into the wood quite a bit before the bushings finally began popping out.


 12-04-2015, 07:22 PM
#48
Registered User
Thread Starter
Join Date: Jun 2015
Location: WI
Posts: 147
Likes: 0
Received 0 Likes
on
0 Posts
I was going to slap the rear shocks a while ago once I got the correct part # from 4wheelparts. The 143's came in but I was really surprised. Would you guys accept these if they looked like this? There was even rust on them. The other one wasn't as severe but it was still scratched on the loops.
May not seem like it but I hate being a PITA... I ended up sending the old ones back a bit ago and I was excited to see the replacements and get em mounted... I couldn't believe it but the replacements were also scratched! Is this normal for shocks??? The fronts are relatively spotless... These... twice in a row same results. I get it they'll end up looking like this anyway so maybe I'm being ridiculous but I like the brand new... smell to things Looks like I'm gonna just hafta be one of *those* customers

May not seem like it but I hate being a PITA... I ended up sending the old ones back a bit ago and I was excited to see the replacements and get em mounted... I couldn't believe it but the replacements were also scratched! Is this normal for shocks??? The fronts are relatively spotless... These... twice in a row same results. I get it they'll end up looking like this anyway so maybe I'm being ridiculous but I like the brand new... smell to things
Looks like I'm gonna just hafta be one of *those* customers
Last edited by duckhead; 12-04-2015 at 07:23 PM.
12-05-2015, 09:26 AM
#49
Nice thread you have going here!
As far as the Shocks go.......Are they Rancho's??? I just recently had a really bad experience with them. I was installing some on my buddies Titan. He ordered the quick struts and rear 9000's from somewhere online. The rears came in a box with the right part numbers, but inside were the wrong shocks!! The boxes were factory sealed as well. One rear shock had a quarter size dent in the canister, and the box was undamaged. So this is something that had to have happened before it was placed in the box.
Then the front struts looked like they just slapped them together in 5 minutes. I had to use the strut compressor to remove the bearing plate to make some modifications for them to sit properly on the spring. I had to do this, because rancho did not want to exchange out the part.
Needless to say......their quality has gone down hill the last few years.
Sorry for the rant.
I would be upset if the new shocks showed up like that.
12-05-2015, 03:23 PM
#50

Dude this build is badass.. nice work!
12-05-2015, 06:23 PM
#51
Registered User
Thread Starter
Join Date: Jun 2015
Location: WI
Posts: 147
Likes: 0
Received 0 Likes
on
0 Posts
Nice thread you have going here!
As far as the Shocks go.......Are they Rancho's??? I just recently had a really bad experience with them............................................
Needless to say......their quality has gone down hill the last few years.
Sorry for the rant.
I would be upset if the new shocks showed up like that.
As far as the Shocks go.......Are they Rancho's??? I just recently had a really bad experience with them............................................
Needless to say......their quality has gone down hill the last few years.
Sorry for the rant.
I would be upset if the new shocks showed up like that.
I don't have any experience with them but I read so many good things about these shocks... I'm sure there are people that complain out there but it seemed like I found so many more positives than negatives. Quick google found this review posted a bit ago from wranglerforum;http://www.wranglerforum.com/f202/ov...0s-597370.html
No need to apologize! Good to hear other perspectives. I wanna give these things a chance so I'm gonna stick with them for a bit longer. I won't lie though... After this second batch I was already pricing out some OME shocks lol.
Thanks yota dude! Wish I had more to post up. Unfortunately I won't have any time until.... next summer
12-14-2015, 11:52 AM
#52
Registered User
Thread Starter
Join Date: Jun 2015
Location: WI
Posts: 147
Likes: 0
Received 0 Likes
on
0 Posts
Well Gizler here comes a rant about Rancho this time from me
I figured I would call them to cut out the middleman to get these shocks replaced. I was also hoping to score another bag of hardware for the front shocks... They did send out a complete hardware set for the front 136's at no cost to me... Awesome. Here's the interesting part.... I tell them about the paint issue and I'm told, "Repaint them with some enamel paint... even though [I] shouldn't have to do that." Word for word. They won't replace them. WTF??????
I call 4wheelparts to have them deal with Rancho... I get an e-mail back from 4WP and embedded in the e-mail is a quote from the Rancho rep, "Upon reviewing the photos, the nicks in the paint finish will not compromise the performance or integrity of the shocks." Hilarious right? So even though they advertise, "Long lasting metallic finish" it doesn't mean that it will in fact be "long lasting" considering it's already rusting in spots fresh out of the box.
So Gizler... I'm off the Rancho wagon now but I may be stuck with these damn things... I ordered these a while ago and 4WP state they may subject me to a 15-30% restocking fee. At over $400 spent, a $120 sock in the gut is too much to stomach.
Alright enough whining... Just wanted to let you all know *MY* experience so far with Rancho. Maybe I can save you the headache in the future...
I figured I would call them to cut out the middleman to get these shocks replaced. I was also hoping to score another bag of hardware for the front shocks... They did send out a complete hardware set for the front 136's at no cost to me... Awesome. Here's the interesting part.... I tell them about the paint issue and I'm told, "Repaint them with some enamel paint... even though [I] shouldn't have to do that." Word for word. They won't replace them. WTF??????
I call 4wheelparts to have them deal with Rancho... I get an e-mail back from 4WP and embedded in the e-mail is a quote from the Rancho rep, "Upon reviewing the photos, the nicks in the paint finish will not compromise the performance or integrity of the shocks." Hilarious right? So even though they advertise, "Long lasting metallic finish" it doesn't mean that it will in fact be "long lasting" considering it's already rusting in spots fresh out of the box.
So Gizler... I'm off the Rancho wagon now but I may be stuck with these damn things... I ordered these a while ago and 4WP state they may subject me to a 15-30% restocking fee. At over $400 spent, a $120 sock in the gut is too much to stomach.
Alright enough whining...
Just wanted to let you all know *MY* experience so far with Rancho. Maybe I can save you the headache in the future...
12-22-2015, 07:25 PM
#53
Registered User
Thread Starter
Join Date: Jun 2015
Location: WI
Posts: 147
Likes: 0
Received 0 Likes
on
0 Posts
I ended up painting my calipers. Bought the G3 kit off of amazon. I was going to go with red but I second guessed that idea. Thought red would be too loud so I chose the modest route with black.
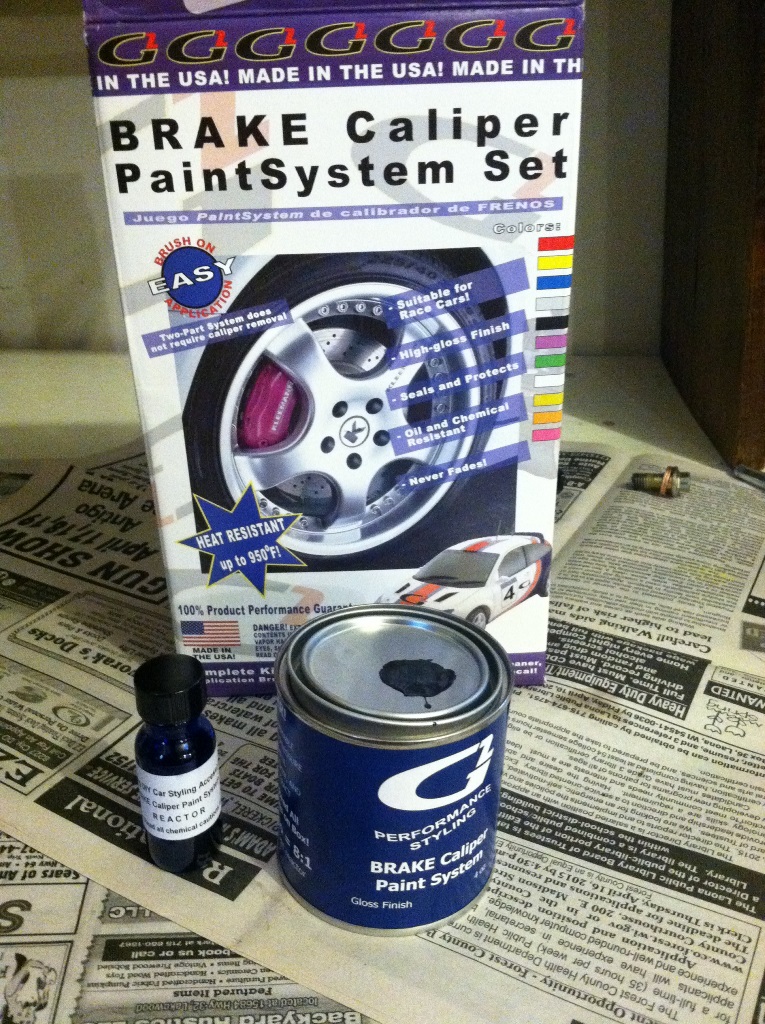
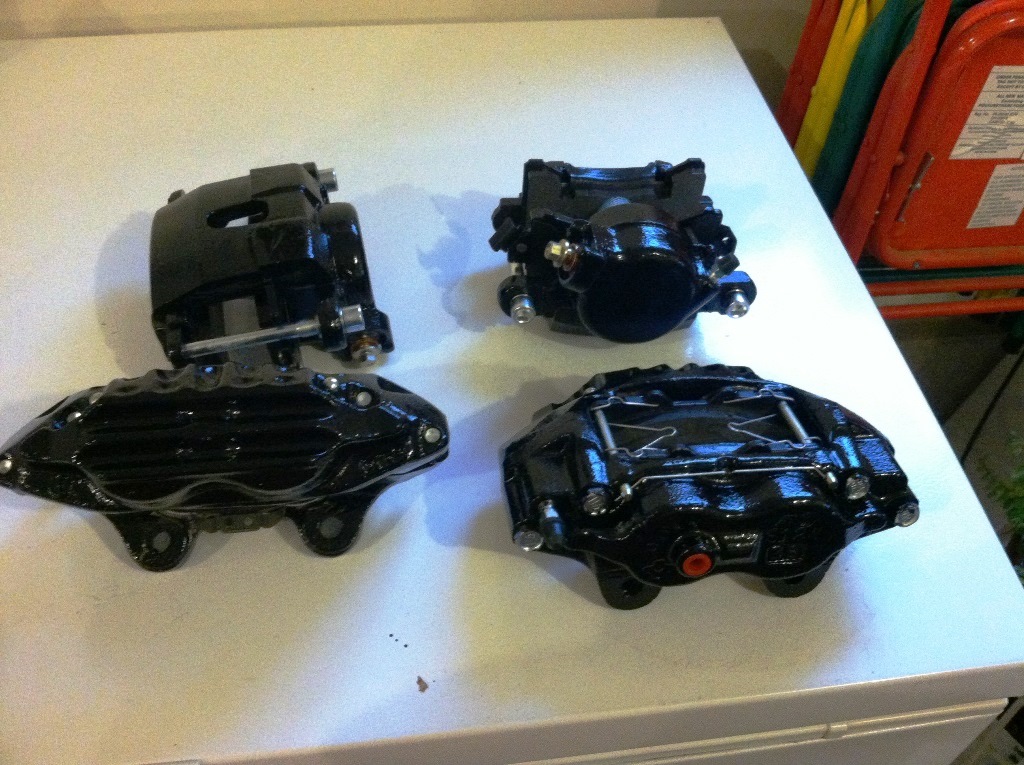
I was surprised how far this stuff went. I had a ton left over. I put 3 coats on my 4 calipers. With all of the excess I wished I would have put another 2 more coats on Could have probably painted the calipers on my other vehicle too. Anyway, I took some 100 grit sandpaper to the already painted GM calipers from the trailgear kit. I bought some refurb'd calipers for the front from rockauto.
RAYBESTOS RC10088
RAYBESTOS RC10087

Took the pads and most everything apart then painted them. Turned out pretty good! Much better than the original GM caliper paint...
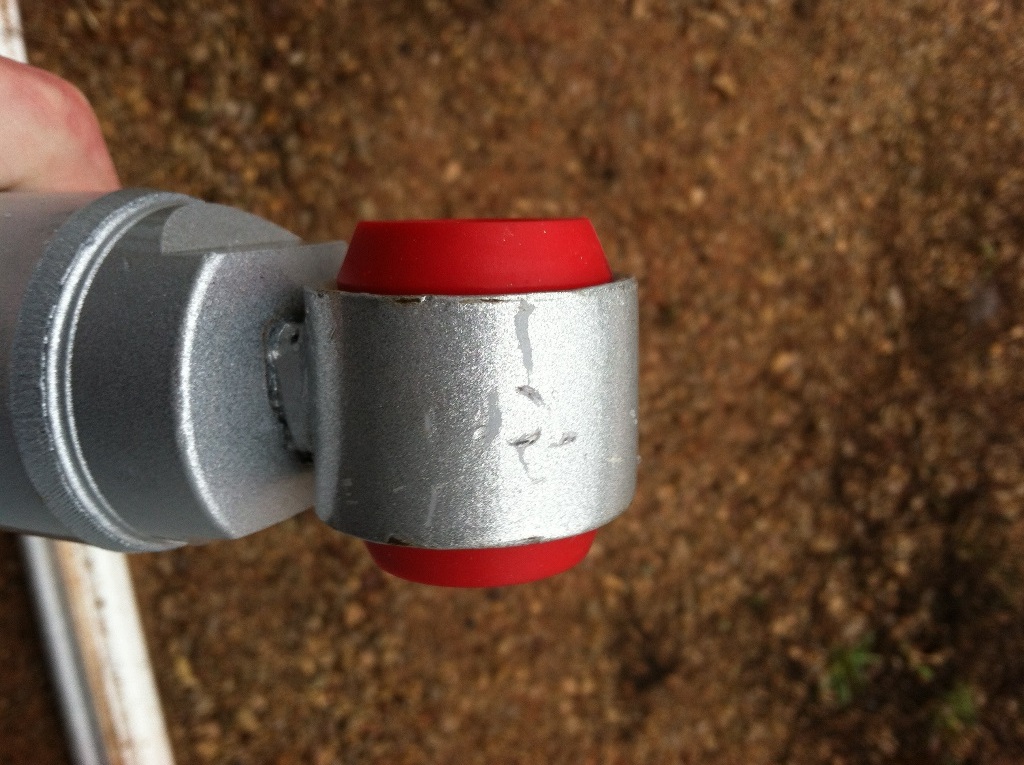
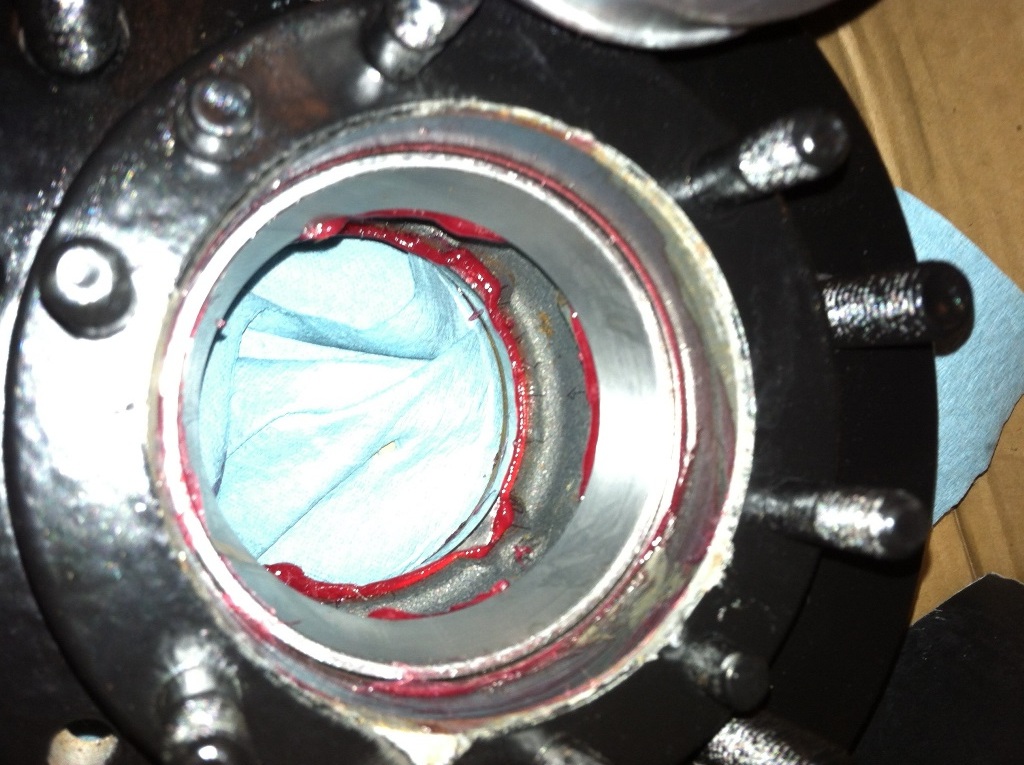
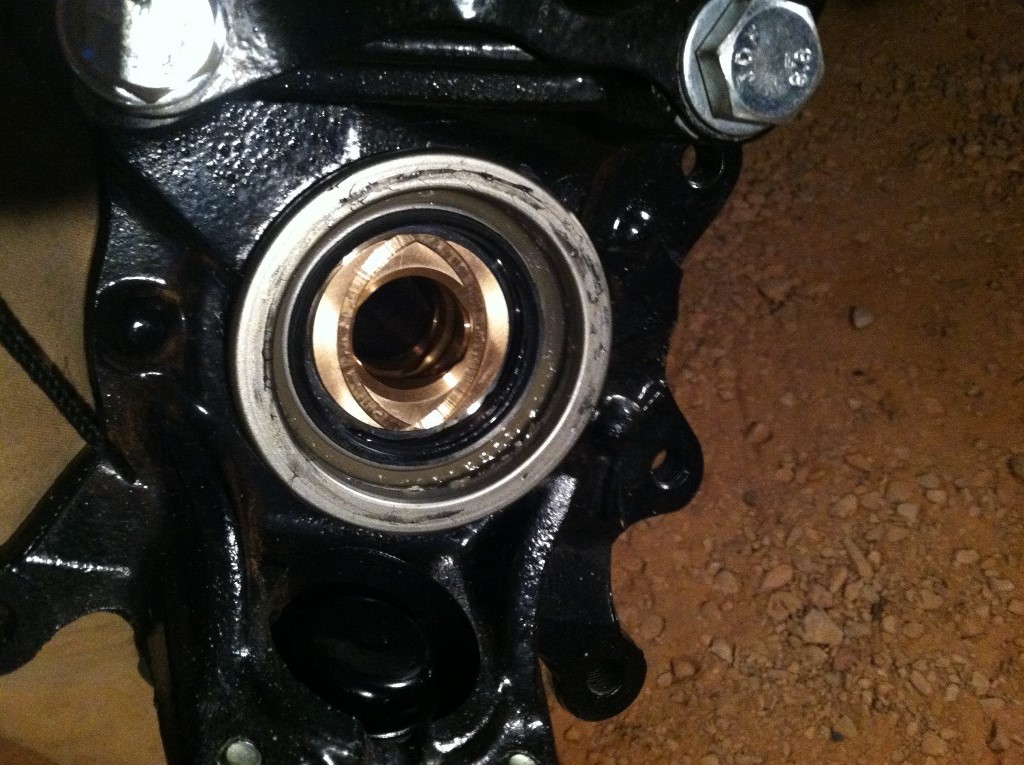
Put new guts inside the knuckles. Had to pound out the old "dust cover" or "seal cup" as I call them... I just took a brass drift and pounded on a side. The cup simply popped right out after a few hits.
Initial separation....
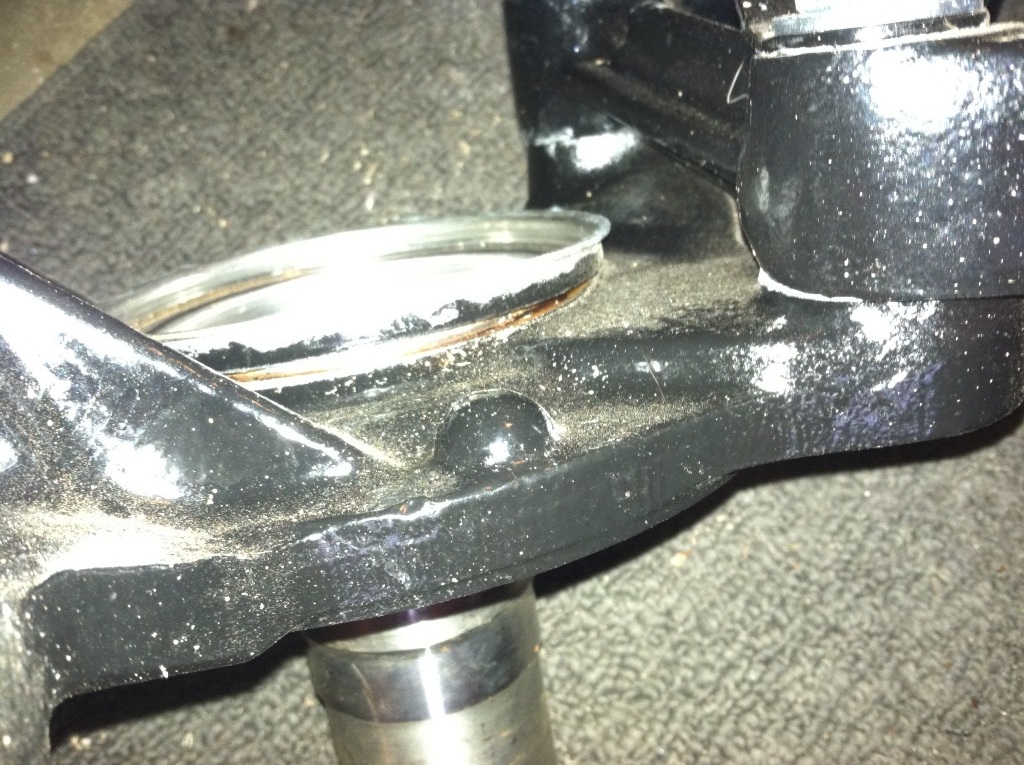
and removal... Wished I would have done this to begin with for the paint. Prior to painting, I didn't know Toyota made the old seals obsolete.
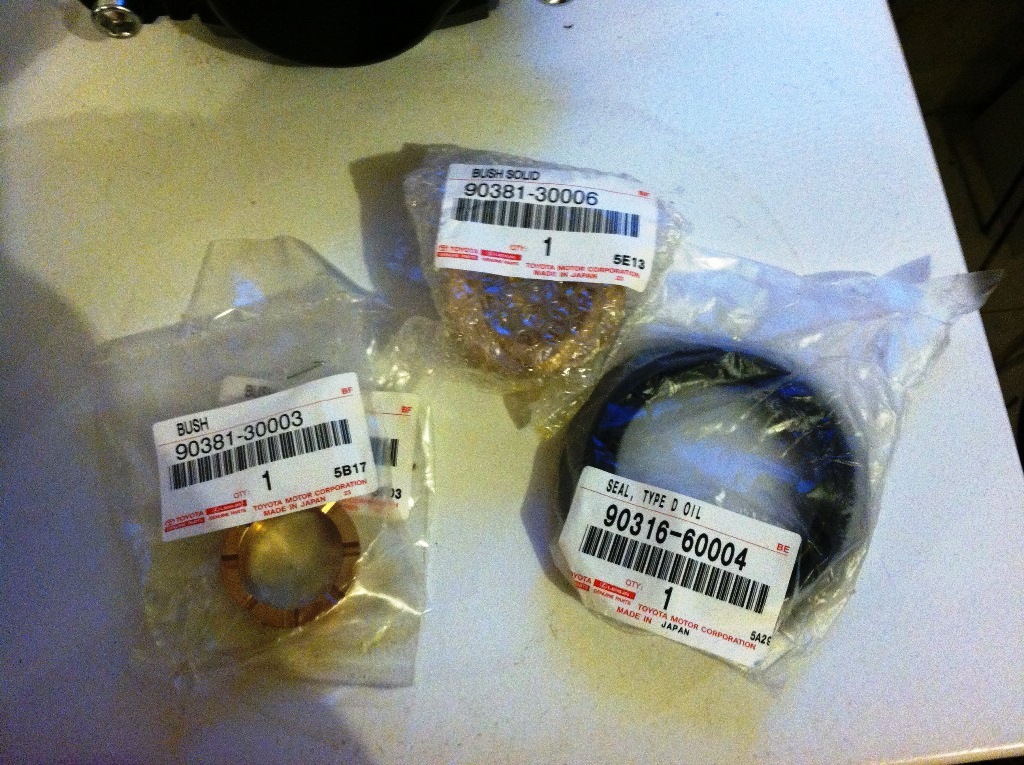
Here are the guts;
Outer brass bushing - 90381-30003
Inner brass bushing - 90381-30006
Knuckle seal - 90316-60004
I used a bearing driver to pound everything in. To keep from contaminating the insides I put shop rags over the seals and bushings while I pounded them in. Add thin layer of grease around everything to help ease everything in.
Pounding inner in... Outer was very similar, didn't take a pic
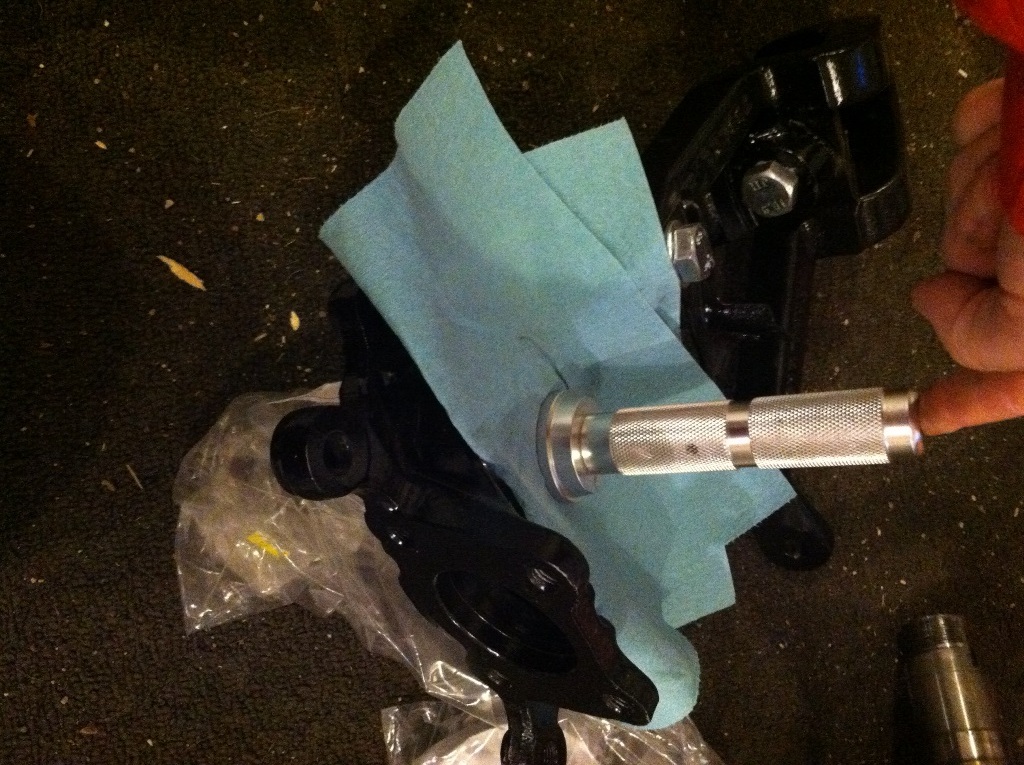
Pounding seal in
And the finished product...

I was surprised how far this stuff went. I had a ton left over. I put 3 coats on my 4 calipers. With all of the excess I wished I would have put another 2 more coats on
Could have probably painted the calipers on my other vehicle too. Anyway, I took some 100 grit sandpaper to the already painted GM calipers from the trailgear kit. I bought some refurb'd calipers for the front from rockauto.RAYBESTOS RC10088
RAYBESTOS RC10087

Took the pads and most everything apart then painted them. Turned out pretty good!
Much better than the original GM caliper paint...
Put new guts inside the knuckles. Had to pound out the old "dust cover" or "seal cup" as I call them... I just took a brass drift and pounded on a side. The cup simply popped right out after a few hits.

Initial separation....

and removal... Wished I would have done this to begin with for the paint. Prior to painting, I didn't know Toyota made the old seals obsolete.

Here are the guts;
Outer brass bushing - 90381-30003
Inner brass bushing - 90381-30006
Knuckle seal - 90316-60004

I used a bearing driver to pound everything in. To keep from contaminating the insides I put shop rags over the seals and bushings while I pounded them in. Add thin layer of grease around everything to help ease everything in.
Pounding inner in... Outer was very similar, didn't take a pic

Pounding seal in

And the finished product...

Last edited by duckhead; 01-09-2016 at 10:23 AM. Reason: Add caliper part number
 01-08-2016, 04:31 PM
#55
Registered User
Thread Starter
Join Date: Jun 2015
Location: WI
Posts: 147
Likes: 0
Received 0 Likes
on
0 Posts
01-08-2016, 07:16 PM
#56
Registered User
Thread Starter
Join Date: Jun 2015
Location: WI
Posts: 147
Likes: 0
Received 0 Likes
on
0 Posts
Well got a bit done over the holiday and time to update...
Mounted rear GM calipers from trail gear. Doesn't take long for the rust to grab hold eh? I would have dropped the wheels on them too but I was waiting on Marlin Crawler to get the 130mm zerk'd bolts in for my springs. I called them and they still don't have any in. They also said they probably won't carry them anymore Looks like I'm going a different route. Probably order trail gear's zerk'd bolts instead. to be continued...

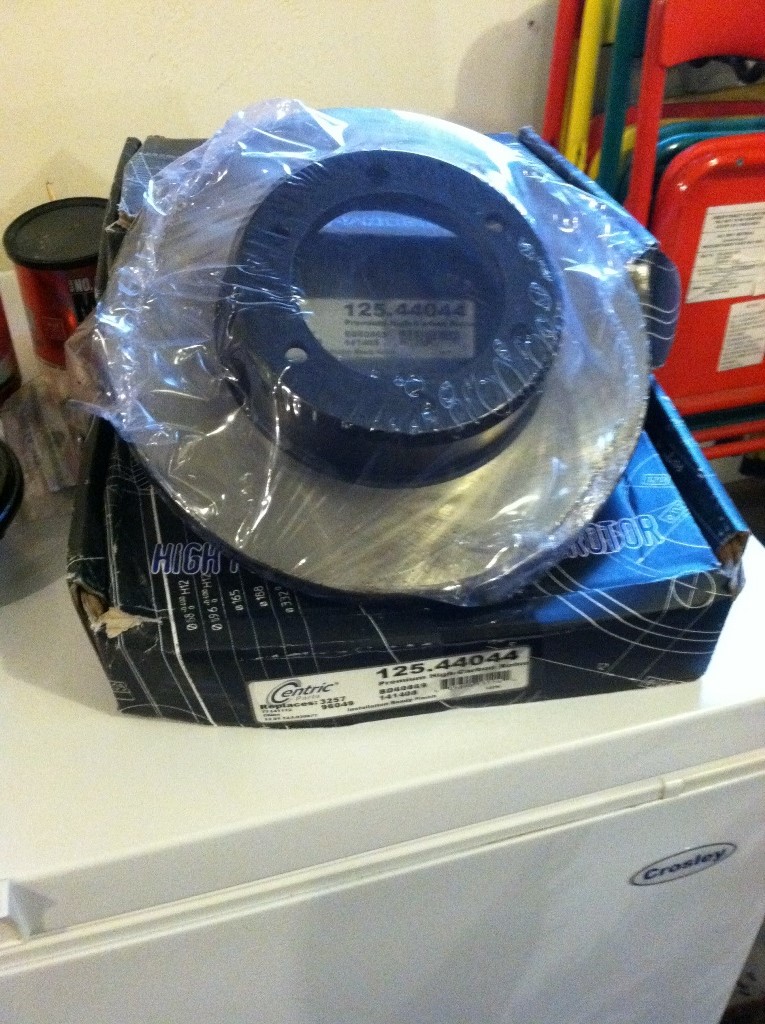
And now back to the knuckle work... I bought new rotors from rockauto. Centric 12544044...
Also the bearing kit from Marlin Crawler. I left out the bag with the hub gaskets and the tab washers.
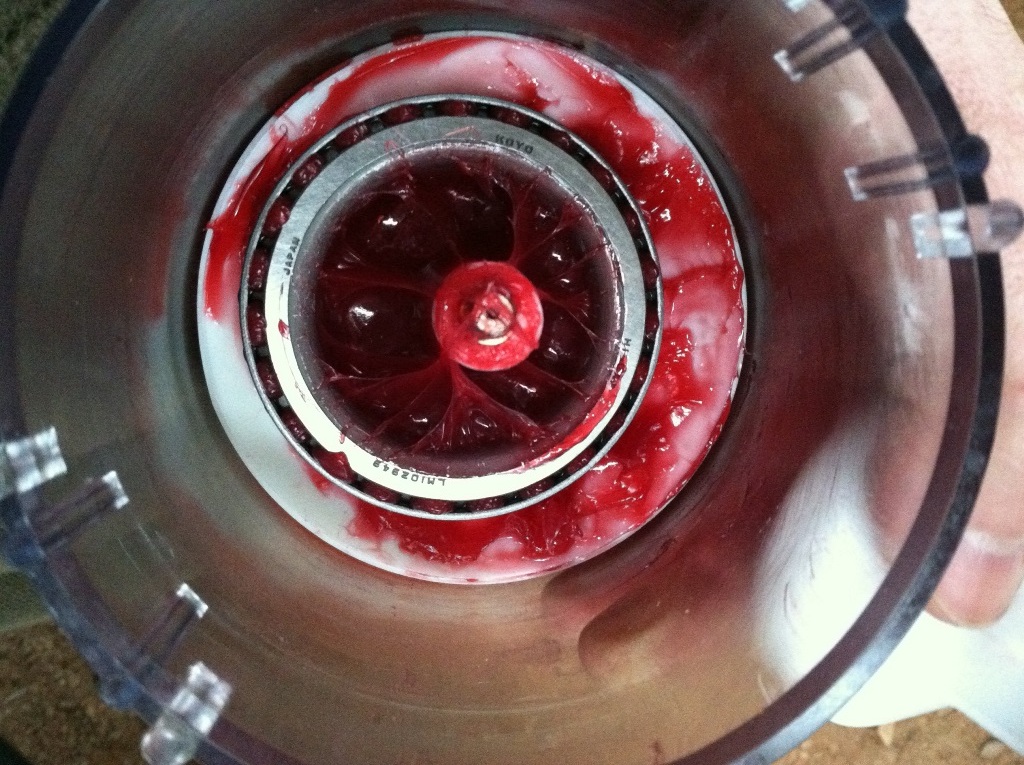
Tools of the trade for this job... Lube em, pound em, neversieze em, and slap the rotor on!
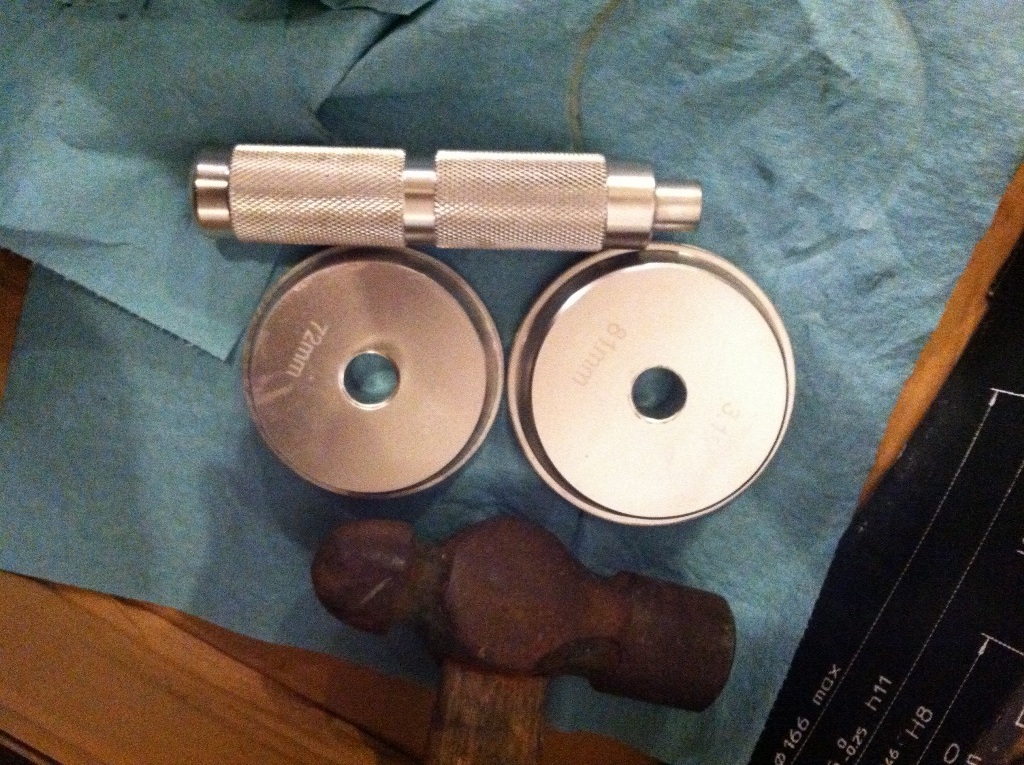
Drop your bearings in a packer... If you don't have one I would get one. They're great Drop in bearing and then put in the seal...
I ordered new CV axles and went genuine toyota. My old CV's were on my truck since I've owned em. I'm hoping to get the same result I also decided to do reman to save on cost. Brand new was too expensive. Oddly enough I didn't take any pics but here's the part number;
43430-35012-84
And this is where things get interesting... There is a very well known thread here on yotatech involving the seals needed on the knuckle;
https://www.yotatech.com/forums/f116...81/index3.html
It states you need parts;
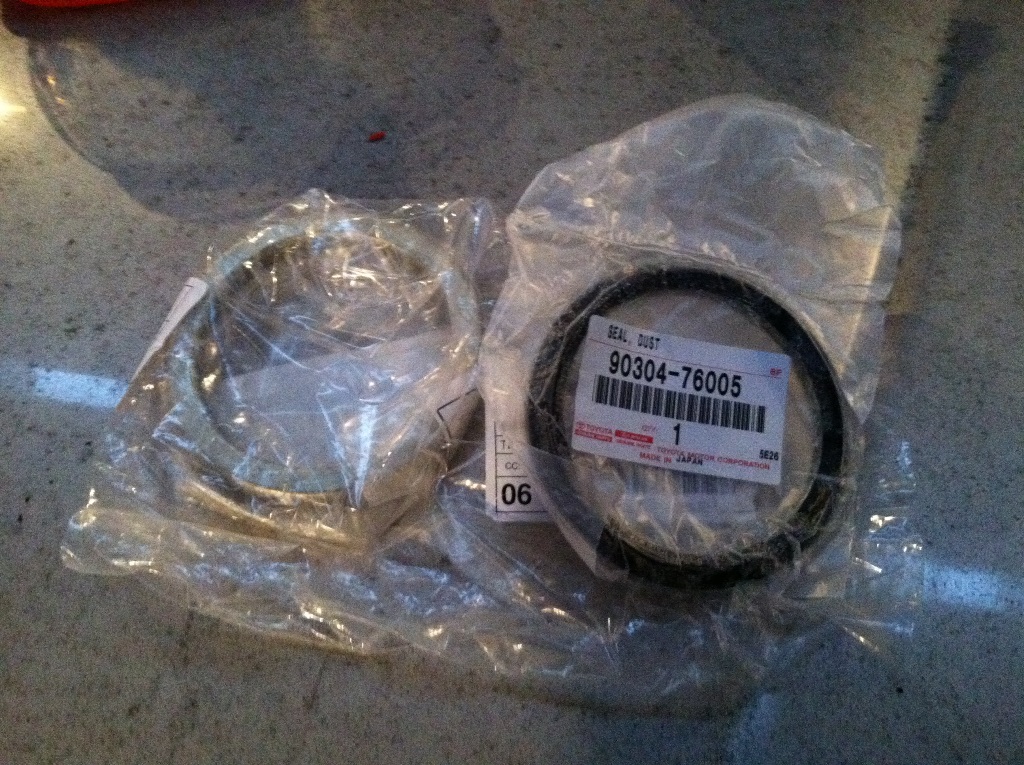
"90304-76005(MAIN) CV SIDE
90316-60004(SUB) KNUCKLE SIDE"
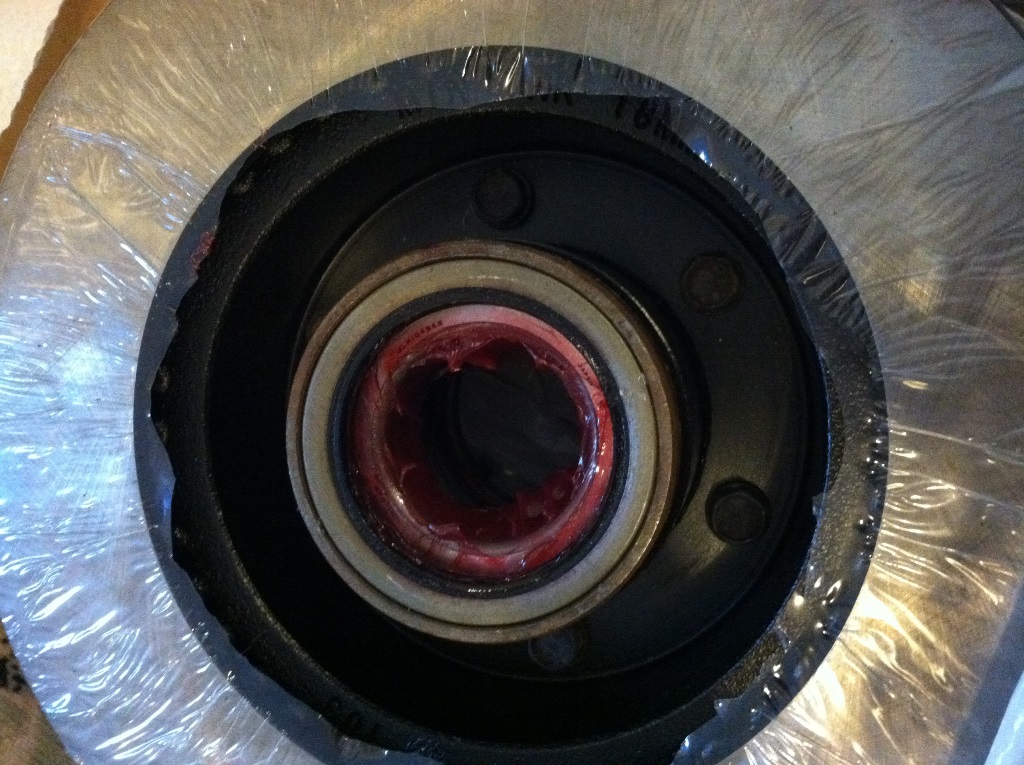
So I ordered those parts... 60004 is great and accurate. 76005 however isn't on the IPB I use to order parts. The part needed for our style trucks is actually 76003. A local Toyota parts person informed me however 76005 was the one I needed. How much more verification is needed??? Here's some pics.
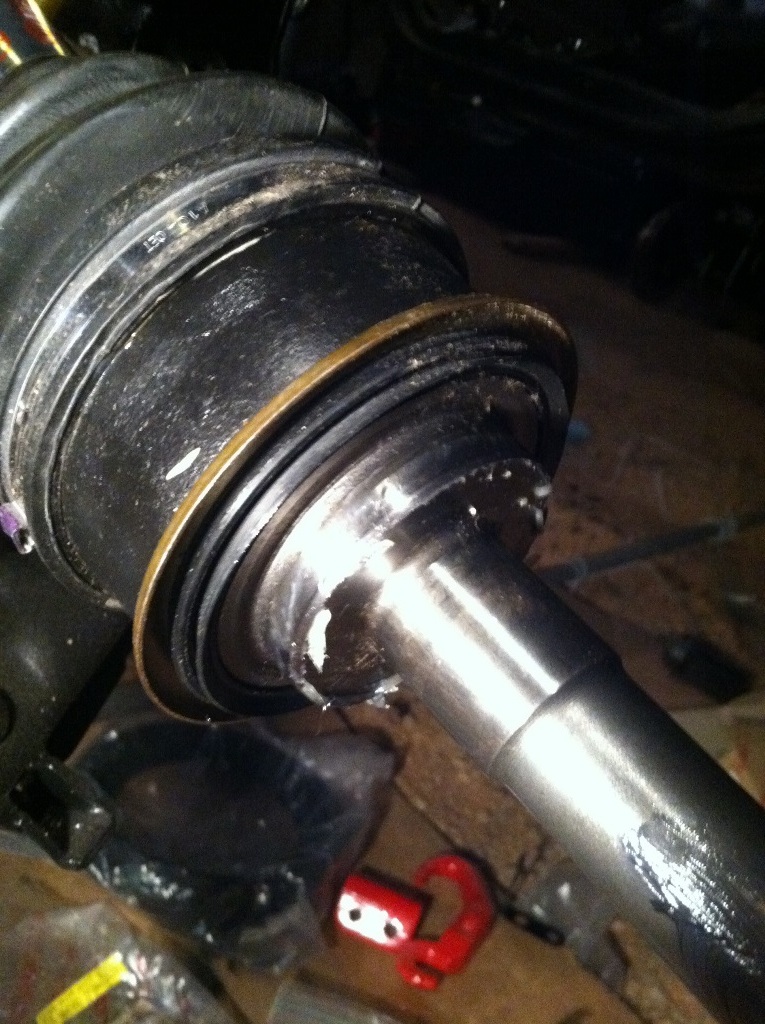
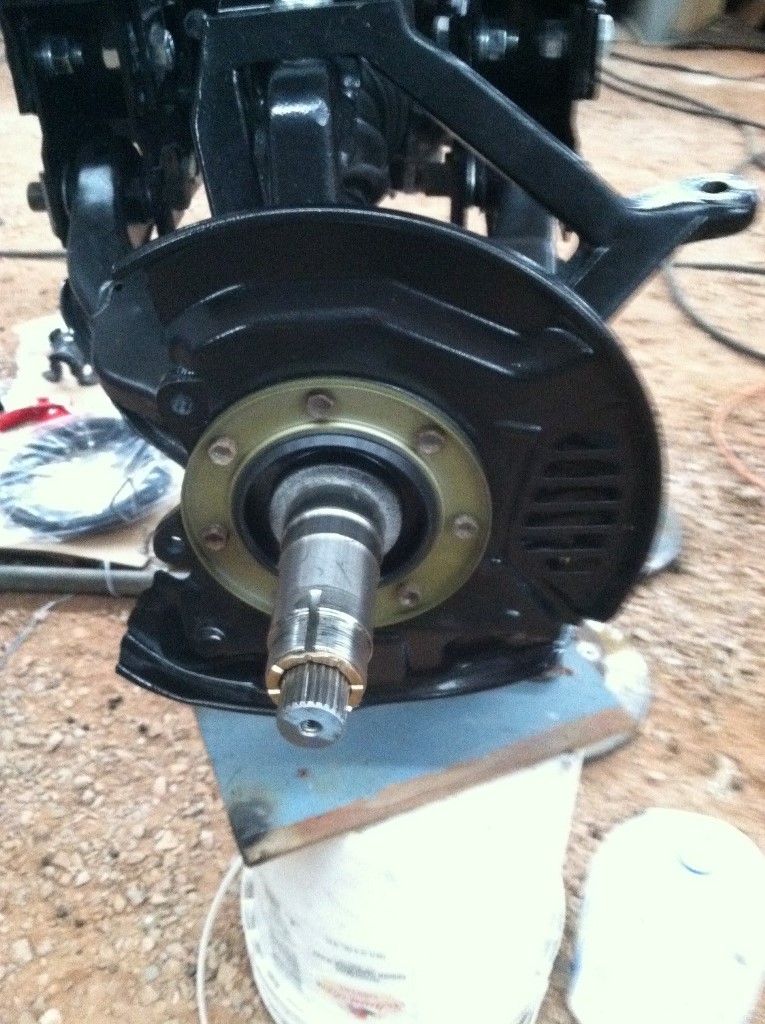
Goes on like this...
But easier to work with when placed directly on knuckle...
And to no surprise I have the same exact problem as everyone else on that forum. I don't know why I thought I'd be different. The CV axle is too short to get the retaining clip on.
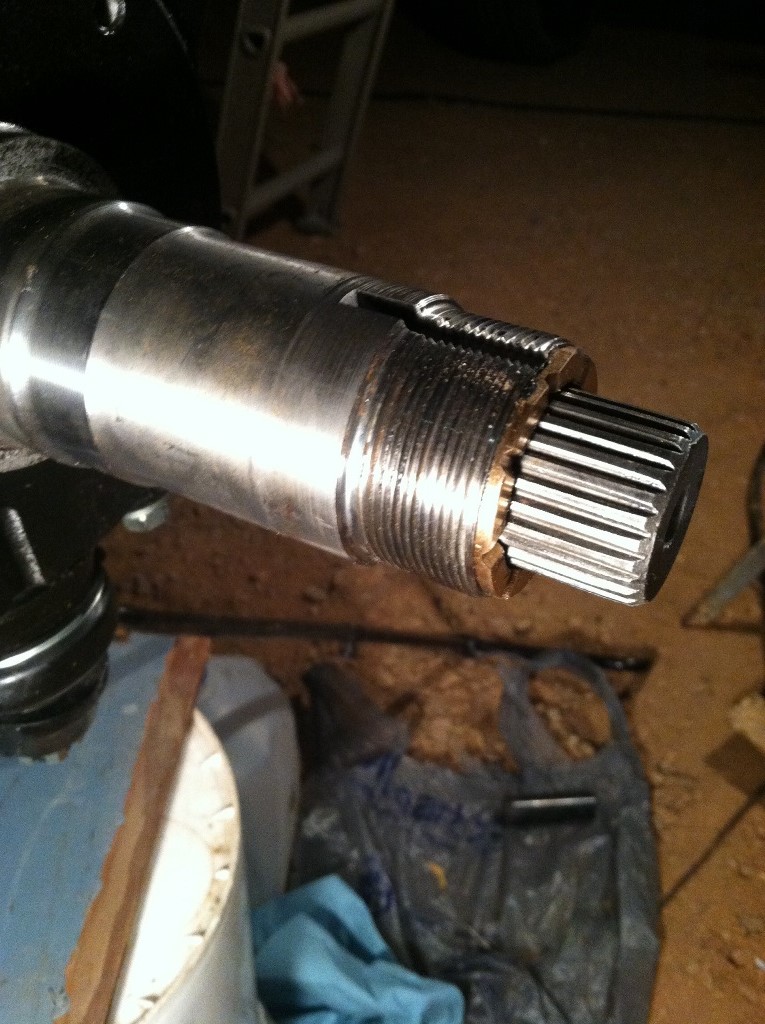
Take out 76005 and she looks good!!!
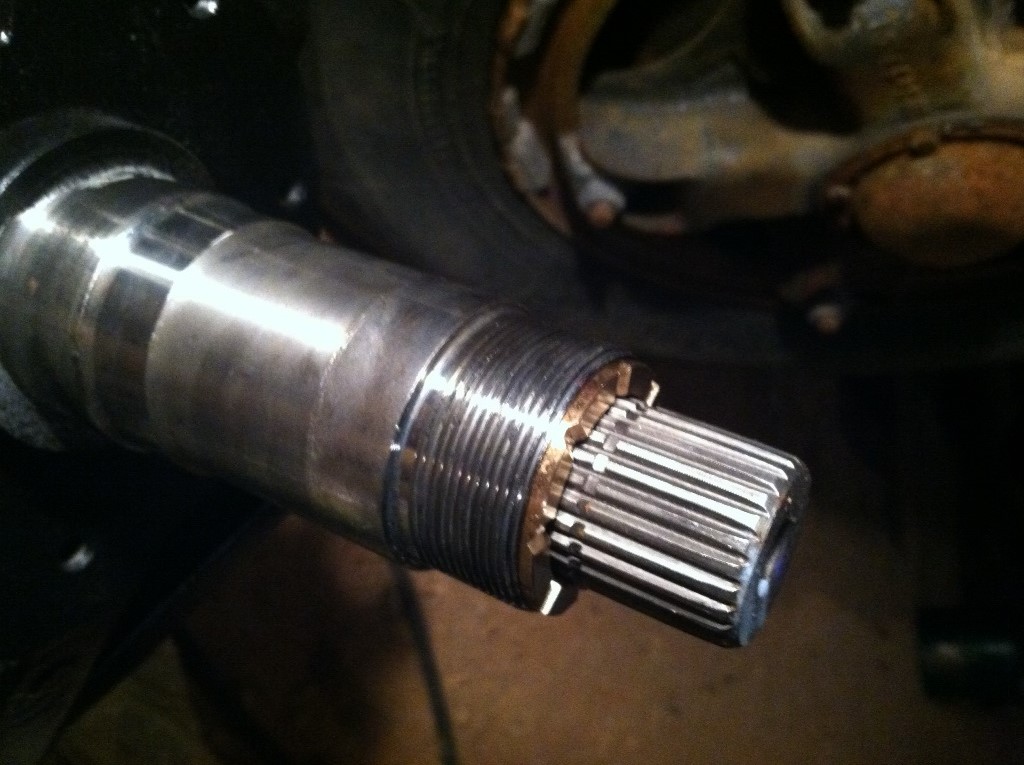
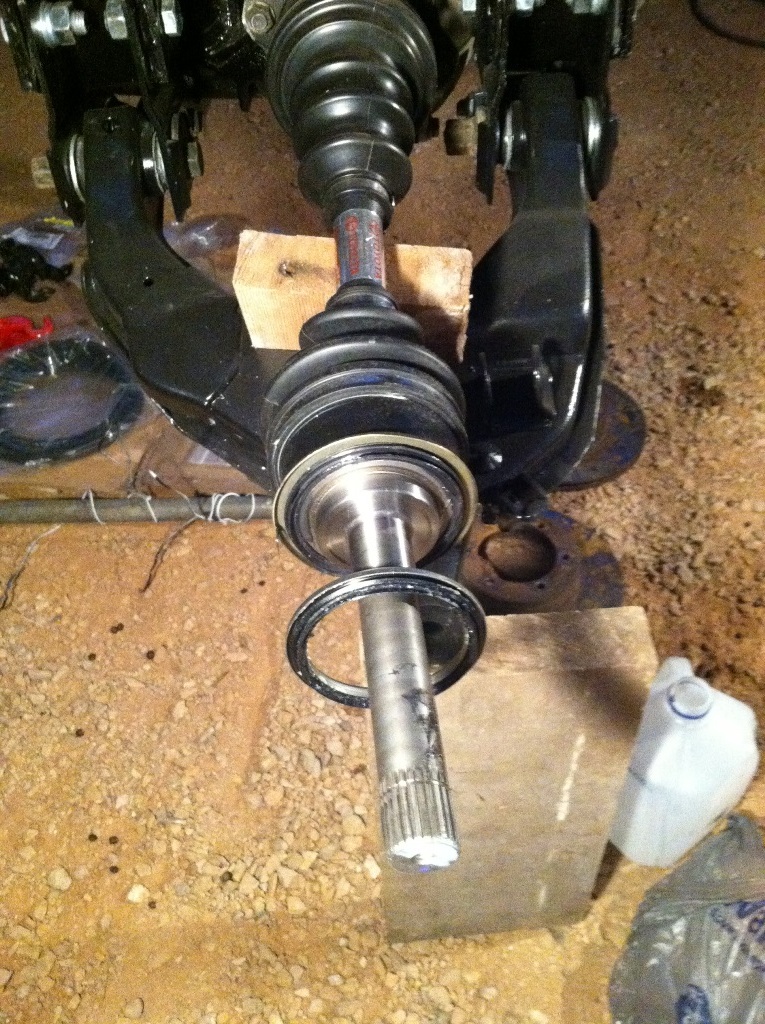
I don't like the idea of not using a retaining clip nor do I like the idea of shaving the seal. Knowing my luck, I would ruin the integrity of the seal by making the changes nonsymmetric. So I went back to my laptop and reverified 76003. I called a different Toyota dealer and now they say 76003. I tried 2 others and 76003 is the one So in hopes of the "right" part fixing the issue, I go to the dealer but I brought my knuckle and axle with me. Good thing because the result is the same! I wished I would have taken a picture of the seal because the seals on 76003 look identical to the seals that come on the CV axle. The parts guy brings in one of their techs... "Why are you putting a seal on a seal" is the first thing he asks. "Because Toyota IPB tells me to" is my response He looks at the exploded view, verifies the part numbers, and comes to the conclusion the IPB is wrong. He said he never put that seal on his 4runner and the seals are identical from the CV compared to 76003. Ditch the second seal and save some cash. I already know this route gives me the result I should and used to have. Done deal! If anyone wants 76005 seals I can give you a great deal Here's a pic of the seals on the CV axle;
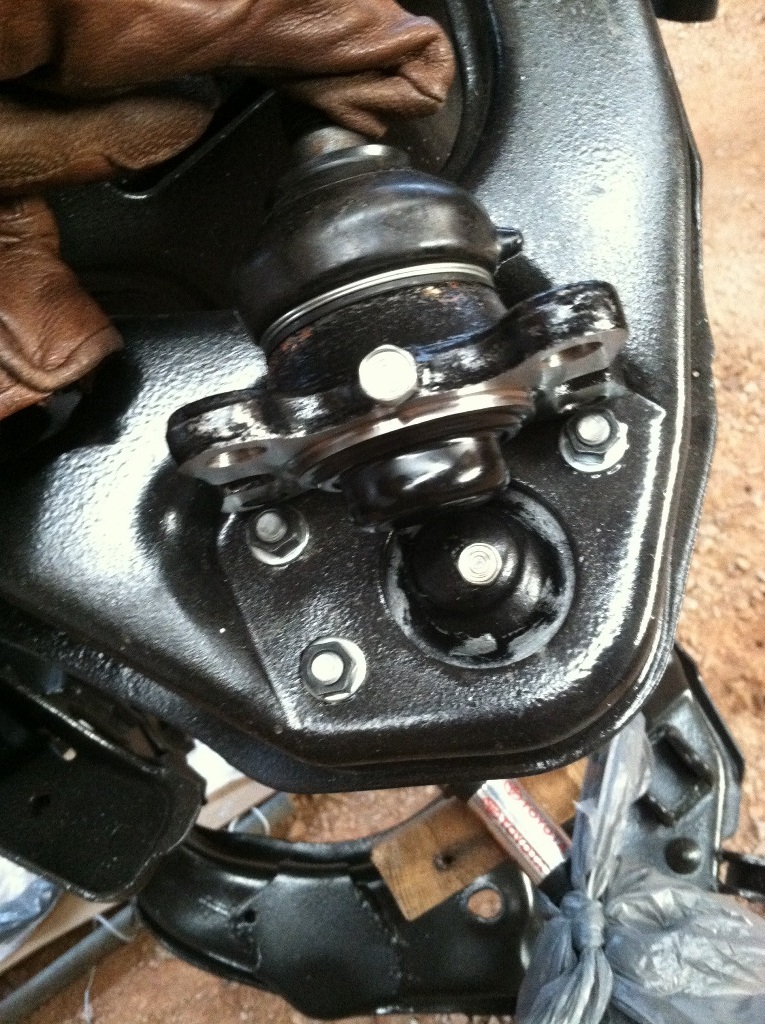
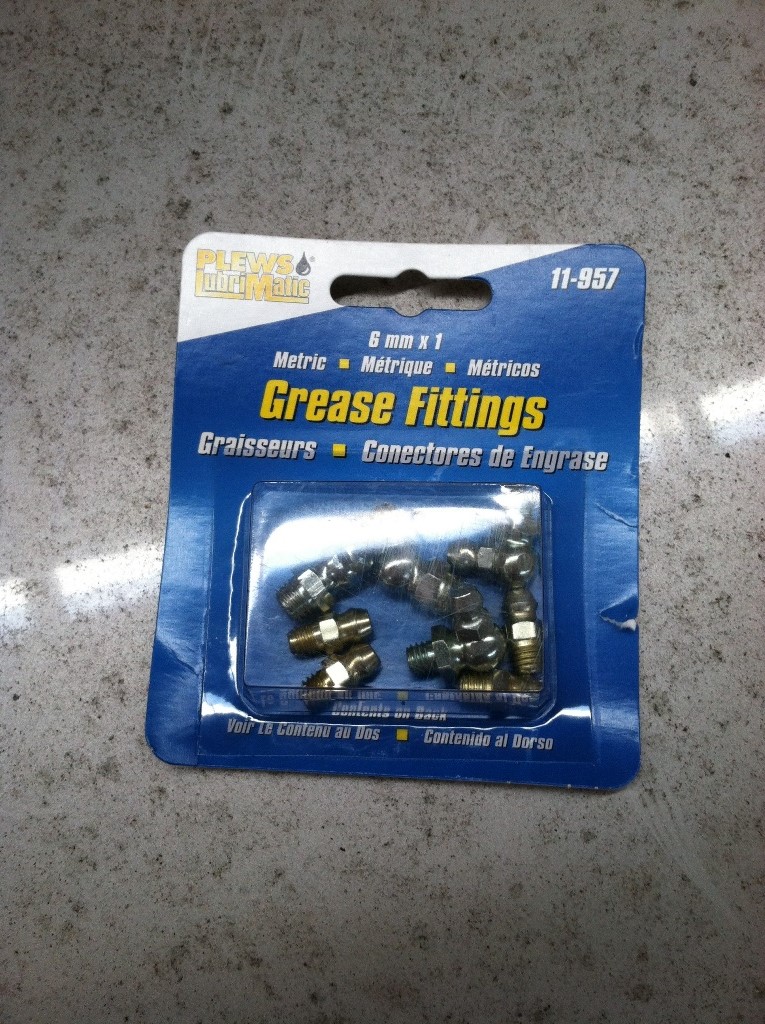
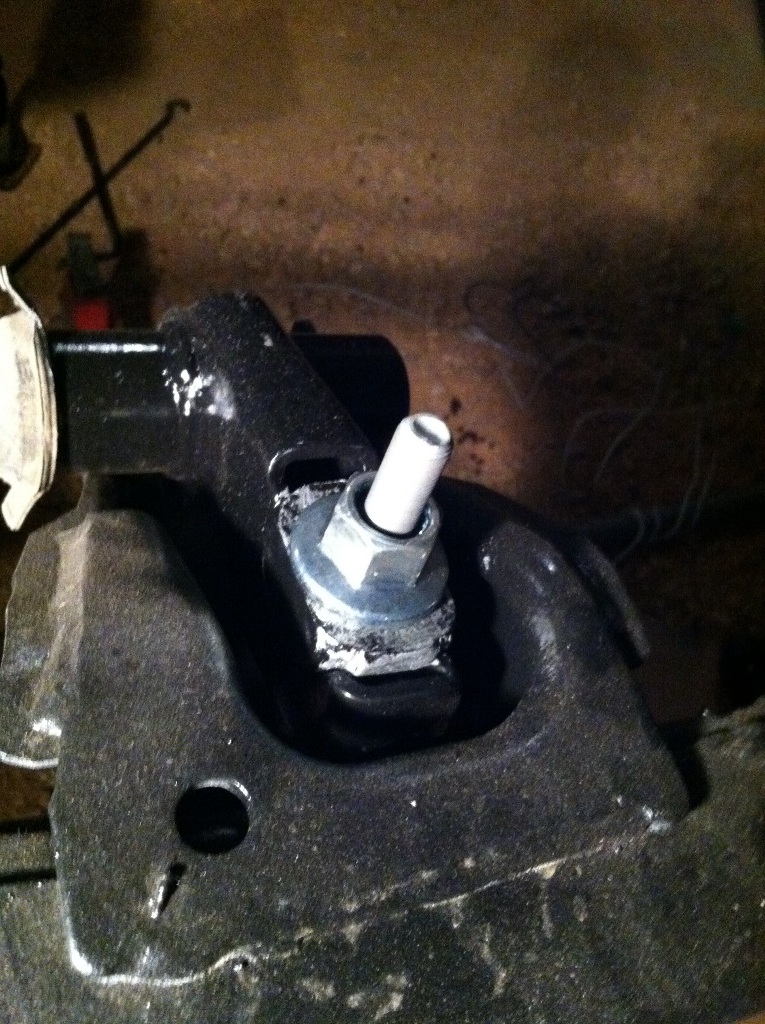
I also ordered new ball joints from Toyota. Pretty big wear item and I did it for the same reason as the CV axles... Surprisingly enough, they didn't come with any zerks. Went out and bought some 6mm x 1. Used 90 degree ones on the lower ball joint so they're accessible at all times (Pic below... Forgot to take pic of upper zerk)
43350-39085 - Upper ball joint
43340-39245 - Lower ball joint
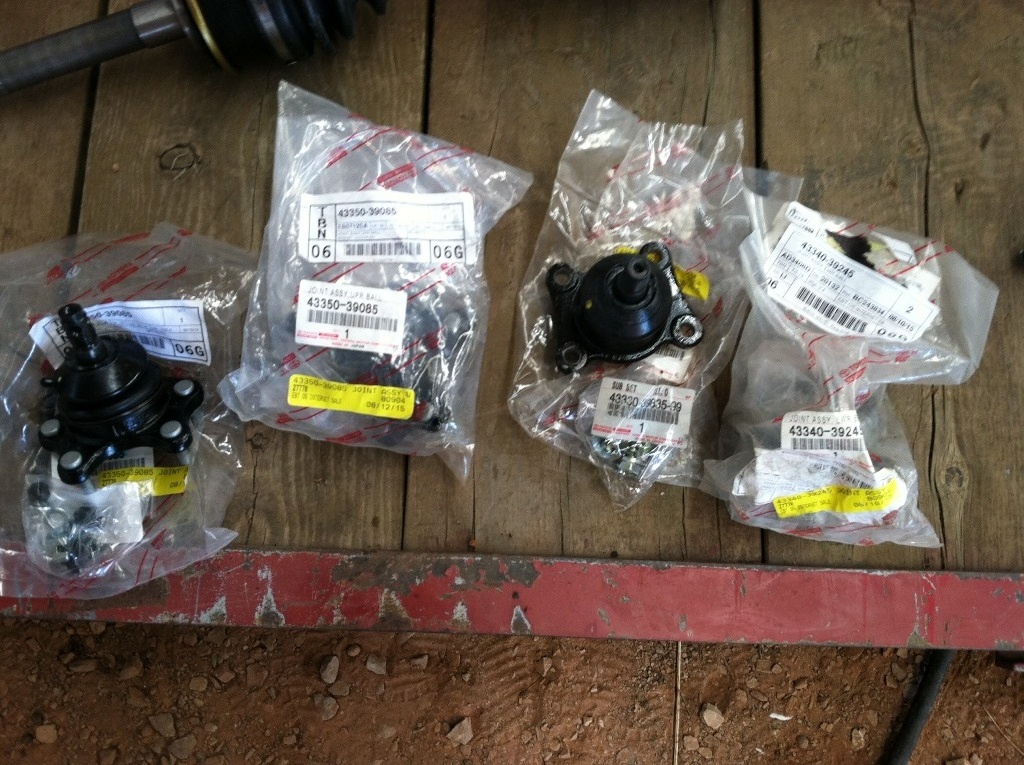
No zerks
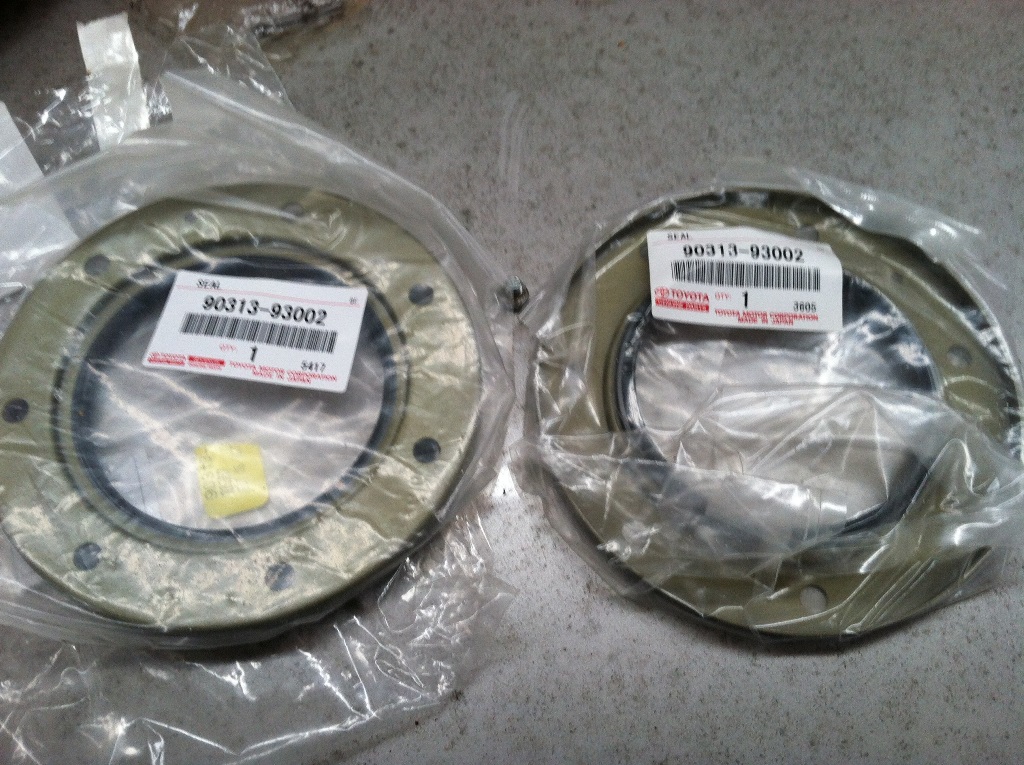
Put new seals on... Part # 90313-93002
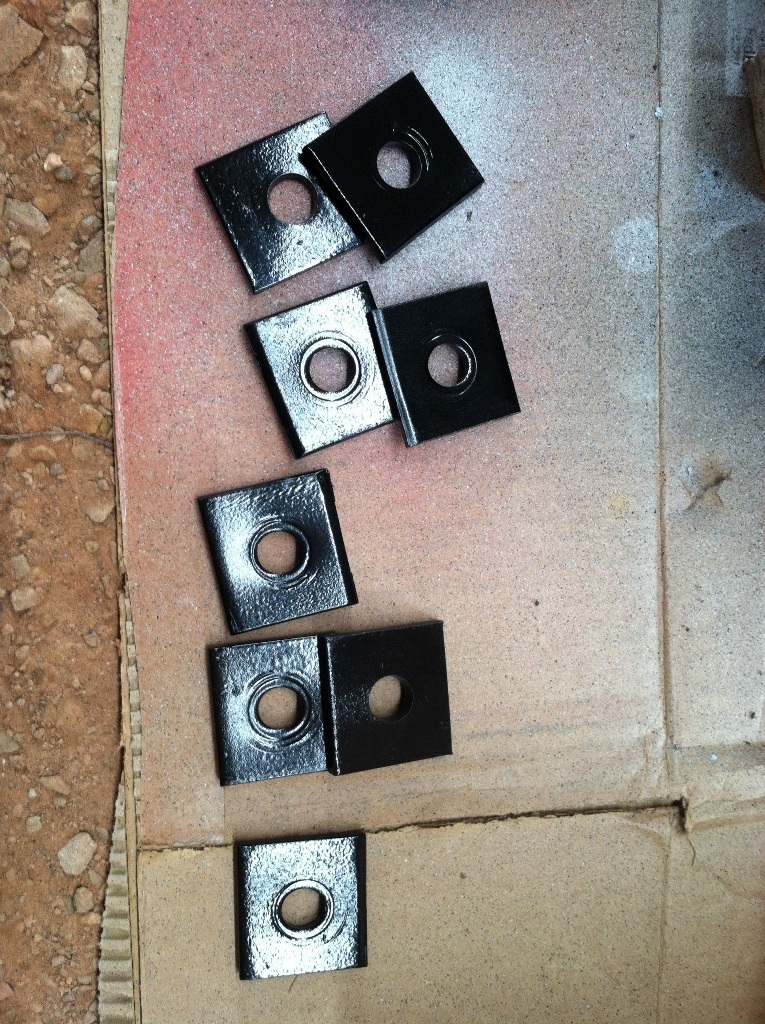
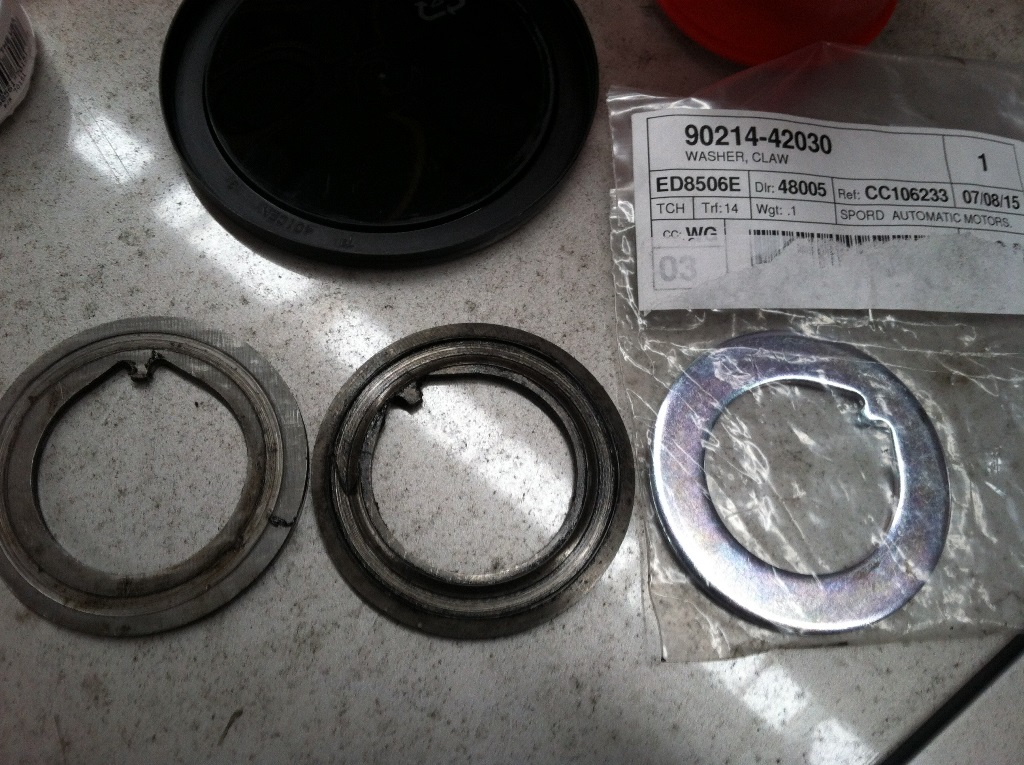
Look at these claw washers Dealer only had 1 left in stock so I snatched it up blindly. I didn't know the shape of em. At least I was able to replace the middle one. The other one I just flipped around.
90214-42030 - Claw washer
I don't have the scale to follow the FSM so I did the 43, 43, 21... Here's a link to help someone else out doing this job without the scale;
http://www.off-road.com/trucks-4x4/t...ent-18322.html
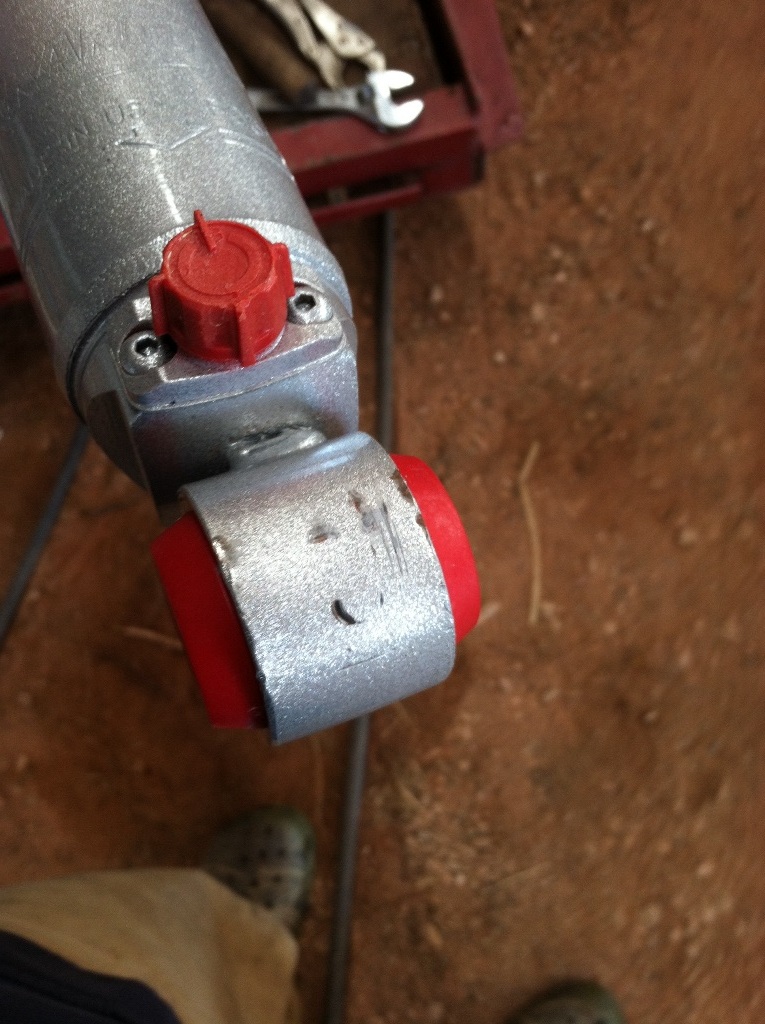
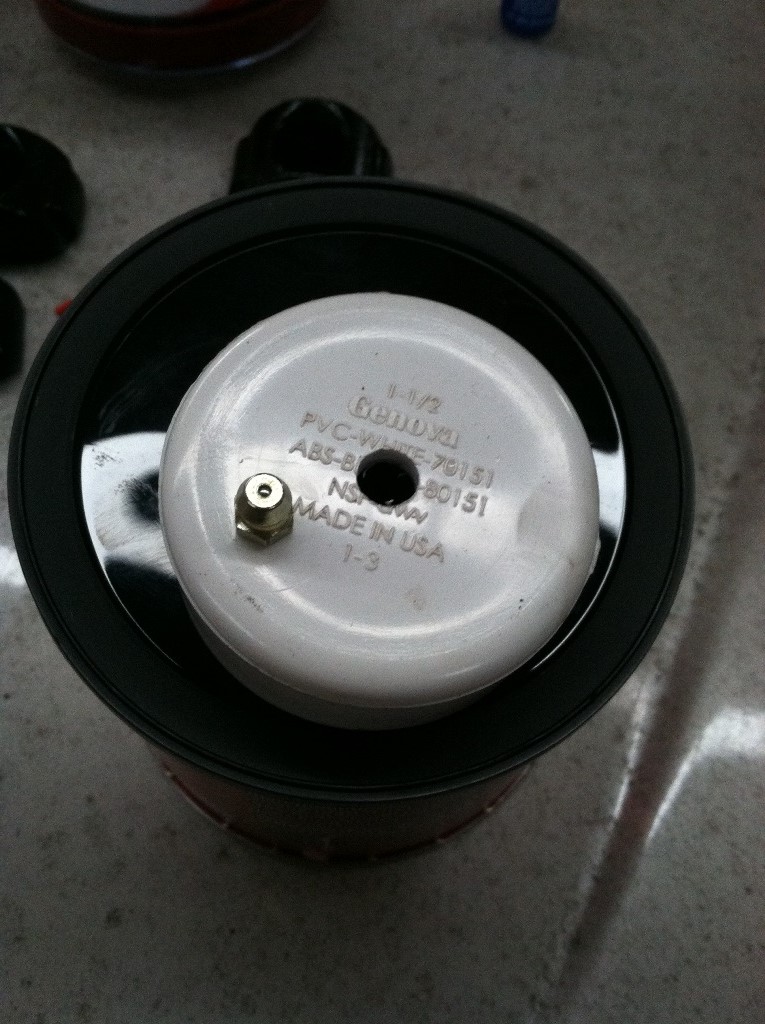
Need a way to grease the CV shaft... What better way than the famous "spindle lubricator" from here on yotatech?!
https://www.yotatech.com/forums/f128...6-95-a-105523/
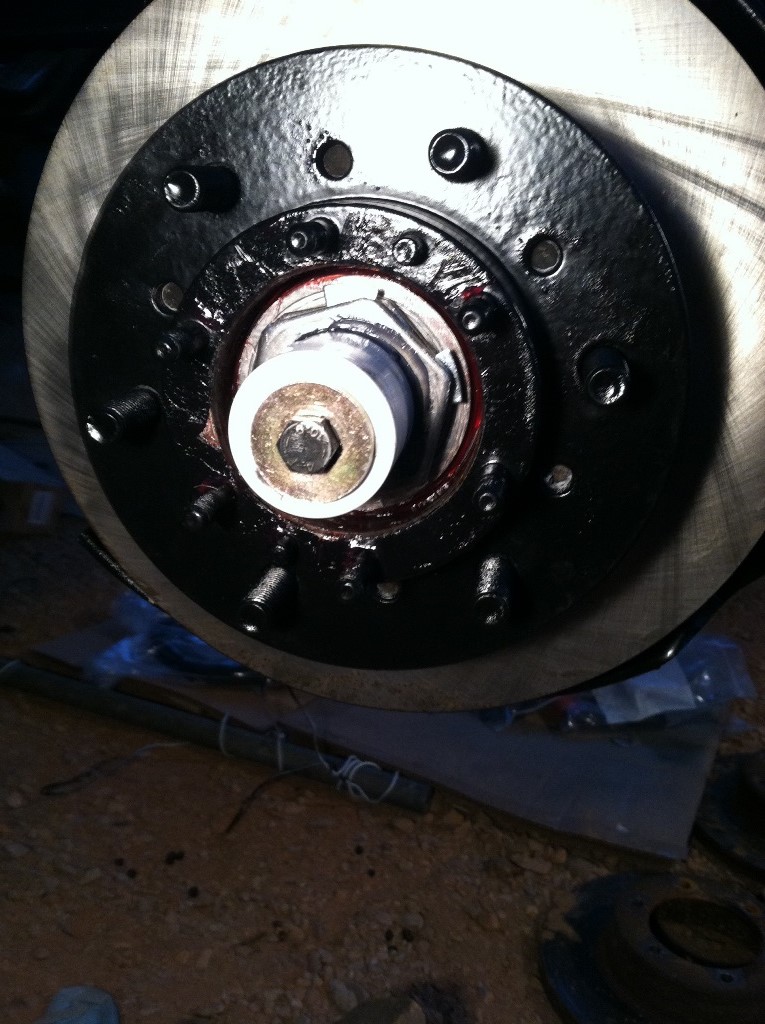
I wanted something fast and cheap so I went PVC. Glad I did. Cost me probably less than $4. Bought a 1.5" end cap as instructed and used a zerk from the package I bought. I had an old tire tube laying around that I used as the seal. Many people were having issues getting the CV axle reseated all the way. I bought a 1" cap as well and used this to suck the axle back in. Worked great
Cutting seal from tire. I then cut it in the shape of my cap and cut a hole in it. Forgot to show a pic of finished rubber.

Drilled holes and then tapped the zerk hole.
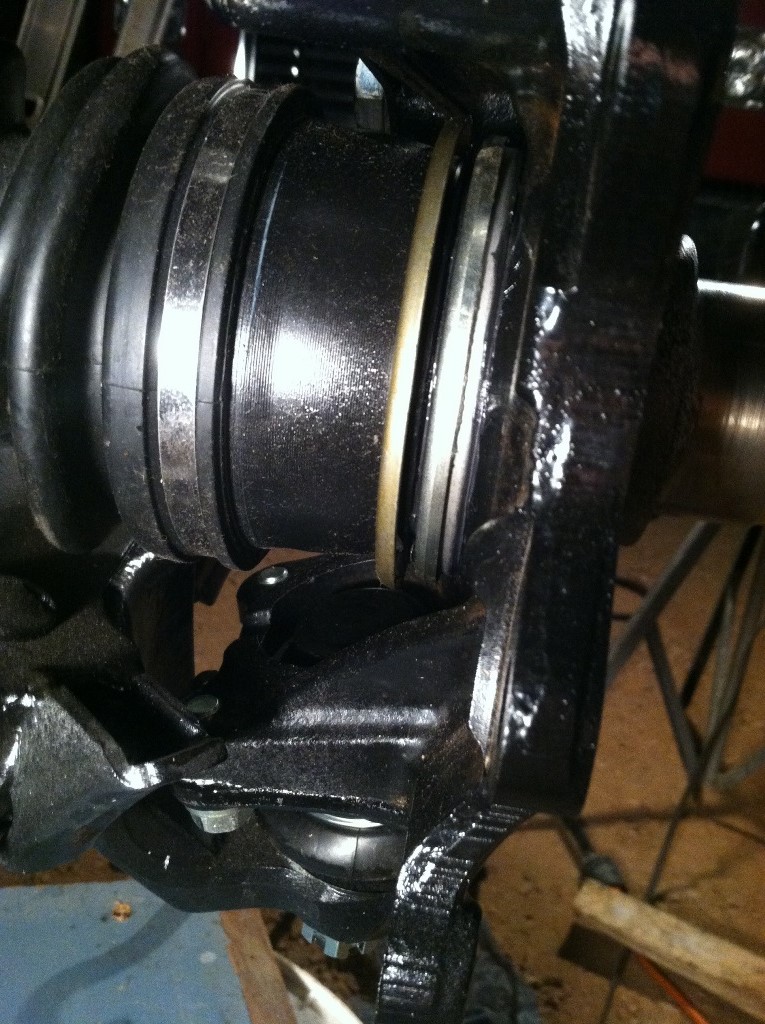
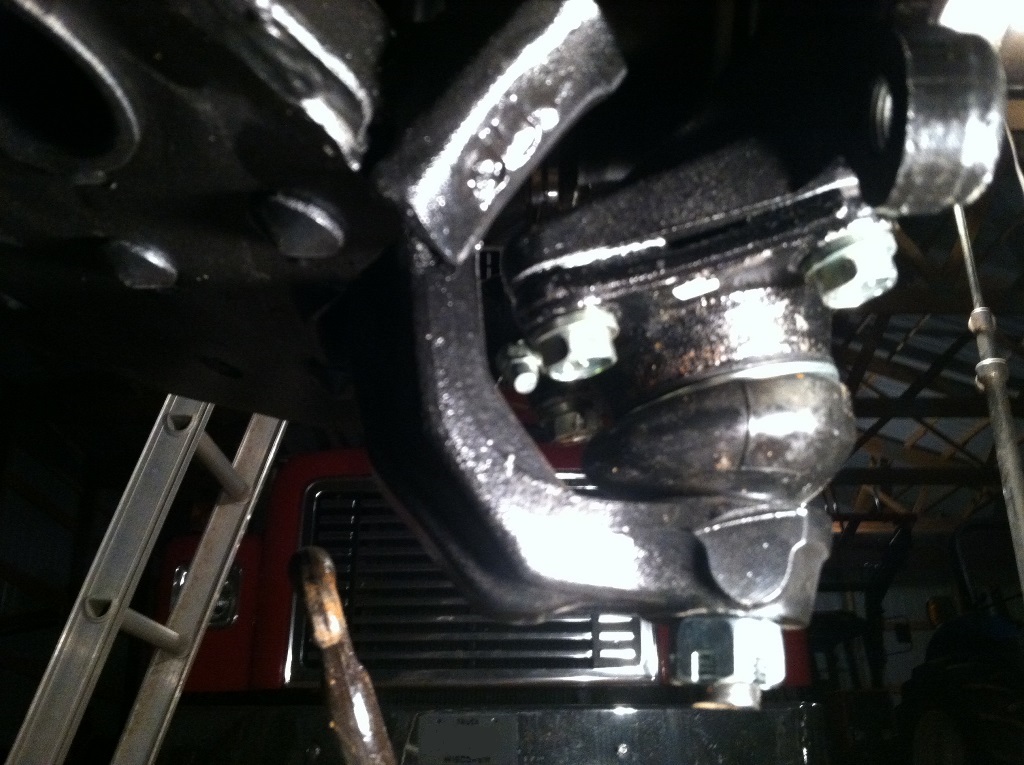
I pulled the knuckle off the top ball joint and stabilized it with a bungee. I didn't need to create a gap but I did so anyway with a ratchet extension. Got that idea from the above thread. Pumped grease in until it just barely started coming through.
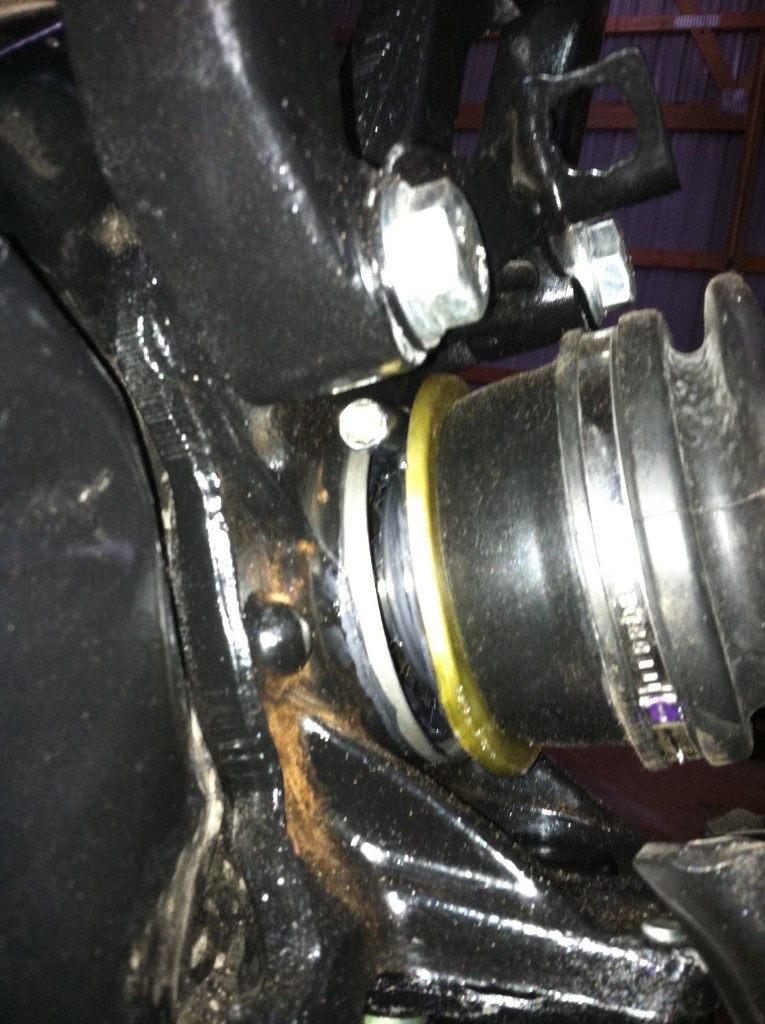
Once it starts coming out the other side, throw on the 1" cap and pull that axle back through!
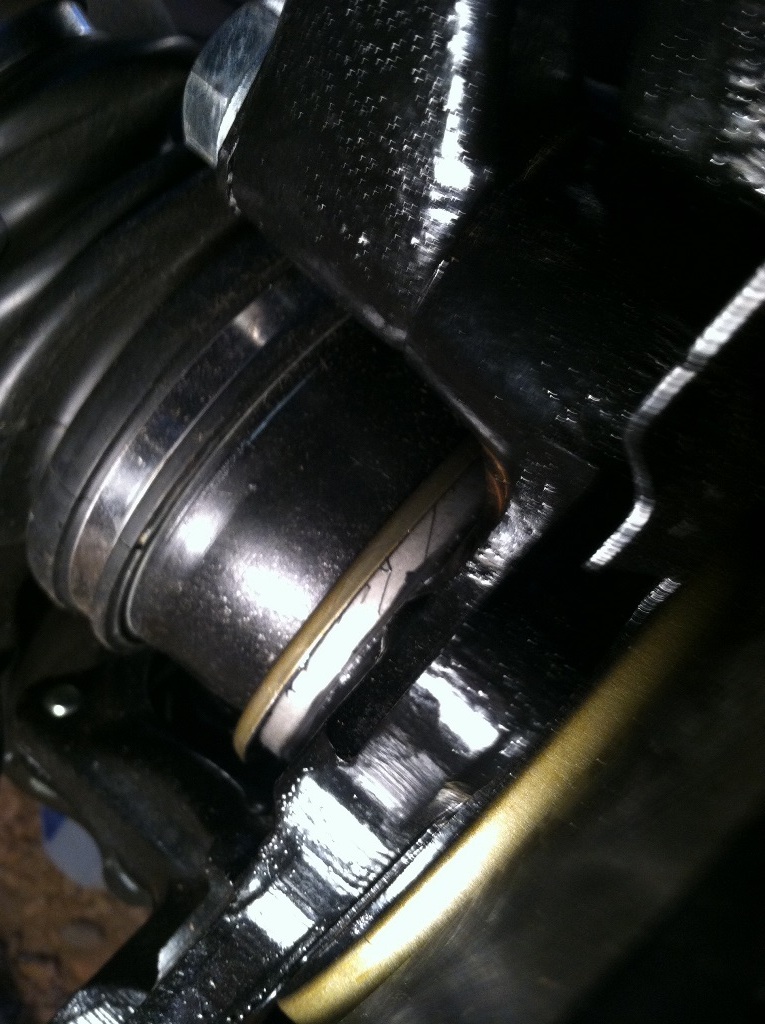
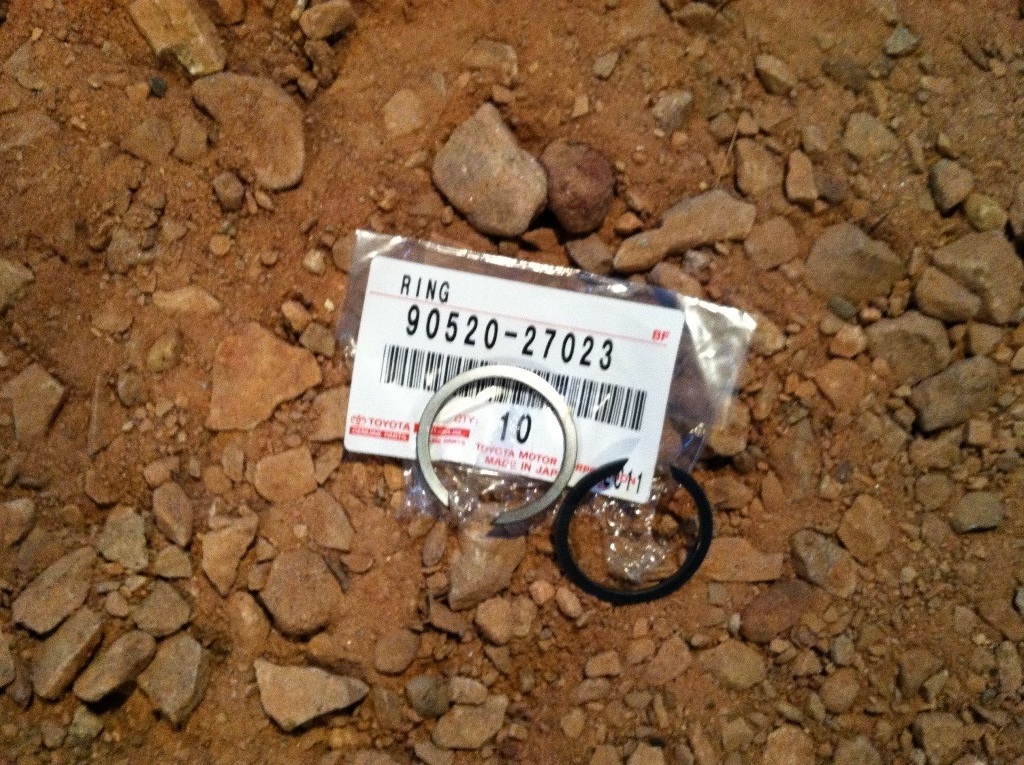
As you pull it through you will have grease come back out. In the pic below you can see it oozing out of the bushing. Along with the retaining clip in it's proper place!
New retaining clips - 90520-27023
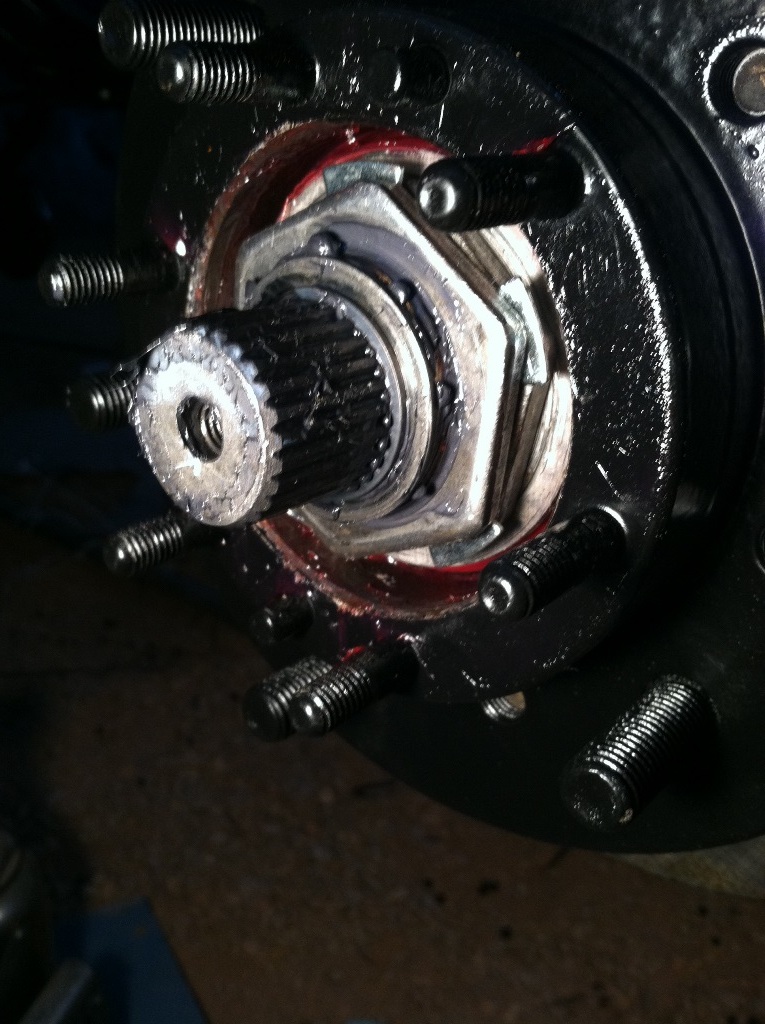
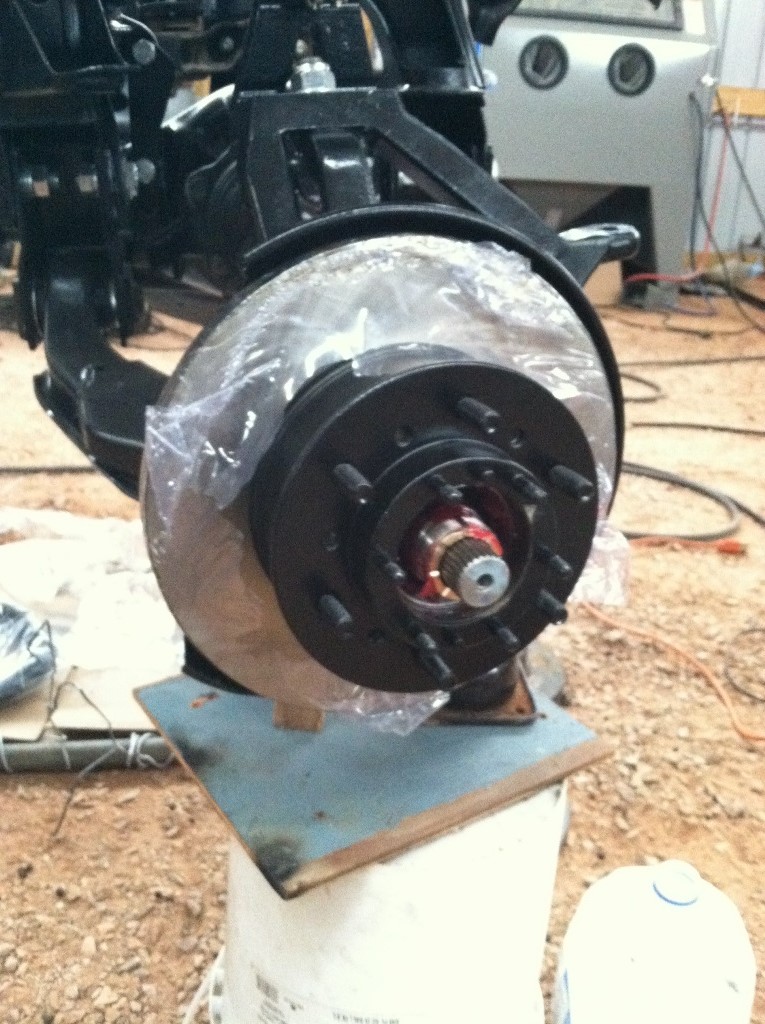
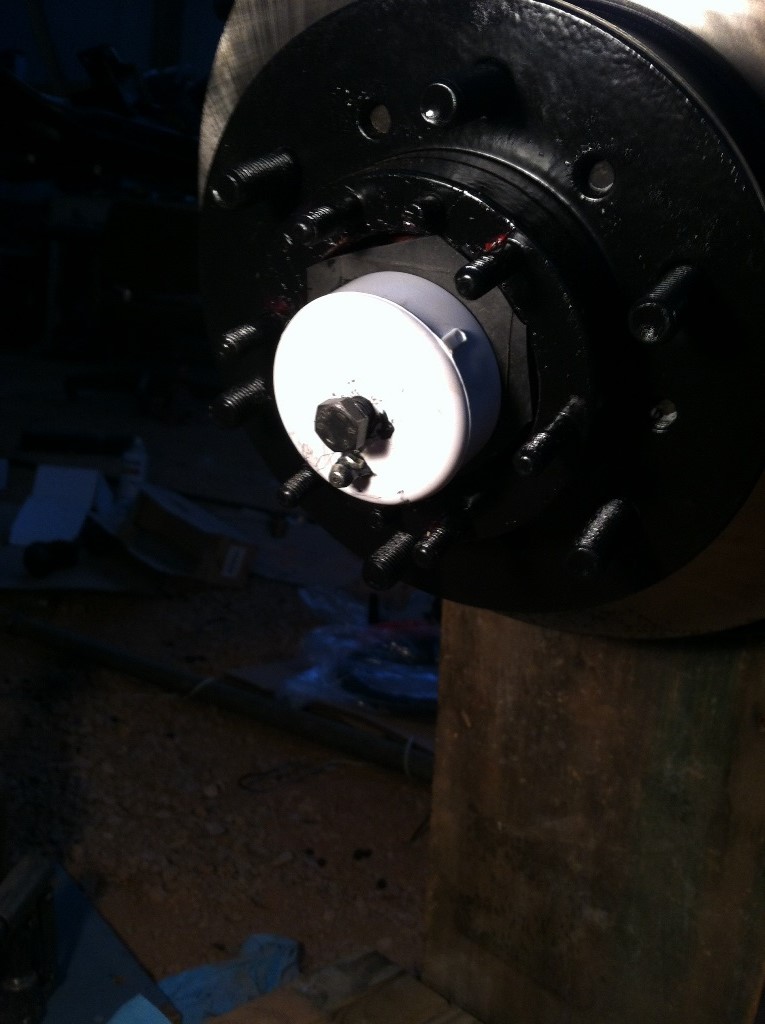
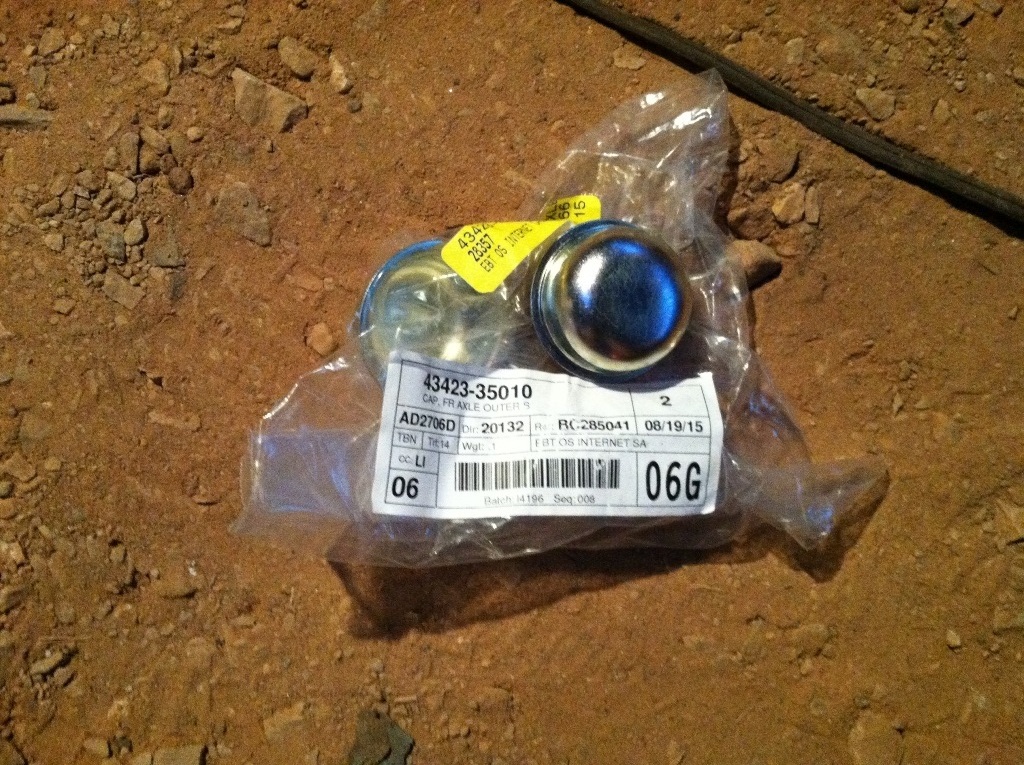
Slap the flange on and put that shiny new cap on! Don't forget those purty calipers
Cap - 43423-35010
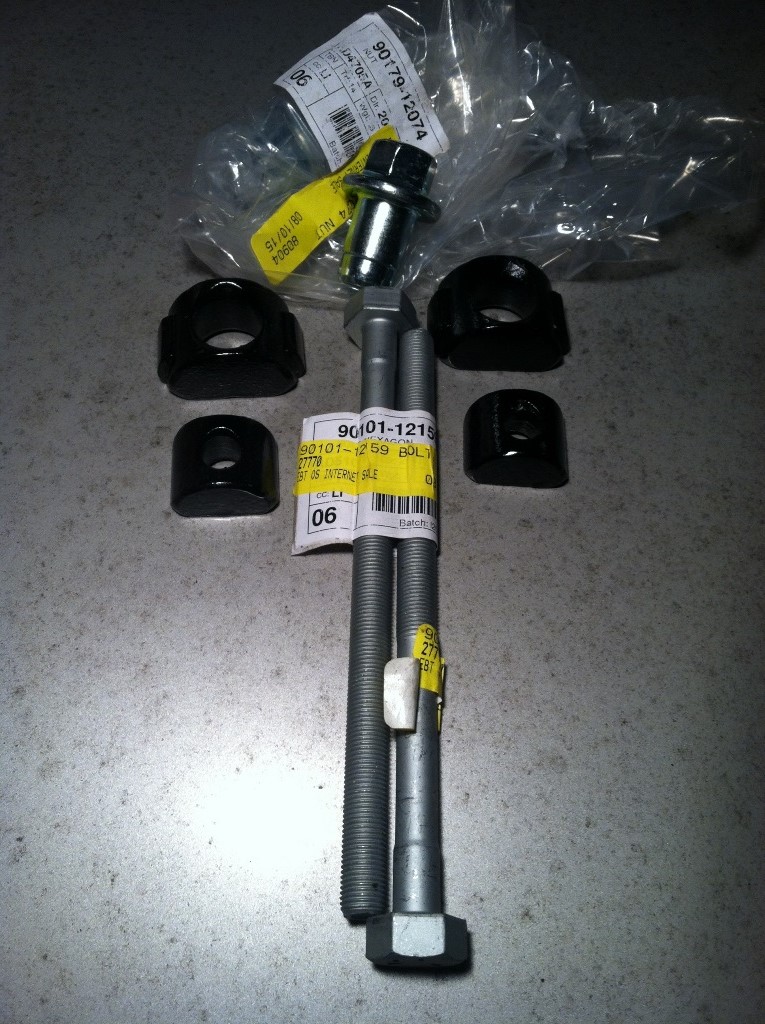
Gotta get ready for the tires... My torsion bolts were shot so I needed new ones. Bought the nuts too. I blasted and painted the other required parts. I neversiezed the crap out of them too. When the old bolt snapped off it shot up and hit the roof... I have 14 ft sidewalls and it slammed into the metal roofing.
Bolts - 90101-12159
Nuts - 90179-12074
Shoes needed new insoles so got em in!


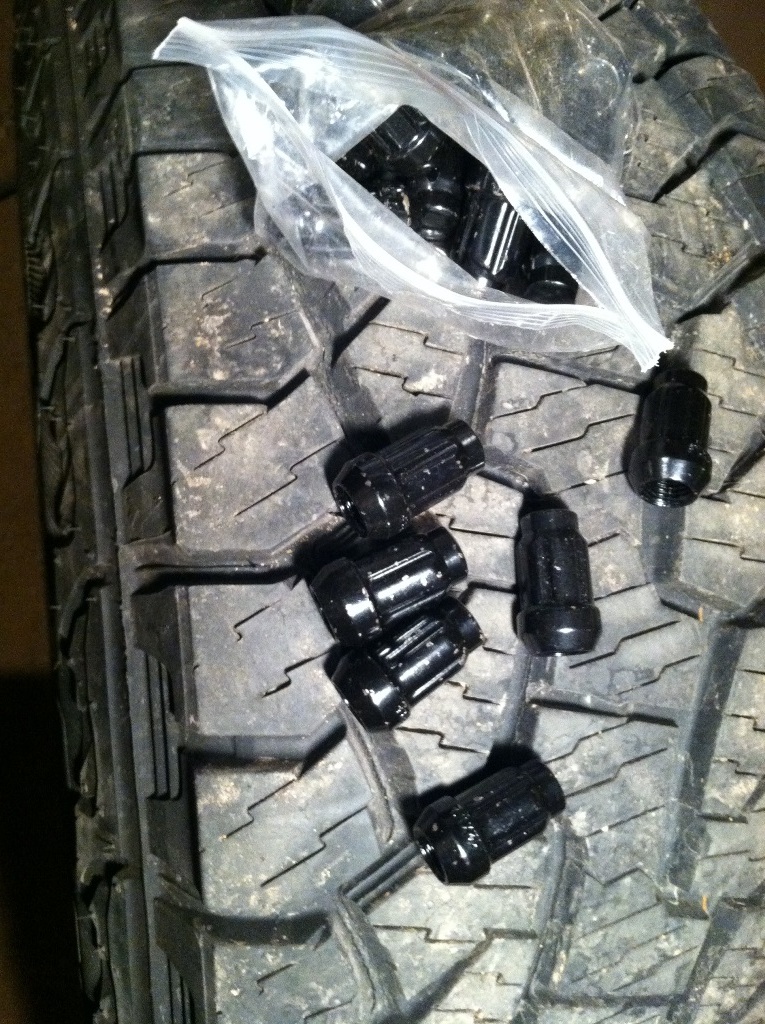
I needed new lugs and I got em from 4wheelparts. Don't do this if you want lugs with paint. Came in a single bag and chipped all over. I keep having paint issues through 4wp... You'd think I'd get the hint
And how bout some meat with those potatoes?! Slapped on the motor mounts.
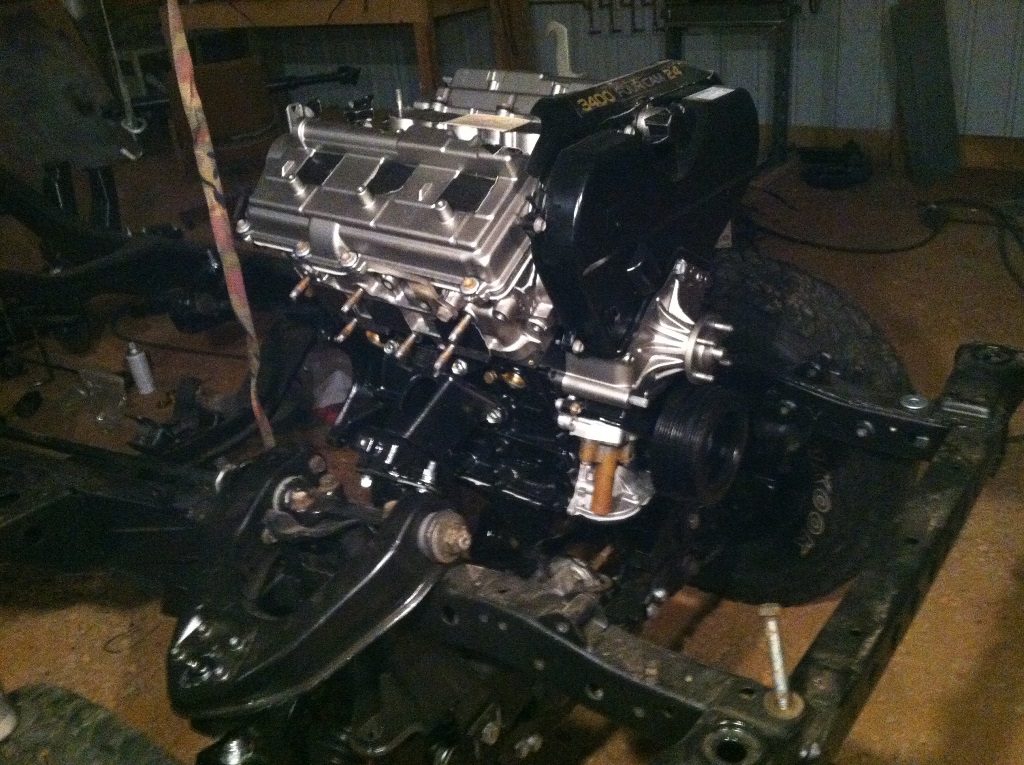
And time to use the ultimate cherry picker!
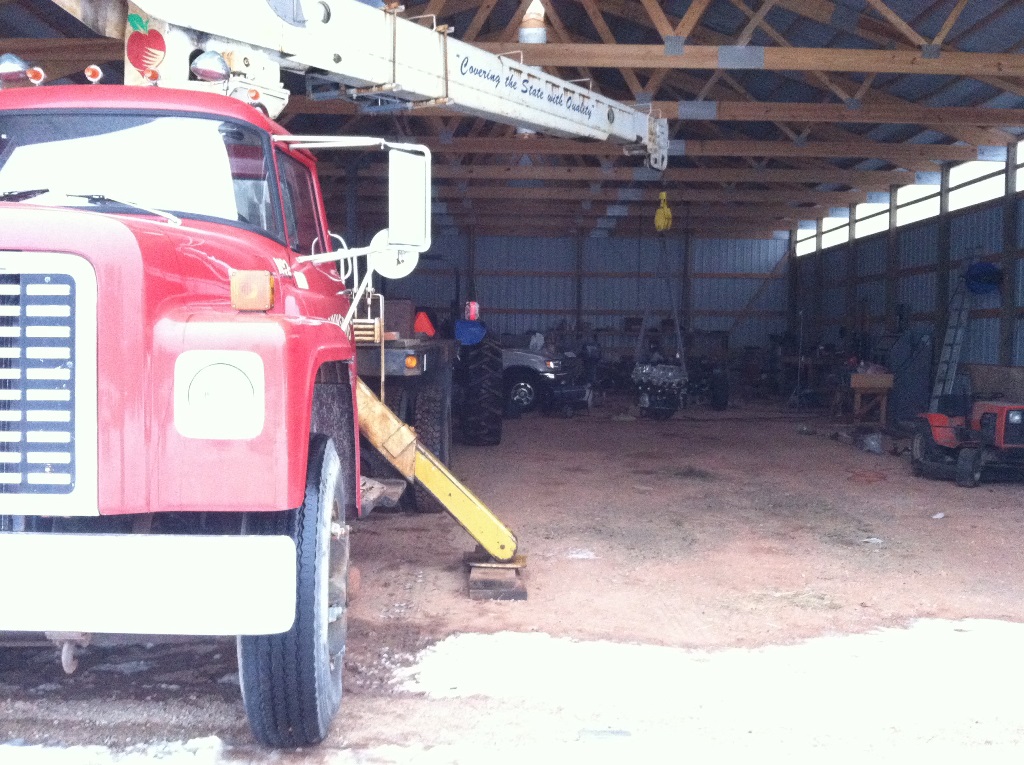
Honestly... Looks great but huge pain in the ace. I was by myself and it was pretty miserable getting it placed right when you're 40 feet away. Thanks to some bungies I got the job done! Anyway here are some pics of Denny's engine...


Bungies getting my mounts in place!
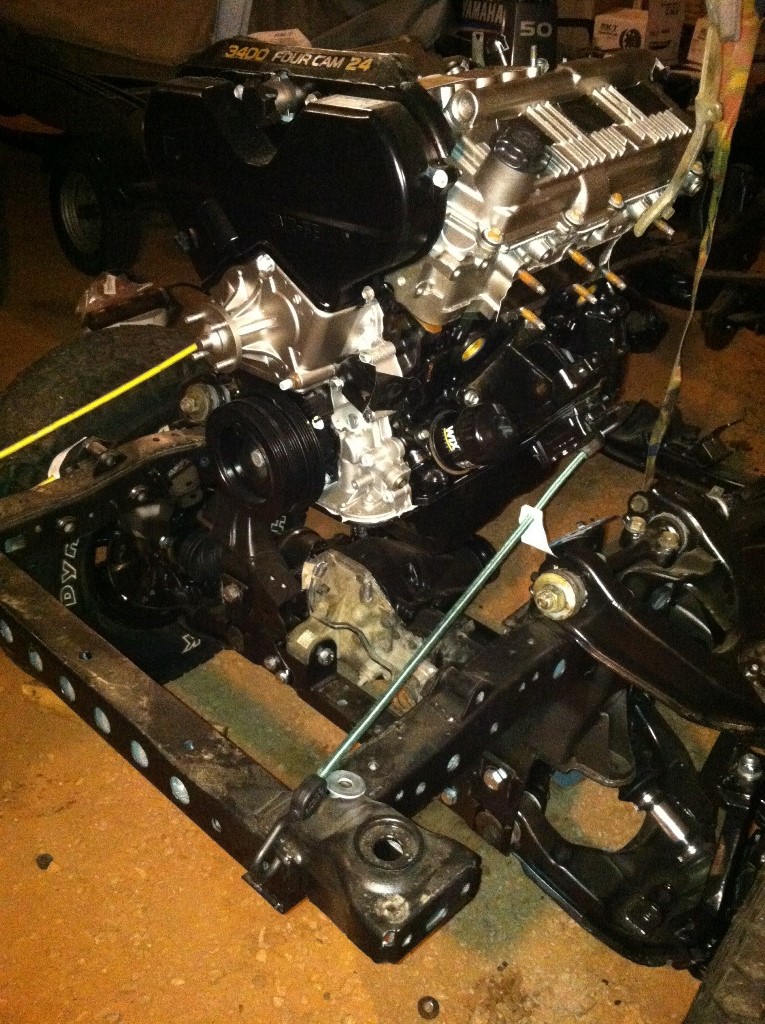
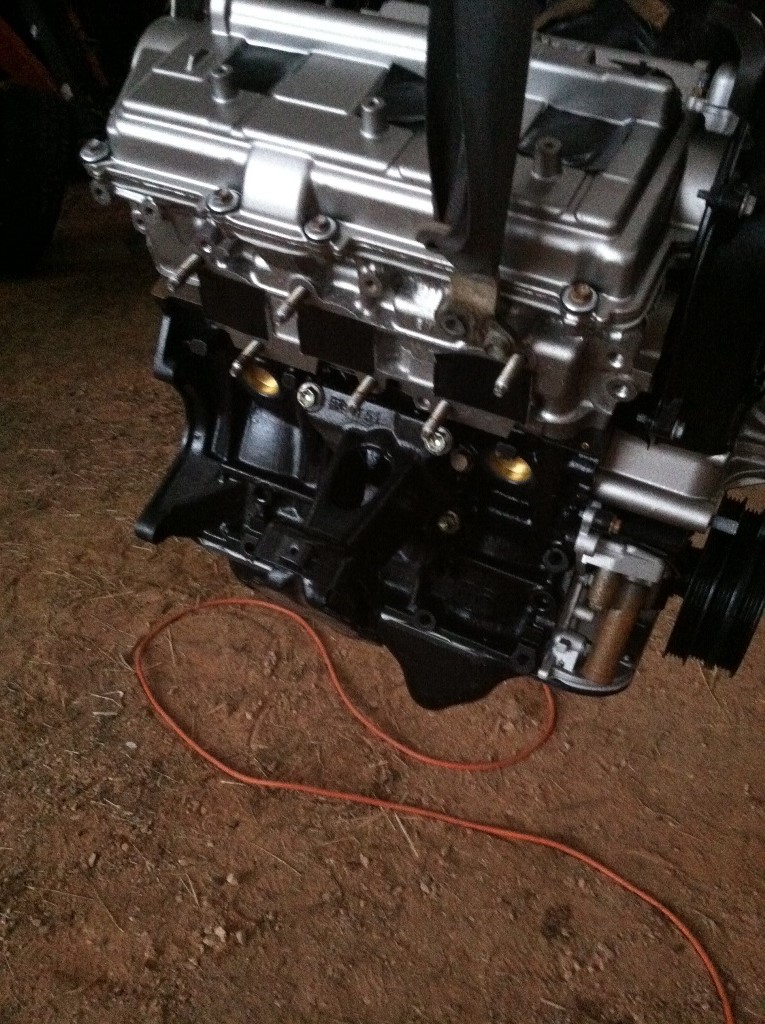
And she's in! I used a board to prop up the rear end to take some stress off the rubber in the mounts. It's gonna be sitting there for a while
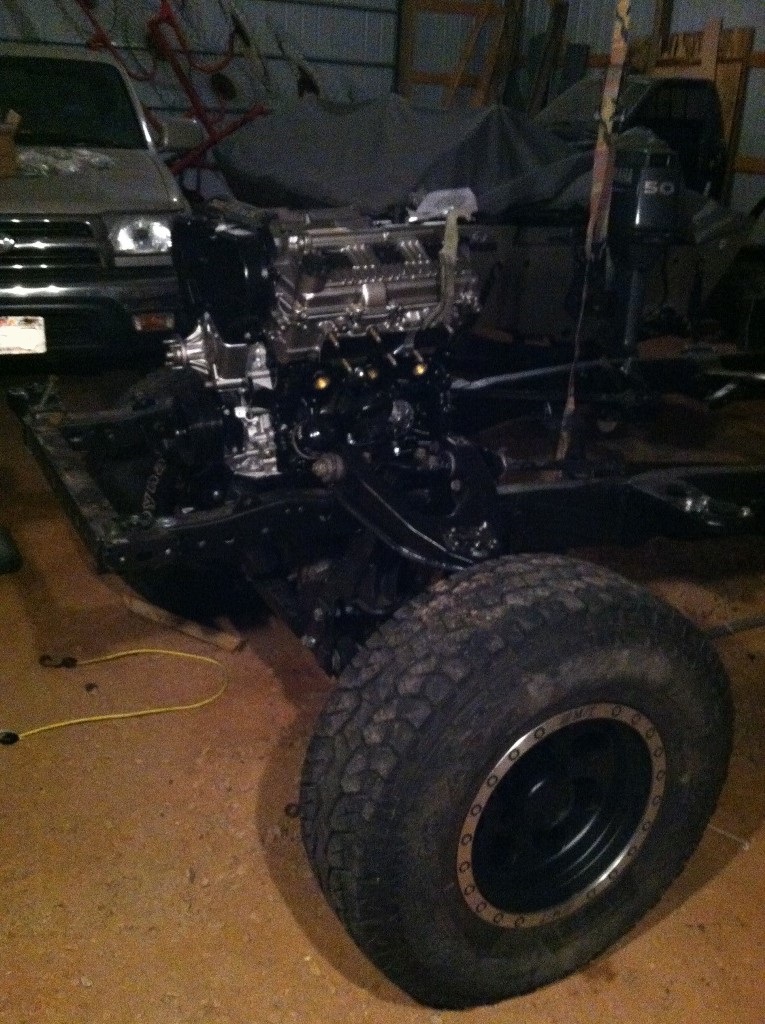
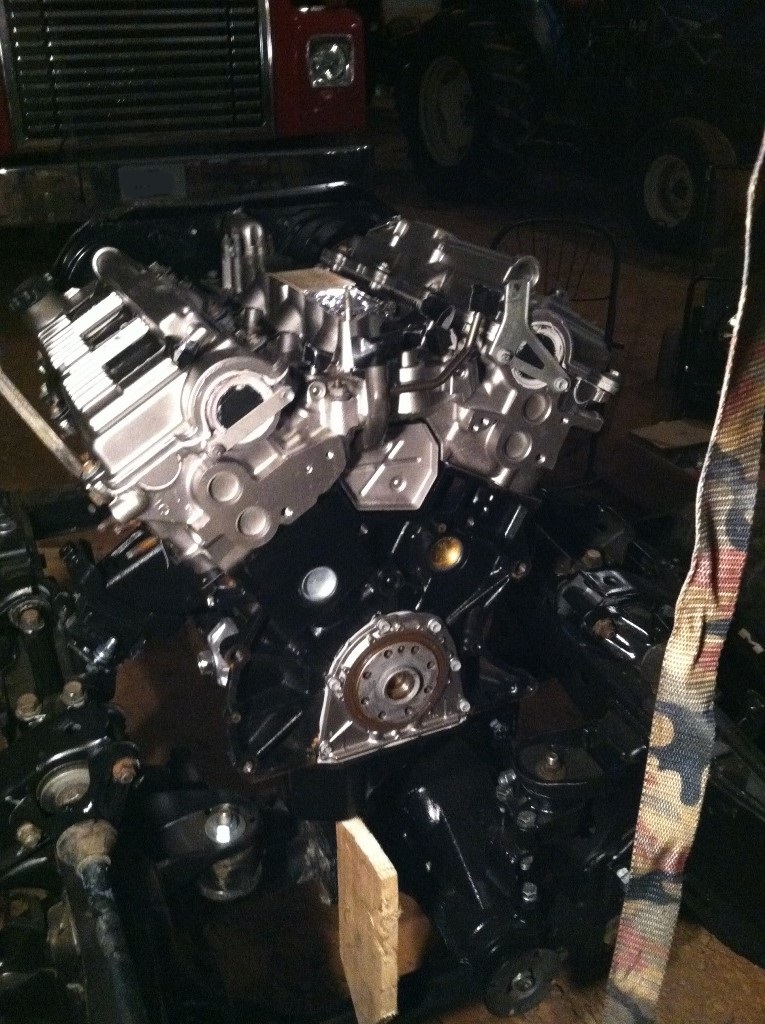
For those that go this route, engine hooks don't come with the motor. I pulled mine off of my 3vz and used em with 1 bolt. Crank the hell out of it and you shouldn't have a problem The bolt holes don't line up for both...
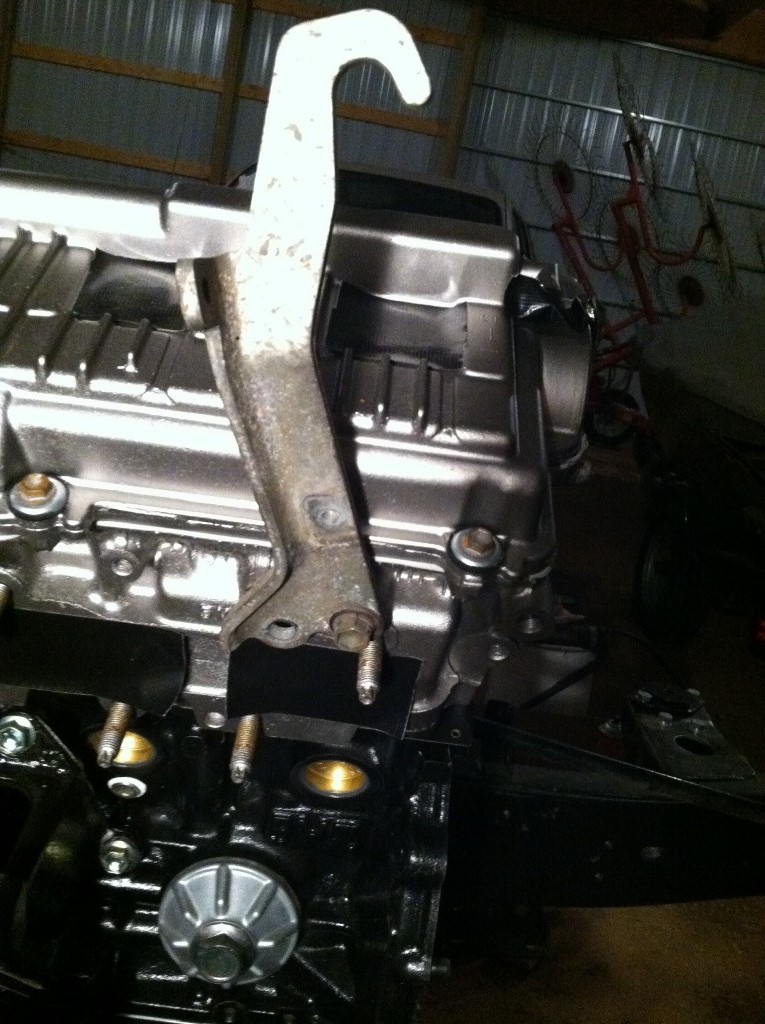
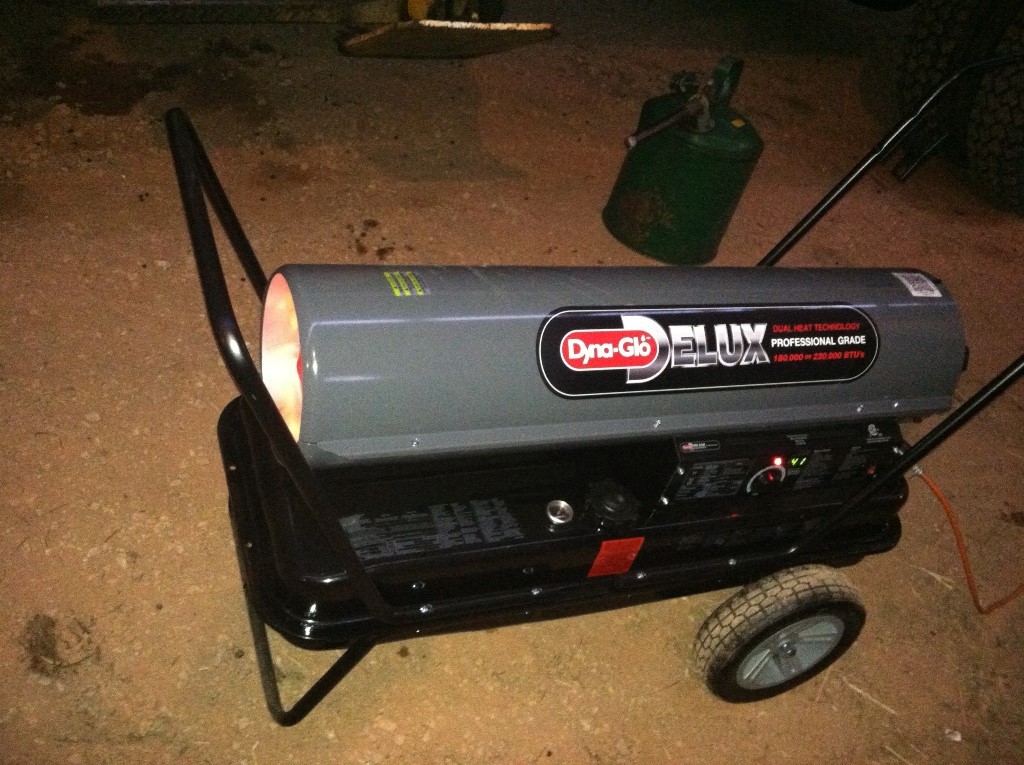
Special thanks to Dyna-glo for keeping me warm!
Oh and this post is way too long to proofread... If there's any errors please excuse
Mounted rear GM calipers from trail gear. Doesn't take long for the rust to grab hold eh? I would have dropped the wheels on them too but I was waiting on Marlin Crawler to get the 130mm zerk'd bolts in for my springs. I called them and they still don't have any in. They also said they probably won't carry them anymore
Looks like I'm going a different route. Probably order trail gear's zerk'd bolts instead. to be continued...

And now back to the knuckle work... I bought new rotors from rockauto. Centric 12544044...

Also the bearing kit from Marlin Crawler. I left out the bag with the hub gaskets and the tab washers.

Tools of the trade for this job... Lube em, pound em, neversieze em, and slap the rotor on!


Drop your bearings in a packer... If you don't have one I would get one. They're great
Drop in bearing and then put in the seal...

I ordered new CV axles and went genuine toyota. My old CV's were on my truck since I've owned em. I'm hoping to get the same result
I also decided to do reman to save on cost. Brand new was too expensive. Oddly enough I didn't take any pics but here's the part number;43430-35012-84
And this is where things get interesting... There is a very well known thread here on yotatech involving the seals needed on the knuckle;
https://www.yotatech.com/forums/f116...81/index3.html
It states you need parts;
"90304-76005(MAIN) CV SIDE
90316-60004(SUB) KNUCKLE SIDE"
So I ordered those parts... 60004 is great and accurate. 76005 however isn't on the IPB I use to order parts. The part needed for our style trucks is actually 76003. A local Toyota parts person informed me however 76005 was the one I needed. How much more verification is needed??? Here's some pics.

Goes on like this...

But easier to work with when placed directly on knuckle...

And to no surprise I have the same exact problem as everyone else on that forum. I don't know why I thought I'd be different. The CV axle is too short to get the retaining clip on.


Take out 76005 and she looks good!!!

I don't like the idea of not using a retaining clip nor do I like the idea of shaving the seal. Knowing my luck, I would ruin the integrity of the seal by making the changes nonsymmetric. So I went back to my laptop and reverified 76003. I called a different Toyota dealer and now they say 76003. I tried 2 others and 76003 is the one
So in hopes of the "right" part fixing the issue, I go to the dealer but I brought my knuckle and axle with me. Good thing because the result is the same! I wished I would have taken a picture of the seal because the seals on 76003 look identical to the seals that come on the CV axle. The parts guy brings in one of their techs... "Why are you putting a seal on a seal" is the first thing he asks. "Because Toyota IPB tells me to" is my response He looks at the exploded view, verifies the part numbers, and comes to the conclusion the IPB is wrong. He said he never put that seal on his 4runner and the seals are identical from the CV compared to 76003. Ditch the second seal and save some cash. I already know this route gives me the result I should and used to have. Done deal! If anyone wants 76005 seals I can give you a great deal Here's a pic of the seals on the CV axle;
I also ordered new ball joints from Toyota. Pretty big wear item and I did it for the same reason as the CV axles... Surprisingly enough, they didn't come with any zerks. Went out and bought some 6mm x 1. Used 90 degree ones on the lower ball joint so they're accessible at all times (Pic below... Forgot to take pic of upper zerk)
43350-39085 - Upper ball joint
43340-39245 - Lower ball joint

No zerks


Put new seals on... Part # 90313-93002


Look at these claw washers
Dealer only had 1 left in stock so I snatched it up blindly. I didn't know the shape of em. At least I was able to replace the middle one. The other one I just flipped around.90214-42030 - Claw washer

I don't have the scale to follow the FSM so I did the 43, 43, 21... Here's a link to help someone else out doing this job without the scale;
http://www.off-road.com/trucks-4x4/t...ent-18322.html
Need a way to grease the CV shaft... What better way than the famous "spindle lubricator" from here on yotatech?!
https://www.yotatech.com/forums/f128...6-95-a-105523/
I wanted something fast and cheap so I went PVC. Glad I did. Cost me probably less than $4. Bought a 1.5" end cap as instructed and used a zerk from the package I bought. I had an old tire tube laying around that I used as the seal. Many people were having issues getting the CV axle reseated all the way. I bought a 1" cap as well and used this to suck the axle back in. Worked great
Cutting seal from tire. I then cut it in the shape of my cap and cut a hole in it. Forgot to show a pic of finished rubber.

Drilled holes and then tapped the zerk hole.

I pulled the knuckle off the top ball joint and stabilized it with a bungee. I didn't need to create a gap but I did so anyway with a ratchet extension. Got that idea from the above thread. Pumped grease in until it just barely started coming through.


Once it starts coming out the other side, throw on the 1" cap and pull that axle back through!


As you pull it through you will have grease come back out. In the pic below you can see it oozing out of the bushing. Along with the retaining clip in it's proper place!
New retaining clips - 90520-27023


Slap the flange on and put that shiny new cap on! Don't forget those purty calipers
Cap - 43423-35010


Gotta get ready for the tires... My torsion bolts were shot so I needed new ones. Bought the nuts too. I blasted and painted the other required parts. I neversiezed the crap out of them too. When the old bolt snapped off it shot up and hit the roof... I have 14 ft sidewalls and it slammed into the metal roofing.
Bolts - 90101-12159
Nuts - 90179-12074


Shoes needed new insoles so got em in!


I needed new lugs and I got em from 4wheelparts. Don't do this if you want lugs with paint. Came in a single bag and chipped all over. I keep having paint issues through 4wp... You'd think I'd get the hint

And how bout some meat with those potatoes?! Slapped on the motor mounts.

And time to use the ultimate cherry picker!

Honestly... Looks great but huge pain in the ace. I was by myself and it was pretty miserable getting it placed right when you're 40 feet away. Thanks to some bungies I got the job done! Anyway here are some pics of Denny's engine...


Bungies getting my mounts in place!

And she's in! I used a board to prop up the rear end to take some stress off the rubber in the mounts. It's gonna be sitting there for a while


For those that go this route, engine hooks don't come with the motor. I pulled mine off of my 3vz and used em with 1 bolt. Crank the hell out of it and you shouldn't have a problem The bolt holes don't line up for both...

Special thanks to Dyna-glo for keeping me warm!

Oh and this post is way too long to proofread... If there's any errors please excuse
Last edited by duckhead; 01-09-2016 at 10:27 AM. Reason: Fix horrible analogy
01-23-2016, 07:41 PM
#57
Registered User
Thread Starter
Join Date: Jun 2015
Location: WI
Posts: 147
Likes: 0
Received 0 Likes
on
0 Posts
I was able to sneak in some time this weekend...
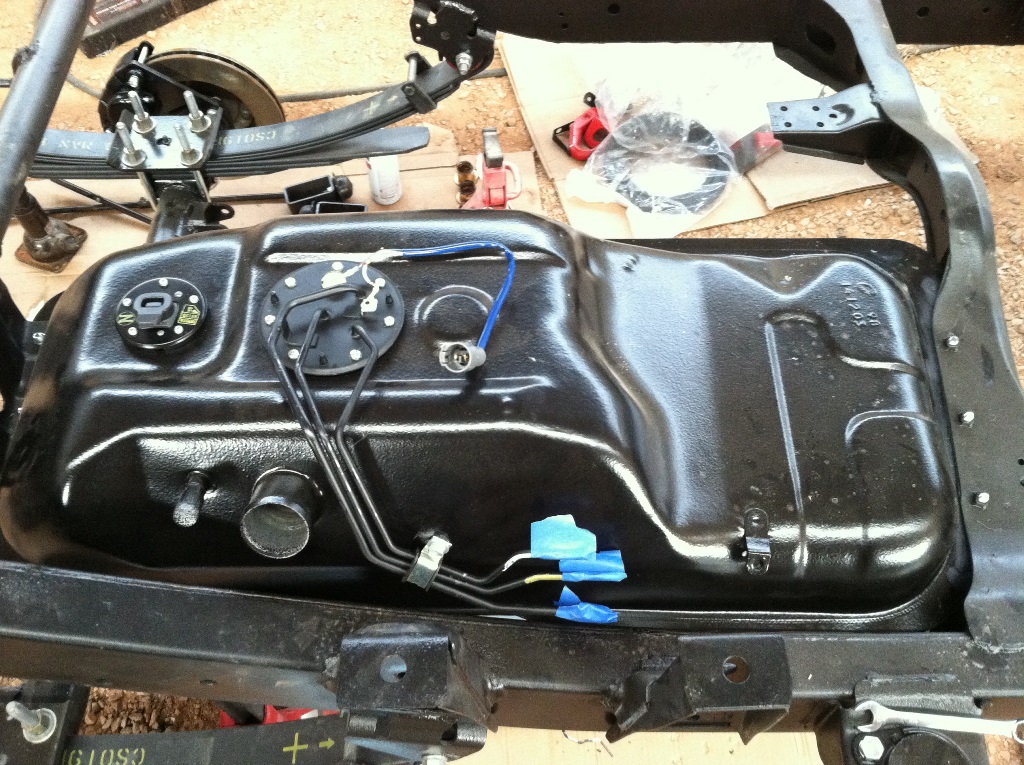
Started out working on my gas tank
Sending unit - 83320-80177
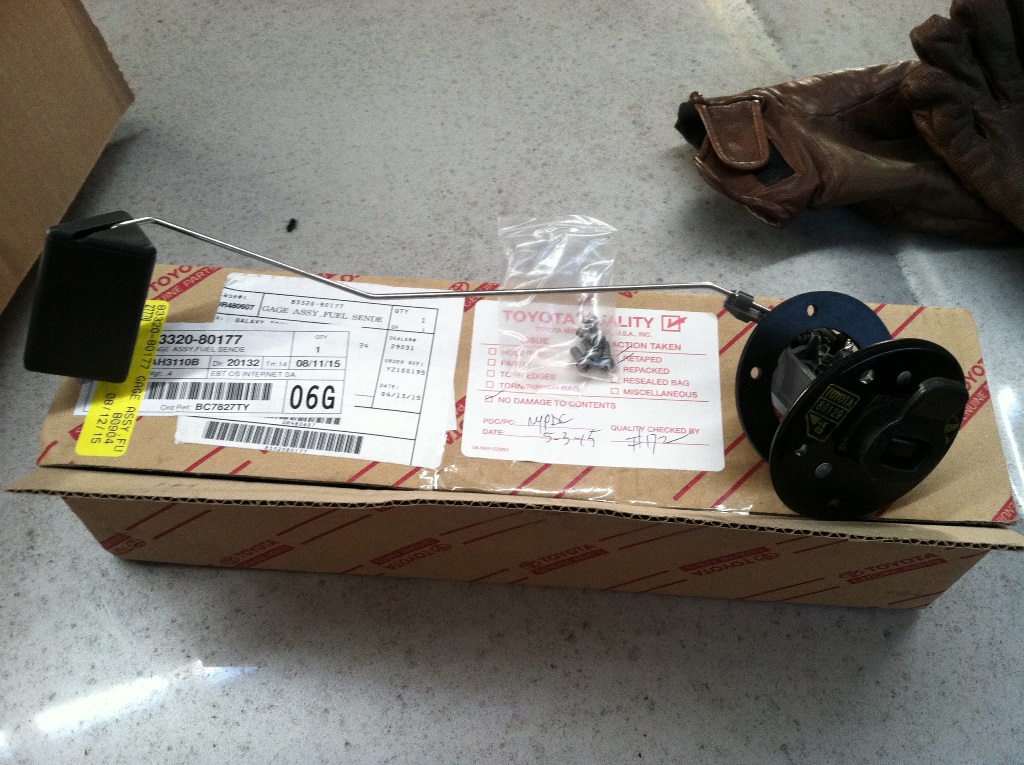
Hanger bracket - 23206-35101
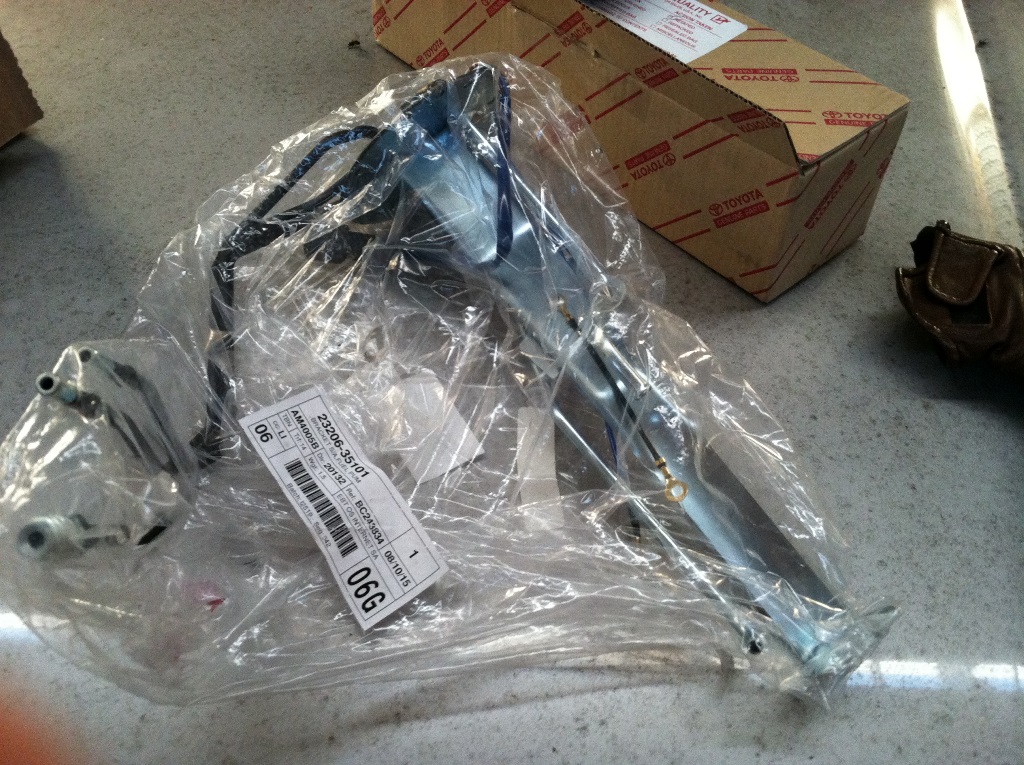
Rubber gasket for the hanger - 77169-14010

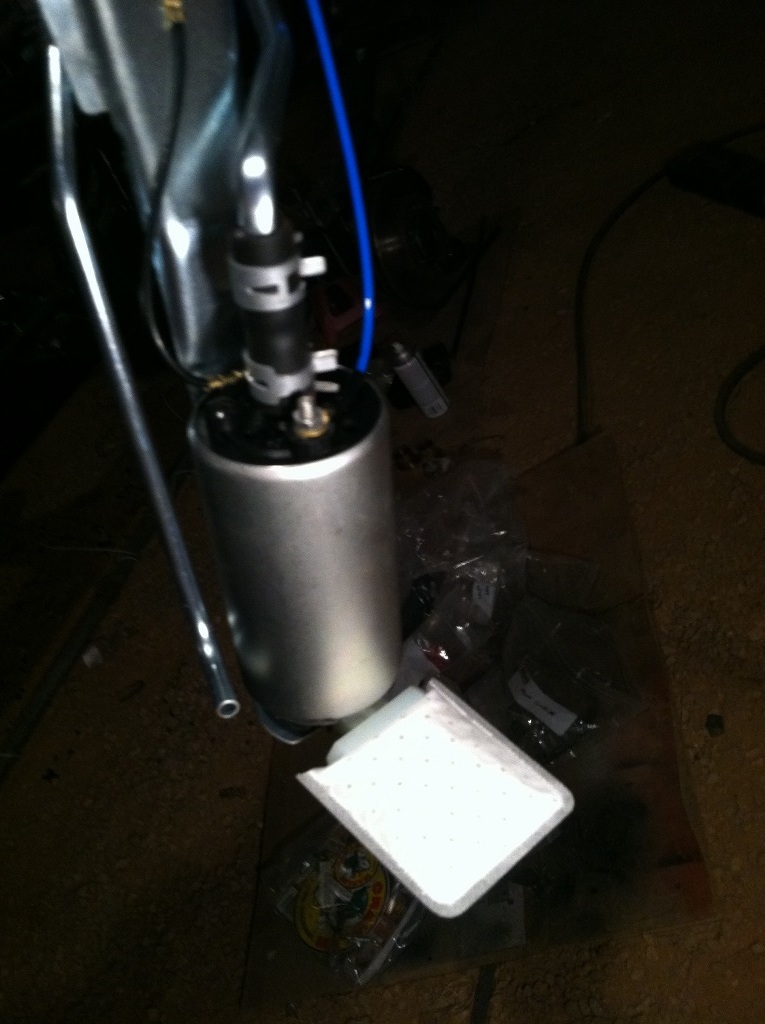
Bought a Denso fuel pump from rockauto. Denso - 9500150
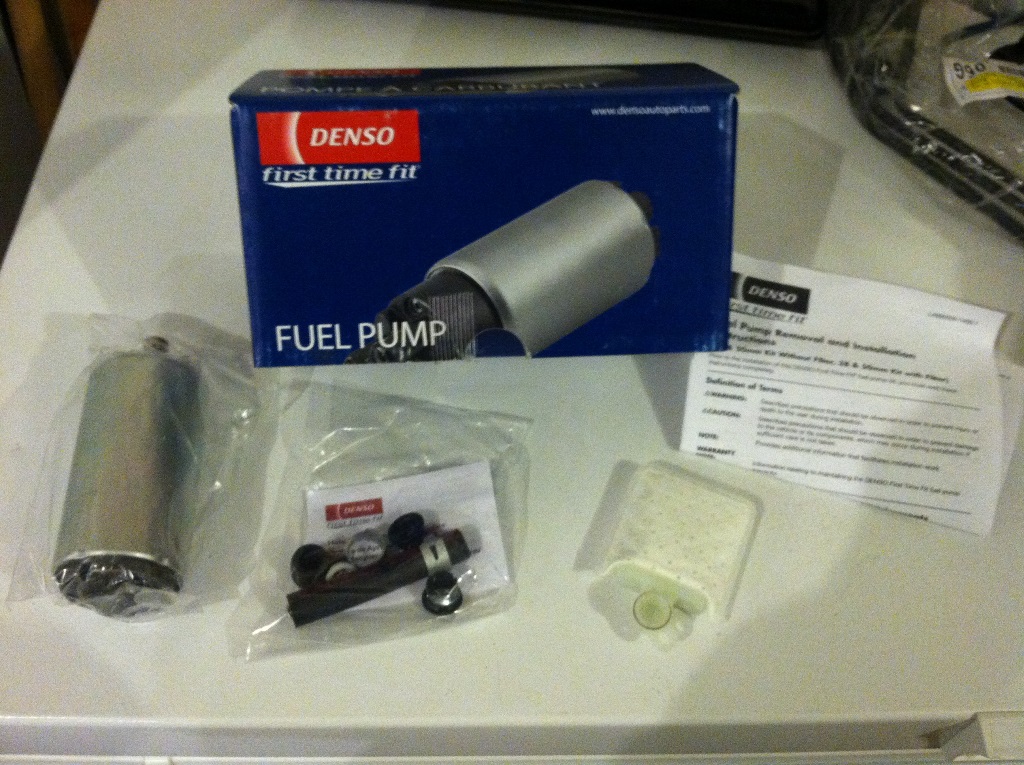
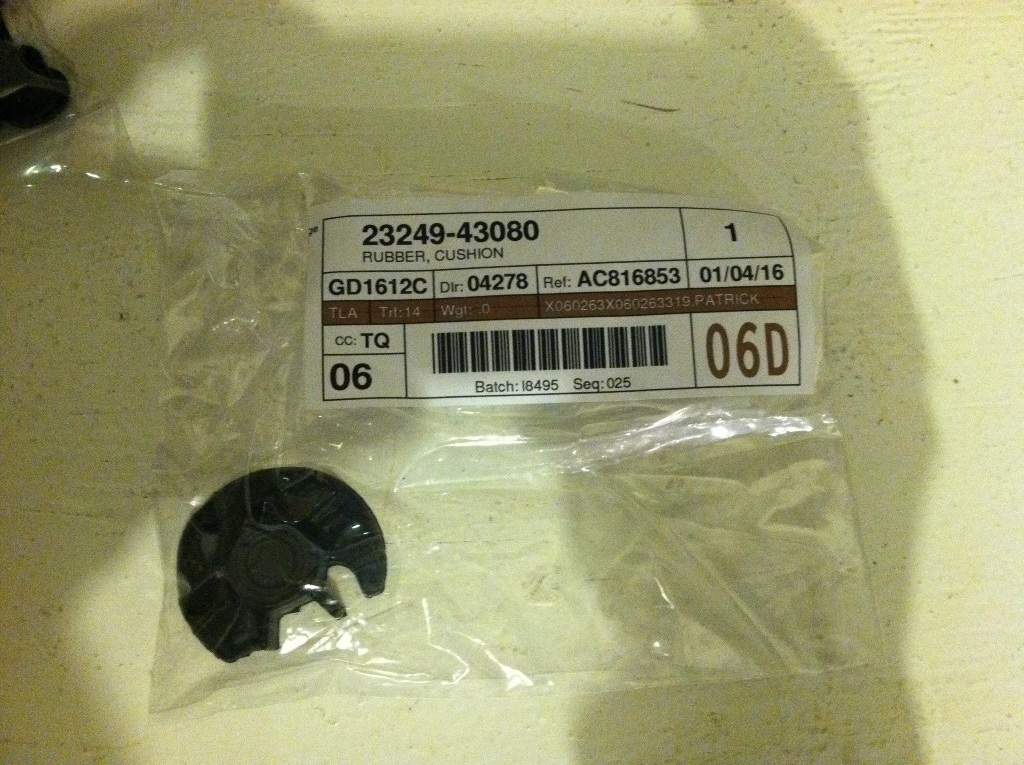
Unfortunately this pump doesn't come with an important part. Need to get the bottom cushion - 23249-43080
Also need a 5mm x .80 nut and a 4mm x .70 nut if I remember right. Sorry... I just ran into local hardware store and snagged em. Can't remember the sizes but Pretty sure those are right.
and here it is installed...
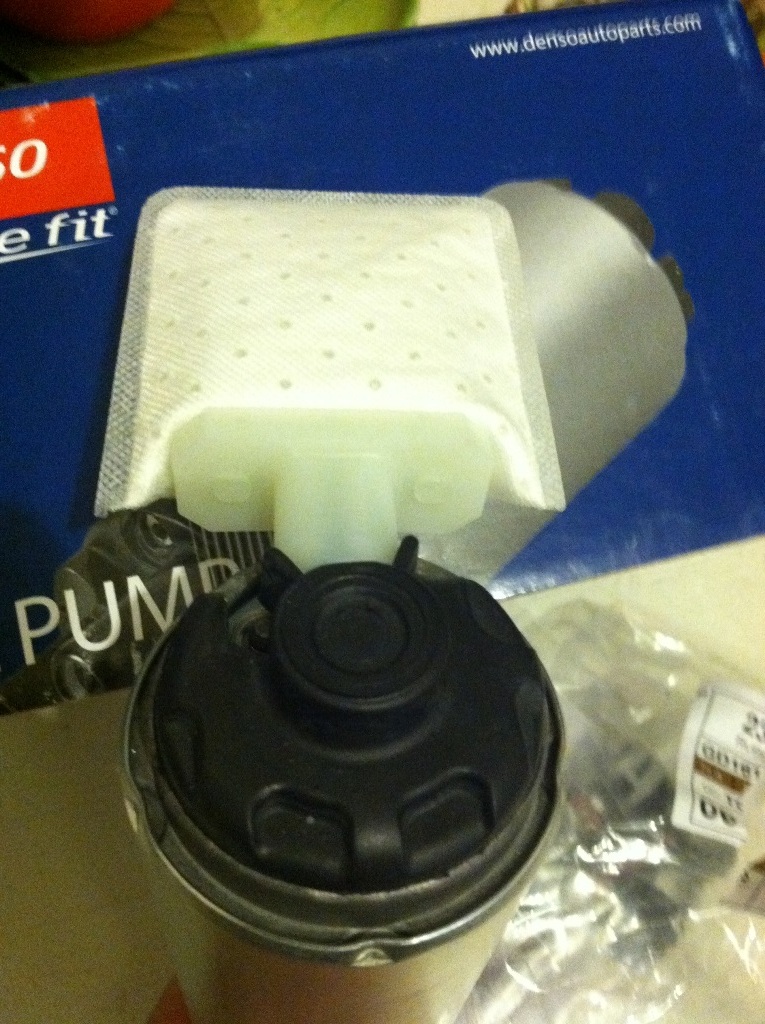
And here's the pump on the bracket
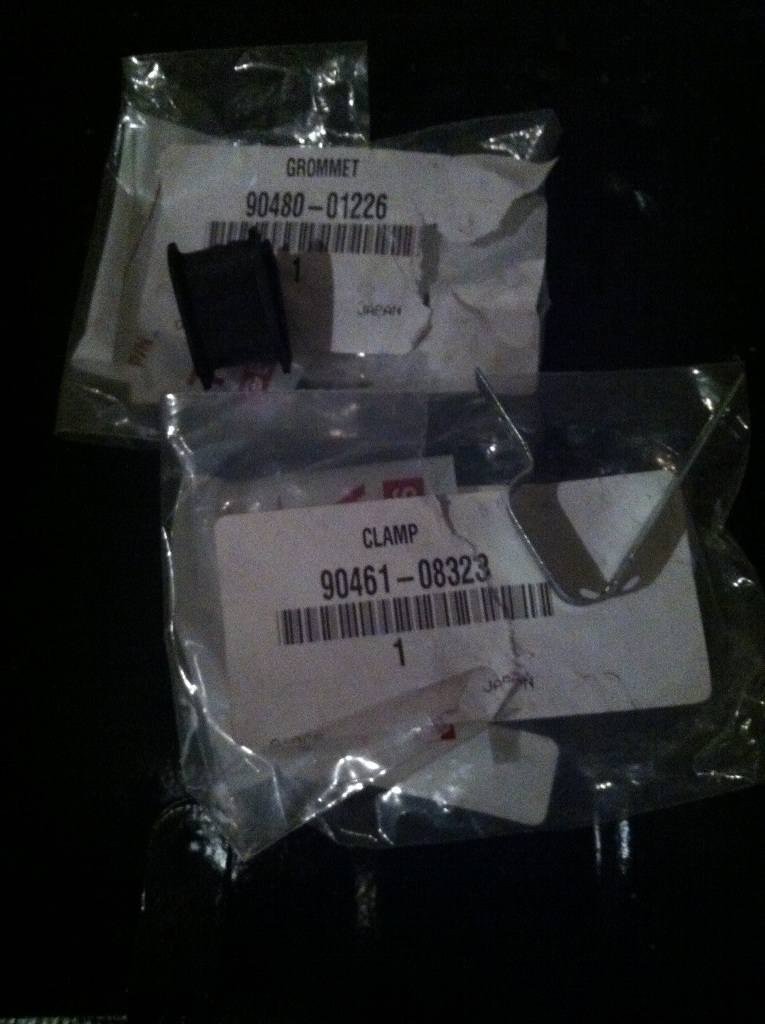
Bought a new clamp for the side of the gas tank. Fastens on the hardlines of the hanger bracket. It's a 2 piece part;
Metal clamp -90461-08323
Grommet - 90480-01226
I've read some people put rubber between the gas tank to protect the paint. Not sure how I feel about it so I put some grease on all contact points of the tank. Should be a bit more forgiving than paint on paint.
And here it is installed! You can see the metal clamp on the side of the tank.
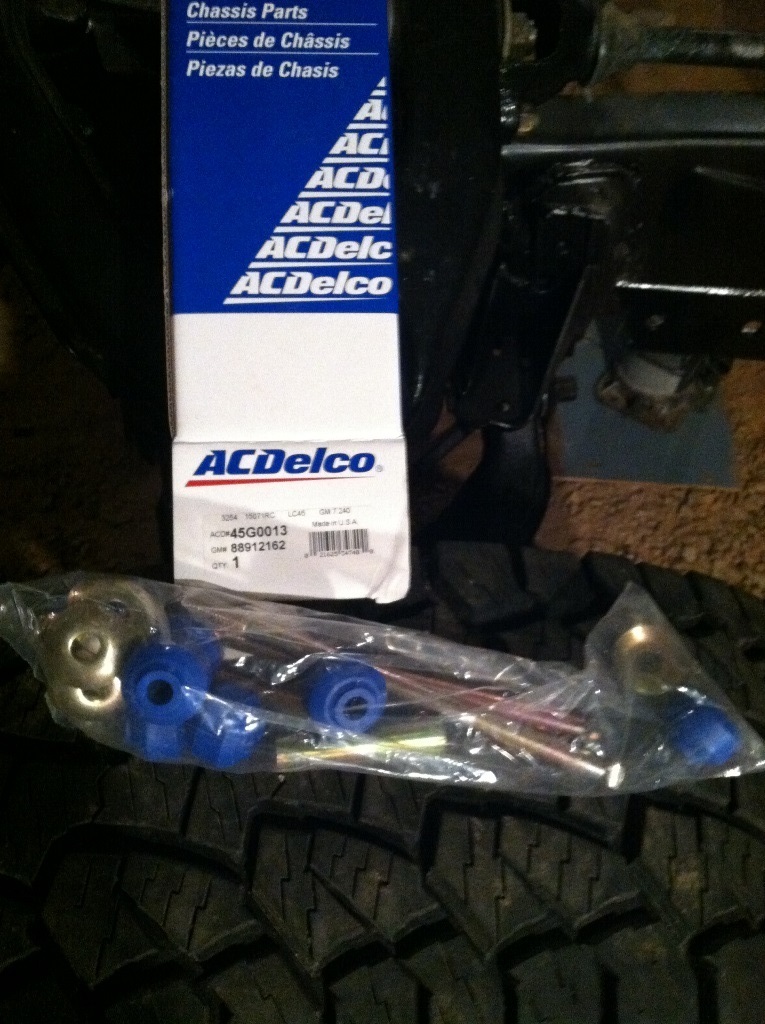
New ACDelco sway bar links - 45G0013
This kit was 2 retainer's short... So I left the cushion meeting the lower control arm retainer-less. Curious how it will hold up. Without the bolt torqued, I don't know how I would be able to start the nut with a 5th retainer though... Not alot of thread to play with. Unless of course this is the way toyota does it now. The FSM shows 5 and my old link had 5...
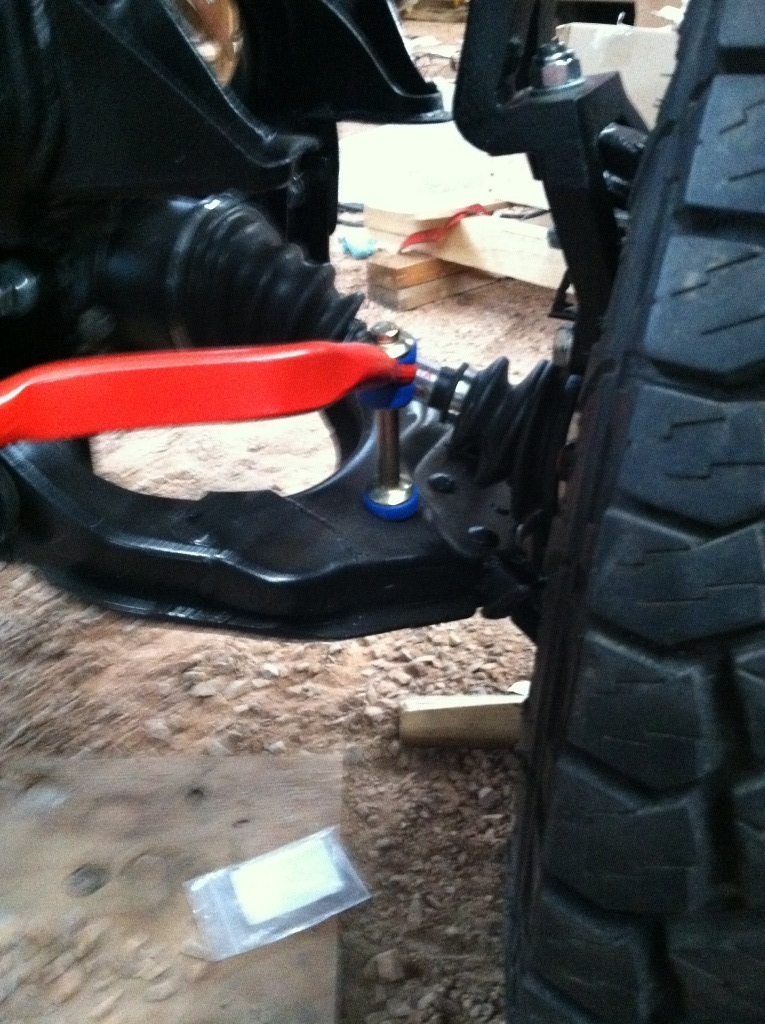
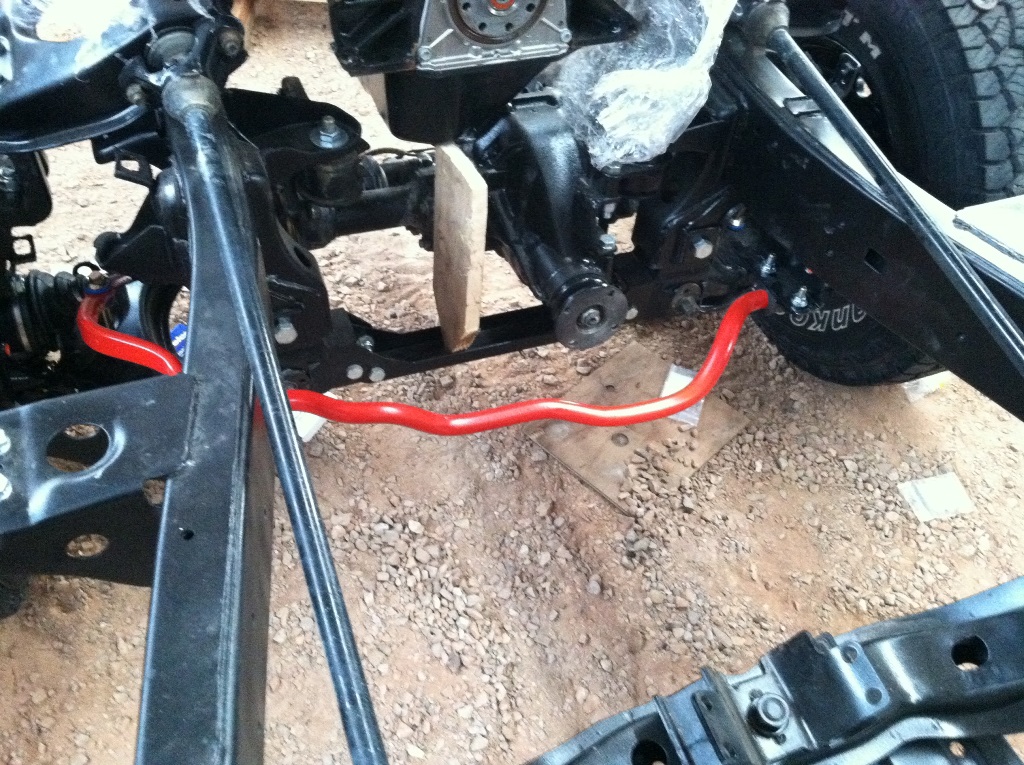
One side dropped in
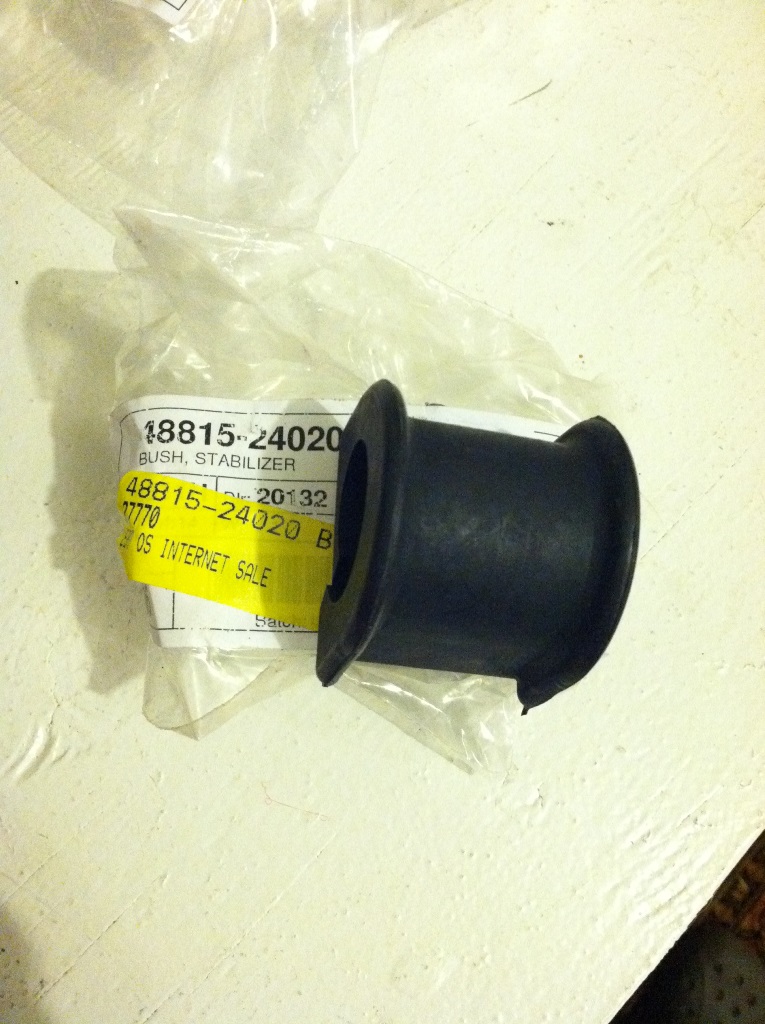
Sway bar bushings - 48815-24020
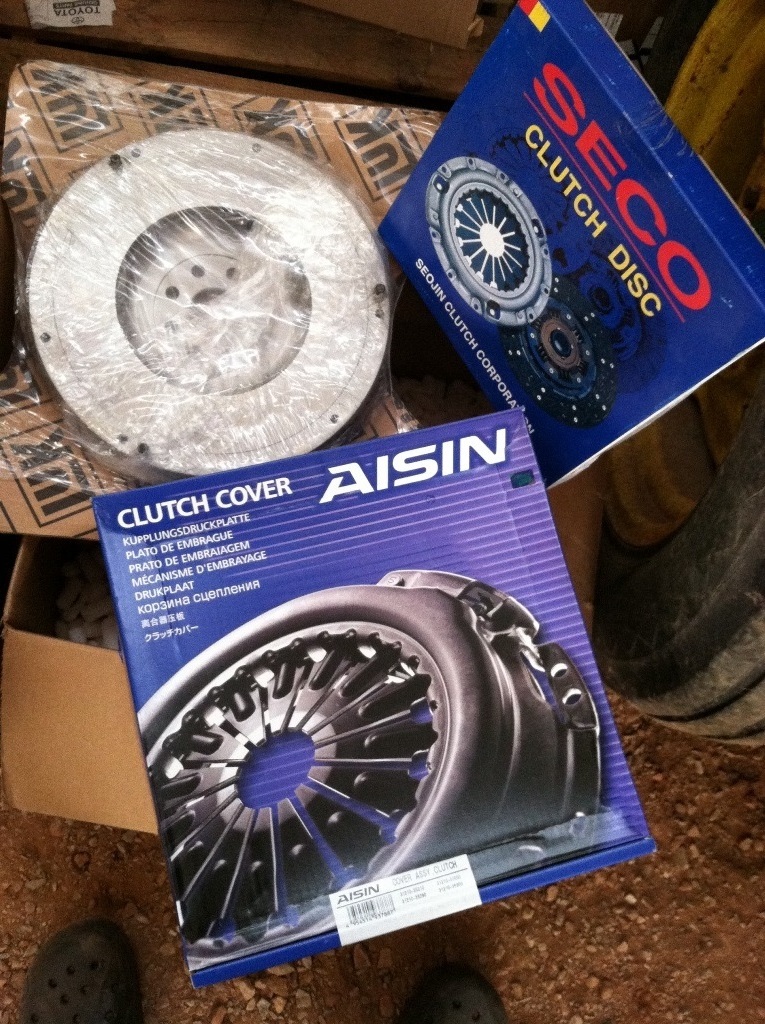
I bought a clutch kit from Marlin Crawler. I didn't take a pic of the bolts it came with, the alignment tool, and the pilot bearing new in the box
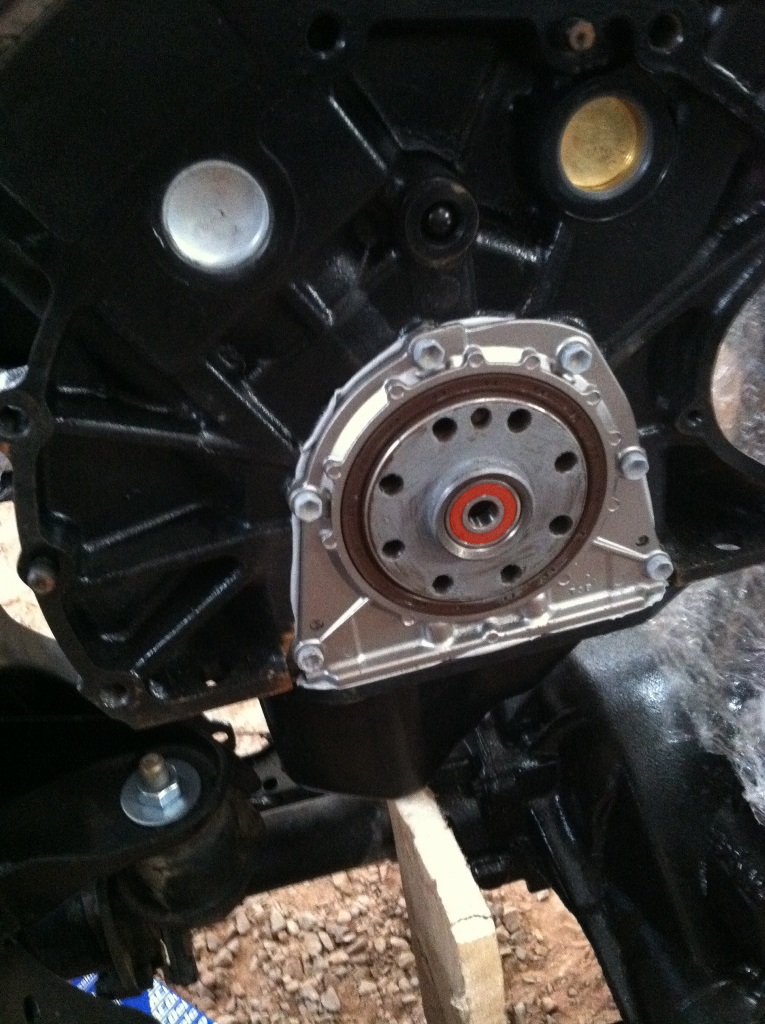
Pilot bearing installed
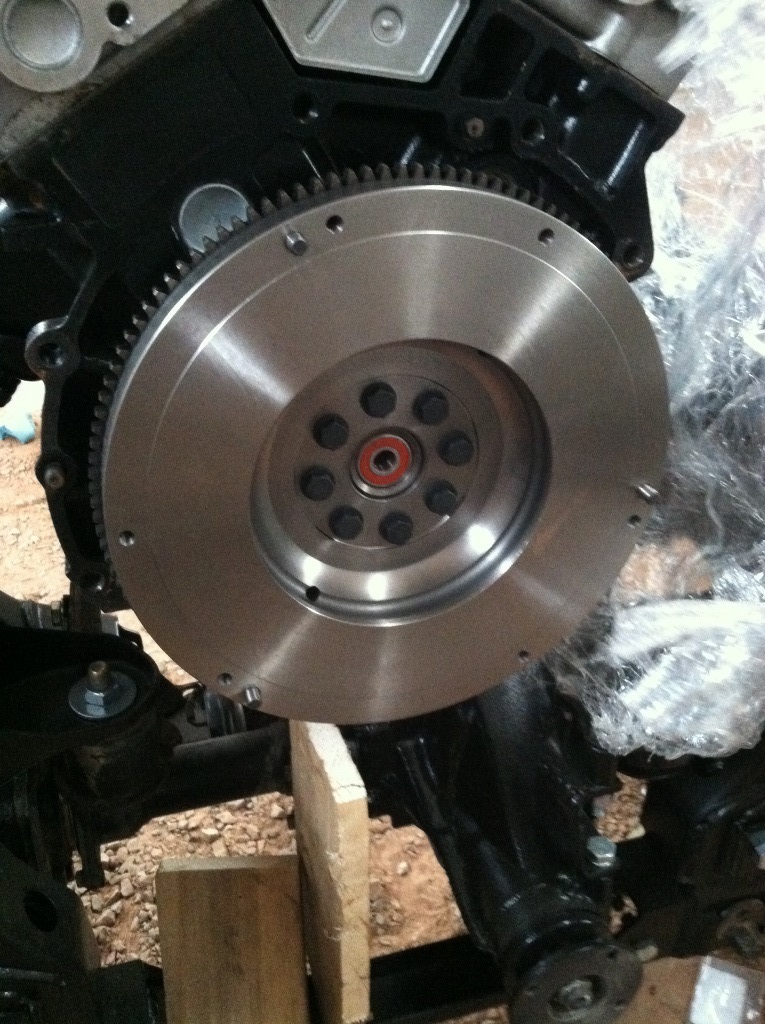
Flywheel in and torqued the bolts to 65 ft-lbs with blue loctite
Clutch disc is stamped on one side notifying which face is flywheel side...

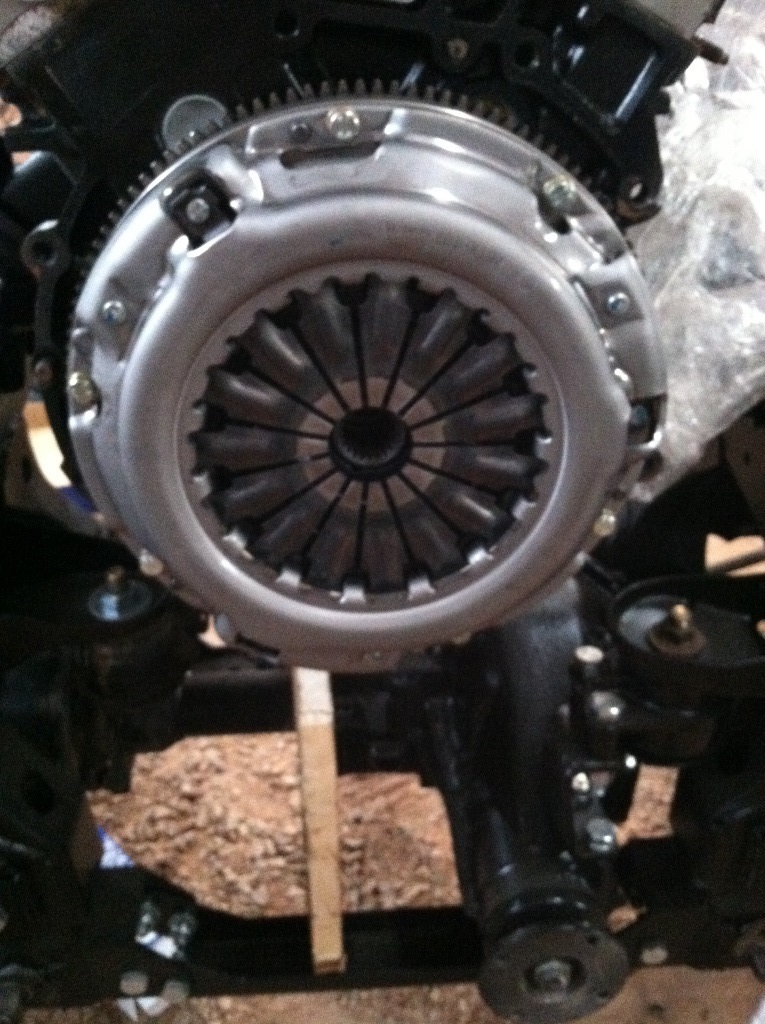
Use the supplied alignment tool and put the cover on. Broke the pull ring off the tool. Torque bolts to 14 ft-lbs with blue loctite.
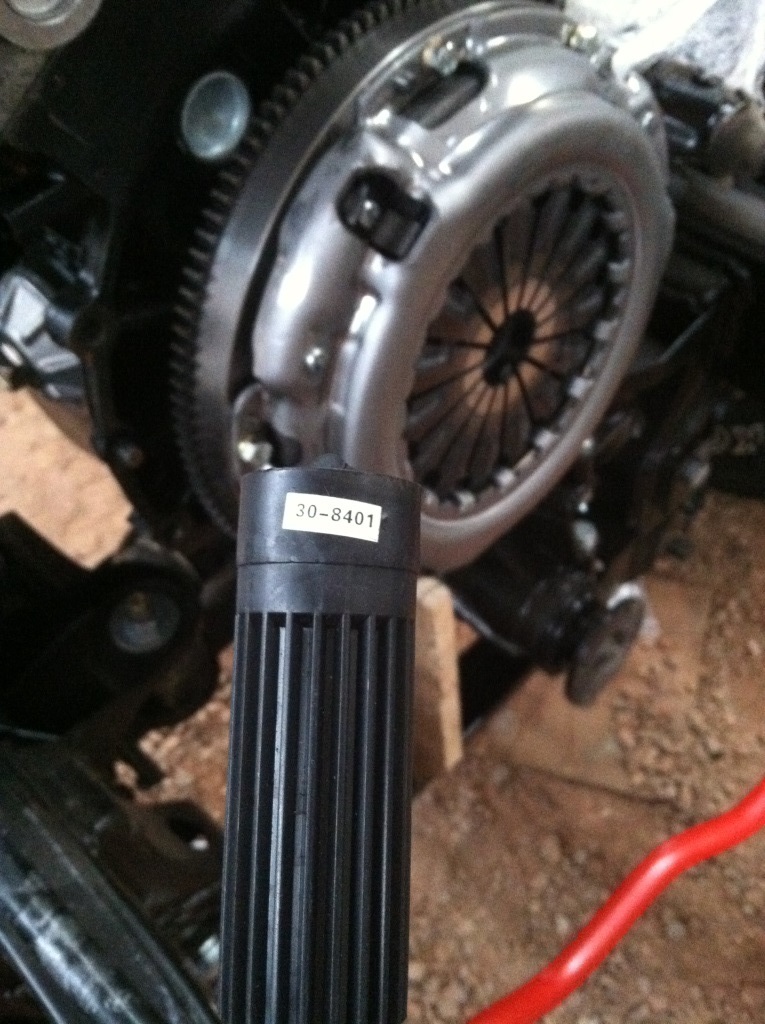
Now did anyone see what I forgot... Pulled everything apart, retorqued, redid loctite. So much more fun the second go around. Don't forget to put this plate in! Sprayed some brake cleaner on it and smeared the gunk around a bit

These also need to come off your old motor too. I forgot about these so they didn't get repainted Maybe later...
Drivers side
Passenger side
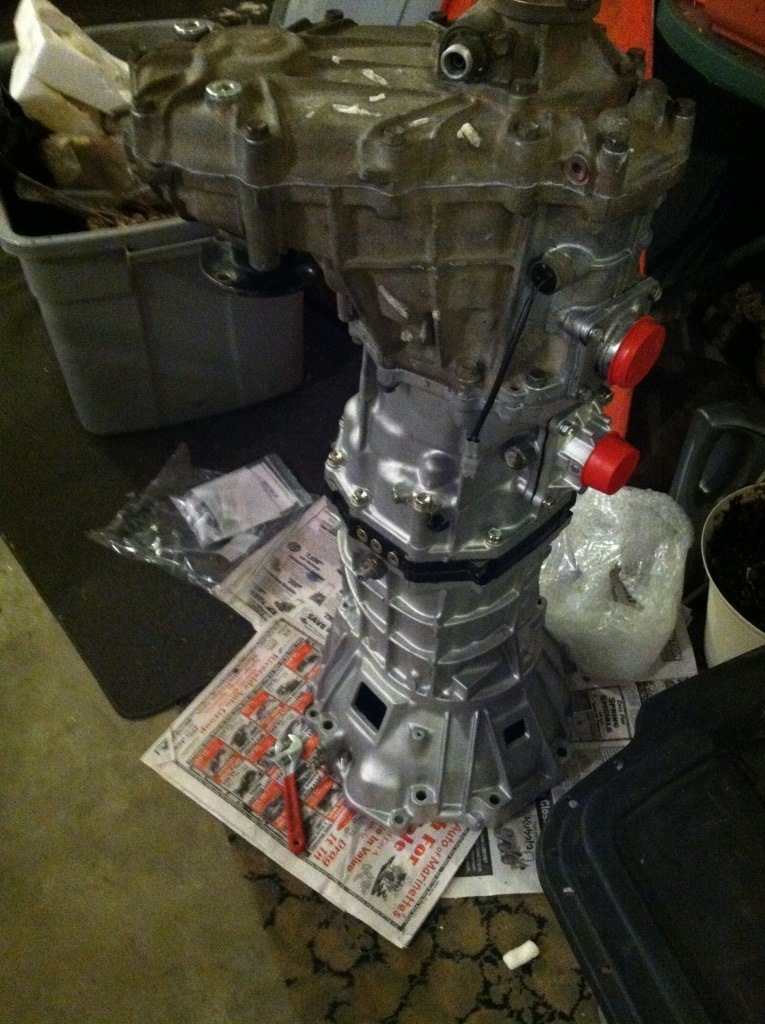
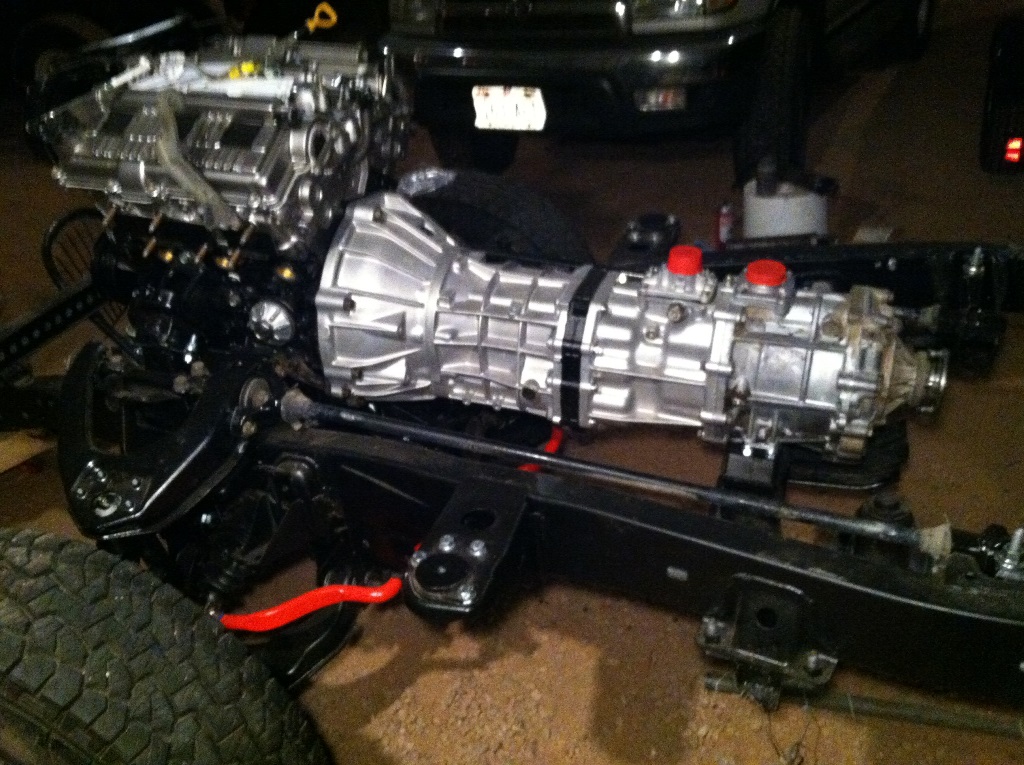
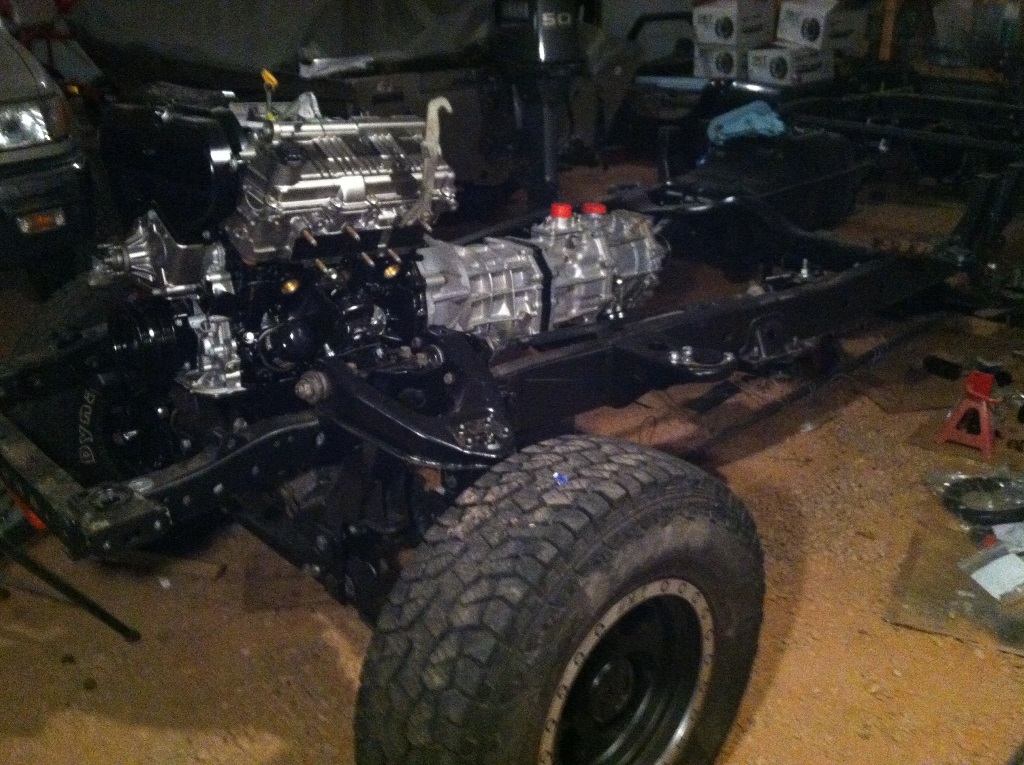
I dropped a post a bit ago about getting my transmission. I was finally able to take a look at it. I ran out of time in the summer so I shipped my t-case out to Marlin Crawler and had em rebuild it. Here they are put together in the warmth of the garage... Used RTV grey.
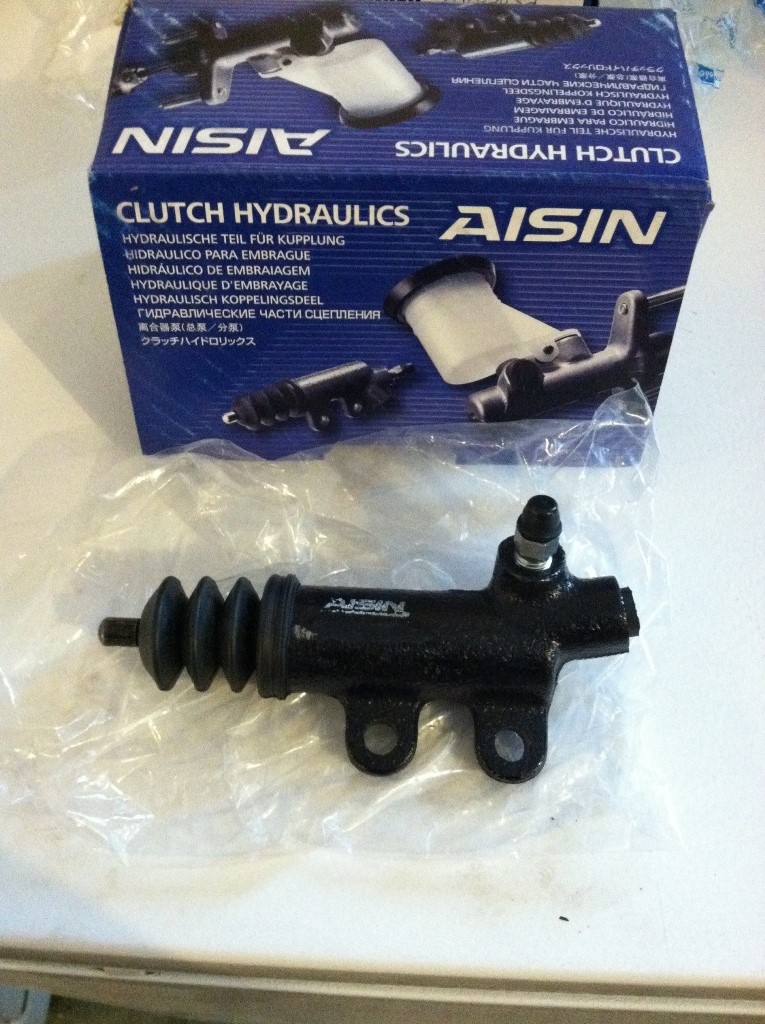
Picked up new slave cylinder from rockauto. AISIN CRT004
Fork - 31204-35031
Fork boot - 31126-20060
Koyo Release bearing from Marlin Crawler kit...

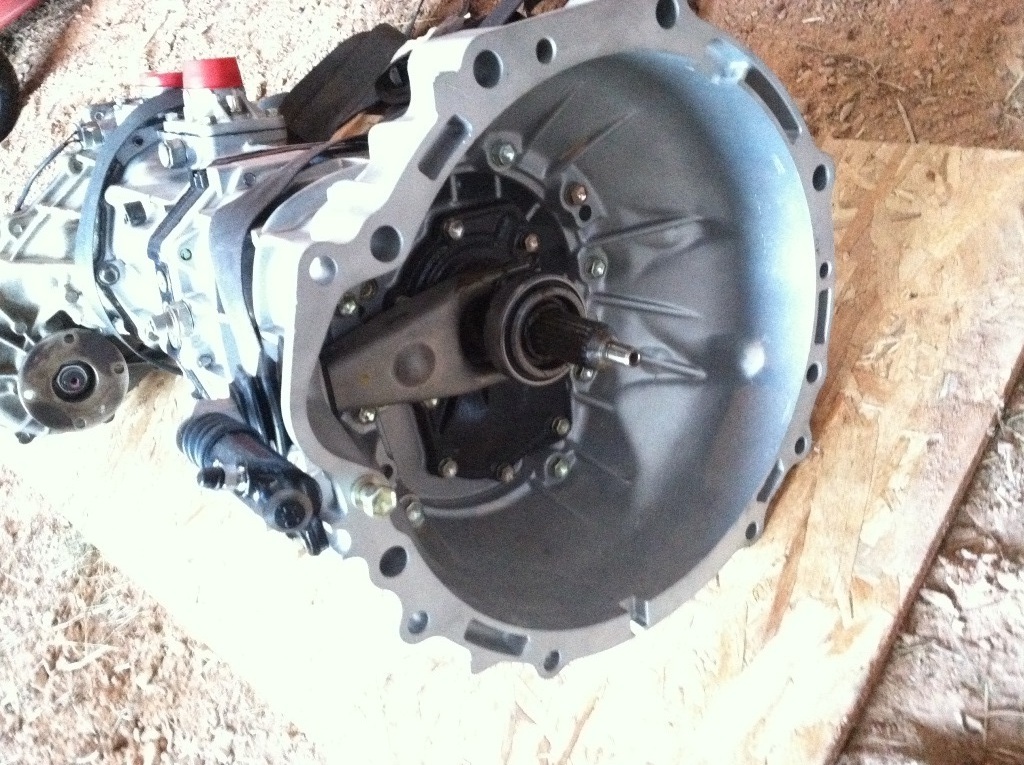
And things are getting scary..... It's almost starting to look like a truck
Started out working on my gas tank

Sending unit - 83320-80177

Hanger bracket - 23206-35101

Rubber gasket for the hanger - 77169-14010

Bought a Denso fuel pump from rockauto. Denso - 9500150

Unfortunately this pump doesn't come with an important part. Need to get the bottom cushion - 23249-43080
Also need a 5mm x .80 nut and a 4mm x .70 nut if I remember right. Sorry... I just ran into local hardware store and snagged em. Can't remember the sizes but Pretty sure those are right.

and here it is installed...

And here's the pump on the bracket

Bought a new clamp for the side of the gas tank. Fastens on the hardlines of the hanger bracket. It's a 2 piece part;
Metal clamp -90461-08323
Grommet - 90480-01226

I've read some people put rubber between the gas tank to protect the paint. Not sure how I feel about it so I put some grease on all contact points of the tank. Should be a bit more forgiving than paint on paint.

And here it is installed! You can see the metal clamp on the side of the tank.

New ACDelco sway bar links - 45G0013
This kit was 2 retainer's short... So I left the cushion meeting the lower control arm retainer-less. Curious how it will hold up. Without the bolt torqued, I don't know how I would be able to start the nut with a 5th retainer though... Not alot of thread to play with. Unless of course this is the way toyota does it now. The FSM shows 5 and my old link had 5...

One side dropped in

Sway bar bushings - 48815-24020


I bought a clutch kit from Marlin Crawler. I didn't take a pic of the bolts it came with, the alignment tool, and the pilot bearing new in the box

Pilot bearing installed

Flywheel in and torqued the bolts to 65 ft-lbs with blue loctite

Clutch disc is stamped on one side notifying which face is flywheel side...

Use the supplied alignment tool and put the cover on. Broke the pull ring off the tool. Torque bolts to 14 ft-lbs with blue loctite.


Now did anyone see what I forgot...
Pulled everything apart, retorqued, redid loctite. So much more fun the second go around. Don't forget to put this plate in! Sprayed some brake cleaner on it and smeared the gunk around a bit 
These also need to come off your old motor too. I forgot about these so they didn't get repainted
Maybe later...Drivers side

Passenger side

I dropped a post a bit ago about getting my transmission. I was finally able to take a look at it. I ran out of time in the summer so I shipped my t-case out to Marlin Crawler and had em rebuild it. Here they are put together in the warmth of the garage... Used RTV grey.

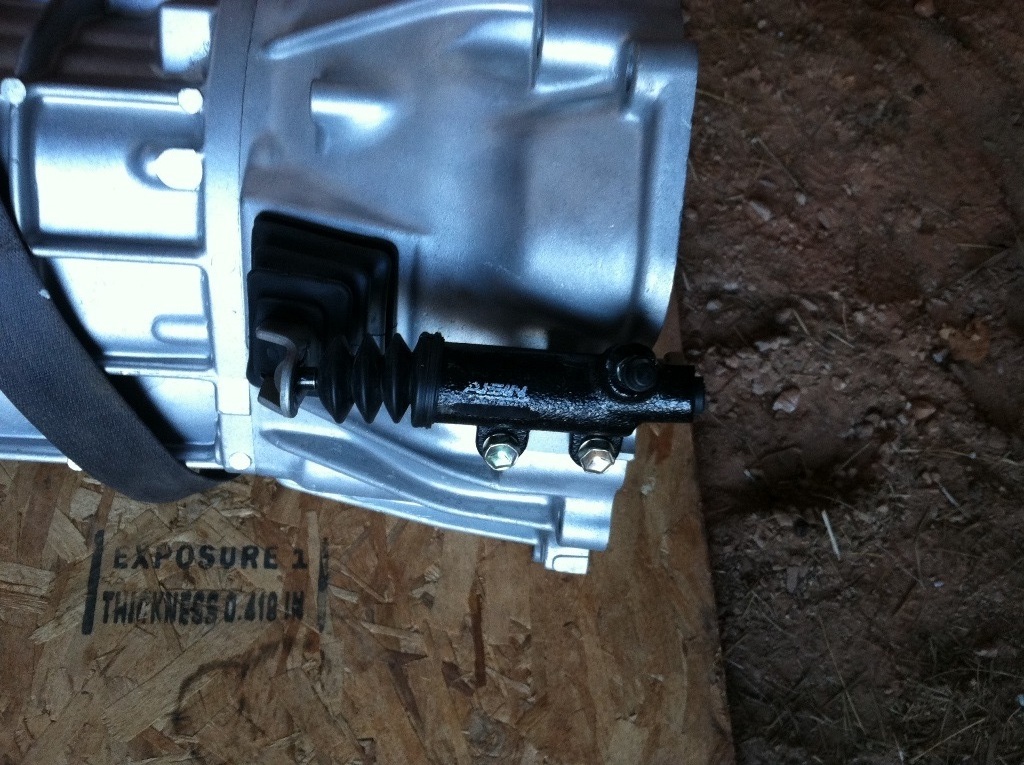
Picked up new slave cylinder from rockauto. AISIN CRT004

Fork - 31204-35031
Fork boot - 31126-20060
Koyo Release bearing from Marlin Crawler kit...


And things are getting scary..... It's almost starting to look like a truck

 01-23-2016, 10:41 PM
#58
Super Moderator
Staff
iTrader: (1)
Join Date: Aug 2008
Location: Anderson Missouri
Posts: 11,788
Likes: 0
Received 21 Likes
on
19 Posts
This is going to be a new truck when you are done. Great job, been enjoying following along. On the gas tank, even if it had the bolt in it, I would suggest not removing it as the corrosion tends to cause them to leak when removed from my experience. Not having the bolt is a plus I would say and keep the gas thieves away.
01-25-2016, 03:45 PM
#59
Registered User
Thread Starter
Join Date: Jun 2015
Location: WI
Posts: 147
Likes: 0
Received 0 Likes
on
0 Posts
This is going to be a new truck when you are done. Great job, been enjoying following along. On the gas tank, even if it had the bolt in it, I would suggest not removing it as the corrosion tends to cause them to leak when removed from my experience. Not having the bolt is a plus I would say and keep the gas thieves away.
Hoping to make this thing last another 20+ years.Which bolt are you referring to about the gas tank?


