85Toyman's 1994 4Runner Build up Thread


 04-10-2011, 09:21 PM
#82
Contributing Member
I orderedt the alt from RMA. I also took the engine mounts off last night so I could start designing a mount for the engine to sit on. I also took the exhaust manifolds off last night.
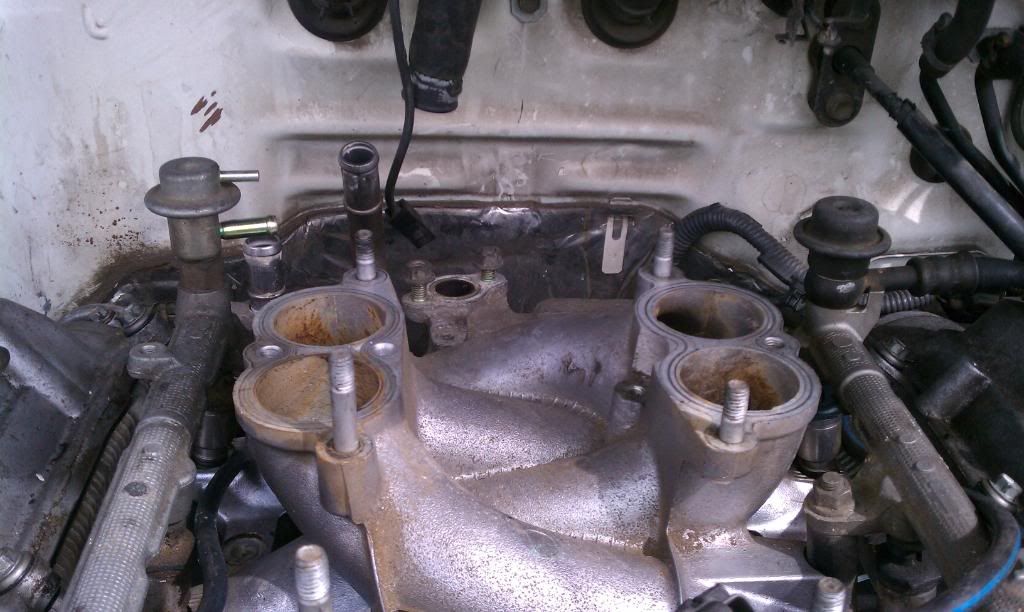
What did you guys do for the 02 sensors that bolt in right by the flanges? I plan on using a magnaflow 2.5" cat back around the original spot. Did you just close the hole up. Next was the egr return line to the manifold. Did everybody just order the egr block off kit? Last question. I found a sensor that is in the side of the bottom sump oil pan on the driver side. I can't seem to find a plug to put into that sensor. Does anybody know what that sensor is for, and if it is needed.
Sorry for all the questions guys but thanks for the help.
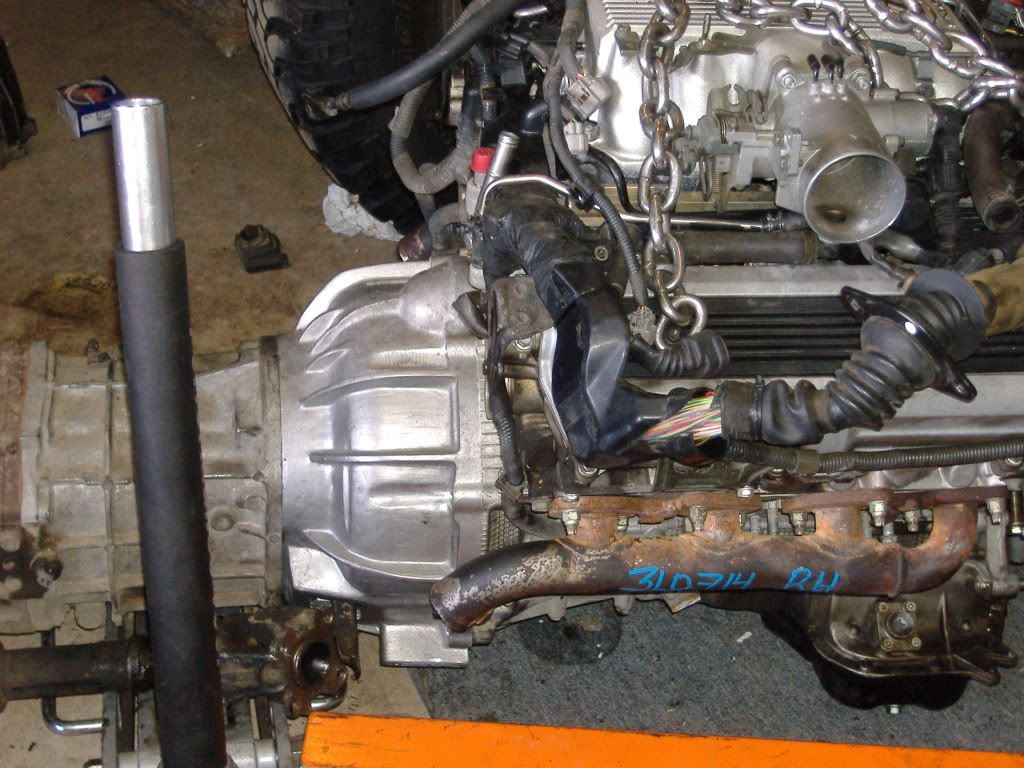
you need those o2 sensors .. so use the exsistingting bungs .. you can cut and rotate the tundra manifolds ..
check out the second pic .. thats where im cutting them and rotating it.
https://www.yotatech.com/forums/f161.../#post51445499
here you can somwhat see the egr return tube at back ..
https://www.yotatech.com/forums/f161...l#post51519049
as far as the egr return line .. im cutting the flange part off the ls or sc manifolds and welding them to the tundra manifolds ,, along with cutting and reworking the egr return tube. i need them to pass the ref here.
and dunkins right on the sensor at the sump its the oil temp and level switch ..
dude its way easier to just do the body lift now and save alot of headache... reworking the pan is a real pain ..
good luck!!
04-10-2011, 09:23 PM
#83
Contributing Member
2nd and 3rd pic
https://www.yotatech.com/forums/f161.../#post51643390
04-14-2011, 01:46 PM
#84
Registered User
Thread Starter
iTrader: (2)
Join Date: Oct 2009
Location: Centeral Willamette Valley Oregon
Posts: 1,044
Likes: 0
Received 5 Likes
on
5 Posts
Well, I ordered the bell housing today from KS racing. I got them to throw a new pivot ball in at no charge. I also ordered the 2100 lb clutch from Marlin Crawler today. I will drop off the 3.0 fly wheel tomorrow to the machine shop. They quoted $125 to cut it to spec and balance it. I am also going to head out to a wrecking yard as they have 2000 tundra manifolds I would like to pickup. Phew that is alot.
Next up is mating it all together and setting it in to see how we look and take some measurments for mounts. I think that I am going to reshape the pickup tube and cut the oil pan. I will add a remote mount oil filter to gain some oil back. I am still looking at Rogers for a 1 1/2" body lift if needed.
Once I have set the engine on mounts, I will see how much I have to work with up front and order an electric fan. Still havn't decided if I want to have the oe radiator modified or get an aluminum unit. I will need to mount temp probes with either unit.
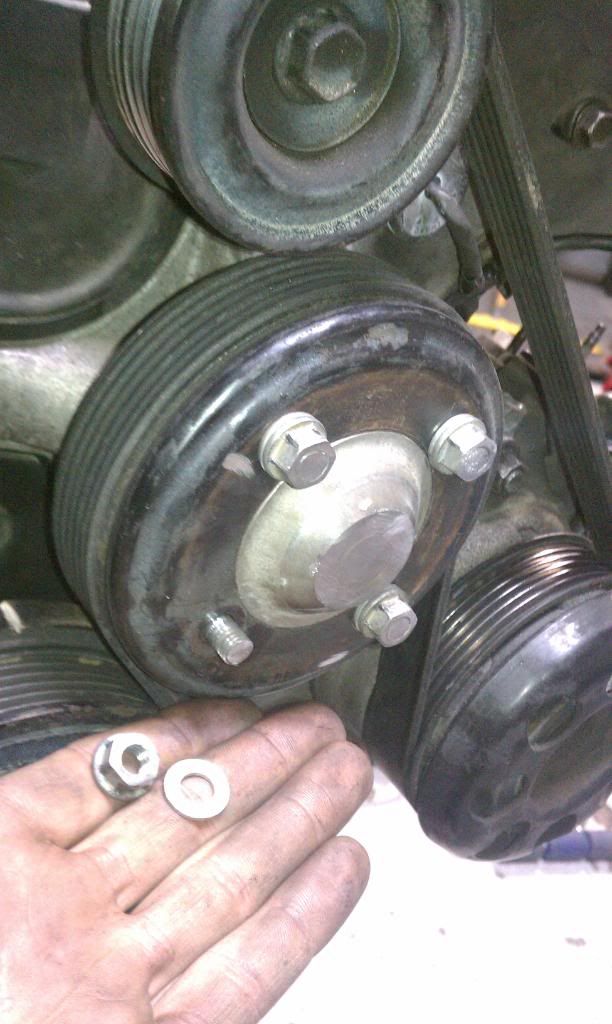
I was looking at the fan idler bracket and am thinking that I will just use washers to fill the gap left by the absence of the fan clutch. Any thoughts, I know some have used the Tundra bracket, just don't want to buy extra stuff I don't need right now.
The timing belt on this engine looks good, and I think I am going to just run it this way to make sure everything works good then I can change the tbelt and tune up later.
Thanks for everybodys help and insite. I was getting discurraged earlier this week as things were not coming together as I planned, but have taken a deep breath and am back on track now.
Next up is mating it all together and setting it in to see how we look and take some measurments for mounts. I think that I am going to reshape the pickup tube and cut the oil pan. I will add a remote mount oil filter to gain some oil back. I am still looking at Rogers for a 1 1/2" body lift if needed.
Once I have set the engine on mounts, I will see how much I have to work with up front and order an electric fan. Still havn't decided if I want to have the oe radiator modified or get an aluminum unit. I will need to mount temp probes with either unit.
I was looking at the fan idler bracket and am thinking that I will just use washers to fill the gap left by the absence of the fan clutch. Any thoughts, I know some have used the Tundra bracket, just don't want to buy extra stuff I don't need right now.
The timing belt on this engine looks good, and I think I am going to just run it this way to make sure everything works good then I can change the tbelt and tune up later.
Thanks for everybodys help and insite. I was getting discurraged earlier this week as things were not coming together as I planned, but have taken a deep breath and am back on track now.
Last edited by 85toyman; 04-14-2011 at 01:56 PM.
04-14-2011, 02:07 PM
#85
Registered User
Join Date: Jan 2011
Location: Englewood, CO
Posts: 375
Likes: 0
Received 0 Likes
on
0 Posts
Washers work. That's what I did. One under each nut. And then I cut off the rest of the stud and the centering pin for the fan. I'll post a pic on here for u tonight.
04-14-2011, 04:08 PM
#87
Registered User
Thread Starter
iTrader: (2)
Join Date: Oct 2009
Location: Centeral Willamette Valley Oregon
Posts: 1,044
Likes: 0
Received 5 Likes
on
5 Posts
Picked up a set of 2000 Tundra 4.7 liter Exhaust manifolds today as well. I sold the 2000 4runner yesterday as well. The profit should allow me to finish this project at a resonable pace now.
 04-17-2011, 09:39 AM
#90
Registered User
Thread Starter
iTrader: (2)
Join Date: Oct 2009
Location: Centeral Willamette Valley Oregon
Posts: 1,044
Likes: 0
Received 5 Likes
on
5 Posts
Ok, installed the tundra manifolds and am about to cut the flange and reposistion the tube to fit down inside the frame rails. I also got a PS pump from a 91 LS400, it should be here in a couple of days.
I also added some bling to my ride. I will take pics just having computer problems at the moment. Desk top crashed and am doing all this on the lap top and my camera's program isn't installed on this to down load.
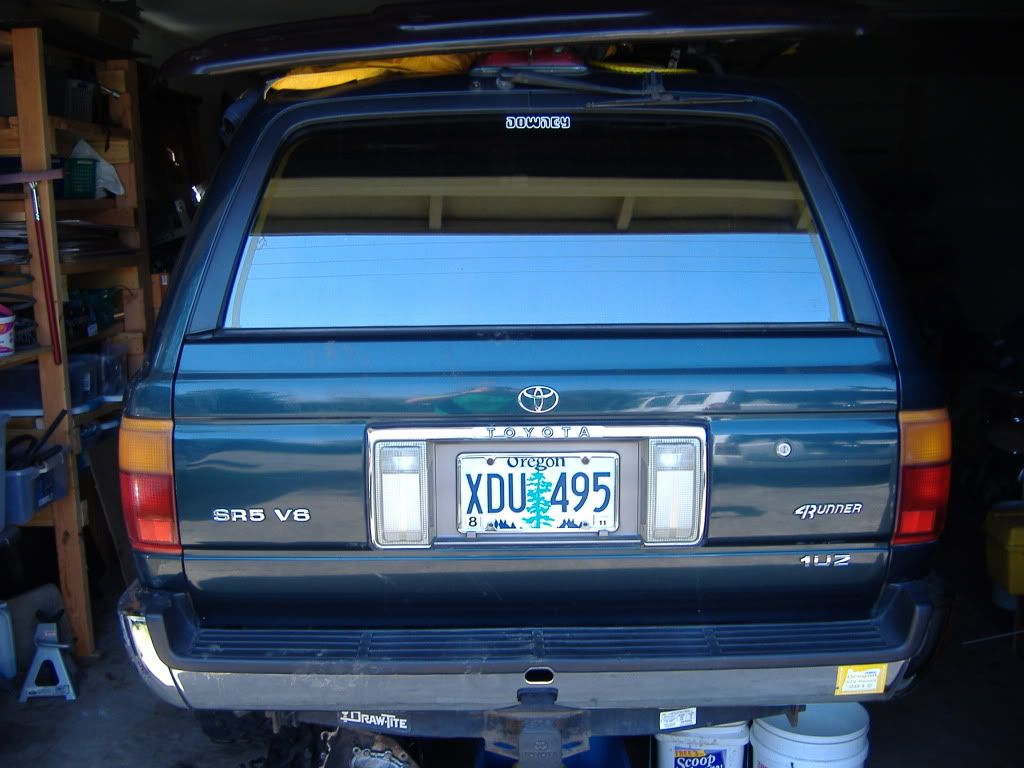
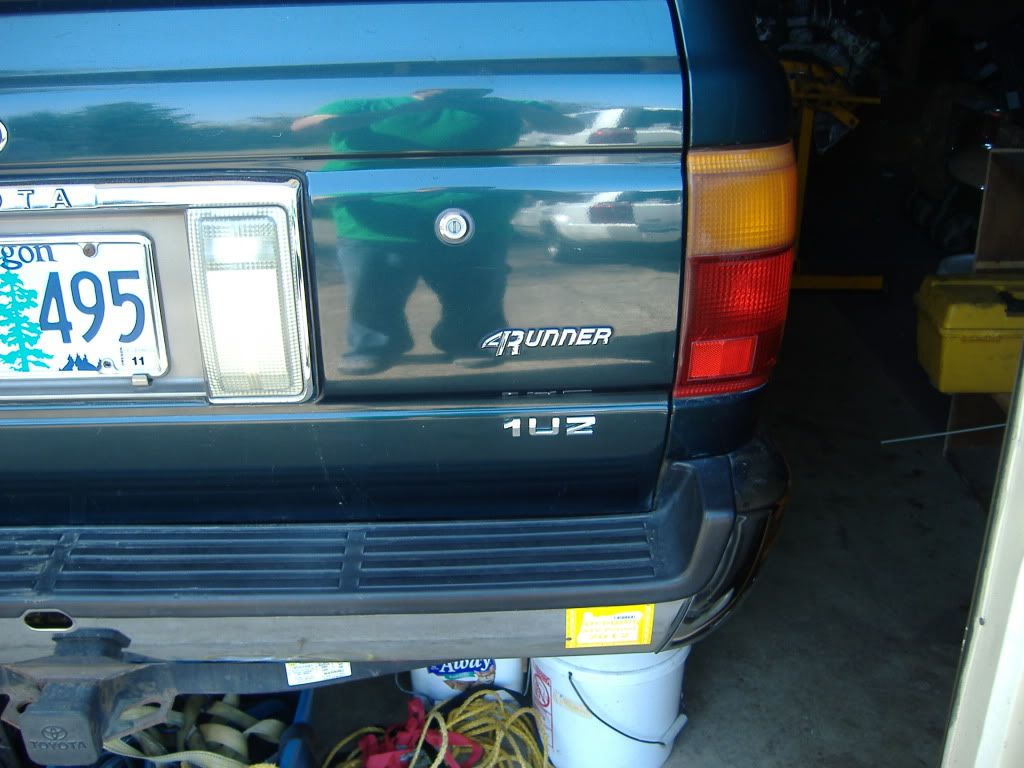
I wanted to let others know suddely that I am not running a V6, so I bought a chrome decal that says 1UZ and placed it under the 4runner name plate on the tail gate. I am also looking at the Tundra V8 plate that is in the grill and adapting it to fit my grill so I can get rid of the V6 emblem.
Small stuff, but something to do while I wait on other parts.
I also added some bling to my ride. I will take pics just having computer problems at the moment. Desk top crashed and am doing all this on the lap top and my camera's program isn't installed on this to down load.
I wanted to let others know suddely that I am not running a V6, so I bought a chrome decal that says 1UZ and placed it under the 4runner name plate on the tail gate. I am also looking at the Tundra V8 plate that is in the grill and adapting it to fit my grill so I can get rid of the V6 emblem.
Small stuff, but something to do while I wait on other parts.
Last edited by 85toyman; 04-17-2011 at 09:41 AM.
04-18-2011, 06:06 PM
#91
Registered User
Thread Starter
iTrader: (2)
Join Date: Oct 2009
Location: Centeral Willamette Valley Oregon
Posts: 1,044
Likes: 0
Received 5 Likes
on
5 Posts
Dropped the 3.0 flywheel and lexus flex plate off at the machine shop today. Should have it back by Friday, they quoted me $150 for all the work including balancing.
Bell was shipped out this afternoon. I took measurement for engine mounts last night and will start tig welding some brackets up later this week.
Bell was shipped out this afternoon. I took measurement for engine mounts last night and will start tig welding some brackets up later this week.
04-19-2011, 10:40 PM
#92
Registered User
Thread Starter
iTrader: (2)
Join Date: Oct 2009
Location: Centeral Willamette Valley Oregon
Posts: 1,044
Likes: 0
Received 5 Likes
on
5 Posts
Does anybody have any pictures of the coolant temp guage sensor they used. I have read that most put it in teh cross over coolant pipe. Just looking for what most of you have done.
04-20-2011, 07:25 PM
#93
Registered User
Thread Starter
iTrader: (2)
Join Date: Oct 2009
Location: Centeral Willamette Valley Oregon
Posts: 1,044
Likes: 0
Received 5 Likes
on
5 Posts
Ok, I got the power steering today via UPS. I was packed really well and the box didn't show any signs of damage. But the pulley is cracked and bent. The crack is just to the out side of the bolt. The pulley is bent enough that is hits the pump and you can only spin it about 1/4 of a turn before it binds up by hitting. I pulled the pulley off and can turn the shaft from the pump fine and it looks good still.
I contacted the seller this evening thru Ebay and hope for a response tomorrow, however I am guessing that they won't have another unit or pulley, so I am looking for a pulley. Does anybody have an extra one laying around they would like to sell me.
If you do let me know.
Thanks
I contacted the seller this evening thru Ebay and hope for a response tomorrow, however I am guessing that they won't have another unit or pulley, so I am looking for a pulley. Does anybody have an extra one laying around they would like to sell me.
If you do let me know.
Thanks
04-22-2011, 01:50 PM
#94
Registered User
Thread Starter
iTrader: (2)
Join Date: Oct 2009
Location: Centeral Willamette Valley Oregon
Posts: 1,044
Likes: 0
Received 5 Likes
on
5 Posts
Got some bling to put on the 4runner
Also got the bell, and going to get the fly wheel today. The machine shop called and said that clocked the bolt pattern since the bolt holes are bigger. They ended up charging me $191 to do it. Wasn't happy, as the quote was $150 for all the work.
Oh well guess that is how it goes.
Also got the bell, and going to get the fly wheel today. The machine shop called and said that clocked the bolt pattern since the bolt holes are bigger. They ended up charging me $191 to do it. Wasn't happy, as the quote was $150 for all the work.
Oh well guess that is how it goes.
04-23-2011, 11:12 PM
#95
Registered User
Thread Starter
iTrader: (2)
Join Date: Oct 2009
Location: Centeral Willamette Valley Oregon
Posts: 1,044
Likes: 0
Received 5 Likes
on
5 Posts
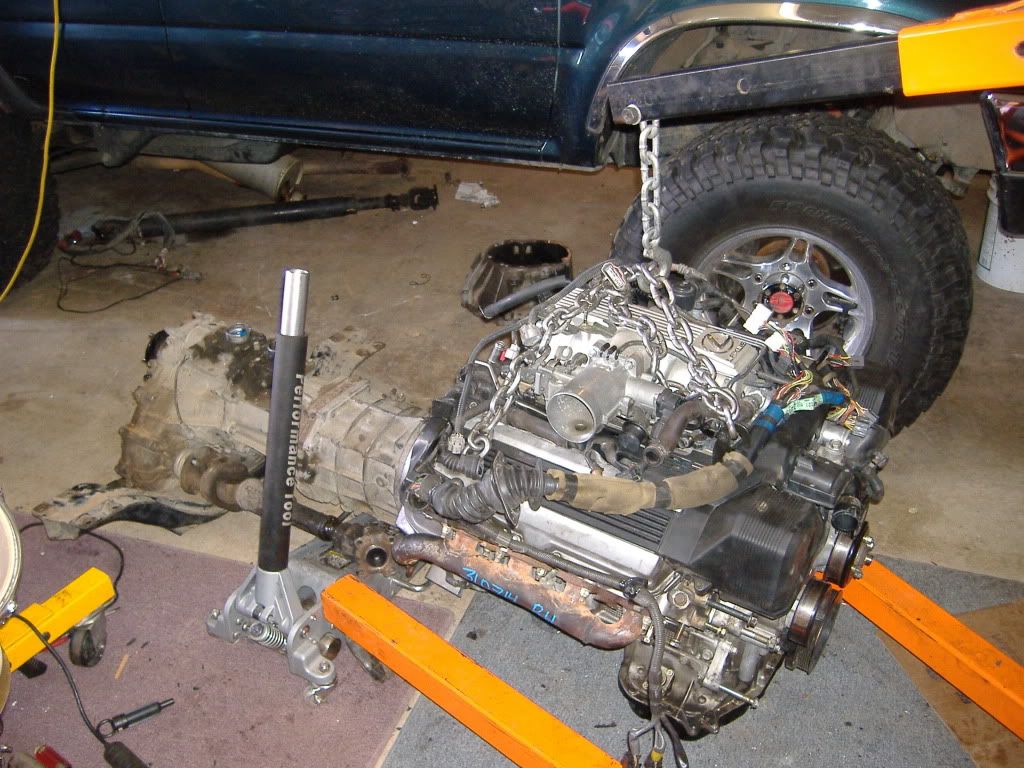
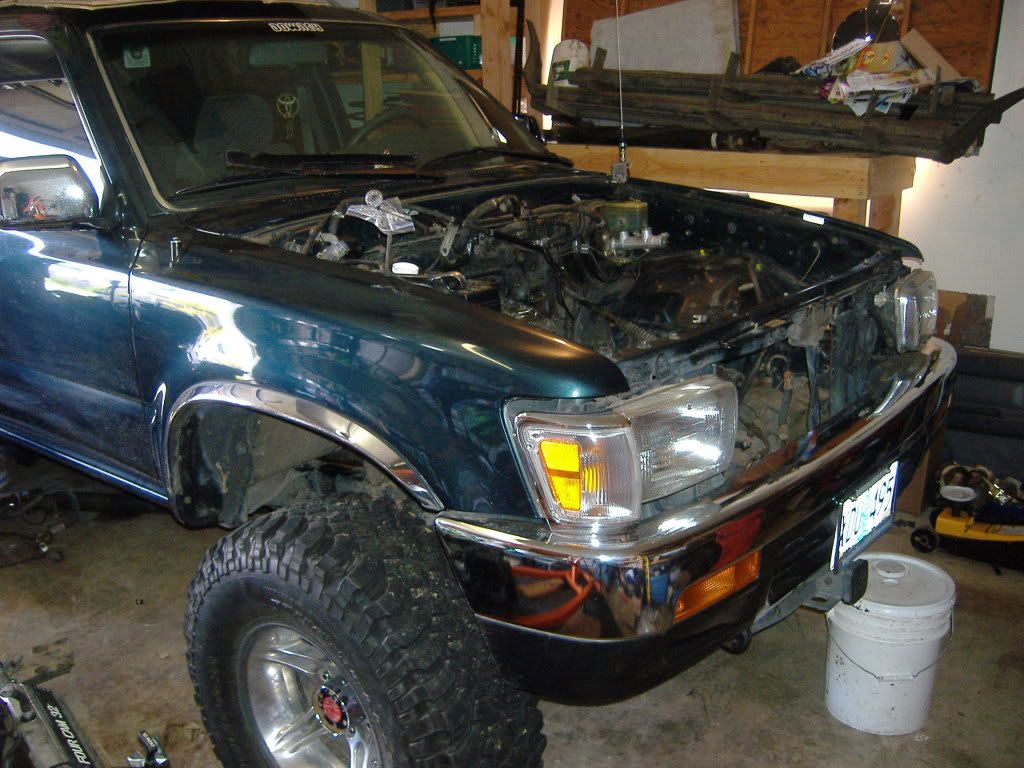
Well, I got the motor in its final resting place. I have it in with no body lift and the rear bell was on with just enough room to fit the tranny without modifying the tranny tunel. It is tight but fits nicely. I also had to cut the steering damper off and will reweld it to the bottom of the relay rod, but I have enough room below the oil pan about 1/4" between the pan and the relay rod. The hood closes with about 1/2" above it. The pan will not need modded either, just had to get it sitting right and it fit nicely.
I need to finish tig welding up the motor mounts all the way and all will be well.
I checked the timing belt and it looks brand new. I think I am going to run it the way it is for a while and make sure I get all the bugs work out then I may do the timing belt.
I am definetly going to have to run a pusher fan. I removed the rest of the air condition stuff, I don't see how I can keep it after all. The fan is going to go where that stuff was sitting in front of the raditator. I may after a while change things and try to get it in there. Maybe a project for next winter. For now I just want to get this thing running.
Last edited by 85toyman; 04-23-2011 at 11:13 PM.
04-29-2011, 11:36 PM
#96
Registered User
Thread Starter
iTrader: (2)
Join Date: Oct 2009
Location: Centeral Willamette Valley Oregon
Posts: 1,044
Likes: 0
Received 5 Likes
on
5 Posts
Well, I haven't got much done lately. I got the clutch kit installed, and the bell housing is on the tranny. I placed 2 washers on the back side of the clutch fork pivot. I think that it should engage the clutch correctly but I haven't mated the two together yet.
I sent back the P/S pump I received from Fresno TAP off of ebay. What a joke. The unit they shipped was clearly damaged before they shipped it. The box was in excellent condition when I got it from the UPS guy. However the pulley was bent and cracked so much so that you couldn't even turn the pulley thru 1/2 a revolution before it contacted the pump. Well on my dime I sent it back and they said they had another unit that was in excellent condition. Well need less to say it was garbage. Pissed off is an under statement. They now want me to return this second unit on my dime to credit me the original purchase price.
So tonight a bought another unit from another vender. Hopefully this unit is in much nicer condition when it gets here. I spent more to get it but I need it, so its on its way.
I should be fitting it all together next week hopefully.
05-03-2011, 03:13 PM
#99
Registered User
Thread Starter
iTrader: (2)
Join Date: Oct 2009
Location: Centeral Willamette Valley Oregon
Posts: 1,044
Likes: 0
Received 5 Likes
on
5 Posts
Thanks guys, its been a fair amount of work, but so far it's been fun. I have only had a few frusterating things come up. The only thing I can say is that I am glad that I don't have to drive this thing so it isn't a rush to get it done. I can't wait to actually drive the thing again.
I am just about finished tig welding up the motor mounts. Then they will get powder coated. I also ordered an aluminum radiator this morning as well. I should have it late this week.
I am just about finished tig welding up the motor mounts. Then they will get powder coated. I also ordered an aluminum radiator this morning as well. I should have it late this week.
Last edited by 85toyman; 05-03-2011 at 03:15 PM.
05-03-2011, 06:51 PM
#100
Registered User
Join Date: Jan 2011
Location: Englewood, CO
Posts: 375
Likes: 0
Received 0 Likes
on
0 Posts
hey 85 how is your fork travel. here is a picture of the bearing im gonna use.
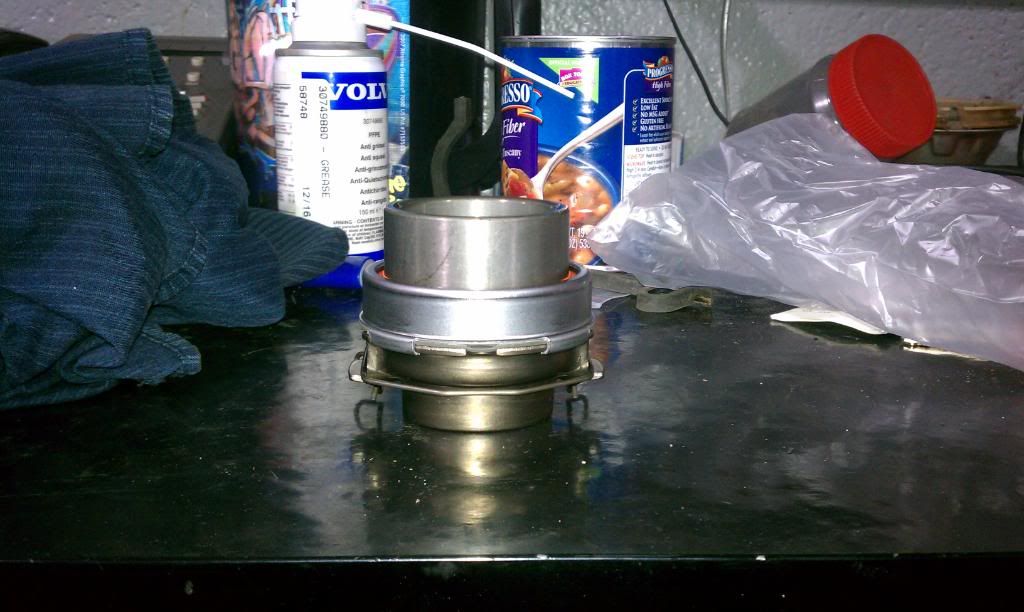
its a 5vz bearing. i got the idea off someone on here as i was looking through thier thread. its much taller then the 3vz bearing.
o and i found a cool thing to do with the fuel line that im gonna try rather then run it across the fire wall. it looks like if you just swap the fuel inlet and the pressure regulator you dont even have to change the fuel system on the runner.
i havent done it yet. im gonna try it tomarrow. ill let you know. right now i have about 90% of the wiring done right now if it turns out i may be able to start this thing soon. fingers crossed.


