85Toyman's 1994 4Runner Build up Thread
 12-10-2010, 10:29 PM
#1
Registered User
Thread Starter
iTrader: (2)
Join Date: Oct 2009
Location: Centeral Willamette Valley Oregon
Posts: 1,044
Likes: 0
Received 5 Likes
on
5 Posts
85Toyman's 1994 4Runner Build up Thread
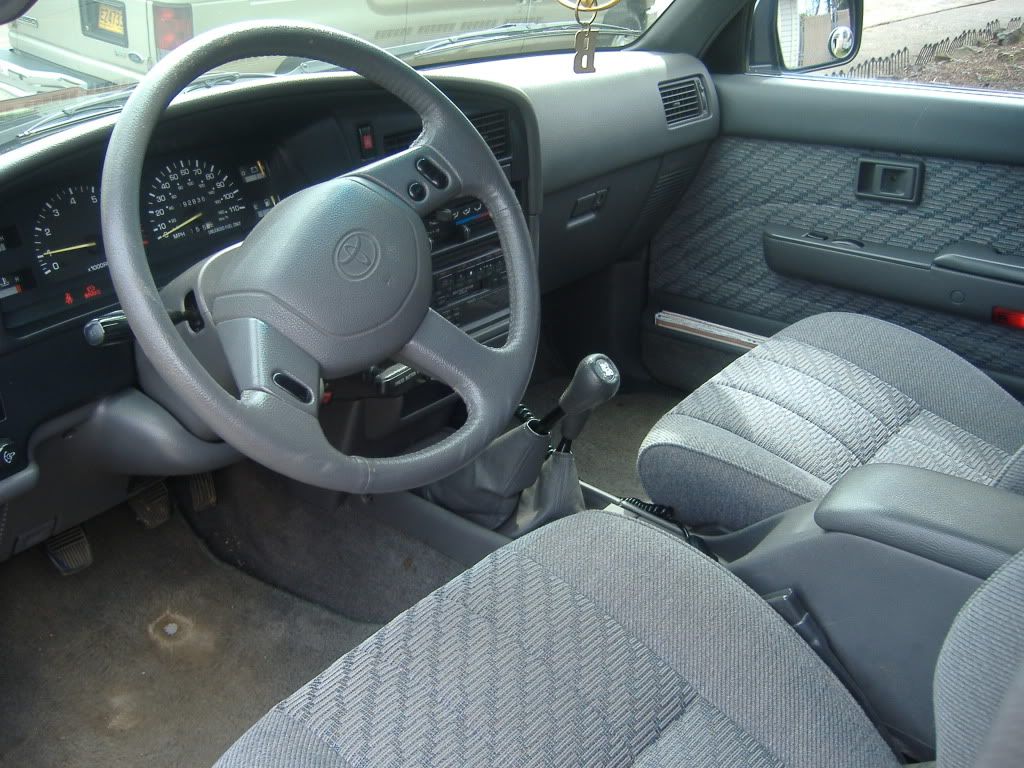
Starting this thread so I can keep track of the 4runner through out the years as I build it. Long story short I sold my last Toyota and bought this so I could haul the wife and kids up to the mountains with me. I bought this rig on 3/1/10 as a really clean stock rig with 192,000 miles. 3.0 V6 with a 5spd. 4:30 gears with 31x10.5x15 BFG All Terrains. Metalic Green with Grey cloth interior. Over all very nice shape body and interior is a 8.5-9 out of 10. I have all the maintance records from the day it was purchased new. Head gaskets were redone at 140,000 miles. New radiator and clutch done at 165,000 miles.
My goal is to build a very capable trail rig. This is just a play toy so down time to install parts isn't a problem. My goals are as follows:
1. Get winch for recovery when off road
2. Buy recovery gear, tree trunk protector, winch extension, straps, snatch blocks, ect
3. Lift it. I will start by building the IFS. May eventually go to SAS.
4. Protection such as sliders. Most likely will build the set I want as nobody carries what I am looking for. Bud Built is the closest thing I can find
5. 1UZFE swap. I have read others who have done the swap and am going to start buying parts to tackle this swap

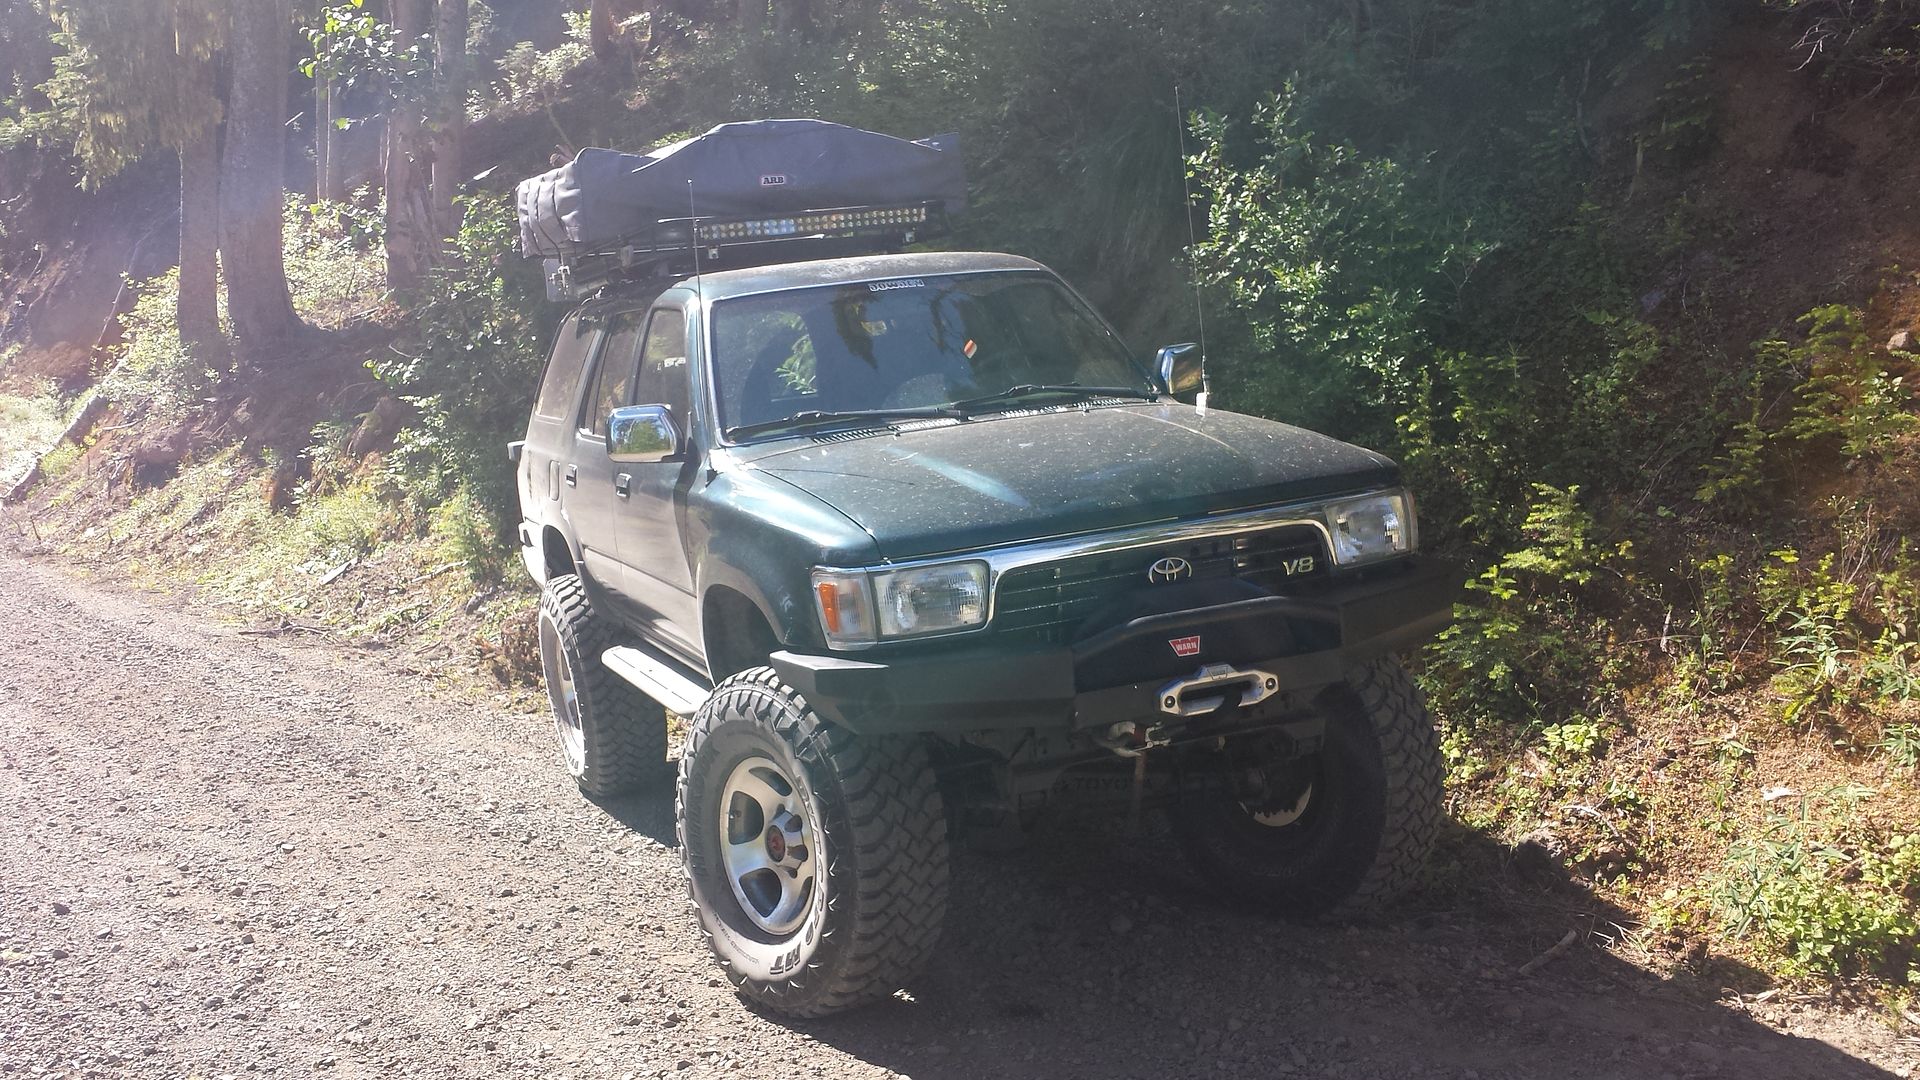
Here is how it looks and sits currently....
Sky winch bumper modified and using a Warn XD9000i with synthetic spydura line on it. Custom built sliders, sky SAS kit, axle widening kit, longfields with hub gears, FZJ80 HP front Elocker with 4.88's, rear Tacoma elocker with 4:88's, 1UZ with original R150 spd.... Lots more if you read thru the build page
Pic
My goal is to build a very capable trail rig. This is just a play toy so down time to install parts isn't a problem. My goals are as follows:
1. Get winch for recovery when off road
2. Buy recovery gear, tree trunk protector, winch extension, straps, snatch blocks, ect
3. Lift it. I will start by building the IFS. May eventually go to SAS.
4. Protection such as sliders. Most likely will build the set I want as nobody carries what I am looking for. Bud Built is the closest thing I can find
5. 1UZFE swap. I have read others who have done the swap and am going to start buying parts to tackle this swap
Here is how it looks and sits currently....
Sky winch bumper modified and using a Warn XD9000i with synthetic spydura line on it. Custom built sliders, sky SAS kit, axle widening kit, longfields with hub gears, FZJ80 HP front Elocker with 4.88's, rear Tacoma elocker with 4:88's, 1UZ with original R150 spd.... Lots more if you read thru the build page
Pic


Last edited by 85toyman; 02-17-2016 at 09:33 AM.
 12-10-2010, 10:31 PM
#2
Registered User
Thread Starter
iTrader: (2)
Join Date: Oct 2009
Location: Centeral Willamette Valley Oregon
Posts: 1,044
Likes: 0
Received 5 Likes
on
5 Posts
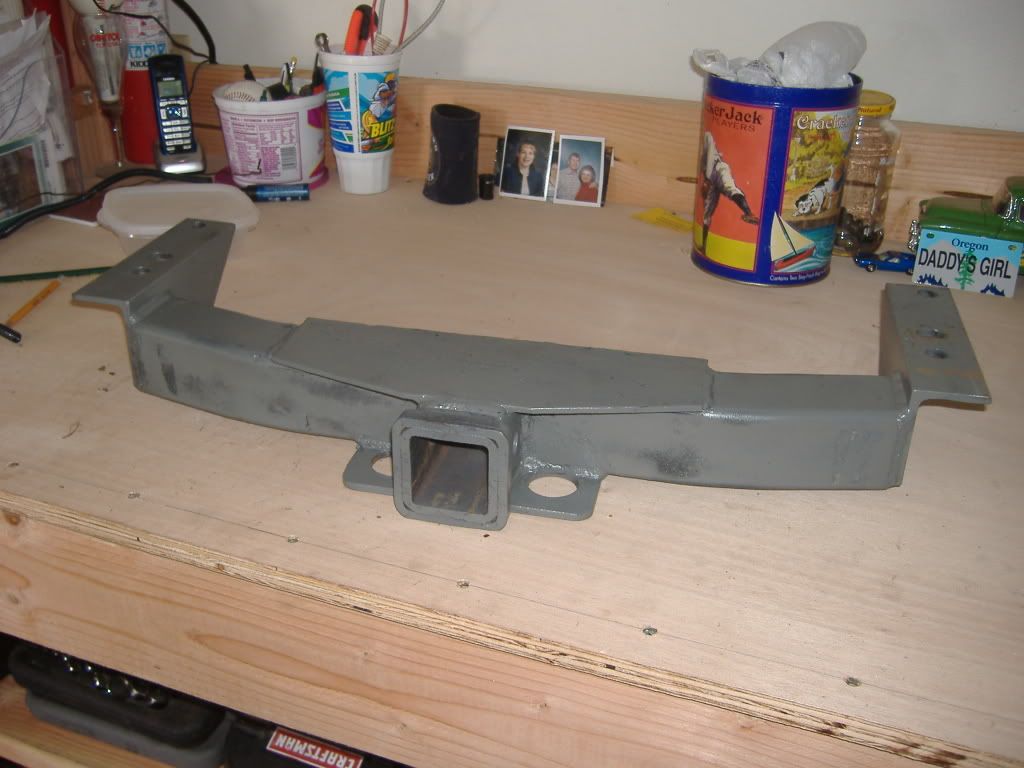
Next up was taking an extra rear hitch I had and cutting it down and welding on side brackets so I could have a hitch for the front end of the 4runner. I would like to get a multi mount winch
I then installed a Midland CB to talk with others while off road.
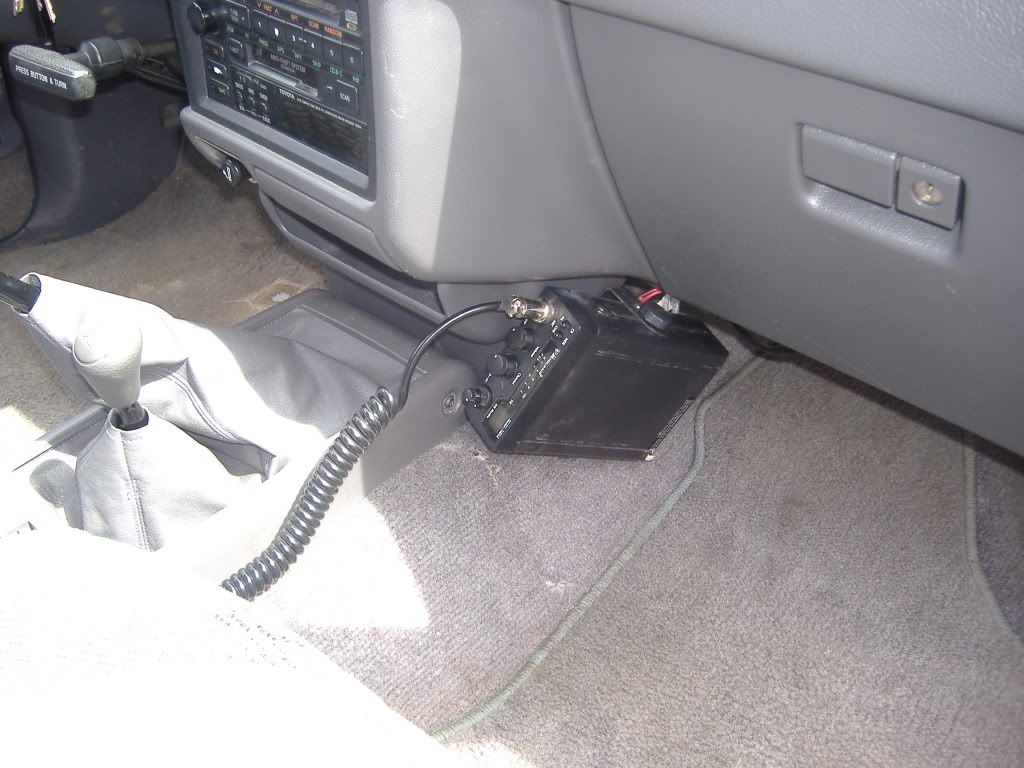
I then installed a Midland CB to talk with others while off road.
Last edited by dropzone; 12-10-2010 at 11:12 PM.
12-10-2010, 10:35 PM
#3
Registered User
Thread Starter
iTrader: (2)
Join Date: Oct 2009
Location: Centeral Willamette Valley Oregon
Posts: 1,044
Likes: 0
Received 5 Likes
on
5 Posts
After driving it about 2 months I decided it ran good and was time to replace the timing belt, drive belts, water pump, hoses, plugs, wires, cap, rotor. Every thing for a good tune up. I also changed the oil in the diffs, tranny, transfer case.
I decided to replace the drive flanges with some aisin hubs. Didn't want the front cv's constantly turning.
Sorry no pictures of the install process. The hubs I got were in need of some good cleaning. I tore them apart and cleaned all the componets and painted the face plate and dial. I then reassembled and greased.
I found out the the rear truss from Downey dosen't fit with the diff drop kit. I pulled the drop and have left the truss in. I plan on building my own cross member with a skid plate that will attach to the front hitch. This should allow me to protect the bottom side of the engine and run the diff drop all at the same time.
Pulled the Pinstripe off and used a nice turtle polish on the rig followed by a wax. Looks very nice.
I have been busy and have not had much time to get far on the skid plate and truss design. I have demo copy that I am playing with.
Last edited by dropzone; 12-10-2010 at 11:13 PM.
12-10-2010, 10:42 PM
#4
Registered User
Thread Starter
iTrader: (2)
Join Date: Oct 2009
Location: Centeral Willamette Valley Oregon
Posts: 1,044
Likes: 0
Received 5 Likes
on
5 Posts
I have been parting 4runners out on craigslist and here on yotatech for a while now and kept a set of 4:88's that came from an automatic unit.
I pulled the 4:88's out of the doner rig and installed them into my 4runner. I replaced 4:30 gears. Still running 31" tires. Need less to say the RPM's were high but she had some good get up and go now. I did this with the intention of lifting it and running 33" tires. But have to start in stages.
I pulled the 4:88's out of the doner rig and installed them into my 4runner. I replaced 4:30 gears. Still running 31" tires. Need less to say the RPM's were high but she had some good get up and go now. I did this with the intention of lifting it and running 33" tires. But have to start in stages.
12-10-2010, 11:02 PM
#5
Registered User
Thread Starter
iTrader: (2)
Join Date: Oct 2009
Location: Centeral Willamette Valley Oregon
Posts: 1,044
Likes: 0
Received 5 Likes
on
5 Posts
I put a set of used 31" tires I had laying around on the 4runner. I pulled the 31" BFG a/t's off and sold them on Craigslist. Waited about 2 weeks and picked up a set of 33x12.5x15 BFG M/T's with about 50% on them mounted on some nice alum wheels for less than half of what I sold the at's for, got to love CL. Center caps say centerline. Not exactly sure of Brand as caps are easy to replace. Still very nice wheels.
With the tires now here I decided to use the rest of the money I had from selling my other tires to start buying the IFS parts I needed.
I ordered my BJ spacers from 4Crawler along with a diff drop kit, sway bar drop kit, panhard drop bracket. I bought a set of Downey Torsion bars from another member here on Yotatech and I ordered the rest thru Jim Sickles of Downey Off road on Ebay. The items I got from him were the rear 2" HD rear springs, Mega Travel Ball Joints, IFS Cross Member. I used Skyjacker Nitro shocks on all 4 corners and installed a Skyjacker Steering stabilizer.
I built the brake extention bracket. I still need to buy an extended rear brake line before I do any serious wheeling.
Trending Topics
12-11-2010, 01:55 PM
#8
Registered User
Thread Starter
iTrader: (2)
Join Date: Oct 2009
Location: Centeral Willamette Valley Oregon
Posts: 1,044
Likes: 0
Received 5 Likes
on
5 Posts
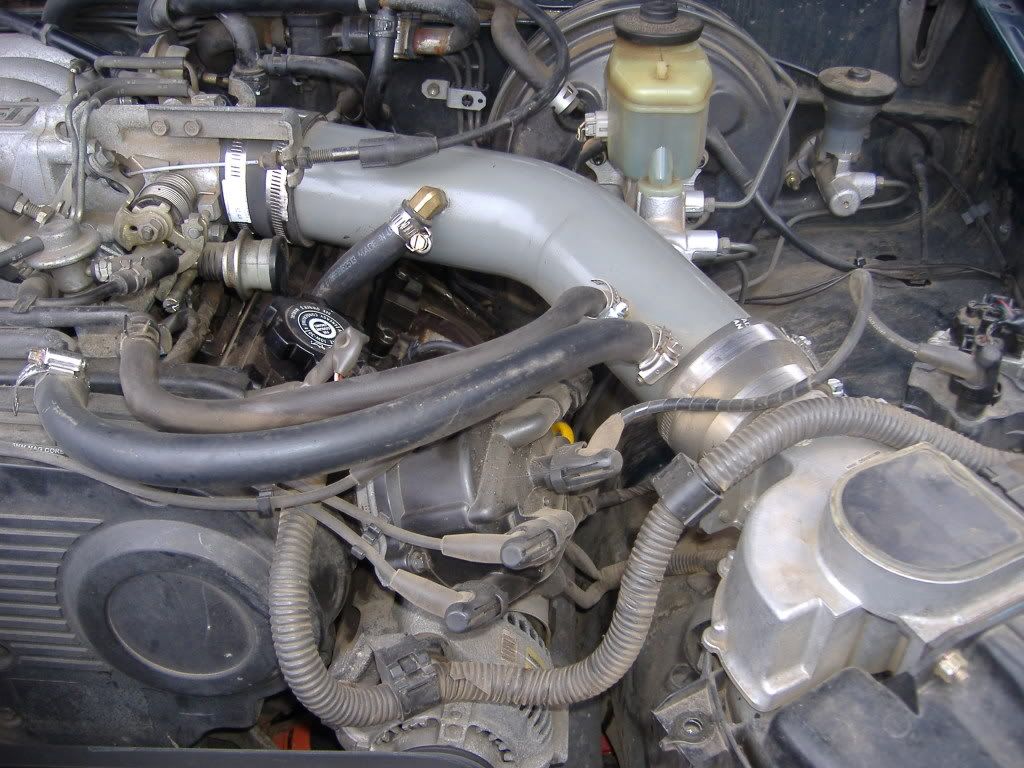
Ok, so I built an ISR tube and put a K & N filter in the OE air box. Sounds good, maybe a little improvement.
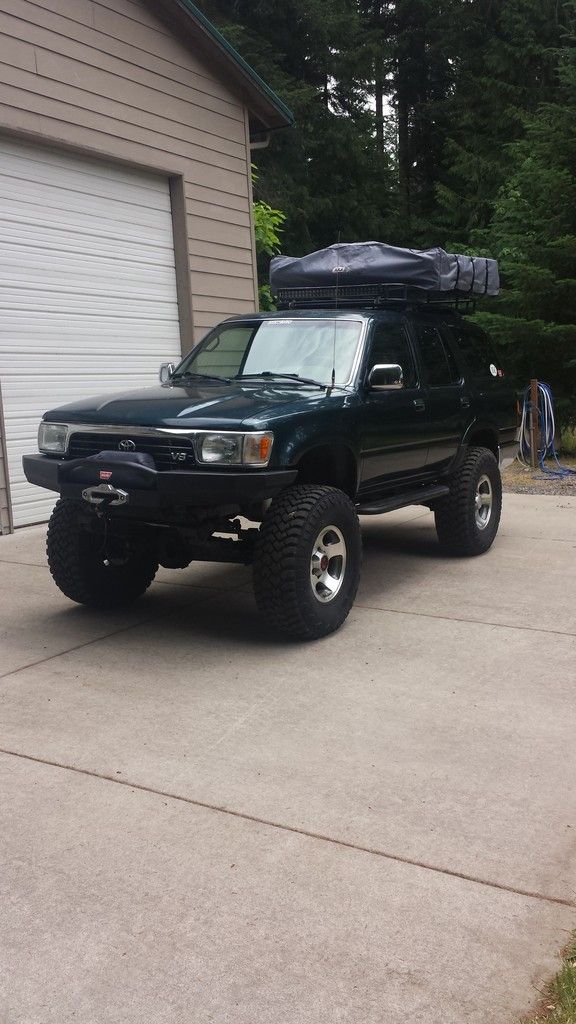
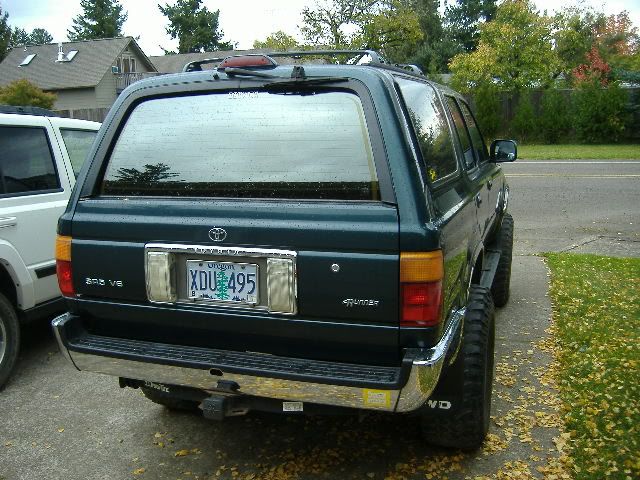
I also removed the pinstripe. I started with a blow dryer and peeled the driver side off. Still have the sticky left over, so I got the 3m wheel that attaches to a drill and removed the passanger side and the glue from the driver side.
I then used some turtle polish and polished the whole rig, this removed any small amounts of sticky I missed and blended the paint where the stipe used to be. Then a good turtle wax and wow she looks good.
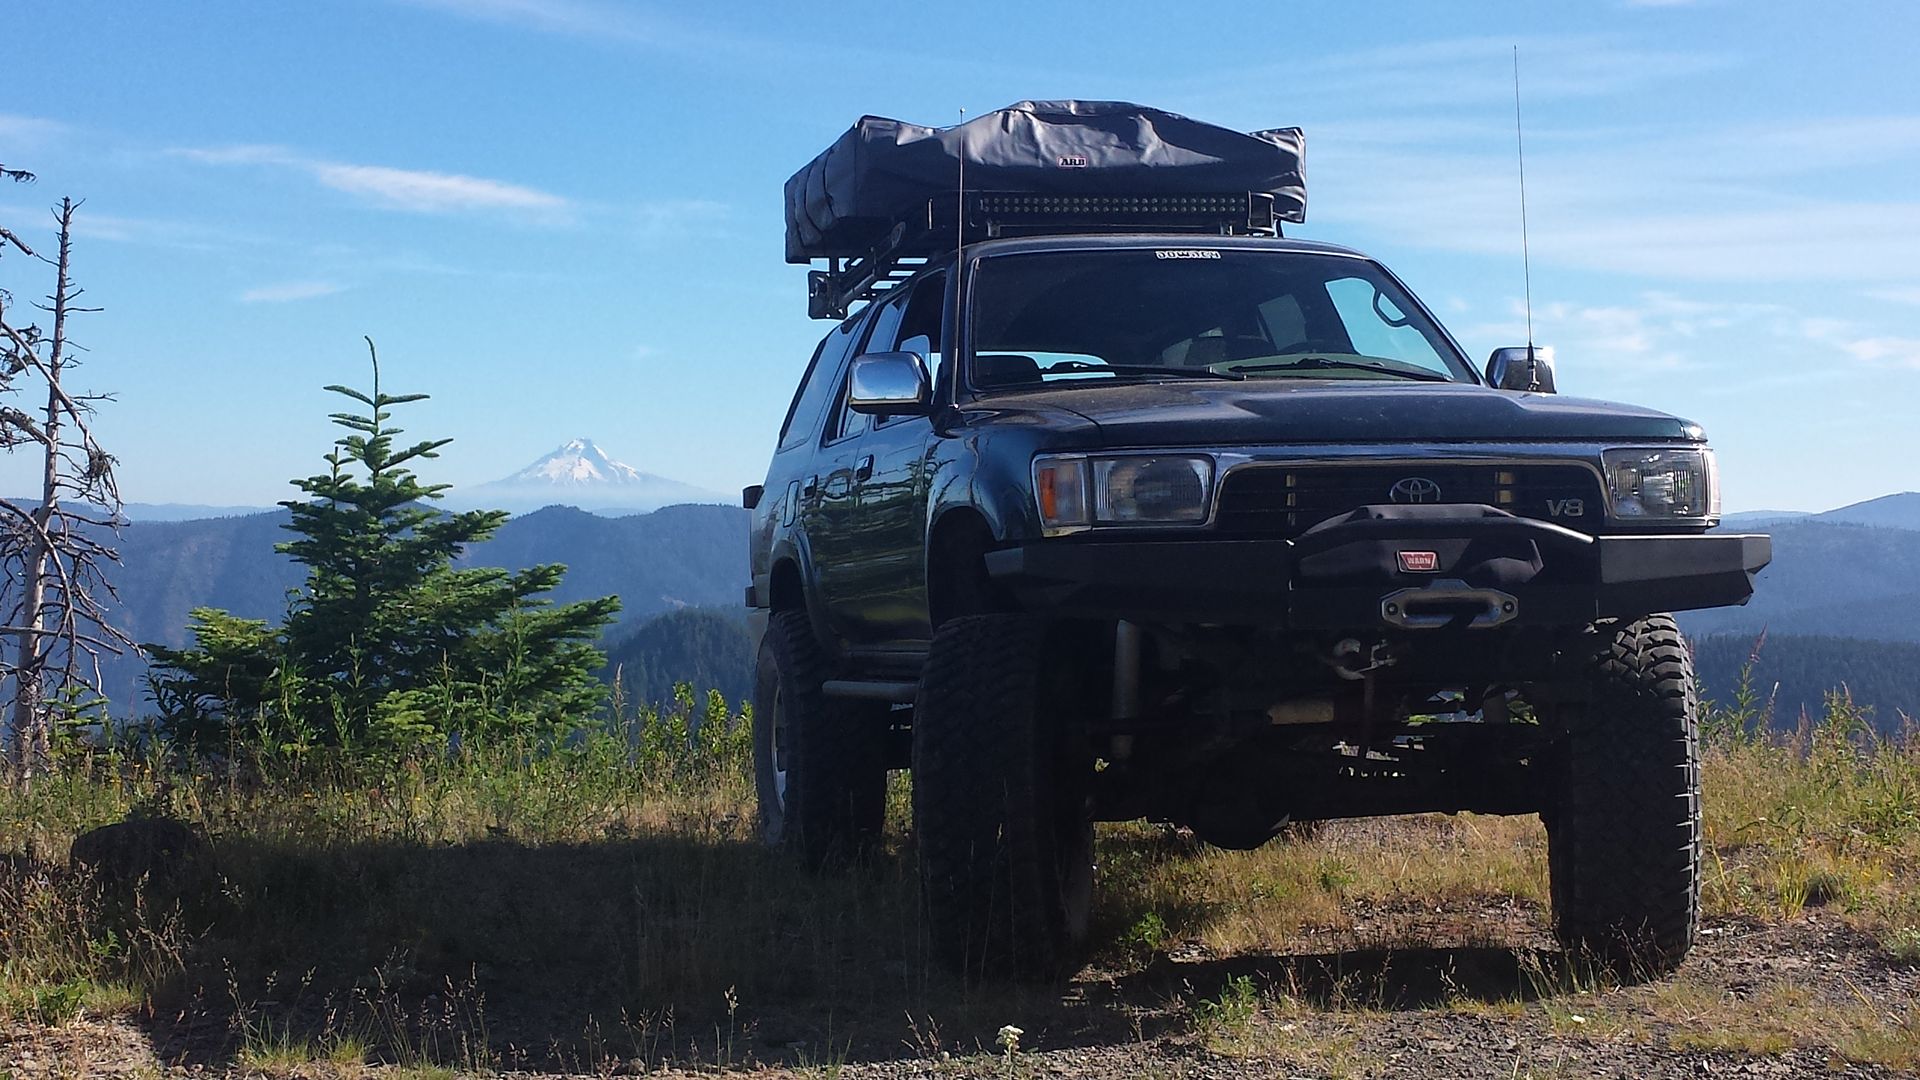
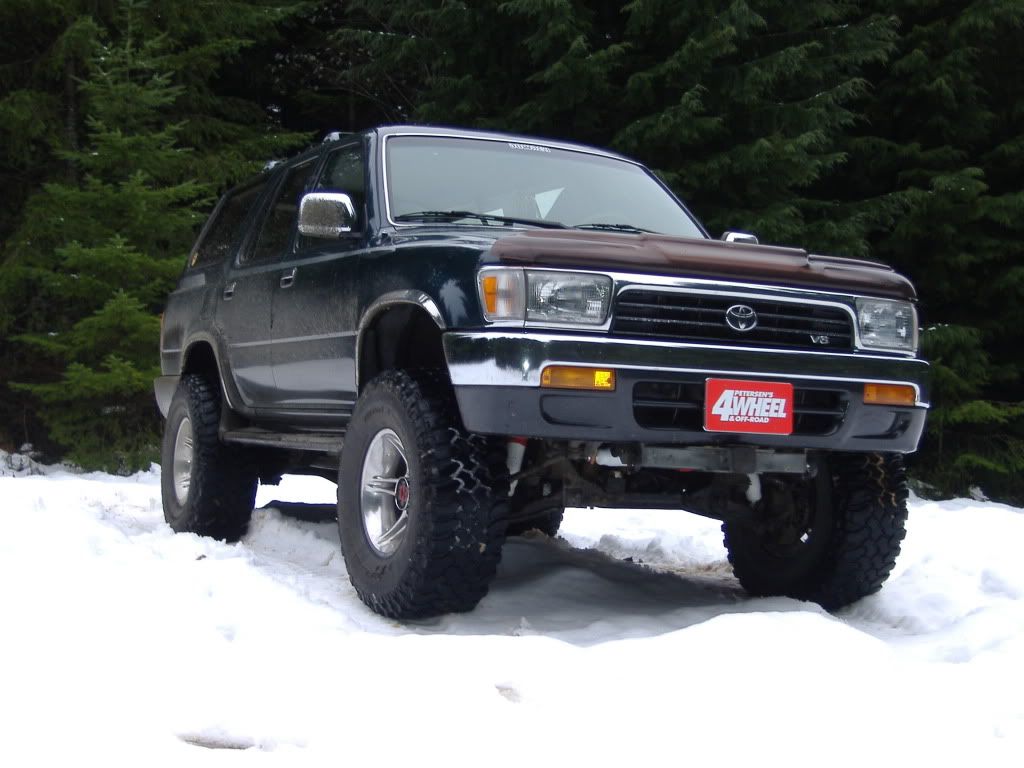
My Favorite Picture so far

ISR Mod
I also removed the pinstripe. I started with a blow dryer and peeled the driver side off. Still have the sticky left over, so I got the 3m wheel that attaches to a drill and removed the passanger side and the glue from the driver side.
I then used some turtle polish and polished the whole rig, this removed any small amounts of sticky I missed and blended the paint where the stipe used to be. Then a good turtle wax and wow she looks good.
My Favorite Picture so far
ISR Mod
Last edited by 85toyman; 12-11-2010 at 02:43 PM.
12-11-2010, 02:39 PM
#9
Registered User
Thread Starter
iTrader: (2)
Join Date: Oct 2009
Location: Centeral Willamette Valley Oregon
Posts: 1,044
Likes: 0
Received 5 Likes
on
5 Posts
Time to remove the steps and build some sliders
Just turned 195,000 miles. Don't get to drive as much as I would like. So 3,000 in 9 months.
Just turned 195,000 miles. Don't get to drive as much as I would like. So 3,000 in 9 months.
Last edited by 85toyman; 12-11-2010 at 02:45 PM.
12-29-2010, 10:51 PM
#10
Registered User
Thread Starter
iTrader: (2)
Join Date: Oct 2009
Location: Centeral Willamette Valley Oregon
Posts: 1,044
Likes: 0
Received 5 Likes
on
5 Posts
So, I ordered the rear braided stainless steel brake line. The stock one was a little on the short side, especially with the rear axle extended. The unit I bought was from SkyJacker. Looks pretty nice. Should hopefully have it on the weekend.
12-31-2010, 07:03 AM
#11
Registered User

Join Date: Nov 2010
Location: Trenton NS
Posts: 41
Likes: 0
Received 0 Likes
on
0 Posts
Nice clean looking runner to start build on.I like it.
How do you like the bj spacers,I am thinking of putting a set in my 89.could use the extra 2 inches.
I can't wait to see whats next.
How do you like the bj spacers,I am thinking of putting a set in my 89.could use the extra 2 inches.
I can't wait to see whats next.
12-31-2010, 08:48 AM
#12
Registered User
Thread Starter
iTrader: (2)
Join Date: Oct 2009
Location: Centeral Willamette Valley Oregon
Posts: 1,044
Likes: 0
Received 5 Likes
on
5 Posts
Thanks, I like the BJ spacers alot. I wanted to fit 33's but didn't like having to use a bracket lift and didn't want the excessive height from a 4" kit. I put downey T bars on and the mega travel BJ's when I did the spacers so I don't have just BJ spacers on a stock bars to compare it to, but with the new stuff on, the front is very smooth, even smoother then when the 4runner was in stock form. I highly recommend them for anybody wanting a little bit of lift and better ride.
I have the metal to start my new A arm rear cross bar. I had a downey bar on there, but with the 1" diff drop the bar won't fit. I am building a custom bar and skid plate that will be 3/16" from that bar all the way up to the front receiver.
Also saving for the 1UZFE engine.
I have the metal to start my new A arm rear cross bar. I had a downey bar on there, but with the 1" diff drop the bar won't fit. I am building a custom bar and skid plate that will be 3/16" from that bar all the way up to the front receiver.
Also saving for the 1UZFE engine.
02-10-2011, 10:56 AM
#13
Registered User
Thread Starter
iTrader: (2)
Join Date: Oct 2009
Location: Centeral Willamette Valley Oregon
Posts: 1,044
Likes: 0
Received 5 Likes
on
5 Posts
Ok, so I am getting ready to do exhaust. I have talked with the exhaust guy and he said we can do this a couple of ways.
1. New 2 1/2" cat and tube with muffler back.
2. Custom cross over that y's into the rest of the pipe and block off the port on the exhaust manifold driver side. The cross over then dumps in the regular flow.
3. Cross over elimintated and pipes brought down from the manifolds and tie back in behind the transfercase.
4. Buy headers and do exhaust. I would have to do this step in stages as I don't have enough for both.
I have done the #3 process before on other trucks and was very happy. Which way do you think I should go.
Last edited by 85toyman; 02-11-2011 at 11:57 AM.
02-11-2011, 11:56 AM
#14
Registered User
Thread Starter
iTrader: (2)
Join Date: Oct 2009
Location: Centeral Willamette Valley Oregon
Posts: 1,044
Likes: 0
Received 5 Likes
on
5 Posts
Was wondering why I didn't seem to have as much power as I remember from other 3.0's I had in the past. I know the 3.0's are high on gas consumption and low on Hp but this seems to really be dogging especially on hills.
I checked the timing and it was set at 7 degrees. I moved it upto about 10 degrees and whow what a difference. The power band is back and it has so much more get up and go.
I checked the timing and it was set at 7 degrees. I moved it upto about 10 degrees and whow what a difference. The power band is back and it has so much more get up and go.
02-15-2011, 07:20 PM
#15
Registered User
Thread Starter
iTrader: (2)
Join Date: Oct 2009
Location: Centeral Willamette Valley Oregon
Posts: 1,044
Likes: 0
Received 5 Likes
on
5 Posts
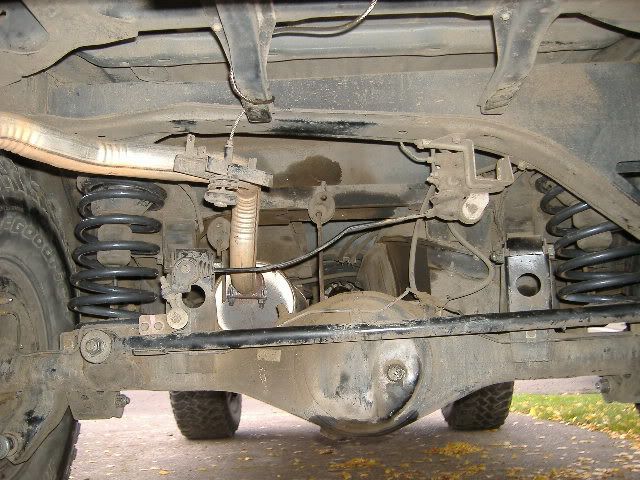
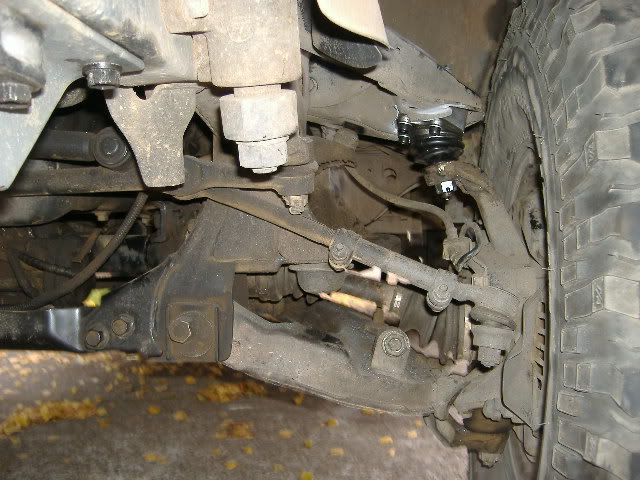
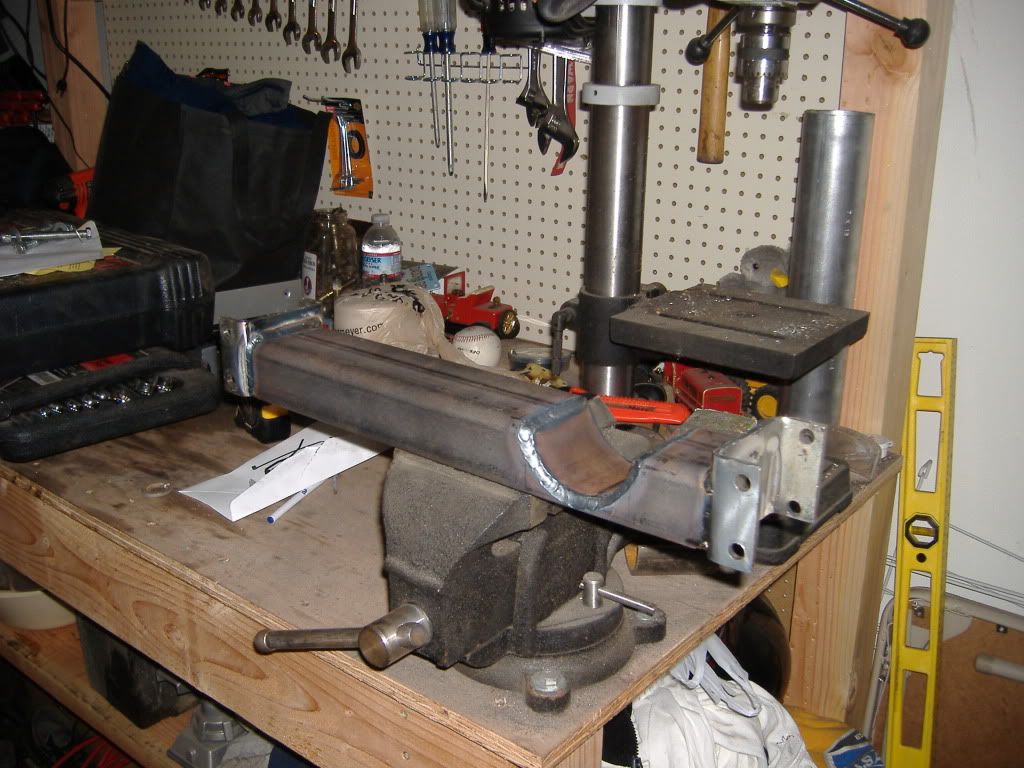
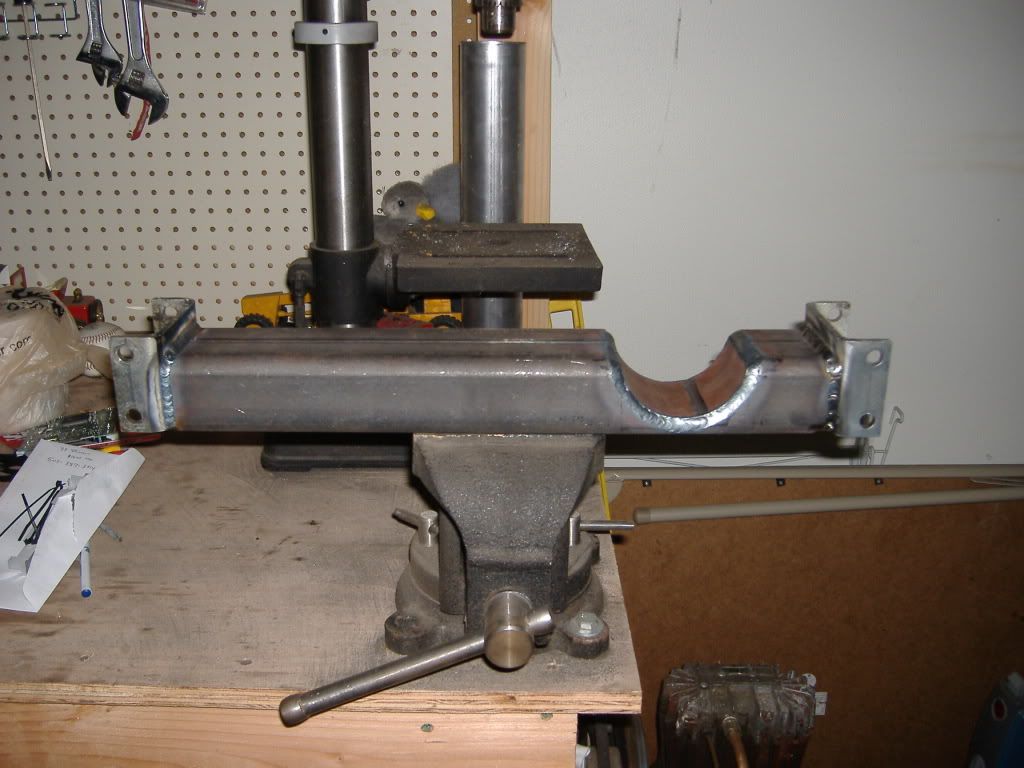
Finished my rear cross member. I just need to bolt it up and add the new skid plate yet. This is my answer to having the diff drop kit installed, having a rear truss and maintaining ground clearance. Next up is the front cross member. This should put the diff back to a stock setting on the cv angles. I still need to powder coat it/ paint it. I haven't decided which way to go.
Last edited by 85toyman; 02-15-2011 at 07:21 PM.
02-16-2011, 09:43 AM
#16
Registered User
Join Date: Jan 2011
Location: Denver,Co
Posts: 28
Likes: 0
Received 0 Likes
on
0 Posts
#3 sounds like a great idea for the exhaust. I like your idea for the diff drop. Great welding beads man! How is the gas after you moved it up to about 10 degrees? subscribed.
02-16-2011, 12:21 PM
#17
Registered User
Thread Starter
iTrader: (2)
Join Date: Oct 2009
Location: Centeral Willamette Valley Oregon
Posts: 1,044
Likes: 0
Received 5 Likes
on
5 Posts
Thanks, Got to love TIG
I am going to eventually go with #3 as well. I will start with a new cat and do 2 1/2" back for now and then have the cross over elimiated and run the pipes down and "Y" them in together. I just bought a 2 1/2" monolithic from Jim of Downey Off Road off of ebay. It should be here next week.
The gas mileage has improved about 1-2 mpg moving the timing back to 10 degrees and I have more power, it actually pulls strong upto 65 in 4th and then just sails in 5th. So much more power than before and better gas to boot. Couldn't be happier. With the exhaust work done I should have alot more torque as well. Hoping for that next week. Just need some time to drop it off.
Last edited by 85toyman; 02-16-2011 at 12:22 PM.
02-28-2011, 04:55 PM
#20
Registered User
Thread Starter
iTrader: (2)
Join Date: Oct 2009
Location: Centeral Willamette Valley Oregon
Posts: 1,044
Likes: 0
Received 5 Likes
on
5 Posts
First good wheeling trip mud and snow. Had a blast
Sorry no pics
I also installed poly bushings on the rear sway bar. Poly pan bar bushings are in the mail.
Sorry no pics
I also installed poly bushings on the rear sway bar. Poly pan bar bushings are in the mail.


