When you click on links to various merchants on this site and make a purchase, this can result in this site earning a commission. Affiliate programs and affiliations include, but are not limited to, the eBay Partner Network.
I've threatened, nay promised a thread for this so here goes.
Having saved up what I thought was a reasonable budget I was watching first gen 4-runners in the local CL. There were two stunning examples of unmolested first generation 4 runners. I just could not (at the time) bring myself to rob them of their garages. Having no indoor storage on the high plains means you expect your vehicle to take on the appearance of a golf ball at some point. So down the price range we go, lots of questionable rides to choose from. Well at least a good half dozen, but nothing stood out and said ME BUY ME. Rough to moderate in and out, the usual "We're not sure what is wrong with it" and "it just blew up". The one that spoke to me finally was a 1986 22rte 4-runner. I might have a screen shot of the advert but not sure yet.
.. 1st pic .. 06-26-2016
I payed less than the ad but still more than I probably could have. The "rod knock", loose nuts and not much left of the gasket between the exhaust manifold to turbocharger turbine inlet, loud but not a gnome with a hammer in the oil pan. There is some obvious engine noise saying something is wrong internally but with the exhaust leak and straight piping the screw driver I had for a stethoscope only gave up a little information over the back ground noise. I bought it sans test drive (shh don't tell nobody), so it didn't get abused any more with all the loose bits falling off. And arranged to come back for it ASAP on the next day off work.
So I show up tools, fresh plates and fluids in hand. A round of inspecting and tightening, re inspect and top off the fluids. Warm the engine, another check for leaks and time for a road test it needs fuel and a clean windshield. Oh did I mention it's covered in lovely beige Colorado clay and sand? Well it is head to toe inside and out a lovely mist pattern of beige clay and sand. Off we go!
It's got a loud exhaust note, my eye level is at least 3-4 inches above my standing height, it's steering like you expect a 4x4 might with fat tires (265/75 = 31.6x10.4") and the pump is screaming its fool head off, rolling down hill around an S curve the stop sign is rapidly approaching and the brakes well they they're there somewhere keep pumping praying and looking for something cheap to run over, surprised it stopped before it crossed into the crosswalk I smile and start to think "I can do this" when the cloud of smoke behind me catches up and the retired soccer mom rolls thru it blaming me for the rainforest or something. I squeal, bounce, smoke and the fun stuff but make it to the main road. Making the left turn up the hill I realize it's quite a bit less powerful than expected and the smoke just billows if I give more throttle, I back off let people give me the evil eye and get thru the traffic light to the fuel station. Bought some fuel, tea and a candy bar, gathered my wits to cross the bloody highway again the other direction and off we go back through the traffic lights to where we started. Arranged to pick it up again at a later date, parked in a new spot with the new plates..
So weighting auto transport fees,Tow company, auto transporter or DIY. Sticker shock! DIY w/ a U-haul is 1/2 the cost of the cheaper but the price per mile still adds up fast even with a multi day discount. I consider tow straping it 60(?) miles a little bit. Finally the decision is made, Drive it with a chase car, not a chase car full of tools mind you but a Caddy with AC and nice seats cause if it breaks you want to be comfy while the tow company gets around to you.. I accept the redneck monster truck persona and just let it smoke with in reason and keep it up to speed with out dusting every one behind us. Every time someone pulled between the 4 runner and Caddy I just knew they were going to be covered in mist. We reached the half way point, where I had planed to stop get refreshments give it a quick inspection (*cough* add fluids) and finish the trip, it is running well and I wave us on. To be regreted later of course.
We roll across the tracks and past the little town, up a decent sized hill. Stopped at the sign after the hill I am feeling confident in the choice to roll on. I pull out making my left turn and creeping up to my travel speed. I was holding 45-50 I think outside the construction zones, slower than the limit but nothing surprising in farm land. Over the hill behind me comes a full size Ford going at least the speed limit compared to my maybe 20-35, so I'm puckering and wondering if this guy is going to kill me or buy me a new ride when this is settled. I let go of the seat fabric as it swerves back into the correct lane, proceeds to slam on the brakes and blinker to make the next turn a couple hundred feet down the road. Thinking "That fool is going to kill someone at that intersection some day", I roll on glad it wasn't me or my family watching from the stop sign in the chase car.
Coming up is "the big hill". 11% for a half mile then 4% for another mile. There is a little bit of straight down hill leading up to it so I let it pick up speed and throw a little extra smoke. By the time I reach the crest there is a legit traffic jam behind me and there might be a legit tractor back there mad we're going so slow, so i pull off and let every one around. I restart the motor, *clue number 2*, and claiming success since we're close enough the local tow guys wouldn't over charge me I roll on. Heats starting to creep up on the gauge a few miles down the road at the next turn, I am puckering again as someone swerves around me, I guess I should have waited the 30-45 seconds more for them to go past but i figured with a half mile or more lead I'd be going faster and maybe I'd get more clearance but NO," Pucker up I am going around!" seems to be the norm now a days. I've got the pedal mashed and the emergency blinkers going as he screams around me way to close.
Now we're boiling hot me and the engine creeping along at the lower speed. I flip the heater on and reach around to get the rear heater going also glancing around I notice the chase car is a lot closer where has my defensive Spy vs Spy smoke screen gone! Into the nearest pull off and it stalls, I crank it and it spins(yay), I (cringe*) dump in several quarts of oil and get it cranked again before anything can get heat soaked and decide it wasn't going to move any more. Travel speed and power are falling rapidly, the smoke is petering out but we're just 5 minutes from home, well 5 if we were not going so slow.
Thirty minutes later It is parked and the days adventure is at an end. A quick once around while it idles, it isn't puking coolant, the internal noise hasn't changed to much still no hammering out of the bottom end. We shut it off and call it a day. The engine is a little loose, a little noisy, but no where near as bad as the one I drove for the last 5 years before it quit, I explain to the loved one giving me scowls and asking if I needed my glasses need checked.
At this point I expect I am likely only replacing the badly leaking turbo, which I've already ordered and recieved a replacement for.
07-26-2016
The next morning I found the sludge while I checked the fluids before moving it into the work space. I had intented that day to swap out the turbos and see how it ran, I changed my mind.
08-02-2016
After considering the options available, time space money and lack of any solid local machine shop contacts, a choice was made and a long block was ordered.
08-06-2016
Hub clean out.
I got a call early from the office with the "your engine is ready", great however I haven't choosen a shop for the install. No problem for the builder just let her know where and when to ship it. So into town I go to talk with the shops in person instead of over the phone to make a final decision. Sticker Shock x 2! One of the shops price went up over 50% between the phone quote and the face to face.
08-10-2016.. Exhaust, turbo and Radiator. removed.
Cylinder #1(left most) & #2, #3 , #4
Turbocharger
-- Overview
-- Note the gap at top left corner
-- and now.. This is radial play, it should be measured at the center of the shaft to less than 0.18mm
-- Turbine contact and scoring the carbon visible in the bottom left.
08-12-2016 Intake removed. Lower intake has oil puddles.
-- Front bank
-- Rear bank
-- Fuel rail not factory, might corrolate with some of the other things found loose so far and the luster on the parts?
This engine has been replaced atleast once, and done sloppy. The stiffener brackets that connect the lower bell to the sides of the block are missing, I noticed early on.
08-16-2016.. Shed build from kit.
-- Many hours later, quiting time
-- Ready for a roof.
10-02-2016.. engine pulled, (Block# 2095610)
10-03-2016.. Long block from Mike @ Sunwest received
-- Minor damage to the gasket kit box. RV 260 cam?
-- 22re not 22rte Gasket set
10-05-2016.. Engine disrobed(#5610), and inspected. What else do you want me to call it, it's called dressing when you put the accessories on!
CAM Pic 1 Piston set #1, still has off the shelf patina
CAM Pic2 Piston set #2, Galled badly. The bearing we heard at purchase perhaps?
-- Two boxes of what-cha-ma-call-its, do-hickies, and thing-a-ma-bobs
-- New long block on the stand. Double bagged to keep the assembly lube from dripping every where.
10-13-2016.. Metal shavings in new long block.
--
-- Drilled not deburred
-- Piston gouged on under side
-- Oil feed non stock tap
-- Threads from said non STD tapping.
10-16-2016.. Soldier on! Mock up continues, oil feed plugged
10-18-2016.. The great bolt clean up, scrub soak scrub soak scrub, taps and die ya get what you pay for napa singles vs china set. The time consuming process of preparing bolts for reinstallation.
-- Start with this.
-- Wipe the major gunk off, spray with brake cleaner, brush the left overs, wipe clean and dry.
-- Soak in cleaner, Scrub with nylon brush, spray with brake cleaner, wipe dry. Run die end to end, spray with cleaner, wipe dry.
-- Left is before soaking in cleaner, Right is heading for the oil bath.
-- Soak in PB blaster, while the next set is done, then rebag with paper towels.
-- The tools!
Obviously you will need to "brake cleaner" anything you decide needs a thread locker or a different coating on. I used copper anti seize pretty liberally for instance. I used several old bulk food jars, 2 gallon maybe, with wide mouths to contain my spray both brake cleaner and penetrating oil. After the first set or so you wind up with a big enough puddle you will only need to respray some stuborn things , and not even those if you have compressed air.
-- I had to buy a tap and die set from "franchise O" it's out of the box condition resulted in.. Galling on the first few sets of threads, due to un finished aka cheap chinese tap&die set. They basicly didn't do any deburing, if you use these out of the box with out cleaning them up, at best you will have un even threads worse case you need a new bolt.
My short review, I payed something like 20-30$ for a 20-30 peice set
Durability remains to be seen,
Finish - I payed 1$ per peice, and it came with a case.
Quality - After putting time into re-finishing(Deburing) it leaves a thread you can use.
During my adventures I also needed a 1/4 inch NPT tap. I bought this as a single from "franchise N" for about 8$. I did NOT need to refinish debur or anything other than lube it to use it. Go figure
10-19-2016.. The great bolt revolt, spares?, Mock up continues
-- dispite my best efforts, SPARES!
sort of..? right to left is
AC Pully tensioner (bent trying to break crank bolt loose)
2 x Engine to bell housing, (not long enough to us on engine stand)
Stock 22R-E(not R-TE) Oil filter lug.
Above those are the Block water drain valve (left side under exhaust near turbo oil feed)
2 x Oil galley plugs.
The others *shrug* they are not the flexplate to torque converter bolts I was missing at this point, I think a few of those found the way into the oil pan instead (the pan bolts are not graded, the flexplate ones are)
-- misc 1
Turbocharger lines. Feed/Drain - oil, 2x Water hardline, by-pass hoses 1,2,3(?) #1 goes under the intake, 2 and 3 feed and drain the turbo
-- misc 2
Transmission oil line brackets, the seperated on goes right side next to starter, the ganged one (upper) mounts under the bracket at the front right side (the AC or the engine mount bracket?)
-- Assembly, Right side
-- Assembly, Left side
-- Lower intake alignment
The bright crescent on the right shows the mis match between the lower intake and the head. All four show a mismatch, how much it differs from an OEM head *shrug* but it is there.
10-24-2016.. "The older I get the more brittle I become", Plastic pintle cap 2016.
-- Pintle cap broken, droped injector,
These need to be ordered online, parts store hase plenty of seals ect but NO pentle caps.
-- Stock turbo oil drain flange not fitting, wrong bolt pattern in the Specimen Sunwest accquired to use as a 22R-TE template.
Really couldn't get a decent picture of this, in the upper left of the bolt hole you can maybe juts make out 2-3mm of the hole in the block.
-- Geese!! No really they are there in the sky! , Spent the morning and a huge chunk of cash getting shafts, an alignment, and tires mounted.
*sad pandas*,On the daily driver, cash budgeted for the 4runner of course.
-- Kinda mostly painted the shed.
At some point I might put the door trim across that makes it look like a split door and fix the trim I painted what ever color that is that isn't white.
10-30-2016.. ECU engine Harness pulled for mockup, Supervisors.
-- I had a little supervision, why the boss gotta watch me work it makes me nervous!
We came to an understanding, You don't move and I don't get the wasp spray and lay waste to all your family.
Pulled the engine harness out of the truck to put it on the engine to continue with the upper intake.
-- Mystery wire identification(O2 sensor)
Between the fore and aft intake runners there is bundled with the A/C vacuum actuator is this wire with a generic spade connector. What is it, why do I not remember where this goes or pulling it off of anything?
--Meter ground in the unknown plug. Ready to probe the plugs.
Oh. that is the oxygen sensor. There was a clue before, did you catch it. It is a shielded wire, only the O2 and KNK are ground plane shielded.
11-08-2016.. Fly/Flex plate bolts
Left - 90119-08498 x 5
Right - 90109-08113 x 1
Index bolt on the right, so you don't get lost while going around in circles slowly increasing the torque on the flexplate. These bolts come in various colors/finishes depending on when you rolled off the assembly line, ie unless you are doing a proper restoration the color doesn't matter get the ones they have the most of they're cheaper and you can always paint one for an Index bolt.
11-09-2016.. Downpipe angle, Oil plumbing, remote filter plate, loose ends, vacuum leaks, Praying Mantis helper, Exhaust pipes.
-- Down tube pointing out the wheel well
-- Should go into the hole straight down behind it in this picture.
It can not be rotated. At this point I am certain the casting of this turbine housing isn't right to say the least. Will need a new down pipe and flange.
-- Oil filter relocated, turbo oil feed plumbed along side the transmission lines to the front.
I need to finish the perm mounting of the oil filter, it's currently held with the self tapping screws from the kit. The inner fender needs reinforced, fender washers tacked into place to spread the load. Then studs and nuts.
Now that we are mostly up to date here(Only three weeks behind, *grin*)... That was way more time consuming than you might expect,
I have very little back story for this one, although it has obviously had a long and rich storied thirty year life. I purchased it from a kid/guy who received it as part of a debt from another young guy, and didn't inquire any further. Twice thru the hands of teens is going to override it being garaged until that point if it was. I suspect it had a tube bumper on it just before sale, my bumper bolts are freshly removed and kid had a shining bumper on his other dirty truck. It has 2 inch(?) lift blocks on the rear, ball joint and differential spaces up front. Rusty rear quarters, replacements up front, no really rusty rear quarters might need some floor too. The front fender pinch joints have been hammered flat. A hole in the left front corner of the cab, could be trail damage or to much flattening of the seam. Mismatched tail gate and fuel door.
He told me he had lots of toyota parts, "extra". In hind sight I should have asked to rummage thru them on the spot, I am missing..
Tail gate trim panel(covers mech' bits),
Shell trim(mount cover/trim),
Left and Right Stiffener brackets (Engine to Bell housing),
Lower engine cover("skid plate"),
Starter access cover,
Rubber plugs for bell-housing (Flexplate bolt access),
Bumper and valance,
Power antenna(maybe),
Sun visor L R,
Dome light cover.
The idle adjustment screw was missing, no 22re on the u-pull lot that day. , Picked up two at the u-pull, one that worked
The forward crankcase vent was sealed off with electrical tape, replumbed this. OEM the front port is ~12-15mm to the 3/8 hard line across the charge pipe and then plumbed into the rubber intake pipe between the AFM and Turbo. My rubber tube is old and butchered, I replaced it with flex line from the AFM to the 90 degree elbow before the turbo. Then drilled and tapped the flat spot on the output side AFM, inserted a 1/4" pipe thread to hose barb and connected to the cross over hardline.
Perch that holds the tailgate spring guide is missing. Realizing the guide ramp the spring rides on was missing the first time I opened it. I grabed one of the plastic guides from u-pull. I didn't notice there wasn't anything to attach it to or I'd of maybe got the U shaped bracket that holds the rear end up.
Damage to the left hand door trim at the rear. *sad pandas* It is kind of all about the interior being rare and in good shape. Too much stitch work todo by hand and sourcing OEM look alike materials sounds like so much fun. Not looking forward to this one.
Trim missing from sun roof cover. At least I have the cover the rest is easy right?
The "Direct fit" radiator I ordered. did not have the turbo feed on the left side. I reluctantly drilled and taped the plastic top tank for a 1/4" to 3/8 barb.
I ordered a turbo oil feed and drain kit for a CT-20 off ebay. I didn't want to butcher the OEM stuff to get it to fit on the non OEM block conversion. Since the oil drain flange attachment point had different bolt/stud spacing, I cut slots in to the kits flanges where needed.
I ordered a CT-20 from speedyrace/emusa. It arrived with what I now know is pretty extreme radial shaft play. The supra fsm lists radial play on a CT-26 as 0.18mm, I had way more than that on a smaller shaft before I installed it. Currently I'm experiencing some internal noises, it's either clearing it's self room (very bad) or the dog-dish/heat-shield/oil-can is somehow loose (dunno how bad that would be, not great at least). Since purchasing the turbo I've had plenty of time to read and research, along my travels I realized there are various versions of the "CT20" and the one I have is intended for the 1LT(?) Diesel. The proper turbo part number 17201-35010 can be ordered from Invasion auto (890$ - 150 CORE). For that price I think I'd rather spend a little more and get a GT25 and adapter flange from LCE. I need to dig out my order# so I can start the claim process for the 30 days or less in service warranty, then call up tech/install support at EMUSA/Speedyracer and see what he wants me to do. I'm not sure whats wrong it could be a simple boost leak, maybe the turbine and compressor combination just don't work for Gas vs Diesel, or just maybe that turbo showed up out of spec and I'm glad and lucky it didn't barf into my new engine. I get no boost, it came with a gauge plumbed to the gas filter, the gauge shows vacuum drop to 0 but doesn't go positive. I recall seeing the OEM gauge give a bar or two once or twice but I've also been having some digital dash glitches (due to low voltage) so can't say for sure there was or wasn't a positive reading on the manual gauge. Curious what the wastegate was seeing I added a T to it's line and a second vacuum/boost gauge, It stays pretty much on zero but there is a slight vacuum at idle if disconnect the gauge and do a smoke test. At this point I can hear the veterans and old folks saying "you could have had a V8".
I just realized it is not going to be above 50 here for a whole week if the forecast is correct, so don't know how much I will get done short term.
TODO:
Route gauge lines into the cabin for oil pressure and waste-gate.
See if I can squeeze 2" gauges into the 1 DIN slot below my after market radio w/o cutting anything 1DIN ~= 7x2". I'd rather fab a face plate than a stand off bracket to something under the dash. (I'm not cutting interior bits!)
Leaking spring clamp on flush tee to rear heater.
OEM fan shroud larger than "direct fit" after market radiator, the after market is maybe three inches shorter at the bottom approximately the height of the OEM end cap so the outlets along the bottom need holes added (Tranny cooler in/out, and Water to block) I will hold off on this as long as I can, maybe I'll get the good radiator into a shop to get cleaned and sealed "soon".
Plus maybe some of those other things like brakes, shocks and the mismatched upper ball joints! No really two totally different ball joints.
That is all for now folks thanks for stopping by.
PS. If your still reading here is your cookie. The digital dash in these 80's era vehicles like the 4runner or Celica, they look like LED's don't they? Look again, when did that color LED be come affordable and efficient enough to mass produce... Yep the old geeks just realized those are VFD/Nixie. And that is FREAKING COOOL, it's also why the brownouts make them unhappy, they are trying to make high voltage off that tiny little 12v.
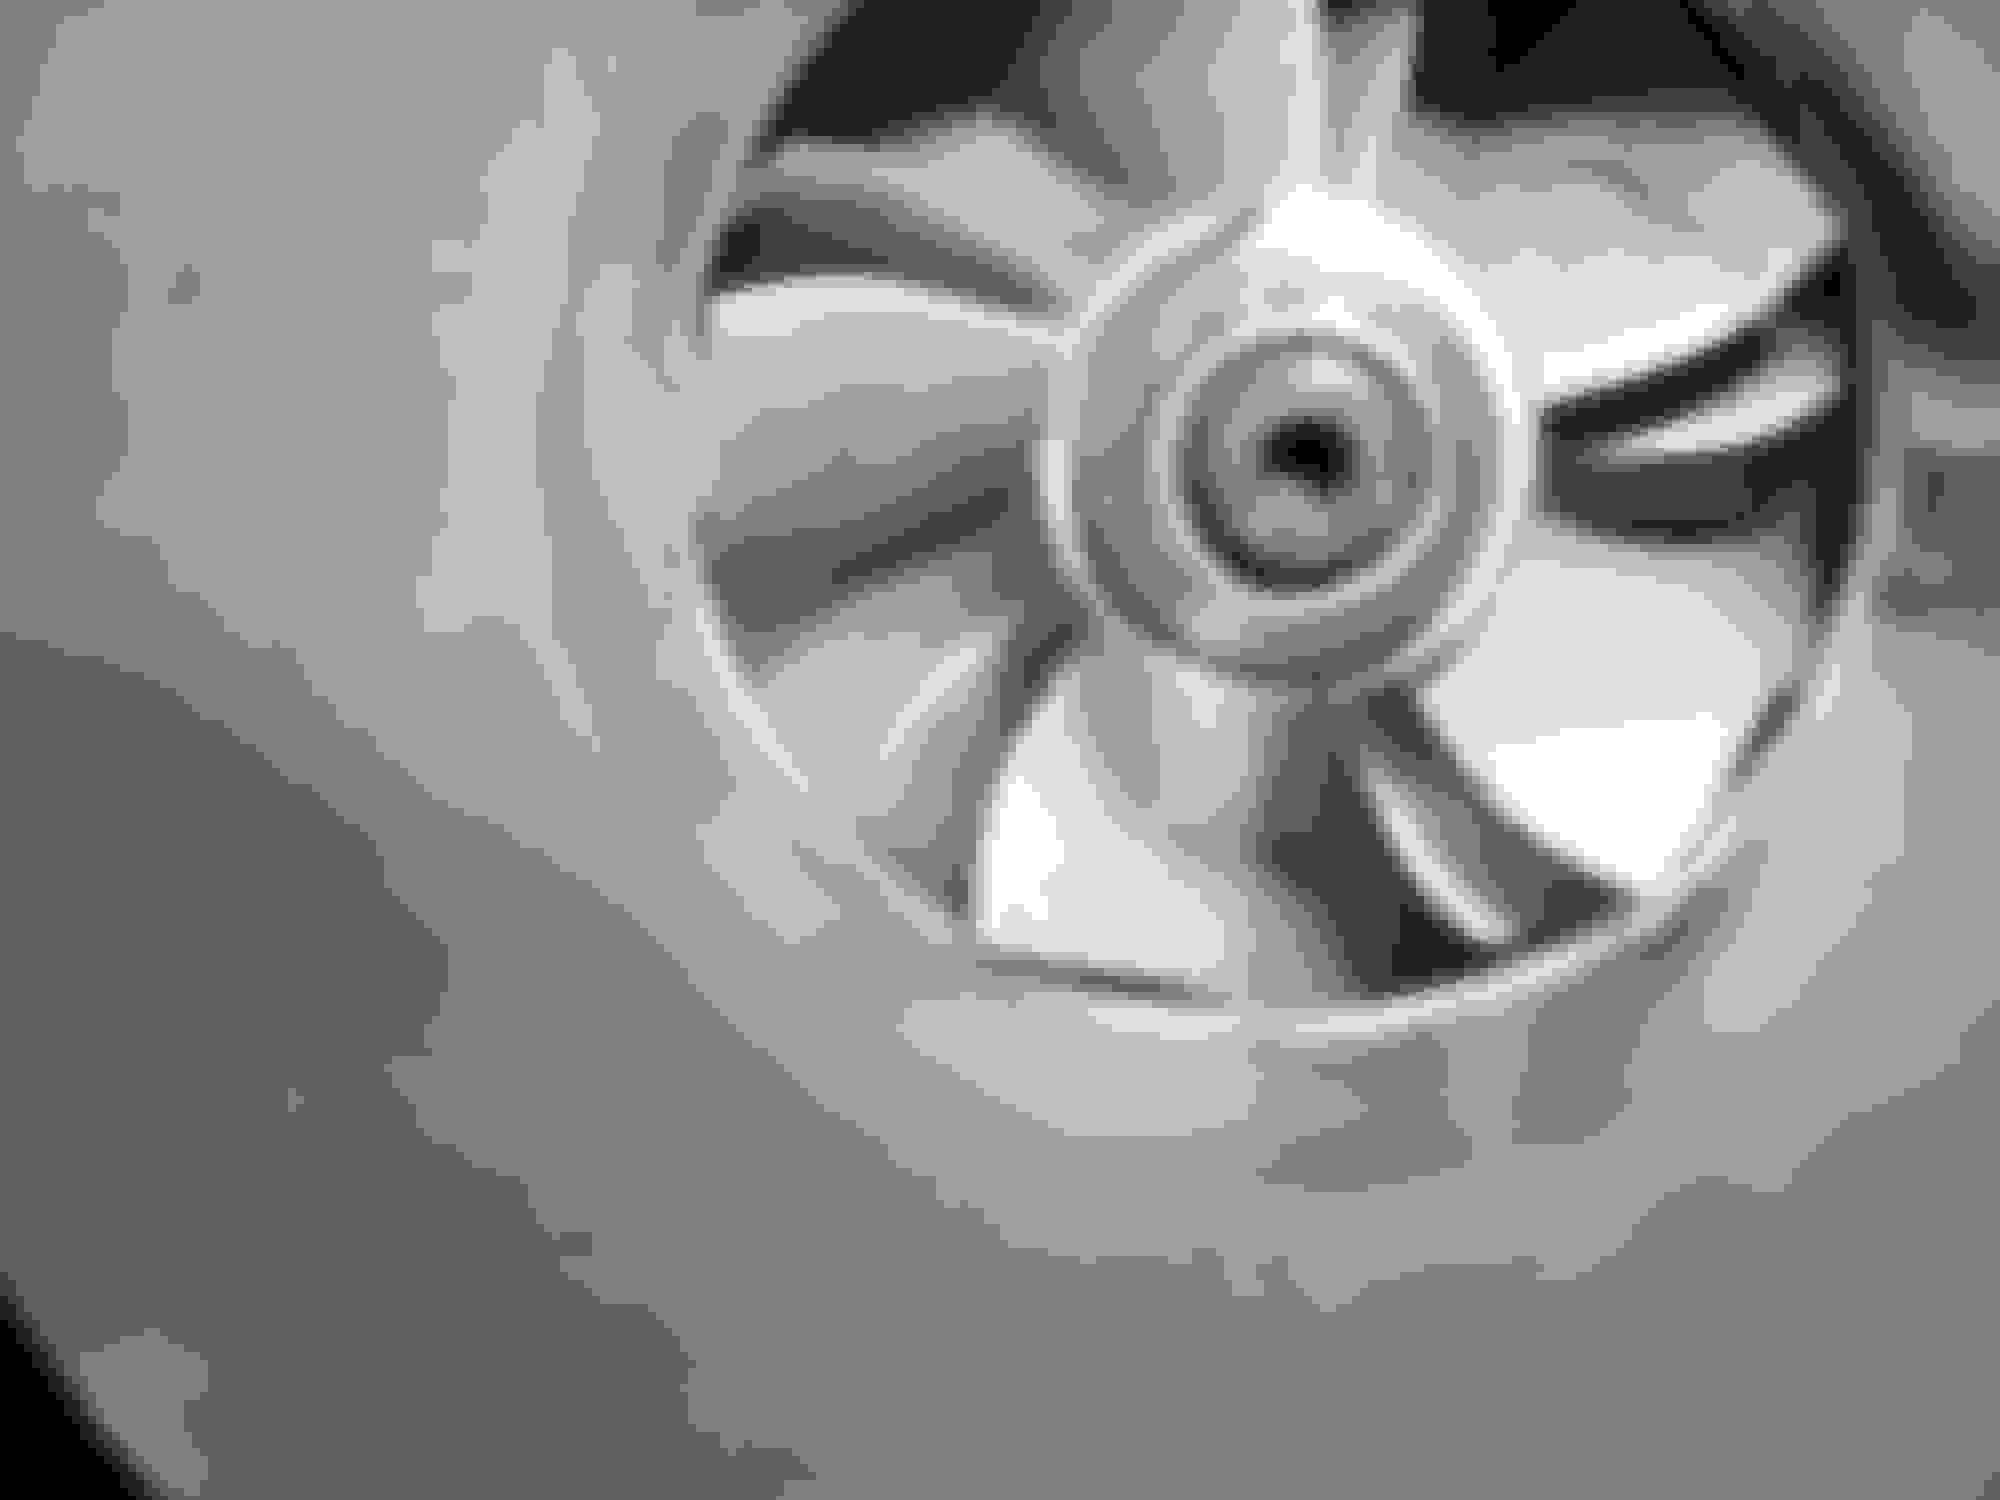
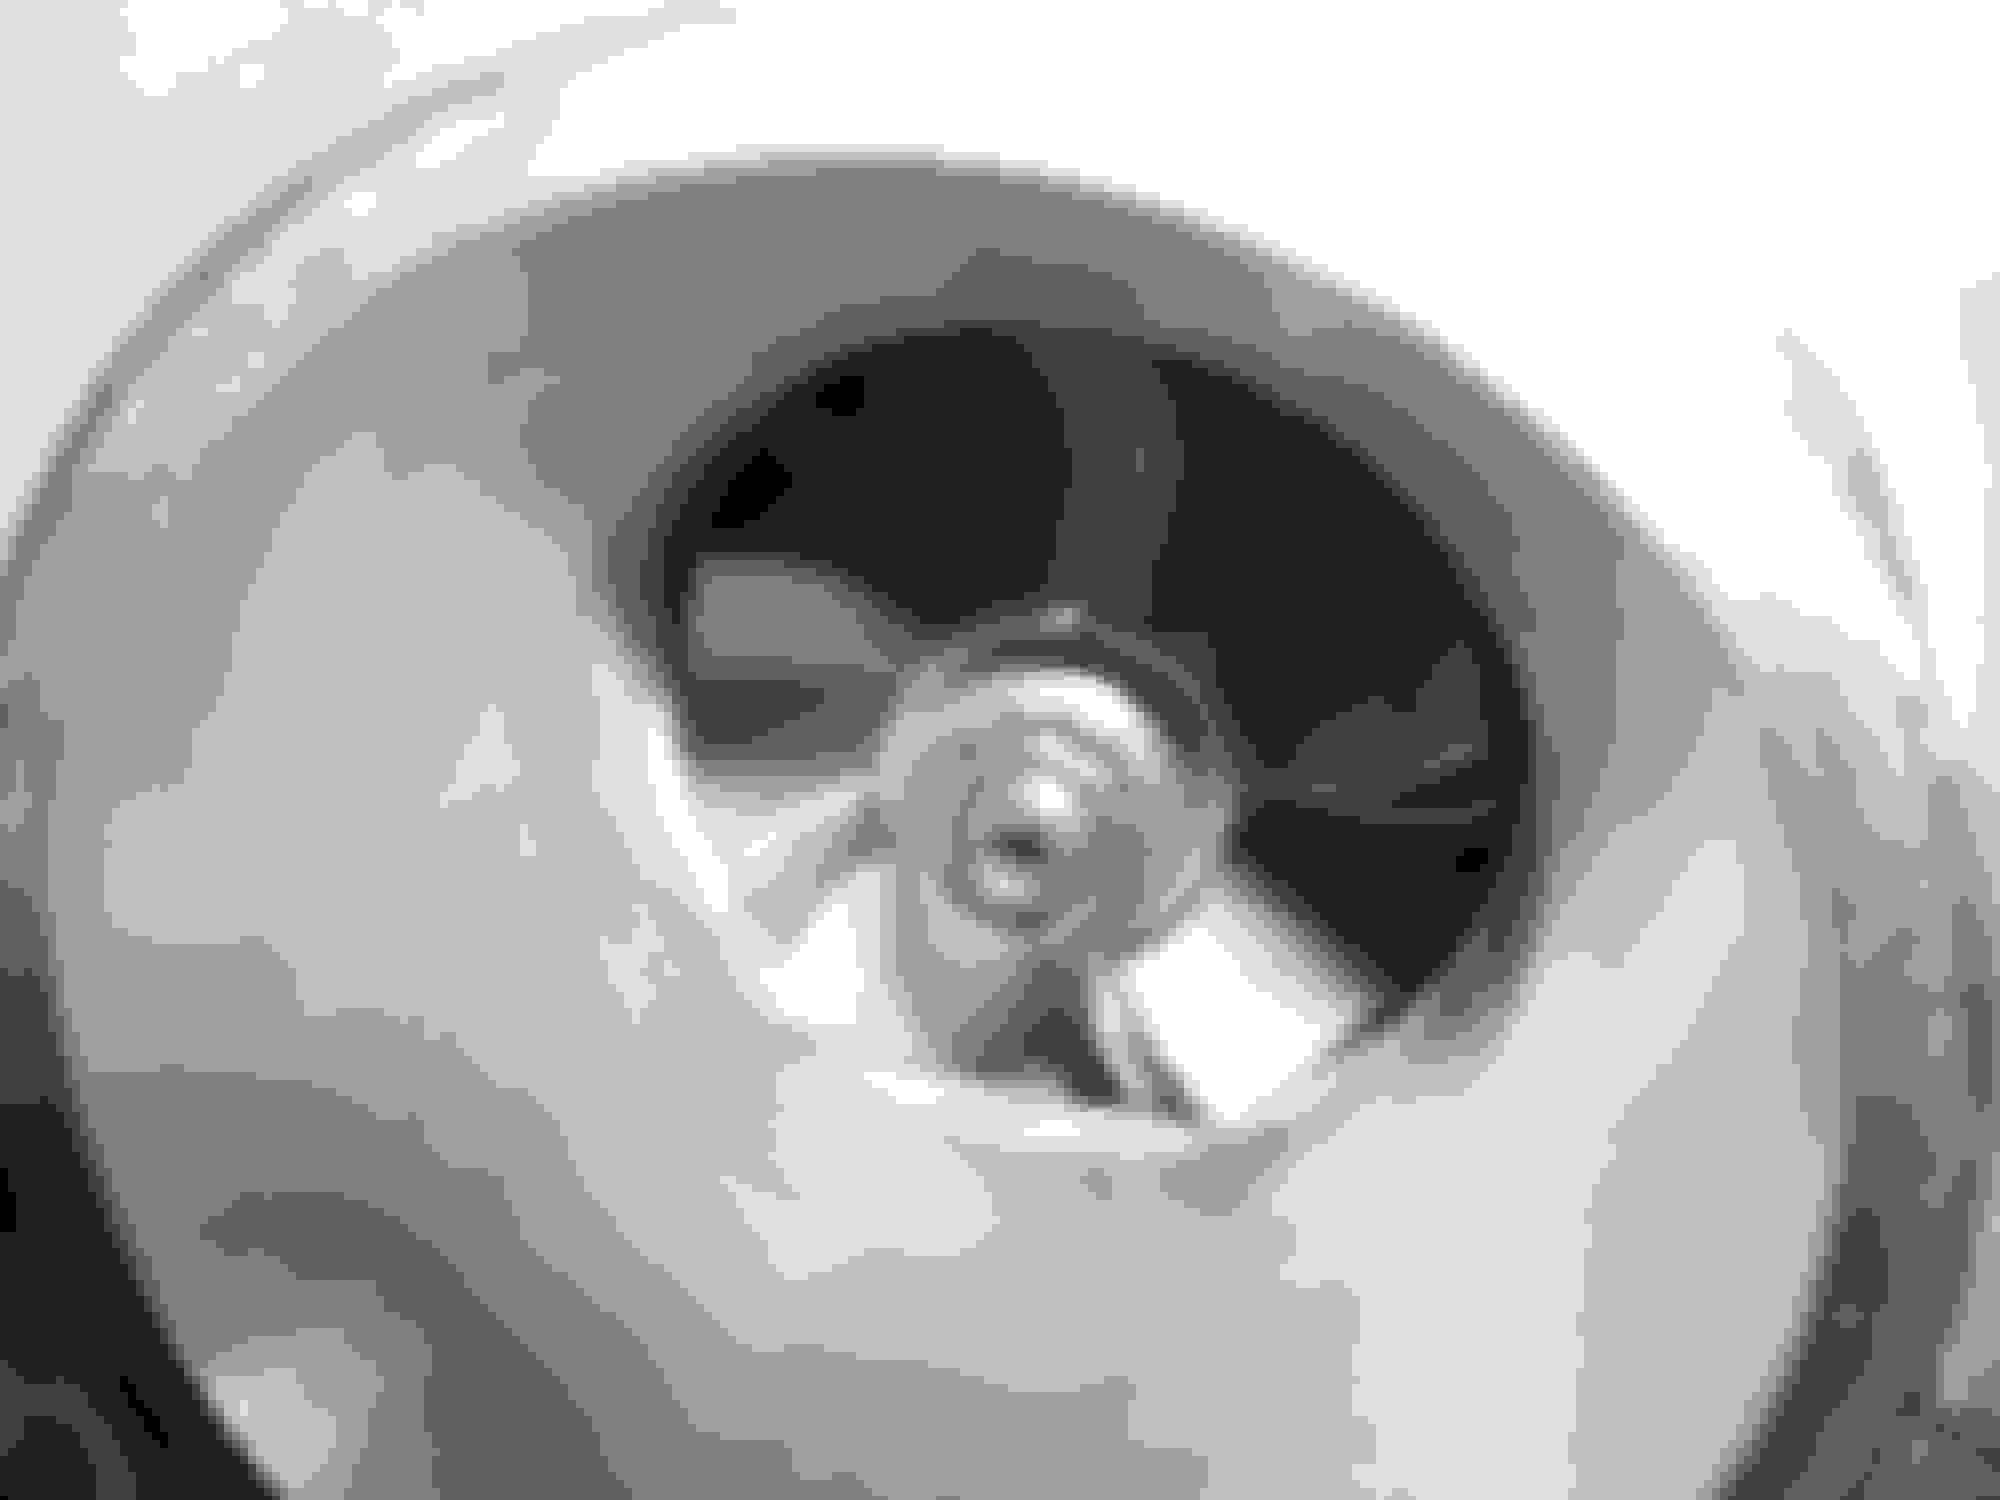
Pulled the elbow off of the turbo compressor intake.
Took a few pictures with my phone of the damage.
Grab the wheel nut to check rotation, and found the nut had backed off.
Check the wheel rotation and it sticks solid at on spot.
Out with the good camera to inspect it on the 4runner.
Looks like the compressor impacted the housing hard enough to finally stall out and spin the nut off. Clock wise rotating shaft, CCW nut and no thread lock. Righty loosie @ 100K RPM to DEAD STALL, leaves a lot of kinetic energy in those parts. I am very lucky the nut stayed on the shaft and none of the blades are broken just bent. (So far).
Oh I neglected to mention the chips and shavings to Mike, it was the same night I blew out the oil feed and by the time I talked to him the next day it wasn't on my mind.
I assume the chips and flakes found on and around the first crank bearing cover were just due to the handling to wrap it up for shipping. I need to point out that it was a long block with just the timing cover and oil pump done by Sunwest, no oil pan installed. They did not send me a time bomb with a lit fuse ,it had a safety pin per-say.
I didn't cover some of this I guess. Mike did real good for me so far. He went to the effort of locating a "turbo block", it turned out to be a non OEM conversion. Made the jigs and ordered the various drills. He did all the machining personally. I don't recall for sure but probably the assembly also. During the wait for the obscure taps and drills he got "caught up" on some work, IE he got real busy and kept forgetting to get the tools picked up, which resulted in some of the delay in my motor shipping and a bit of a discount for me on home delivery. I had to talk to him about the gasket set also, he offered to pay for the new exhaust gasket right off recalling that the -TE uses the other bolt pattern. I explained I had not purchased anything yet, and he had ITM drop ship me a full 22R-TE gasket set.
*EDIT* Working nights with the time difference meant communication was a problem. By the time they opened I was dead tired and passed out, by the time I woke up they were long closed.
Filled a claim with the turbo supplier and gave the install support line a call for good measure. They have multiple distribution points, EBAY, speedyracer.com, and emotorusa.com, and differing refund & warranty policies on different links of the same sight. *eyeroll*
Originally Posted by http://www.speedyracer.com/warrantyclaims
We are offering basic three months store warranty; Some parts are covered by manufacturer's warranty which may be longer than store one; If customer would like to buy longer warranty, please contact sales@speedyracer.com for the quote on individual product
If a part was successfully installed, went into service, and then failed, it may be eligible for warranty replacement. You must report to us through our email within 30 days of the failure, we will issue a Return Merchandise Authorization (RMA) number. Parts that are covered by a manufacturer's or our Store's warranty may be returned for exchange for like product replacement. Refunds are not issued on warranty items.
I am expecting since EMUSA and Speedyracer have the same business address, I purchased direct enough I have a manufacturers guarantee worth more than TP. And I will be getting a replacement either due to it being DOA (From the shaft play), or the second paragraph regarding a service life of less than 30 days.
I was asked to call back tomarrow, he would have time to look up my claim ticket and order also the owner would be in to clarify the "terms". I called at 5:55 right after mashing submit on the claim, just to hear a live person makes ya feel better sometimes.
A time line update. Discrepancies noticed from turbo receipt. I definitely didn't buy the turbo before the 4runner.
06-26-2016 Purchased 36522
06-29-2016 First drive.
06-30-2016 turbo ordered.
08-06-2016 Engine ordered
10-03-2016 Engine received
11-09-2016 Engine installed to chassis
11-10-2016 Radiator tap
11-11-2016 Intake plumbing.
11-15-2016 Vacation started..
11-16-2016 First start
11-20-2016 Test drive #1, it snowed the 17th & 18-19th were cold.
11-21-2016 Test drive #2, engine stalled at turn around, rattle pitch changed.
11-22-2016 Decided turbo not spooling, dial indicator purchased to check radial mid shaft. Lots of turbo reading and information collected.
11-26-2016 Test drive & fuel added to tank.
11-28-2016 Loose compressor nut found, claim filed under DOA and Service life clauses.
Service start date is 2016 Nov 16.
The engine and turbo have less than four hours run time, less than fifteen miles driven, and less than eight heat cycles. That is in reverse order, one run to the gas station, two runs on the dirt road, two runs on the paved road, set the efi x2, a few short idle runs to seal leaks.
Its more mileage than I'd like but it needs to be WOT in low @ 2400 RPM to do the boost checks which is not OK to do where children are everywhere. So then unfortunately it's close to a mile in any direction to have enough room to turn around.
For the record the 88 FSM flow chart should have you perform TC-5 before TC-4 I am almost certain. Check the impeller before trying to do a moving chassis boost test, seems like a good practice.
OK TO DO
TPS sensor, pig tail needs replaced, sensor needs replaced, verify signal levels pre-post 89, add both connector types for part interchange.
Order & Pick up plug for oil feed line, since my feed comes I out of the adapter plate at the lowest point with the filter mounted high I will loose at least what's suspended in the line ~= 100cc = 1/10 quart.
Then I get to bust knuckles tying to pull the turbo without pulling the exhaust manifold until I in frustration resort to pulling them attached to each other using the engine crane because cast iron it's not light at all.
Last edited by Co_94_PU; 11-28-2016 at 05:43 PM.
Reason: turbo order date wrong
Link
The prefix for pigtail electrical connectors is 90980 the rest of the part number is on the plastic housings.
Not enough left of my TPS connector to get a number off it. Guess I have to go into the catalogs. There is an 88 at u-pull, if it's still on it, it has the same plug with different color codes also a Celic. Wind steady and gusting, not a fan of cold and windy. It can wait it is a cosmetic issue, the sensor repair is holding also..
If the clamp on the radiator hose is rotated to between 9 and 11 it will interfere with the TPS connector. In my case it is 33% of what holds it in place, the other two thirds are the zip tie to the temp switch and a safety wire. Other wise it should probably go on the reverse of my usual, being right handed I tend to place the adjustment head facing my right, with the head facing left.
I didn't mention the TPS repair I had to-do. I couldn't get the TPS adjustment to read anything. Then I noticed the seal on the back had more than one color of sealant on it, obviously the chips & scratches around the plate go deeper than I though and it's probably not just wear and tear. The case was pried open from the back side, the lugs are attached to the front. This caused the tracks to lift from the circuit board, I re soldered the ground to the trace with just enough room to get the iron in. Tested the repair, seal it close it test it again then finally glue the metal plate back in. I don't have any old pre rohs solder, higher lead, so eventually it will probably stress crack but I'm OK with that. Pretty sure first gens are new enough to already have the low lead stuff, and they use the old school stuff still for aeronautics and military grade but radio shack doesn't carry it.
No call from Napa to come pick up my order, must not be coming from the local warehouse I guess.
Got a confirmation email from sales@speedyracer.com I have an issue number now. They asked if I wanted it replaced or refunded also but didn't respond to my email or change anything in their tracking system. Guess it's a once a day thing and I'll have to call and pester them. If I am going to get it installed before it snows it needs to ship tomorrow, but I don't want to buy another and pay express shipping for a faulty quality check.
Last edited by Co_94_PU; 11-29-2016 at 04:34 PM.
Reason: Formatting
Nice to see another turbo being brought back to life. Its sad that most of the time, guys either motor swap them or swap it to N/A. I personally have gone with the GT-25R kit from LCE. I have the same turbo on my Mazdaspeed Protege and it spools very fast. Havent got a chance to fire her up yet. I do things rather slowly, but if you want any pics of what the kit entails, check out the build thread.
Nice to see another turbo being brought back to life. Its sad that most of the time, guys either motor swap them or swap it to N/A. I personally have gone with the GT-25R kit from LCE. I have the same turbo on my Mazdaspeed Protege and it spools very fast. Havent got a chance to fire her up yet. I do things rather slowly, but if you want any pics of what the kit entails, check out the build thread.
So, what are the future plans for this thing?
Understatement for sure, but we'll forgive you cause kids are awesome and they grow so fast and well life happens! I remember reading some of that thread way way back.
I like the idea of a more recent turbo, specifically water cooled and with ball bearings, and looked at the LCE kits several times. A different turbo isn't out of the question, eventually. However turbocharger science is a rabbit hole I'm trying really hard not to go down. I am an optimist but I don't see getting away with increasing the flow or pressure much on the stock system's fuel and timing.
Whats that saying "No plan survives first contact with the enemy" I think, well there are quite a few parts in a modern automobile and each one gets to decide if it wants to be friendly or not every time you pick it up. So I am still shooting at a moving target unfortunately. Originally I was just sick of not being able to get out of my drive way in winter, or worse snowed in at work. Mostly that original goal stands "Make it run, make it drive, make it warm inside, all before the snow gets serious". Then there are creature comforts and junk yard mods, needs a loading/panic handle on the drivers side, *cough* bumpers *cough* blinkers. Suspension and drive train can probably stay the way it is until I learn to out drive it, I'd like to see some wheel spacers added or different offset rims to adjust for the lift. I see the Icelandic trucks with the big flotation tires and think "yep, that is what I need here on the open plains", and see the long travel guys fling themselves over dunes and think "yep that looks like a blast." but I guess I lean more towards the overland Icelandic style if it comes down to it. I guess it seems more practical than a dune runner or rock crawler.
At some point I will need to make a solid decision on cleaning it up and restoring it or just leaving it bashed. It owes me some money I'm pretty sure I will only be getting out of it in the form of a big ole smile and some redneck fun, so putting a new rear pan in, bodywork & paint doesn't seem a good return. I lean towards leaving it but have to keep reminding myself to leave stuff alone.
Received turbo #3, appears to have similar or the same radial play #2 did before it was installed. It's been awhile so hard to say for sure and it's not like I measured the first one anyway. I took a crude measurement off this one with the slide gauge against the compressor wheel on one side and the outside of the housing. Push towards = 43.85, Push away = 44.03. subtract them and I wind up with 0.18mm of radial play at the end of the shaft, it should be measured between the bearings while moving both ends of the shaft in the same direction. So that number doesn't give an accurate reading of the bearings. what it does show is the clearance between the housing and compressor wheel might be compromised.
Now I get to make plans what to do with it, try to return it take the loss on shipping and restocking or keep it. If I keep it do I run it as is, or tear it apart first. I dislike the idea of taking it apart and not having it balanced. There seems to be a consensus that they(EMUSA turbo's) are component balanced(compressor grinds on the back, turbine grinds) and as an assembly (compressor front ground, shaft alignment marks). I also dislike not knowing 100% that those bearings are in tolerance and there aren't any chips flakes or non deburred surfaces.
-- Sorry Thought I had sent this off already a few days ago.
-- Back to the regularly scheduled program..
Nothing practical done over the weekend really.
Disassembled Turbo #2 with the broken shaft. Found the shaft in three pieces. It broke on the compressor side at the step down from the bearing to the wheel, also at the turbine side right at the bearing. The piston ring on the rear was never found, it flew out or it is now part of the mangled shaft. The turbine housing is cracked, chipped, wallowed out and generally destroyed where the piston ring sits. The compressor housing is in pretty good shape it could use a buffing but imagine it's usable for a spare. The shaft other than being broken seemed in pretty good shape it consistently measured at 10.00-10.01mm. The rear bearing (#2) is cracked along one axis and slightly elliptical, it needed to be pushed out with a deep-well socket since it was mangled on the outside face. The front bearing (#1) showed a little bit of grey metal for about 60*. The front seal showed a little bit of blueing from heat along the top. The thrust plate and its bearing were slightly worn with no major distortions, I have no specs on these parts at all so not imperial data. I don't have the proper gear to measure the housing, well I don't have proper gear to measure anything it's all Harbor Freight and un-calibrated, the legs are too short on my sliding micrometer to get down there you need a bore gauge or ID calipers.
---- #2 Inspection and STD/STD bearing data
Code:
Part ID OD L
Bearing #1 Compressor 10.44 15.90 9.39
Bearing #2 Turbine 10.42 15.95/7 9.18
Spacer 11.93 15.89
Shaft 10.00-10.01

STD/STD Bearing
MAX OUTER DIAMETER (mm) 15.9283
MIN OUTER DIAMETER (mm) 15.9156
MAX INNER DIAMETER (mm) 10.0330 0.395"
MIN INNER DIAMETER (mm) 10.0228
----
Now of course this is the damaged turbo but I expect to find the shaft in the new one (#3) to be the same ~10.00 mm shaft. The maximum radial play for a CT-26 is 0.18mm.
WARNING Arithmetic ahead!!
We need to divide this for each oil space, Housing-Gap-Bearing-Gap-Shaft-Gap-Bearing-Gap-Housing, so 0.18/4 = 0.045mm MAX at each oil gap. Convert this to 'merikan 0.045/25.4 ~= 0.00177" MAX. So given a shaft of 10.00mm an ID range of 10.0228-10.0330 I'd assume ideal clearance 0.0254mm or 0.001inch and a practical max of 0.0381mm or 0.0015inch. Setting a lower threshold for the max radial is a good thing, since the 0.18mm is based on the Ct-26 from the 7mgte FSM.
So I choose a clearance range of 0.025 to 0.040.
All that translates to the estimated size in the center housing for the journal bearings.
( (Max - Min) / 2 ) + Min = 15.92195 Nominal bearing OD.
Add oil gap
+ (2 x 0.0254) =15.97275 Nominal housing ID,
Or
+ (2 x 0.40) = 16.00195 Max housing ID.
Now I just need the ambition and a clean spot to take it apart in. AND someone to tell me I am correct putting a gap between the housing and journal bearing!
Oh on a side note I'm thinking winter is about ready to show up finally. With that in mind I could put a 22R-E exhaust manifold on it, plate over the AS system, maybe have to tap for an Ox sensor, re-route my water and cap the oil lines for under 100$ be done in half a day and actually get to drive it.
The exhaust from the turbo back is really giving me head aches because of so many variables. I wish the 35010 turbine housing was easier to find, then I could use the Ox sensor housing / Downpipe I have. It will cost 60-160$ in materials (no tools) or upwards of 270$ to get something off the self that still needs modified to replace the section between the Turbine output and catalytic converter.
Turbo #3 is installed and making boost. It hasn't made the dreaded noise the other one made right off, but I'm still not thrilled about the tolerances. I pulled it apart and measured before installing this one and everything was borderline, can't say which side of the border cause a slide micrometer isn't the right tool and doesn't have enough accuracy/digits.
Oil pressure gauge line is leaking in the engine bay, got a new 1/2" to 1/8" NPT to fix it.
TODO:
Head lights, passenger side is cracked
Turn signals need more zip ties so they face the corner they are on not the opposite one..
Heat shields, will have to DIY (?)
Drive train noise, howling(?) under engine braking. There maybe a leak at the rear diff I will need to keep an eye on.
I noticed on a photo I might be missing the clip that holds two of the heater hoses to each other. It is not missing. BUT why do I only have that expandable heat shield stuff on one of those lines there, the rest must be covered by the shields that attach to the manifold and turbo is that right. More photos to hunt up I guess.
Order shipped from McMaster-Carr. yay!
100 bearing quality index balls for the Aisn hub, and 20 inchs of ~2lb/inch spring just in case.
2 pc 3/16 mild steel, 1 pc 2" ID 90* short radius schedule 40, 1 pc 2" ID 6"L straight schedule 40.
Line #1 because I obviously lost it, IF it was in there when I took it apart "I swear it wasn't, and I caught a fish yea big too!"
Line #2 is hopefully going to be my new downpipe elbow that needs to hold the oxygen sensor.
Ideally the simple construction I had in mind would put the exhaust right where I wanted it but, surprise.. It will point about 20-30* vertical of where I need it, I'll need to dig up the algorithm for forming curves out of straight pipe. In short you make marks on the center line for each cut point, calculate the sin(?) for the angle you need, cut some pizza wedges flip one over and weld them up. I'd like to get it near the stock location such that the intermediate pipe can use the mount that is supposed to be on the bellhousing/engine. It also needs to be located such that I can get a simple connection between the manifold and intermediate pipe for the turbo fails trail fix pipe, so straight as possible not to far aft or at a 90* to the cylinder wall.
I need to cut the elbow apart along the radius. I'll try willing it apart first but after that any suggestions are welcome.. I plan to cut the elbow along the radius so I have an inside and outside curve. The inside curve will be flush to the the turbine edge on one side of the flange and form one of the four walls. The outside will be moved toward the wastegate approximately 2 inches to clear the "penny" and pivot, this forms the opposing wall. By notching a section of straight pipe length wise to form a saddle it will span the gap between the two curved pipe walls. This leaves two open sides that need crescent cuts and might be tricky to weld, but it leaves a great 2" ID section to mate the 3 bolt flange to the intermediate pipe. I might be able to get a professional to weld this all up and figure out the cut problem for not much more than lunch
22RTE Downpipe to intermediate pipe flange is a 3 bolt ?mm center ??mm ID. ( I think this is written out in the shed, just under 3" and less than 2", it's a "special" toyota one as best I can tell)
Cracked open the plug on the rear diff. It has plenty of fluid.
Not sure how much of it actually gear oil, but it had fluid. The good news is the axle seals seem pretty tight, it vented when I removed the plug, the bad is the vent is plugged. I also noticed what could be salvage yard markings on the axle housing..
TODO: Rear differential, change fluid, unplug and extent breather
What would be the recommended way to clean that up? I imagine I'm going to need to pull it out sooner rather than later. I'd like to flush it at least but with what?
What would be the recommended way to clean that up? I imagine I'm going to need to pull it out sooner rather than later. I'd like to flush it at least but with what?
Diesel fuel would work well, and be cheapest.
Stoddard solvent or kerosene would be more spendy and not be any more effective.
There is a post (or two) here about lift blocks effecting the parking brake. Guess what, I have lift blocks and had bad brakes!
Ok so the parking brake cable runs out of the cab to the adjustment connection under the right(P) side, along the frame eventually to a pivot above and mounted to the rear axle. At that pivot is a junction for the L/R cable to the brake mechanism. The left hand cable is actually a continuation of the cable from the adjustment and runs from the pivot thru a nylon lined guide then attaches to the brake lever. The right hand cable is a short 12-16 inch section that runs from the pivot mentioned above to the right side arm. In the stock configuration both cables are routed over the spring and have no interference.
Because of the left hand cable being a single run plus the way it joins the right side at the pivot, the pivot can stick in a position (to the left) that disables the drum auto adjustment, wears down the pad, and generally makes for bad braking.
Lots of lube and the pivot freed up, but the right side arm was sticking lots of working it back and forth with a pry-bar and it freed up as well.
Now add to that lift blocks that put the spring right where the cables normally run. Mine were routed under the springs, logical its the shorter route. The brake arms were not modified, if you move the cable farther down the arm you can get the clearance it just decreases the leverage so the lb spec in the FSM doesn't match. This also puts the cable under constant tension if not adjusted. The right side shows a minor fray from rubbing the spring.
The LSPV arm to the axle may have been modified to account for the lift, or just bent to make it fit, or maybe trail damaged. It doesn't seem the right shape to me, but I don't have another to look at.
Left hand side for comparison, note the arm extends along the seem of the rubber boot. Right side before de mangling Right hand side after de mangling, breaker bar hiding to the left. Right side brake pad inspection port. Spec for that gap is 0.6mm
I don't really trust the brake to hold it still on a big hill but it holds it at idle now and of course stops way better with the pedal.
Stock tire size is P225 / 75 R 15, 28.5" diameter.
My tires are 265 / 75 / R 15, 30.5" diameter.
Stock chassis to ground clearance for an RN61LG-PGZA
Front : 288mm (11.339")
Rear : 421.5mm (16.594")
My lift:
Front : XX, think it's 1" need to measure
Rear : XX, think it is 2" need to measure
My chassis estimate
Front : 13.339" (+2, one for tires, one for diff spacer)
Rear : 19.594" (+3, one for tires, two for blocks)
The moral of this story?
Bwahhaha, I'm not sure I even have a jack that will lift this off the ground I didn't even try after checking the stands.
I have ball joints in the mail and shims/spacers for the rims, I'm not sure how I am going to be able to put on! Guessing the rear needs at least 24" of lift height. =(
Last edited by Co_94_PU; 12-15-2016 at 07:08 PM.
Reason: I do math bad
You math a lot better than most on here, brother. Also, for cleaning out the axle, I'd suggest draining out as much as possible, then liberal use of blue shop towels to get the buts up, then wipe the inside down with a rag coated in gear oil. By then it should all be clean with no nast left.
Got up the other day before the sun to run into Denver and hit the upull. Only to find out the 88 4runner they had the day before wasn't listed any more.. They put out another 87 pickup sometime that same day which I spotted after closing, so another early morning yesterday. I sit in city-iot stop and go for an hour to get near downtown and get there about an hour after they open. They have signs up for their 50% off day, Dec 18, which bummed me out a little till I got inside and the clerk says it's actually a two day sale and admission is only 1$ too. I beeline to the 87 and find it gutted of aluminum, no intakes or heads on any 22re on the lot. Maybe one third member and manual transmission..
So my shopping list was:
Fan shroud - I don't want to cut my OEM metal one BUT might have to
TPS - mine is repaired, has a broken mount tab, broken WP plug
Engine stiffener brackets - awol, these are the lower bellhousing supports
Optional wants:
Loading handles
Sun visors
Shoulder belts rear seat
dome light lens cover
Tailgate coverSome other odds and ends I forget ATM.
I scored both engine brackets no problem, one of them was just laying under that 87. Found one smashed fan shroud obviously only still there because it was a front collision and pressed into the radiator remains. Not a single TPS I could find. I did score the newer fuel rail without the pulse damper, so I can swap that out the next time the diaphragm sets out and wants to leak. I didn't even really look for the optionals I was distracted over the lack of intakes.
Hit the Aurora upull on my way out of town. Picked up a 90 TPS and pigtail. Couldn't find any dual switching relays readily handy to hack the light circuit, but grabbed some assorted pairs.
USPS delivered my ball joints from Rockauto, I went with the nicest looking grease bellows *eyeroll*
UPS delivered my McMaster order.
0.094" 2# spring, 0.094" ball bearings. For my Asin hub indexer.
2" id 2" radius 90* schedule 40
2" I'd 6" L straight schedule 40
2x 3/16" thick 2 1/4" width 6" length mild plate
I went with the 3/16 which is slightly thinner than the schedule 40, since going up to 1/4 plate had a bigger difference in thickness it also saved a bit of budget. I probably could have used a thinner material, but wanted to avoid stainless since the flange is mild and McMaster doesn't carry schedule 20 in mild. This pipe is beastly, in hand it's a daunting cut and weighty. I will need to make a new stay for the turbocharger, I expect this elbow will weigh 50% more than the OEM elbow and the OEM stay isn't long enough because the diesel exhaust housing sits farther away from the block.
I haven't made any cuts yet, not even the mounting holes for the flange, so have time to reassess the layout. I can point the outlet straight to the gap between frame and transmission by rotating the 90* to point there and shaving a corner off the elbow. This will leave an opening to fill similar to ct26 swap thread a straight section can cover this, it was very blockish and looked troublesome to fit lots of little triangles. If the trim from the elbow is used as an end peice it leaves an arched opening that is easier to match with a single peice, but it will be best to be hot vs cold formed due to the material thicknesses.
It would be a lot simpler if someone with a foundry made a US market downpipe for the diesel ct20. Not just from my wanting off the shelf parts. I mean simpler than duplicating the turbo exhaust housing, since it's a simple shape and only has three face milling steps. The proper exhaust housings run up in price to crazy amounts, there were some that came out of AZ for around a grand iirc some found on eBay attached to maxpeed ct20's that probably came out of China/Taiwan again around a grand for turbo with proper angled housing. The other off the shelf option is the cxracing kit, that downpipe adds about 320$ to thier ct20's price.
You could probably do a one off casting and build a backyard foundry for a grand with poor scavenger skills. I looked into it a little bit, if you have access to old containers the big expense is the insulation (fiberfrax) @ 200+. You would have deterioration of the lining smelting steel due to the temperature so it's a recurring expense, but not an every run expense.
It's an interesting process. Measurements are taken of the original. These measurements need to be scaled up depending on the shrinkage factors of the final casting material, this is about 5% for steel. They have overscale rulers for this that read 5% over so one inch is actually 1.05 for example, or it can be done manually. Then an oversized model produced. In a one off run this could be a wax sculpting. In a mass produced state-of-the-art situation they do the sculpting in CAD, sent it to can and a big bad 3d printer just prints out a sand casting ready to pour into. In the backyard assuming the first one might need some tweaks or you're needing more than one you'll need a reusable system. Start off with the two over sized flanges crafted of MDF and moisture sealed and set in a fixture to put them into the orientation needed. Roll out a sheet of clay that will form the center section and press the oxygen sensor flat into it. Form into place and join the edges. Now you have a reusable, as long as kept moist, plug to make forms off of. Plaster a mold from the plug to make the consumables. Due to the shape it will need to be a four piece mold. Assemble the mold with clamps and fill with the foam or wax used in a lost casting. Form the fill tubes, wow mad science and physics behind these, keep it simple worry mostly about shrinkage and the reservoir. Assemble the casting boxes with the forms surrounded by sand... And away you go, as mentioned there are just the three spots to machine flat and holes to drill.
So yeah, I am not doing that. it's way off budget. It is more space I don't really have. It would facilitate more tools I don't have room for like lathes and mills. So yeah.. nice diversion on a snowy day, not happening.
I need to remeasure the 3bolt flange that mates the downpipe to the intermediate pipe. I have it at just under 3 inch bolt spacing and 2.?? For the exhaust, and think maybe it's one off since I can't find one and I can replace it with what ever size I want.
Third member and rear housing clean up. Not thrilled it's heavy, people estimate it's 50-100 pounds. I will have to rig something with rope to drop it slowly and no squish myself. I saw a Land cruiser install where he walked it up to the housing standing on the flange that seemed pretty smooth. If the back side is tied under the flange so it doesn't slip forward a wratchet strap can be used under the front flange to host it up into place. Ideally I expect you want a tranny jack where you could strap it in and level it, but having the right tool for the job just takes the "fun" out of it.
Also pointed out while I was browsing 3rd installs.. Where the rear cover of the axel housings are welded on there is a ridge and gap formed that traps debris such as metal shavings or in my case dirt or whatever that crud is. It's obvious once you are I there it will need attention but good to know before hand.
Guess that covers all of today's non-update update. For now
Bah, the 3rd member isn't that heavy. it's much lighter than the front. I've done both. rear third is mostly just awkward. front third is heavy, awkward, and requires an extra set of arms. just make sure those arms aren't attached to a person with ADD. I spent the better part of 20 minutes bench pressing that front dif while a buddy looked for the bolts...then the ratchet...then the socket...then trying to get it aligned correctly...
 11-27-2016, 05:26 PM