Volcom's 1984 4Runner Build-Up Thread
 01-13-2009, 07:53 PM
#81
Registered User
Thread Starter
Mar 02, 2008
I finally got the 40's mounted yesterday. Here's a couple test fit pictures of the driver's side rear.

Looks like I've got enough trimmed to clear so far. I'm planning on using the forklift again to see if they rub. If they are going to rub, it's going to be right in the area of the exhuast pipe.

The front looks like it will rub in pictures but in person, there is plently of room.


Frame vs. tire clearance, should be good there also!


Uh, I've got a small leaning problem

Big ol' tire ballons

The stack of the other 3

Plenty of garage door clearance thanks to the 8 foot door
I finally got the 40's mounted yesterday. Here's a couple test fit pictures of the driver's side rear.
Looks like I've got enough trimmed to clear so far. I'm planning on using the forklift again to see if they rub. If they are going to rub, it's going to be right in the area of the exhuast pipe.
The front looks like it will rub in pictures but in person, there is plently of room.
Frame vs. tire clearance, should be good there also!
Uh, I've got a small leaning problem
Big ol' tire ballons
The stack of the other 3
Plenty of garage door clearance thanks to the 8 foot door
 01-13-2009, 07:54 PM
#82
Registered User
Thread Starter
March 09, 2008

Plenty of clearance all way around the tire! Good, I didn't want to have to trim that big hole any bigger

Rear tire barely kisses the frame rail at full flex. Nothing to worry about.

I took the fender off to get a better idea of how much rubbing the front was going to have on the firewall rather than on the fender itself (I can trim the fender back later).
This was at full stuff with the bumpstop fully mashed with a level spring. It was rubbing at full turn to the driver's side. I plan on lowering the front bumpstops down an inch and trimming that pinch seam on the firewall for now. I will still have decent compression travel but am limiting it compared to when I ran the 33's.

Closeup of the rubbage. Not as bad as I thought!!! I figured it would have been worse.
Plenty of clearance all way around the tire! Good, I didn't want to have to trim that big hole any bigger
Rear tire barely kisses the frame rail at full flex. Nothing to worry about.
I took the fender off to get a better idea of how much rubbing the front was going to have on the firewall rather than on the fender itself (I can trim the fender back later).
This was at full stuff with the bumpstop fully mashed with a level spring. It was rubbing at full turn to the driver's side. I plan on lowering the front bumpstops down an inch and trimming that pinch seam on the firewall for now. I will still have decent compression travel but am limiting it compared to when I ran the 33's.
Closeup of the rubbage. Not as bad as I thought!!! I figured it would have been worse.
01-13-2009, 07:55 PM
#83
Registered User
Thread Starter
March 23, 2008
Got a ton of work done Saturday thanks to CuBuff4Runner, my brother and dad!
I ended up working on tubbing the firewall with Jeff while my brother, dad, and other buddy worked on making some 16ga. sheetmetal tubs for the rear.

After plasma cutting the drivers side firewall out

Big hole from the inside. It's cut back all the way to the body mount.

After welding in the replacement sheetmetal. I hate welding sheetmetal after this project (first time welding sheetmetal). CuBuff4Runner was much better at it then I was.
I will seam seal both the inside and outside welds. Then I will shoot some rubberized coating on the outside and herculine the inside.

Inside driver's side. I will need to remount the fuse block. Welds look like goose but it doesn't matter what they look like under seam sealer and herculiner

Passenger side inside. I will relocate the computer into the glove box.

Passenger side outside. We tried a different method from the drivers side and it cut the fab time in half. Once again, seam sealed and covered up with some kind of liner will hide the ugly (plus make it water proof).
It was a tough job but I'm glad it's done. Will be nice not to have the front tires rub on the firewall while flexed out and turning.

Here's a rear tub that EROCK, gpn911, and friend cut and rolled up. Turned out perfect and will fit and weld right into the quarter panel.
Got a ton of work done Saturday thanks to CuBuff4Runner, my brother and dad!
I ended up working on tubbing the firewall with Jeff while my brother, dad, and other buddy worked on making some 16ga. sheetmetal tubs for the rear.
After plasma cutting the drivers side firewall out
Big hole from the inside. It's cut back all the way to the body mount.
After welding in the replacement sheetmetal. I hate welding sheetmetal after this project (first time welding sheetmetal). CuBuff4Runner was much better at it then I was.
I will seam seal both the inside and outside welds. Then I will shoot some rubberized coating on the outside and herculine the inside.
Inside driver's side. I will need to remount the fuse block. Welds look like goose but it doesn't matter what they look like under seam sealer and herculiner
Passenger side inside. I will relocate the computer into the glove box.
Passenger side outside. We tried a different method from the drivers side and it cut the fab time in half. Once again, seam sealed and covered up with some kind of liner will hide the ugly (plus make it water proof).
It was a tough job but I'm glad it's done. Will be nice not to have the front tires rub on the firewall while flexed out and turning.
Here's a rear tub that EROCK, gpn911, and friend cut and rolled up. Turned out perfect and will fit and weld right into the quarter panel.
01-13-2009, 07:55 PM
#84
Registered User
Thread Starter
May 11, 2008
Big thanks to my brother and Jeff for the help on Saturday. We got quite a bit done and finally got to mount all 4 tires and actually take it for a drive.
Sorry for the pictures, I had to turn the lightening way up to see the contrast between the tires and trucks.

Side by side with CuBuff4Runner's 96 4Runner (SAS'ed on 36" Iroks)

Lower down to see the tire size difference

Side shot of the show truck minus the tail gate. lower quarter panel, and turn signal

There are quite a few differences in our trucks even though they sit almost as tall as each other. Notice the rear shackle height difference (frame on the 84 stays high where the 96 dips down after the wheel)

Headlights are almost the same height but the top of the cab is higher on the 84 by a couple of inches.

13" of clearance under the front diff on the 84

Waggy D44 vs Toyota axle width. D44 wins.


Nice collection of colors on this side

Driver's side inner 16 ga.tub. It's fully welded. Just needs some seal seal and Hurculiner on it to make it water-proof inside.

I still have some welding on this side. We really wanted to get it out for a test drive so I'll finish up the welding at a later day.

Driver's side inner. I think the new tubs came out really well. They are strong also. I could stand on them on the inside and no flex at all.

CuBuff's new beadlock wheels. He's got such a badass 3rd Gen!

Driving impressions - I knew it was going to be slow. Let's put it this way, I wasn't let down It's pretty slow. I don't think I'll ever use 5th gear. 4th gear was pretty much just holding speed, no accleration at all in 4th. 3rd gear and 4K rpm (I'm guessing) was around 55 mph. The truck drove great with these tires (not even balanced yet). Ride was nice and smooth and the brakes seemed to slow it down good enough.
I'm still glad I chose the 40's rather than 35-37's. I would have still just as much work making them fit in the rear quarterpanel.
Next up, seam seal and undercoat / hurculine the rear tubs and trim the front fenders. I also need to work on my hydro assist mounts and fab up some new bumpstops.
Big thanks to my brother and Jeff for the help on Saturday. We got quite a bit done and finally got to mount all 4 tires and actually take it for a drive.
Sorry for the pictures, I had to turn the lightening way up to see the contrast between the tires and trucks.
Side by side with CuBuff4Runner's 96 4Runner (SAS'ed on 36" Iroks)
Lower down to see the tire size difference
Side shot of the show truck minus the tail gate. lower quarter panel, and turn signal
There are quite a few differences in our trucks even though they sit almost as tall as each other. Notice the rear shackle height difference (frame on the 84 stays high where the 96 dips down after the wheel)
Headlights are almost the same height but the top of the cab is higher on the 84 by a couple of inches.
13" of clearance under the front diff on the 84
Waggy D44 vs Toyota axle width. D44 wins.
Nice collection of colors on this side
Driver's side inner 16 ga.tub. It's fully welded. Just needs some seal seal and Hurculiner on it to make it water-proof inside.
I still have some welding on this side. We really wanted to get it out for a test drive so I'll finish up the welding at a later day.
Driver's side inner. I think the new tubs came out really well. They are strong also. I could stand on them on the inside and no flex at all.
CuBuff's new beadlock wheels. He's got such a badass 3rd Gen!
Driving impressions - I knew it was going to be slow. Let's put it this way, I wasn't let down
It's pretty slow. I don't think I'll ever use 5th gear. 4th gear was pretty much just holding speed, no accleration at all in 4th. 3rd gear and 4K rpm (I'm guessing) was around 55 mph. The truck drove great with these tires (not even balanced yet). Ride was nice and smooth and the brakes seemed to slow it down good enough. I'm still glad I chose the 40's rather than 35-37's. I would have still just as much work making them fit in the rear quarterpanel.
Next up, seam seal and undercoat / hurculine the rear tubs and trim the front fenders. I also need to work on my hydro assist mounts and fab up some new bumpstops.
01-13-2009, 07:56 PM
#85
Registered User
Thread Starter
After a summer of 4 wheeling on the 39.5's, I'm going to have to redesign my hydro assist system. I bent the tie rod twice (after straightening it once). The second time took out my hydro ram and bent up the frame pretty good.
Here's the custom 25 degree dent tie rod

So I cut the bracket off of the top of the housing to attempt to relocate it closer to the passenger side.

I need to gain about an inch on the driver's side to stop the bracket from hitting the U-Bolt plate and bumpstop.
Drained the ram

Here's the driver's side bumpstop after getting bent. Check out that bulge on the outside of the frame

And here's the passenger side, what the driver's side looked like before the damage.

The broken ram that I have to send back to PSC to repair

Here's the cage that DIRTCO gave to me for the 4Runner


Slowly getting it back to normal with fenders and stuff
Here's the custom 25 degree dent tie rod
So I cut the bracket off of the top of the housing to attempt to relocate it closer to the passenger side.
I need to gain about an inch on the driver's side to stop the bracket from hitting the U-Bolt plate and bumpstop.
Drained the ram
Here's the driver's side bumpstop after getting bent. Check out that bulge on the outside of the frame
And here's the passenger side, what the driver's side looked like before the damage.
The broken ram that I have to send back to PSC to repair
Here's the cage that DIRTCO gave to me for the 4Runner
Slowly getting it back to normal with fenders and stuff
Last edited by Volcom; 01-13-2009 at 08:01 PM.
01-13-2009, 08:06 PM
#86
Registered User
Thread Starter
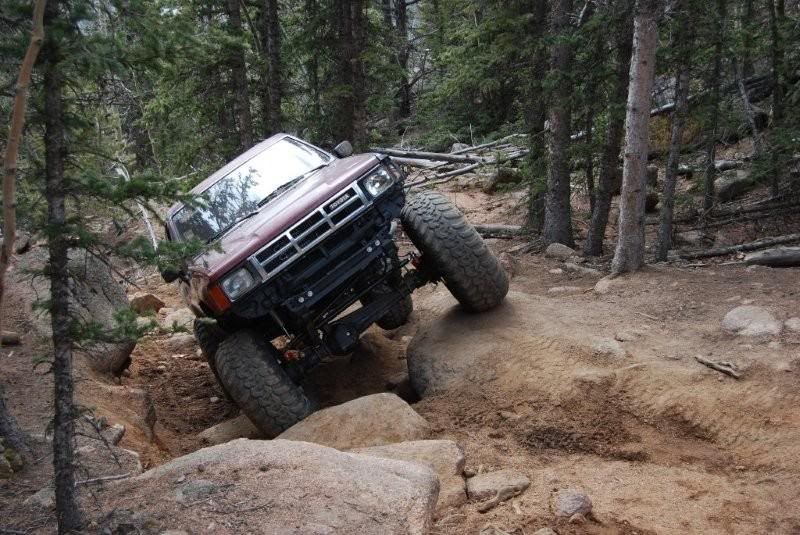
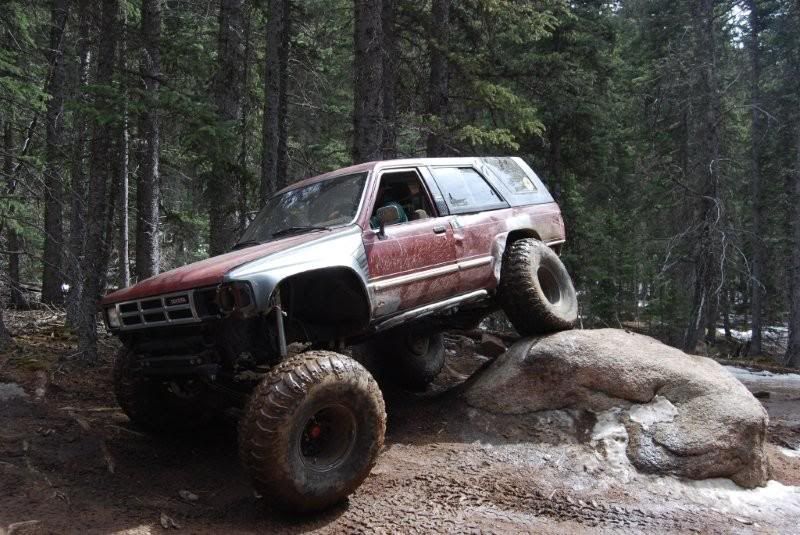
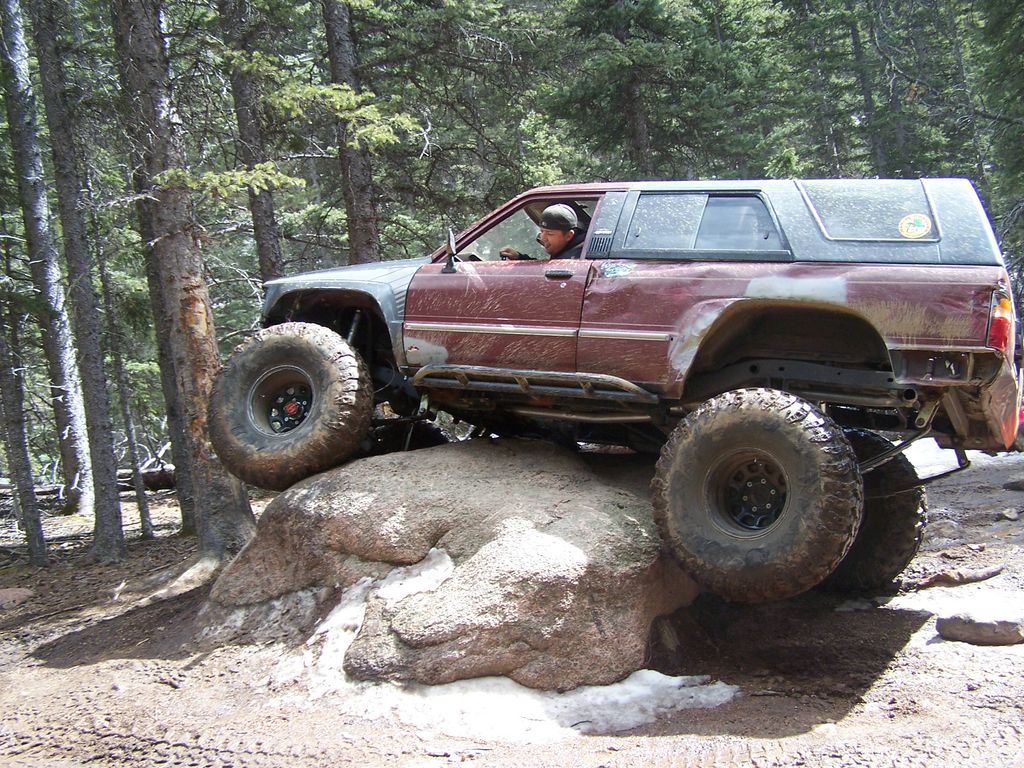
Trails ran in 2008
Liberty (Penrose), Holy Cross, BV Carnage, Patriot (Penrose)
2008 Pictures
Liberty

[YOUTUBE]http://www.youtube.com/watch?v=HhvG1VXJ7Ys[/YOUTUBE]
Holy Cross


BV Carnage


Patriot
Part 1
[YOUTUBE]http://www.youtube.com/watch?v=tgvtPM3mnbo[/YOUTUBE]
Part 2
[YOUTUBE]http://www.youtube.com/watch?v=GCtAI4j8B3c[/YOUTUBE]
2007 Pictures
BV Carnage Pics


Blanca Pictures


Penrose - Liberty Trail


Chinamans

[YOUTUBE]http://youtube.com/watch?v=kTnLil3wmto[/YOUTUBE]
Trails Ran in 2007
Moab - Moab Rim, Cliffhanger, Hells Revenge, Metal Masher, Poison Spyder Mesa, Golden Spike, Gold Bar Rim, Pritchett Canyon
Colorado - Liberty, Eagle Rock, Saran Wrap, Blanca, BV Carnage, Chinamans Gulch
Liberty (Penrose), Holy Cross, BV Carnage, Patriot (Penrose)
2008 Pictures
Liberty
[YOUTUBE]http://www.youtube.com/watch?v=HhvG1VXJ7Ys[/YOUTUBE]
Holy Cross
BV Carnage
Patriot
Part 1
[YOUTUBE]http://www.youtube.com/watch?v=tgvtPM3mnbo[/YOUTUBE]
Part 2
[YOUTUBE]http://www.youtube.com/watch?v=GCtAI4j8B3c[/YOUTUBE]
2007 Pictures
BV Carnage Pics
Blanca Pictures
Penrose - Liberty Trail
Chinamans
[YOUTUBE]http://youtube.com/watch?v=kTnLil3wmto[/YOUTUBE]
Trails Ran in 2007
Moab - Moab Rim, Cliffhanger, Hells Revenge, Metal Masher, Poison Spyder Mesa, Golden Spike, Gold Bar Rim, Pritchett Canyon
Colorado - Liberty, Eagle Rock, Saran Wrap, Blanca, BV Carnage, Chinamans Gulch

 02-11-2009, 06:52 AM
#91
Registered User
Thread Starter
I'm upgrading the tie rod. I bent up the last one. My last tie rod was labeled as 1/4" wall 1.25" tubing but it looked more like 3/16" compared to some actual 1/4" wall DOM.
I also didn't like the FJ80 TRE's and having to buy 2 $30 spare FJ TRE's as spares. The ballistic heims were $8.50/each so carrying spares is much easier on the wallet. I don't think I'll have the major issue of the hydro ram rotating the tie rod using heims over TRE's.
I also like the fact that I can space the tie rod up higher (with misalignment spacers) off of the passenger high steer arm. I also had major contact between the tie rod and leaf spring on the passenger side when drooped. Not very good on the TRE or tie rod.
02-15-2009, 08:51 PM
#92
Registered User
Thread Starter
Got to work on it for a couple of hours today. I removed the steering arms and took them to my grandfather's machine shop to bore out the tapered tie rod holes to 3/4". Used the Bridgeport (Vertical milling machine). I also lost the drain plug for the oil pan 
03-27-2009, 09:00 AM
#93
Registered User
Thread Starter
Here's how I aligned it at home. Clamped 2 pieces of 1"x1" to the brake rotors and marked off a line at 40". Had it towed in 3/16". Took it to my friend's shop to get aligned and it was towed out 1/10 of a degree. Not bad for home alignment.


I bought some -6 an plugs to try and plug the hydro lines coming from the PS box. Found out that since the lines have a swivel connection, they leak even with plugs in them. They need to be tightened against a solid fitting to get the swivel to stop leaking. I needed to drive the 4Runner over to my dad's house to do the work on it since he's got a welder. Oh well, it was a good idea.

So I had to hook up the ram and fill/bleed the system to drive it 3 miles. Didn't know what to do with the ram so I wire/zip tied it to the front spring hanger

Here's what the 3/4" heim and misalignment spacers / safety washer look like installed.

Drag Link / Tie rod side shot

3/4" heim vs. FJ80 1 ton TRE

4Runner looked funny as hell on 31's

I bought some -6 an plugs to try and plug the hydro lines coming from the PS box. Found out that since the lines have a swivel connection, they leak even with plugs in them. They need to be tightened against a solid fitting to get the swivel to stop leaking. I needed to drive the 4Runner over to my dad's house to do the work on it since he's got a welder. Oh well, it was a good idea.
So I had to hook up the ram and fill/bleed the system to drive it 3 miles. Didn't know what to do with the ram so I wire/zip tied it to the front spring hanger
Here's what the 3/4" heim and misalignment spacers / safety washer look like installed.
Drag Link / Tie rod side shot
3/4" heim vs. FJ80 1 ton TRE
4Runner looked funny as hell on 31's
03-28-2009, 11:41 AM
#94
Registered User
Thread Starter
Here are the finished hydro assist pics. I made a new bracket for the top of the diff. It's made out of 2"x 2" x 3/16". I tried to place the ram as perfectly in line with the tie rod as possible to try and get rid of the ram rotating the tie rod. I also tried to get it as close to keep the leverage factor down on the bracket welded to the tie rod.


Backside of mount on top of the diff

As close and as parallel as possible. Close enough that I have to undo the passenger side hiem from the steering arm to get the bolt in and out of the diff bracket.

It makes slight contact at full steer L&R. I have a new bolt with the head half shaved off to replace it.

Frontside of diff bracket to show the radius cut to fit the curve of the housing.

I just used the TG tie rod bracket I had bought from the first time I installed the assist. I cut it down and just welded it to the tie rod rather than having it on a clamp.

Another shot of the tie rod bracket.

Closeup of the diff bracket.
Backside of mount on top of the diff
As close and as parallel as possible. Close enough that I have to undo the passenger side hiem from the steering arm to get the bolt in and out of the diff bracket.
It makes slight contact at full steer L&R. I have a new bolt with the head half shaved off to replace it.
Frontside of diff bracket to show the radius cut to fit the curve of the housing.
I just used the TG tie rod bracket I had bought from the first time I installed the assist. I cut it down and just welded it to the tie rod rather than having it on a clamp.
Another shot of the tie rod bracket.
Closeup of the diff bracket.
03-28-2009, 03:30 PM
#95
Registered User
Thread Starter
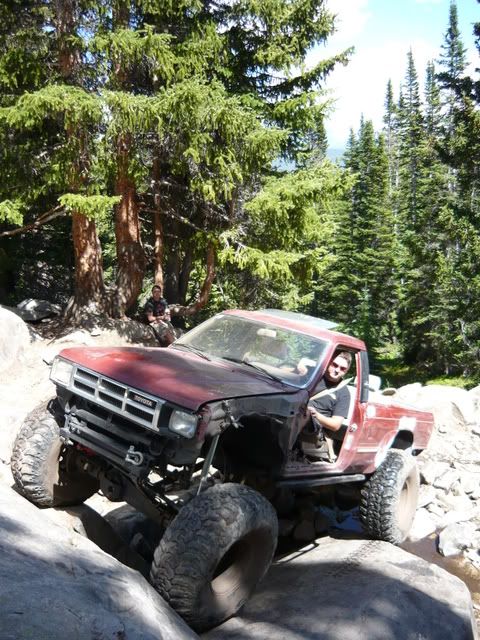
I took the 4Runner out on March 21st for a beginning of the wheeling season, making sure my hydro assist system works trip


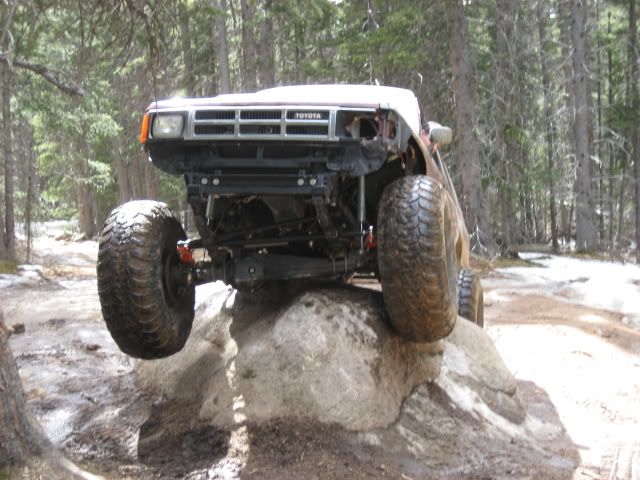
Can't believe I didn't have enough tire for this
Can't believe I didn't have enough tire for this
03-29-2009, 06:38 AM
#99
Registered User
Join Date: May 2007
Location: Summit County, Colorado
Posts: 1,441
Likes: 0
Received 0 Likes
on
0 Posts
How did the steering work out? Does it steer any differant, or feel tighter? I've been thinking about converting over to hiems too. All my tie rods are only a couple months old and everytime it's cold I can feel and hear them move (like they have play inside them). I guess it could be that the taper is wore out in the steering arm, I don't really know but it drives me crazy! How hard was it to bore out the holes, could it be done with a drill press?
Looks like you had fun wheeling! Where and when are you going next?
Looks like you had fun wheeling! Where and when are you going next?
03-29-2009, 12:49 PM
#100
Registered User
Thread Starter


