Cabot's '85 SR5 Extended Cab 4x4 (re)Build
 07-20-2012, 12:57 PM
#1
Registered User
Thread Starter
Cabot's '85 SR5 Extended Cab 4x4 (re)Build
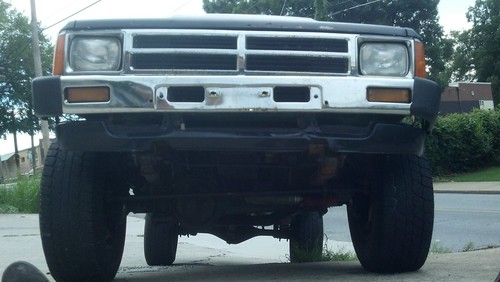
I joined the '85 club a few days ago. I posted a picture of the truck in the show off your 84-85 thread. I have a growing list of things that need to be done, but everything g about the motor and drive line seem pretty solid.
When I got it, it was doing the surging idle thing, so the first thing I did was idle it down to 750rpm. It sounds great now. Then there was a false overheating problem. Got that solved here: https://www.yotatech.com/forums/f115...stions-256380/ Thanks, Vang530!
On my way home from picking it up, it seemed way too easy to get to 75mph. I called my friend who was following me in a totally stock 2001 Tacoma. We talked for a minute, and I determined that I'm actually going 70mph when my speedometer says 90mph on 31's. I'm also around 3500rpm or so when I hit 70. The plate under the hood says that I'm supposed to have 4.10 gears. Some quick math seems to indicate that one of the POs swapped in 5.29 3rds.
Here's my original to do list:
1)There are wires and hoses dangling loose under the hood everywhere. I want to get that all cleaned up.
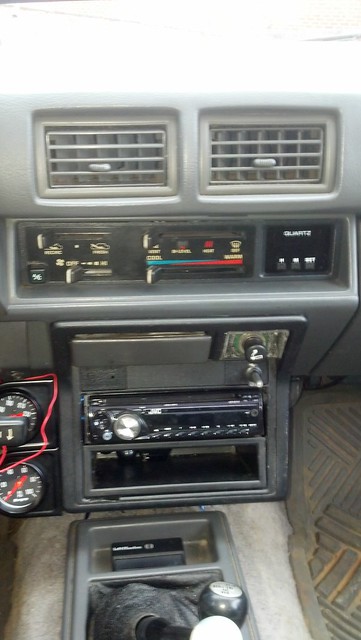
2)The cd player is obviously hooked up wrong.
3) Get the oil pressure gauge working Thread: https://www.yotatech.com/forums/f115...stions-256414/
4) 12,000 and 30,000 mile service. I've done these once. It's probably time again. I forget what's involved.
5) The front diff is leaking, and the seals on the back side of the knuckles are leaking and have been sealed up with RTV by a PO. I guess I'm rebuilding that. The rear will get done when I put in a E-Locker. It just has a small pinion leak.
6) Rebuild power steering pump and the junkyard IFS box.
7) Install OME springs, FOX Shocks, high steer, shock relocation brackets, etc. It's going to sit on 33x10.5x15 BFG KM2's
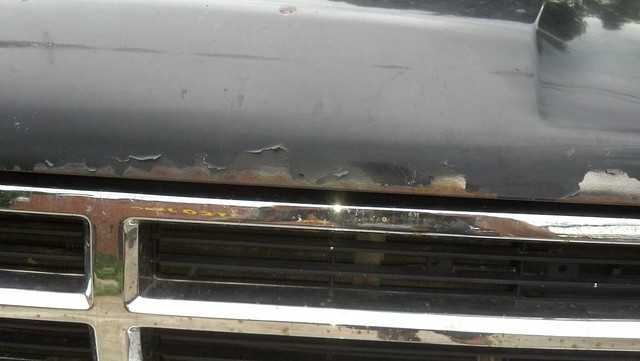
8) There is a little rust, and I can see where it has some body filler chipping out of a couple of spots. Also, the paint has chips and flakes. I hit something with the front fender and with the tailgate. Once I get this thing rolling again, I'm taking it to my friend Phil, the sheet metal wizard to fix all of that.
9) Armor and tube bumpers.
The list will be changing and growing, for sure, and this thread is going to be full of random info about these trucks that I'm collecting for my own reference. Maybe someone else will find something useful here too.
Edit 10/14/16: When I bought this truck back in July of 2012, I knew that I wanted to do something basically half way between a restoration and building into an off-road rig, but what I needed immediately out of it was reliable transportation and an introduction to working on something with fuel injection. I�d just sold a Volkswagen Golf because I didn�t know how to work on a modern fuel injected vehicle yet and couldn�t afford the maintenance. I knew that the Toyota pickup had a reputation for running forever and being easy to work on. I started researching these things and realized that I could get fuel injection and a solid front axle from the factory on a 1985. At that point, I began my search for a truck. I found my truck on Craigslist for $3000. It�s an SR5 extended cab with basically every option.
I�ve had a couple of 4x4s previously and had wanted to build an off-road vehicle since I was 16. Now that I had a truck, the next step was to save up for another car that could take over daily driver duties so that I could pull the truck apart and still have some transportation. I daily drove this thing for several years before stumbling across a deal on a diesel 2002 Jetta that needed some work. Keeping the truck on the road had taught me that with tools, time, and a factory service manual, I could perform most any process on any vehicle. I got the car running. Shortly after that, the truck developed an oil leak on the front of the engine; the CFC radiator (total junk) I�d previously installed started leaking; the heater core started leaking, and the power steering pump started leaking. The tires were bald. I decided that it was time to pull this thing off the road for a bit of an overhaul.
My work on this truck has been sporadic. Since I pulled it off the road, I�ve put a badly wrecked Volkswagen back on the road. I�ve converted another one from automatic to manual. I�ve built three bicycles. I keep putting this truck on the back burner. It�s been so long that I forget what I�ve posted and what I haven�t. Sometimes I�ll work on it for days and take neither pictures nor document my progress here.
I�ve read and learned so much since I started messing around with this thing. I figured I�d update the first post in the thread to reflect where it�s at now. I�m planning to keep a current to do list in this first post. I�ll continue to update the thread with new posts about what I accomplish with the truck.
Here's what's left to get it driveable:
Miscellaneous engine bay stuff:
Replace all vacuum lines and air hoses
Replace valve cover gasket and half moon
Front Main Seal
Lift and crossover steering:
Clean and paint IFS box
Mount IFS power steering box
Set up front shock hoops
Order Power Steering Pump Seal
Reseal power steering pump
Rebuild front axle
Source used and rebuild OE hubs
Put new gear oil in the front axle
Source and install high-steer arms and linkage
Install extended brake lines on front
Bleed brakes
Remove steering tower from front axle
Install Old Man Emu springs all the way around
Steering alignment
Replace center support bearing
Install Rear Bump Stops
Stuff Related to my leaky coolant system:
Replace all coolant hoses
Replace thermostat
Have OE radiator repaired
Have new heater core custom built
Finish putting the coolant system back together
Reinstall interior
Stuff to have worked on:
Take power steering pressure line to hydraulic shop
Diagnose A/C
Get tires put on
When I got it, it was doing the surging idle thing, so the first thing I did was idle it down to 750rpm. It sounds great now. Then there was a false overheating problem. Got that solved here: https://www.yotatech.com/forums/f115...stions-256380/ Thanks, Vang530!
On my way home from picking it up, it seemed way too easy to get to 75mph. I called my friend who was following me in a totally stock 2001 Tacoma. We talked for a minute, and I determined that I'm actually going 70mph when my speedometer says 90mph on 31's. I'm also around 3500rpm or so when I hit 70. The plate under the hood says that I'm supposed to have 4.10 gears. Some quick math seems to indicate that one of the POs swapped in 5.29 3rds.
Here's my original to do list:
1)There are wires and hoses dangling loose under the hood everywhere. I want to get that all cleaned up.
2)The cd player is obviously hooked up wrong.
3) Get the oil pressure gauge working Thread: https://www.yotatech.com/forums/f115...stions-256414/
4) 12,000 and 30,000 mile service. I've done these once. It's probably time again. I forget what's involved.
7) Install OME springs, FOX Shocks, high steer, shock relocation brackets, etc. It's going to sit on 33x10.5x15 BFG KM2's
8) There is a little rust, and I can see where it has some body filler chipping out of a couple of spots. Also, the paint has chips and flakes. I hit something with the front fender and with the tailgate. Once I get this thing rolling again, I'm taking it to my friend Phil, the sheet metal wizard to fix all of that.
9) Armor and tube bumpers.
The list will be changing and growing, for sure, and this thread is going to be full of random info about these trucks that I'm collecting for my own reference. Maybe someone else will find something useful here too.
Edit 10/14/16: When I bought this truck back in July of 2012, I knew that I wanted to do something basically half way between a restoration and building into an off-road rig, but what I needed immediately out of it was reliable transportation and an introduction to working on something with fuel injection. I�d just sold a Volkswagen Golf because I didn�t know how to work on a modern fuel injected vehicle yet and couldn�t afford the maintenance. I knew that the Toyota pickup had a reputation for running forever and being easy to work on. I started researching these things and realized that I could get fuel injection and a solid front axle from the factory on a 1985. At that point, I began my search for a truck. I found my truck on Craigslist for $3000. It�s an SR5 extended cab with basically every option.
I�ve had a couple of 4x4s previously and had wanted to build an off-road vehicle since I was 16. Now that I had a truck, the next step was to save up for another car that could take over daily driver duties so that I could pull the truck apart and still have some transportation. I daily drove this thing for several years before stumbling across a deal on a diesel 2002 Jetta that needed some work. Keeping the truck on the road had taught me that with tools, time, and a factory service manual, I could perform most any process on any vehicle. I got the car running. Shortly after that, the truck developed an oil leak on the front of the engine; the CFC radiator (total junk) I�d previously installed started leaking; the heater core started leaking, and the power steering pump started leaking. The tires were bald. I decided that it was time to pull this thing off the road for a bit of an overhaul.
My work on this truck has been sporadic. Since I pulled it off the road, I�ve put a badly wrecked Volkswagen back on the road. I�ve converted another one from automatic to manual. I�ve built three bicycles. I keep putting this truck on the back burner. It�s been so long that I forget what I�ve posted and what I haven�t. Sometimes I�ll work on it for days and take neither pictures nor document my progress here.
I�ve read and learned so much since I started messing around with this thing. I figured I�d update the first post in the thread to reflect where it�s at now. I�m planning to keep a current to do list in this first post. I�ll continue to update the thread with new posts about what I accomplish with the truck.
Here's what's left to get it driveable:
Miscellaneous engine bay stuff:
Replace valve cover gasket and half moon
Lift and crossover steering:
Set up front shock hoops
Source used and rebuild OE hubs
Source and install high-steer arms and linkage
Install extended brake lines on front
Bleed brakes
Replace center support bearing
Install Rear Bump Stops
Stuff Related to my leaky coolant system:
Replace thermostat
Have OE radiator repaired
Have new heater core custom built
Stuff to have worked on:
Diagnose A/C
Last edited by cabot; 04-01-2020 at 10:05 AM.
 07-21-2012, 09:56 PM
#3
Registered User
Thread Starter
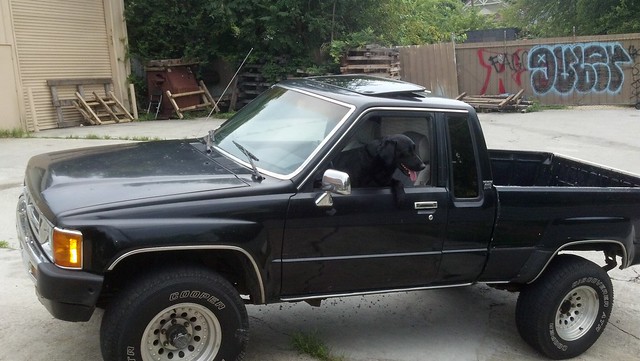
To start, I'm thinking that the biggest I'd go with this thing is 4" lift on 33x10.50. It seems like it would be too complicated to go to 35's. I'm not sure at what point you need to move the front axle forward, when you need to go to crossover steering, whether the non ifs steering box can handle turning 35's, etc. I'm also concerned about that effect they would have on gas mileage (I got slightly over 20 on my first tank). Finally, I want a very streetable tire that isn't wider than 10.5. I hate the look of wider tires. Your rig looks like you could answer some of my questions here, nothingbetter.
Pics:


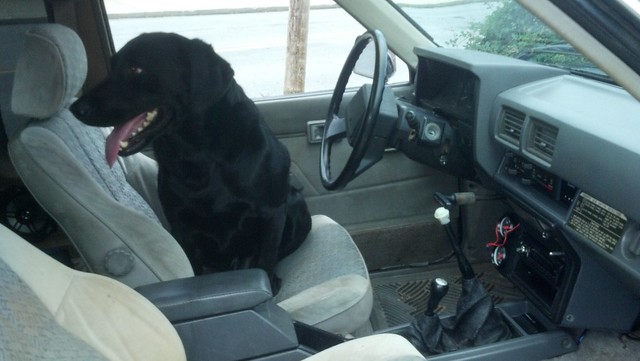
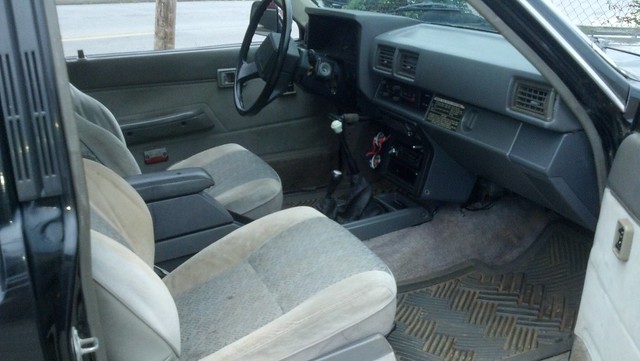


Pics:
Last edited by cabot; 10-15-2016 at 11:45 AM.
07-22-2012, 01:01 AM
#4
Super Moderator
Staff
iTrader: (1)
Join Date: Aug 2008
Location: Anderson Missouri
Posts: 11,788
Likes: 0
Received 21 Likes
on
19 Posts
Nice looking little truck. I just bought a 85 extended cab that a guy was using for parts. I have a few projects that I need to finish up and am hoping to start on in a year or so. Seeing yours makes me see the possibilities. The extra cabs are getting harder to find. Looking forward to your build.
07-22-2012, 06:53 AM
#5
Registered User
Thread Starter
Man... I can't believe that someone was using an 85 extended cab for parts. They were clearly using the wrong one for parts--should have been fixing up the 85 with whatever their other truck was... haha. Oh well... you win that one, Terry.
07-22-2012, 06:36 PM
#6
Registered User
Join Date: Jun 2012
Location: Brandon, MS
Posts: 173
Likes: 0
Received 0 Likes
on
0 Posts
Agree with you there Cabot! I've seen many of these trucks taken to part out. I just have to save one too!! Wish mine was an extra cab though.. My next one will be for sure! If you do a 4 inch lift crossover steering is best. The ifs box will hold up well if you do it right. 3 inch lift you can probably get away with the stock steering for a while. The steering wears out quick though if you are off road a lot. I'll be doing the crossover steering soon on my truck in the next week or so. It will give you an idea on the price and stuff. I'll let you know how it goes
07-24-2012, 11:10 AM
#7
Registered User
Thread Starter
Well... looks like I'll need to get a welder before I lifting this thing then. My dad is good at it and been doing it forever, but I haven't welded in maybe ten years. I'll probably need to practice a bit before I do any welding up mounts for my suspension and steering. I suppose that an angle grinder is going on my tool wish list as well.
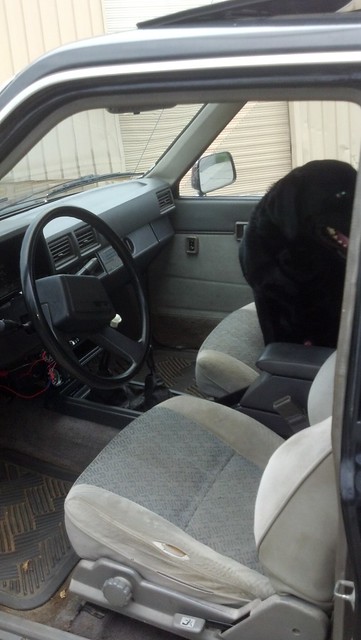
And yes, I'm excited about saving one of the rarer of these little trucks. I want to look into having my seats reupholstered in a way that will maintain the SR5 inserts. My driver's seat's padding under my butt is about worn out, but the way the lumbar support deal works makes it the most comfortable seat I've ever had in any vehicle.
In other news, I've got my radiator in the shop. Here's to hoping it can be refurbished! I found a pinhole in it near the outlet in the top tank. Also, with sustained driving on the highway (speedometer at 70-75, tachometer over 3k--this is actually around 55mph) the temperature still begins to rise toward the non-normal range.
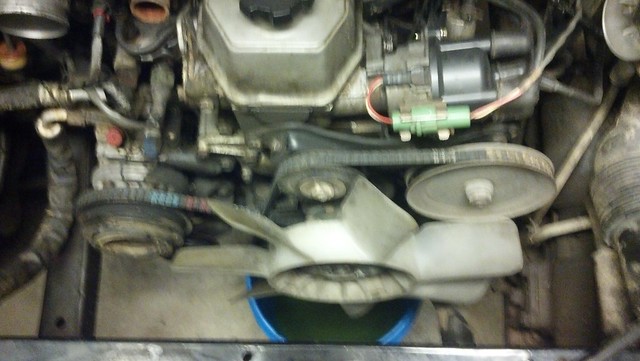
And, here are some pictures of the removal process:
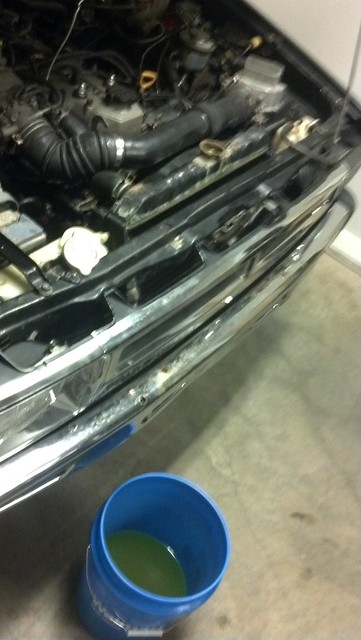
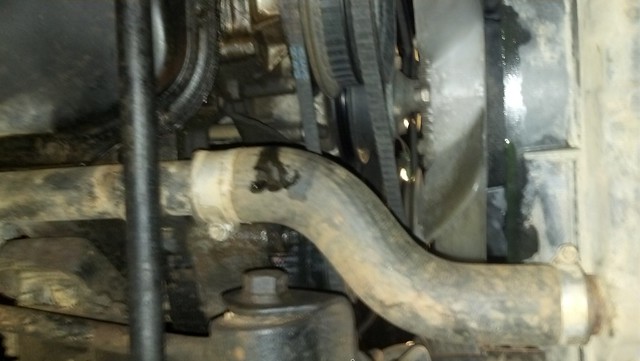
It seemed convenient not to actually remove the bottom hose from the engine, so I left it. I just pulled it off the radiator.
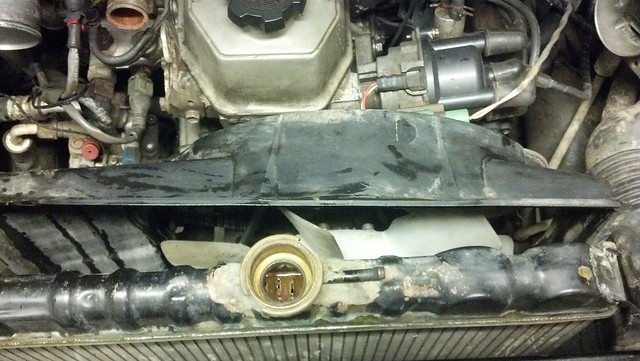
I couldn't get the shroud out until I loosened the top two bolts on the radiator. After loosening those bolts, I removed the shroud then the bottom two bolts. I finally finished pulling the top two and removed the radiator.
This was way easier than I remember it being pulling the radiator out of my Scout a few years back. I think I had to cut all the hoses out that time.
I don't know why I didn't get pictures of the radiator after removal. Both output spouts were rusty enough that I'm worried whether this repair is going to work out.
For future reference: The preferred thermostat is the 192 degree Toyota number 90916-03070. The earlier trucks were updated to this part number in a TSB to help with the temp overshoot problem.
For future reference: All 22re ground locations
I need to do more engine bay cleaning and sort out what this oil pressure gauge sending unit connector problem. I'm pretty much at a loss for how to hook that up.
And yes, I'm excited about saving one of the rarer of these little trucks. I want to look into having my seats reupholstered in a way that will maintain the SR5 inserts. My driver's seat's padding under my butt is about worn out, but the way the lumbar support deal works makes it the most comfortable seat I've ever had in any vehicle.
In other news, I've got my radiator in the shop. Here's to hoping it can be refurbished! I found a pinhole in it near the outlet in the top tank. Also, with sustained driving on the highway (speedometer at 70-75, tachometer over 3k--this is actually around 55mph) the temperature still begins to rise toward the non-normal range.
And, here are some pictures of the removal process:
It seemed convenient not to actually remove the bottom hose from the engine, so I left it. I just pulled it off the radiator.
I couldn't get the shroud out until I loosened the top two bolts on the radiator. After loosening those bolts, I removed the shroud then the bottom two bolts. I finally finished pulling the top two and removed the radiator.
This was way easier than I remember it being pulling the radiator out of my Scout a few years back. I think I had to cut all the hoses out that time.
I don't know why I didn't get pictures of the radiator after removal. Both output spouts were rusty enough that I'm worried whether this repair is going to work out.
For future reference: The preferred thermostat is the 192 degree Toyota number 90916-03070. The earlier trucks were updated to this part number in a TSB to help with the temp overshoot problem.
For future reference: All 22re ground locations
I need to do more engine bay cleaning and sort out what this oil pressure gauge sending unit connector problem. I'm pretty much at a loss for how to hook that up.
Last edited by cabot; 04-30-2015 at 01:14 PM.
Trending Topics
07-24-2012, 12:35 PM
#8
Registered User
Join Date: Jun 2012
Location: Brandon, MS
Posts: 173
Likes: 0
Received 0 Likes
on
0 Posts
You should only have to weld on the steering box if your doing crossover steering. No need to buy a welder for a one time use lol. Although an air dremel works out great and can be used for many things, such as a grinder! The radiator problem isnt to bad. Where you from?
07-24-2012, 01:16 PM
#9
Registered User
Thread Starter
I'm from rural Tennessee (Estill Springs). I moved to Georgia for school about 10 years ago. I lived in Macon for several years. I've been in the Atlanta area for about a year and a half now.
I see you're in Brandon, Nightmare. My dad is from Hattiesburg. I need to get over that way to visit some family sometime. I haven't been in several years. You a lifelong Mississippian or a transplant?
Also, I just ran into a deal on a welder that I can't pass up. I'm interested in building bicycle frames. I'll probably put sliders on the truck at some point. I could continue listing uses for a welder, but that would be silly. If I don't get this welder, I'll probably hold off on getting one for a while, but it definitely wouldn't be a one time use thing.
07-24-2012, 01:22 PM
#10
Registered User
Join Date: Jun 2012
Location: Brandon, MS
Posts: 173
Likes: 0
Received 0 Likes
on
0 Posts
Sounds good on the welder! And yes, been here my whole life. I was going to say I have a new radiator that came with my parts truck if you weren't to far away. I don't feel good about shipping it because of what it is. But if your interested, I won't be asking near the retail. Just PM me about that if you want it.
07-25-2012, 04:23 AM
#11
Super Moderator
Staff
iTrader: (1)
Join Date: Aug 2008
Location: Anderson Missouri
Posts: 11,788
Likes: 0
Received 21 Likes
on
19 Posts
The guy I bought mine from, bought the farm it was on. The owners of the farm left it abandoned on it. The owner I got it from started using it as parts. I have about everything I need to put it back together except for a title. I have been down that road before and it is alot of trouble to go thru, but I am not planning on starting it anytime soon.
I am not going to part it out or anything and will replace the parts I dont have when I come across them at a good deal. Besides I got two other projects to wrap up before I even start another one. It is too nice of a truck to see parted. I got it when I went to buy an 84 as a 2 for 1 special. Supposed to go pick it up Friday if the owner and I can get our schedules in sync with each other. Someone did put in an 89-95 dash in it, but I have a couple of spare dash that I can put into it. I will post some pics of it when I get it home. It will get covered up and be a future project.
I am not going to part it out or anything and will replace the parts I dont have when I come across them at a good deal. Besides I got two other projects to wrap up before I even start another one. It is too nice of a truck to see parted. I got it when I went to buy an 84 as a 2 for 1 special. Supposed to go pick it up Friday if the owner and I can get our schedules in sync with each other. Someone did put in an 89-95 dash in it, but I have a couple of spare dash that I can put into it. I will post some pics of it when I get it home. It will get covered up and be a future project.
07-25-2012, 04:28 AM
#12
Super Moderator
Staff
iTrader: (1)
Join Date: Aug 2008
Location: Anderson Missouri
Posts: 11,788
Likes: 0
Received 21 Likes
on
19 Posts
On your radiator, I would suggest taking it to a professional shop and have it power flushed. The Preston kits just wont get all of the rust build up out of it. Around here you have to pull it and it cost $25 to get it cleaned. If you watch it you will be amazed at how dirty it is. Looks like mud.
My radiator shop brazes on the neck and water pipes. I have never had a problem with them when he is done. You can almost count on needing your brackets brazed back on too. I have seen my temp guage go down 25% just having the radiator flushed.
My radiator shop brazes on the neck and water pipes. I have never had a problem with them when he is done. You can almost count on needing your brackets brazed back on too. I have seen my temp guage go down 25% just having the radiator flushed.
07-27-2012, 11:49 PM
#13
Registered User
Thread Starter
Well, I took my radiator to the shop. In Atlanta, it's a little more than $25 for the service, but they tanked it, pressure tested, repaired and repainted it. The guy even delivered it too me when he was done. I replaced the the main coolant hoses, removed the the aftermarket temp gauge and plugged that port. I was able to get the sheared bolt out of the thermostat housing with some PB Blaster and an Easy Out. The thermostat was new, as the PO stated at the time of purchase.
I replaced nearly every piece of vacuum line there is under that hood. I fixed some of the worst wiring I've ever seen. Epoxied the broken in half main relay box back together. Oil change with Mobil 1 and OEM filter. New OEM PCV valve and grommet. New OEM air filter.
Correct OEM oil pressure sender installed but not wired up yet.
I drove home from Atlanta to Tennessee tonight. I was spinning around 3200rpm at 58mph for a little over for hours on the interstate. No overheating. Coolant temperature gauge stayed at just under 1/2 the whole trip. Best running motor that's been in anything I've owned.
I should be getting a tag and exhaust tomorrow. The engine bay is looking way better. I'll get pictures tomorrow.
07-28-2012, 07:19 PM
#15
Registered User
Thread Starter
I would have never found that tiny little coolant bypass hose if it hadn't let me know its location by spraying coolant everywhere as soon as I got every little leak fixed. Holy God I just burned myself.
 done it a hundred times! And still cant remember it myself!
07-28-2012, 09:17 PM
done it a hundred times! And still cant remember it myself!
07-28-2012, 09:17 PM
#17
Registered User
Thread Starter
Haha... Makes me want to keep a spare at all times. I had been trying to get my AC going all day. I was going to return some tools, and that little guy blew out.
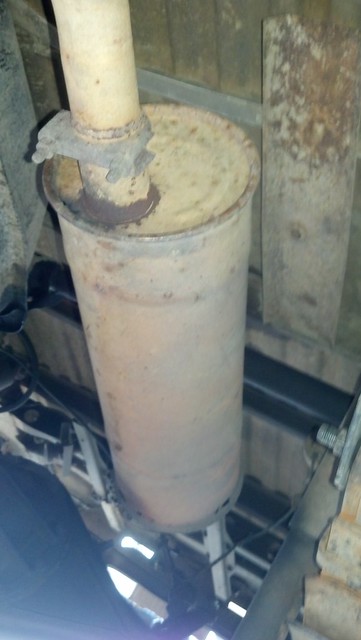
I got exhaust put on today but couldn't figure out where the leak in my AC is. It leaks down to no vacuum immediately (under one minute), but I can't figure out where the leak is. I'm thinking about having a shop repair it. It just seems beyond me short of just putting in all new AC components.
I was too frustrated to get any pictures of anything during daylight hours.
07-29-2012, 05:06 PM
#18
Registered User
Thread Starter
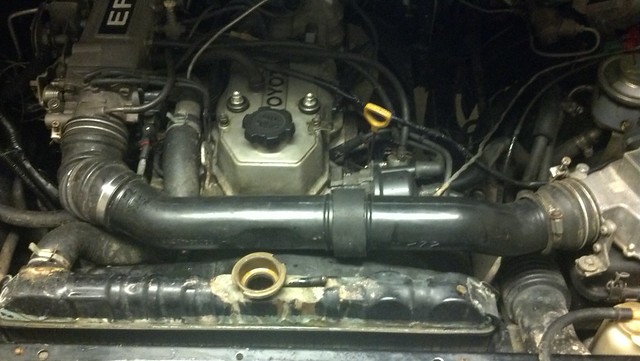
I finally snapped some photos of what it looks like under the hood. The vacuum line that I ordered from Bug Eyed has some braided sheathing that I think looks pretty nice.
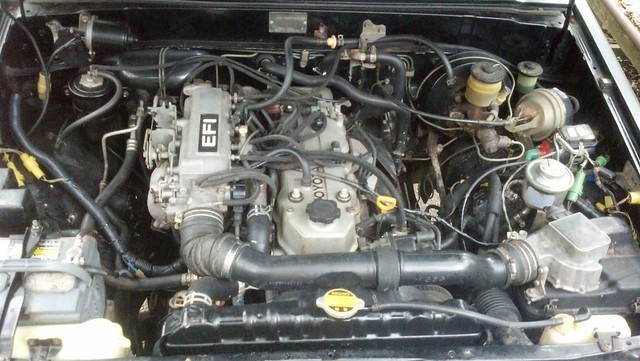
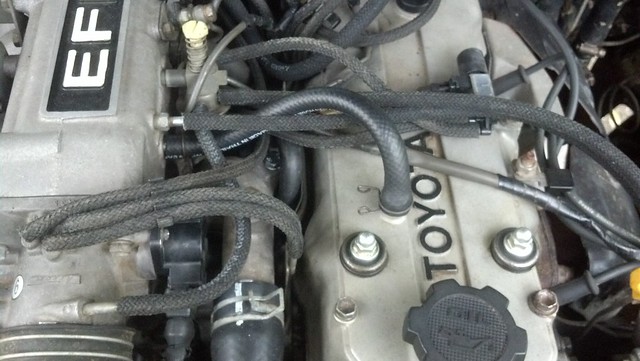
There are a few hoses that were larger or peculiar in some way. I�m going to order those through Toyota. The big one in the second picture there is one that I kind of made by heating and stretching one end of a piece of SAE fuel line. That's temporary. I�m also going to get the other three coolant hoses that go to the heater core. The valve that opens and closes the heater core is super crusty but seems to work fine. I�m in the Dirty South, and it�s the peak of summer, I won�t be needing a to use that guy too much for a while. If anyone has an extra one of those that is plastic from a later year and in good working order, PM me with a price please.
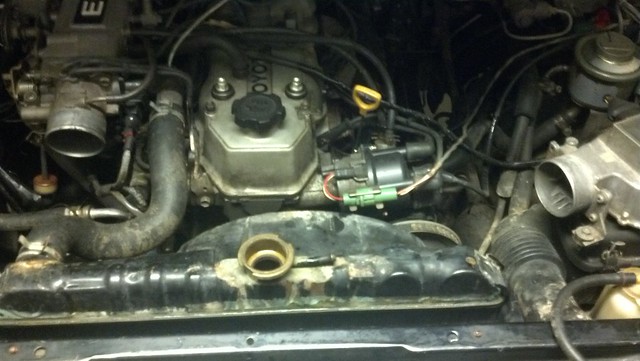
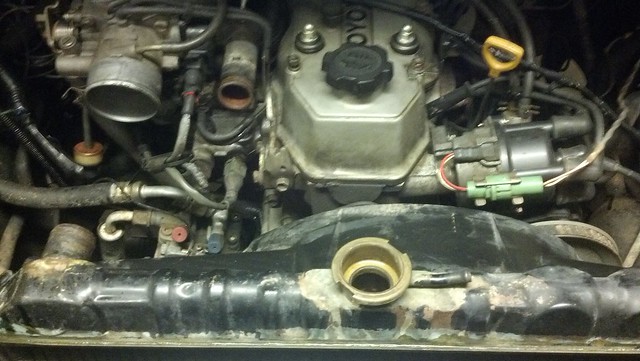
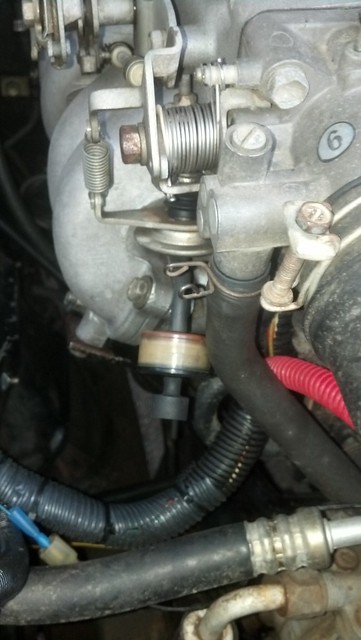
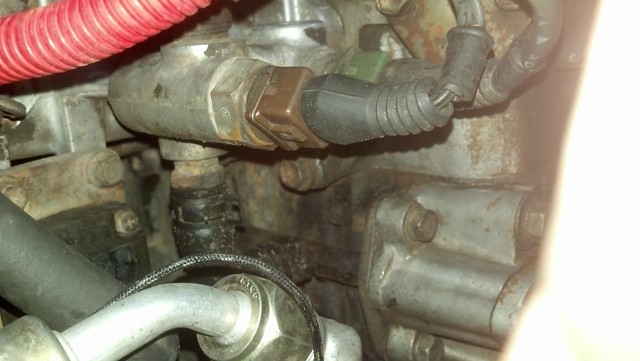
This thing looks like it might have something to do with high idle or cruise control. Neither one of those currently works, nor can I see what else might connect to the other side into the weird little plastic boot. I know that the piece of vacuum line holding that guy is supposed to be at least a few inches longer because it was all cracked up before. I just cut out the cracked portion and stuck it back on temporarily. If any of you guys know what that guy does, please let me know (Thanks ahead of time).
I�ve mentioned a couple of times that the wiring in this truck is pretty hacked up. I find crappy wiring pretty much everywhere I see wiring that I hadn�t before. I was telling my Toyota-Tech friend this, and he suggested that I build a whole new wiring harness from the truck�s wiring diagram to "save myself some time and money". I told him that I thought his idea was a bit over my head. At that point he said that he �slightly gets off on wiring,� that he can get all the appropriate connectors, and that he would love to help me build a new harness for the whole truck. We�re doing that three weekends from now! Good bye and good riddance to any and all electrical demons.
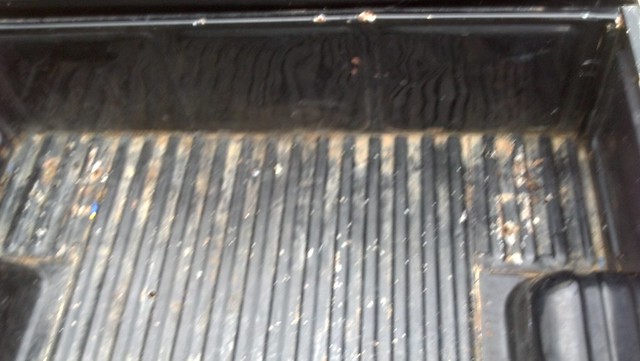
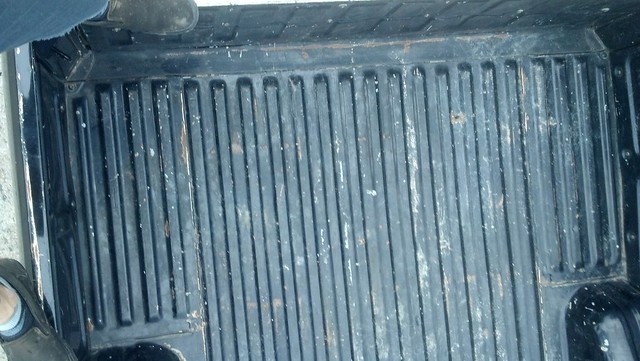
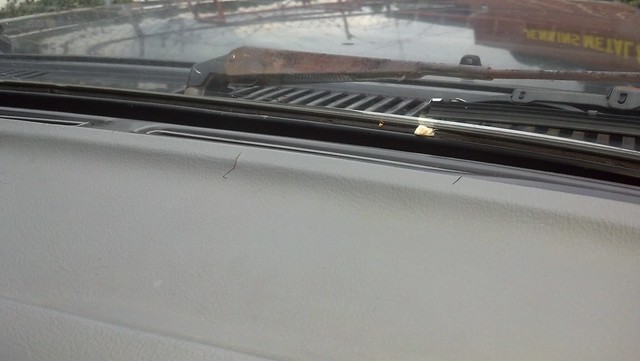
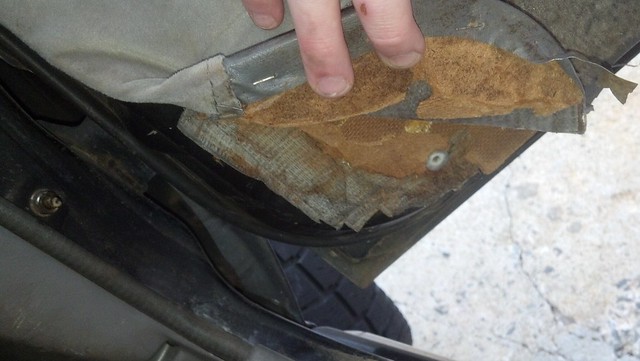
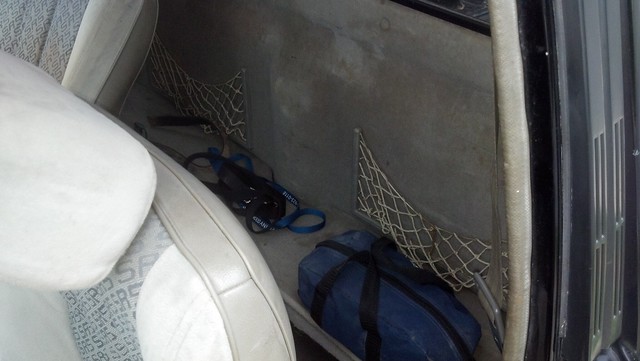
I noticed that my bed doesn�t sit exactly flat and found a few spots where rust has previously been repaired. I�m going to pull the inner panels out, check out the body mount bushings or whatever these things have and start exterior body work in the week coming up.
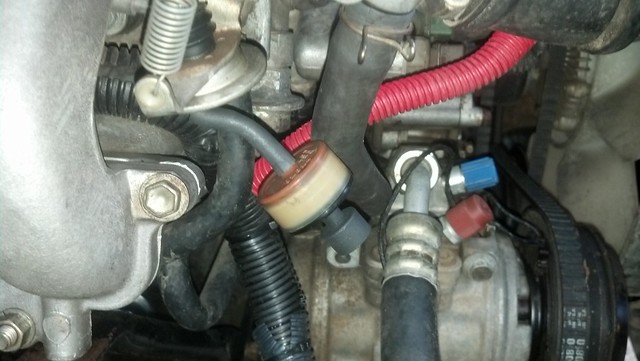
Here are some pictures of that little dirtbag of a hose that exploded on me last night (the new piece installed):
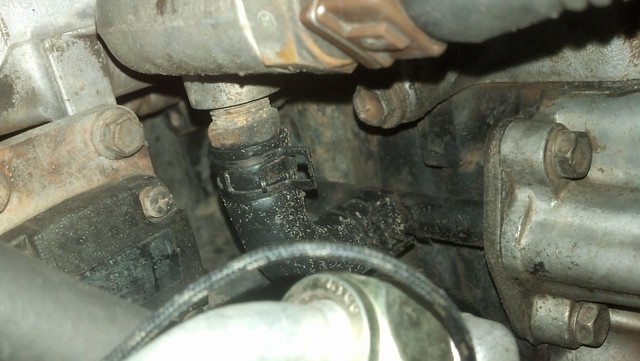
And, finally, I'm beginning to suspect that I have a leaky rear main seal. There is oil that occasionally drips from between the block and the bell housing. I also find it on my rear bumper and tailgate.
There are a few hoses that were larger or peculiar in some way. I�m going to order those through Toyota. The big one in the second picture there is one that I kind of made by heating and stretching one end of a piece of SAE fuel line. That's temporary. I�m also going to get the other three coolant hoses that go to the heater core. The valve that opens and closes the heater core is super crusty but seems to work fine. I�m in the Dirty South, and it�s the peak of summer, I won�t be needing a to use that guy too much for a while. If anyone has an extra one of those that is plastic from a later year and in good working order, PM me with a price please.
This thing looks like it might have something to do with high idle or cruise control. Neither one of those currently works, nor can I see what else might connect to the other side into the weird little plastic boot. I know that the piece of vacuum line holding that guy is supposed to be at least a few inches longer because it was all cracked up before. I just cut out the cracked portion and stuck it back on temporarily. If any of you guys know what that guy does, please let me know (Thanks ahead of time).
I�ve mentioned a couple of times that the wiring in this truck is pretty hacked up. I find crappy wiring pretty much everywhere I see wiring that I hadn�t before. I was telling my Toyota-Tech friend this, and he suggested that I build a whole new wiring harness from the truck�s wiring diagram to "save myself some time and money". I told him that I thought his idea was a bit over my head. At that point he said that he �slightly gets off on wiring,� that he can get all the appropriate connectors, and that he would love to help me build a new harness for the whole truck. We�re doing that three weekends from now! Good bye and good riddance to any and all electrical demons.
I noticed that my bed doesn�t sit exactly flat and found a few spots where rust has previously been repaired. I�m going to pull the inner panels out, check out the body mount bushings or whatever these things have and start exterior body work in the week coming up.
Here are some pictures of that little dirtbag of a hose that exploded on me last night (the new piece installed):
And, finally, I'm beginning to suspect that I have a leaky rear main seal. There is oil that occasionally drips from between the block and the bell housing. I also find it on my rear bumper and tailgate.
08-04-2012, 07:16 AM
#19
Registered User
Thread Starter
The clutch master cylinder and slave cylinder totally died on me last night. The truck was blocking a friend's driveway, so I couldn't wait to order Aisin stuff. The Toyota dealership had nothing. Let's hope this Duralast business holds up for a while.


