Boomtacoma's 85 Ext Cab Build up
 01-01-2013, 10:19 PM
#81
Registered User

Join Date: Dec 2012
Location: St. Louis, MO area
Posts: 2
Likes: 0
Received 0 Likes
on
0 Posts
One of the best threads I've seen. Great pics and camera placement on the build as you went through it. The 63" chevy rear springs, with re-located spring and shackle mounts, give you enough lift without blocks? I heard you have to eliminate or cut the rear out of the bottom leaf, acts as sort of a traction bar? Also, if you move the rear leafs to the front, does that add lift or just move the axle forward. Thanks and truck looks great.
 01-05-2013, 07:52 AM
#82
Registered User
Thread Starter
You can get anywhere from 3 to 6 inches of lift with the 63s. It depends on the shackle placement. I had some guidance from my friend ray and we got mine just about right. My shackle angle is to my liking. It provided enough lift for the 37s. They were set up to keep the tires centered in the wheel well. Some people have removed the overload or trimmed them down. I left them in. I do need to address my front springs. They haven't settled like I have wanted. I might need a different pack or remove a leaf.
01-05-2013, 07:56 AM
#83
Registered User
Thread Starter
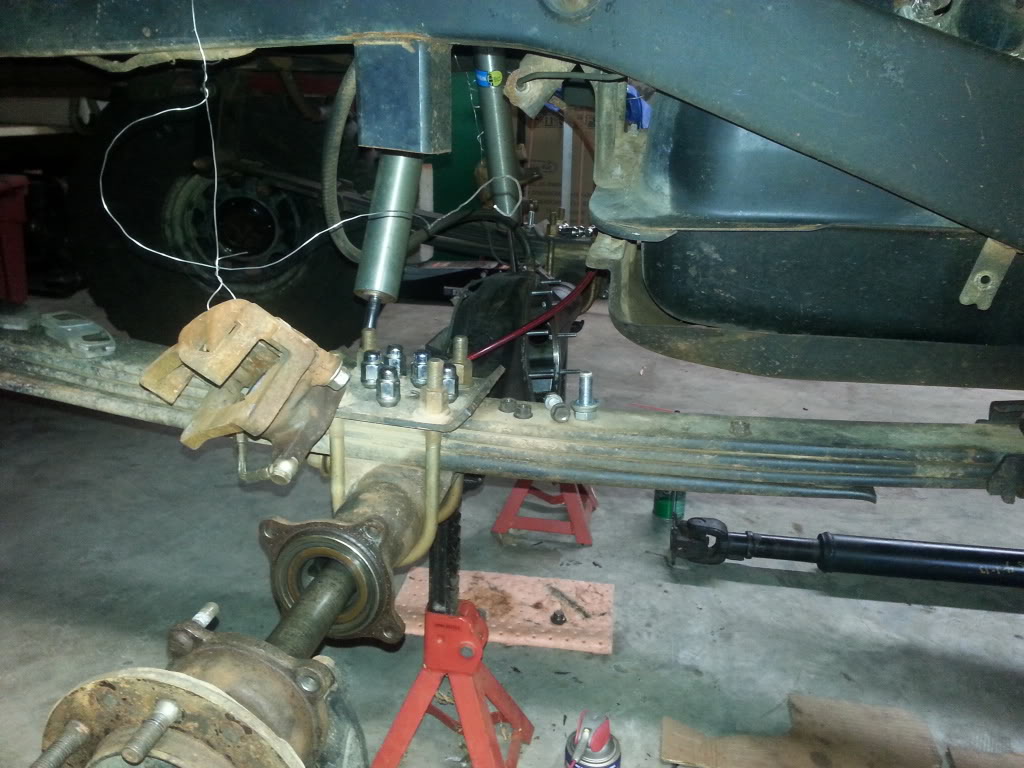
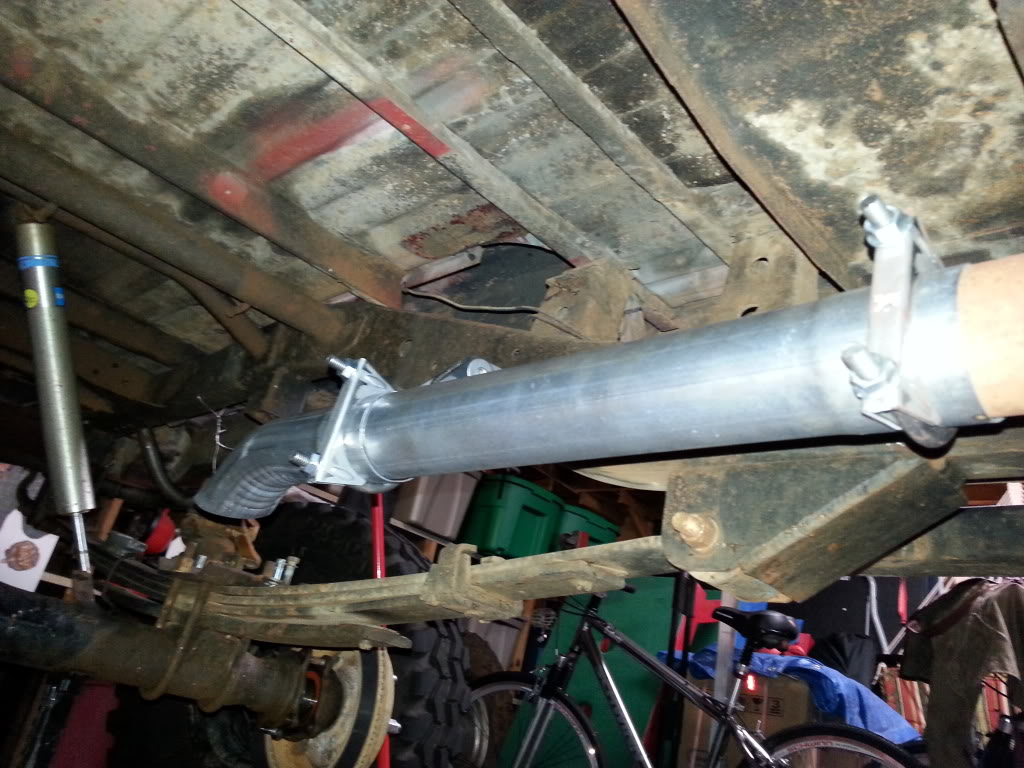
Got about 75% of all the hoses ran to their positions. I test fit the ram and used a set of shock bushings for spacers on the axle housing. I need to drill out the hole on the axle side mount to accept the 5/8 bolt that came with the PSC kit. I also need a 5/8 bolt about 3 inches longer to use this existing mount.
I used some 1x1 angle iron to mount the cooler in front of the radiator. Its held on with some zip ties now until I figure out how to attach it securely. I used a couple pieces of scrap hose that I had laying around to protect the cooler hoses going through the core support.
I made up one end of the high pressure line that goes to the steering box to see how much slack I have to make up that connection. I also got the low pressure fitting off the steering box and cleaned up ready to go on the other box.
I just need to find some time to go pick up my steering box in Conroe. Will do that this coming week of possible.


After I take care of the last little chores, I will break it all down trim some sharp edges and paint all the bare metal.
sent from my Galaxy 2 Skyrocket
I used some 1x1 angle iron to mount the cooler in front of the radiator. Its held on with some zip ties now until I figure out how to attach it securely. I used a couple pieces of scrap hose that I had laying around to protect the cooler hoses going through the core support.
I made up one end of the high pressure line that goes to the steering box to see how much slack I have to make up that connection. I also got the low pressure fitting off the steering box and cleaned up ready to go on the other box.
I just need to find some time to go pick up my steering box in Conroe. Will do that this coming week of possible.
After I take care of the last little chores, I will break it all down trim some sharp edges and paint all the bare metal.
sent from my Galaxy 2 Skyrocket
Last edited by Boomtacoma01; 01-05-2013 at 08:04 AM.

 04-06-2013, 07:03 PM
#85
Registered User
Thread Starter
After messing around with this project for a while, I finally got the hydro assist wrapped up and ready to fill.
Looks kinda tight.

Cooler in place. The bracket for the latch support was flipped around 180 degrees to make a little needed room for the install.

I had to chop out a little of the front core support. I used some 3/8 fuel line to put on the sharp edges and zip tied them down. I also used some scrap hose to keep the cooler lines from getting cut.

Got everything tight. Ready for a test drive this week.


I have been trying to get some productive wrenching done as of late after the worlds longest hydro assist install.
Now on to other business at hand:
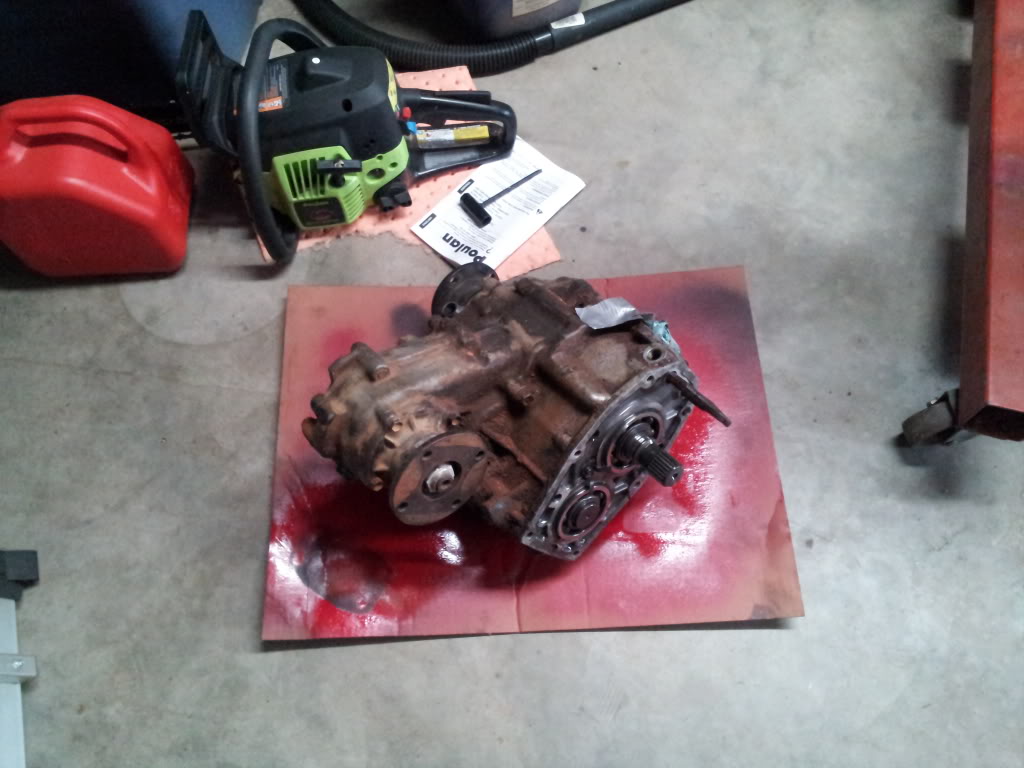
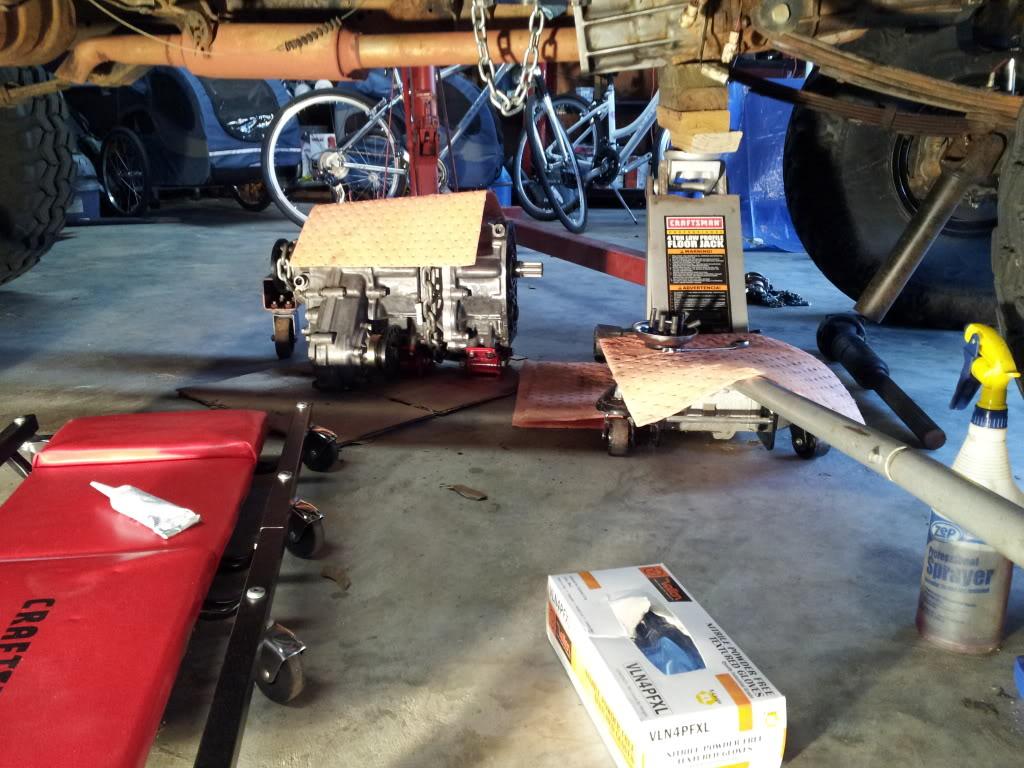
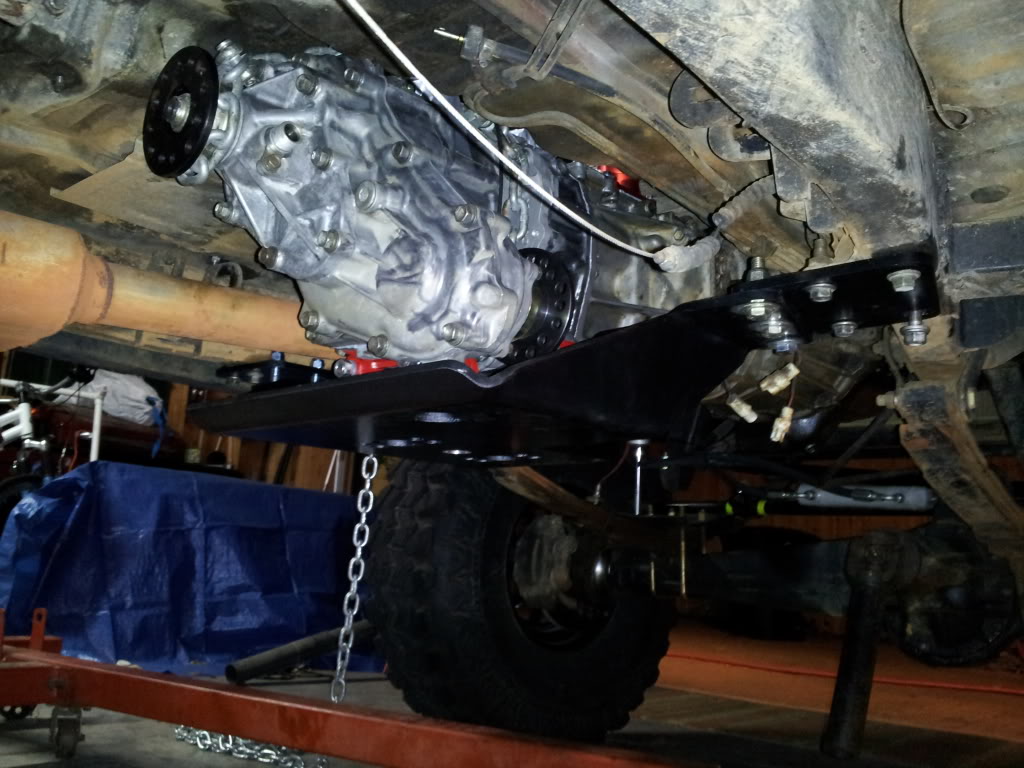
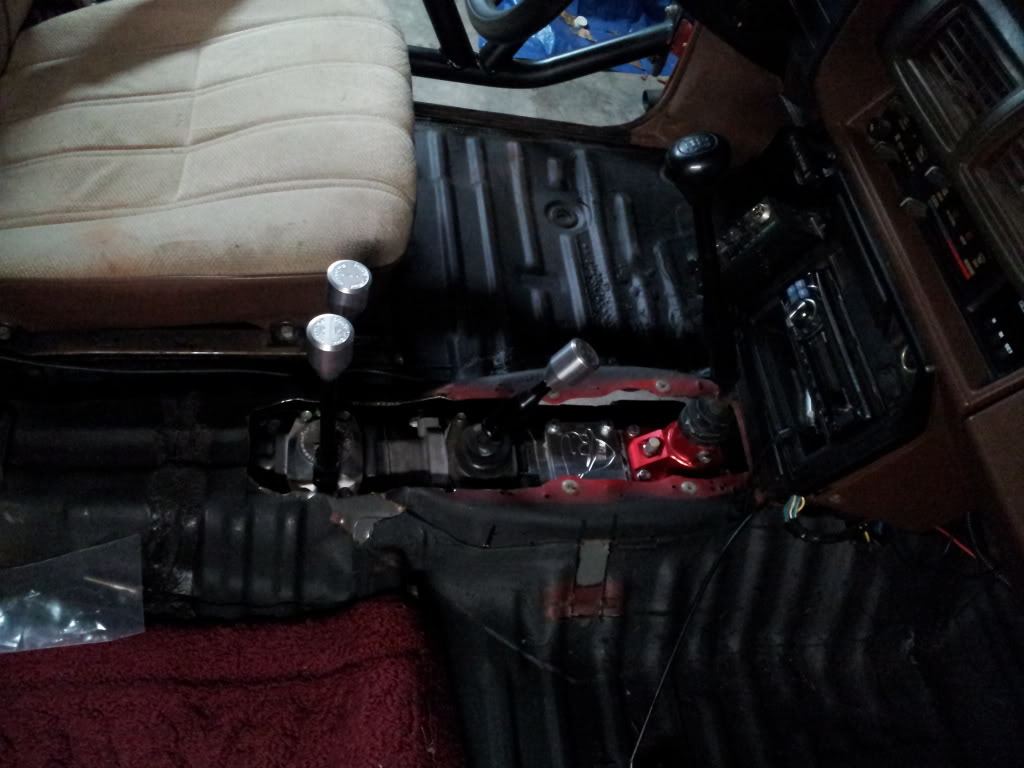
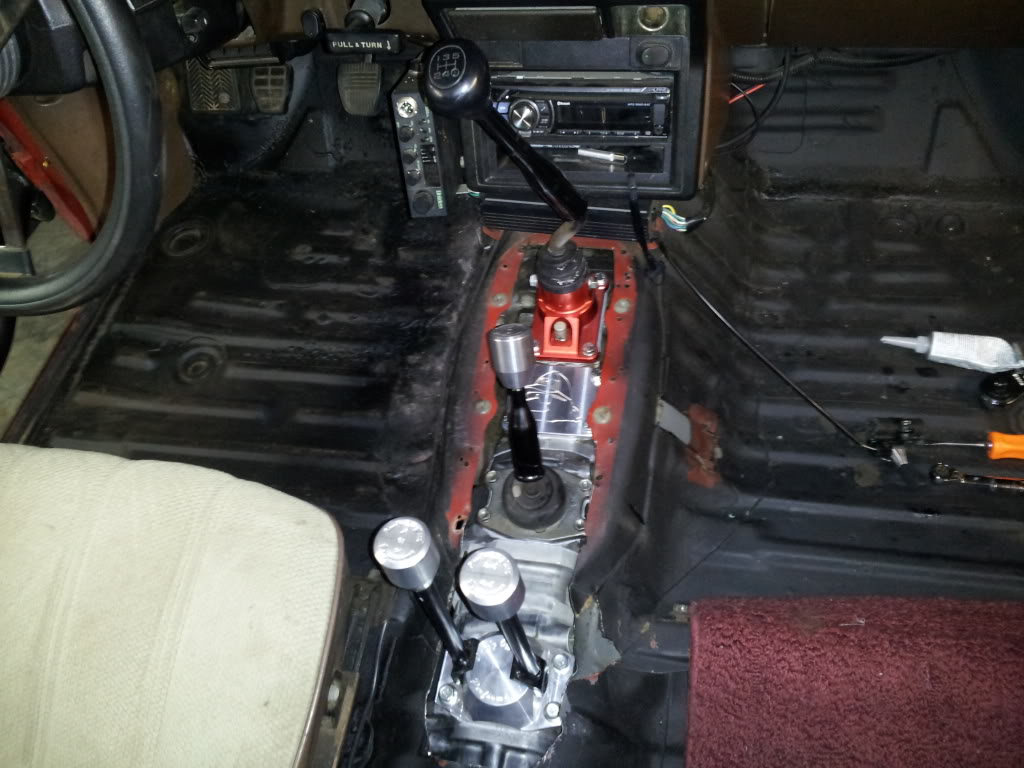
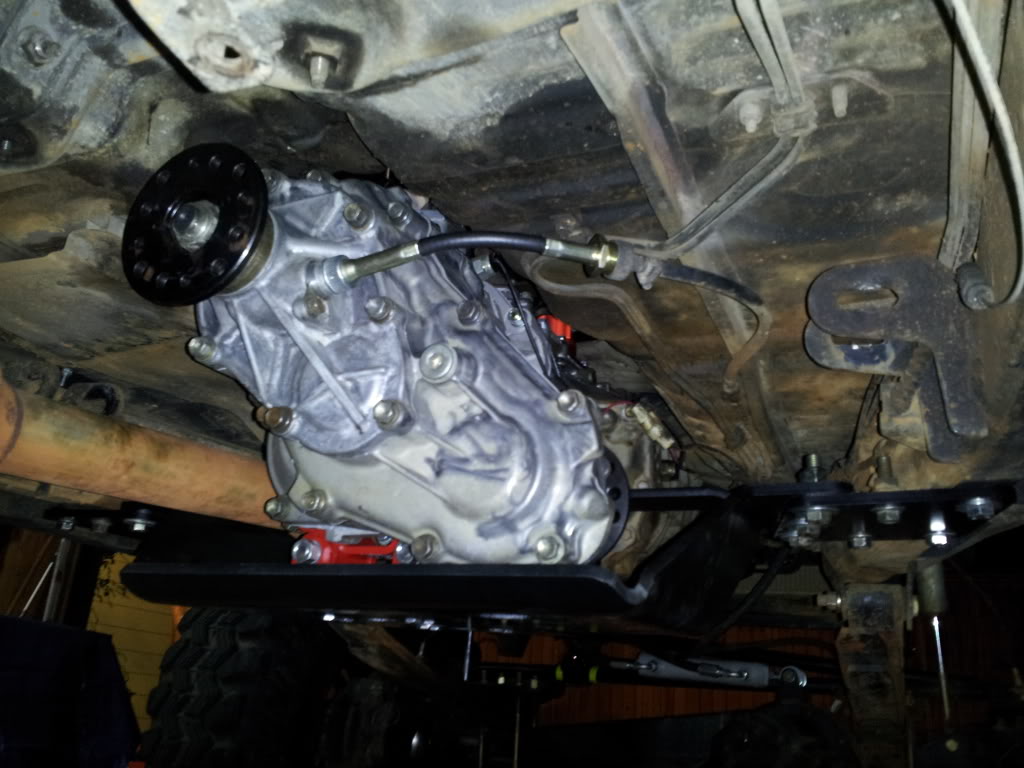
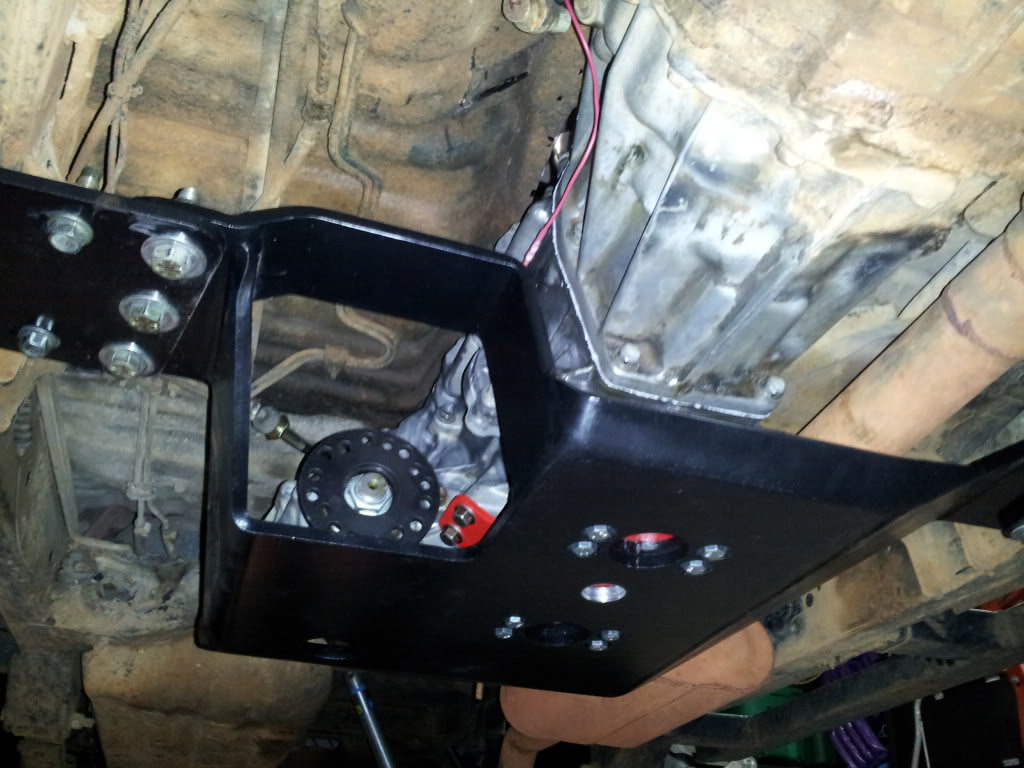
Install the 23 spline Dual Ultimate Transfer Cases.
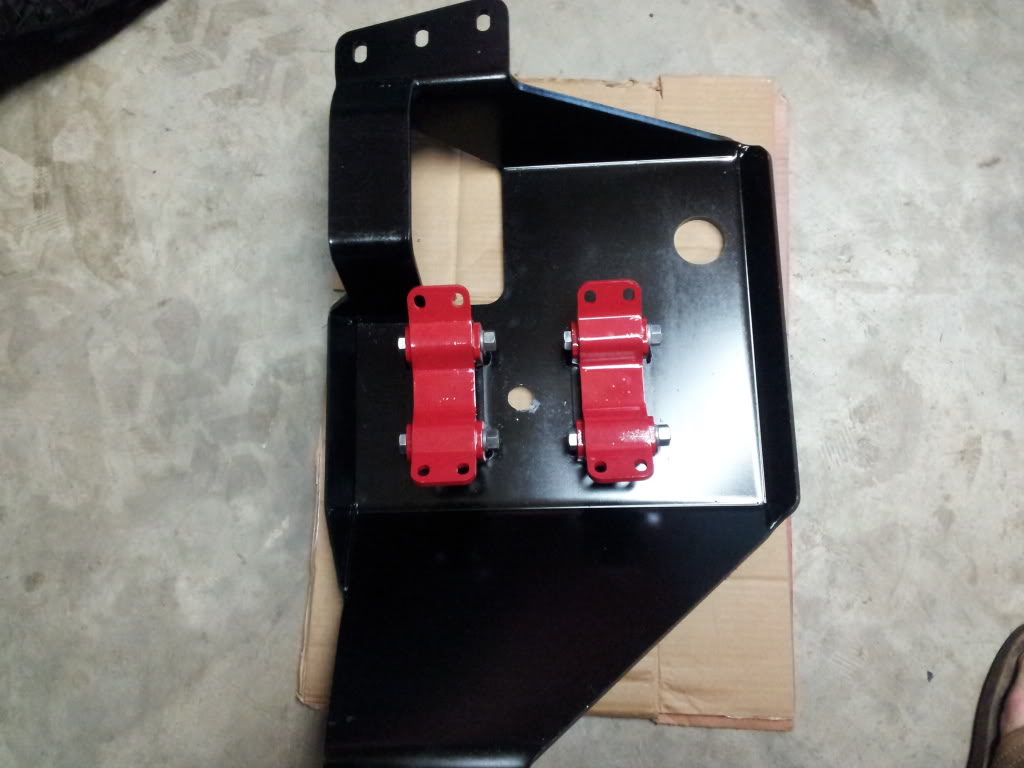
I have had these put together for a while. The list of goodies include: MC-07 Dual adapter, Longfield Rear output, MC 30 spline front output, MC Total 23 Spline Input, Daves Offroad Twin Sticks, 4xInnovations HD TC mounts and a Sky's Offroad TC Crossmember.
Removed the front driveshaft
Removed the TC shifter and block off plate.
I painted both TC mounts.
Got the TC pulled this morning.
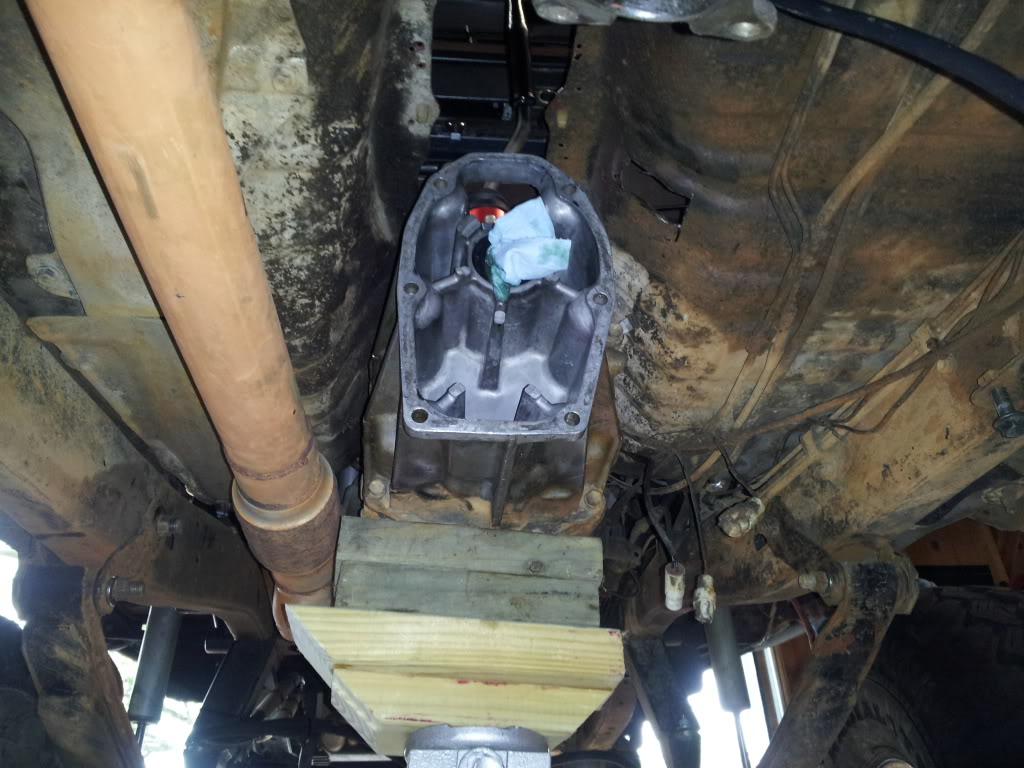
Drilled a whole in the crossmember in order to drain the crawlbox through the adapter.
Had some help show up last night. Patrick (scotia) came by and helped me stab the Duals into position.
It was pretty painless. The front input was aligned correctly and we got it buttoned up. I just required and extra set of hands as usual.
The fasteners that came with the x-member were a little troublesome. I got that figured out today. Should have it all buttoned up tonight. Then, I need to add some break in gear oil and install the shifters.
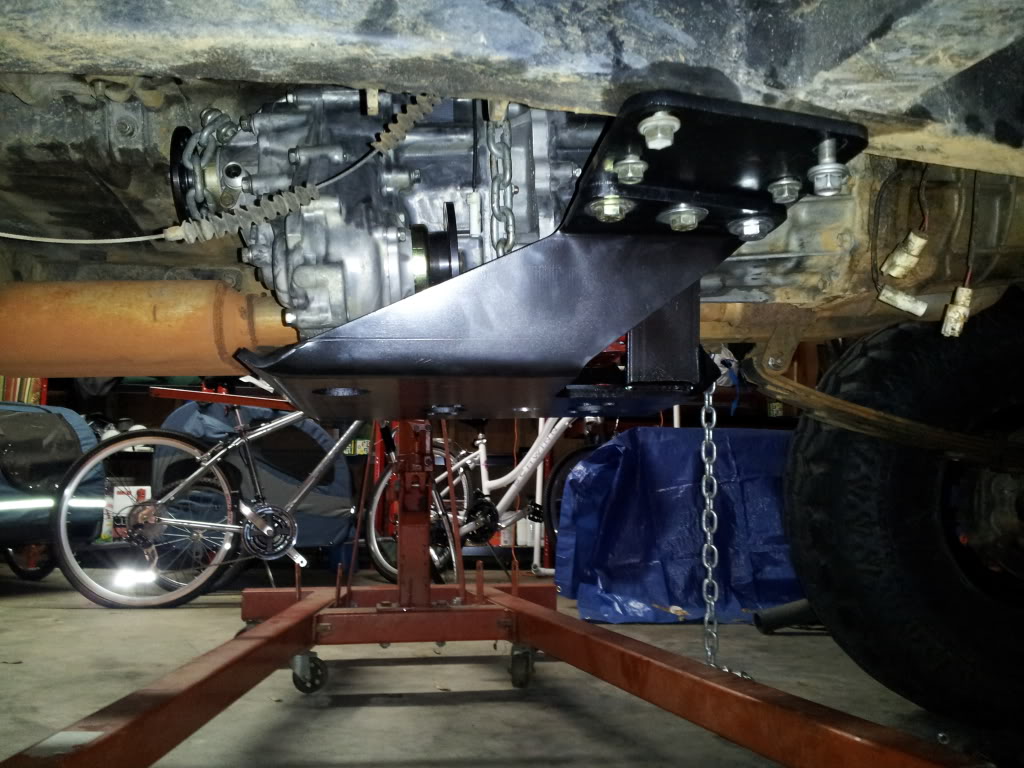
Fluids added and buttoned up
Looks kinda tight.
Cooler in place. The bracket for the latch support was flipped around 180 degrees to make a little needed room for the install.
I had to chop out a little of the front core support. I used some 3/8 fuel line to put on the sharp edges and zip tied them down. I also used some scrap hose to keep the cooler lines from getting cut.
Got everything tight. Ready for a test drive this week.
I have been trying to get some productive wrenching done as of late after the worlds longest hydro assist install.
Now on to other business at hand:
Install the 23 spline Dual Ultimate Transfer Cases.
I have had these put together for a while. The list of goodies include: MC-07 Dual adapter, Longfield Rear output, MC 30 spline front output, MC Total 23 Spline Input, Daves Offroad Twin Sticks, 4xInnovations HD TC mounts and a Sky's Offroad TC Crossmember.
Removed the front driveshaft
Removed the TC shifter and block off plate.
I painted both TC mounts.
Got the TC pulled this morning.
Drilled a whole in the crossmember in order to drain the crawlbox through the adapter.
Had some help show up last night. Patrick (scotia) came by and helped me stab the Duals into position.
It was pretty painless. The front input was aligned correctly and we got it buttoned up. I just required and extra set of hands as usual.
The fasteners that came with the x-member were a little troublesome. I got that figured out today. Should have it all buttoned up tonight. Then, I need to add some break in gear oil and install the shifters.
Fluids added and buttoned up
04-10-2013, 06:00 PM
#86
Registered User
Thread Starter
I may have added a few more lumens to the Red Truck with a slightly used Blitzpro 21S LED bar. Fits perfectly under the hoop on my Marlin bumper

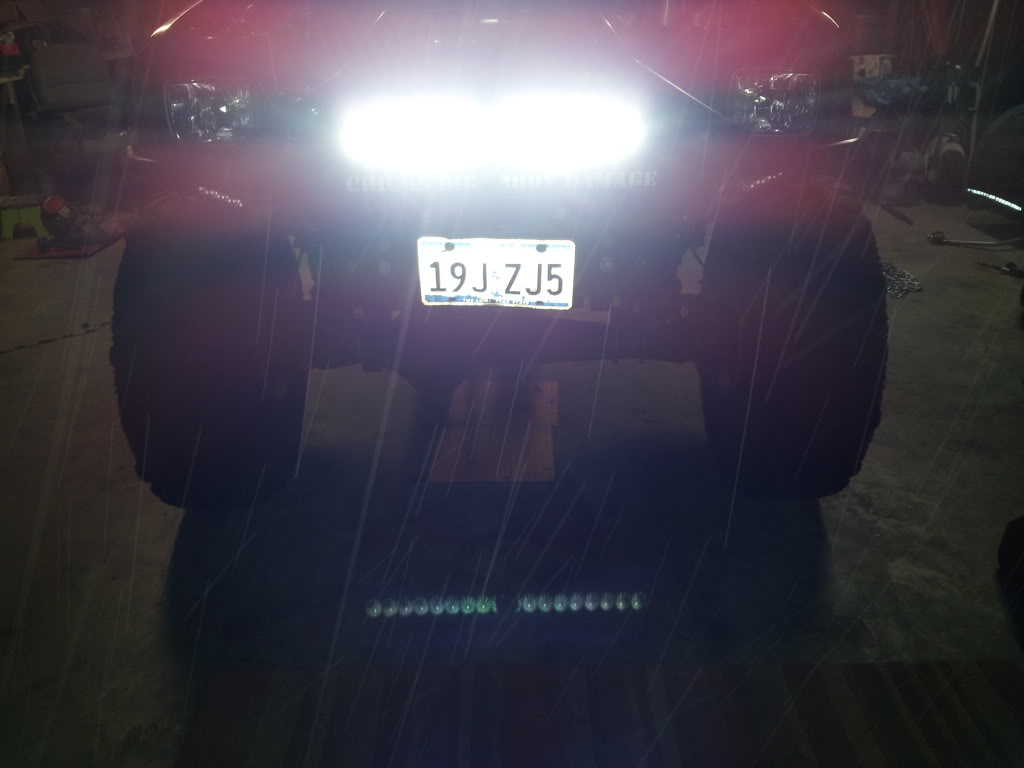
I still need to get the mounts figured out but that will be very close to the final placement sans the zip ties.
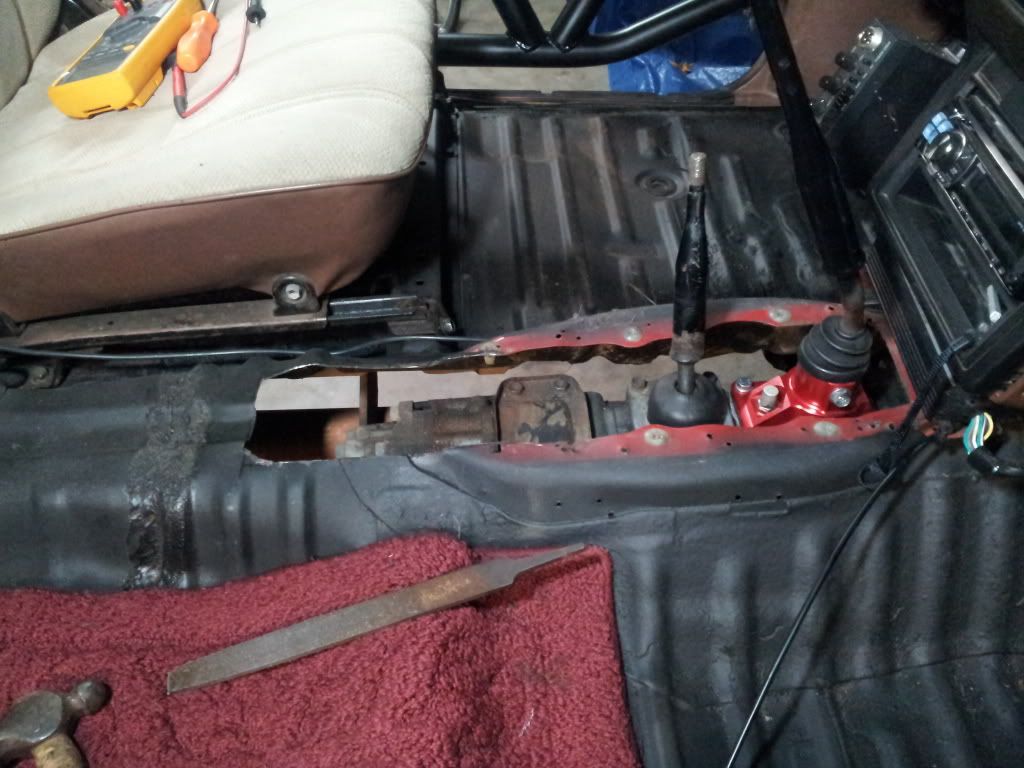
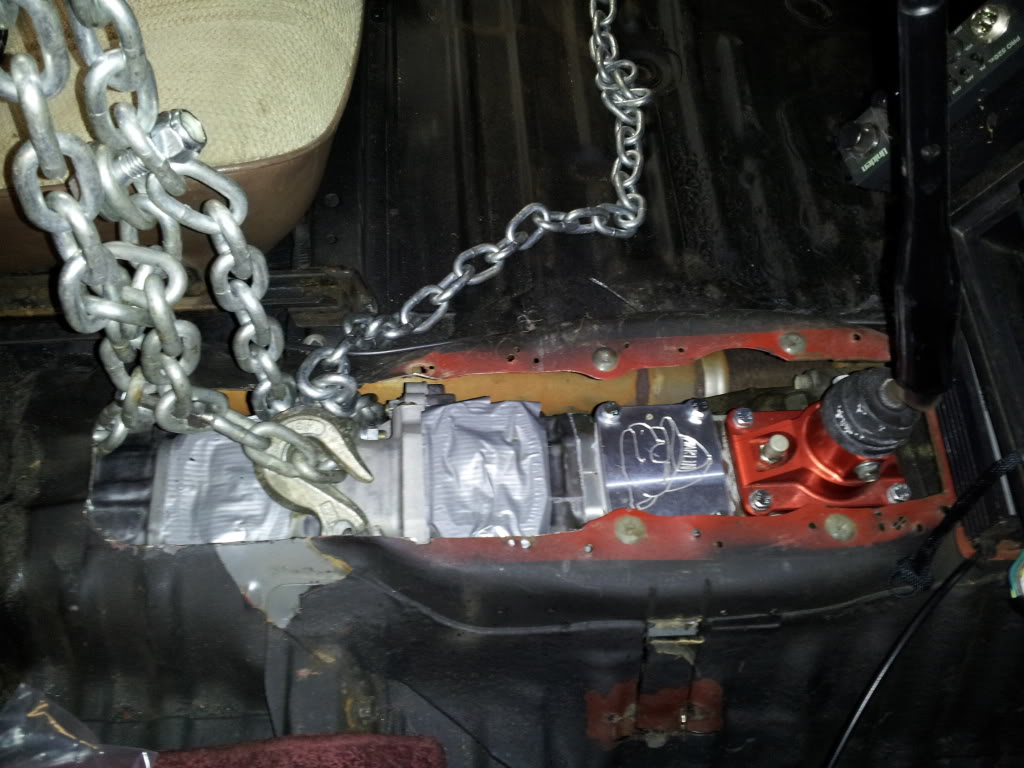
Here are a couple of shots of my nearly completed transmission tunnel cover
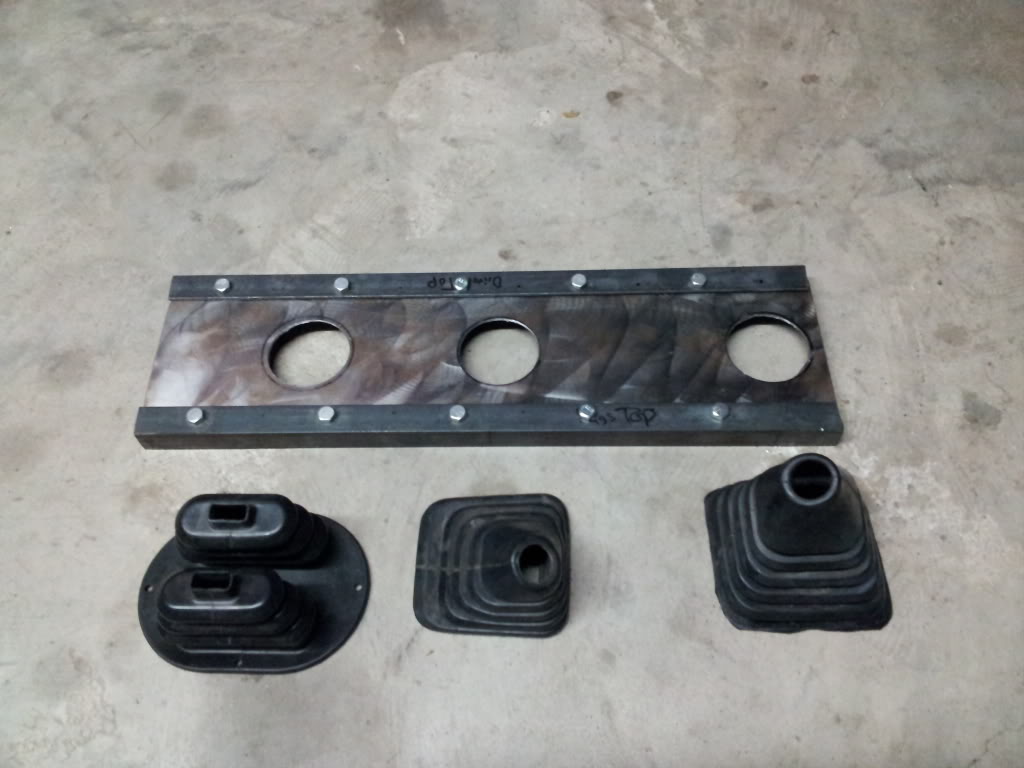
The base that the above panel will mount on
I still need to get the mounts figured out but that will be very close to the final placement sans the zip ties.
Here are a couple of shots of my nearly completed transmission tunnel cover
The base that the above panel will mount on
04-30-2013, 06:41 AM
#88
Registered User
Thread Starter
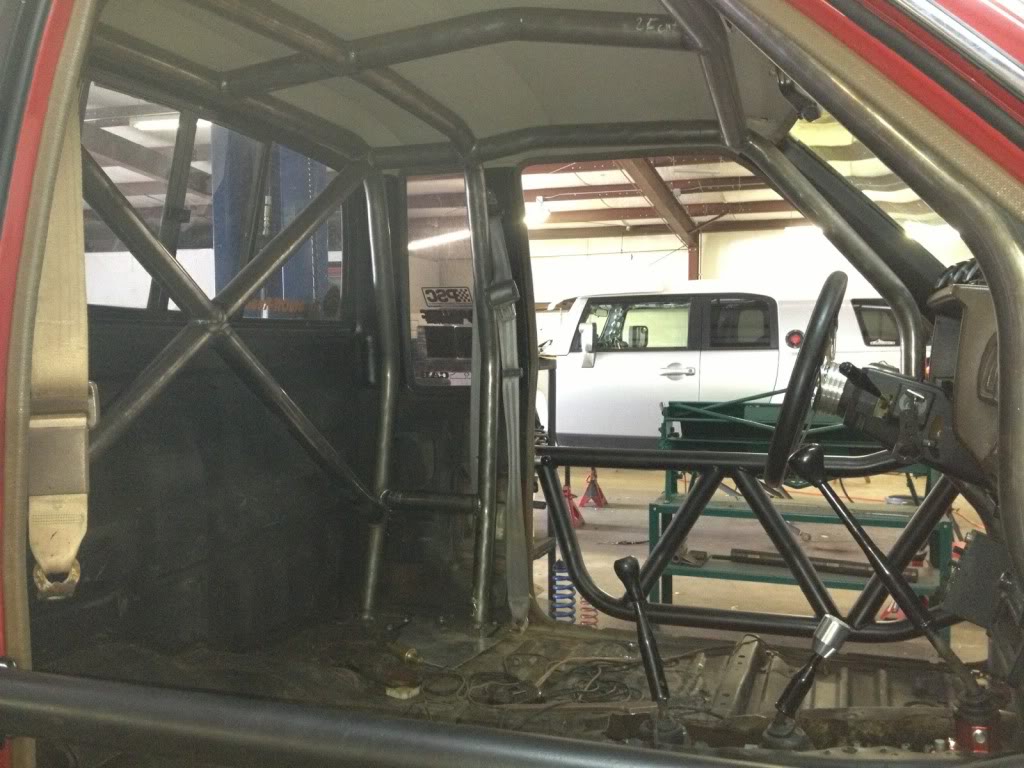
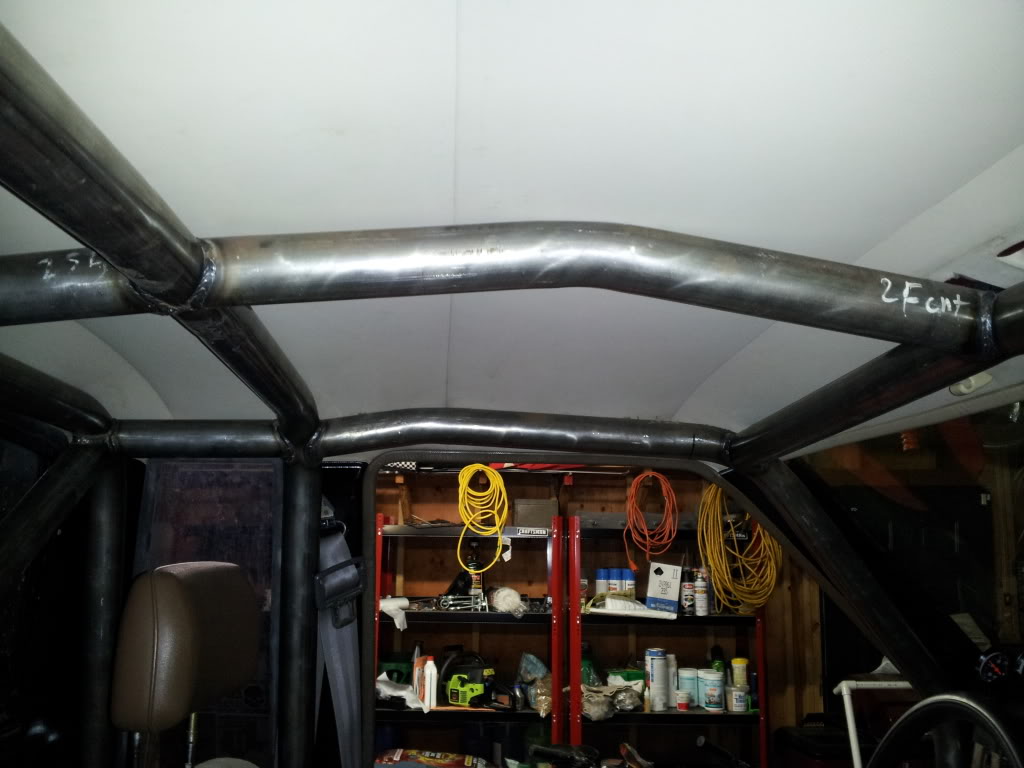
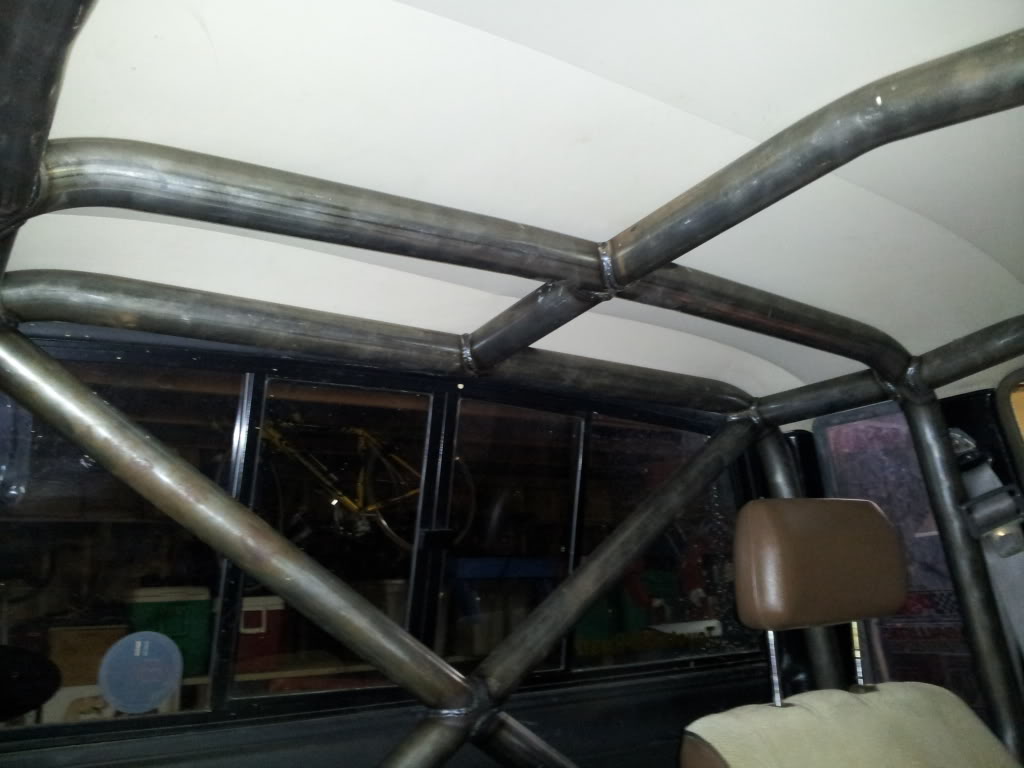
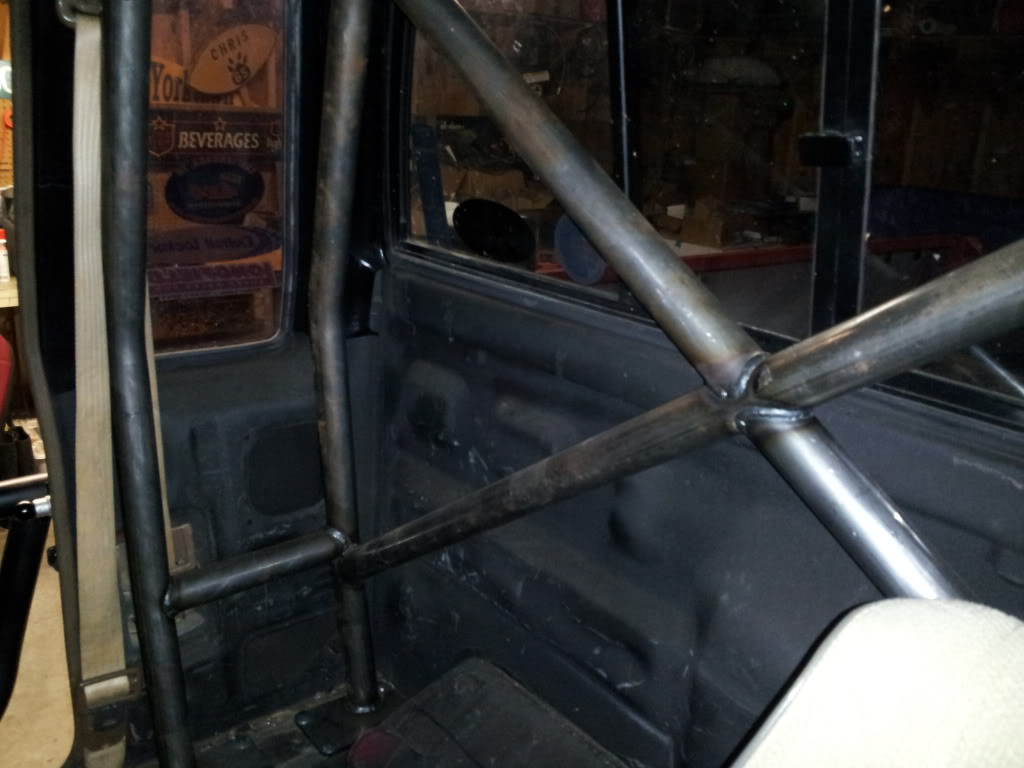
Got the truck back from Brave Motorsports. I'm very impressed with Daves work. Didn't put the grab handle on right now. They seemed like they would be in the way (of my head)in one spot. I need to get some bar padding for sure. He didn't tie the cage to the frame due to my Ghetto Fab sliders and some body mount interference. When I get some new sliders I will get them tied in then.
Here are a couple pics
I have to have the interior back together by wednesday night so I can wheel this weekend.
Here are a couple pics


I have to have the interior back together by wednesday night so I can wheel this weekend.
05-08-2013, 08:46 AM
#91
Registered User
Thread Starter
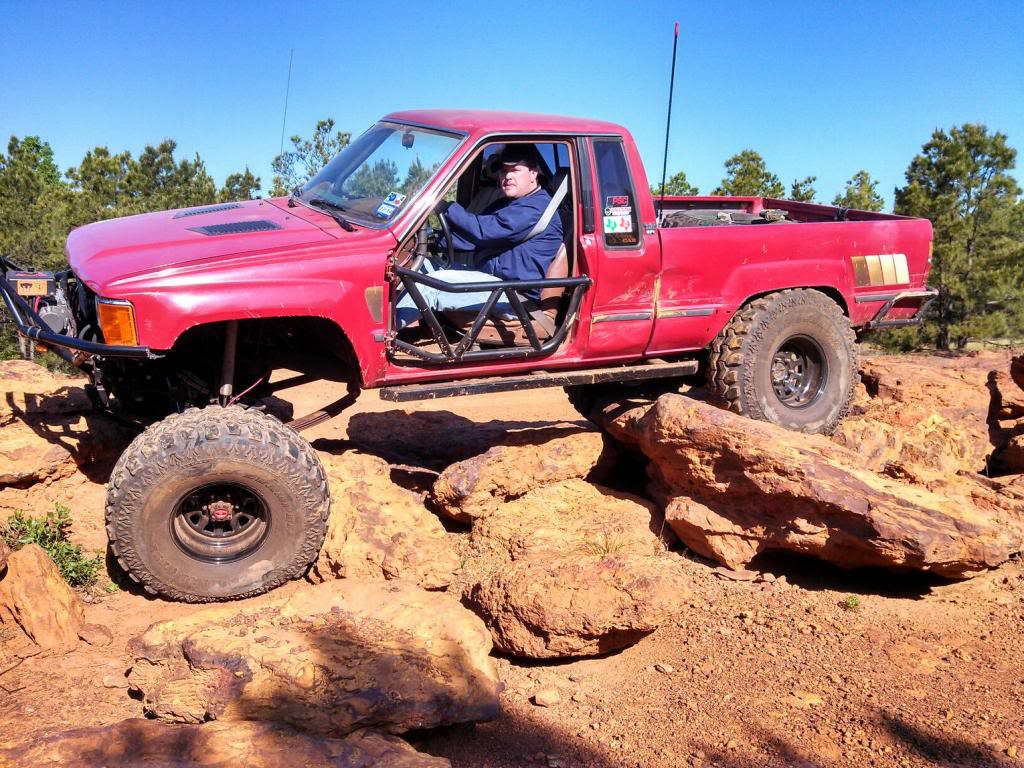
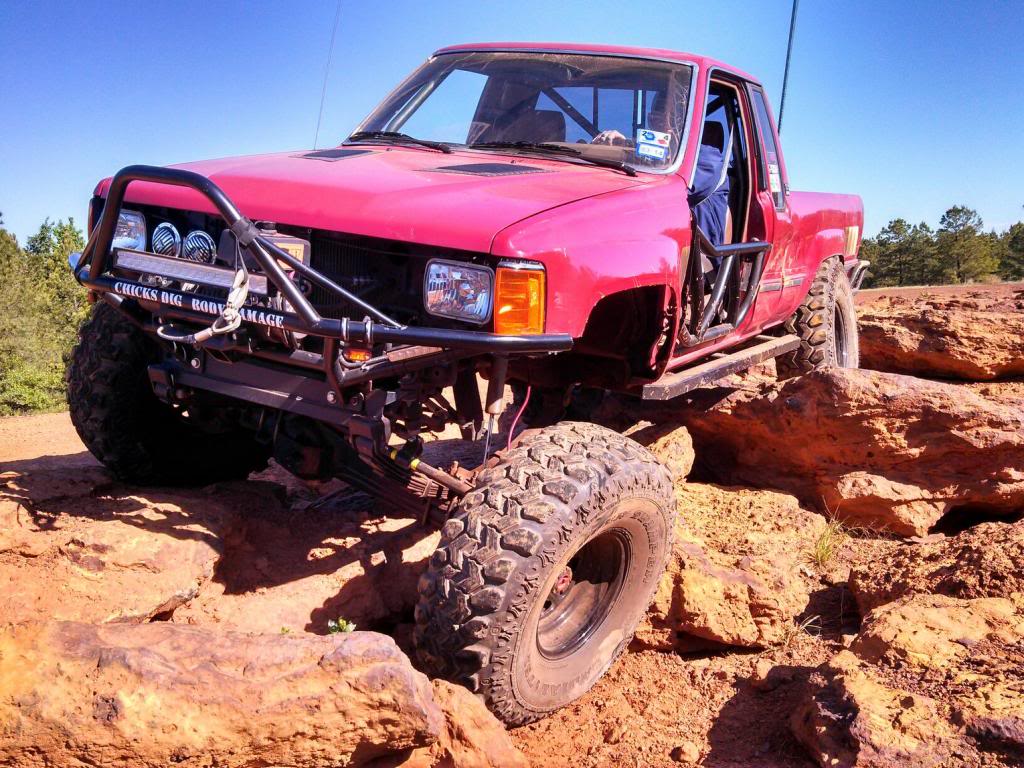
Weather was awesome. Saturday was the mid 60's and breezy.
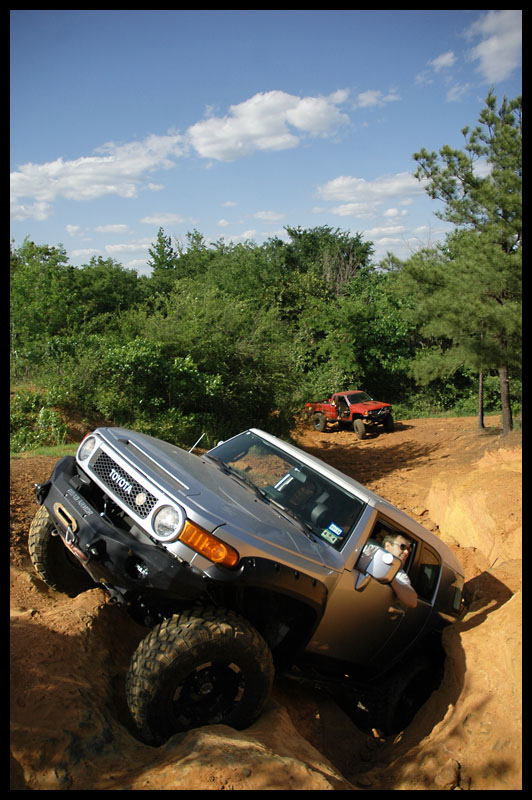
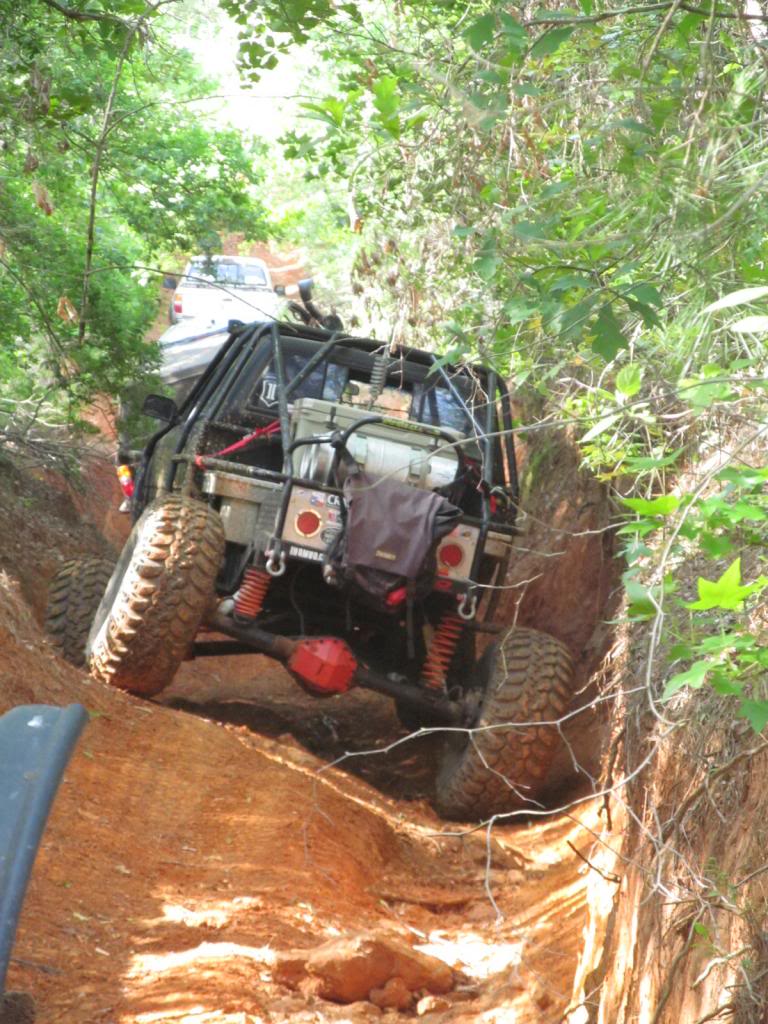
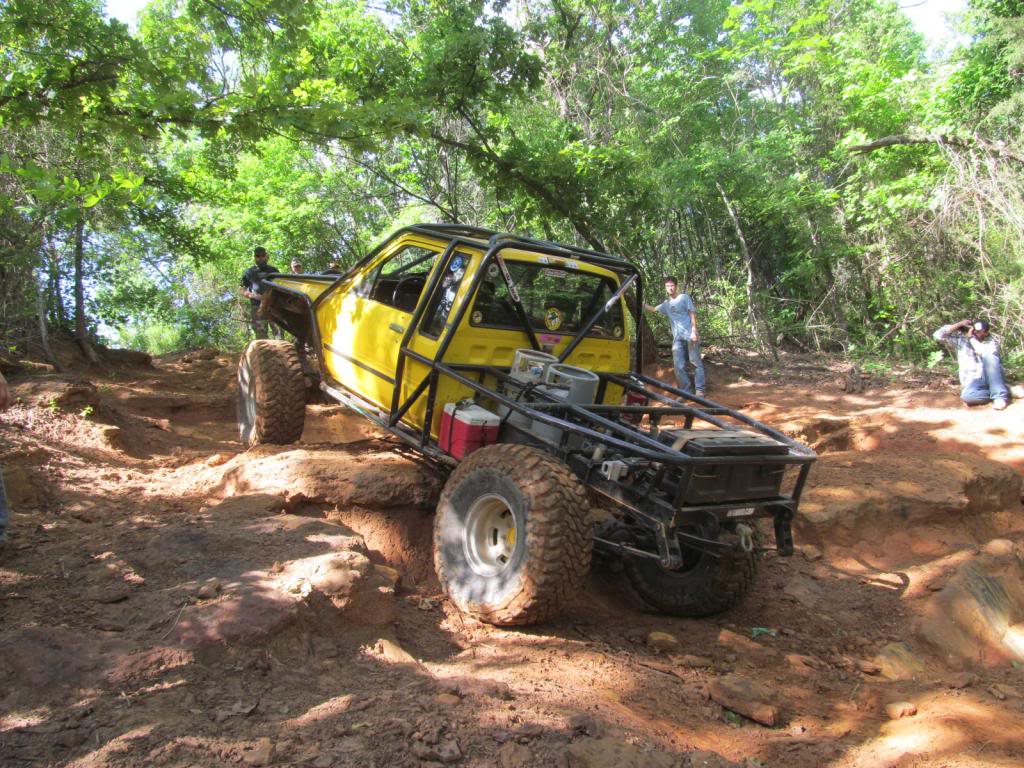
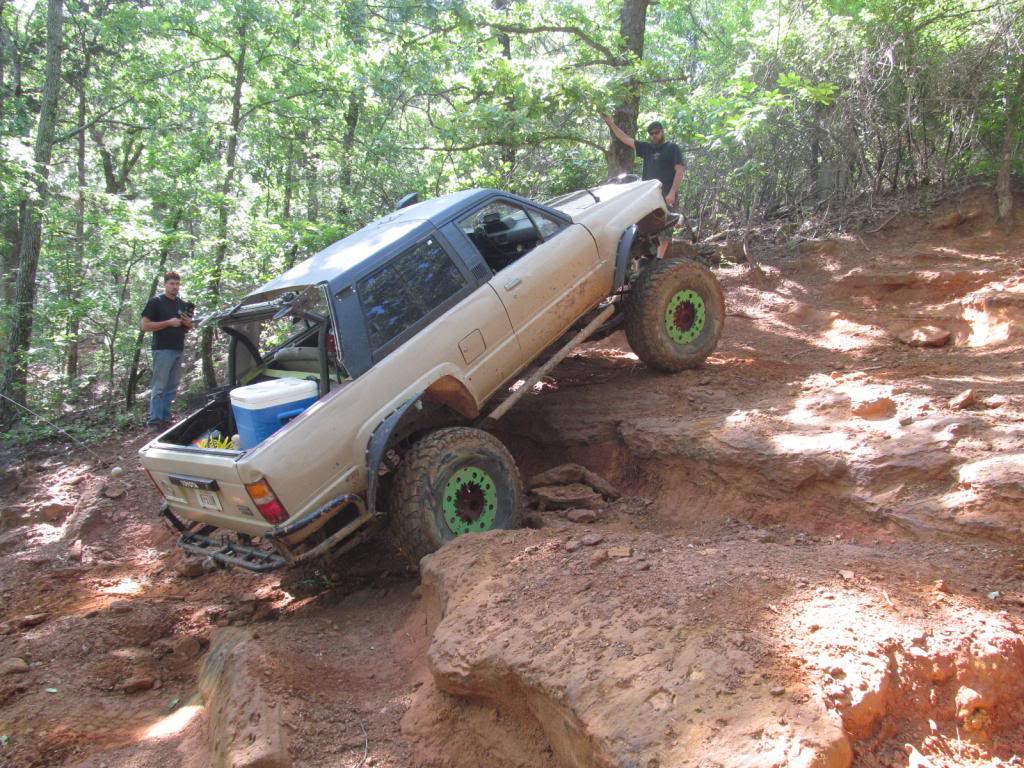
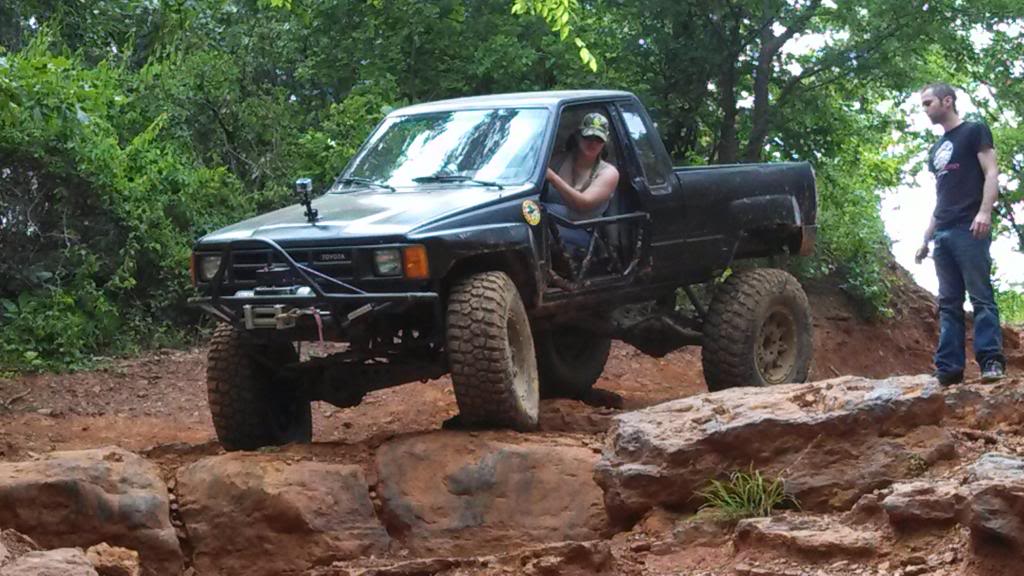
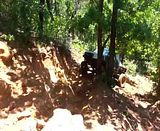
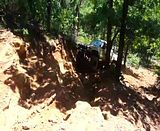
We hit some Pretty good stuff: Twister about 3 times, the backside where Jason flopped a few years ago. Going down JP Expressway was awesome. I got back at Whatever from last year with some guidance from Jason. Shake Rattle and Roll was good fun. Clydes Ravine was good as usual. Did all the regular stuff mainly. Saw an FJ break a tierod in Twister. I did the rock garden for the first time.
I won some 5/16 x 100 Firewire Synthetic winch line.
Carnage included my cell phone, a little body damage, A TC leak and driveline rattle.
Going to look at that stuff this week.
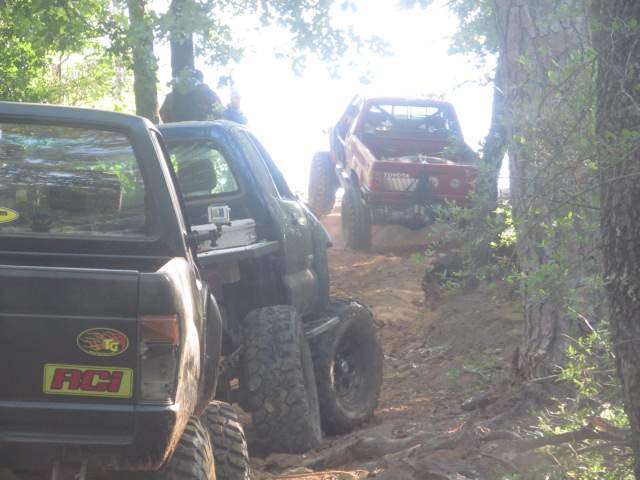
some pics
Rock Garden Pics

The rest of mine are on my camera at home
FJ that was stuck in twister
 [/QUOTE]
 [/QUOTE]
Randy on Shake Rattle and Roll
Bob burping his tire
Rest of my pics
http://s241.photobucket.com/user/boo...y/Jambo%202013
We hit some Pretty good stuff: Twister about 3 times, the backside where Jason flopped a few years ago. Going down JP Expressway was awesome. I got back at Whatever from last year with some guidance from Jason. Shake Rattle and Roll was good fun. Clydes Ravine was good as usual. Did all the regular stuff mainly. Saw an FJ break a tierod in Twister. I did the rock garden for the first time.
I won some 5/16 x 100 Firewire Synthetic winch line.
Carnage included my cell phone, a little body damage, A TC leak and driveline rattle.
Going to look at that stuff this week.
some pics
Rock Garden Pics


The rest of mine are on my camera at home
FJ that was stuck in twister


 [/QUOTE]


 [/QUOTE]
Randy on Shake Rattle and Roll
Bob burping his tire
Rest of my pics
http://s241.photobucket.com/user/boo...y/Jambo%202013
07-24-2013, 01:30 PM
#92
Registered User
Thread Starter
Started working on the red truck a little.
Blitzpro tube mounts for the Hawk21S led bar
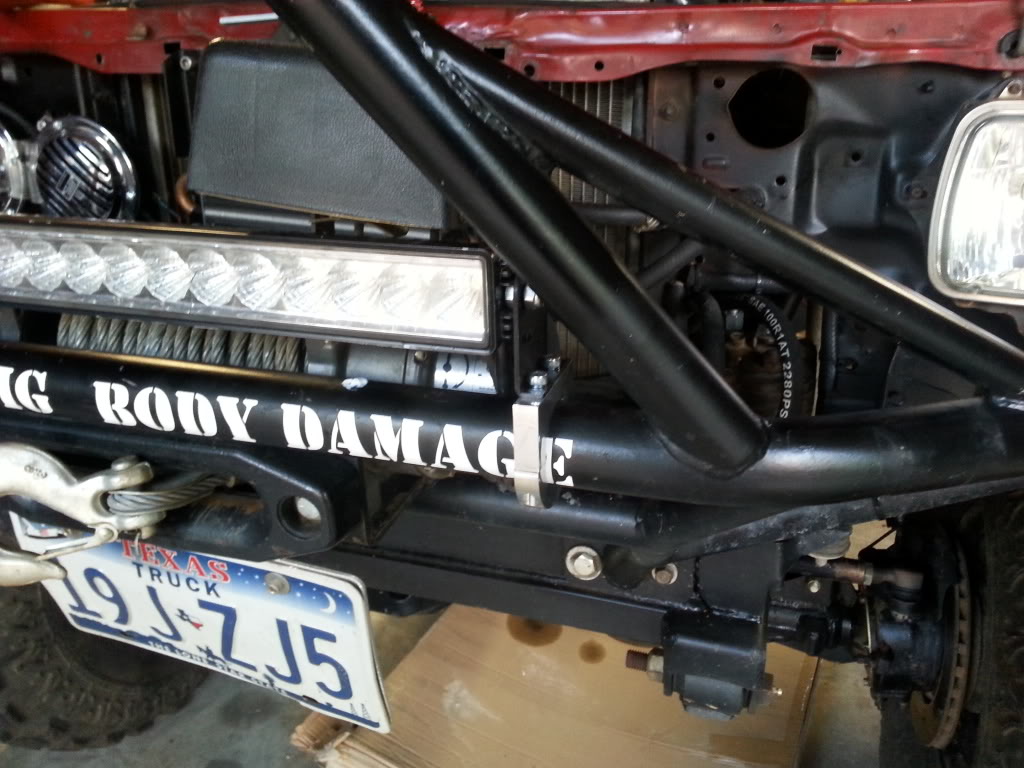
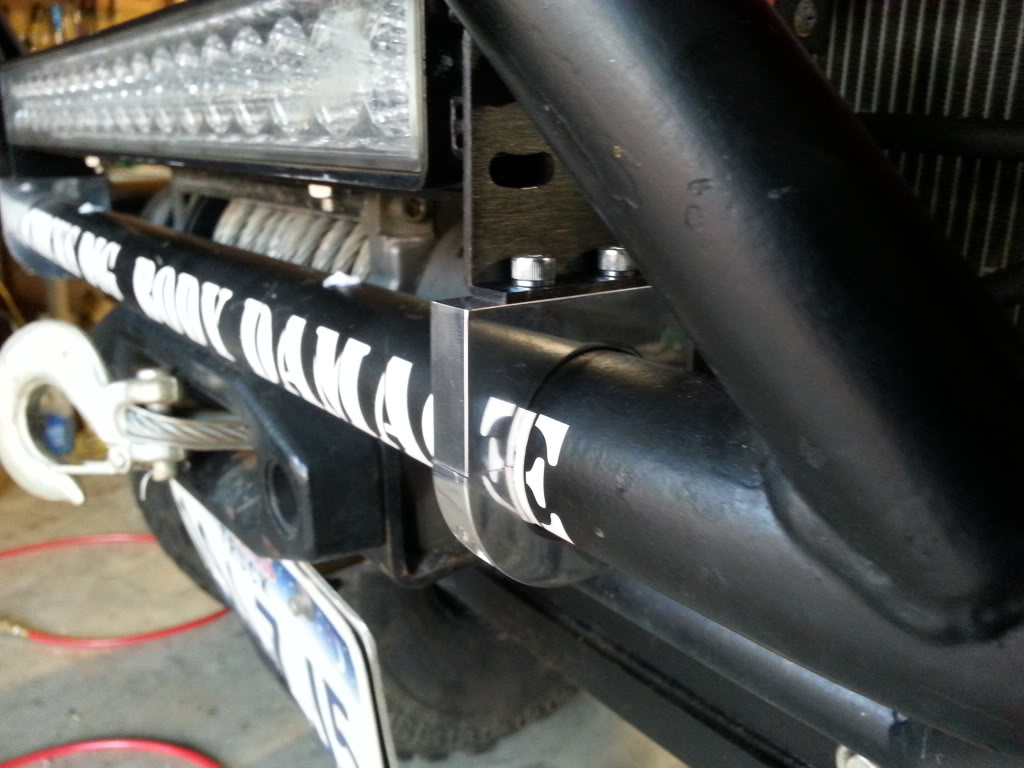
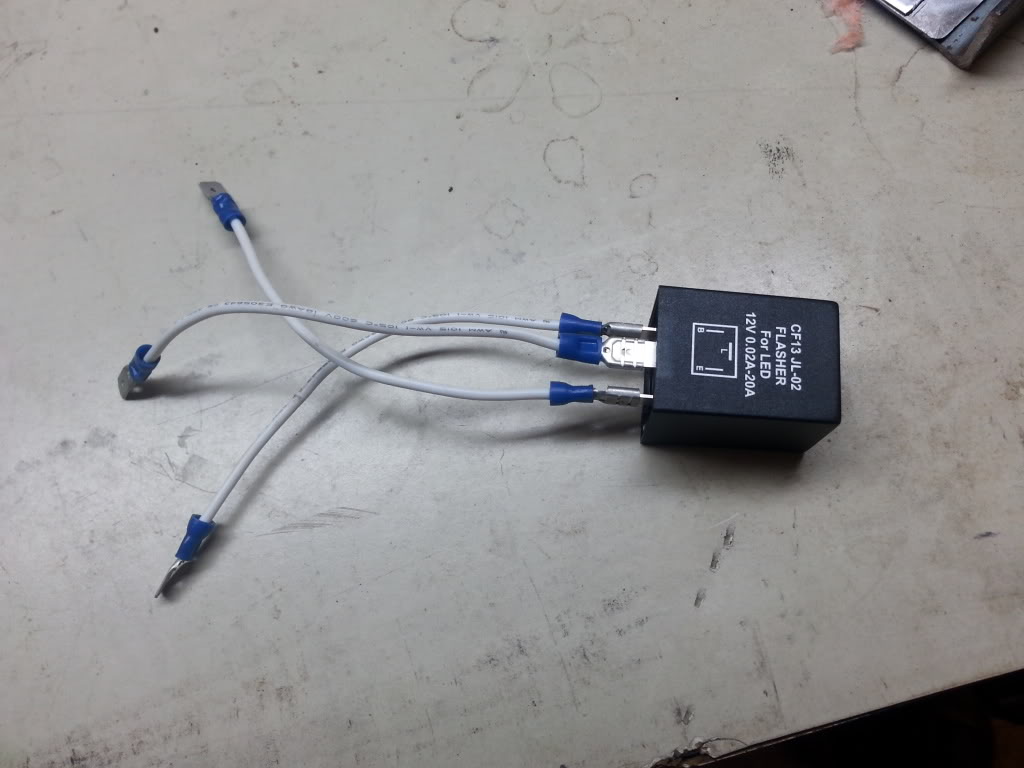
I got my electronic flasher in from superbrightleds and used the Rob method (thanks) and made some short jumpers to get it plugged in on the driver side fuse panel
I also added 3/4" 2 led lights (on each side) to the front marker lights to replace my running lights and wired the existing running light as my blinker. They utilize the same plug so it was a simple swap between the 2 plugs to do so. I finished cleaning up the exterior wiring on the front bumper while I was at it.
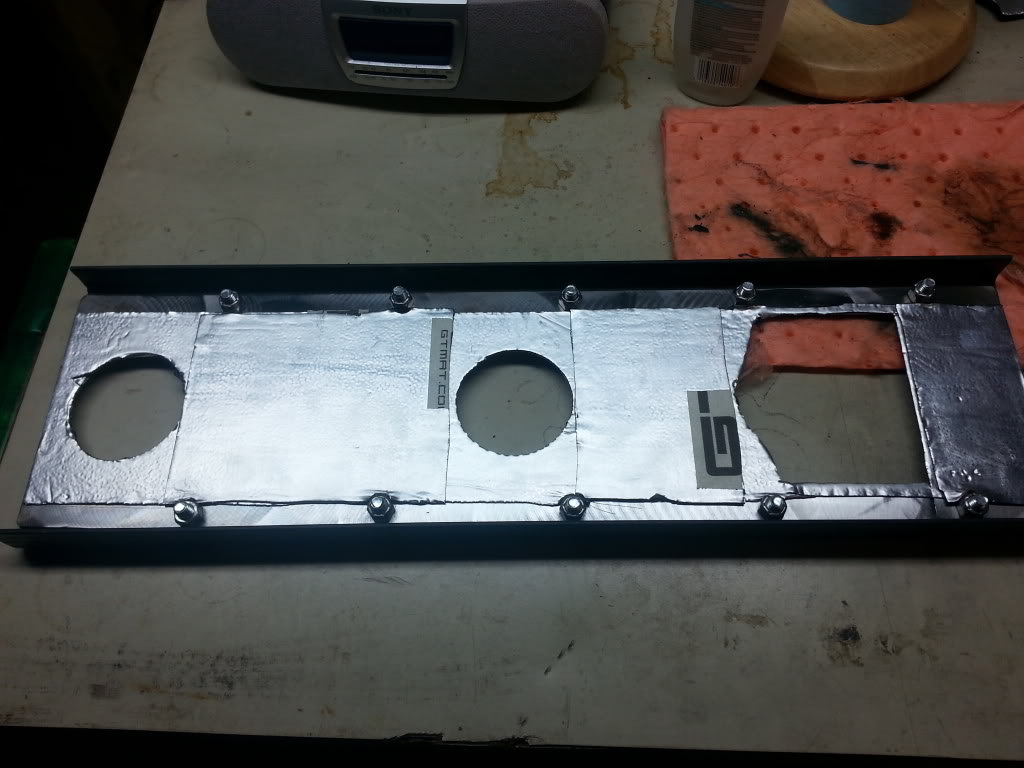
I am still in the process of finishing up my Trans tunnel cover and added some heat/noise deadener (GT Mat)to the underside of the top panel.
I got a new set of Delrin frame bushings from Davez Offroad to replace my almost non-existent ones that in there now. I will tackle that this weekend along with installing a set of Sky's banana shackles that I have had for a while.
Thread on Pirate where I found them:
http://www.pirate4x4.com/forum/toyot...-bushings.html
I also scored some free exhaust wrap from a co-worker that will hopefully reduce some of the cab floor temps.
I have a couple little projects to finish up including the rear axle re-assembly.
Blitzpro tube mounts for the Hawk21S led bar


I got my electronic flasher in from superbrightleds and used the Rob method (thanks) and made some short jumpers to get it plugged in on the driver side fuse panel

I also added 3/4" 2 led lights (on each side) to the front marker lights to replace my running lights and wired the existing running light as my blinker. They utilize the same plug so it was a simple swap between the 2 plugs to do so. I finished cleaning up the exterior wiring on the front bumper while I was at it.
I am still in the process of finishing up my Trans tunnel cover and added some heat/noise deadener (GT Mat)to the underside of the top panel.

I got a new set of Delrin frame bushings from Davez Offroad to replace my almost non-existent ones that in there now. I will tackle that this weekend along with installing a set of Sky's banana shackles that I have had for a while.
Thread on Pirate where I found them:
http://www.pirate4x4.com/forum/toyot...-bushings.html
I also scored some free exhaust wrap from a co-worker that will hopefully reduce some of the cab floor temps.
I have a couple little projects to finish up including the rear axle re-assembly.
08-20-2013, 11:57 AM
#93
Registered User
Thread Starter
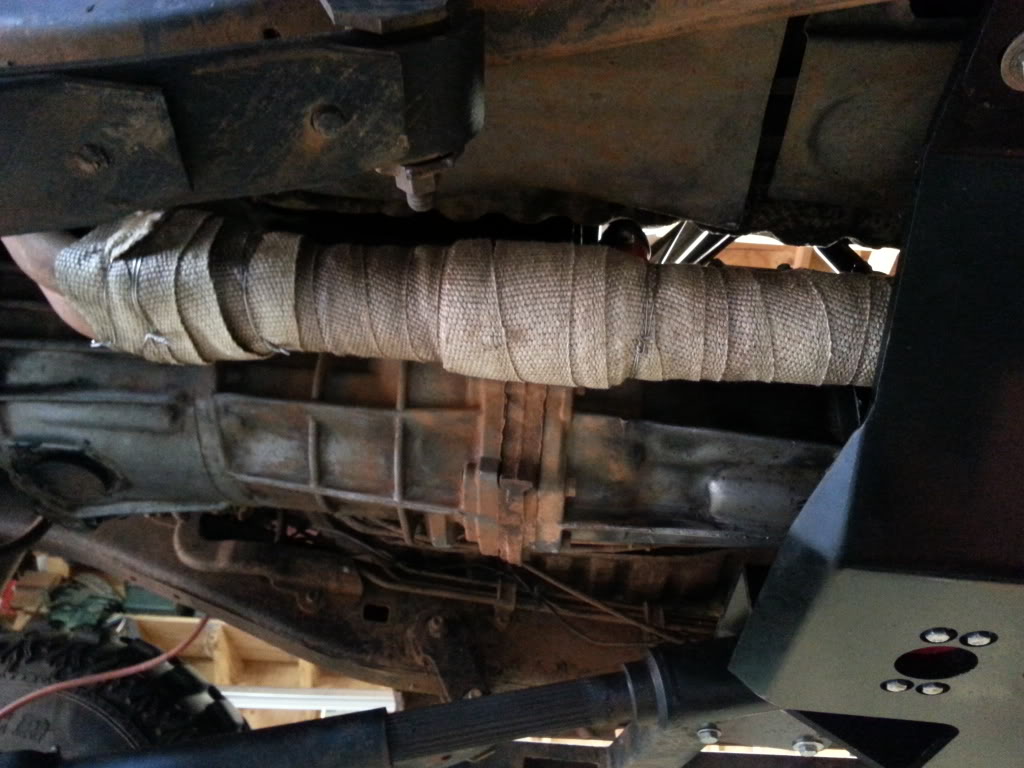
Got the Exhaust wrapped from the collector to the front of the muffler
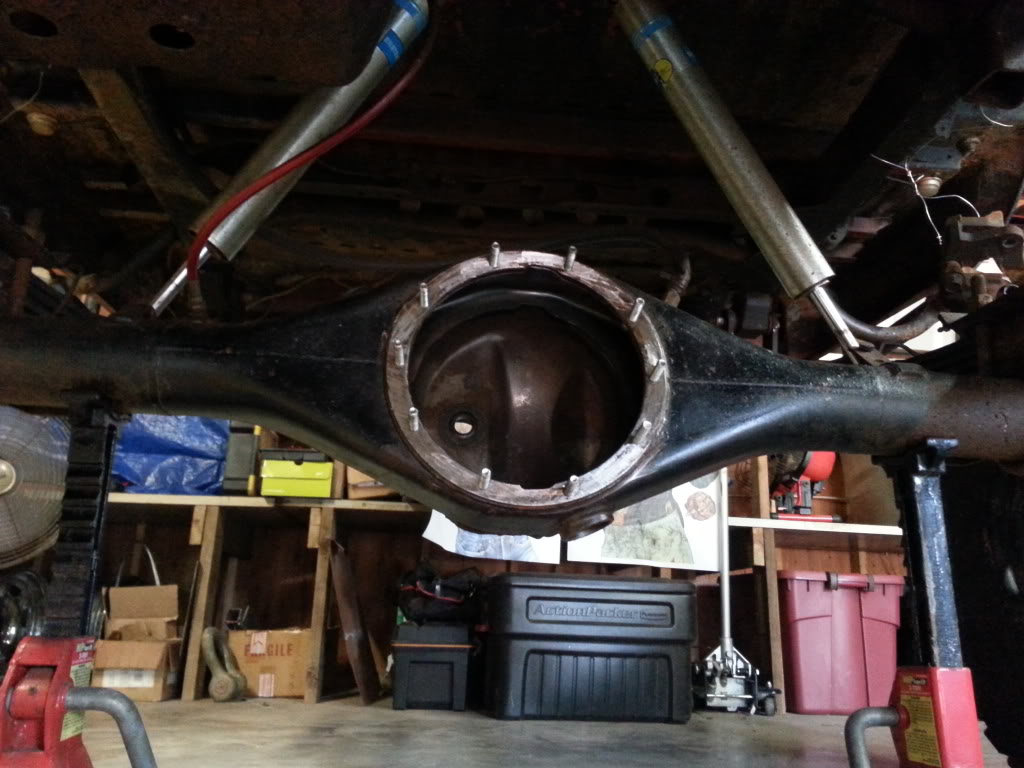
All new rear studs in the rear housing
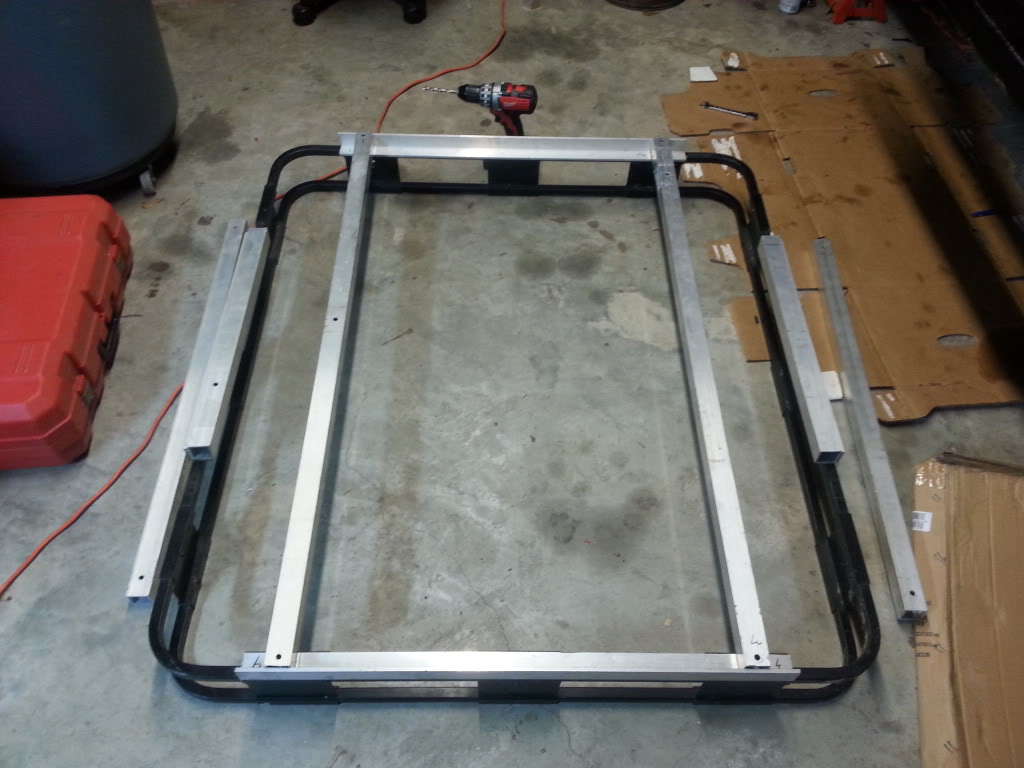
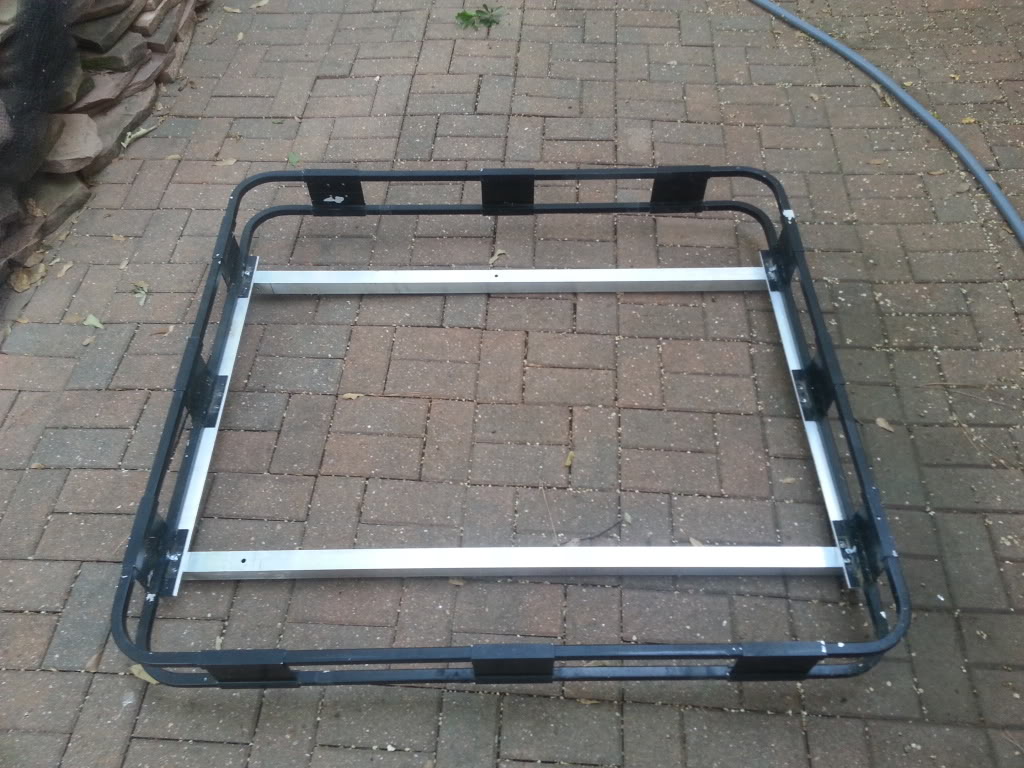
I have also been working on this bed rack. I added 1.5x1.5x 1/4" aluminum angel to each end. the runners on the outside are 1.5" 6061 Al tubing. I need one more piece to put in the middle of the rack and then need to source something to use for a floor. I havent decided if the rack will go in the Tacoma or the Hilux or both. I need to figure that out.

 10-03-2013, 07:09 AM
#94
Registered User
Thread Starter
I extended the exhaust outlet further towards the rear to help eliminate some in cab drone. Surprisingly the truck sounds better at idle.
Maybe a little back pressure is a good thing. The exhaust is temporary until I find a quieter option.
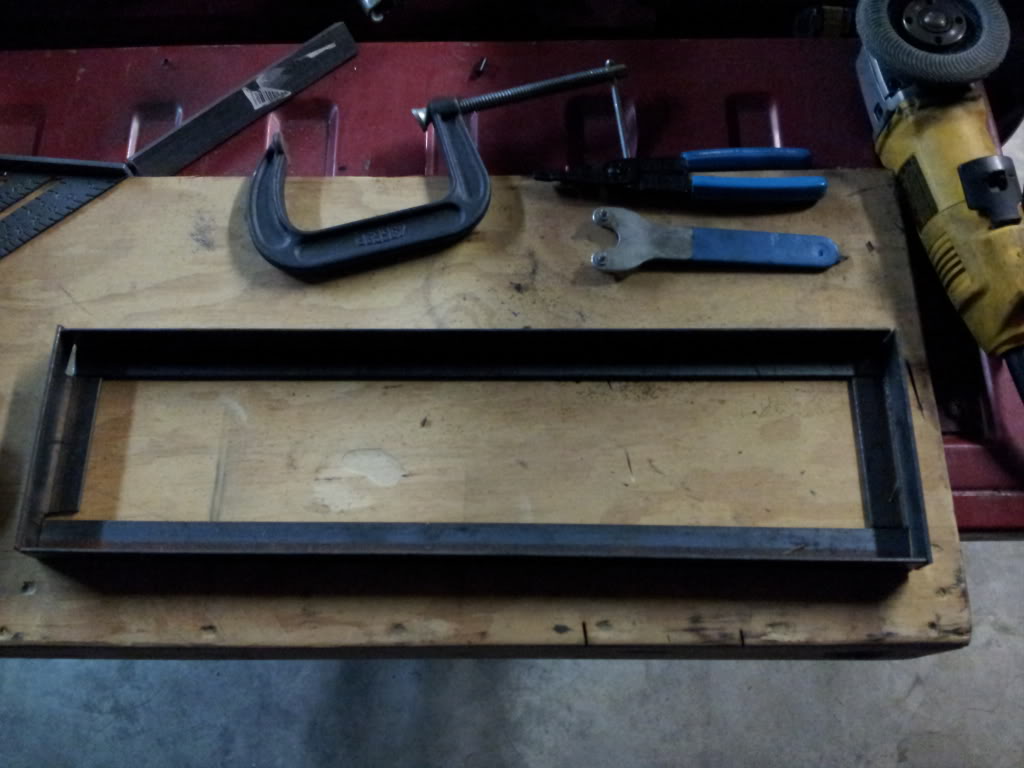
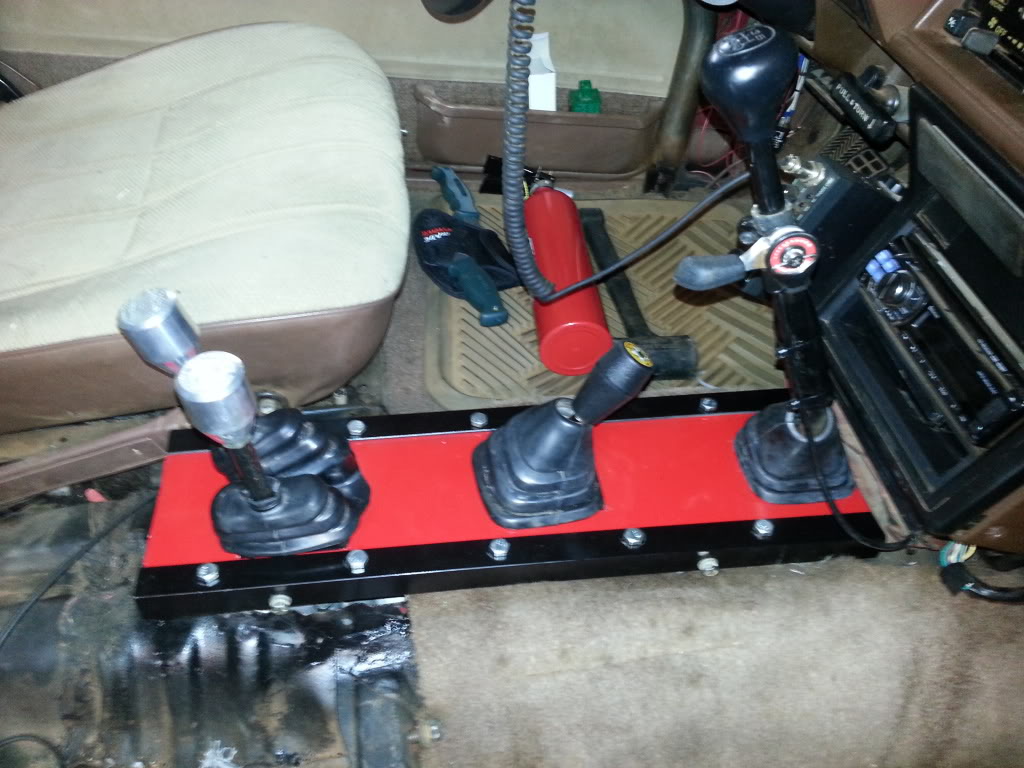
Finally got this 99% done. Just need to seal it up a little better by the twin sticks.

List of items to finish:
move steering cooler closer to radiator
install new grill
trim whats left of my rear bump stop mounts with the plasma (while I still have it) Done
remove seats Done
enlarge crawl box shifter opening Done
install nut zerts Done
finish transmission tunnel cover Done
add some sheet metal to make it somewhat water tight and seal it up and paint Done
take some measurements for my new seat mounts
find some 1.75 tube for the seat mount bases and A to B pillar tie-ins
Pick up 3rd member
re-assemble rear axle
fill rear differential
install rear driveshaft
install delrin front frame bushings
clean up garage
Maybe a little back pressure is a good thing. The exhaust is temporary until I find a quieter option.
Finally got this 99% done. Just need to seal it up a little better by the twin sticks.


List of items to finish:
move steering cooler closer to radiator
install new grill
trim whats left of my rear bump stop mounts with the plasma (while I still have it) Done
remove seats Done
enlarge crawl box shifter opening Done
install nut zerts Done
finish transmission tunnel cover Done
add some sheet metal to make it somewhat water tight and seal it up and paint Done
take some measurements for my new seat mounts
find some 1.75 tube for the seat mount bases and A to B pillar tie-ins
Pick up 3rd member
re-assemble rear axle
fill rear differential
install rear driveshaft
install delrin front frame bushings
clean up garage
Last edited by Boomtacoma01; 10-03-2013 at 07:12 AM.
10-09-2013, 06:38 AM
#97
Registered User
Thread Starter
Picked up my 3rd from Joe earlier this week after he had a look over it..
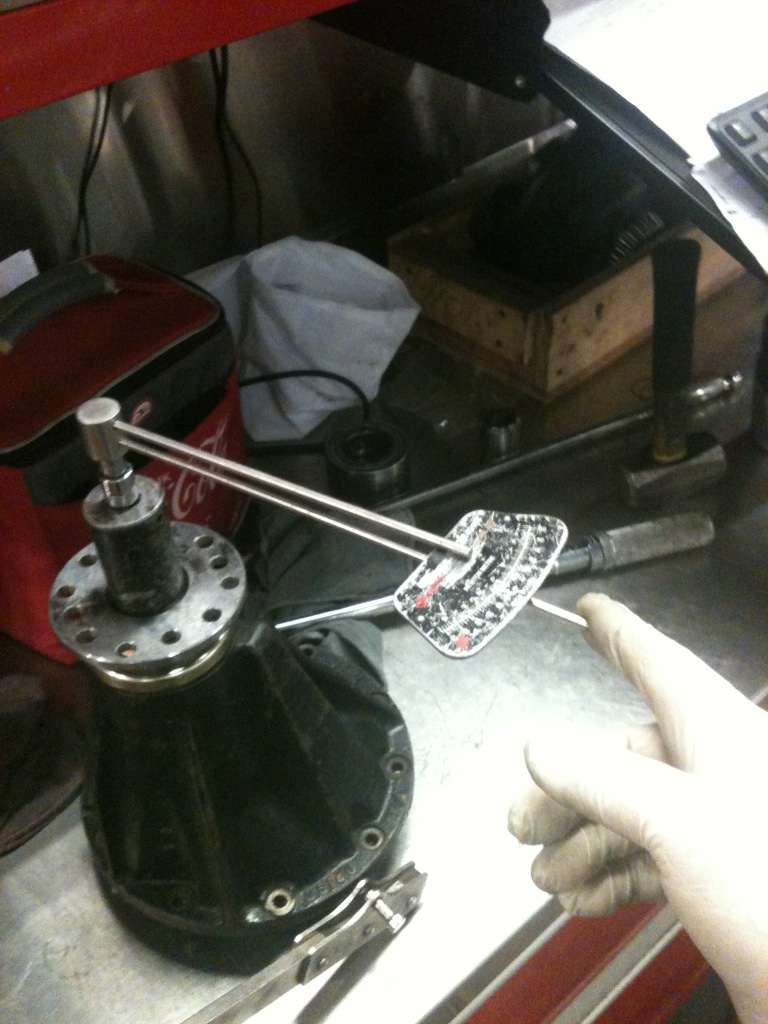
I had him check it out due to the fact I let a friend have my TC flange after he destroyed his rear end and after I put the new flange on It didn't feel right to me. So I sent it to the expert. He also threw in a tube of Toyota FIPG for the install.
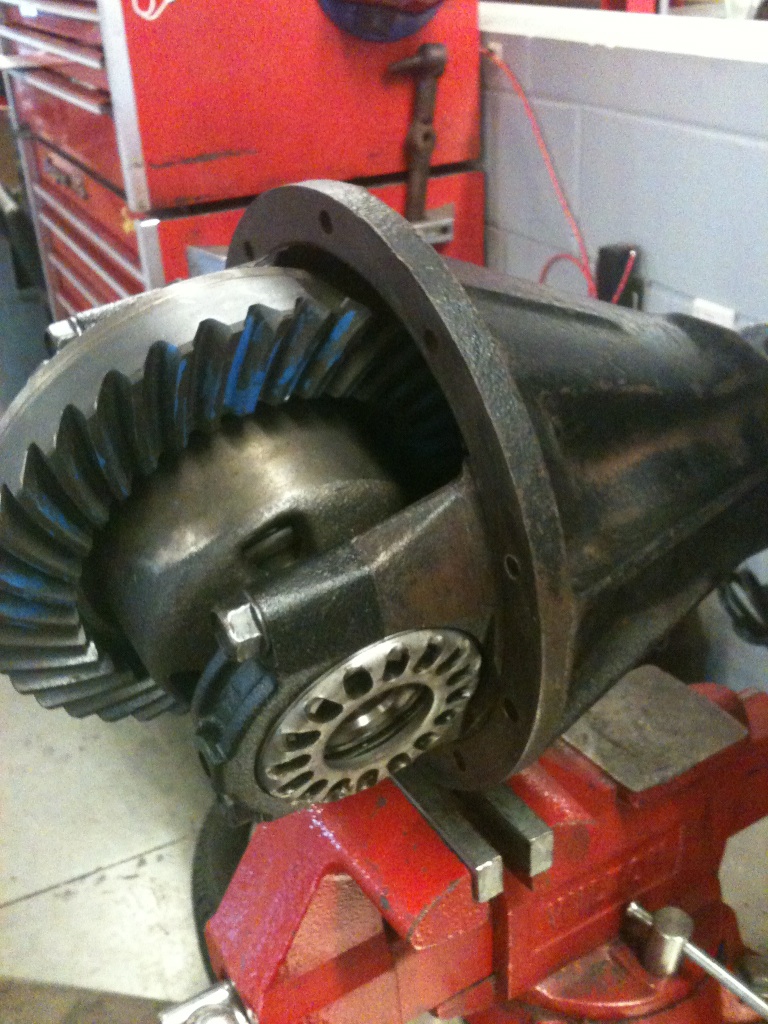
I got the fresh 3rd member with the G2 5.29's and Detroit in and sealed up.
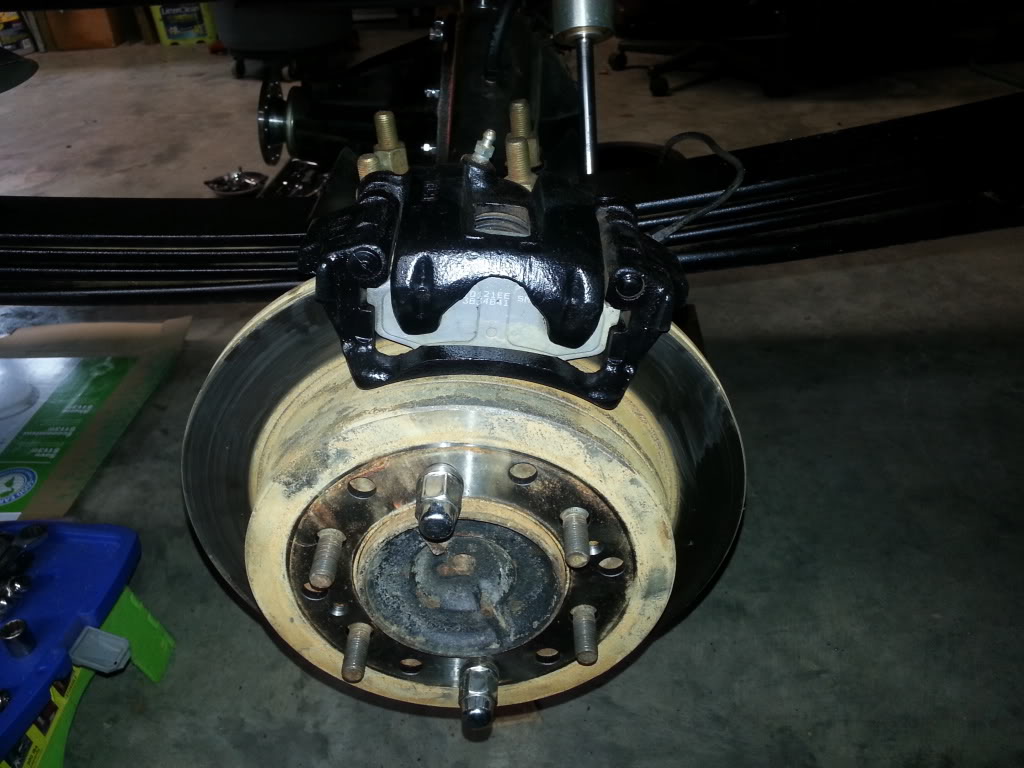
I painted both the rear calipers since I overlooked that when I did the rear disc brakes. Its not the best but it is better than rust.
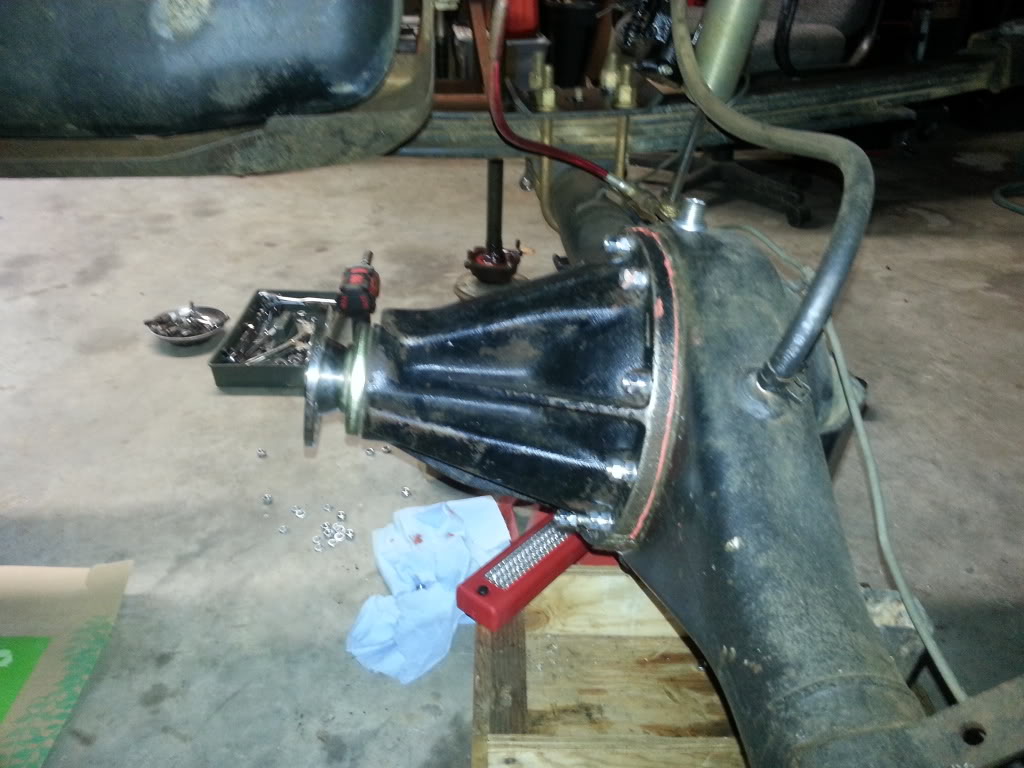
I have a drivable truck now. Just need to add oil to the rear diff. I wanted to let the FIPG set over night.
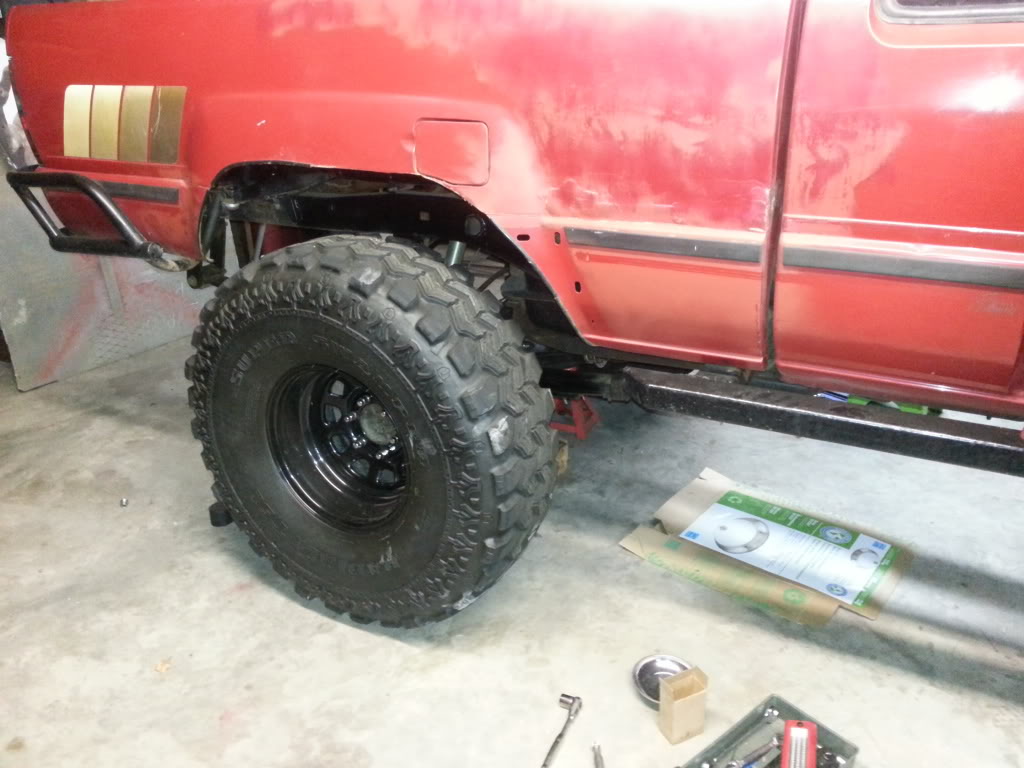
I wanted to post this pic. I installed my rear driveshaft while the rear tires were still ever so slightly off the ground. This made the install a 1000 times easier due to the fact that you could rotate the DS (w/ the TC in Neutral) to get all the DS bolts tightened in an easy to reach position. I dont know why I never did that in the first place


I had him check it out due to the fact I let a friend have my TC flange after he destroyed his rear end and after I put the new flange on It didn't feel right to me. So I sent it to the expert. He also threw in a tube of Toyota FIPG for the install.
I got the fresh 3rd member with the G2 5.29's and Detroit in and sealed up.

I painted both the rear calipers since I overlooked that when I did the rear disc brakes. Its not the best but it is better than rust.

I have a drivable truck now. Just need to add oil to the rear diff. I wanted to let the FIPG set over night.
I wanted to post this pic. I installed my rear driveshaft while the rear tires were still ever so slightly off the ground. This made the install a 1000 times easier due to the fact that you could rotate the DS (w/ the TC in Neutral) to get all the DS bolts tightened in an easy to reach position. I dont know why I never did that in the first place
 10-17-2013, 07:43 AM
#98
Registered User
Thread Starter
I started driving the red truck this week to begin breaking in the gears gently in order to be prepared for some cool weather, late season wheeling. Everything seems to be working properly as of right now.
I still have an annoying little oil dribble coming from the duals. Its not enough to be worried about just annoying. I will address that when I pull the cases for a new clutch and rear main seal (which is I suspect needs to be addressed). I may do an Engine Builder H2o pump, Timing Chain, oil pump, front main and Timing cover replacement when I do that too (just to have both ends covered).
I still have an annoying little oil dribble coming from the duals. Its not enough to be worried about just annoying. I will address that when I pull the cases for a new clutch and rear main seal (which is I suspect needs to be addressed). I may do an Engine Builder H2o pump, Timing Chain, oil pump, front main and Timing cover replacement when I do that too (just to have both ends covered).
10-29-2013, 08:24 AM
#100
Registered User
Thread Starter
The only place that they were rubbing were on the rear bumpstop mounts and I cut those off.
This weeks to do list:
Install front Delrin frame bushings
Install ARP hub studs
Check/service front hubs/axle
Then hopefully wheel/rinse/repeat!!
This weeks to do list:
Install front Delrin frame bushings
Install ARP hub studs
Check/service front hubs/axle
Then hopefully wheel/rinse/repeat!!


