85 Extra Cab Saved from Crusher
 01-11-2013, 03:16 AM
#1
Super Moderator
Staff
Thread Starter
iTrader: (1)
Join Date: Aug 2008
Location: Anderson Missouri
Posts: 11,788
Likes: 0
Received 21 Likes
on
19 Posts
85 Extra Cab Saved from Crusher
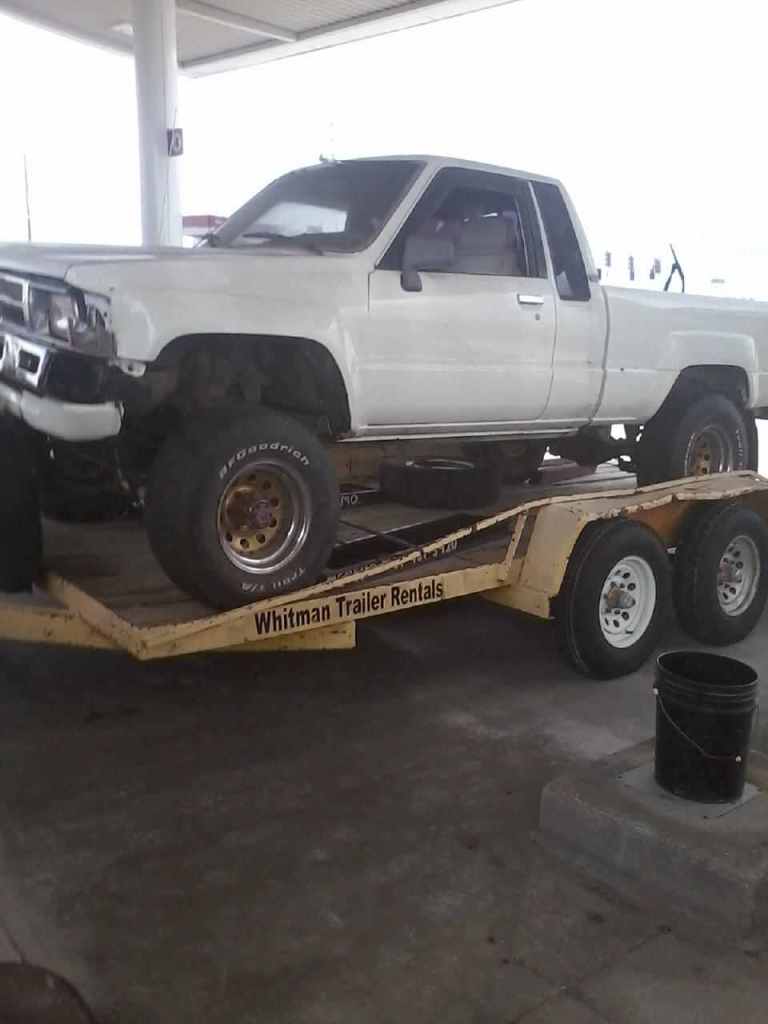
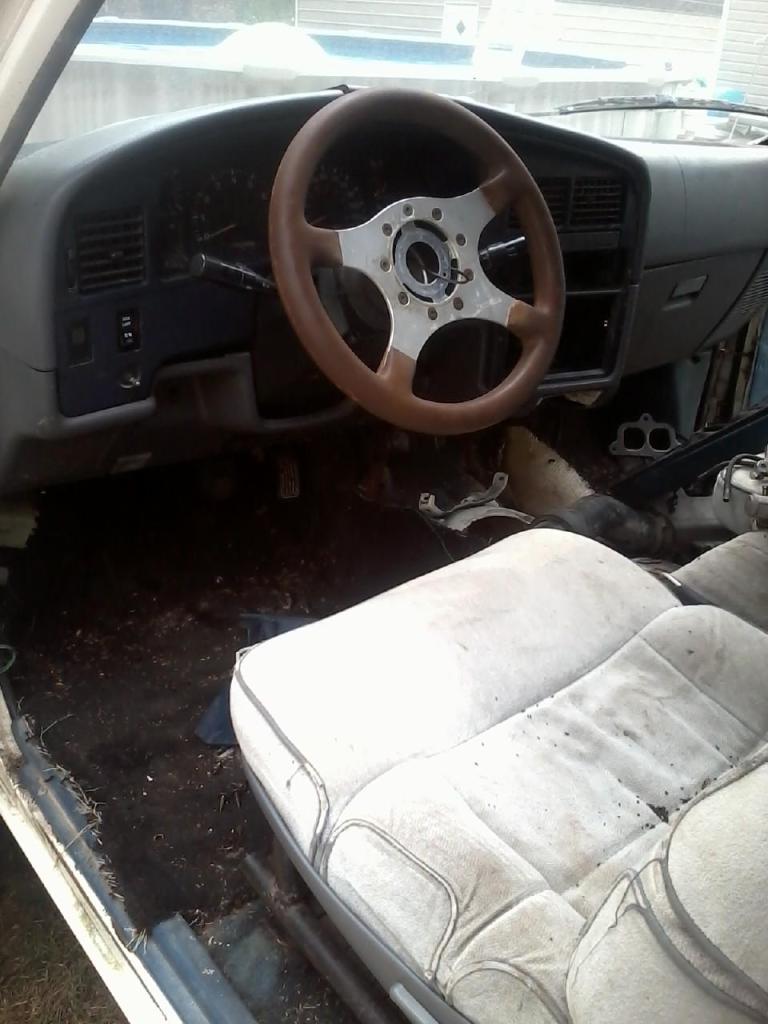
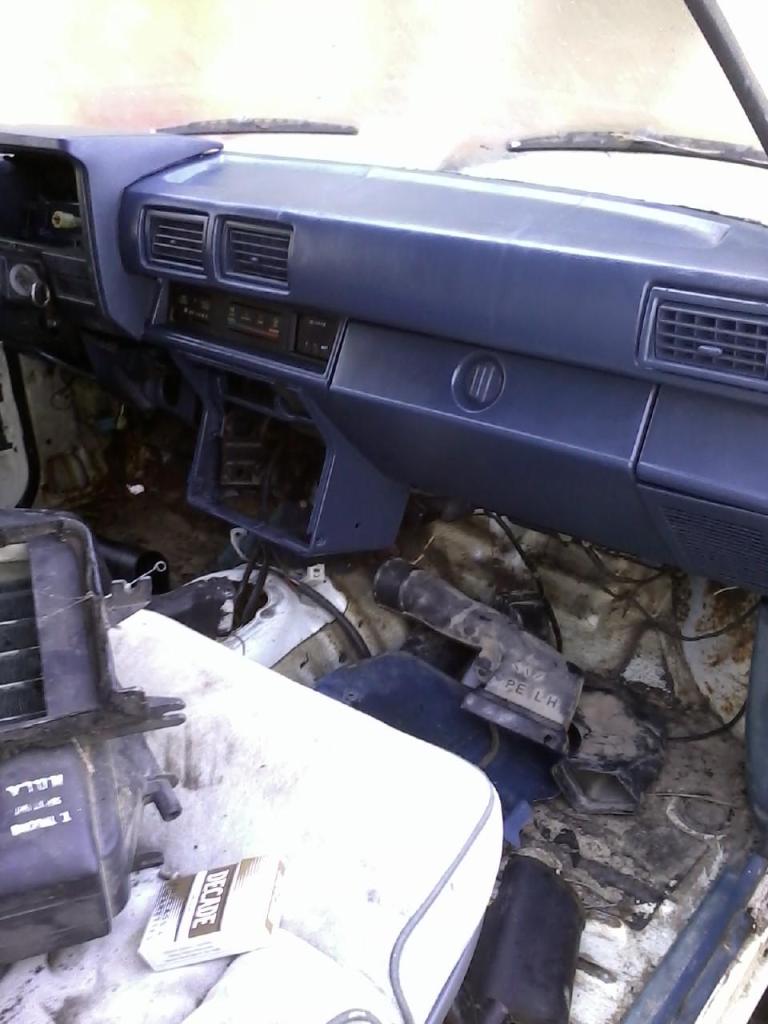
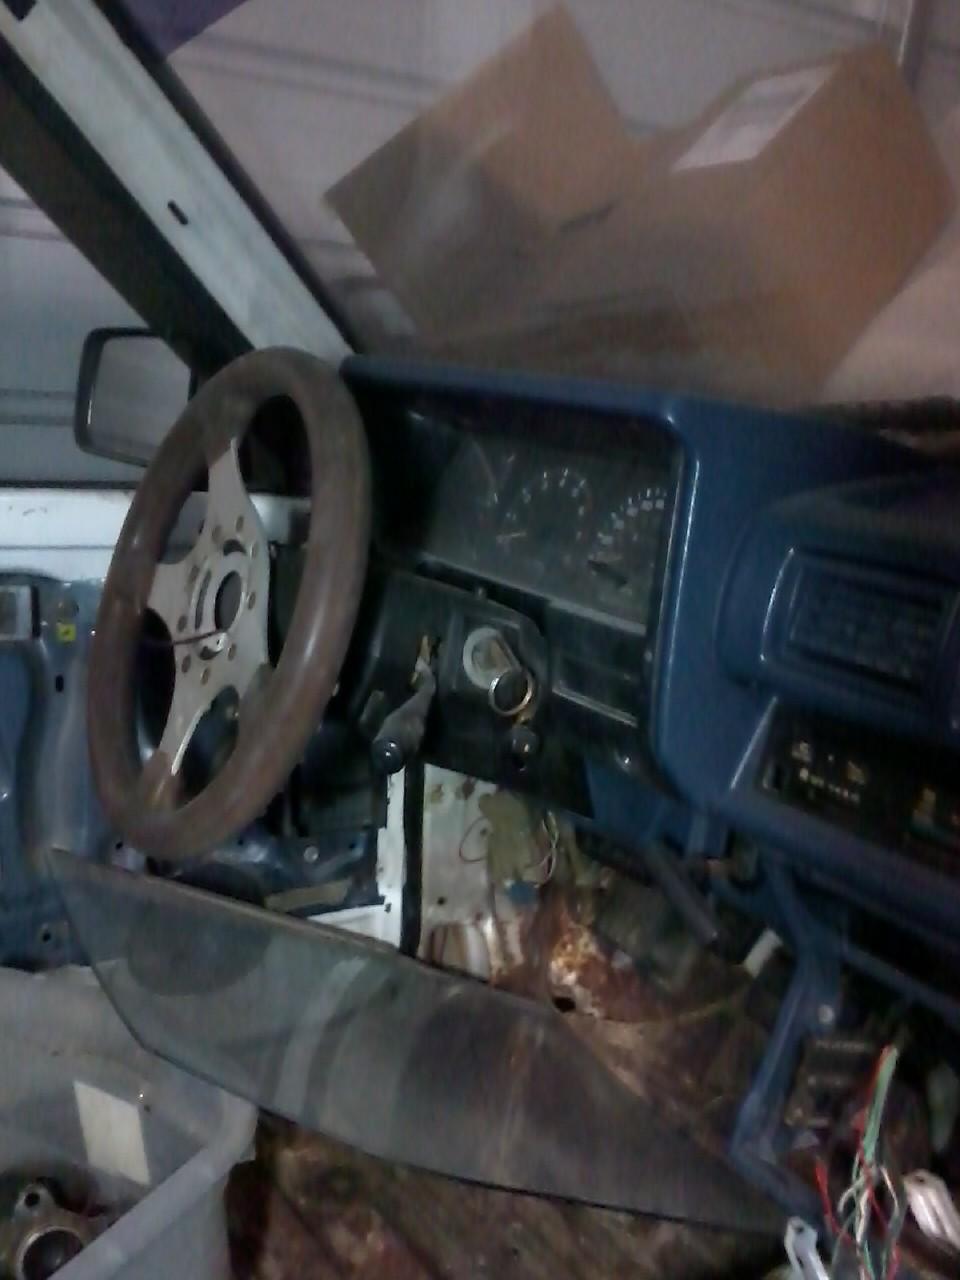
I bought an 84 Standard Cab to fix and sell and the owner said if I wanted this 85 I could have it as the following Saturday it was going to the crusher, he wanted it out of his field. It was used as a parts truck. It looks good, but it was repainted and is peeling, has some big runs in it, they put a 90's dash in it and it was just resting on the steering column. Head and tranny was missing, had a Chevy van converion seat in it. I brought it home on July 27th 2012. Only good thing about it is the frame and body, everything else will need to be redone. Wiring is butchered up.
It has been just sitting until I got my 86 Runner done and since it is nearly done and my two runners I have started on January 11th, I want to keep this the same date as well, just different years 88 Runner 2011,86 Runner 2012, and now this 85 Extra cab 2013. These are my three keepers.
Was fixing a standard cab for myself until I came across this one. I am 6 feet tall and a standard cab is just a little cramped for me. This is a rarer truck so that got my attention as well.
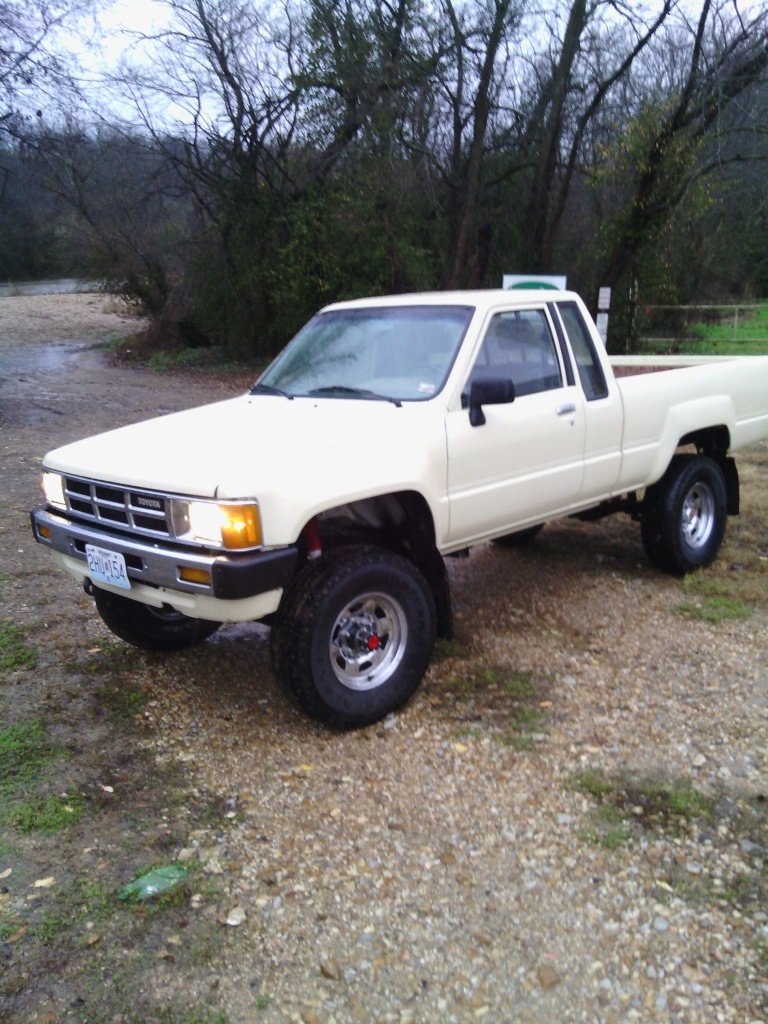
Day I brought it home.
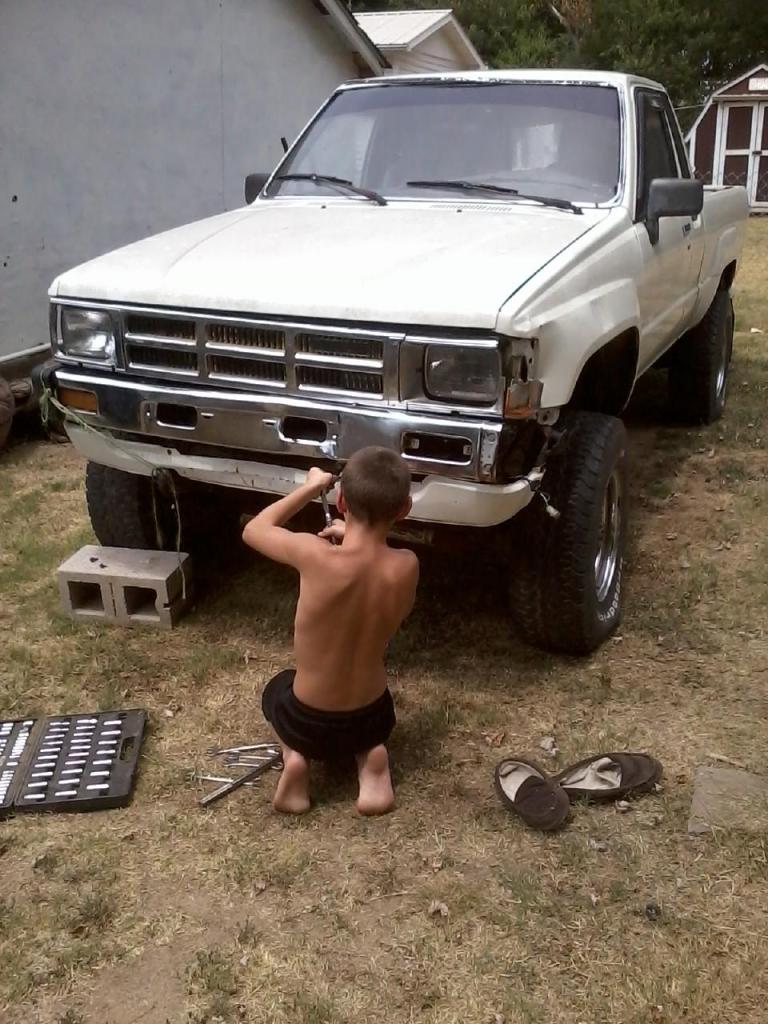
Justin helping me getting the bumper off to work on some wires and the bumper after getting it home.
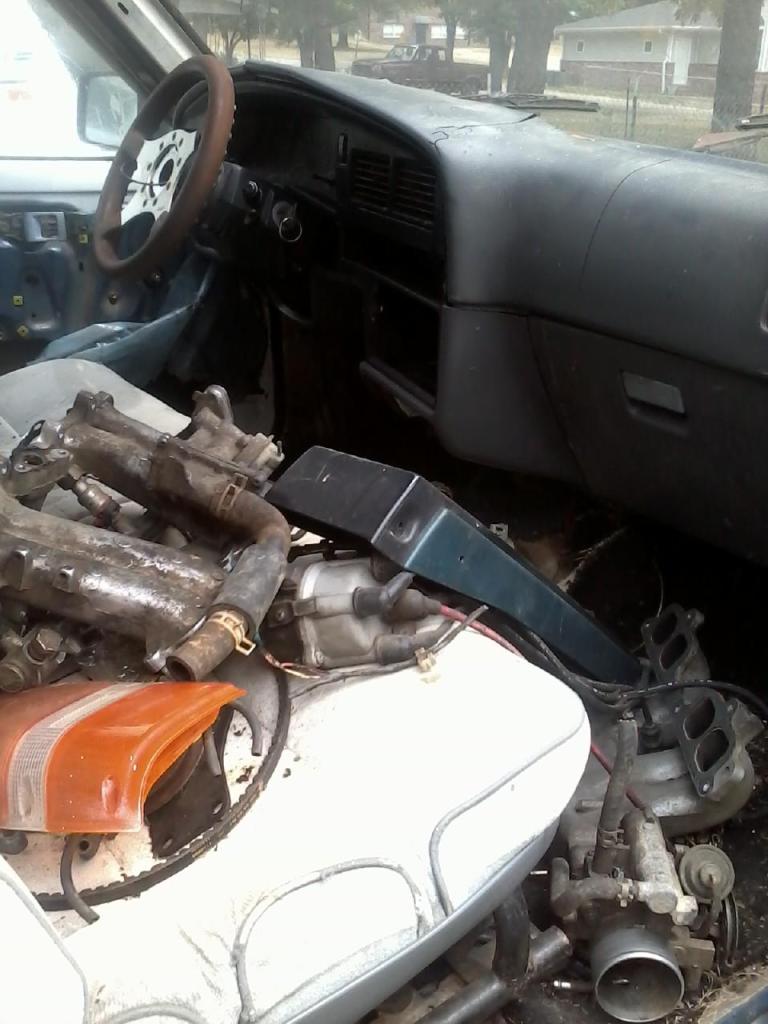
Dash that was just sitting on steering colmn and how bad interior is.
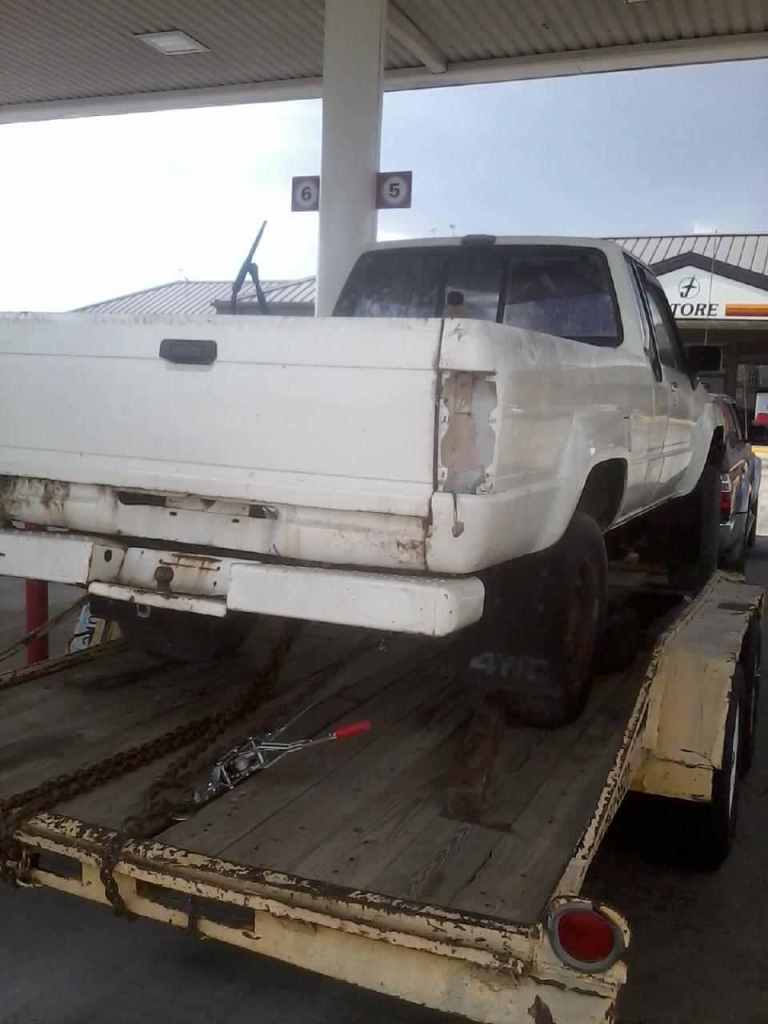
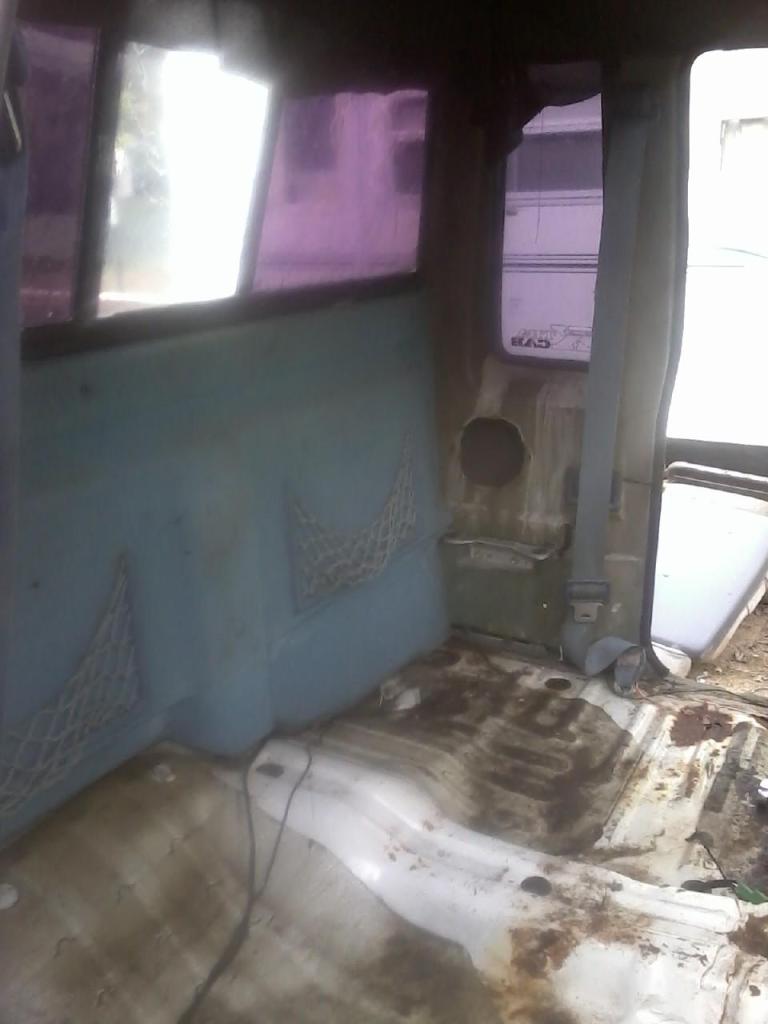
Back hacked up.
Page 1 post 9...Getting 80 amp fuse out https://www.yotatech.com/forums/f198.../#post52042170
Page 2 Post 24.. Cleaning the Intake System https://www.yotatech.com/forums/f198...l#post52044719
Page 2 Post 25 Testing IACV https://www.yotatech.com/forums/f198...l#post52045185
Page 2 Post 27 Parts Page https://www.yotatech.com/forums/f198...l#post52045802
Page 5 Post 100 Fuel Cleaning Information https://www.yotatech.com/forums/f198...l#post52064973
Page 7 Post 125 Fuel Tank Differences https://www.yotatech.com/forums/f198...l#post52077759
Page 7 Post 129 Low Level Fuel Option. https://www.yotatech.com/forums/f198...l#post52078255
Page 7 Post 137 Low Level Fuel Light https://www.yotatech.com/forums/f198...l#post52078550
Page 10 Post 186 Removing Pilot Bearing https://www.yotatech.com/forums/f198...l#post52105905
Page 12 Post 228 FSM Igniter Test https://www.yotatech.com/forums/f198...l#post52105905
Page 12 240 Pick up Coil Test https://www.yotatech.com/forums/f198...l#post52121343
Page 13 Post 244 Injector Differences https://www.yotatech.com/forums/f198...l#post52136944
Page 14 Post 266 Injector Connectors https://www.yotatech.com/forums/f198...l#post52202574
Page 14 Post 278 Back up Light Upgrade https://www.yotatech.com/forums/f198...l#post52202574
Page 17 Post 333 Cressida AFM https://www.yotatech.com/forums/f198...l#post52216147
Page 18 Post 345 Door Latch Part Numbers https://www.yotatech.com/forums/f198...l#post52217303
Page 19 Post 379 Windshield Cowl/Stove Pipe Cleaning https://www.yotatech.com/forums/f198...l#post52221468
Page 24 Post 476 Door Latch Fix https://www.yotatech.com/forums/f198...l#post52225500
Page 24 Post 480 Ignition Switch Removal https://www.yotatech.com/forums/f198...l#post52225629
Page 25 Post 495 3rd Gen Ball Joints https://www.yotatech.com/forums/f198...l#post52226780
Page 28 Post 554 Disabling Door Buzzer https://www.yotatech.com/forums/f198...l#post52231951
Page 29 Post 562 Headlight Ground Upgrade https://www.yotatech.com/forums/f198...l#post52234649
What it looks like now.
It has been just sitting until I got my 86 Runner done and since it is nearly done and my two runners I have started on January 11th, I want to keep this the same date as well, just different years 88 Runner 2011,86 Runner 2012, and now this 85 Extra cab 2013. These are my three keepers.
Was fixing a standard cab for myself until I came across this one. I am 6 feet tall and a standard cab is just a little cramped for me. This is a rarer truck so that got my attention as well.
Day I brought it home.
Justin helping me getting the bumper off to work on some wires and the bumper after getting it home.
Dash that was just sitting on steering colmn and how bad interior is.
Back hacked up.
Page 1 post 9...Getting 80 amp fuse out https://www.yotatech.com/forums/f198.../#post52042170
Page 2 Post 24.. Cleaning the Intake System https://www.yotatech.com/forums/f198...l#post52044719
Page 2 Post 25 Testing IACV https://www.yotatech.com/forums/f198...l#post52045185
Page 2 Post 27 Parts Page https://www.yotatech.com/forums/f198...l#post52045802
Page 5 Post 100 Fuel Cleaning Information https://www.yotatech.com/forums/f198...l#post52064973
Page 7 Post 125 Fuel Tank Differences https://www.yotatech.com/forums/f198...l#post52077759
Page 7 Post 129 Low Level Fuel Option. https://www.yotatech.com/forums/f198...l#post52078255
Page 7 Post 137 Low Level Fuel Light https://www.yotatech.com/forums/f198...l#post52078550
Page 10 Post 186 Removing Pilot Bearing https://www.yotatech.com/forums/f198...l#post52105905
Page 12 Post 228 FSM Igniter Test https://www.yotatech.com/forums/f198...l#post52105905
Page 12 240 Pick up Coil Test https://www.yotatech.com/forums/f198...l#post52121343
Page 13 Post 244 Injector Differences https://www.yotatech.com/forums/f198...l#post52136944
Page 14 Post 266 Injector Connectors https://www.yotatech.com/forums/f198...l#post52202574
Page 14 Post 278 Back up Light Upgrade https://www.yotatech.com/forums/f198...l#post52202574
Page 17 Post 333 Cressida AFM https://www.yotatech.com/forums/f198...l#post52216147
Page 18 Post 345 Door Latch Part Numbers https://www.yotatech.com/forums/f198...l#post52217303
Page 19 Post 379 Windshield Cowl/Stove Pipe Cleaning https://www.yotatech.com/forums/f198...l#post52221468
Page 24 Post 476 Door Latch Fix https://www.yotatech.com/forums/f198...l#post52225500
Page 24 Post 480 Ignition Switch Removal https://www.yotatech.com/forums/f198...l#post52225629
Page 25 Post 495 3rd Gen Ball Joints https://www.yotatech.com/forums/f198...l#post52226780
Page 28 Post 554 Disabling Door Buzzer https://www.yotatech.com/forums/f198...l#post52231951
Page 29 Post 562 Headlight Ground Upgrade https://www.yotatech.com/forums/f198...l#post52234649
What it looks like now.

Last edited by Terrys87; 05-09-2016 at 10:01 PM.
 01-11-2013, 03:17 AM
#2
 01-11-2013, 03:28 AM
#3
Super Moderator
Staff
Thread Starter
iTrader: (1)
Join Date: Aug 2008
Location: Anderson Missouri
Posts: 11,788
Likes: 0
Received 21 Likes
on
19 Posts
These two tucks are going to be my last major rebuilds for awhile as I want to get them in more then just stock condition.
My trucks.
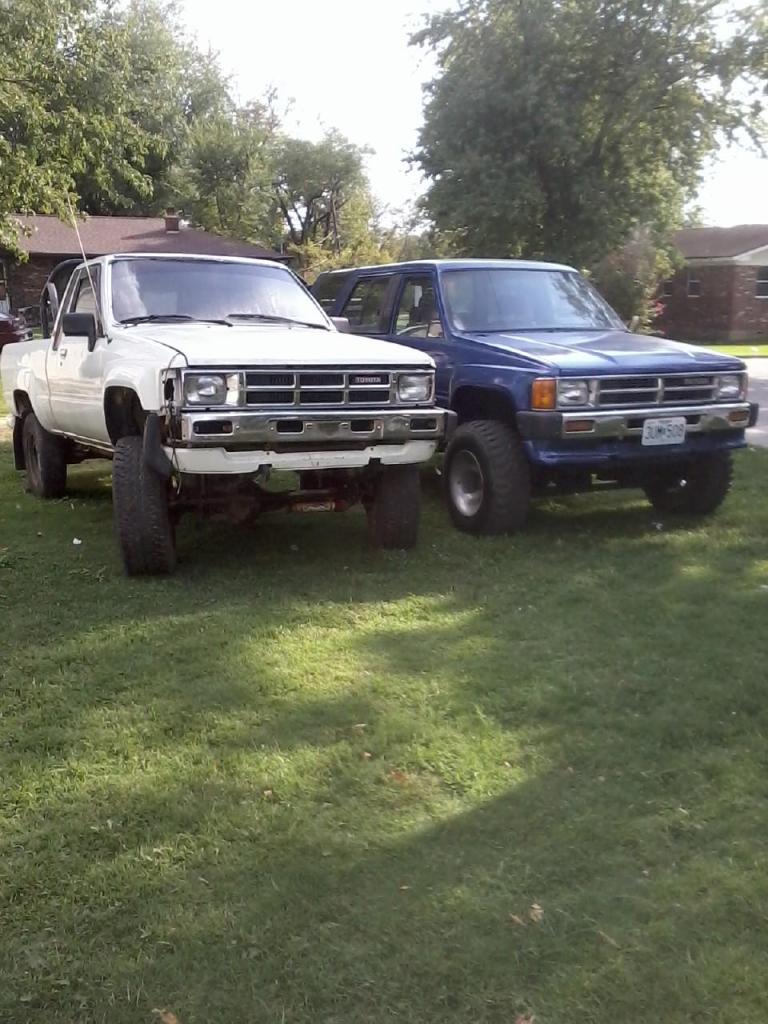
Mistys Truck and still my favorite truck. All 3 were junk when I got them.
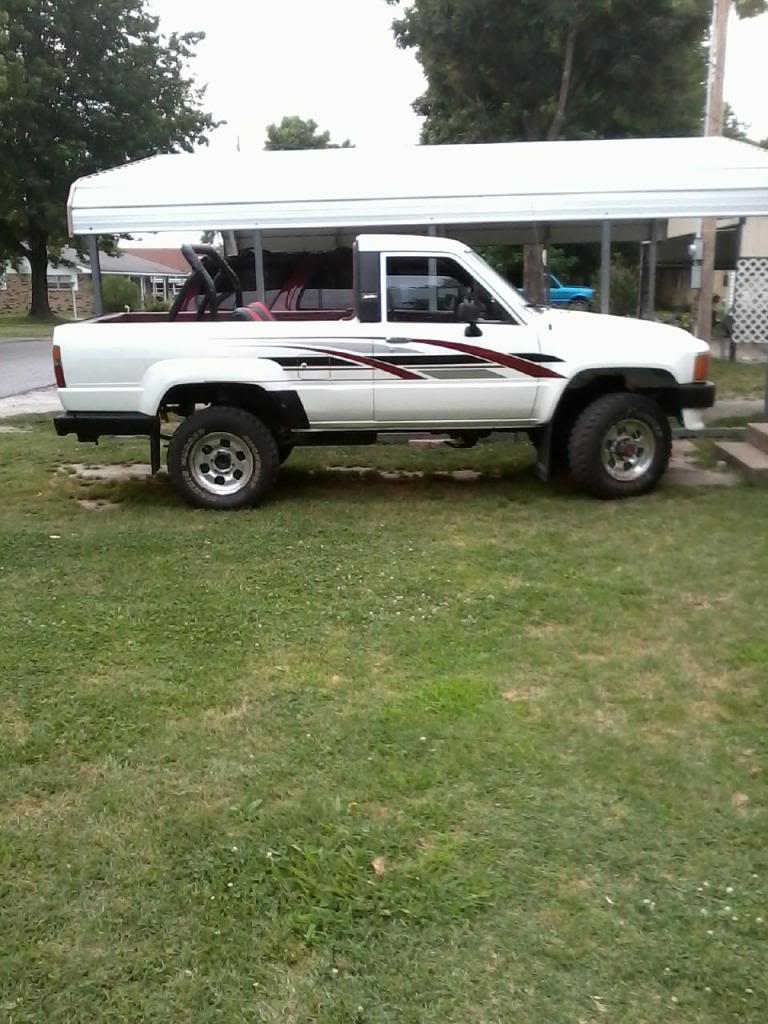
My trucks.
Mistys Truck and still my favorite truck. All 3 were junk when I got them.
Last edited by Terrys87; 01-11-2013 at 03:34 AM.
01-11-2013, 11:44 AM
#4
Nice to see you started a build thread on this one Terry. The Extra cabs sure are nice for us taller guys (I'm 6'-1). I just got another 83' 4x4 for a daily driver and forgot how tight on legroom the first gen toyotas are, lol. Look forward to seeing what you have in store for this one!
01-12-2013, 10:40 AM
#5
Super Moderator
Staff
Thread Starter
iTrader: (1)
Join Date: Aug 2008
Location: Anderson Missouri
Posts: 11,788
Likes: 0
Received 21 Likes
on
19 Posts
Thanks Ed.. I am looking forward to it. I could have it running and on the road in a quick amount of time if I really wanted to, but I do want it to look good as well. I was out snooping thru some parts and found I have a great set of injector wires. The one that came with this truck was really hacked up. I have some final tweaking and peaking on my 86 and get the tranny in Mistys runner and then it is on with this build.
I figure about two more weeks that I want to finish up and then I am tearing down one of two motors. One is the short block that came with the truck and then I have a complete motor that I dont know anything about.
Right now it is looking like it is going to be red with tan interior but still havent decided the colors that I am going to go with just yet. Sure wish I knew how to use a color program to see what the truck would look like in different colors. The exterior will compliment the interior. I just dont care to paint the engine bay, but if need to I will. Painting the engine bay black would be easy but since that isnt how Toyotas came, I wont do it that way.
I have some really nice green that I think would look great on a standard cab, but not on an Extra cab. All colors are up for grabs and maybe even black, but it is at the bottom of the list. It has to be flawless or it will show, but the body is fairly straight.
I am painting an 86 Extra cab identical to mine only it is white with a gray interior this spring or early summer so this build will move fast as I want to paint them both at about the same time since I will have the shop cleaned for painting.
02-14-2013, 04:17 AM
#6
Super Moderator
Staff
Thread Starter
iTrader: (1)
Join Date: Aug 2008
Location: Anderson Missouri
Posts: 11,788
Likes: 0
Received 21 Likes
on
19 Posts
Been a little disappointed in how this build has been going so far. It has been to cold to do anything on the truck and since it is a project and I just dont have to have it running it has been getting neglected. Build will change a little for now. I may be going overseas for a year so my plans for now are to just get it running. When I get back, then I will do a full tear down of it and go thru it from bumper to bumper.
I have a tranny for it so now I just need to get a motor for it. I have two motors and I am going to tear into one this week end and see what it looks like. Right now I just plan on rebuilding the top end of it for now and get it driveable.
I have cleaned a painted alot of the parts that are off it it and have them laying in the truck bed. Actually quiet a few done. The wiring has been hacked up bad so I am getting some of that fixed and still have aways to go.
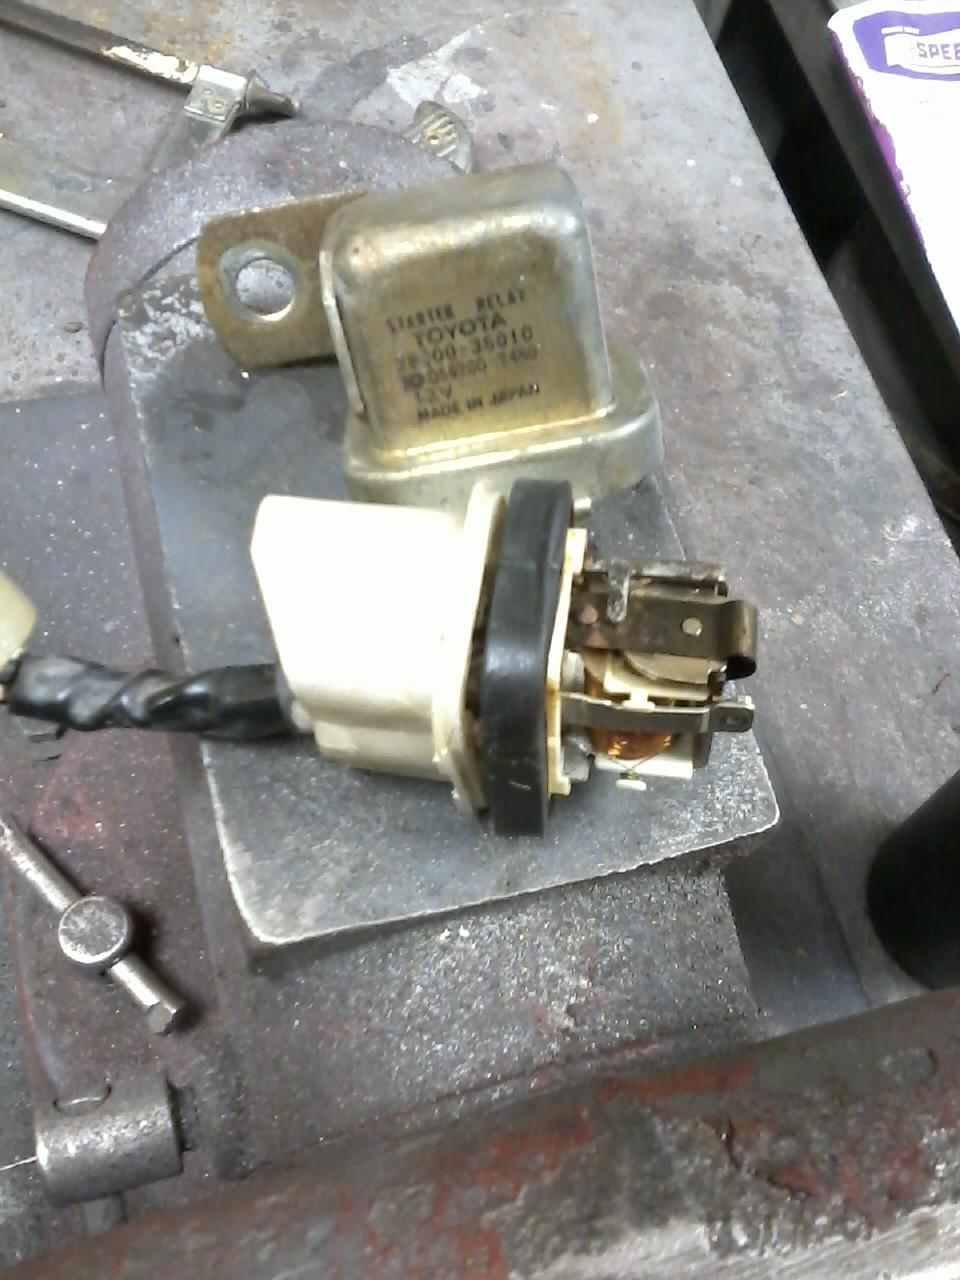
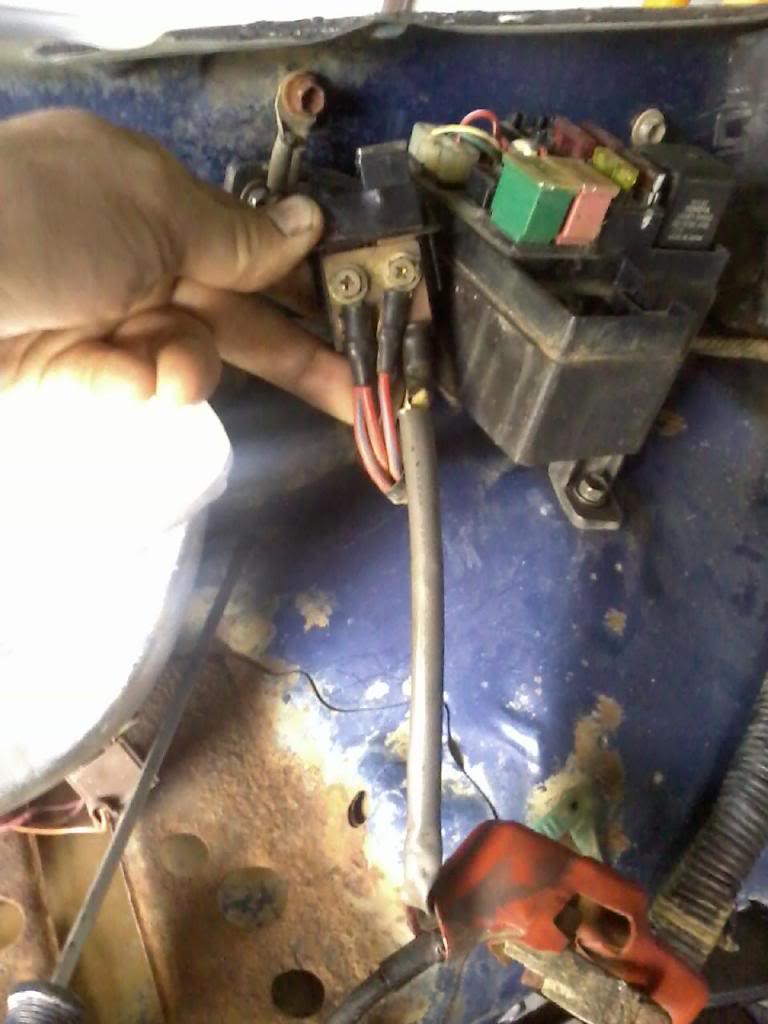
Since this truck was used for parts, I am slowly going thru and replacing what I have found missing. It is missing a Starter Relay and I have one of those. Rad4Runner has a great write up on his thread about cleaning the contacts in these and I have done it on my other trucks. It makes a big difference on how solid it can make the starter work.
Rad has a better write up but I will show how it is easily taken apart and clean the contacts.
There are 6 tabs that need to be lifted up and the metal can will pop off. If it is difficult to remove, the rubber seal is what is sticking to the metal. Just take it easy and work a jewelers screwdriver around the edge of the rubber to break its contact to the metal case.
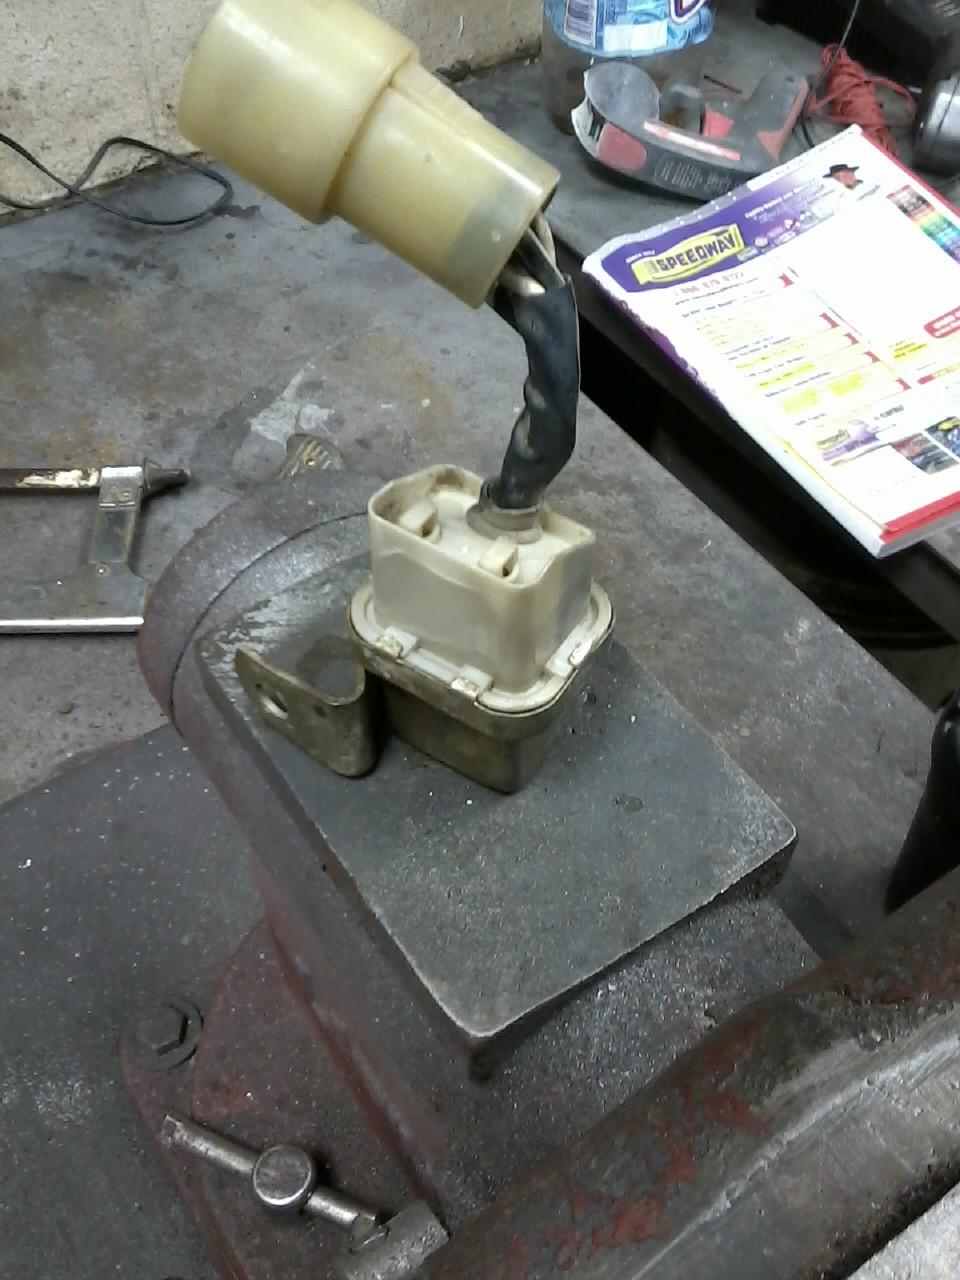
Here it is seperated. This works great for as bad as it may look. I put it on my 86 Runner to test it before and after I cleaned the contacts on it. I probably have another relay that I just need to find but in the mean time this one will work. I used a small piece of 600 grit sand paper and cleaned the carbon from in between the contacts. A cheap but great fix. Check Rad4Runner thread for more and better info.
I have a tranny for it so now I just need to get a motor for it. I have two motors and I am going to tear into one this week end and see what it looks like. Right now I just plan on rebuilding the top end of it for now and get it driveable.
I have cleaned a painted alot of the parts that are off it it and have them laying in the truck bed. Actually quiet a few done. The wiring has been hacked up bad so I am getting some of that fixed and still have aways to go.
Since this truck was used for parts, I am slowly going thru and replacing what I have found missing. It is missing a Starter Relay and I have one of those. Rad4Runner has a great write up on his thread about cleaning the contacts in these and I have done it on my other trucks. It makes a big difference on how solid it can make the starter work.
Rad has a better write up but I will show how it is easily taken apart and clean the contacts.
There are 6 tabs that need to be lifted up and the metal can will pop off. If it is difficult to remove, the rubber seal is what is sticking to the metal. Just take it easy and work a jewelers screwdriver around the edge of the rubber to break its contact to the metal case.
Here it is seperated. This works great for as bad as it may look. I put it on my 86 Runner to test it before and after I cleaned the contacts on it. I probably have another relay that I just need to find but in the mean time this one will work. I used a small piece of 600 grit sand paper and cleaned the carbon from in between the contacts. A cheap but great fix. Check Rad4Runner thread for more and better info.
Last edited by Terrys87; 02-11-2014 at 10:47 PM.
02-14-2013, 08:38 AM
#7
Contributing Member
Join Date: Mar 2003
Location: COTKU,Ontario,Canada
Posts: 11,334
Likes: 0
Received 0 Likes
on
0 Posts
Looks like an interesting project.. I did'nt think the 90 dash would fit in the 84+ cab but it seemed to... the proper dash looks better though...
why not paint it to match Misty's runner including the stripes? then you'd have a pair...
why not paint it to match Misty's runner including the stripes? then you'd have a pair...
Trending Topics
02-14-2013, 11:07 AM
#8
Super Moderator
Staff
Thread Starter
iTrader: (1)
Join Date: Aug 2008
Location: Anderson Missouri
Posts: 11,788
Likes: 0
Received 21 Likes
on
19 Posts
Hello aviator.. They did a poor job of sticking the dash in. It was bowed in the middle and only had 5 tabs holding it on and the steering column was holding it on the drivers side. The color is still up in the air, but I have thought of sorta of matching it to Mistys Runner just because I dont care for painting the engine compartment. Doing a full color change is easy with the exception of doing the engine compartment and that is a work out and something I would want done if I did change the body color. I could strip the compartment out and do it right but that is alot of work.
But you are right, this is a bigger project then what it looks like. I will be painting it, interior, and motor work. All of that I am comfortable with and I have done worse projects but my biggest concern is fixing the leaks on the front axle. I have never worked on a solid axle and some say it isnt to bad to work on. One thing I have learned is that in most cases Toyota makes the best parts to be used for replacement. The front axle is the exception when it comes to the seals and I cant recall right off which one it is. Someone like Trail Gear or Marlin Crawler makes a better seal.
But you are right, this is a bigger project then what it looks like. I will be painting it, interior, and motor work. All of that I am comfortable with and I have done worse projects but my biggest concern is fixing the leaks on the front axle. I have never worked on a solid axle and some say it isnt to bad to work on. One thing I have learned is that in most cases Toyota makes the best parts to be used for replacement. The front axle is the exception when it comes to the seals and I cant recall right off which one it is. Someone like Trail Gear or Marlin Crawler makes a better seal.
Last edited by Terrys87; 02-14-2013 at 11:32 AM.
02-14-2013, 11:27 AM
#9
Super Moderator
Staff
Thread Starter
iTrader: (1)
Join Date: Aug 2008
Location: Anderson Missouri
Posts: 11,788
Likes: 0
Received 21 Likes
on
19 Posts
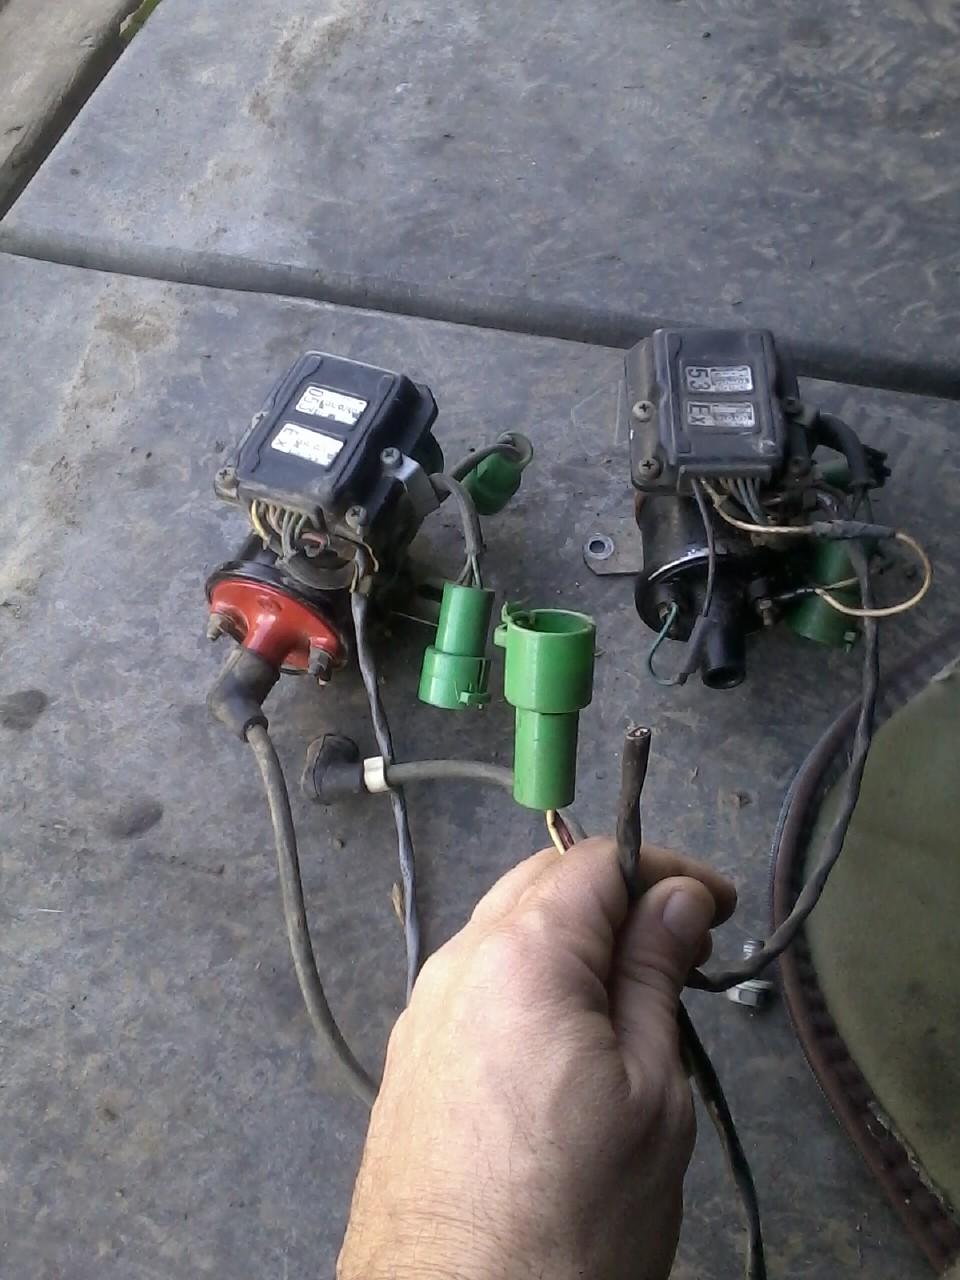
I did get a little more accomplished today. First I replaced the coil and igniter. I found this coil and igniter when buying some parts for my runner and the guy wanted $10 for it so I grabbed knowing that it was a good deal and it would work for this truck. If you do your shopping around and have patience you can find the parts.
Someone cut the end off of the orginal coil and igniter. I have a spare igniter that I could put on and will combine the two at a later time to have a spare.
My $10 replacement part and cut one.
Here is the new coil mounted and when it was used as parts they took the brake booster. I had a spare booster and master cylinder so I went ahead and cleaned them up and got them mounted. Previously I had worked on the air filter box and it is barely showing in the picture. Got it permantly mounted. The drivers side is pretty much done until I get a motor in. I will get in there and get the engine bay cleaned up before the motor goes in.
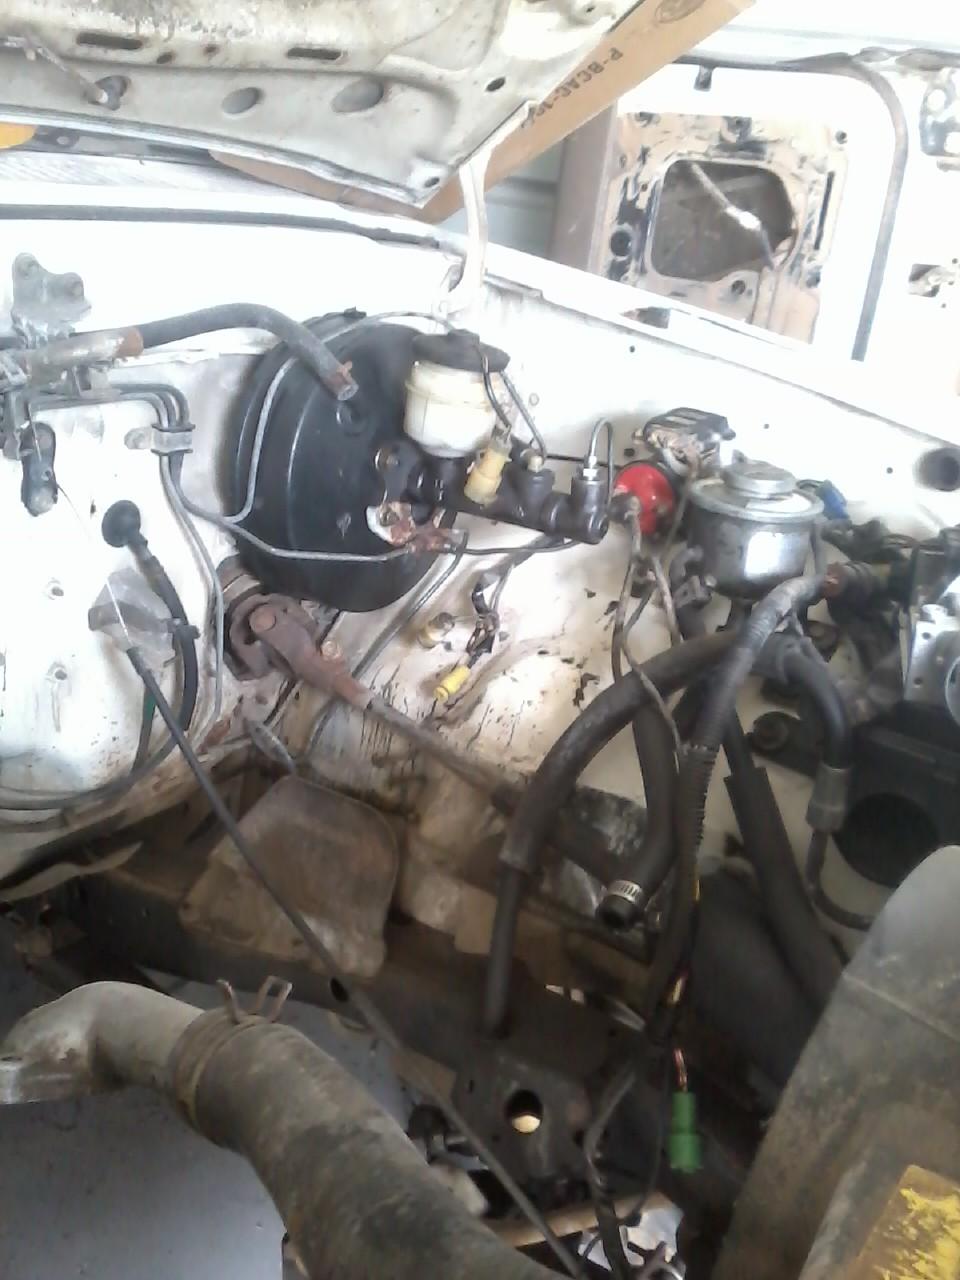
I got the starter relay mounted and got the fuse box mounted. Got all of the correct fuses in. I still need to get a 80 amp fuse and get it put in. The fusible link is the gray wire laying in my hand. When I first started working on Toyotas, I didnt know that a Fusible link was actually a wire.
The motor that I have in my hand is to my windshield washer bottle. It is beyond repair. What I have done in the past is to get a windshield pump from a Sienna and just swap the plugs between the two. I am sure other models will interchange but wanted to put that info out for others as these motors are just about impossible to find off of an older truck.
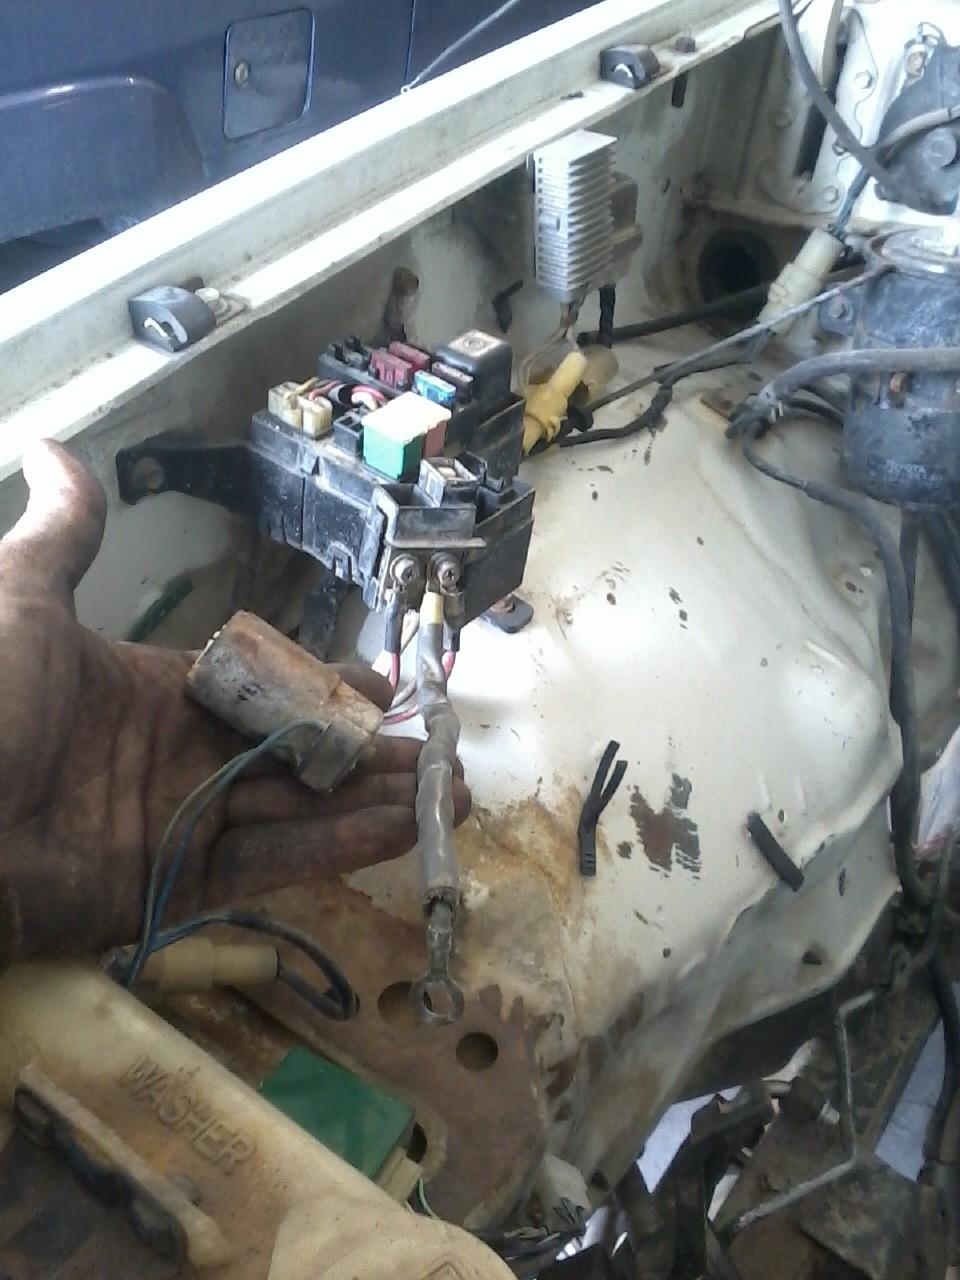
How to remove the 80 amp fuse. Picture from my 86 build to show about replacing the 80 amp fuse.
The 80 Amp you have to pry this tab to the firewall and push out the bottom.
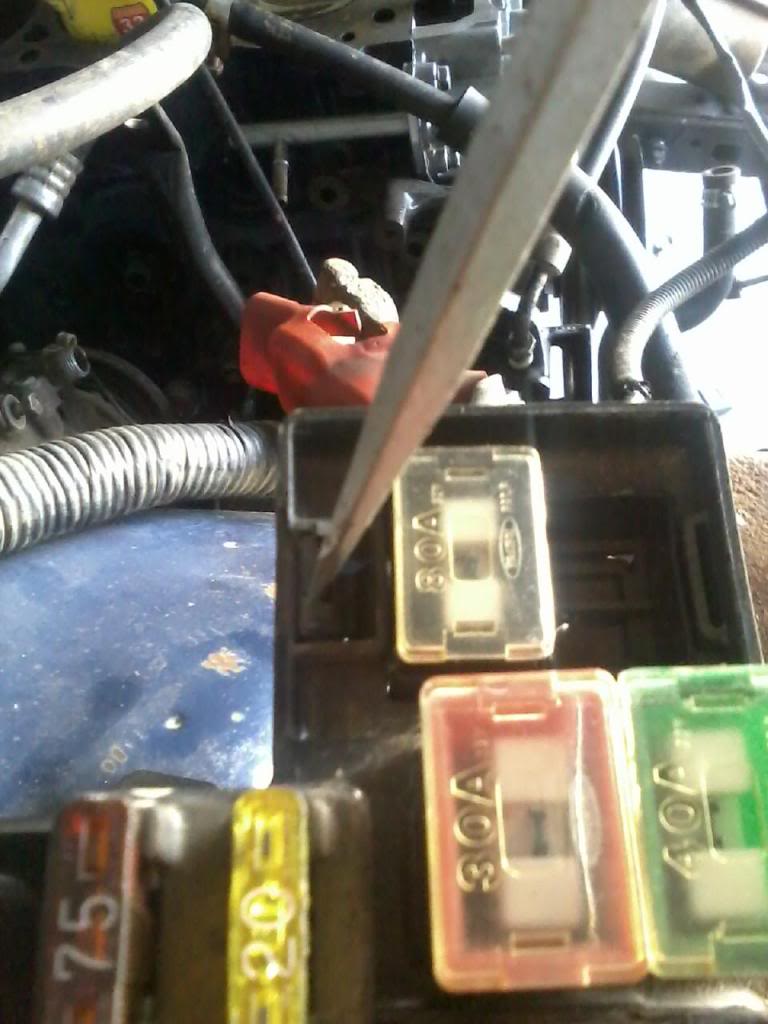
Here it is mounted to the Fuse. It mounts behind the wires. I usually have to take a 8mm socket to the screws the first time. They can be TIGHT.
Someone cut the end off of the orginal coil and igniter. I have a spare igniter that I could put on and will combine the two at a later time to have a spare.
My $10 replacement part and cut one.
Here is the new coil mounted and when it was used as parts they took the brake booster. I had a spare booster and master cylinder so I went ahead and cleaned them up and got them mounted. Previously I had worked on the air filter box and it is barely showing in the picture. Got it permantly mounted. The drivers side is pretty much done until I get a motor in. I will get in there and get the engine bay cleaned up before the motor goes in.
I got the starter relay mounted and got the fuse box mounted. Got all of the correct fuses in. I still need to get a 80 amp fuse and get it put in. The fusible link is the gray wire laying in my hand. When I first started working on Toyotas, I didnt know that a Fusible link was actually a wire.
The motor that I have in my hand is to my windshield washer bottle. It is beyond repair. What I have done in the past is to get a windshield pump from a Sienna and just swap the plugs between the two. I am sure other models will interchange but wanted to put that info out for others as these motors are just about impossible to find off of an older truck.
How to remove the 80 amp fuse. Picture from my 86 build to show about replacing the 80 amp fuse.
The 80 Amp you have to pry this tab to the firewall and push out the bottom.
Here it is mounted to the Fuse. It mounts behind the wires. I usually have to take a 8mm socket to the screws the first time. They can be TIGHT.
Last edited by Terrys87; 02-14-2013 at 11:35 AM.
02-14-2013, 01:27 PM
#10
Super Moderator
Staff
Thread Starter
iTrader: (1)
Join Date: Aug 2008
Location: Anderson Missouri
Posts: 11,788
Likes: 0
Received 21 Likes
on
19 Posts
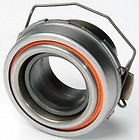
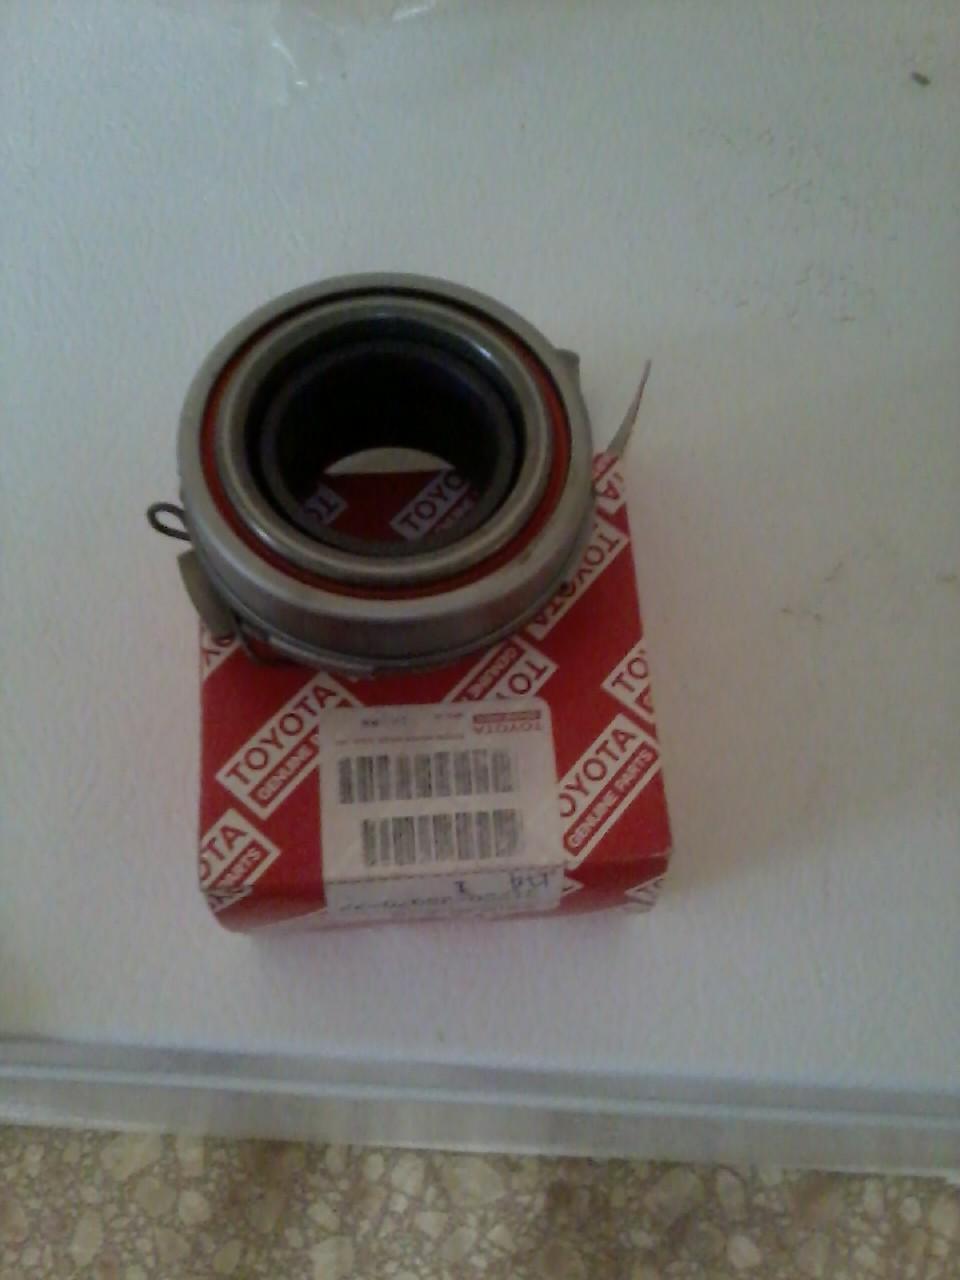
I know I am going to need a new clutch assembly. I just got the Toyota Throwout Bearing(31230-35070-77) for $3 and $5 shipping off of ebay. I see them on the web anywhere from $40-$90. Just got to keep your eyes out for the good deals.
31230-35070-77
I get my Denso wire off of ebay as well. If you look in the picture above of the aftermarket plug wire, you can see it is a poor fitting. These are what the factory use and are cheaper then what the parts stores have and alot better quality.
Denso Wires Link>>> http://www.ebay.com/itm/250854901322...84.m1438.l2649
Last edited by Terrys87; 03-06-2014 at 08:44 AM.
02-14-2013, 04:26 PM
#11
Super Moderator
Staff
Thread Starter
iTrader: (1)
Join Date: Aug 2008
Location: Anderson Missouri
Posts: 11,788
Likes: 0
Received 21 Likes
on
19 Posts
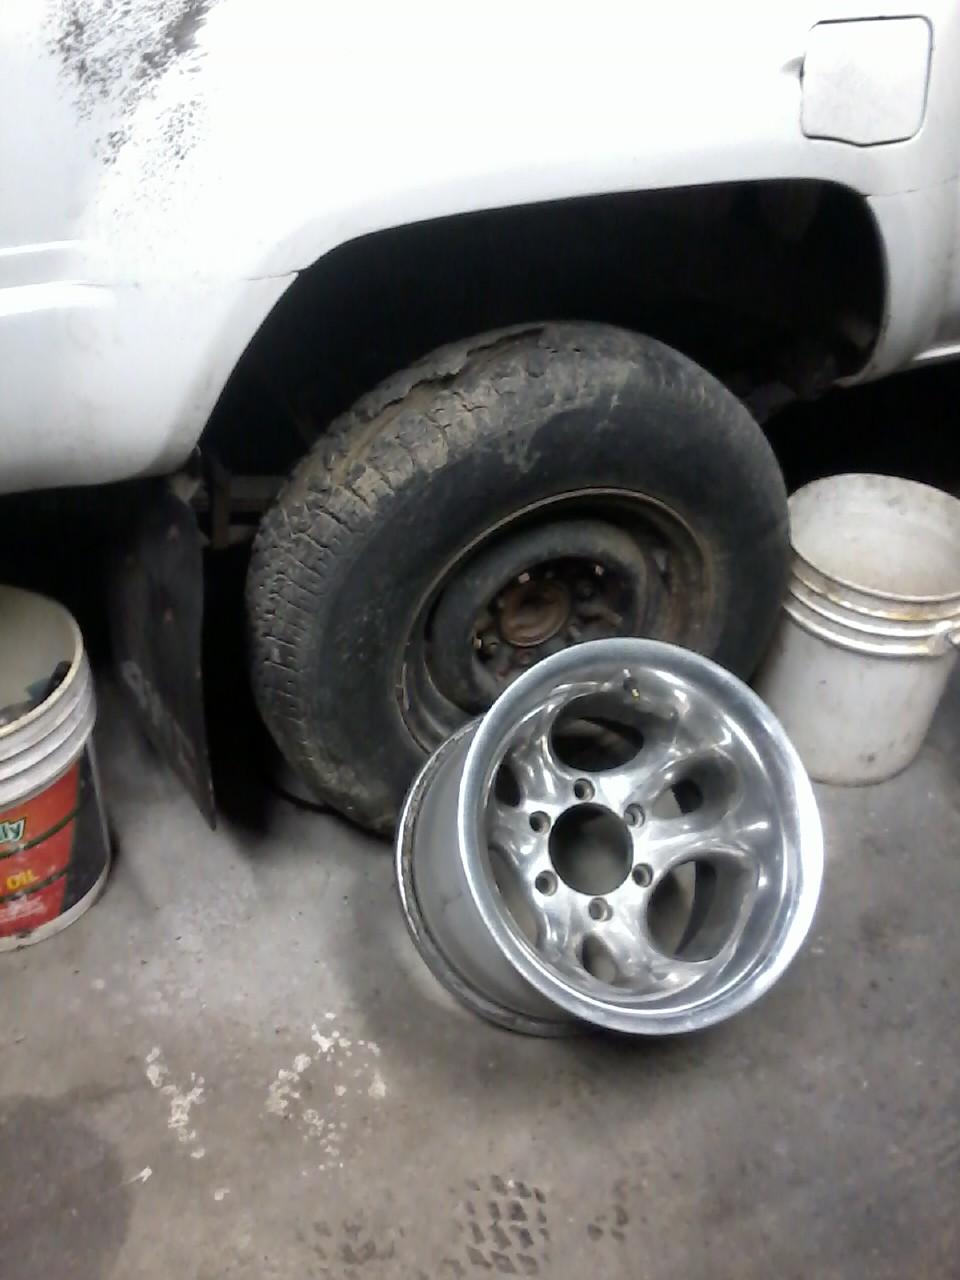
Right now this is the wheels I might put on for the time being when I get to the tires. These are 10 inches wide and was to wide for my runner. I think a solid axle sits higher and they shouldnt cause any problems with the stock height. I have just recently seen some Enkei wheels that came on some Toyotas and might get some of them later. I have recently found 2 sets so hoping when the time comes they will pop up on the internet or locally later.
I have a great price for anyone needing a spare tire. lol . It actually holds air.
I did get my SR5 Guage in the other day. Every truck I have ever had, I always add the guages. Idiot lights always come on after a problem. I have a stock steering wheel I will put on later.
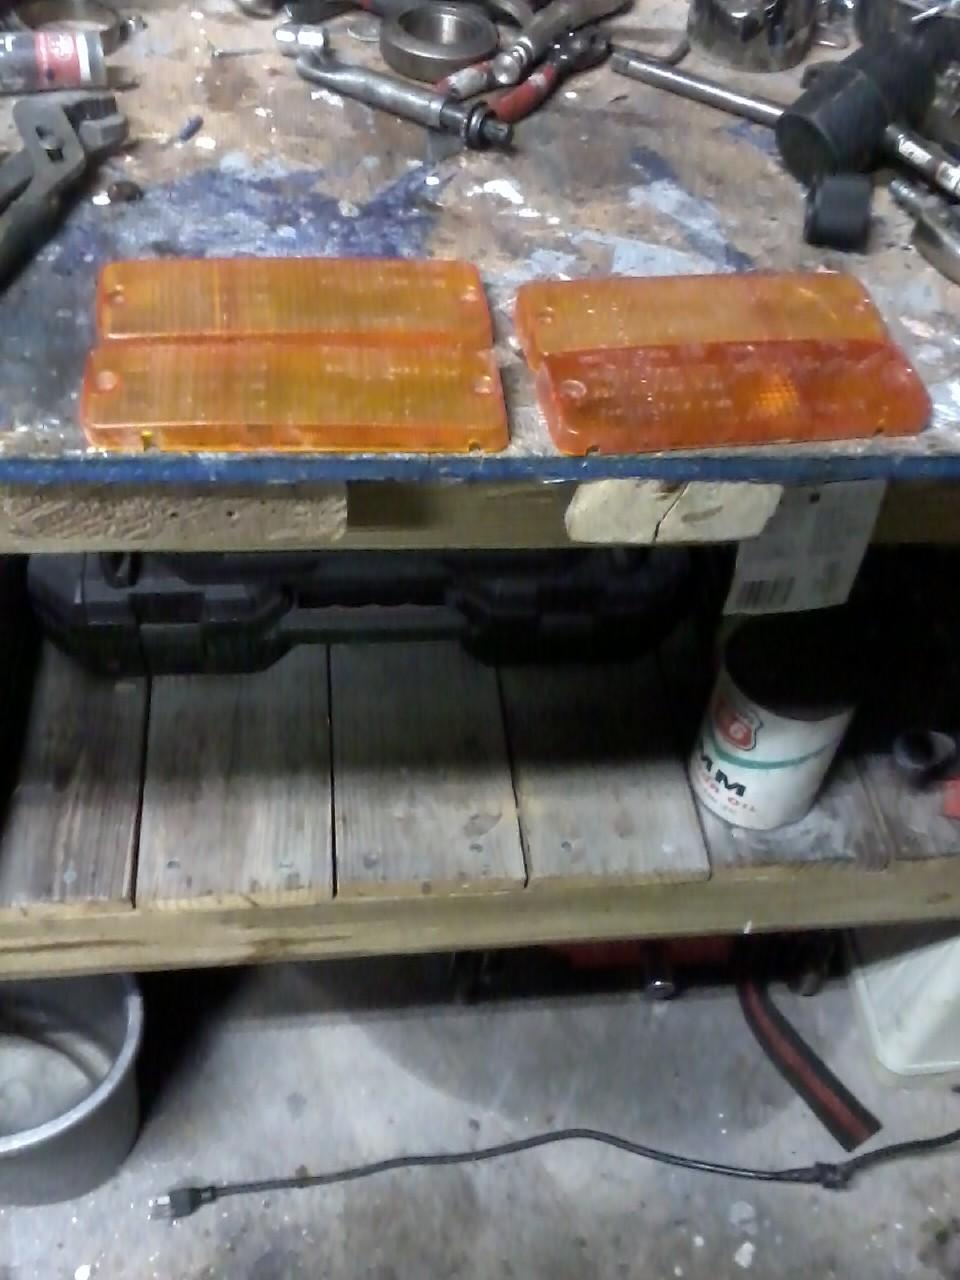
These lenses were really dull. I used some rattle can clear coat and they are alot brighter. They are dusty as the I tried to get the dust out of the shop and think I got it everywhere else but out of the shop. Think I will use the set on the left as they match each other better.
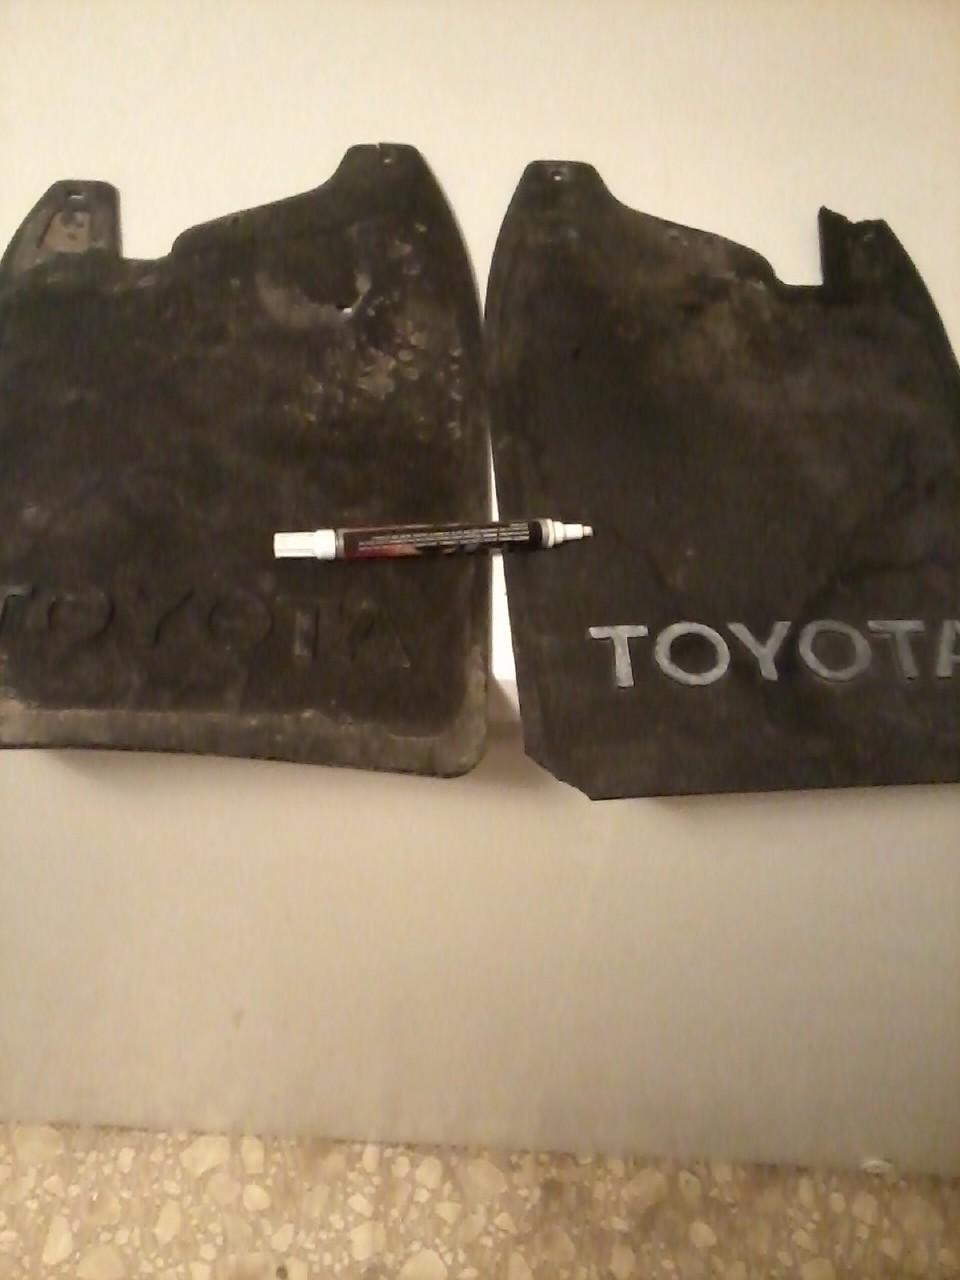
I used the mudflaps off of this truck for my 86 Runner. The other day I went and bought a transmission and the guy was just going to throw them in with the tranny. He parted out a wrecked turbo truck and wants to get rid of alot of his Toyota stuff as he as several other projects. He has a large box of interior pieces, turbo ECU, wiring, SR5 guage other odds and ends that I will be getting off of him. I didnt have the room to haul it home. He also has 3 trucks that he wants $7000 for and 2 would make it worth it, I just dont have the place to store them or time to mess with them right now.
Wanted to get one more thing accomplished today. It felt good to get to work on it again.
I have a great price for anyone needing a spare tire. lol . It actually holds air.
I did get my SR5 Guage in the other day. Every truck I have ever had, I always add the guages. Idiot lights always come on after a problem. I have a stock steering wheel I will put on later.
These lenses were really dull. I used some rattle can clear coat and they are alot brighter. They are dusty as the I tried to get the dust out of the shop and think I got it everywhere else but out of the shop. Think I will use the set on the left as they match each other better.
I used the mudflaps off of this truck for my 86 Runner. The other day I went and bought a transmission and the guy was just going to throw them in with the tranny. He parted out a wrecked turbo truck and wants to get rid of alot of his Toyota stuff as he as several other projects. He has a large box of interior pieces, turbo ECU, wiring, SR5 guage other odds and ends that I will be getting off of him. I didnt have the room to haul it home. He also has 3 trucks that he wants $7000 for and 2 would make it worth it, I just dont have the place to store them or time to mess with them right now.
Wanted to get one more thing accomplished today. It felt good to get to work on it again.
02-16-2013, 01:20 PM
#13
Super Moderator
Staff
Thread Starter
iTrader: (1)
Join Date: Aug 2008
Location: Anderson Missouri
Posts: 11,788
Likes: 0
Received 21 Likes
on
19 Posts
Hello HiLux.. The left rear tires has alot more tread and it is the one I cant get to hold air. I will eventually just pull it and get it fixed. I have 3 BFG and I cannot find a used one to match up what I have on it right now just to get them all the same. But atleast it as a set to move it around so I can live with that for now.
02-16-2013, 01:34 PM
#14
Super Moderator
Staff
Thread Starter
iTrader: (1)
Join Date: Aug 2008
Location: Anderson Missouri
Posts: 11,788
Likes: 0
Received 21 Likes
on
19 Posts
I have a head that I should be getting later this week. My brother is just swapping a whole new motor in his so I will just use it. This motor came out of a wrecked truck that I bought and the tranny had two bad gears in it. I am just going to do a top end rebuild on this motor. I wont do a full rebuild as I can get a motor from http://www.unitedengine.com for about $1100 and with a rebuild kit, head, and machine work you can get to that cost fairly quickly in my opinion. Check their specials and that is with shipping and tax.
I draw the limit on having head work at about $170 and a complete rebuild at about $500ish then I will start with another motor. I have used two of their motors before and they were some excellent motors.
This motor I am going to use for now ran when I bought the truck according to the PO but got used as a parts truck, Alot of the sensors are missing. I have most of them but may needing a few and will come up with them when I get to that stage.
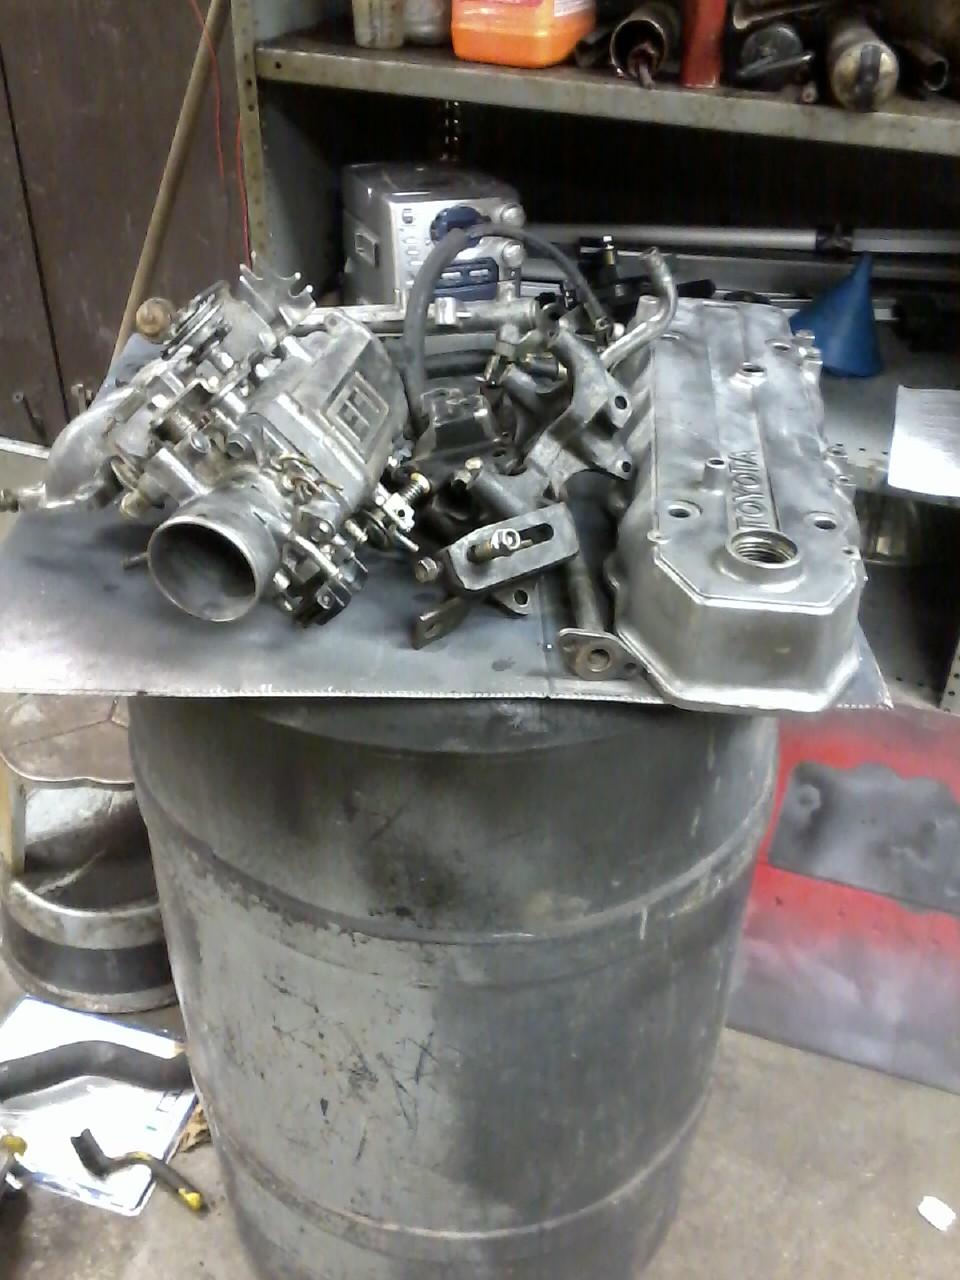
Everything but the Cold Start Injector and TPS is missing.
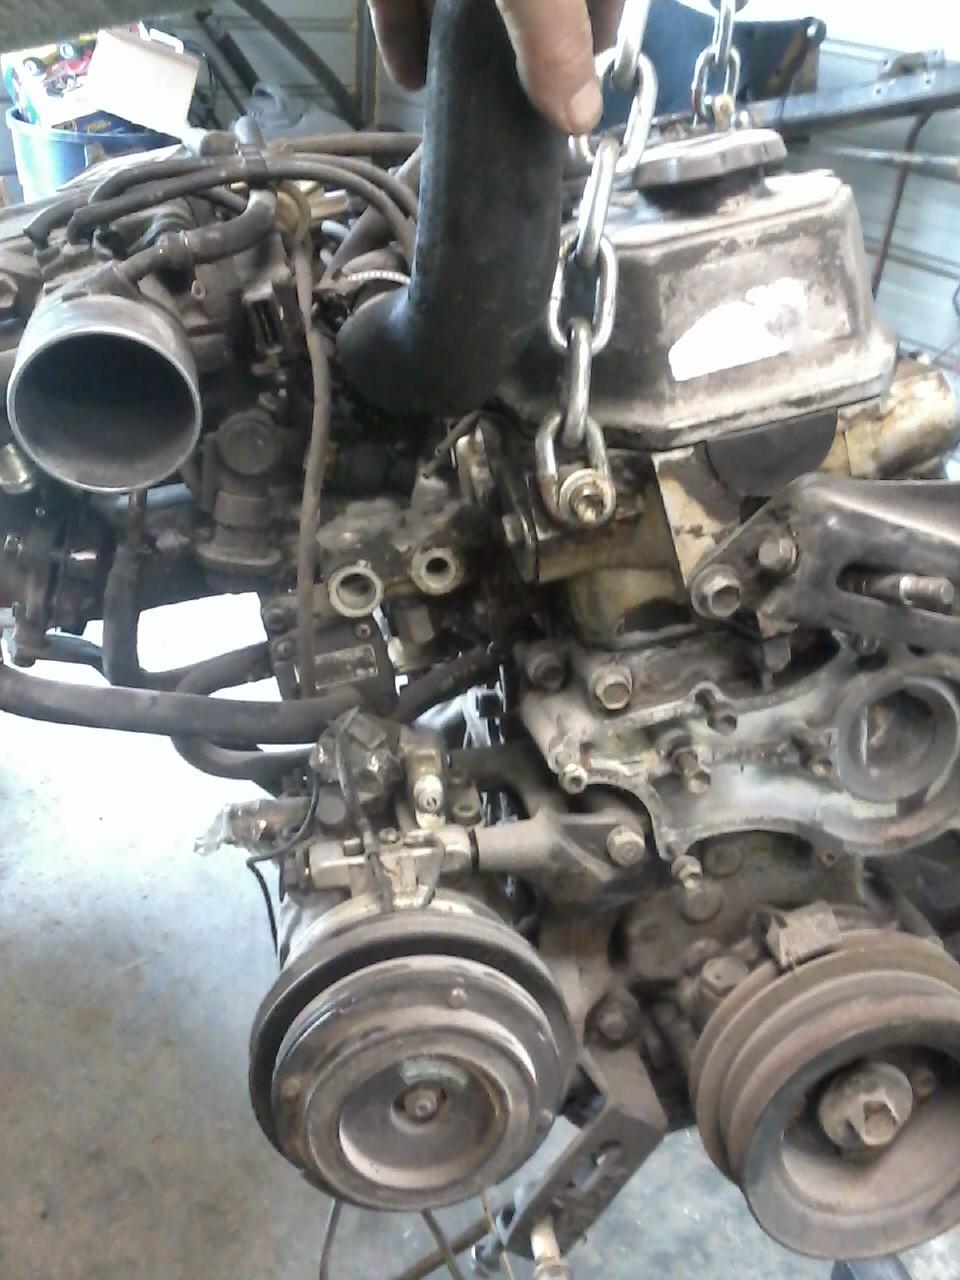
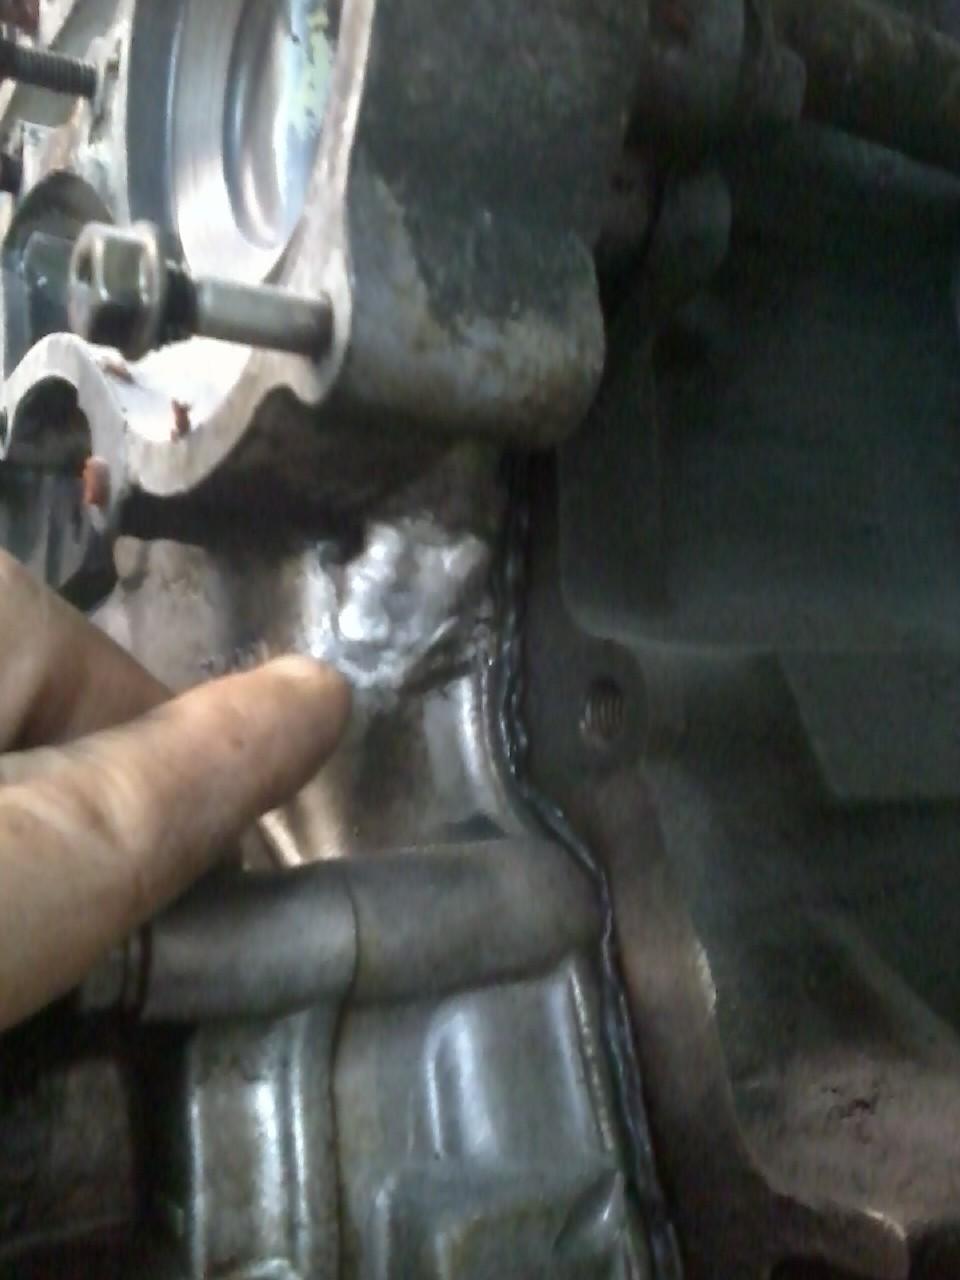
I can already tell I will need to replace the Timing Cover. I think I have one of those laying around as well. I am just curious as to what the motor looks like inside.Really the only major thing that I think right off to get the rest of the truck running is seats and the fuel injector harness. I have two harnesses that have been cut up and could combine the two and make one. I am on the hunt for one right now and will find one eventually. They even got the water pump.
I draw the limit on having head work at about $170 and a complete rebuild at about $500ish then I will start with another motor. I have used two of their motors before and they were some excellent motors.
This motor I am going to use for now ran when I bought the truck according to the PO but got used as a parts truck, Alot of the sensors are missing. I have most of them but may needing a few and will come up with them when I get to that stage.
Everything but the Cold Start Injector and TPS is missing.
I can already tell I will need to replace the Timing Cover. I think I have one of those laying around as well. I am just curious as to what the motor looks like inside.Really the only major thing that I think right off to get the rest of the truck running is seats and the fuel injector harness. I have two harnesses that have been cut up and could combine the two and make one. I am on the hunt for one right now and will find one eventually. They even got the water pump.
Last edited by Terrys87; 12-23-2015 at 05:01 PM.
02-18-2013, 12:41 AM
#15
Super Moderator
Staff
Thread Starter
iTrader: (1)
Join Date: Aug 2008
Location: Anderson Missouri
Posts: 11,788
Likes: 0
Received 21 Likes
on
19 Posts
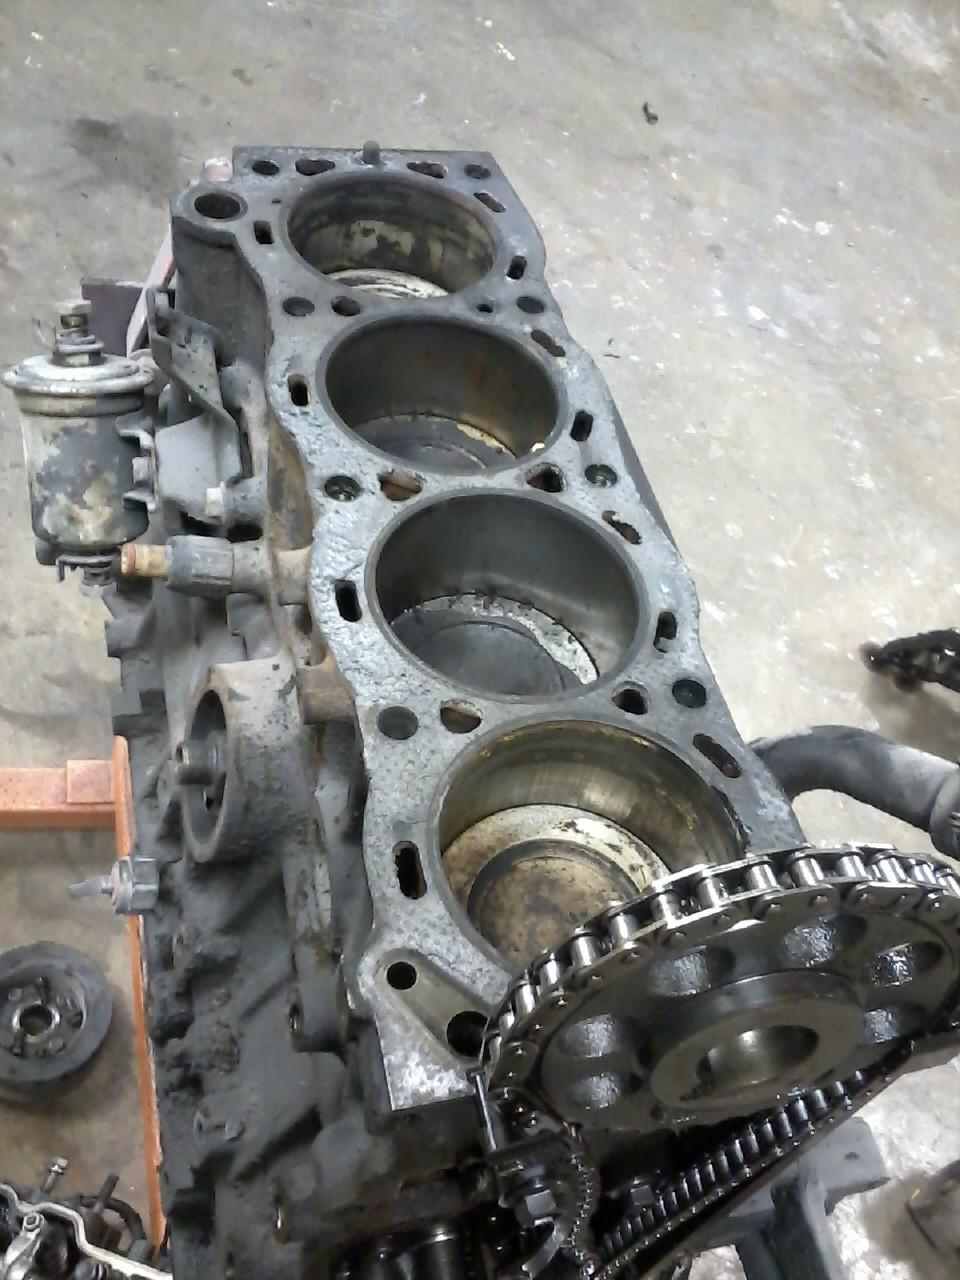
I tore the motor down and wont be using this one. Apparently the PO left the spark plugs out on 3 cylinders and it has surface rust on the cylinder walls. It can be bored or maybe even honed but with the timing cover, the plugs being out and just overall condition that I can tell that this motor wasnt taken very good care of. I will just list it as a rebuildable short block on Craigslist and get it out of my shop. It is rebuildable but I have 2 other short blocks and a long block that are probably in better condition so will look at maybe using one of those.
You can see the back cylinder and it is probably the best of the 3 cylinders that didnt have spark plugs in. I am going to keep the Timing Chain Guides. I broke a Timing Chain guide one time putting on a head and had to buy another complet kit. I will replace the Timing Chain on my next motor but some used parts are great to have if you do something like I just mentioned.
I am going to use alot of parts of off this motor for my next build. One thing I can never find is something to mark the timing mark when setting time. This time I soaked a Qtipwith some paint and marked it and then hit it with some clear coat. Trying to think ahead a little bit on this build. I did get a few other parts cleaned up and will have several more that arent showing that I have done previously. When I get then cleaned and painted, I put them in the back of the bed or in tote bins and it speeds things up when I do get to reassembly time.

Something I worked on the day before. Got the A pillars trim cleaned and painted.
Old Gray
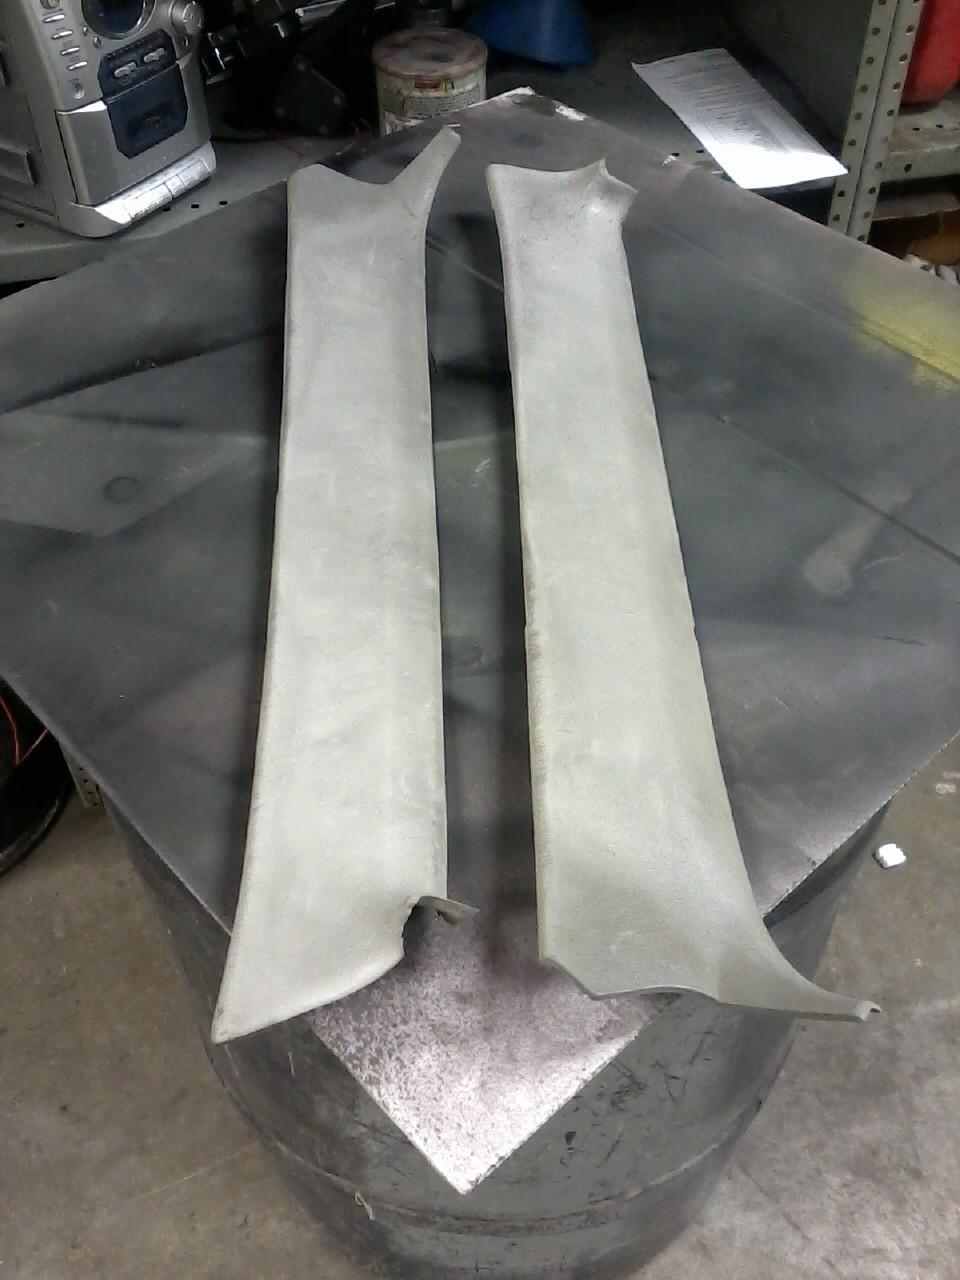
Will install them when the shop is warmer.

You can see the back cylinder and it is probably the best of the 3 cylinders that didnt have spark plugs in. I am going to keep the Timing Chain Guides. I broke a Timing Chain guide one time putting on a head and had to buy another complet kit. I will replace the Timing Chain on my next motor but some used parts are great to have if you do something like I just mentioned.
I am going to use alot of parts of off this motor for my next build. One thing I can never find is something to mark the timing mark when setting time. This time I soaked a Qtipwith some paint and marked it and then hit it with some clear coat. Trying to think ahead a little bit on this build. I did get a few other parts cleaned up and will have several more that arent showing that I have done previously. When I get then cleaned and painted, I put them in the back of the bed or in tote bins and it speeds things up when I do get to reassembly time.
Something I worked on the day before. Got the A pillars trim cleaned and painted.
Old Gray
Will install them when the shop is warmer.
02-19-2013, 03:40 AM
#16
Registered User
Another great build in the works Terry! And your adding efi?? 84 didnt come with efi did it?? You will definetly like to have the extra cab to gain you some more leg room. KyleB has a 84 xtracab as well in town here if you have any ?? His has had a 4.3 swap w chevy trans and tcase. I think youll be happi with the 22re. Good work!!
02-19-2013, 12:08 PM
#17
Super Moderator
Staff
Thread Starter
iTrader: (1)
Join Date: Aug 2008
Location: Anderson Missouri
Posts: 11,788
Likes: 0
Received 21 Likes
on
19 Posts
Thanks kornhuskerwizard... Right now this is my half project. The one I am not spending awhole lot on right now as I am still working on the 86 Runner but I am about as far as I can go with it for now and it wont be long til this is what I focus my attention on this one. Right now I am just trying to get it all back together and find what all piees are missing since it was used as a parts truck.
I will get it all together and hope to have it running in about 2 month before I leave so the wife will have a truck to use around here. When I get back it will get tore down to the frame and everything will get painted. I would much rather do bodywork, but right now I just wont have the time to get it repaired and painted in time mostly due to the weather as my shop isnt heated.
This truck is actually fuel injected. There were some trucks that were and what I understand not many. That is one reason that I like it as it is a rarer truck, ane xtra cab for my height and being fuel injected, extra cab and the only year they did solid axle with fuel injection makes it more rare.
When I do get done with it, about the only real upgrades I am doing to it is 31 inch tires and a bull bar that I have for it. It is just going to be one clean looking stocker that has been done from top to bottom with a really nice interior,paint and a good dependable drive train. My 86 Runner is going to be the one that I really want to get the attention but this truck is going to be nice when I get done.
02-19-2013, 12:25 PM
#18
Super Moderator
Staff
Thread Starter
iTrader: (1)
Join Date: Aug 2008
Location: Anderson Missouri
Posts: 11,788
Likes: 0
Received 21 Likes
on
19 Posts
I got some more parts cleaned. Still havent decided on a paint pattern yet for the motor. Will just need to wipe them down with degreaser and paint and that wont take long when I get to that stage.
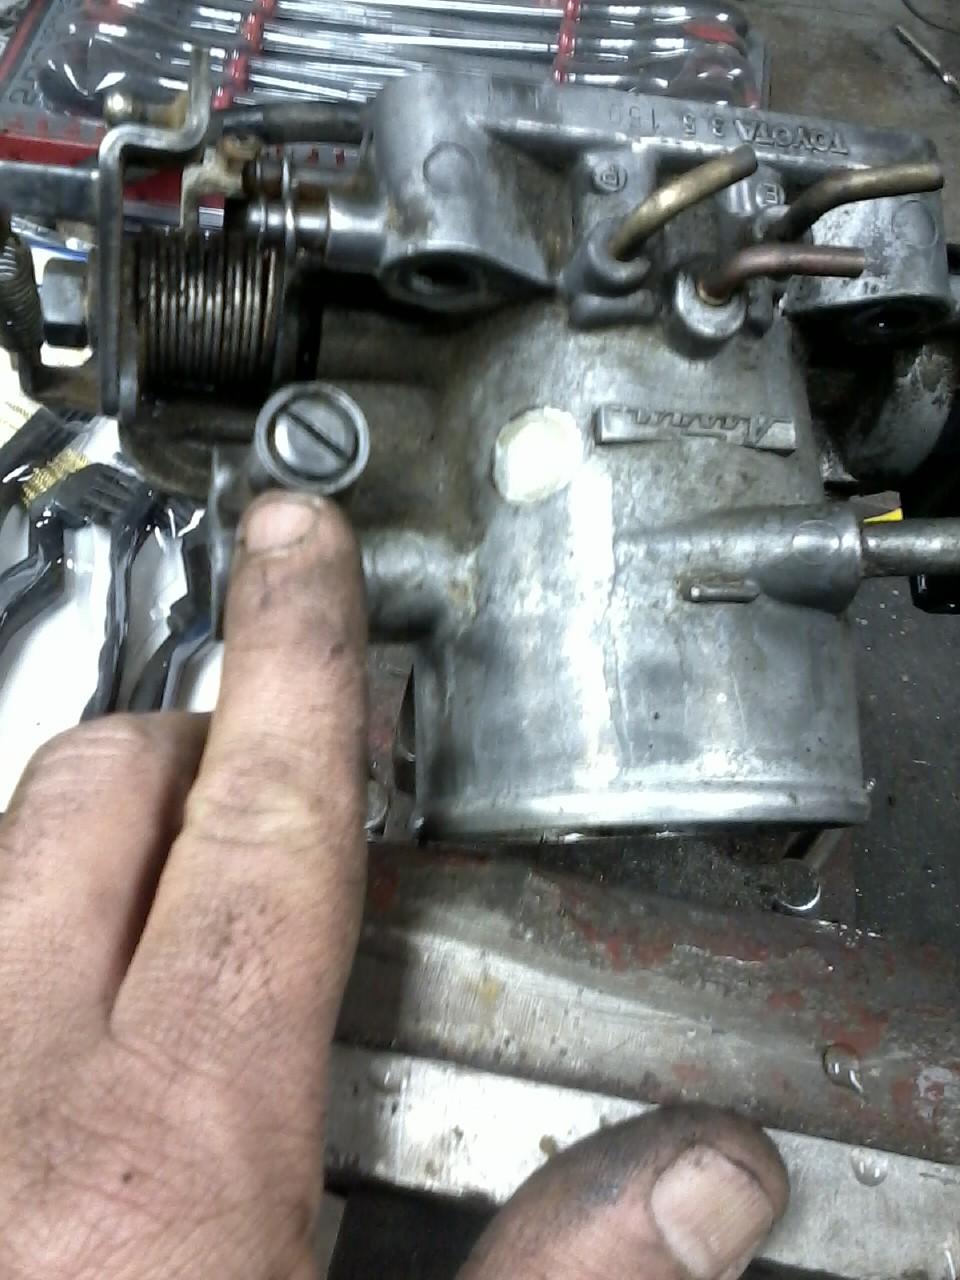
I was asked recently where to adjust idle. Wanted to have this pic available when I want to show it or for others that may not know.
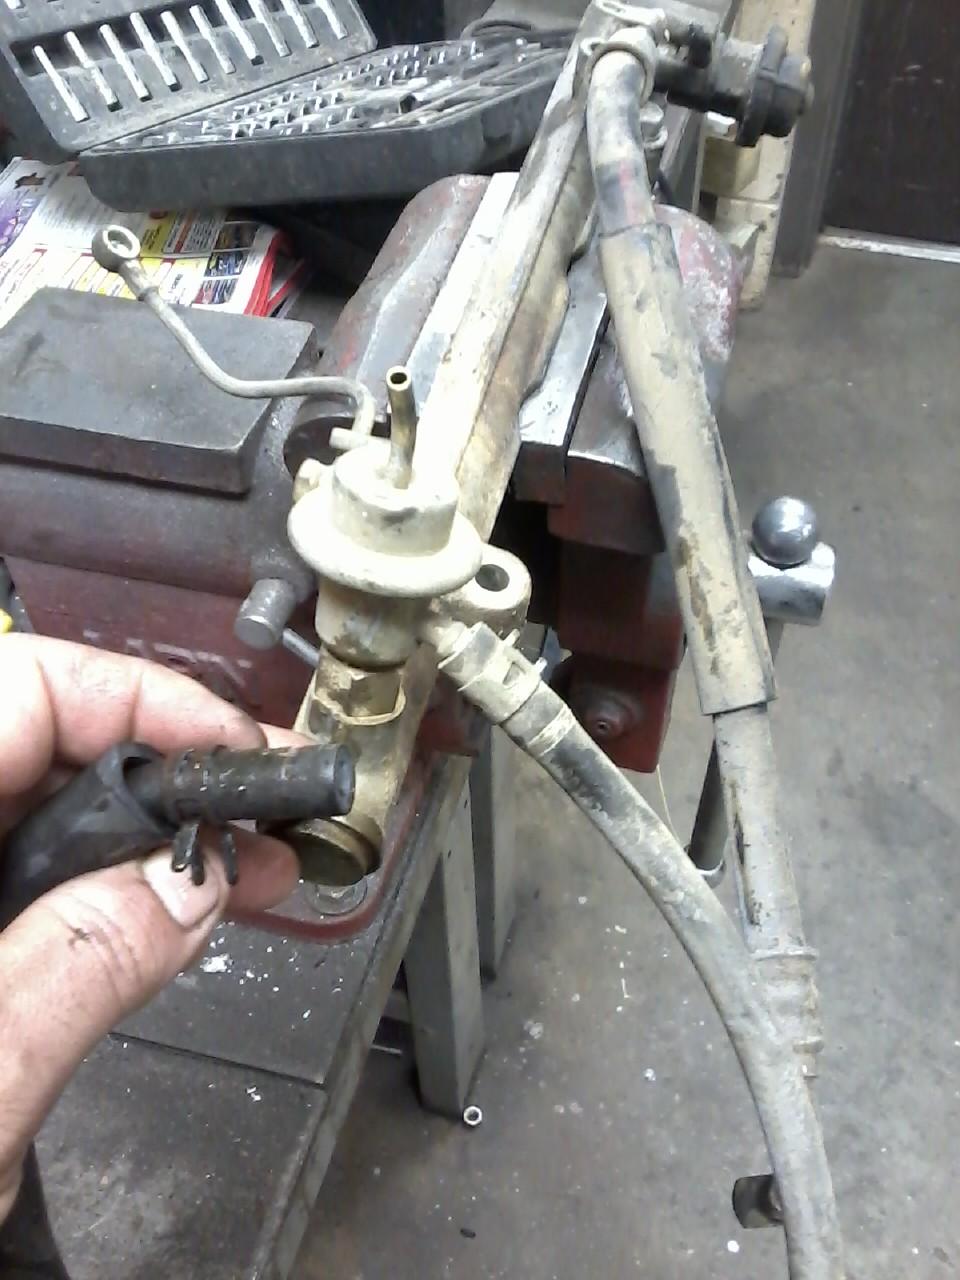
If you want to do the Differential Breather upgrade, this is the Nozzle that will fit into your differential then add the hose and clamp the breather on top.
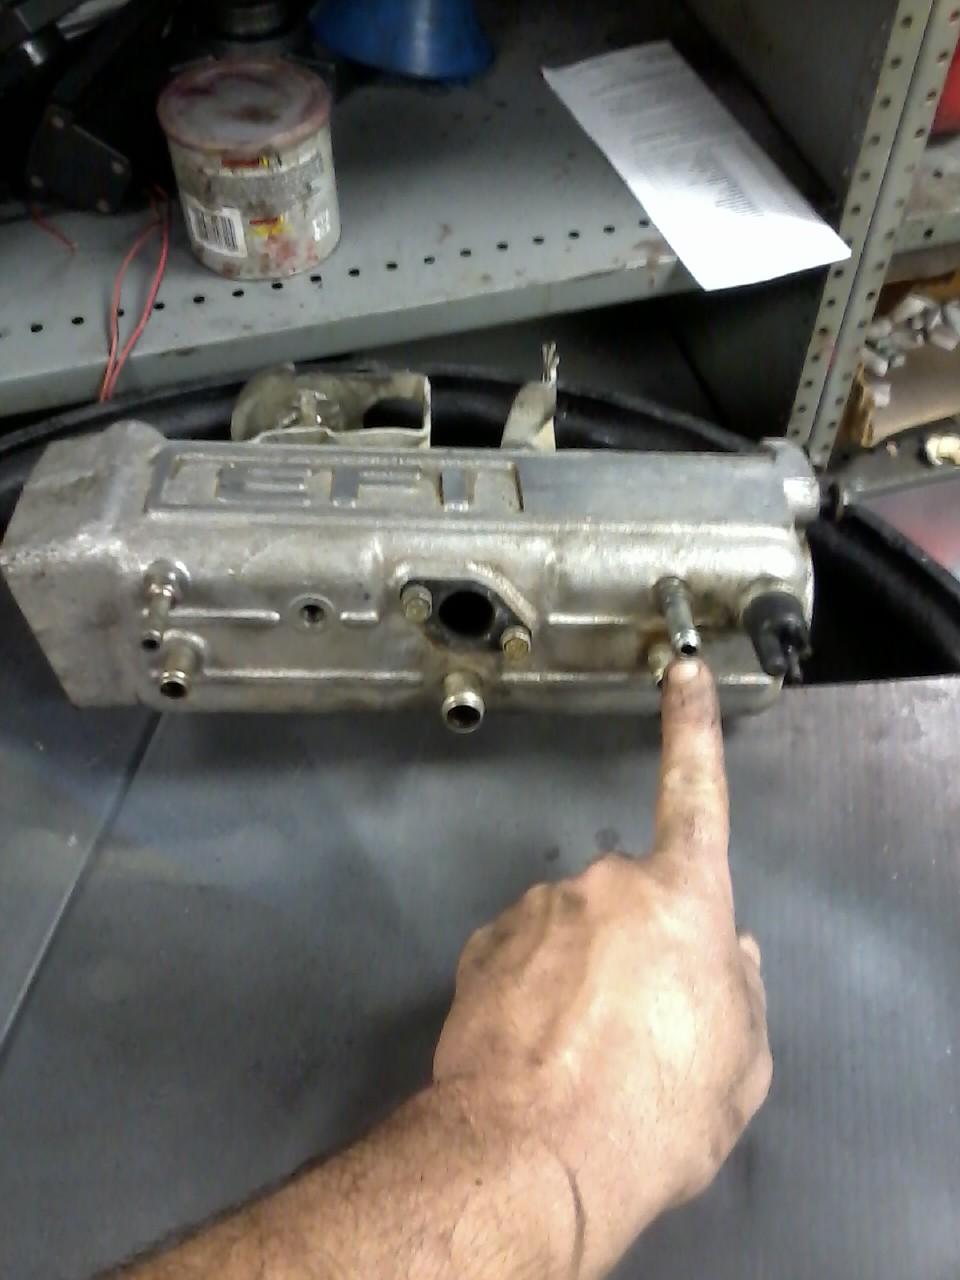
When I want to know if the fuel pump is flowing like it should, this is the hose I pull off and watch and see how fast it fill up a quart jar. It will fill one in about 30 seconds or so for a rough guess. Also the metal line on the cab that this hose hooks up to is the return line to the tank. I have been finding alot of the lines clogged and the trucks still run great. I use an air hose to see if it is clear and with the gas cap off you will hear the tank bubble. On my Runner builds, I show what the "J" lines that are normally clogged up as well.
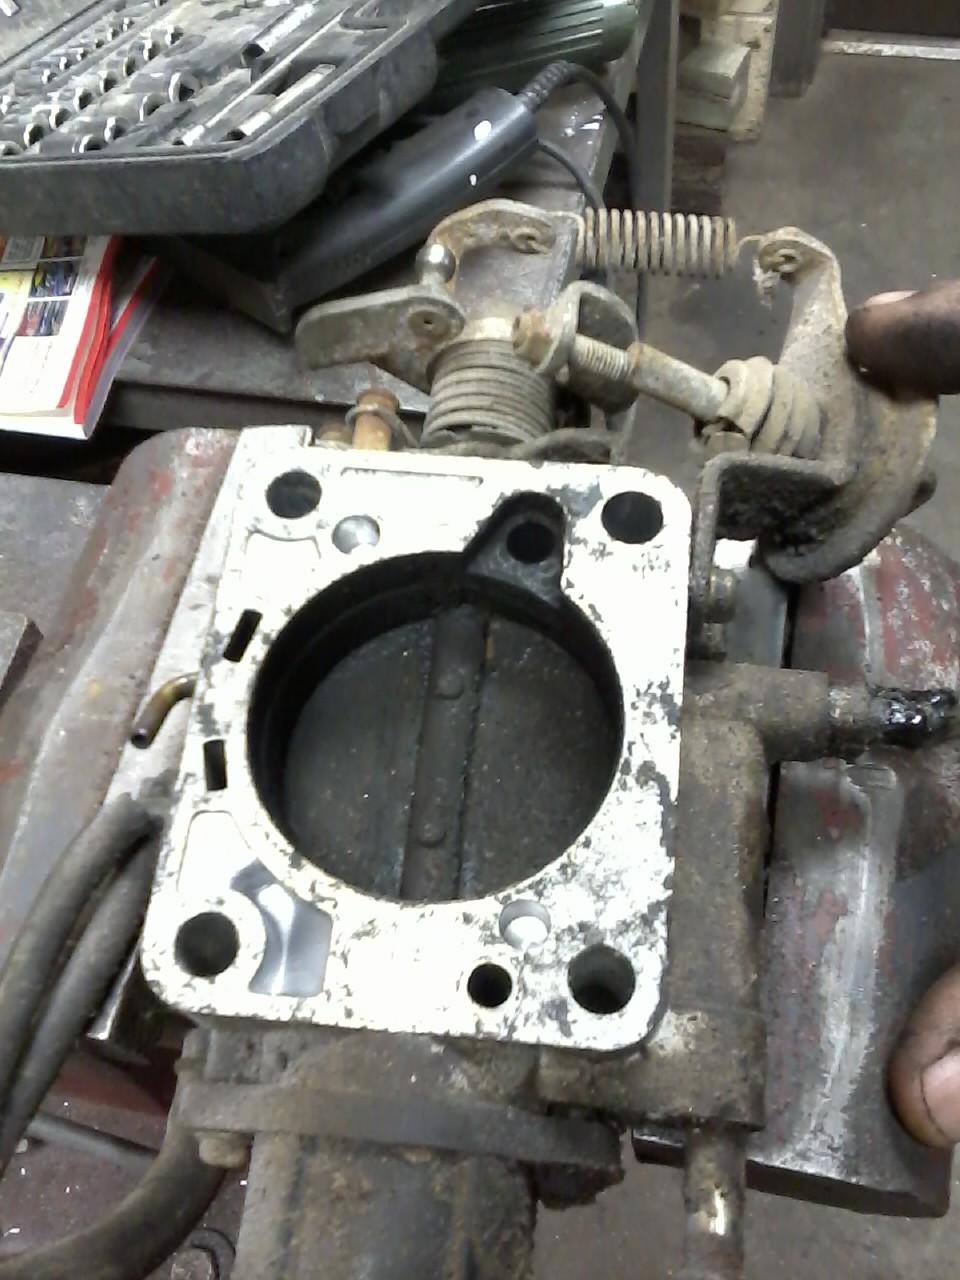
I got all of the carbon out of the Throttle Body and Plenum. You cant really see on this one but it was built up with gunk and when letting the butterfly valve close easily it would stay open. If I snapped it by letting the spring do it it closed like it should. I cleaned around the pivot points and added a little oil and it operates so much smoother now.
I was asked recently where to adjust idle. Wanted to have this pic available when I want to show it or for others that may not know.
If you want to do the Differential Breather upgrade, this is the Nozzle that will fit into your differential then add the hose and clamp the breather on top.
When I want to know if the fuel pump is flowing like it should, this is the hose I pull off and watch and see how fast it fill up a quart jar. It will fill one in about 30 seconds or so for a rough guess. Also the metal line on the cab that this hose hooks up to is the return line to the tank. I have been finding alot of the lines clogged and the trucks still run great. I use an air hose to see if it is clear and with the gas cap off you will hear the tank bubble. On my Runner builds, I show what the "J" lines that are normally clogged up as well.
I got all of the carbon out of the Throttle Body and Plenum. You cant really see on this one but it was built up with gunk and when letting the butterfly valve close easily it would stay open. If I snapped it by letting the spring do it it closed like it should. I cleaned around the pivot points and added a little oil and it operates so much smoother now.
Last edited by Terrys87; 11-30-2014 at 11:44 PM.
02-19-2013, 12:31 PM
#19
Super Moderator
Staff
Thread Starter
iTrader: (1)
Join Date: Aug 2008
Location: Anderson Missouri
Posts: 11,788
Likes: 0
Received 21 Likes
on
19 Posts
While writing up my last post, Santa in the brown suit showed up with my $3 part and $5 shipping $8 total. This particular bearing isnt cheap. I found it on ebay still in its wrapper. Wahoo!! One less part I need for this truck.
02-19-2013, 01:36 PM
#20
Registered User
Great score on the bearing terry. What did you use to get your intake and valve cover so clean?? Also thats awesome that the fitting fits off the intake for the breather mod. I have a celica engine i will see if it has one, im pretty sure it does. Sounds like you like doing body work more than engine work?? Im opposite, nice to trade info and share ideas. My brother has the 85 4runner that was also straight axle and f.i. which is kinda rare. Sounds like you saved another one that most people would have given up on. Im sure it will look awesome if it turns out like your other builds Terry.


