SCToys Project Road Runner (81 SR5 P/U) Build-UP
 04-20-2011, 01:13 PM
#1
Registered User
Thread Starter
SCToys Project Road Runner (81 SR5 P/U) Build-UP
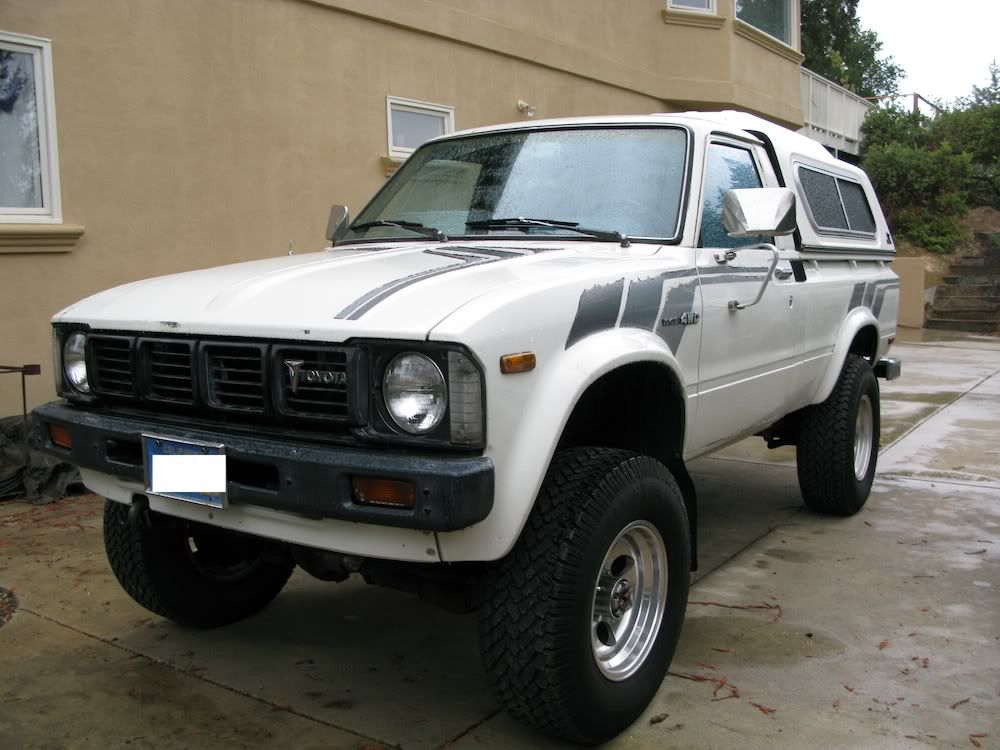
So it all started when I found this 1981 SR5 locally on craigslist.
This is what it looked like the day I brought it home.
Installed the rear 4.88s and drove it around with a lot of torque on 31s for a while. Found 35s on craigslist mounted on 15x10 rims. Drove it like this for a while

The 15x10s rubbed on the steering arms, so I had to run 1/4 inch wheel spacers.
Put 6 inch shackles in the rear to level out the saggy butt.
Bought some Hella E-Codes because it couldn't see a thing at night.
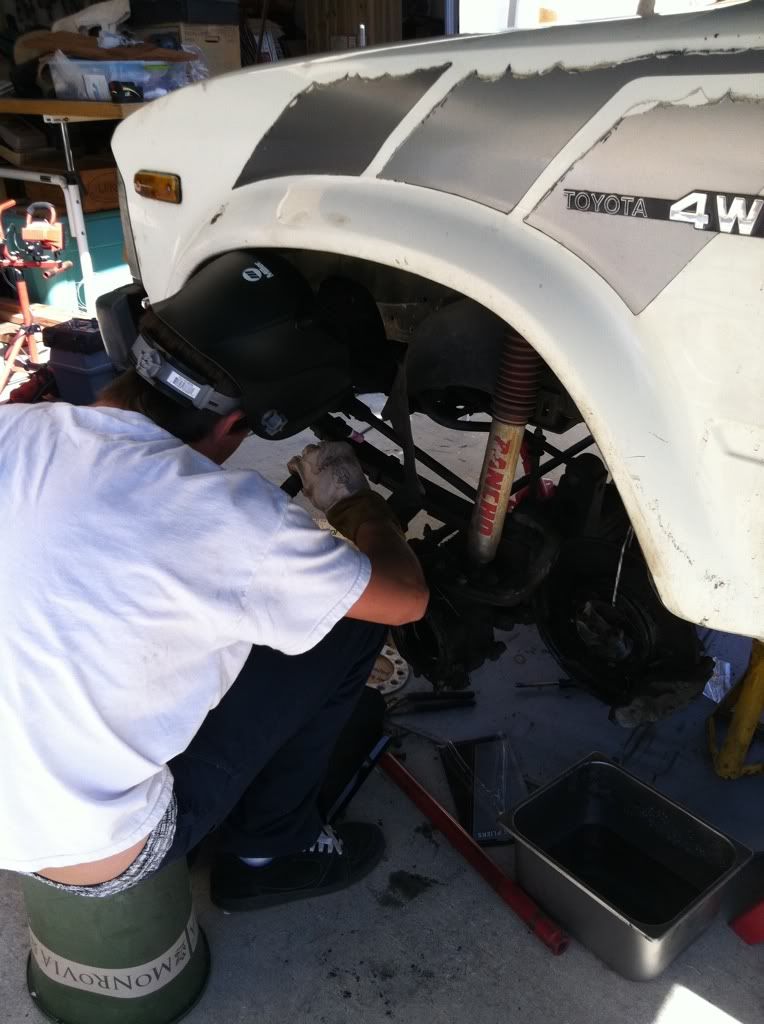
Wasn't sure what to do with the truck, but then I jumped on a deal on yotatech and picked up and Front axle that was mostly rebuilt (hi-steer arms attached) with the rest of the hi-steer kit, 4.88s and Aussie locker, power steering gear box and 1 inch master cylinder. Vented LC rotors. I spent the next several months collecting parts and this weekend I began tearing my truck apart. Several days later and a lot of sore knuckles this is the result. I did all of the wrenching and all of the welding myself.
Ended up using the axle housing I bought with hi-steer arms installed, taking the axles out of my 81 and cleaning them up and packing them with new grease. Using the brake calipers off my 95 sitting with a blown head gasket at the moment. put new brass bushings in the spindles and used the wheel hubs and locking hubs from my 81 because the axle I bought came with IFS wheel hubs. Now I have a frankenaxle.
First problem I ran into was a stuck/rounded off bolt on the old manual steering box. A little magic from the TIG torch and craftsman and it was out.
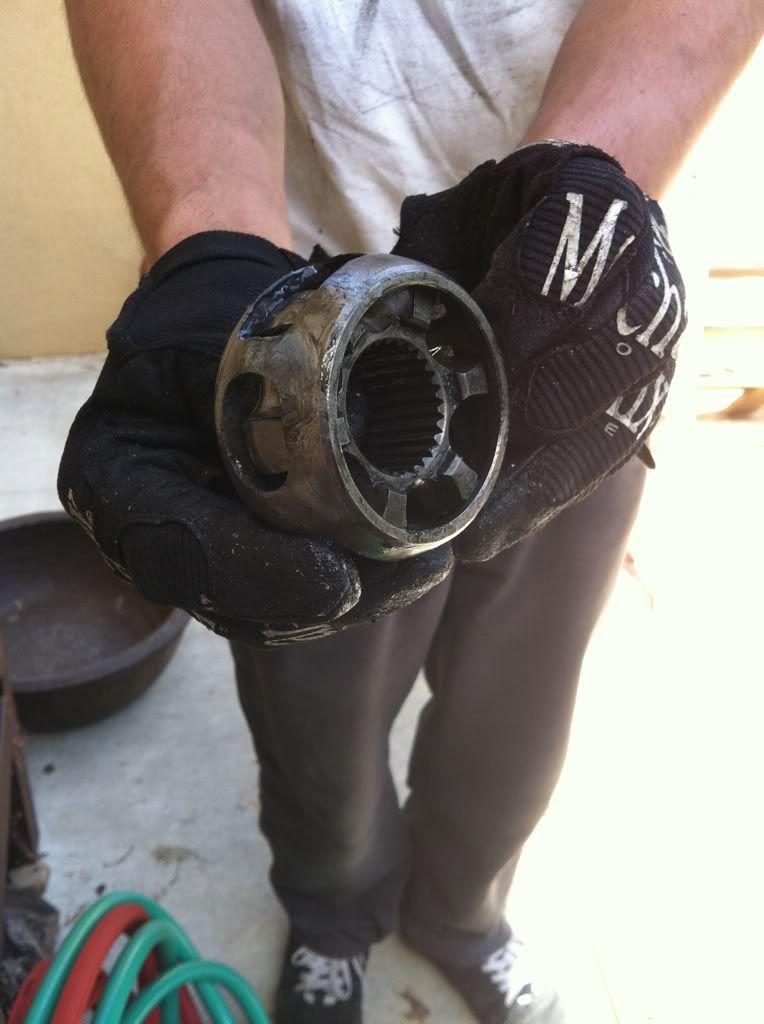
The most frustrating problem I had was getting the new snap rings to slide back into the birfield.
A little picture to remember how the cages go back together
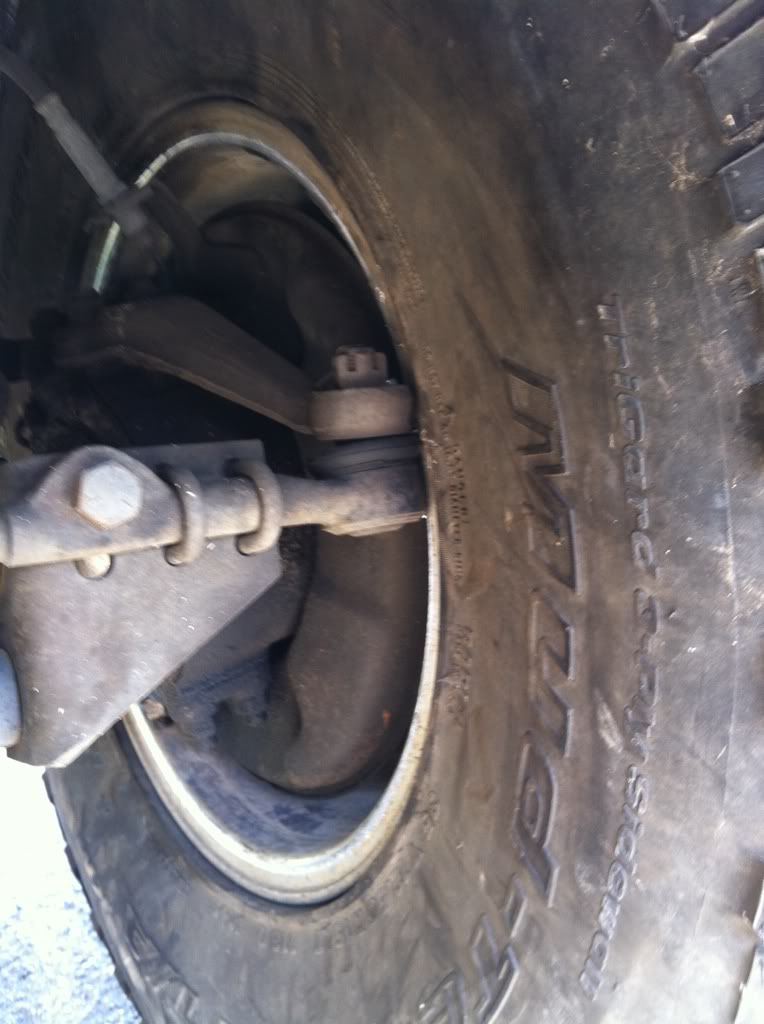
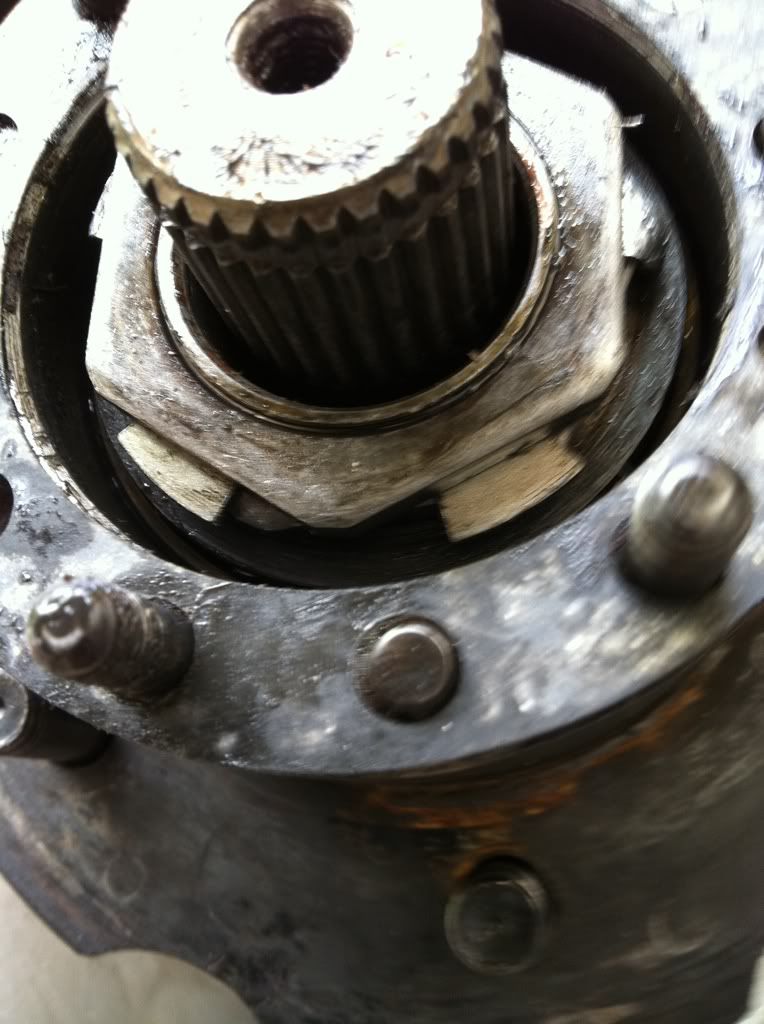
Long side went together beautifully, but the short side has something fishy going on. The axle doesn't come through the middle of the spindle, it's pushing very tightly against the top and will not rotate in the knuckle with the spindle torqued down. I need to take it apart again and figure out what's wrong, but until Marlin sends me a complete wheel bearing kit (they forgot to send all the seal and gaskets) I am not tearing it apart again. Wabbit says possibly the brass bushing isn't in their straight, but I checked that it looked flush to me after I put it in. Maybe it needs to be honed straight? Odd though because I used brand new toyota bushings.
[IMG]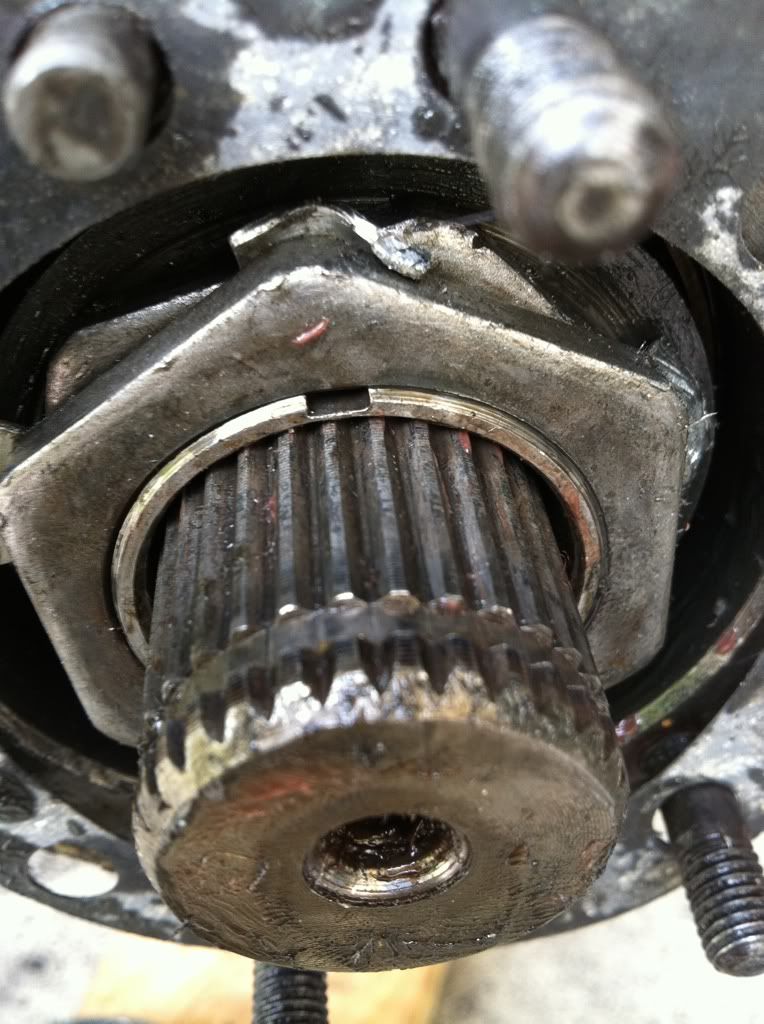 [/IMG]
THANKS Toyospearo for the axle rebuild thread, never would have had to courage to do this without you. This is my major project on a toyota and first project flying solo.
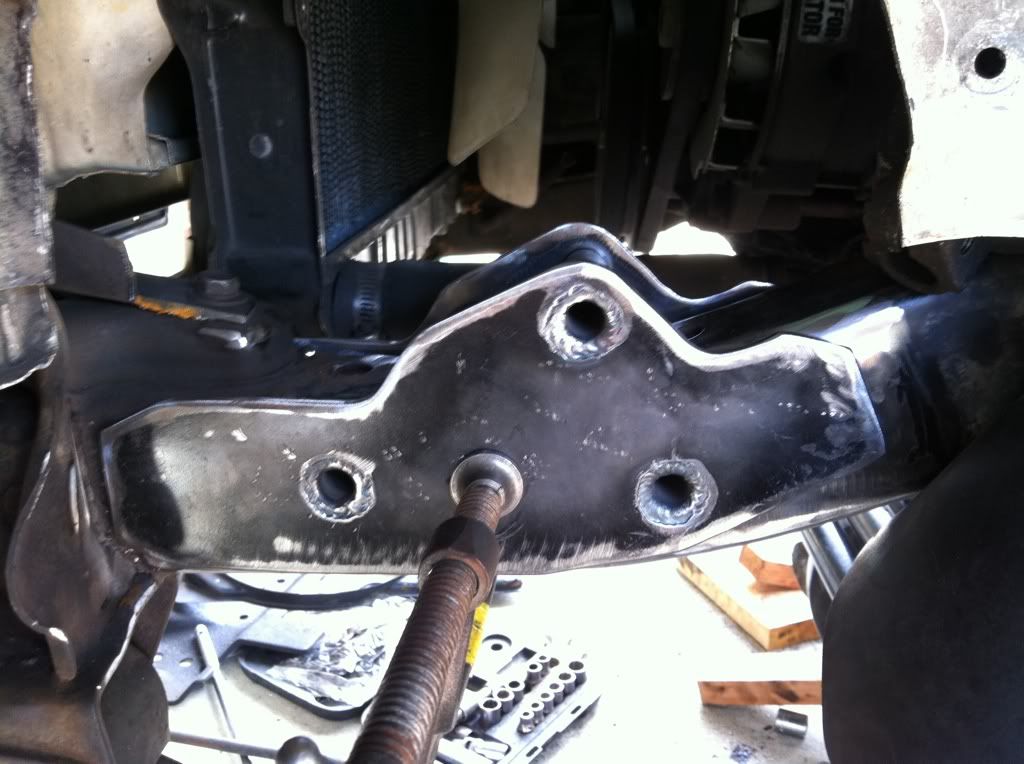
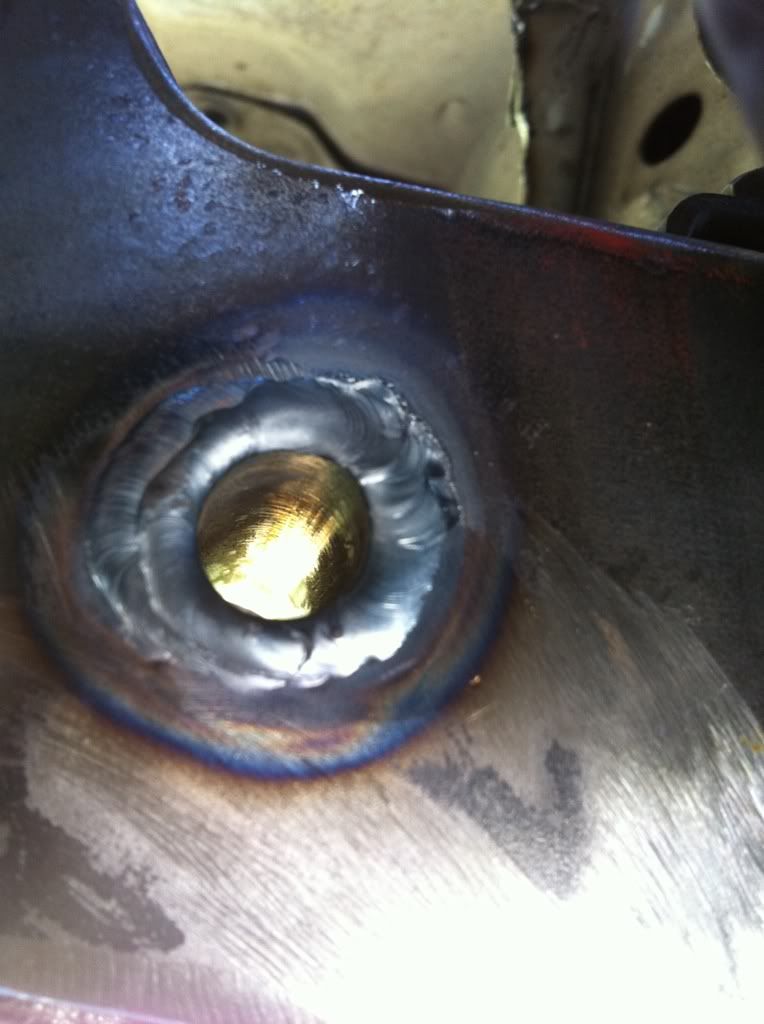
After much cutting of sway bar bracketry, drilling and grinding. FYI do not use a high torque drill to drill the holes. I was sketched out by it in the first place, but it was the only drill that had a big enough chuck for my bit. I nearly broke my wrist when the bit seized up when it broke through the frame. The drill spun out of support hand instantly and wrapped the cord around my arm holding my hand on the trigger. Just barely managed to slip my hand out in time.
Got my bracket ready to tack it in place (only have a 110V) connection where I have been working. Going to burn it in later.
Box installed so I can drive it around to the other side of my house to finish the welding.
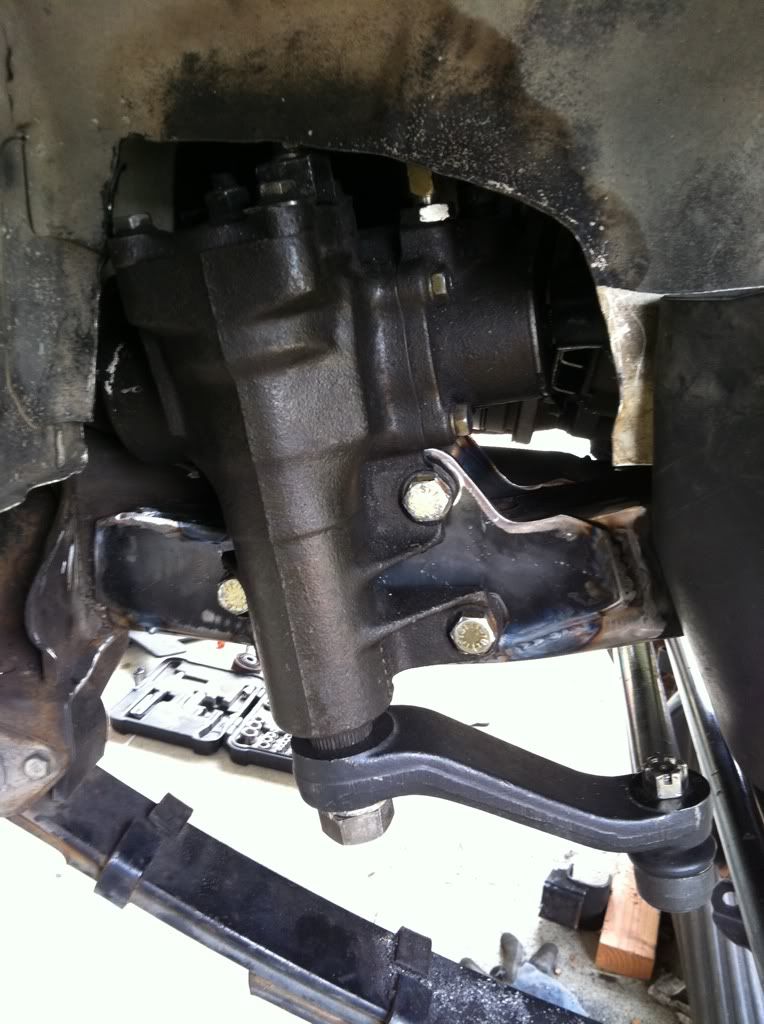
Power steering installed
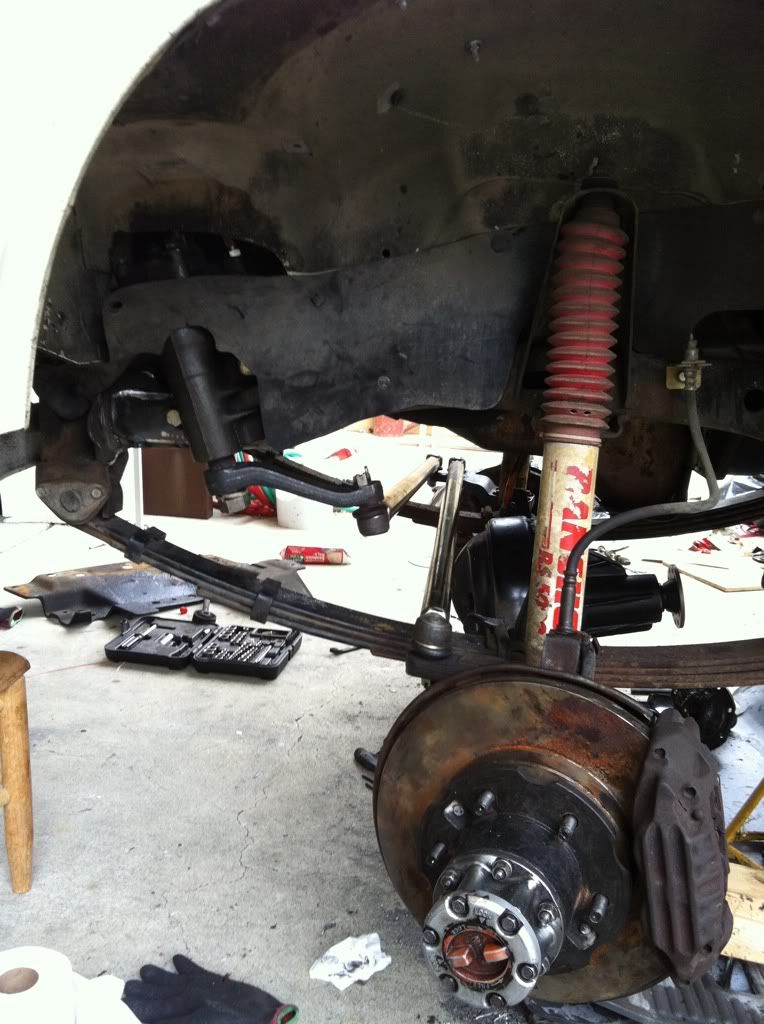
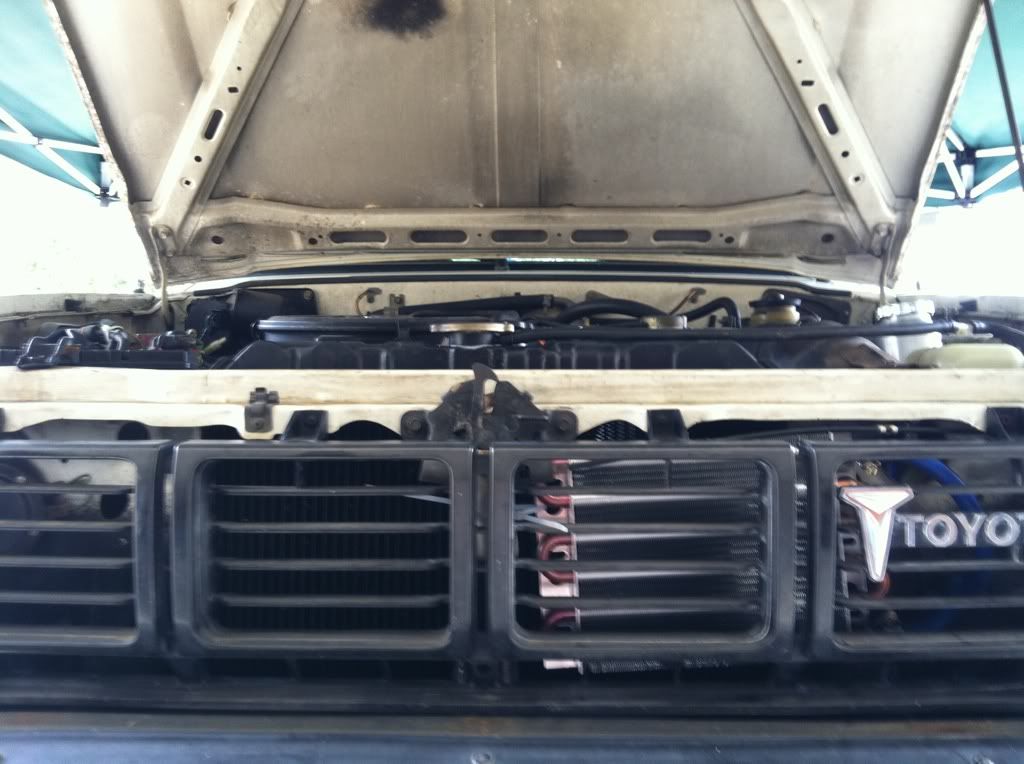
Not sure I like the cooler here, it blocks my radiator a bit, I am going to look for a smaller one, I need a new radiator anyways though. It looks like the inside of an old tea kettle. I plan on going with a full aluminum radiator soon as the funds are available.
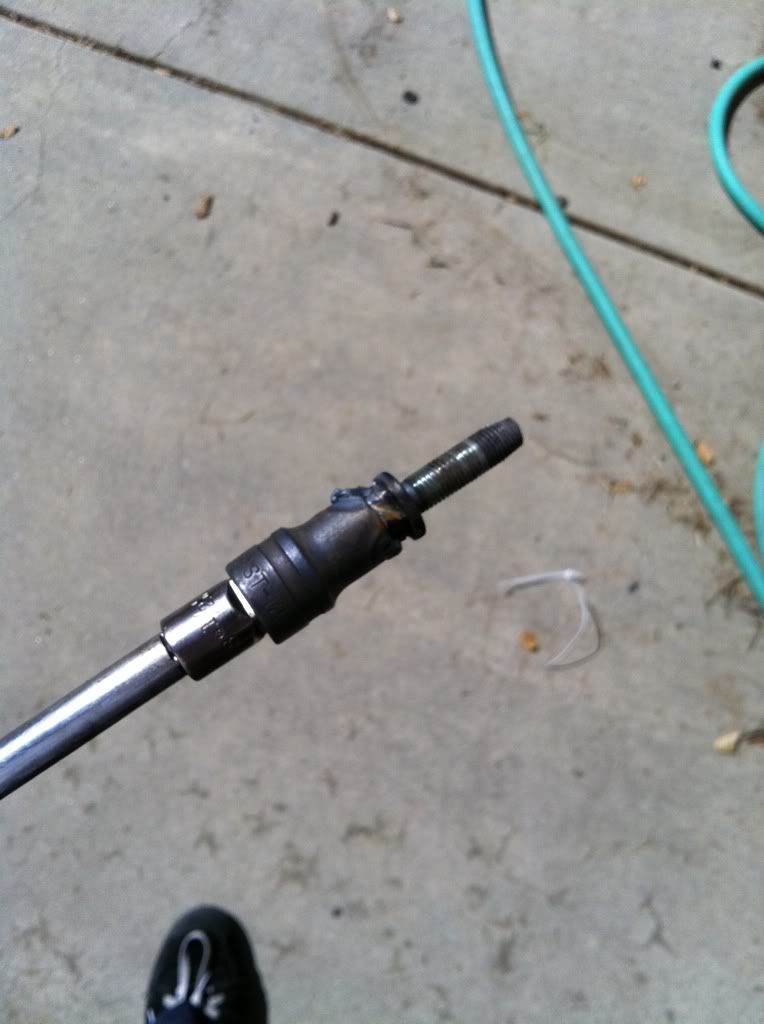
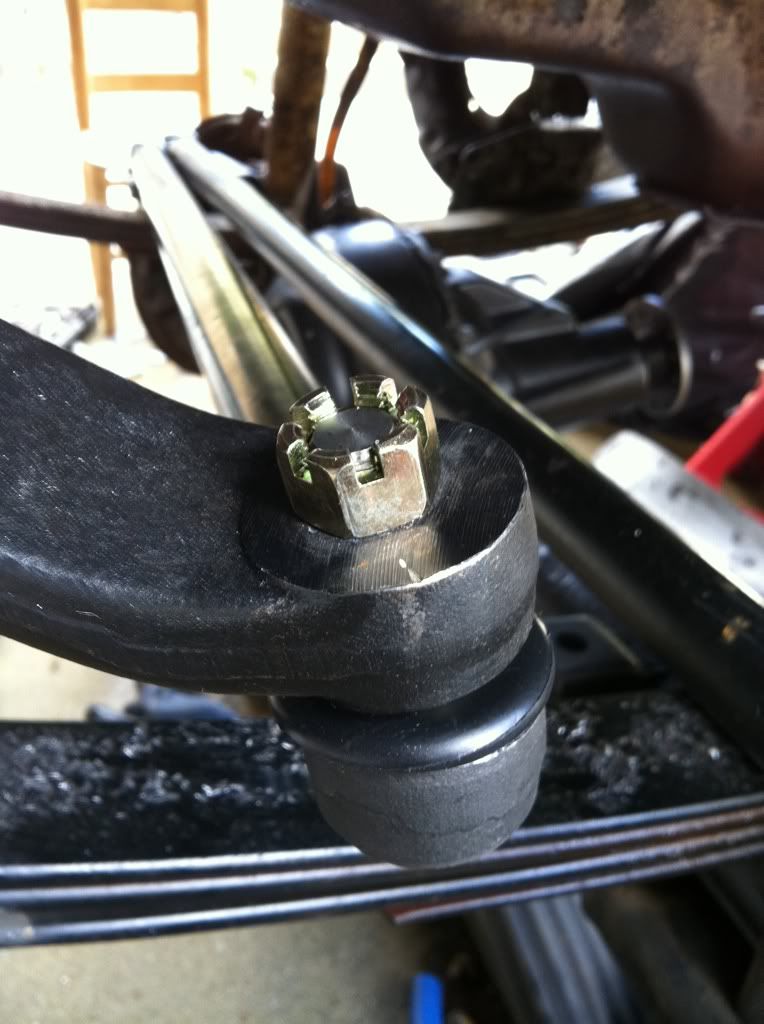
And this is how it sits, I am waiting for a new tie rod end... managed to strip the Castle nut onto the pitman arm... it wasn't even on far enough to get a cotter pin through so I didn't bust out the torque wrench yet and it stripped. Bad design I think. So this is how it sits until Trail gear sends me a new L threaded tie rod. Any suggested tie rods to use in the future?
This is what it looked like the day I brought it home.
Installed the rear 4.88s and drove it around with a lot of torque on 31s for a while. Found 35s on craigslist mounted on 15x10 rims. Drove it like this for a while
The 15x10s rubbed on the steering arms, so I had to run 1/4 inch wheel spacers.
Put 6 inch shackles in the rear to level out the saggy butt.
Bought some Hella E-Codes because it couldn't see a thing at night.
Wasn't sure what to do with the truck, but then I jumped on a deal on yotatech and picked up and Front axle that was mostly rebuilt (hi-steer arms attached) with the rest of the hi-steer kit, 4.88s and Aussie locker, power steering gear box and 1 inch master cylinder. Vented LC rotors. I spent the next several months collecting parts and this weekend I began tearing my truck apart. Several days later and a lot of sore knuckles this is the result. I did all of the wrenching and all of the welding myself.
Ended up using the axle housing I bought with hi-steer arms installed, taking the axles out of my 81 and cleaning them up and packing them with new grease. Using the brake calipers off my 95 sitting with a blown head gasket at the moment. put new brass bushings in the spindles and used the wheel hubs and locking hubs from my 81 because the axle I bought came with IFS wheel hubs. Now I have a frankenaxle.
First problem I ran into was a stuck/rounded off bolt on the old manual steering box. A little magic from the TIG torch and craftsman and it was out.
The most frustrating problem I had was getting the new snap rings to slide back into the birfield.
A little picture to remember how the cages go back together
Long side went together beautifully, but the short side has something fishy going on. The axle doesn't come through the middle of the spindle, it's pushing very tightly against the top and will not rotate in the knuckle with the spindle torqued down. I need to take it apart again and figure out what's wrong, but until Marlin sends me a complete wheel bearing kit (they forgot to send all the seal and gaskets) I am not tearing it apart again. Wabbit says possibly the brass bushing isn't in their straight, but I checked that it looked flush to me after I put it in. Maybe it needs to be honed straight? Odd though because I used brand new toyota bushings.
[IMG]
[/IMG]THANKS Toyospearo for the axle rebuild thread, never would have had to courage to do this without you. This is my major project on a toyota and first project flying solo.
After much cutting of sway bar bracketry, drilling and grinding. FYI do not use a high torque drill to drill the holes. I was sketched out by it in the first place, but it was the only drill that had a big enough chuck for my bit. I nearly broke my wrist when the bit seized up when it broke through the frame. The drill spun out of support hand instantly and wrapped the cord around my arm holding my hand on the trigger. Just barely managed to slip my hand out in time.
Got my bracket ready to tack it in place (only have a 110V) connection where I have been working. Going to burn it in later.
Box installed so I can drive it around to the other side of my house to finish the welding.
Power steering installed
Not sure I like the cooler here, it blocks my radiator a bit, I am going to look for a smaller one, I need a new radiator anyways though. It looks like the inside of an old tea kettle. I plan on going with a full aluminum radiator soon as the funds are available.
And this is how it sits, I am waiting for a new tie rod end... managed to strip the Castle nut onto the pitman arm... it wasn't even on far enough to get a cotter pin through so I didn't bust out the torque wrench yet and it stripped. Bad design I think. So this is how it sits until Trail gear sends me a new L threaded tie rod. Any suggested tie rods to use in the future?
Last edited by SCToy; 04-20-2011 at 01:18 PM.

 04-20-2011, 02:20 PM
#5
Registered User
more than likely the issue with the axle not sitting in the knuckle straight is you dont have the correct ammount of shims on your trunion bearings...top and bottom..at least theats what it looks like to mee...
04-20-2011, 02:23 PM
#6
Registered User
Thread Starter
 04-20-2011, 02:36 PM
#7
Registered User
haha yeah check out this site...i cant remember if they have the FSM there or not but they have ALL kinds of other info http://pirate4x4.com/forum/showthread.php?t=775780
Trending Topics
04-20-2011, 03:07 PM
#9
Registered User
Thread Starter
thanks, I've read through most of the axle rebuild threads I could find. I felt pretty confident in everything except shimming the knuckles. I don't have the tools to measure them, but I guess I'll be adding those to my collection now 
04-20-2011, 08:46 PM
#11
Registered User
Thread Starter
04-24-2011, 02:45 PM
#13
Registered User
Thread Starter
has anyone else had this problem?
I bought the steering box and hy-steer kit used from the same person so I assumed had a Trail Gear Pitman arm. I torqued it to 90lbs-ft which is what the marlin suggested on their instructions page as trail-gear doesn't have any numbers on their website that I could find. Guess I'll just lock-tight it for now, but not really satisfied with that solution.
I bought the steering box and hy-steer kit used from the same person so I assumed had a Trail Gear Pitman arm. I torqued it to 90lbs-ft which is what the marlin suggested on their instructions page as trail-gear doesn't have any numbers on their website that I could find. Guess I'll just lock-tight it for now, but not really satisfied with that solution.
04-26-2011, 06:40 PM
#15
Registered User
Thread Starter
Well got everything working today, and took a little drive to the hardware store. Then I came back and took the power steering box off to do a little welding.
Here are the pics
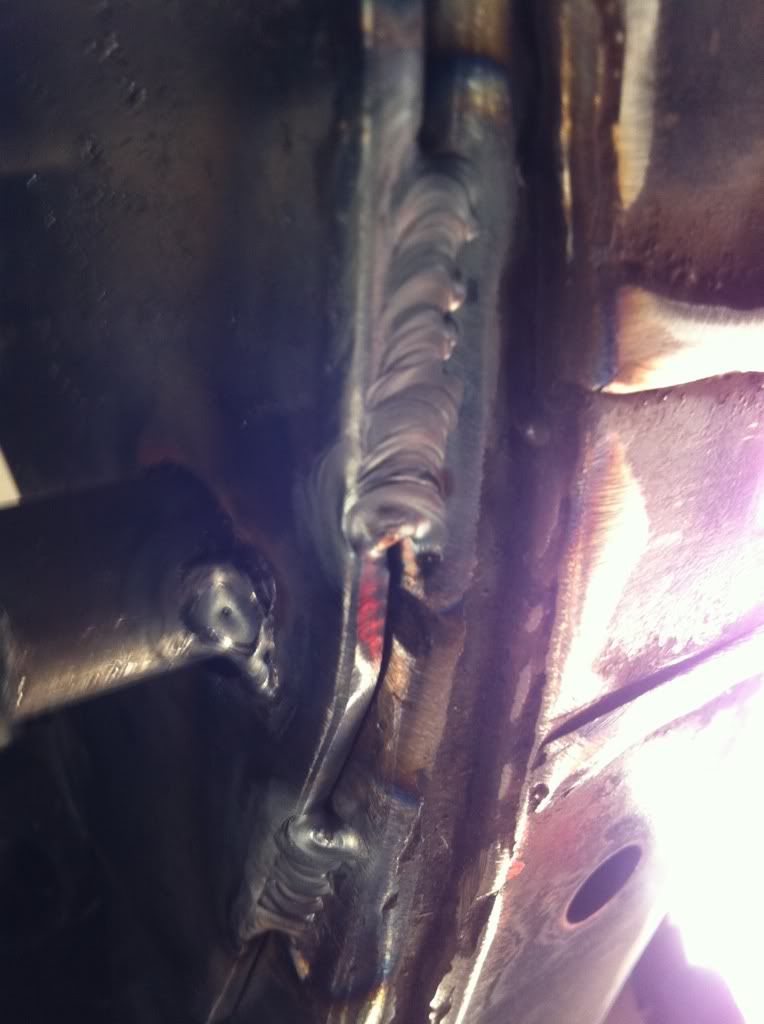
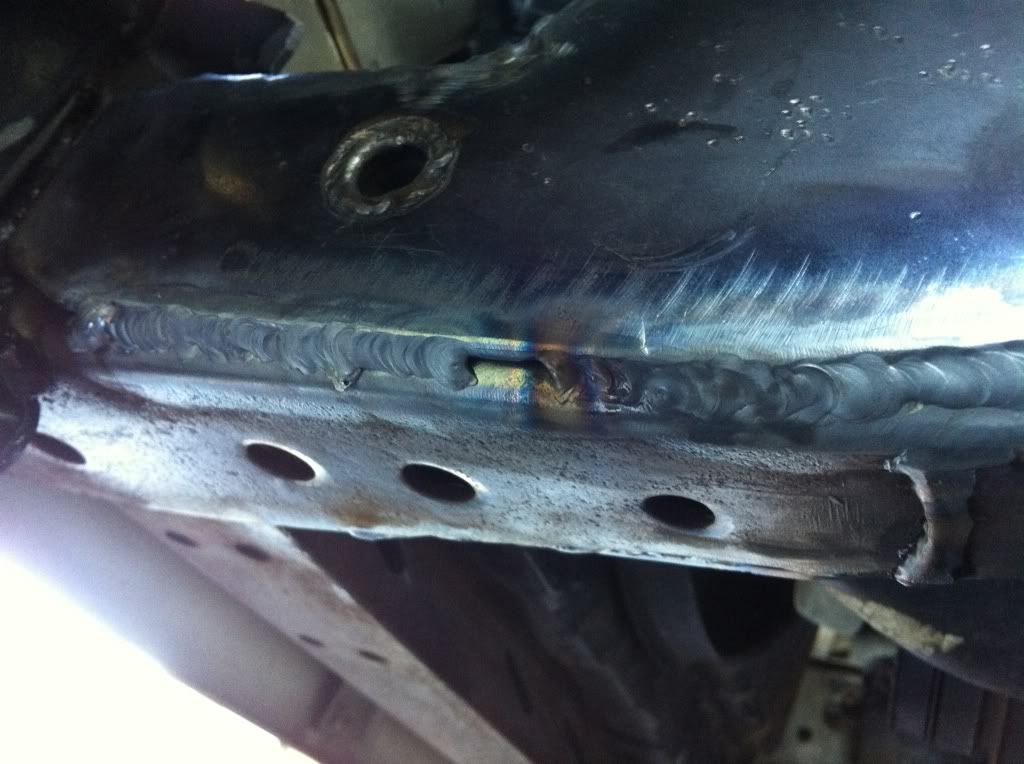
welded up all the circles on the back where I cut the tubes off

Had a little trouble with this massive gap to close. I knew the inner frame side would be a real PITA so I made the gap much smaller on that side instead of splitting the difference.
All closed up
Left this little gap open for water to drain out of because I couldn't get the whole thing sealed until it comes time cut the spring mounts off and make a new one.
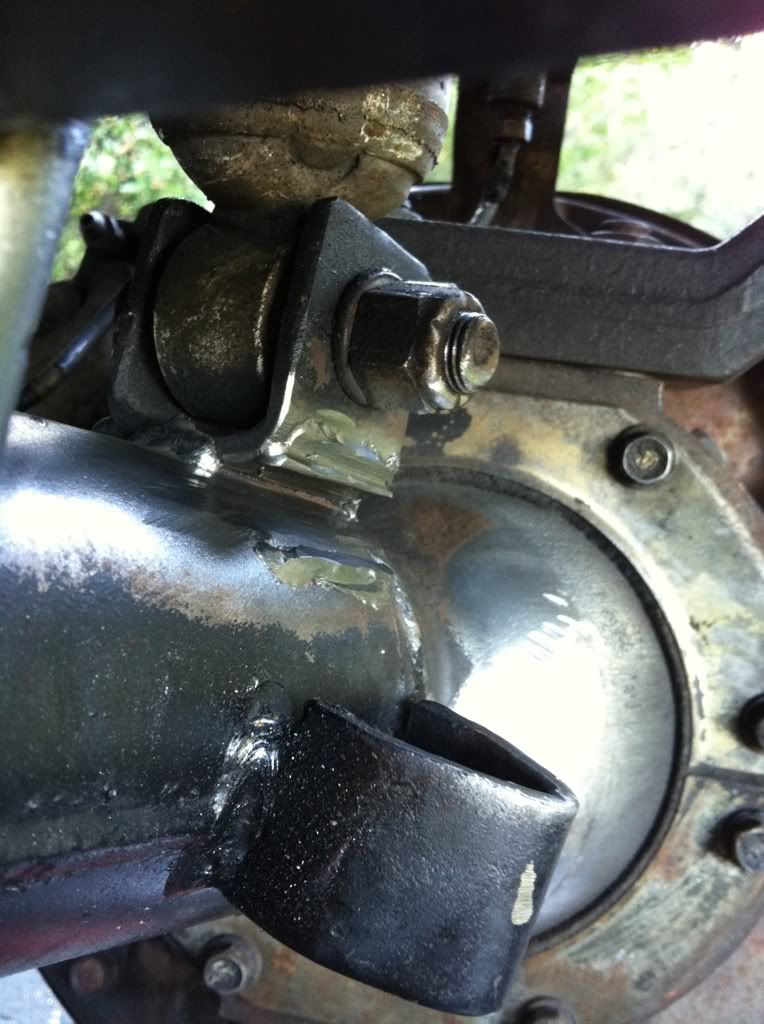
Then I discovered that one of the shock mounts was failing.
Sorry phone is funky sometimes about focusing
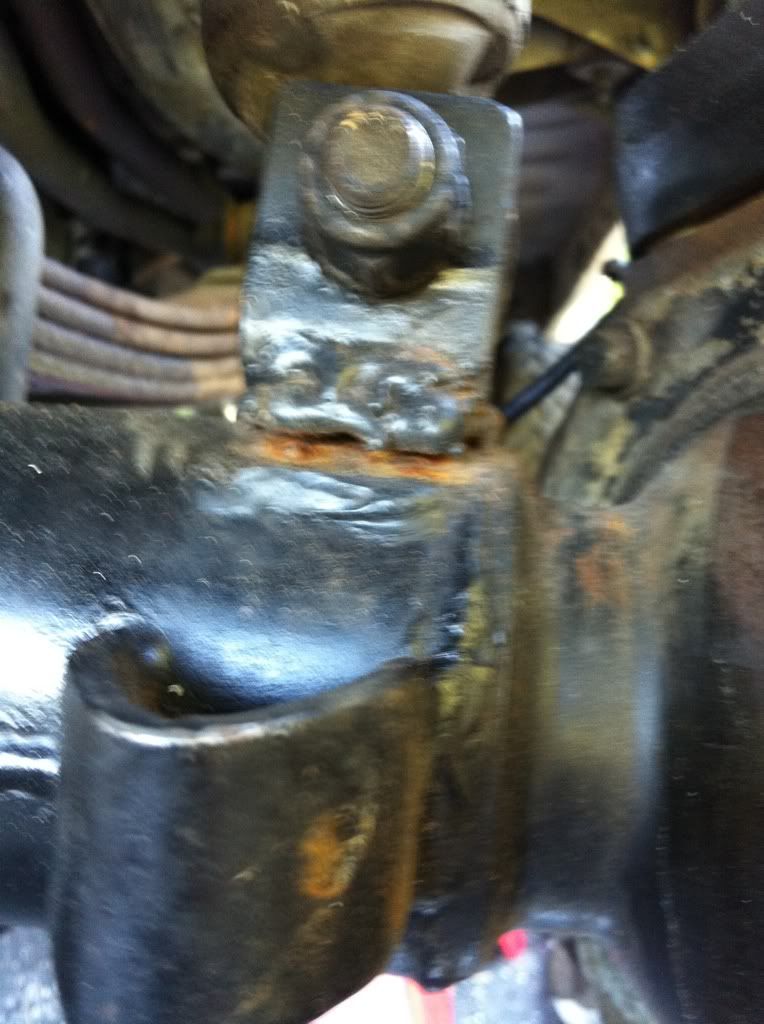
Cleaned the failing weld out
And hopefully this will just about do it Had to stack a bunch of smaller beads, but the root was pretty good.
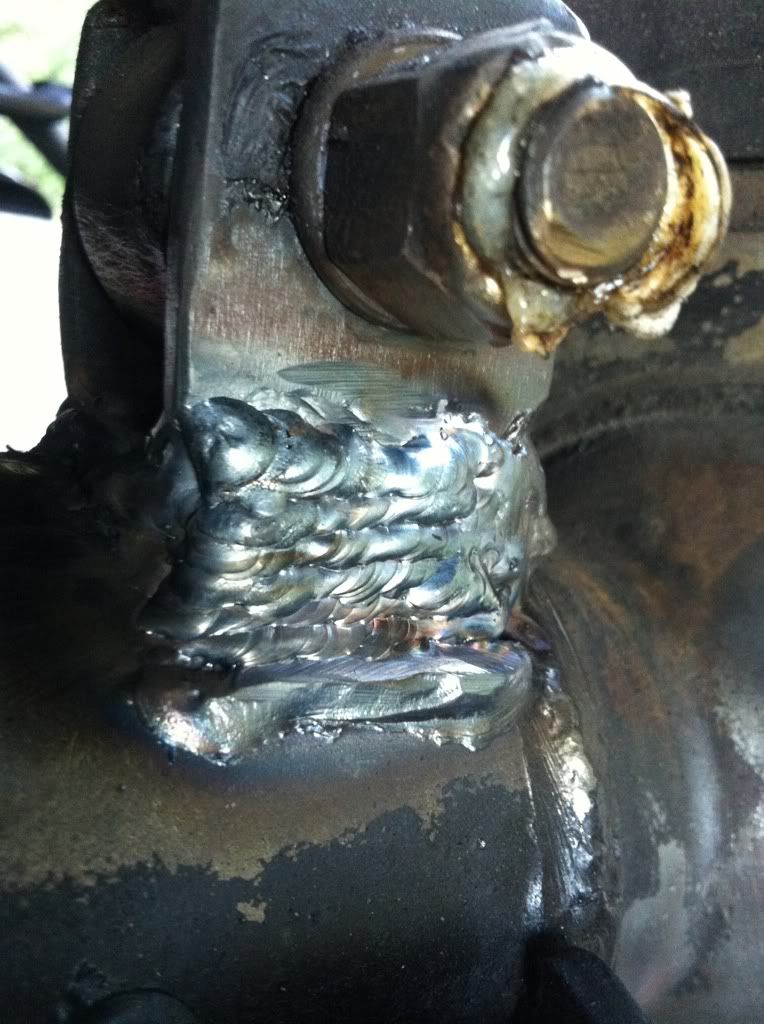
Overall I am pretty happy with how it came out. This was my first project with my welder and first thing I've welded outside of school on coupons. I am discovering that welding in the real world is not as easy as on a nice flat table with a stool. Lots of problem solving of how to actually reach it. I can stack dimes all day long at the table, but not so clean when you gotta lie on your back and work with funny angles. It's been a real learning experience.
Here are the pics
welded up all the circles on the back where I cut the tubes off
Had a little trouble with this massive gap to close. I knew the inner frame side would be a real PITA so I made the gap much smaller on that side instead of splitting the difference.
All closed up
Left this little gap open for water to drain out of because I couldn't get the whole thing sealed until it comes time cut the spring mounts off and make a new one.
Then I discovered that one of the shock mounts was failing.
Sorry phone is funky sometimes about focusing
Cleaned the failing weld out
And hopefully this will just about do it Had to stack a bunch of smaller beads, but the root was pretty good.
Overall I am pretty happy with how it came out. This was my first project with my welder and first thing I've welded outside of school on coupons. I am discovering that welding in the real world is not as easy as on a nice flat table with a stool. Lots of problem solving of how to actually reach it. I can stack dimes all day long at the table, but not so clean when you gotta lie on your back and work with funny angles. It's been a real learning experience.
04-26-2011, 06:41 PM
#16
Registered User
Thread Starter
yes, I was lazy and didn't take the shock off as I should have and burnt the lock nut, but these ranchos are garbage and I will be replacing them soon.
 04-27-2011, 07:23 PM
#19
Registered User
Thread Starter
04-27-2011, 10:08 PM
#20
Registered User
Thread Starter


