KawaZX636's 1983 Toyota Pickup Restoration

 05-17-2013, 07:33 PM
#62
Lons, the OME springs shouldn't require any adjustment of the shackle hangers, but I'll certainly have pictures and info when I get to installing them.
Corey, keep working on that guy with the press, you can't beat the old school equipment like that. Not quite sure why you would ever need 70 tons, but I suppose it's nice to know you have it when you need it!
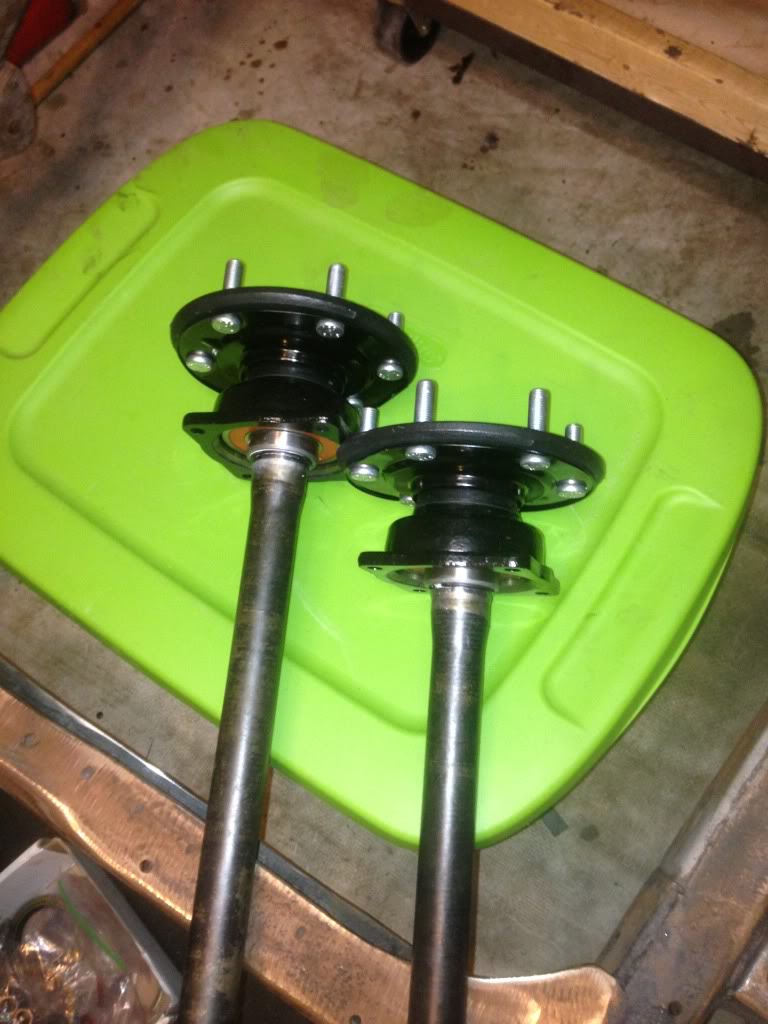
I got more work done tonight. Here's a shot of those rear axle shafts with the bearings and wheel studs pressed in.
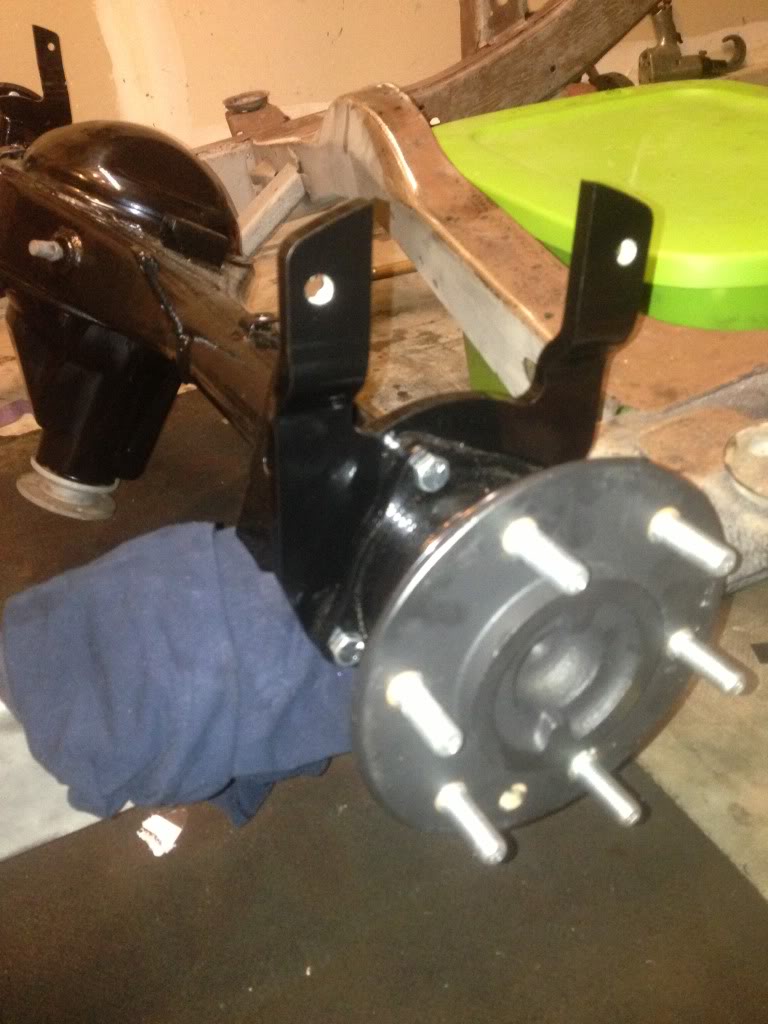
And the axle shafts installed with the Sky Engineering rear disc brake conversion bracket:
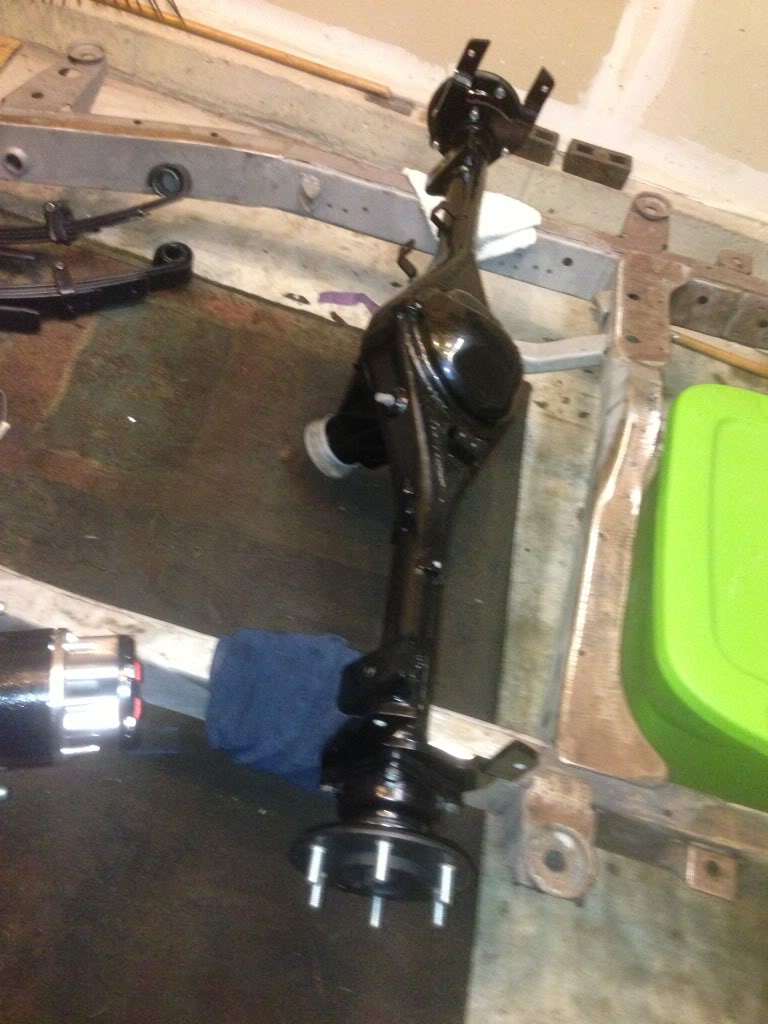
And alas... a completed front axle:
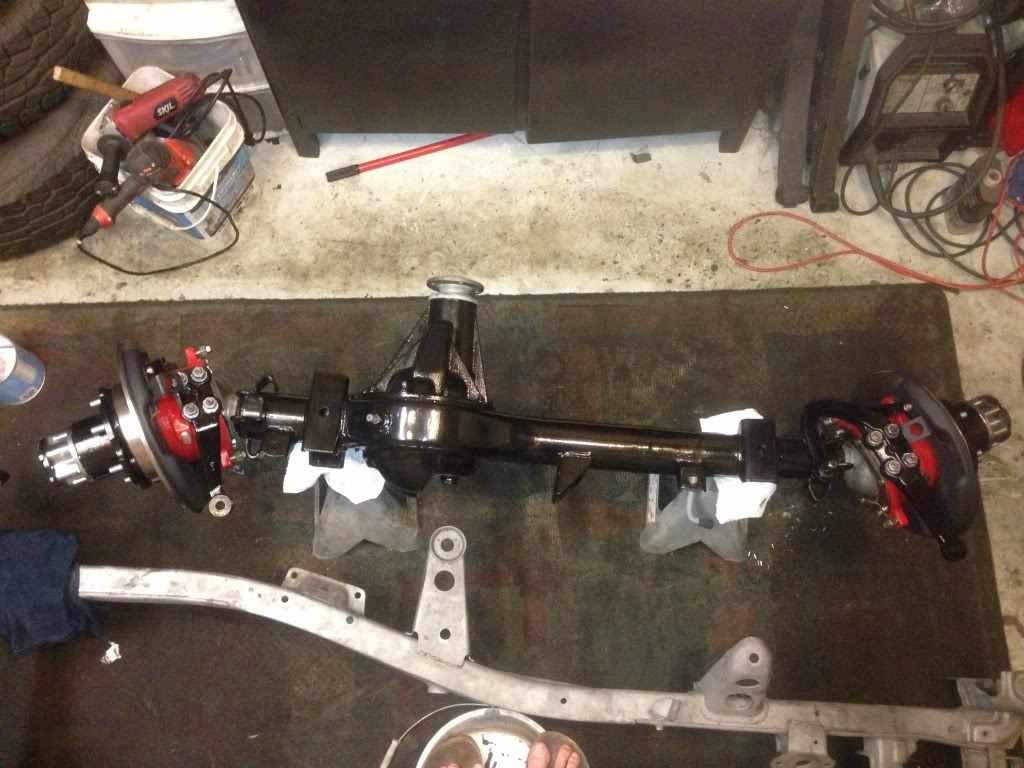
Well....kinda... I slid on the aisin hub locks for looks. I have to run out and find a 54mm socket to torque down the spindle nuts so I couldn't bolt the hub locks down just yet. Everything spins smooth and freely so I'm pretty stoked about that, but you never know if it is truly done right until it's rolling down the road with all 4 wheel still attached!
Corey, keep working on that guy with the press, you can't beat the old school equipment like that. Not quite sure why you would ever need 70 tons, but I suppose it's nice to know you have it when you need it!
I got more work done tonight. Here's a shot of those rear axle shafts with the bearings and wheel studs pressed in.

And the axle shafts installed with the Sky Engineering rear disc brake conversion bracket:


And alas... a completed front axle:


Well....kinda... I slid on the aisin hub locks for looks. I have to run out and find a 54mm socket to torque down the spindle nuts so I couldn't bolt the hub locks down just yet. Everything spins smooth and freely so I'm pretty stoked about that, but you never know if it is truly done right until it's rolling down the road with all 4 wheel still attached!

 05-17-2013, 07:36 PM
#63
Corey, on another note, how far backed up are you guys when it comes to building beds? I'll be looking your way when I get to it, but I don't have the space to have a bed lying around right now. How much notice do I need to provide you?
05-17-2013, 07:54 PM
#64
70 tons is so nice .. specially when you need to bend 1/2 " plate .. bends this stuff like butter . This is the largest sheet I have personally bent with it , and as far as stuff I do .. I dont see any need for any larger !
as for the beds .. we can "store" if needed .. and ship when you are ready to recieve .
I always suggest to my customers .. best to get the deposit in ASAP . Then I can guanentee a build date . right now , we are BOOKED till SEPT /13 ..
even with new staff coming on board this year ..
Best to email me for more info.
.
Last edited by slacker; 05-17-2013 at 07:56 PM.
05-17-2013, 08:01 PM
#65
I'll be in touch with you. I've got a lot more purchases that are higher on the priority list right now and I have a couple ideas for my stepside box that I'm willing to try out to hold me over, but eventually I will go with you unless a reeeeeeally nice original bed pops up.
05-19-2013, 09:14 PM
#66
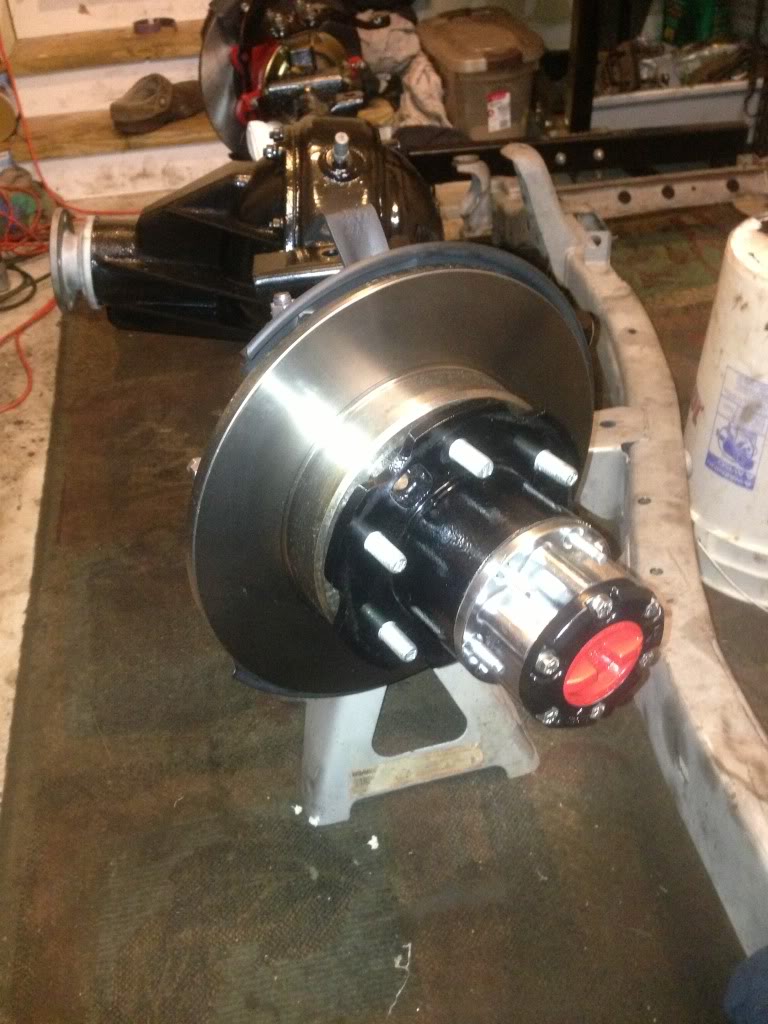
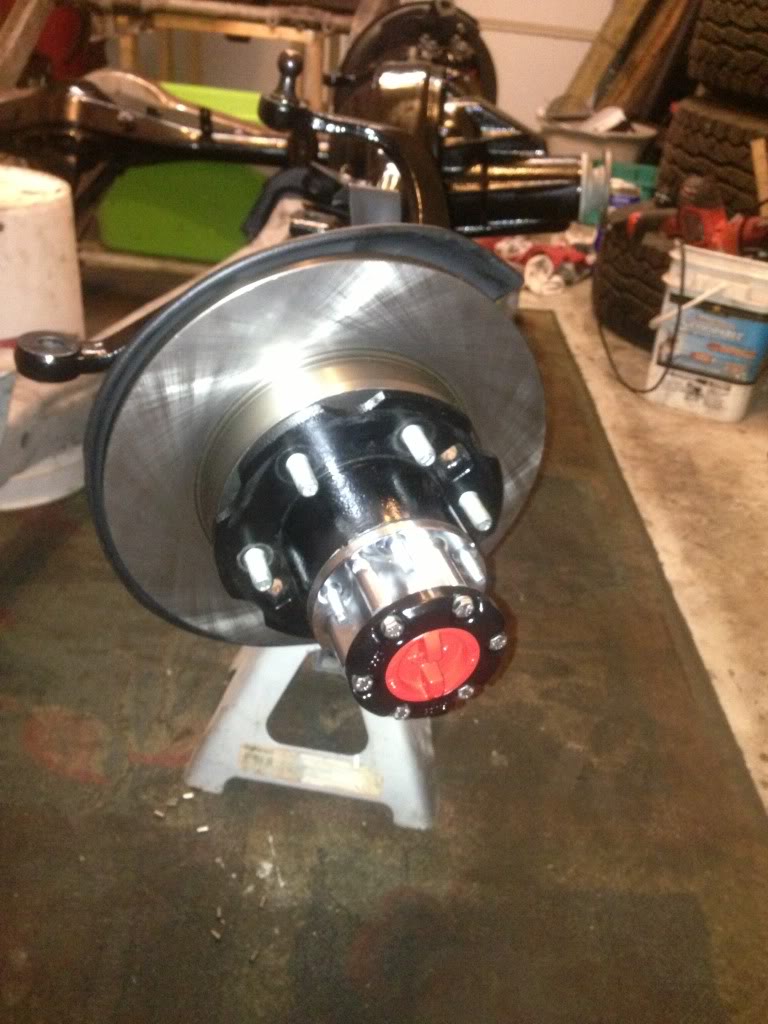
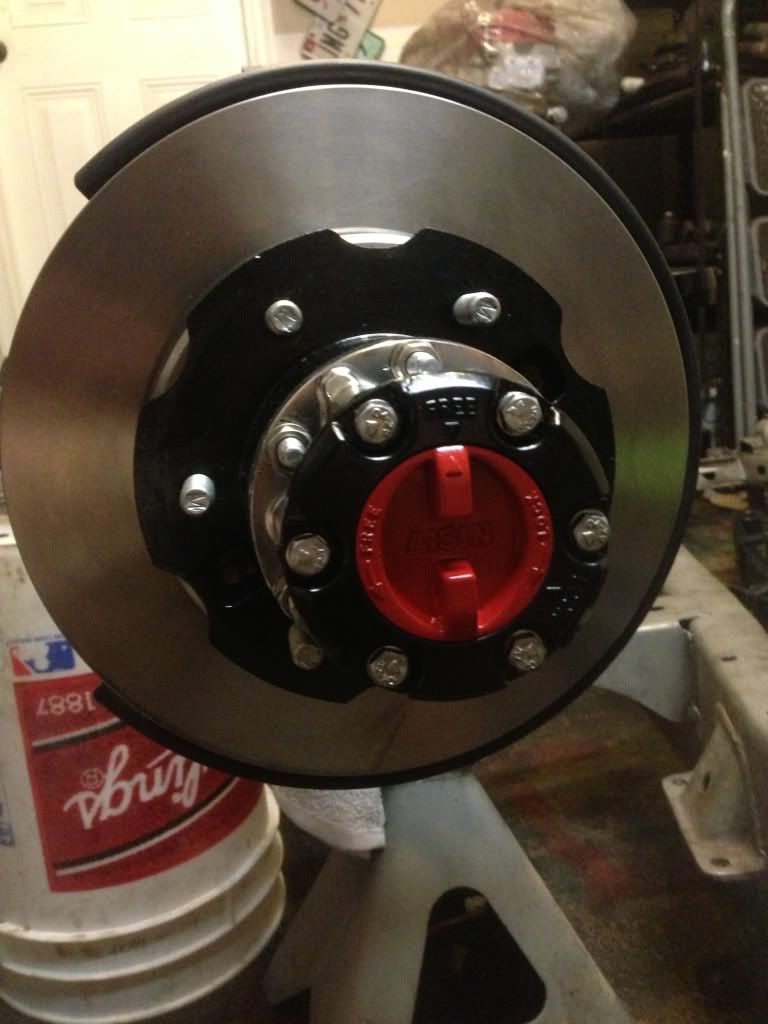
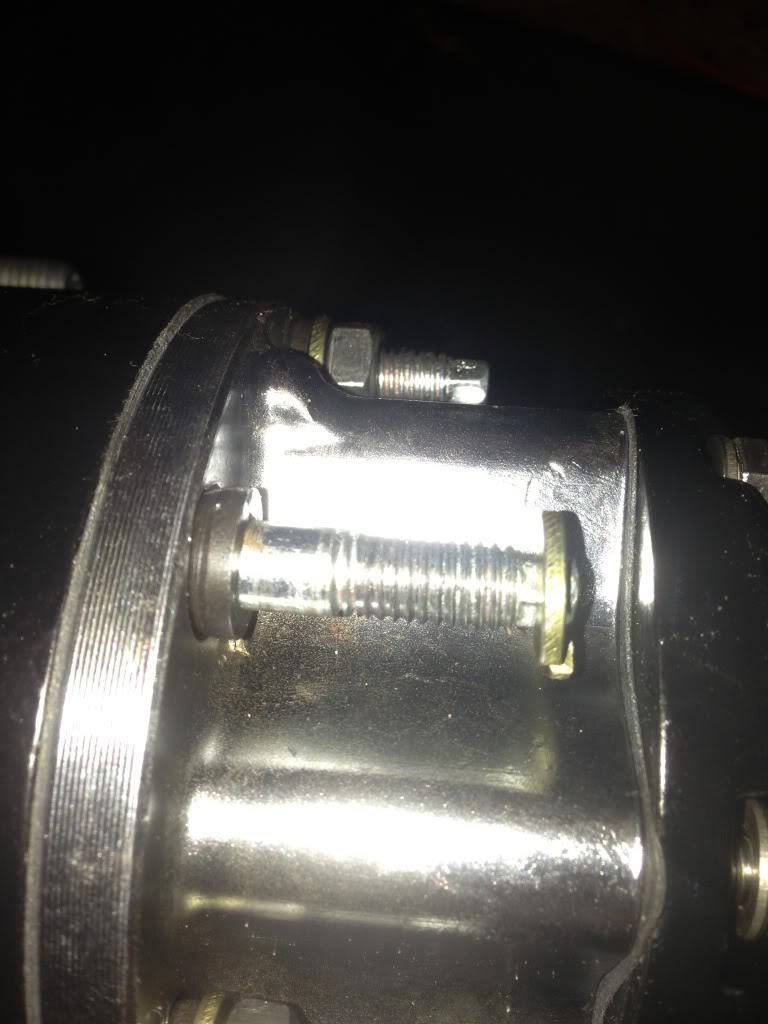
I got the Aisin Hubs finished up today, well kind of... I somehow managed to strip two of the hub studs on the driver side. I'm using Trail Gear Super Metal hubs stud and two of the nuts began to spin after about 10ft lbs of torque. It was pretty strange that all of the others torqued down to 23ft lbs with no problem but these two didn't even make it half way. Seems like those two studs may have been slightly faults so I emailed Trail Gear and hopefully they will shoot me out a couple replacements.
Here's the passenger side complete:
Here's a shot of one of the stripped studs. (I back the stud out and just left it in there finger tight so I wouldn't lose the cone washer):
Here's the passenger side complete:

Here's a shot of one of the stripped studs. (I back the stud out and just left it in there finger tight so I wouldn't lose the cone washer):

Last edited by kawazx636; 05-19-2013 at 09:17 PM. Reason: fixed link
05-21-2013, 07:28 AM
#67
Registered User

Join Date: May 2013
Posts: 1
Likes: 0
Received 0 Likes
on
0 Posts
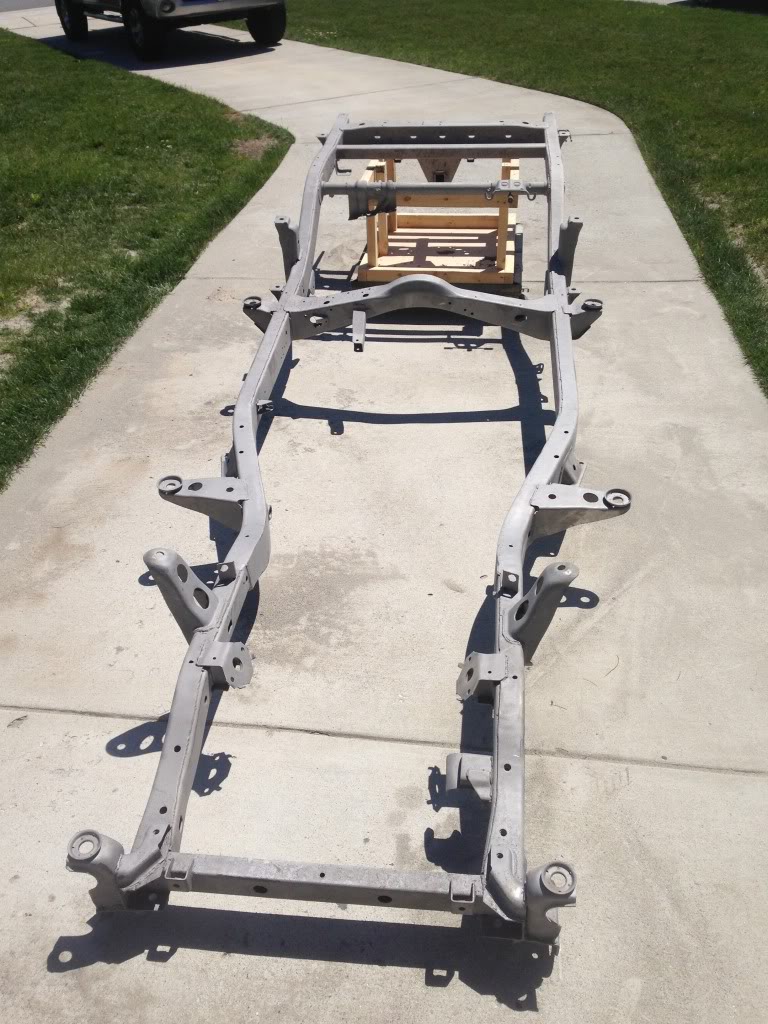
New guy here just purchased a 1985 in desperate need of frame work..... :-( but the P.O. put a ton of money into this truck, so you have inspired me to get busy..... Kudos on your progress! " In need a frame!!!!

 05-25-2013, 05:12 PM
#70
X2 on Corey's comment^^ The drag link ball on my j-arm was actually loose causing my steering to wonder so I welded a bead around the perimeter of the bottom. You're kinda S.O.L. if you're trying to replace that because I know no idea where you would find a replacement ball or a big enough press to squash it in (Corey, I may have found some use for that 80 ton press you said you were getting!!)
05-26-2013, 04:36 AM
#72
My frame definitely wasn't perfect, I had to remove some old frame repairs that the PO half assed and patch a couple sections that were rotted through. But for the most part it is solid now and straight. I'm about to get started on finishing up the rest of the sandblasting today, just waiting to see some activity from the neighbors so I don't wake them up with I fire up the air compressors!
 i'm workin' on it
05-27-2013, 06:20 PM
i'm workin' on it
05-27-2013, 06:20 PM
#74
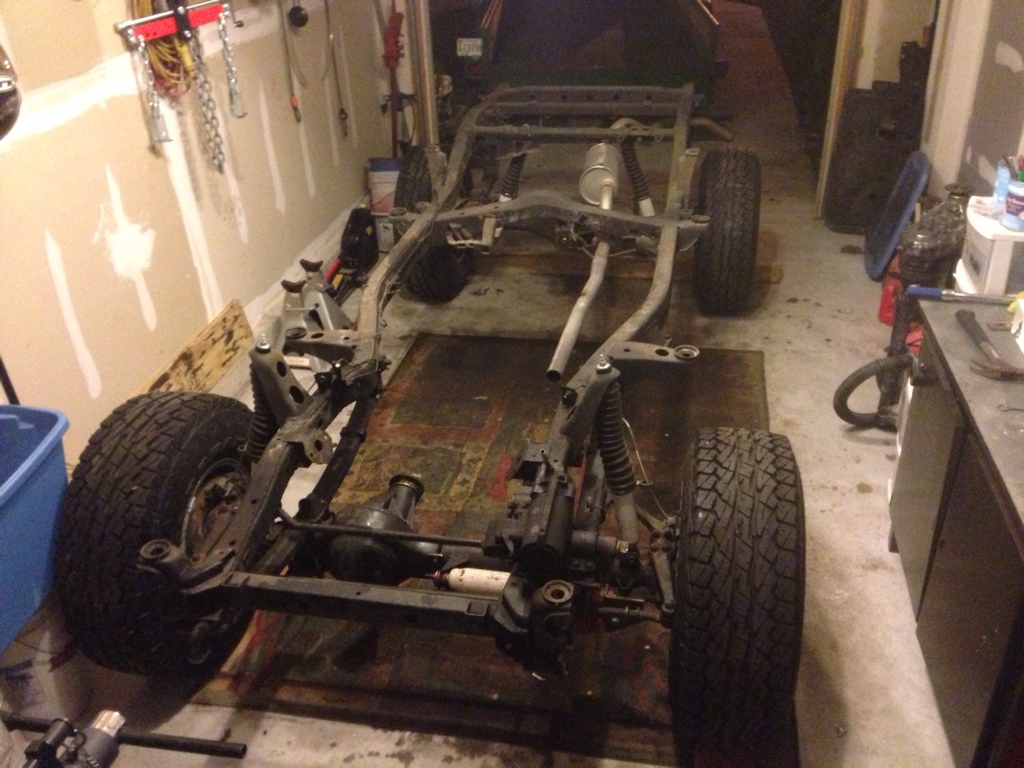
Ok, so I finally discovered that my sandblaster officially sucks!! I borrowed a sandblaster from my co-worker. He's doing a resto on an International Scout and said that his blaster was stripping everything off and doing the job really well for him... soooo here's the god send that he let me borrow:
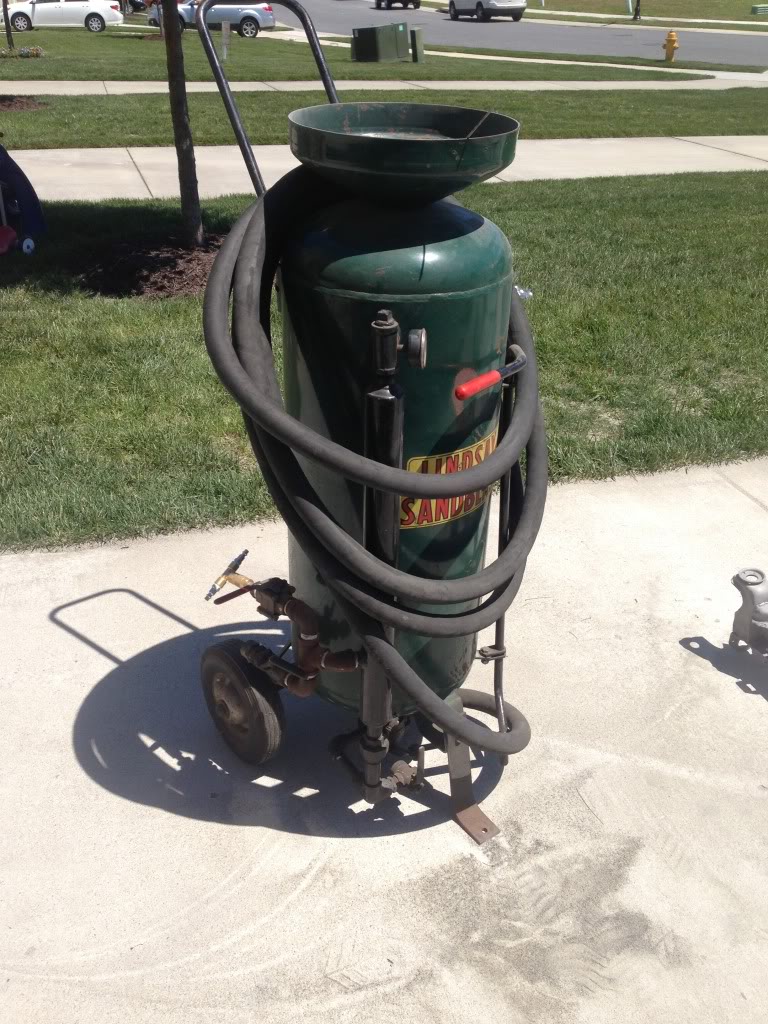
Hooked it up to my gas powered compressor as well as my 80 gallon electric compressor so that I would have plenty of continuous air. I was running about 80-90 PSI through the blaster and never had to stop to let the compressors catch up. After about 6 hours of blasting I ended up with this:
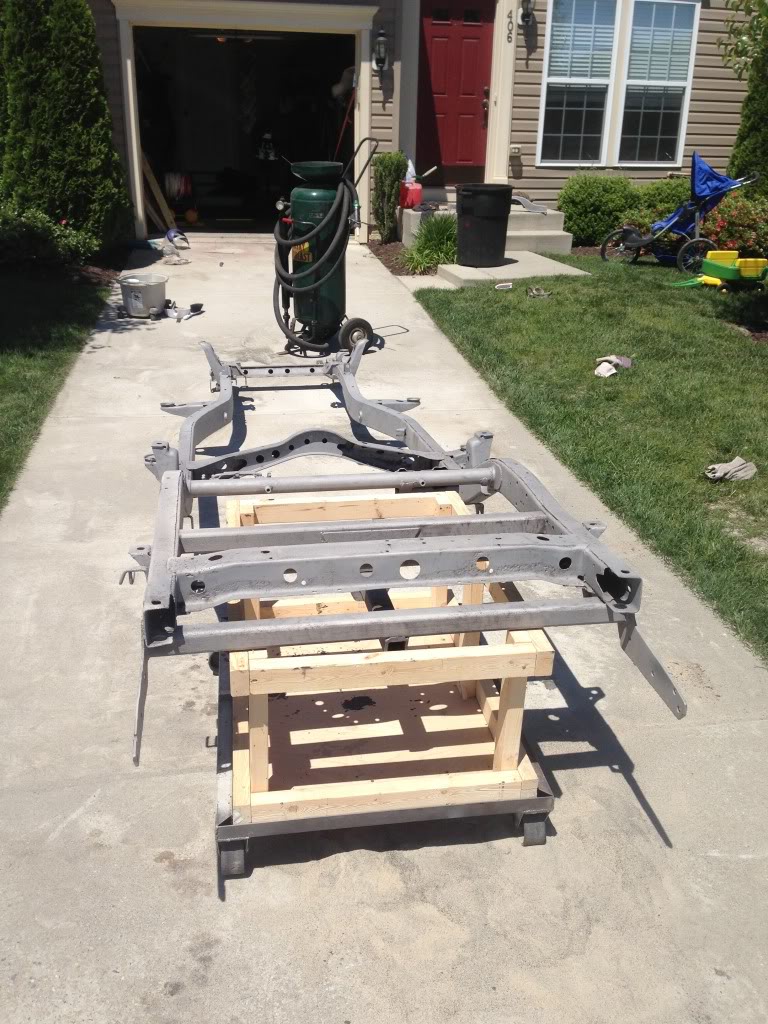
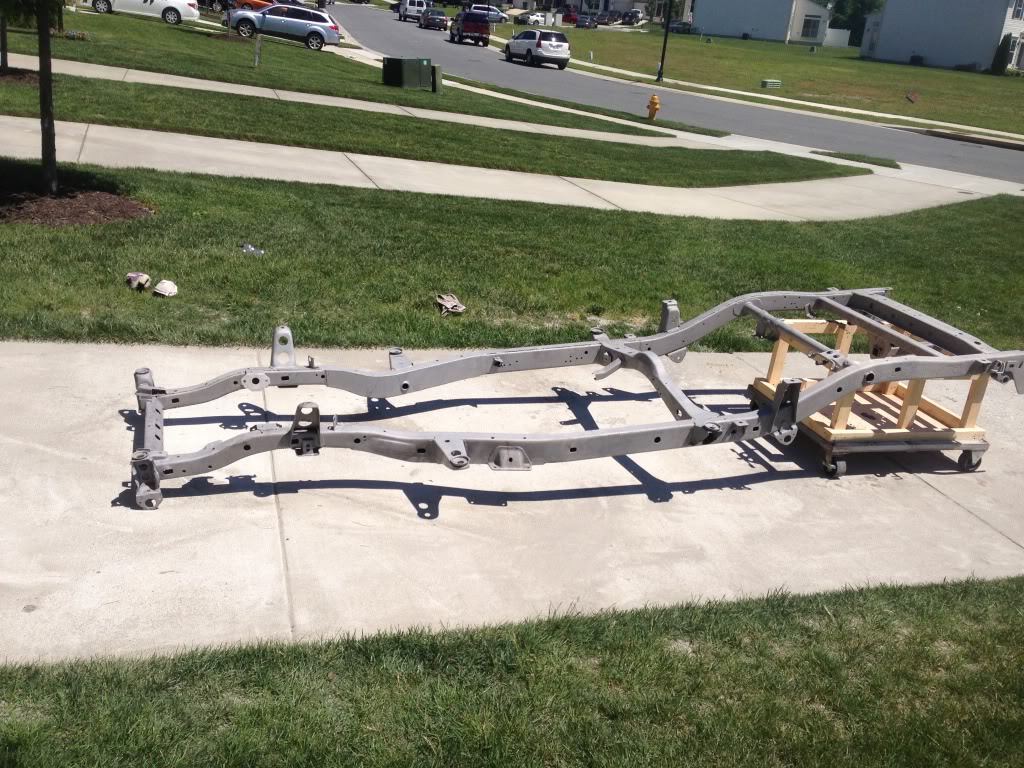
Keep in mind that I started with this:
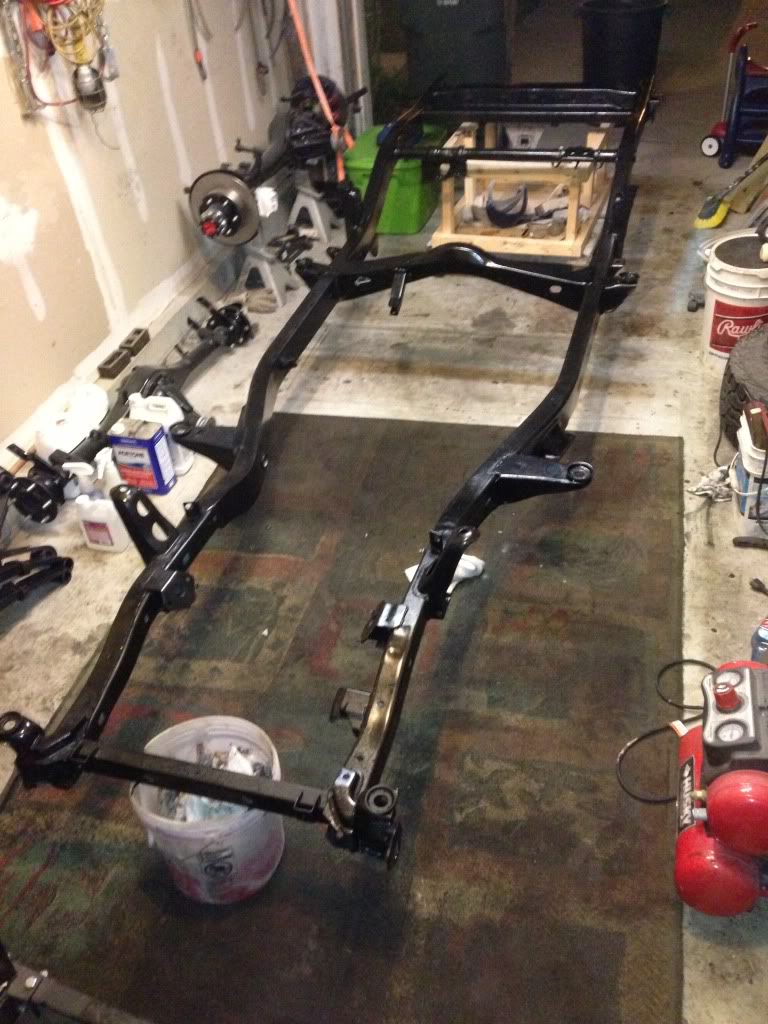
I went back over the portions that I previously blasted since I managed to get it a little greasy when I was building my axles. I also shot my tranny cross member, bumpstops, tranny bell housing plate, shock/u-bolt brackets and some other odds and ins that I plan on powdercoating.
A little side note to those who may be painting their frame... DO NOT HALF ASS IT and use that cheap rubberized spray on coating! I was cussing the PO the whole time because he had that stuff caked on so thick that this beast of a blaster was having a hard time getting it off! So keep the guy you sell your truck to in mind when you make these kinds of decisions.
Soooo, this week I plan on slapping some POR-15 on the frame and powdercoating the rest of the miscellaneous parts that I have cleaned up. If my front OME springs ever come in then I should be getting a rolling chassis together soon! WOOT WOOT!
Last edited by kawazx636; 05-27-2013 at 06:25 PM.
05-28-2013, 06:50 PM
#75
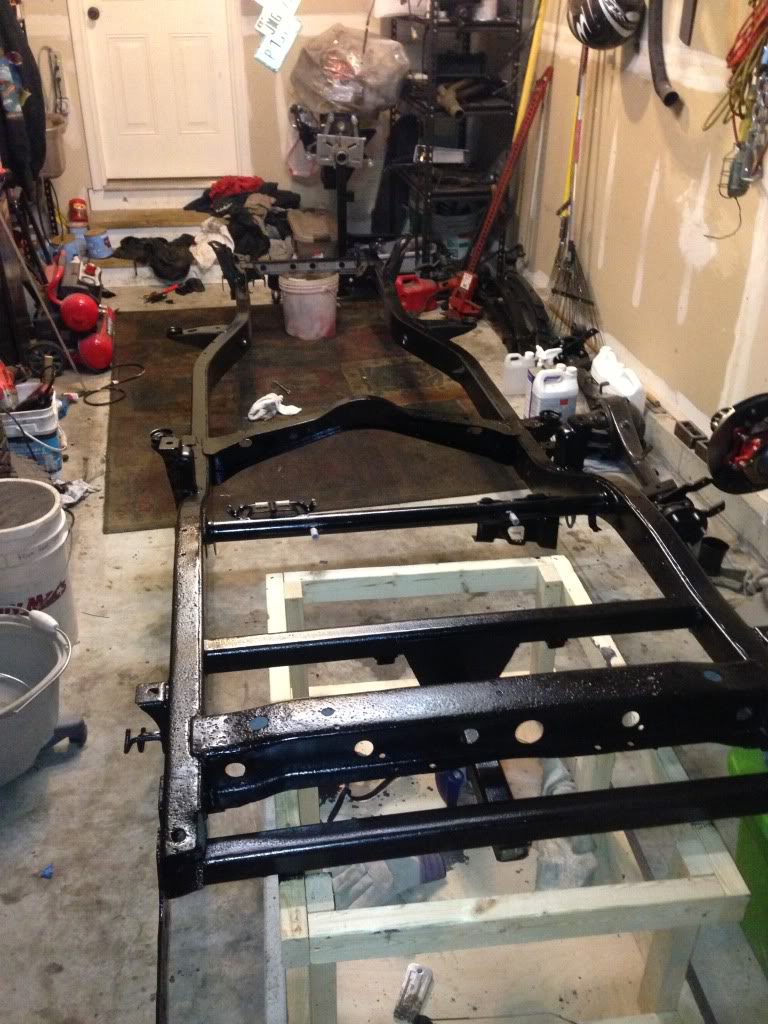
Applied the first coat of POR-15 tonight. I'm planning on doing 3 thin coats and then at least 2 coats for POR-15 semi-gloss ChassisCoat. For now, I'm brushing on the base coat and so far it's laying down rather flat. If it doesn't flatten out well after 3 coats then I'll knock down the ridges with some 320 sandpaper, spray a 4th base coat and then spray the ChassisCoat.
So far I only painted the top and sides of the frame. Tomorrow night, I'll flip it and lay down the first coat on the bottom, then flip it the next night to do the 2nd and 3rd coat on the top and side and flip it the following night to do the 2nd and 3rd coat on the bottom.
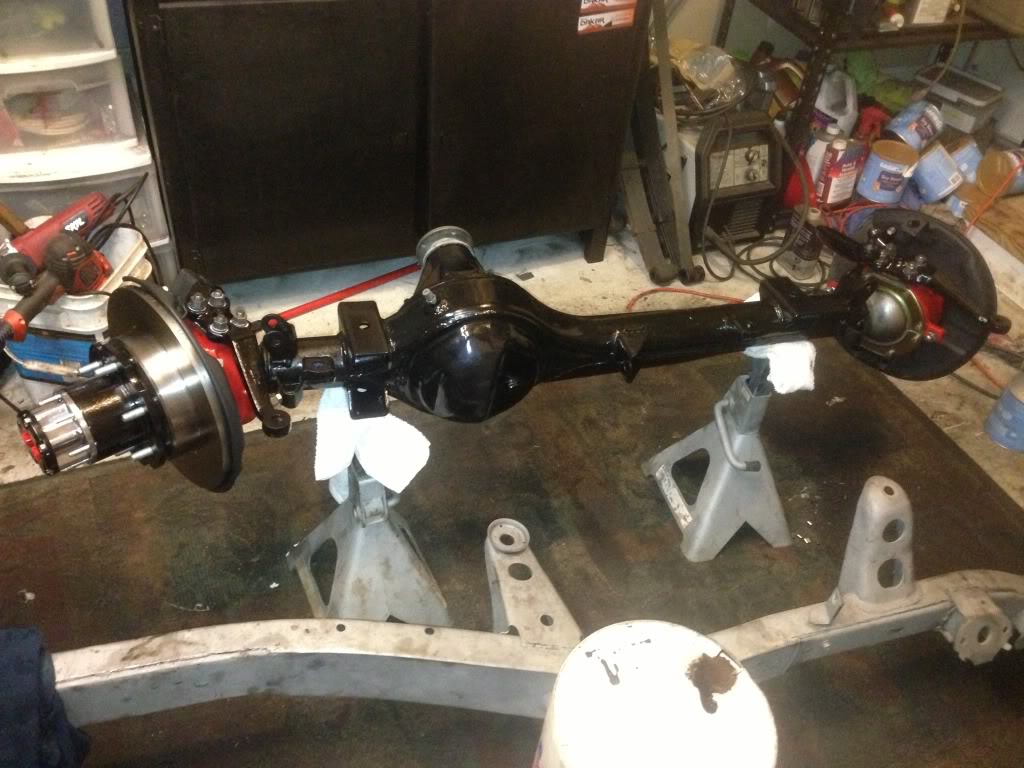
For those wondering how far this stuff goes, I'll give you an idea... So far I have applied 3 coats to both axle housings and one coat to at least 3/4 of the frame and I haven't even used a half quart yet. I imagine that I'll be able to get everything painted with less than 1.5 quarts. This stuff goes a long way.
Here are the results so far:
So far I only painted the top and sides of the frame. Tomorrow night, I'll flip it and lay down the first coat on the bottom, then flip it the next night to do the 2nd and 3rd coat on the top and side and flip it the following night to do the 2nd and 3rd coat on the bottom.
For those wondering how far this stuff goes, I'll give you an idea... So far I have applied 3 coats to both axle housings and one coat to at least 3/4 of the frame and I haven't even used a half quart yet. I imagine that I'll be able to get everything painted with less than 1.5 quarts. This stuff goes a long way.
Here are the results so far:

 05-29-2013, 08:44 PM
#77
I'm planning on doing the inside, but I still need to find a nosle to feed down the frame to spray it.
Did the second coat of POR-15 and it's not laying as flat as I'd like it to. So I'm going to lay down a light third coat, knock down the ridges with some 320 and spray a light fourth coat before I spray the top coat. The stuff truly is awesome, I still haven't used a whole quart yet!
Did the second coat of POR-15 and it's not laying as flat as I'd like it to. So I'm going to lay down a light third coat, knock down the ridges with some 320 and spray a light fourth coat before I spray the top coat. The stuff truly is awesome, I still haven't used a whole quart yet!
05-30-2013, 05:46 AM
#78

That thing barely fits in the garage! lol I can't wait to see what the truck looks like.
05-30-2013, 09:15 AM
#79
Registered User
First off, KAWA: your axles look badass. What paints did you use on them? I'm going to do mine this summer and you have totally inspired me to put some effort into the outside appearance too.
Secondly, where do you guys find POR-15? I'm going to do my frame in sections as I expose it and I need to do some rust removal and prevention. I've seen several other brands at the parts house, but they all seem a little shoddy.
Secondly, where do you guys find POR-15? I'm going to do my frame in sections as I expose it and I need to do some rust removal and prevention. I've seen several other brands at the parts house, but they all seem a little shoddy.
05-30-2013, 05:56 PM
#80
Registered User

Join Date: May 2013
Location: Illinois
Posts: 51
Likes: 0
Received 0 Likes
on
0 Posts
First off, KAWA: your axles look badass. What paints did you use on them? I'm going to do mine this summer and you have totally inspired me to put some effort into the outside appearance too.
Secondly, where do you guys find POR-15? I'm going to do my frame in sections as I expose it and I need to do some rust removal and prevention. I've seen several other brands at the parts house, but they all seem a little shoddy.
Secondly, where do you guys find POR-15? I'm going to do my frame in sections as I expose it and I need to do some rust removal and prevention. I've seen several other brands at the parts house, but they all seem a little shoddy.
http://www.por15.com/


