JustDSM's '83 SR5 Build up Thread


 06-04-2011, 02:51 PM
#82
Registered User
Thread Starter
Join Date: Dec 2006
Location: Las Cruces, NM
Posts: 383
Likes: 0
Received 0 Likes
on
0 Posts
06-04-2011, 03:01 PM
#83
Registered User
Thread Starter
Join Date: Dec 2006
Location: Las Cruces, NM
Posts: 383
Likes: 0
Received 0 Likes
on
0 Posts
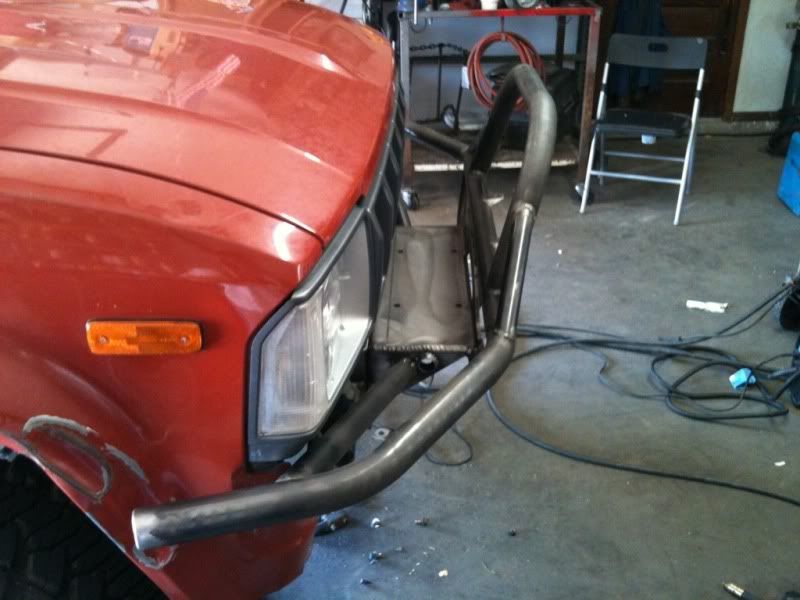
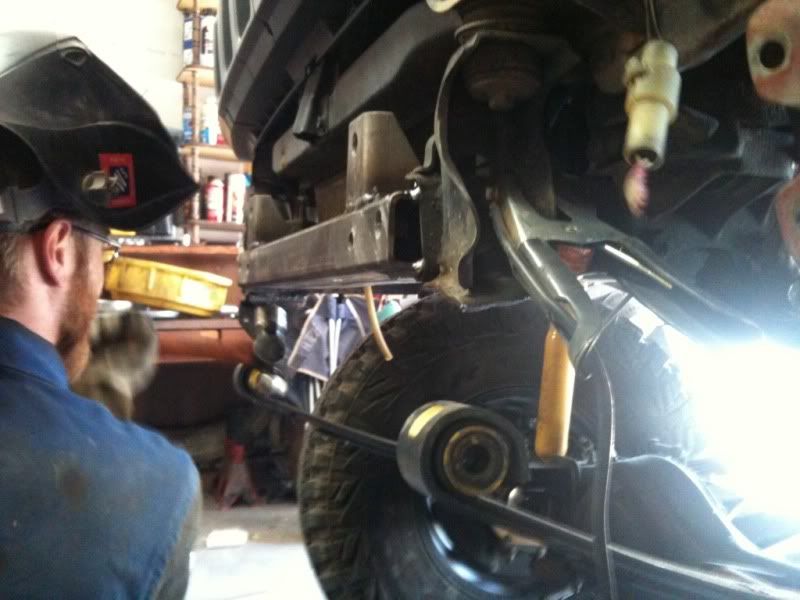
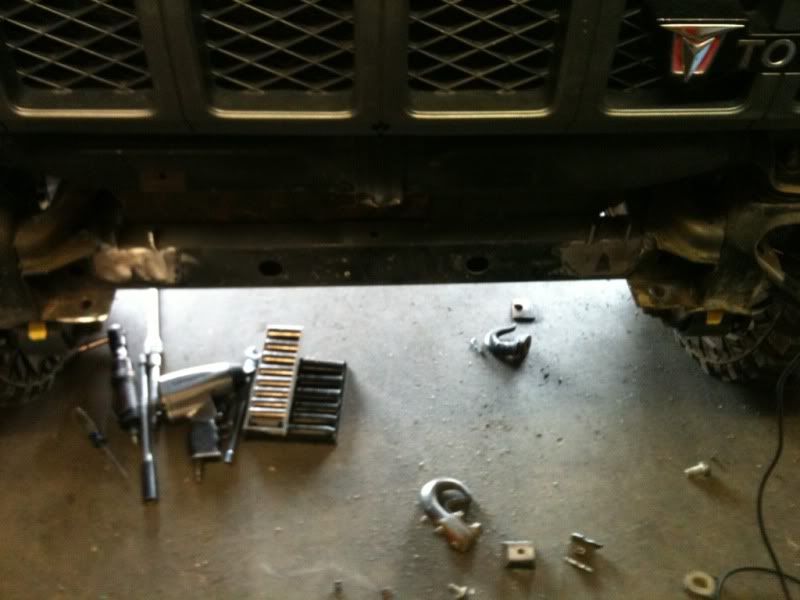
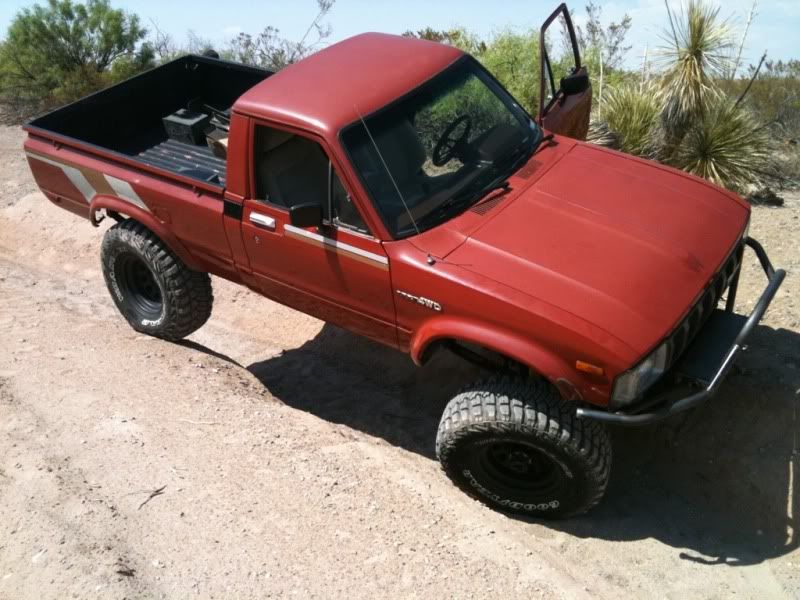
So today was the day to do a little fab work on the Yota!
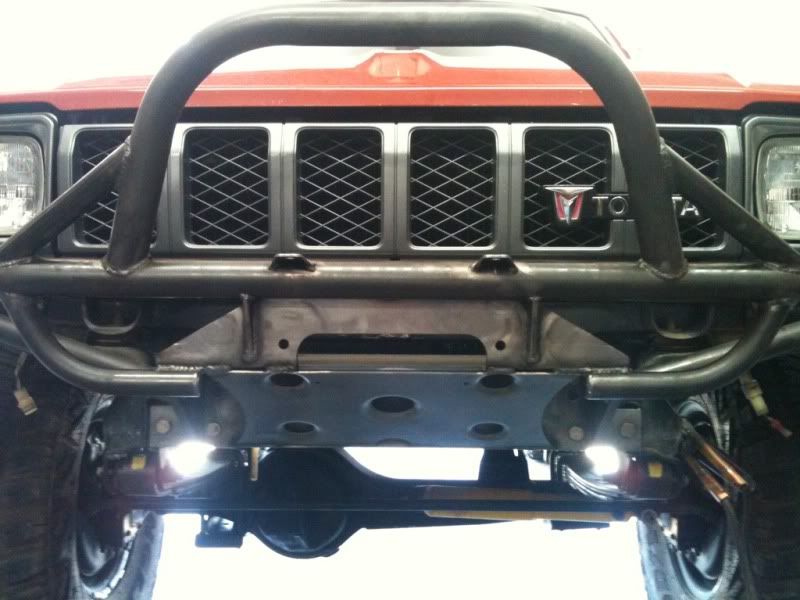
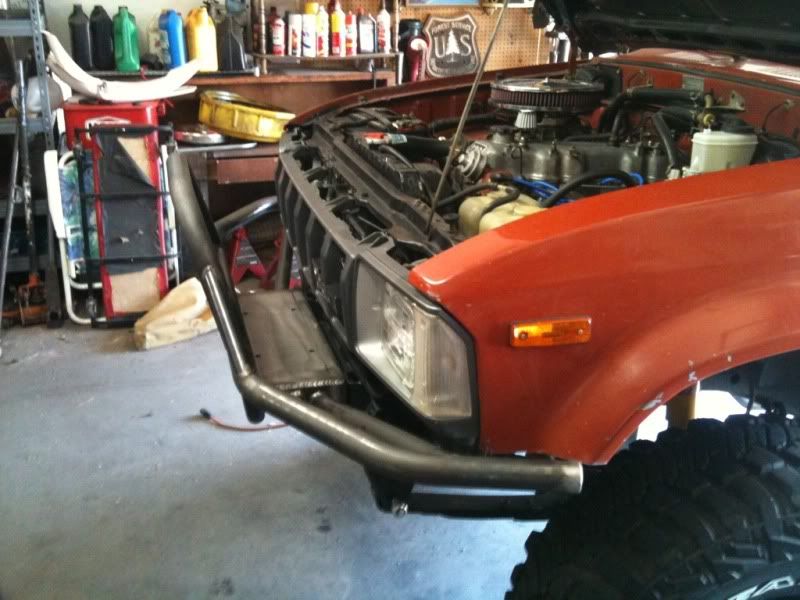
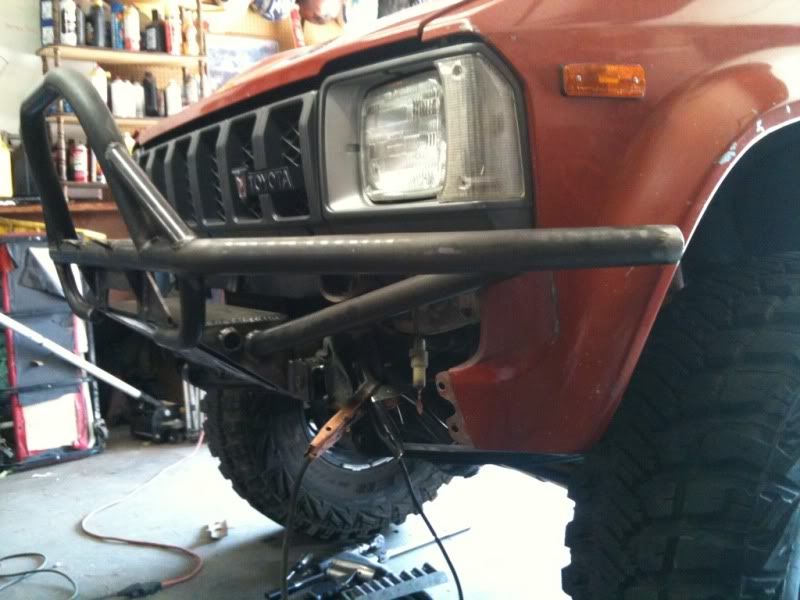
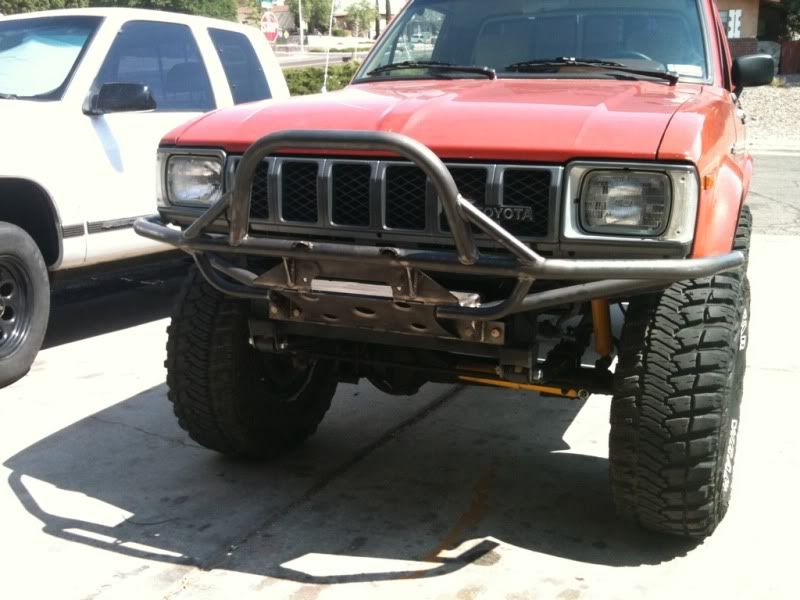
Getting the front of the truck prepped for the new spring hanger and Addicted Offroad front bumper:
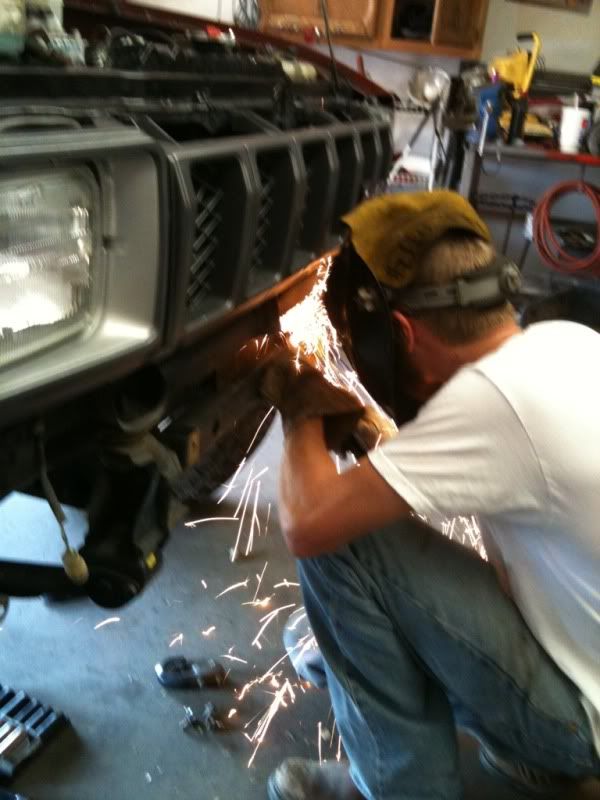

Scotty's "Pre 84" adapter. Improves the strength of the front of the frame quite a bit!
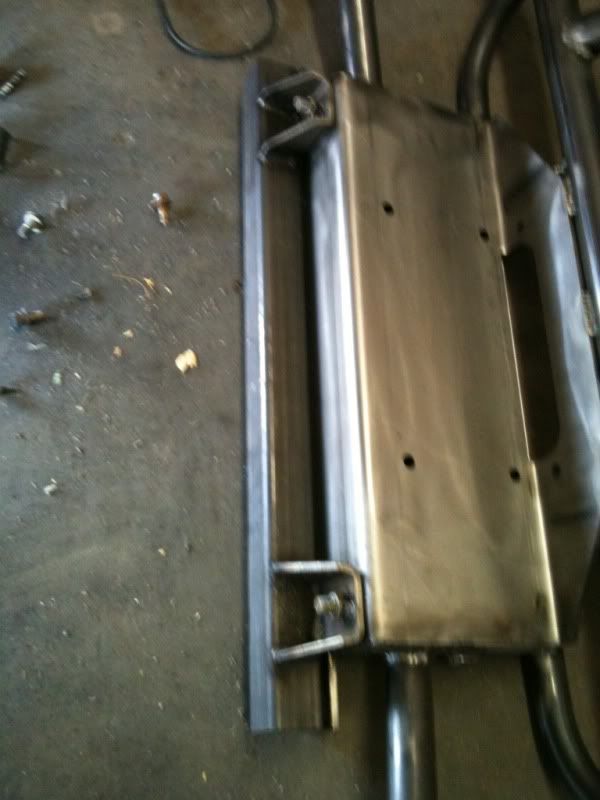
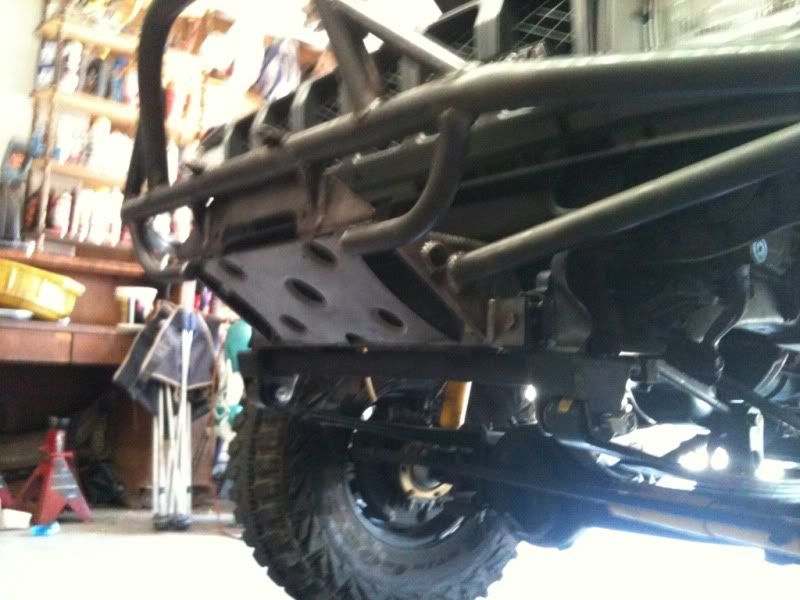
Getting it mocked up and aligned:
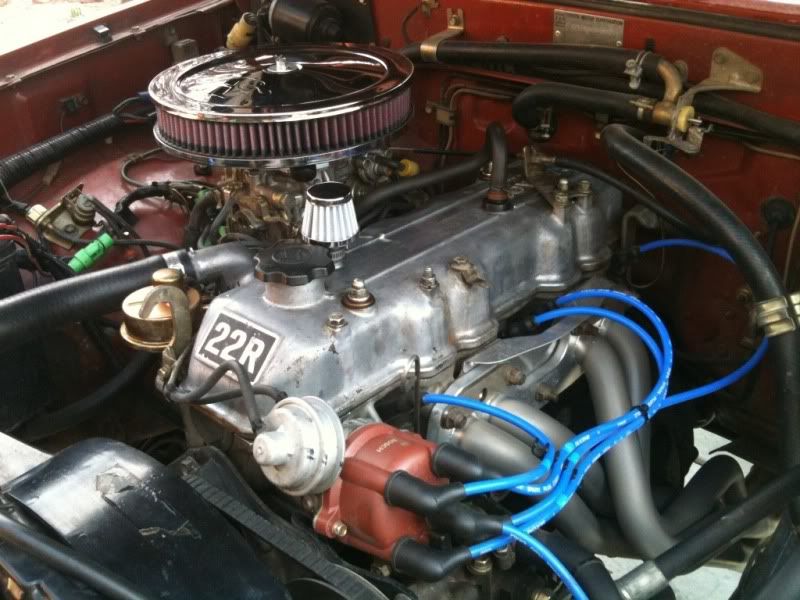
I had the hood open, so why not..
Getting stuff burned in:

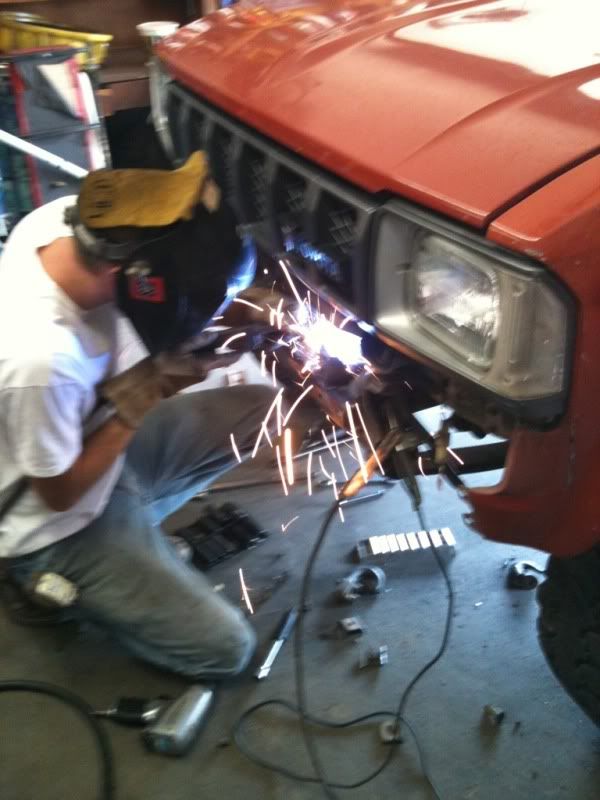

And fitted!!
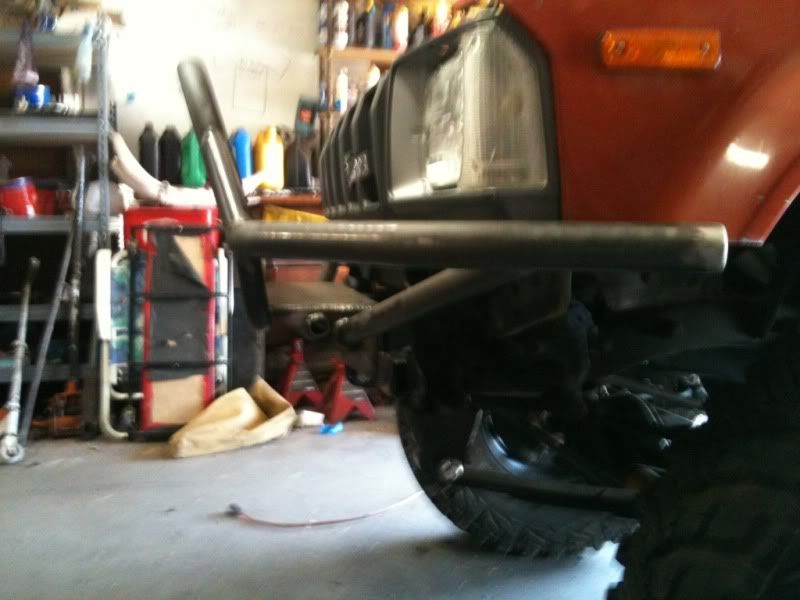
And had to go play..

Getting the front of the truck prepped for the new spring hanger and Addicted Offroad front bumper:
Scotty's "Pre 84" adapter. Improves the strength of the front of the frame quite a bit!
Getting it mocked up and aligned:
I had the hood open, so why not..
Getting stuff burned in:
And fitted!!
And had to go play..
06-04-2011, 03:06 PM
#84
Registered User
Thread Starter
Join Date: Dec 2006
Location: Las Cruces, NM
Posts: 383
Likes: 0
Received 0 Likes
on
0 Posts
So I've decided I'm going to run the Chevy springs I've got in the shed, and get some more rear flex.
If anyone interested in some virtually brand new Old Man Emu rear leaf springs I'm going to be selling these. You'll find them in the classifieds section. I'm asking $125 + shipping. They'll inlude brand new OME poly bushings front and rear.
If anyone interested in some virtually brand new Old Man Emu rear leaf springs I'm going to be selling these. You'll find them in the classifieds section. I'm asking $125 + shipping. They'll inlude brand new OME poly bushings front and rear.
06-04-2011, 03:19 PM
#86
Registered User
Thread Starter
Join Date: Dec 2006
Location: Las Cruces, NM
Posts: 383
Likes: 0
Received 0 Likes
on
0 Posts
Yes sir. I will tweak the ride height with shackle length. I'm only shooting for 2-3 inches, and that's typically what a Chevy spring swap provides.
On a seperate note, I'm going to lose the (Orignal spare from '83) spare, and build a custom carrier for some ammo cans, and a military 5 gallon fuel can. The concept will be to build a "tray" that has a hinge in the front, and the rear will drop down allowing me access to my goodies stored inside. It'll be locked with a padlock to keep honest people honest.. I'll be moving the full size 33" spare up into the bed with a custom carrier.. I have yet to figure up a design for that, but it'll be designed as to not interfer with my rear view, and take up as little room in the bed as possible.
On a seperate note, I'm going to lose the (Orignal spare from '83) spare, and build a custom carrier for some ammo cans, and a military 5 gallon fuel can. The concept will be to build a "tray" that has a hinge in the front, and the rear will drop down allowing me access to my goodies stored inside. It'll be locked with a padlock to keep honest people honest.. I'll be moving the full size 33" spare up into the bed with a custom carrier.. I have yet to figure up a design for that, but it'll be designed as to not interfer with my rear view, and take up as little room in the bed as possible.
06-04-2011, 05:56 PM
#89
Registered User
Thread Starter
Join Date: Dec 2006
Location: Las Cruces, NM
Posts: 383
Likes: 0
Received 0 Likes
on
0 Posts
It's this kit from LC Engineering:
http://www.toyotacatalog.net/M1WebGe...1-7C50D616B902

They make one for the Weber Carbs:
http://www.toyotacatalog.net/M1WebGe...2-B34F63D7909F

http://www.toyotacatalog.net/M1WebGe...1-7C50D616B902
They make one for the Weber Carbs:
http://www.toyotacatalog.net/M1WebGe...2-B34F63D7909F
06-04-2011, 07:50 PM
#90
Registered User
iTrader: (2)
Join Date: Oct 2007
Location: colorado
Posts: 1,308
Likes: 0
Received 0 Likes
on
0 Posts
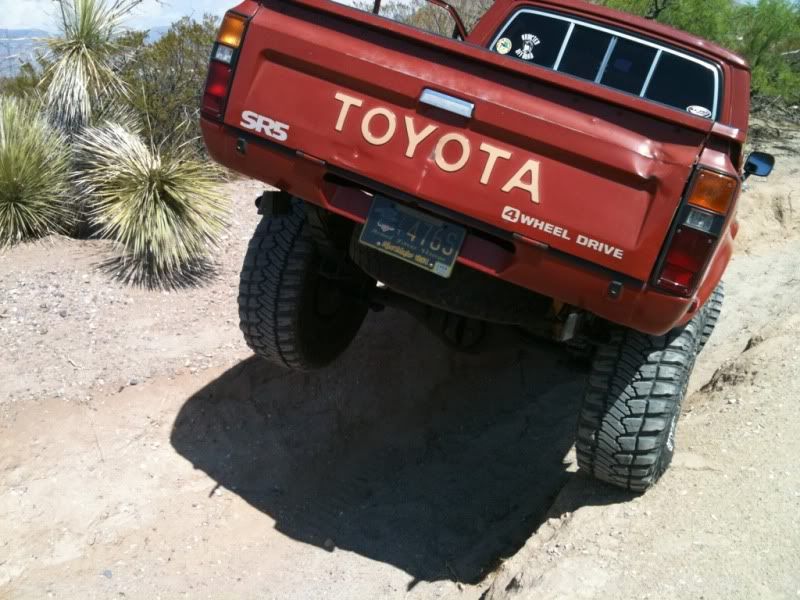
Mine stock on 33s is about 18" so you got about 4.5" of lift and should settle some thats perfect and what im looking for is about a 22" height on 33s
Last edited by 4x4YOTA; 09-11-2011 at 03:09 PM.
06-05-2011, 06:42 AM
#92
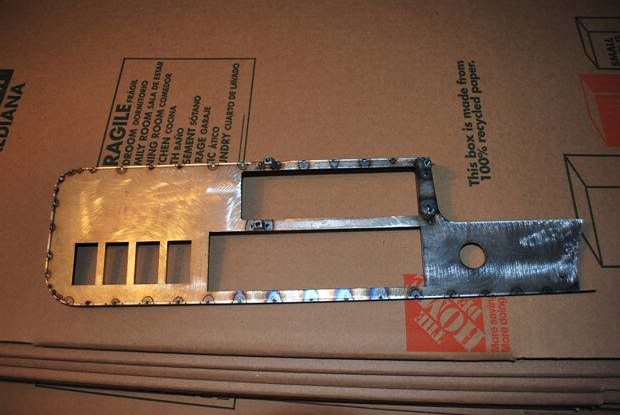
Scotty's bumper is really nice on your rig, I have one on my '87. Thinking of getting another one for my '83 like yours. Is the plate reinforcement kit for the bumper made out of 1.5x1.5 box? I thought I saw some nuts welded to the backside of it for the bumper mounting, I guess he fished them in there and welded them.
Your build is very similar to my 83 build, currently have the same springs, and putting on Sky's hi steer kit.
Your build is very similar to my 83 build, currently have the same springs, and putting on Sky's hi steer kit.
Last edited by Yopar; 06-05-2011 at 07:02 AM.
06-13-2011, 10:16 AM
#93
Registered User
Thread Starter
Join Date: Dec 2006
Location: Las Cruces, NM
Posts: 383
Likes: 0
Received 0 Likes
on
0 Posts
I'd have to put a tape measure up to it, but from glancing at it, it does look like 1.5" box tubing with some bracketry and thread bosses welded to it. I'm anxiously awaiting going HySteer too! Sky's kit is wicked nice, I'm sure you'll love it!
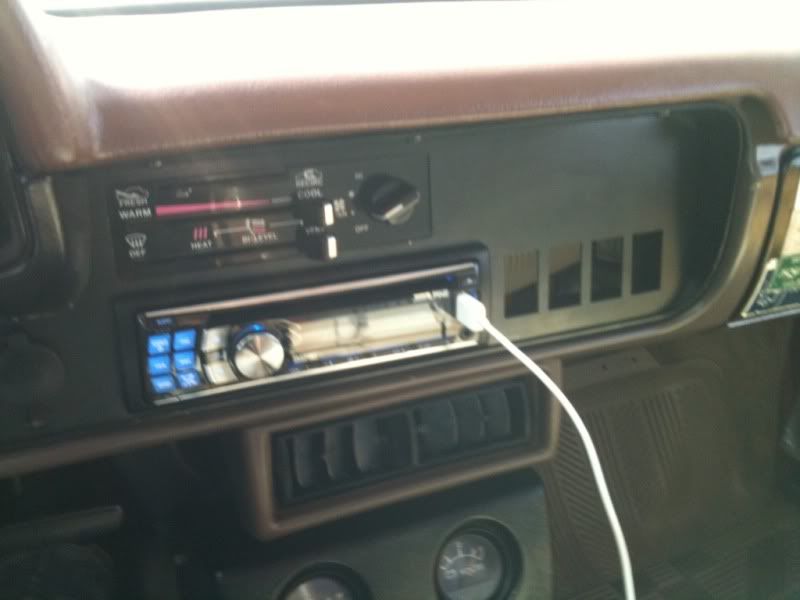
Newest addition to my interior..

Newest addition to my interior..
06-17-2011, 04:41 PM
#94
Registered User
Thread Starter
Join Date: Dec 2006
Location: Las Cruces, NM
Posts: 383
Likes: 0
Received 0 Likes
on
0 Posts
Got the new dash panel installed along with a new dash (old one was cut up badly). Also put in a new Alpine deck that allows me to charge my iPhone, play my mp3's from the phone, as well as access Pandora (internet radio) so I'll always have good tunes to listen to!
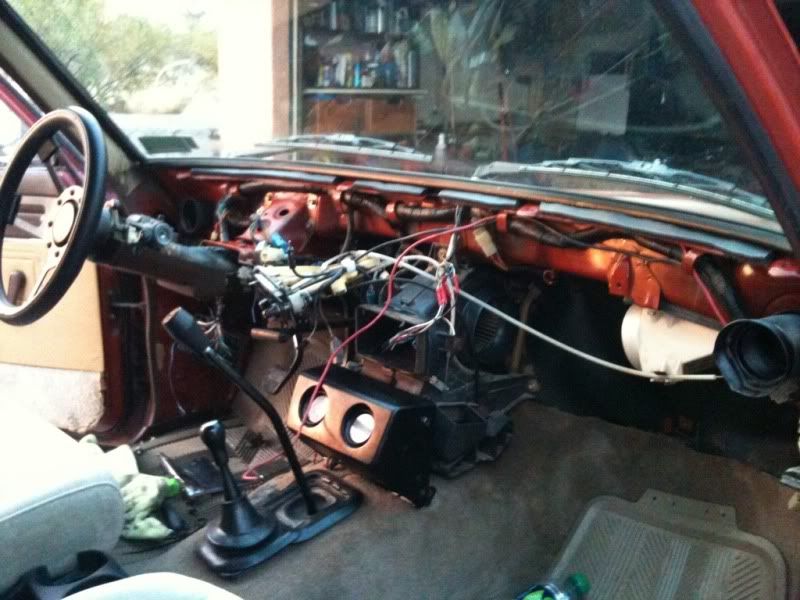
While I was doing that I dropped the driveshaft off at a local shop to have them press out the old u-joints and replace them. The rear most joint was pretty trashed. After replacing them, the truck drives so much smoother/quieter. I could get used to this!
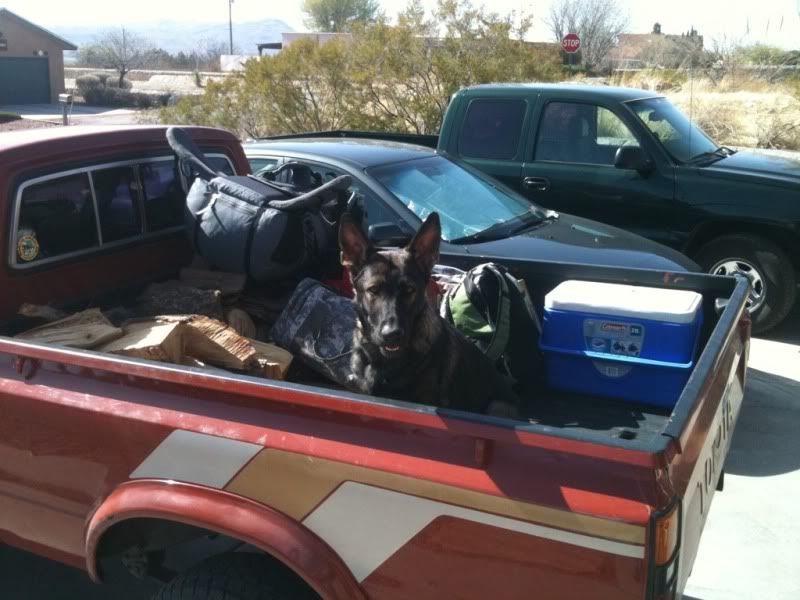
Not much else to report other than I'm looking at patching my air matress that was designed to fit in the bed and curve around the wheel wells. I also test fit my Sportztent truck bed tent and think I just might go camping with my German Shepherd pup (Kadin vom Kraftwerk) and enjoy my 3 day weekend in the hills! Hope everyone has a good weekend!

While I was doing that I dropped the driveshaft off at a local shop to have them press out the old u-joints and replace them. The rear most joint was pretty trashed. After replacing them, the truck drives so much smoother/quieter. I could get used to this!
Not much else to report other than I'm looking at patching my air matress that was designed to fit in the bed and curve around the wheel wells. I also test fit my Sportztent truck bed tent and think I just might go camping with my German Shepherd pup (Kadin vom Kraftwerk) and enjoy my 3 day weekend in the hills! Hope everyone has a good weekend!
Last edited by JustDSM; 06-17-2011 at 04:42 PM.
 09-01-2011, 10:29 AM
#97
Registered User
Join Date: Aug 2008
Location: Oklahoma
Posts: 126
Likes: 0
Received 0 Likes
on
0 Posts
I'm curious about how the Peel-N-Seal held up over the summer in the NM heat. Does the truck set out in the sun?
I just started doing my floor and was wanting to do behind the seat, roof and doors, But I heard that the Peel-N-Seal might come loose when exposed to heat. I kind feel like it wont be an issue but want to see how yours held up. I was going to do my floor with Peel-N-Seal and do the rest of the truck with a more expensive mat but I would rather do the Peel-N-Seal for sure and maybe just the dynamat on the roof.
By the way nice job!
09-01-2011, 12:48 PM
#98
Registered User
Thread Starter
Join Date: Dec 2006
Location: Las Cruces, NM
Posts: 383
Likes: 0
Received 0 Likes
on
0 Posts
Padawon,
Thanks for inquiring!
The Peel-N-Seal has held up perfectly thorugh the summer. I didn't do the top of the cab (didn't want to pull the headliner) but I did do the rear of the cab. While I don't have any pictures, I've had the carpet out just over a week ago to dry up a spilled water bottle. I didn't see the material seperating from the floor in any area, even along the edges. I think the effort I put into prepping the surface paid off. The truck is 100% outside. Garage is full of junk, and sadly this thing has to sit out and bake all day, everday.
I'll be interested to hear how it works out for you, so keep me updated.
09-01-2011, 02:07 PM
#99
Registered User
Join Date: Aug 2008
Location: Oklahoma
Posts: 126
Likes: 0
Received 0 Likes
on
0 Posts
Awesome! Will do.
Im taking picks so I might do a build thread similar too yours soon.
I was searching around for several hours for sound deadener and stumbled upon a post about P-n-S. I went to the Lowes web site and there are several reviews for the p-n-s all from car people giving it a good rating as being used as sound deadener in theirs vehicles.
I cleaned my surface with a heavy duty d-greaser (Greased Lightning) washed it down with water, let dry, and then cleaned the surface with denatured alcohol.
Good way to save some serious cash!


